DIY contact paper countertops
Transform Your Ugly Old Granite Countertops with Contact Paper!
Are your ugly granite countertops needing an update and you have no budget for new ones? Don’t worry; you’re not alone!
Here’s how to DIY contact paper countertops for only $100 !
WHY CONTACT PAPER!?
Today I’m beyond excited to share this budget friendly approach to updating old counters! Yes, you read that right. Contact paper can work wonders and give your countertops a fabulous facelift.
Over the years contact paper has definitely evolved! I remember the days it felt as cheap as a school book covers! Now they’re making them super thick and more durable then we were expecting!
Before we even tried applying this contact paper we did a bunch of heat tests and stain tests just to be sure it was durable enough for our needs.
Just like any temporary solution I feel there are pros and cons to every option!
Contact paper Pros:
- doesn’t stain
- strong glue ( depending on the quality of contact paper )
- scratch resistant
CONS:
- not heat resistant
- not resistant to cutting
This post may contain affiliate links. Read my disclosure policy.
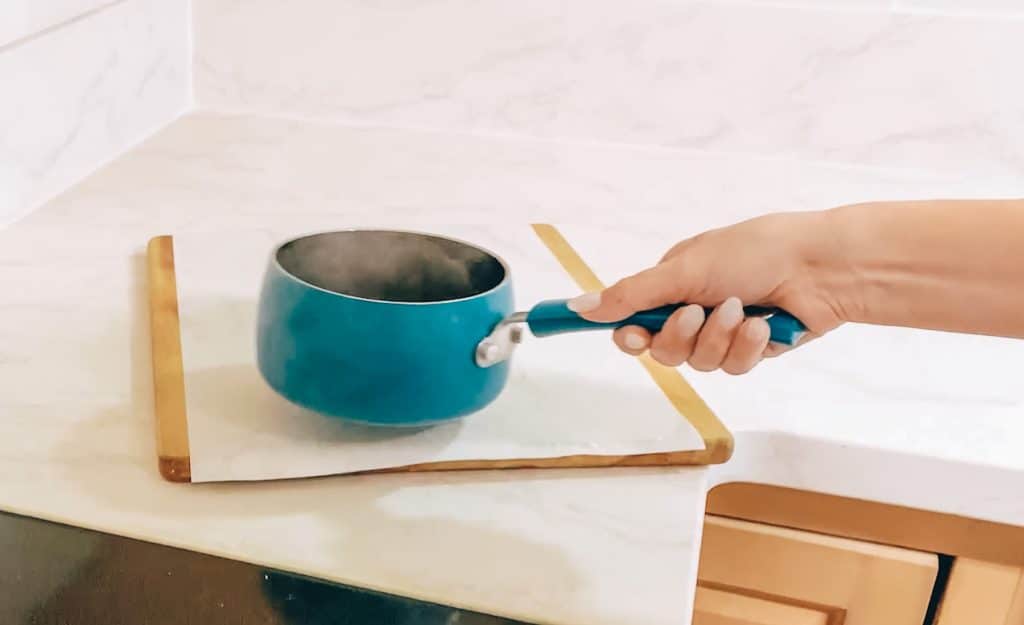
Heat TESTing!
We did two heat tests! One with a hot frying pan after frying an egg and one with a pot of boiling water. We applied the contact paper onto a wooden cutting board for the test and left both hot pots/pans on there for a minute. The frying pan left a slight melted ring. The boiling water pot left almost no residue at all. I noticed a slight change in texture on the contact paper. I share the results in my video.
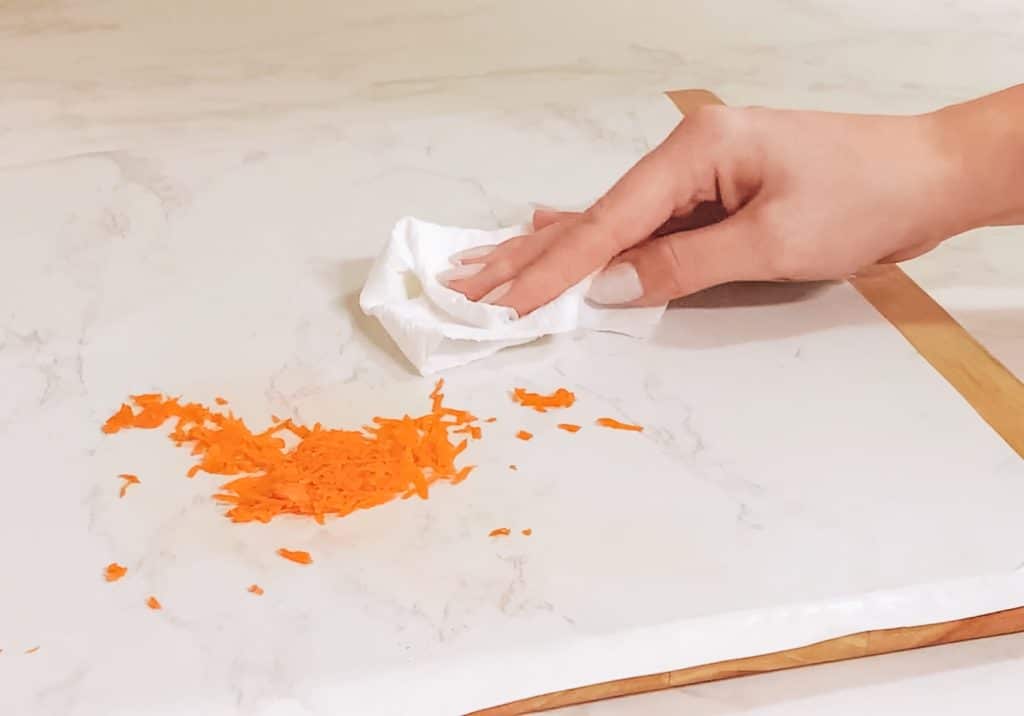
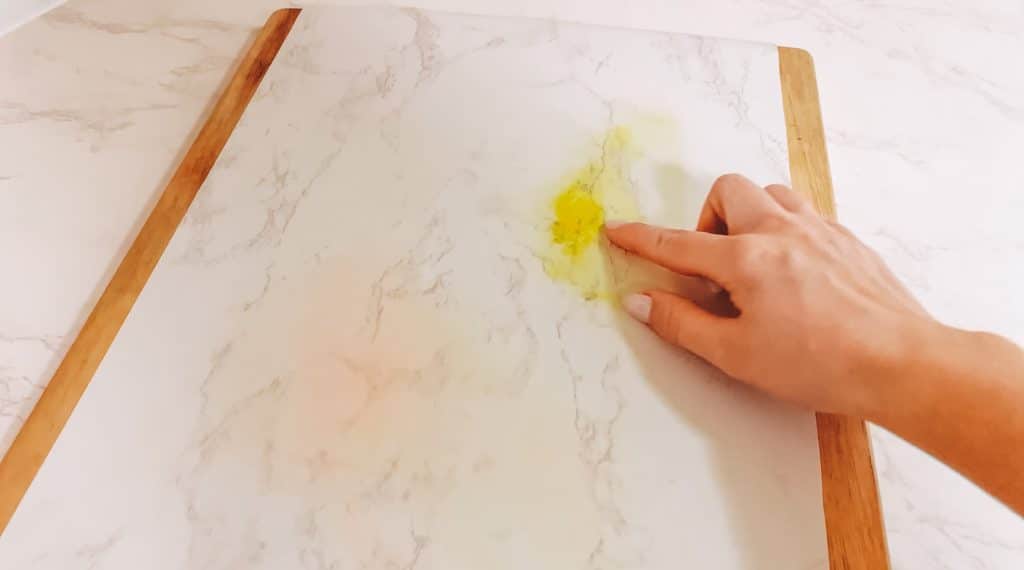
Stain testing!
We also did two tests for this. One with turmeric and one with shredded carrots. We left both on the surface for about 3 minutes then wiped them off. The results were pretty scary at first! Honestly when first trying this test I didn’t think the stains would come out. I scrubbed the areas a bit with soapy water and it removed most of the stain. Then went over it with a magic eraser! for about 30 seconds and Viola! The stains were completely gone!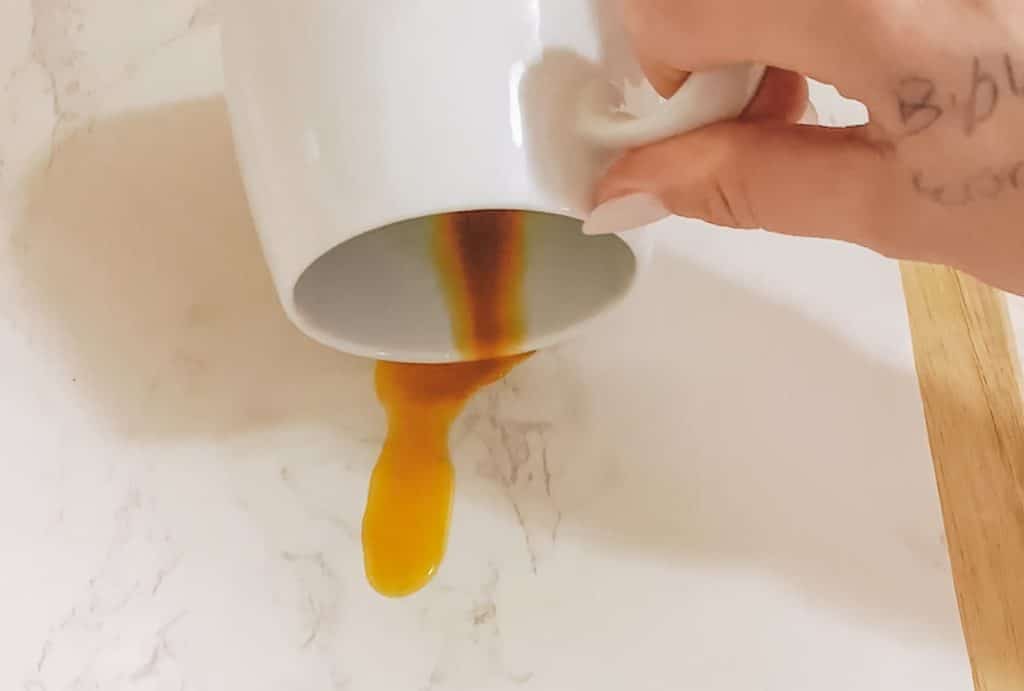
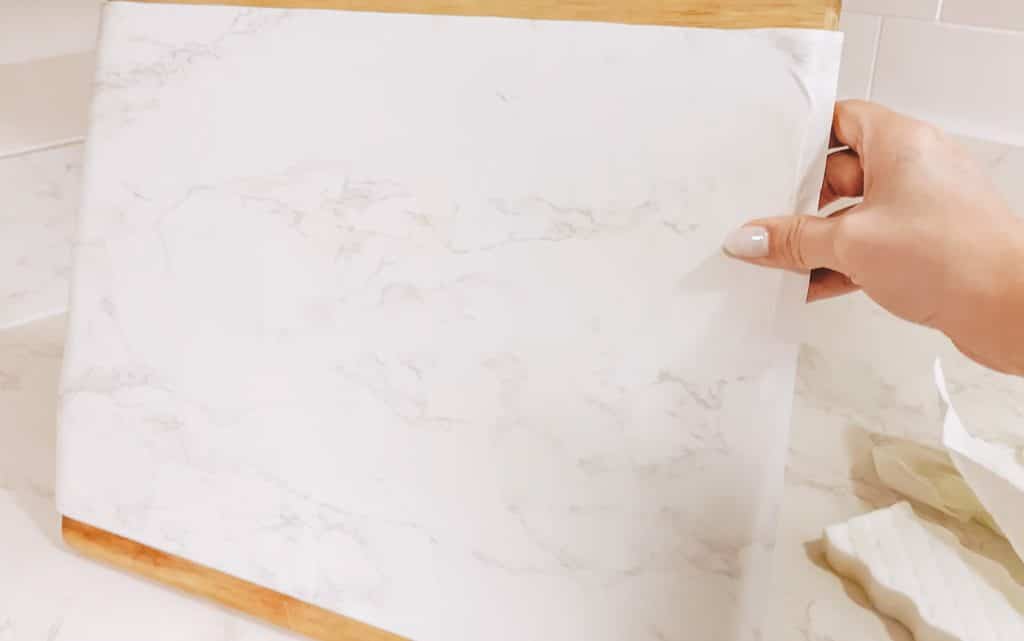
Final Results!
AVOID Epoxy!!
Over the years we’ve tried it all. Epoxy counters?! Ours were great up until the 6th month mark and turned super yellow and ugly. But, that wasn’t even the worst! They stained so easy it made it impossible to keep them looking clean. You can check out our DIY marble bathroom countertop here.
Our experience pros and cons with epoxy
Pros:
- Pretty heat resistant
- Pretty scratch resistant
Cons
- Stains super easy
- Not resistant to cutting
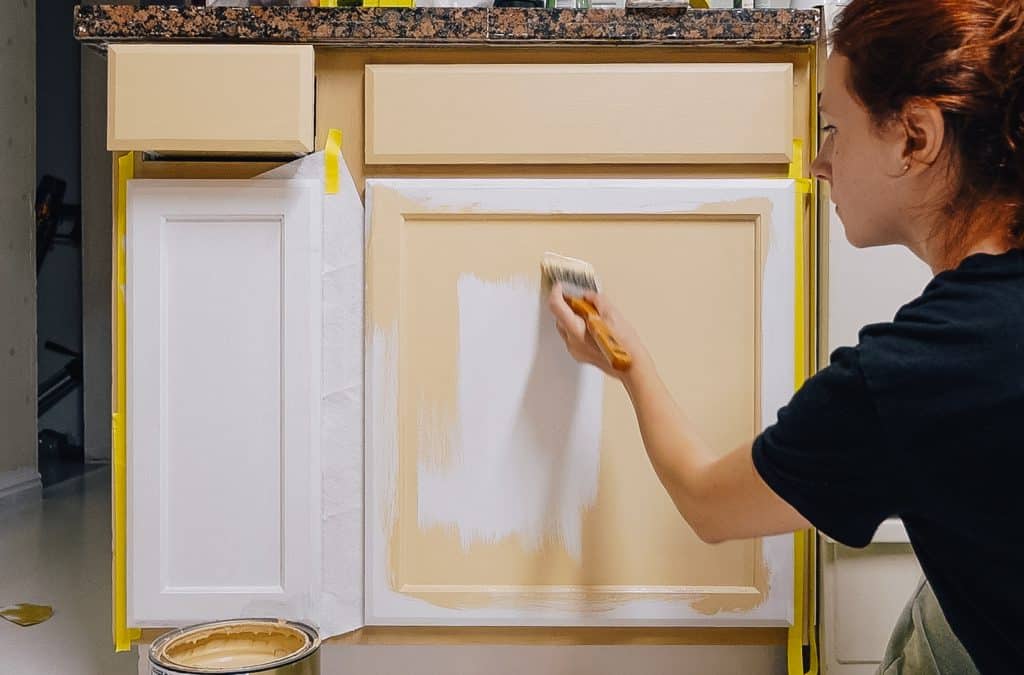
Why not just paint them?!
We’ve also tried this. The counters ended up being a complete fail. They peeled everywhere and didn’t hold up well to staining at all. You can check out how we painted them here. Also share how they held up and removal process of the paint here.
This option for us had no pros except for the fact that they were white and looked better at first then our ugly granite countertops. That didn’t last long though.
Pros :
- white when newly painted
Cons:
- stains super easy
- chips really easy
- not heat resistant
OKAY LET’S GO!
Get ready to transform your ugly old granite countertops into a stunning kitchen centerpiece!
Materials You’ll Need:
- contact paper ( We got ours on amazon )
- scissors
- utility knife
- a squeegee or old credit card
- mild dish soap and water for cleaning
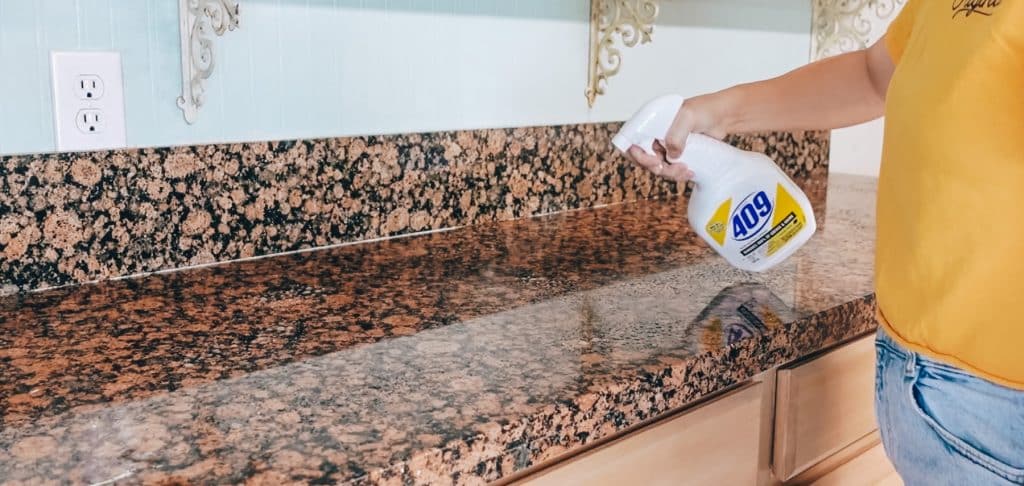
- 409 cleaner
- acetone + paper towels
- a hairdryer ( heat gun won’t work for this )
Here’s the contact paper we used ( below )! We tested a few different ones before we chose this one as the most durable, non-staining, and stickiest one!
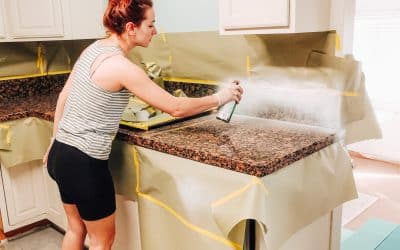
Step 1: Prepare Your Workspace
I first started off with clearing my countertops and going over them with mild dish soap and water. Once they were squeaky clean, I sprayed them down with 409 and wiped them clean with a wet rag a few more times. Use a flat knife to scrape away any build up on your counters. Don’t forget to get the sides and bottom of your countertops. The bottoms could be easily overlooked. They’re just as important if not more important because the contact paper needs a clean surface to hold on to down there or it’ll keep peeling away over time.
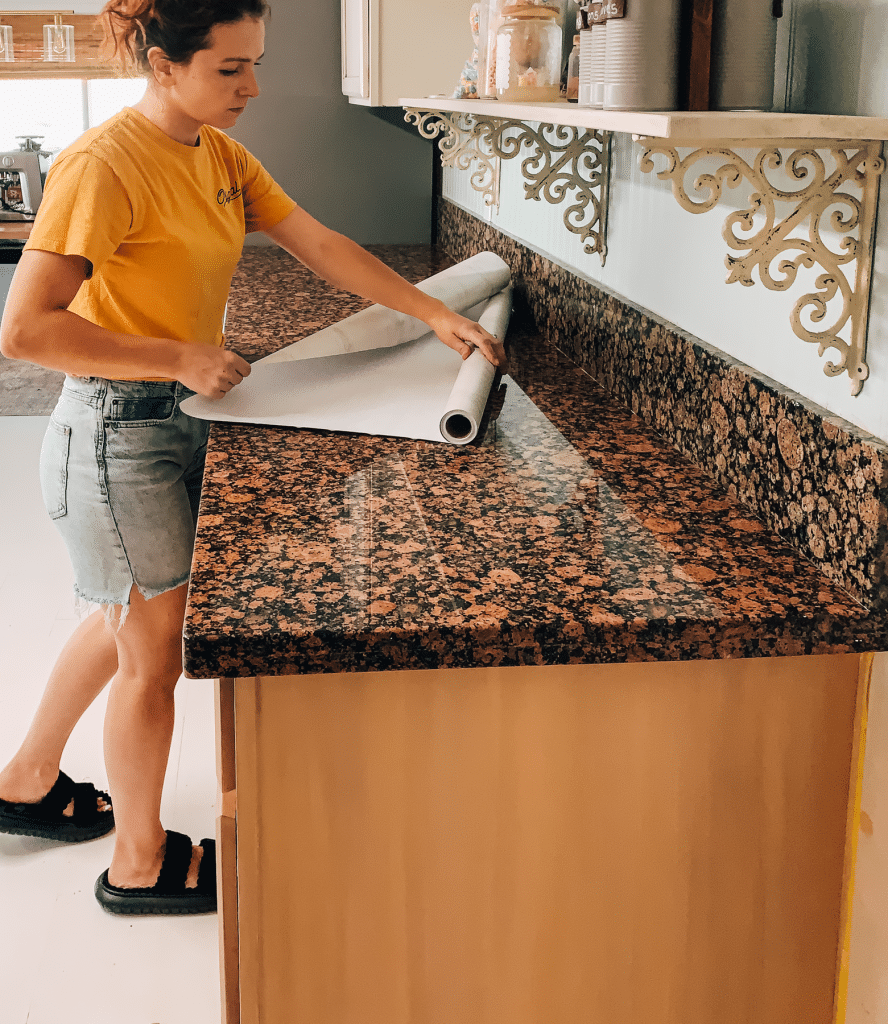
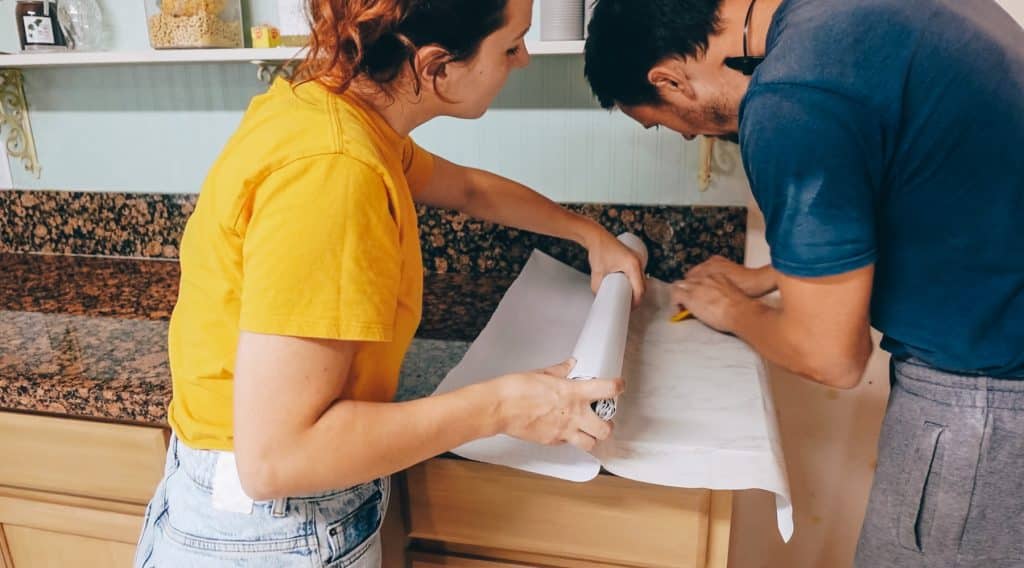
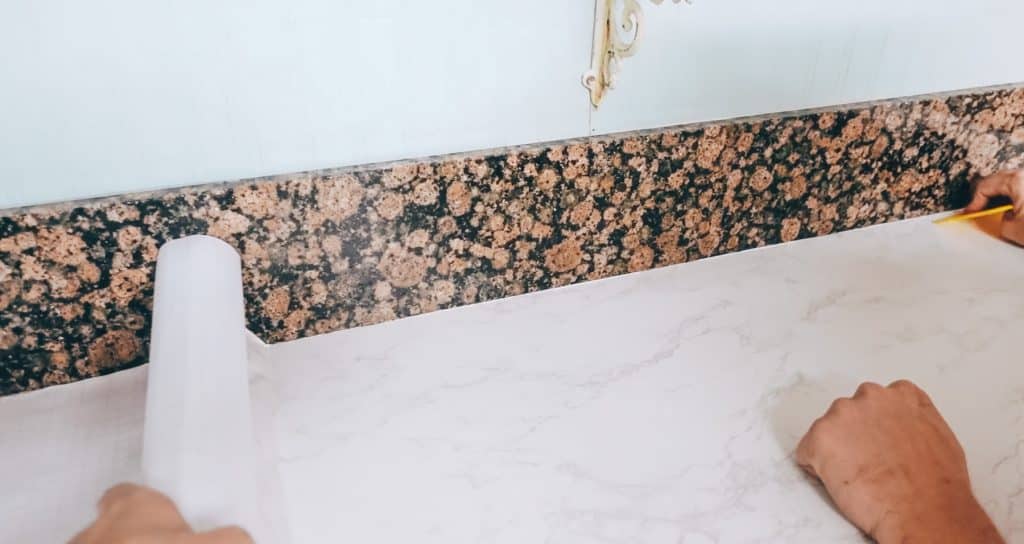
Step 2: Cut to size
Unroll your contact paper on a flat surface. I unrolled it right on the countertop and cut it to size right there. Be sure to leave enough for folding over the sides and enough for the bottom. Our contact paper came so wide I was able to cut some off at the top and use it for the backsplash portion of the ugly granite.
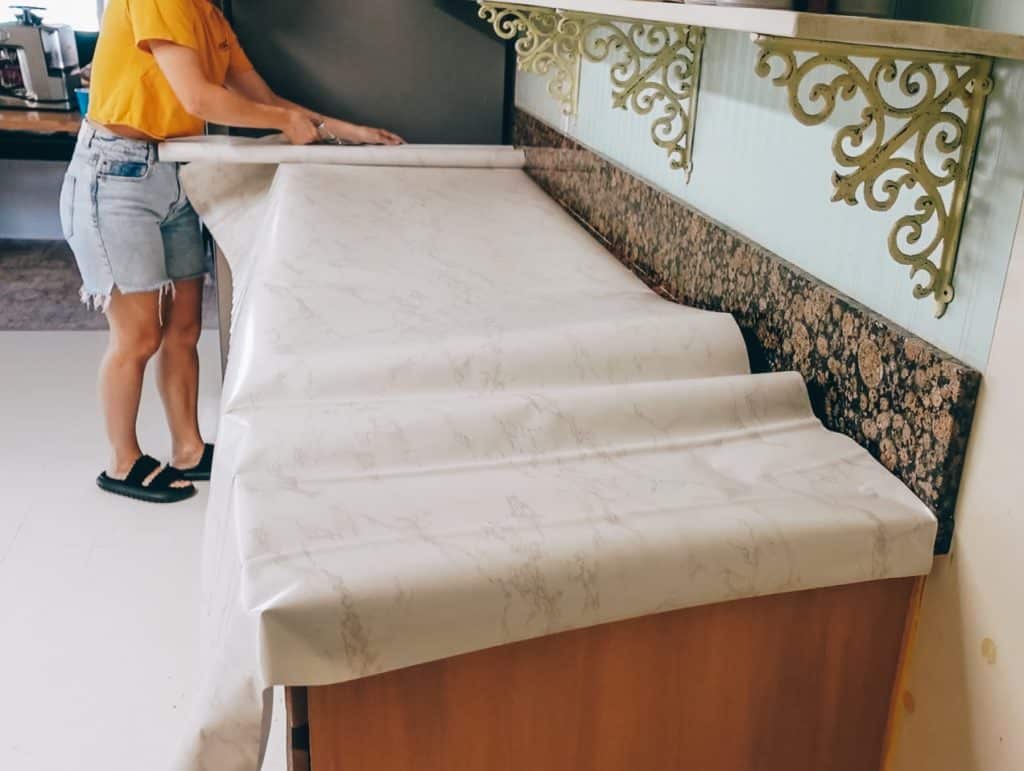
Step 3: ROLL it on!
Now to help everything stay neat while you’re applying roll your contact paper back onto the roll face side in.
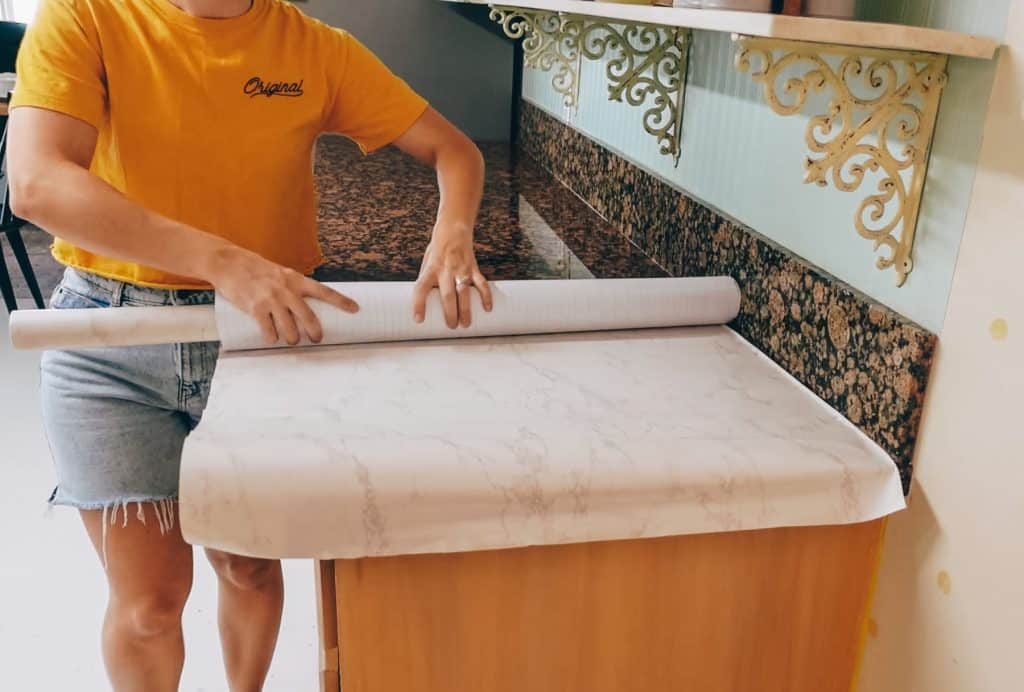
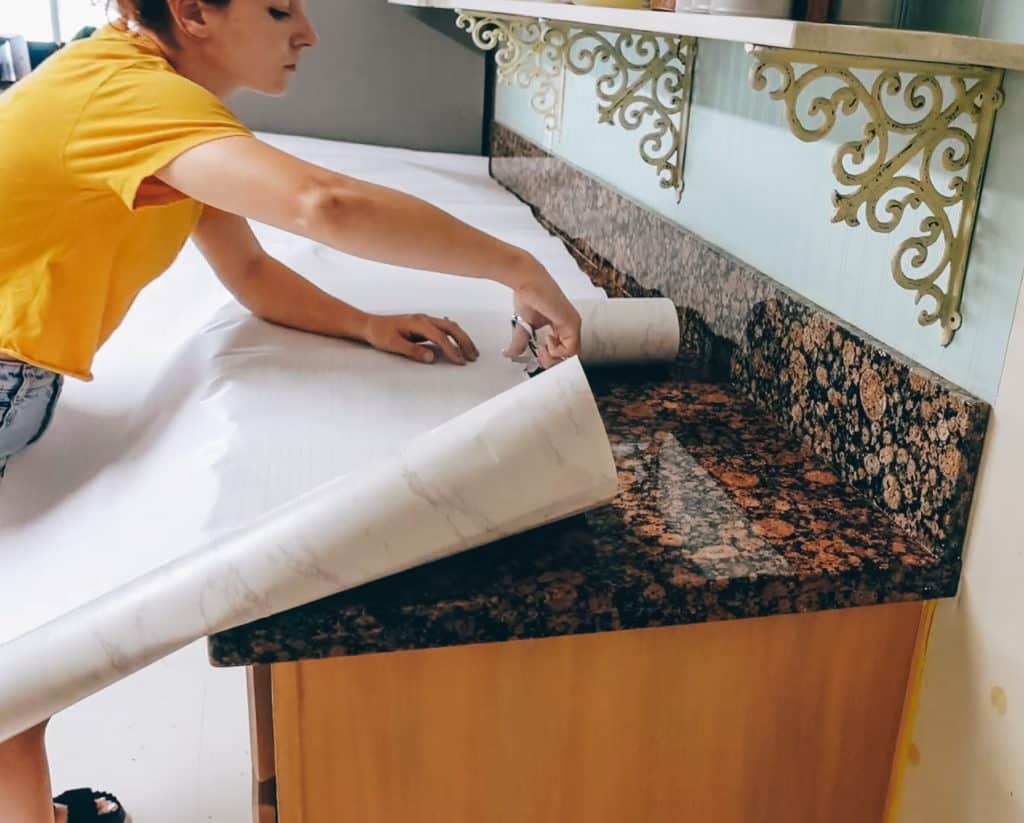
Step 5: APPLY the contact paper!
This is where the magic begins! Slowly peel the backing of the contact paper. Use your squeegee to slowly apply the contact paper!
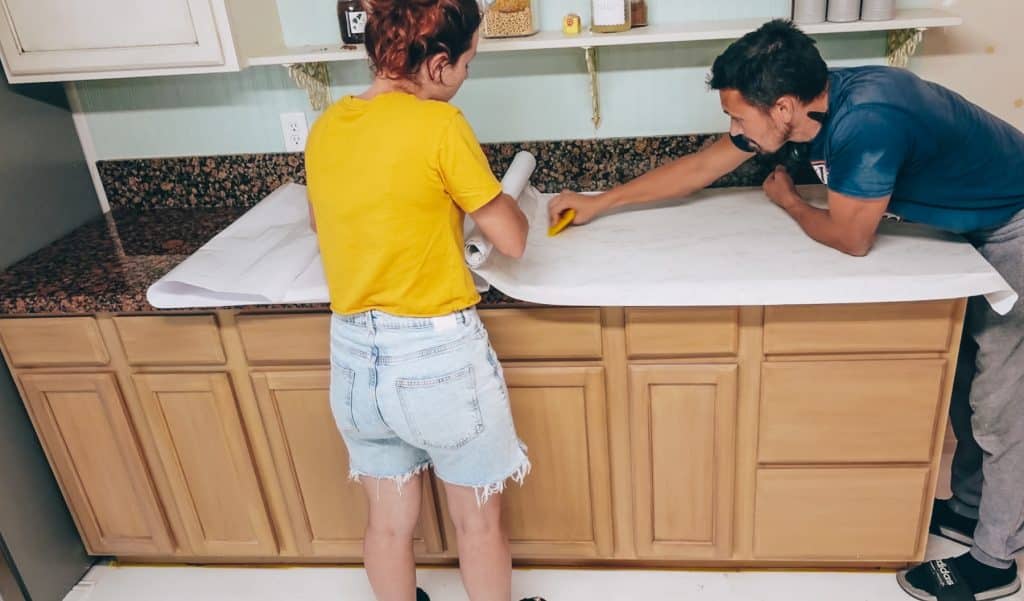
TIP: Keep the roll elevated while applying. This will keep bubbles at bay.
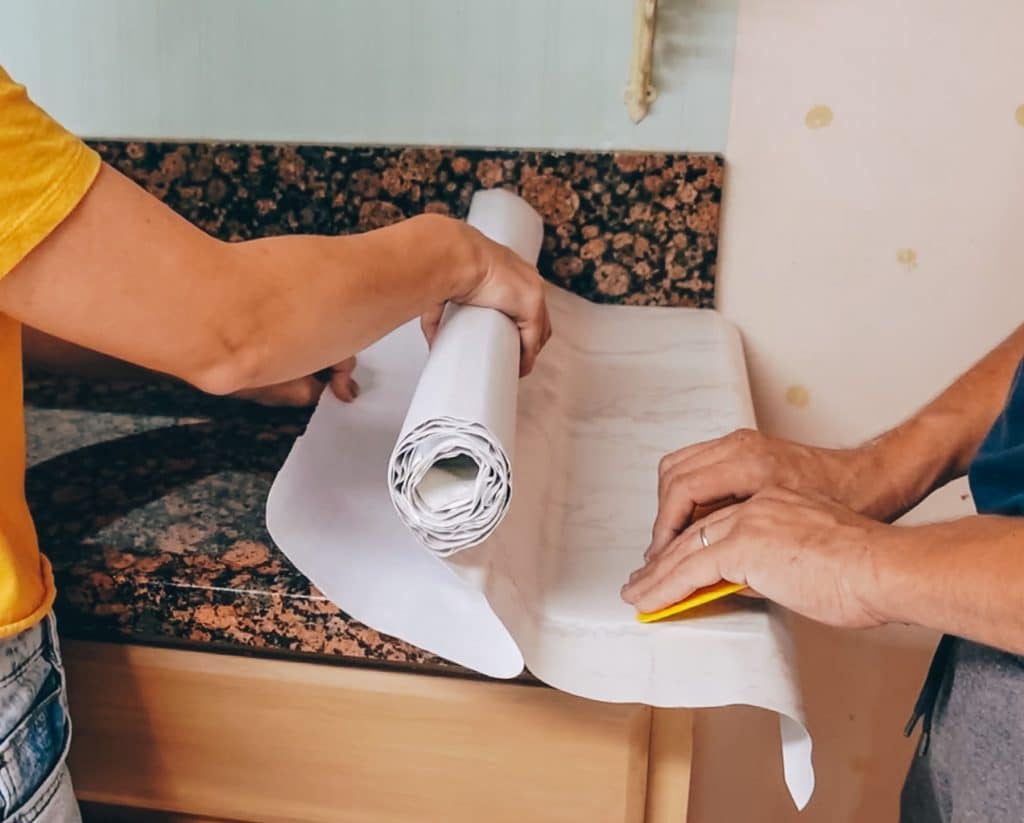
It works best if one person is holding it up while the other works in one inch sections to apply it on. A 10 ft table took us about 40 minutes. Keep in mind you can totally do this alone however it’s pretty easy to get bubbles and if you’re picky like we were we decided teamwork makes the dream work. There are contact papers that aren’t as sticky and can easily be removed to fix bubbles this wasn’t the case with our contact paper but, I liked this about ours because I know it’ll last longer this way.
It took me about three day to apply the contact paper on all the counters.
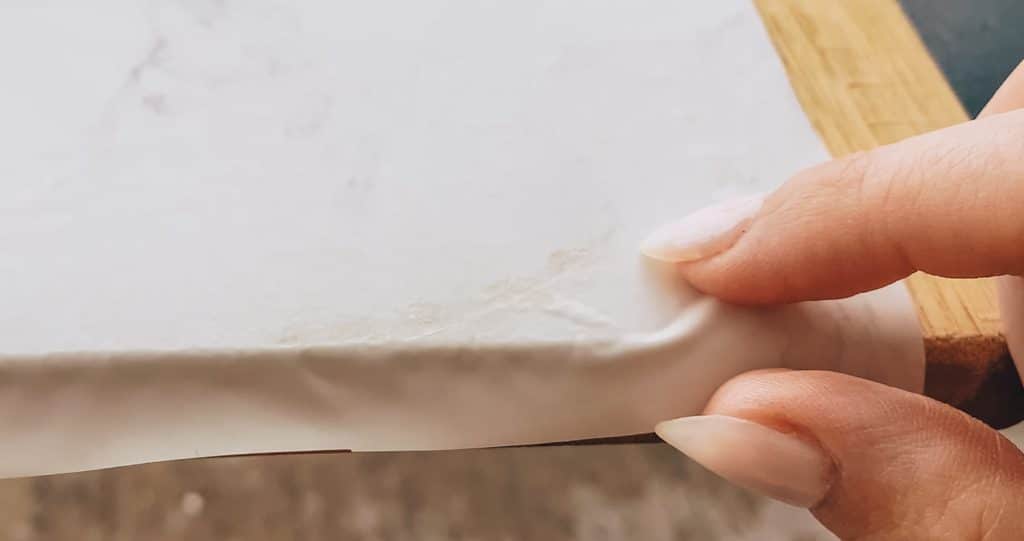
Step 6: HOW about the Edges!
I’m not gonna lie originally we definitely overthought this process! I saw somewhere on youtube that it’s a good idea to apply it slightly on the wall in case it starts applying offset however this created so many problems for us. It was a lot harder to apply because it kept crumpling in the corner and actually was really hard to control whether you wanted it closer or further from the corner. We learned that just keeping the roll flush to the wall while applying worked out great since we planned on adding silicone on all the corners anyways. I share more about this in the video!
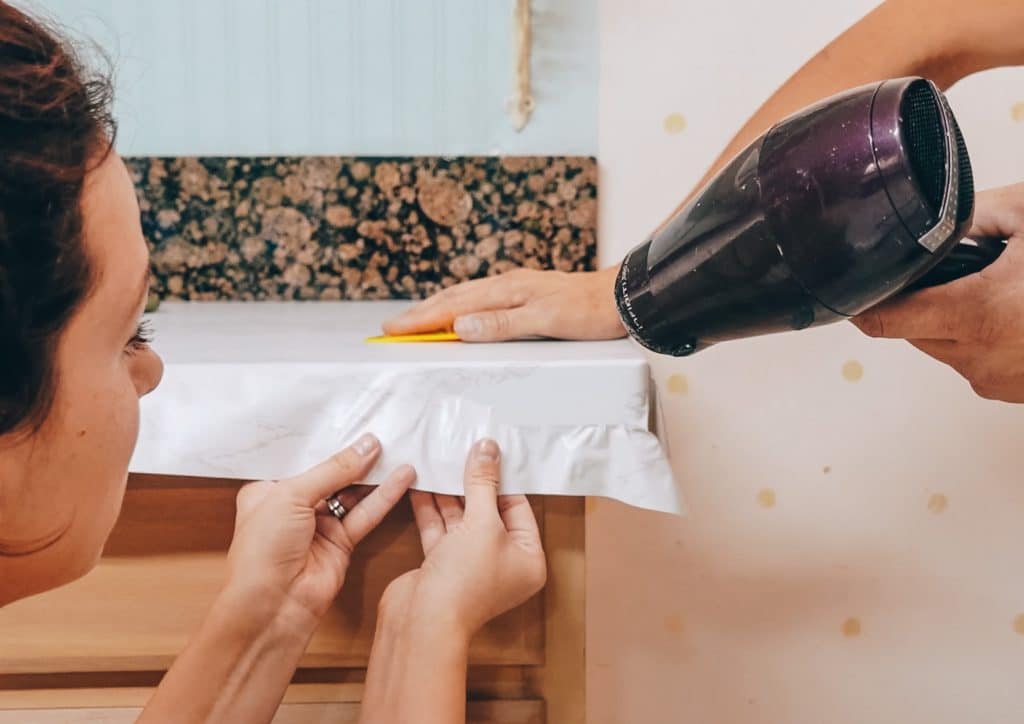
HOW TO STRETCH CONTACT PAPER FOR NICE EDGES!
To finish off all our edges we used a blow dryer and simply stretched it on. This was also a pretty tedious process however I think it was worth it! I love that you can’t see any folds or cuts. It looks just like marble from afar!
I share more on the video why we didn’t use a heat gun! I also share on there how we finished all the other corners with a square edge by cutting into the contact paper!
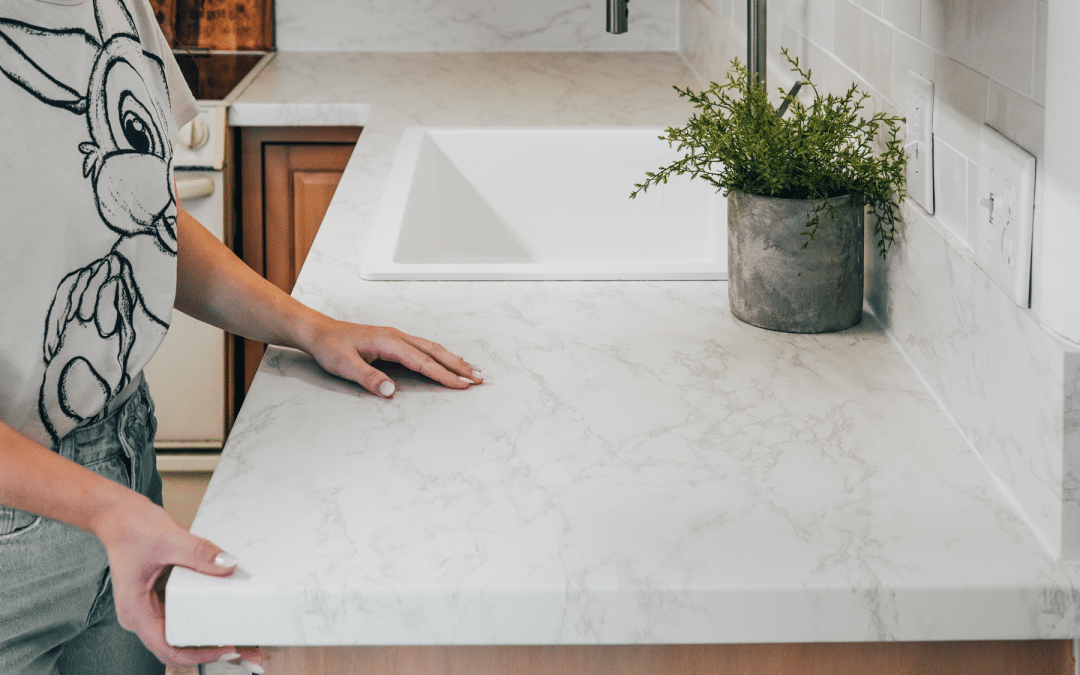
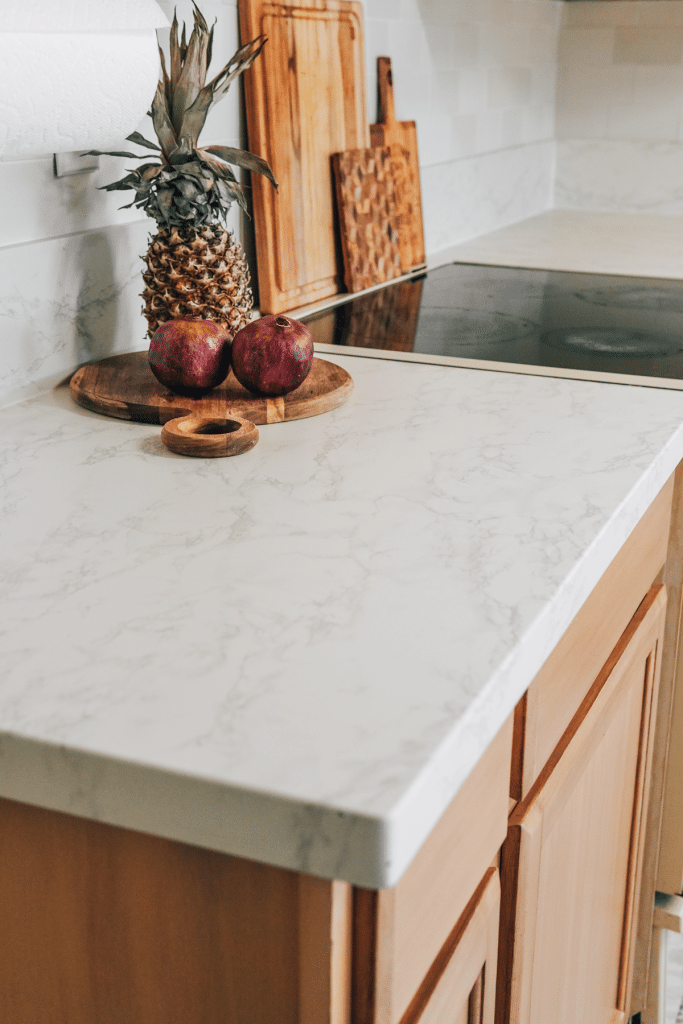
WHITE MARBLE COUNTERS DONE!
Our once ugly old granite countertops are now a thing of beauty, thanks to this amazing contact paper and Tony’s help of course! Couldn’t have done it without him!
A TRIP Down memory lane!
Here are some shots of our kitchen dating back to 2012 when we just moved into to our home.
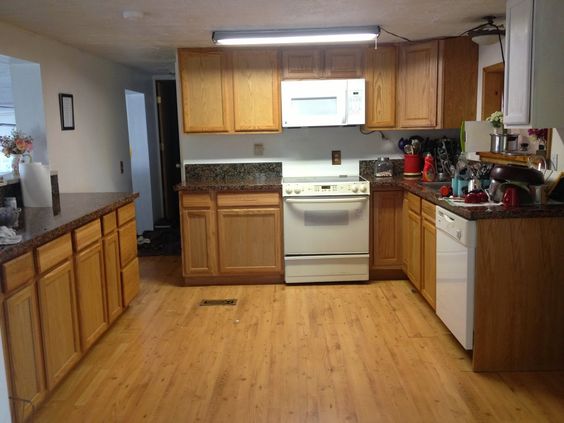
2012
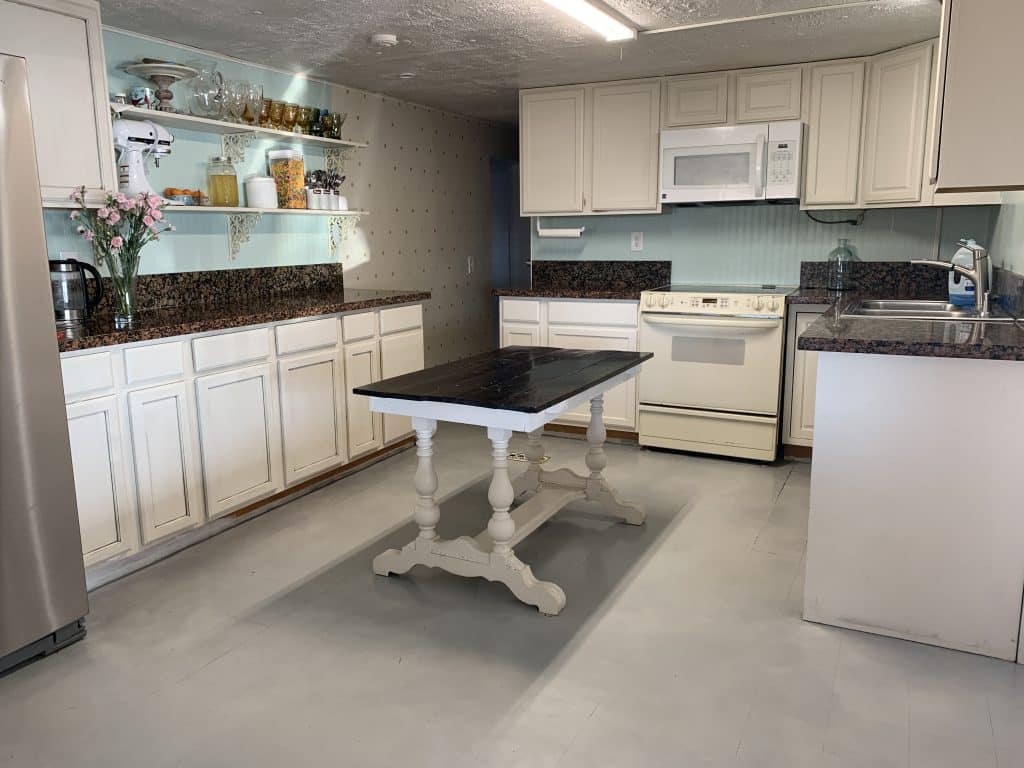
2018 After my shabby chic obsession!
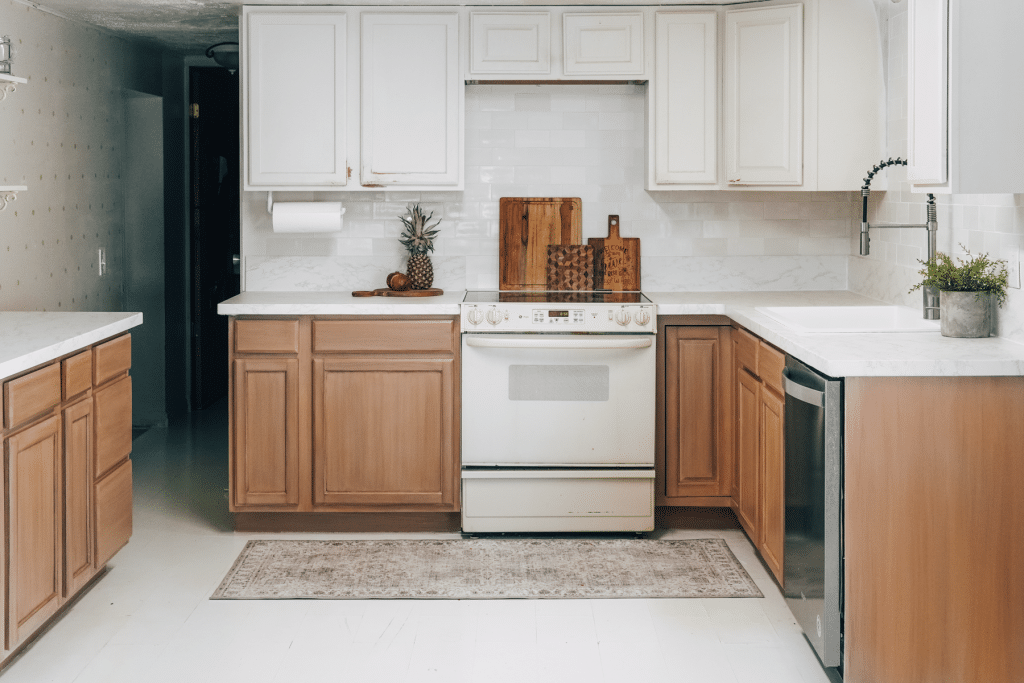
OUR kitchen now! 2023! Still so much work to be done! AND YEP I painted those fake orange laminate floors!
It has been come together so beautifully with the last few projects! If you missed it I shared how I painted these bottom cabinets to look like wood! YEP you read that right! That’s not real wood! I just painted them to look like real wood!
painting my cabinets to look like wood!
CHECK OUT I DID IT HERE! (painting cabinets to look like wood )
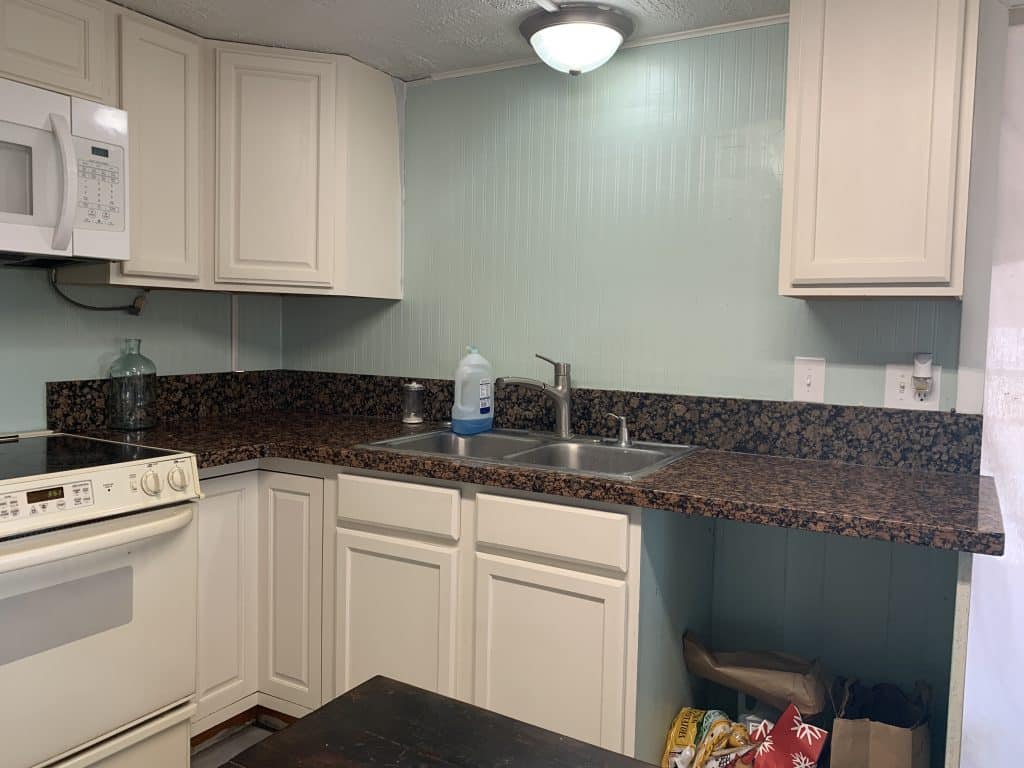
before ( our sink area )
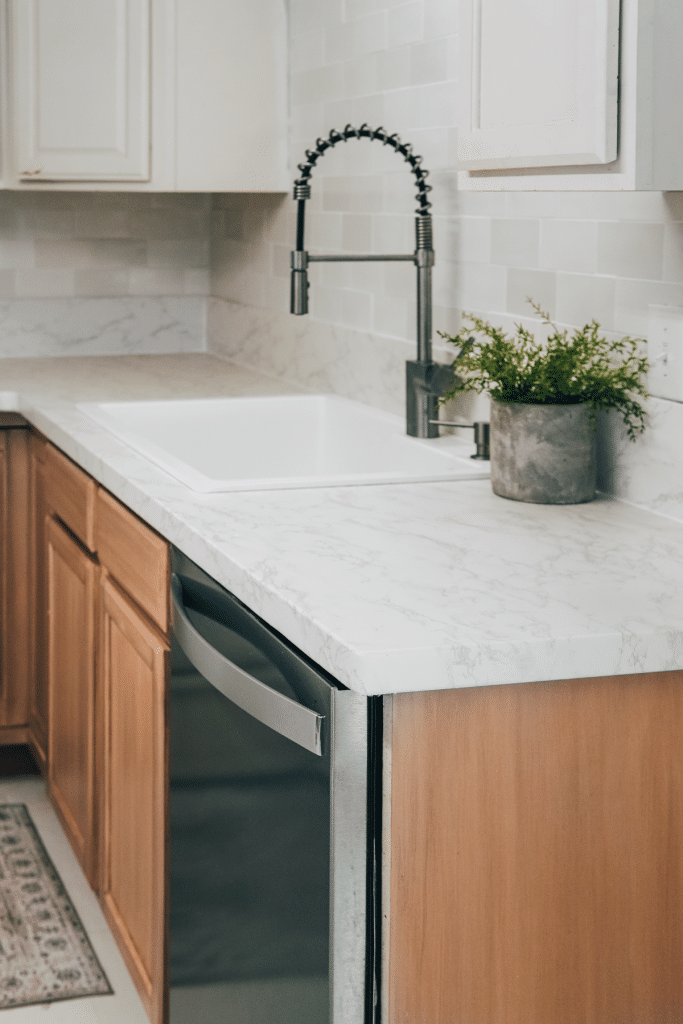
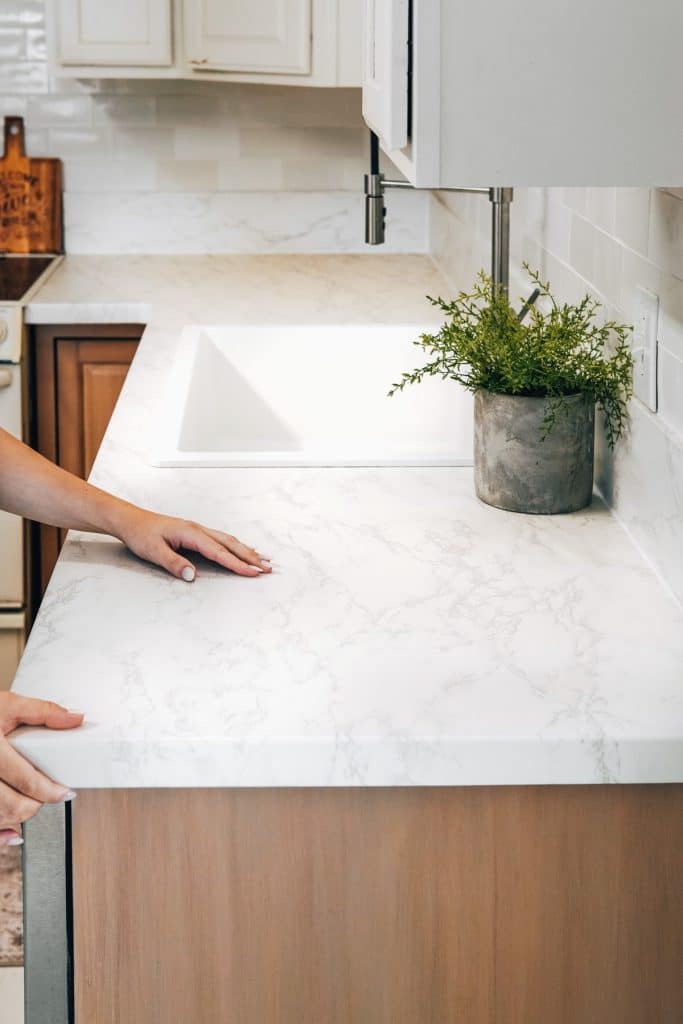
after our sink area ( need to get more photos with the same angle )

granite before the white marble contact paper
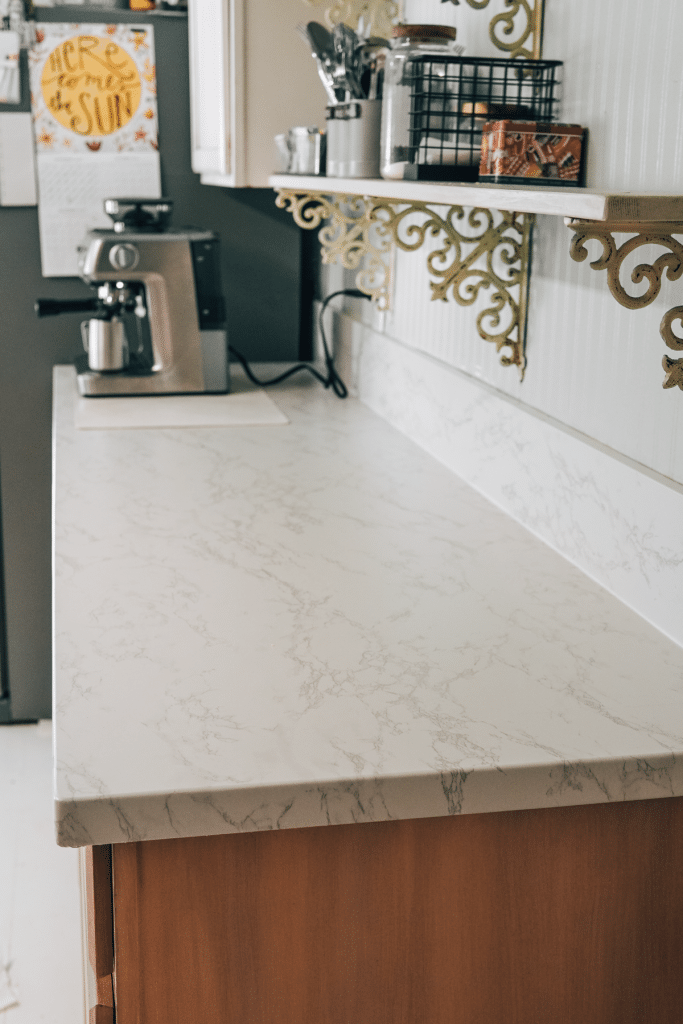
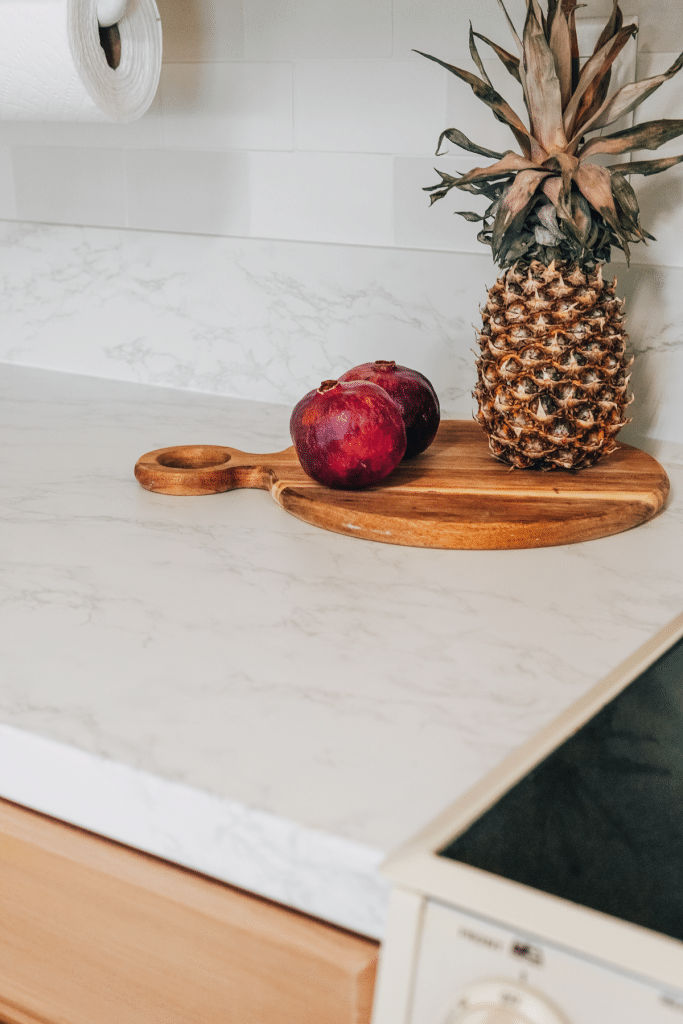
After the contact paper! I still can’t believe how good this contact paper looks! and I love that it’s matte finish!
I like to keep a few cutting boards on the table in case we need to quickly cut something or set something hot on here. Over the years I have gotten used to setting hot stuff on my glass stove top and the sink so I feel like not much has changed anyways!
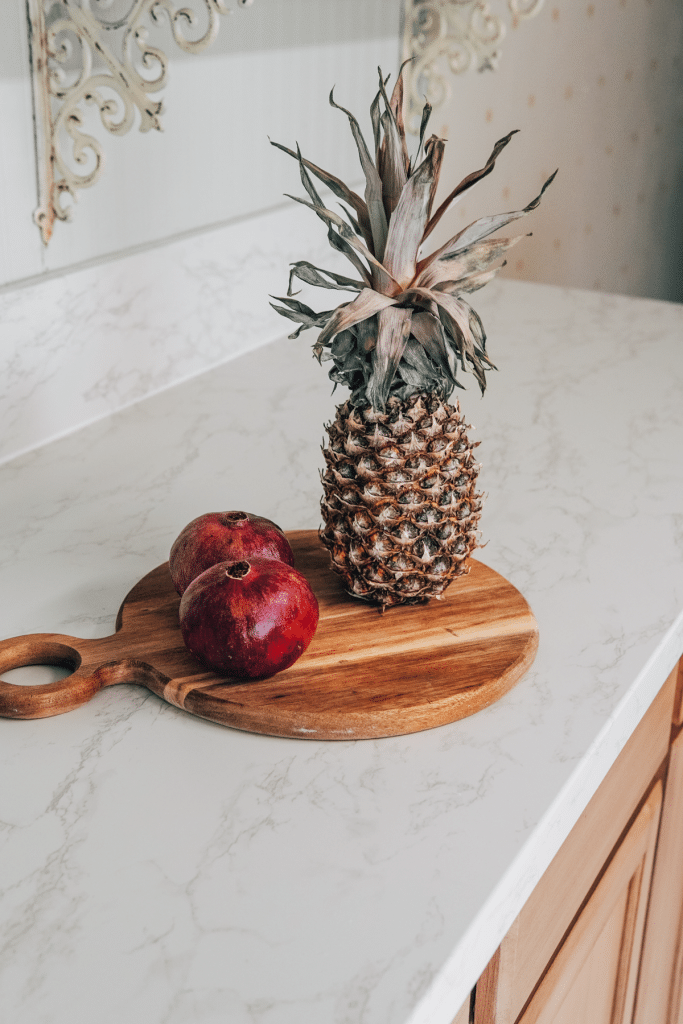

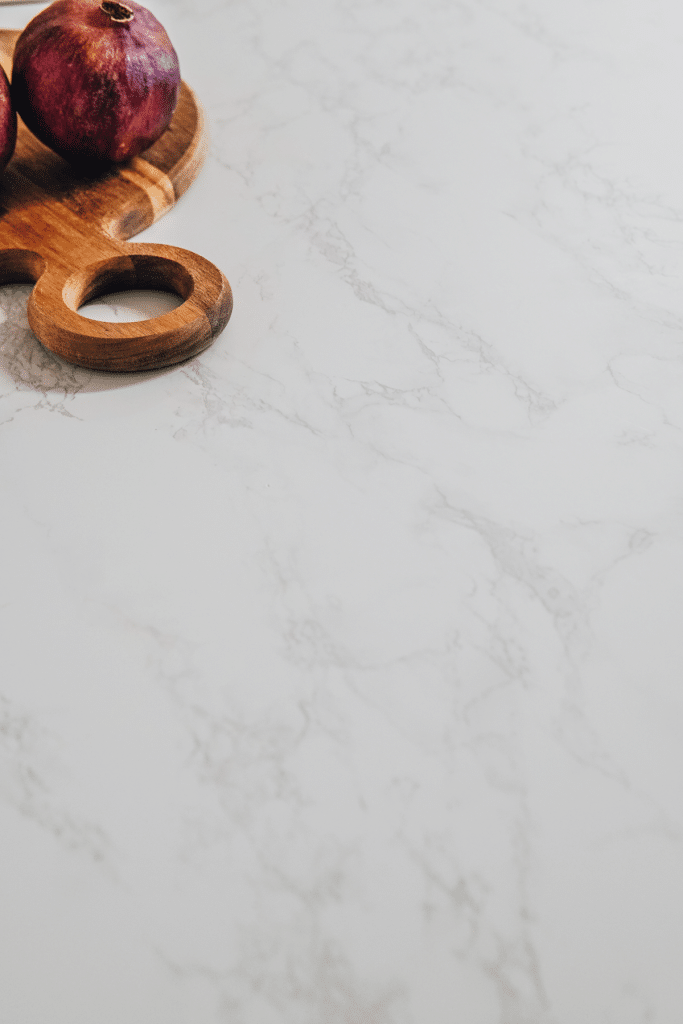
I was a bit worried about the veining look fake or too dark but it’s actually super light and so elegant!
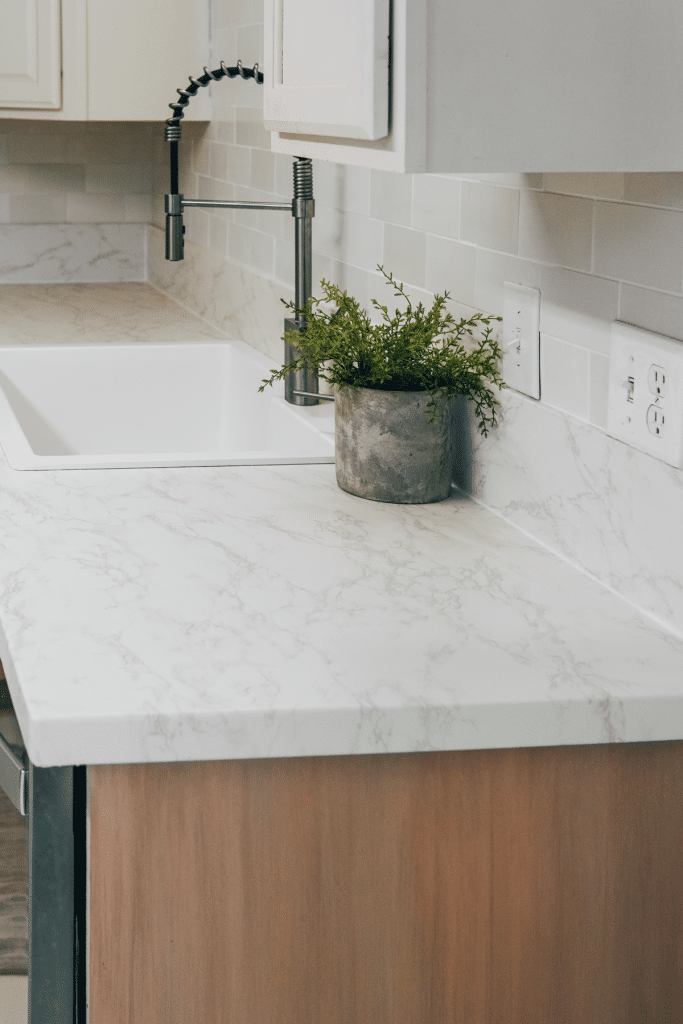
Goodbye ugly orange granite counters and hello to our bright new kitchen! We’ve been using these counters for two months and so far they’ve been holding up to good. I share all the details in the video!
Wanna hear the best part! These are totally renter friendly and can eventually be removed if we miss the granite 😀 !
That’s all for this DIY transformation! I hope you’re inspired to give your own ugly counters a transformation with contact paper!
Applying contact paper to your old granite countertops is a fun and exciting way to breathe new life into your kitchen.
Painting My Granite Countertops #FAIL
Hi everyone, I hope you're doing great. Let me start off by say that this DIY wasn't exactly a success! I was actually dreading to share this DIY for so long because of how many problems I had with it but, decided to still go ahead and share it because it might be...
HOW TO STYLE A CHRISTMAS TREE IN A BASKET
Hi everyone, today I'm sharing how I styled my christmas tree in a basket. View this post on Instagram A post shared by 🌿Family fun and DIYS...
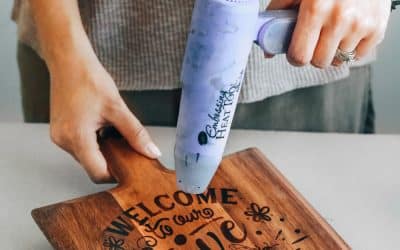
HOW TO BURN PICTURES IN WOOD
Hi Everyone, Today we'll be burning some designs in wood with a heat gun. No wood burning tools required besides the heat gun. This is actually called a chemical wood burn and is so quick and easy to do! Here's what you'll need: 1 tbs of ammonium chloride 8 tsp...

CANDLE HOLDER SET MADE WITH PVC PIPES
Hi everyone, today I'm sharing how I made these easy candle holder set using some pvc pipe and concrete. What you'll need round mold 2.5" in diameter ( Here's one I found on amazon ) concrete ( I used cement all ) It sets pretty fast. level plastic pvc pipe (...

DIY Christmas Bells From Recycled Bowls
Hi everyone, here's how I made some super easy DIY Christmas bells. These can easily be a kids craft and cost under $10 to make. I originally saw these stars at pottery barn and fell in love but, I couldn't afford $30-$60 per candle bell so I decided to try and make...
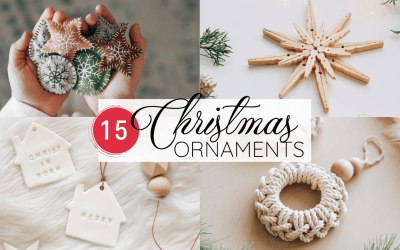
15 Christmas Ornaments You Can Make!
Hi everyone, I hope your enjoying this fall season! We've been having some great weather. I'm really enjoying watching all the leaves turn color! It's my favorite time of year. I've officially been making DIYs since 2017 on this blog and decided it's time to share...
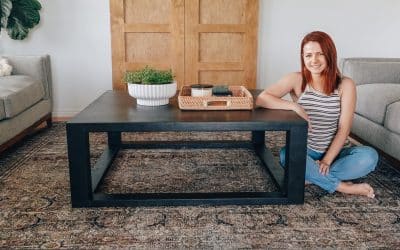
DIY Coffee Table With 2×4’s
Hi everyone, It's been a while since I've shared on here. I hope you're all doing well 😀 ! If you aren't subscribed to my youtube channel I've been way more active on there sharing lots of cricut projects. Last week, me and Tony decided to build a DIY coffee...
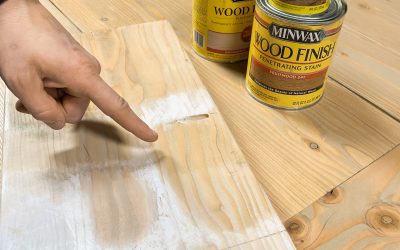
Best Wood Stain For Pine | Douglas Fir !
Hi everyone, today I'm sharing about the best wood stain techniques for douglas fir or pine wood. Staining Douglas Fir! Douglas fir isn't an easy wood to stain! If you remember our previous DIY table it was also made of Douglas fir and I made the mistake of...

Sliding Glass Patio Door Idea + DIY frosted Glass
Hi Everyone, I hope you're doing well and staying safe. If you're looking for patio door curtain ideas, DIY frosted glass, patio door covering ideas, or just an easy way to get privacy while keeping budget in mind,? Than you've come to the right place. Why blinds and...
DIY Breakfast Nook | Banquette Seating
Howdy folks! I hope you're all doing well. Today I'll be sharing how we made this super easy seating for our dining area which also serves as our breakfast nook. If you're looking to make your own I'll be sharing our exact banquette seating dimensions. Before we start...
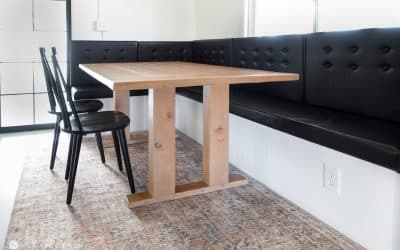
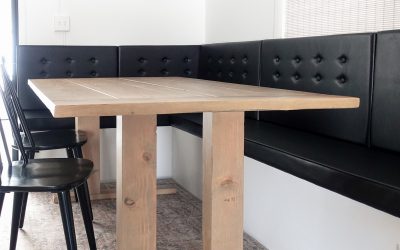
Easy Modern DIY Farmhouse Table
Hi everyone, today I'm sharing how we made our DIY modern farmhouse dining table with the most basic tools. This was really easy to make and could easily be a 2 day project. A great weekend project! WHAT NOT TO DO WHEN BUILDING A TABLE! We had originally planned on...

Dollar Tree Christmas Trees USING PICTURE FRAMES
Hello everyone! Today I'm sharing how you can transform cheap dollar tree picture frames into the cutest Christmas tree decor! https://www.lilyardor.com/diy-cat-house/ I love the Christmas decor at dollar tree however I can never pass up a good dollar tree hack! Best...
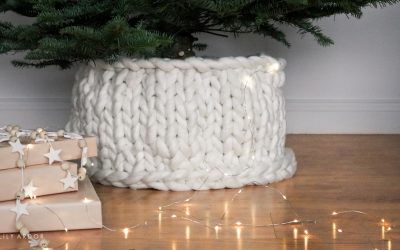
DIY Christmas Tree Collar | Chunky Knit
Hi everyone, today I'll be sharing how I made my chunky knit christmas tree collar. This DIY doesn’t require any knitting experience and requires only three steps to complete. If you missed my chunky knit series I did a few years back I made a chunky knit blanket....

Magnetic Chalk Board Christmas Tree DIY + Cricut Ornaments
Hello there everyone! I hope you've had a great week! I'll be sharing a few DIYS today. How we made our super easy magnetic chalk board that I turned into a Christmas tree sign and some really easy ornaments you can make using your cricut explore air 2. time needed:...

3 Ingredient Homemade AIRCLAY Recipe + DIY Ornaments
Hi Everyone! I hope you are doing well and having fun decorating for Christmas! If you're looking for non cracking homemade airclay you've come to the right place! Last week I had the opportunity to do some airclay recipe testing. It was a long and tiresome...

DIY Vintage Bells From Recycled Soda Cans
YEP!! The title says it all! If you're a recycler of soda cans this DIY is right up your alley 😀 ! Today I'll be sharing how I made vintage bells from soda cans. total time: about 30 minutes ( depending on drying times) this post contains affiliate links ( please...

DIY Hedge Hog Ornament From Pinecones
Hi Everyone, meet Mr.Spikes. He's cute and fluffy and loves to hang out on our Christmas tree. Today I'll be sharing how to make your own mini hedge hog ornament from pinecones . Time needed: About 20 minutes. Supplies: Tiny piece of white faux fur Pine cone...

DIY Wood Stars From Clothespins
Hi Everyone, If you've missed me on instagram last week I announced that I'd be doing a series of 10 Christmas DIYs and sharing them one day at a time. All these DIYs will be fairly easy and simple to make so if you're a beginner to DIYs I got you covered😉....
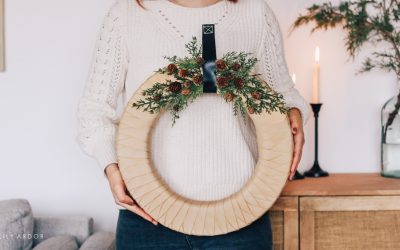
How to make a wreath | With Leather – Minimalist Style
I love minimal decor. It's timeless and always has touches of nature. You'll usually see lots of wood elements, natural textures and neutral colors with white used as the main color. Last week I was on the hunt for the perfect Scandinavian wreath...

DIY Candle Holders With Sugru Modable Glue
"This post is sponsored by sugru. All opinions are my own. " A few weeks ago I got a special package in the mail. If you're not familiar with sugru moldable glue that can be formed into any shaped an once it sets usually about 24 hours. It's permanent. I love this...