Hello there everyone! I hope you’ve had a great week!
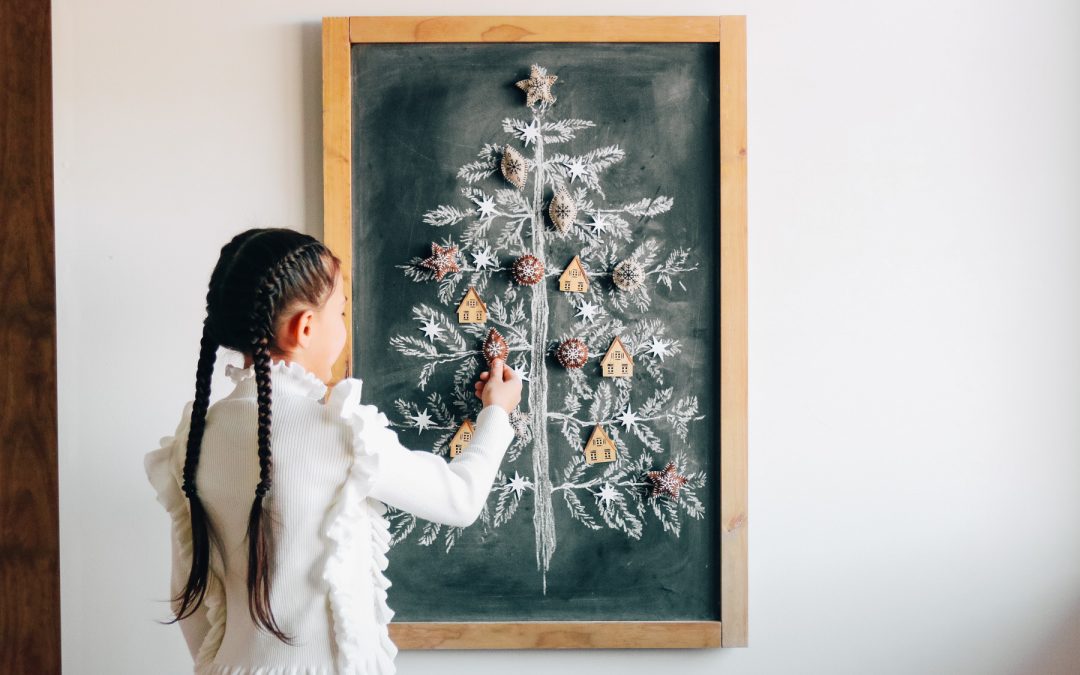
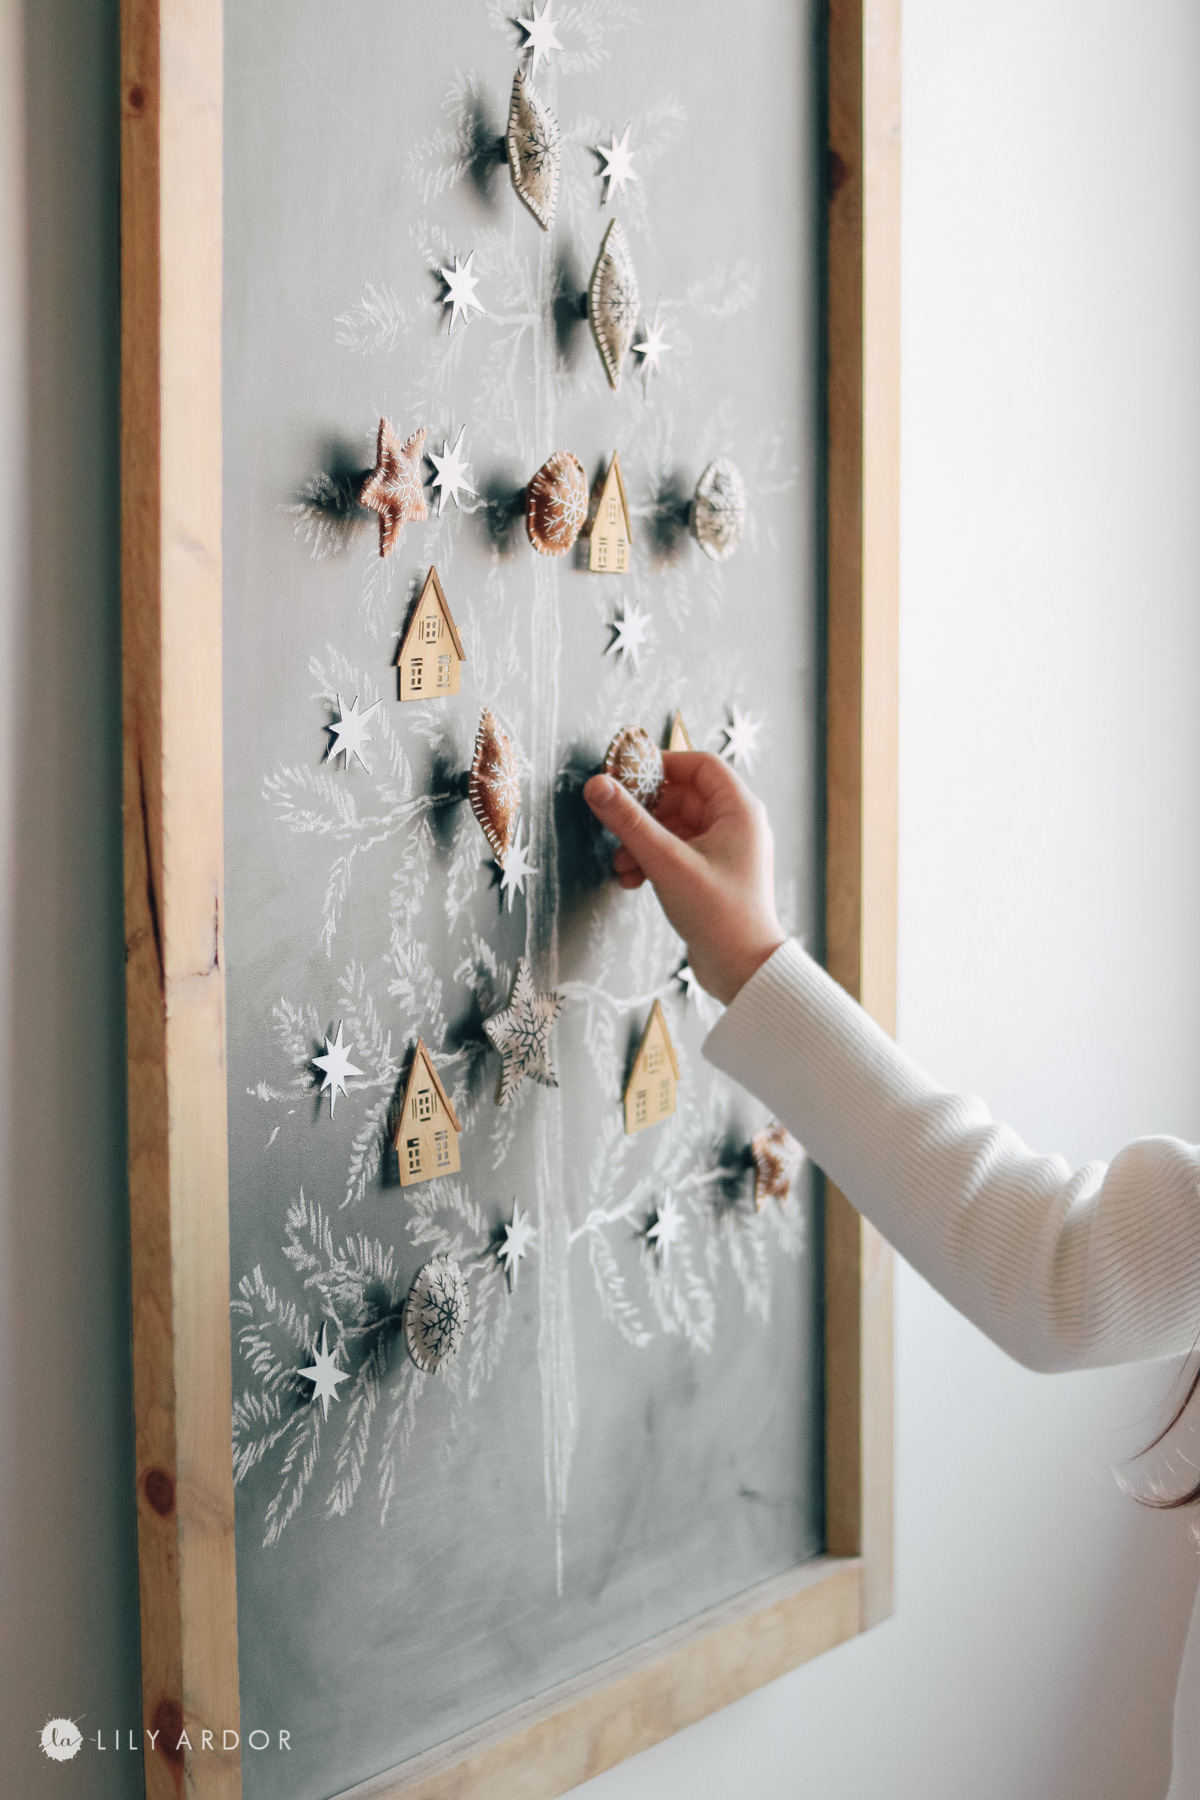
I’ll be sharing a few DIYS today. How we made our super easy magnetic chalk board that I turned into a Christmas tree sign and some really easy ornaments you can make using your cricut explore air 2.
time needed:
It took use about 1 hour to make the magnetic chalk board sign and it took me an additional 2 hours to make the ornaments.
Supplies:
For the chalk board christmas tree
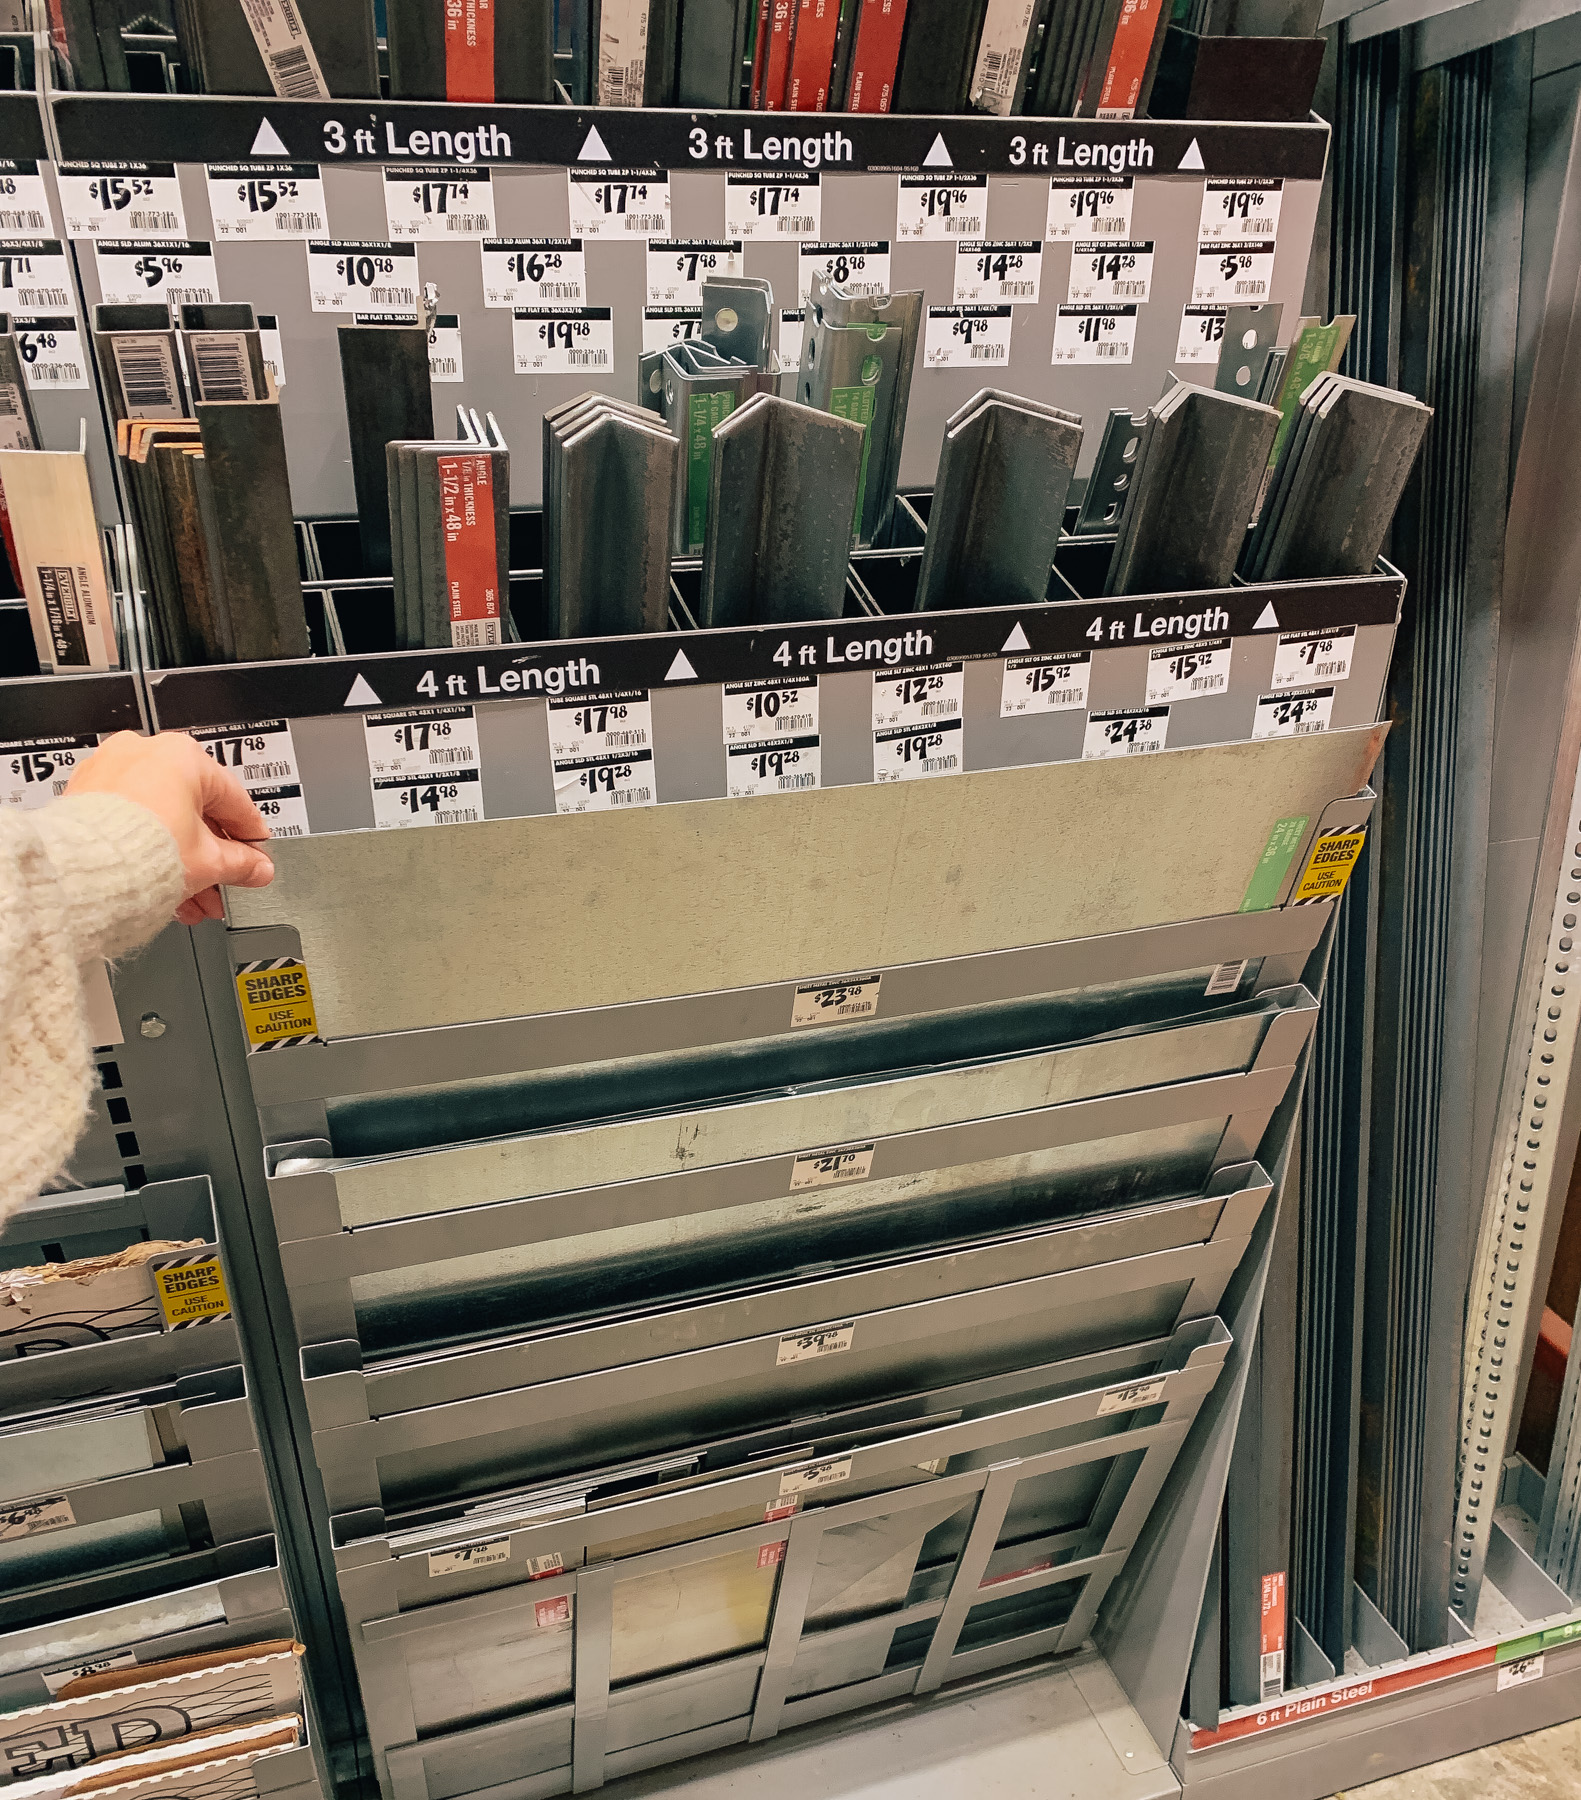
- metal sheet ( zinc plated from homedepot )
- 2 – 1″x3″s for the frame
- fruitwood stain
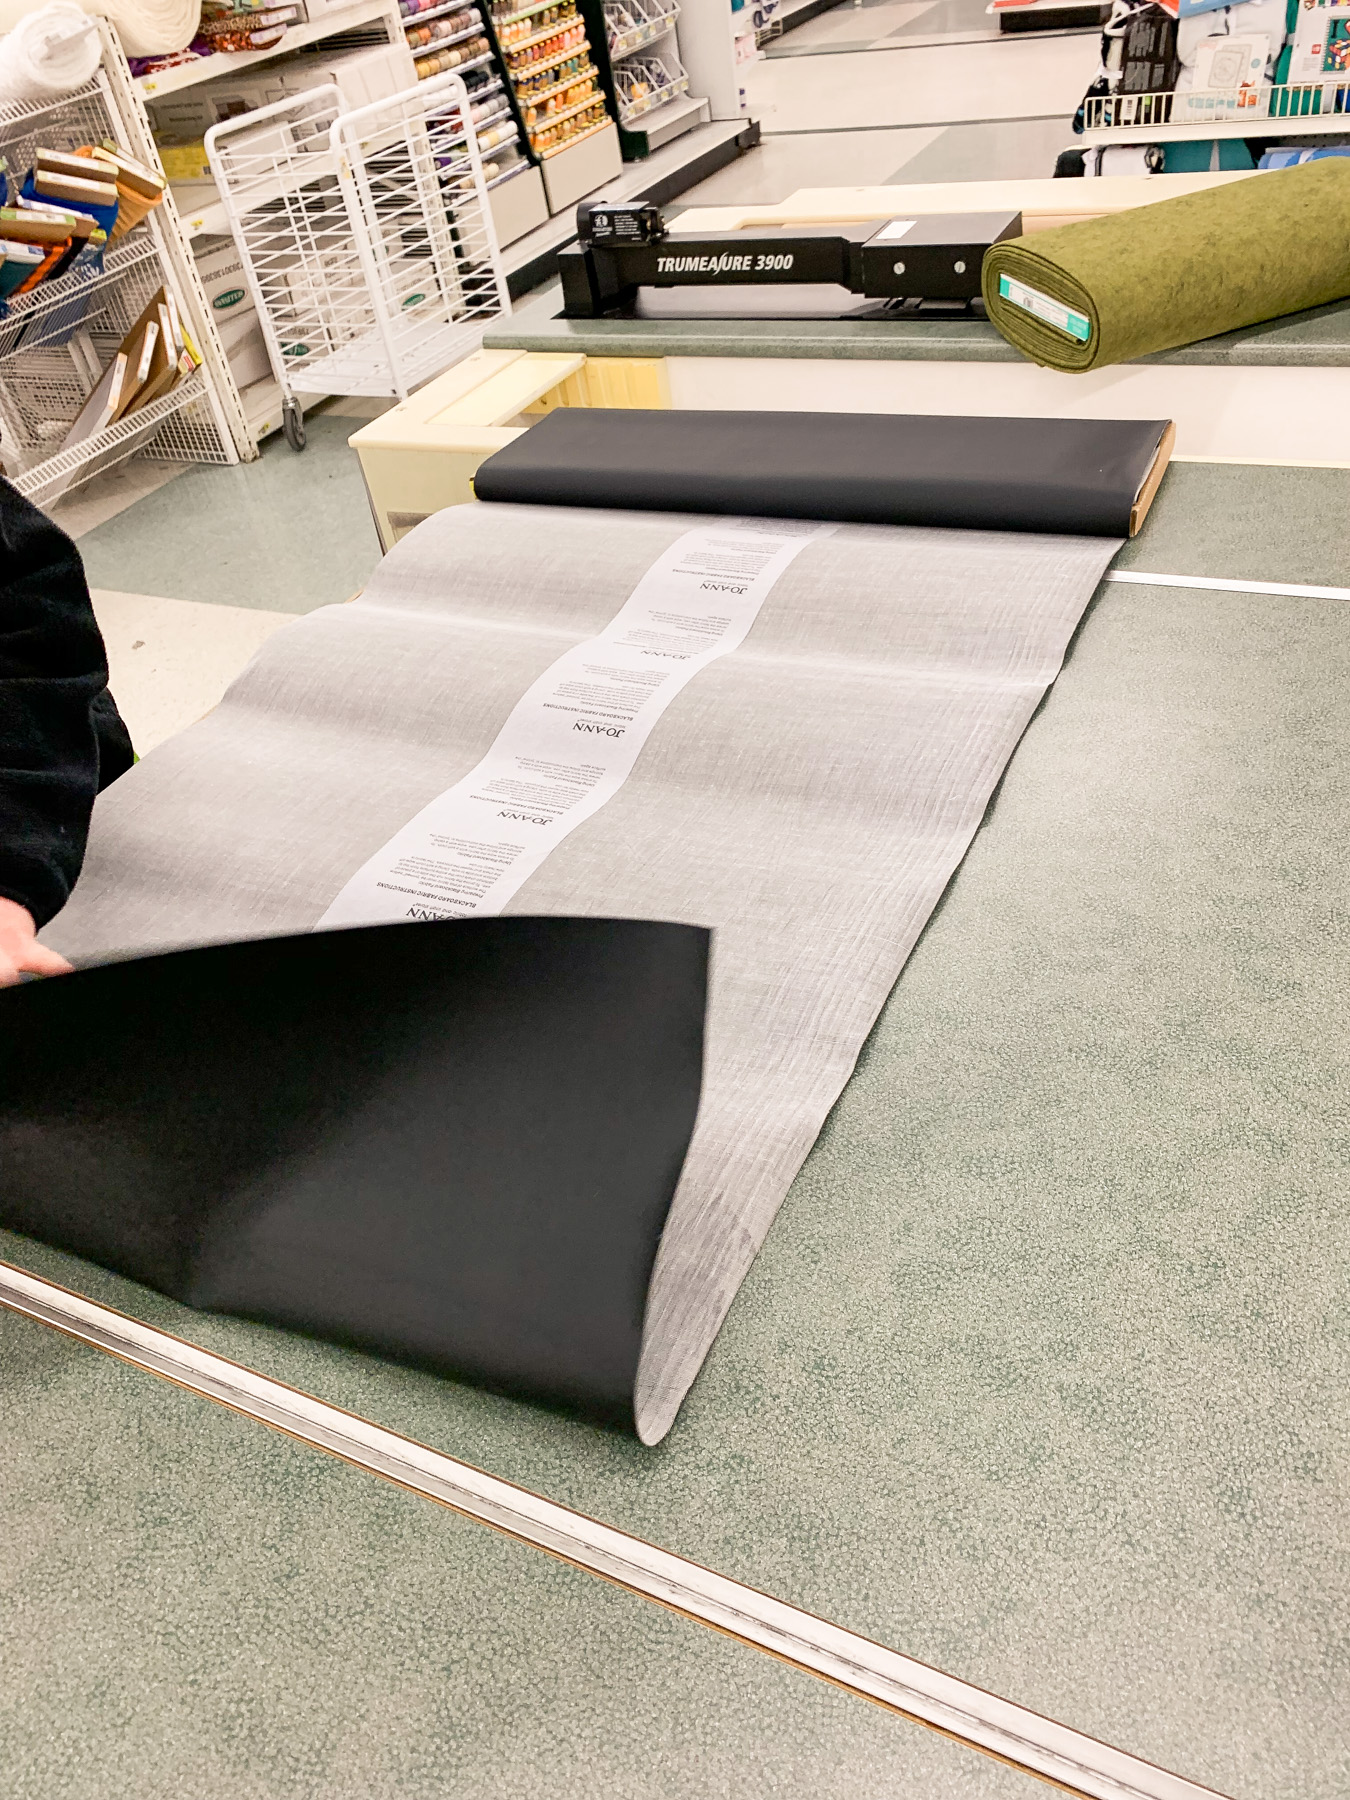
- black chalkboard vinyl
- scissors
- drill
- self tapping screws
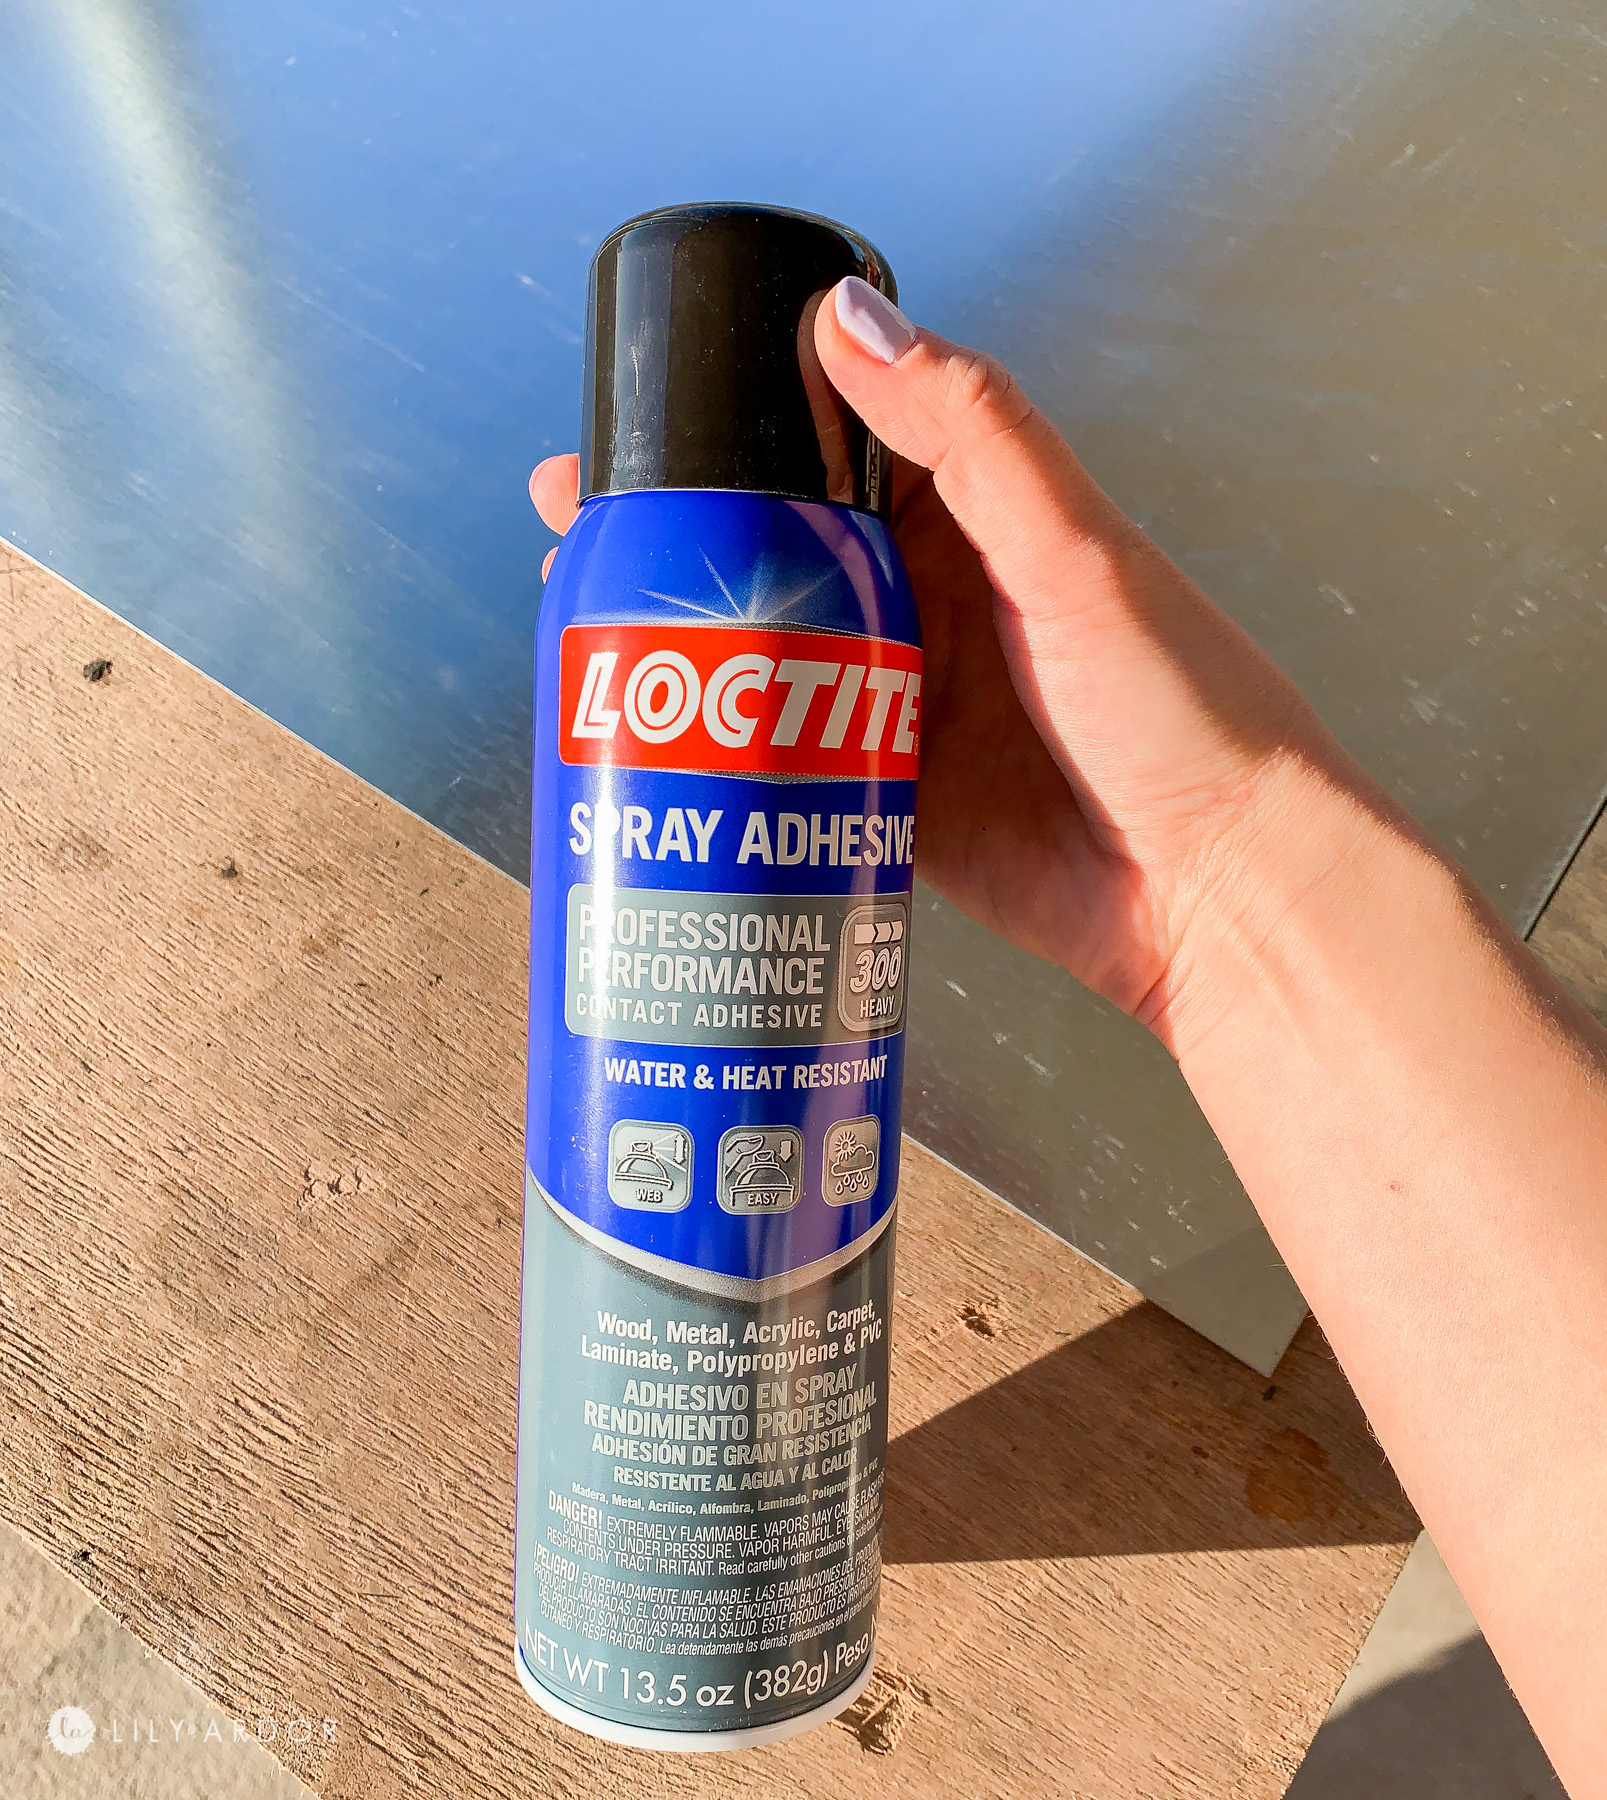
- loctite adhesive
Getting the Correct Metal
My first task was finding a metal sheet the would magnetize. I was surprised to find the perfect sized sheets at homedepot. The price wasn’t too bad too. I got the zinc coated sheet which was around $24.

Attaching chalk board vinyl fabric!
I was trying to decide between spraying on chalkboard paint or attaching chalkboard vinyl onto the metal. They sell spraypaint that looks and feels like chalkboard but, after a ton of brainstorming and a few dms on instagram from you guys mentioning it might scratch from the magnets. We decided it was best we used chalkboard vinyl just incase. I bought some chalkboard vinyl fabric at Joanns. Honestly I was looking for the adhesive vinyl roll and stumbled on this black board vinyl fabric. I had no idea they even made chalkboard fabric! THAT’S SO COOL!
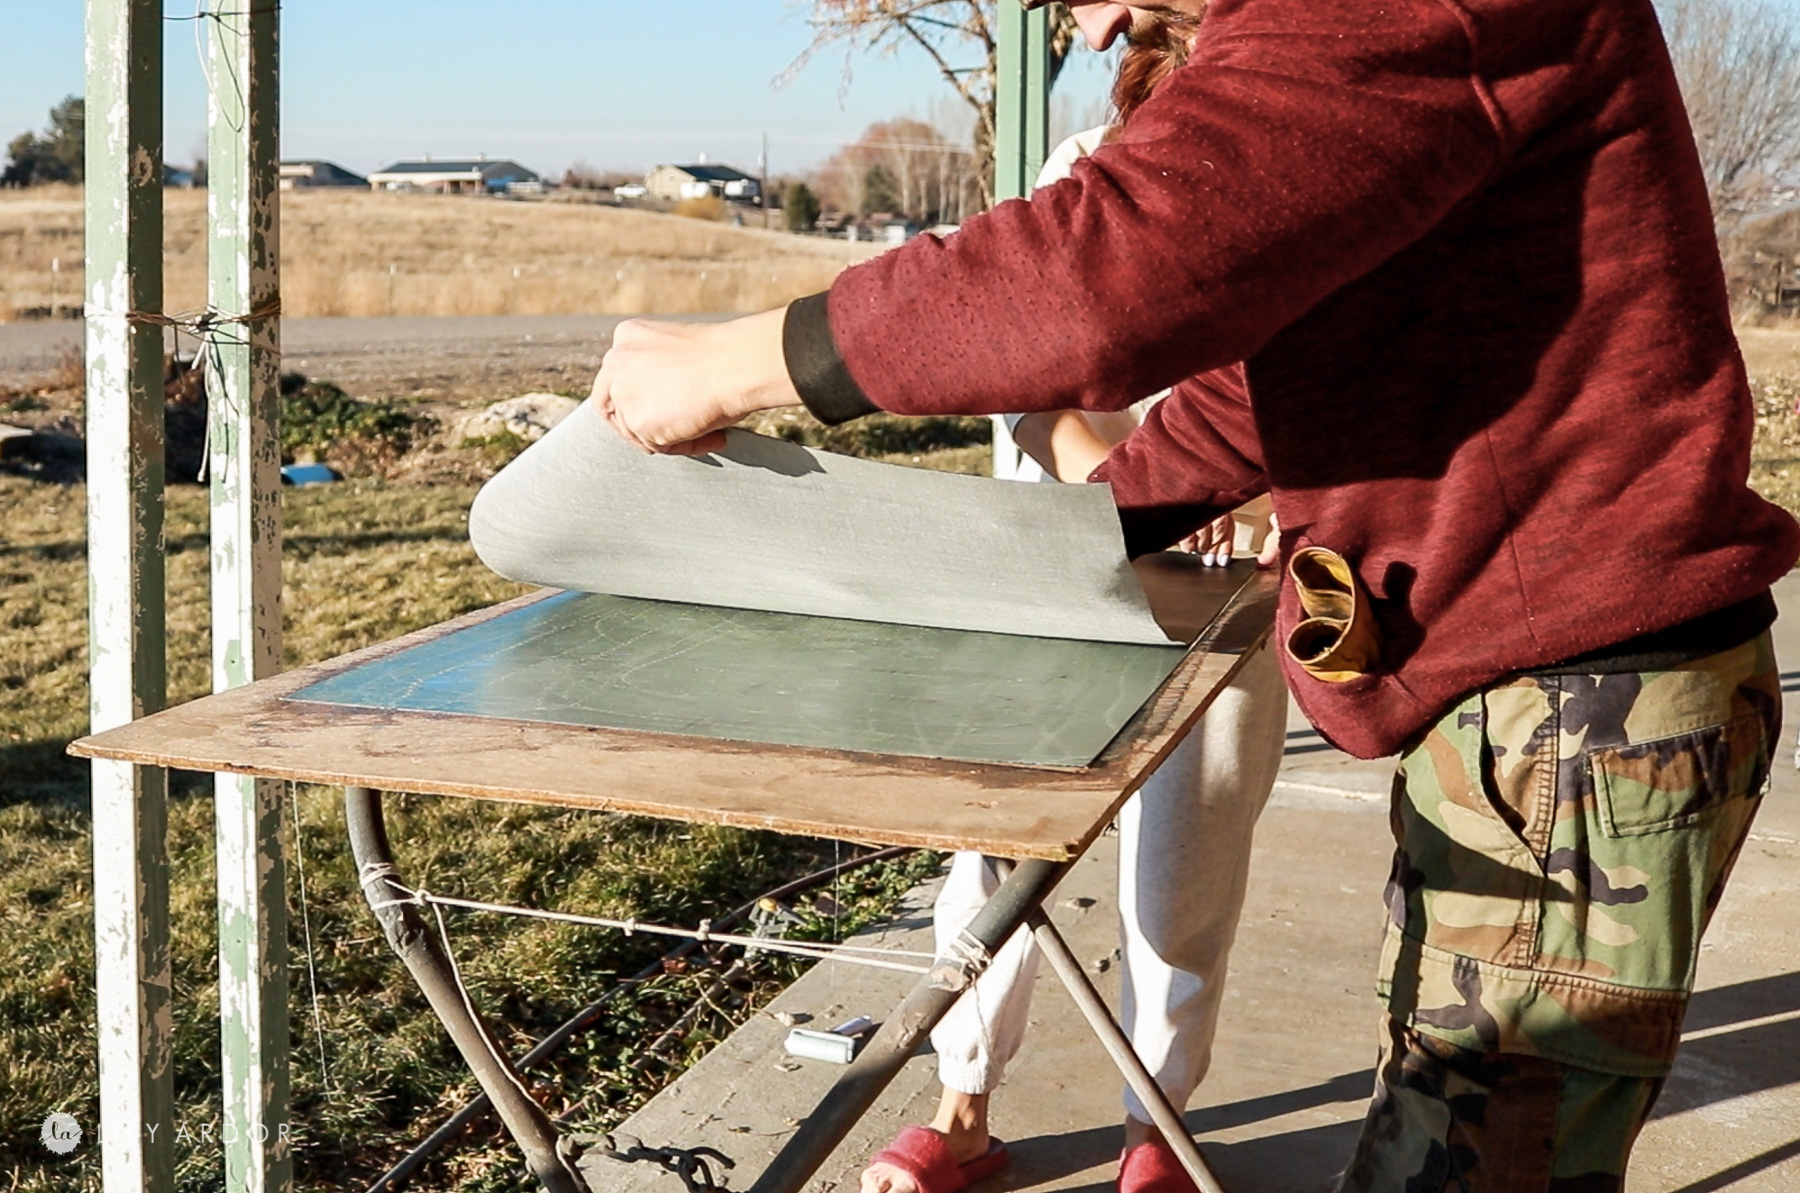
 Tony first cut the fabric down to size and we used some ( photo below) loctite adhesive to attach the vinyl fabric to the metal sheet. OH MY GOSH this adhesive is amazing!! It’s sso strong.
TIPS WHILE WORKING WITH LOCTITE:
A few things to keep in mind.
- It’s probably best to do this outside because it’s adheres like tree sap and won’t come off.
- It dries fast if you don’t lay you’re fabric over it right away. I literally ran inside for 2 minutes to fix a wrinkle on the fabric and when I came back the adhesive had already mostly dried.
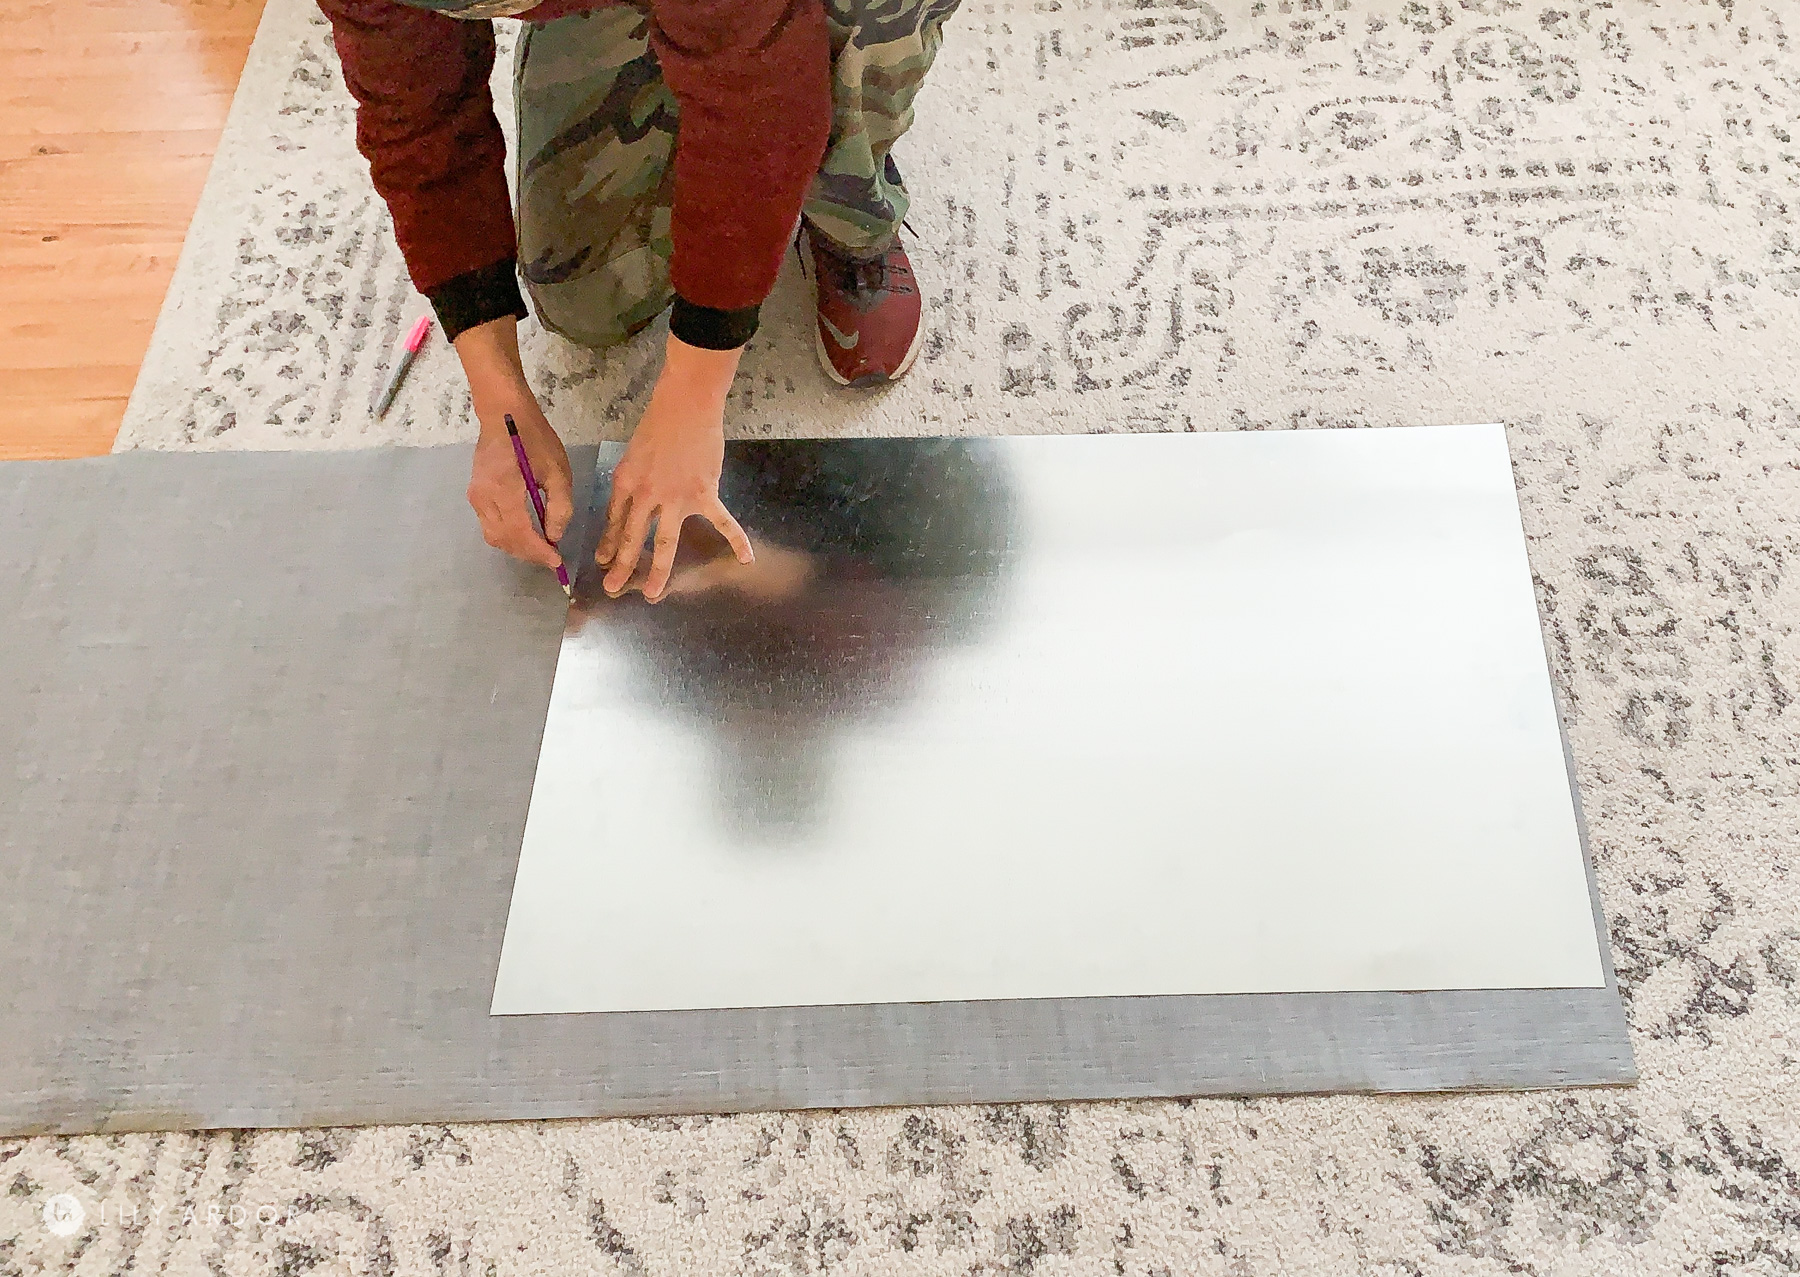
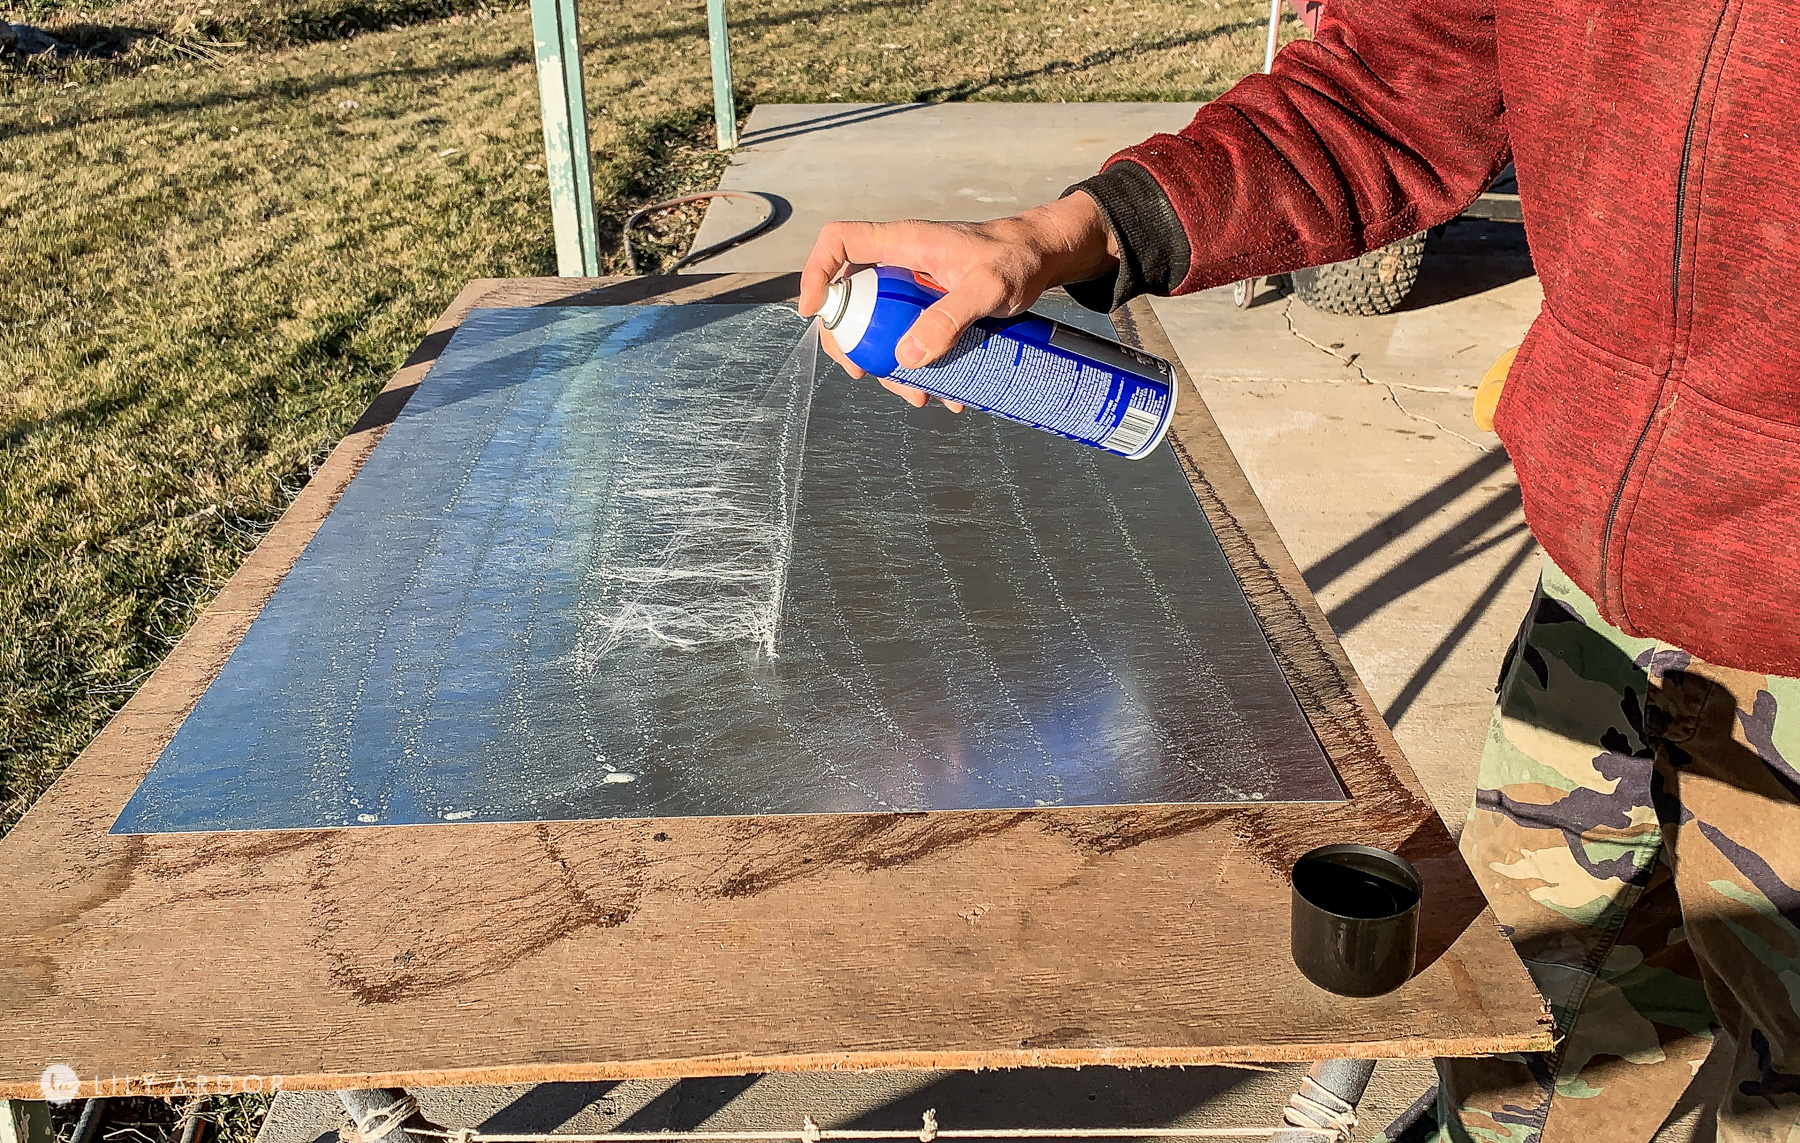
We quickly lay our fabric over the area we sprayed and smoothed out the surface moving all the bubbles to the edges.
Creating the frame!
Next Tony cut out some 1″x3″s and to go around the metal sheet.
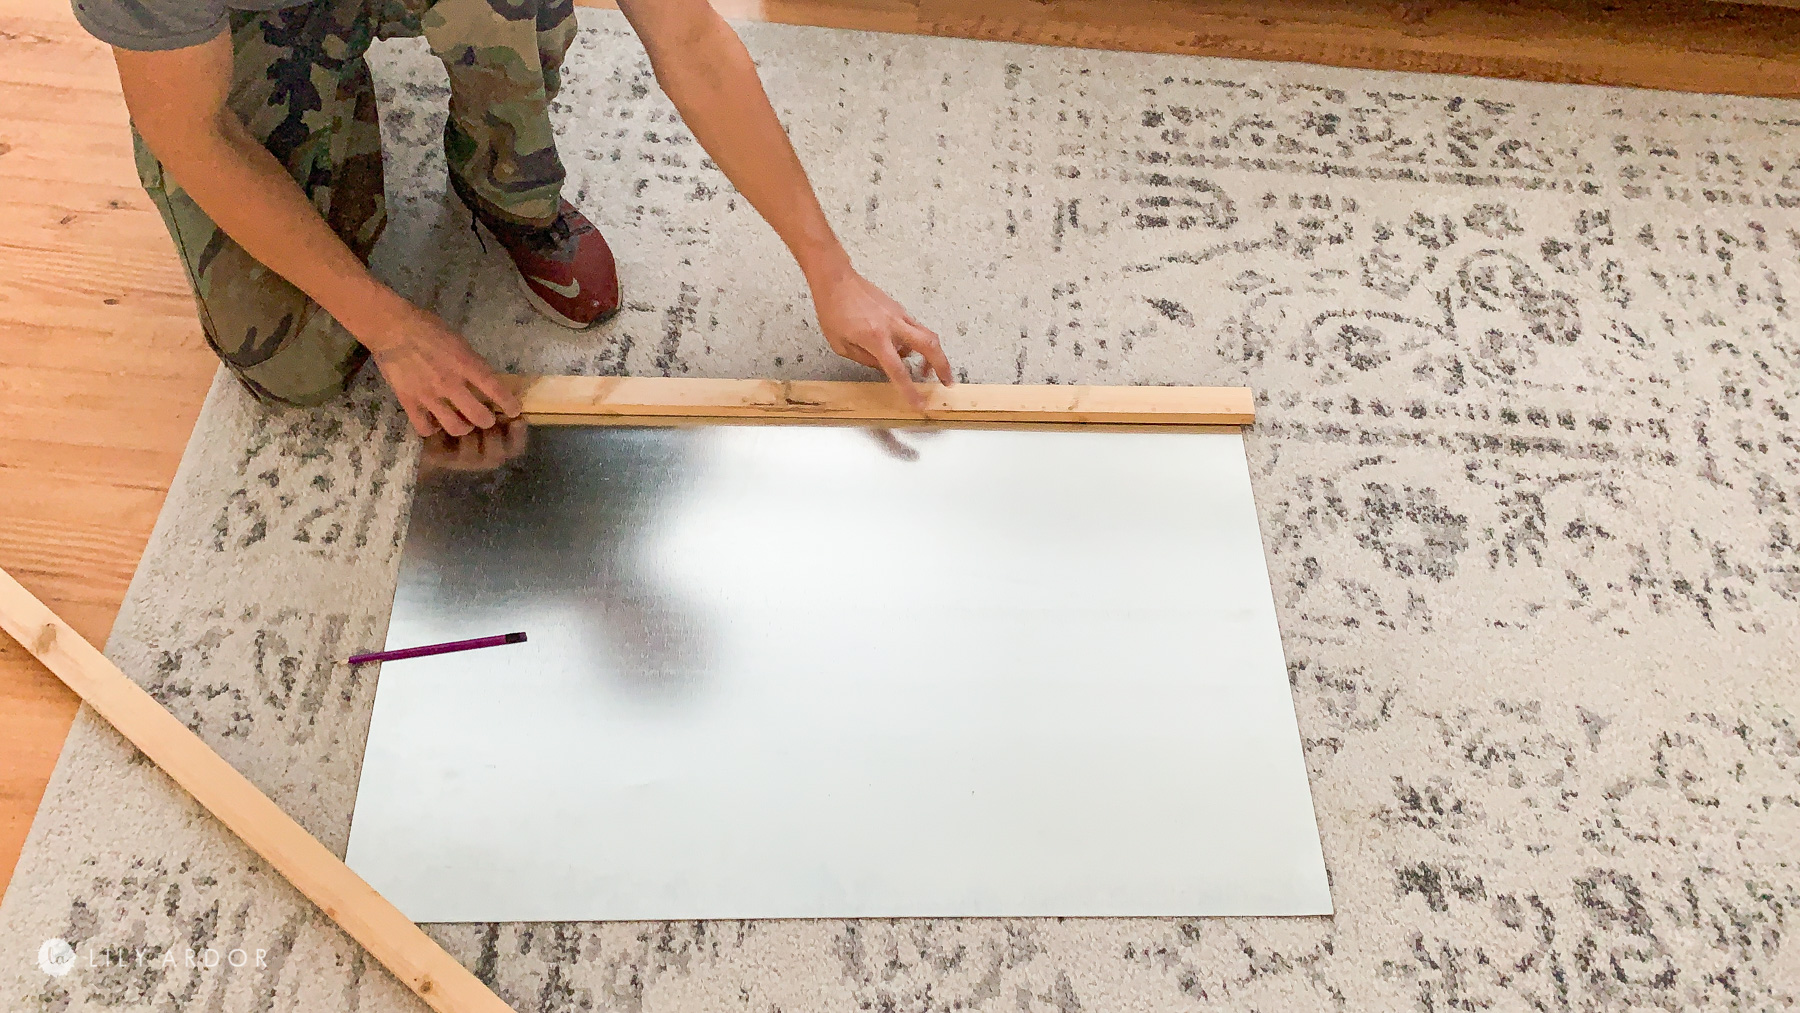
We used some self tapping screws to attach the wood frame to the metal. I love these screws. You don’t need to pre-drill when you use them.
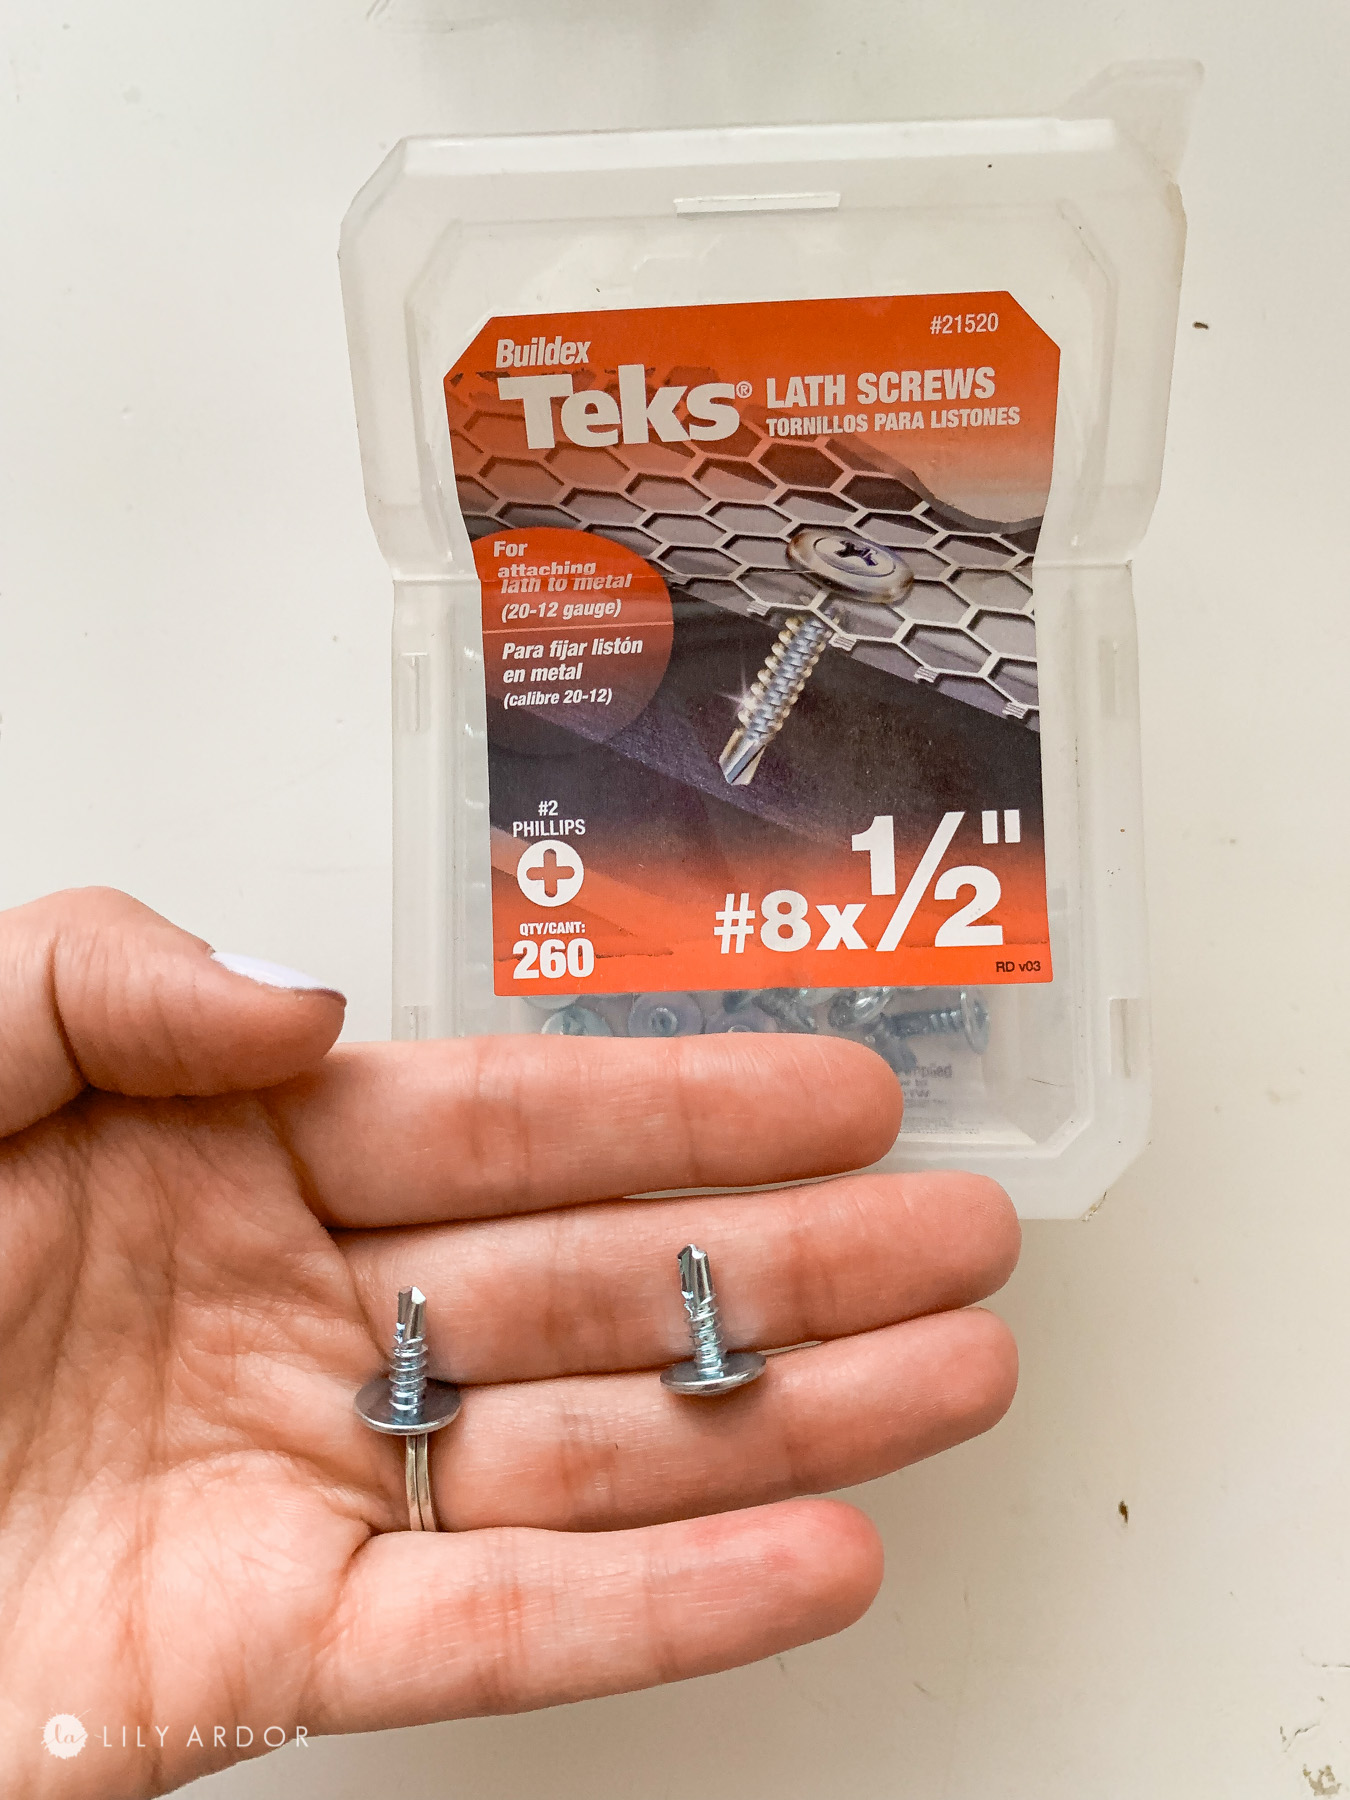
Tony flipped the metal sheet face down and slipped each wood piece under the metal. He than used the screws to secure the metal to the wood.

Here’s a quick video version of the DIY
That’s it! I can’t believe how easy this was to make! AND that’s christmas tree is WAY cuter than I had imagined it would be! LOVE the minimalist vibes it gives off!


You’re probably wondering were I got these super cute ornaments! RIGHT?
DIY faux embroidered ornaments with Circut explore air 2!
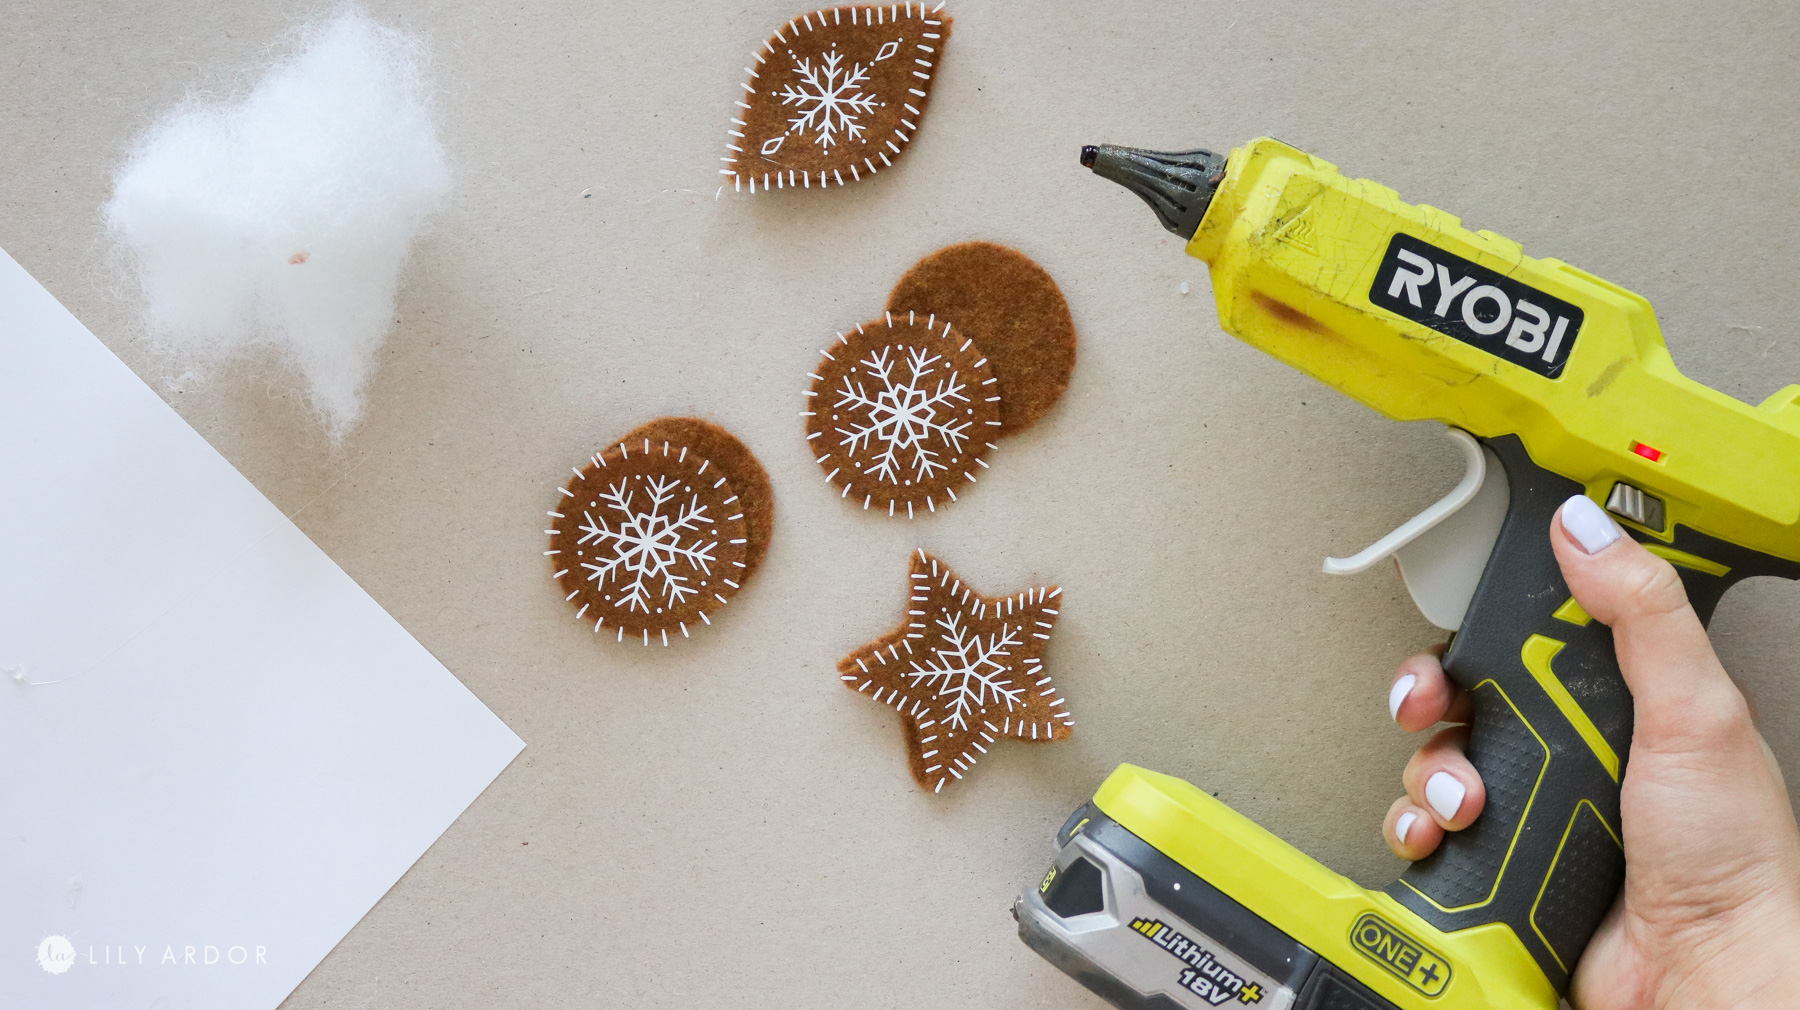
YEP! I made them using my cricut explore air 2. I had so much fun making these ornaments! Originally inspired by Nordic embroidered ornaments I had found on pinterest! THESE DO NOT REQUIRE ANY SEWING SKILLS AT ALL!

I used my cricut to machine to cut out the shapes on felt fabric and embroidery pattern on iron on vinyl. After surfing the cricut design space library I couldn’t find a project that would work to make these ornaments so I designed these myself. Here’s the link for the project.
If you have more questions feel free to CHECK OUT THE VIDEO HERE 😀 ! I share all the details on there!
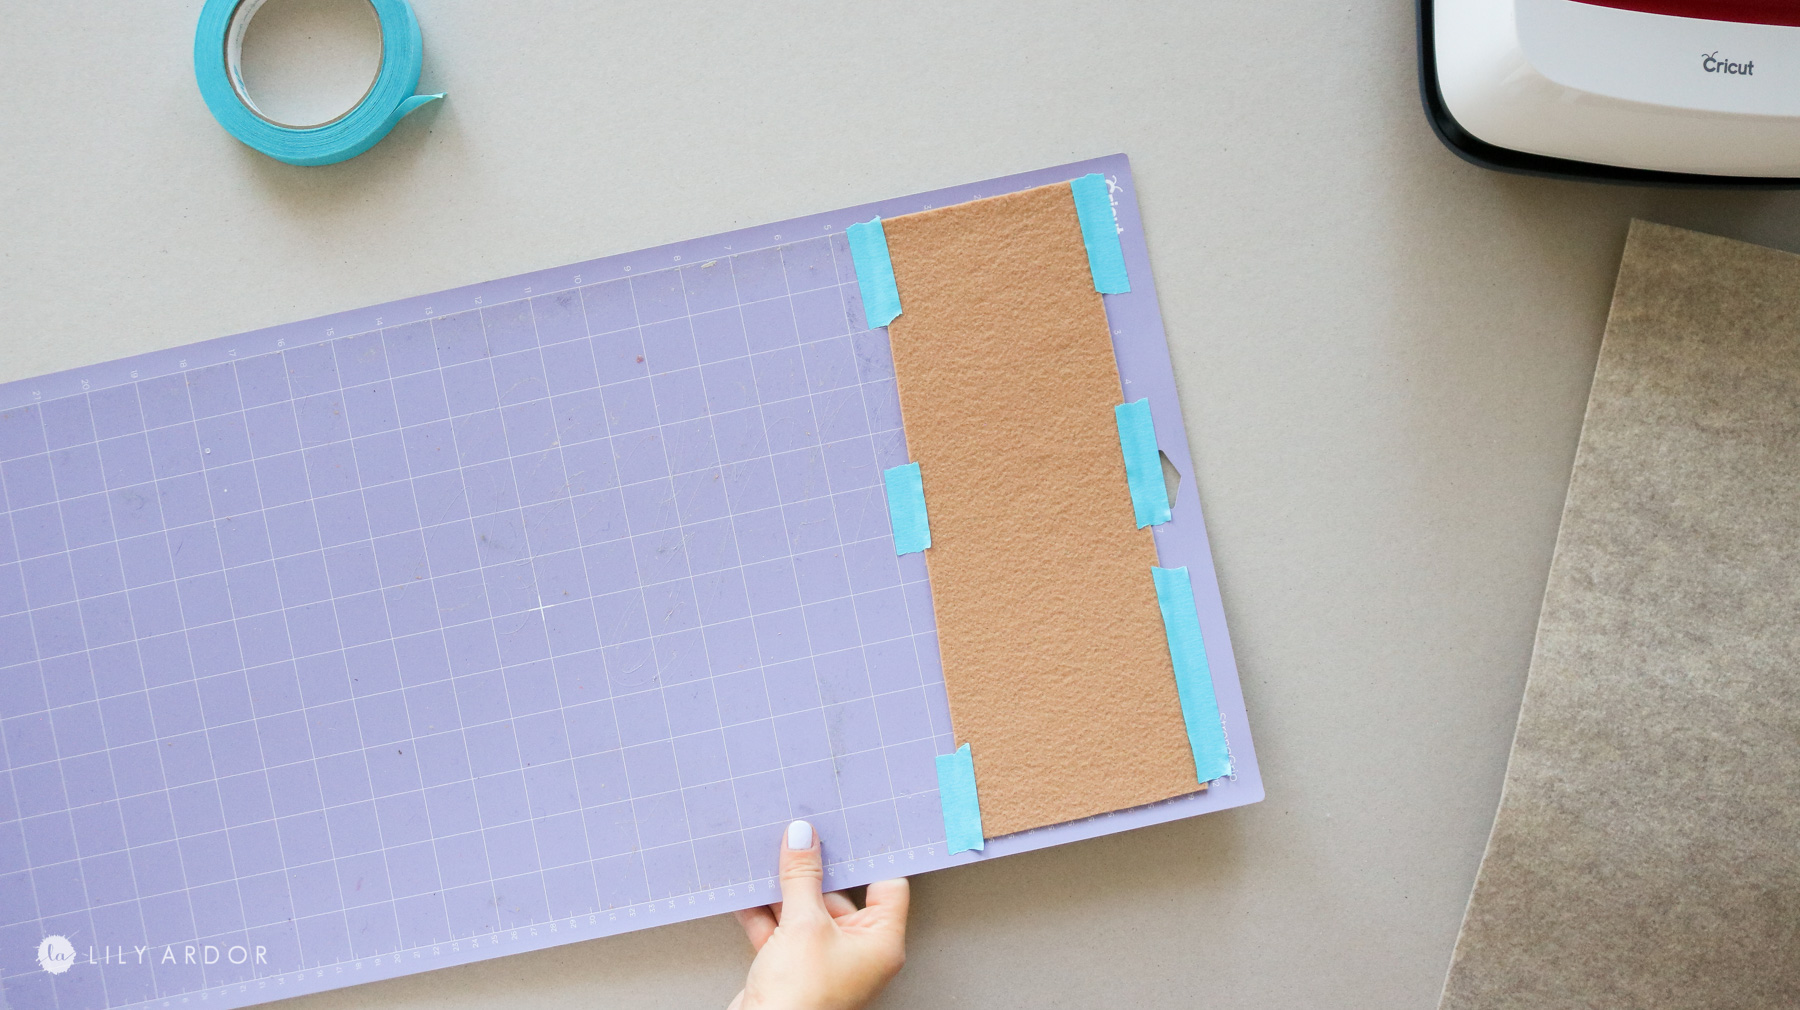
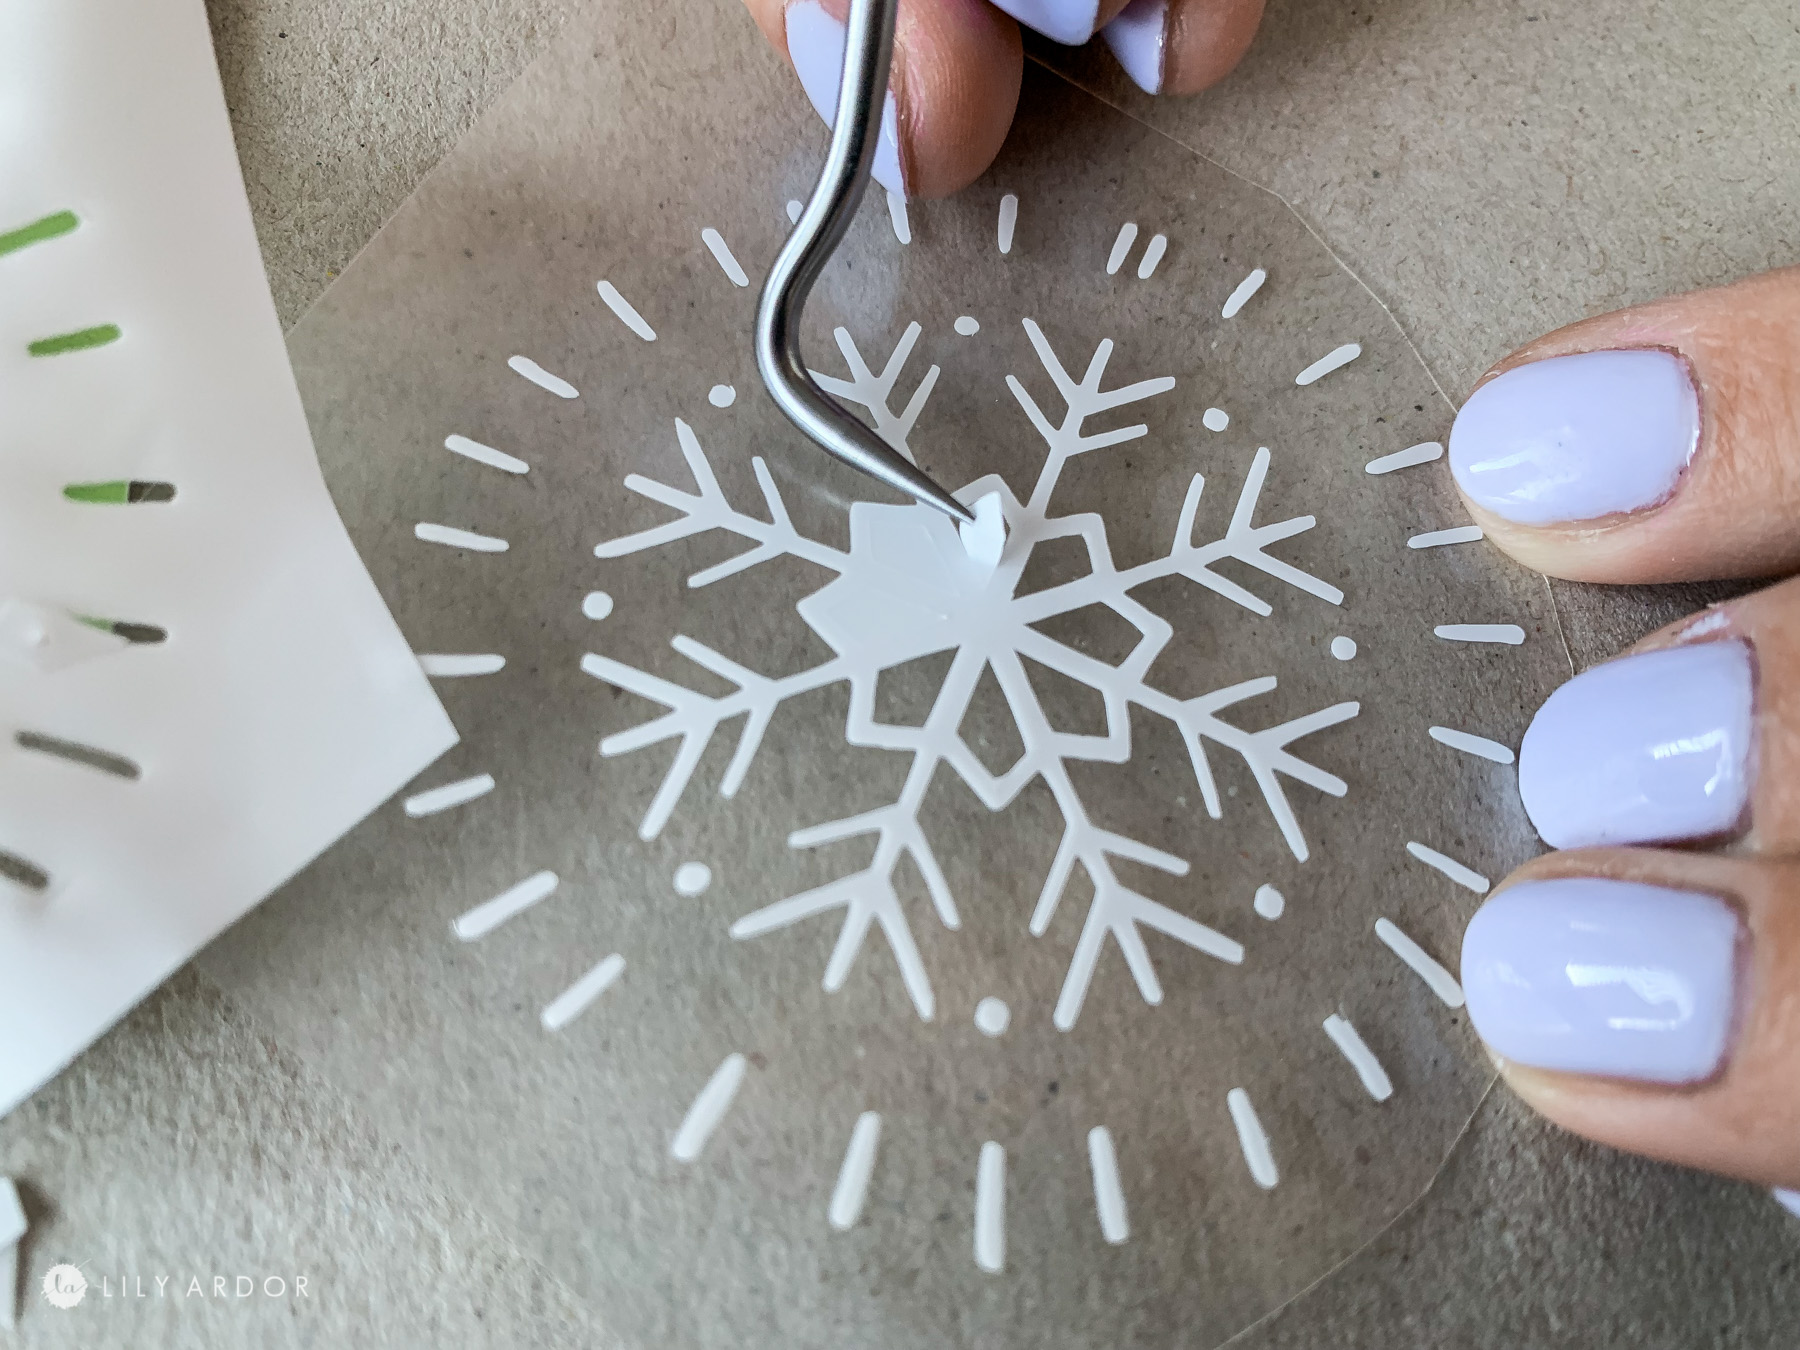
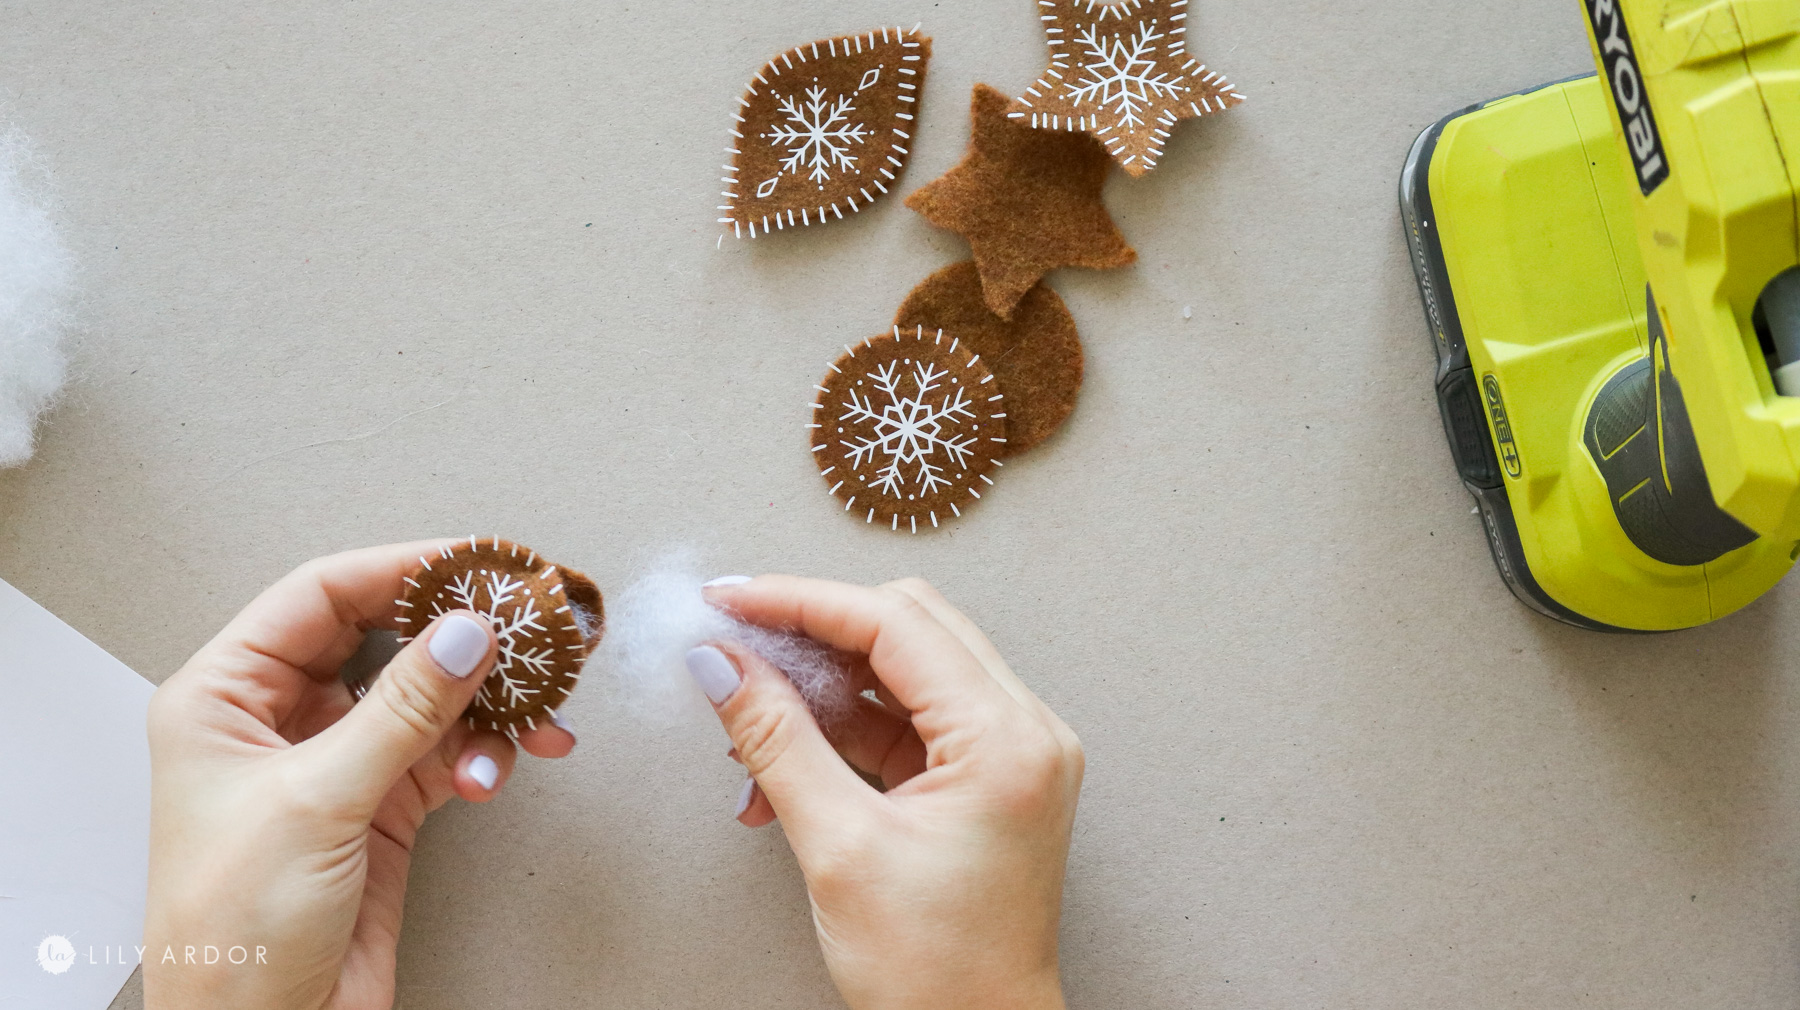
Once the shapes were cut out I heat set the vinyl onto the felt.
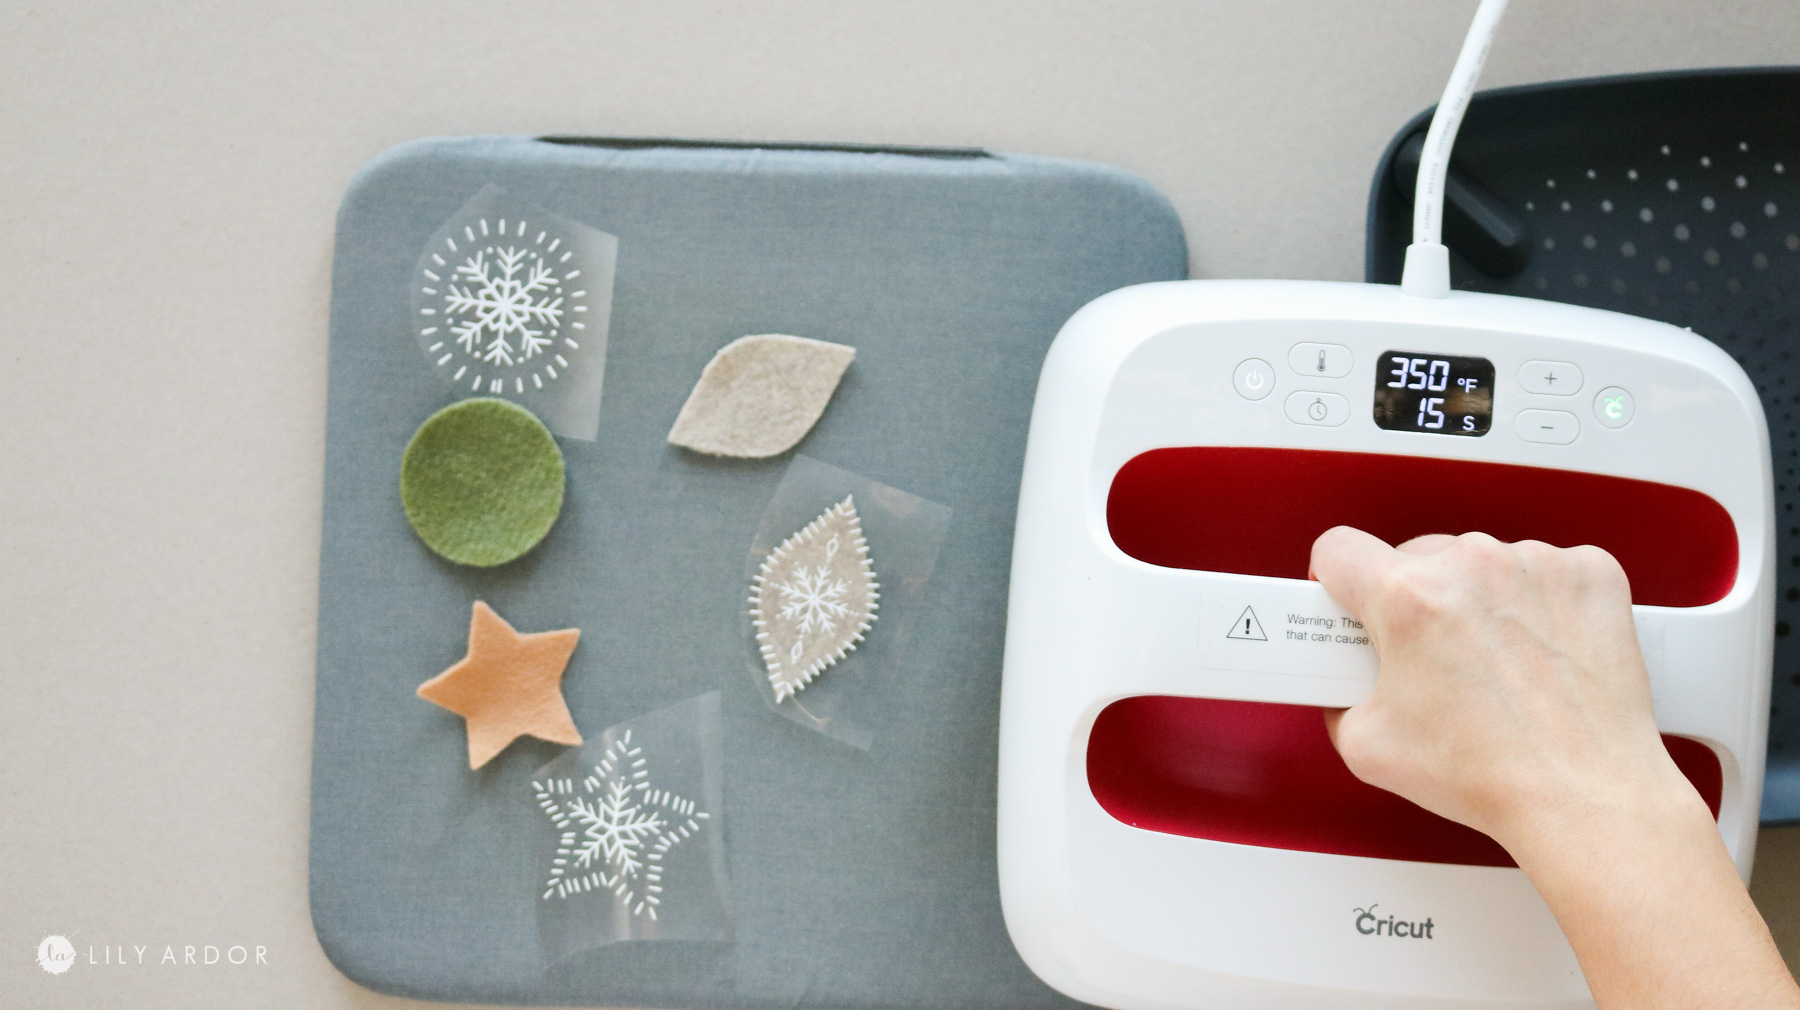
I than hot glued the ornaments shut about 3/4 of the way and stuffed them before glueing them shut completely. That it!!
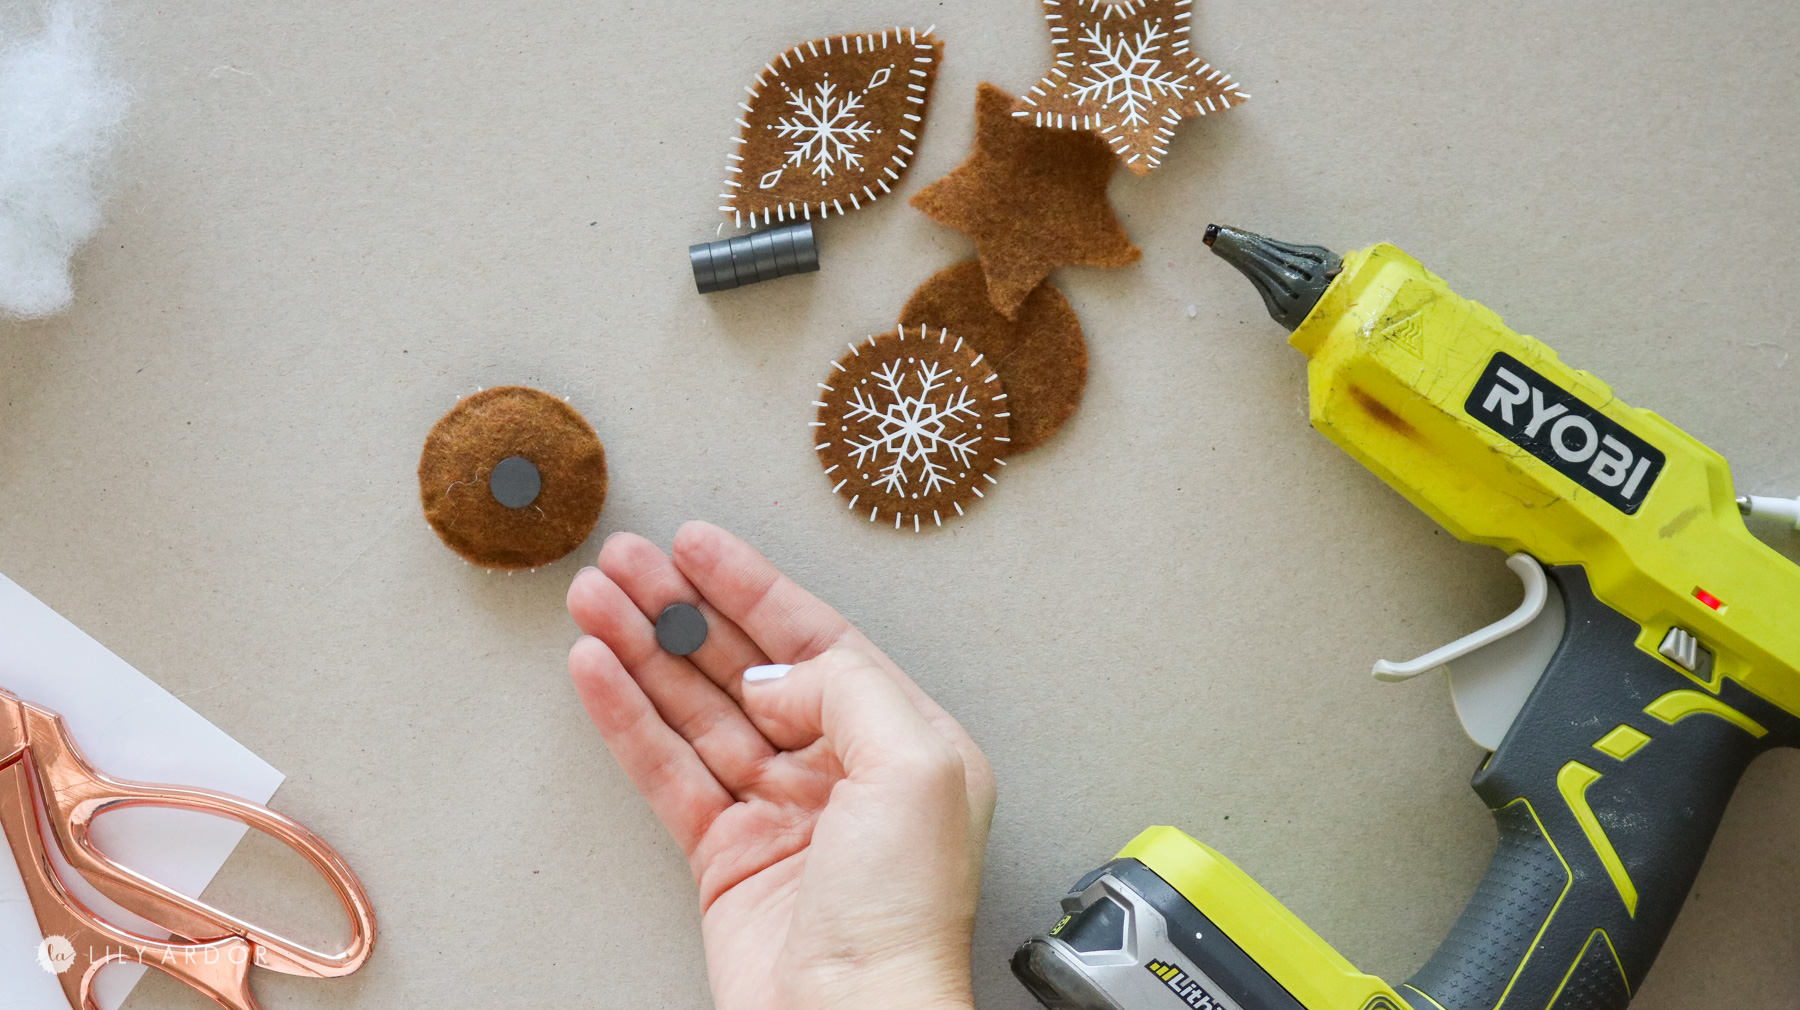
You can add a loop and hang these on your tree or add a magnet to the back so it magnetizes to the chalk board.
CAUTION CHOKING HAZARD !
- Please use caution around kids and pets. I wouldn’t recommend having this around little ones as it can be a choking hazard. ( disclosure policy )
I LOVE the stitching on the edges! I do think that’s what makes them look more realistically embroidered rather than just vinyl 🙂
This was such a fun project! Can’t wait to make some bigger ornaments for my real tree now!

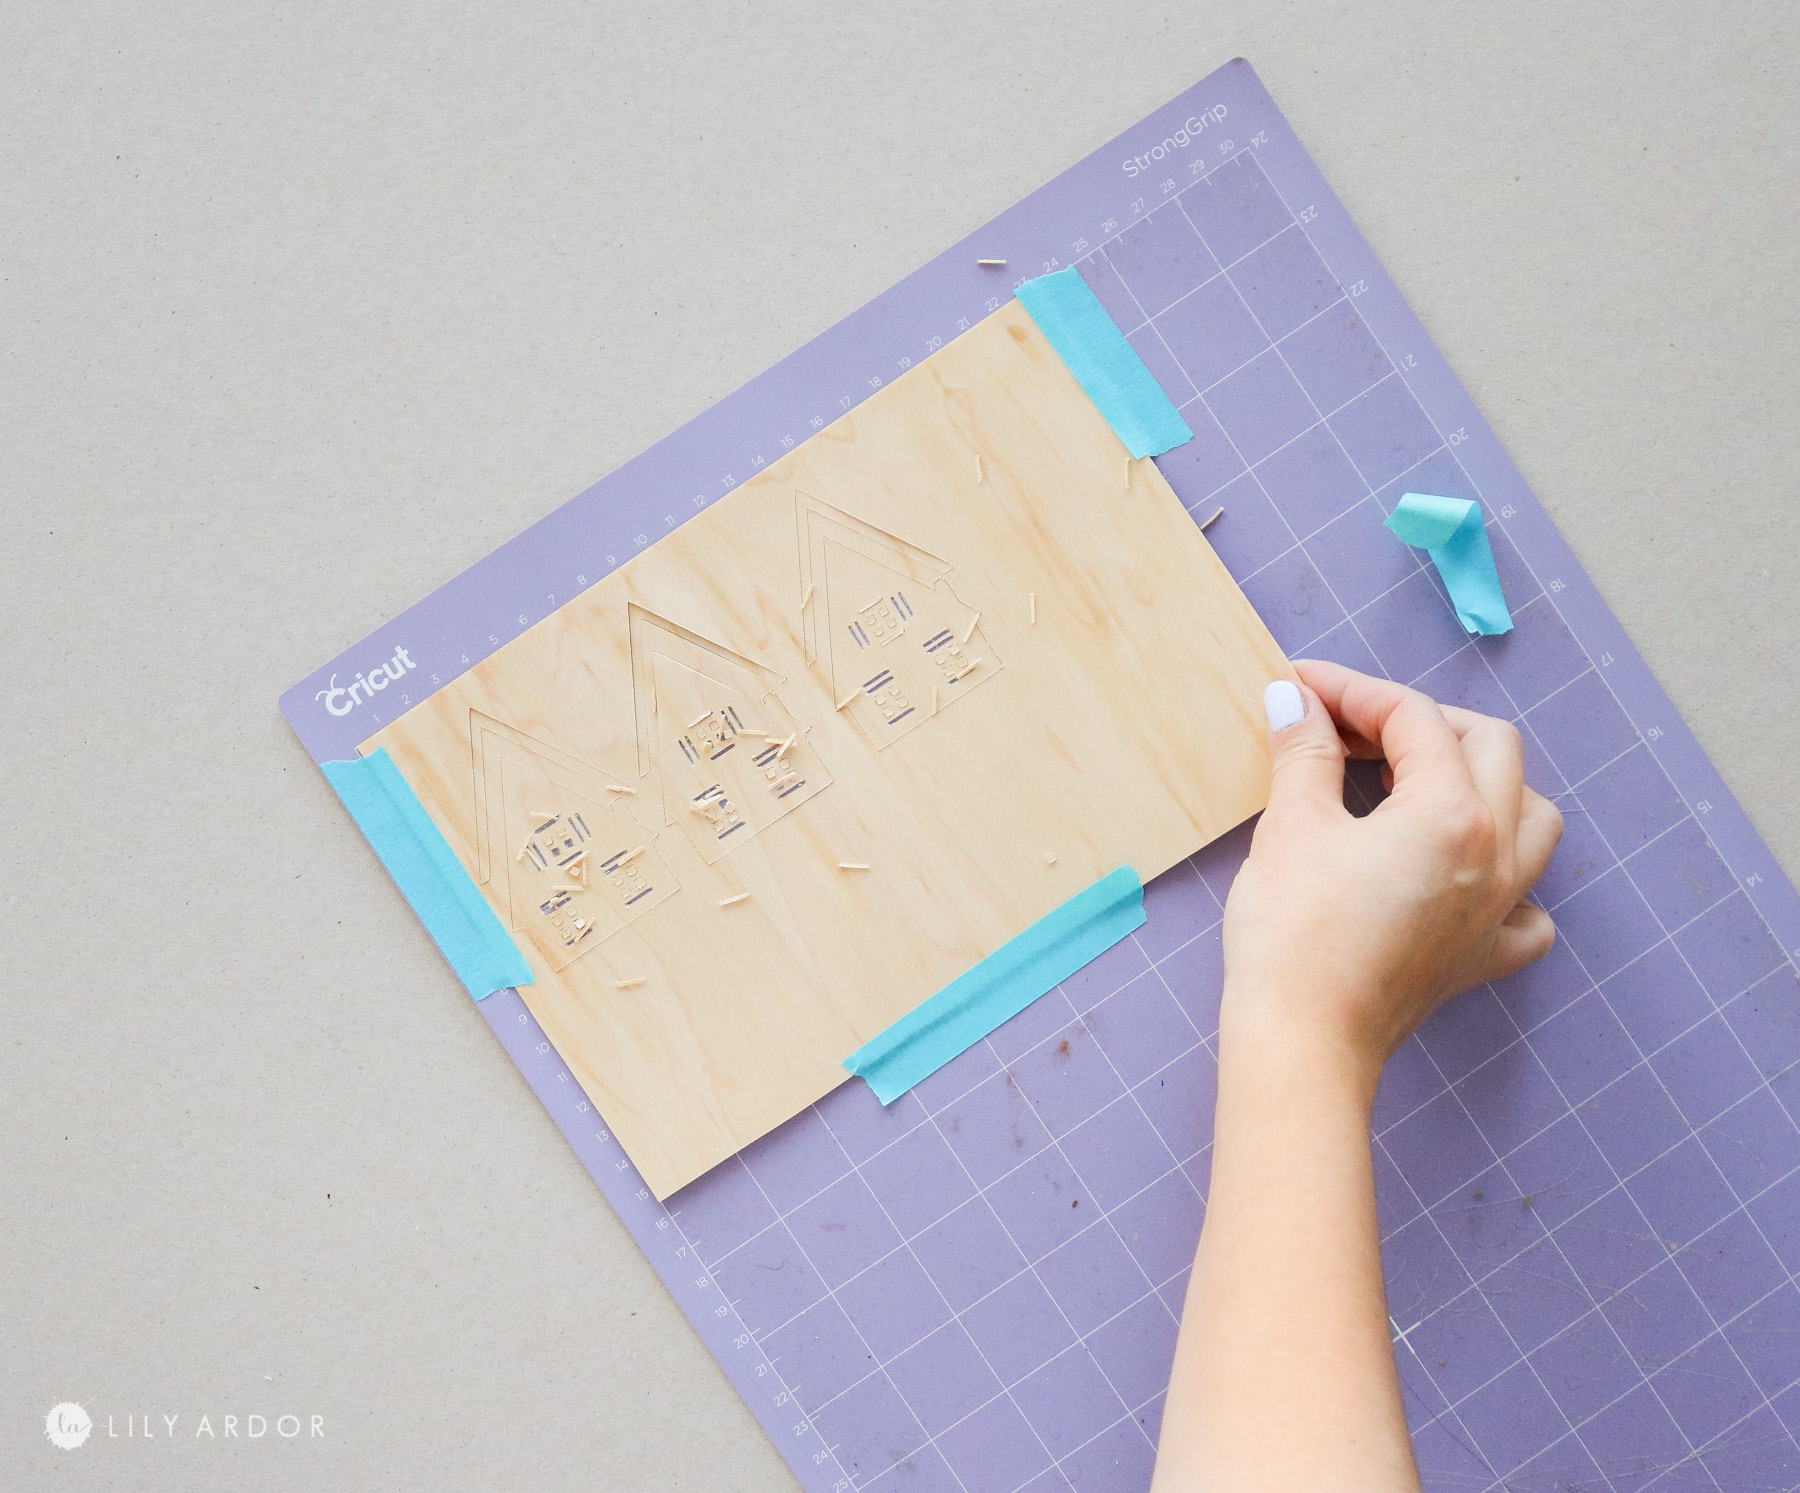
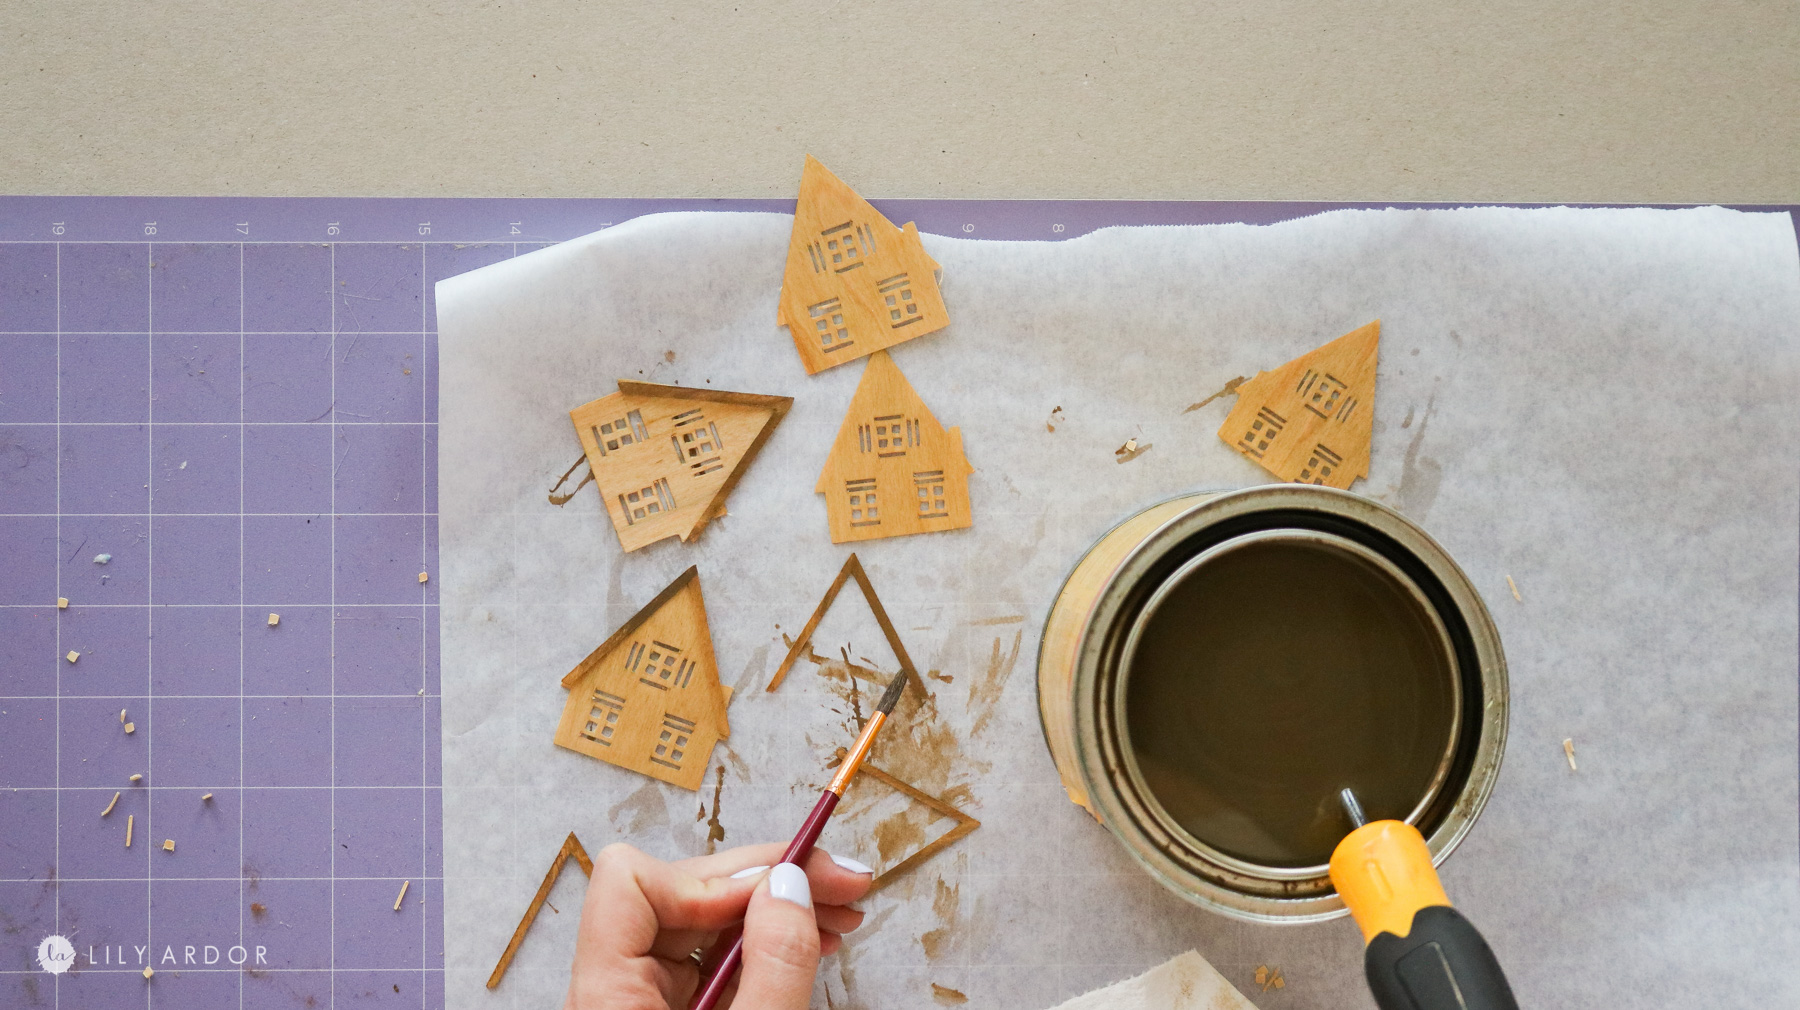
Here’s how I made the – DIY Mini Wood Cabin Ornaments!
Cricut sells these wood veneer sheets and they’re amazing! This stuff is literally like wood paper.
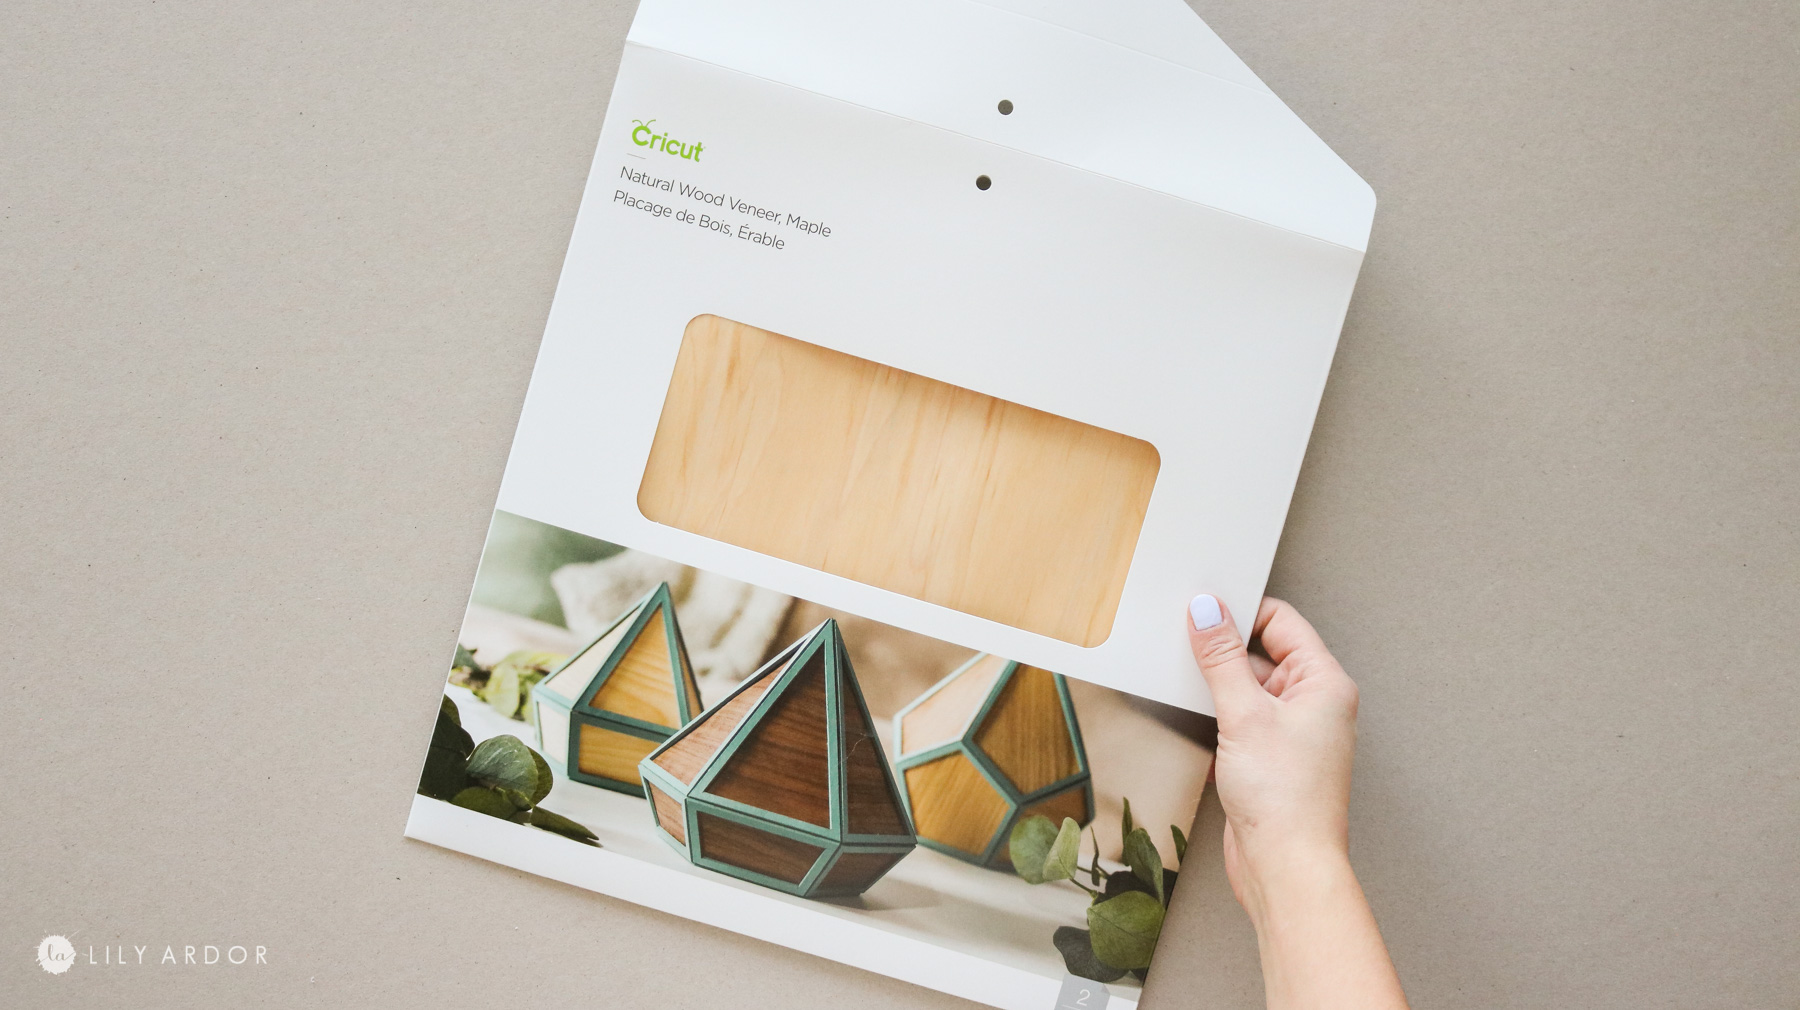
I also made my own cabin design you can find on cricut design space here. You’ll need the strong grip mat and the deep point blade to cut the wood veneer. I LOVE how intricate it cuts all those little details! It’s amazing! Feel free to check out the video for way more details about these cricut projects. You can see the video here.
I also stained them with my favorite fruit wood stain. I stained the rooftops with some stain from the bottom of the can after scraping it with a screw driver. To get it just a shade darker. That’s it!
I also added magnets to these and they went on our magnetic christmas tree! I love how tiny they are. Also thinking how cute would they be on a real Christmas tree. I’d probably have to upsize them though. 😀

That’s all for now! I hope these inspire you to pull out your cricut and make some cute last minute Christmas crafts!
Best Wishes,
Lily