Hey there, fellow DIY enthusiasts! Welcome to the cozy corner of kitchen makeovers. I’m super excited to kick off my DIY series that’ll give your kitchen a fresh new look. We’re going to tackle it all, from painting your kitchen cabinets to giving those dated granite countertops a makeover, creating cool concrete tiles, and even adding a rustic stone wall with floating shelves. Let’s bring some character and warmth into your kitchen!
Painting Kitchen Cabinets to Resemble Wood: The Ultimate Transformation
Before we jump into the nitty-gritty of painting your kitchen cabinets to look like wood, let’s set the stage. We’ve all seen those eye-catching kitchen cabinet ideas, inspiring kitchen cabinet colors, and creative ways of redoing kitchen cabinets. This DIY adventure is all about personalizing your space, making it uniquely you. Get ready for a fun and funky wood-graining journey!
Supplies :
- Dark walnut minwax stain (water based )
- neutral color minwax stain ( water based )
- cheap brushed ( from lowes )
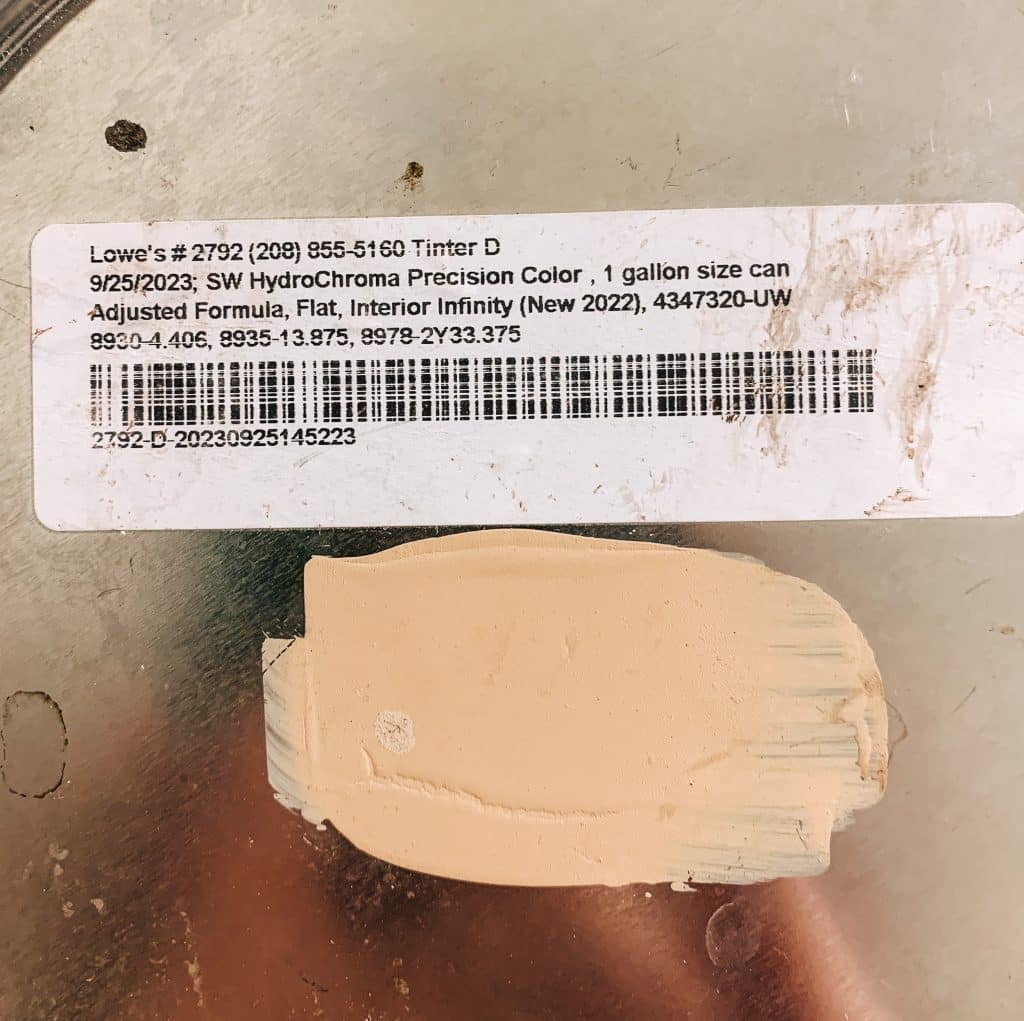
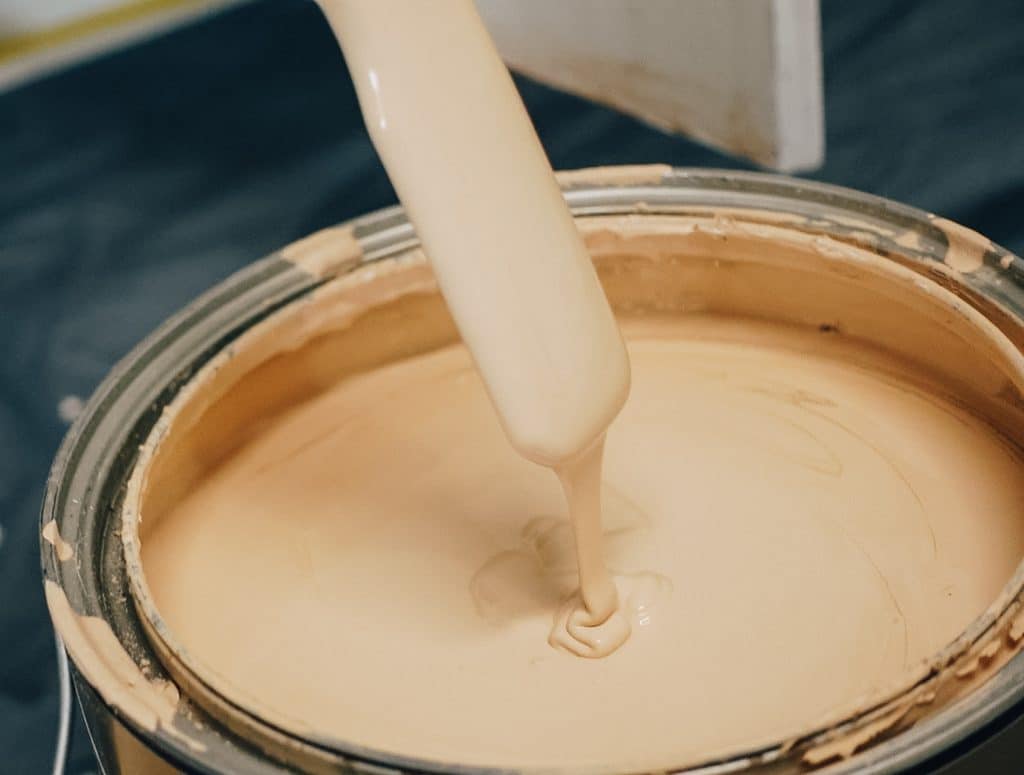
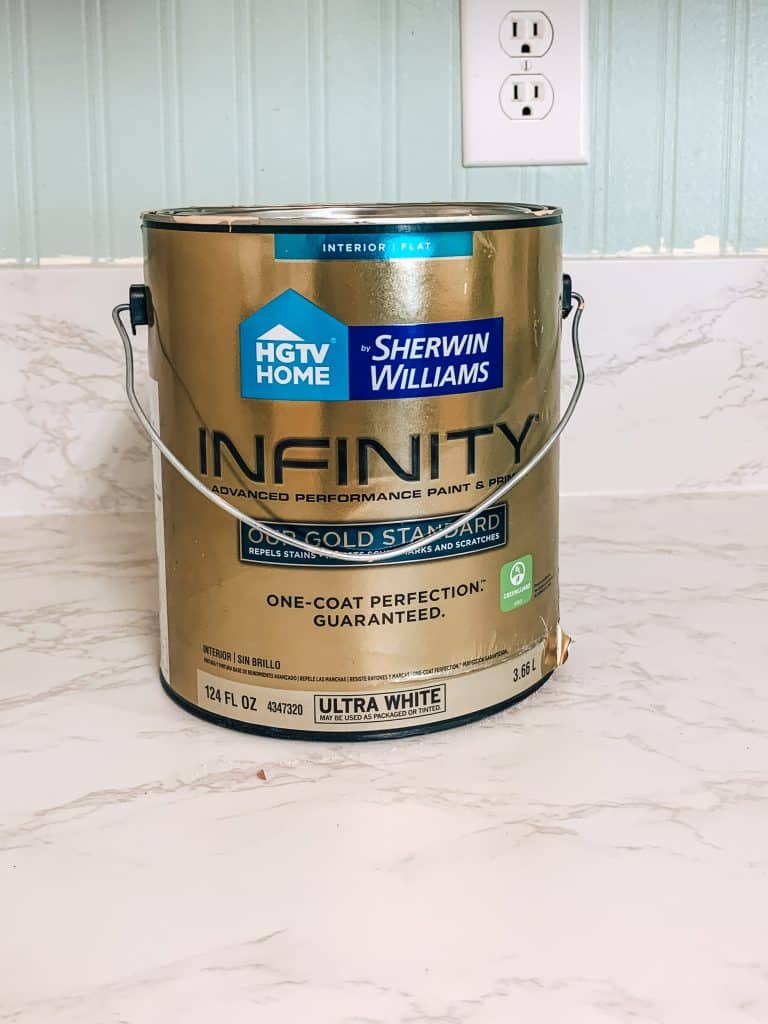
- peach base color ( brand sherwin williams )
- grip seal primer
- floetrol ( important for nice brush strokes )
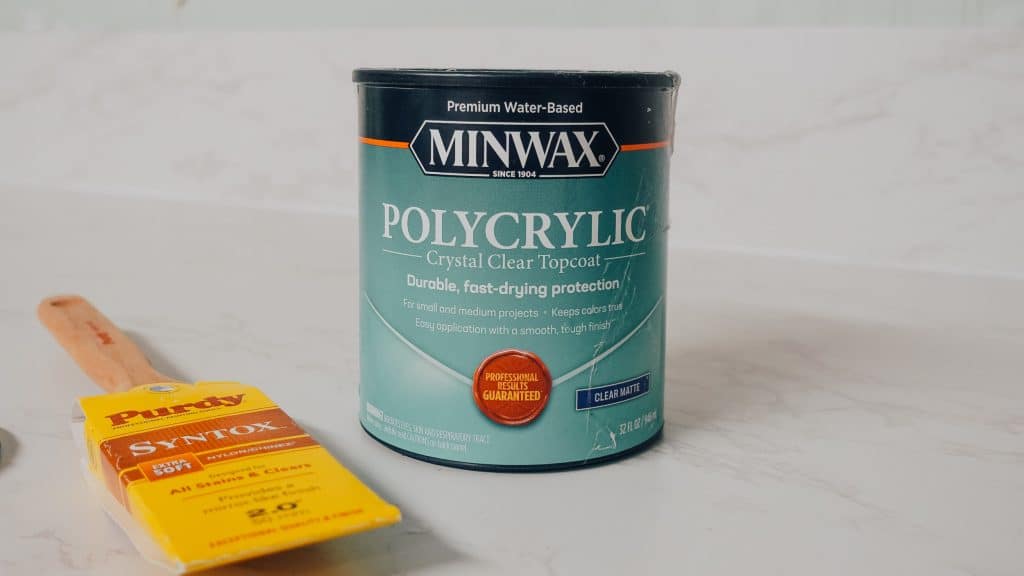
- Minwax matte polycrylic
Prep for the Cabinet Painting Party
First things first, let’s get our prep game strong. I started by sanding down any loose paint and gave the cabinets a good scrub with 409 to get rid of grease. The secret sauce? Priming them with Seal Grip, which is basically the MVP that’s never let me down. It worked like a charm on my floors, and I swear, no cracks, no peeling – just pure awesomeness.
Four Easy-Peasy Steps to Achieving a Wooden Look
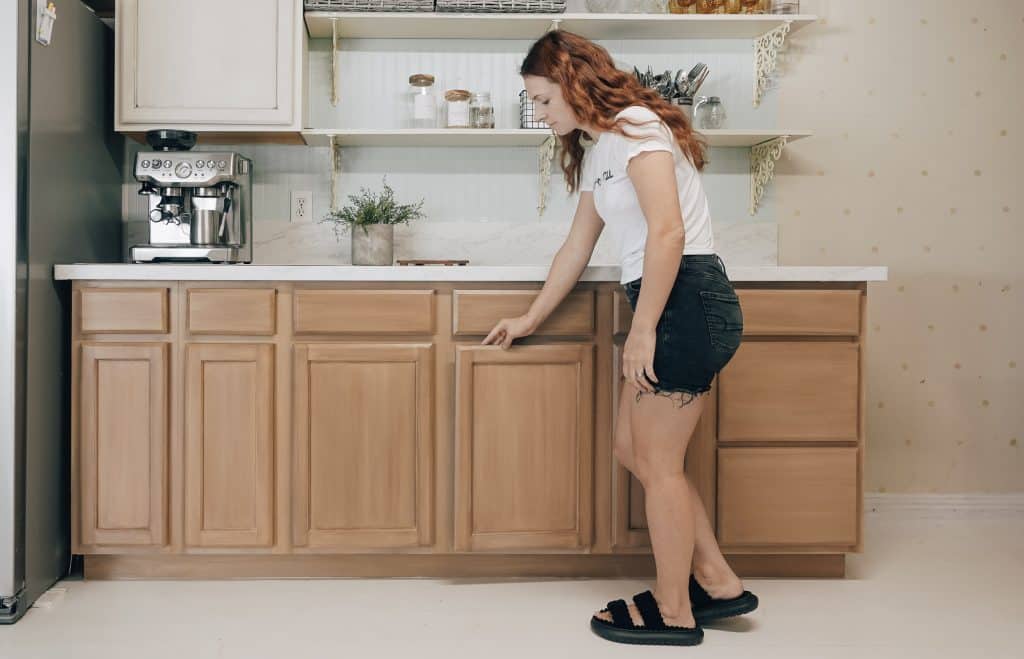
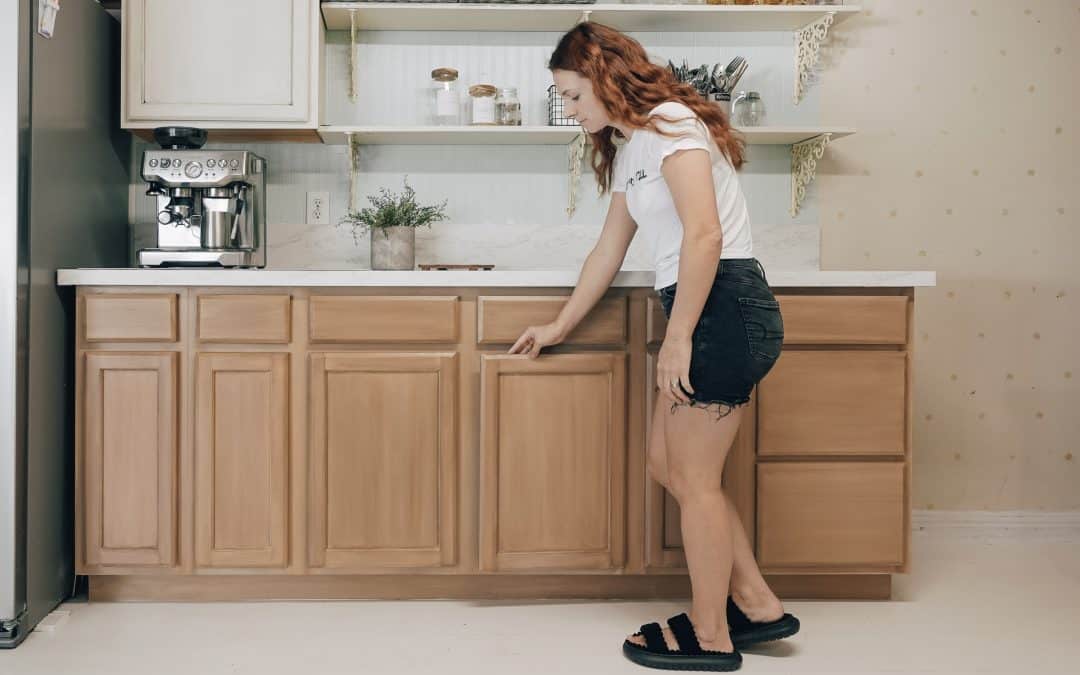
You can either take off the cabinets and paint them if it’s easier for you. Or can do it while they’re assembled. I found it easier to have them assembled because I could make the colors look cohesive. The cabinets look so different when painted outdoors and brought inside.
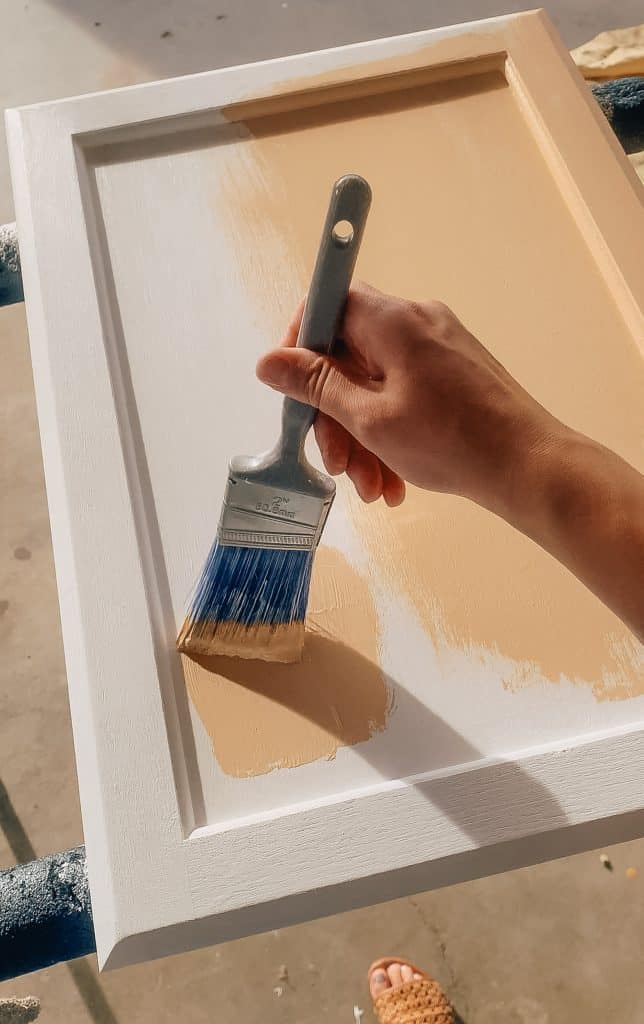
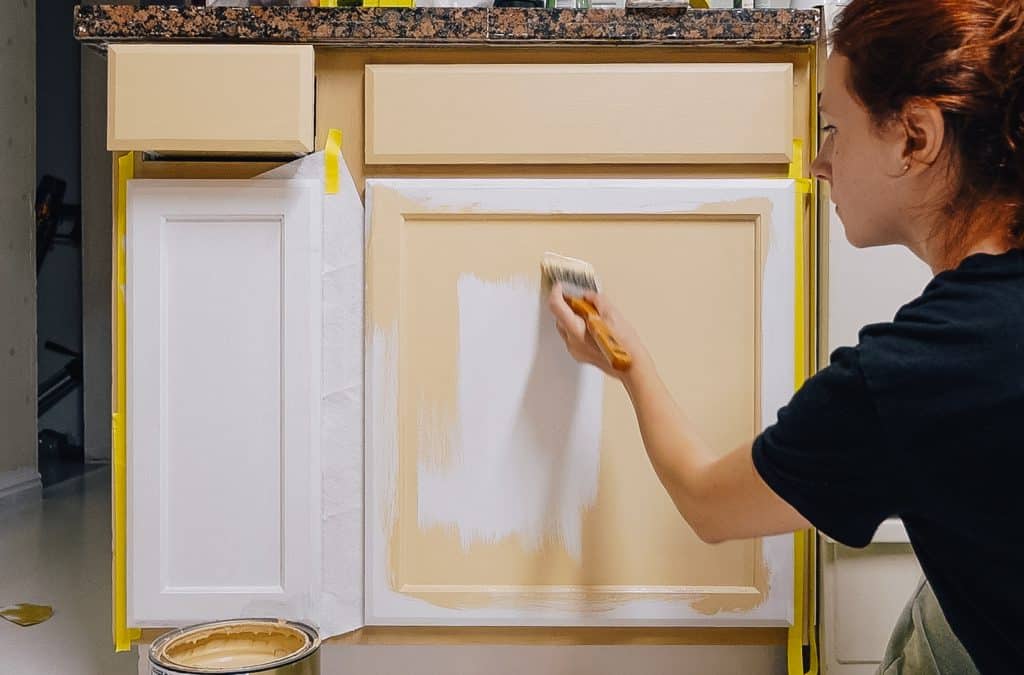
Step 1: The Peachy Base Color
First up apply an even coat of this peachy base color! I’ll even spill the beans on the color code so you can replicate the magic. I choose to go with sherwin williams for the first time. No regrets! Honestly the best stuff ever! Goes on smooth like butter. %95 coverage in one coat. Not thick and hard to work with and it’s sandable! Doesn’t roll up. ( not sponsored I just love it ) All step one to dry completely before moving onto step 2.
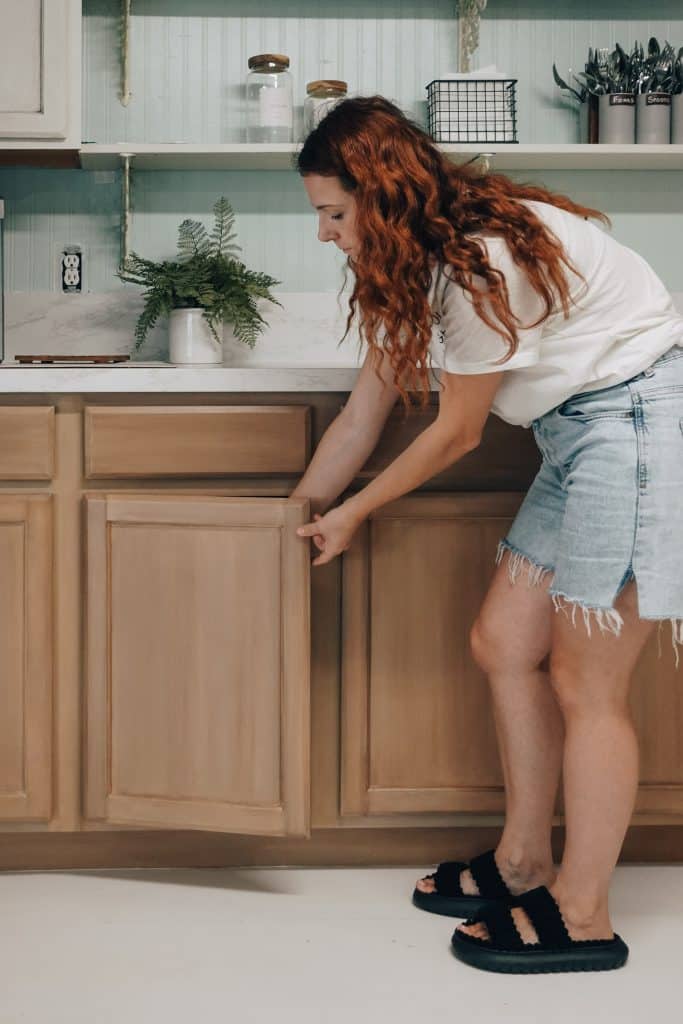
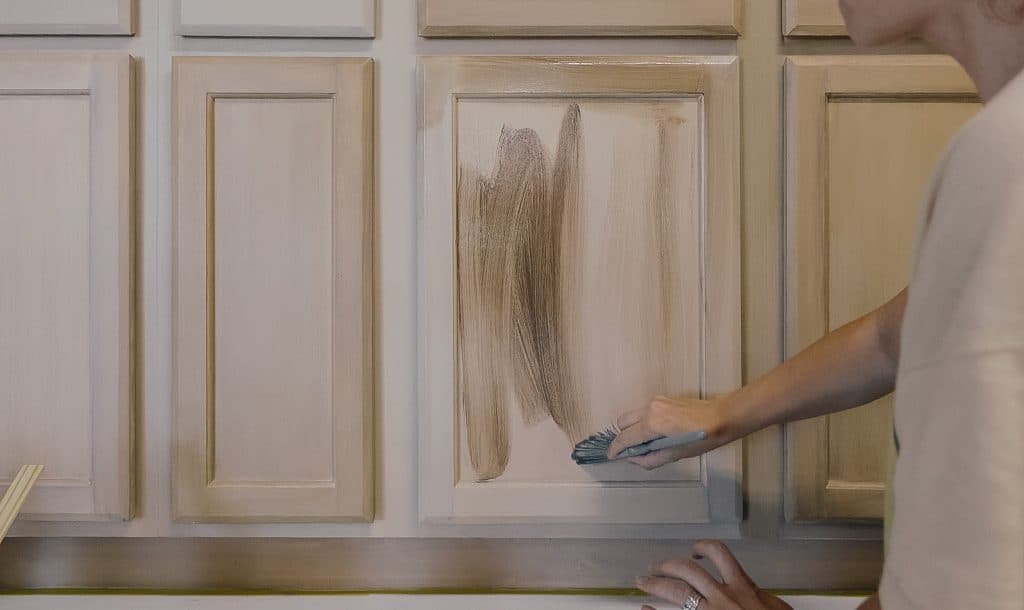
Step 2: Let’s Create Some Wood Magic
After the base color has dried, it’s time to work your DIY magic. Wet the surface and brush on the peach colored paint. Then gently dip your brush into water-based Minwax dark walnut stain. A little drop goes a long way. Check out the video to see how much I used. Apply it over the diluted paint, following the wood grain’s direction. This step gives you that lovely taupe undertone all the expensive wood has. Again allow to dry completely before moving onto step 3.
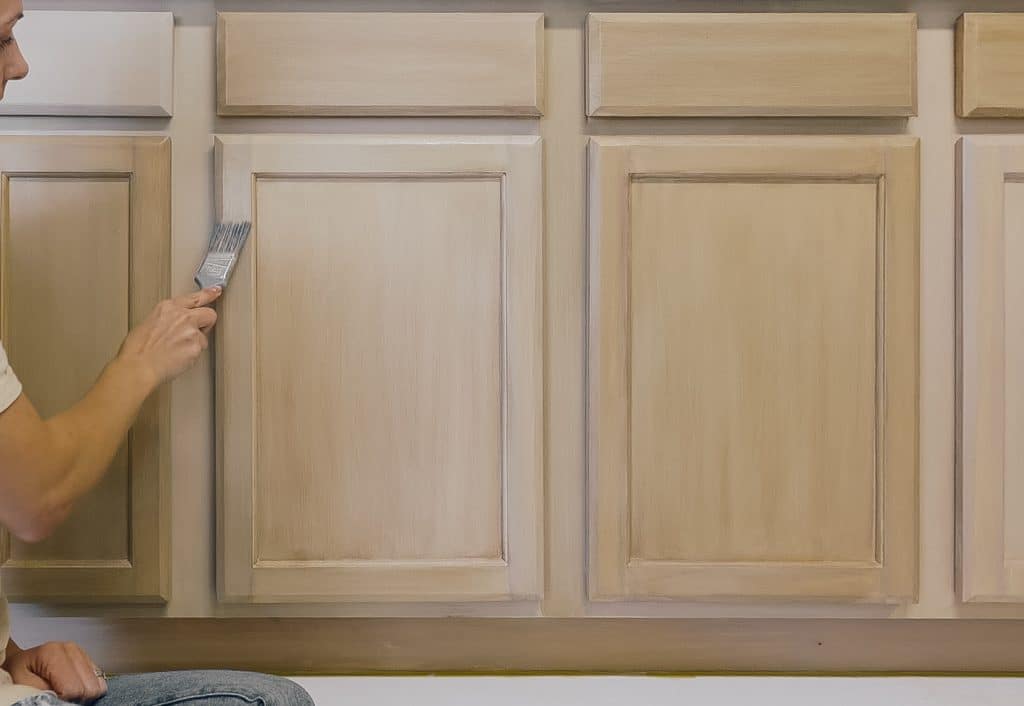
Step 3: Get that Grain!
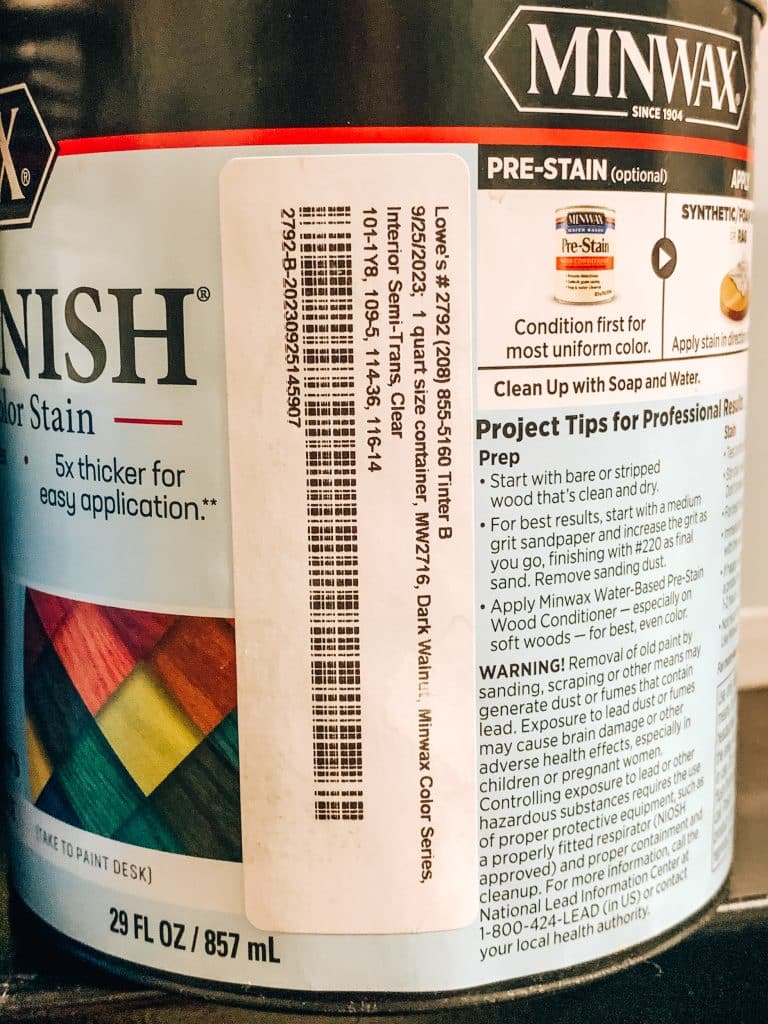
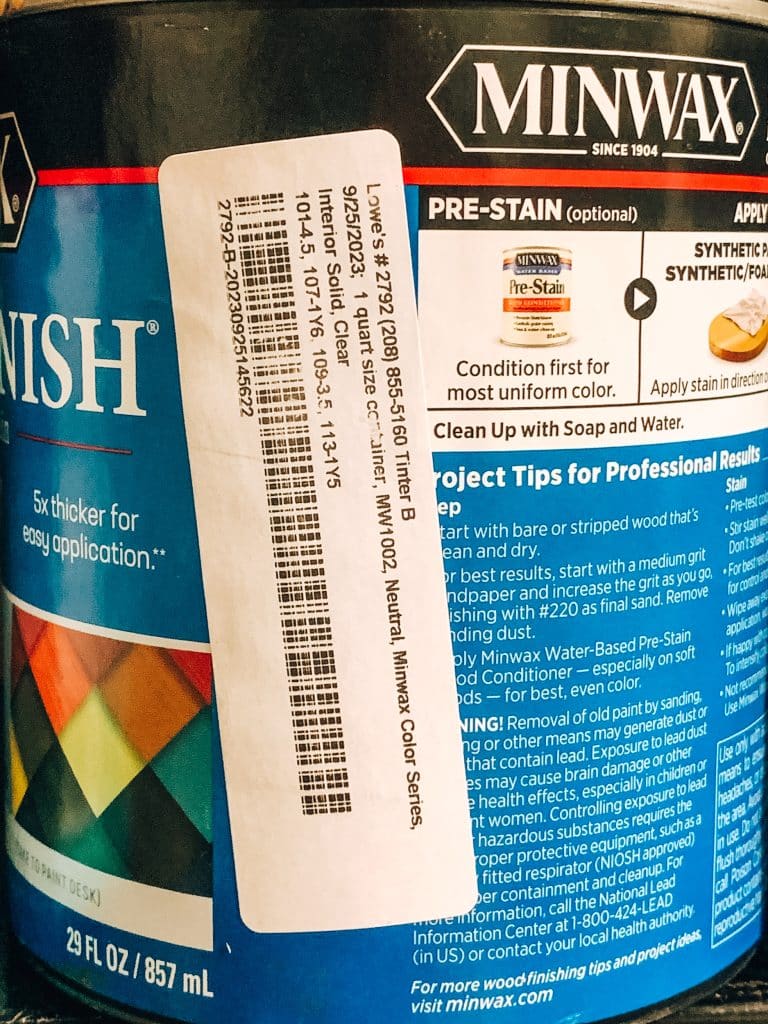
In this step, you’ll mix Floetrol with dark walnut and mustard color stain, creating a lighter and a darker shade. Light brown and deep mustard. No need to stress about getting the perfect color; it’s all about adding your personal touch. Adding photo of the color codes for the waterbased stains as well.

![]() touch.
touch.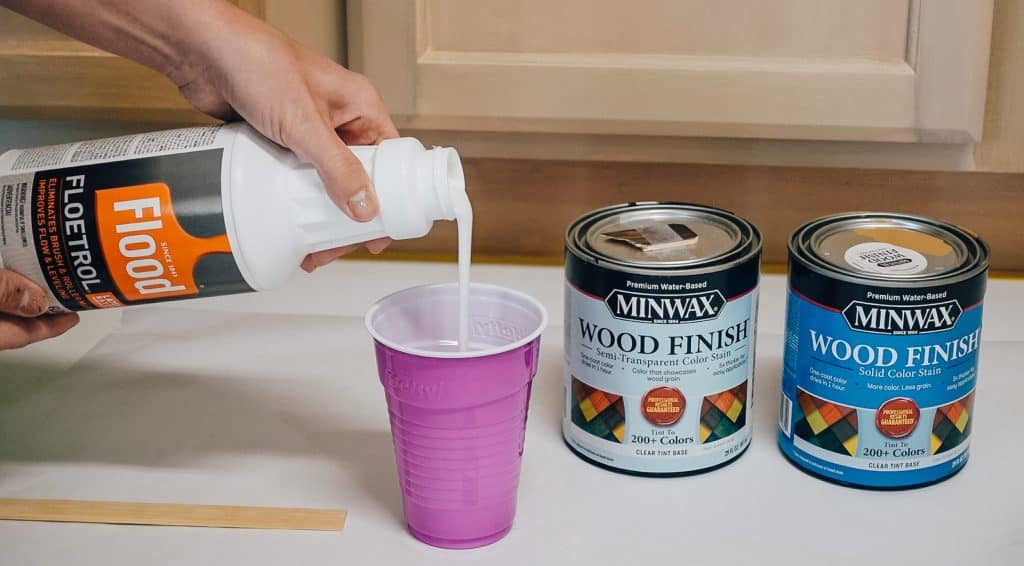
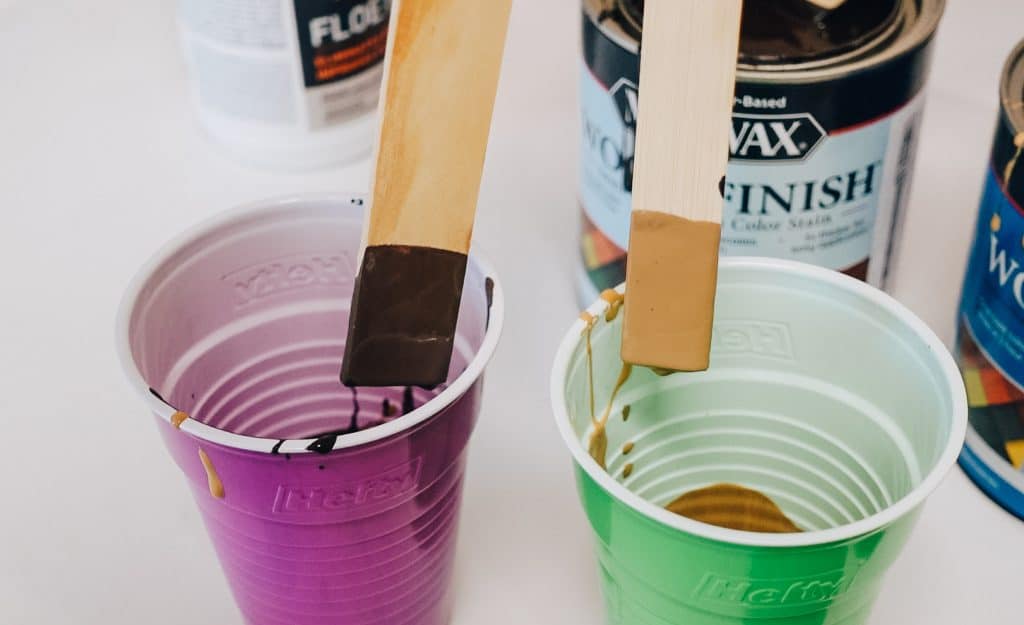
Once the previous layer is dry, moisten the area again and apply your mixed stain, starting with the light brown. Keep brushing and wiping. I like to apply it over the whole cabinet then wipe most of it off and keep blending. This ensures you have a moist base and the wood effect will be created more evenly. If it feels too wet wipe more down with a paper towel. Works best if the wood stain becomes the tiniest bit tacky and once you run the brush over it the effect sits in place. This means it’s the perfect wetness. Keep in mind you’ll have about 10 minutes of working time before it starts drying to much. Allow this step to dry for 24 hours before continuing onto the next step.
Step 4: Add a Hint of Mustard
Finally, apply the mustard stain and wipe most of it off, so the wood’s color tone changes without turning yellow. It’s about about building up layer. I know it doesn’t seem like much but it makes a difference.
Throughout the process, you can always refer to the video for a more in-depth demo. Videos are great when you want to see the whole shebang in action.
Pro Tips for a Smooth Finish! THIS WILL MAKE OR BREAK YOUR PROJECT!
1. Keep a wood planter or cutting board nearby to keep your color in check.
2. Don’t forget to wash your brush every two to three cabinets to avoid too much color change. ( the dark walnut builds up on the brush )
3. Finish each step on all the cabinets before moving on to the next step. One of the hardest things I struggled with was consistency. It’s easy to get carried away with finishing sections and forgetting how much brush strokes dips, or how runny you did it.
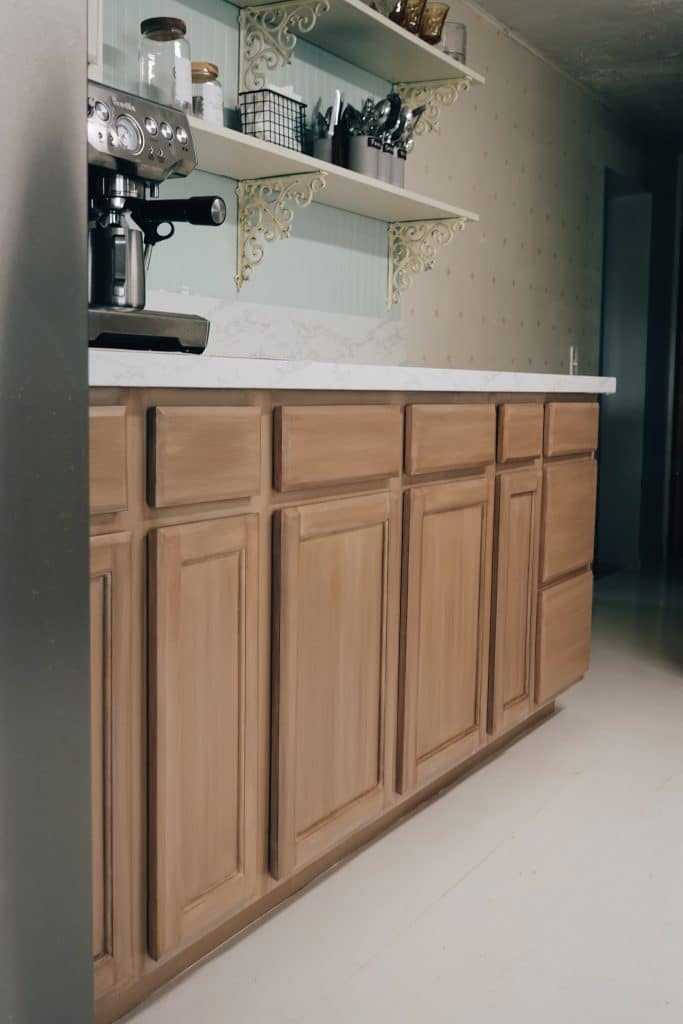
The Final Flourish: Choose the Right Finish
When it comes to sealing the deal, I trust Minwax products for a finish that stands the test of time. I’m not getting paid to say this, but their stuff has never let me down.
And when it comes to brushes, the Valspar All Stains brush paired with Minwax products will make your finish look like a pro did it – trust me, your guests won’t believe you DIY-ed it!
Stay Tuned for More DIY Goodness
Don’t forget to sign up for my newsletter to catch the rest of my kitchen transformation journey. I hope you enjoyed this Kitchen cabinet idea!
Next up, I’ll spill the beans on how I transformed my ugly granite countertops into beautiful white marble for just a $110!!!
So, grab your paintbrushes and let’s get creative! Your kitchen is about to become a masterpiece, and it’s all thanks to your DIY skills. Get ready for some crafting fun, and let’s make your kitchen cozy and fabulous! Happy DIY-ing!