I love minimal decor. It’s timeless and always has touches of nature. You’ll usually see lots of wood elements, natural textures and neutral colors with white used as the main color.
Last week I was on the hunt for the perfect Scandinavian wreath and realized they’re all hoop wreaths. I’m not 100% sure this one is considered Scandinavian or Nordic in any sense but, I do get those vibes from it so, I’m going to call it that 😅.
Time Needed:
If you choose to give your wreath the braided look like I did it took me a little over 2 hours to complete but, if you’re in rush you could simply wrap strips of leather around the wreath which would only take you about 20 minutes to make.
Total Cost:
Around $20.
This article contains affiliate links. For more info read the disclosure policy here.
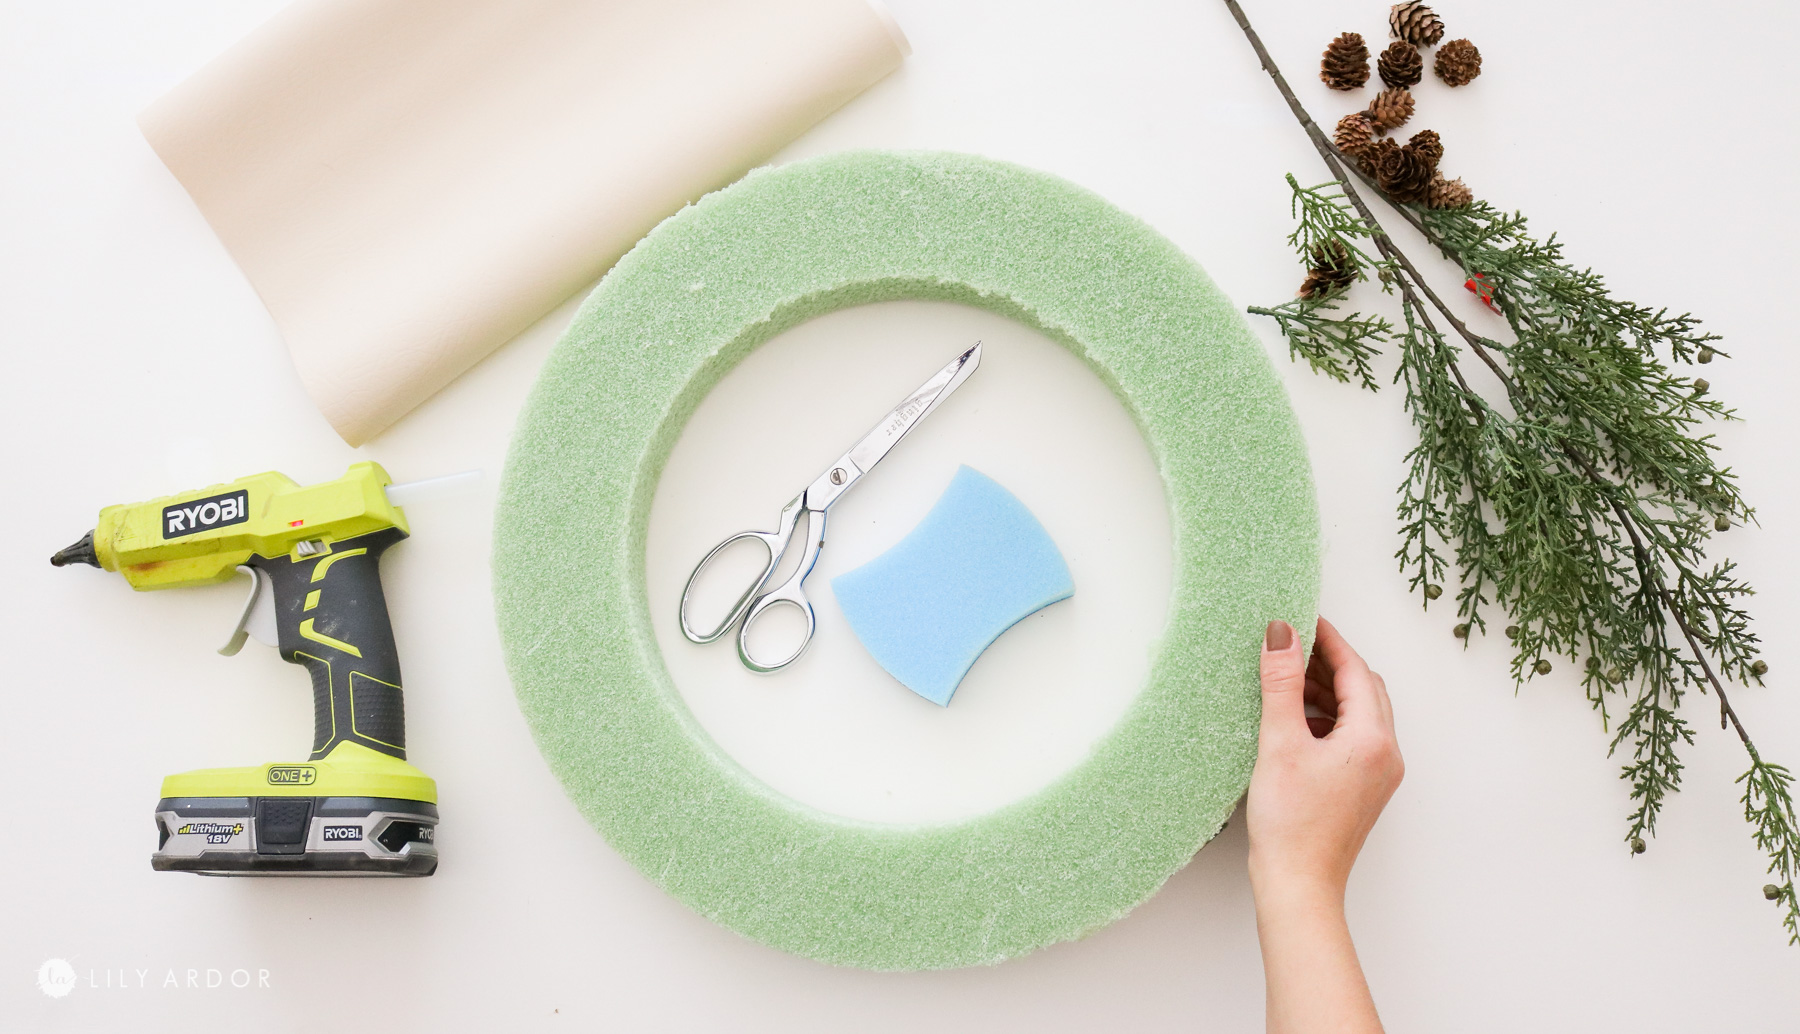
Supplies:
linking similar products found on amazon.
- Foam Wreath ( similar one on amazon here )
- greenery
- pinecones
- hot glue + glue gun
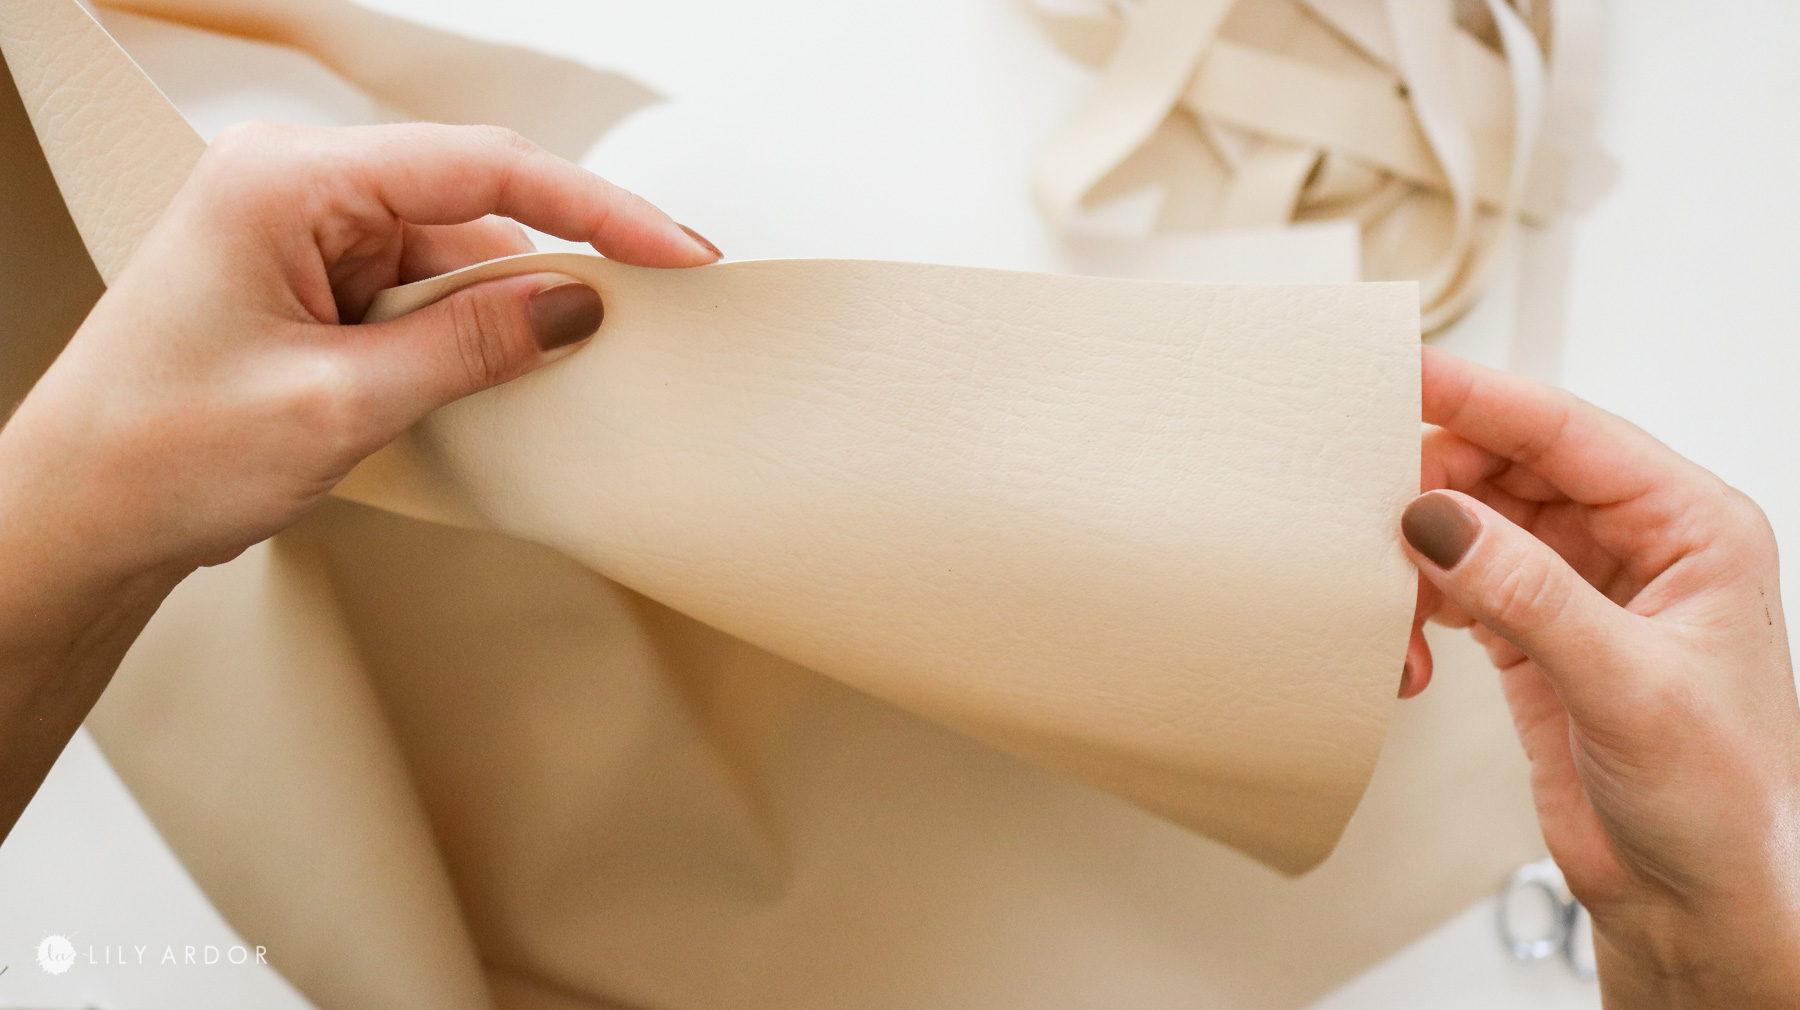
- 1 yard of faux leather vinyl
- sponge
- brown acrylic paint ( I used honeycomb and golden brown)
- scissors
This is the first leather wreath I’ve ever seen anywhere. Honestly I was a little inspired by my chunky knit wreath that I made the other year. It’s a super simple wreath and I wanted something a little less fluffy. I started thinking what other materials can I use to get a braided look like the previous wreath had. That’s when leather popped into mind. Even though this wreath is made with faux leather you can choose any fabric you have around the house. Burlap would be so cute too.
You can also choose to go with real leather however I should mention I did use up a good 3/4 of a yard of faux vinyl so it could get pretty pricey if you’re using really leather
Step 1: Prepping for your Scandinavian Wreath!
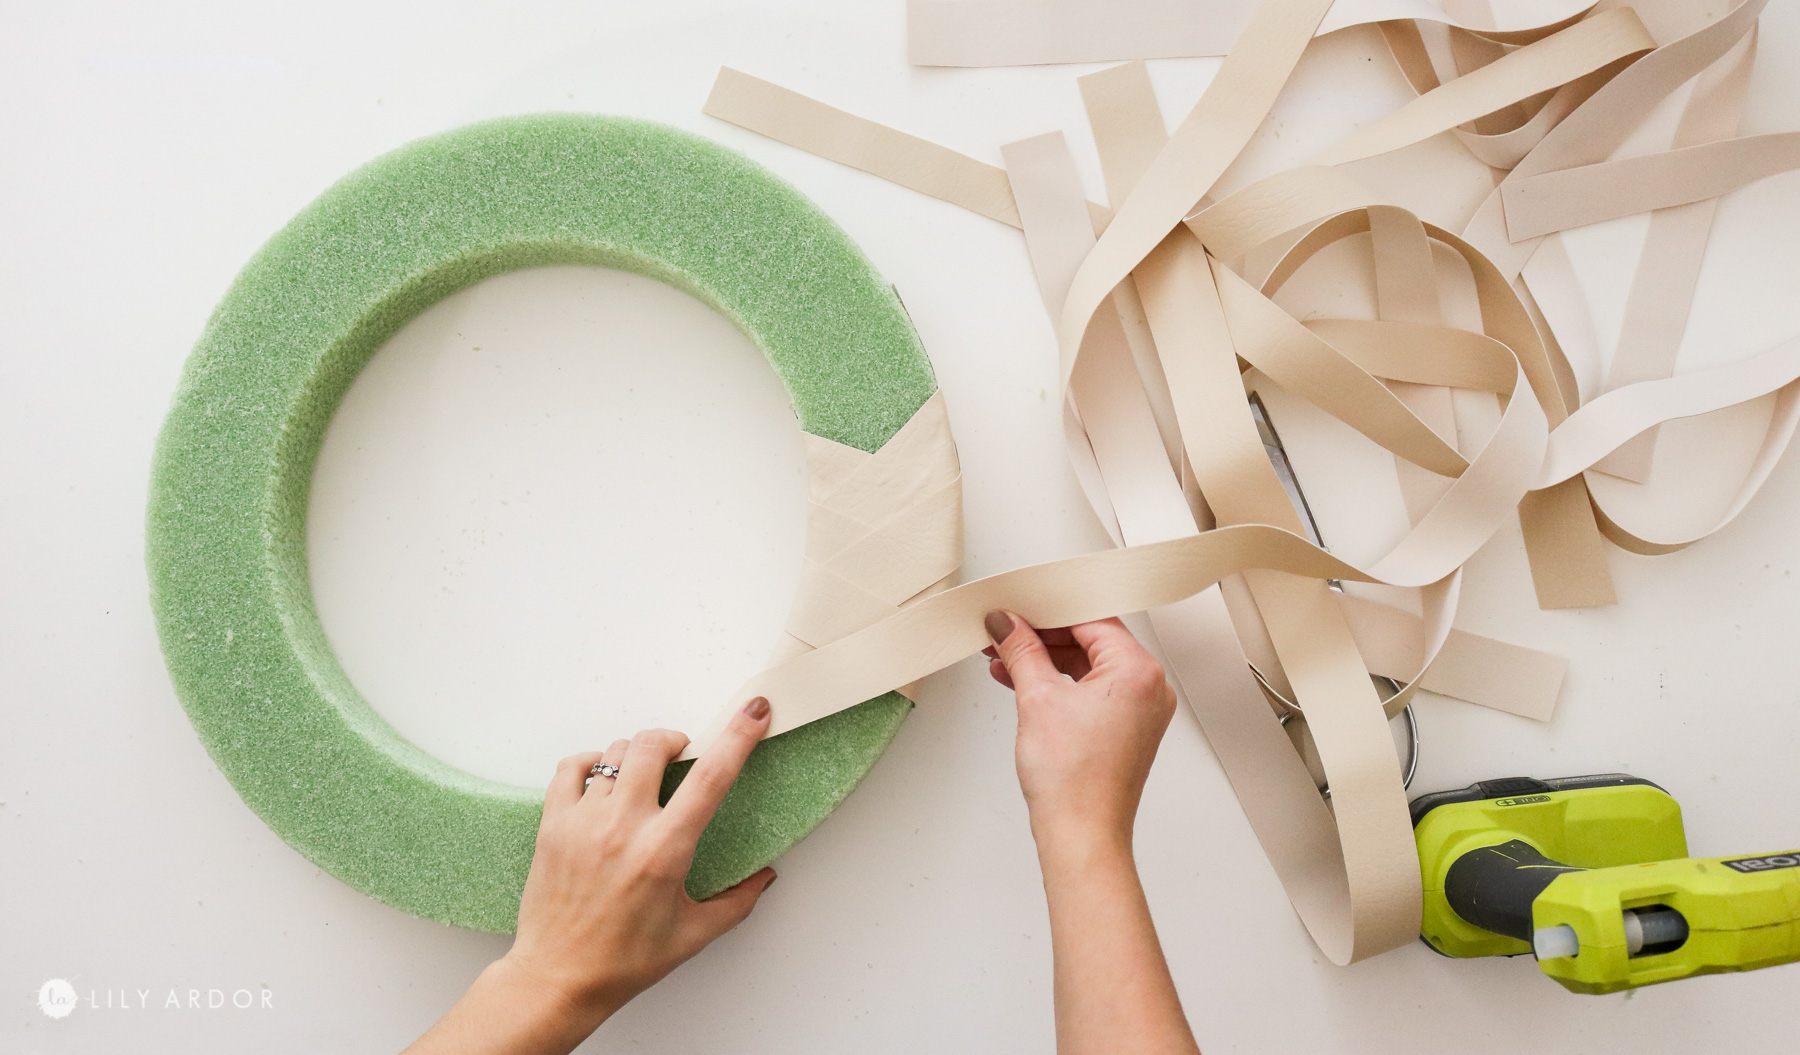
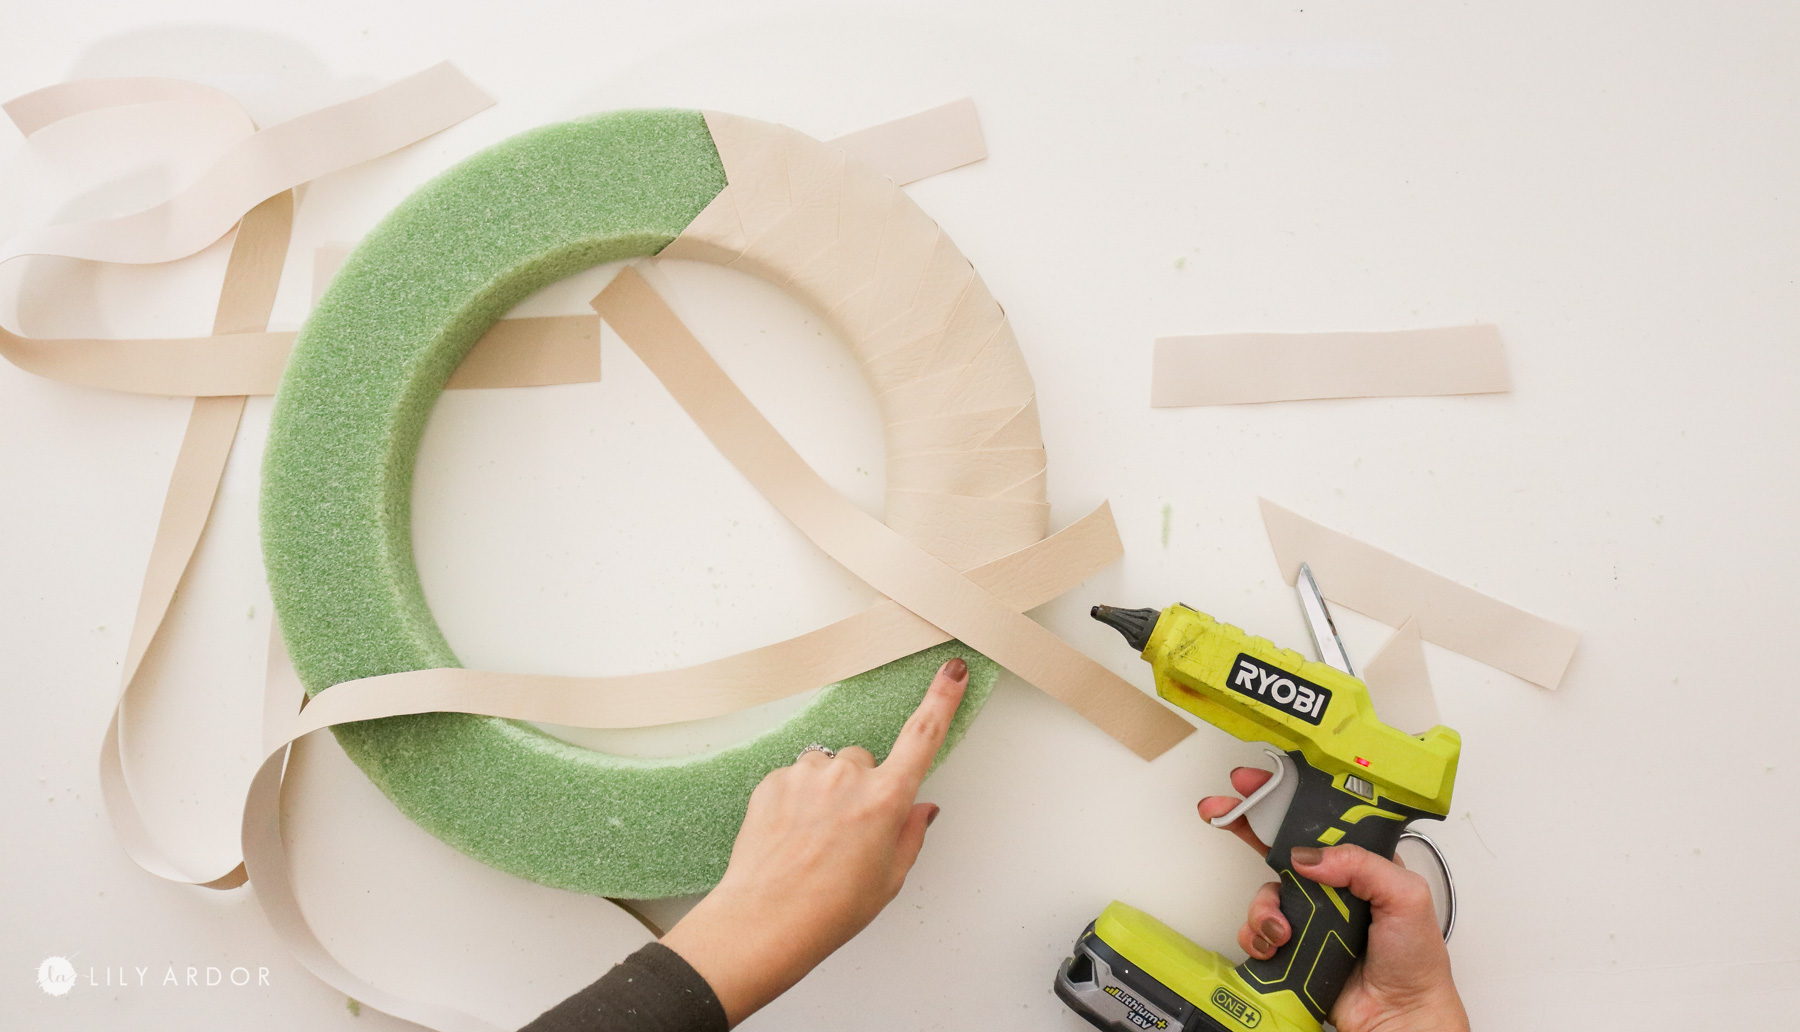
I first started off by cutting 1 inch strips of leather. I did not shorten them just yet and kept them as long as the fabric was. 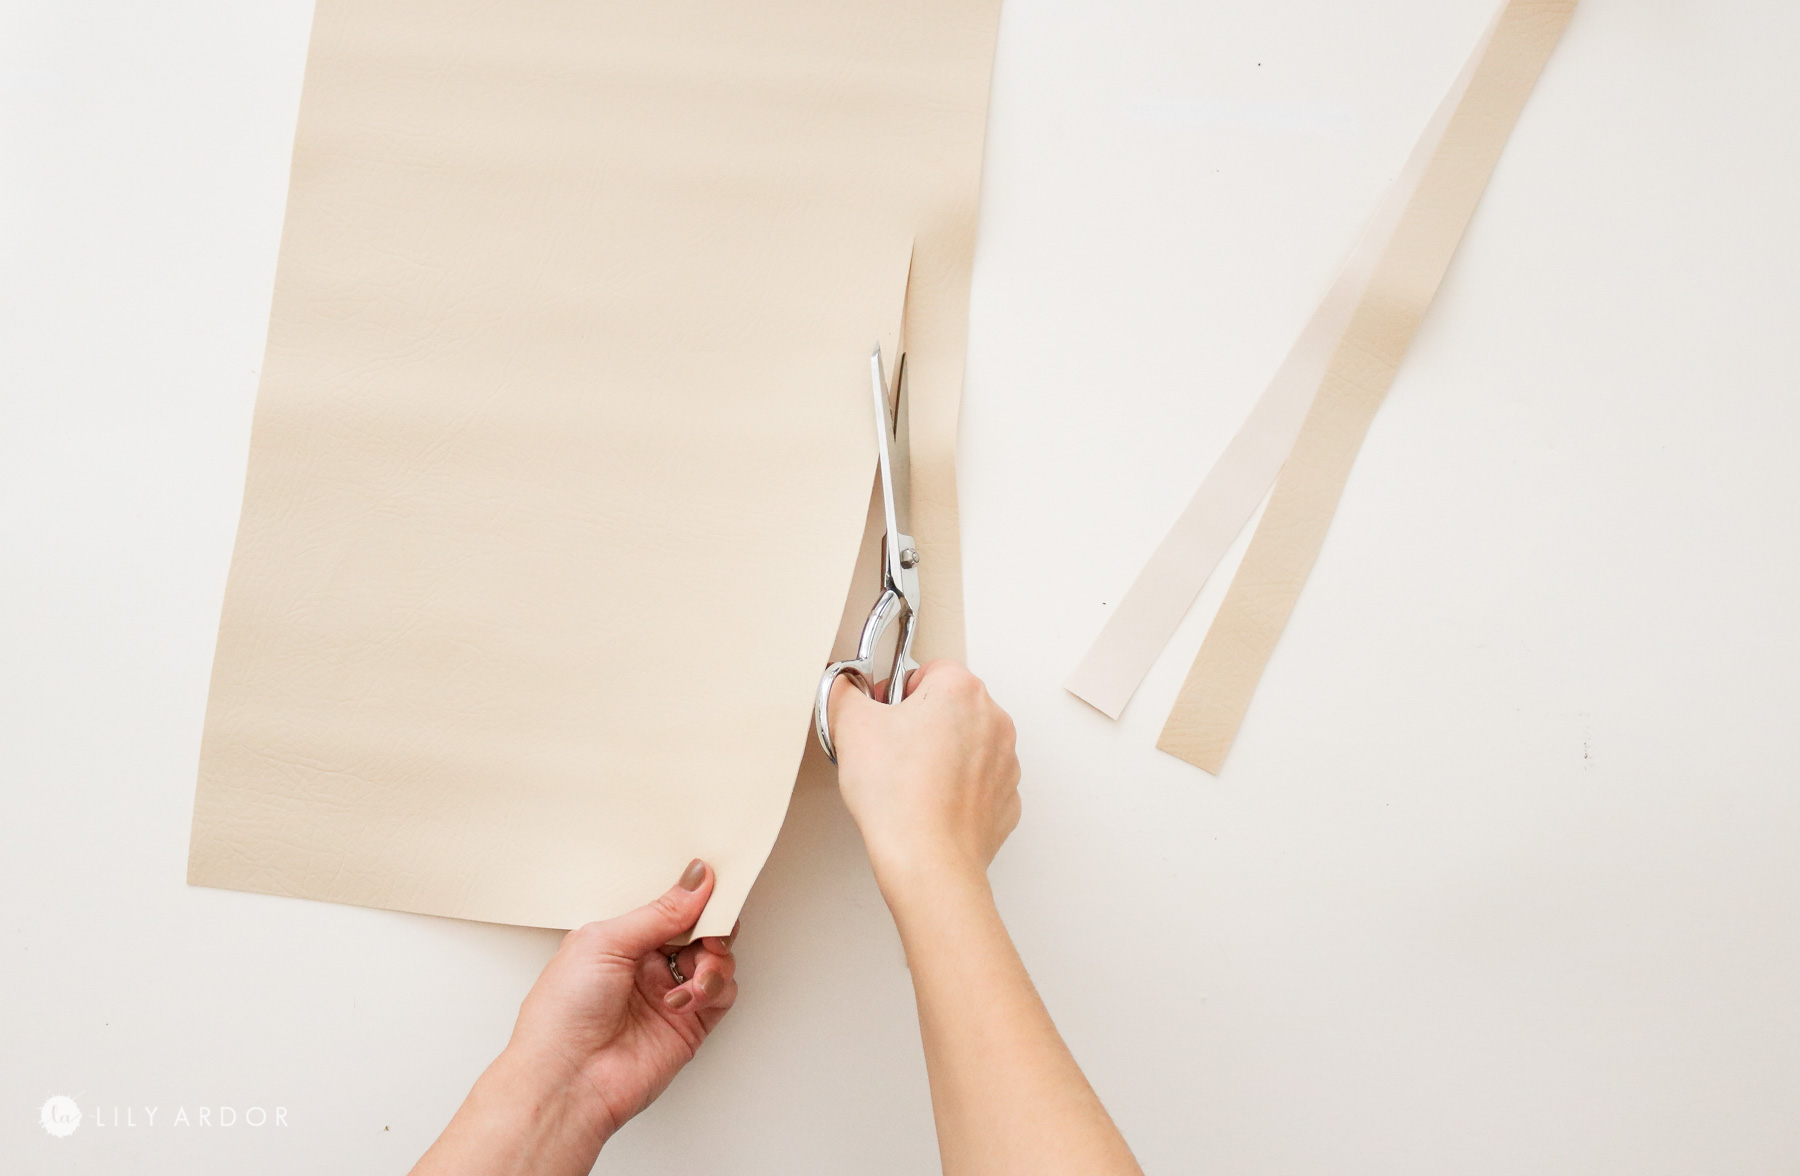
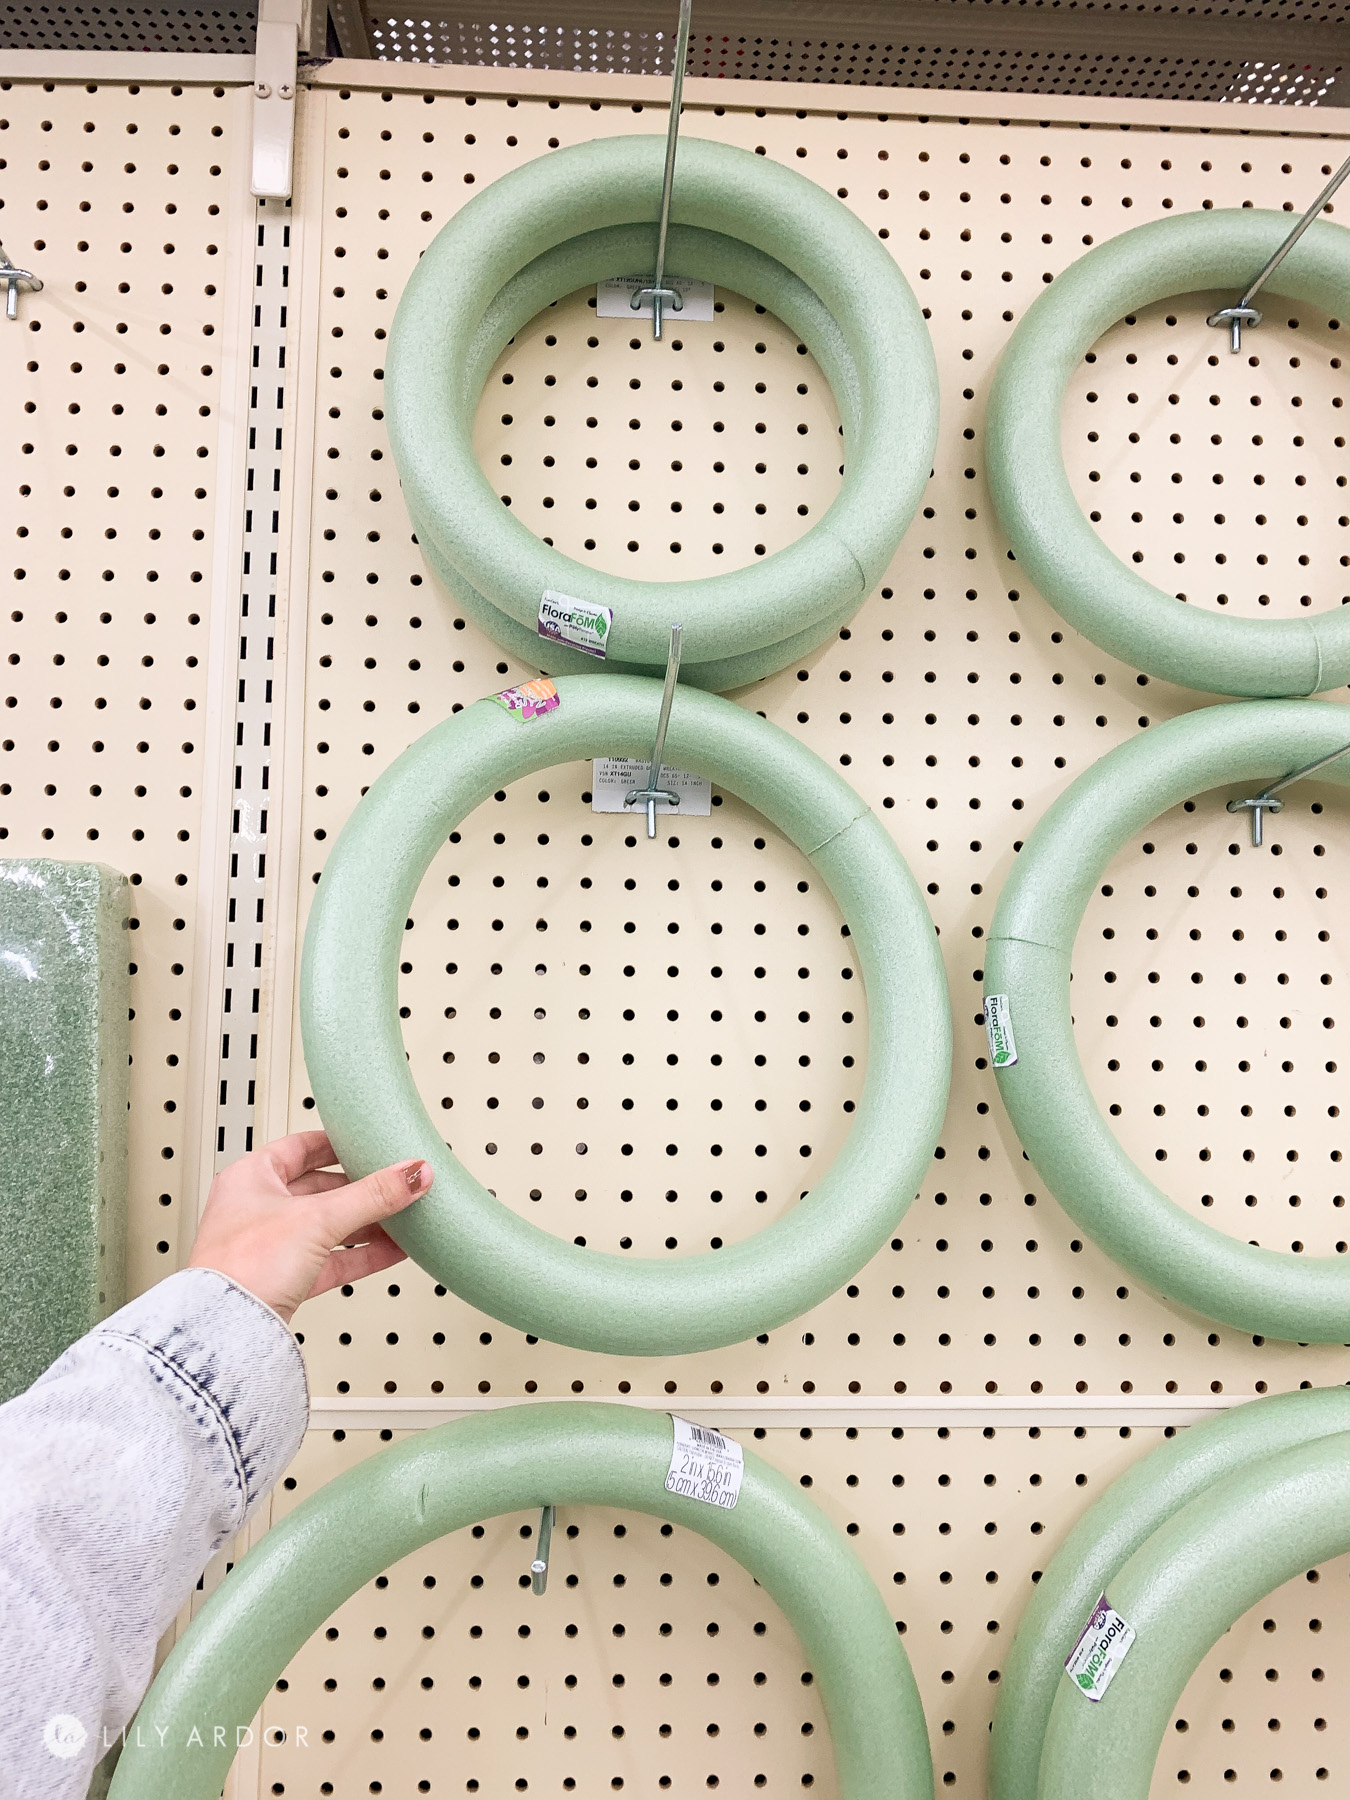
Picking the right wreath base
There’s a few different foam wreath bases you can choose from. Originally I had planned on using a wreath with rounded edges however when I got to the craft store I realized these round ones looked pretty thin all around. I wanted something thicker all around to show off the leather more so I ended up finding a wreath with square edges that was a bit thicker which worked perfect. My wreath measured about 3 inches in thickness ( width) and 16 inches in diameter. I found a few options on amazon that were close to what I used. Here’s a 13″ wreath that’s almost as thick as the one I used and Here’s 16″ inch wreath that’s a bit thinner.
Step 2: Attaching Leather to the wreath!
Okay so this is probably the most confusing step. It actually took me a good minute to figure it out. The trick is to attach these leather strips onto your foam base in an X shape. Attach the first one at a diagonal angle then the second one in the opposite direction. Keep repeating these two steps working your way all the way around the wreath. I guess it’s like creating a braid with the leather strips if the makes any sense. I hot glued each leather strip to the back of the wreath and snipped off any remaining leather. Try not to add any hot glue around the front of the wreath as it shows through the leather. You’ll see a little bump if you do. Ok I know getting that braided look might be a bit tricky 🙁 . You can also just wrap the leather strips around the wreath until it’s covered. I think that would be super cute too.
OR better yet you can CHECK OUT THE VIDEO VERSION to this DIY wreath. I go into WAY MORE detail on there. You can check it out here. 😃
Step 3: Giving your leather a weathered look!
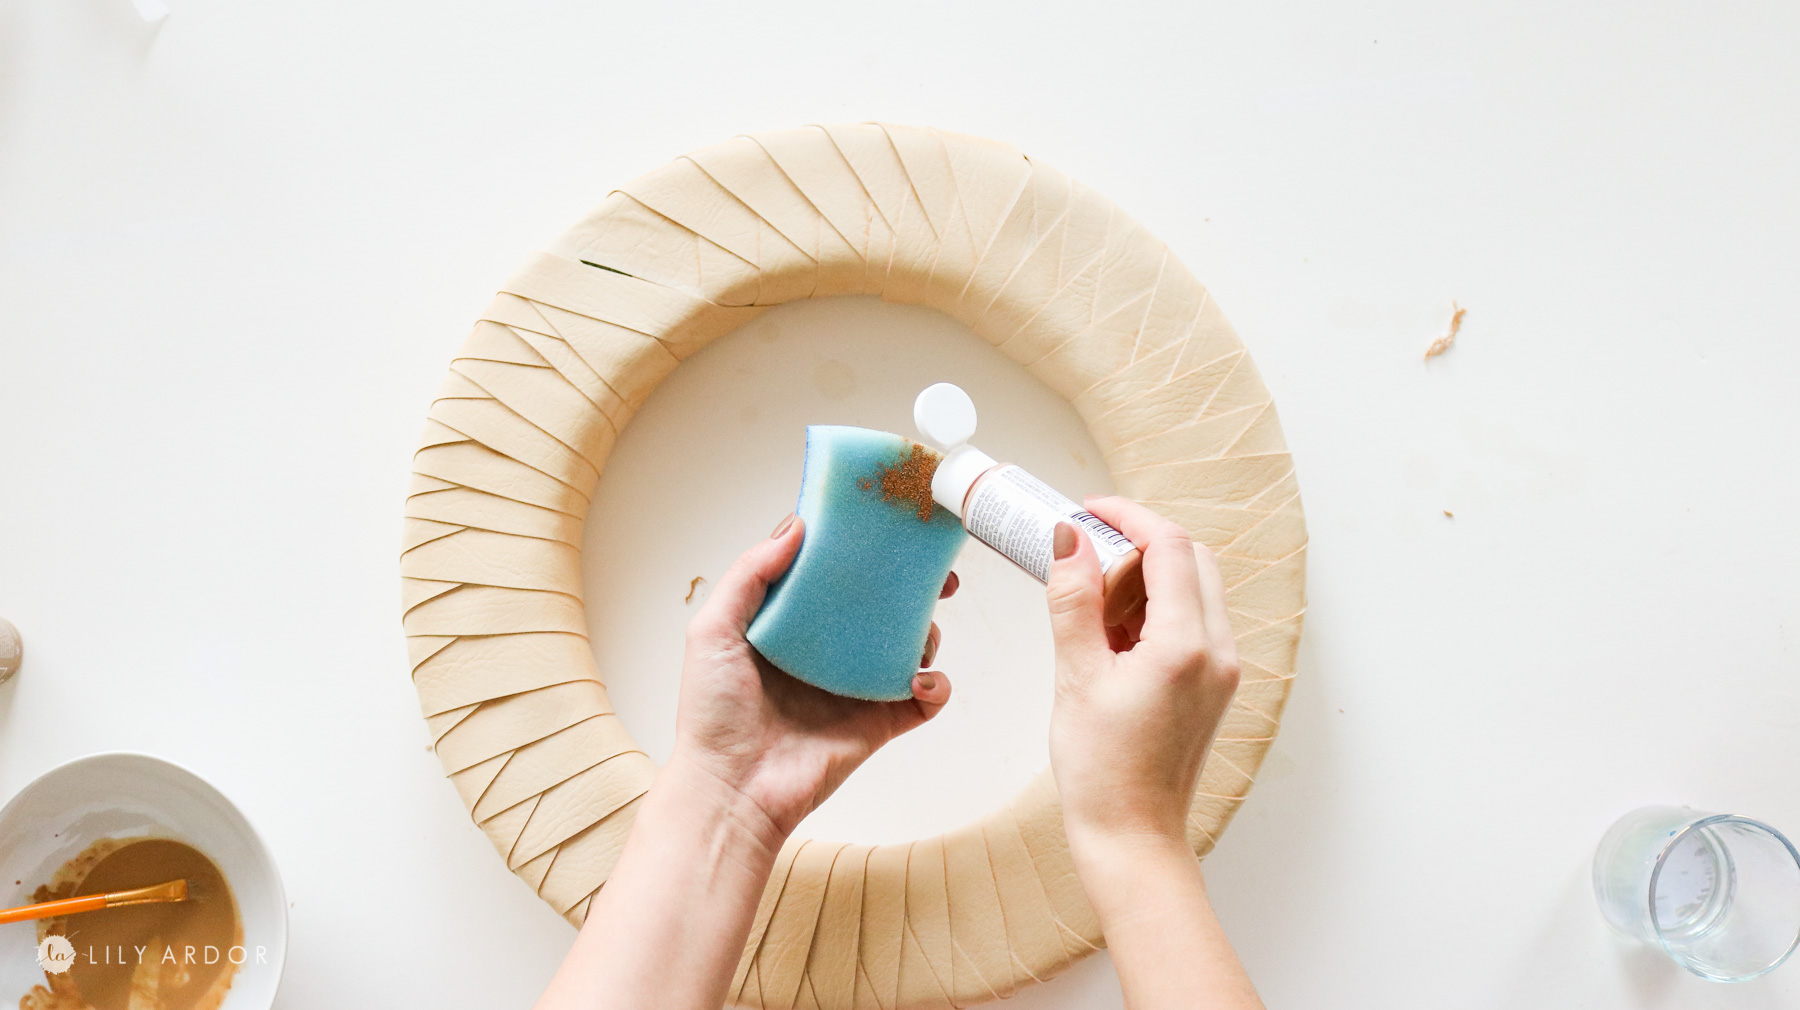
Okay next because I used faux leather I wanted to give it a realistic look. I decided to try and give it a weathered look. Any brownish color craft paint should work for this. The colors I used were honeycomb and golden brown. 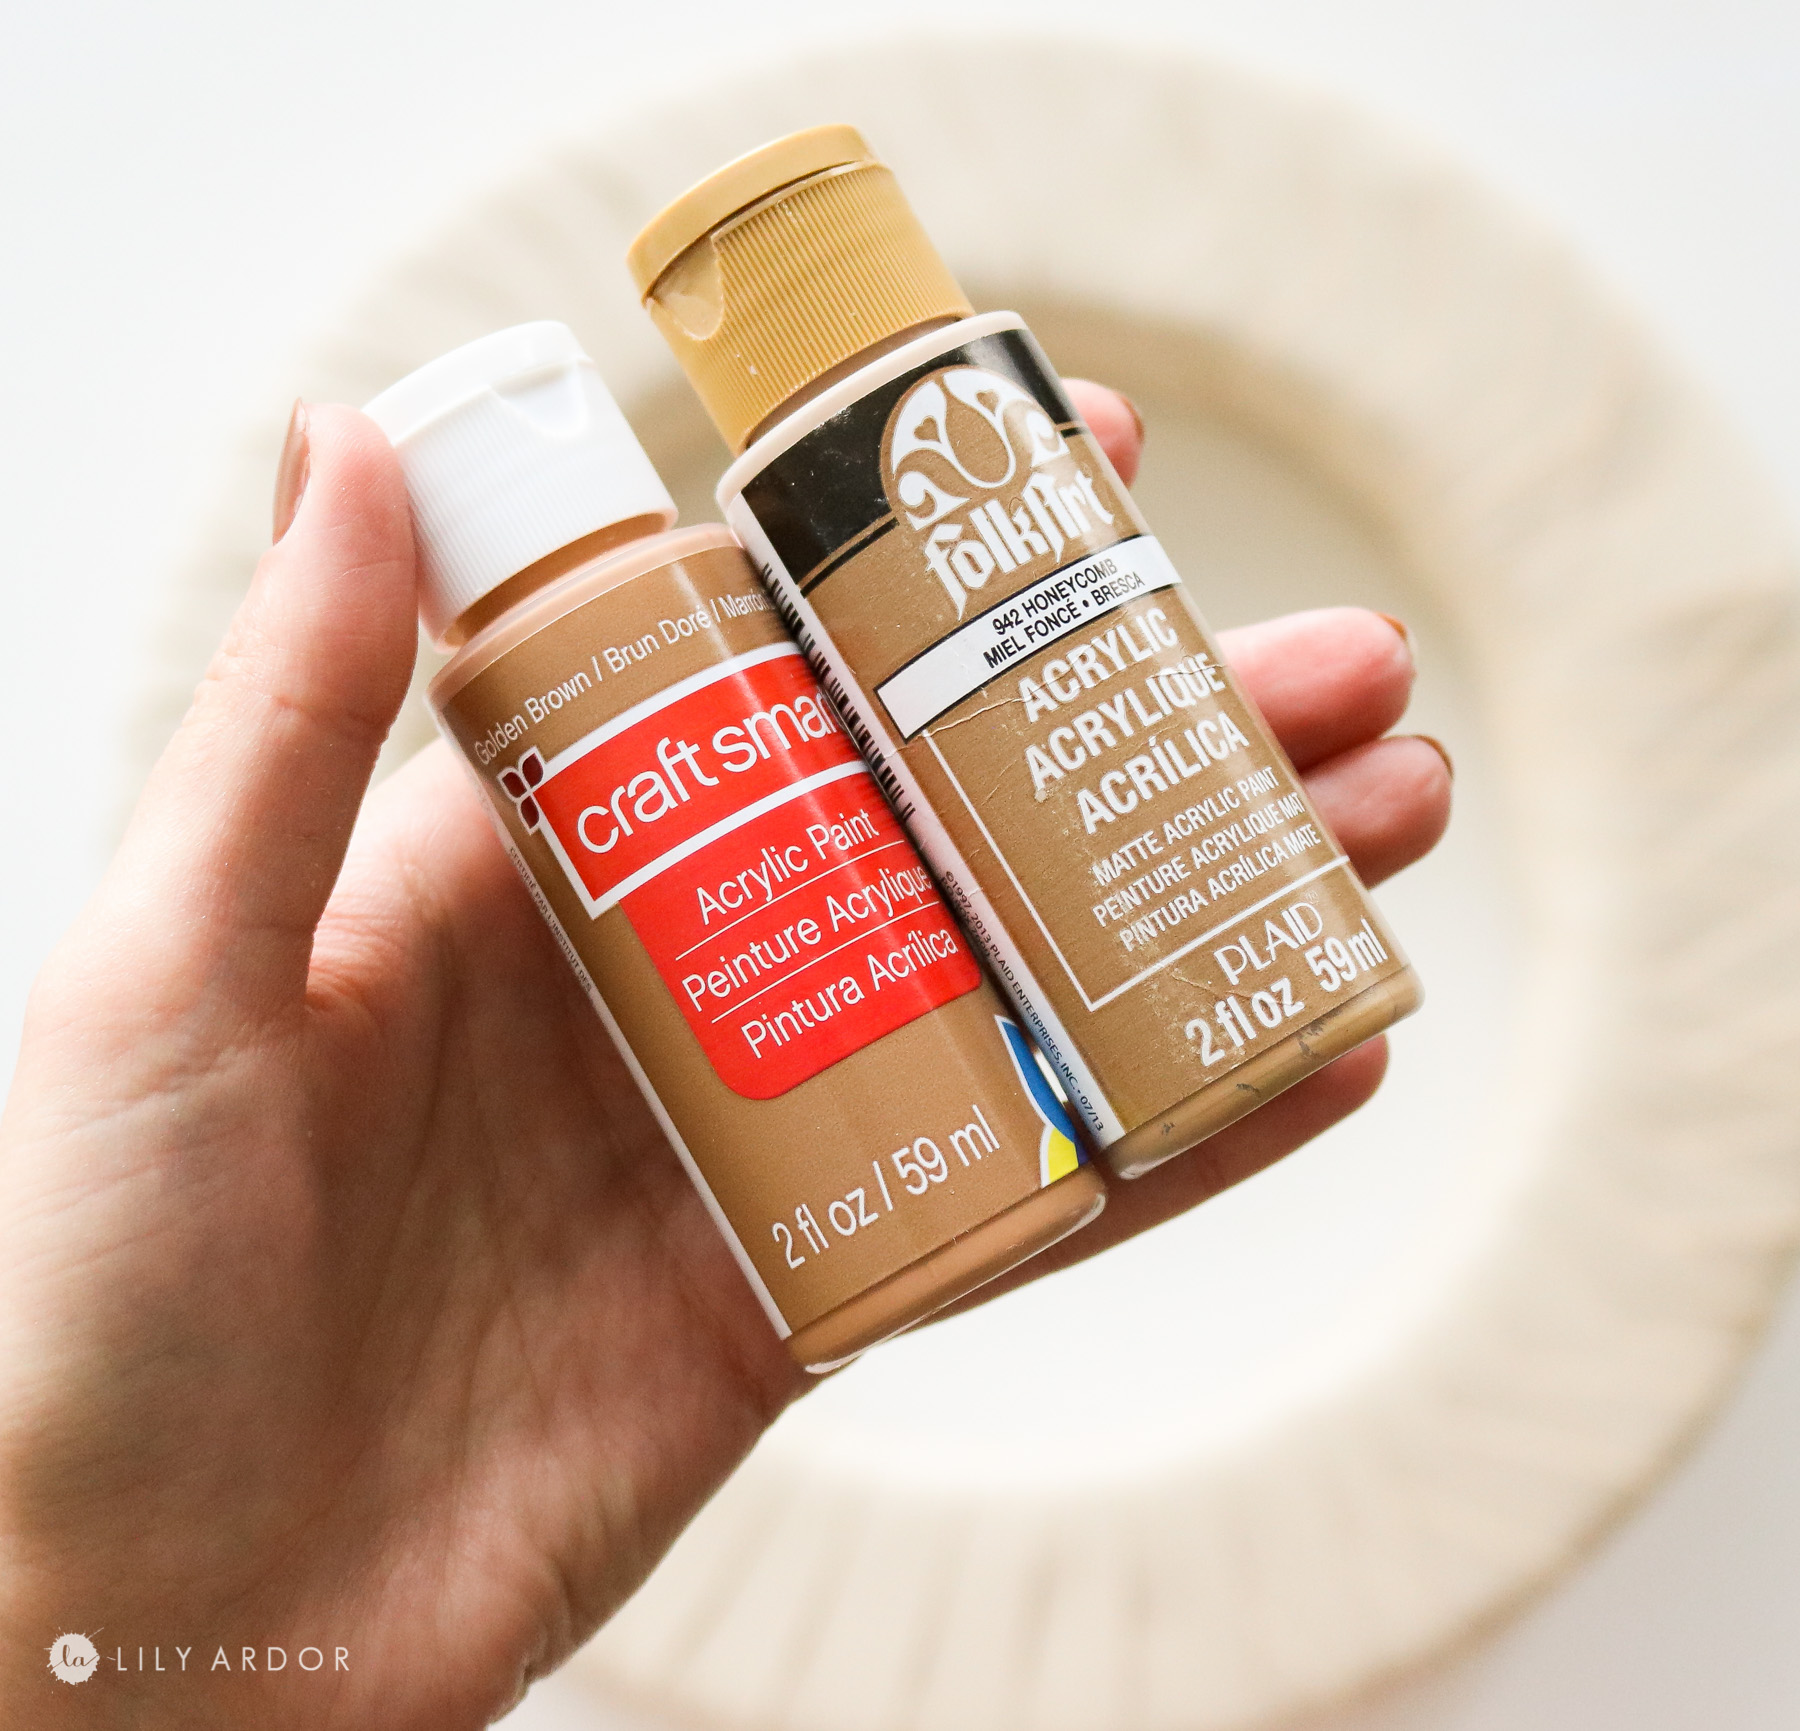
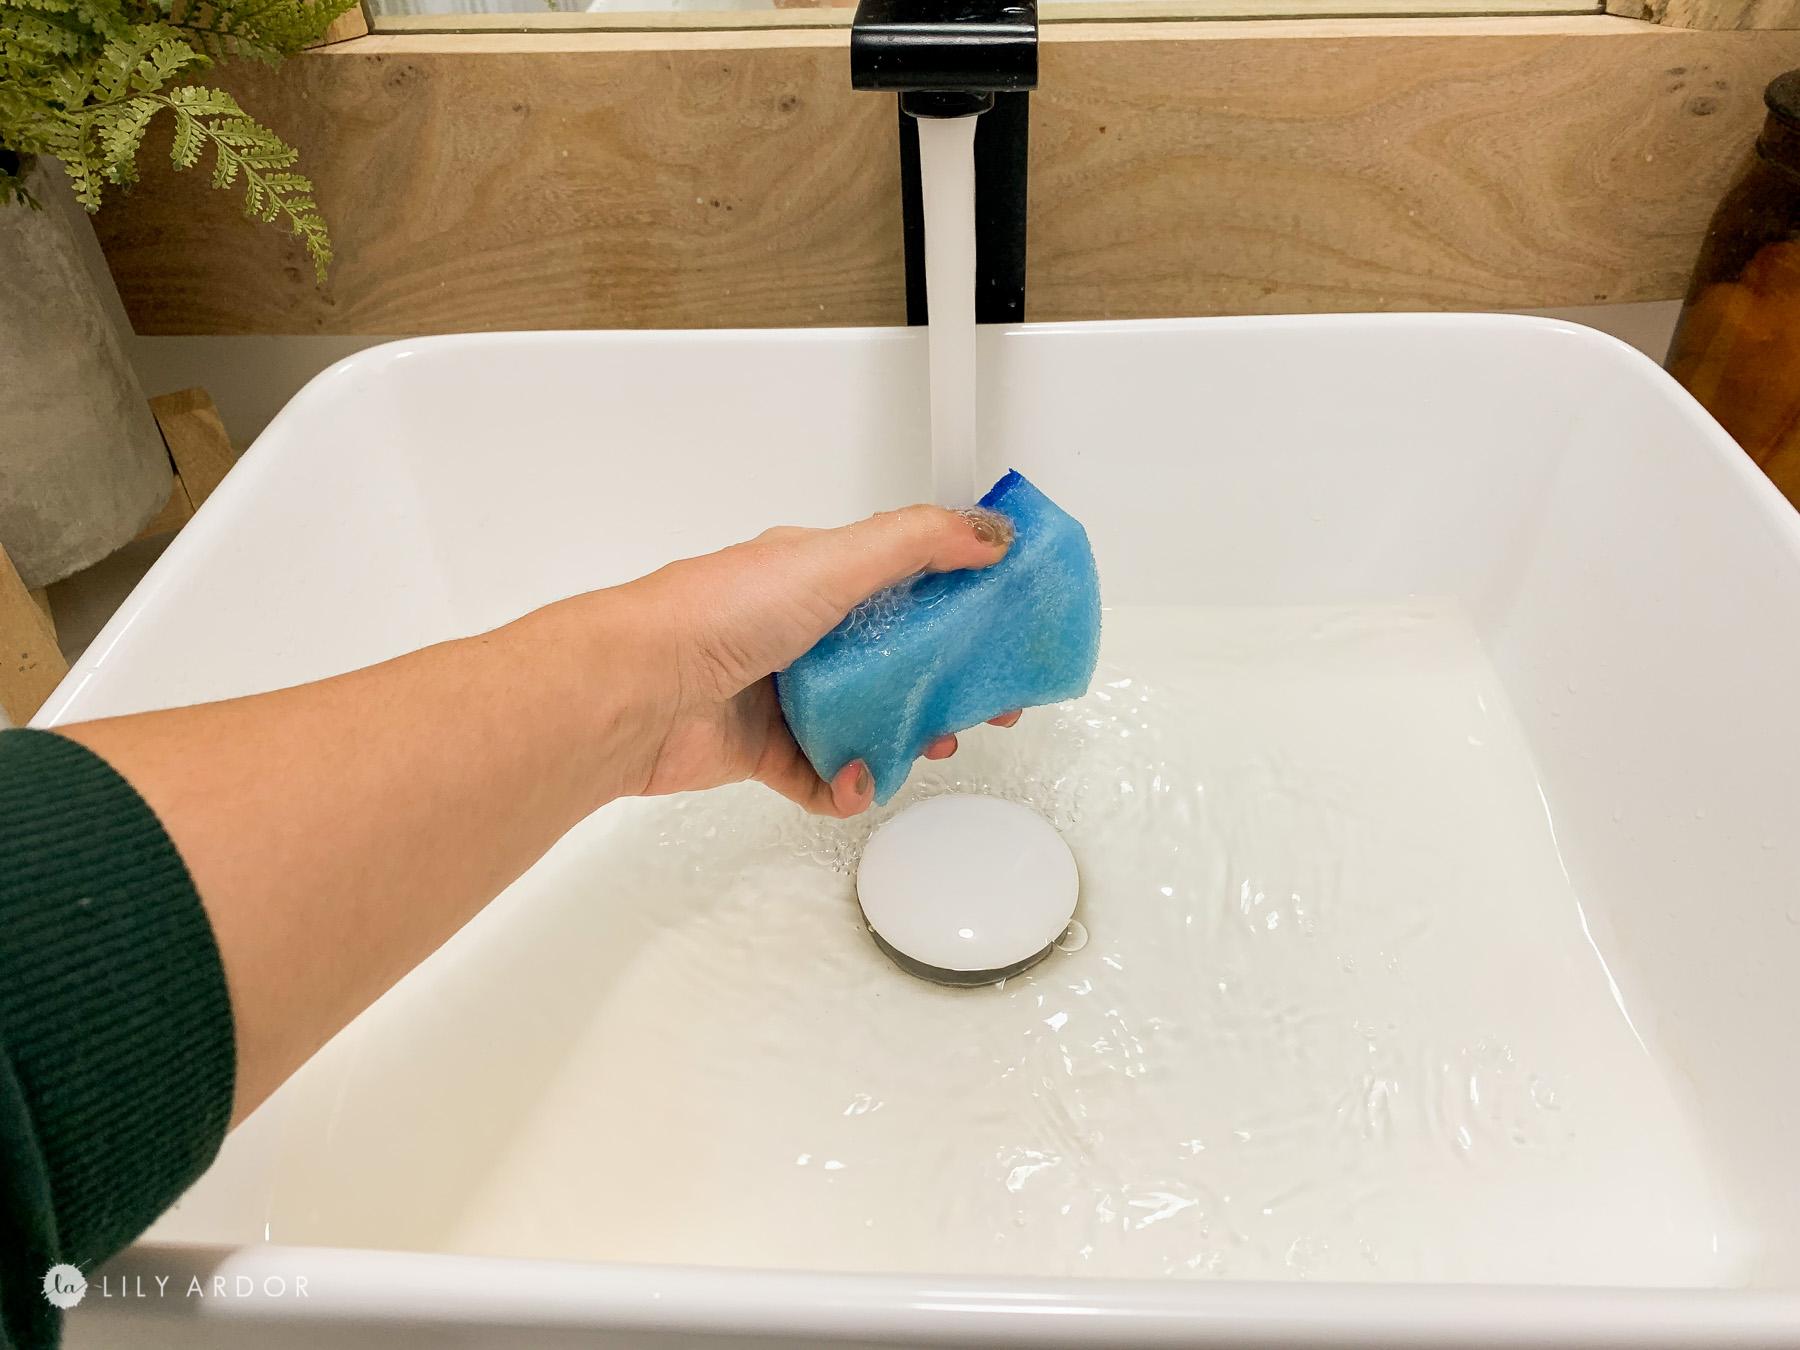
I wet my sponge and wrung it out as much as I could leaving it slightly moist.
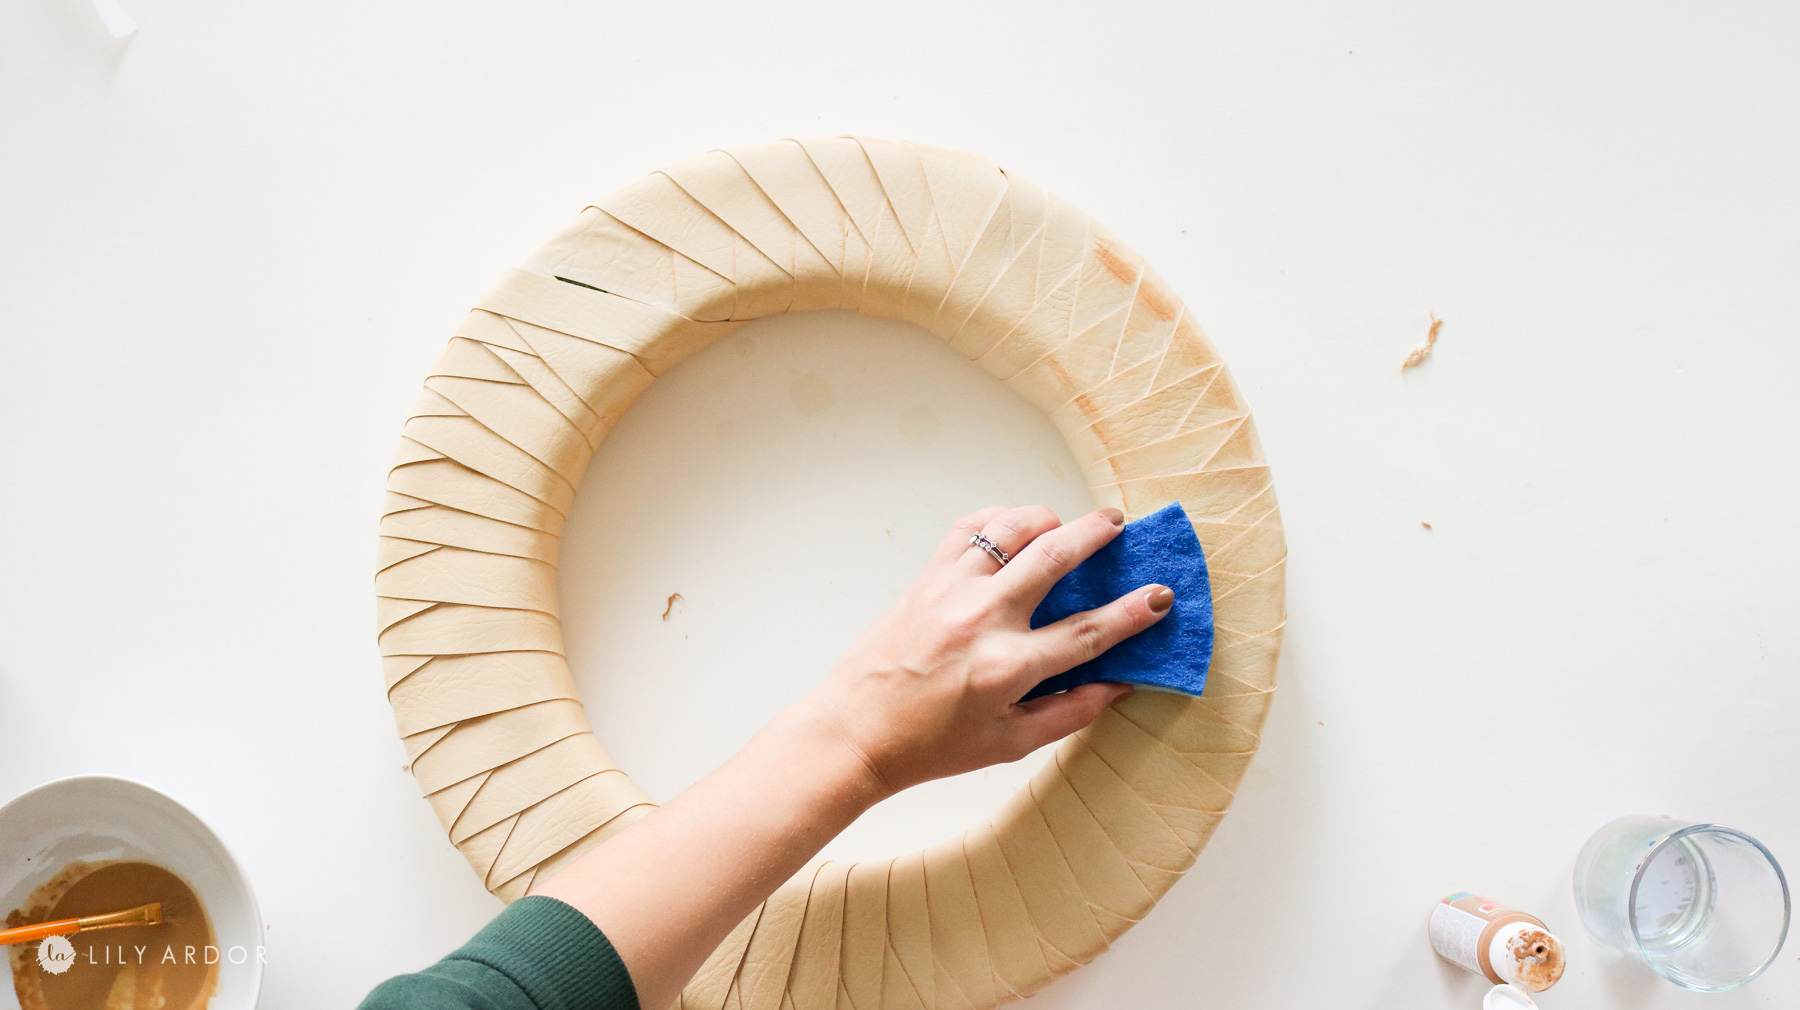
I than applied the craft paint directly out of the bottle onto the sponge. Just a few dabs. This idea behind this technique is to give the leather just enough character to allow the texture pop.
Next I rubbed the color onto the wreath and let the paint dry. Once it’s dry clean your sponge and use it to remove most of the color. Pretty much scrubbing the color off. This should leave some color in the cracks of the leather giving it a weathered look. Pretty easy right!

Step 4: Adding Finishing Touches to your NORDIC wreath!
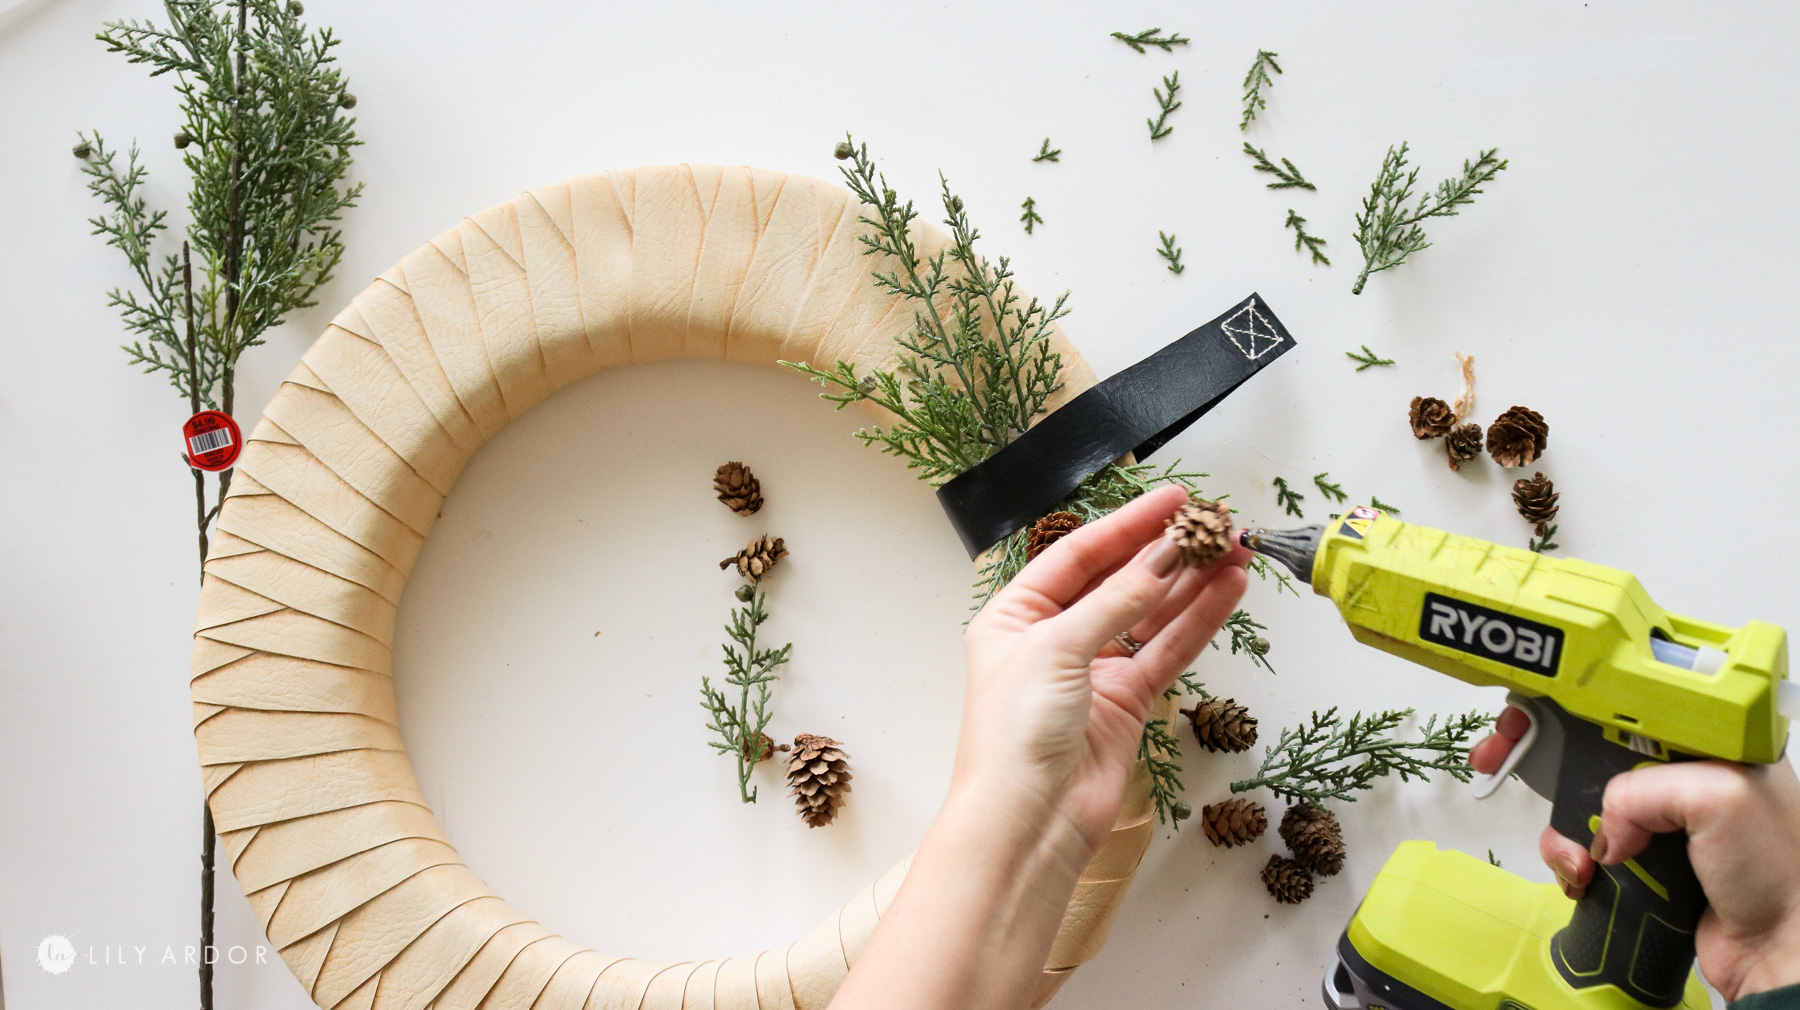
I wanted to keep it simple and thought maybe a cute leather strap would be cute. So, I painted a strip of leather black and added some stitching to the top. The stitching is totally optional and is only for decorative purposes. I used some hot glue to secure it later on.
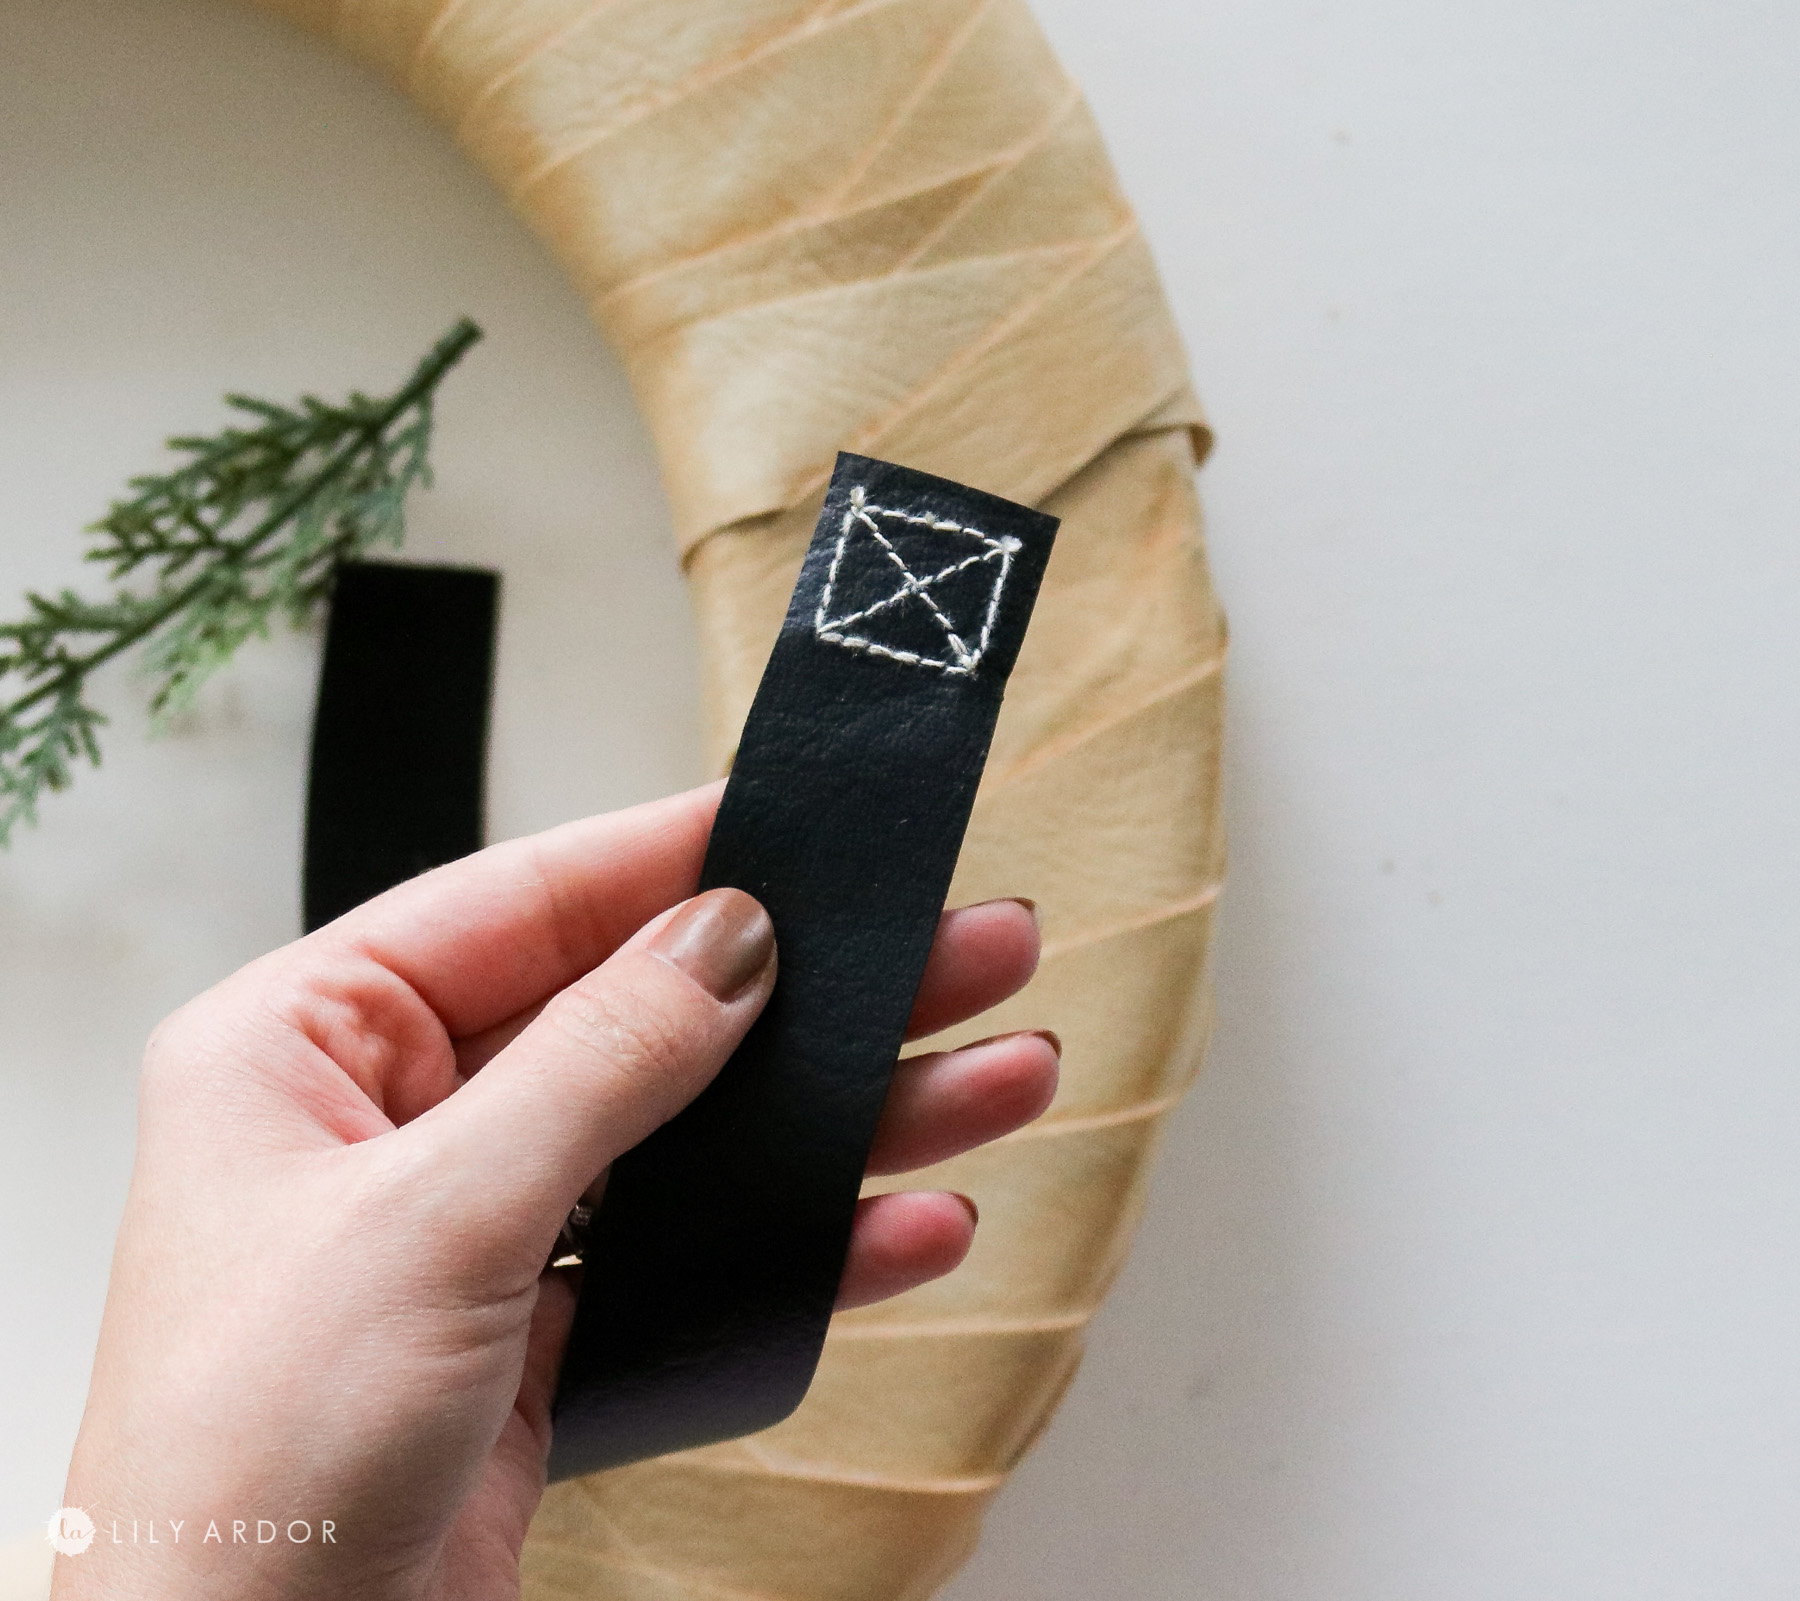
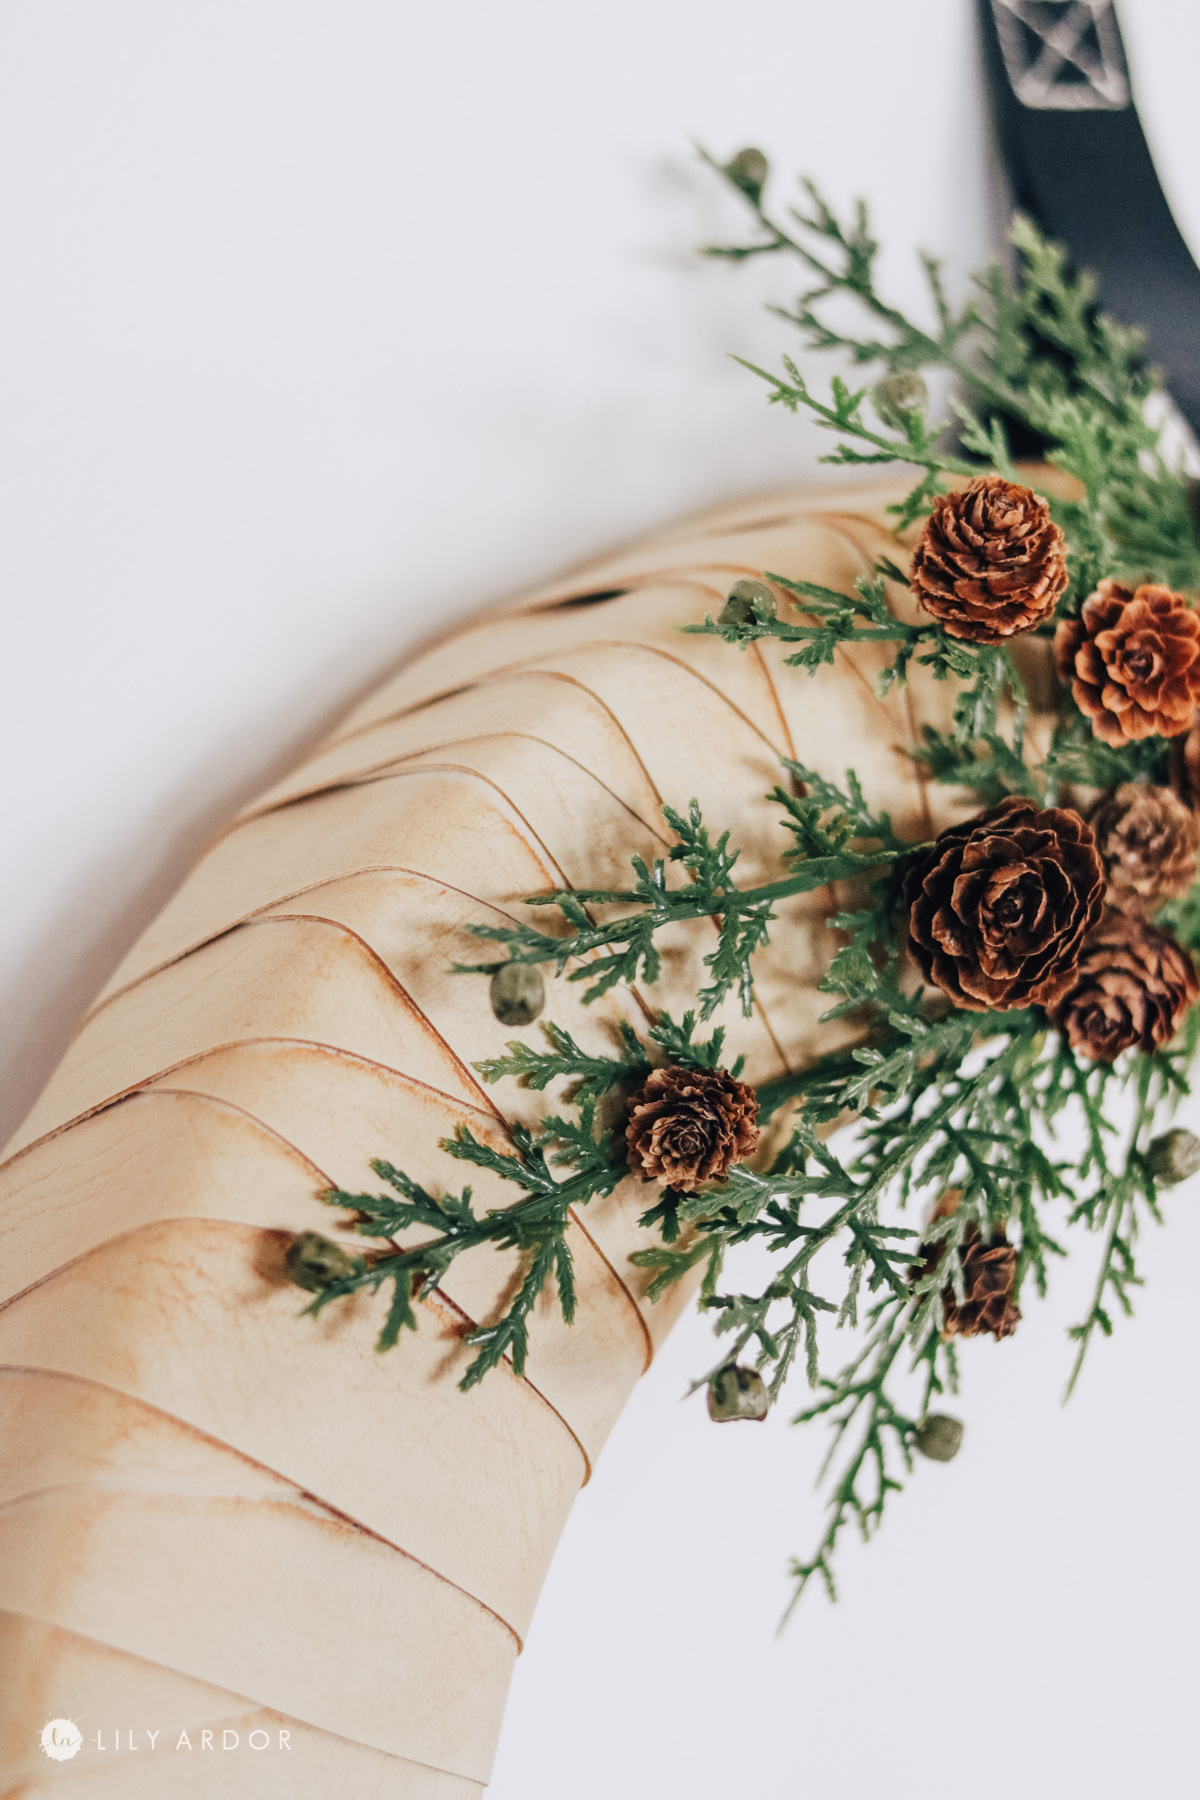
I also added some greenery to where the loop would be. When attaching them with hot glue I slightly stuck the greenery under the leather strip. This helped hold them in place better.
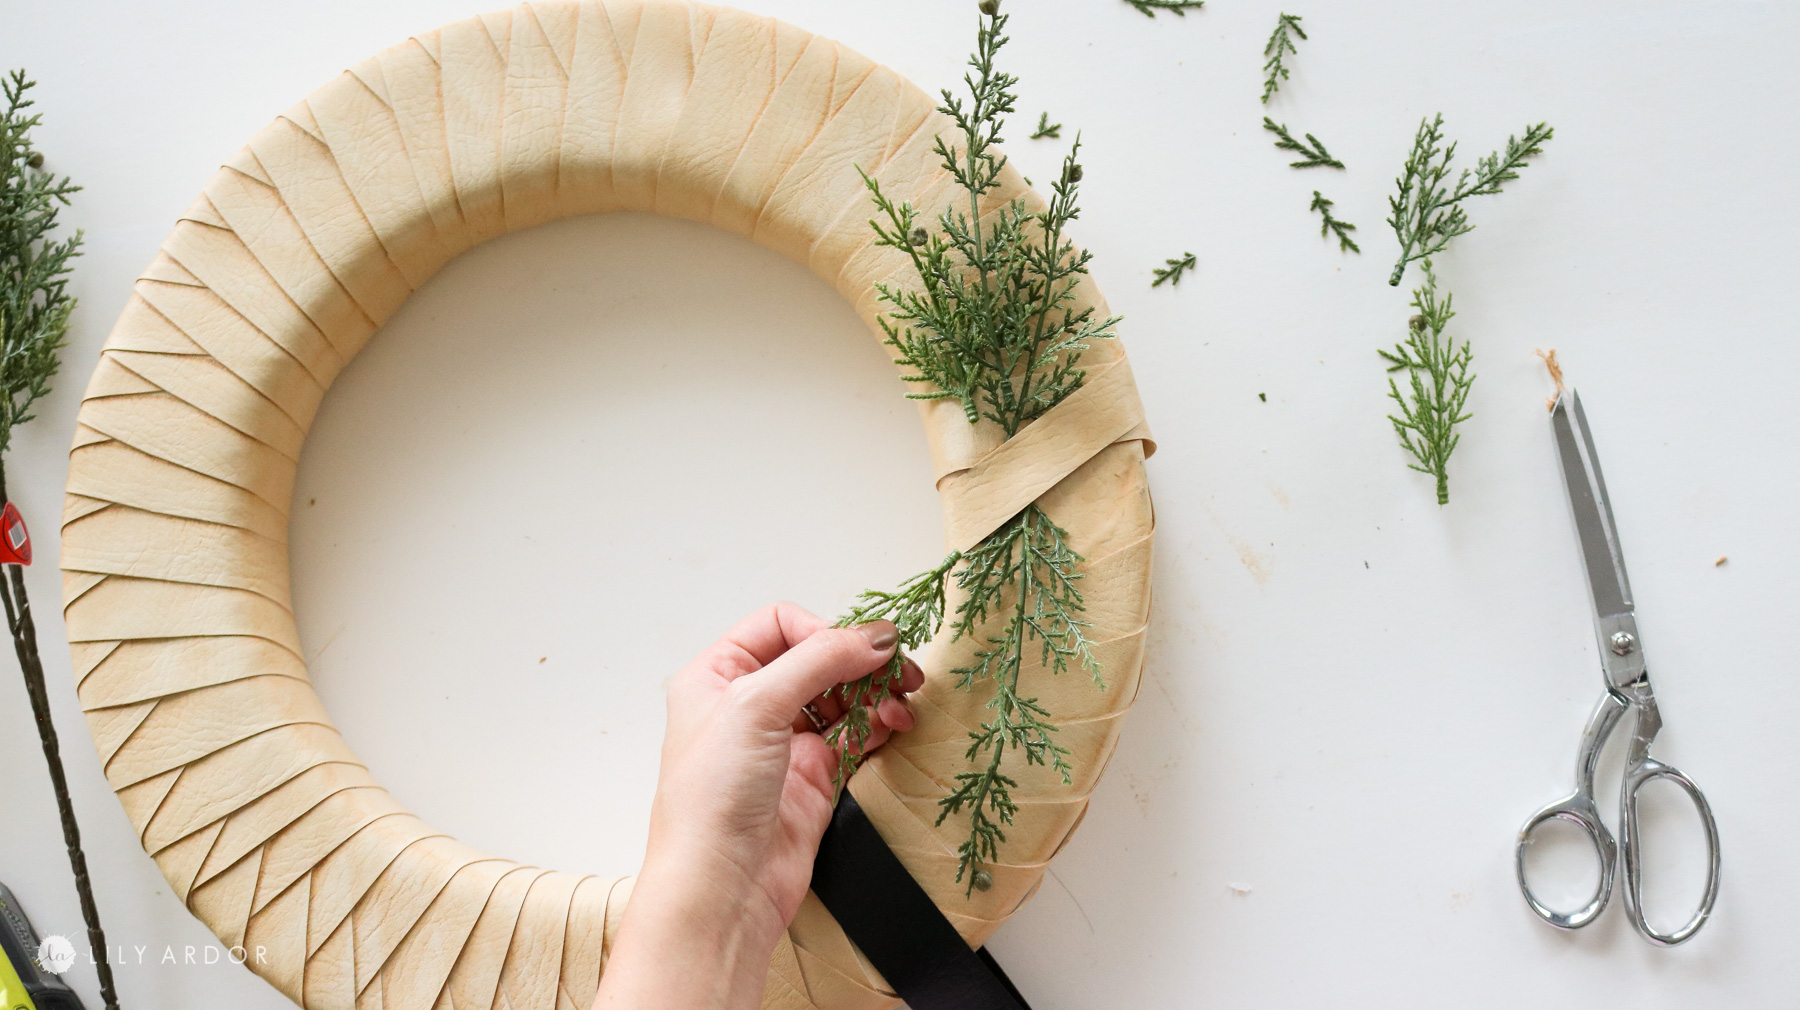
To finish it off I added a few pine comes to complete the look.
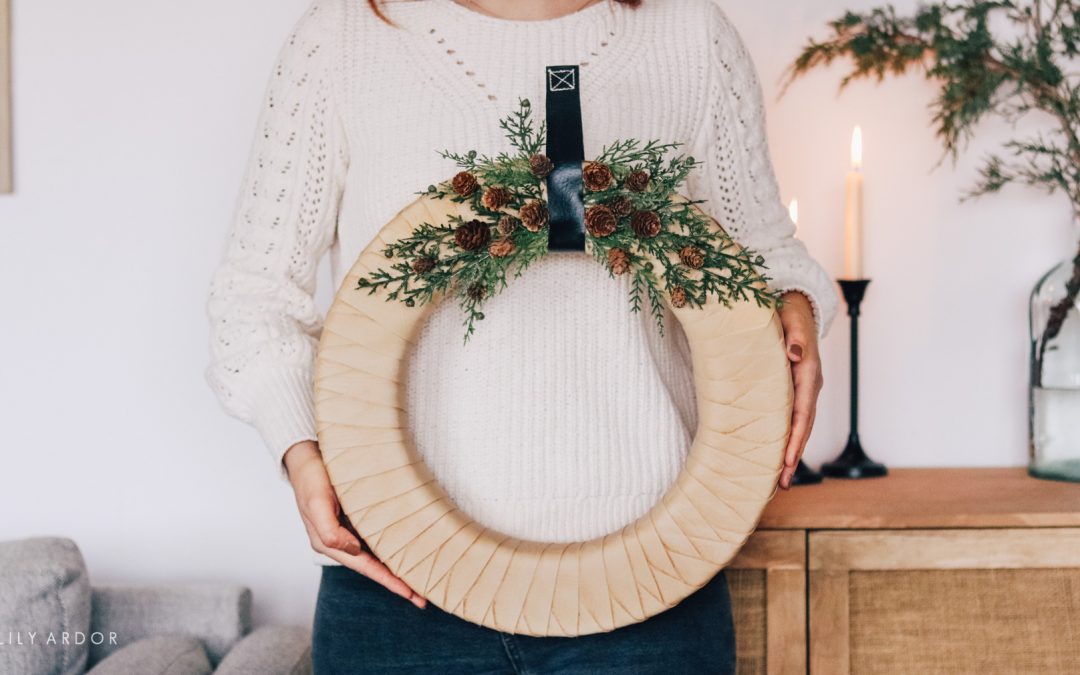
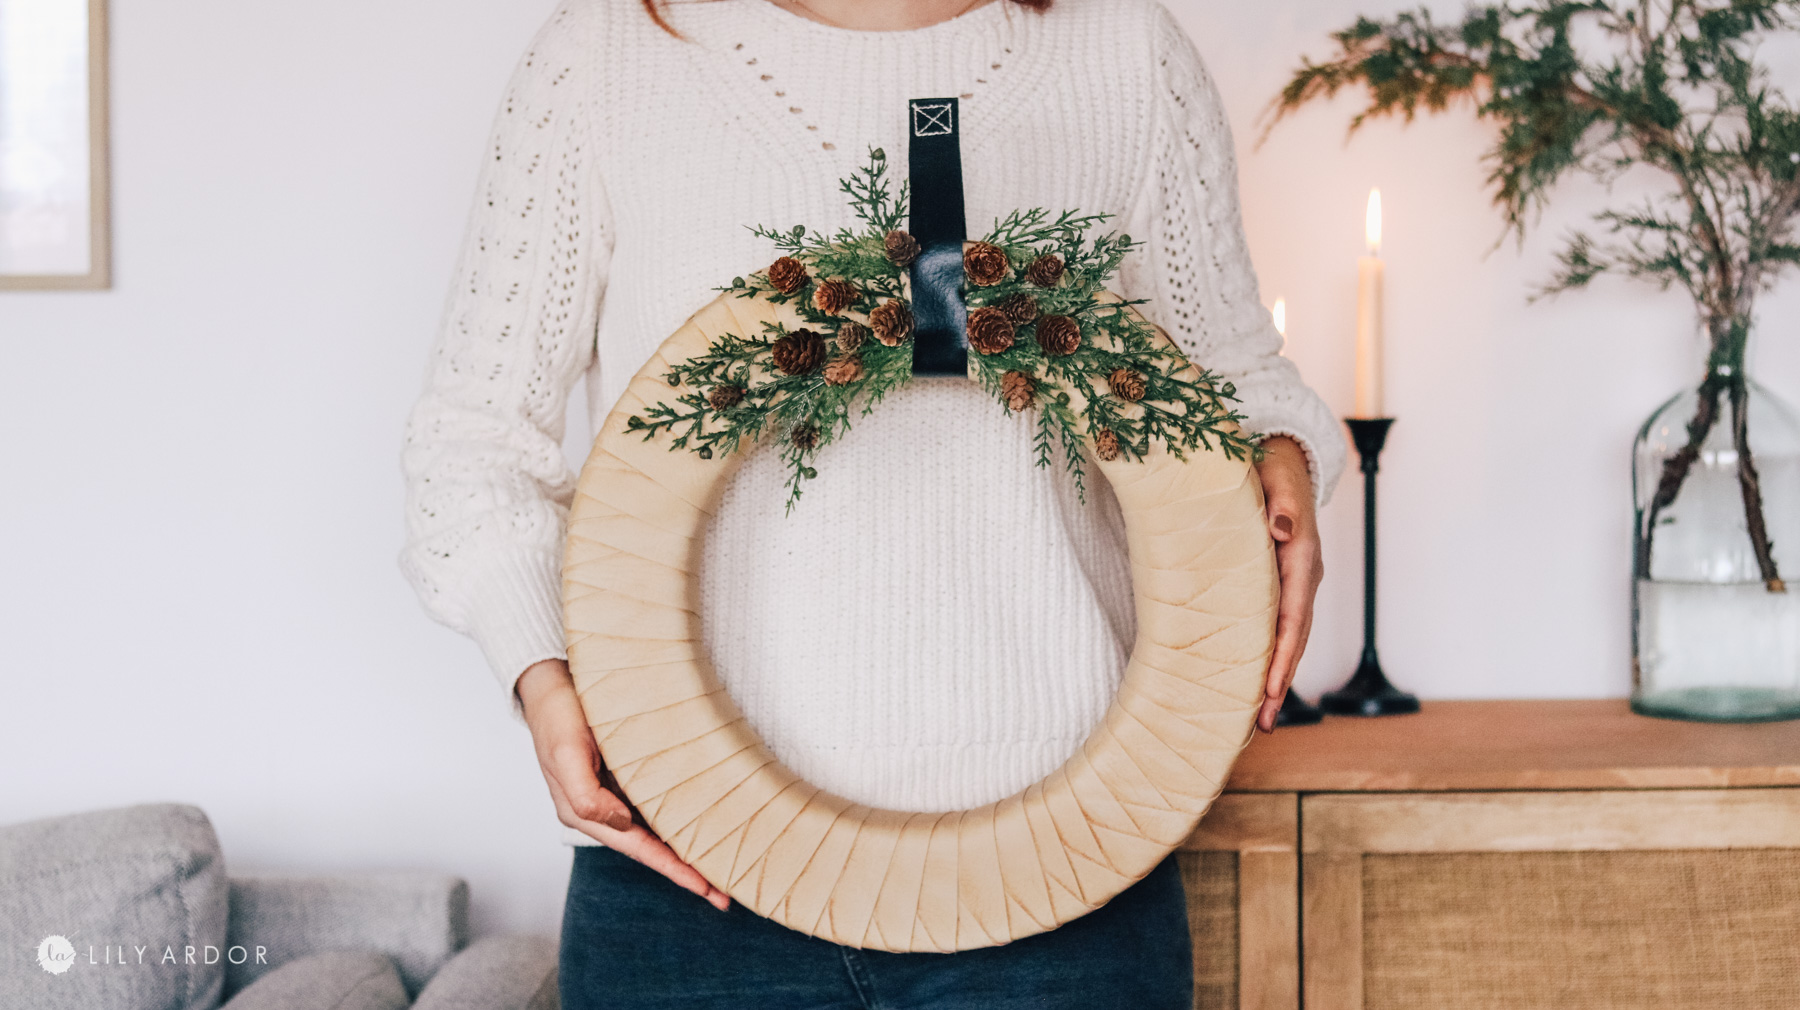
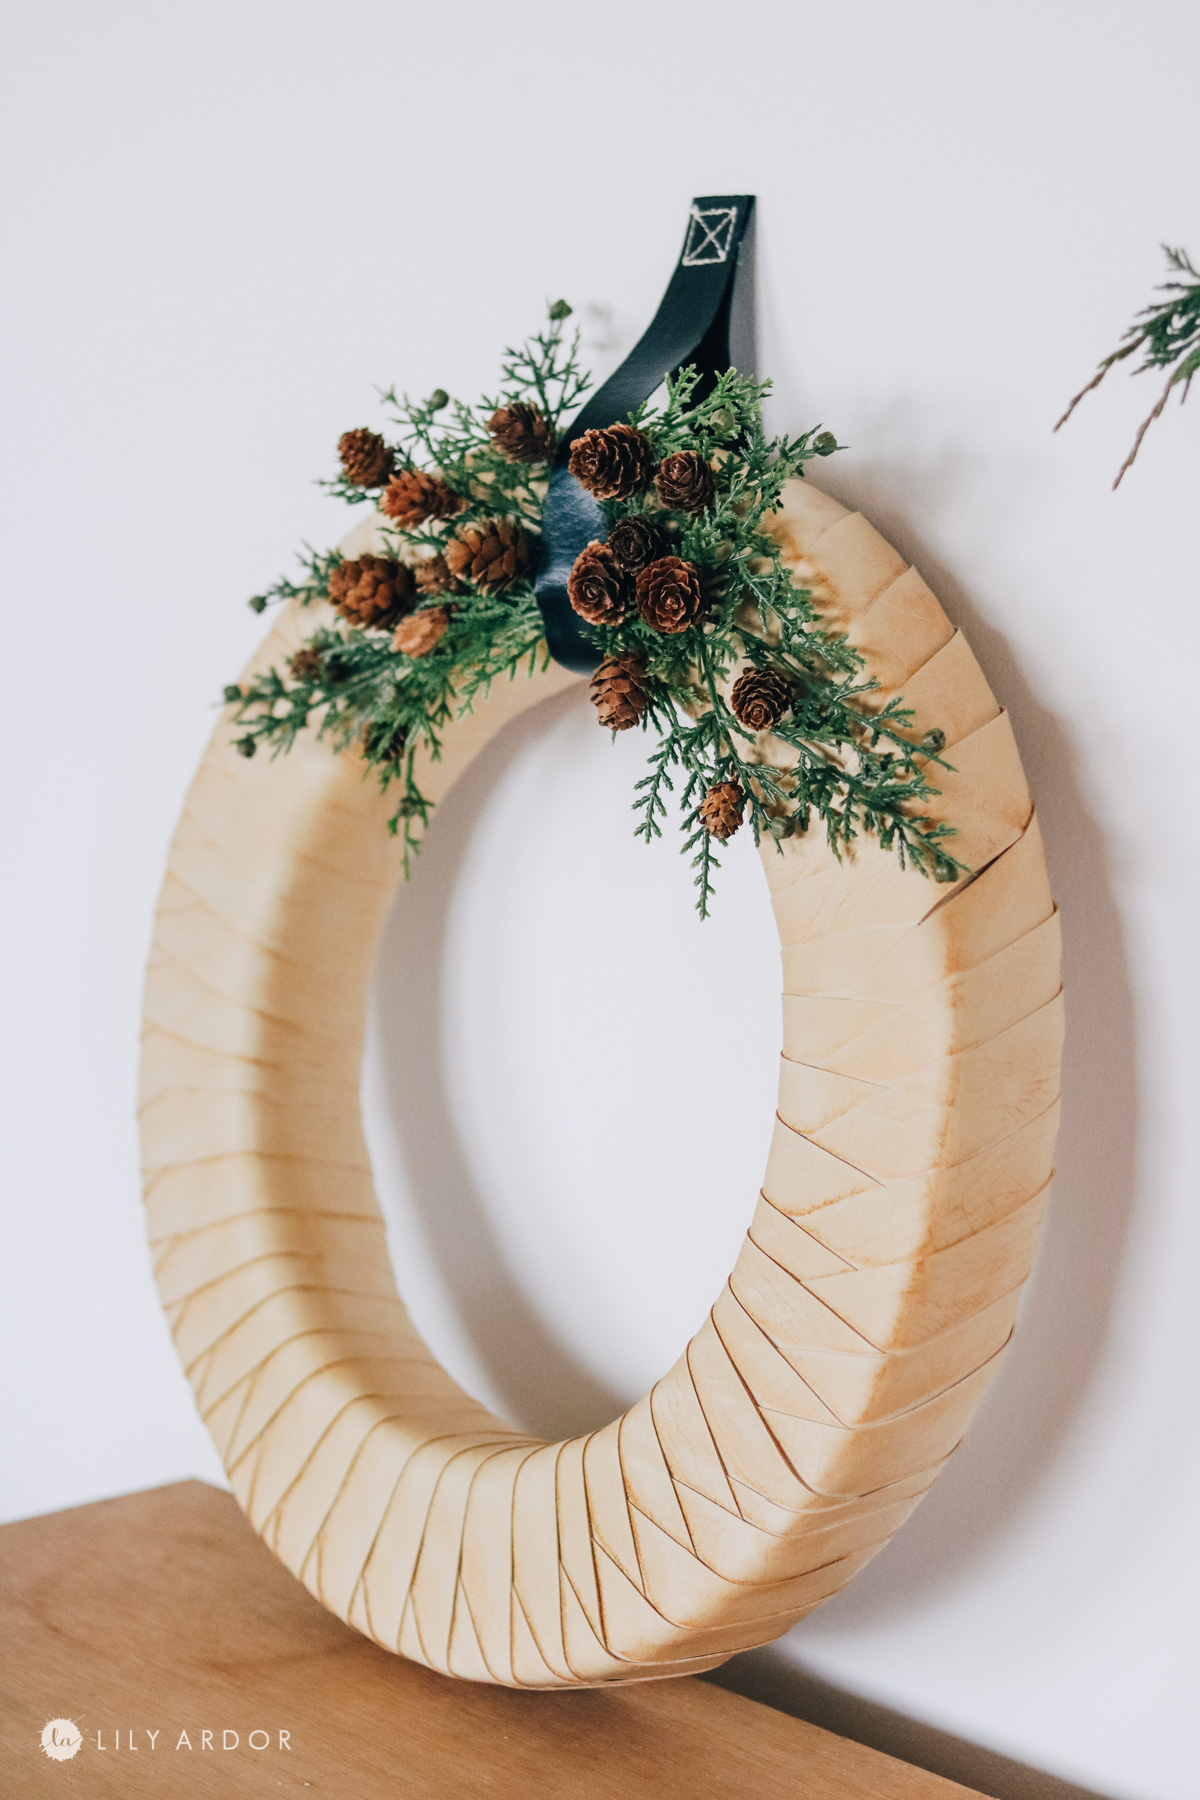
DIY Scandinavian Christmas Wreath!
That’s it! Here’s how my Christmas wreath looks!
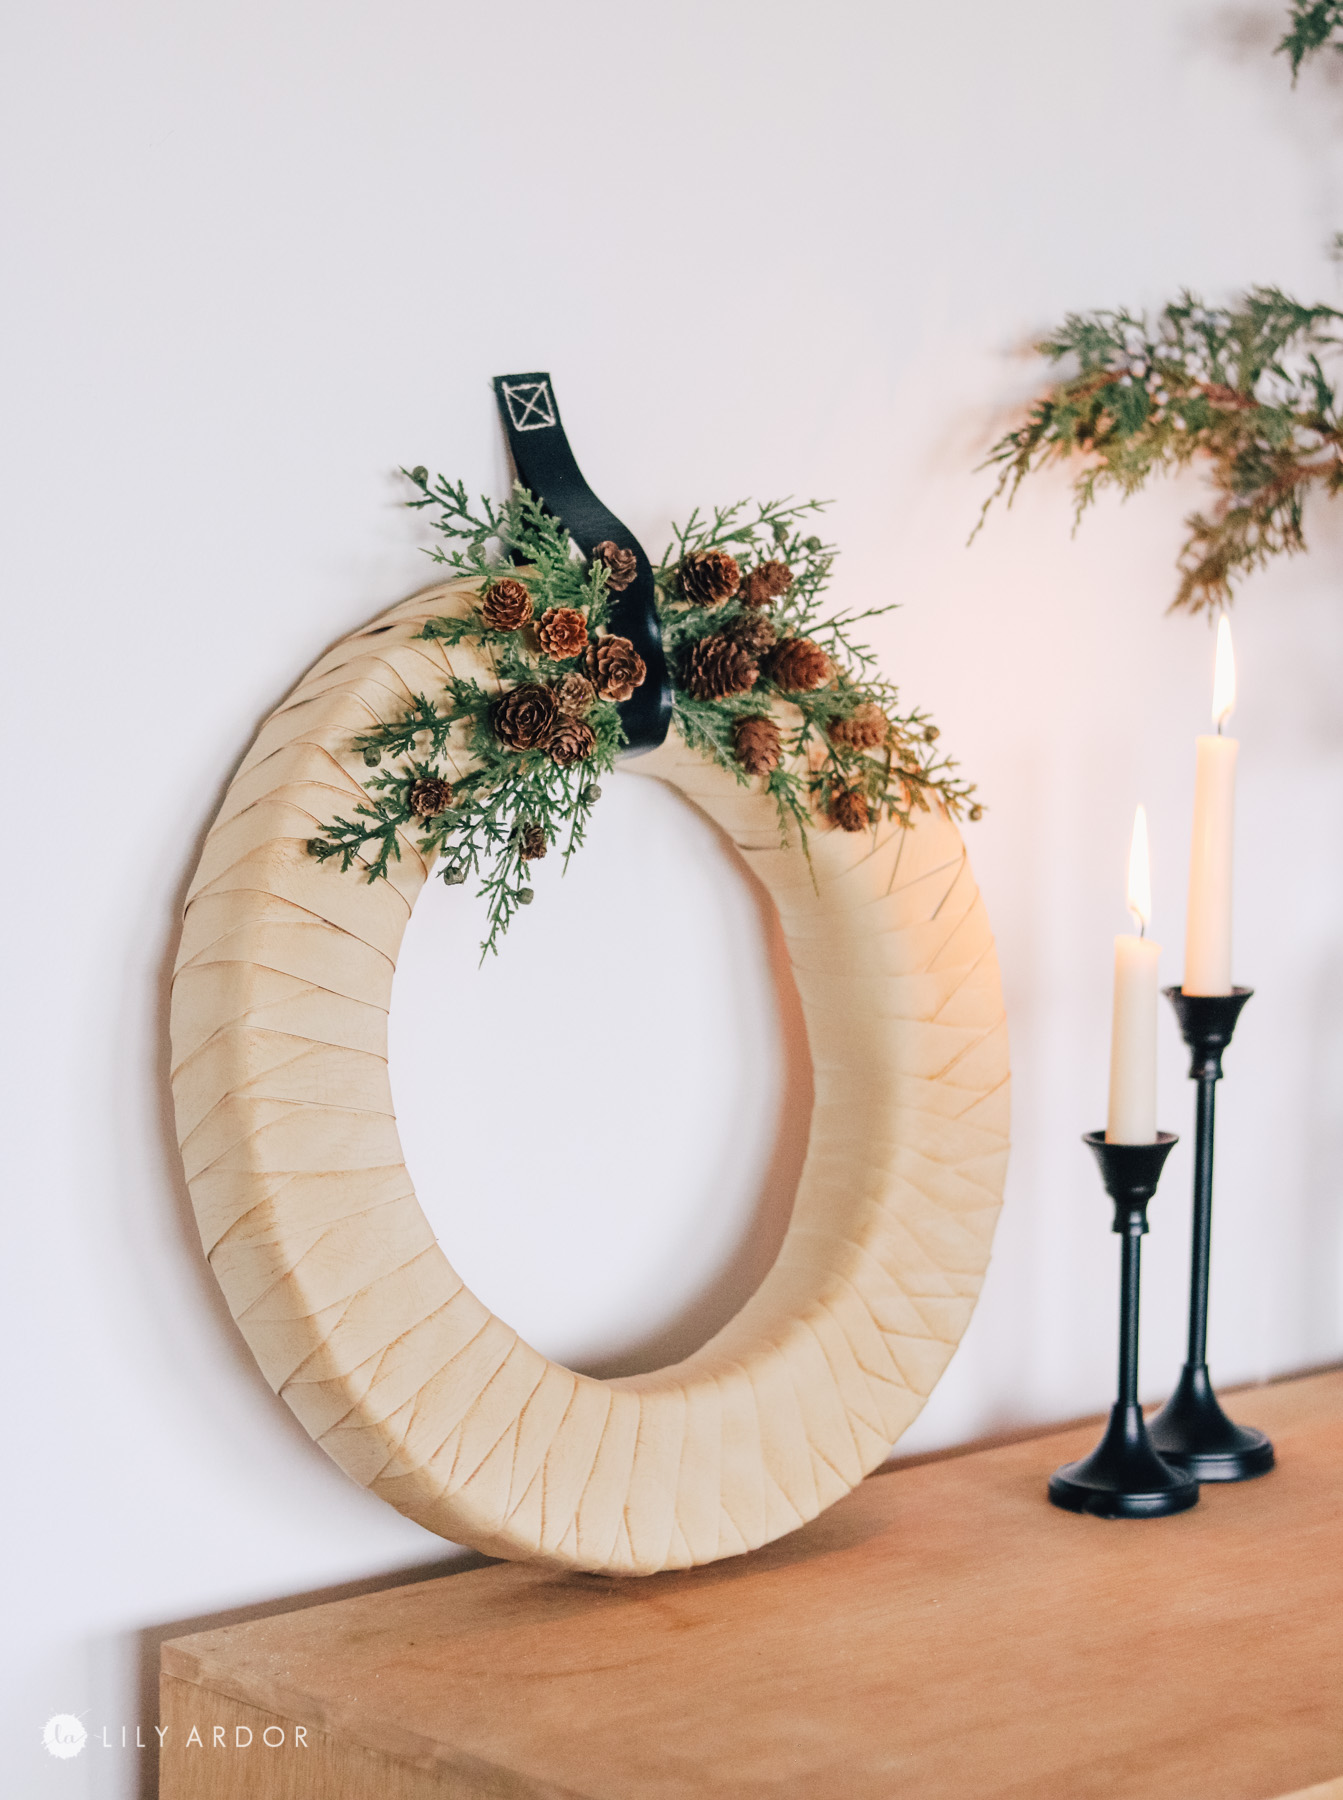
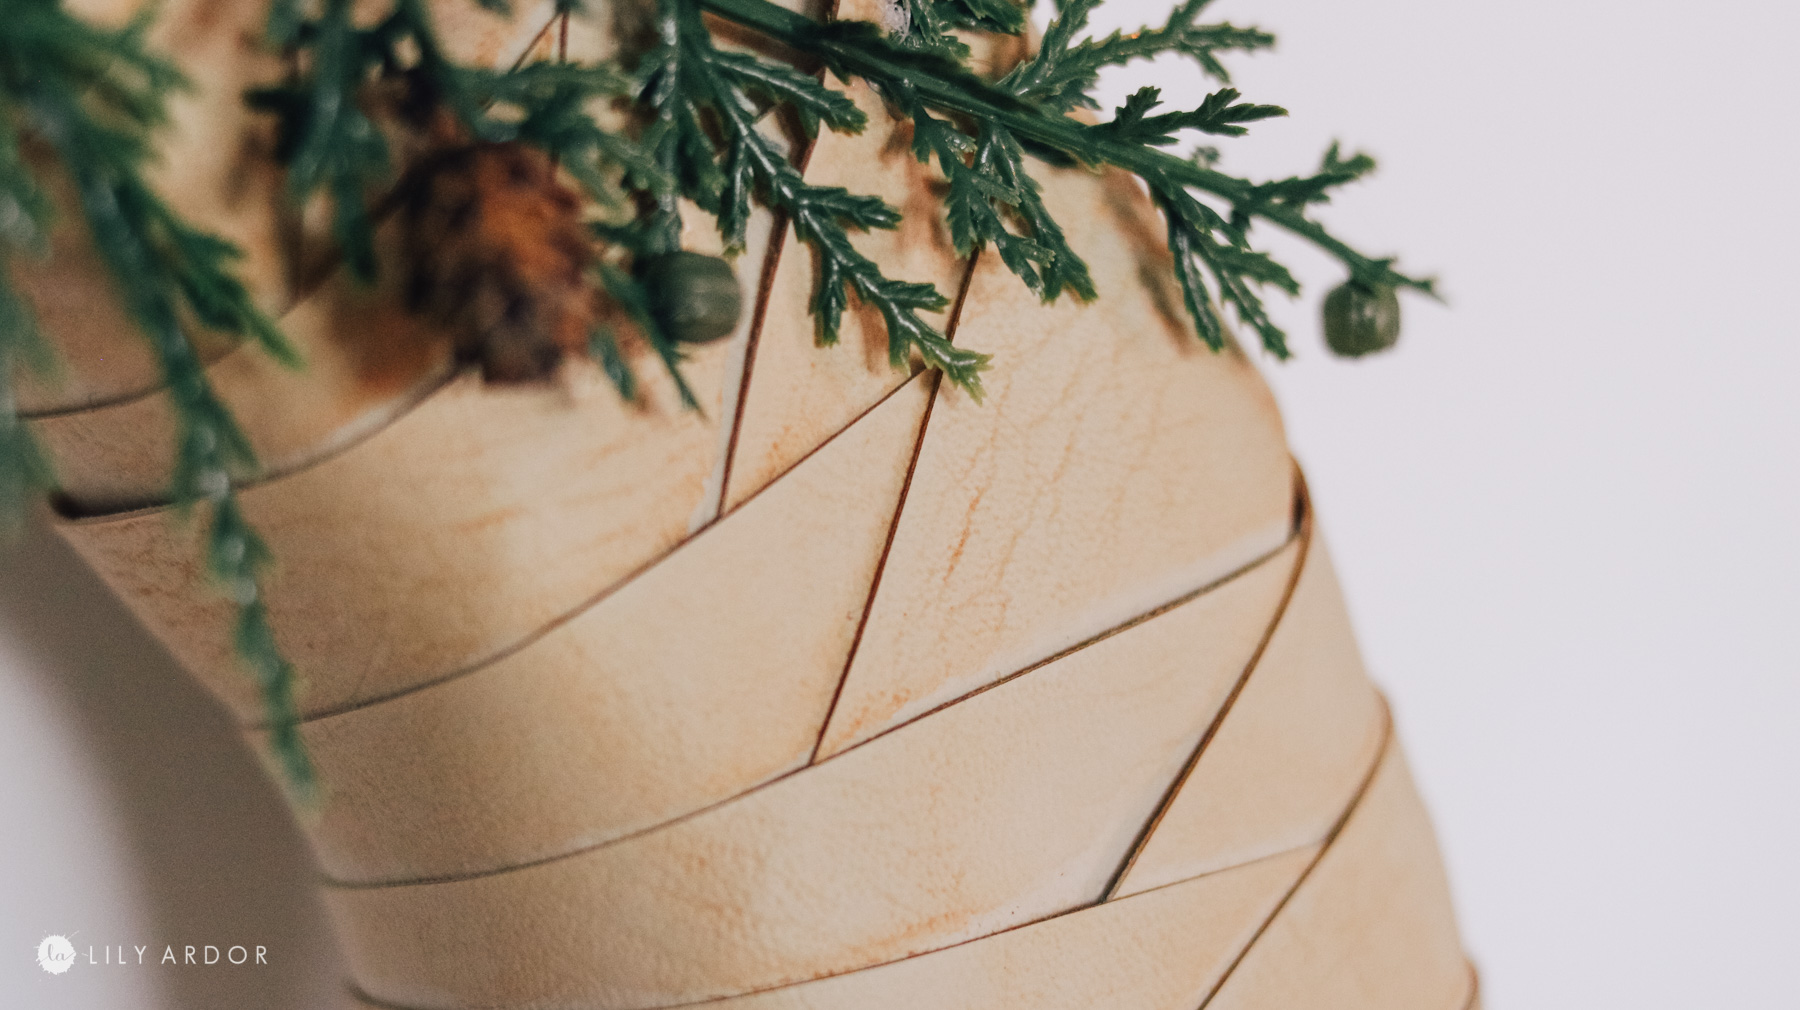
I love how the leather turned out. It’s looks so real with the weathered look.
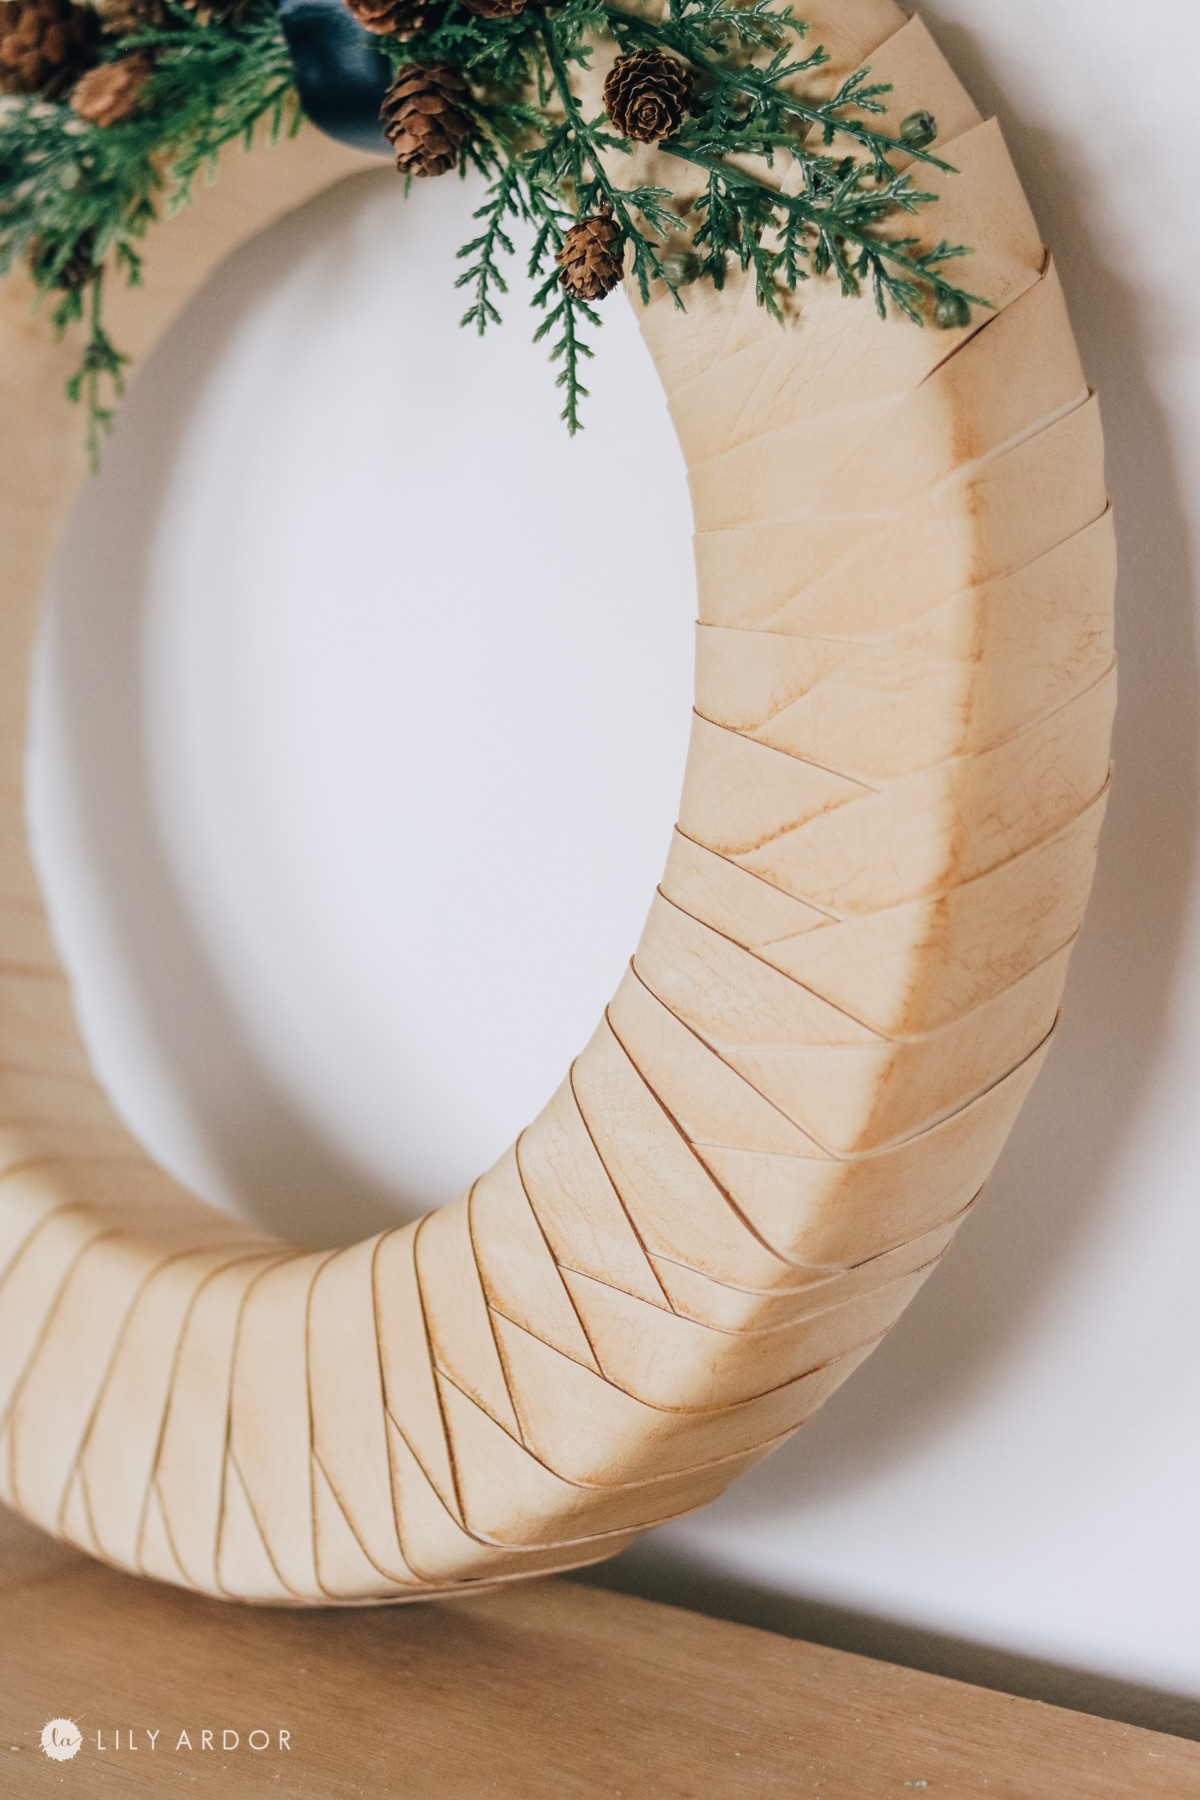
Here’s a close up shot of the leather.
YEP! This is officially my favorite DIY wreath to date. What do you think?
I’m not usually a warm colors kinda gal but, lately I’ve really been loving me some nice neutral tones. To pin point it exactly I think I’m drawn towards boho \ nordic decor. A mix of both or in other words a neutral bohemian pallet.
This leather strap is everything. I’m so glad I decided to add the stitching detail. It gives the wreath that perfect touch.
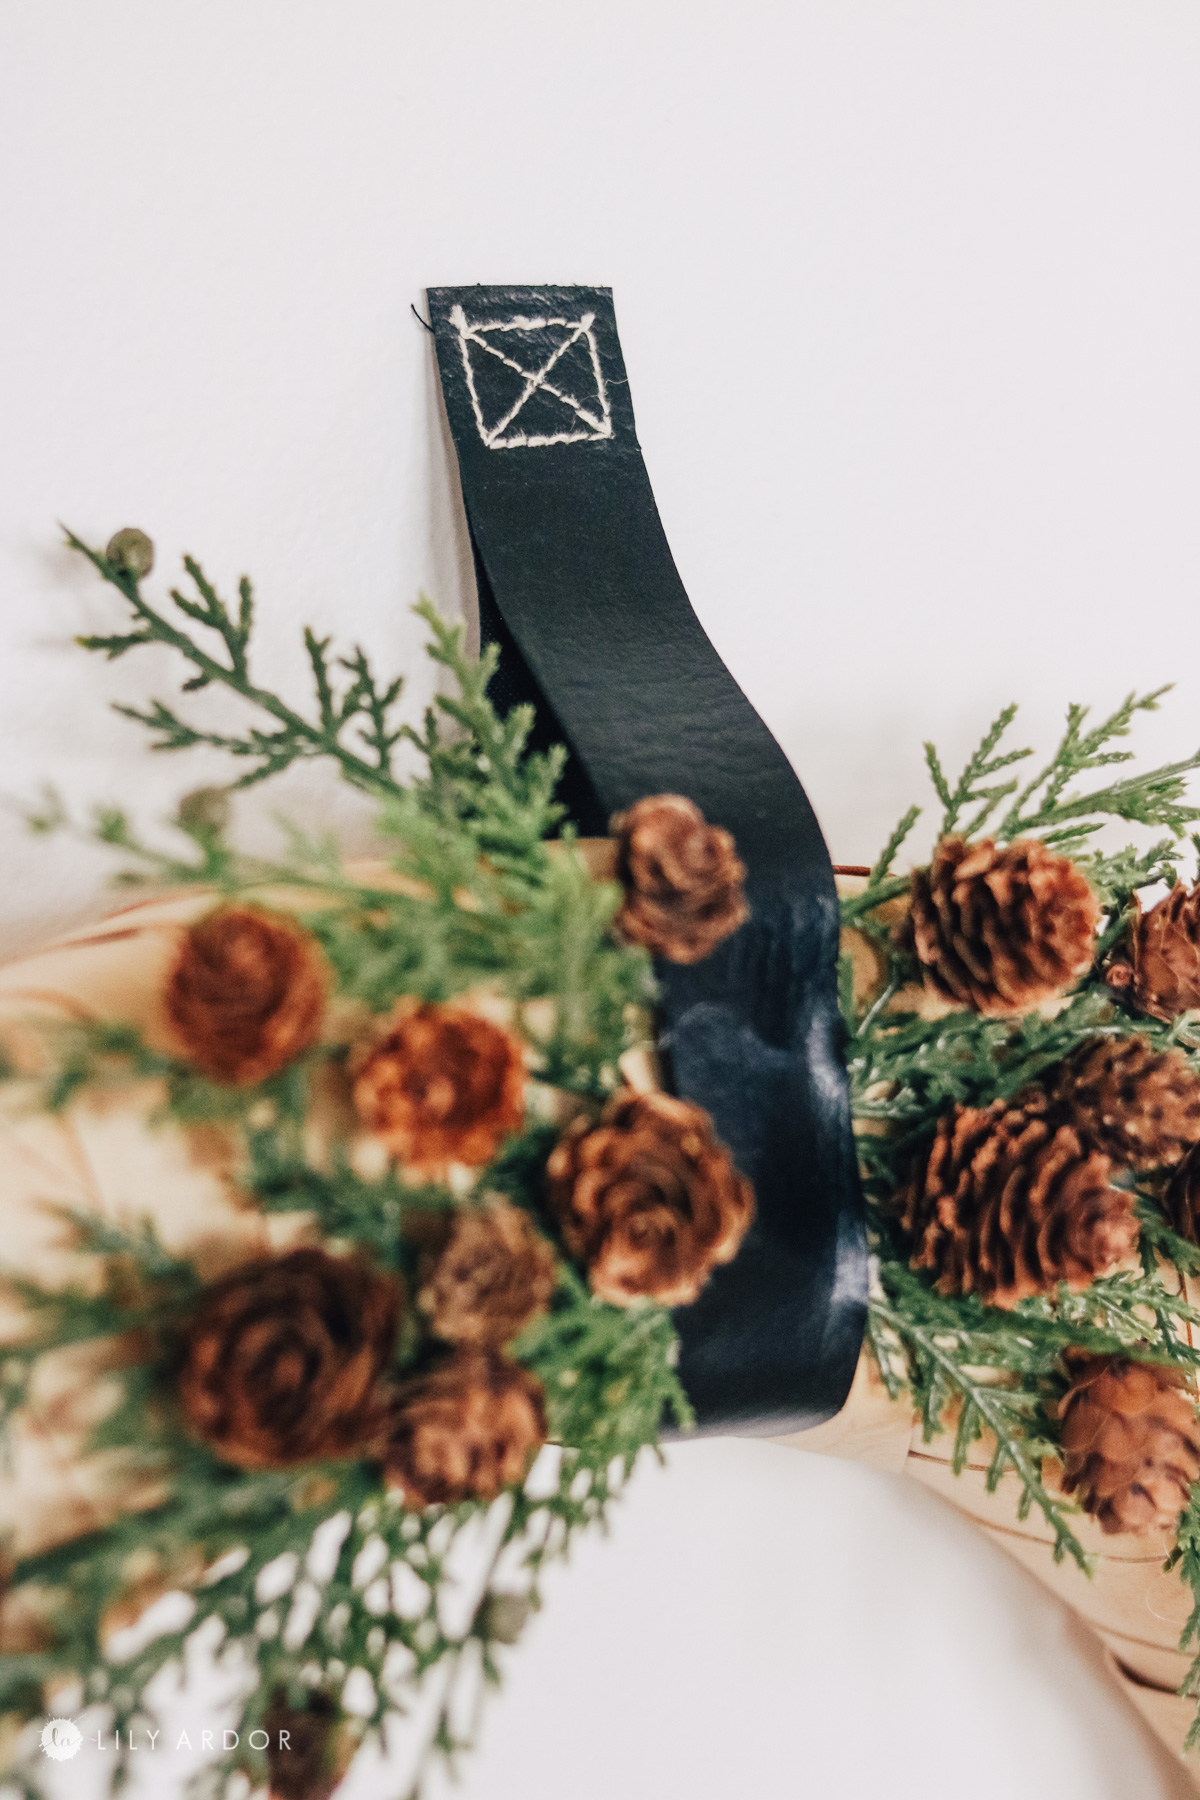
AND those pinecones! They’re so stinking cute! I got a full bag of them from hobby lobby for $5.
That’s it for now! Thanks for stopping by! I’ll see you all next time. Happy crafting everyone. I hope this inspires you to make some Nordic decor for Christmas.
Best Wishes,
Lily
shop supplies on amazon ( note: Not all these supplies are the exact same ones I used. Some are are just similar ones I’ve found on amazon)


