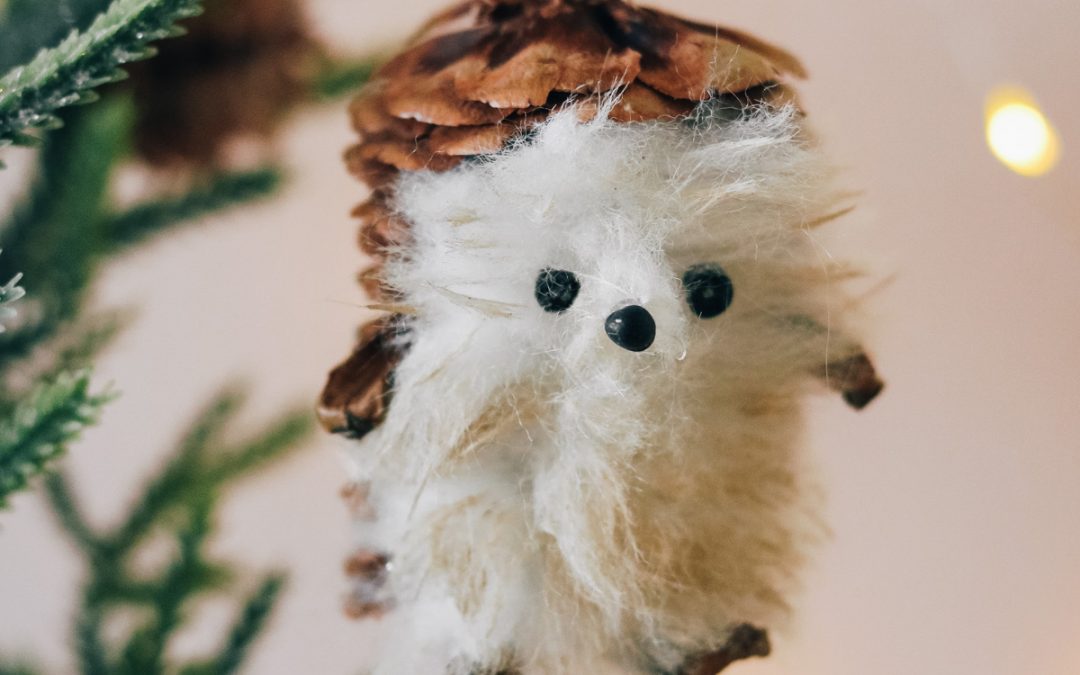
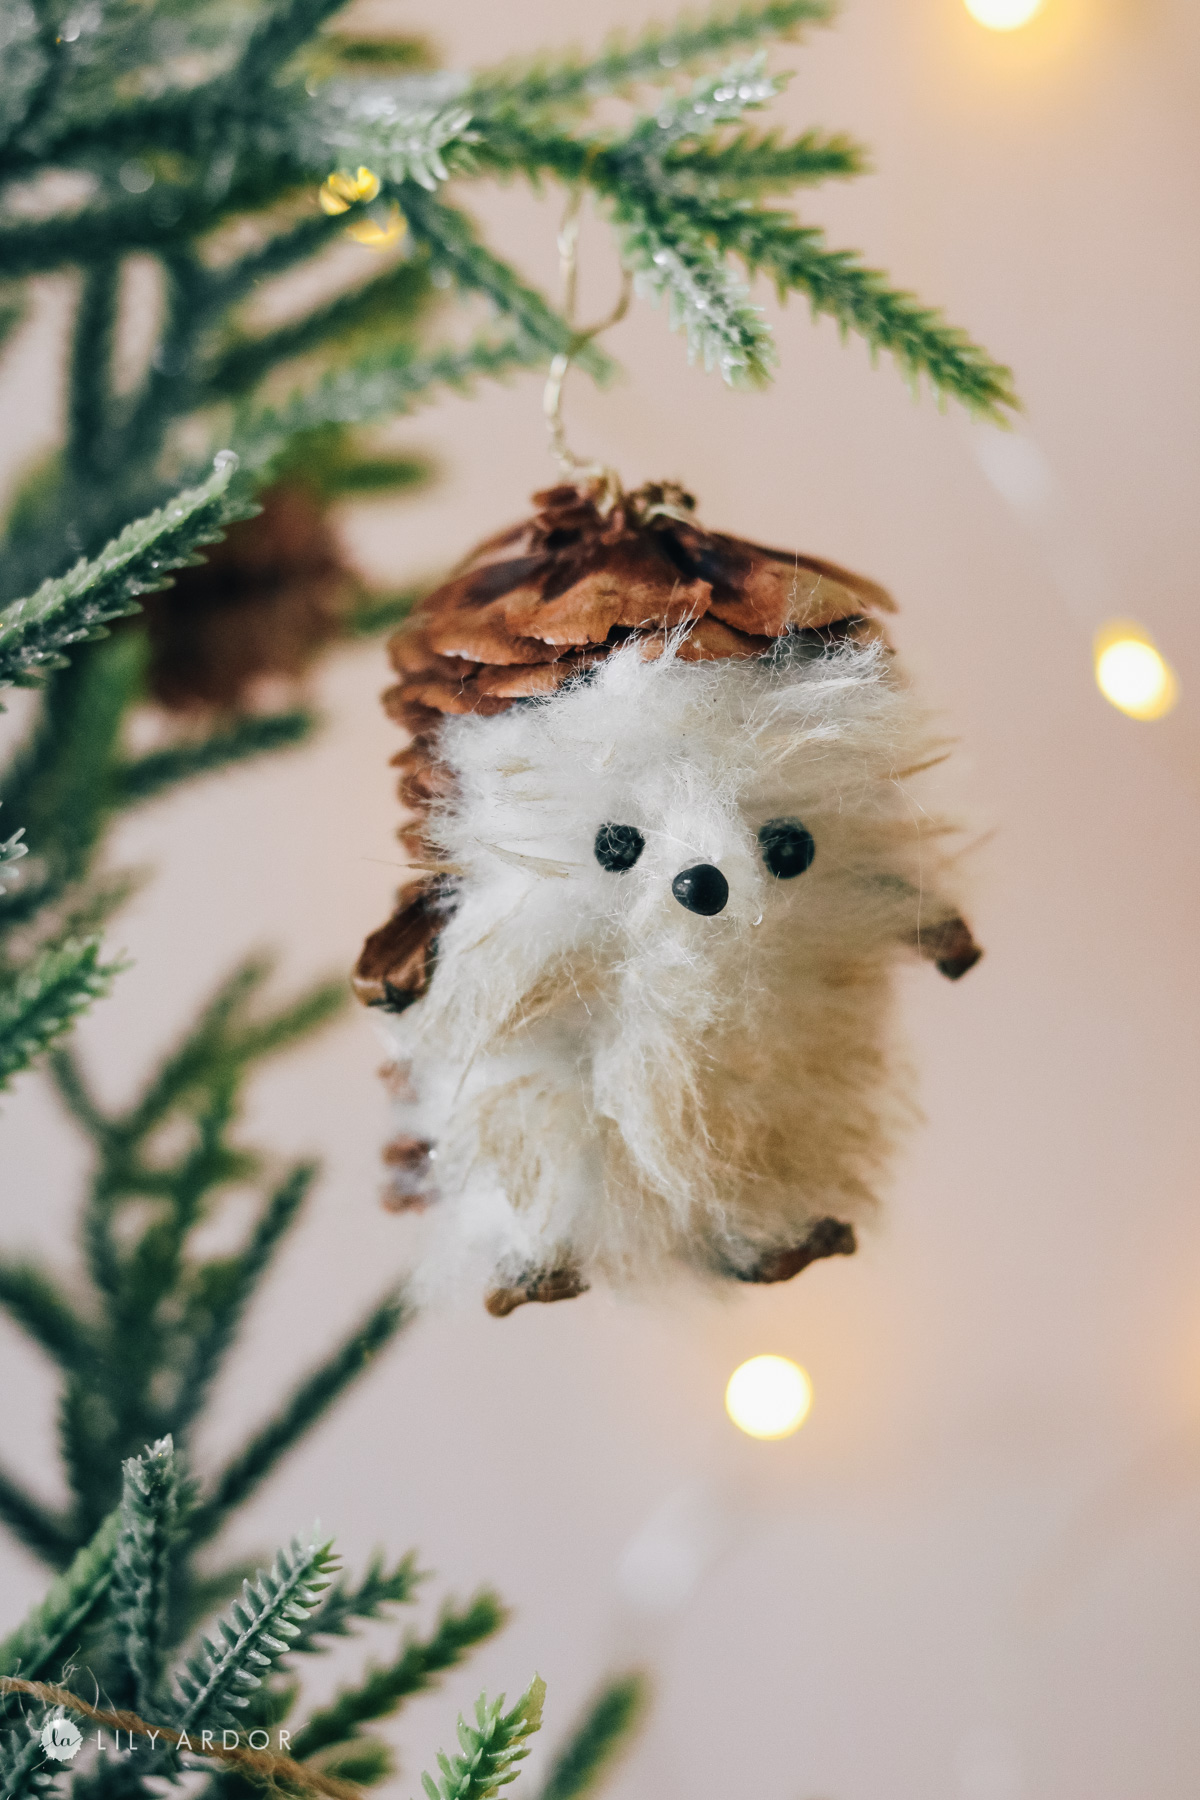
Hi Everyone, meet Mr.Spikes. He’s cute and fluffy and loves to hang out on our Christmas tree.
Today I’ll be sharing how to make your own mini hedge hog ornament from pinecones .
Time needed:
About 20 minutes.
Supplies:
- Tiny piece of white faux fur
- Pine cone
- Wire cutters
- Tan acrylic paint and water
- Brush
- Play dough, or porcelain clay to make eyeballs and nose
- Hot glue and glue gun
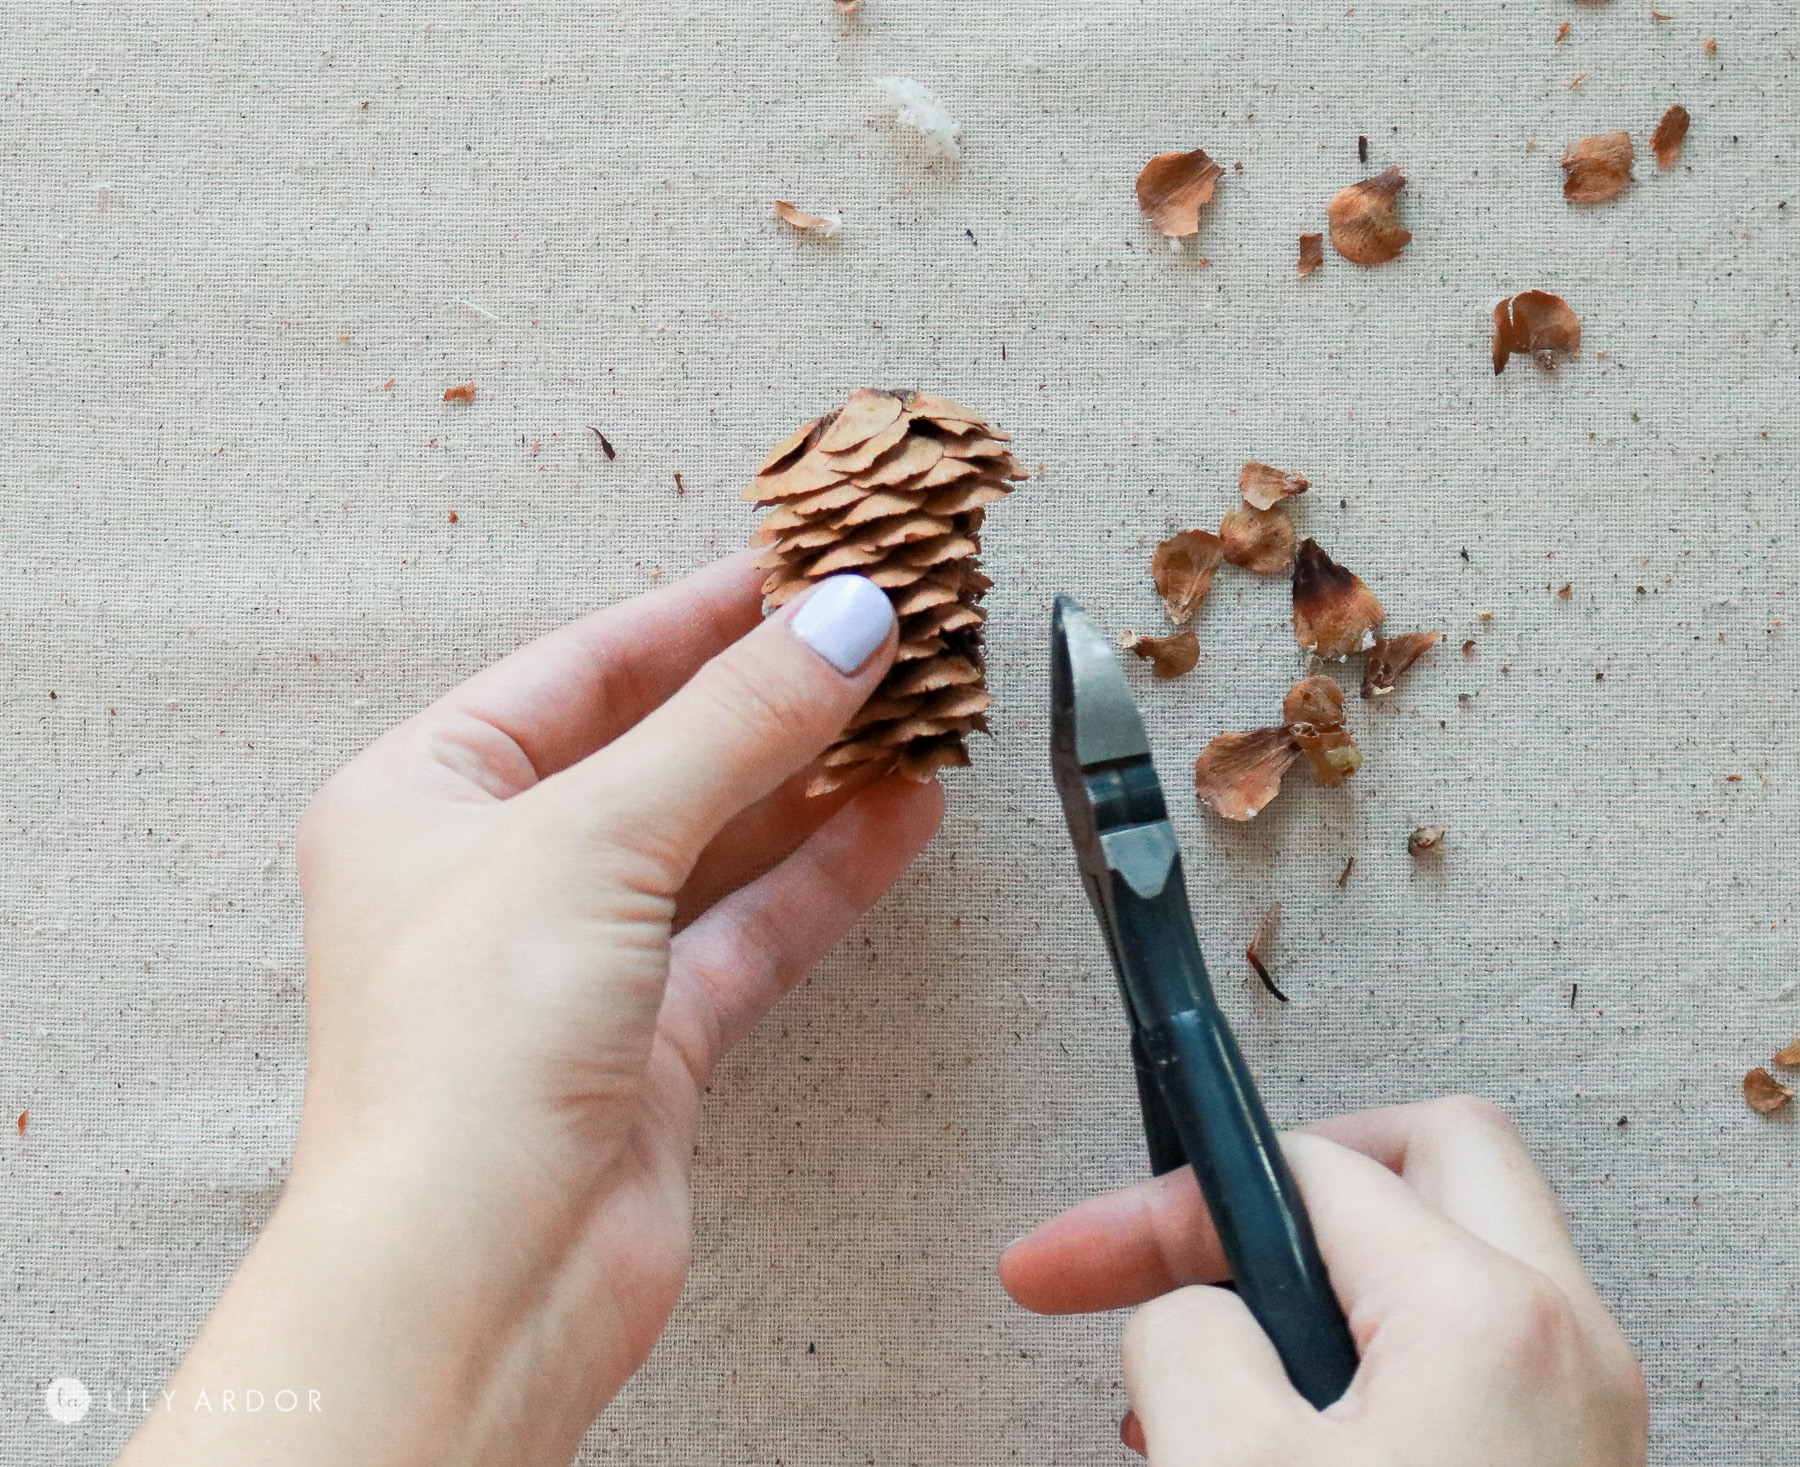
Step 1: Shaping the pine cone!
I first started off by shaping the pine cone. I cut off the top of the pine cone so it’s not too pointy and removed about 3/4 of an inch off the bottom to shorten it. This made it about 1.5 inches in length.
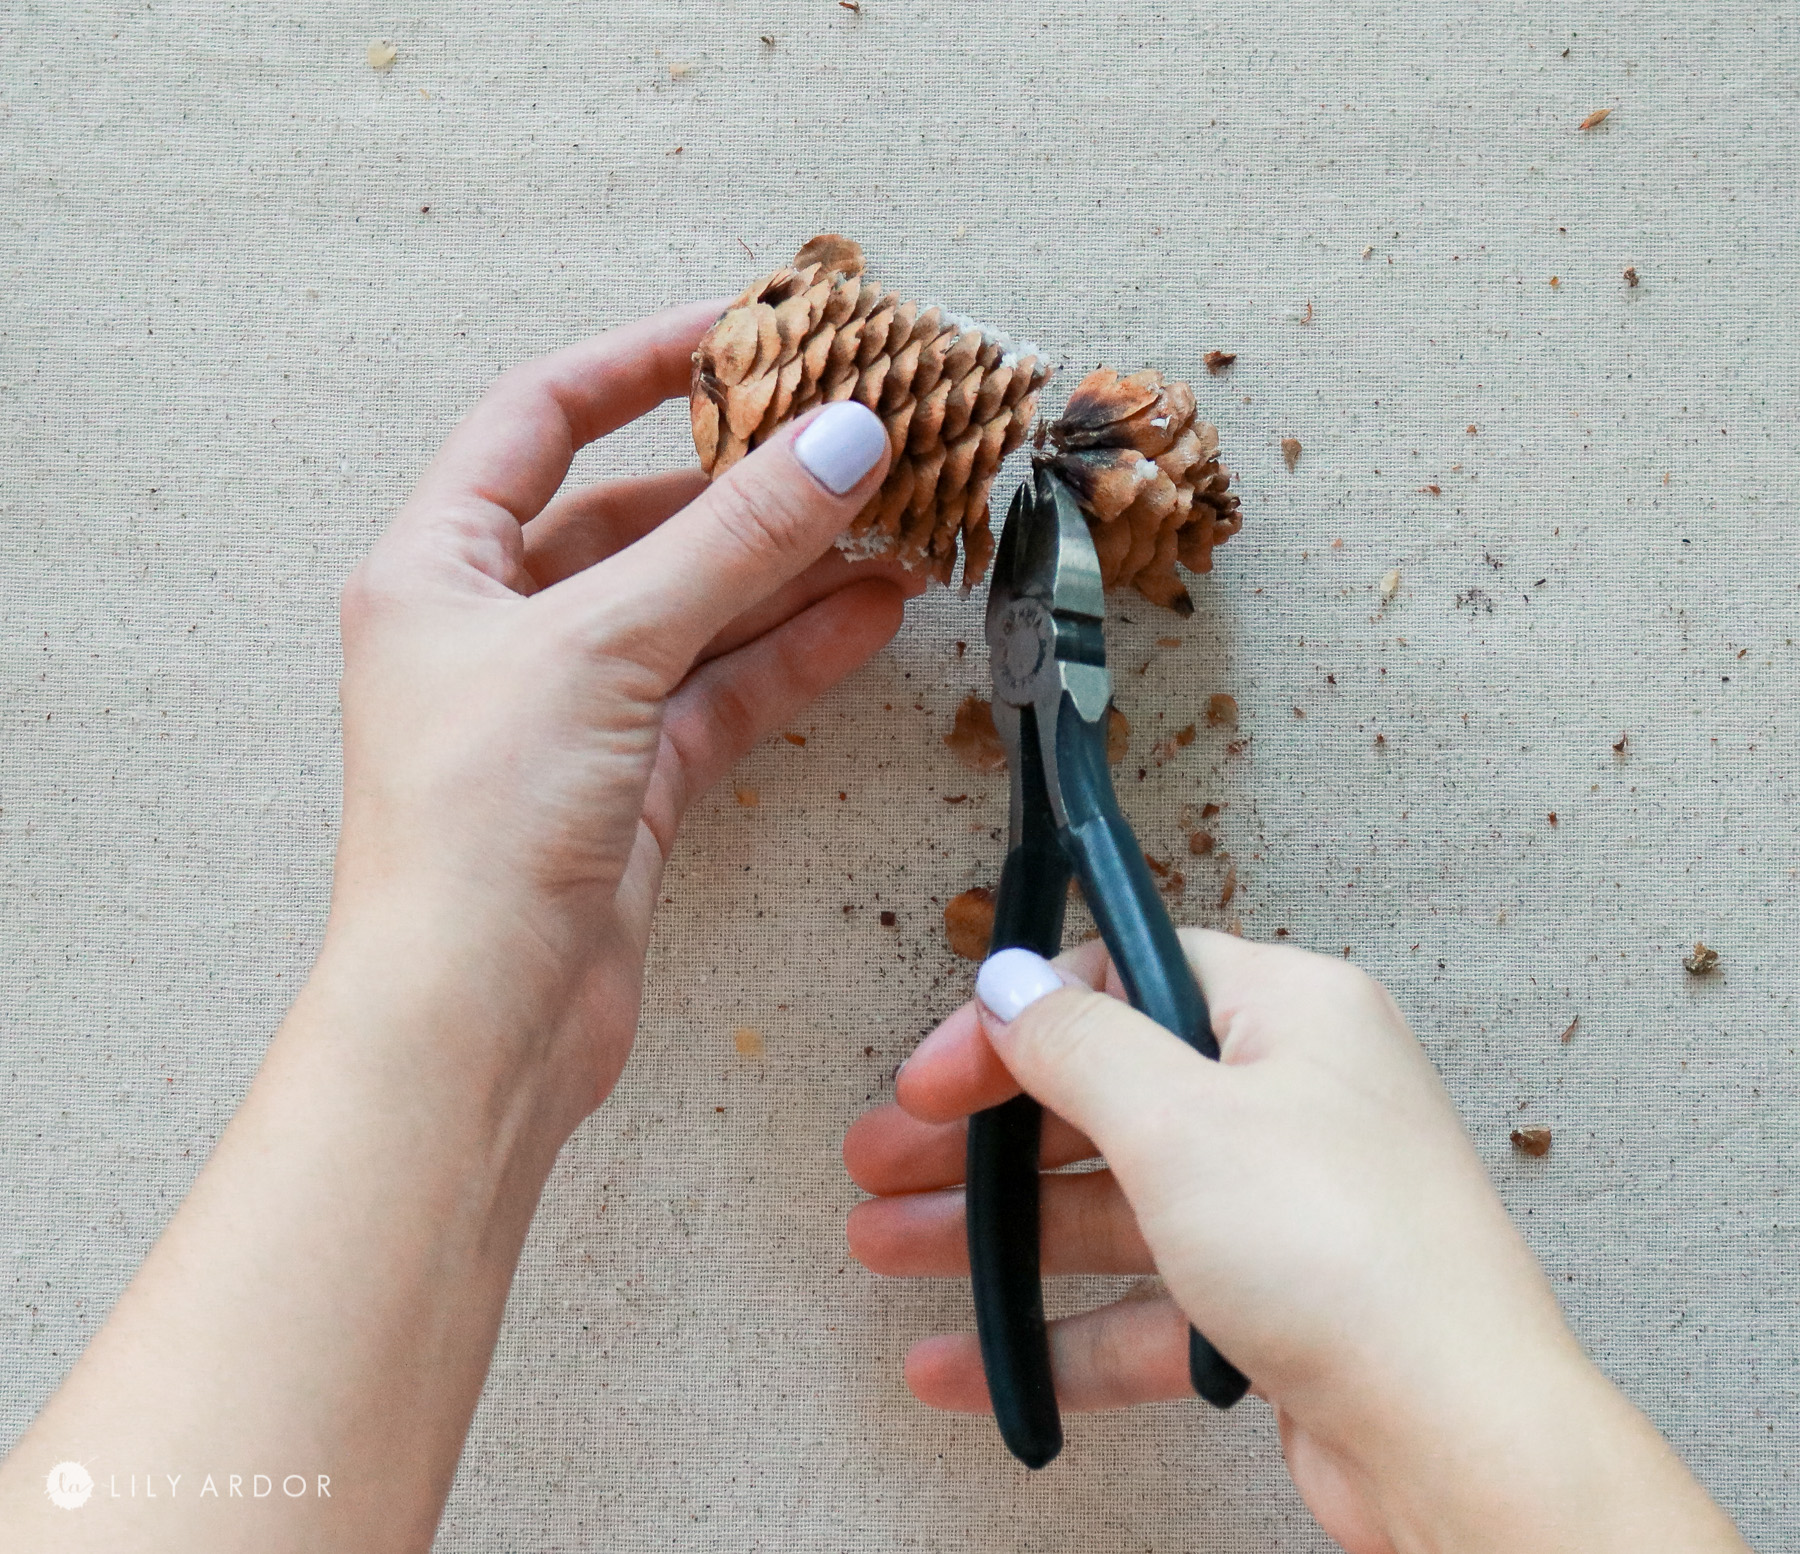 I then used my wire cutters and removed pine scales to flatted one side of the pine cone leaving a bit of scales at the top for his hair..
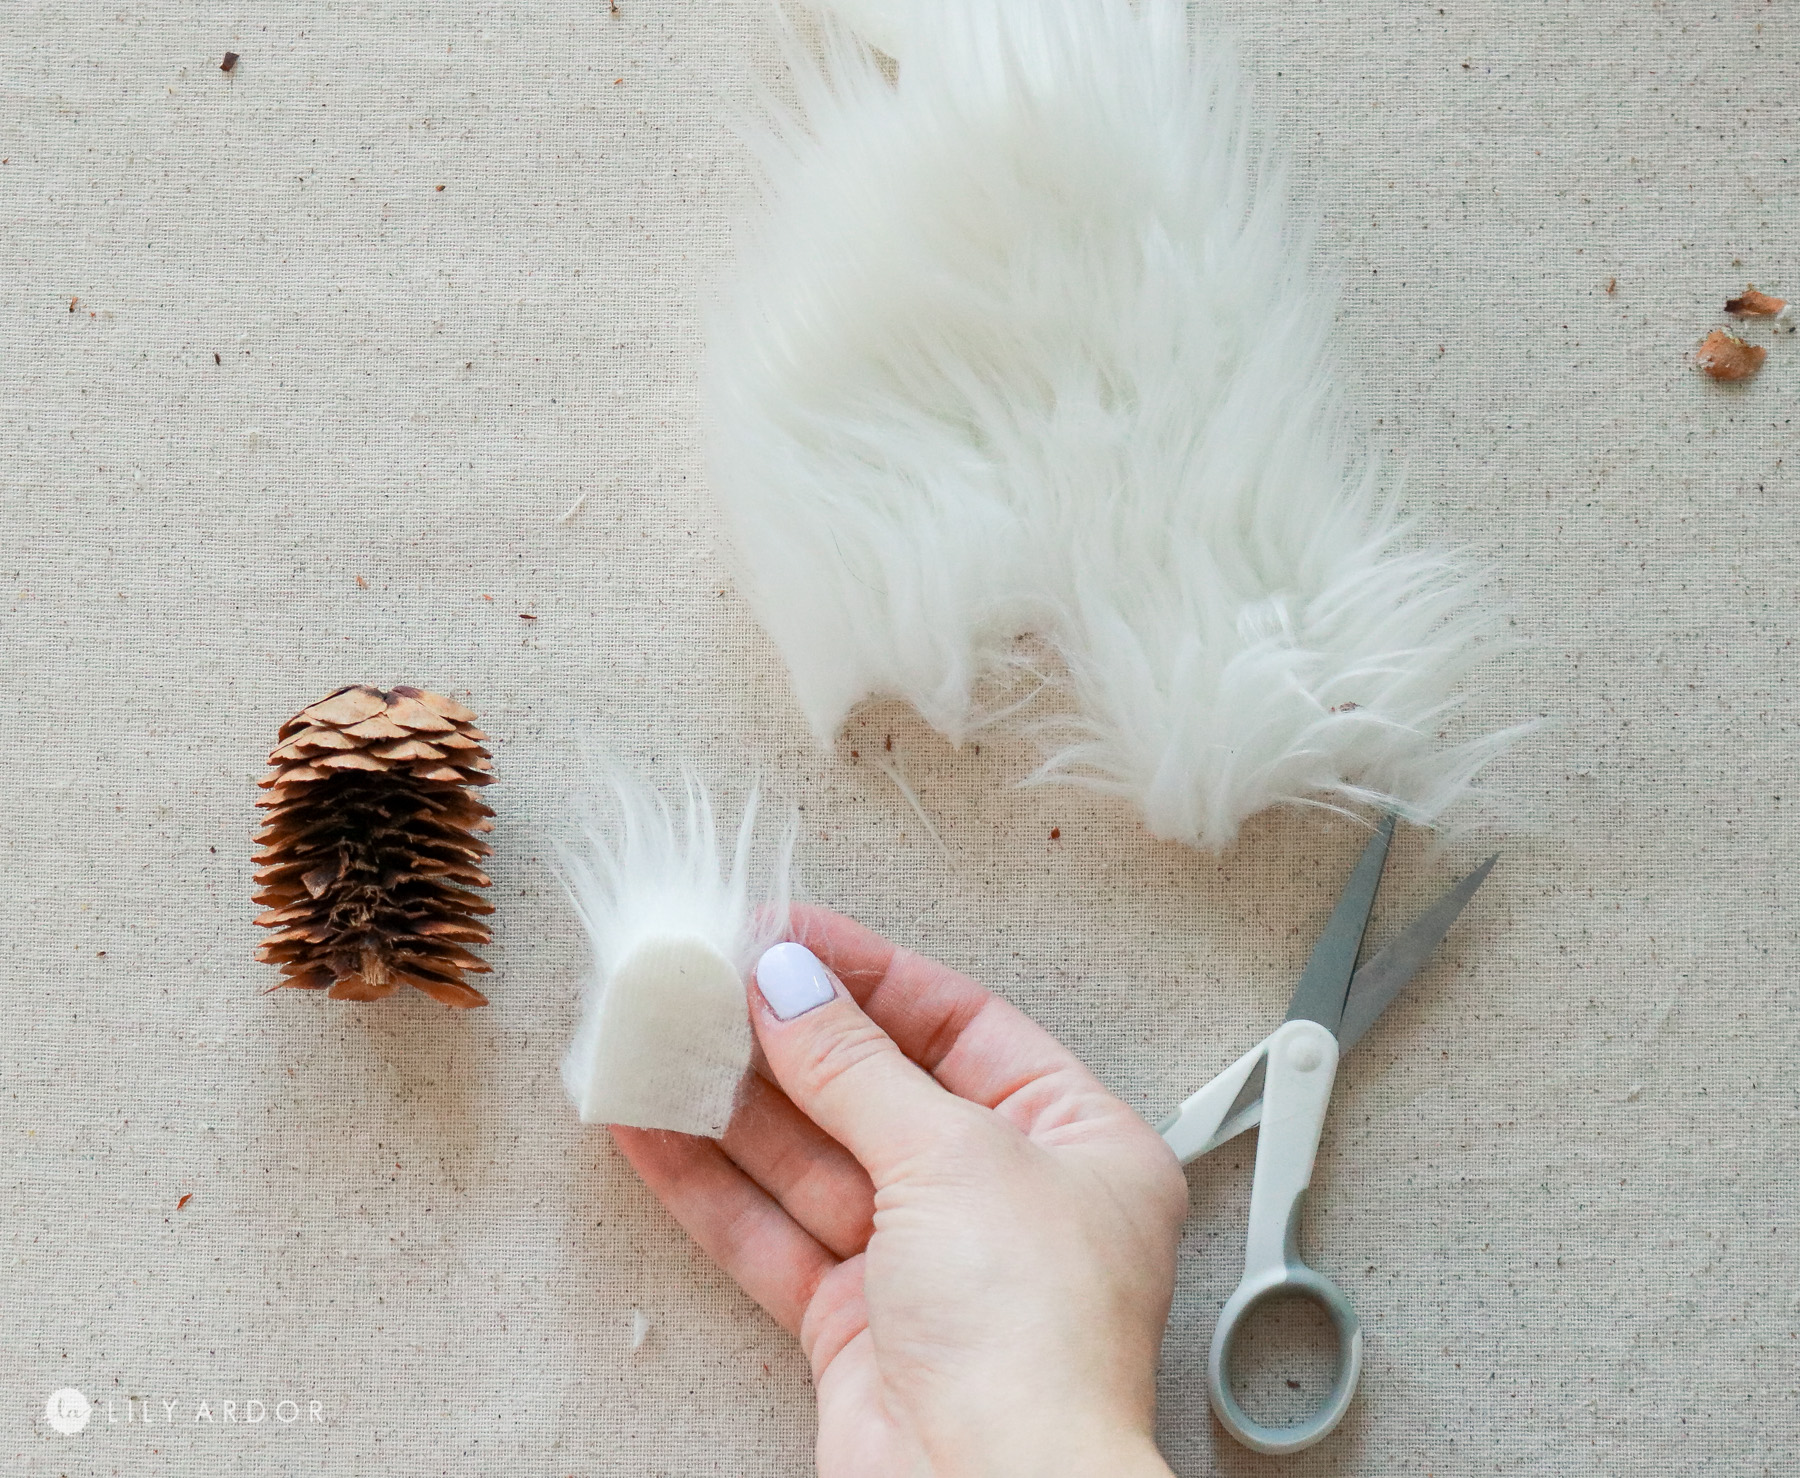
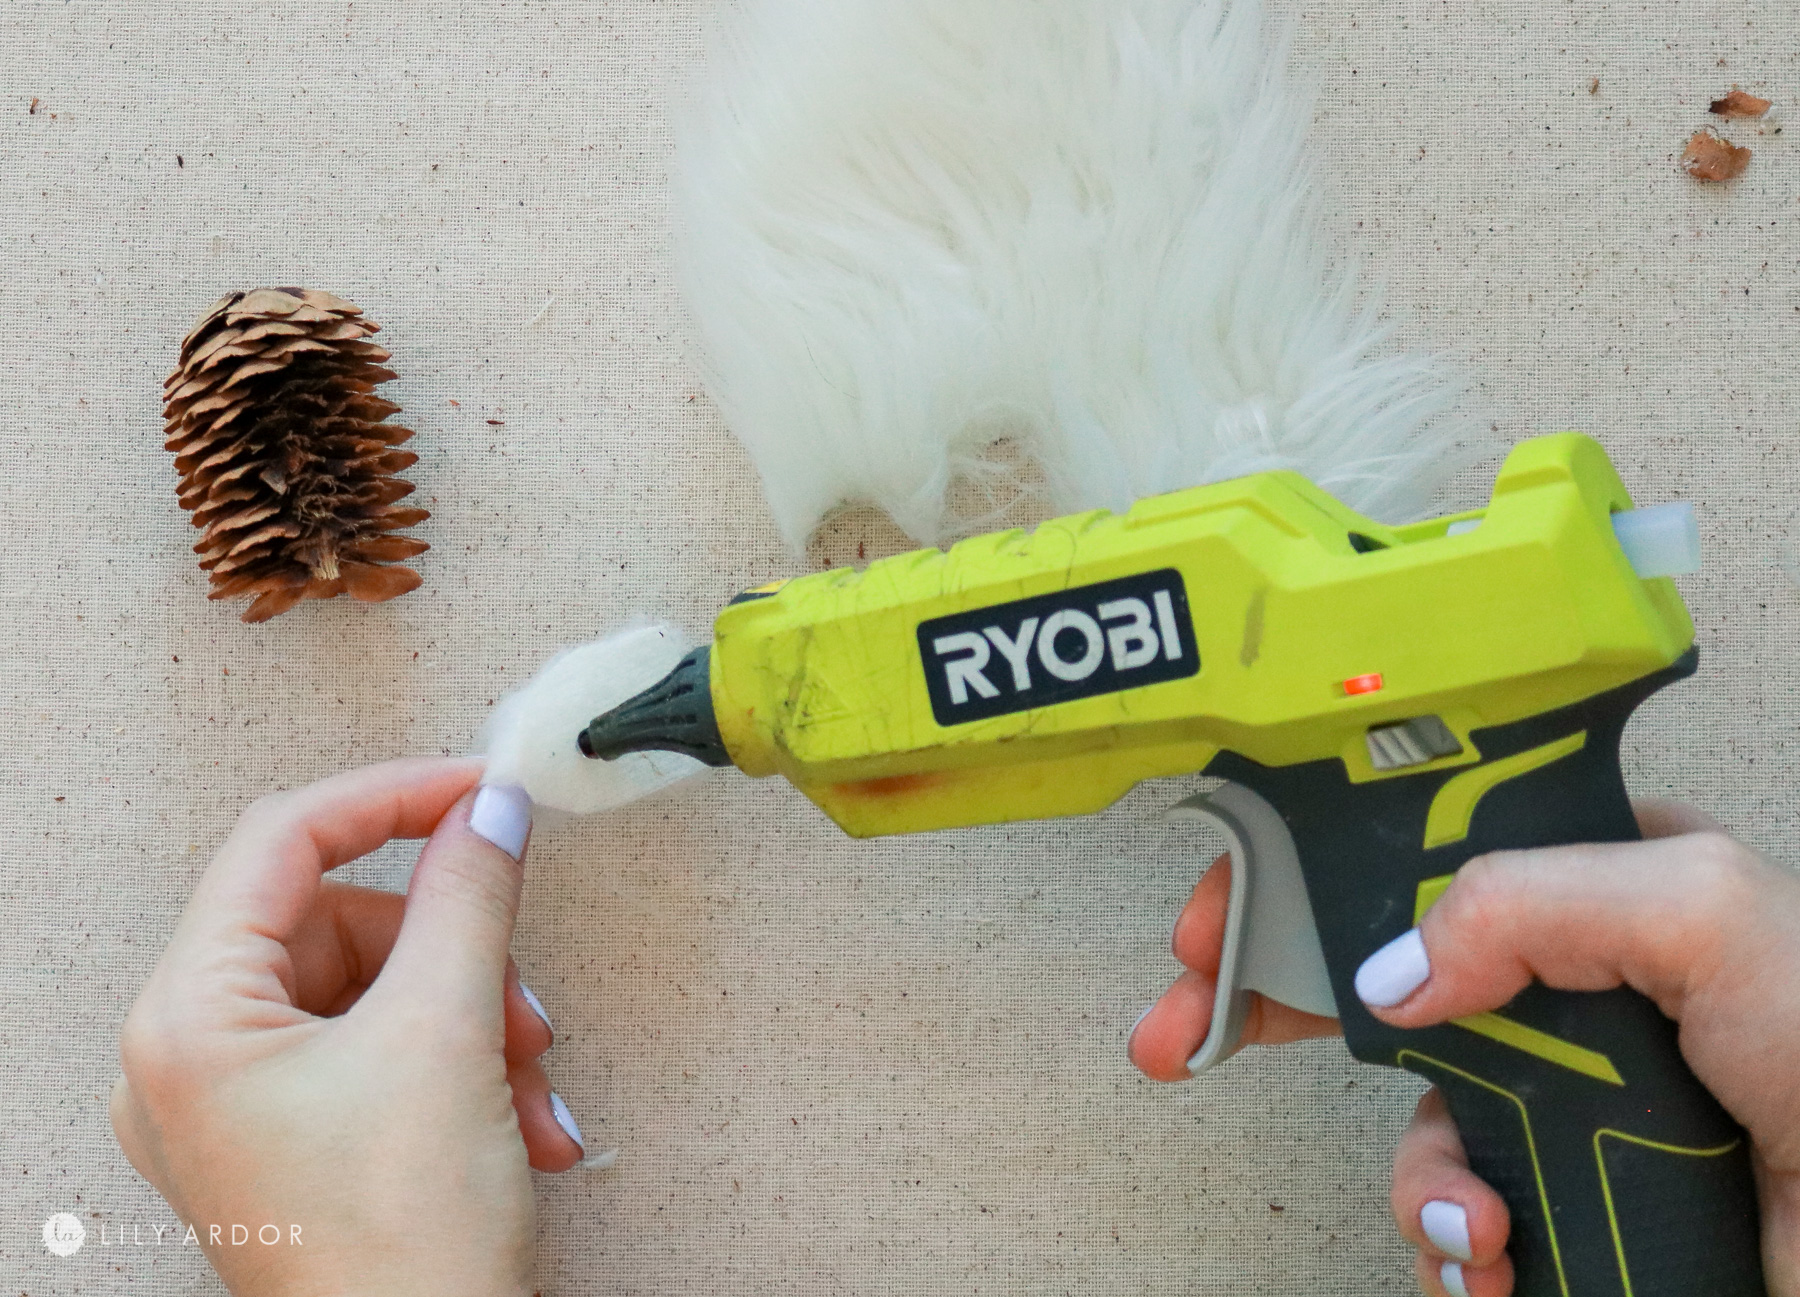
Step 2: Adding the fur!
Next I cut out a longish dome shape out of the faux fur and hot glued it onto the area that I had flattened out.

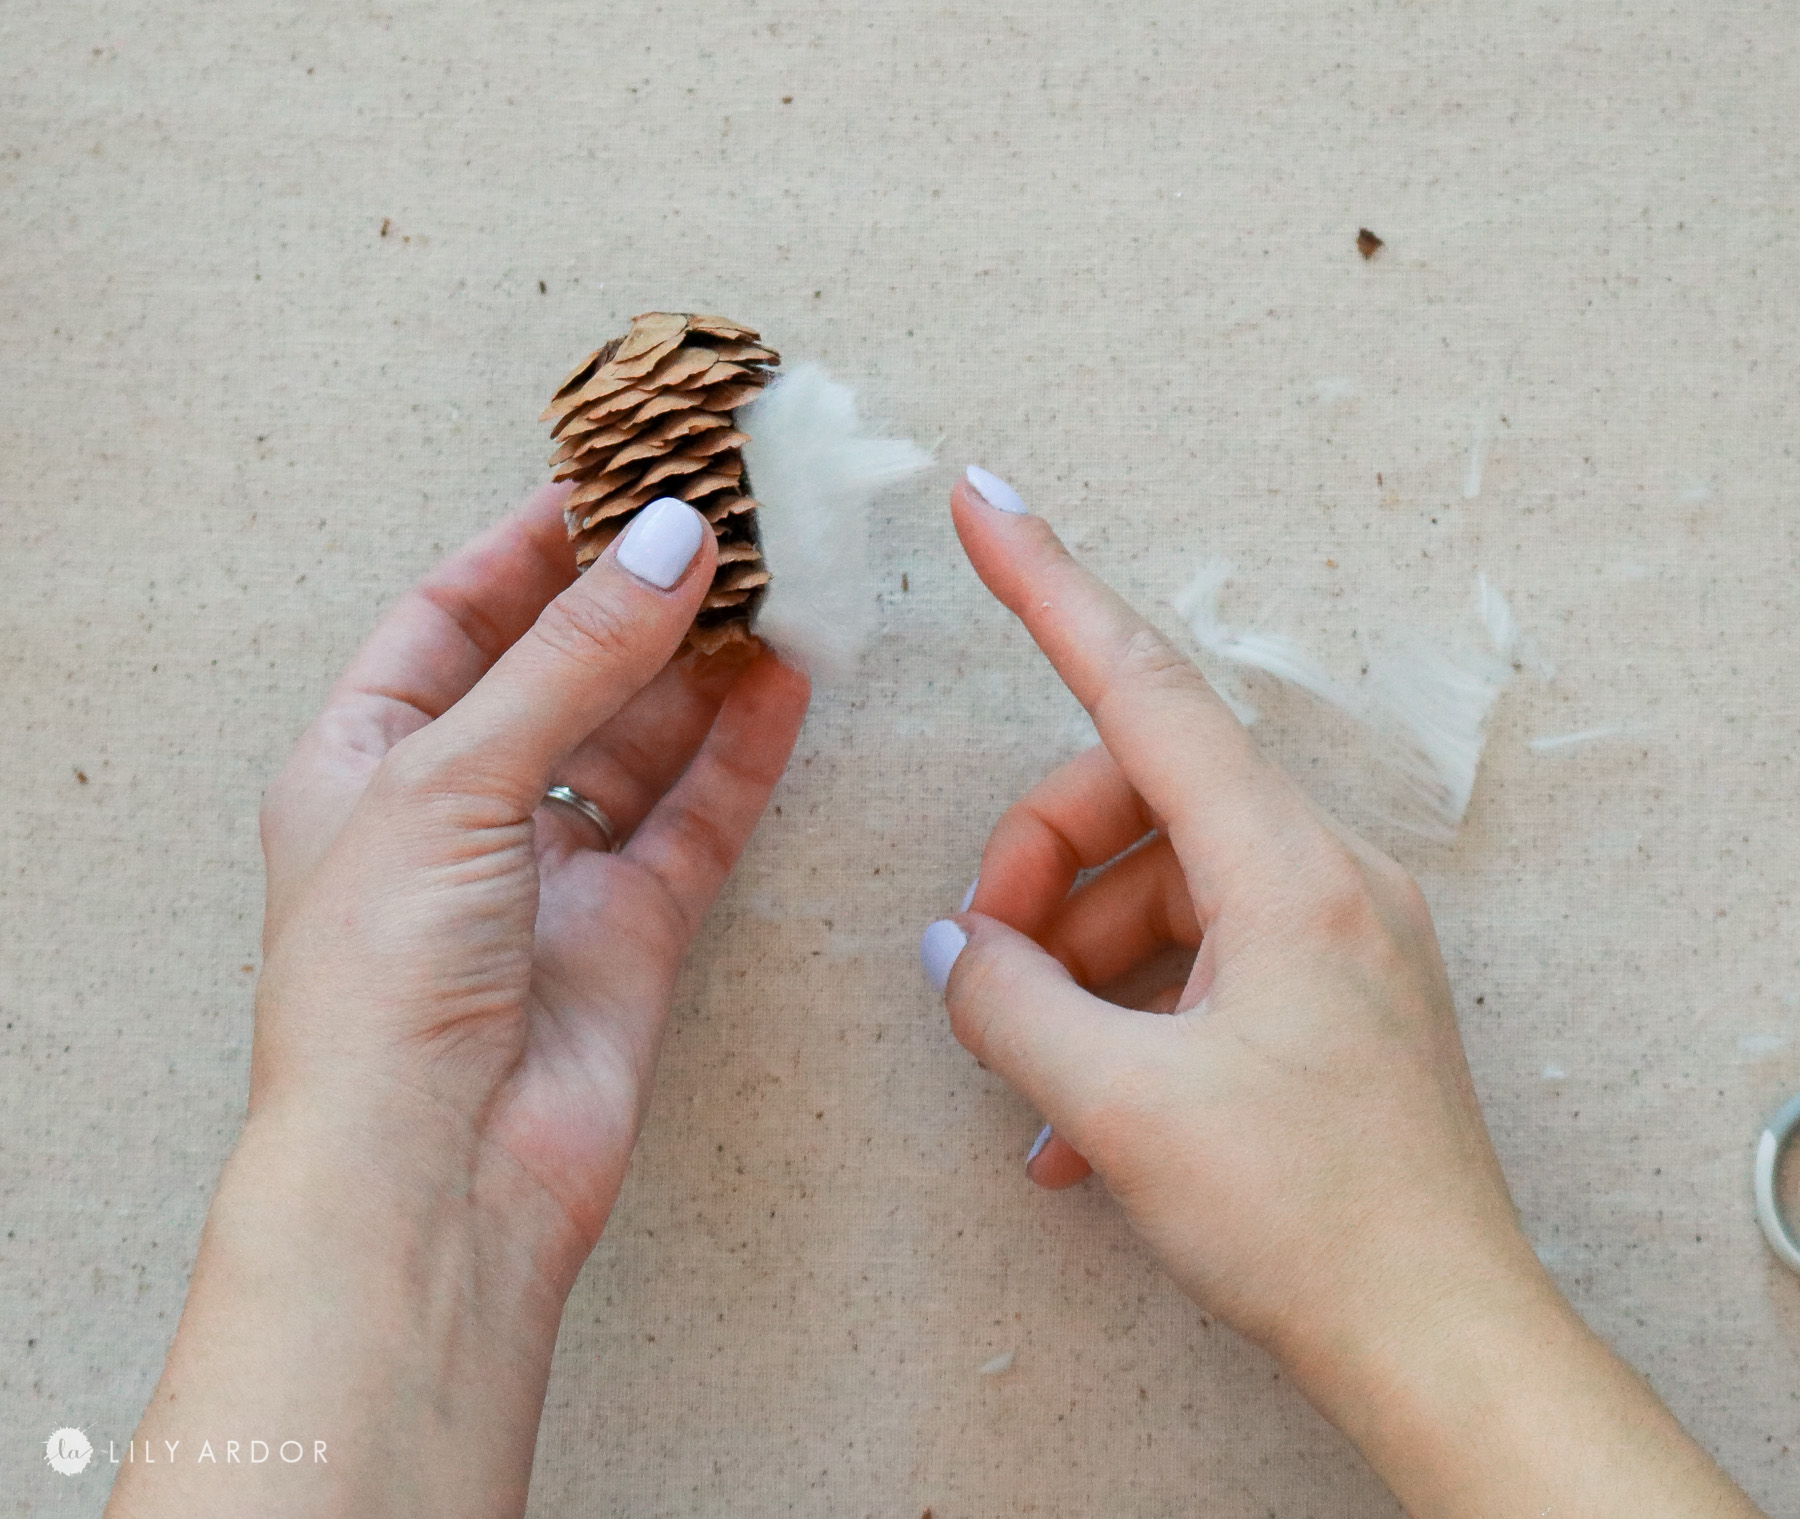
Step 3: Coloring the fur and trimming it!
I separated the fur into three parts and trimmed the top and bottom shorter and left the middle section a tiny bit longer for the nose. 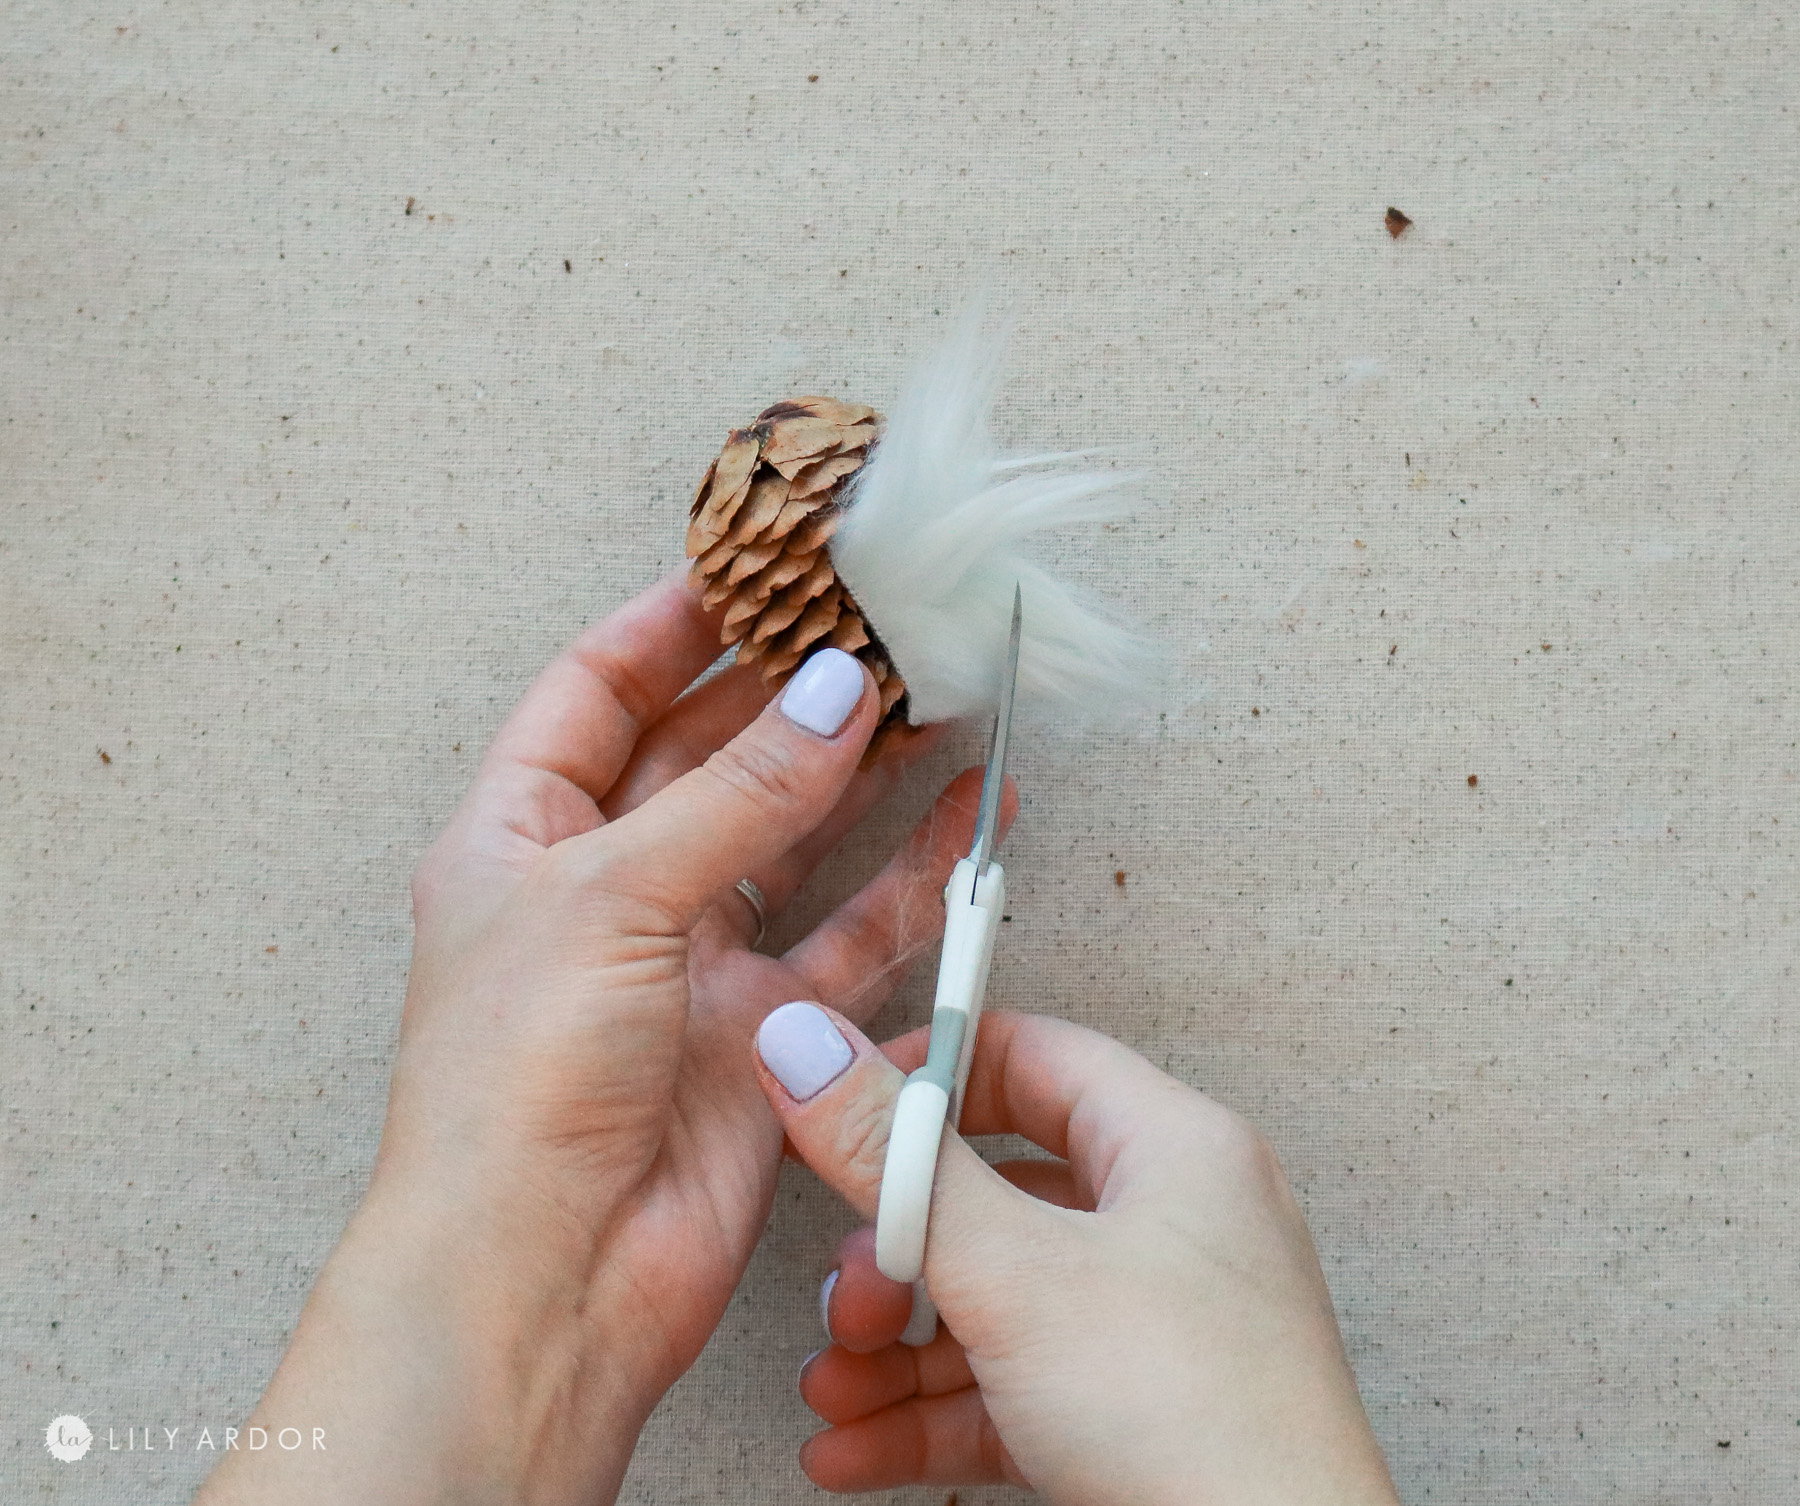
Next I made some very diluted tan water with acrylic paint and gently applied some onto the fur with brush. It’s important not to add too much paint as it will make the fur clumpy.
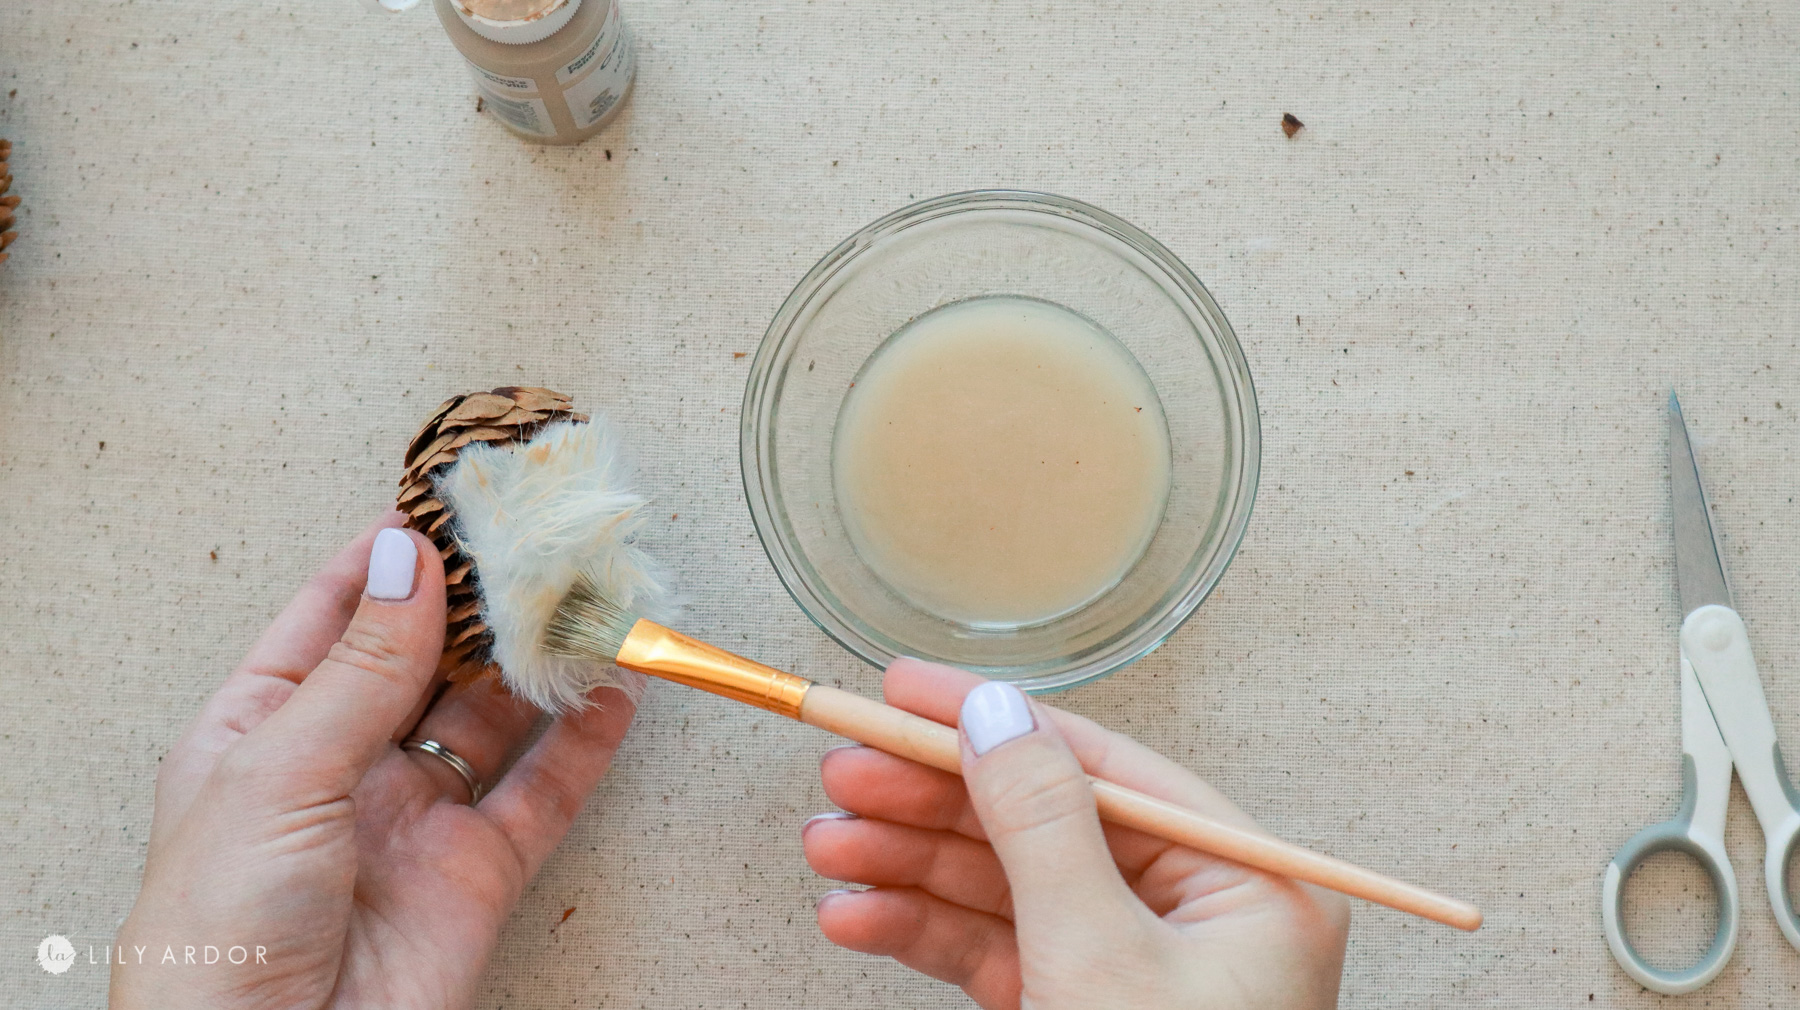
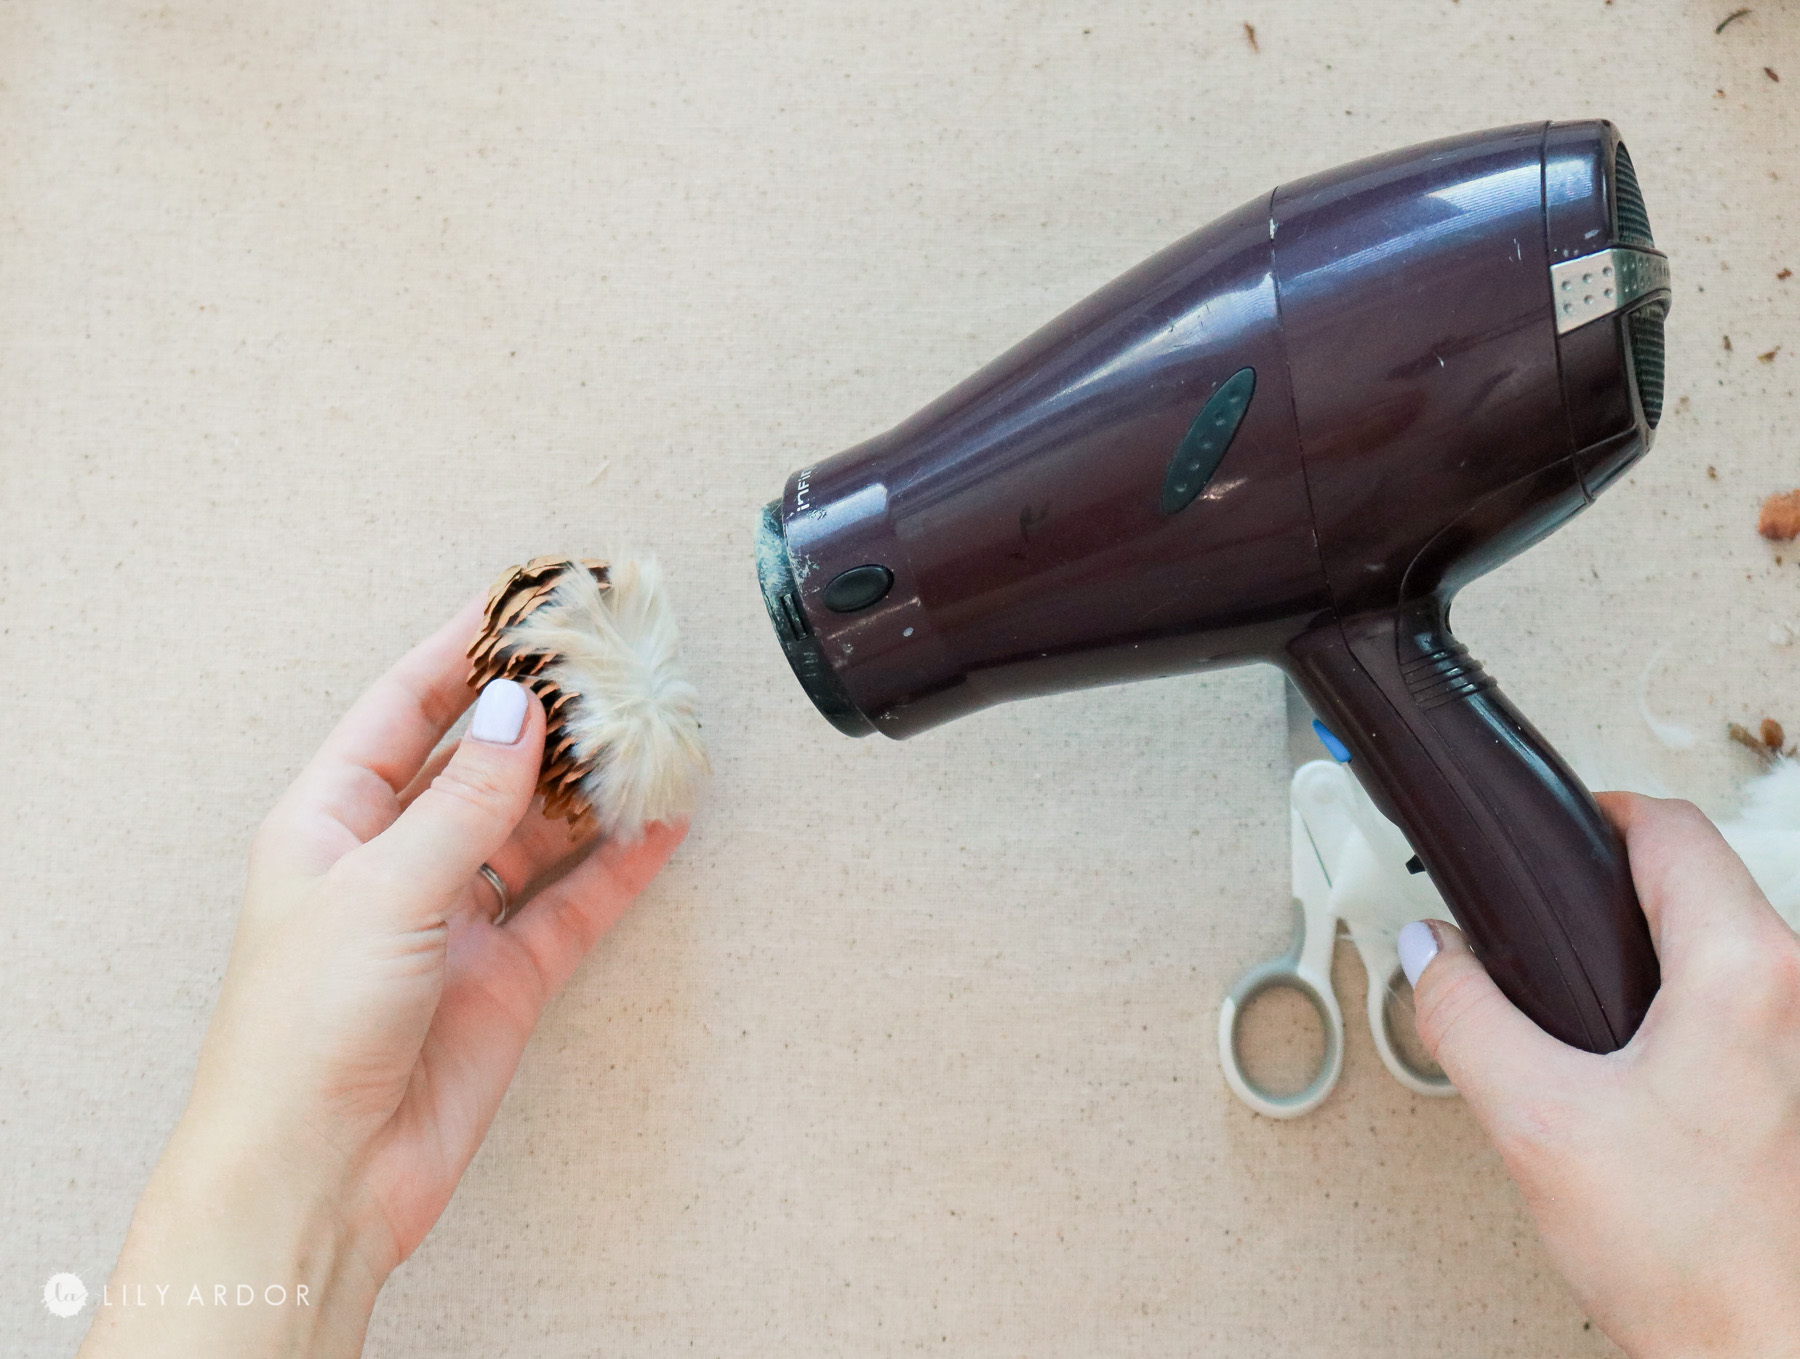
Once you’ve colored it it’s time to dry it. Use a hair dryer to dry the fur on the hedge hog and you’re ready for the eyes and nose.
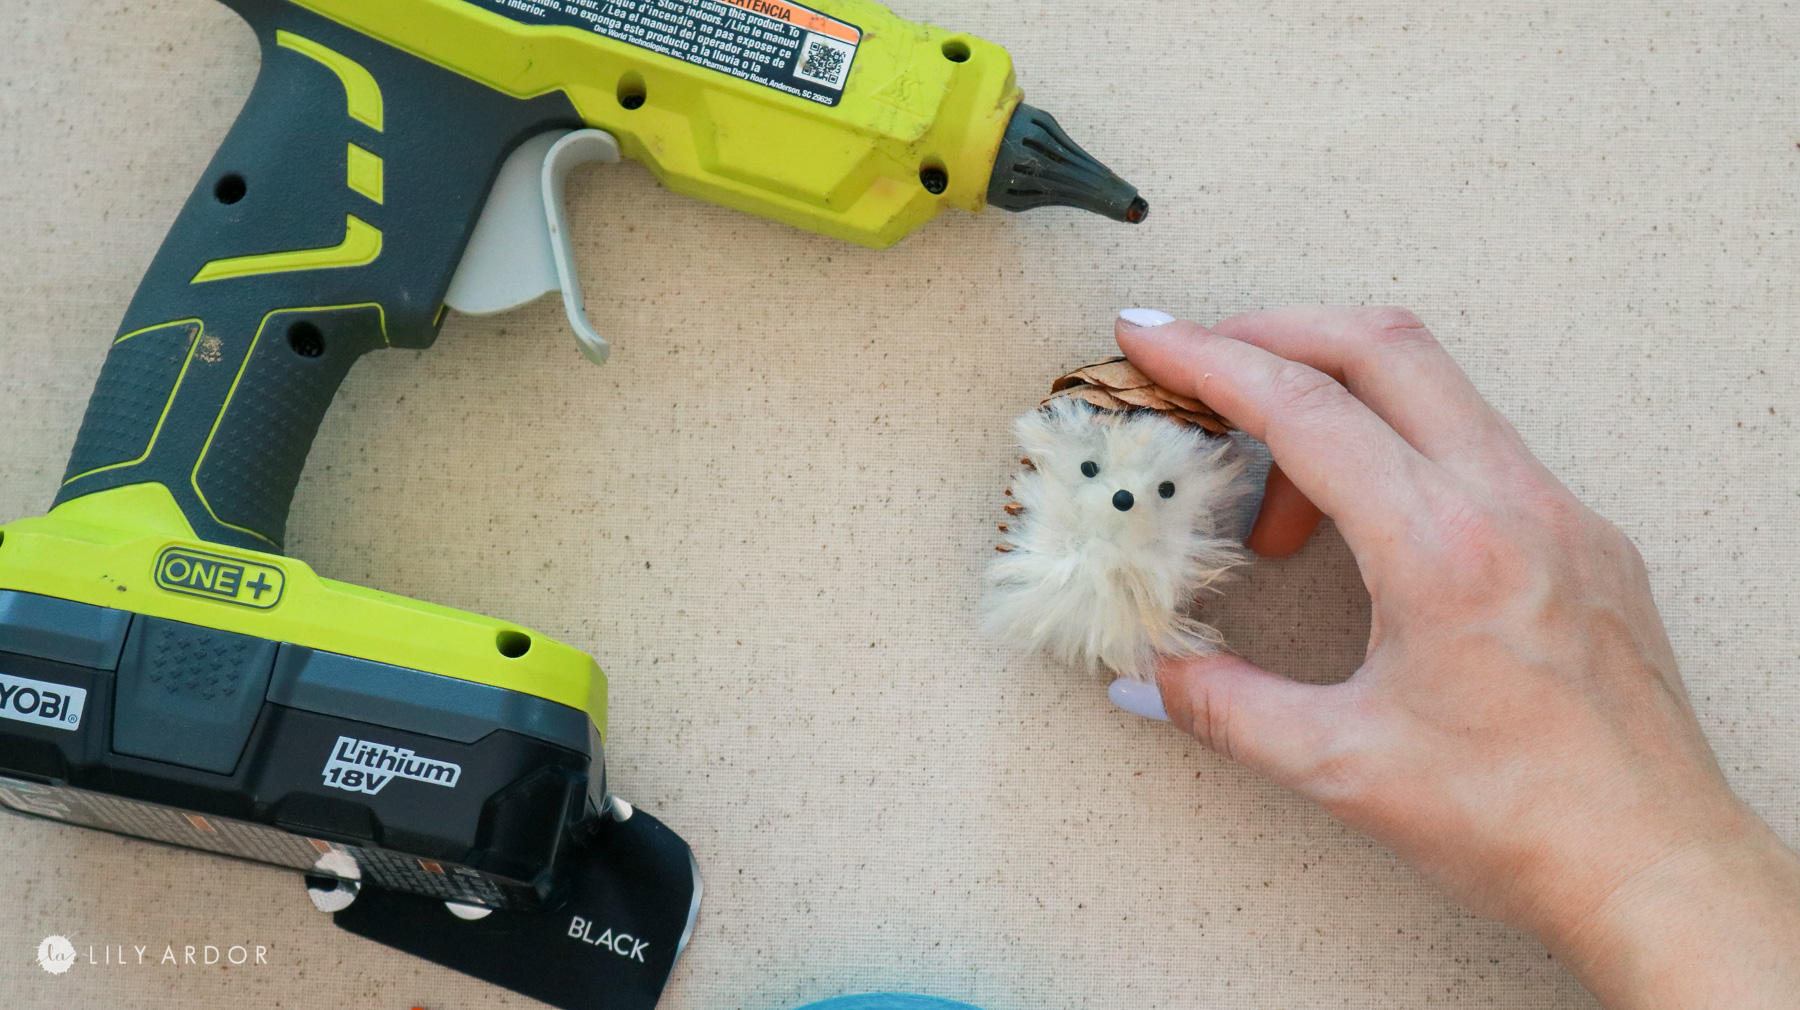
Step 4: Add the eyes , nose, hands and legs!
To make his eyes and nose I used sugru. You can also use play dough or porcelain clay. Or even small black beads if you have any. 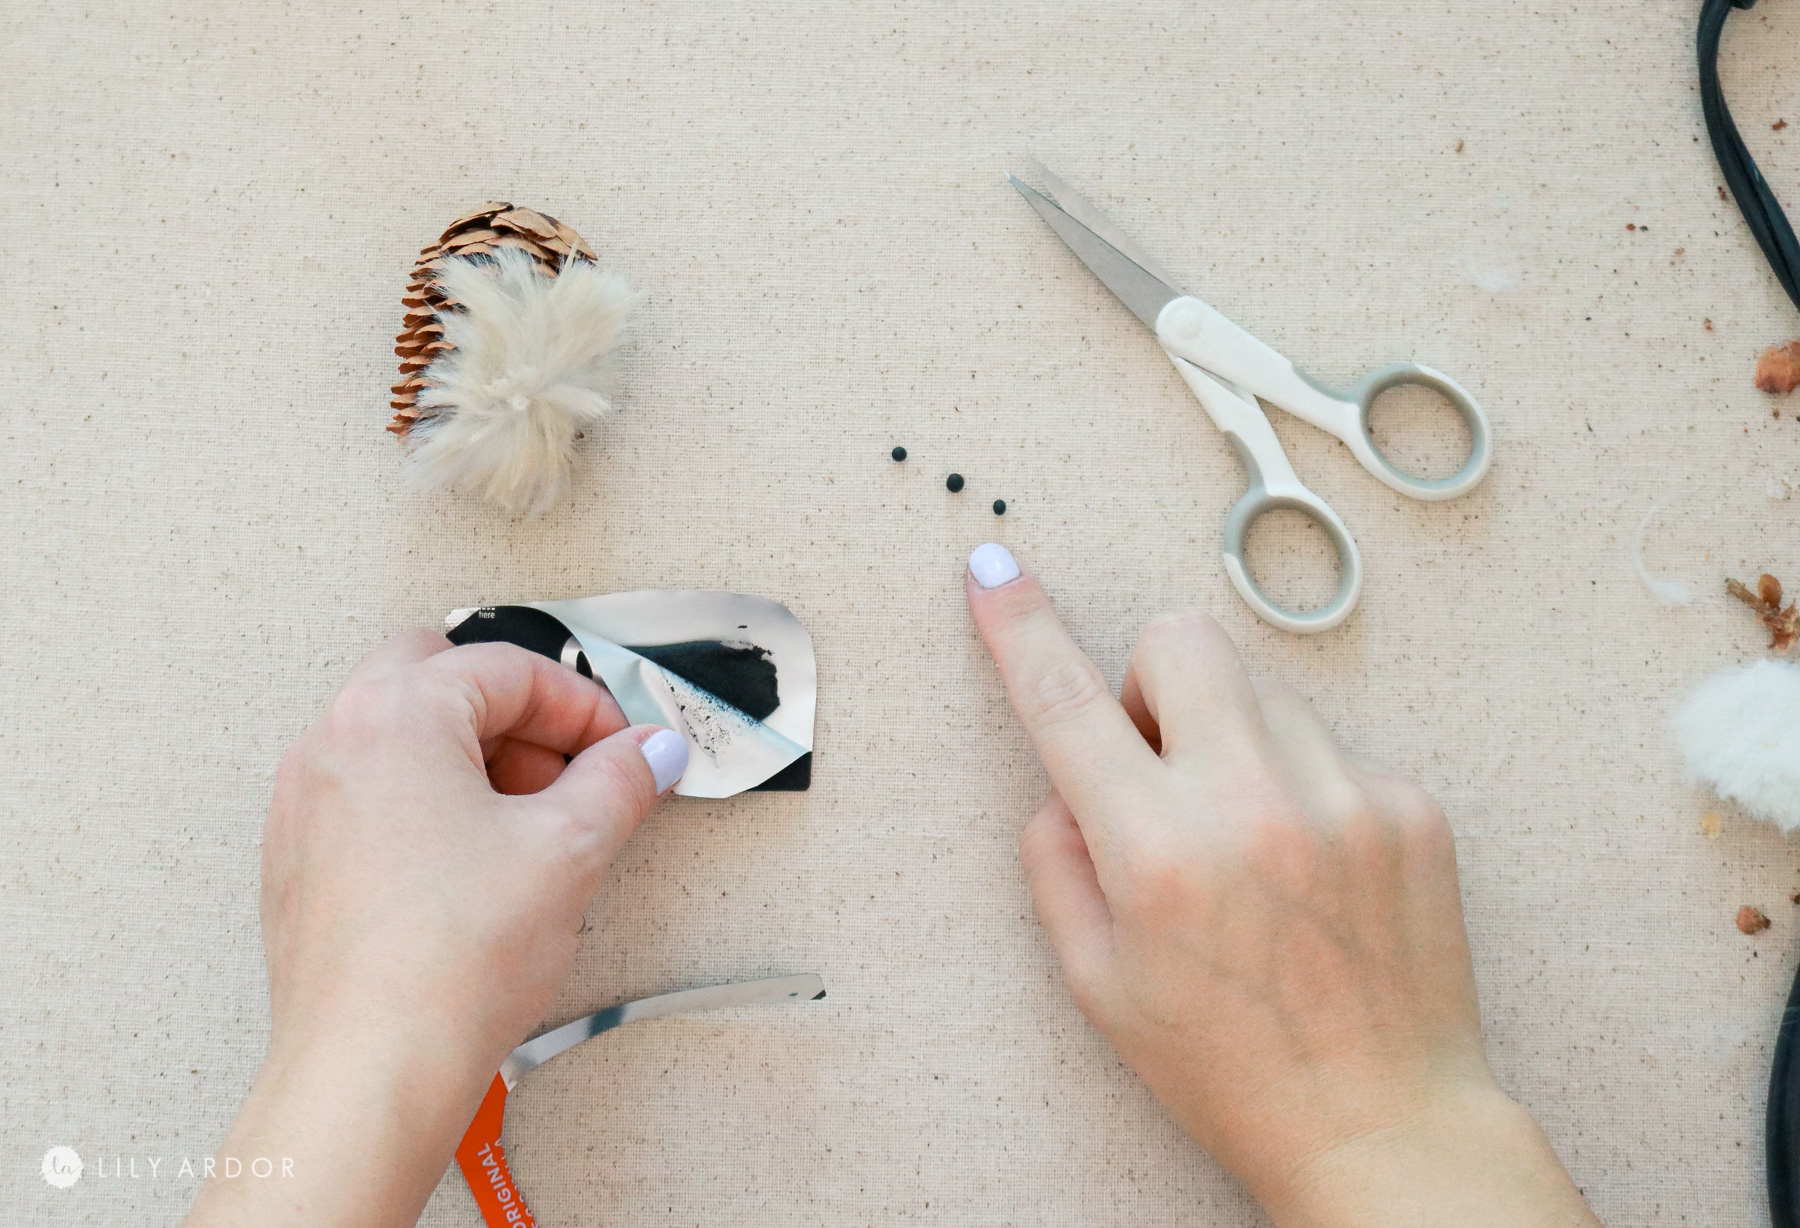
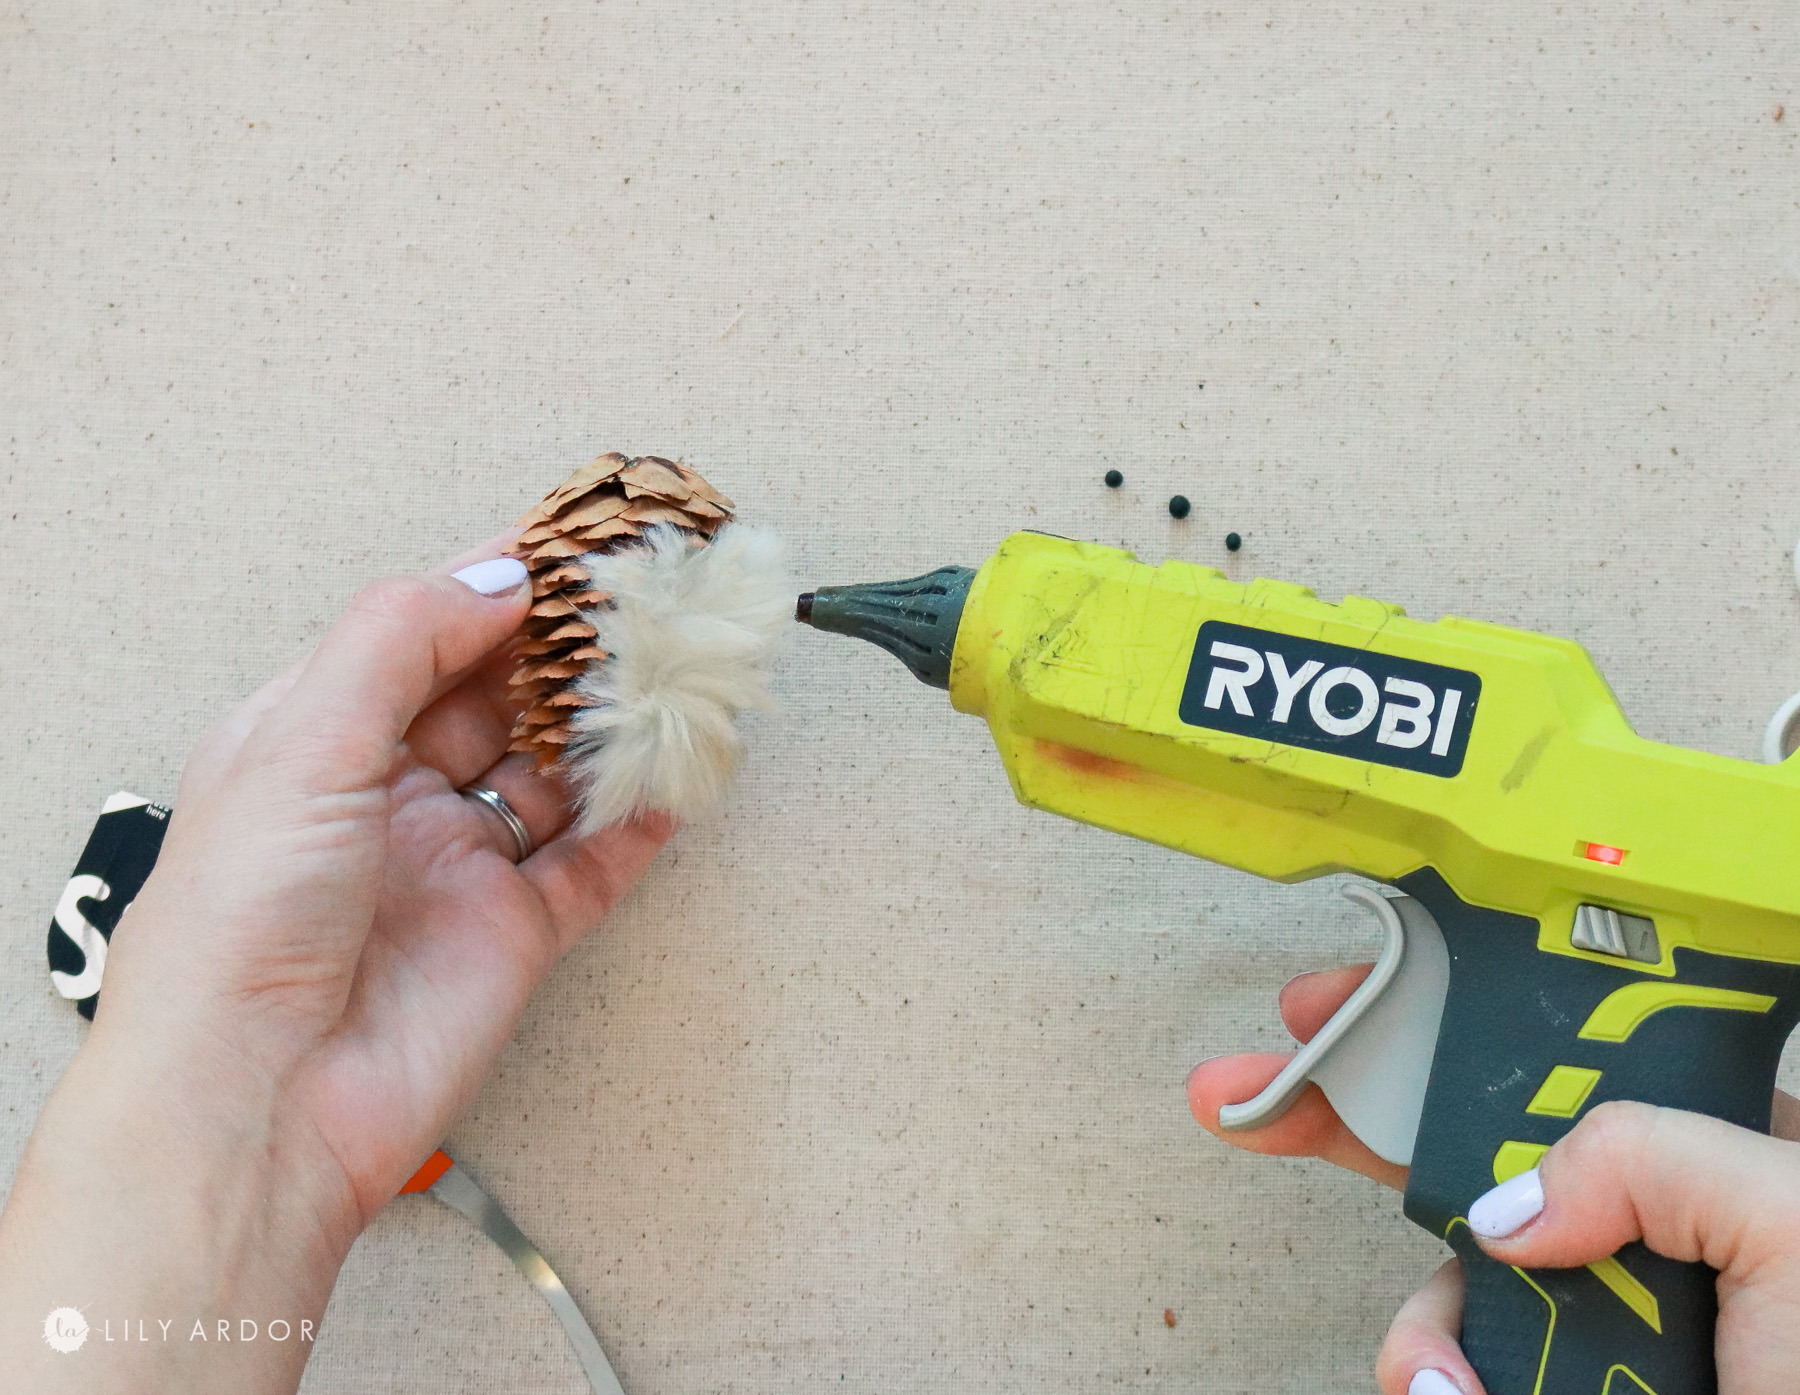
Before attaching the nose I applied some hot glue to the top of his nose and rolled it with my fingers. Careful not to burn yourself. Let your hot glue cool off a bit before touching it. This should harden the surface so his nose isn’t floating on fur. You might need to snip some of the hot glue before attaching the nose. My glue ended up creating a sharp point which I didn’t need.
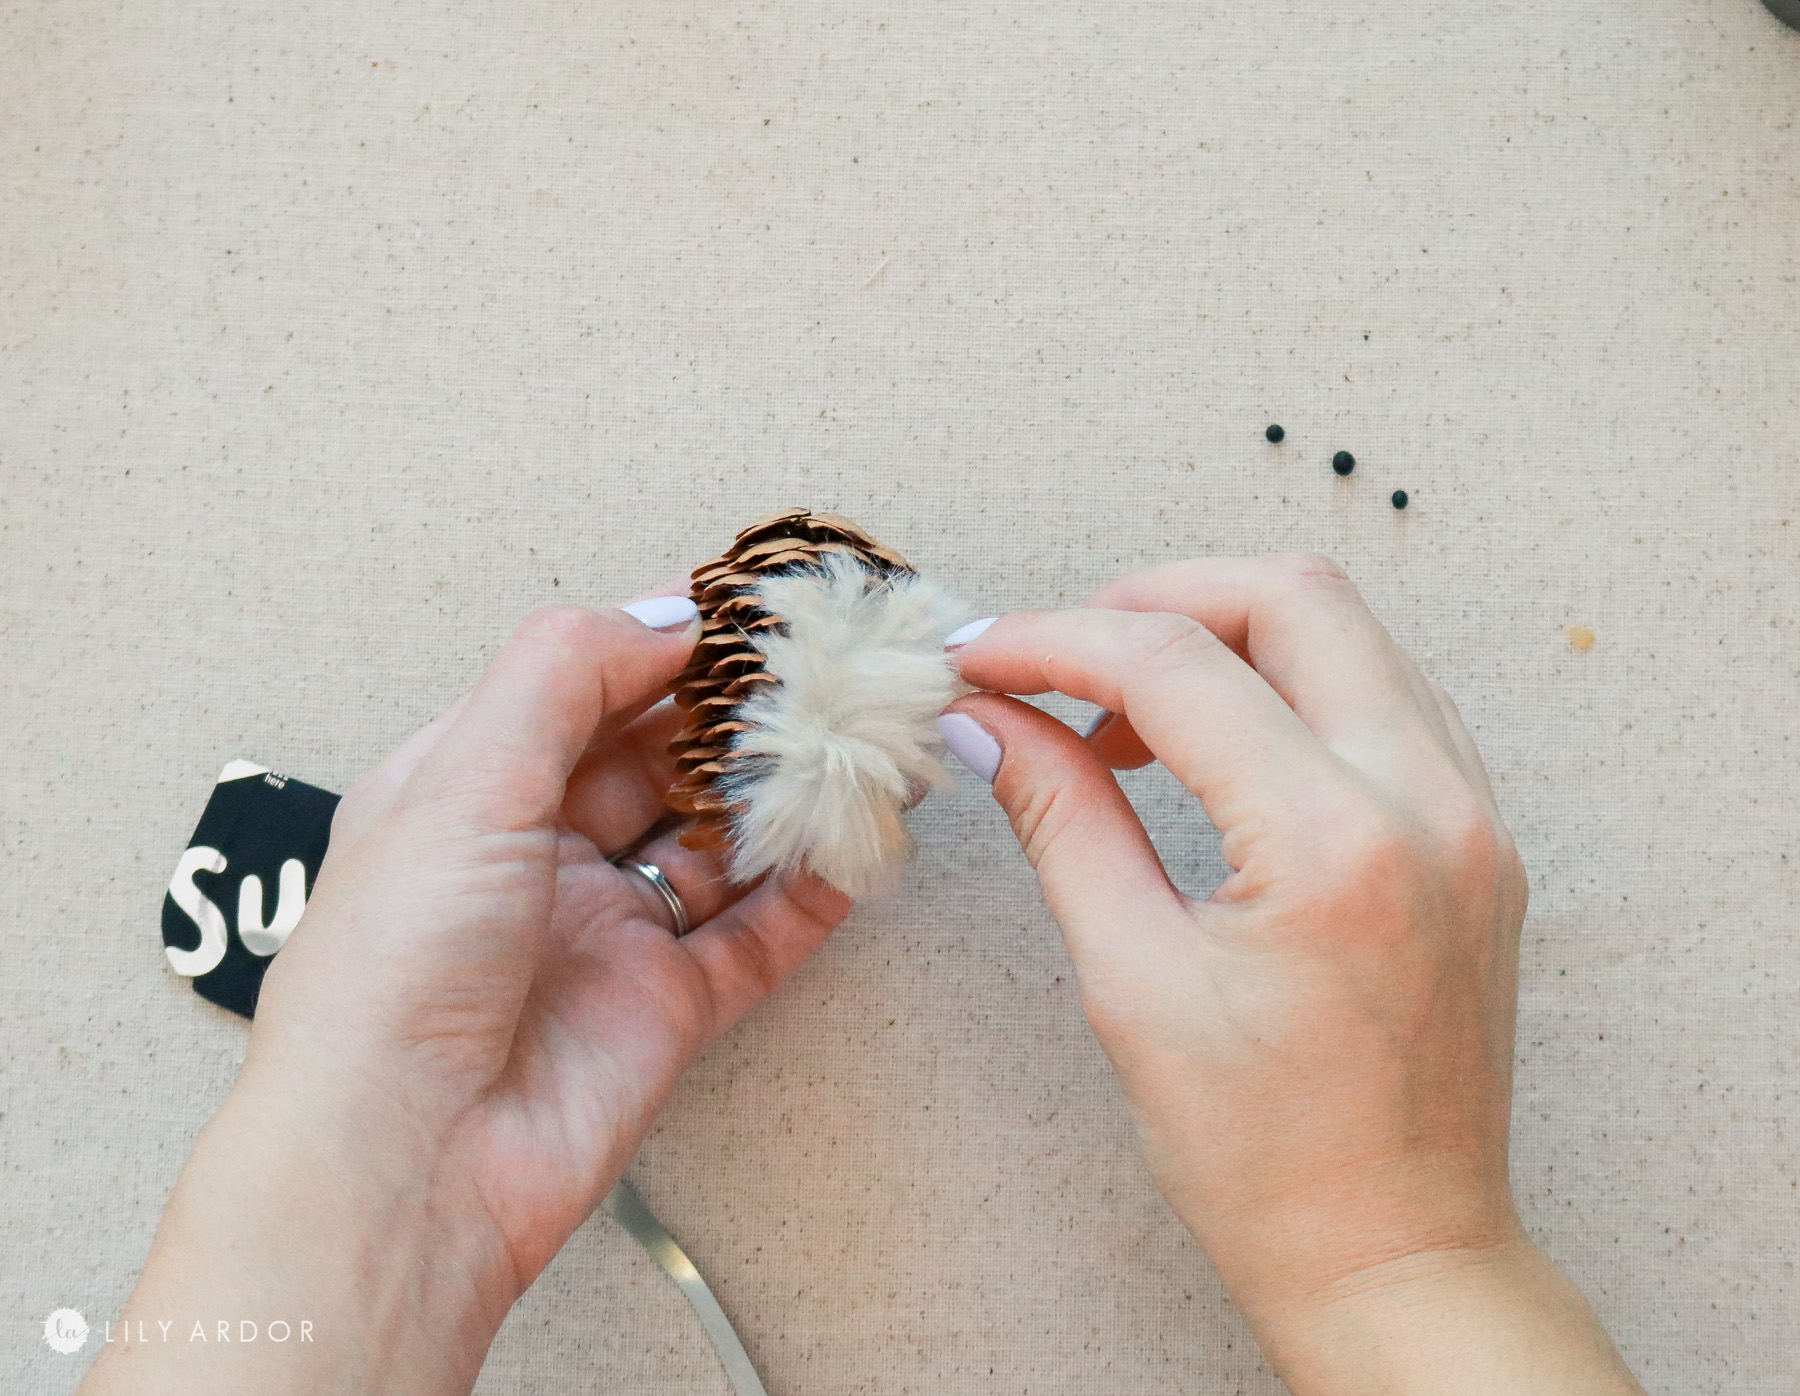
I moved the fur into place and attached the eyes with hot glue as well.
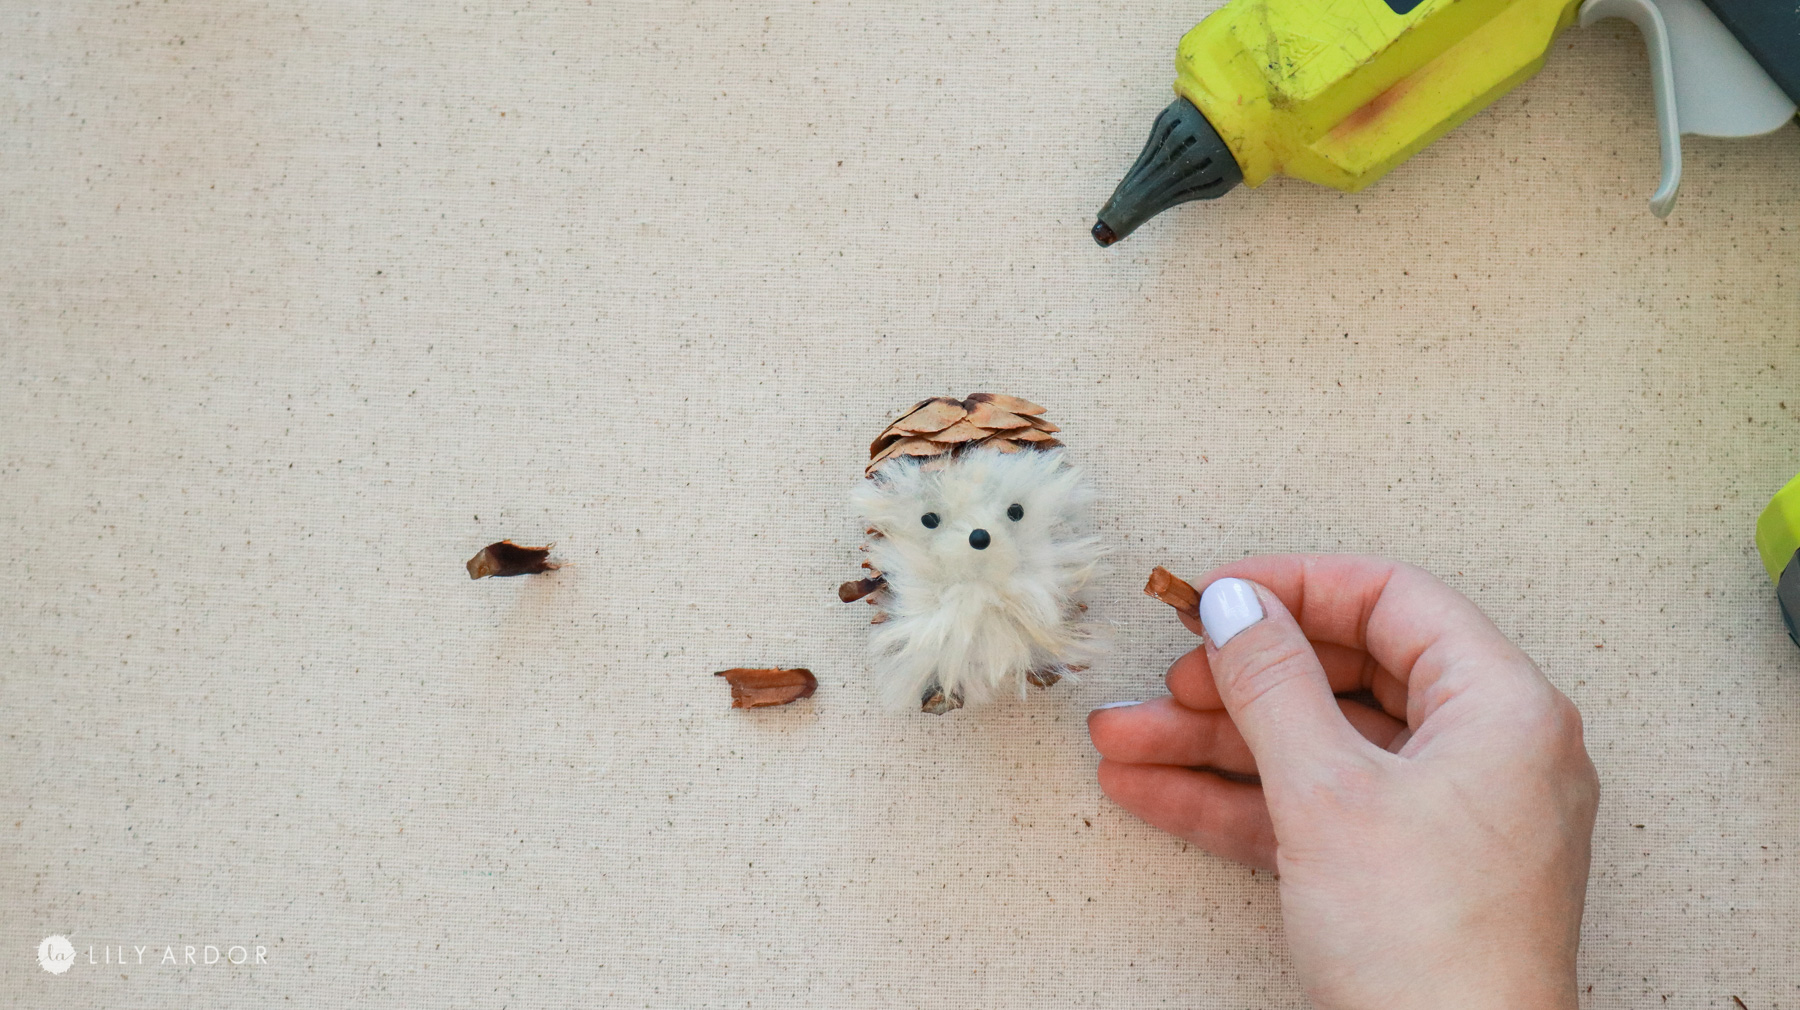
And for the last step I added some hands and legs using pine scales. It looks cuter if you use bigger pine cone scales. I had a hard time getting the smaller ones to be visible.
That’s it!
Isn’t he the cutest furry hedge hog out there!
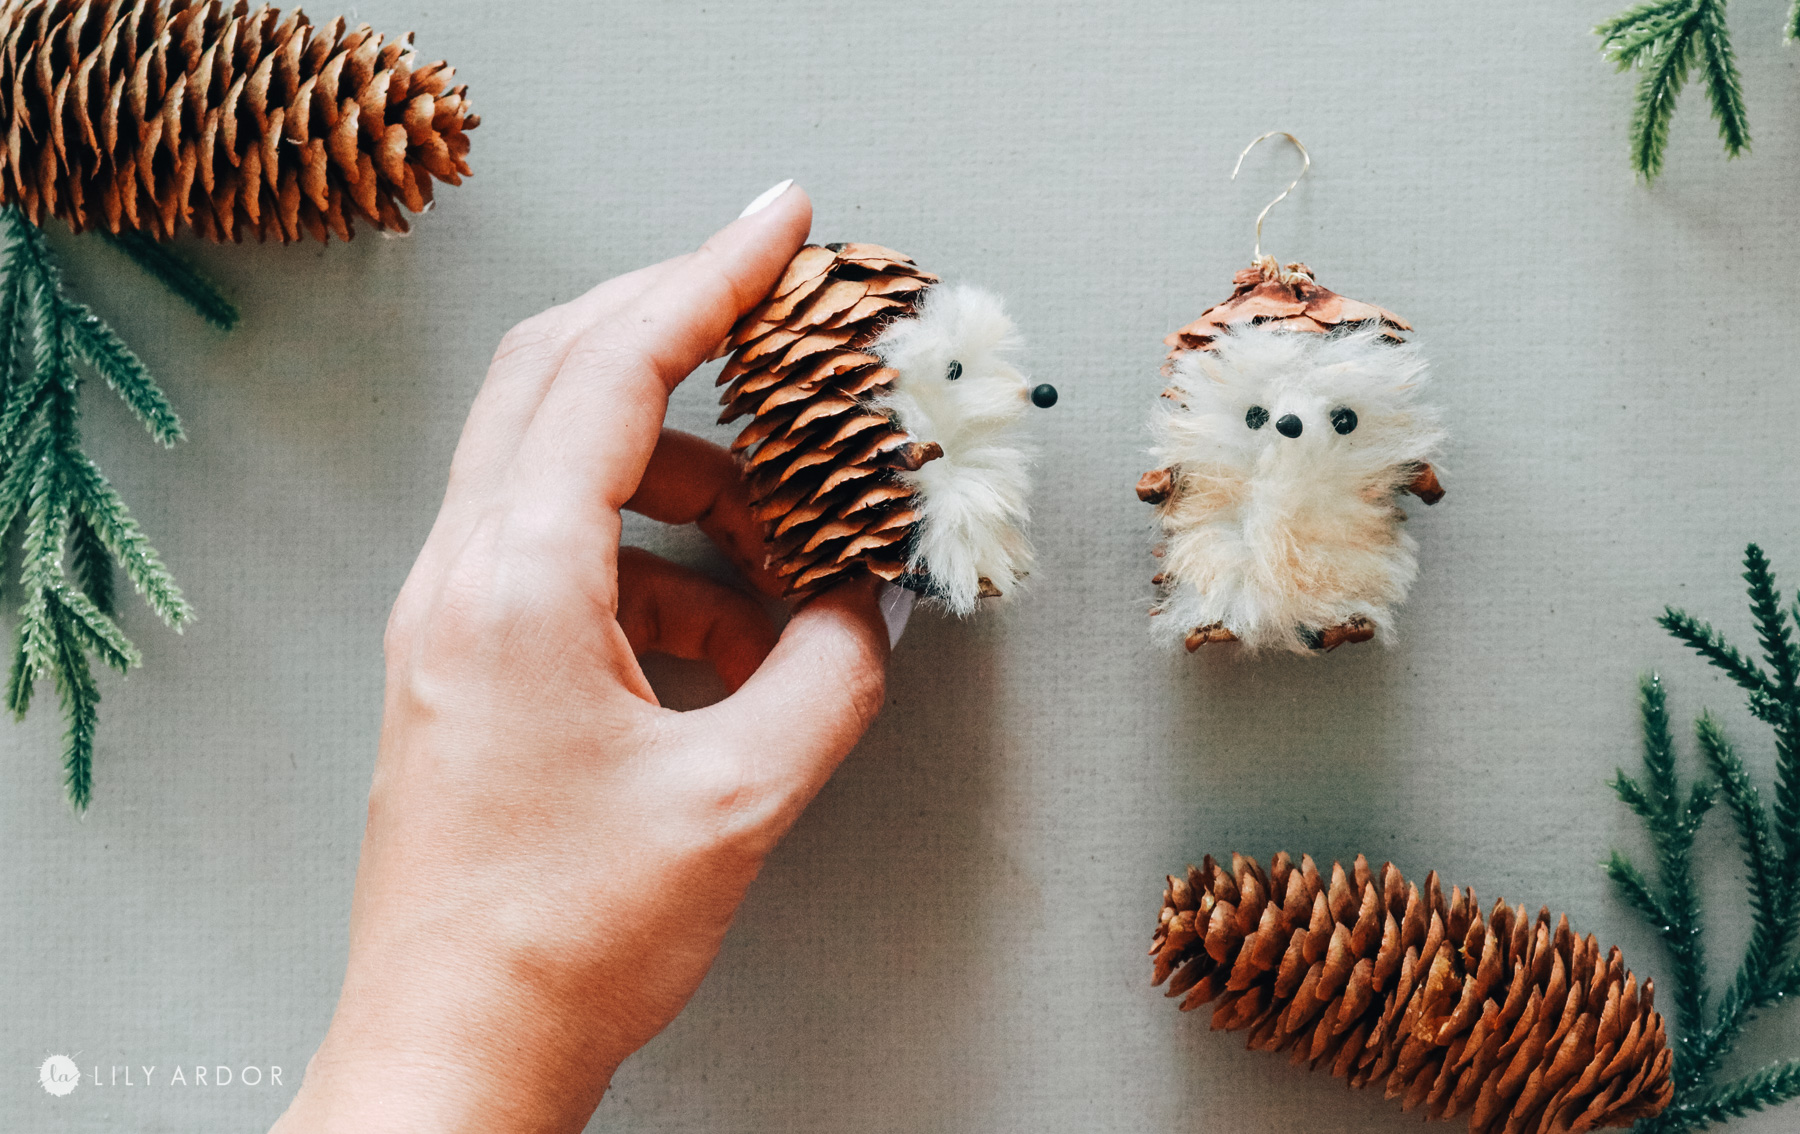
I also wanted to mention that I used the longer pine cones with finer scales. The bulky pine cones with chunky scales probably don’t really work for this although I can’t say for sure because I didn’t really try it.

I still can’t get over how cute these are!
Thanks for tuning in! I hope you enjoyed this DIY. I’ll see you all next time.
OH btw almost forgot to mention. I’m doing 10 days of Christmas DIYs on instagram. You can check it out here if you’re not already following me on there.
Best Wishes,
Lily