Hi everyone, I hope you’re doing great.
Let me start off by say that this DIY wasn’t exactly a success! I was actually dreading to share this DIY for so long because of how many problems I had with it but, decided to still go ahead and share it because it might be helpful to some of you.
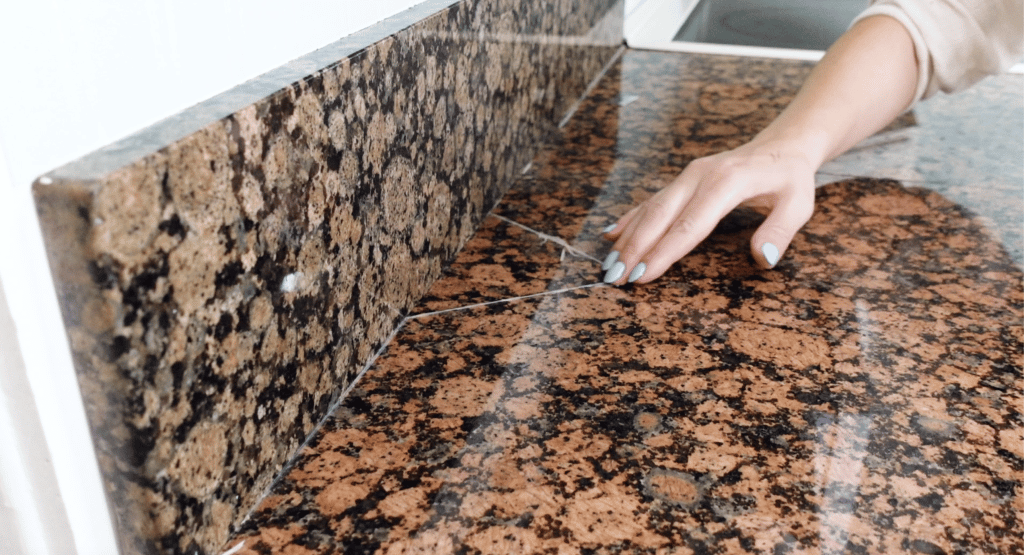
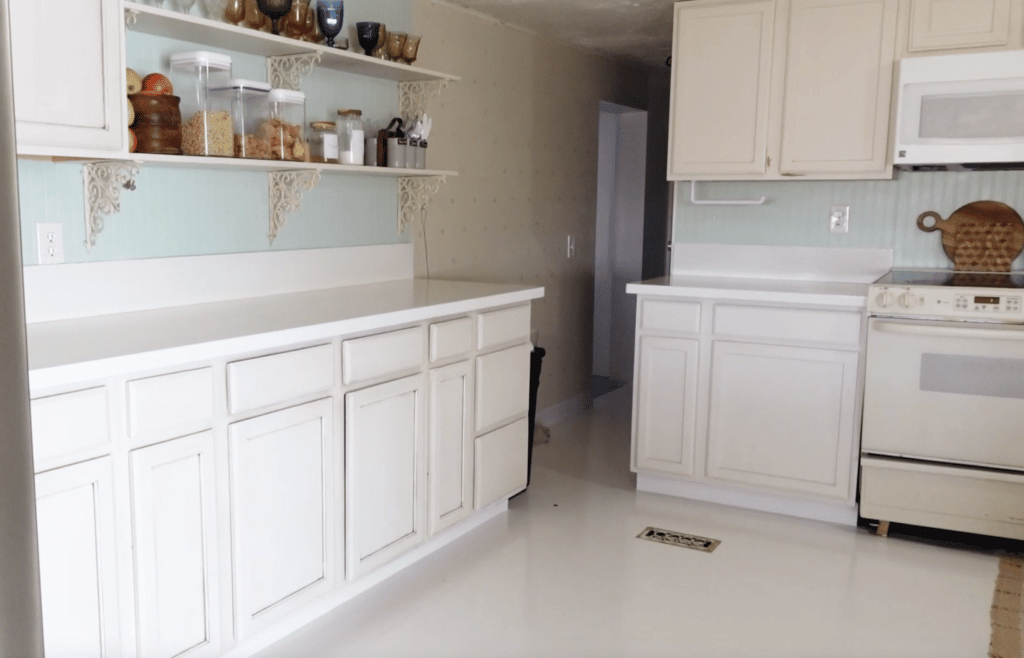
As much as I enjoyed having real granite countertops I was really sick of the color. It didn’t matter how I styled my kitchen it just always looked dark and gloomy because of the countertops. To add onto the fact that they’re dark and orange the backsplash sections didn’t match too. After we purchased this house the owners that installed it got a good deal on them and didn’t think it looked so bad. It’s served us great for years but, I was ready for some change of scenery.
Prepping the countertops
I can not express this enough! Making sure you countertops are properly cleaned is so important.
I started by lathering all the counters with dawn soap and rinsing them. I then wiped them down and used a Razor blade to remove the silicone in the cracks. Just getting them clean felt like it took half the day. I also propped up the sink instead of removing it,
Next I used some acetone and a microfiber cloth to degrees the surfaces.

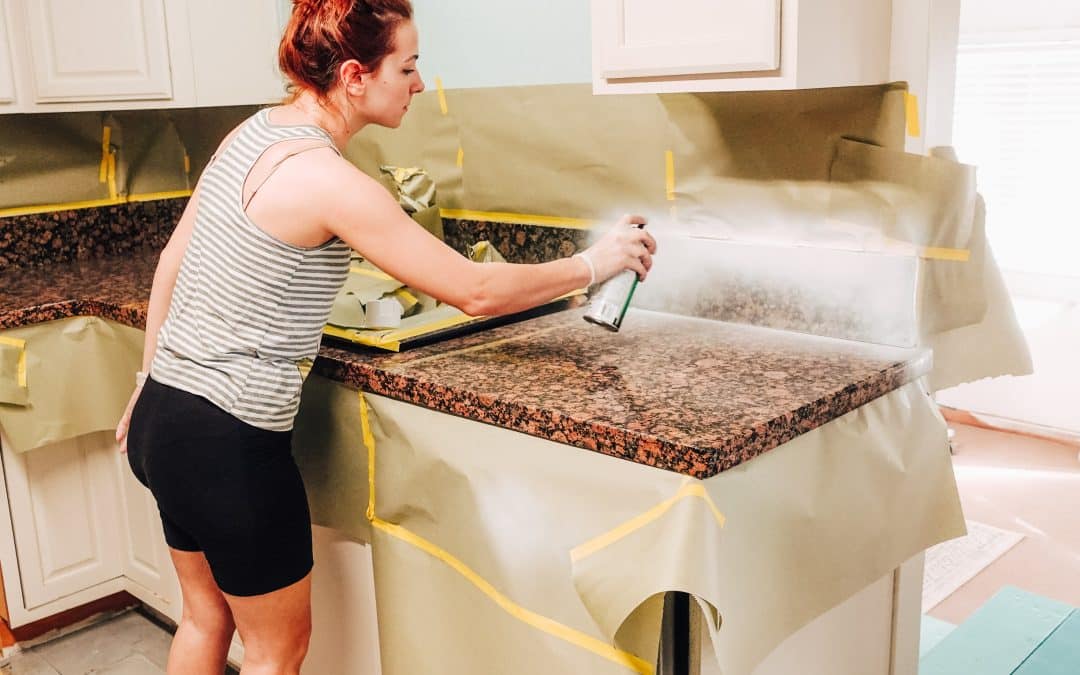
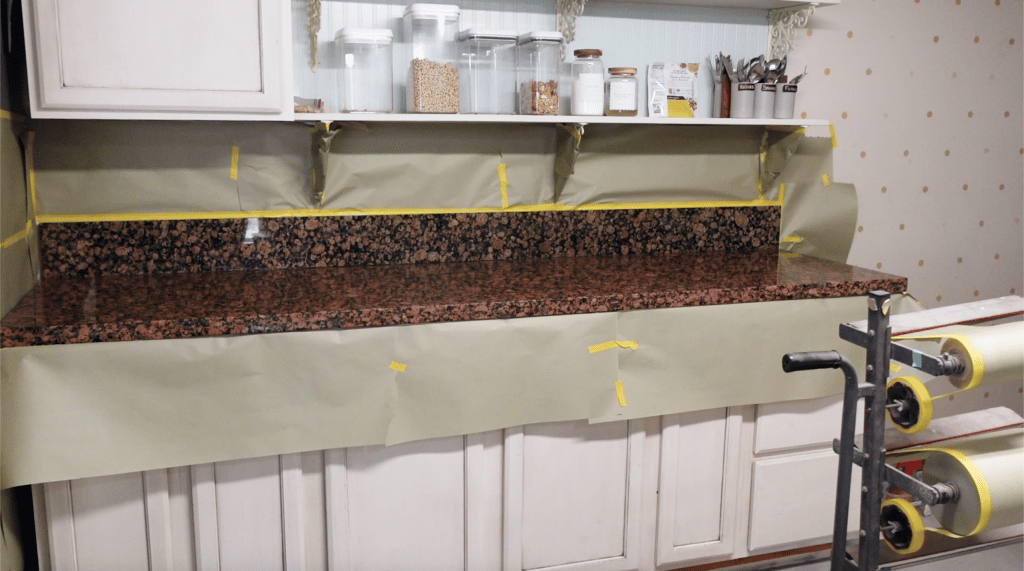
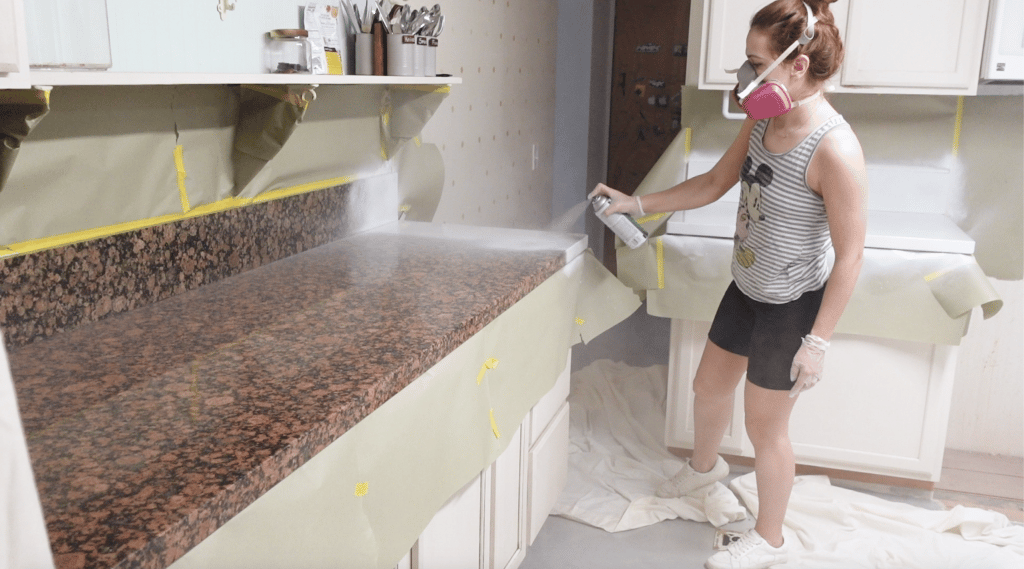
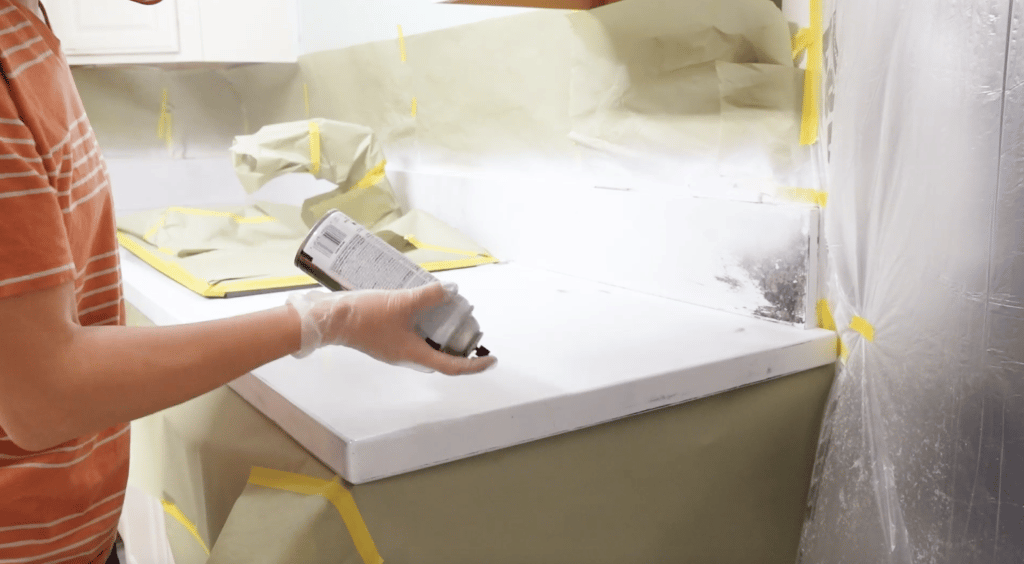
I borrowed Tonys handy masking station to masked all around the bottom top and sides of the counters. I also masked around the kitchen sink to make sure it doesn’t get any over spray on it.
Spray painting the counters!
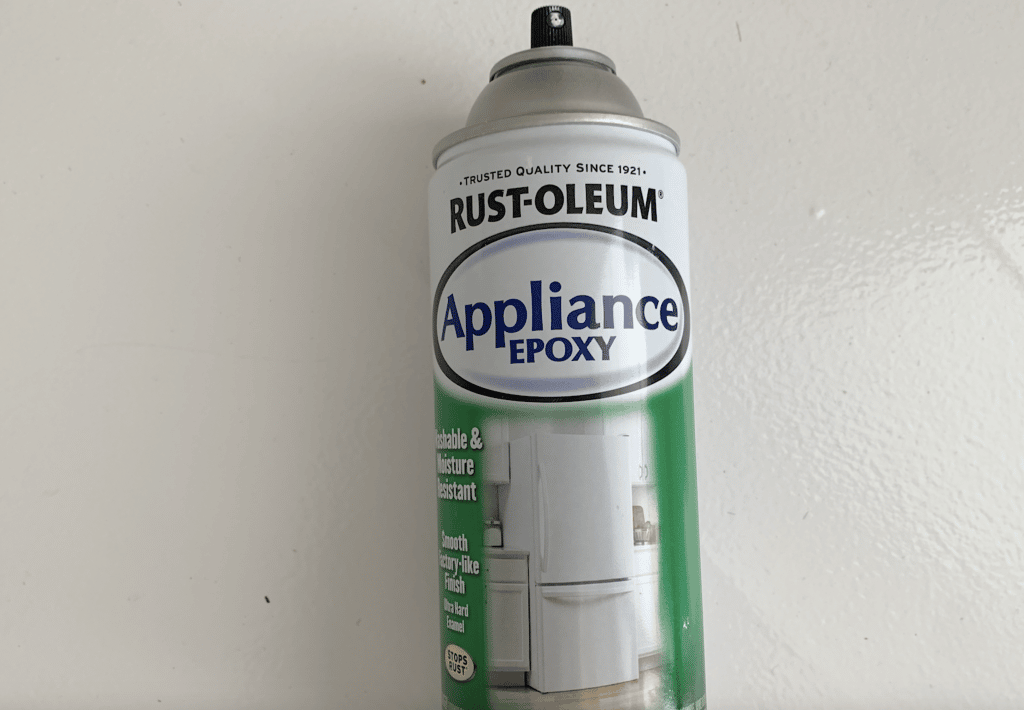
Okay next I started giving it the first coat of paint. This is the paint I used.
I’ve read so much about it online and was super excited to try it. At this point I had already done so many things wrong. I should of masked off the whole room from the rest of the house and covered my floors but, for some reason I was fooled into thinking the over spray wouldn’t be so bad. THE over spray was horrendous!
WHERE IT ALL WENT WRONG!!
The first coat I did was very light. Just to give it an overall white look. I only had 4 cans of spray paint and the first coat took up about 3 cans. I made a quick run to the store to buy more but ended up having to go to another homedpeot location because they were out of stock. By the time I got home it has been two hours once I applied the first coat.
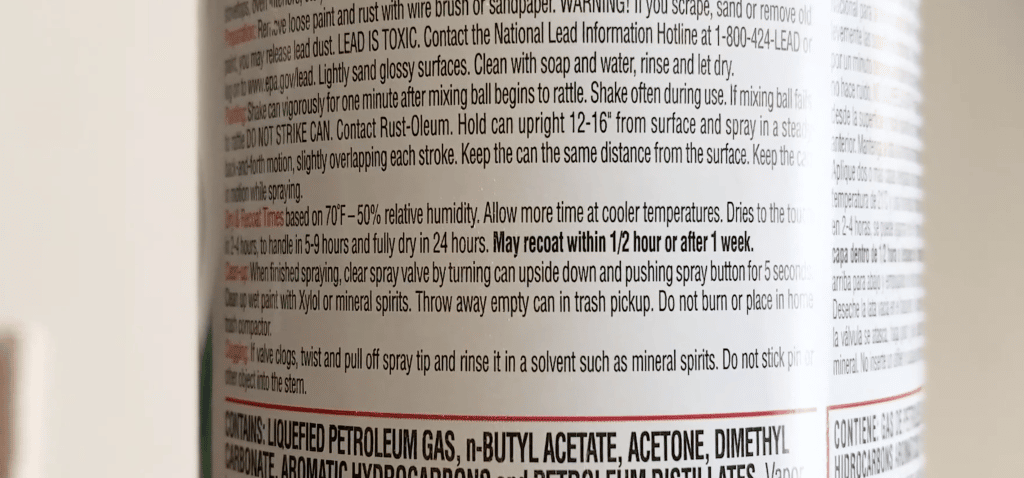
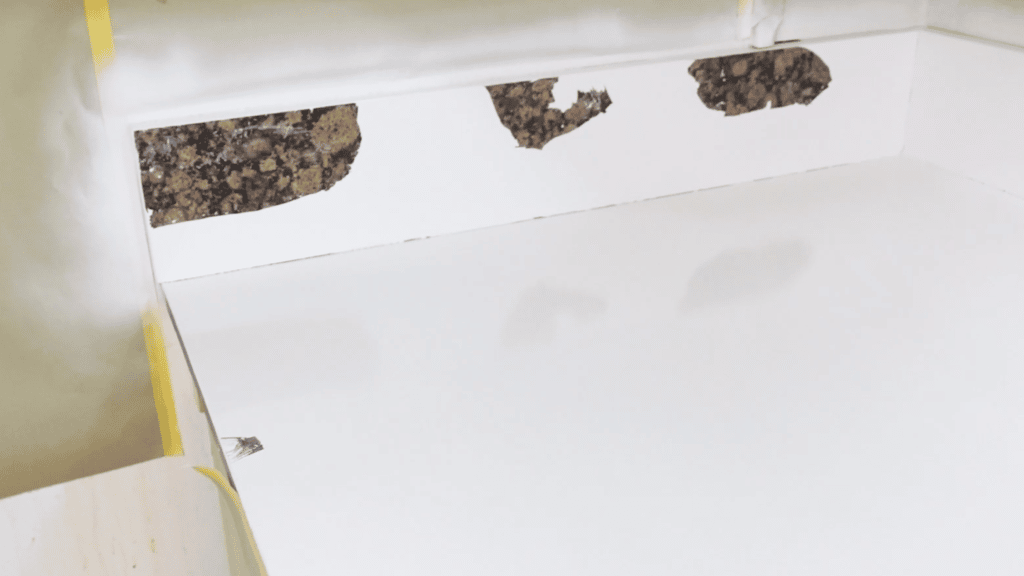
I quickly started applying the second coat and quickly realized it was this was a big fail! The paint started curdling up and it was lifting the first coat. I ended up scraping a bit of it off in some areas thinking to recoat. Then I decided to take a second to read over the instructions again and realized it says that you mat redcoat within 30 minutes or after a week. That’s when I sunk in my seat and realized this project was on hold.
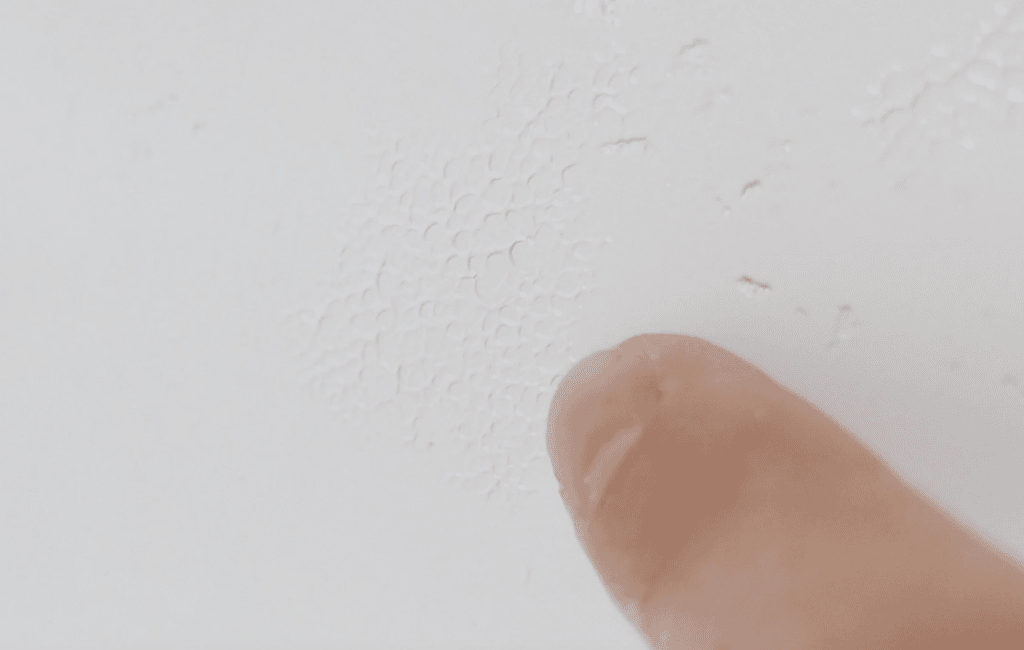
After a week I sanded the areas that had a scaled like texture. I also sanded the whole countertop down as well and noticed small scabs the came off. Even though I had washed and decreased the counters I guess some dirt still managed to get it’s way onto the counters and was coming off with the paint. This is why I would strongly advise against spray painting the tables. If I were to do this again I would definitely roll on paint.
Round two!
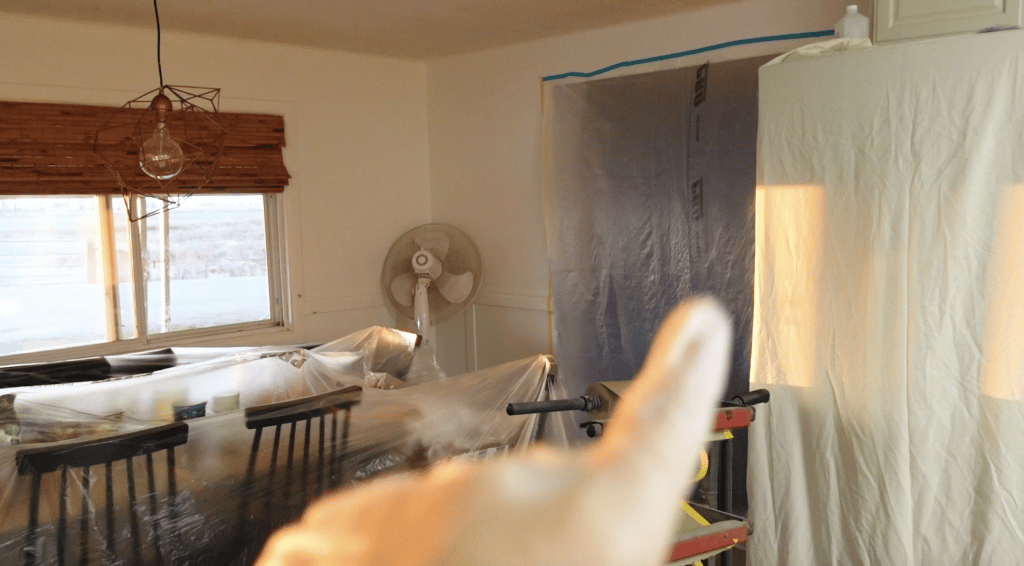
The second time I was painting I decided to seal off the whole room. I taped plastic all over the doorways and opened the window and added a fan in there to suck out all the fumes. Tony also opened a window in the back room and we left a bit of the plastic open to create a draft. The really helped keep all the fumes out of the rest of the house. THIS STUFF IS TOXIC!! It smells so bad!
I than used some rubbing alcohol and a microfiber towel to wipe the surfaces again. I started giving it a second of paint and at first it seemed like it was going great.
Troubleshooting!! IT DID IT AGAIN!
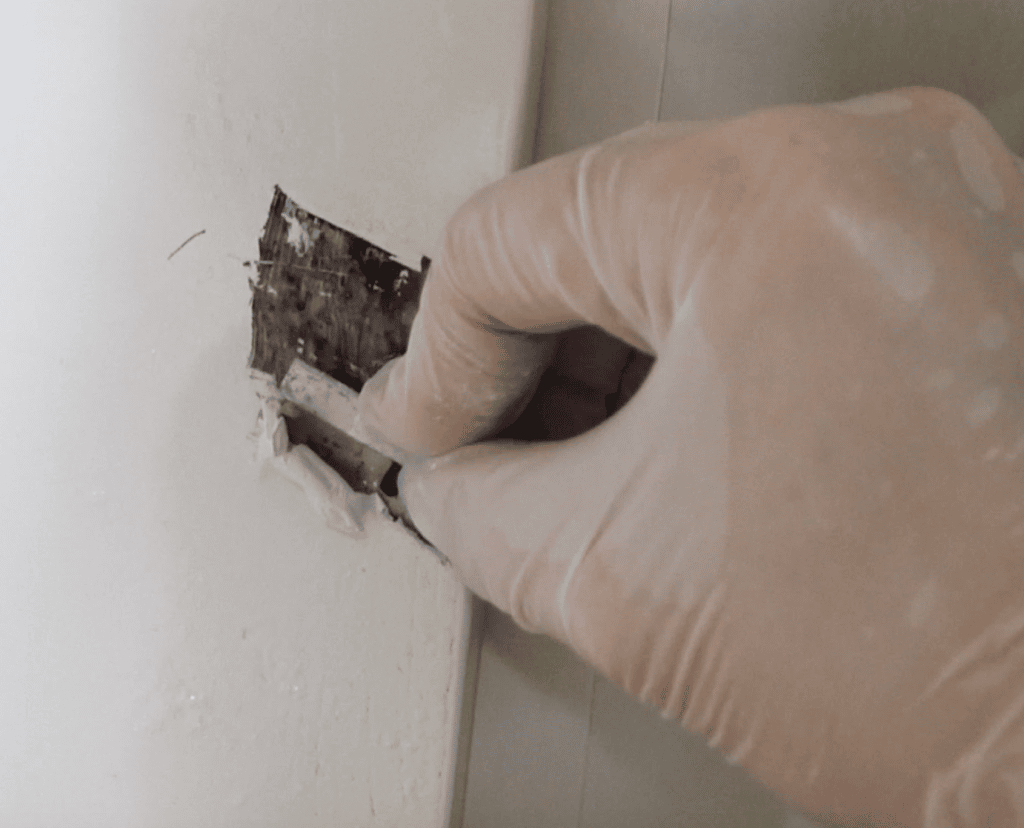
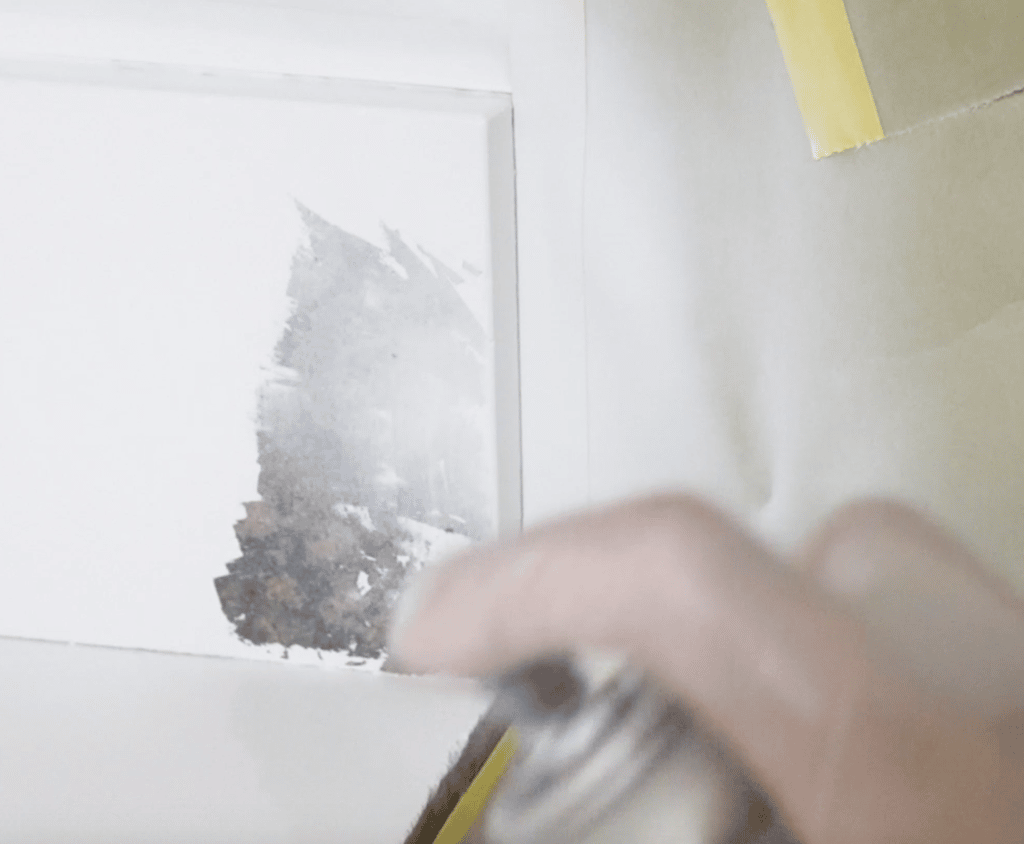
Some areas started curdling up again. I honestly wanted to cry at this point! I wasn’t going to wait a whole other week just to give it another coat and have it do the same thing. So I quickly used a razor blade and scraped of what was bubbling. I then gave it a light coat immediately. Let it sit for a few minutes between coats and covered it completely. I’m still not sure why it bubbled even though I let it cure for a week. It seems this spray paint frankly just sucks!! It probably works best only if applied in multiple coats every 5 minutes or so. Even a 7 day cure did do the trick.
there were about 7 areas that bubbled and I had to scrape and immediately repaint.
YET another reason why I would strongly suggests to avoid spray paint for a project like this. You never know what kind of chemical reaction it’ll have between coats.
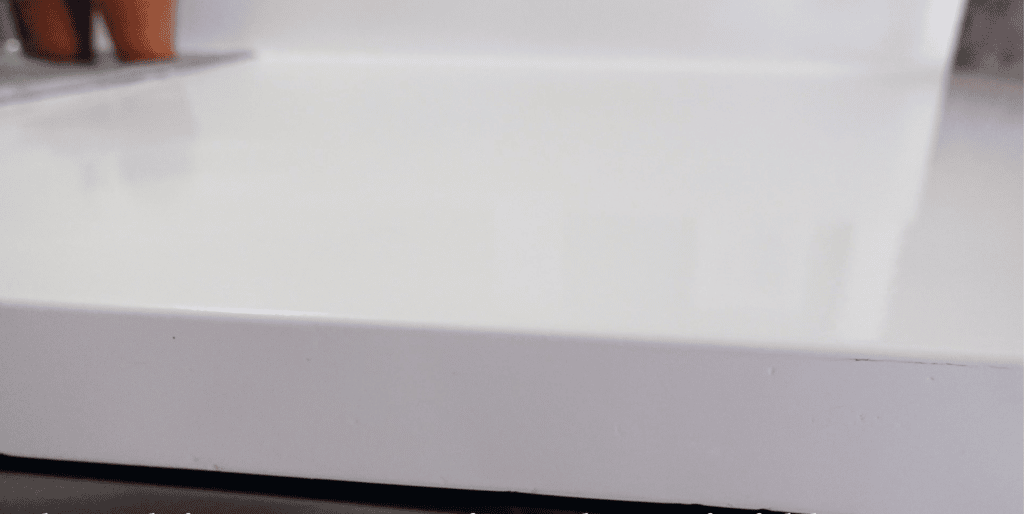
Here’s how the surface looked with 2 coats for paint.
SEALING THE COUNTERTOPS!
I decided to use the water based polyurethane to apply on top so it doesn’t stain as much. I used this sponge that says its for all water based finishes and it seemed to work great. But the texture it left looked to brushed on so I actually ended up using a foam roller.
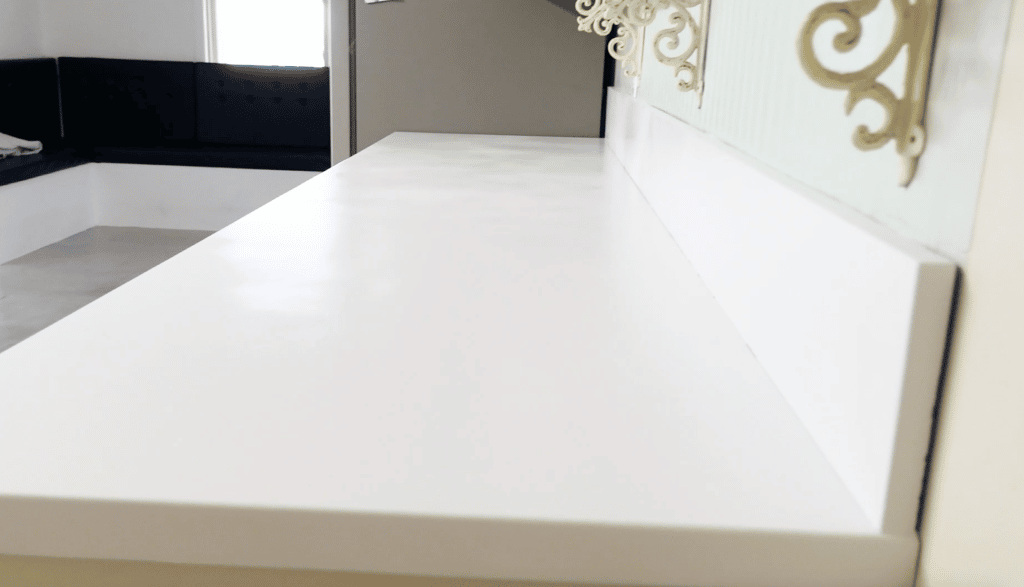
Here’s how the counters turned out. They look so good white.
I try not to scrub the table hard and not to leave any liquids on it for too long. I’ve left liquids on it though and they seemed fine. I’m still waiting to get a new sink and range but it’s already looking so bright in the kitchen . I love the shine on the counter. If I get any stains I use a magic eraser.
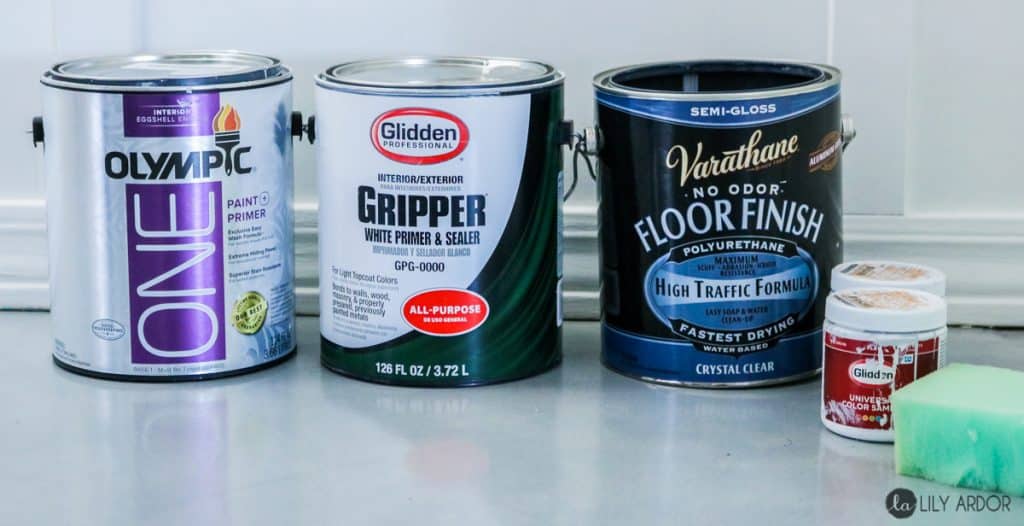
THESE ARE THE PRODUCTS TO USE!
Okay real quick if I was to do this again. I would first of primer the counters with some bonding primer. Also called gripper. It literally adheres to anything and is so so strong. I used this stuff when I painted my wood laminate floors and they held up so well. Never peeled. Then I would either use regular latex paint or roll on the epoxy paint. I think rolling it on is the best option. It gives you a nice thick coat.
I would then seal with the the varathane floor clear finish. Honestly though if you can get your hand on the minwax brand it surpasses the varathane quality in my opinion. I’ve used it on so many projects. It lasted for over 3 years on my floors and only had light scratches but never peeled or came up. This combination of primer paint and sealer worked the best in my experience. I honestly wish I would of done the same to my counters.
WHY I DIDN’T EPOXY MY COUNTERS!
So I’ve done epoxy counters in my bathroom and unfortunately I found out real quick that they stain really easy. Considering how messy it gets working with epoxy ( prob not as messy as spraypaint but still) those are the reasons I didn’t use epoxy.
That’s all for today! I hope you found the article helpful! I was really dreading sharing about this but, I guess you live and you learn. I will never be spray painting counters again!
xx,
Lily