Hi everyone, here’s how I made some super easy DIY Christmas bells.
These can easily be a kids craft and cost under $10 to make.
I originally saw these stars at pottery barn and fell in love but, I couldn’t afford $30-$60 per candle bell so I decided to try and make some.
Supplies needed:
- 2 bowls ( I found some on amazon that already have the rim around the edges for the bells – https://amzn.to/3pPkU6U )
- rub and buff ( https://amzn.to/3oOKutF )
- black spray paint
- electrical wire recycled
- sugru – ( https://amzn.to/31VPVhc )
- paintable silicone
Let’s make some Christmas bells!
Finding the perfect round shape for your bowls is so important. This can make or break you project. They need to taper out and be a bit on the taller side. To pick the perfect bowls I simply held them up against each other and compared the shape to a real bell image I found online.

It’s also important to keep in mind whether you plan on making it into a candle. You’ll need make sure you’re bowl is glass, metal or ceramic for this. Making a candle in a plastic bowl could be fire hazardous.
![]()
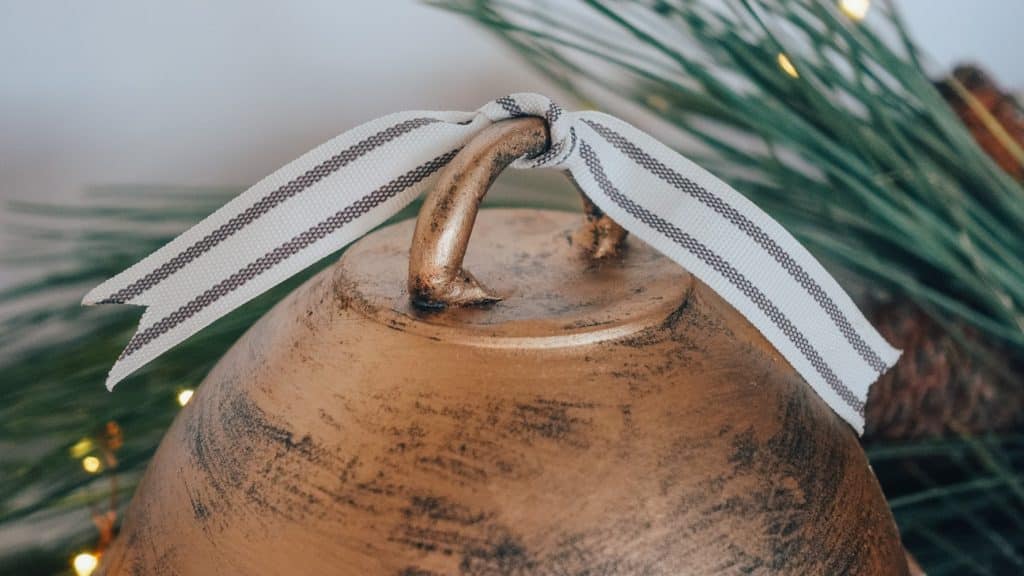
Step 1: Adding a handle!
I used sugru to shape and added a handle to the bowl. If you’re not familiar with sugru it’s like polymer clay but dries without having to cure in the oven. It attaches to almost any surface and is paintable. You can get it on amazon here – https://amzn.to/31VPVhc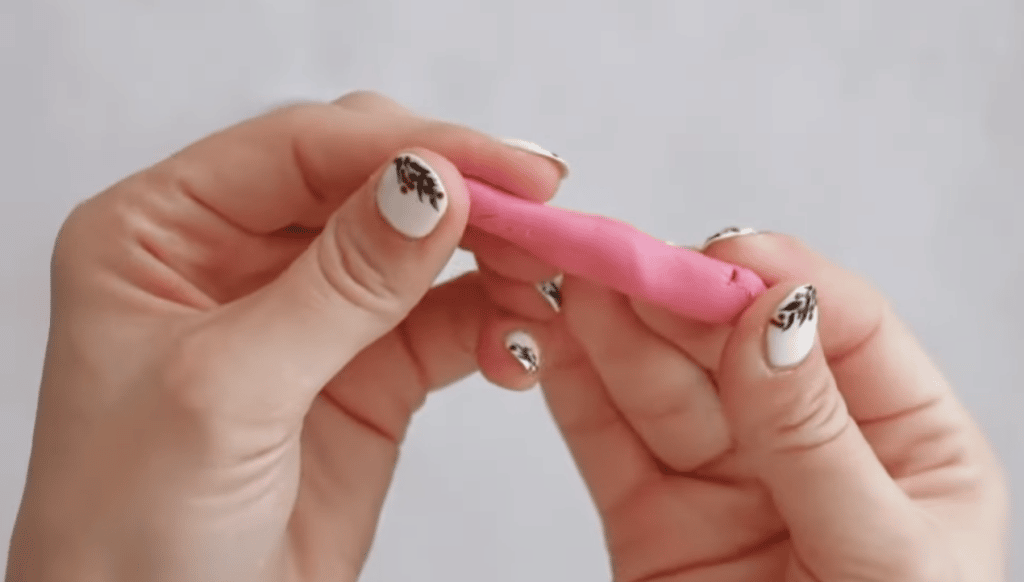 Sugru Alternatives :
I know if you’re making more then one bell sugru can get pricey. You can substitute sugru with polymer clay but you’ll need metal , ceramic or glass bowls to cure it in the oven. You can also use model magic which is super fluffy clay that air dries beautifully.
I applied a thin layer of sugru to the base of the bowl and added a small handle that I shaped from sugru. The video shows this in more details if you want to check it out.
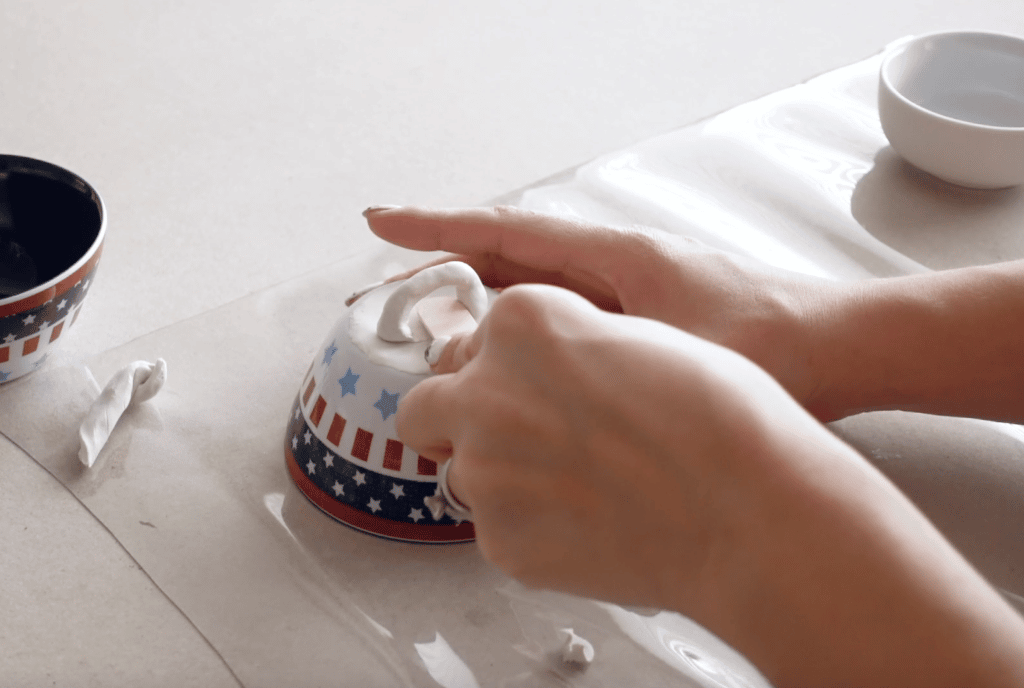
I also rolled out the sugru into a long rope and add that to the bowl around the edges. Photo below is how it looked once it was ready to cure for 24 hours.

Step 2: Sealing Holes!
For my bigger plastic bowls Instead of making a rope out of sugru to go around the bowl I used some recycled electrical wires. I actually like this so much more. It looks much neater this way.
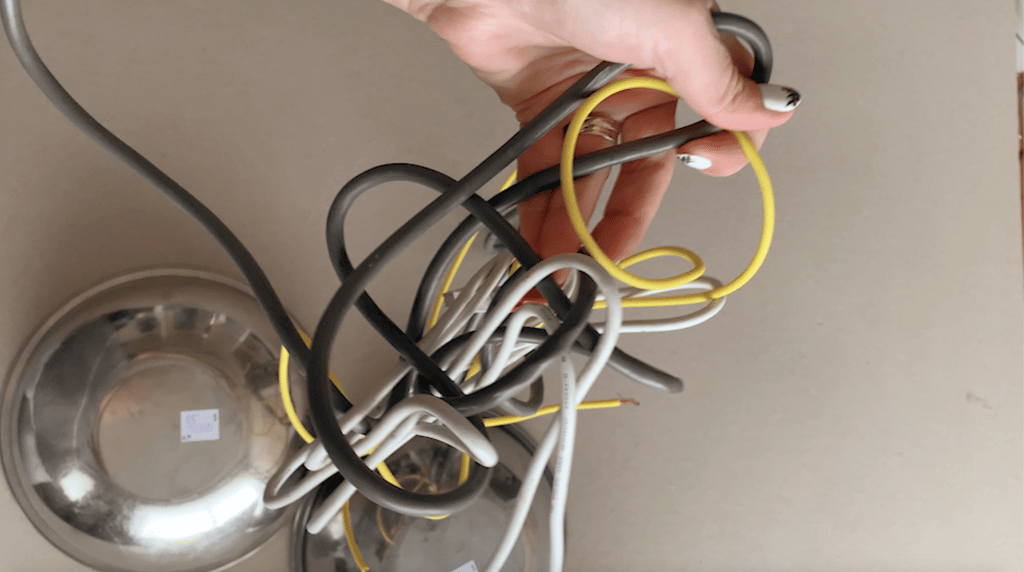 You can use e6000 glue or hot glue to attach the wire to the edges. This actually got pretty messy and I found that heavy duty hot glue worked a bit better.
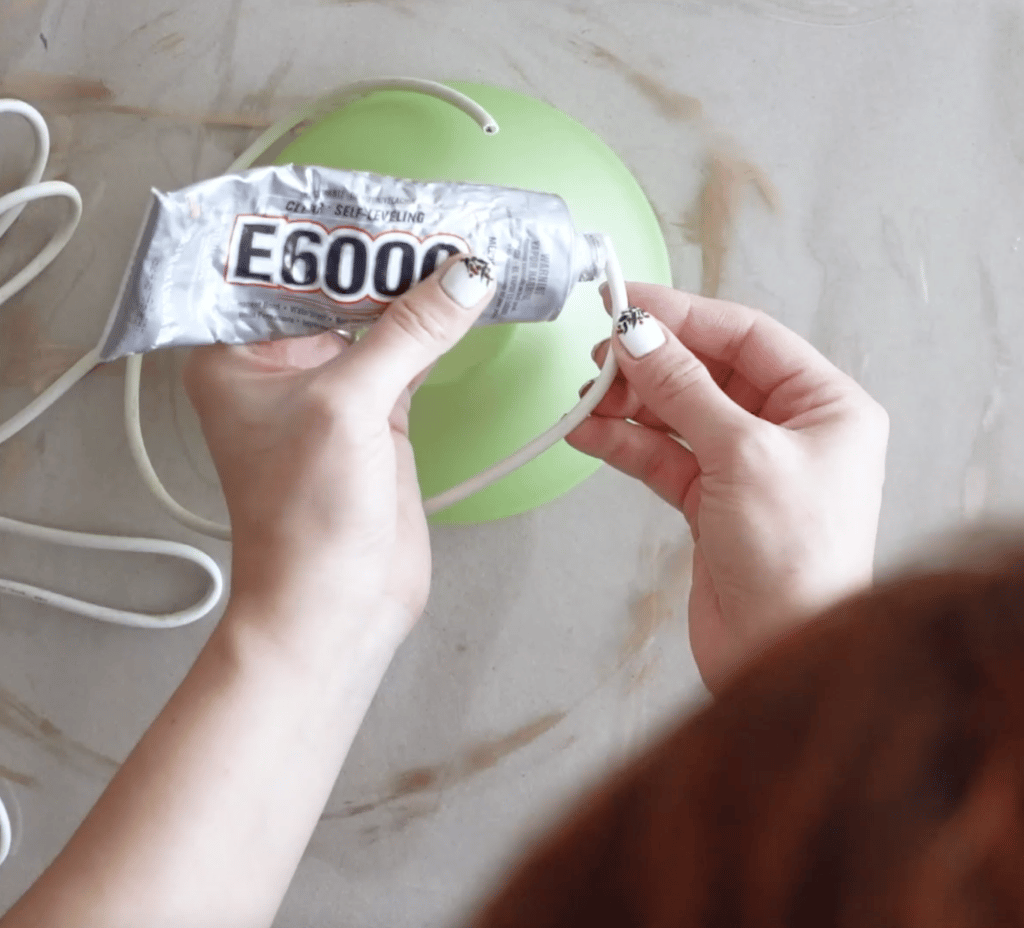
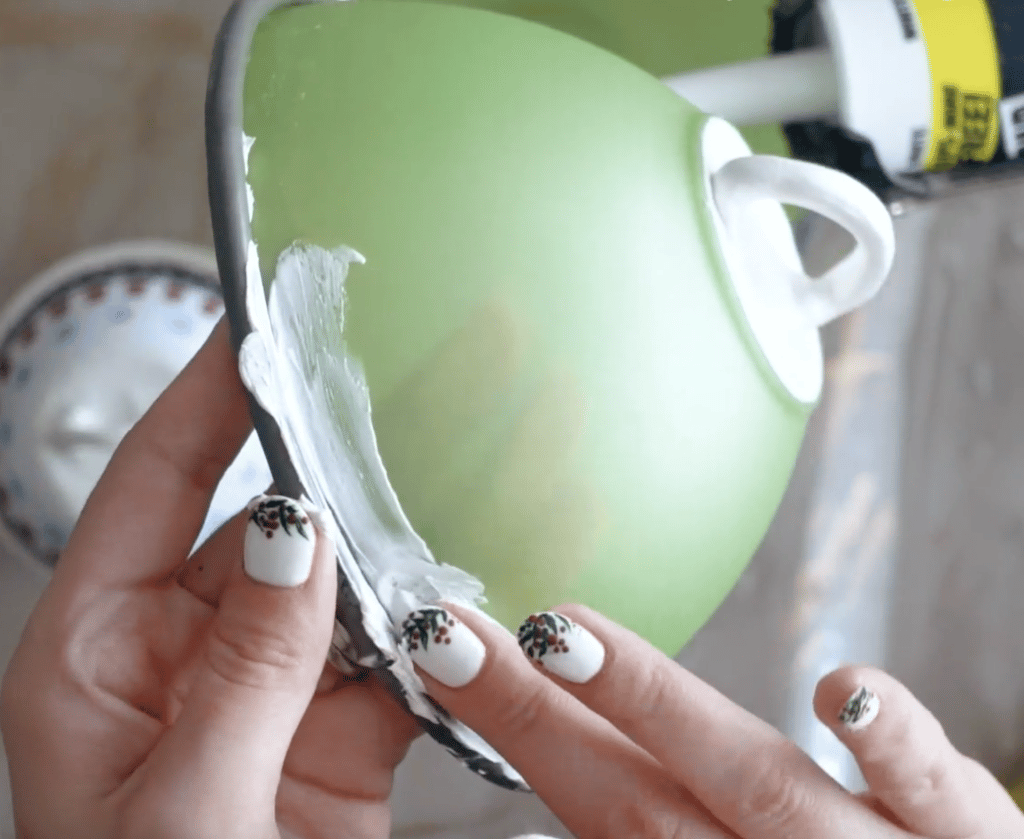
Next I used some paintable silicone and sealed all the gaps where the wire was attached. This made it look like one piece.
Step 3: Painting the bells!
I used some rustoleum flat black spray paint and gave them a coat of paint.

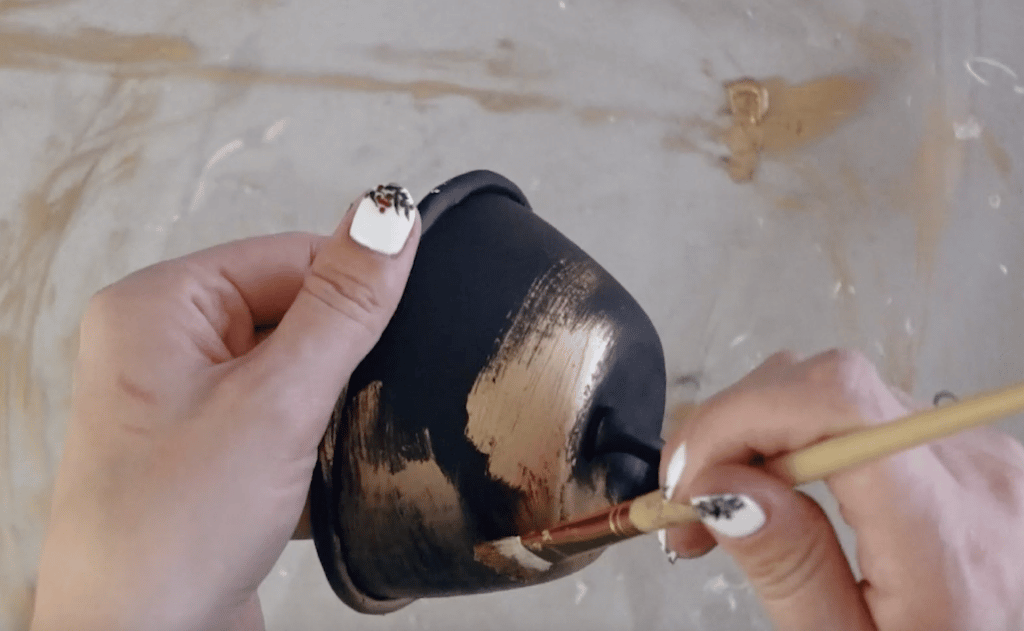
Once they were completely dry they were ready to be gilded. Using some rub and buff I applied a thin layer with a hard bristle brush.
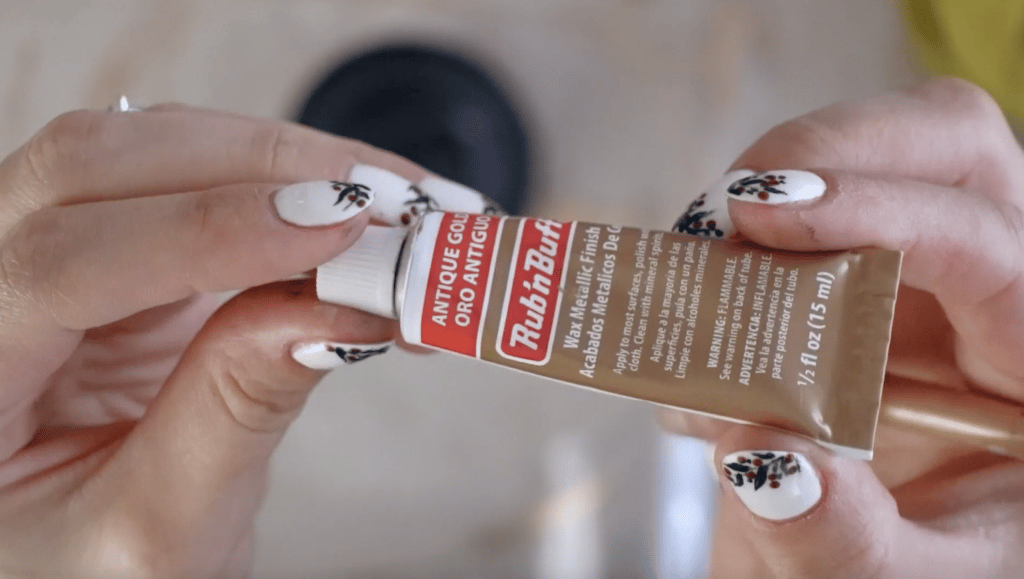
I made sure to use horizontal sweeping motions and leave some black visible.
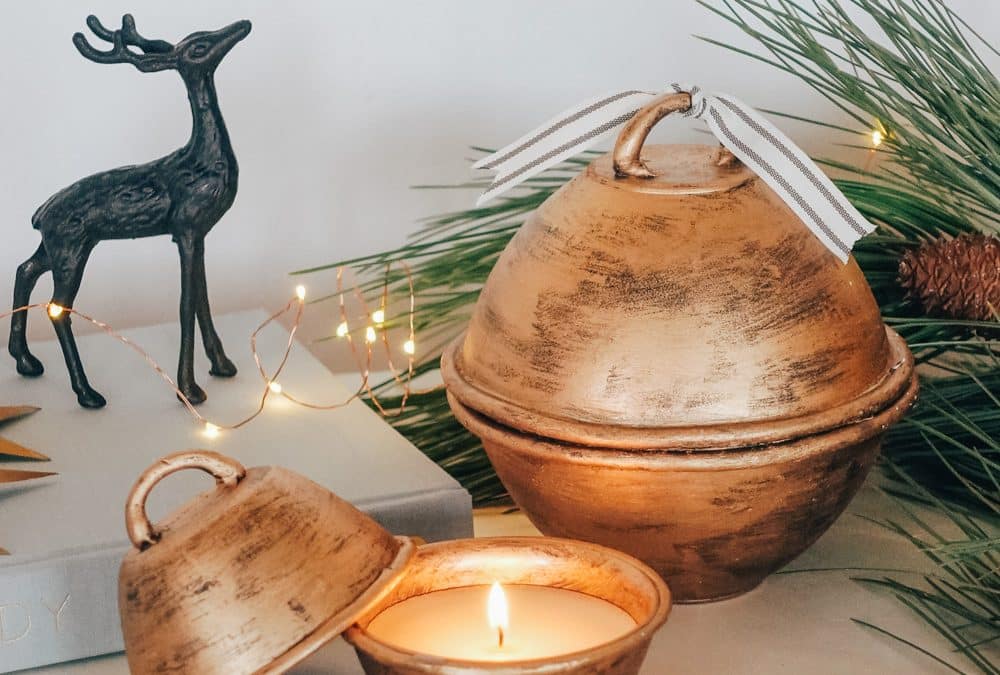
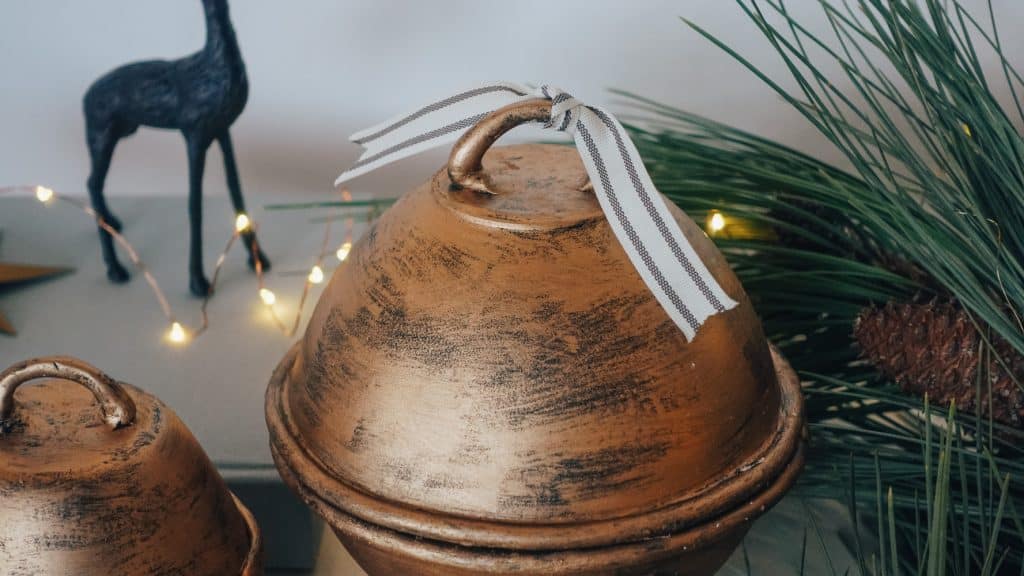
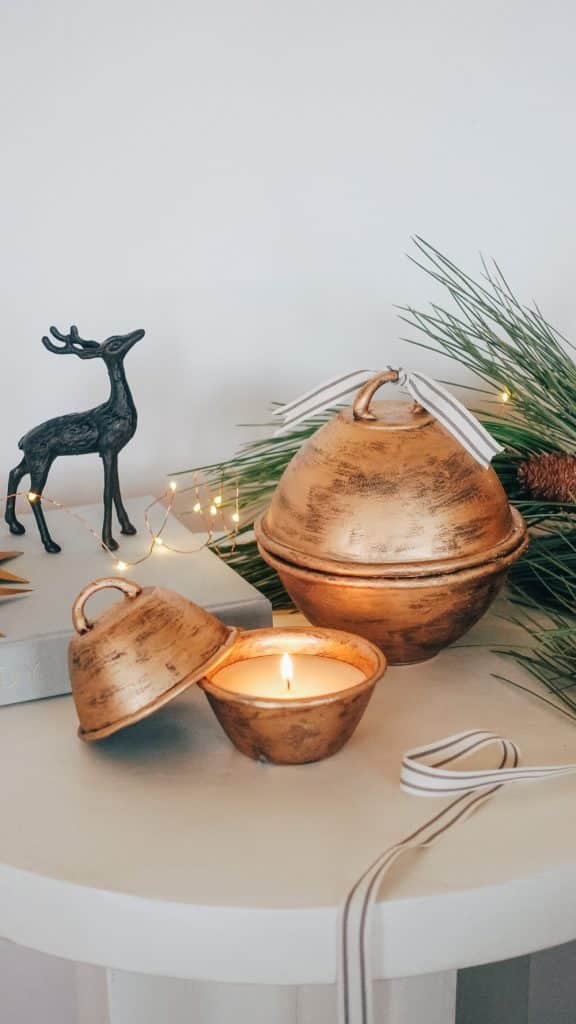
That’s it! Here’s how they turned out.
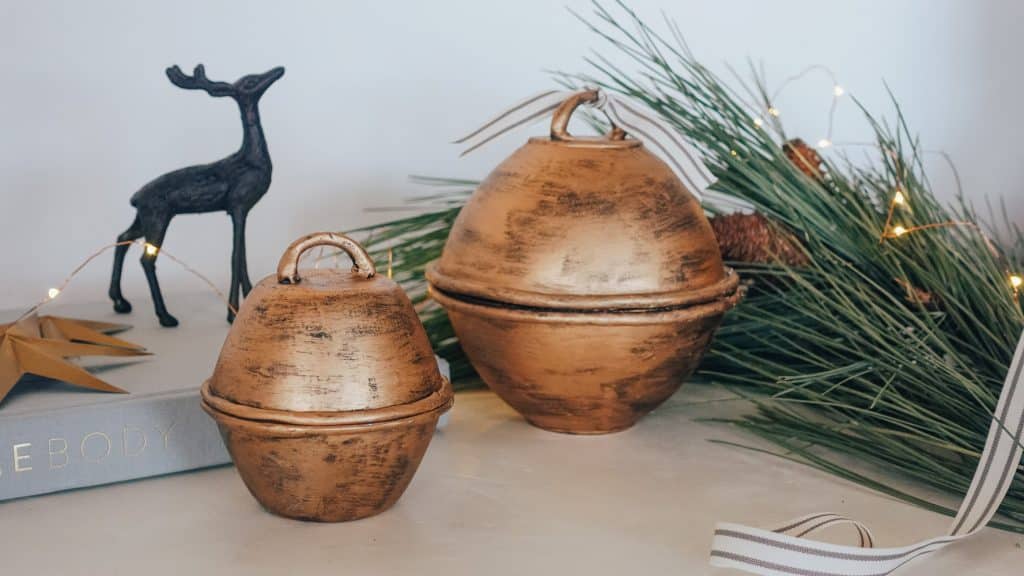
I added some ribbon on the bigger bell.
And actually turned the small bell into a candle. It’s so cute this way! Love how it glows up the living room corner. 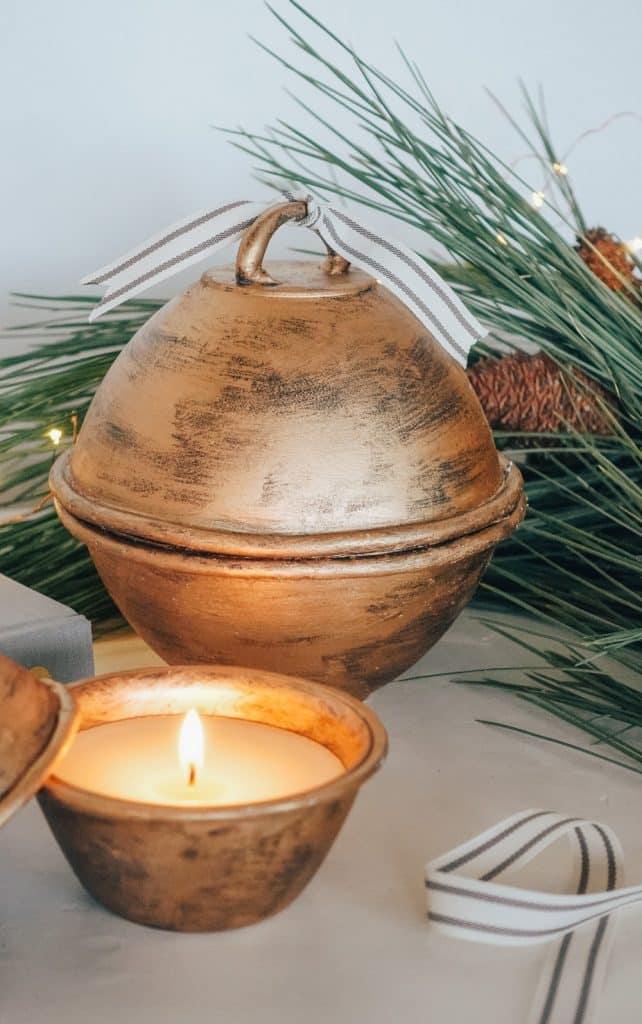
The gold rub and buff is one of my favorite gilding tools! I love how rustic it looks yet so elegant. I also love that it’s not that glossy. 
And the way that black pops through!
That’s it for this DIY! I hope this inspires you to make something cute for Christmas !
XX,
Lily
GET MORE CHRISTMAS TUTORIALS HERE – https://www.lilyardor.com/Tutorials/diy-index/holidays/
What a wonderful idea I can’t wait to be able to make one