
Hi Everyone, I hope you’re doing well and staying safe.
If you’re looking for patio door curtain ideas, DIY frosted glass, patio door covering ideas, or just an easy way to get privacy while keeping budget in mind,? Than you’ve come to the right place.
Why blinds and curtains might not be the option for you!
Today I’ll be sharing how I gave my old glass patio doors a makeover. I had a curtain over them for years and was so over it.
Vertical blinds or sheer curtains were not an option. I really wanted to see the full frame of the door and not have to add a curtain rod that would cover it with curtains or blinds. I also realized blinds can also get really pricey and I just feel like they would make the space look smaller.
My favorite part about this window treatment is, it only takes about an hour to complete on your glass sliding patio doors. If you’re working on a smaller window it can take minutes. It’s won’t block light out completely instead you’ll get a beautiful light filtering effect while still giving you that privacy.
You can do this on any window/glass surface! AND best of all it’s pretty budget friendly! Cost me under $50 for the whole patio door.

WHY contact paper IS THE BEST OPTION for DIY frosted windows!
DIY window frosting could be done a few ways. Before looking into contact paper I’ve considered other options. Amazon sells window cling and frosted spray paint. They both seemed like a great option until I did some research and realized they weren’t as reliable and long lasting as the contact paper.
WHY window cling wasn’t my choice
I’ve heard so many folks say window cling only really works great on new windows. It comes off too easy and isn’t very permanent. I’ve haven’t had much experience with window cling so I can’t say for sure but what I can say, is that it can get pretty pricey and I didn’t want to risk it.
<br />
WHY frosted spray paint wasn’t my choice
The other option was frosted spray paint. I was super close to picking this option because it was so affordable. The only downside to the spray paint option is that it scratches off fairly easily. If you have pets or little kiddos this is probably not the best option. It’s also super messy.
I spray painted the frame of the doors black and just the one coat of spray paint left my floors in the kitchen/dinning area in a layer of black dust. I can’t imagine what it would of been like if I had to spray the whole surface of the window in multiple coats.
<br />
How to spray paint metal window and door frames!
I decided to spray paint the frame of the doors black to give it a more modern look. The silver was so worn out and old and in major need of a face lift. I first scrubbed the metal down with a sponge and soapy water. I than wiped it dry and gave it a light sand with some sandpaper.
I than masked the metal frame off and gave it a coat of black rustoleum spray paint. That’s it! It’s that easy. 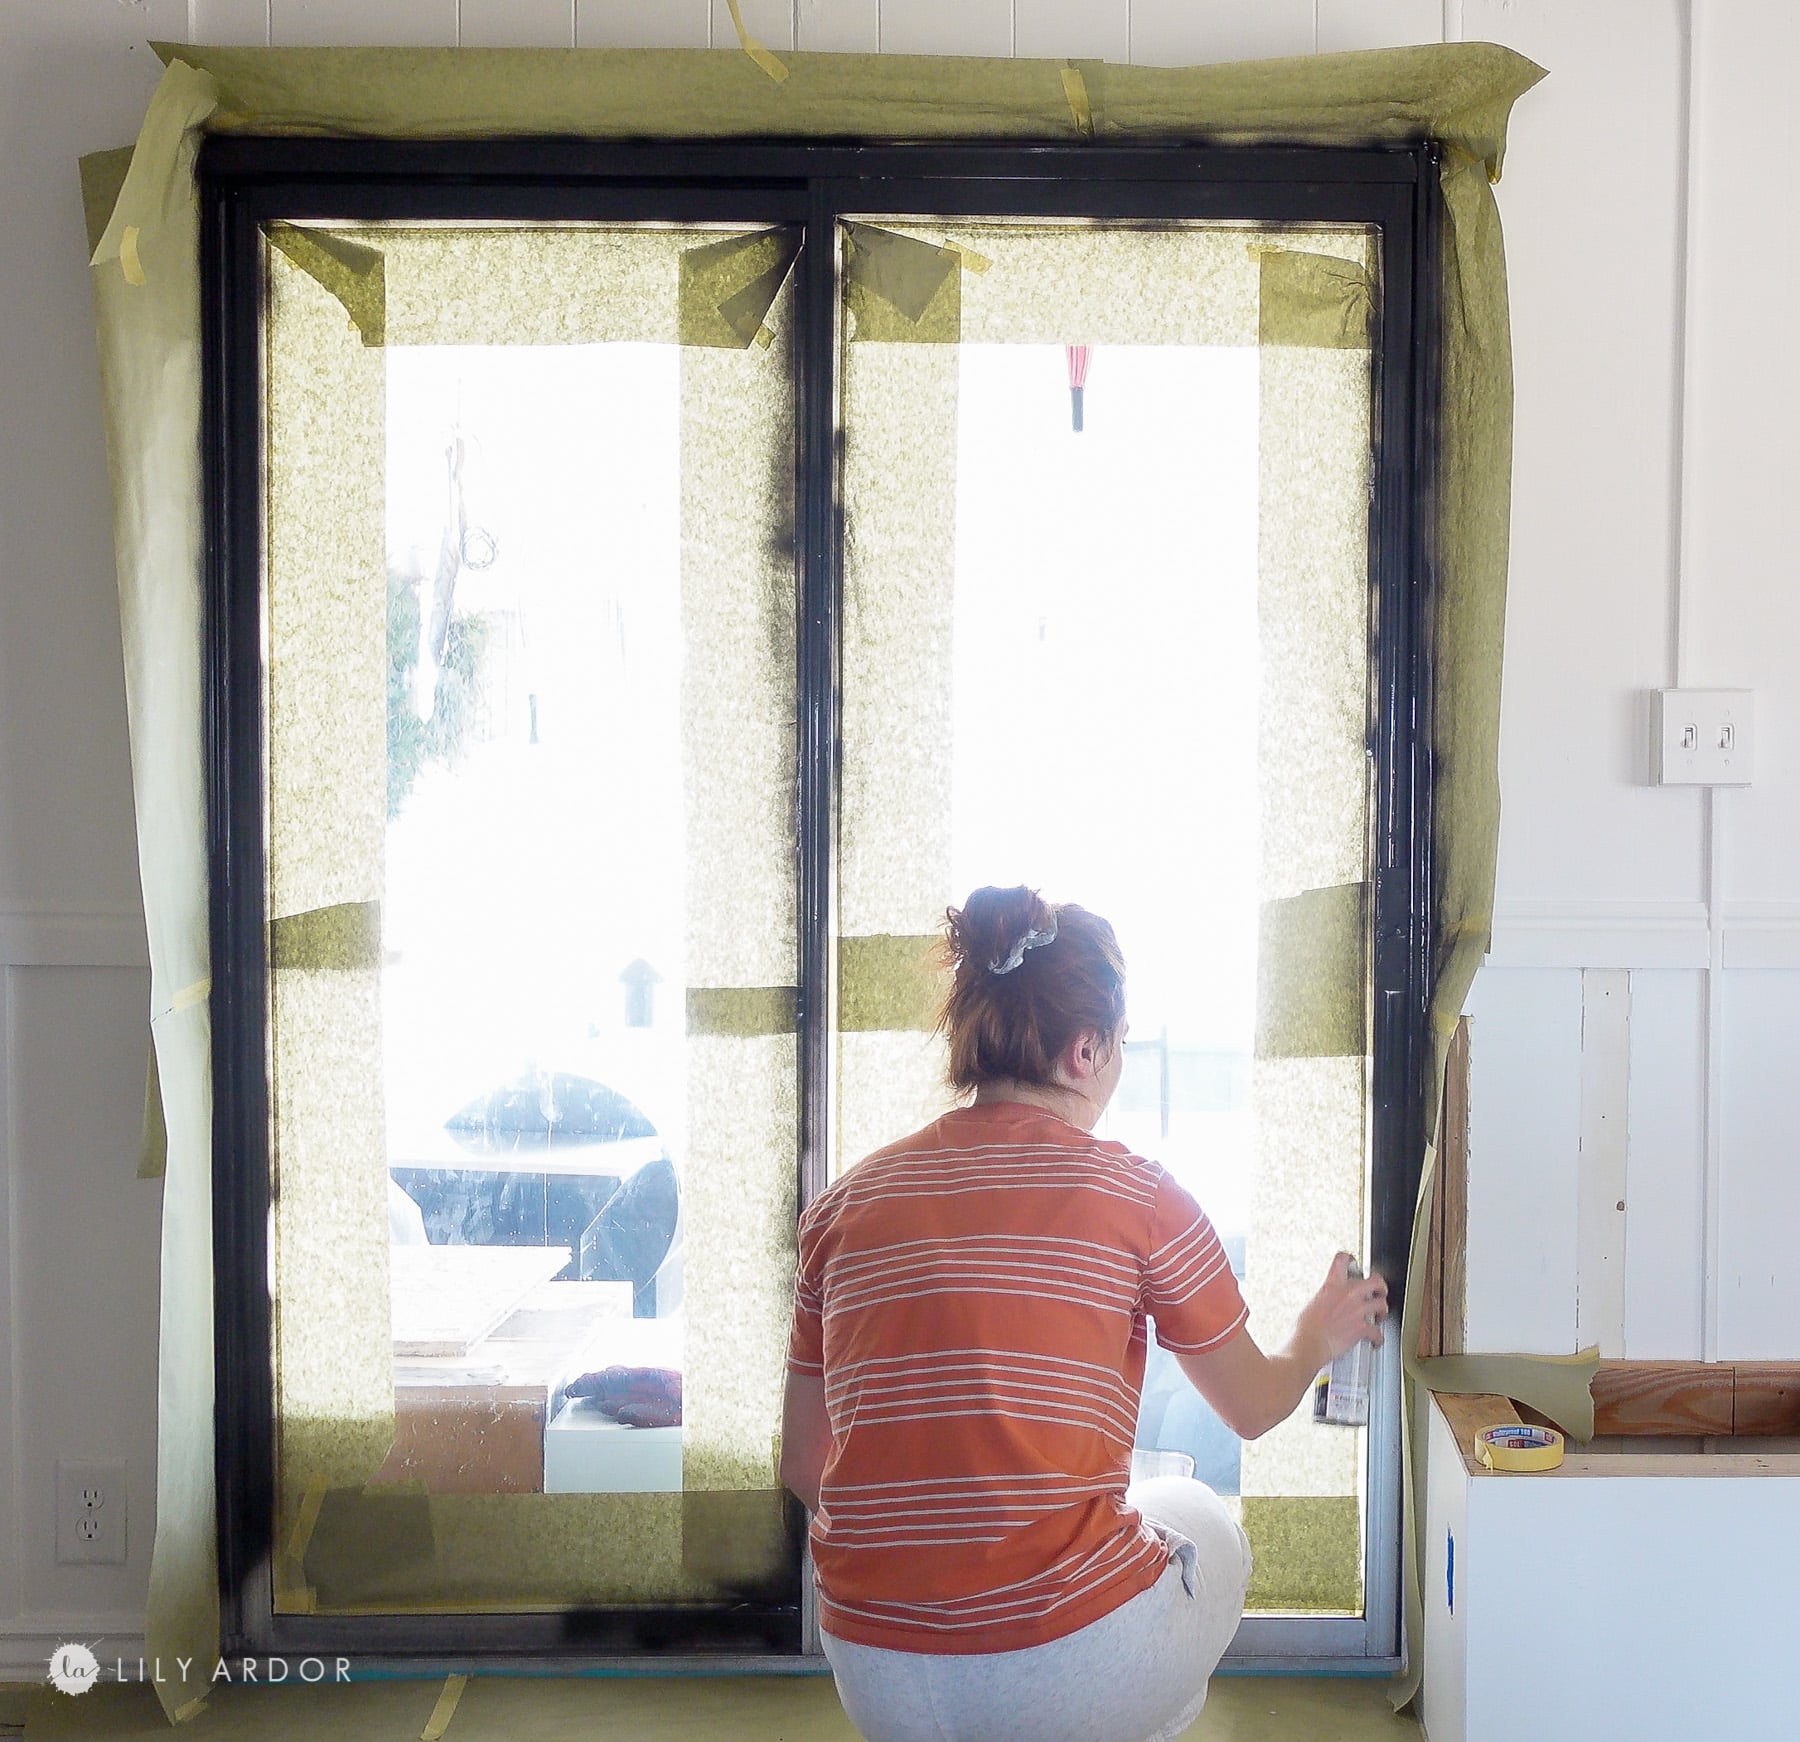
Picking the correct contact paper
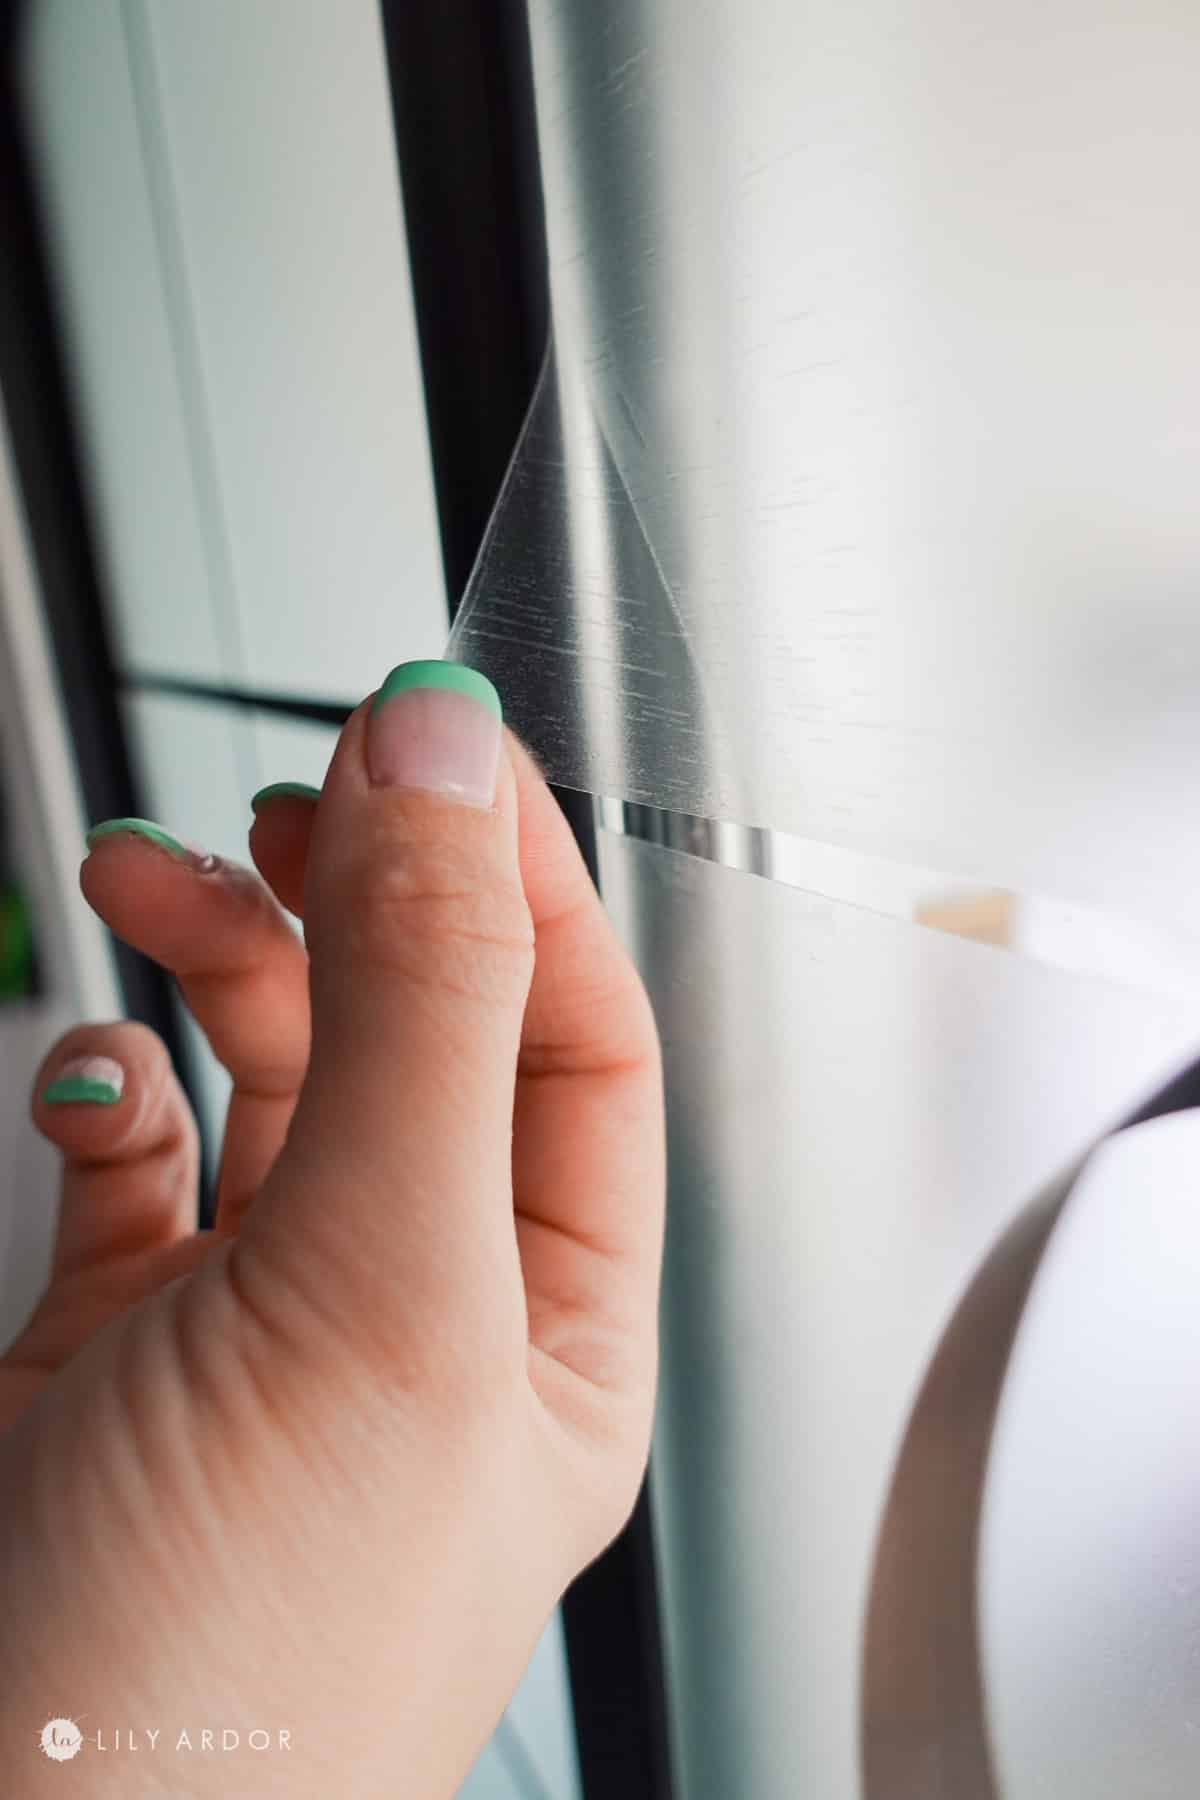
There’s actually frosted contact paper that’s sold specifically to frost window. I will say I’ve found that it’s usually more expensive then regular contact paper. It’s also good to know that most regular contact paper has somewhat of a frosted look to it even though it’s labeled as clear. This was the case with my contact paper.

I found an amazing deal on amazon for the regular contact paper that turned out costing me under $50 for the whole project.
How to Frost windows with contact paper
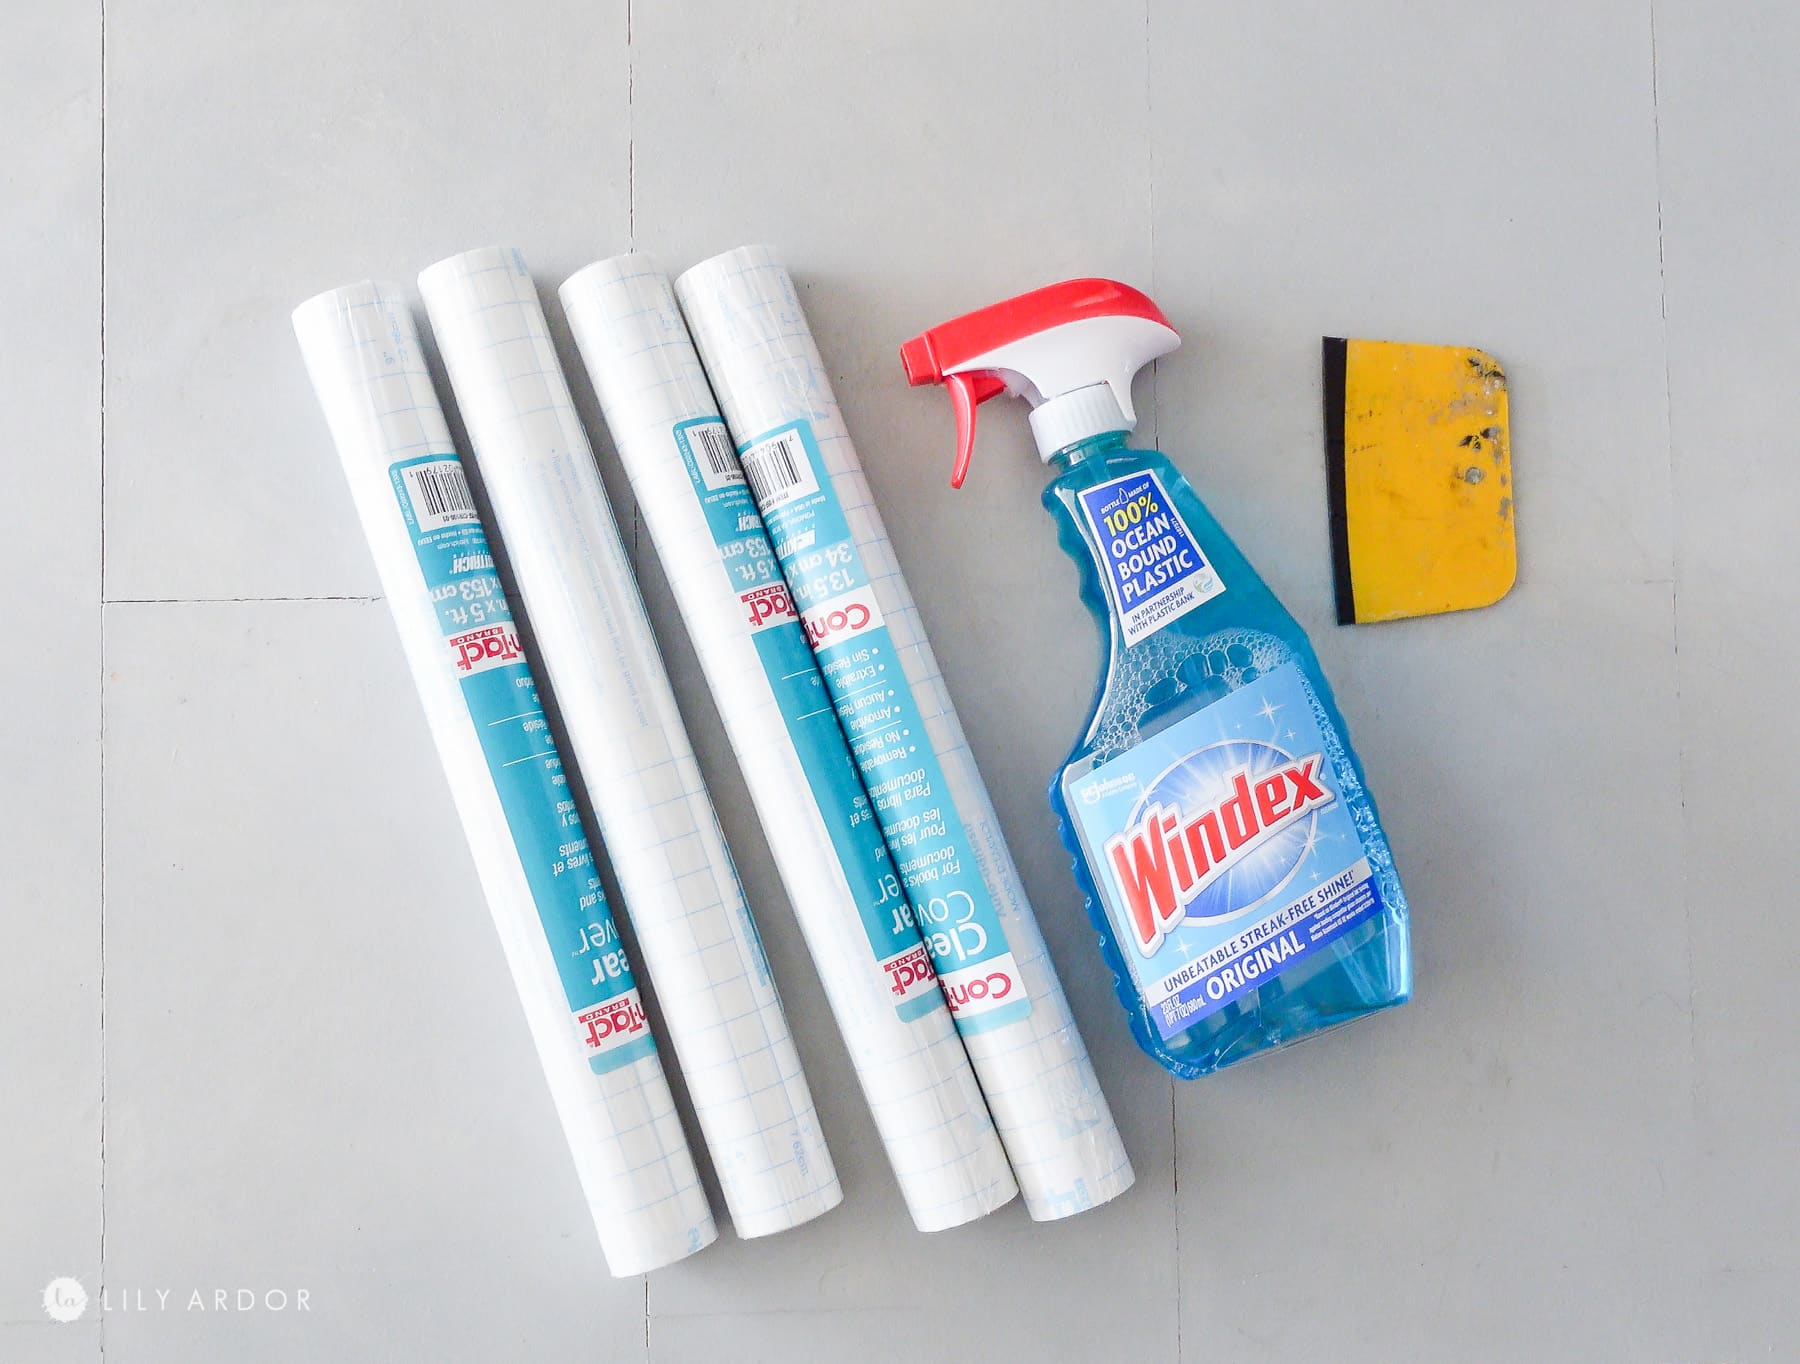
supplies:
- contact paper
- windex
- squeegee or flat puddy knife
- razor blade scraper
- dry wall knife
- gaffer tape
Total cost:
Depending on your window size this can cost less or more. Because I was applying this onto a big area like glass doors I ended up using a total of 6 rolls which cost me around $38. Granted one roll was a complete waist because I messed up in the beginning.
I would highly recommend buying an extra roll just to practice on. I also got some gaffer tape that cost me around $8. I chose to go with the gaffer tape because it has a matte finish which I really wanted.
<br />
Step 1 : Prep your windows!
In order for the contact paper to adhere good you must clean the windows properly. I used my razor scraper and went over the whole window to clean up any build up on the window the wouldn’t come off with windex and paper towels.
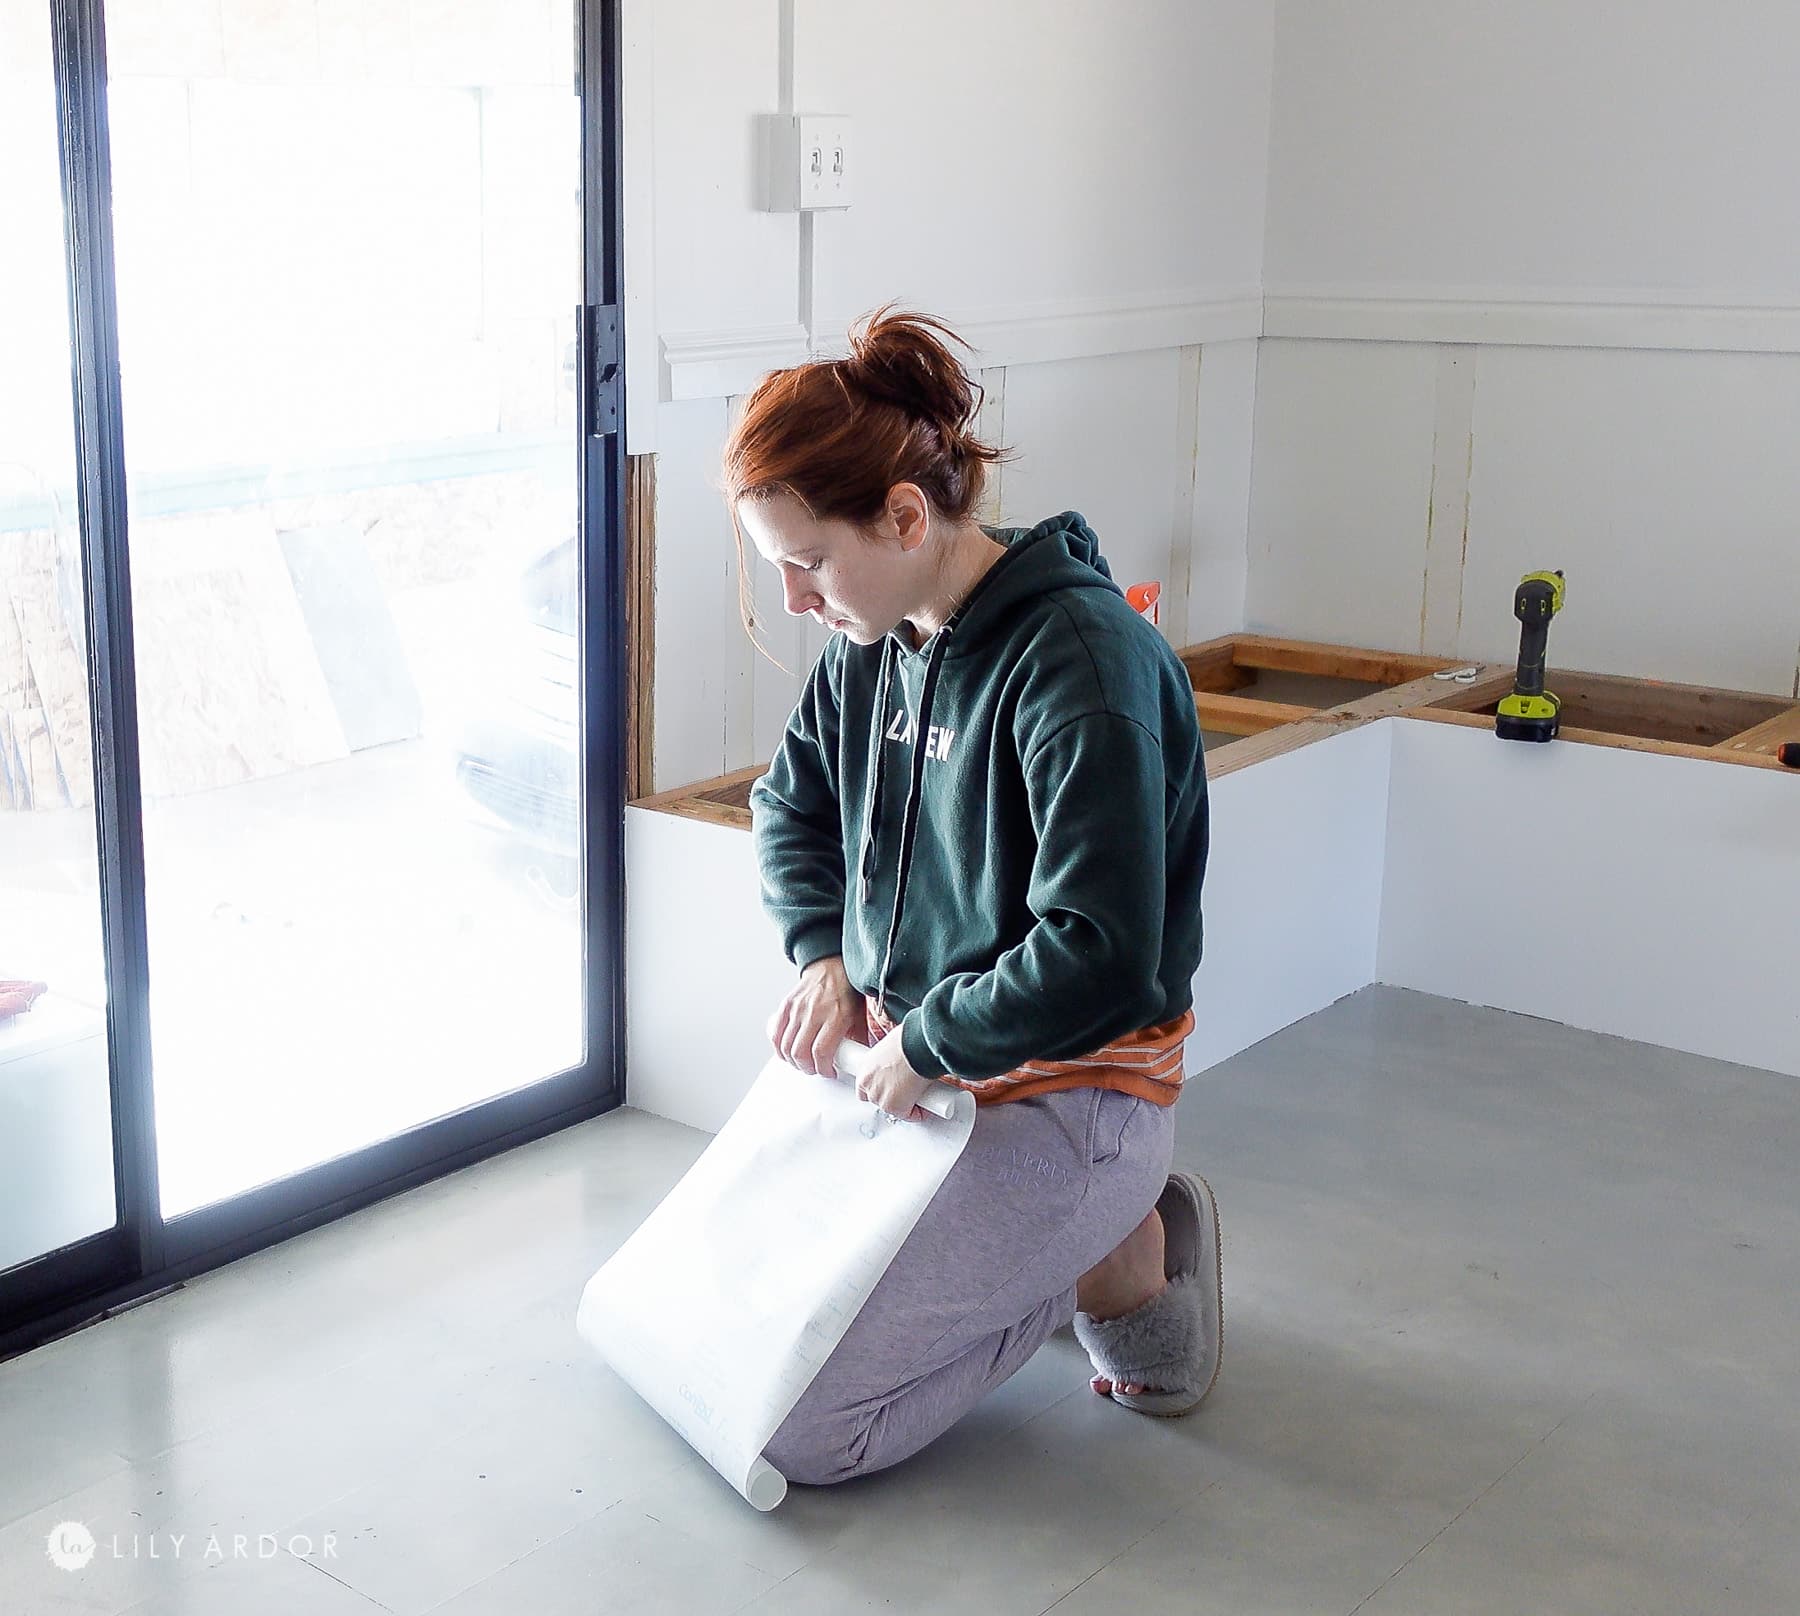
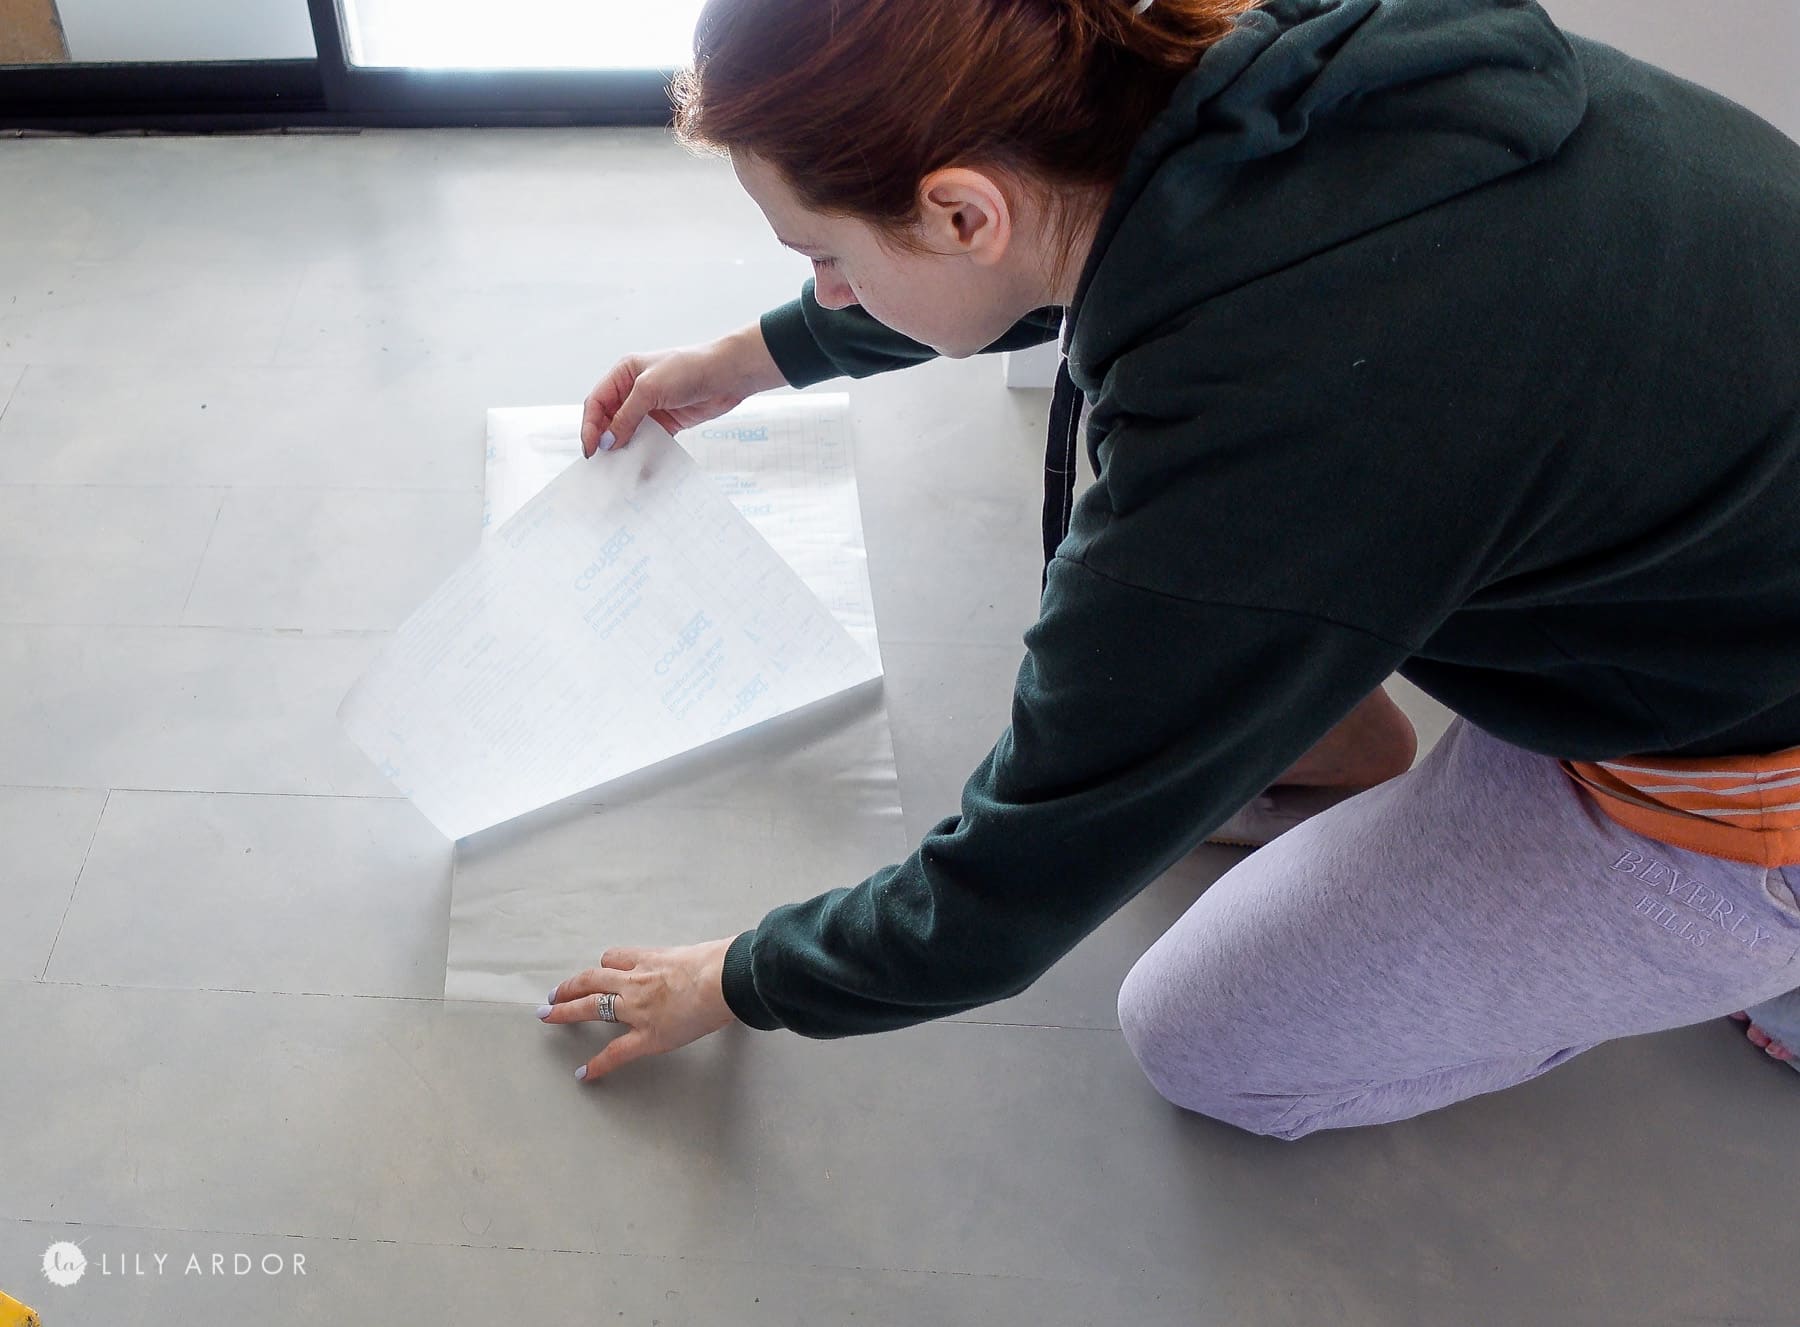
Step 2: Prepping the contact paper!
Remove the packaging from the contact paper and roll it a few times in the opposite direction from which it was rolled up as originally. This helps you remove the backing easier.
The goal here is to have the contact paper lay flat without rolling up on you while your trying to work with it. Its super hard to remove the backing while it keeps rolling up. I learned that the hard way.
Step 3: Attaching the contact paper to the window!
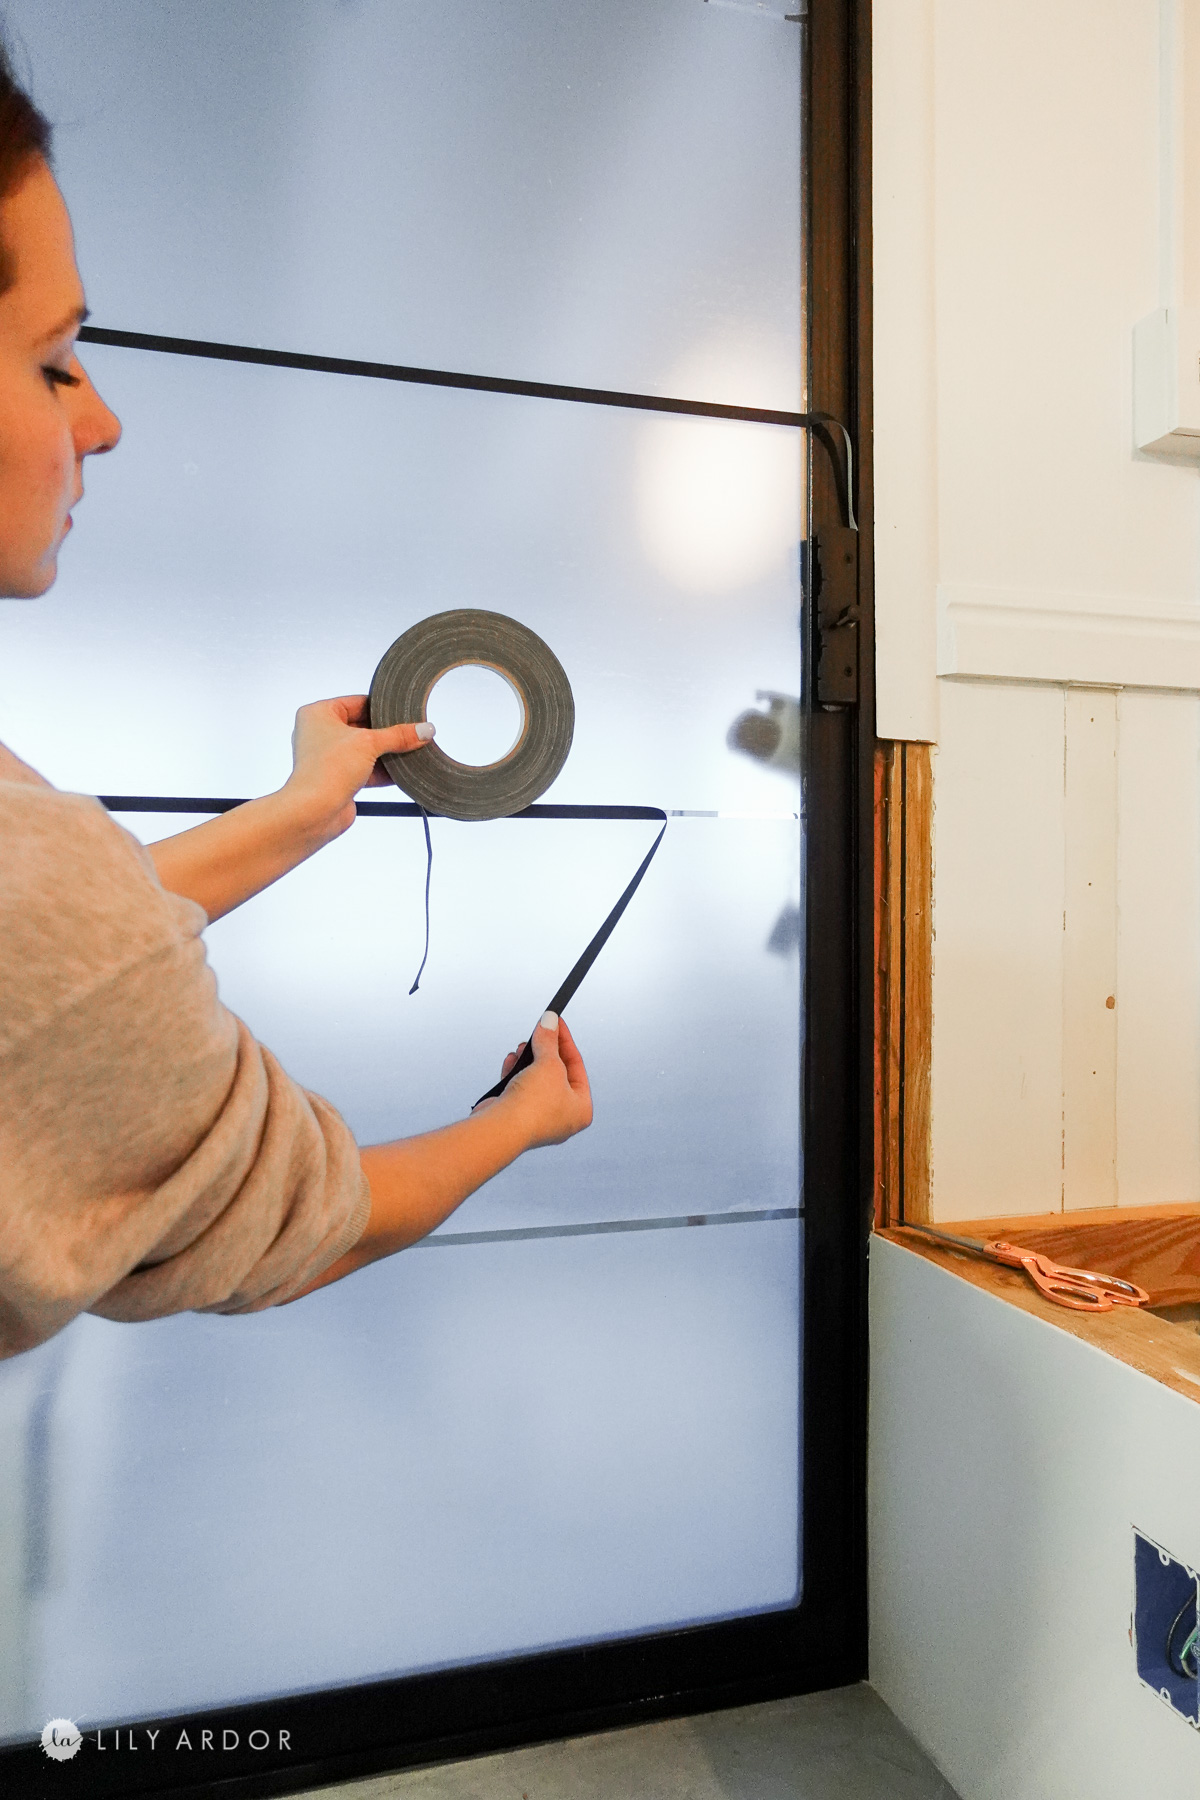
Next cut your contact paper to size. I made sure my contact paper was about 1 inch longer in length then my window size. I decided to hang the contact paper sheets horizontally. I calculated if I hung them this way with 1/4 inch gaps in between each sheet I should have exactly enough to cover the whole window.
The gaps would then be filled with black decorative tape. You can also hang the contact paper vertically just keep in mind you will need to add tape over the seams.
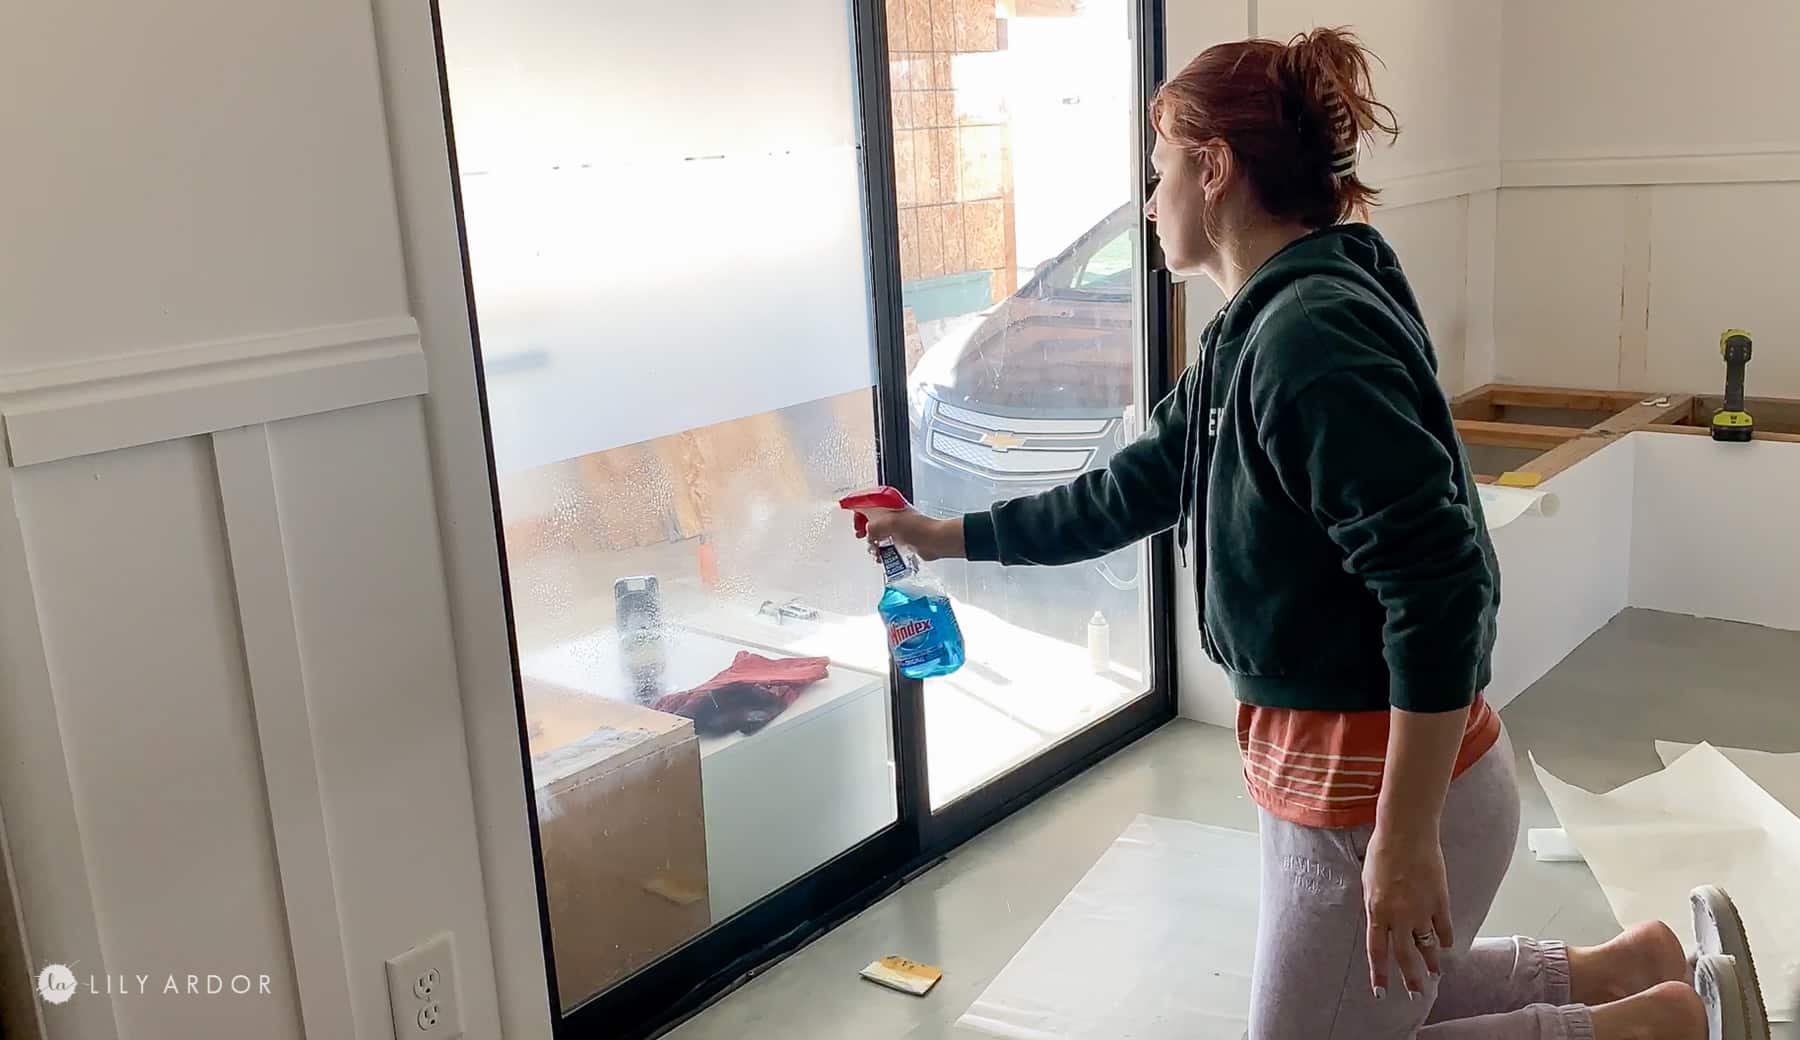
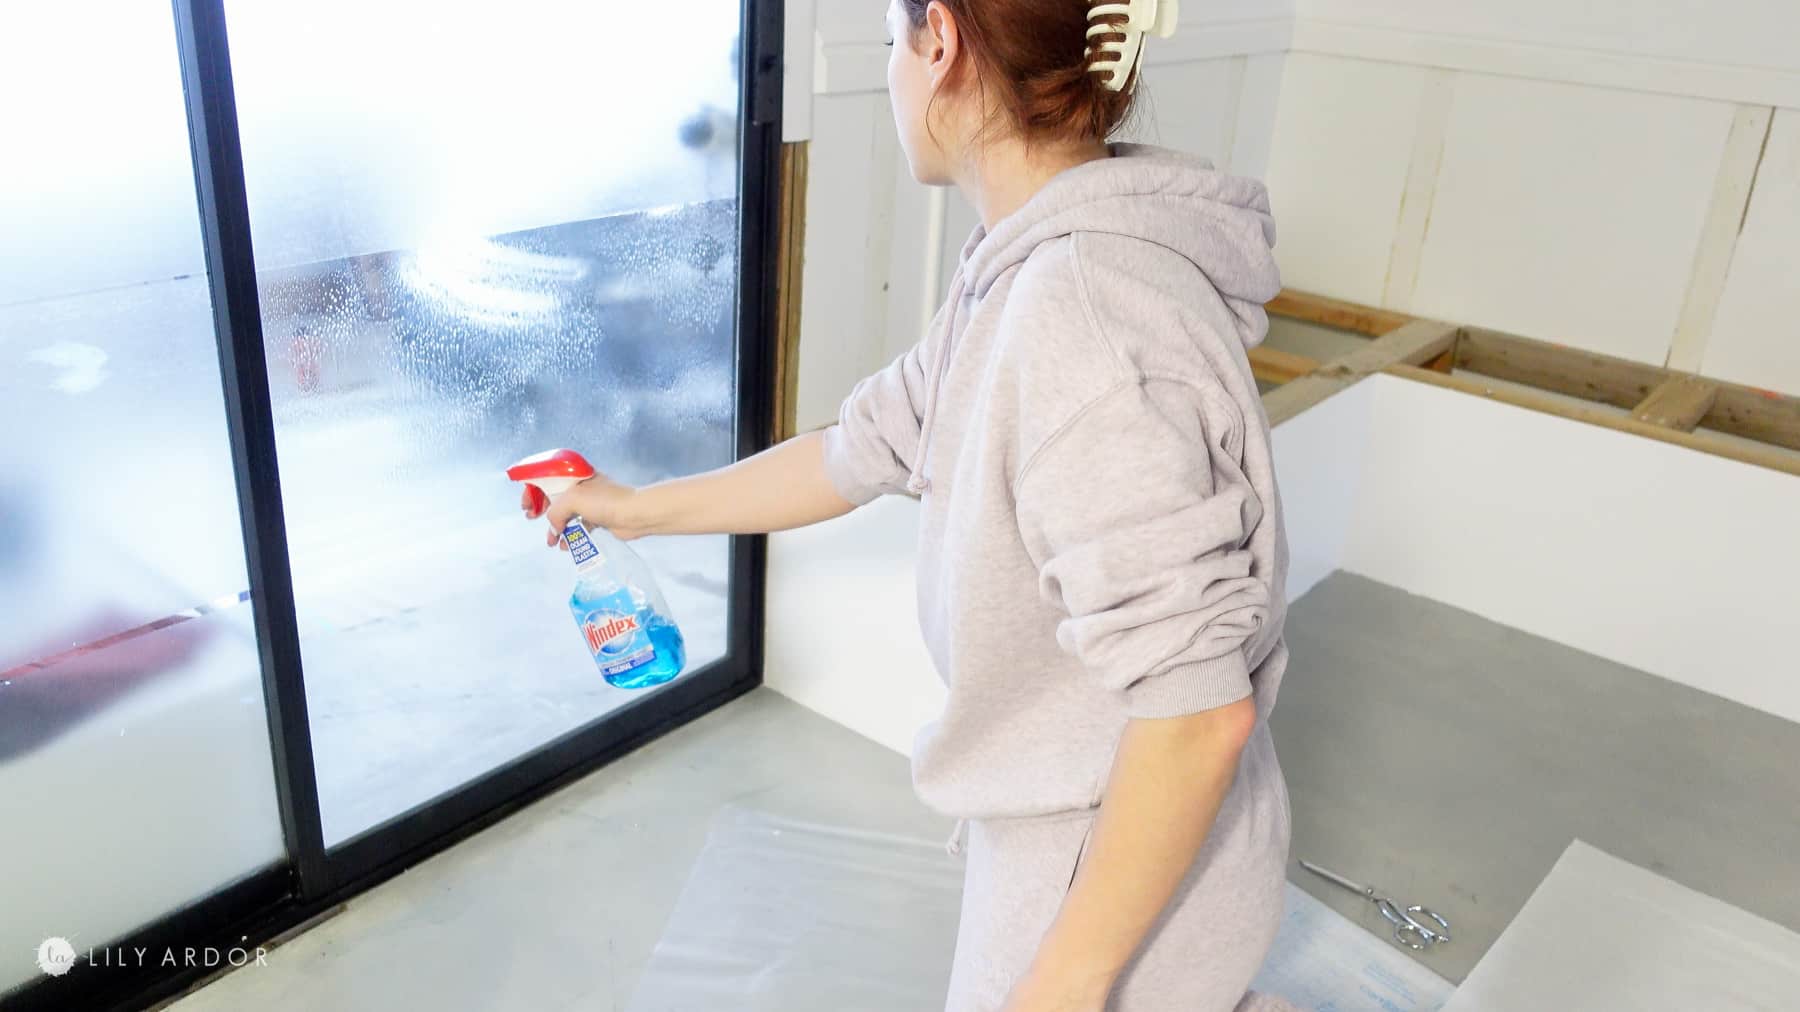
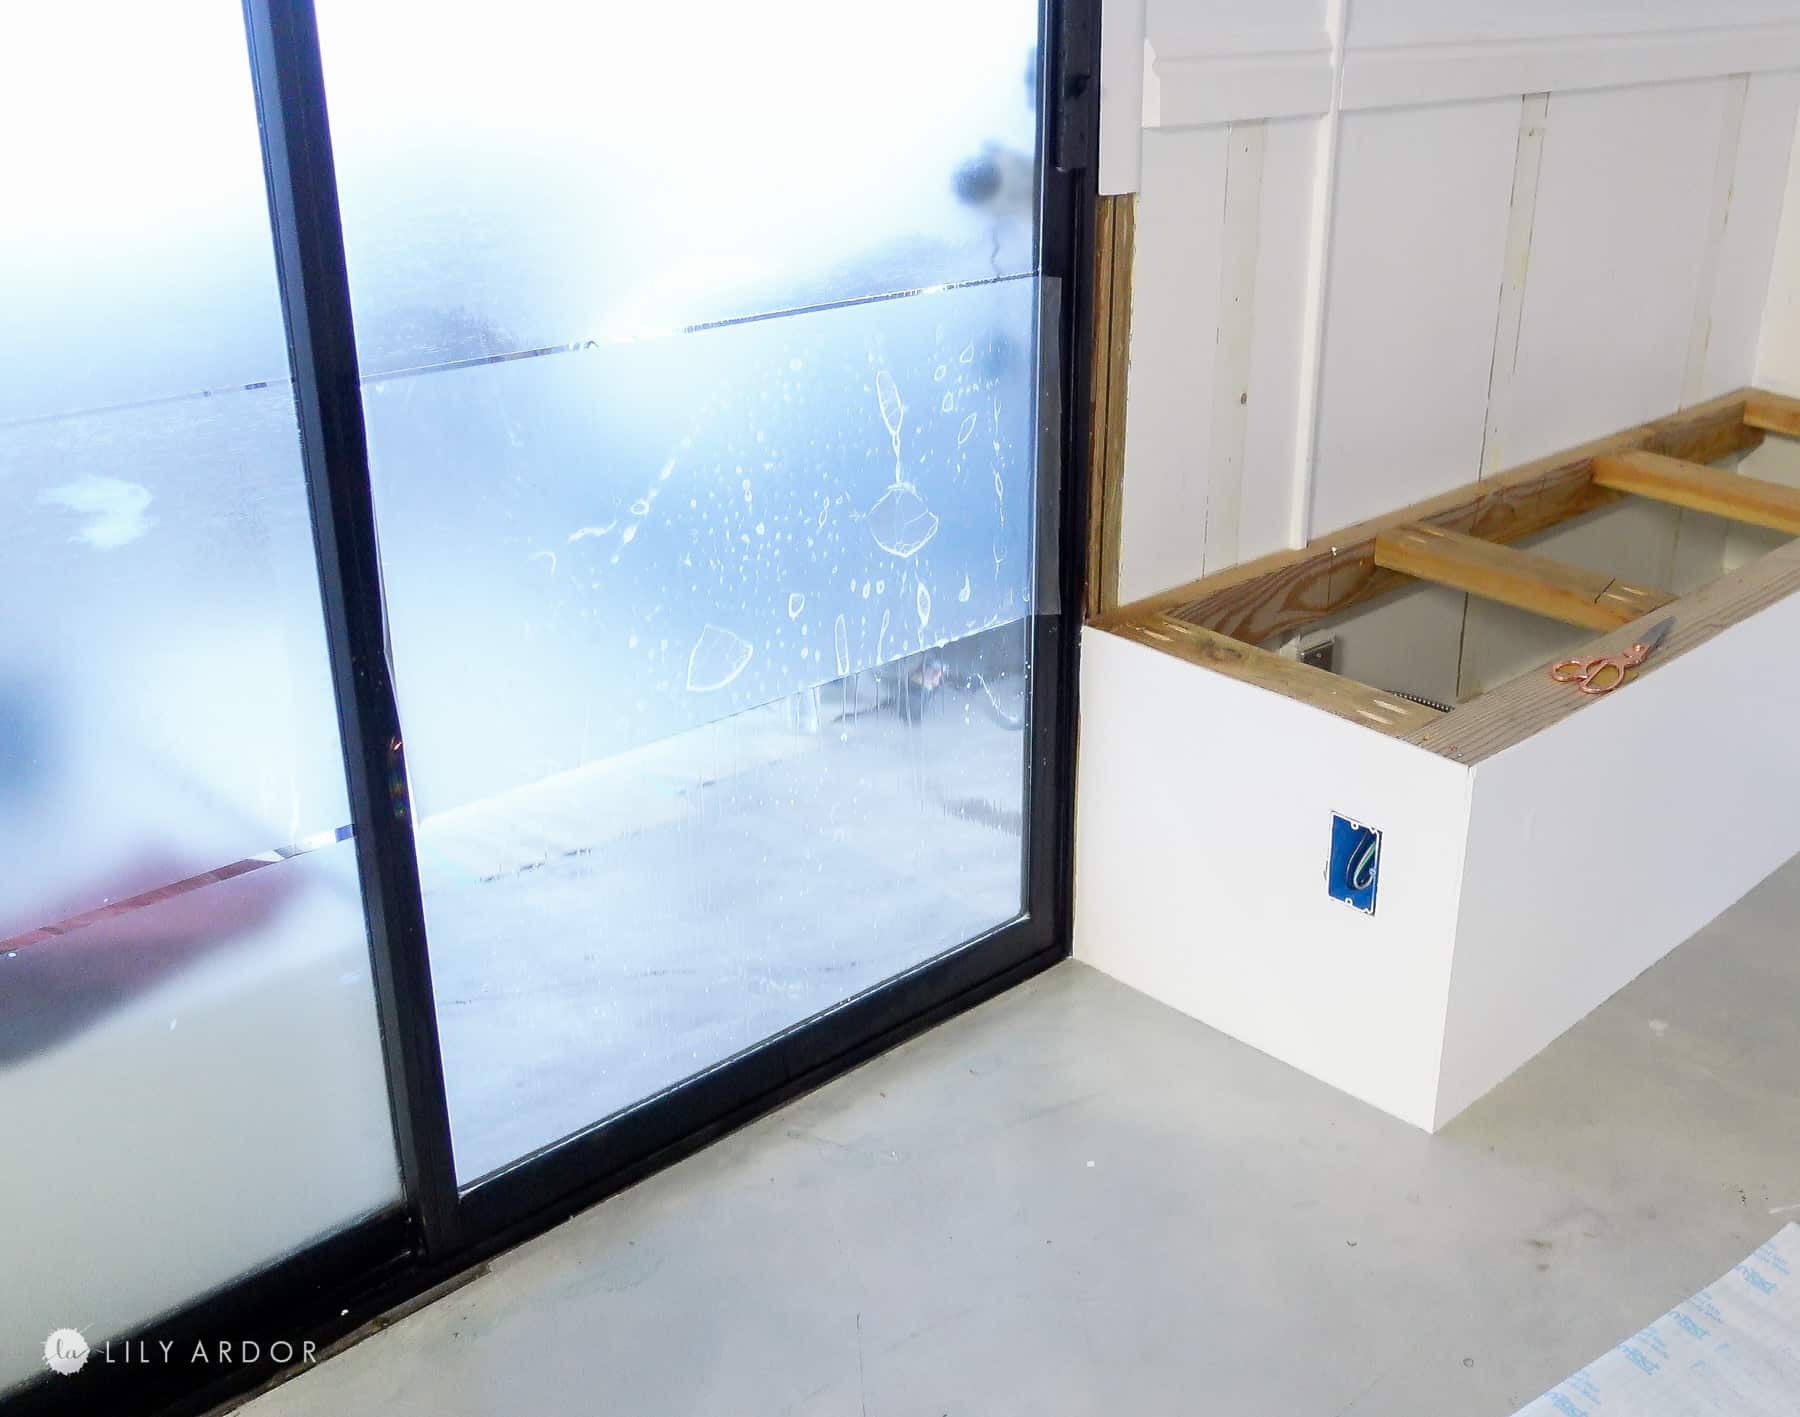
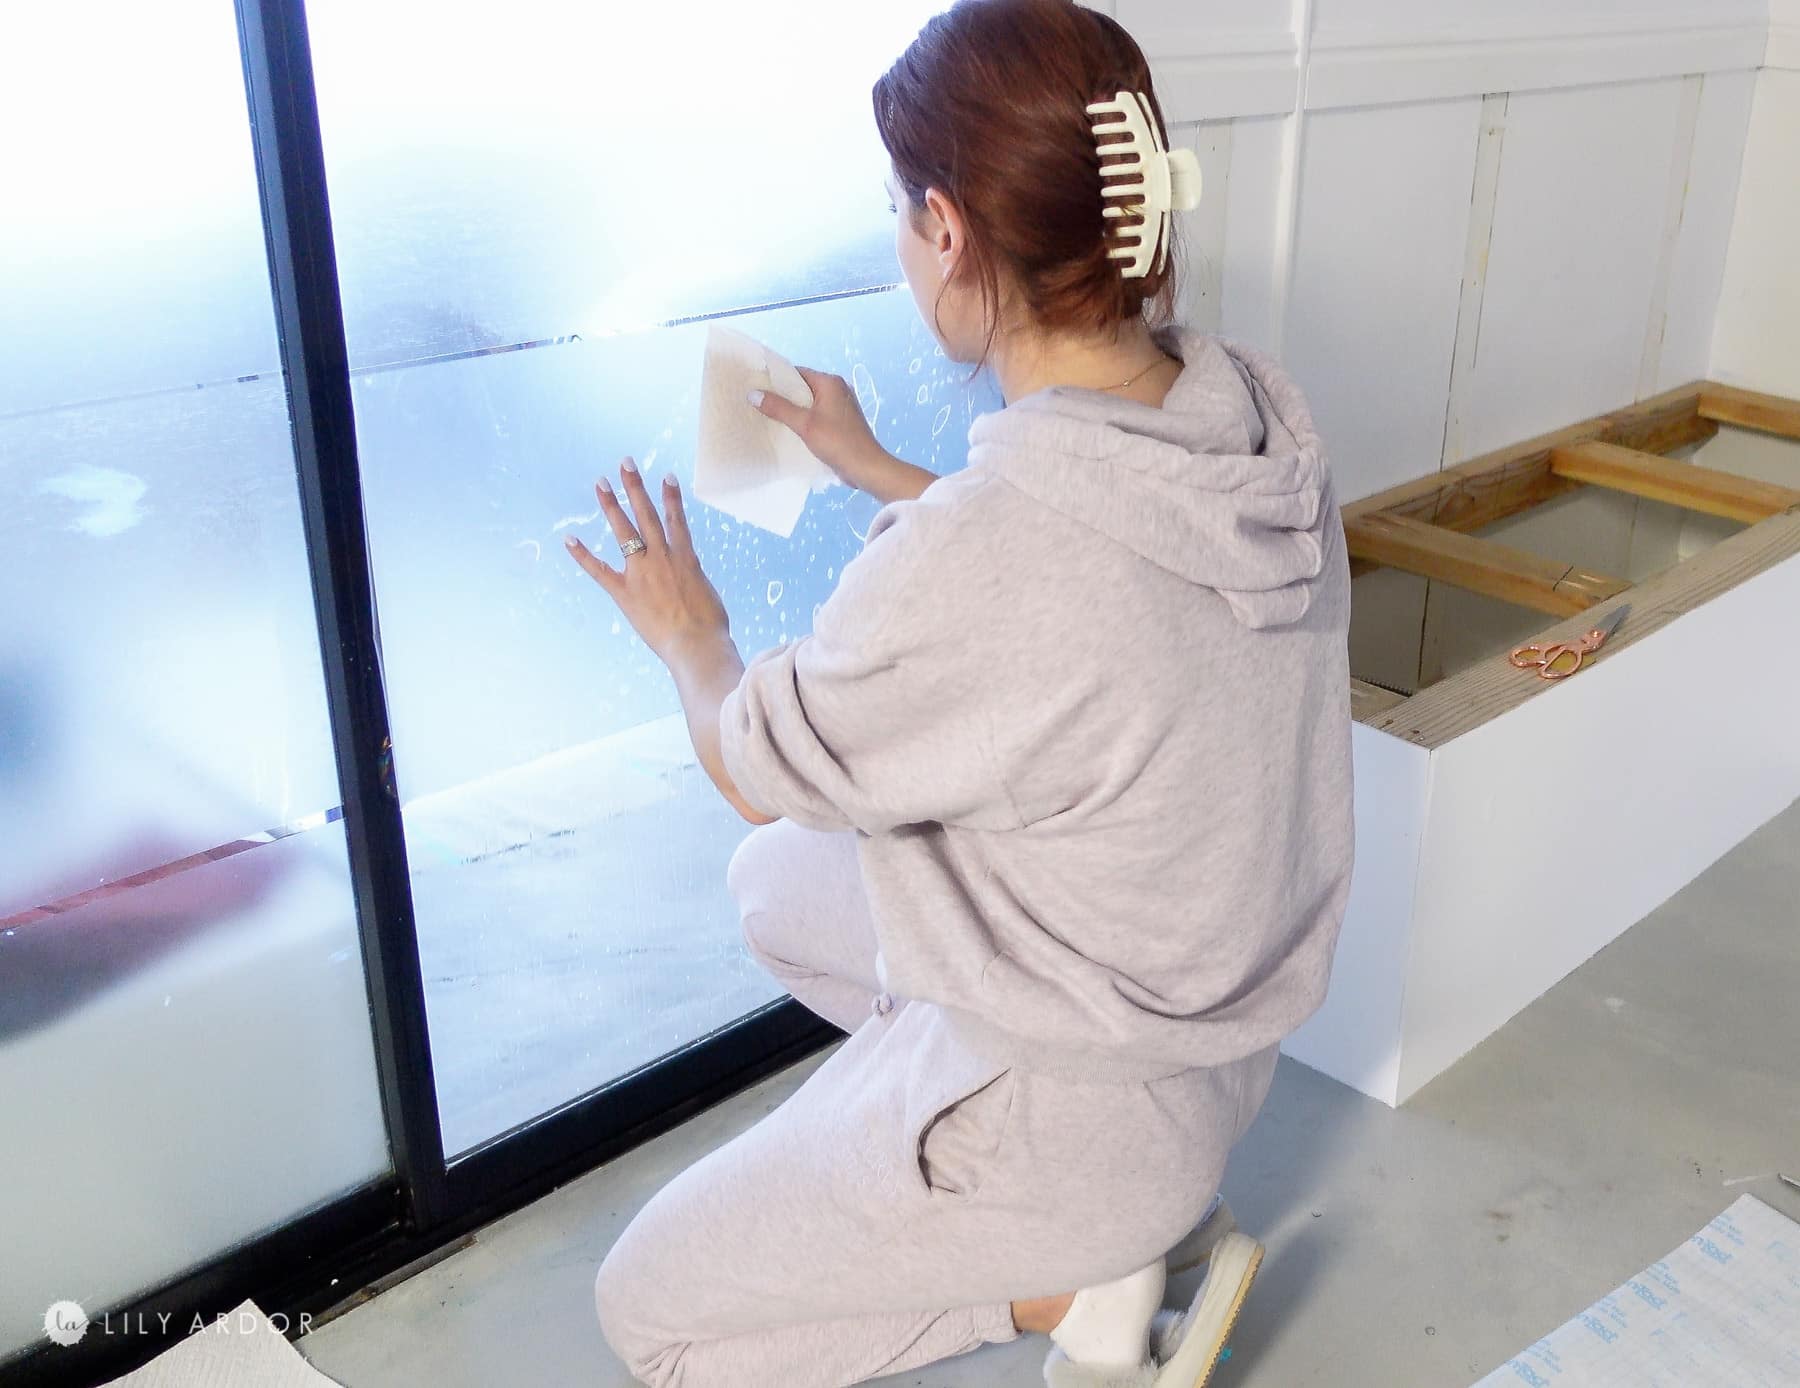
Make sure the surface you’re working on is clean and dust free. Remove the backing from the contact paper. Now soak the window with a ton of windex where you plan to add the contact paper.
Don’t be shy with the windex. The window must be soaked so you can easily reposition the contact paper if needed. Don’t worry about the bubbles just yet.
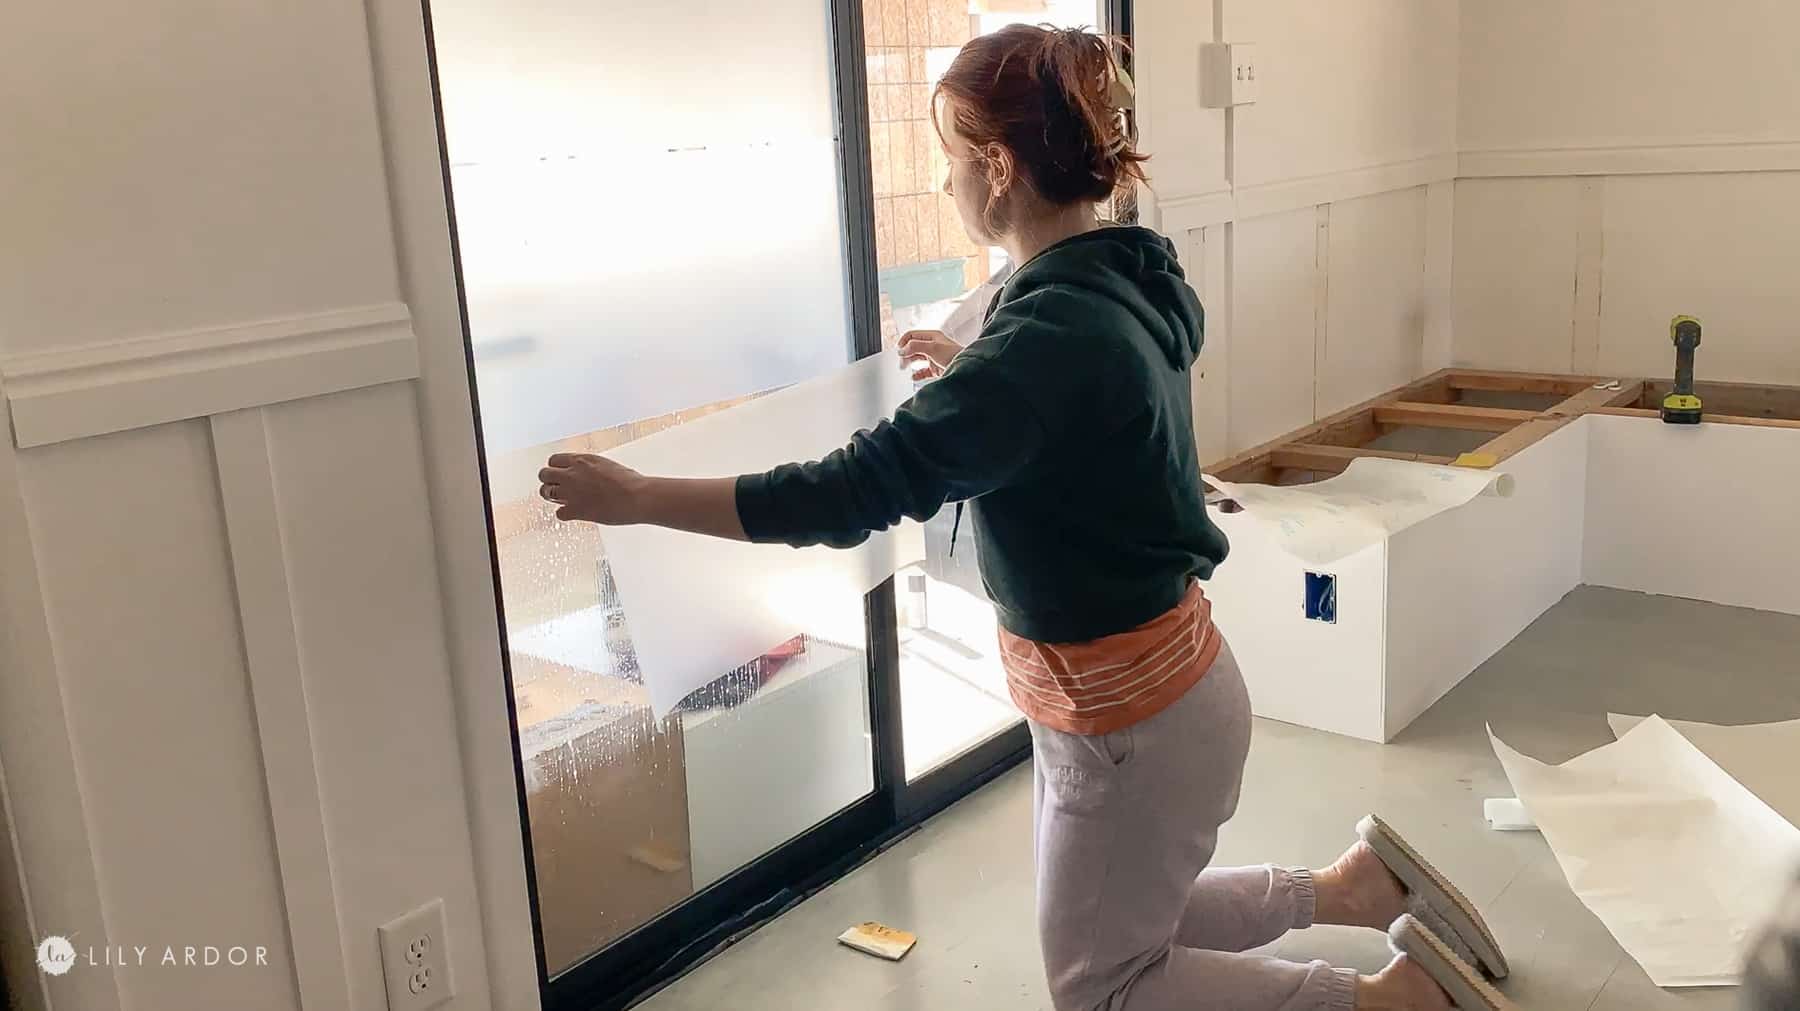
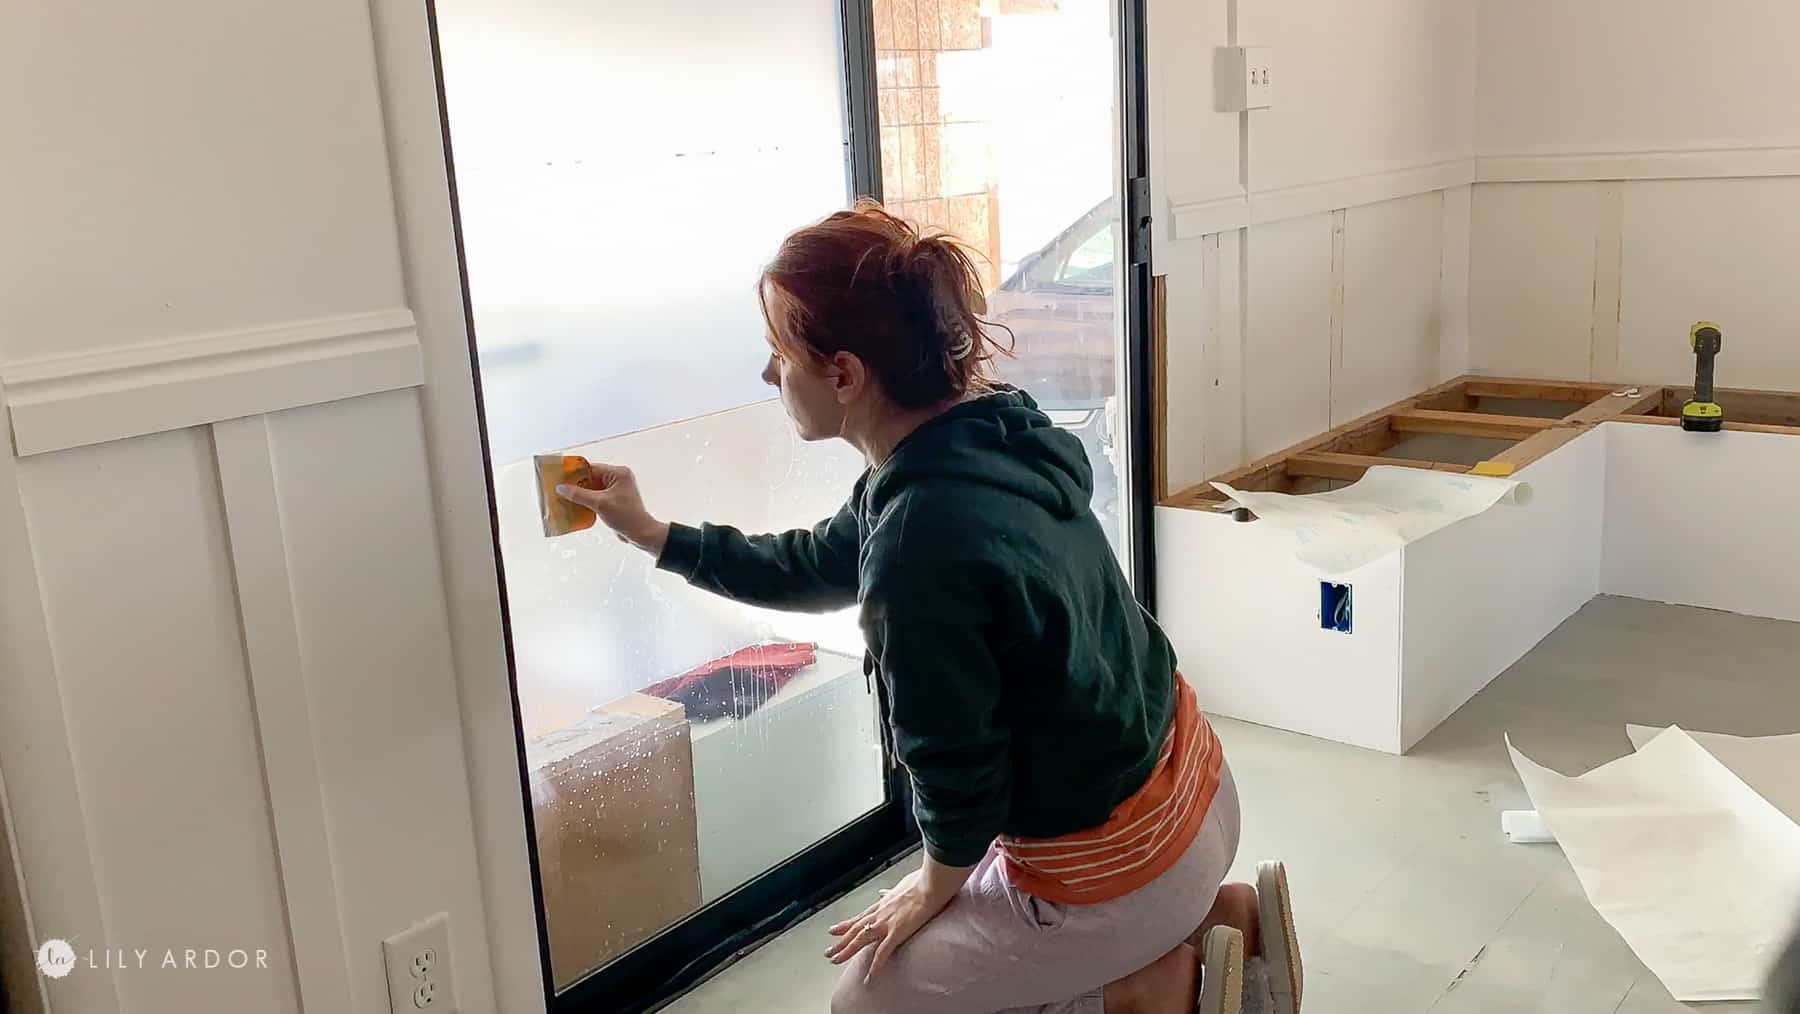
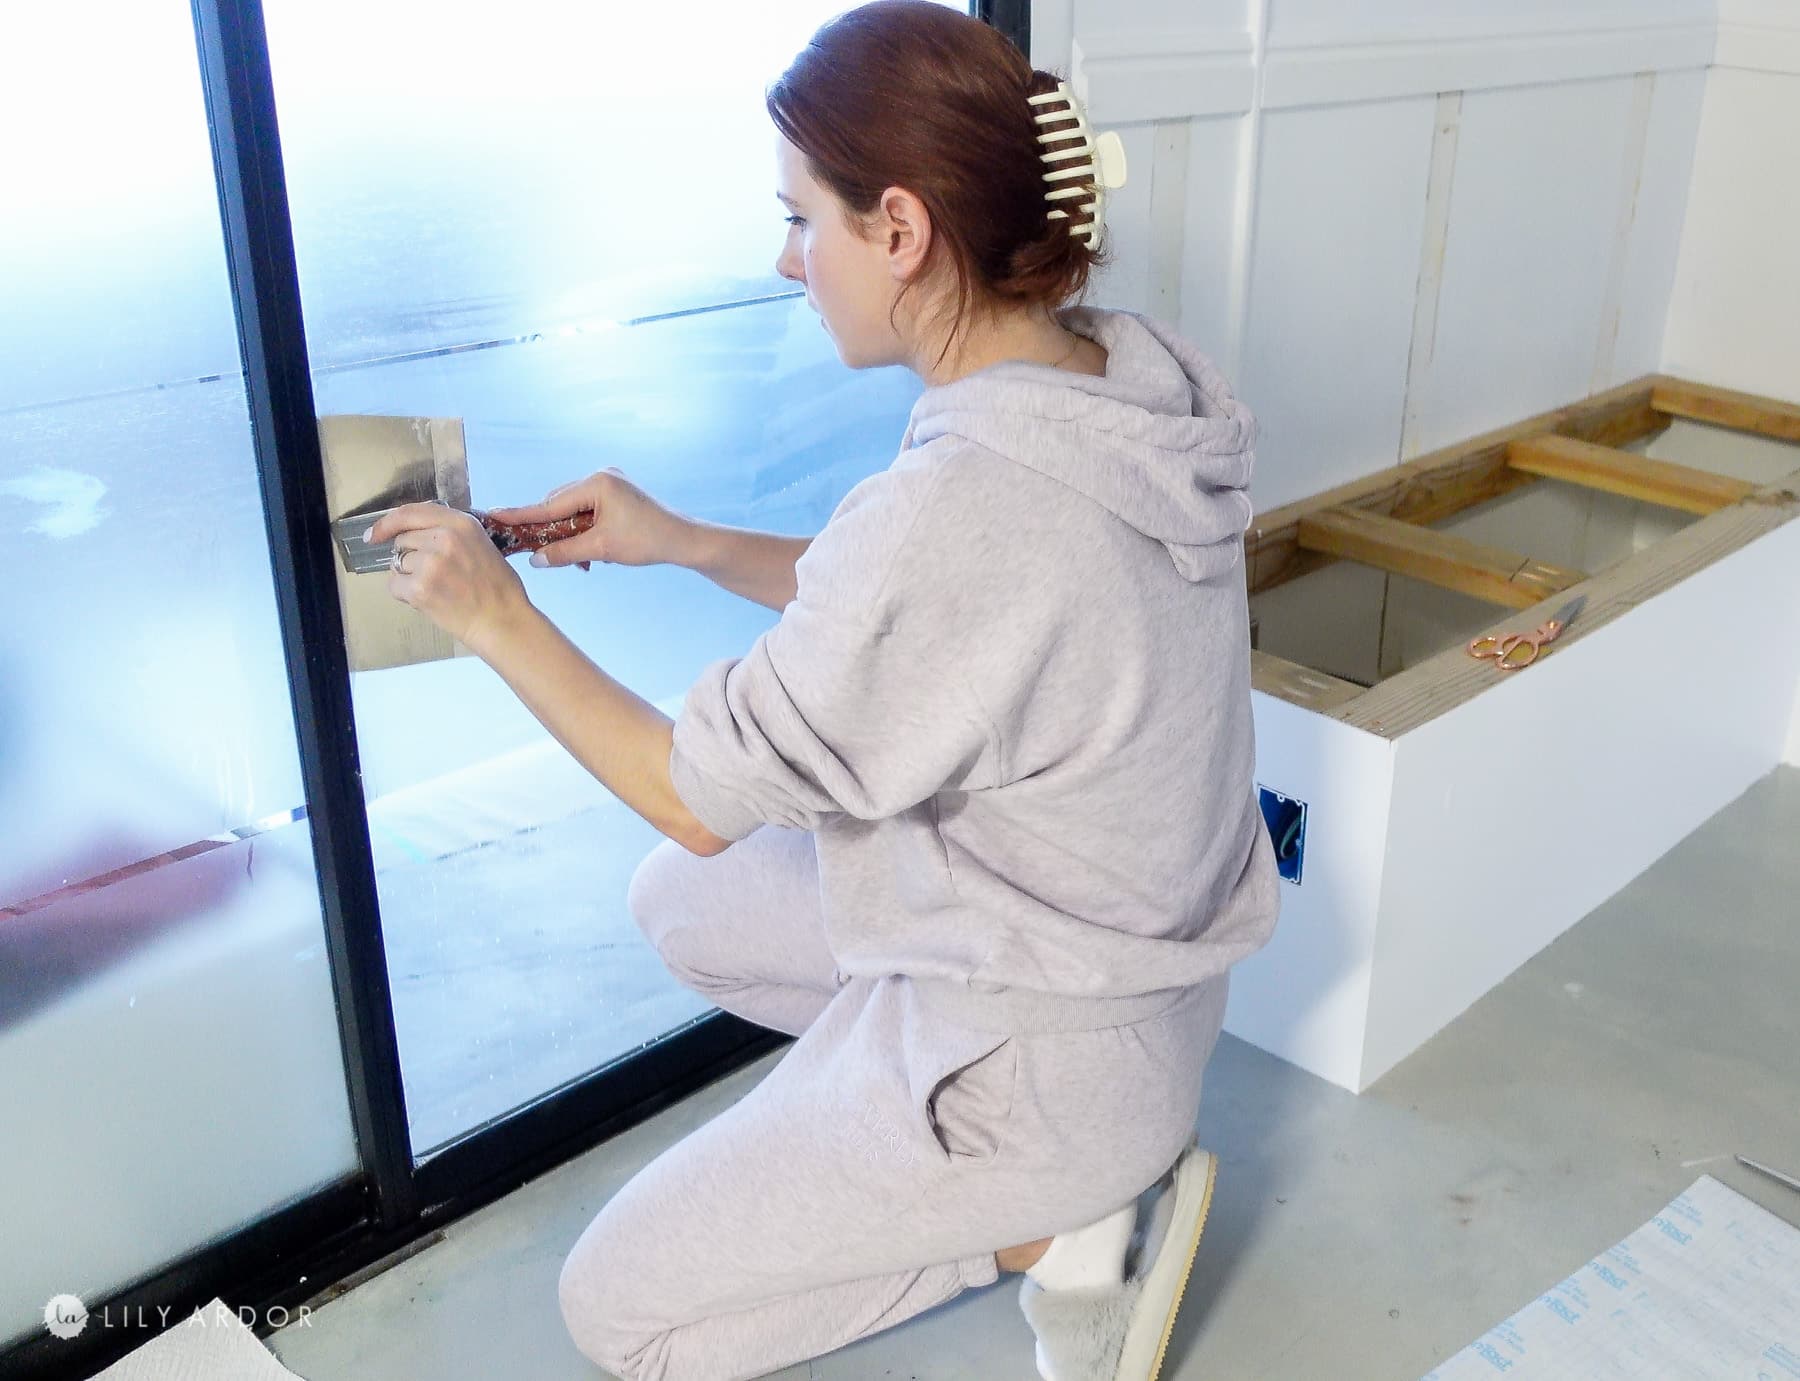
Step 4: Removing the bubbles!
Next I used a plastic puddy knife and pushed all the bubbles with windex to the edges. This should be super easy to do if you’ve applied enough windex under the contact paper.
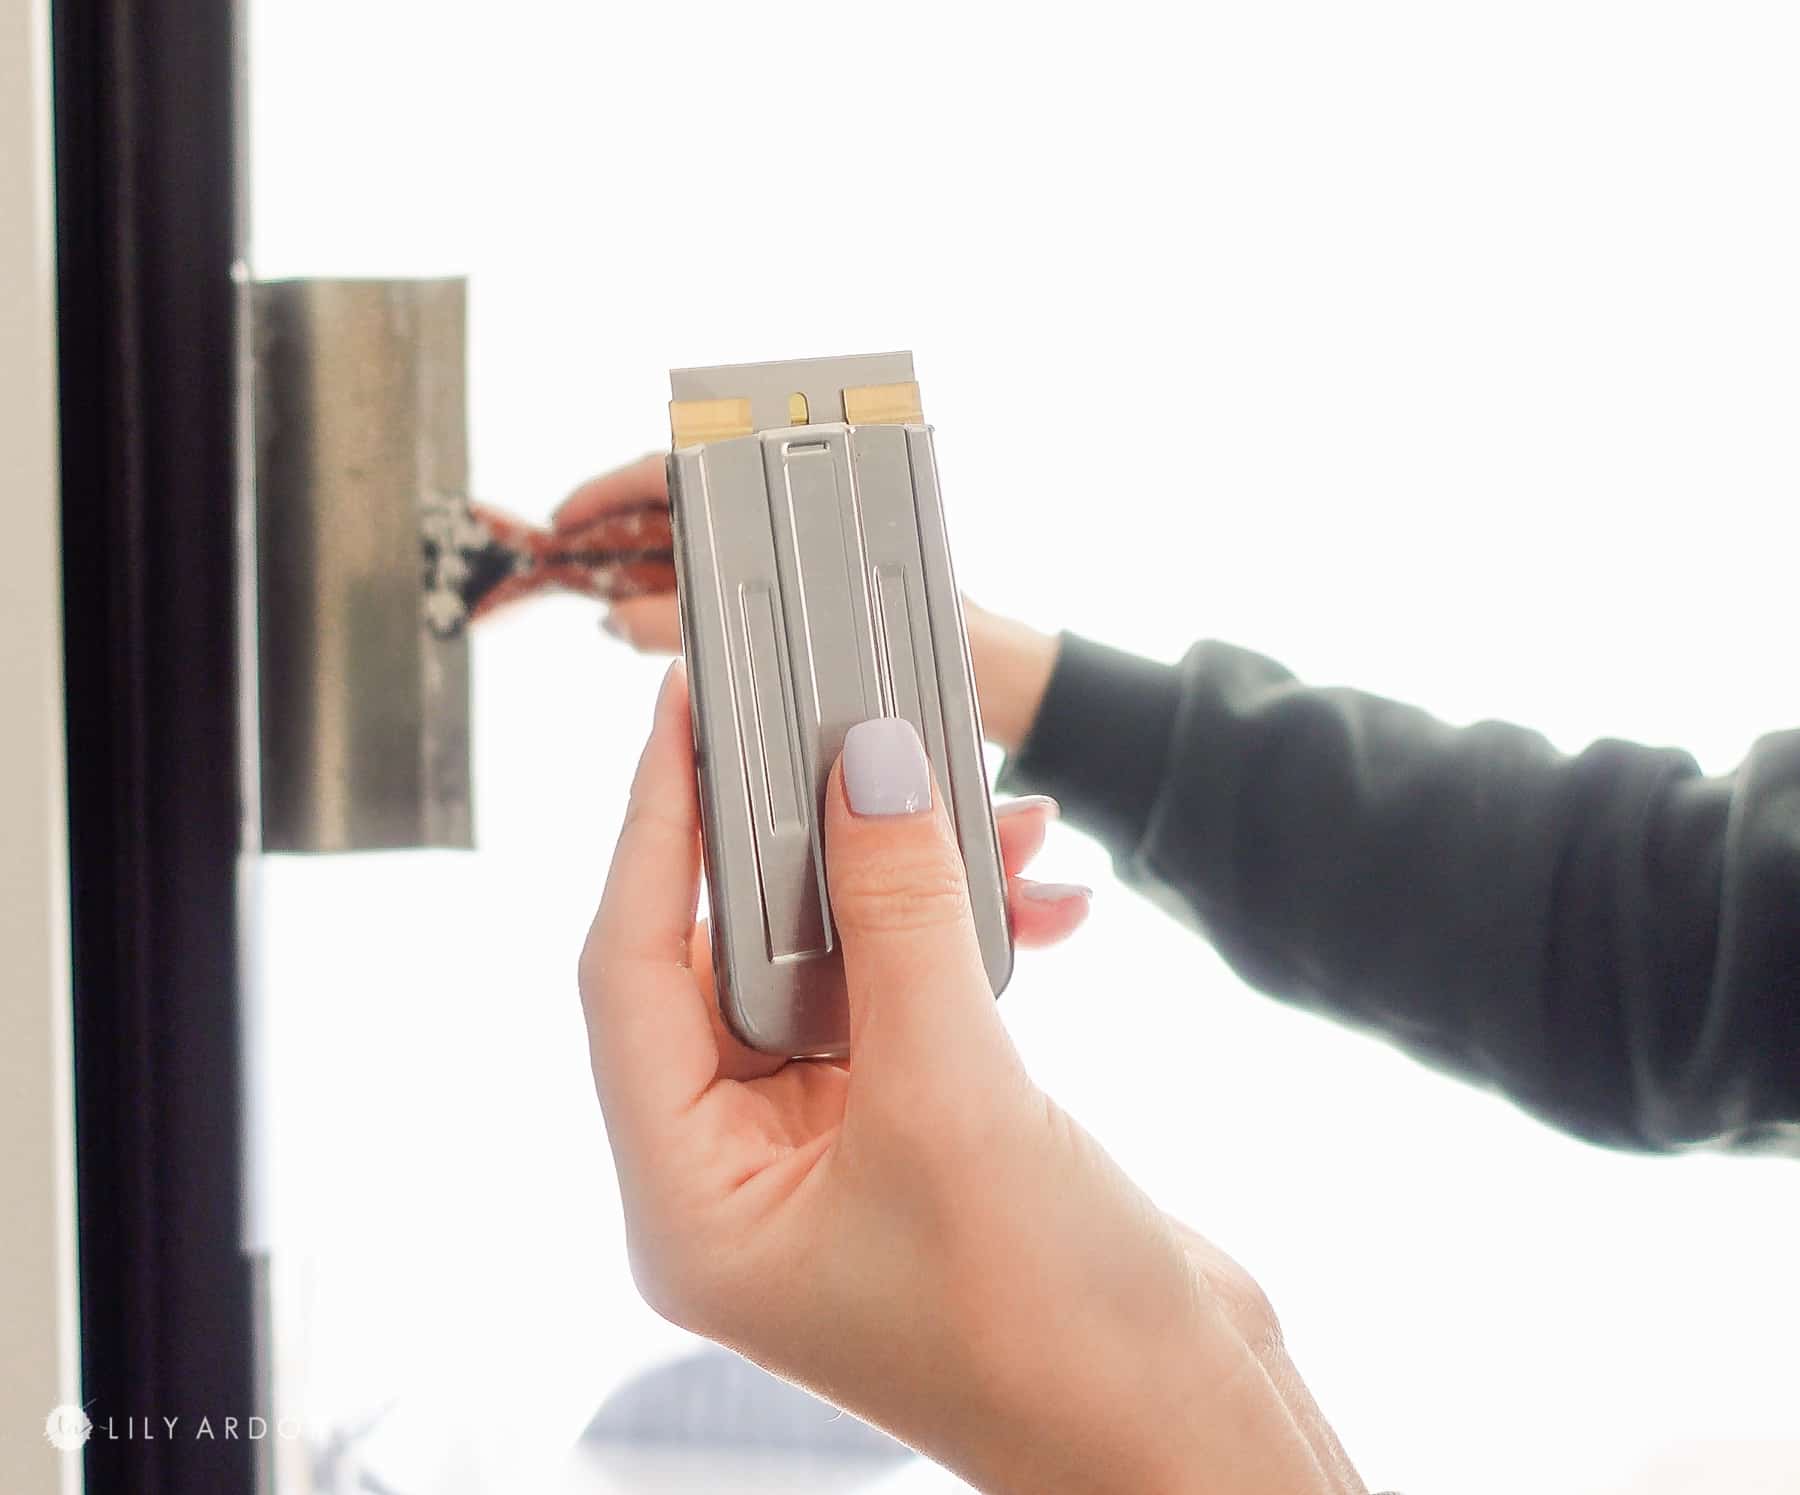
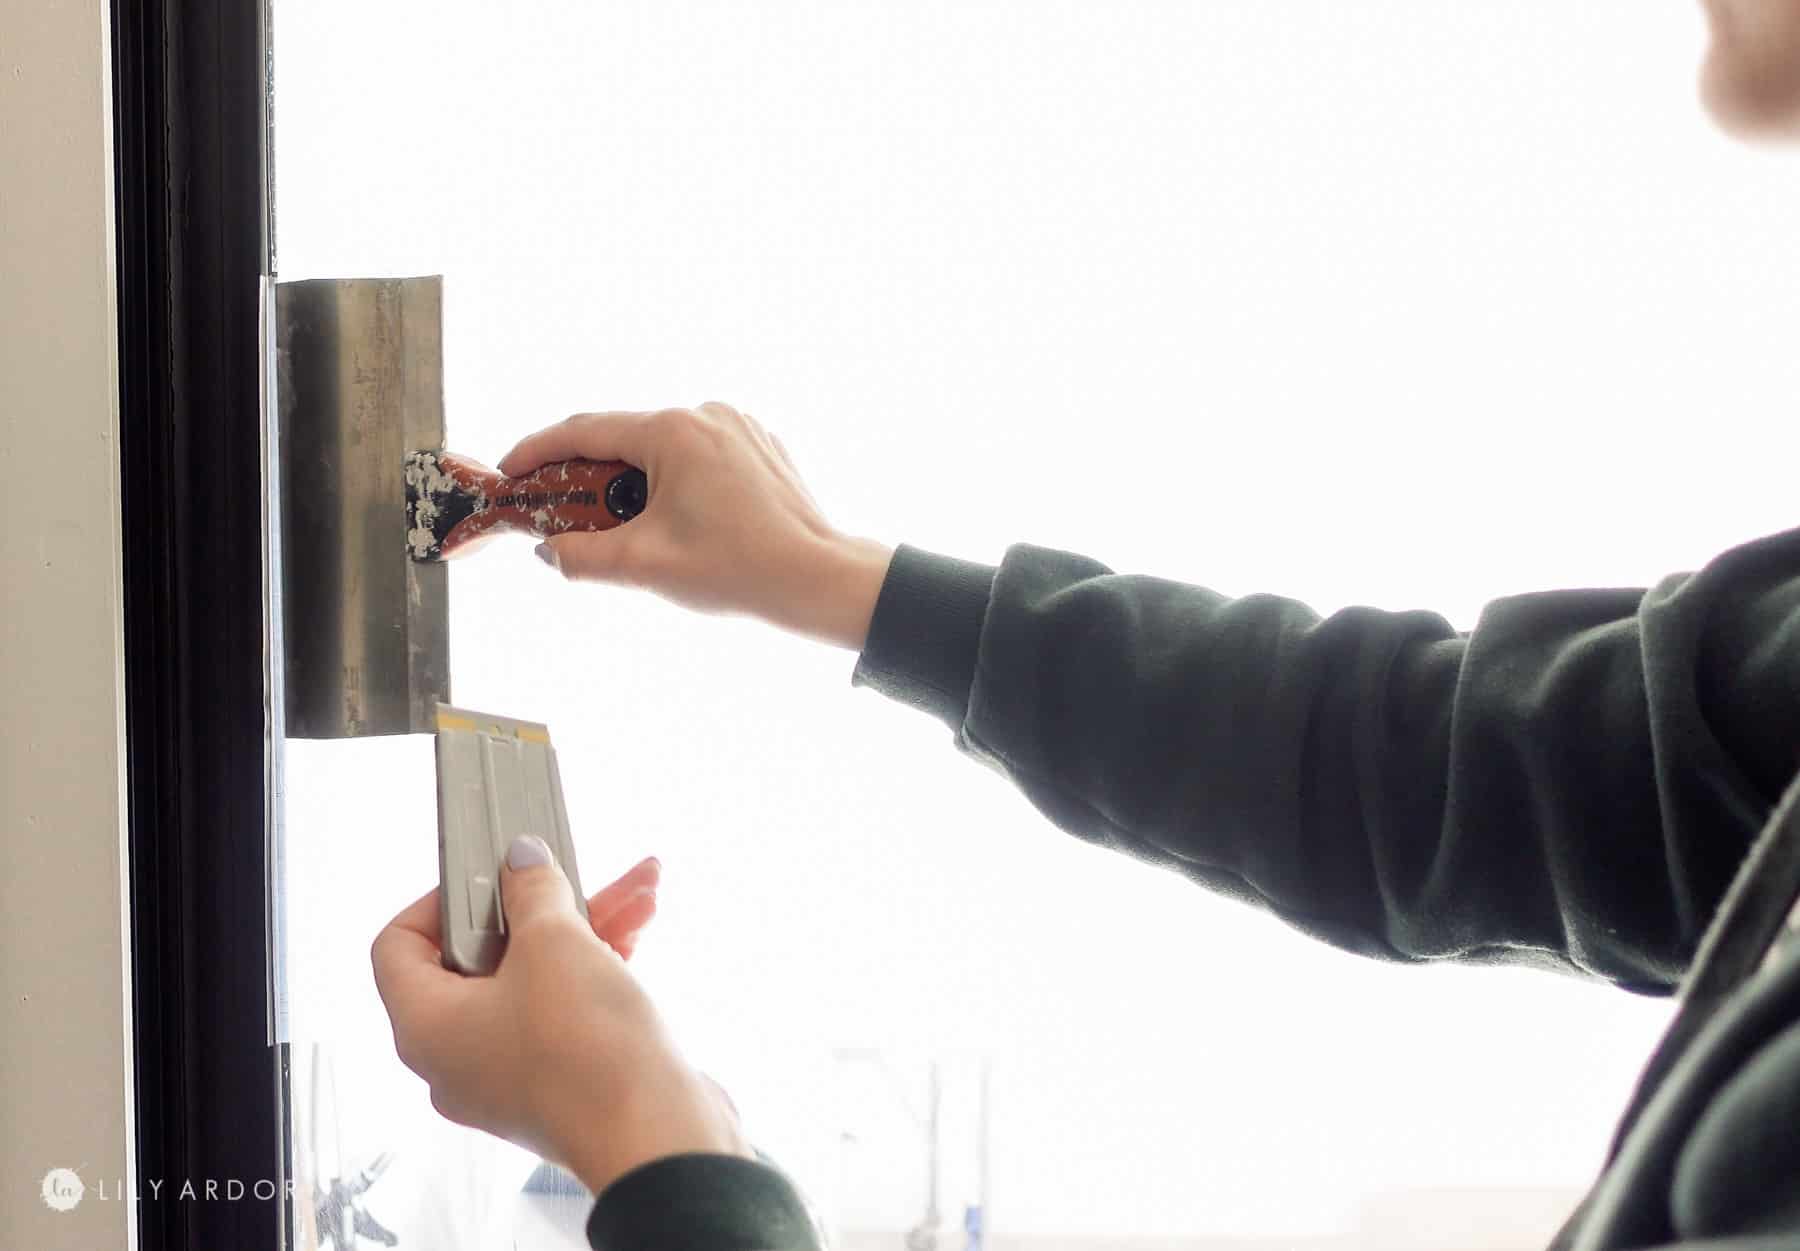
Step 5: How To clean up the edges!
Next I used a drywall knife and set it against the edge of the window. I then used the razor scraper to cut off excess contact paper.
Keep repeating the last few steps to cover the whole window surface.
OTHER DIYS YOU MIGHT LOVE!
How to hem your dress in minutes!
DIY Modern farmhouse table under $200

DON’T FREAK OUT!
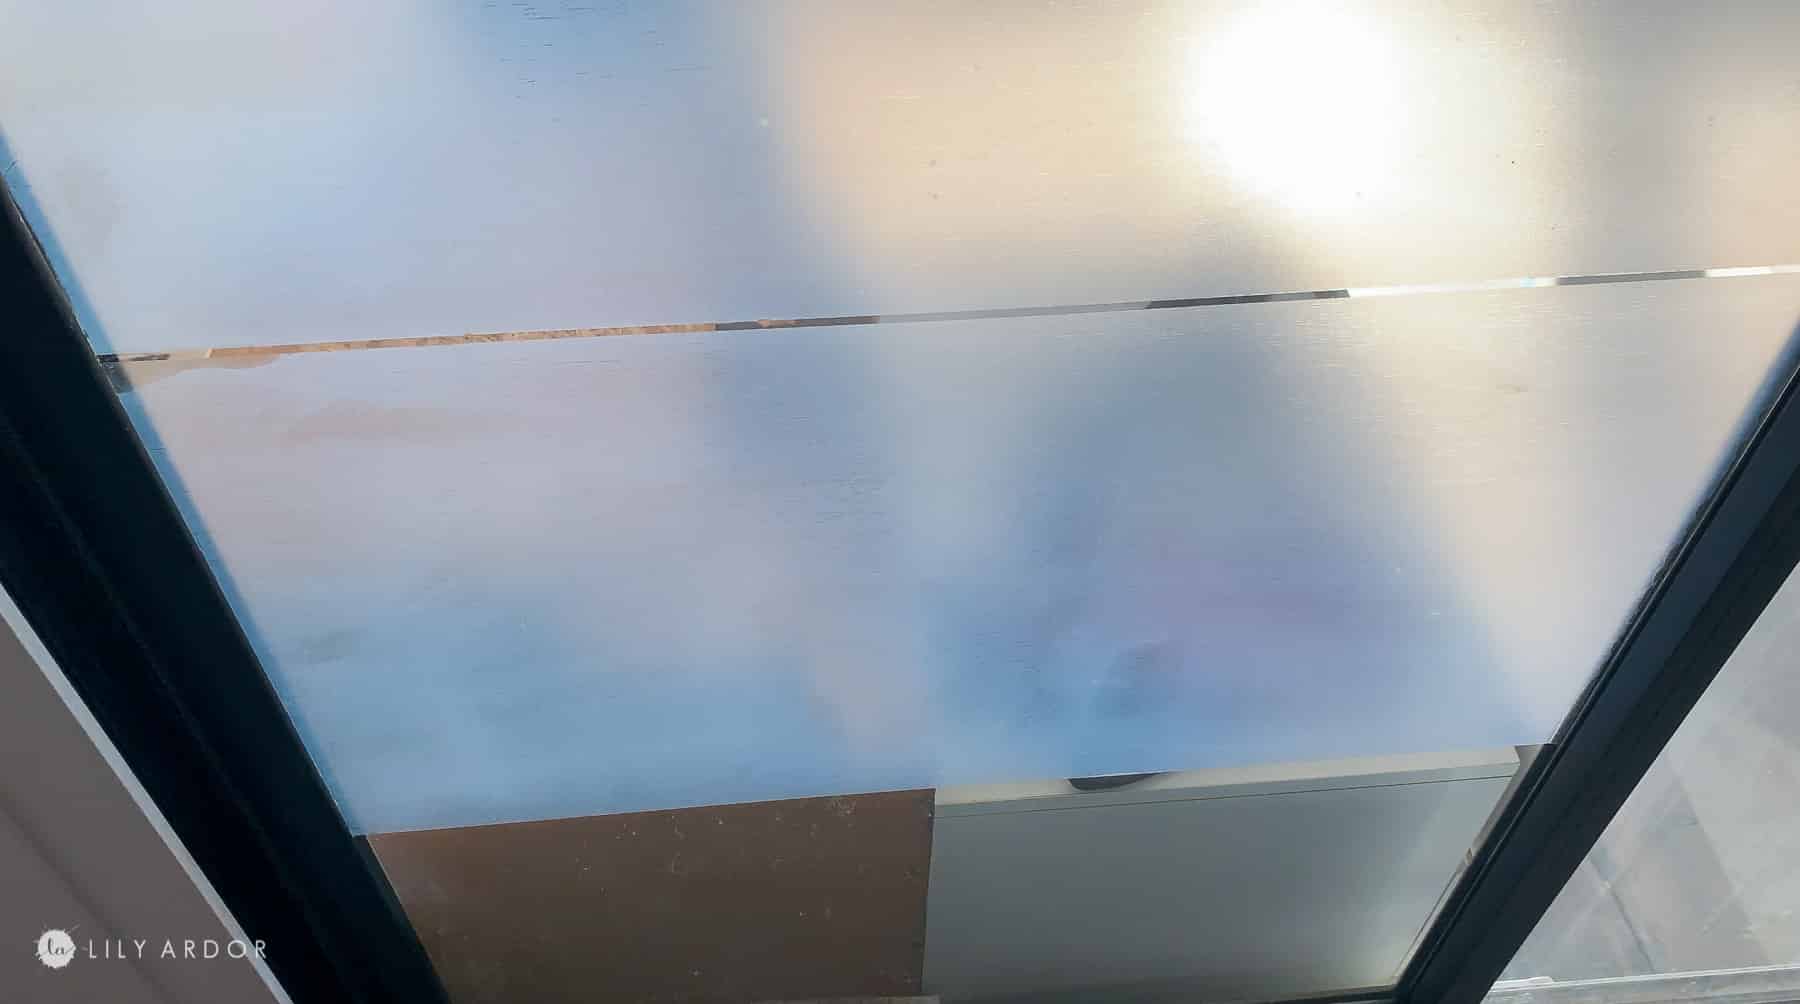
Okay so over the next few days you’ll notice the windex drying under the contact paper. Don’t freak out it will look spoty and even yellowish in some areas. This is totally normal.
I’ll tell you what that same day I applied the contact paper after few hours I was considering the spray paint option because of how spotty it was looking. I honestly didn’t think it would clear up. The next day I woke up to a super nice and smooth finish! Trust me it’ll clear up!!
( Photo below is a few hours after application. Look at all that yellowing)
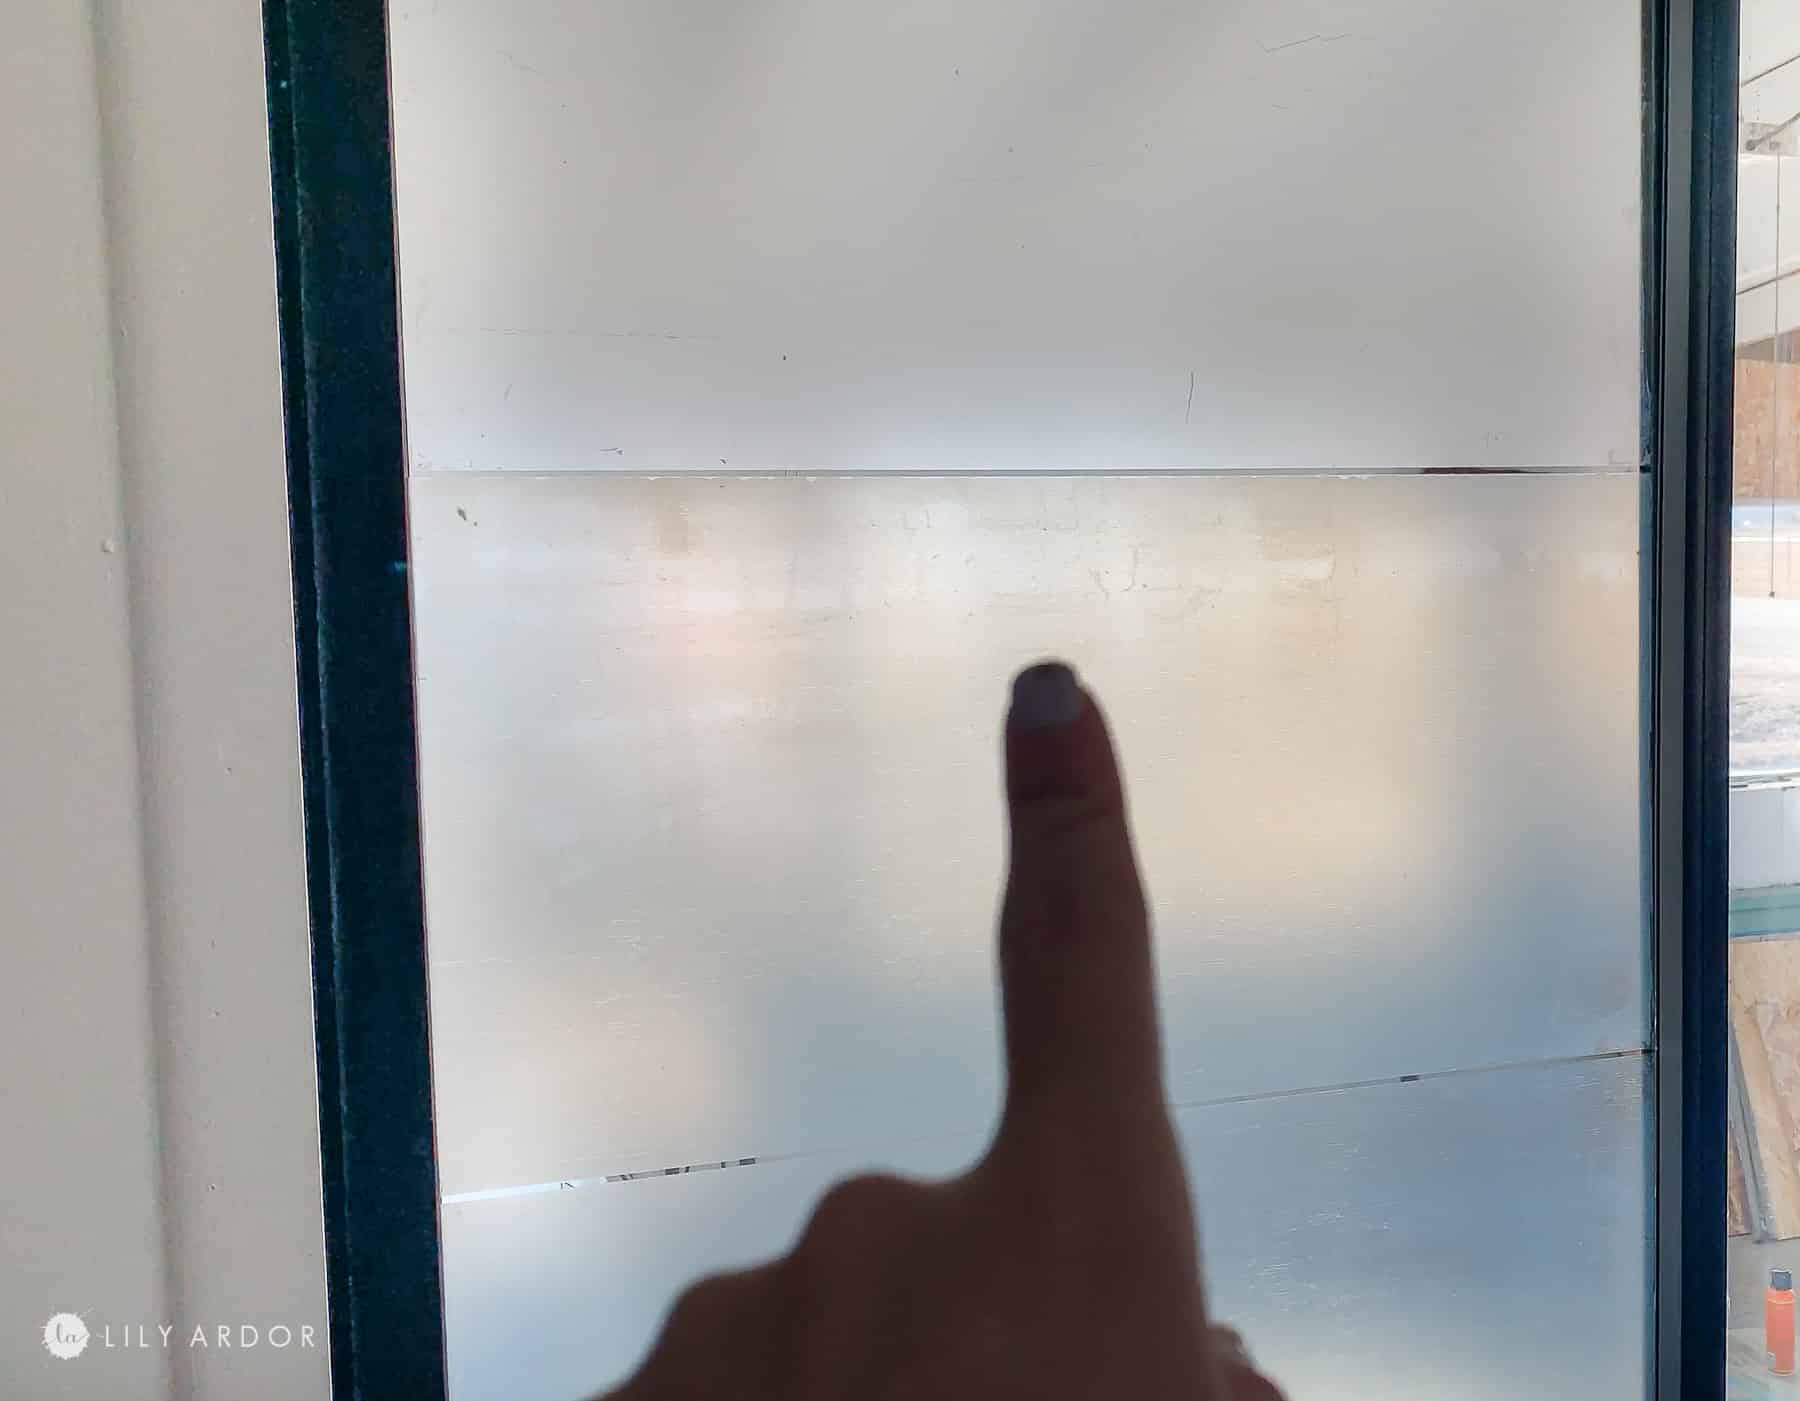
The same evening ( photo below )
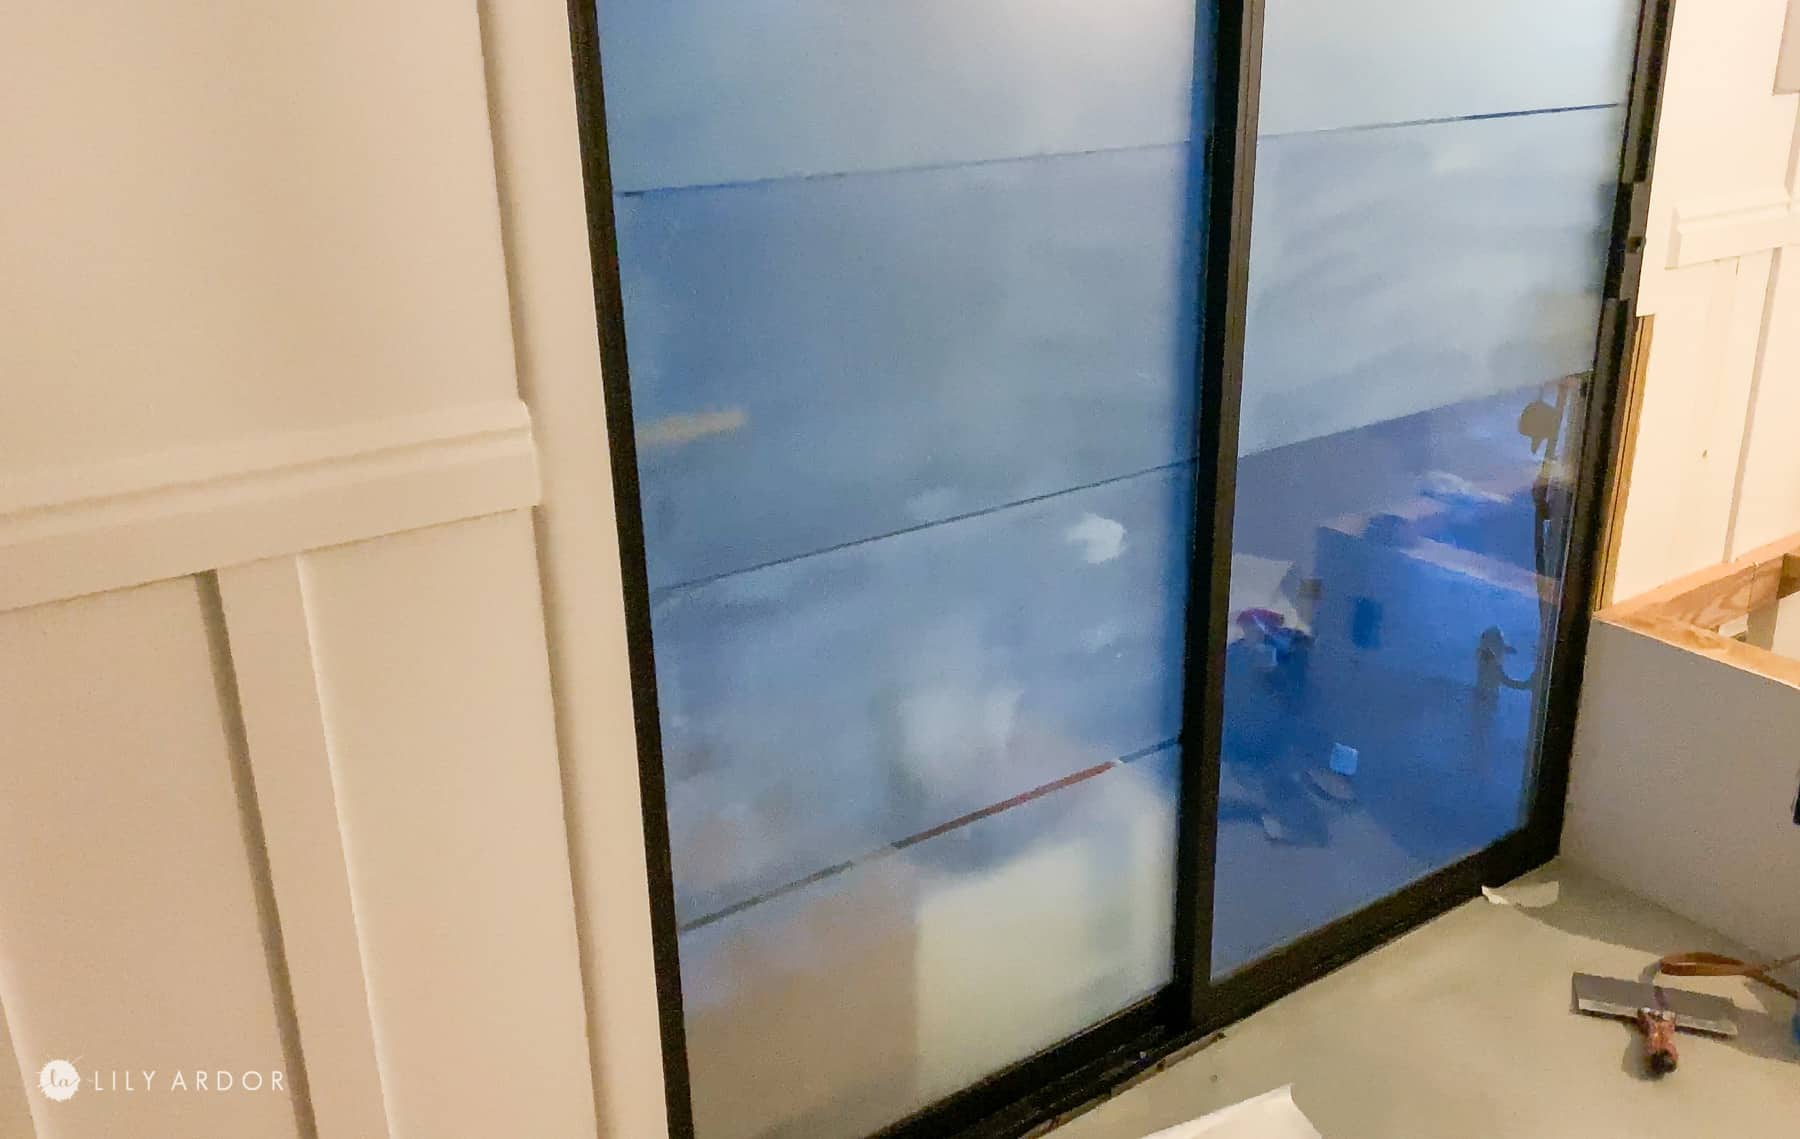
The blue hue from the windex hasn’t dried and is visible in this photo below.
finishing touches
You can apply the decorative tape on the window the next day. My tape was 1/2 inche in width. I was also considering adding a vertical strip but, I love how modern the horizontal lines looked.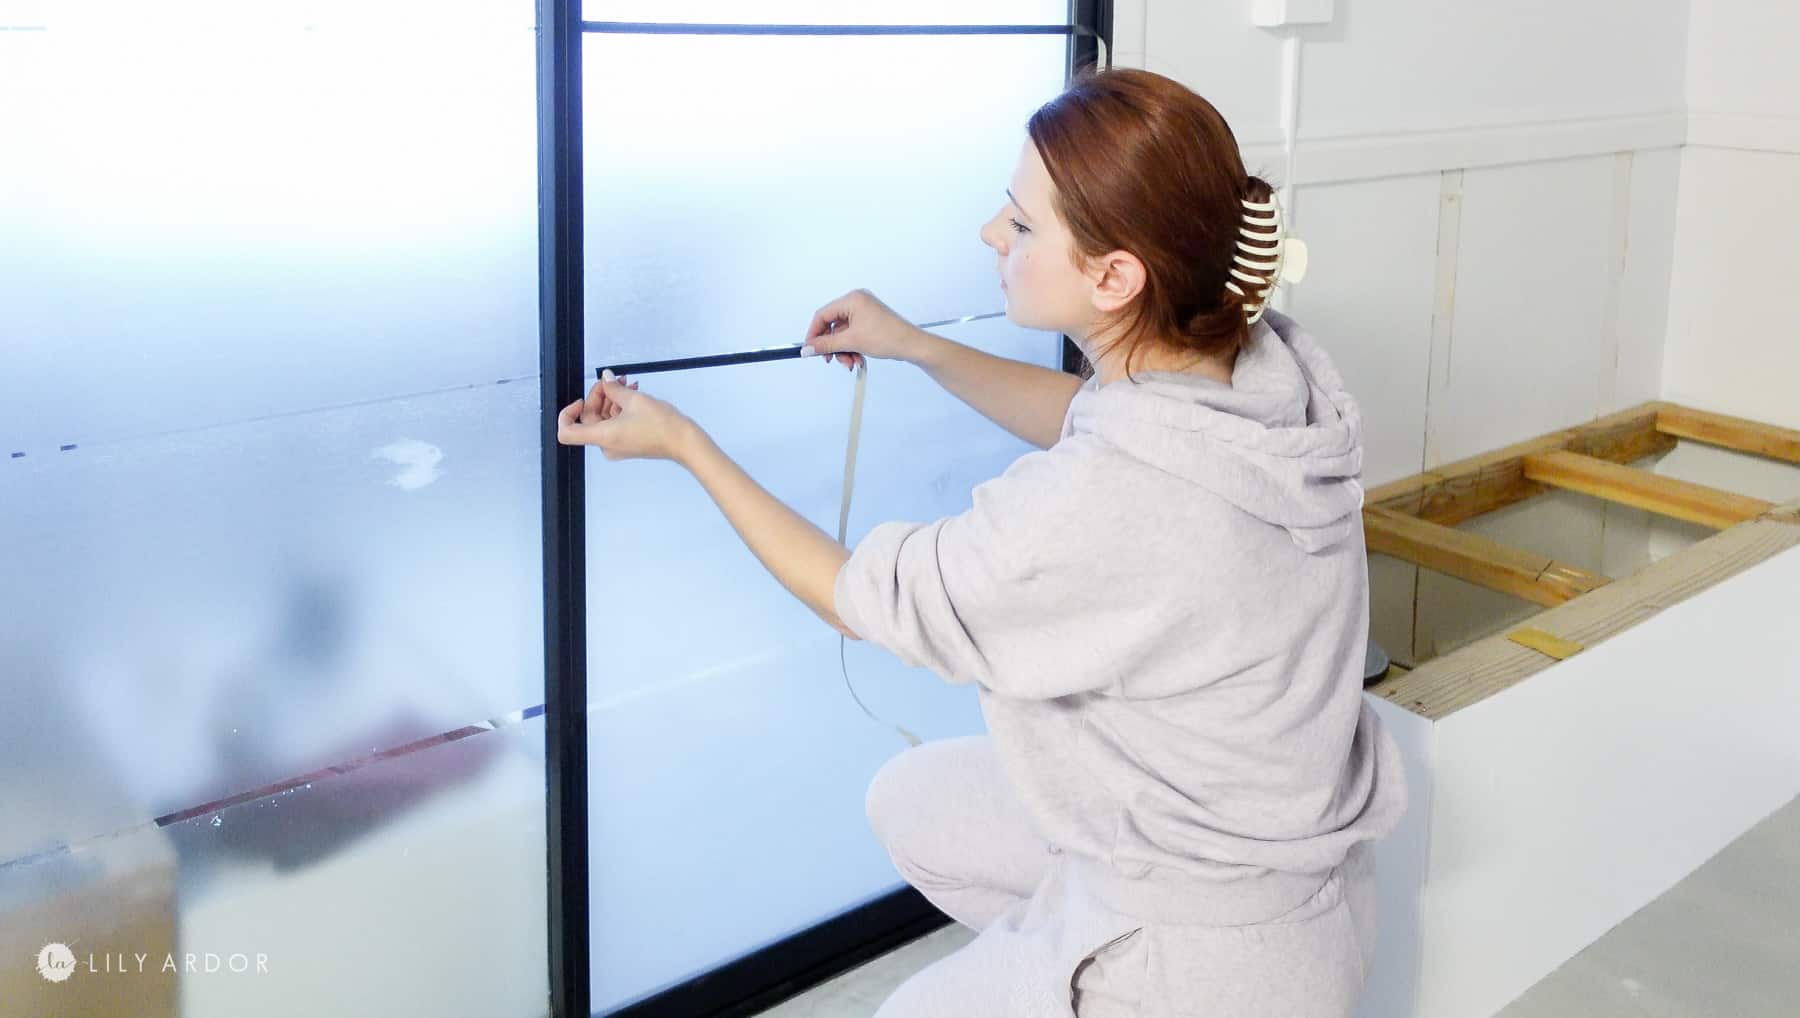
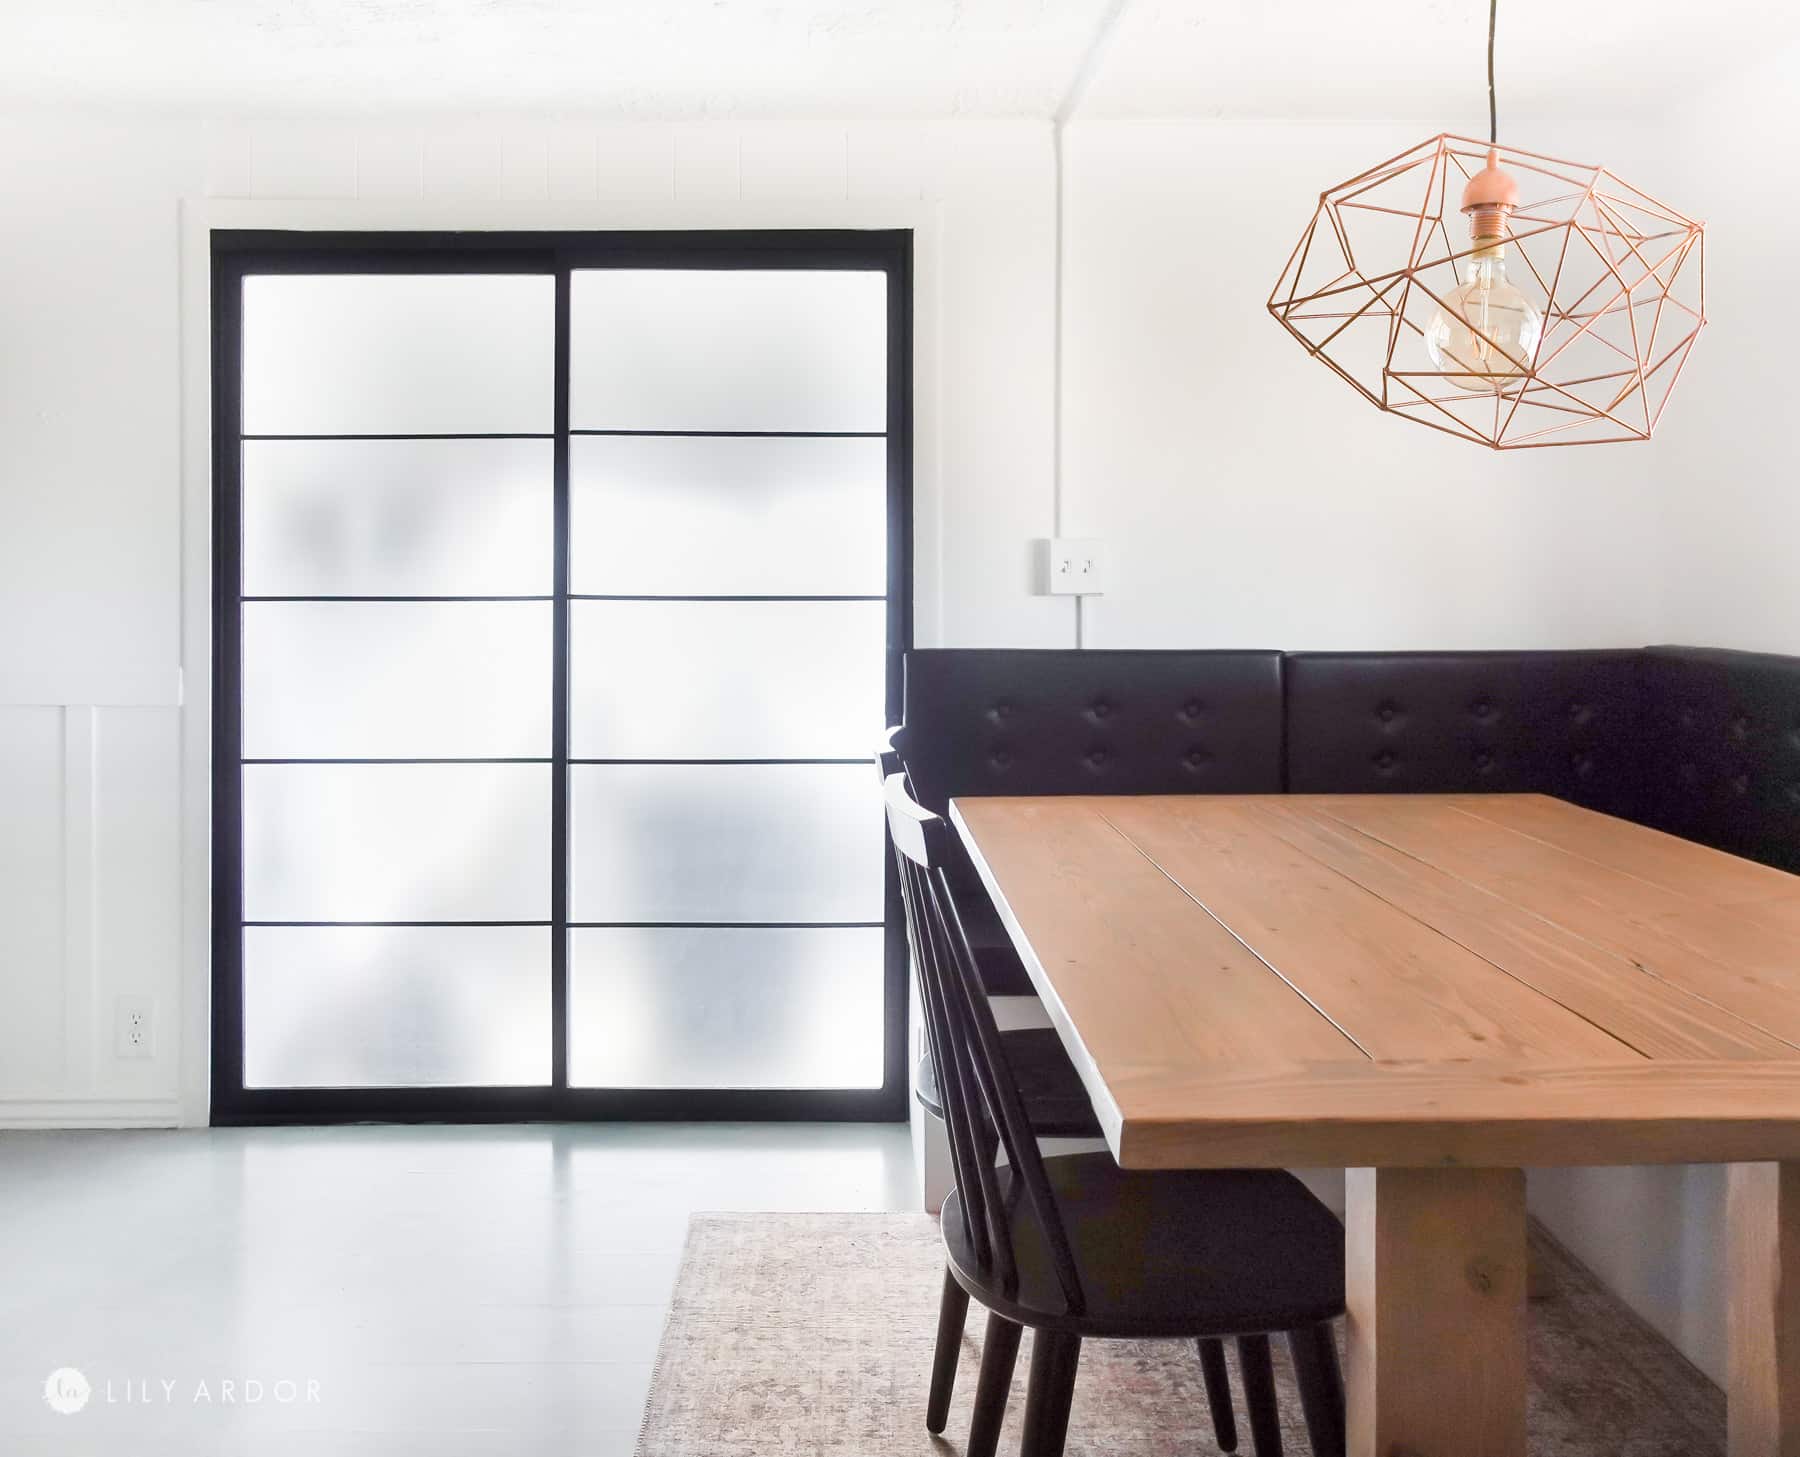
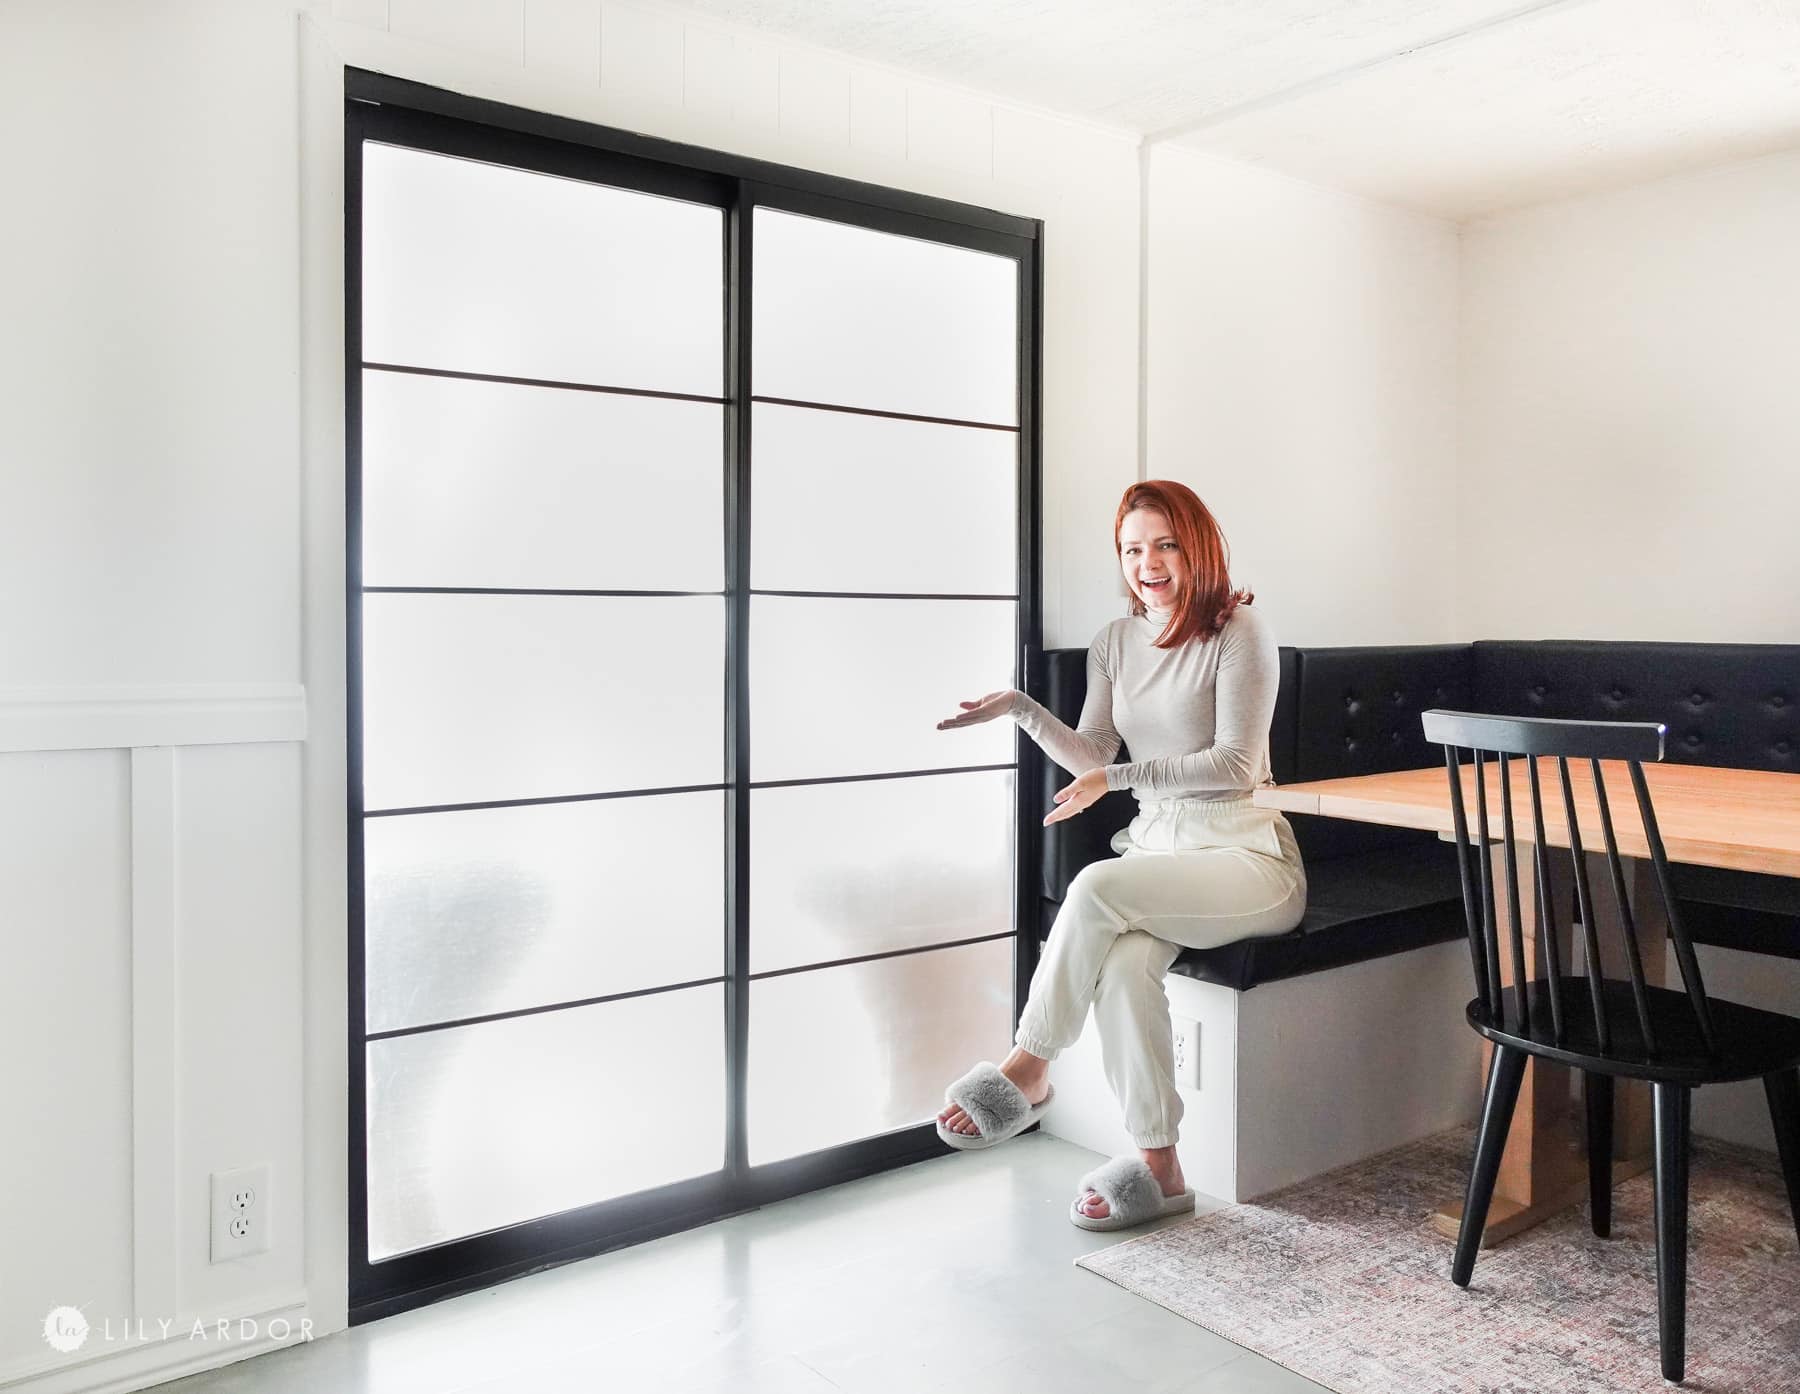
That’s it! Here’s how the completed doors look! I love how affordable this was!
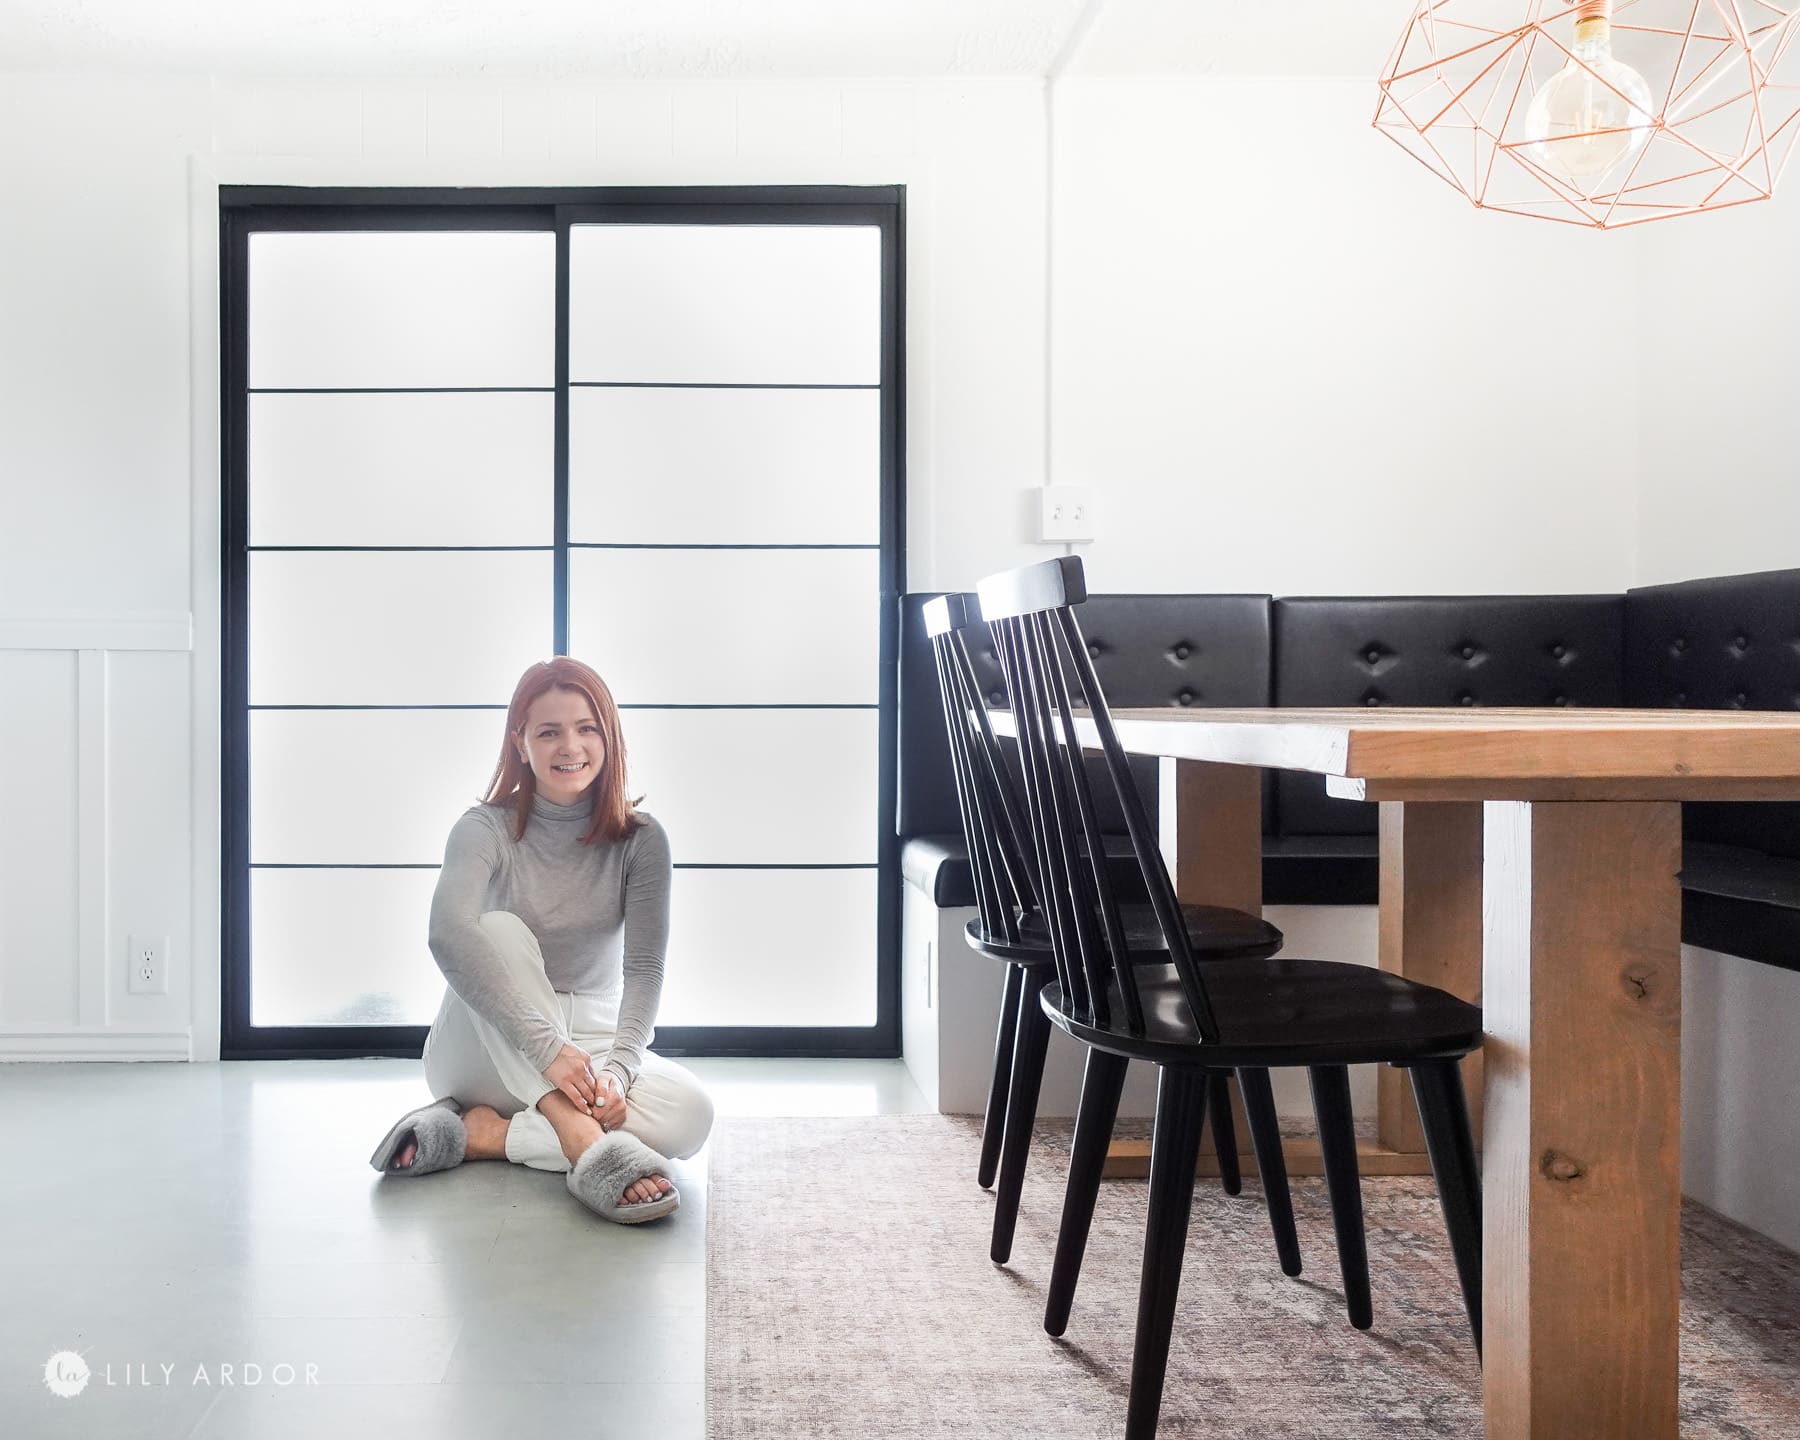
Best of all I LOVE that it’s super durable compared to the other two options. If you have little kiddos this will not scratch off like spray paint off a window.
If you want to add two vertical lines of tape here’s how it’ll look ( photo below) I love how zen this looks!


Here’s some shots of what it looked like before. Isn’t it crazy what a little bit of paint and tape can do! YEP these doors go out into our carport.
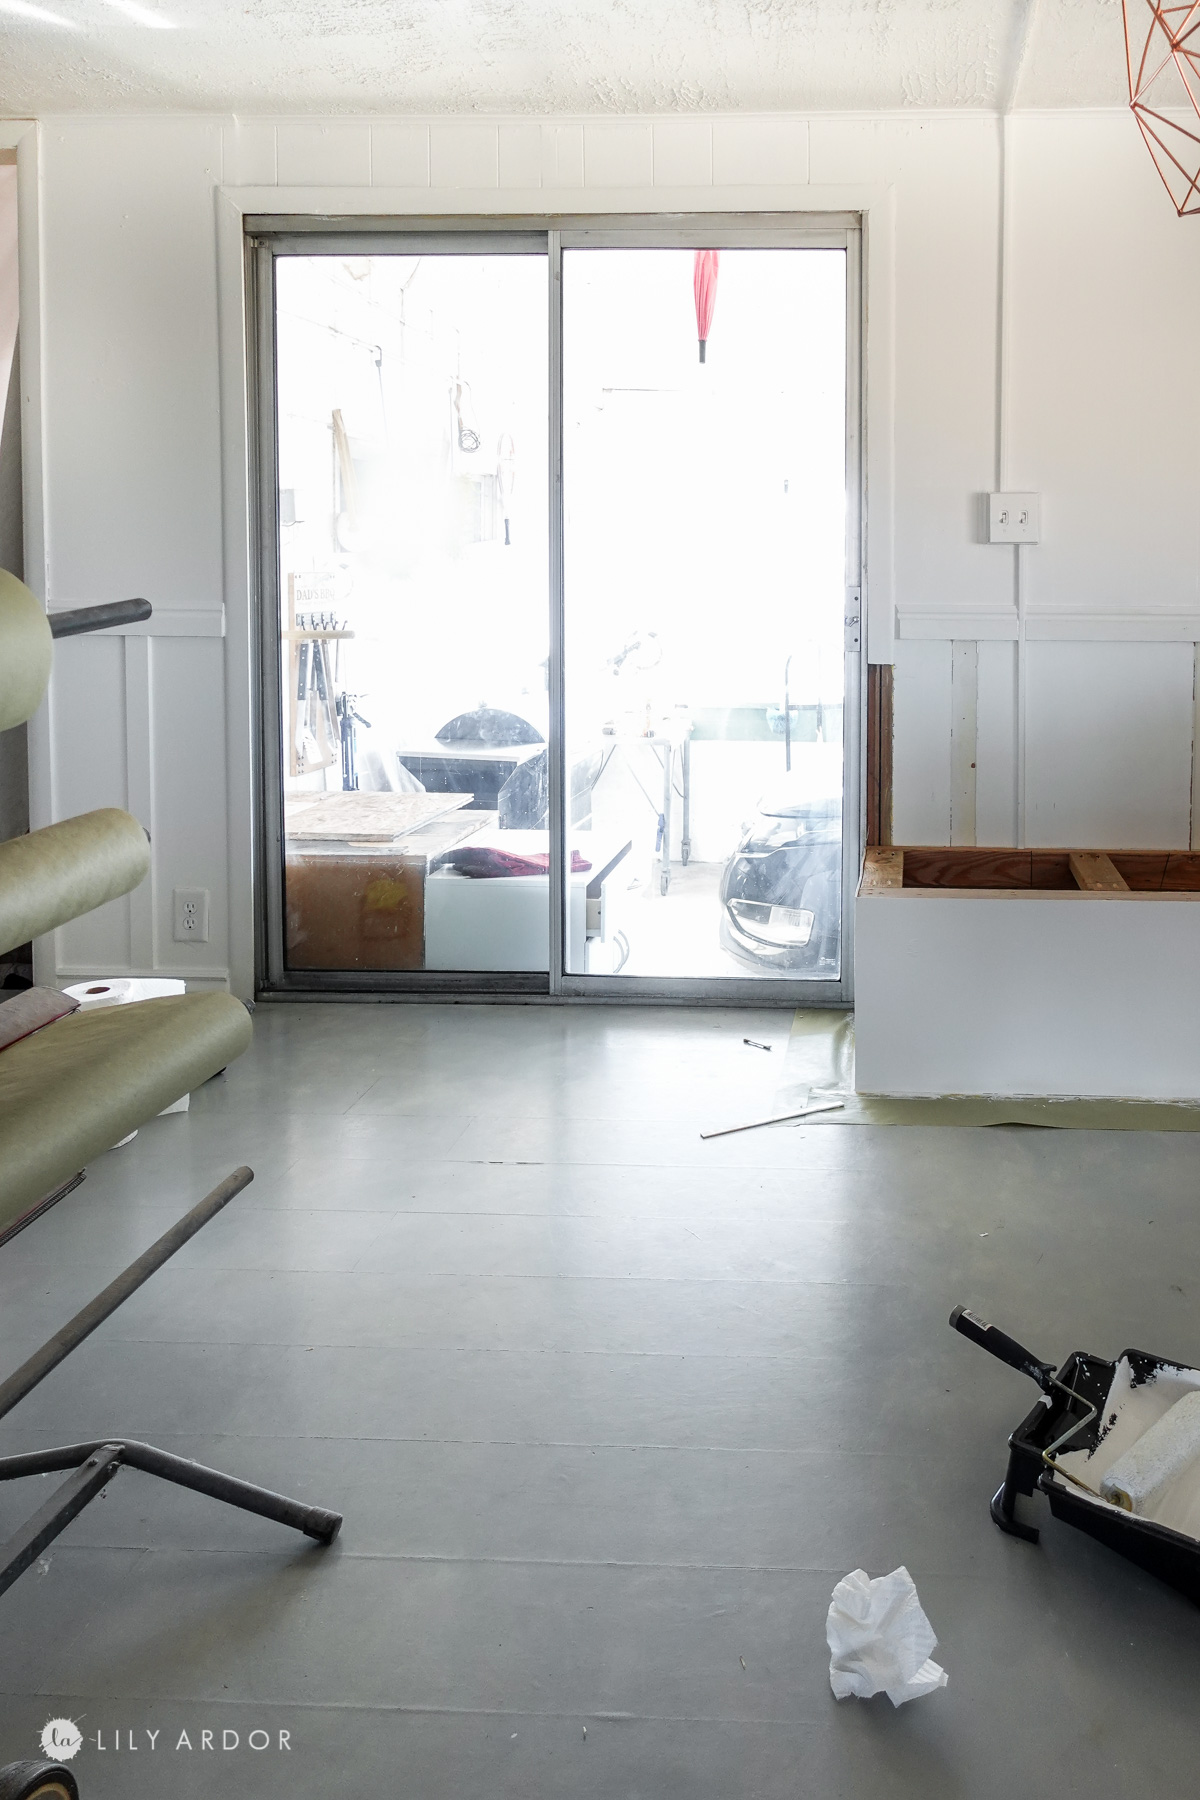
LOVE how it gives us privacy yet still keeps the space modern and clean! I don’t like slide door blinds at all and this is such a great alternative!

Okay everyone! That’s it for today’s DIY! I really hope you found this helpful! I hope you have a great week!
xo ,
Lily
OTHER DIYS YOU MIGHT LOVE!
How to hem your dress in minutes!
DIY Modern farmhouse table under $200
Love that. Thanks for sharing this wonderful window conversion idea. A simple plan that produces an elegant visual boost.
I’m glad you liked it Deb 🙂
Kudos!!!! This is the best ideas for those with sliding glass doors that want some privacy!
Wow what a great look on that door! It really fits the space well too in terms of design and feel. Nice choice!
Thank you so much
I love this. I have sliders and I am contemplating doing this because blinds are hideous to me. How do you clean it though after.
Glad to hear you loved it. Just a damp cloth. Or spray window as you usually would with glass. It’s way easier to keep clean then regular windows.
Hello! Love this! Did the contact paper you used have adhesive on the back?
Yes it did. Happy to hear you loved it! 🙂
Just wondering how it’s holding up? Considering doing this to our dining room patio sliding door. It looks really nice in photos, but Does it look tacky at all close up? You did such a great job!
It holding up really well. Still looks as new as the day installed it. The frosted glass doesn’t stain and is so easy to keep clean. And not not tacky at all. I’ve actually had a few folks think I replaced my doors with new ones. they couldn’t believe it was tape and frosted glass until they came up and inspected it. I would totally do this again. Thank you glad you liked it 🙂
Thanks 🙂 its contact paper not paint.