
Hello everyone! Today I’m sharing how you can transform cheap dollar tree picture frames into the cutest Christmas tree decor! https://www.lilyardor.com/diy-cat-house/
I love the Christmas decor at dollar tree however I can never pass up a good dollar tree hack! Best part about these Christmas trees is you won’t need any cutting tools like saws or anything like that and, you can easily make them in under 30 minutes unless you want to go all out and add custom decorated beads like I did 🙂 .
supplies:
- razor blade scraper tool
- white colored pencil
- ruler
- dollar store frame (5×7 or 8×10)
- wood beads
- metal rod or skewer stick
- acrylic paint
- baking soda
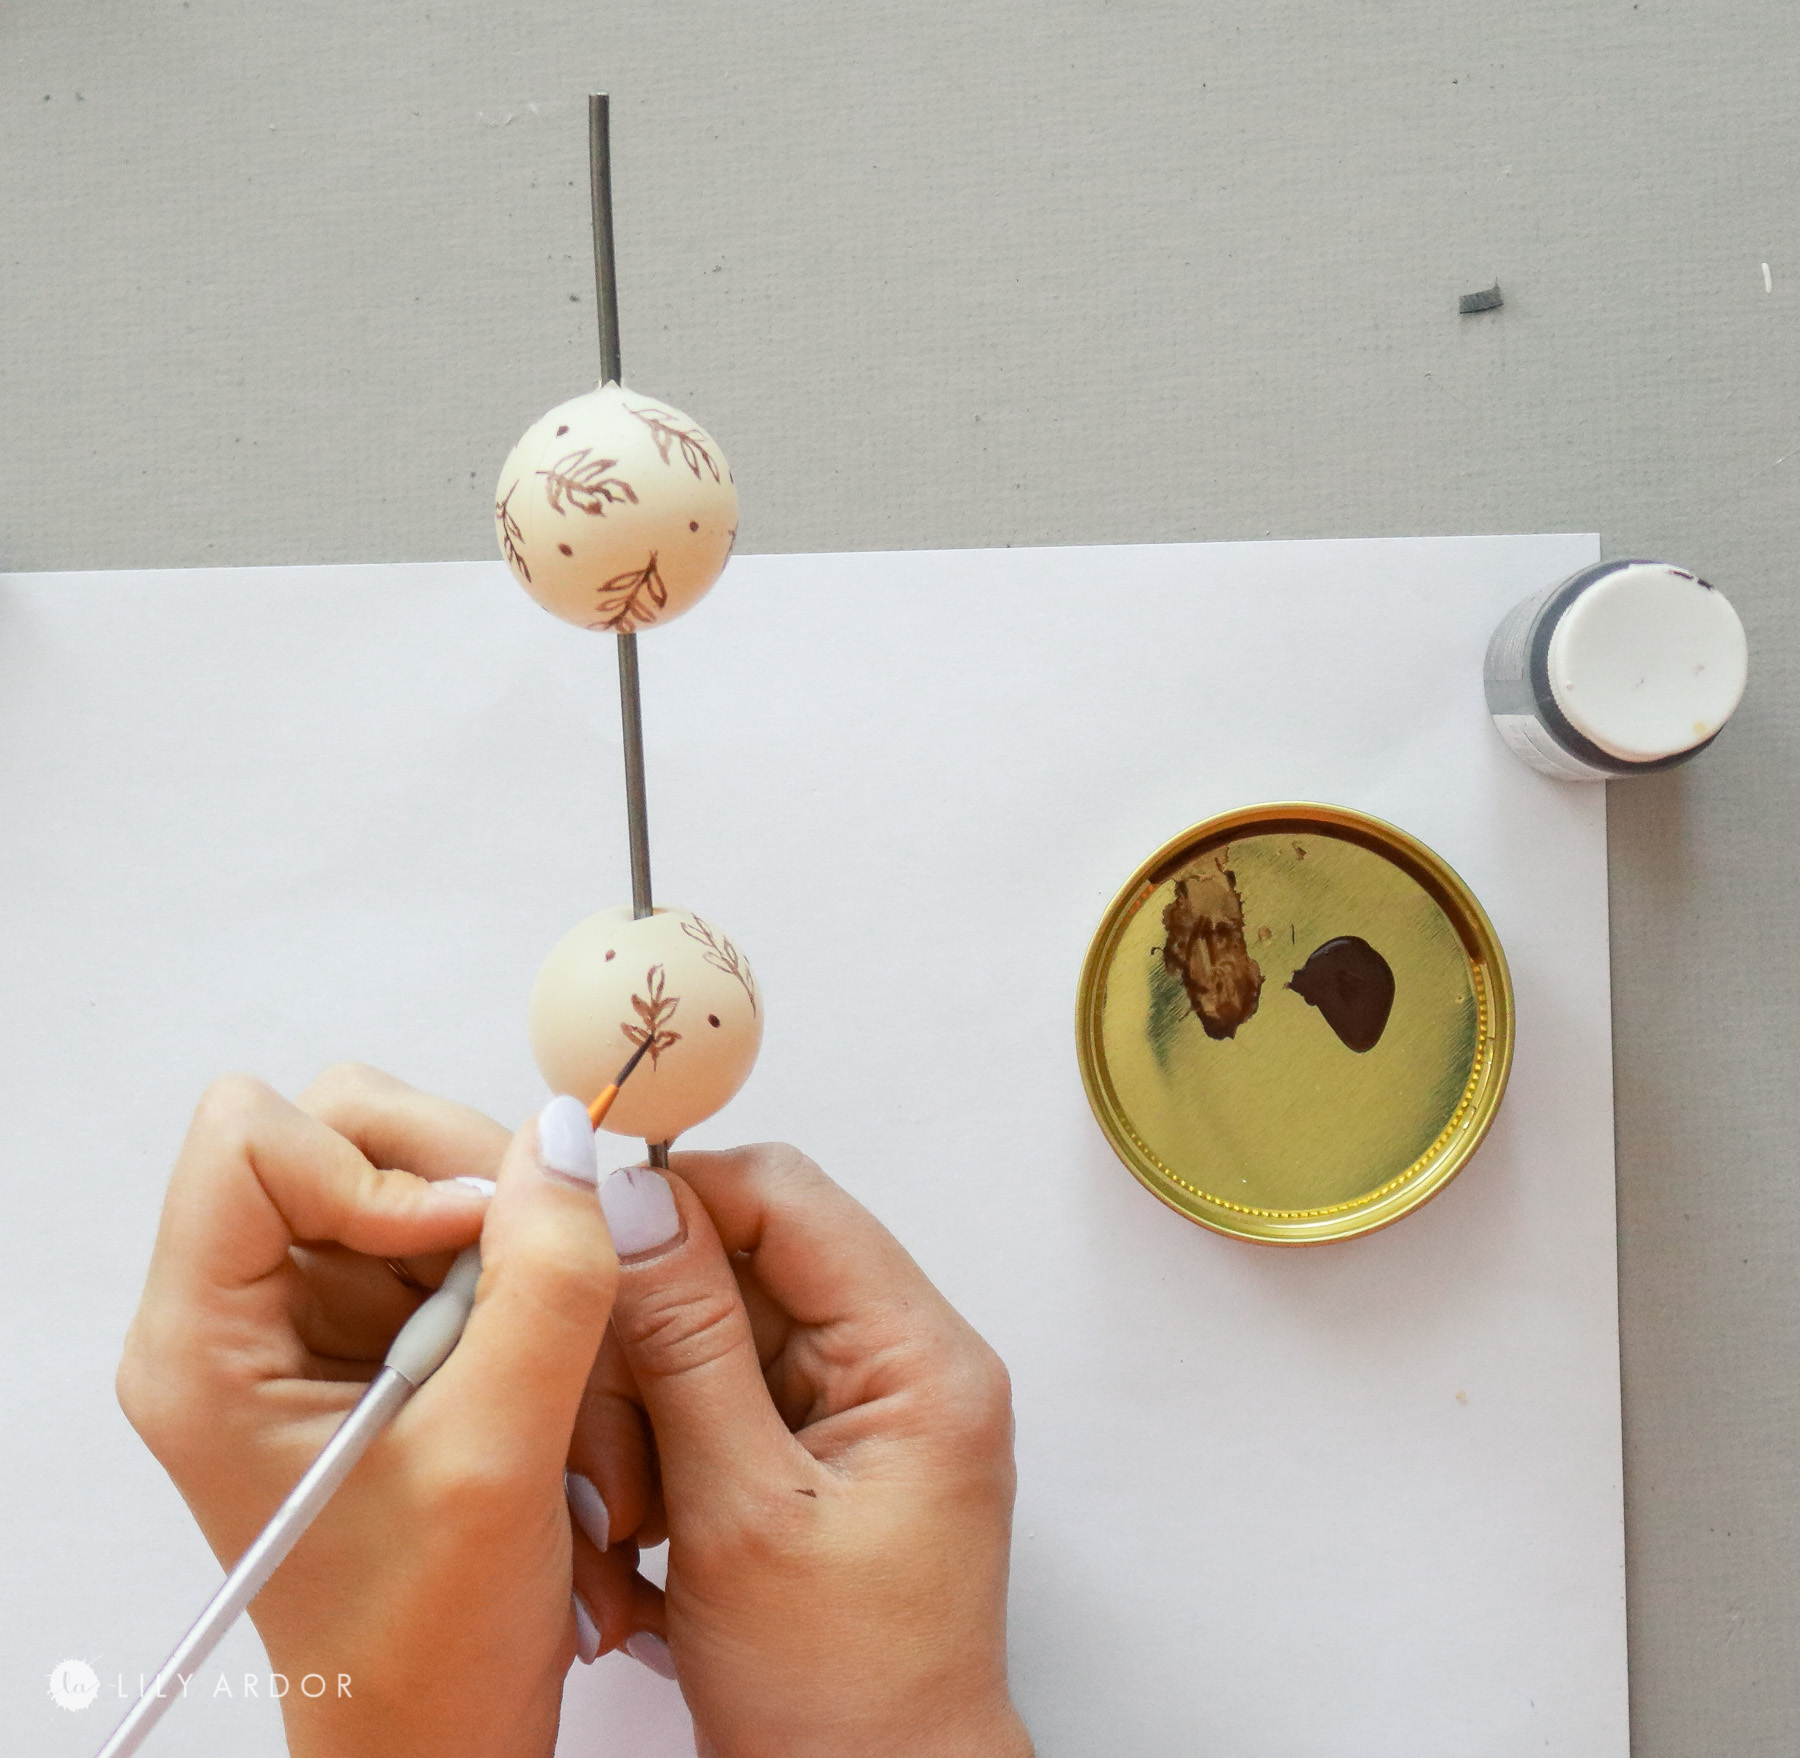
Optional: decorated beads
- 2 ping pong ball
- acrylic brown paint
- detail brush
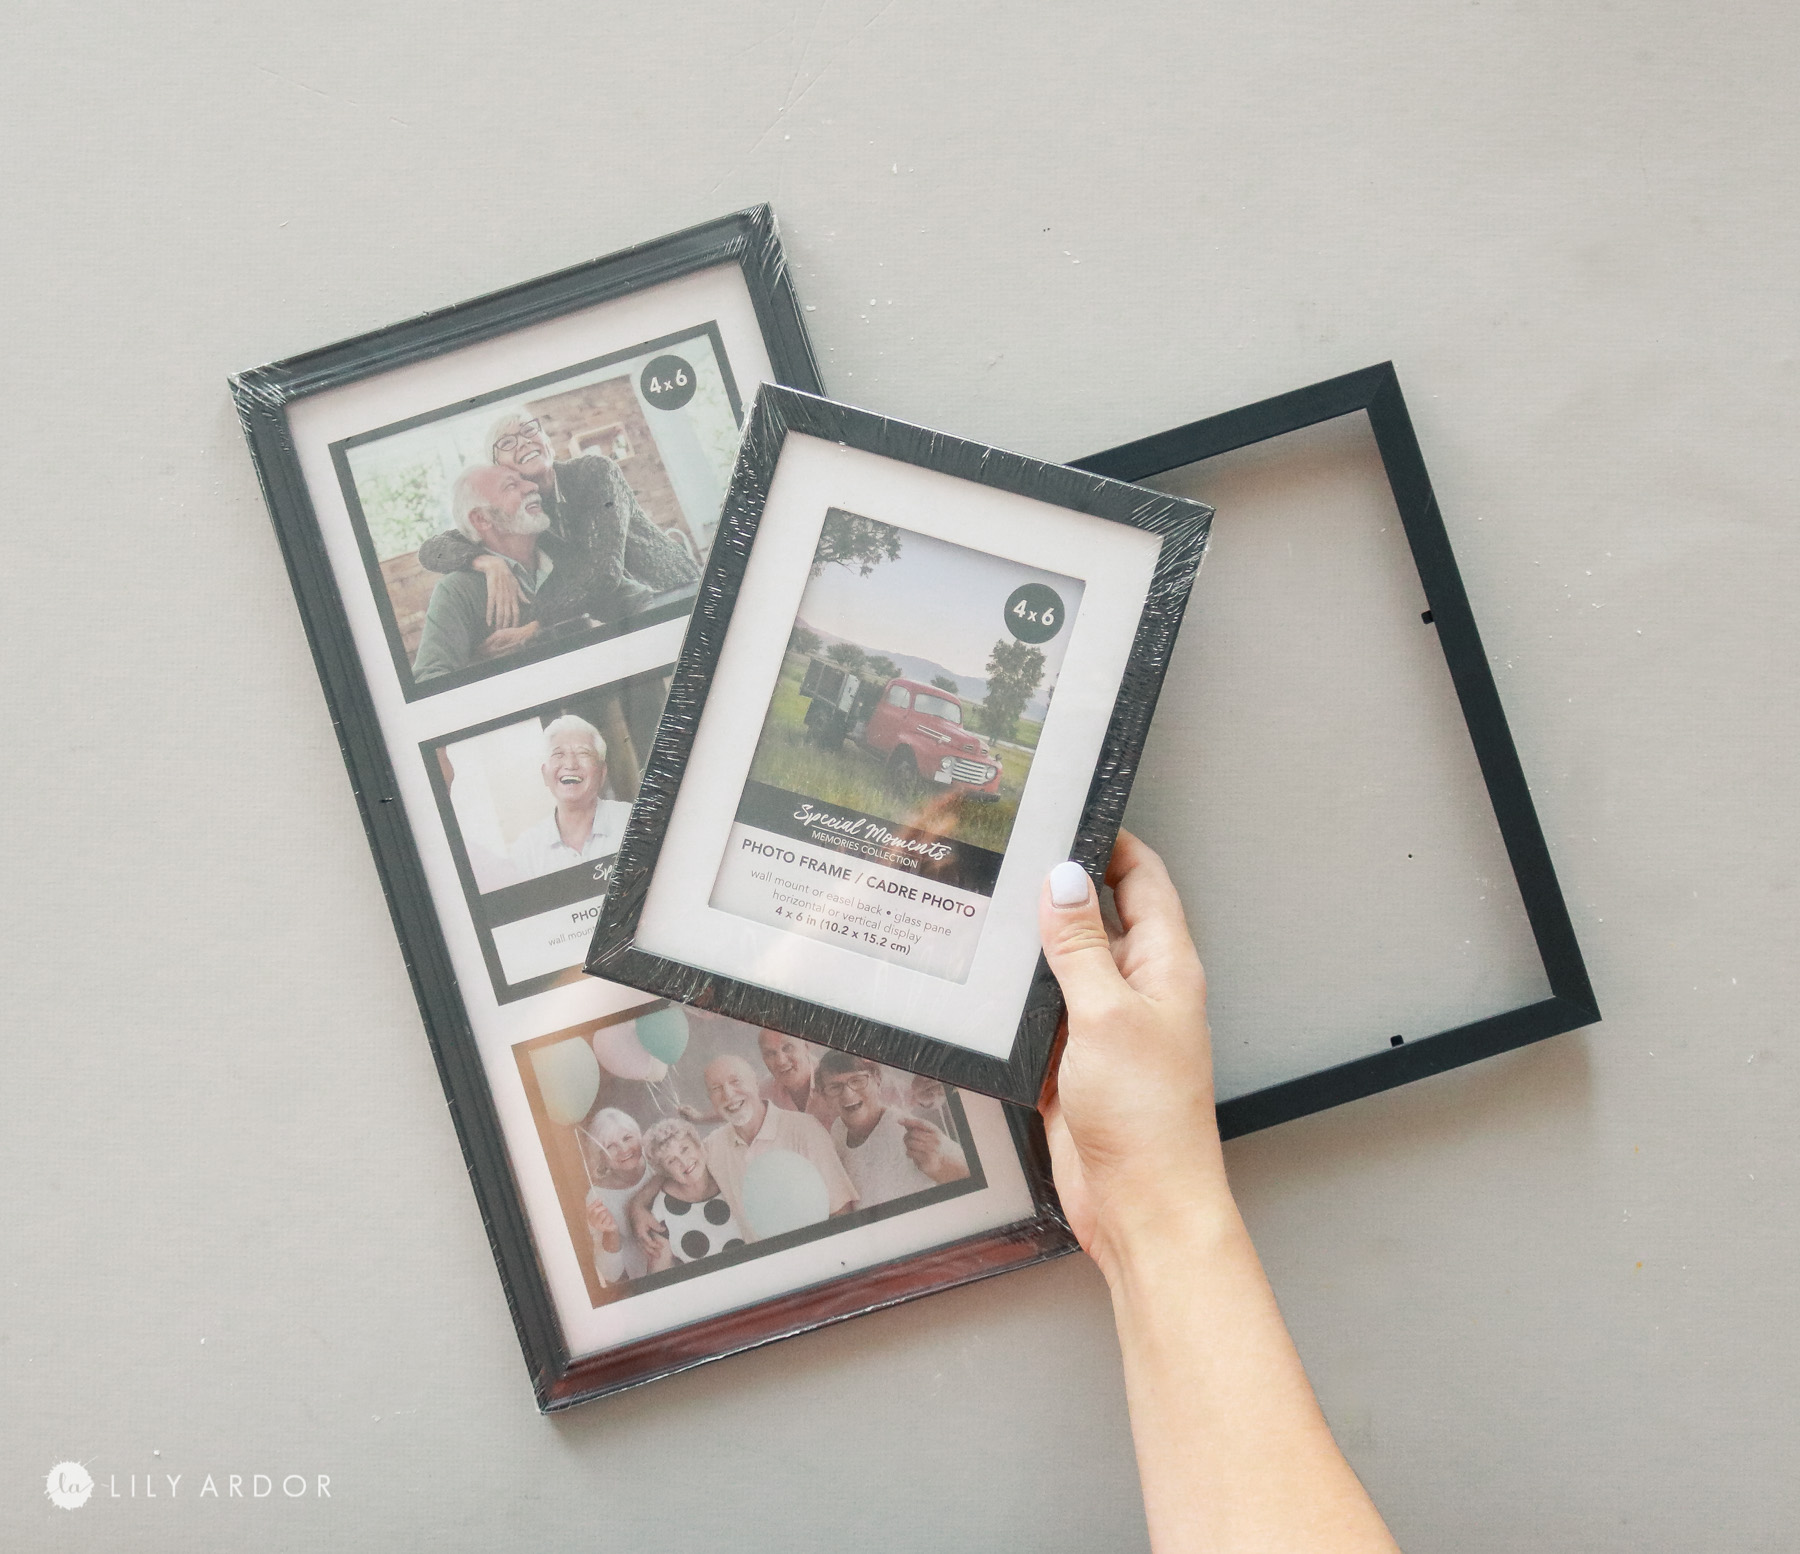
What type of dollar store frames work for this!
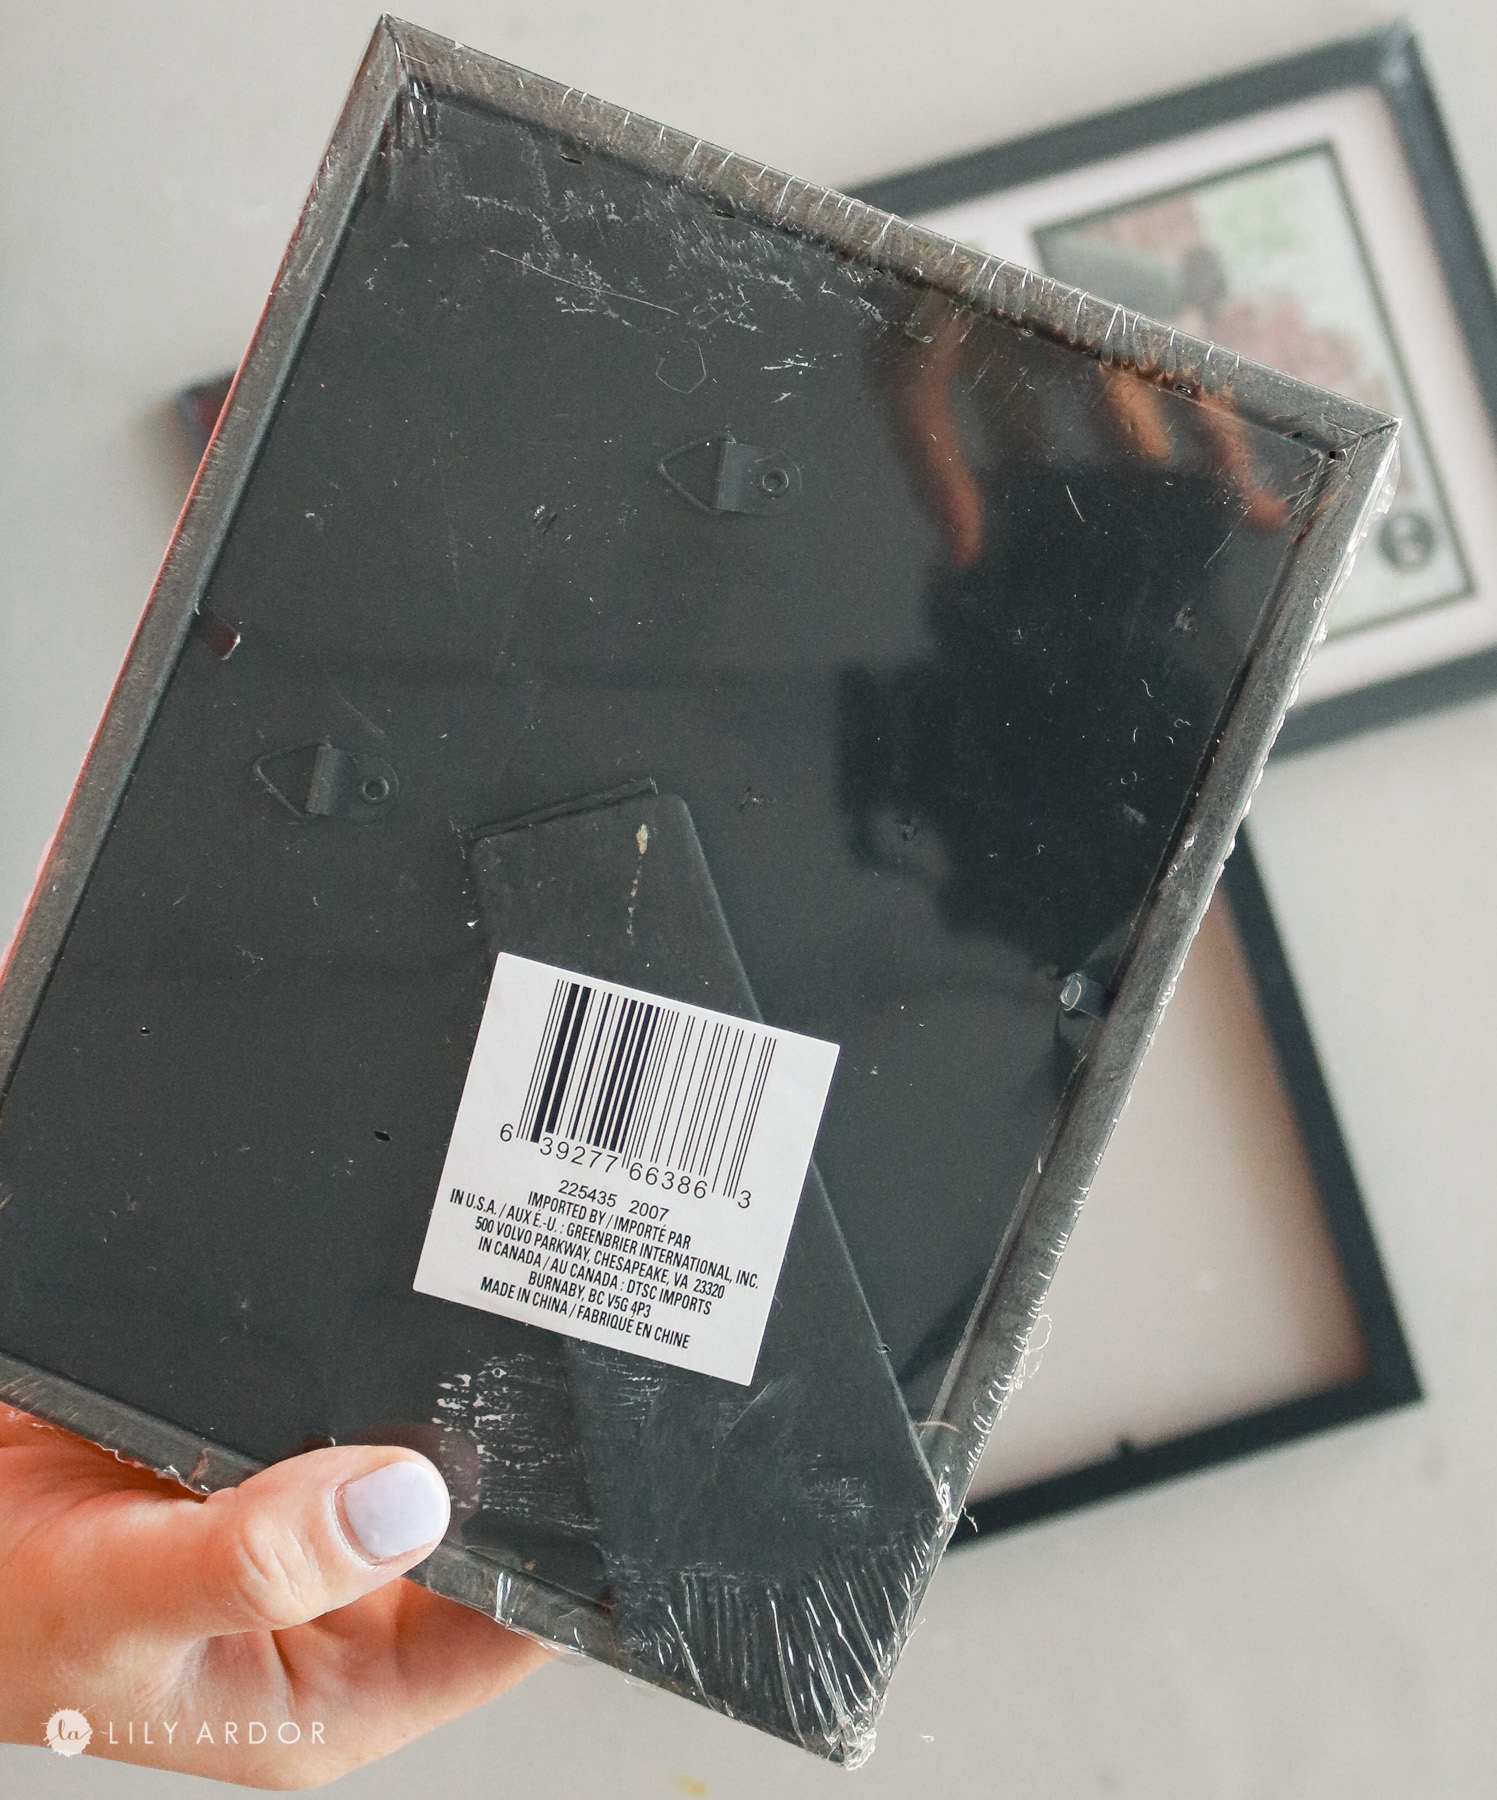
It’s important to choose the correct dollar store frames when making this. The photo below shows the back side of the frames I used. They have a thin plastic coating over a foam like material. I’m not sure what it’s called exactly but it’s pretty easy to cut. If you choose a wood frame it would probably take you a lot longer to got those angled cuts unless you use a saw. I know I’ve seen a variety of both wood and foam at our dollar tree decor section.
DOLLAR TREE CHRISTMAS TREE FROM PICTURE FRAMES
Step 1: Taking apart the frame!
The first step to making these trees is taking your frames apart. To do this you will need a clean edge like a table would work great. Hold your frame over the edge making sure the back side is facing you (upside down) . Align the 45 degree angle on the frame with the edge of your table and use a hammer it break what’s hanging off. It should pop right off. I did this about 7 times just to test how much damage it does to the frame and it was pretty minimal. Some of the foam breaks off a bit but, usually only on the back.
The front of the frame never got ruined on all of my pieces. If you notice a big chunk of foam breaks off you can always hot glue it back into place. I did this to one my frames on the back side.
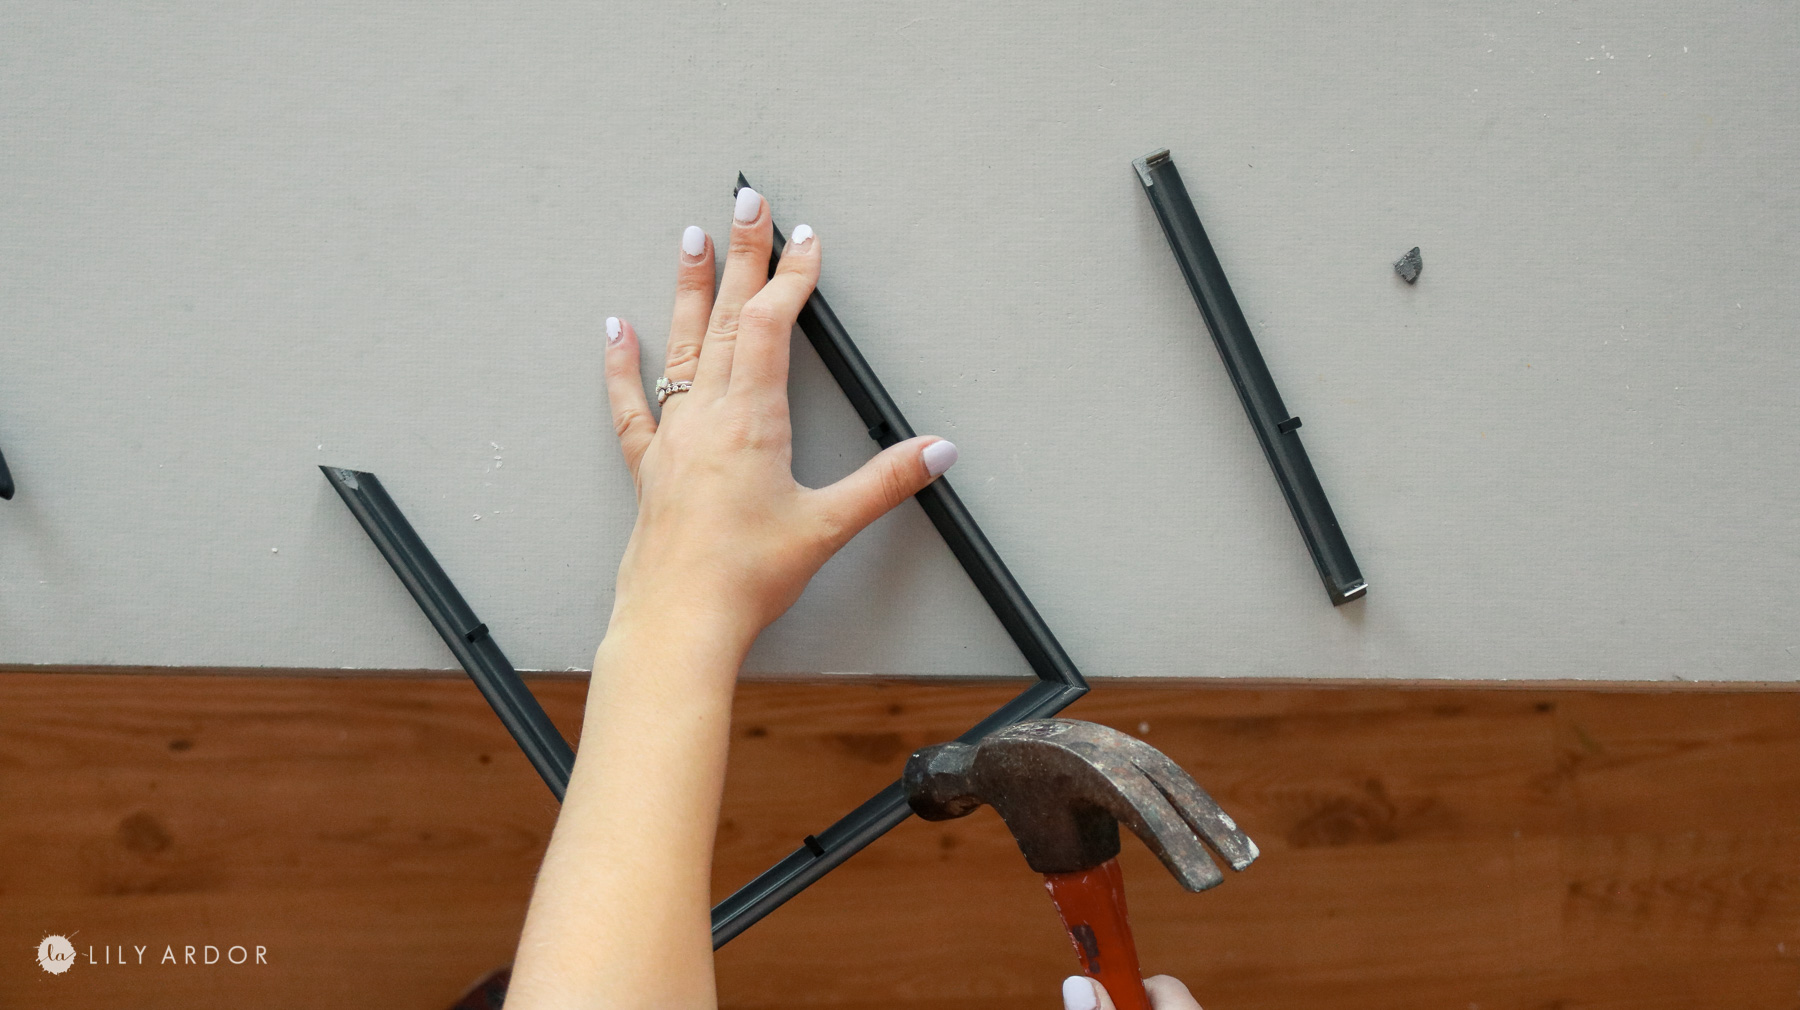
Out of the four pieces you get from your frame you’ll only need 3. You’ll be using the 2 longer pieces and one shorter piece to make the tree.
Step 2: Cutting angles on the frame pieces!
Okay now that you have your pieces ready you’ll need to give them angled cut on the ends.
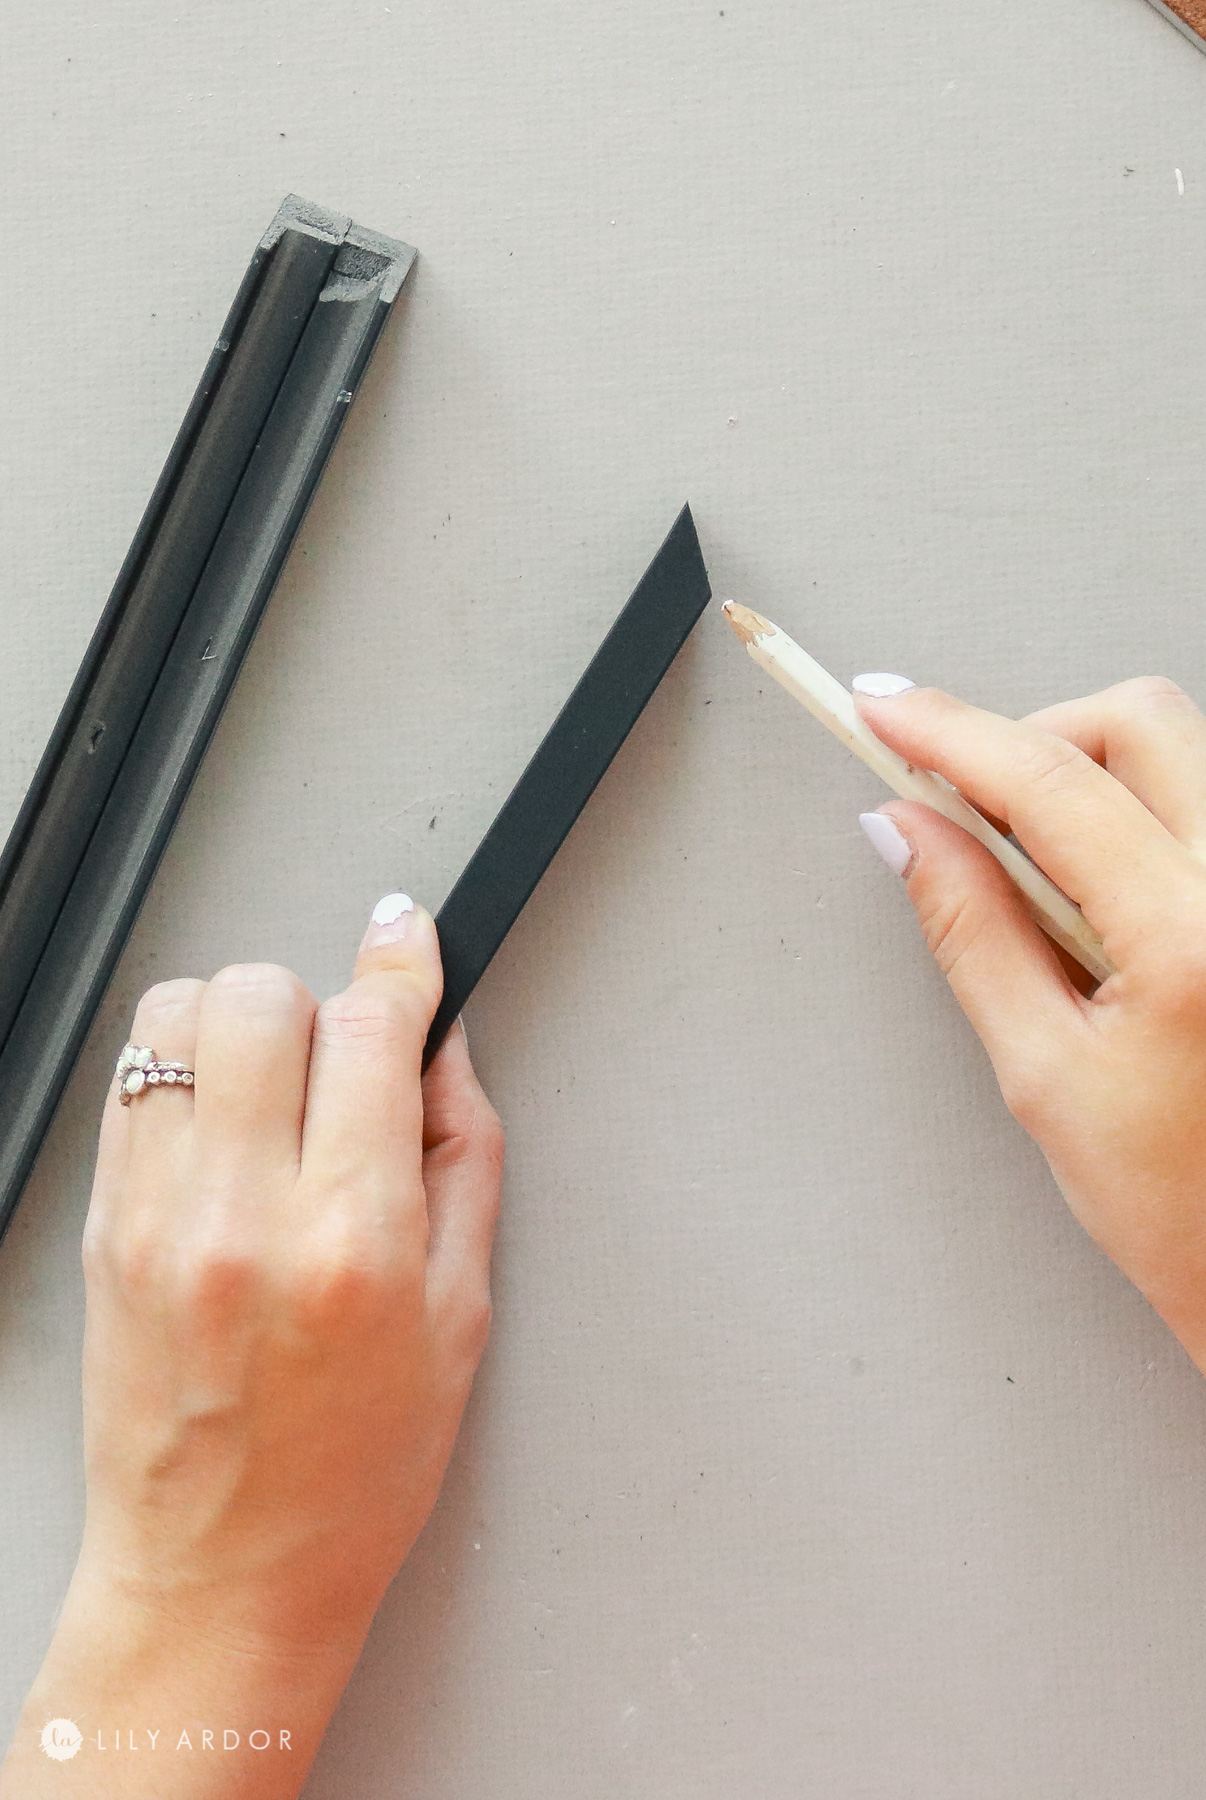
Use a ruler and white pencil and start by measuring on both long piece 2 cm from this point ( where pencil is pointing to)

I lay the piece flat and measured and marked my 2cm on both long pieces on one end only.

flip the piece to the side and connect the line where you marked to the very tip.
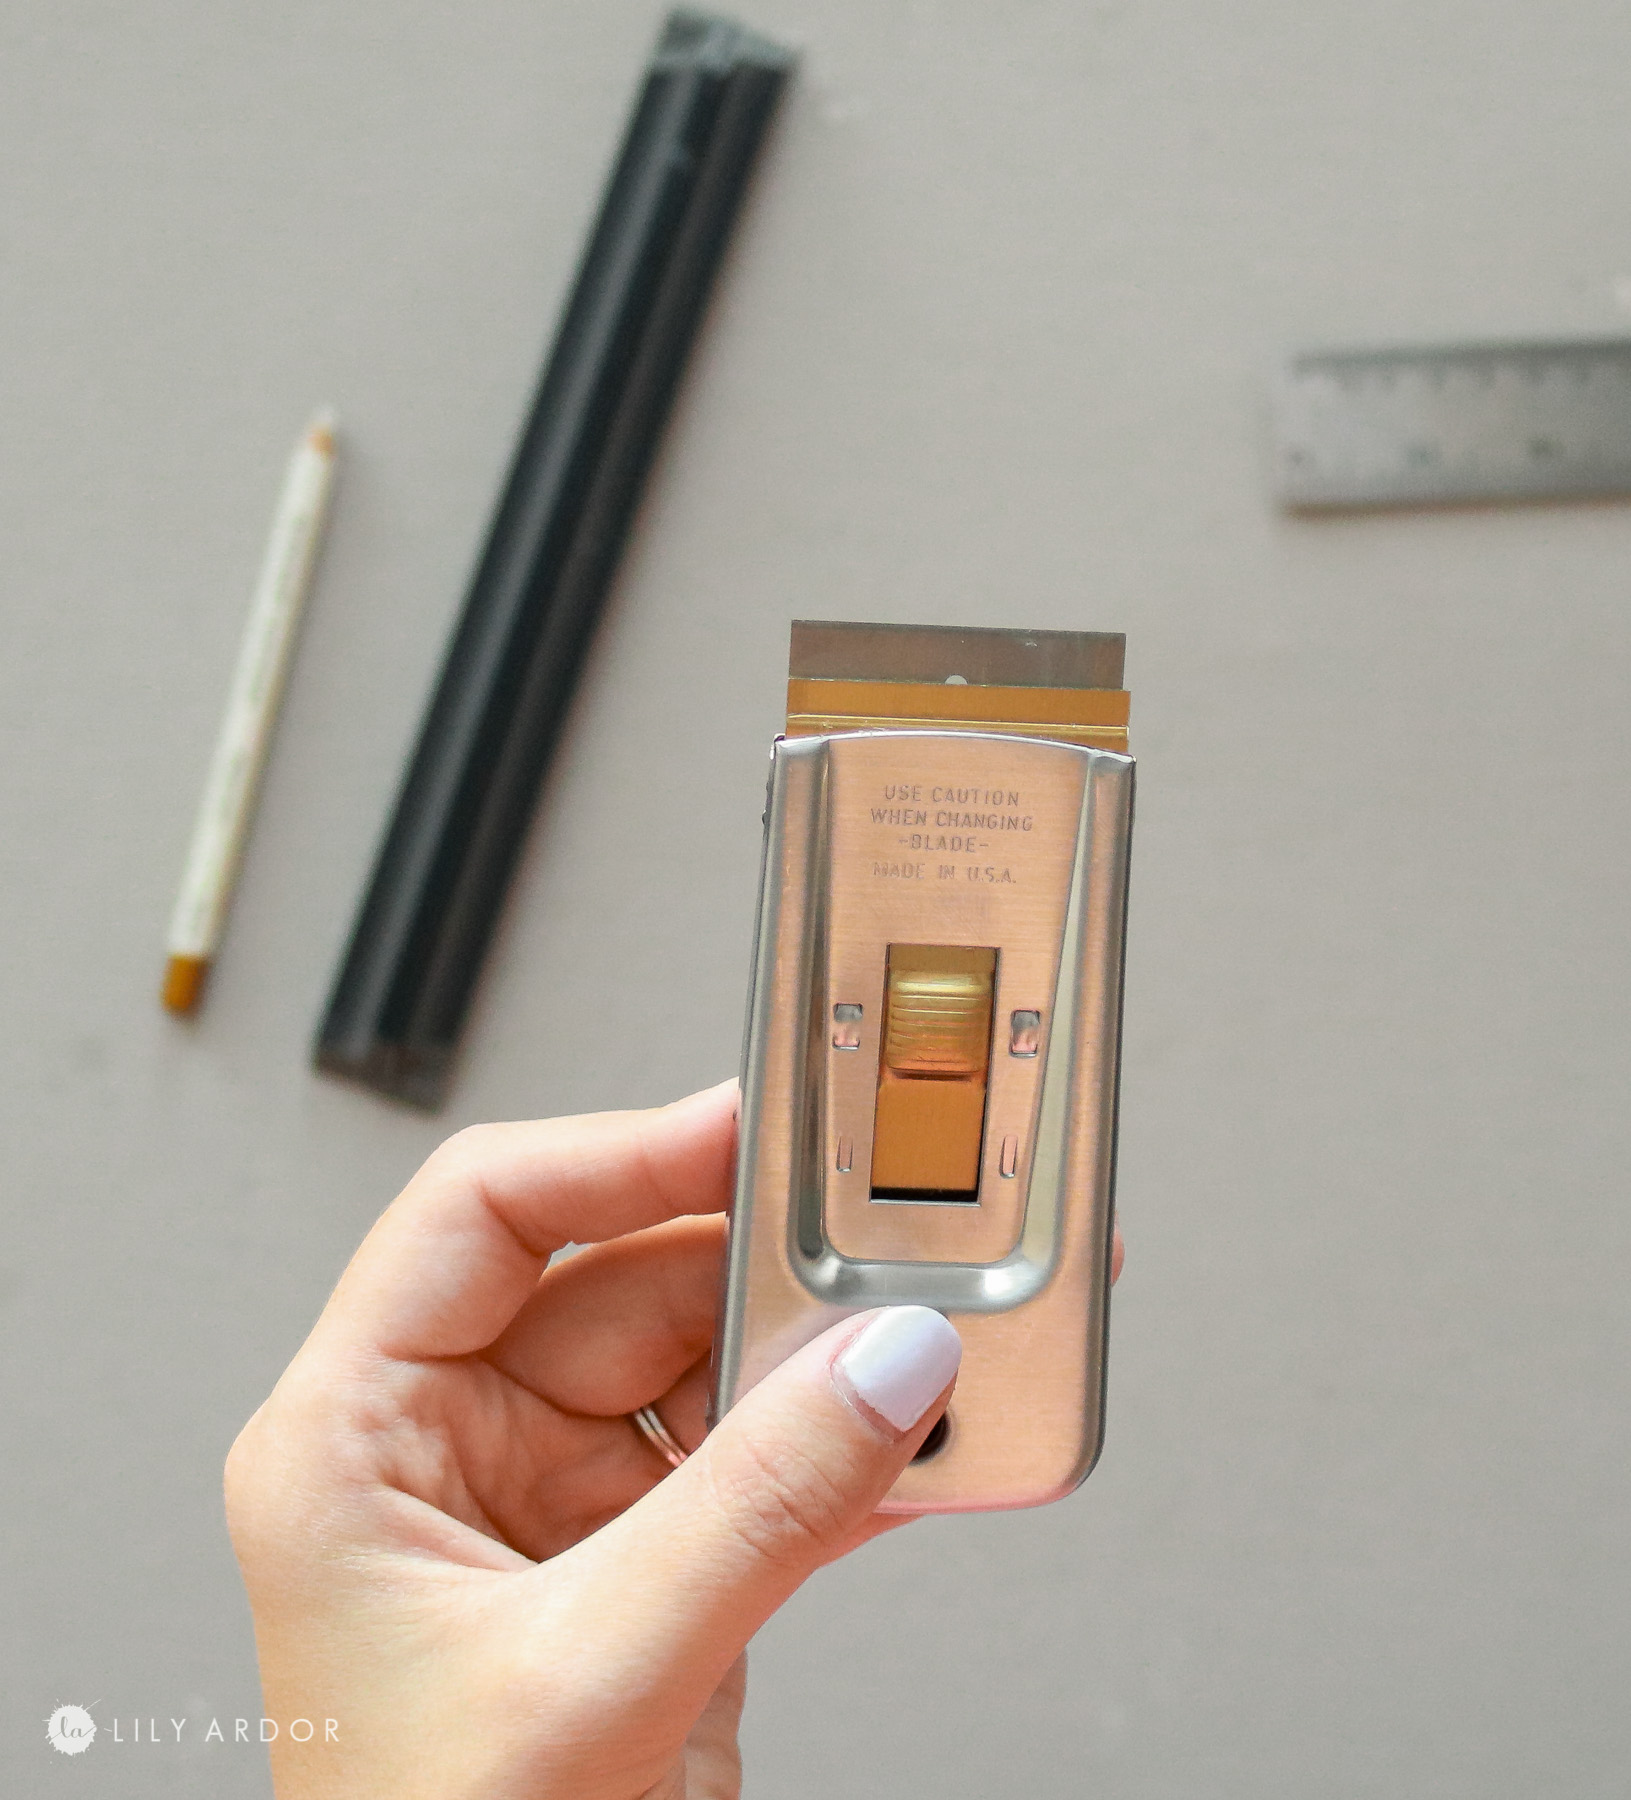
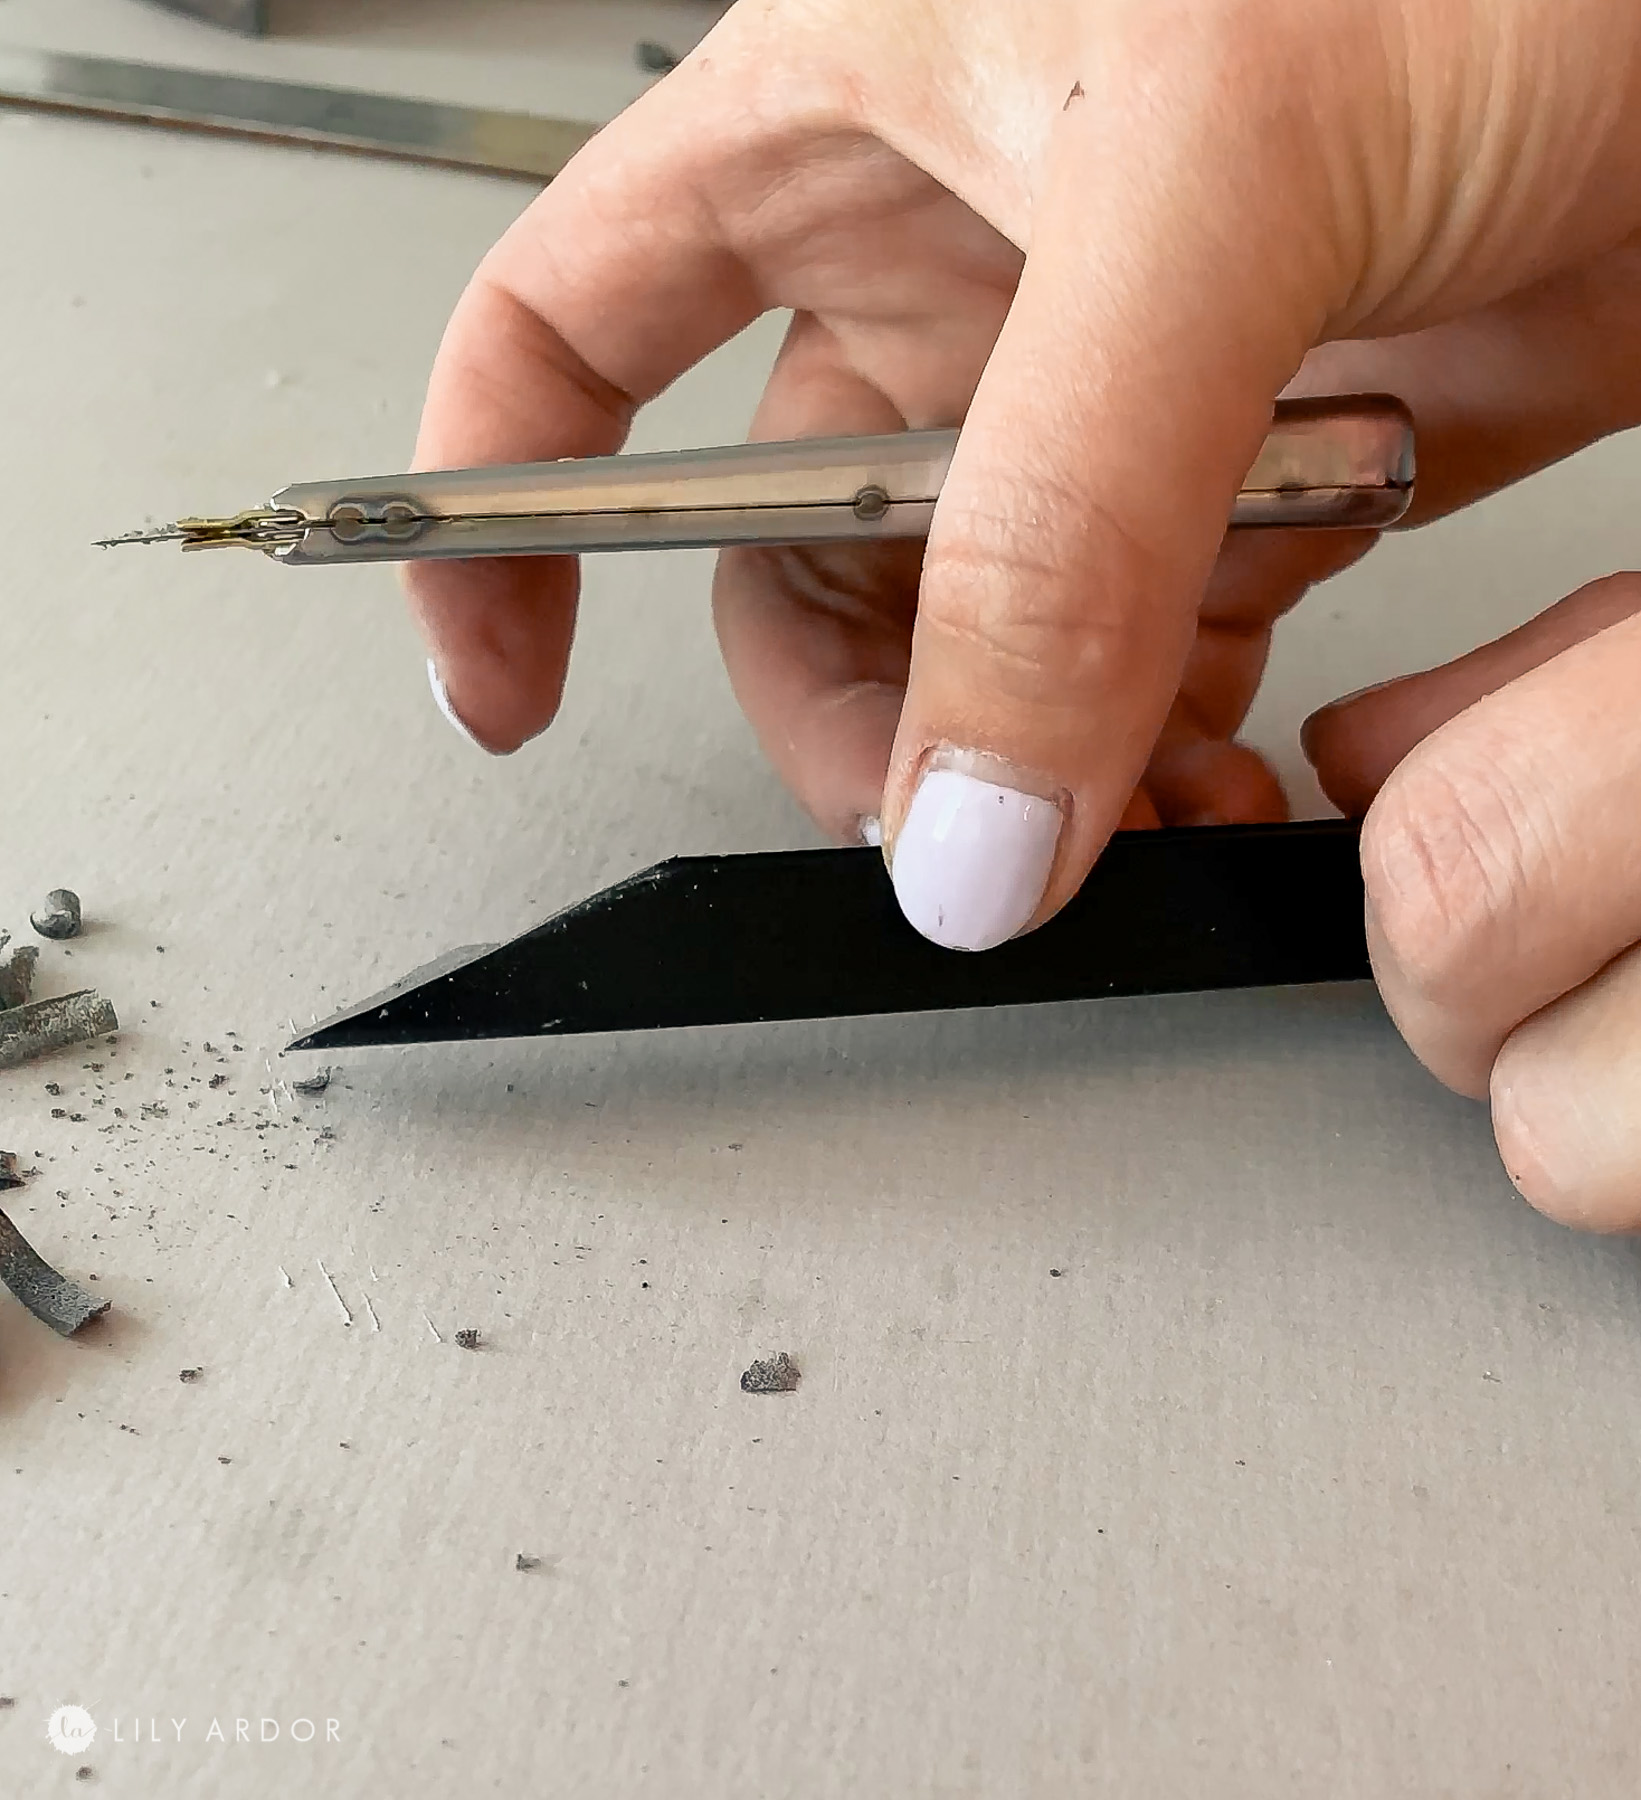
Here’s the tool I used to cut my angles.
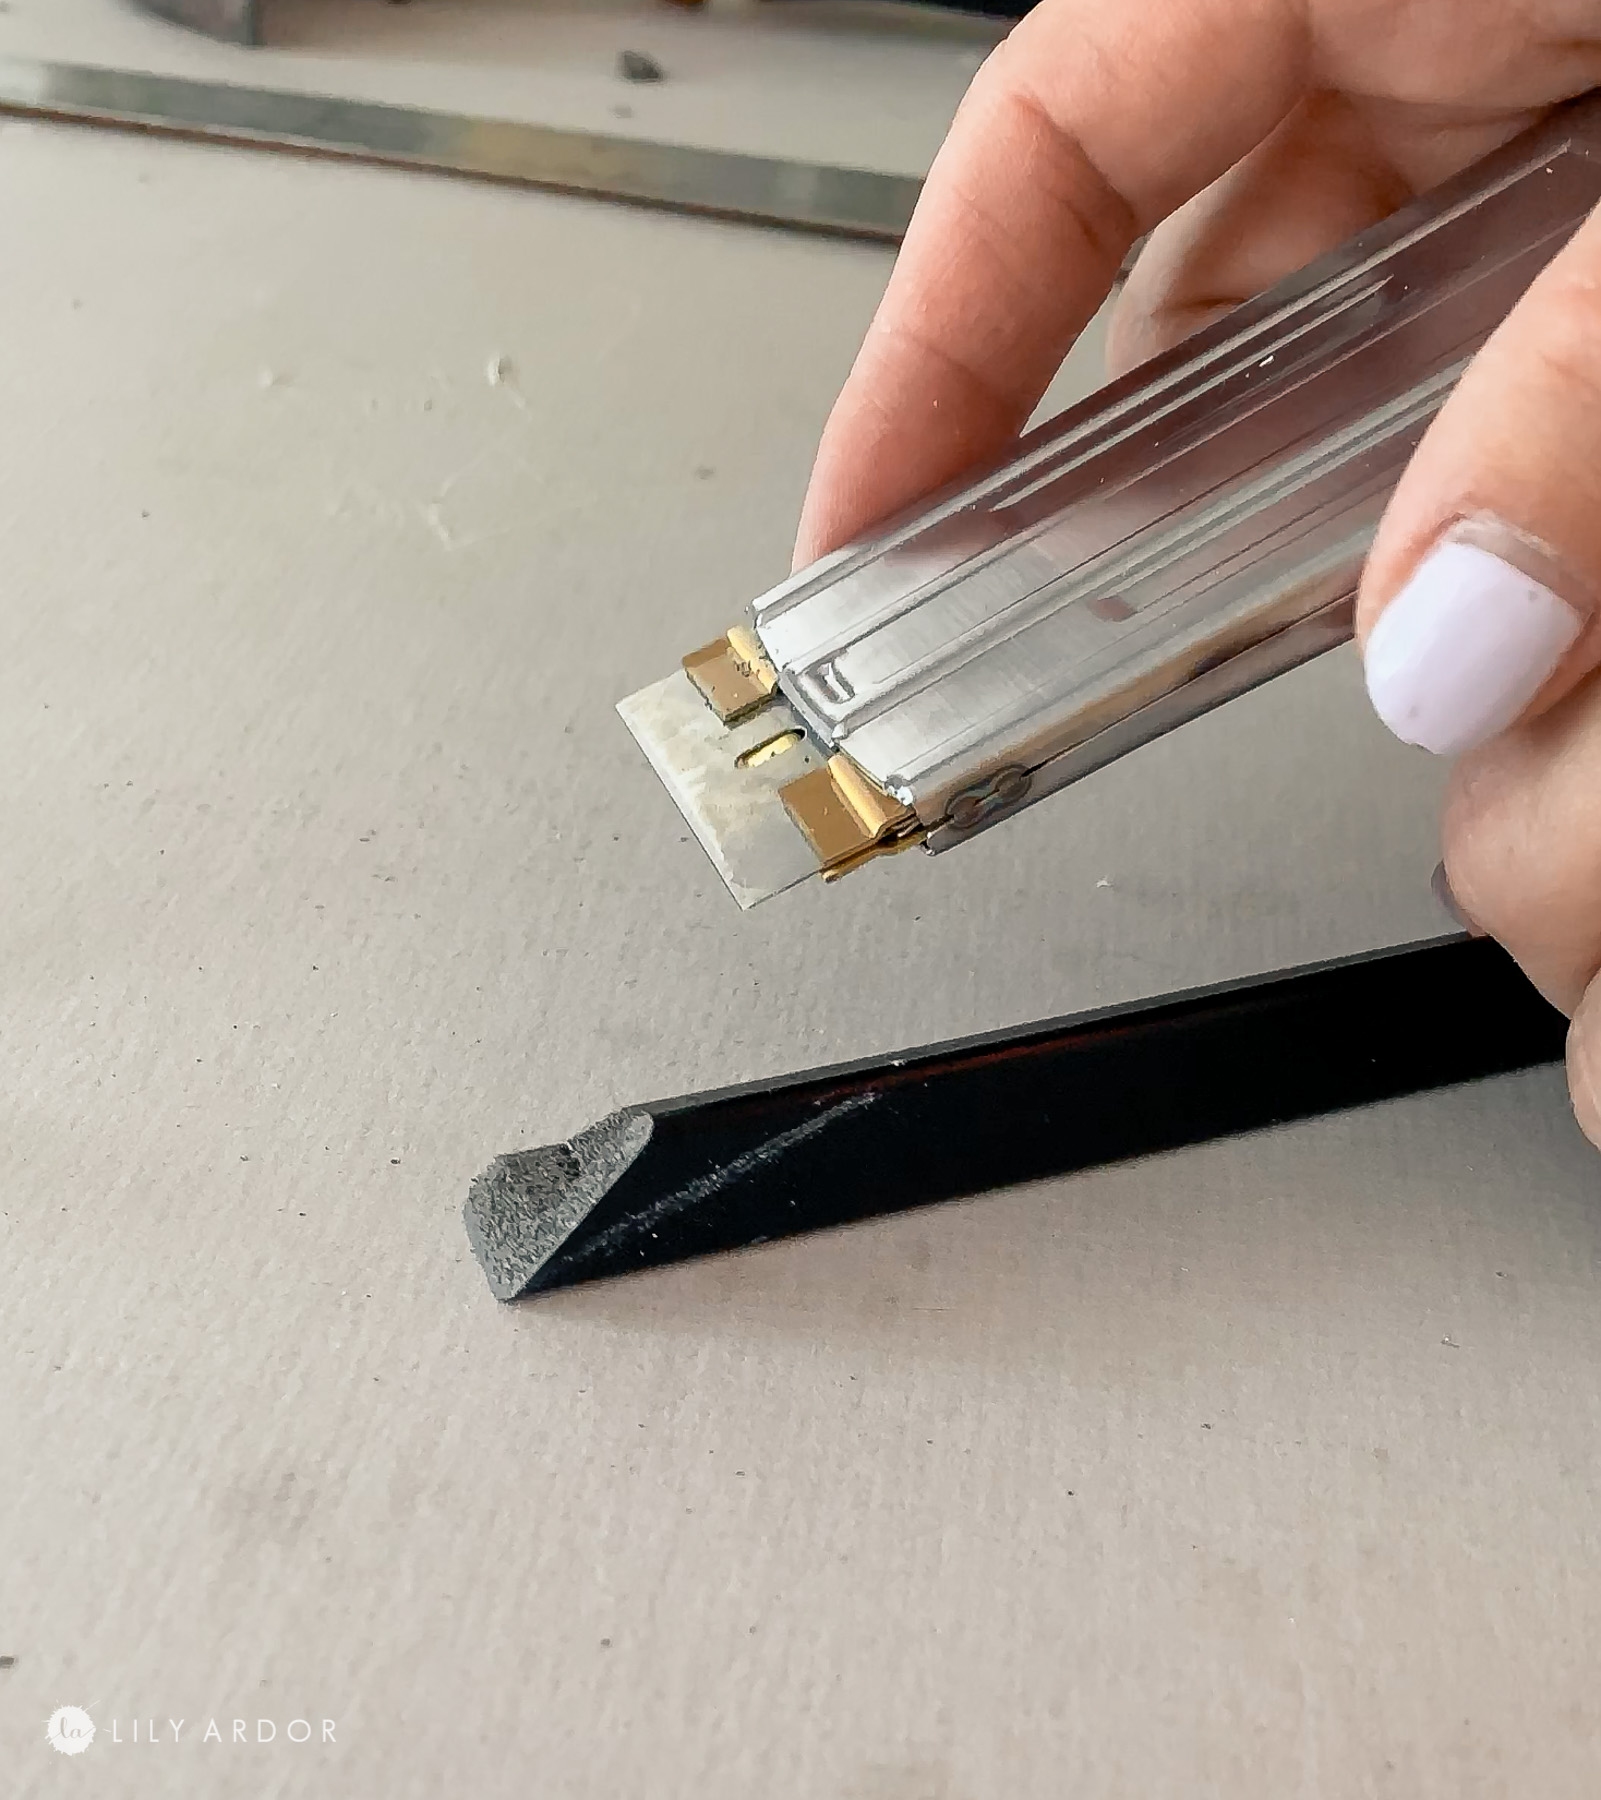
I lay the piece flat against the table again and used my scraper took to shave off pieces until I got a perfect angle. The trick is not to position your razor blade downward too much while shaving it off. Shave off a small amount at a time.
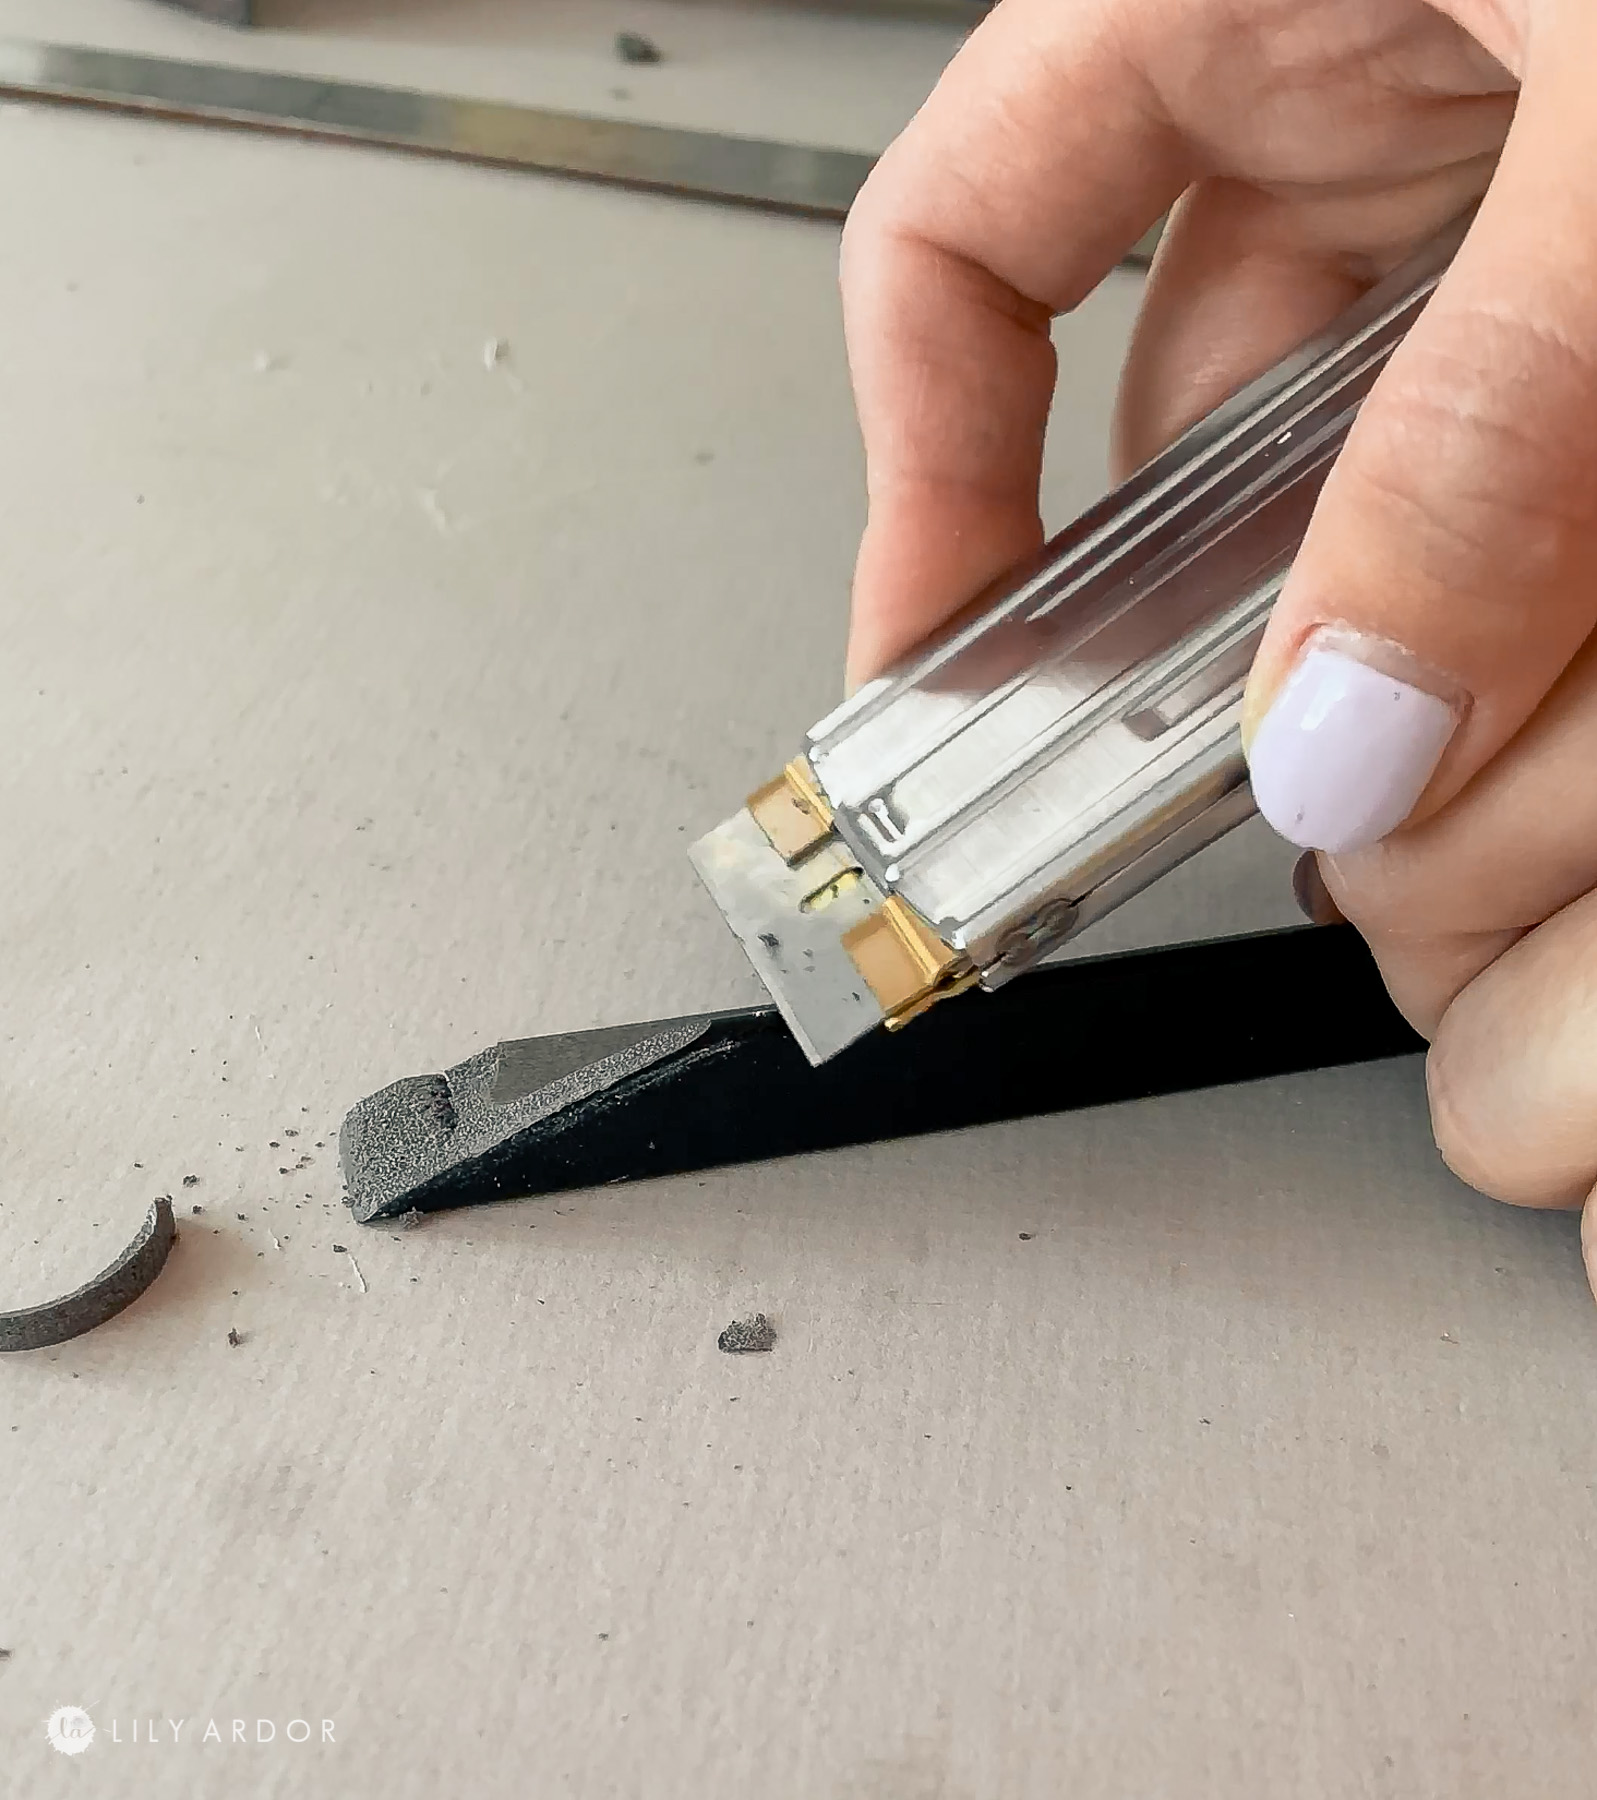
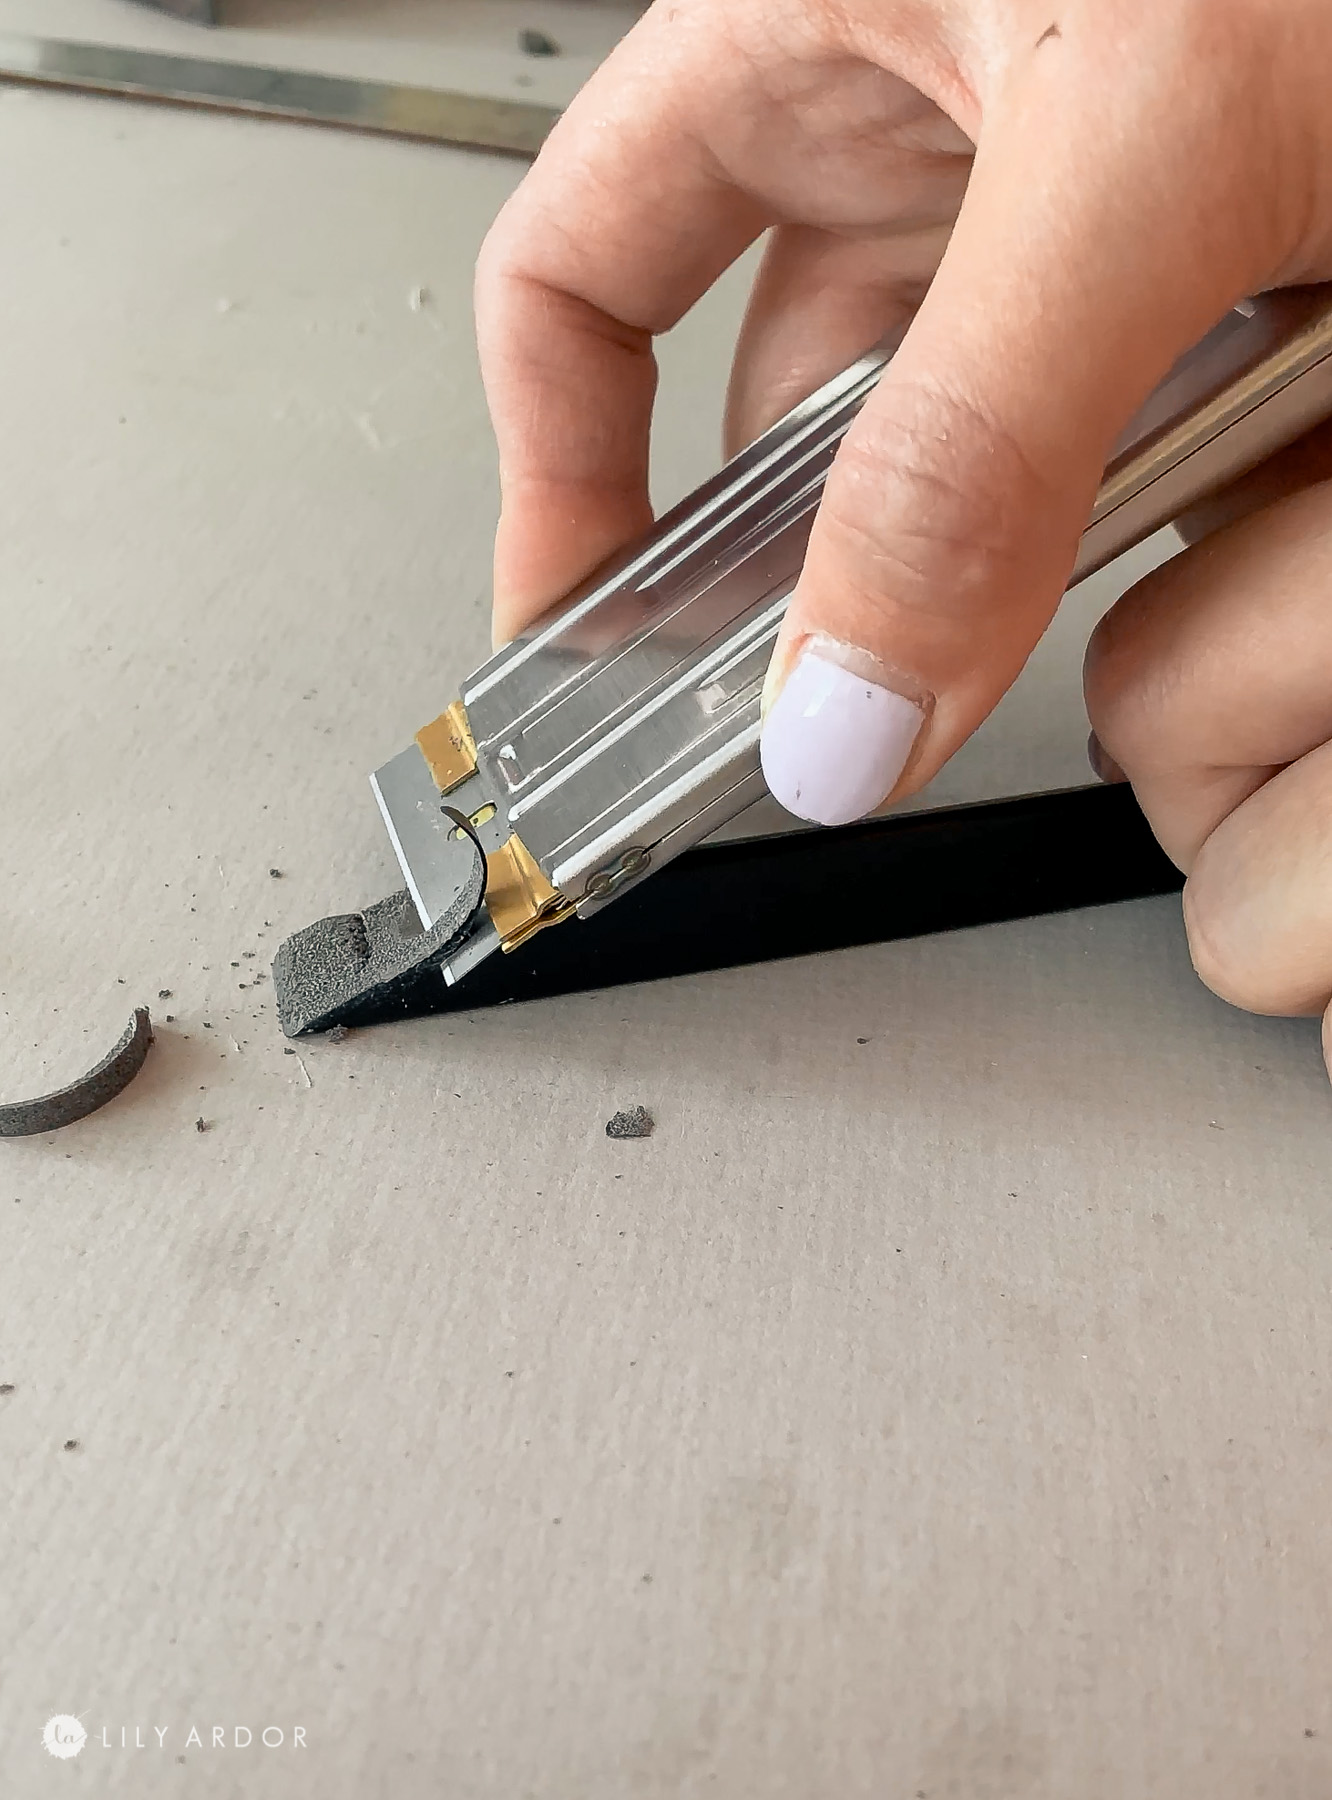
Don’t bite off chunks that are too big because it can simply break off instead of giving you a clean cut.
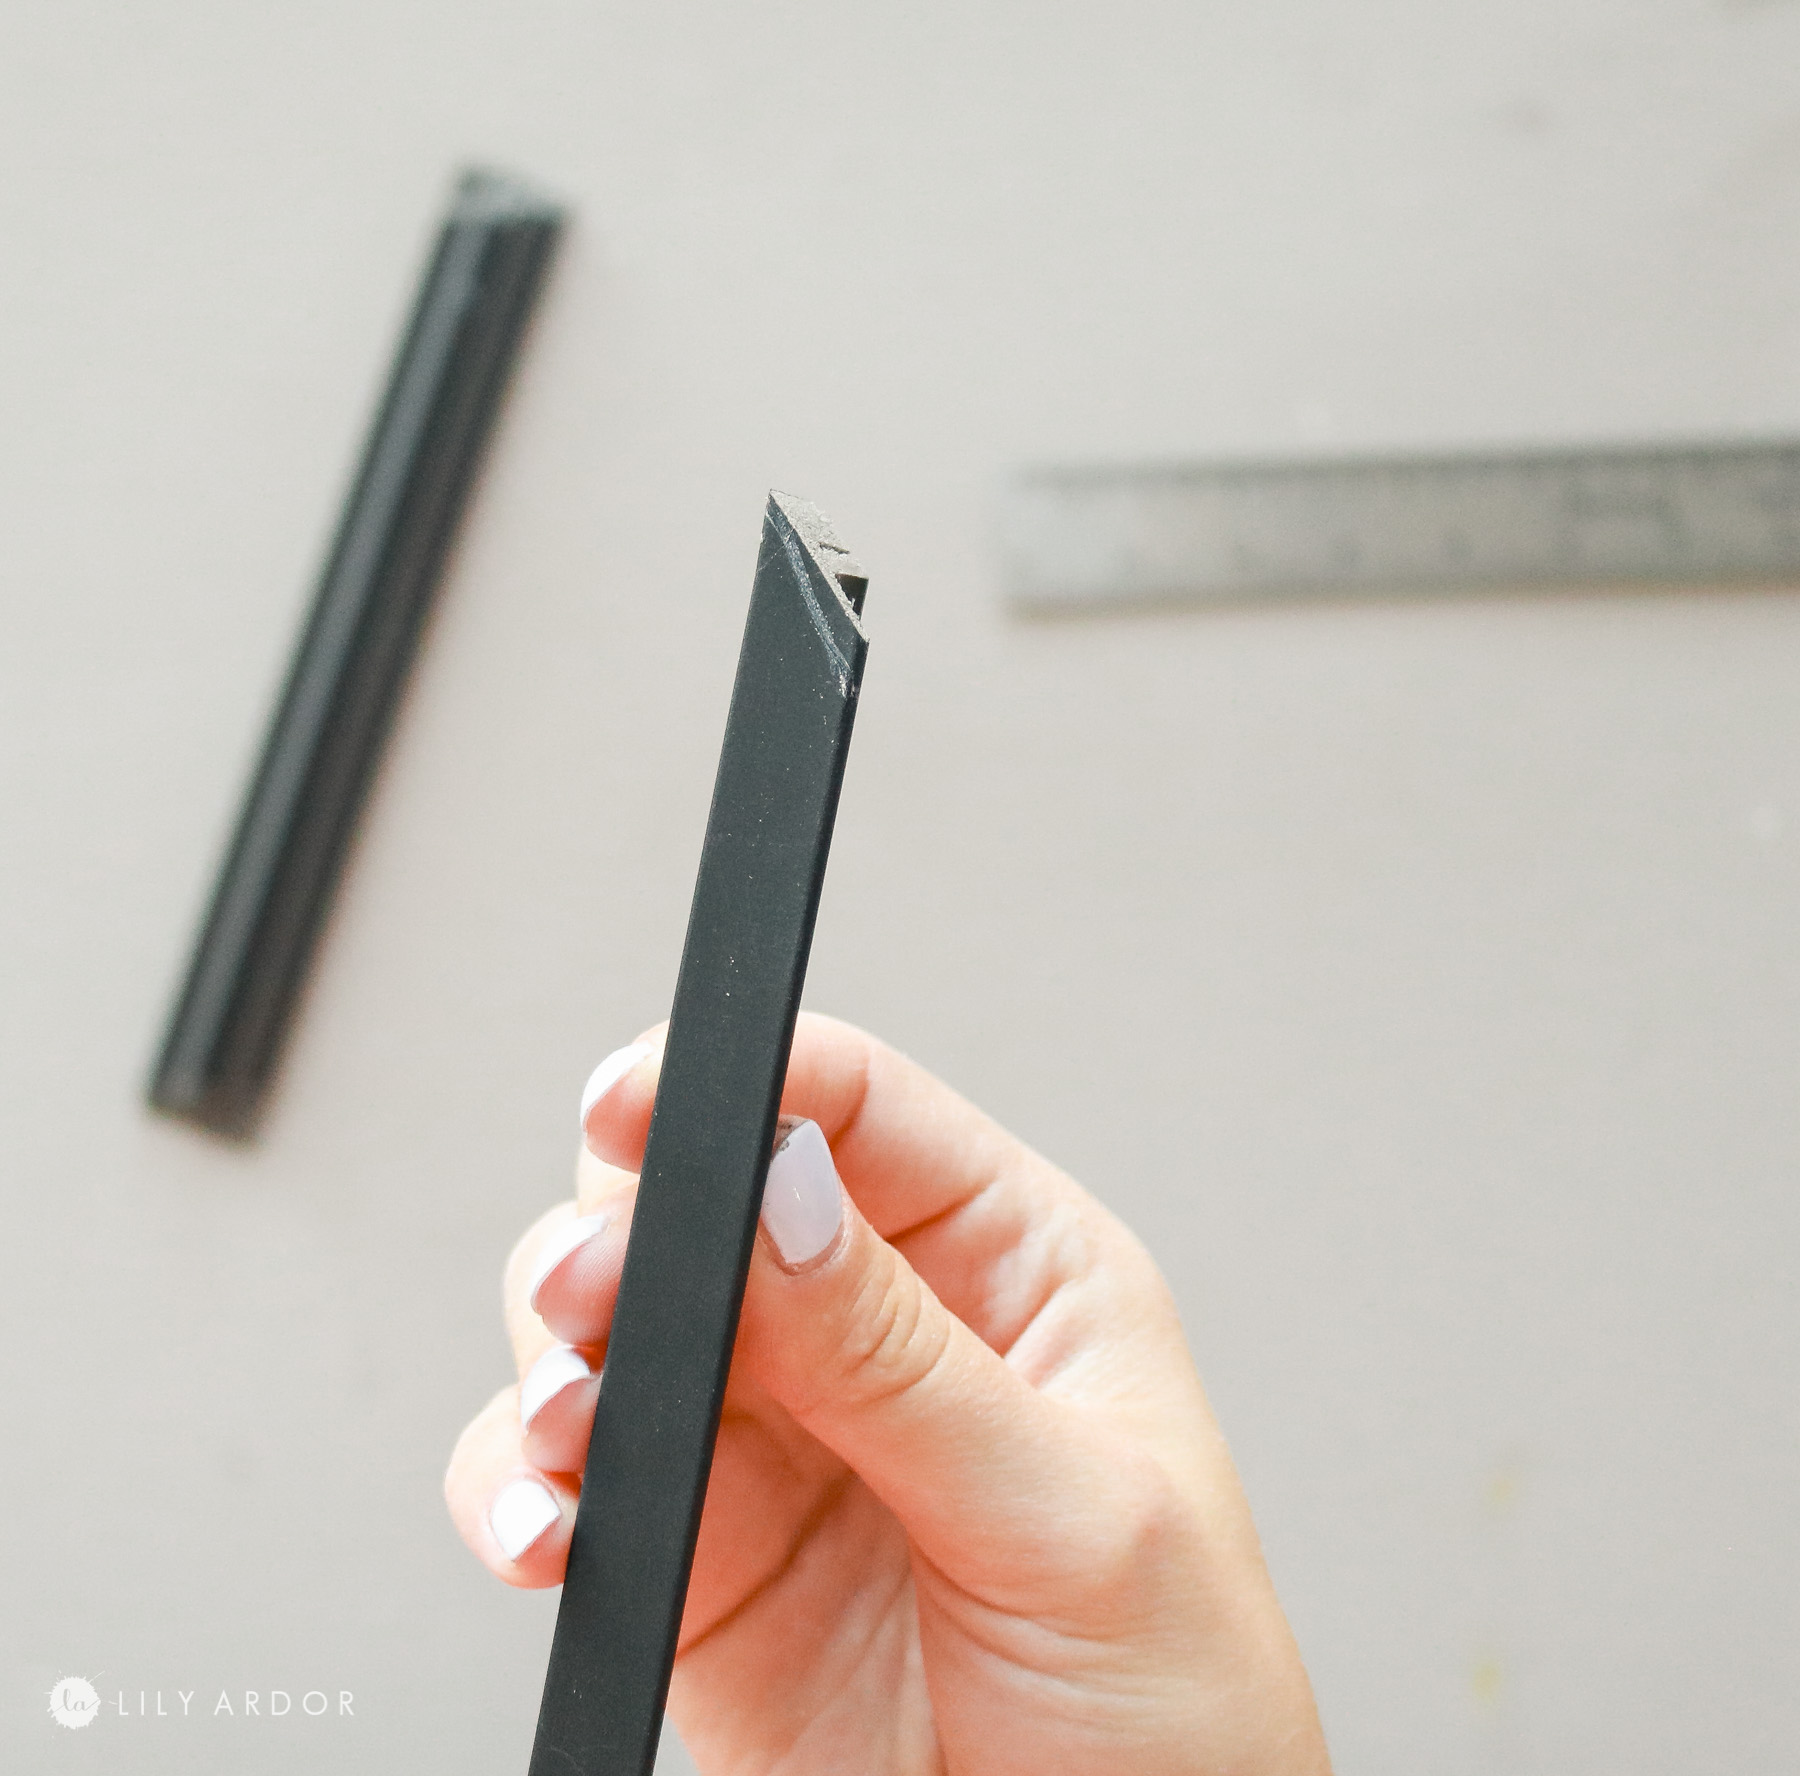
Here’s what my angled cut looked like once I was done. It doesn’t have to be perfect because the hot glue will hide some of it too.
Next I measured and marked the smaller pieces on both ends at 0.5cm on both ends and also shaved it off.
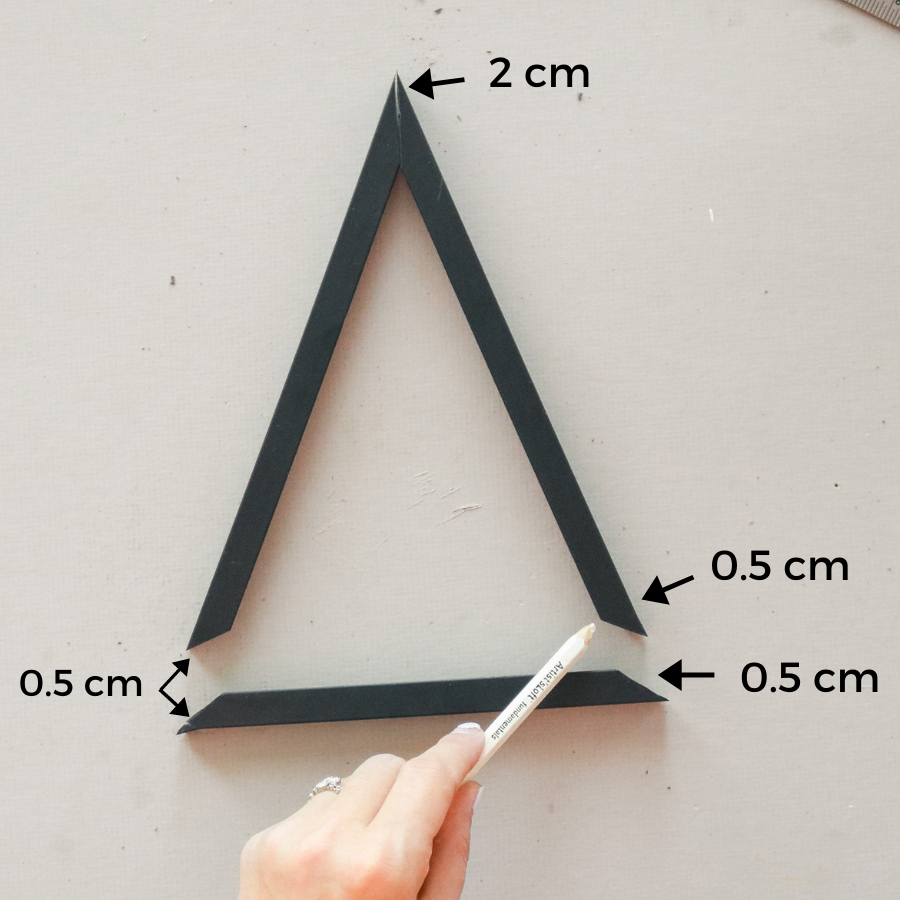
To avoid all confusion here’s what I marked on all of my pieces. All the bottom pieces only got 0.5cm shaved off and the top got 2cm shaved off.

If you’re tree seems too wide you can give it a slimmer look by shortening the bottom piece a little. Keep in mind the other pieces might need trimming as well to adjust to it.
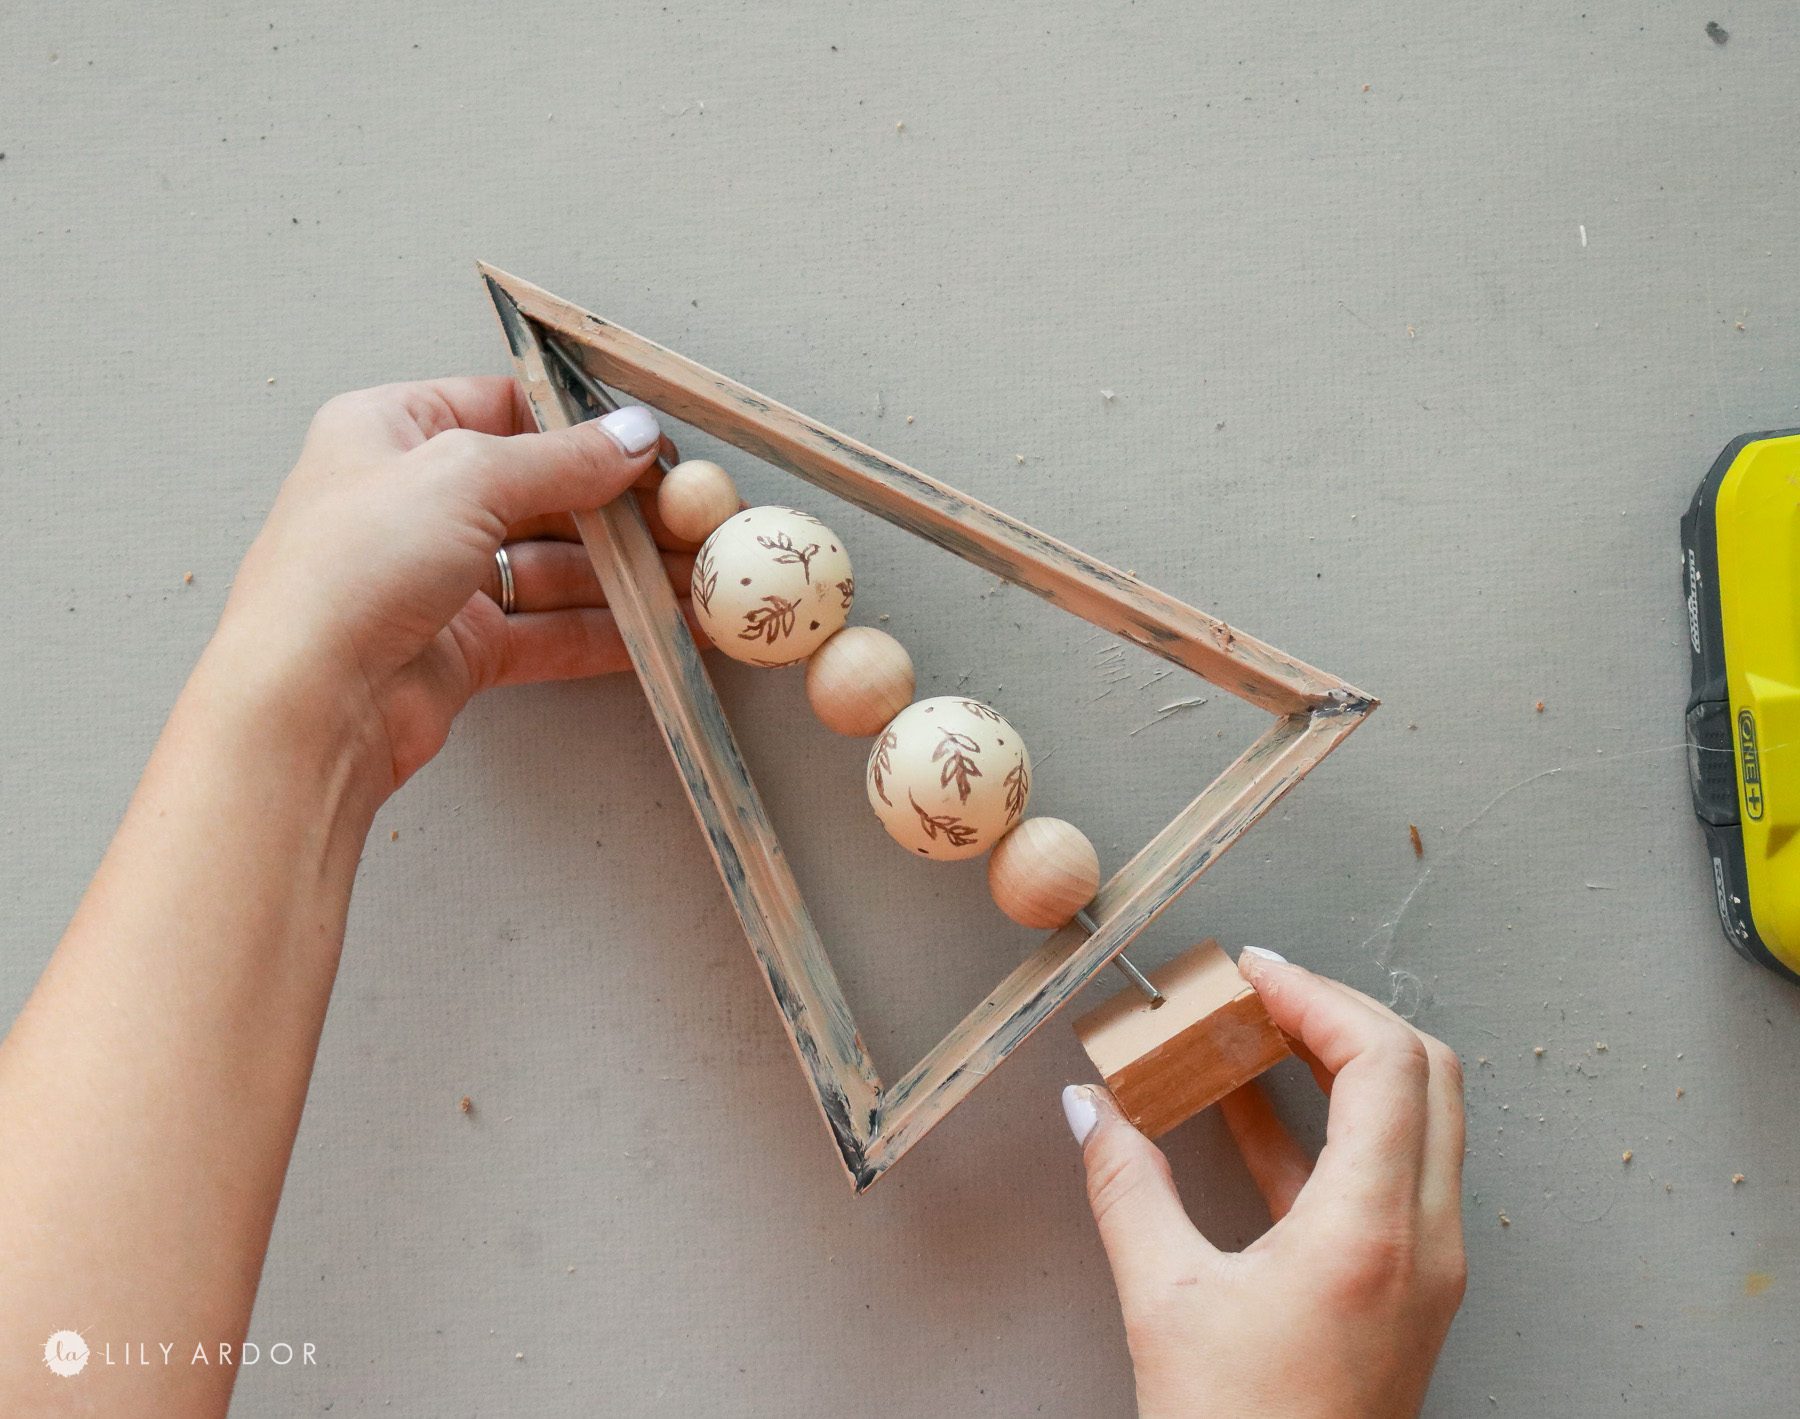
Step 3: Assembling your Christmas tree!
Okay now all the pieces are ready to be assembled. I prepped a small wood block from a recycled 1″x3″ and drilled a hole in the center of the wood block for the metal rod. I also drilled a whole in the center of the bottom piece of the Christmas tree before hot gluing all the pieces together.

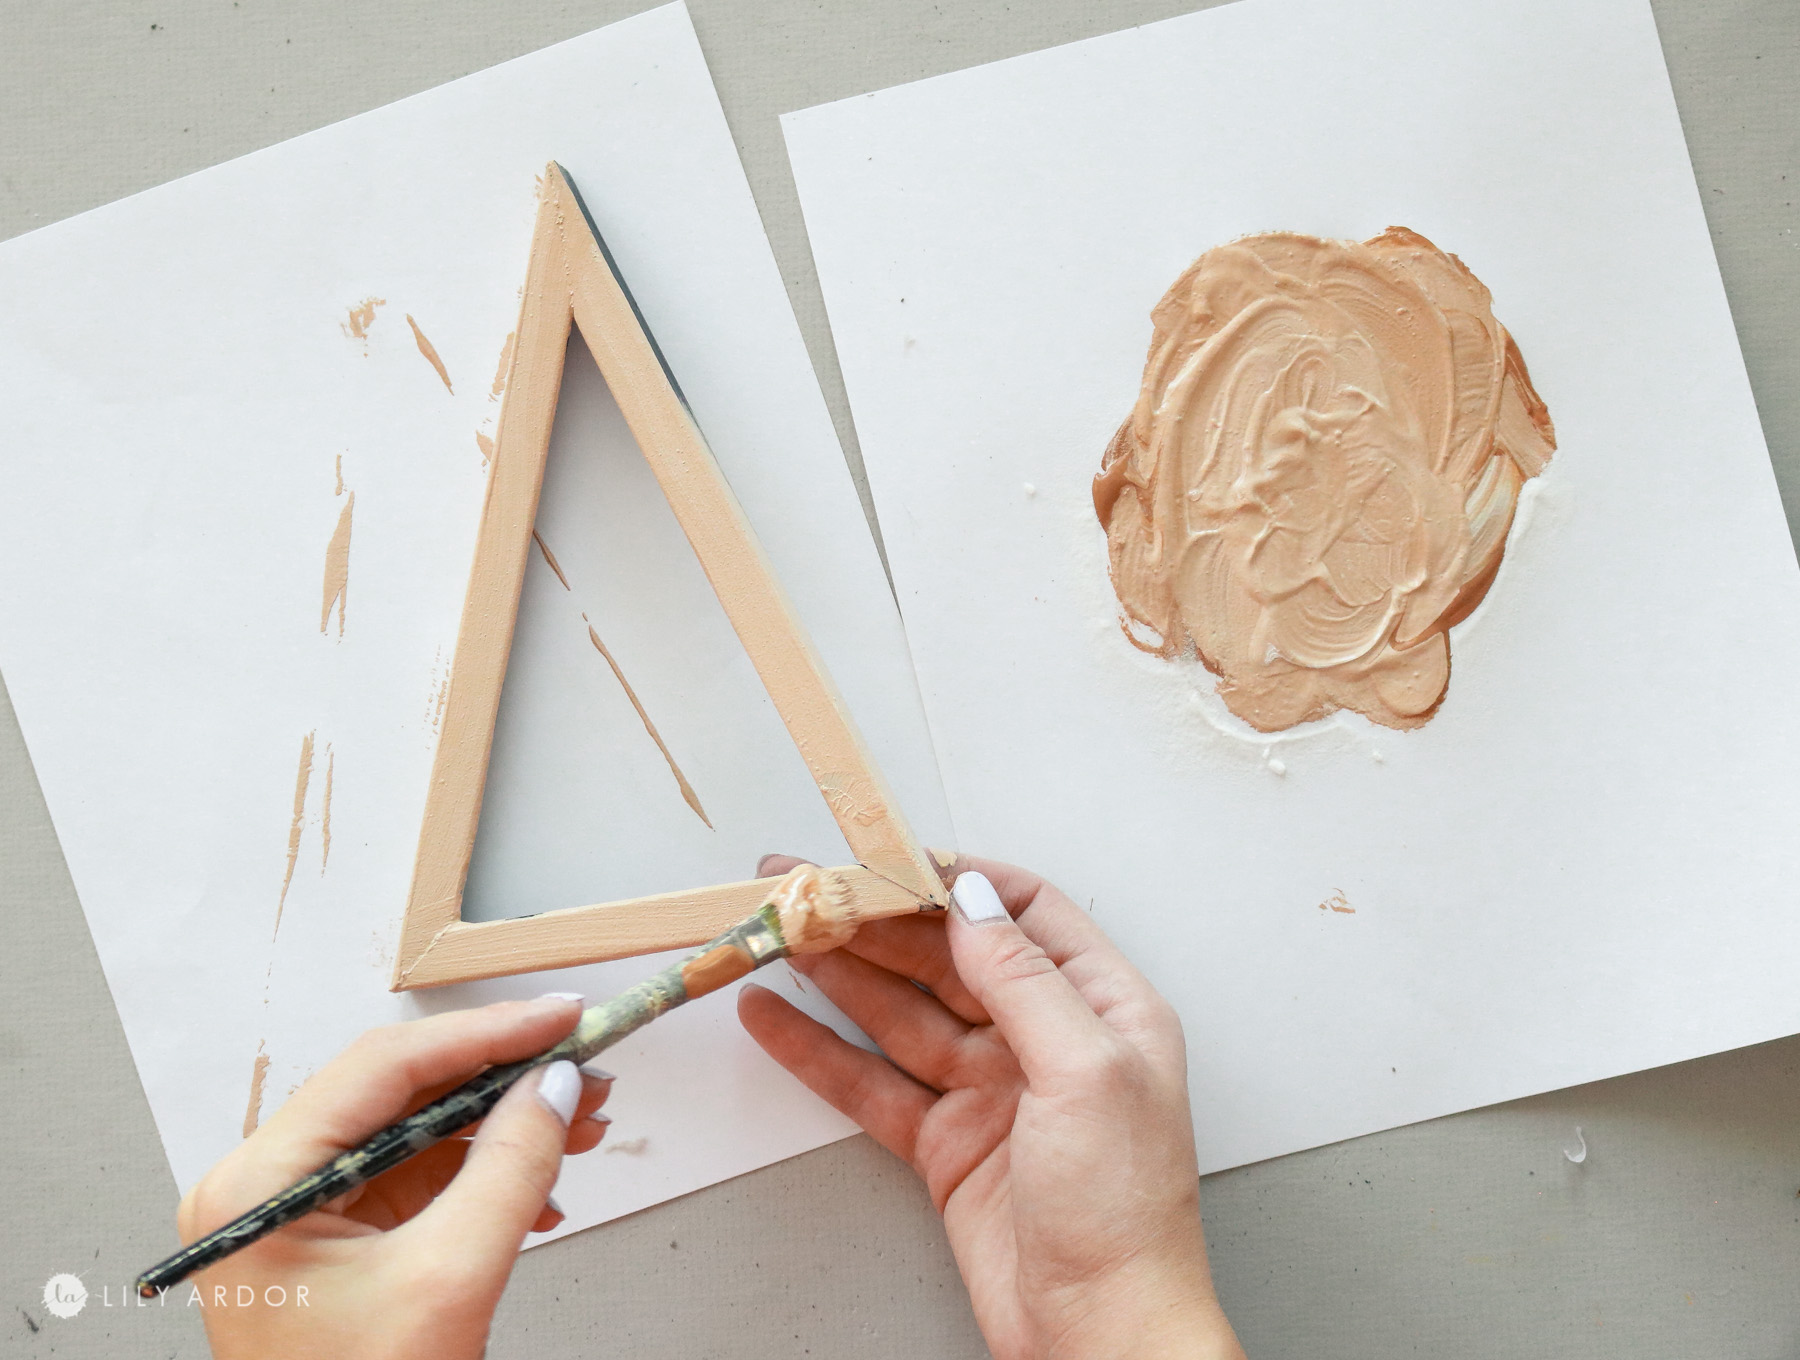
Then I used some tan acrylic paint and mixed baking soda into it to paint the Christmas tree.
To add some character I decided to paint little designs on some ping pong balls I had from a previous project. I than fed some wood beads onto the metal rod and installed it inside the Christmas tree. I got my metal rod at homedepot. You can also use a wood skewer that can be found at the dollar tree.
To secure it all together I hot glued the metal rod at the top and hot glued the wood block to the tree.
That’s it! Here’s how it looks complete! Who knew dollar store decor could look so cute!!

I love those details on the ping pong balls! It looks so cute against the wood beads. Also love how the tan color matches the wood beads. This turned out way better than I was expecting! Who would of thought dollar store frames could look so good.
 They would look so cute next to some candle sticks.

That’s it for now! Thanks for stopping by! I hope this DIY inspires you to create some of your own dollar tree Christmas trees! I can’t wait to share more dollar tree Christmas decorations with you. Merry Christmas everyone 😀
Best Wishes,
Lily
You may also like