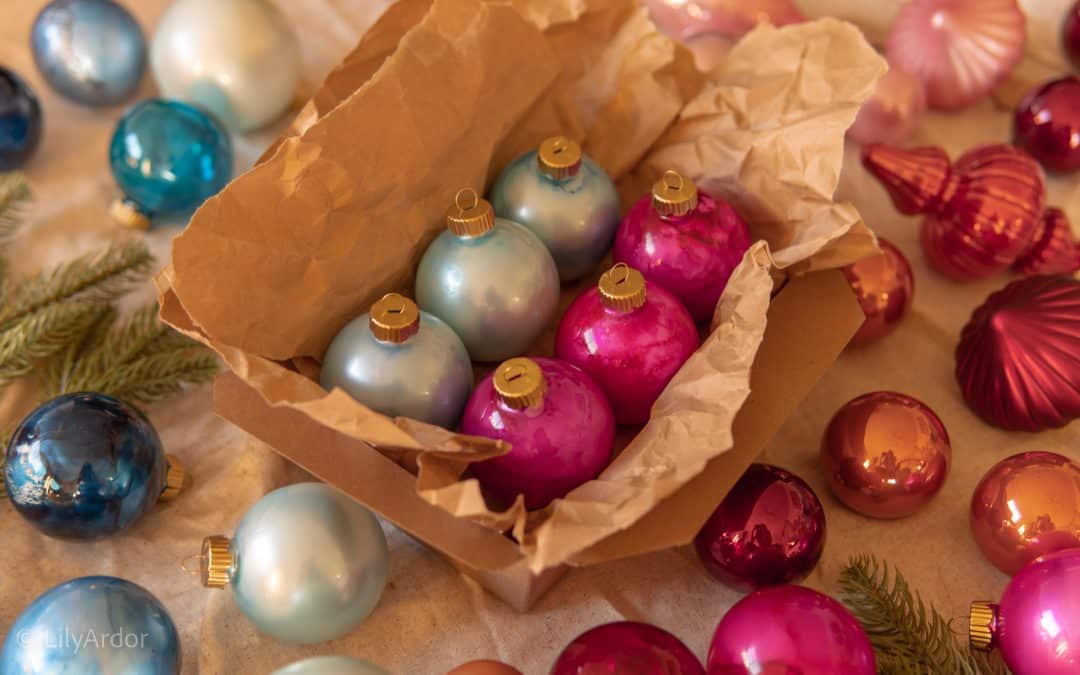
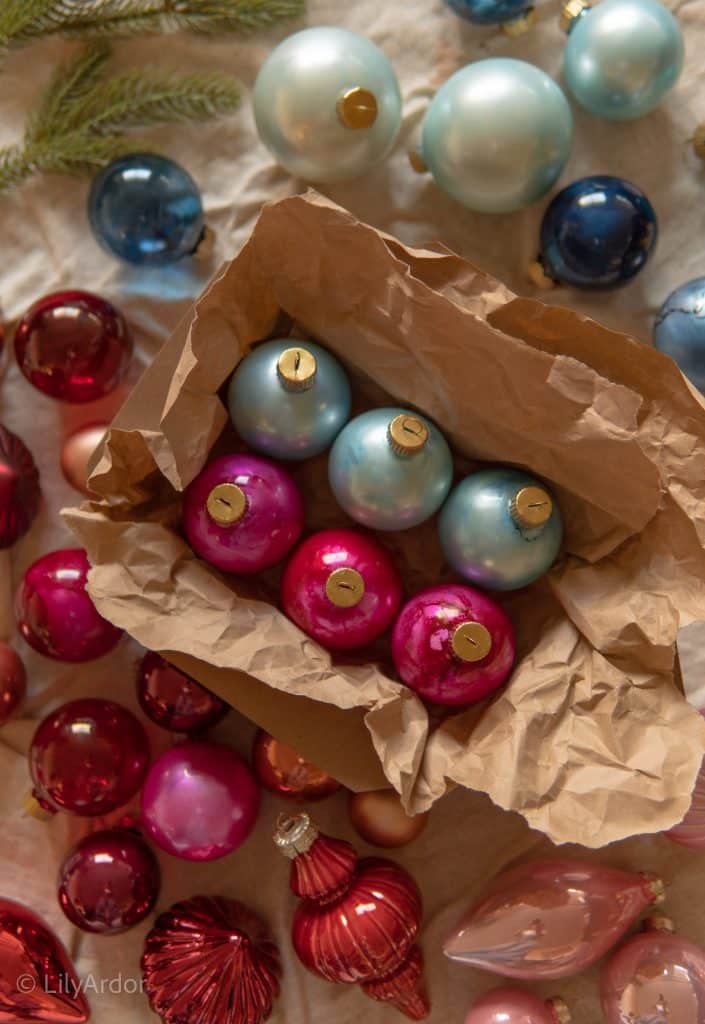
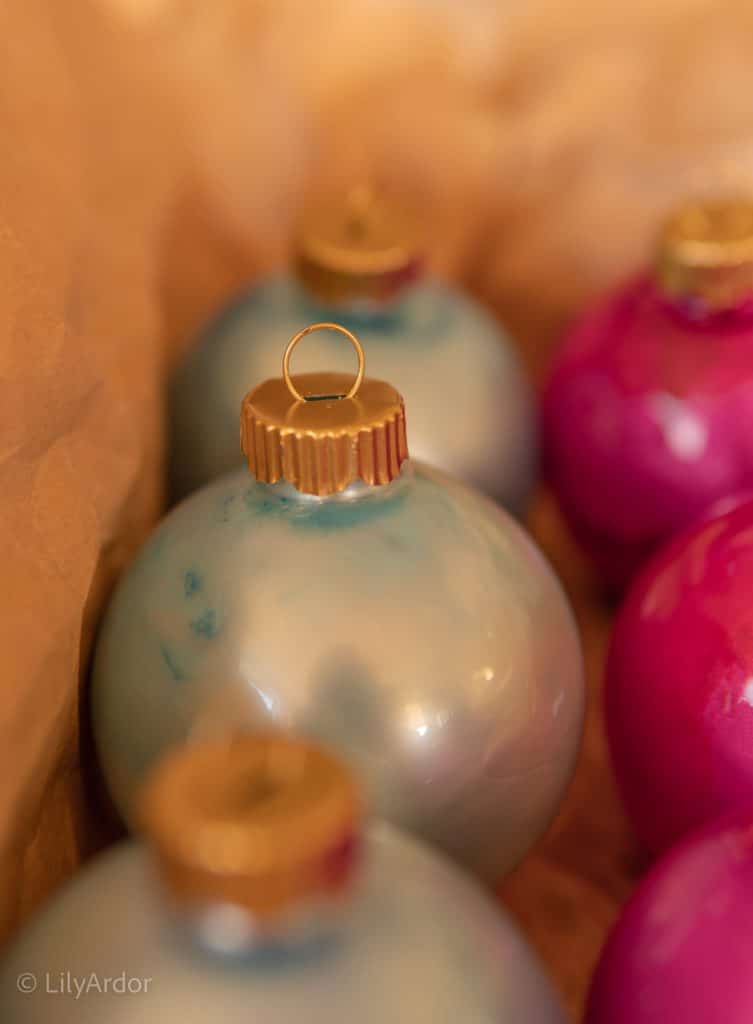
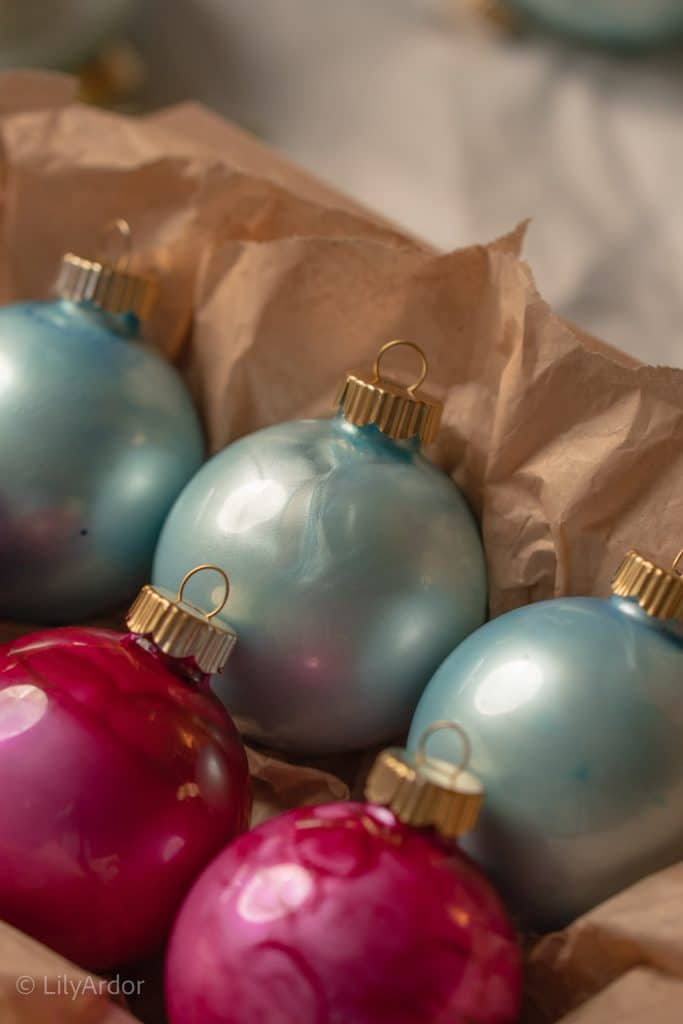
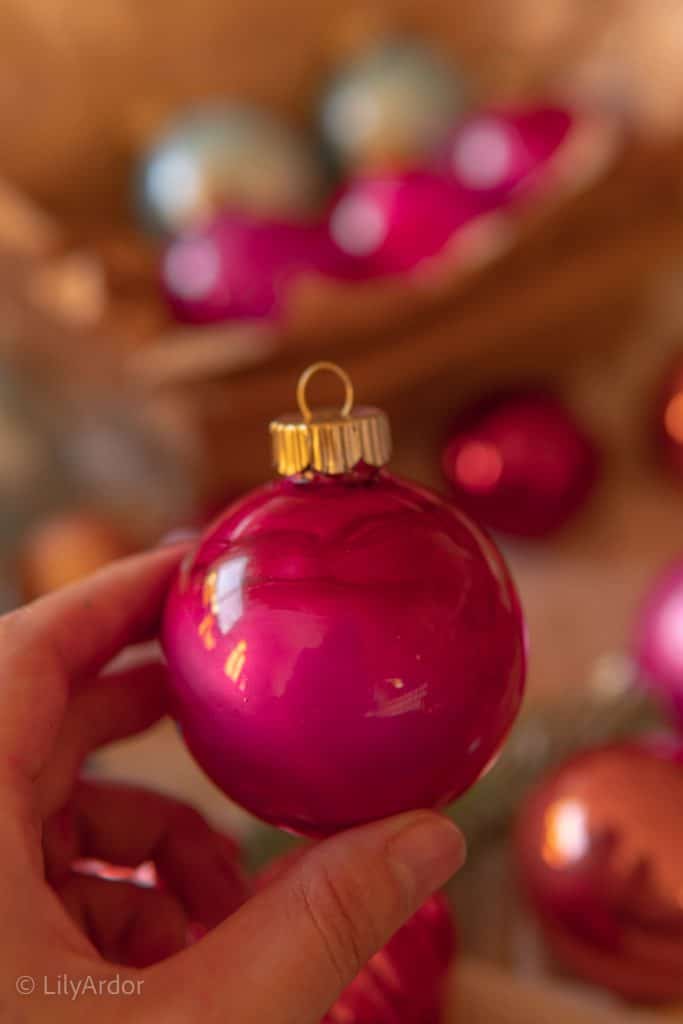
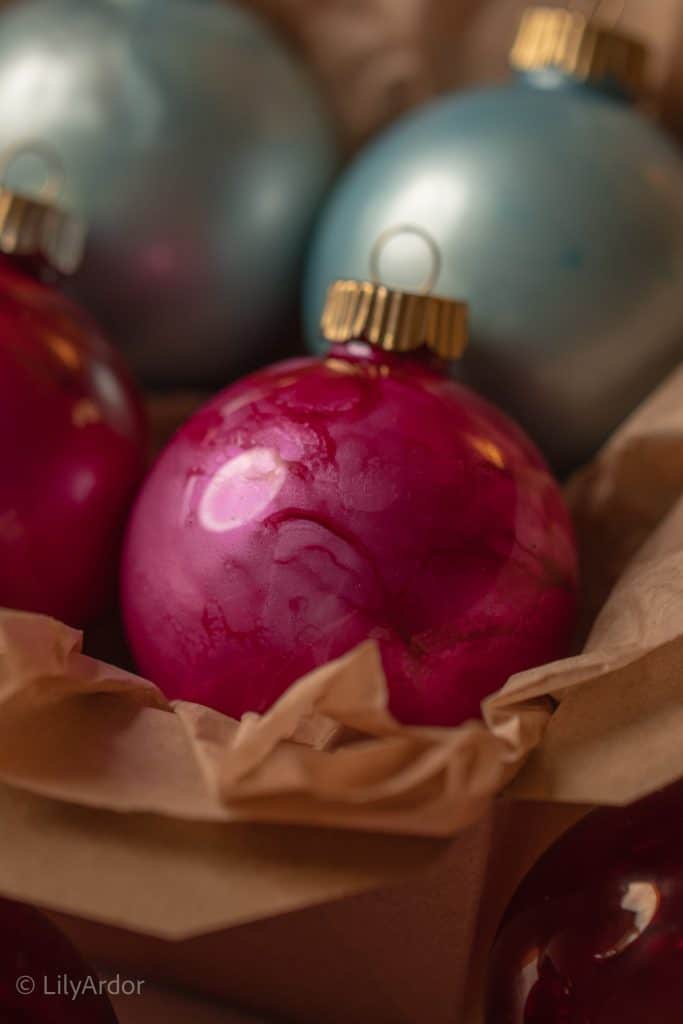
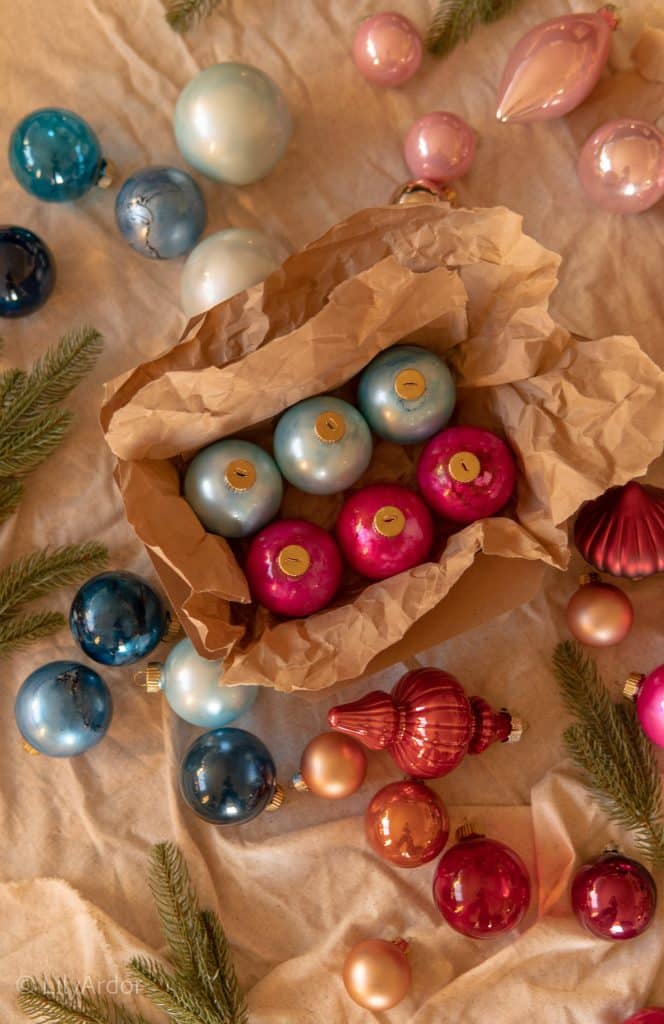
Crafting Nostalgia: DIY Old-Fashioned Glass Christmas Ornaments
Hey DIYers! Remember those vibrant, old-school Christmas trees sparkling with every color. Growing up we didn’t have a tree every year but when it did it sure was colorful!
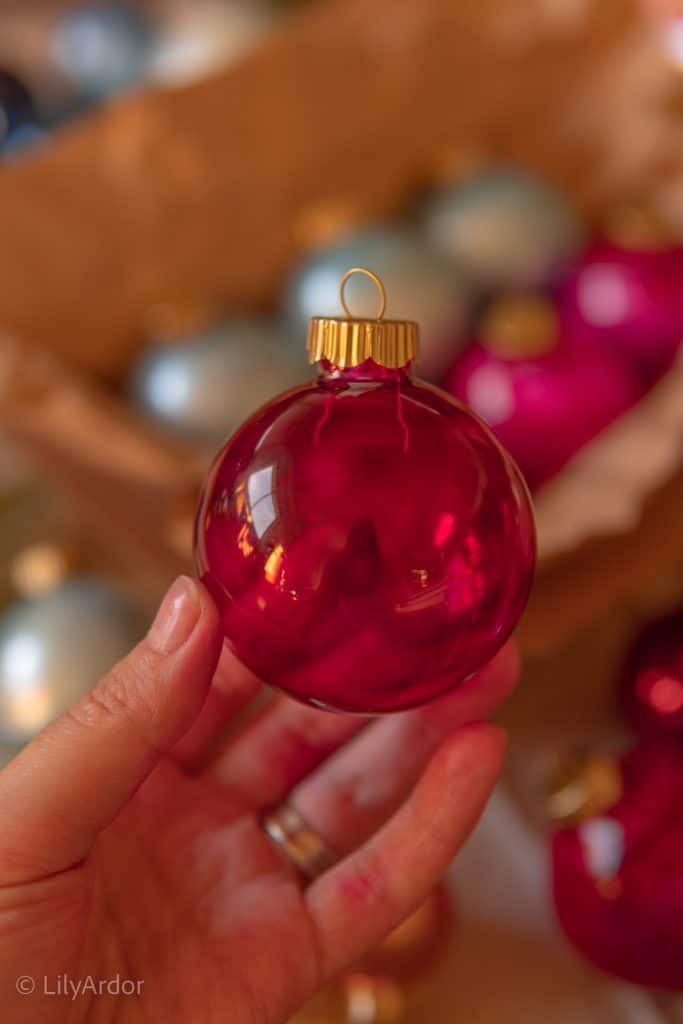
Well, who says we can’t have our own nostalgic tree today? Let’s make some unique glass ornaments that’ll bring back memories!


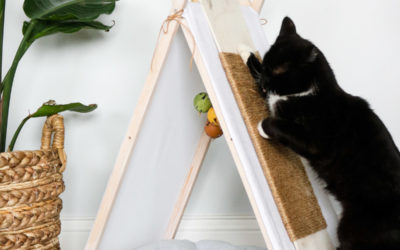
DIY Cat house (Tepee from An Old Tv Tray)
Meet Tod! Hello Folks!! How's your summer so far? This week I'm sharing how I made a DIY cat house! We're getting some nice warm days here in idaho and I'm excited to get started on some bigger wood projects! hint hint ...live edge coffee table soon ( if I can get...

DIY Plant Stands from wood!
Idaho Adventures Recap Today I'm sharing how I made my DIY wood plant stands but, before we began a quick recap. HELLO beautiful people! It's been an amazing couple of weeks. I know I've been a bit absent lately and that's because we had family over for a week. ...
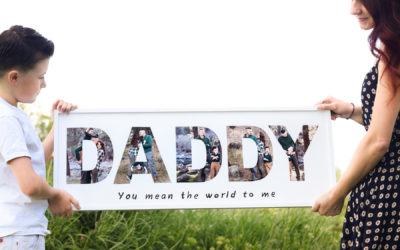
DIY Father’s Day Gift
DIY Gift For Dad Hi, everyone I hope you had an amazing memorial day weekend. Today I'm sharing a DIY father's day gift but before I start I wanted to share what we've been up to. We went out fishing caught some fresh dinner and had a blast! How did you spend your...

Mother’s Day Butterfly Gift From Printables
This Mother's day butterfly gift idea was on my to-do list for a few months now! Time got the best of me and I just finally had a chance to get around to it. I know mother's day is like one day away and the chances of getting this gift done before mother's is almost...
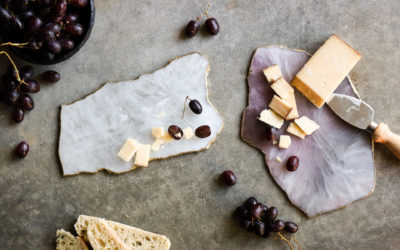
DIY Resin Agate Serving Boards
Today I'll be sharing how I made DIY resin agate! Hello Beautiful? How was your week? OH my goodness can I just say...,this resin stuff is ahhmazing! Originally I had actually planned on making some wall art! I've been really inspired by all the alcohol ink art and...

DIY Head Planters from concrete
DIY head planters! That's what I'll be sharing with you today! So.., I envisioned my concrete head planters to be angelic but grown up. HAHA! Sorry I couldn’t find any other way of describing it. Instead I got a dude that looks like a roman emperor and a cool...
DIY Closet Doors under $50
THE NO BUDGET CLOSET DOORS! Today I'm sharing my DIY closet doors! HELLO beautiful people! It's finally been warming up and raining A LOT this year! It feels like more rain than any other year since we've moved to idaho. This doesn't bother me though😬! I...
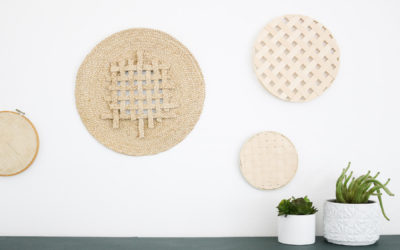
Sunhat Transformed into a Wall Basket
Wall Baskets Hello my craft friends! OMG Instagram has the prettiest collection of wall baskets! If you're new to wall baskets search #wallbasket on Instagram!! I wish I could just pick a few from my favorite Instagram posts😬. Unfortunately a lot of the stuff I see is...

How I organize all my paper clutter
Office Organizing! I have seriously been carried away with all my bedroom remodeling! If you've been following along on Instagram you probably saw I just shared my new DIY closet doors that I'll be posting here soon. (burlap involved!😁) This office organizing video...
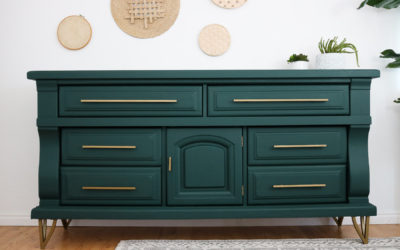
DIY Dresser Makeover
A Much Needed Dresser Update HELLO beautiful people!! Happy Sunday! Today's topic is my green dresser! I was so scared and excited to give this dresser a makeover! Scared??! Because I never cut the bottom of a dresser off before... I questioned this idea for a while...
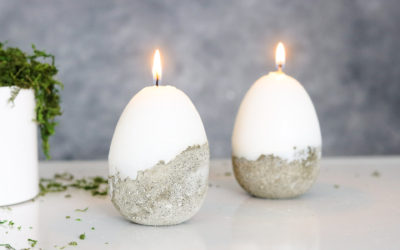
DIY Concrete Easter Candle
HUNTER GREEN FRENZY Hello crafty people! How have you been? I spend all day painting my old dresser which turned out to be more of a product testing experience rather than getting the dresser done. After a 3 coats of paint and 2 attempts at matte finishes I finally...
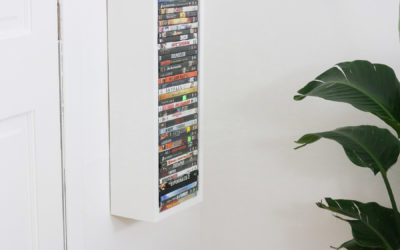
DIY Media Shelf In 20 minutes
Super Easy Media Shelf Hello and Happy Spring! Is it too early to say that! I'm just so over winter😑. I figured if keep saying it maybe spring will come faster! HAHA 😅😂 Okay so, I know I'm a bit behind on sharing what I've been up to lately. I've made quite a few...
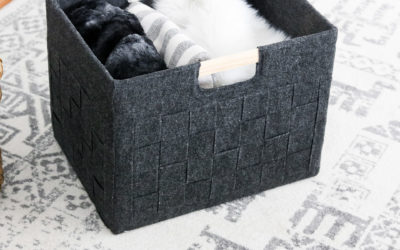
DIY Felt Box
OH MY! How I've missed DIY's!! Okay, I was overly excited to make this felt box. As much as I loved my organizing series I've been missing DIYing and crafting way to much!! So, this week a little detour before we get back on track with the rest of the organizing...
How I Organize My Bathroom
How I Organize My Bathroom Okay, so there's not much to share here but I figured I'd do it anyways. Just in case it might be helpful to someone. I know my bathroom isn't your average bathroom and most of this stuff is probably going to be totally un-relatable. My...

100% Cotton Sheets Full Review + GIVEAWAY (ended
Cotton Sheets Review So, I’m pretty darn picky when it comes to soft bedding. When I say picky, I’m mean REAL PICKY! My skin feels everything! Every crumb, every seam on pants, every clothing tag! Jeans are a big no no unless they’re super duper soft! Oh gosh shall...
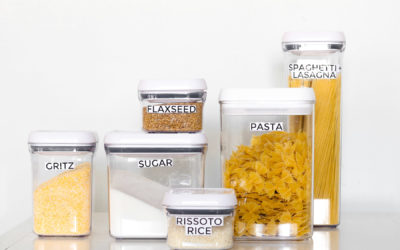
5 Things You Need To Organize Your Kitchen
Organizing Challenges Okay Okay I know I've only been talking about this organizing challenge for a whole month already and I'm so terribly sorry to put it away for so long! 😀 The house finally seems in order and since the kitchen was my first room I organized I'll...
DIY 3d Stenciled Planter
The De-clutter Continues Why hello there😊, what have you been up to? I was hoping things would slow down after Christmas. Sadly they didn't for me! This month flew by so quick and I can't believe it's almost February. Last week I shared a few sneak peeks with you...

DIY Bible Verse Gift Idea
How were your Holidays? Hello😀, Happy January! How was your Christmas and New years? We got to visit family for Christmas in California. Attended Christmas service. Spent quality family time! Lots of cooking and baking! Oh and we played white elephant for...
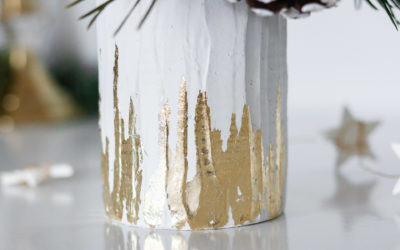
Gold Leaf Vase
DIY Gold Leaf Tin Can Vase As promised, here's my last tin can upcycle of the year. I've actually always wanted to try applying plaster to a tin but, thought it would be a flop. Plaster is a very versatile medium and sticks to virtually anything. I love that you could...

Rustic Christmas Centerpiece
Enamelware Inspired Tin Can Centerpiece Me and great time management are just not meant to be this Christmas. Seriously though, Christmas is literally days away and I still have so many DIYs planned. What was I thinking😲!! On a positive note If you need a last minute...