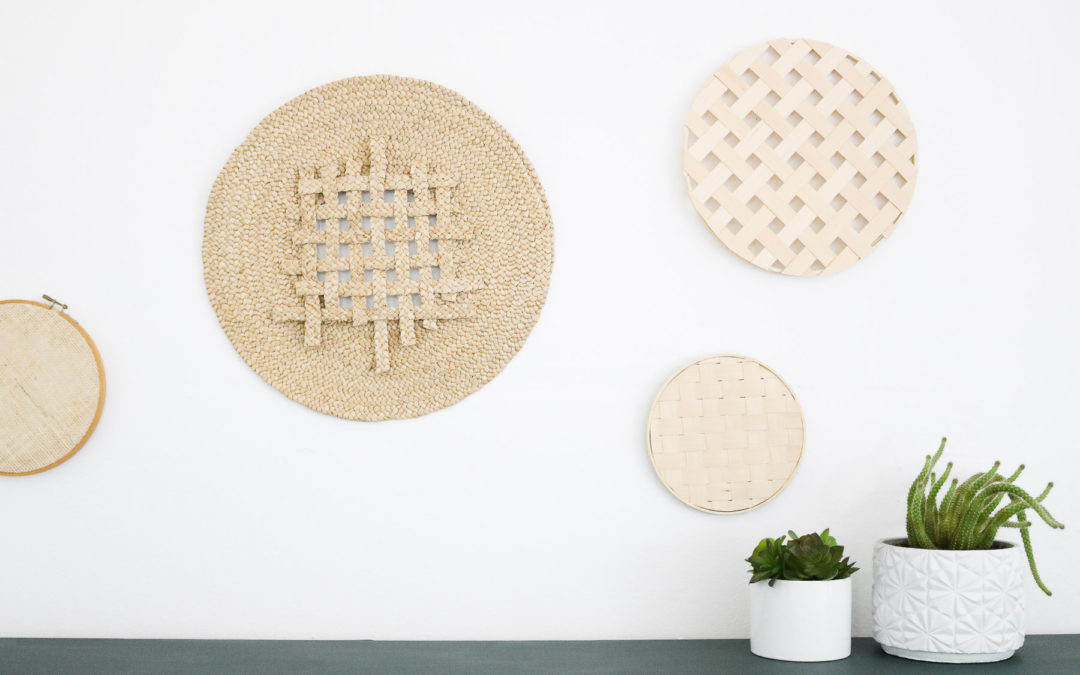
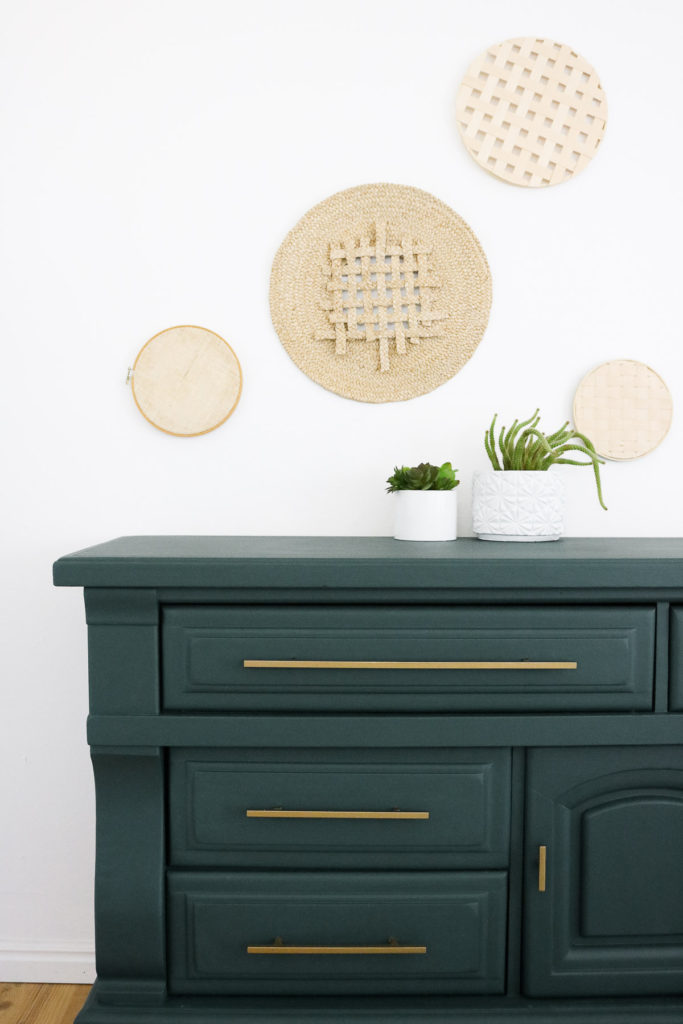
Wall Baskets
Hello my craft friends! OMG Instagram has the prettiest collection of wall baskets! If you’re new to wall baskets search #wallbasket on Instagram!! I wish I could just pick a few from my favorite Instagram posts😬. Unfortunately a lot of the stuff I see is usually not sold any more, custom made or way out of my price range. After doing a little bit of shopping research online and a few trips to home decor stores I knew I wasn’t going to be able to afford $80-$100 for a wall of baskets. On top of that I couldn’t find the colors I needed. They’re mostly sold in sets of 8-10 wall baskets and have lots of color contrast. Since I wanted these baskets above my new green dresser which is a lot of color already on it’s own I felt like the baskets would need to be more subtle to match. Maybe a natural pine or birch wood tone 🤔?
This DIY was not planned at all! When I stopped by at my local thrift stores to find wall baskets I wasn’t expecting to come out with a sunhat! I actually came across some cute wall baskets and than again they were all different colors. NOT at all what my room needed so, right before heading out the door I decided to sweep through the store one last time just to see if there’s anything I can up-cycle. I guess you could say this is pretty normal for me! That’s usually how I like to shop.LOL 😂 ! If I can’t find what I’m looking for, I start looking for something that could be made into what I need! That’s when I came across a sea of sunhats and a light bulb went on! I thought if I could flatten a hat out somehow 🙈 than it’ll be close enough to what I need! 😊AND in this case color was no object! They had sunhats in every hue😻!
Additonal idea: You can also use natural jute chargers to add to your wall basket collection. ( * amazon affiliate link)
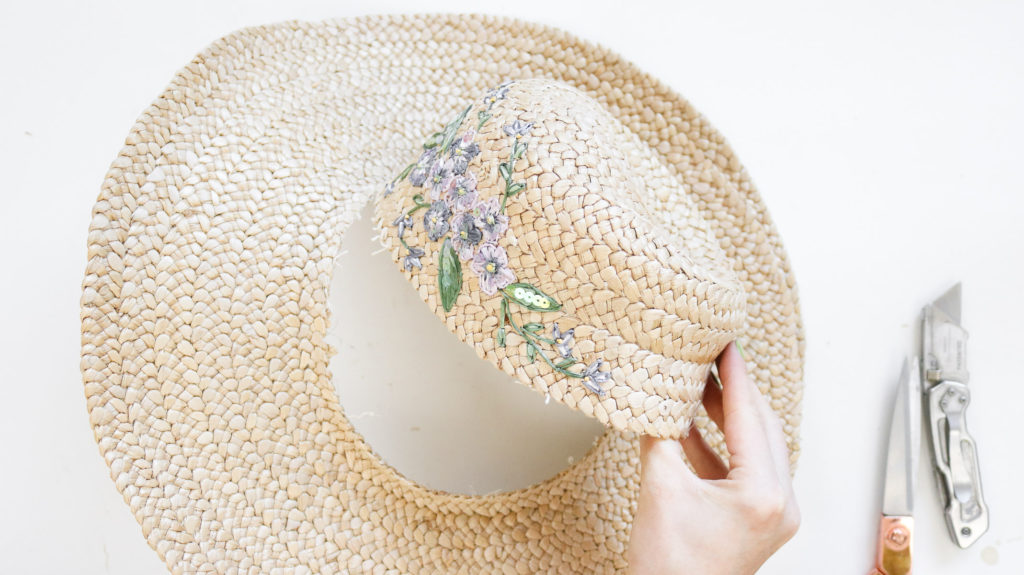
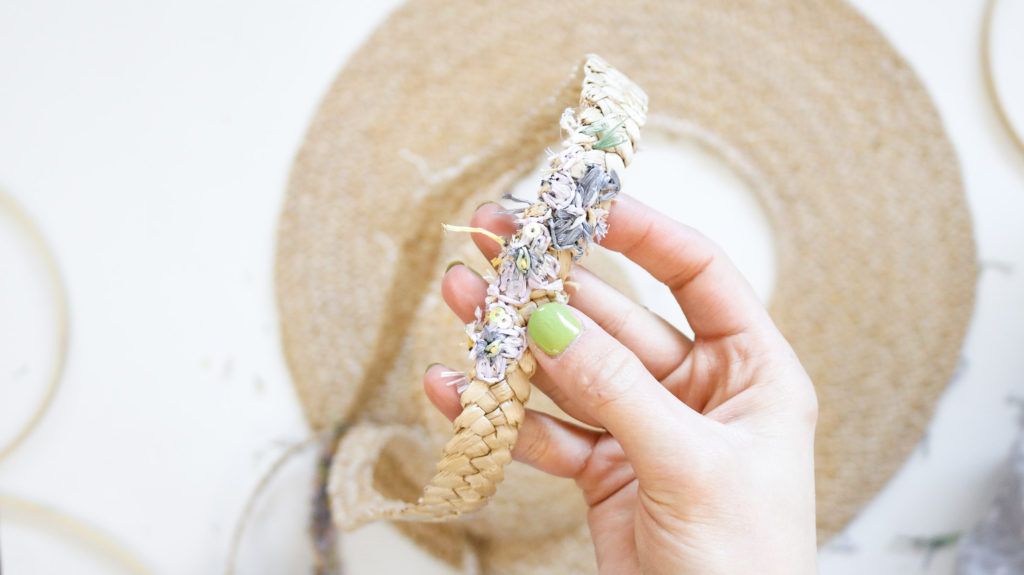
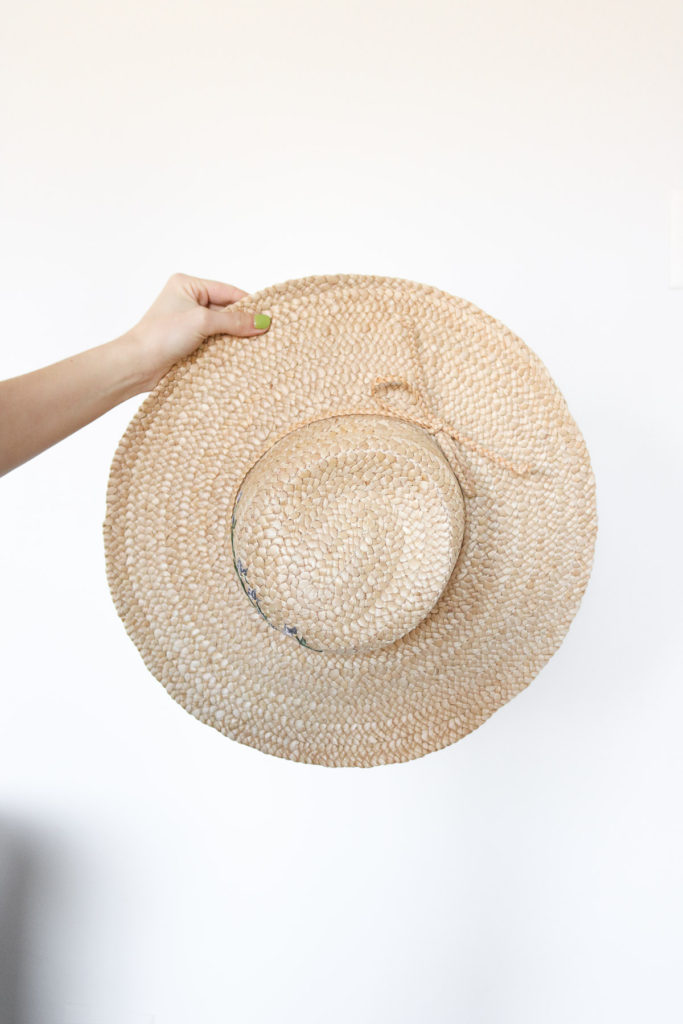 This sun hat really caught my eye! It was a pretty color and had some cute embroidery! Also fit really well LOL😅 not that that mattered because I would completely take it apart anyways but, the embroidery was something I wish I would have avoided! If you can get one without embroidery go for it! It’s not easy to remove all that threading!
OTHER DIYs YOU’LL LOVE:
What Type of Sunhat Will Work for this !
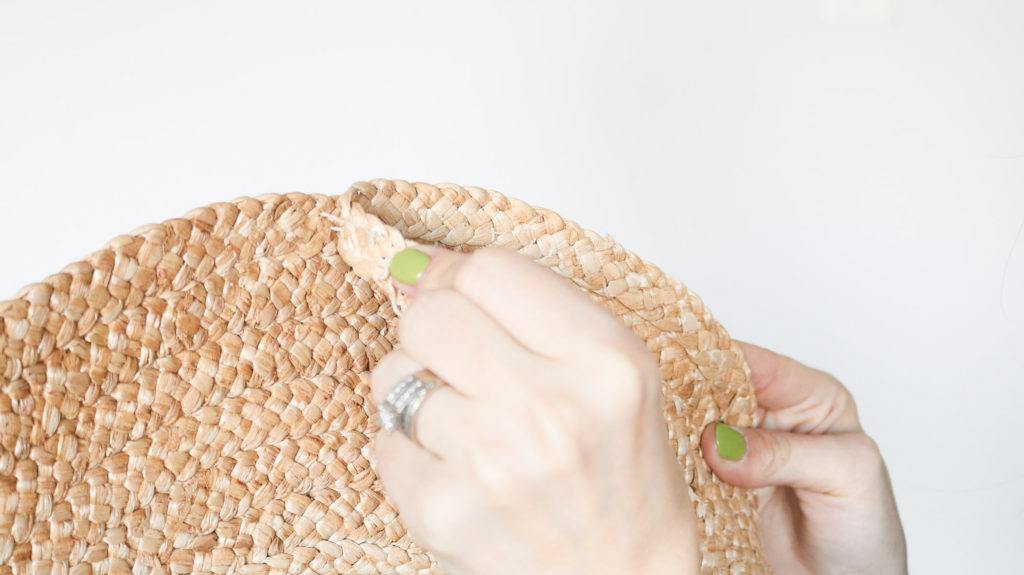
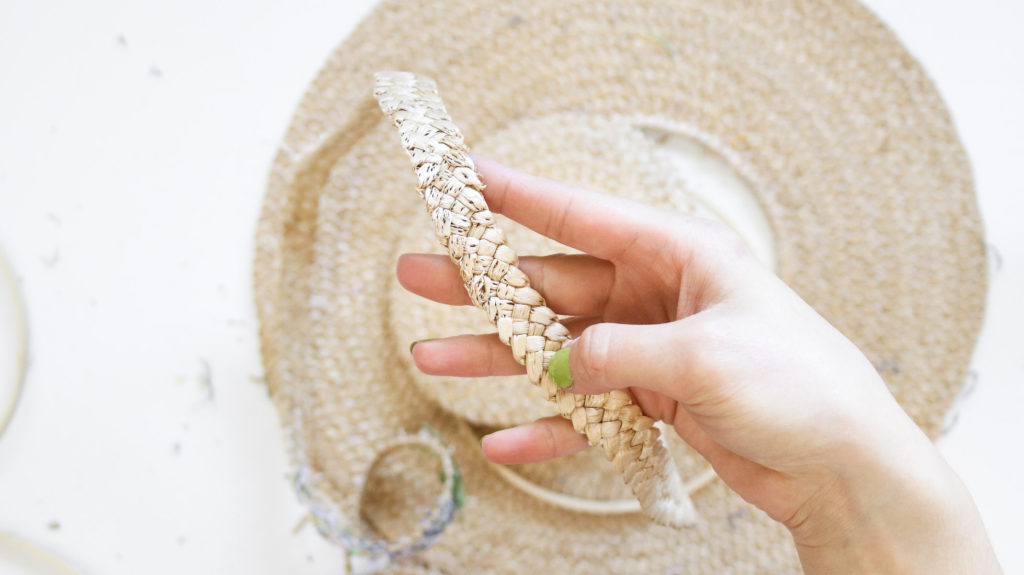
A few things to watch out for when picking your sunhat is #1 avoid embroidery! LOL😬 did I say that already! #2 Make sure the sunhat is made from a braid that’s sewn together to form a hat instead of a solid woven hat. This will insure that you could use the braid to create your own pattern without the whole hat falling apart on you once you cut into it. (photos below show examples of my hat)
Time Needed :
30 minutes to 1 hour
This will really depend on what type of hat you have. If it has embroidery it might take a bit longer.
Total cost: $4
Your price will depend on how much your hat cost plus tools to make it. I only had to pay for the hat and had the rest of the tools at home to make it.
Supplies Needed:
- a sun hat that’s made from a braid
- hot glue
- scissors
- iron
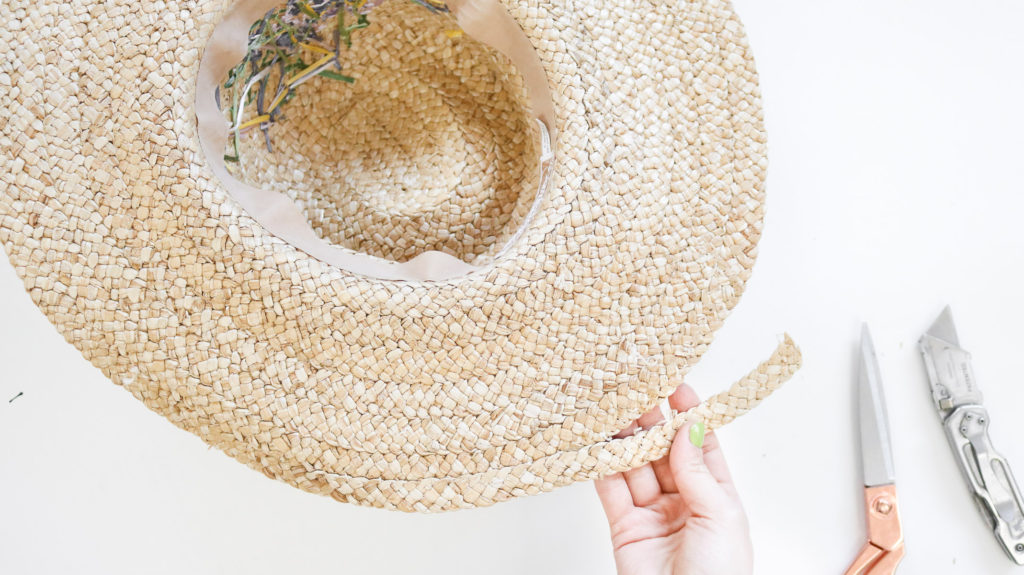
Step 1: Removing the top of your Hat!
To begin start by removing the top portion of your hat. Pick a braid as close to the edge of the raised area as possible and take the stitching apart to remove the top instead of just cutting the whole thing off. This helps keep the fraying at bay and gives it a neater finish. If needed you can cut it off a little bit. That’s what I had to do once I came all the way around.
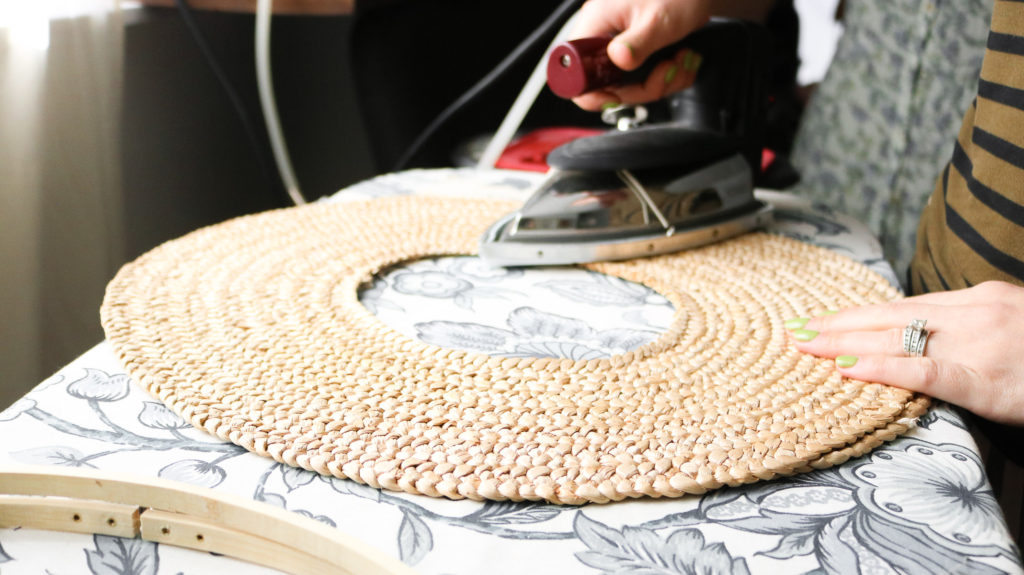
Following that you should be left with a disk. Use your iron to flatten it out. It should become pretty flat! 😀
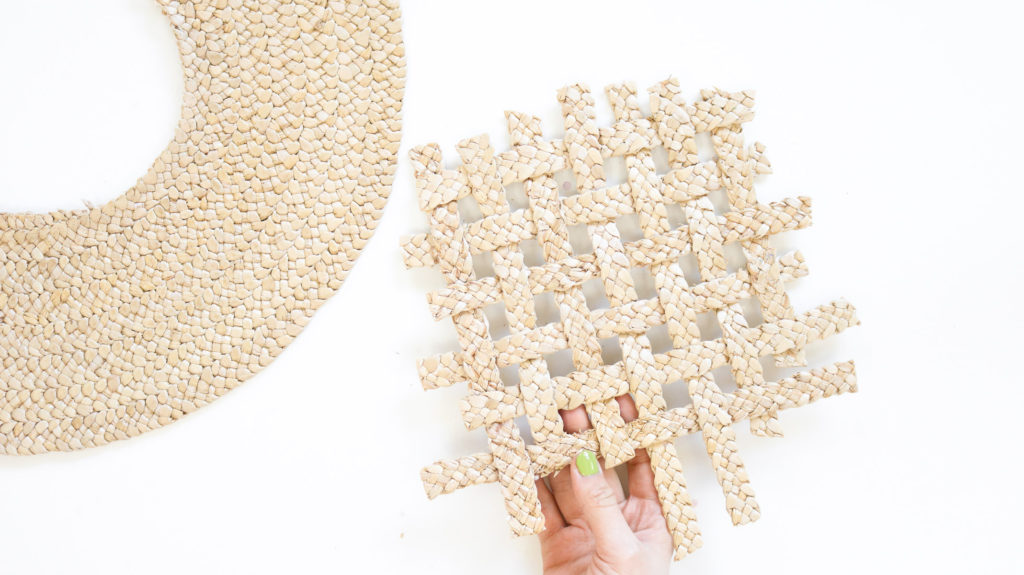
Step 2 : Creating Your Weave for your Wall Basket!
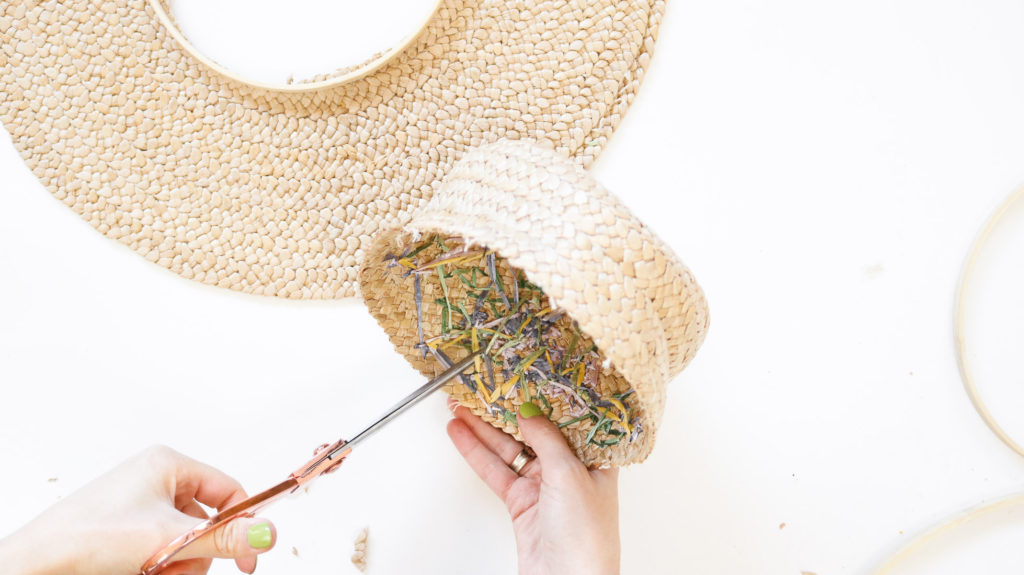
Now take apart the top of your hat to get some strips of braids that you can create your own pattern with. This will cover the center of your disk. If you have embroidery on it you can either cut those parts out or take the threads out. I started taking some out and eventually ended up cutting the rest of the embroidery out.
Here’s the strips I was left with. I also flat ironed these strips as well before creating a weave.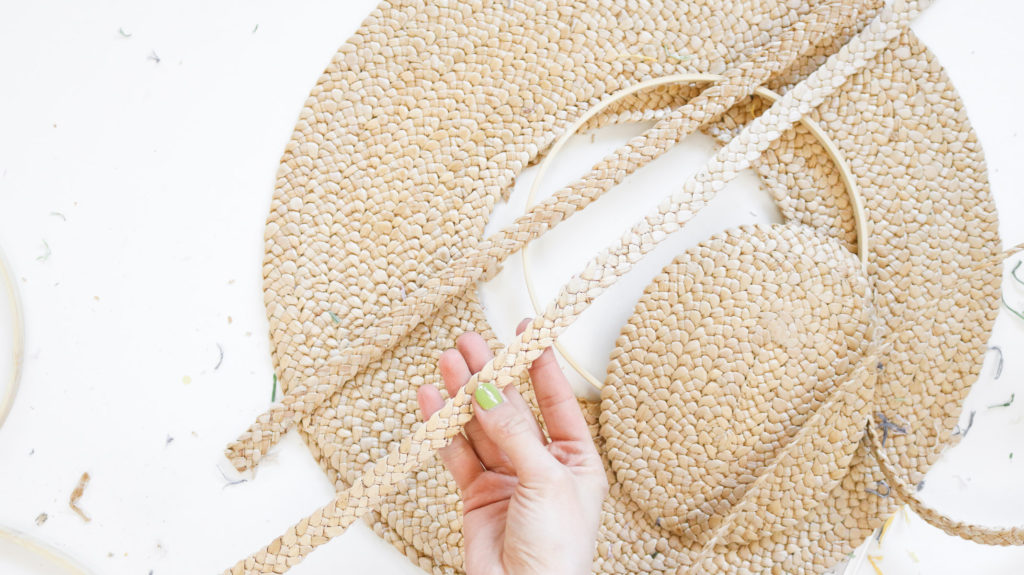
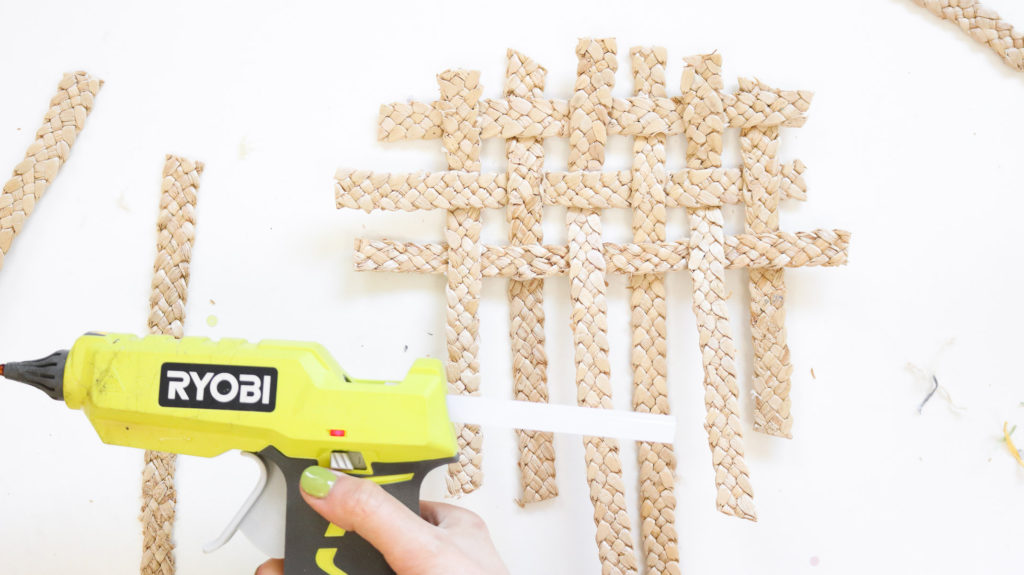
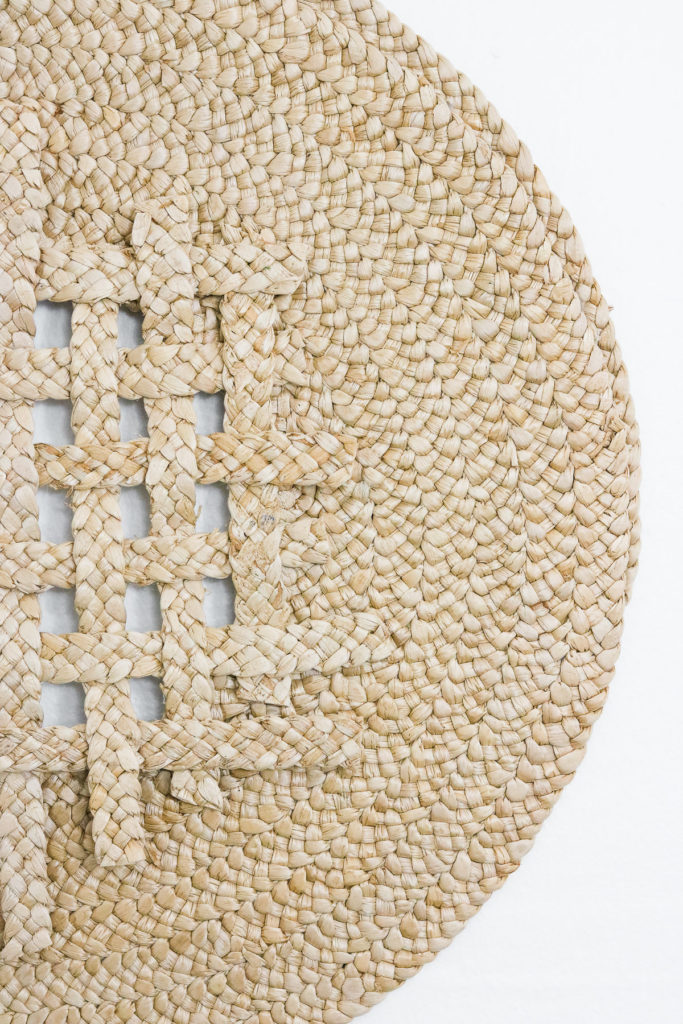
Next cut them into strips that are long enough to cover the center of your disk and start weaving them. If they’re crooked don’t forget to iron them this will insure that your weave has a neat finish. I used some hot glue to secure all my pieces into place and once the weave was a solid piece I ironed it once again to make sure it was nice and flat.

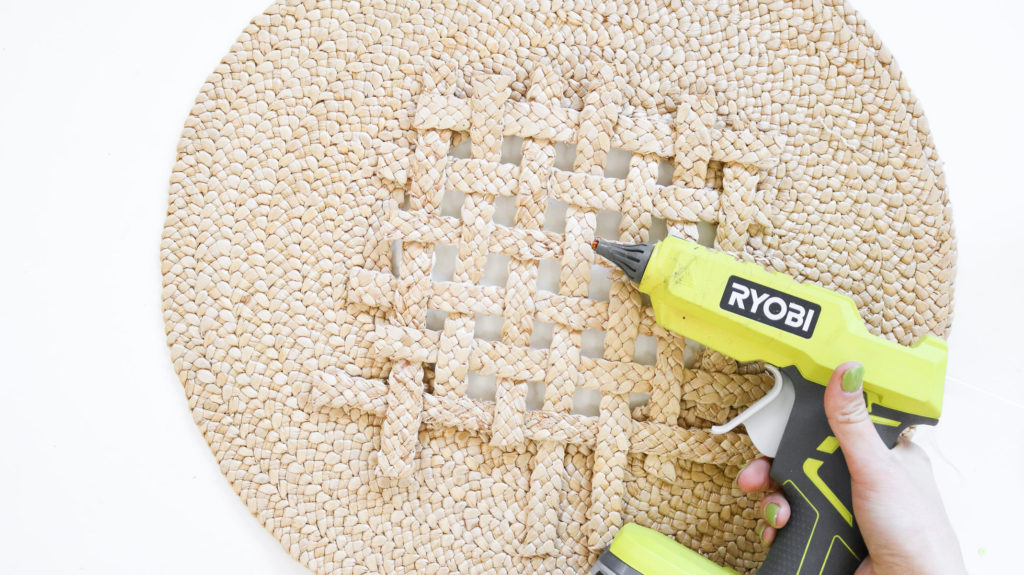
Step 3 : Attaching your weave to your wall basket!
Then use some hot glue to attach your weave to the disk and that’s pretty much it! You can attach it from the back side if you don’t want the raw edges of your weave showing or attach it on the top like I did. I actually really loved the look of the raw edges!
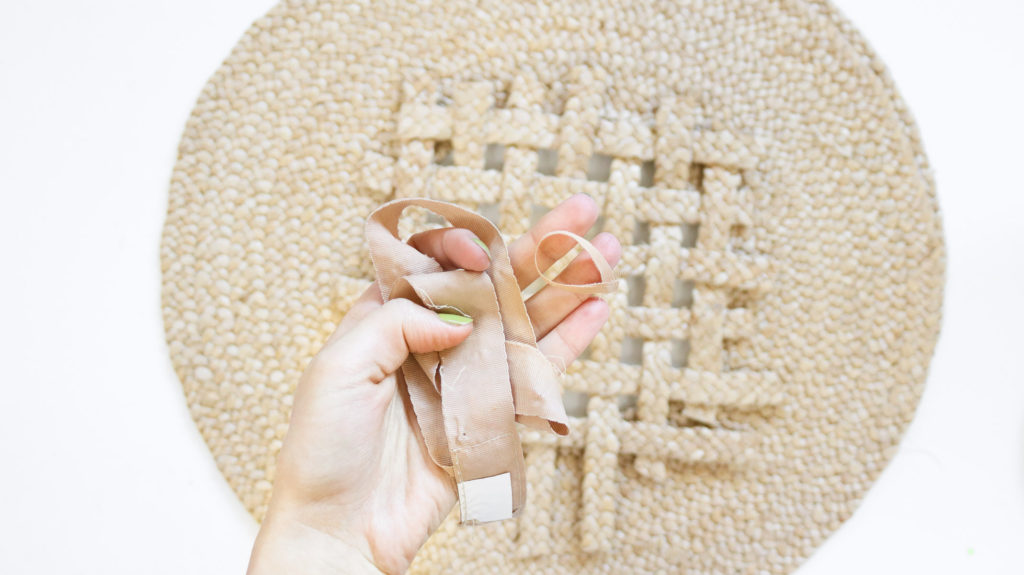
I also made a little loop from the lining inside the hat and attached it to the back of the wall basket to have something to hang it by. 😀
Here’s a quick DIY video! 😀
Here’s how it looks on my wall. ( ps. it’s also functioning as a plugin cover..💁 I’m assuming it was made for a tv but we don’t have one hanging there so this came in pretty handy)
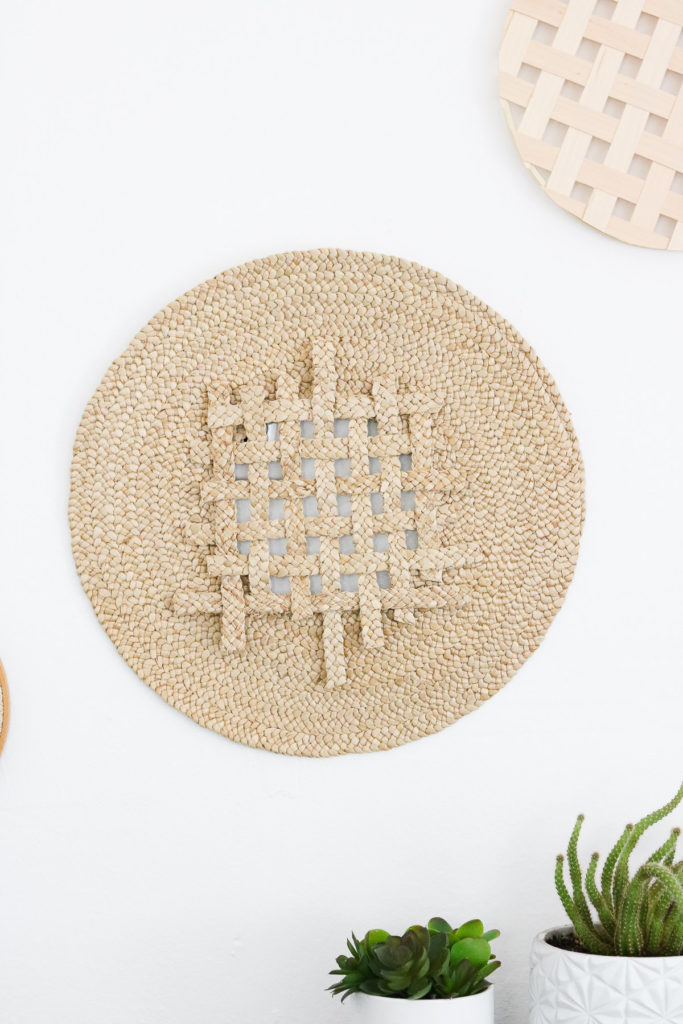
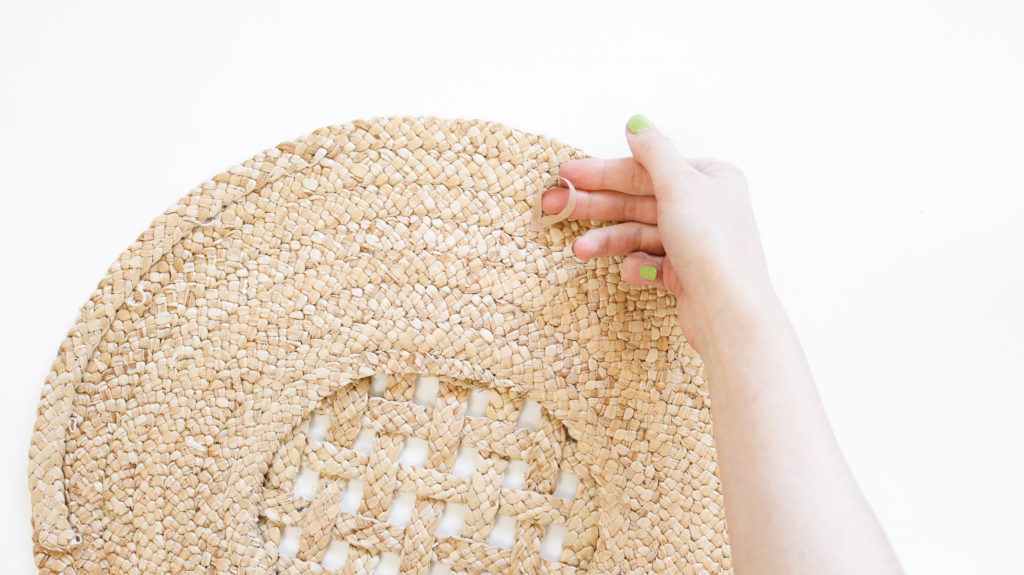
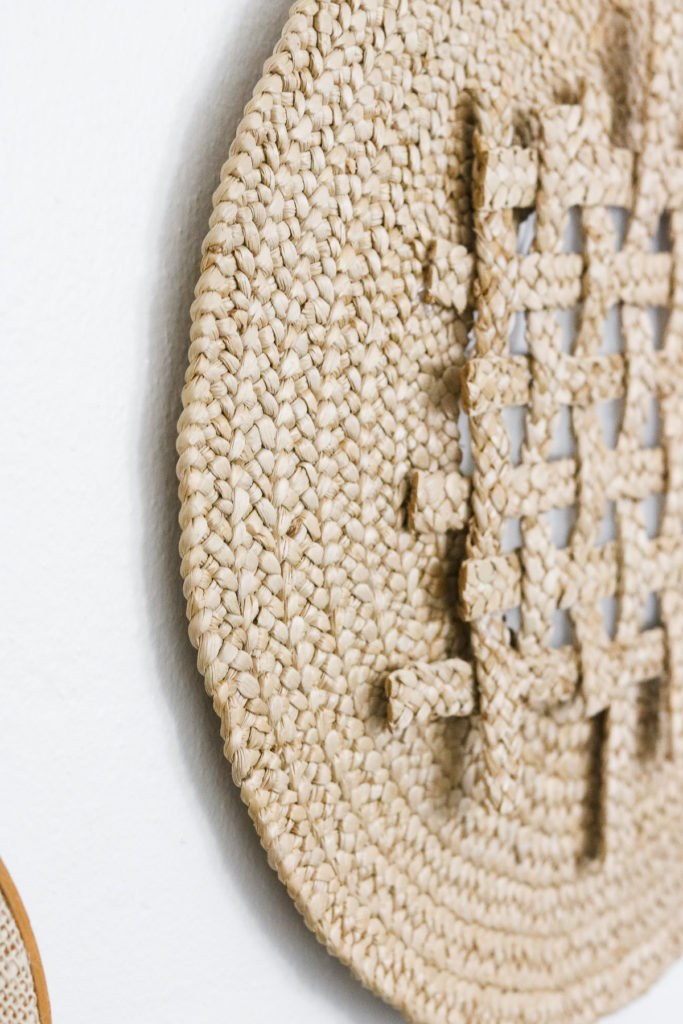 I just love the texture on this basket! 😀 It’s such a pretty braided weave!
That’s it for today! I hope this inspires you to make your own wall baskets! 😀
XO Your Friend,
Lily-
cute as can be. I love it! I have a ton of hats laying around collecting dust. this is a great upcycle.
YAY!! I’m so happy to hear that you love it! Gosh now that I think of it I donated a bunch in January when I did my clean out. LOL Wish I would of thought if this earlier. I’m glad you could bring some new life into those hats! Happy Crafting. 🙂 LEt me know how it goes! 😀