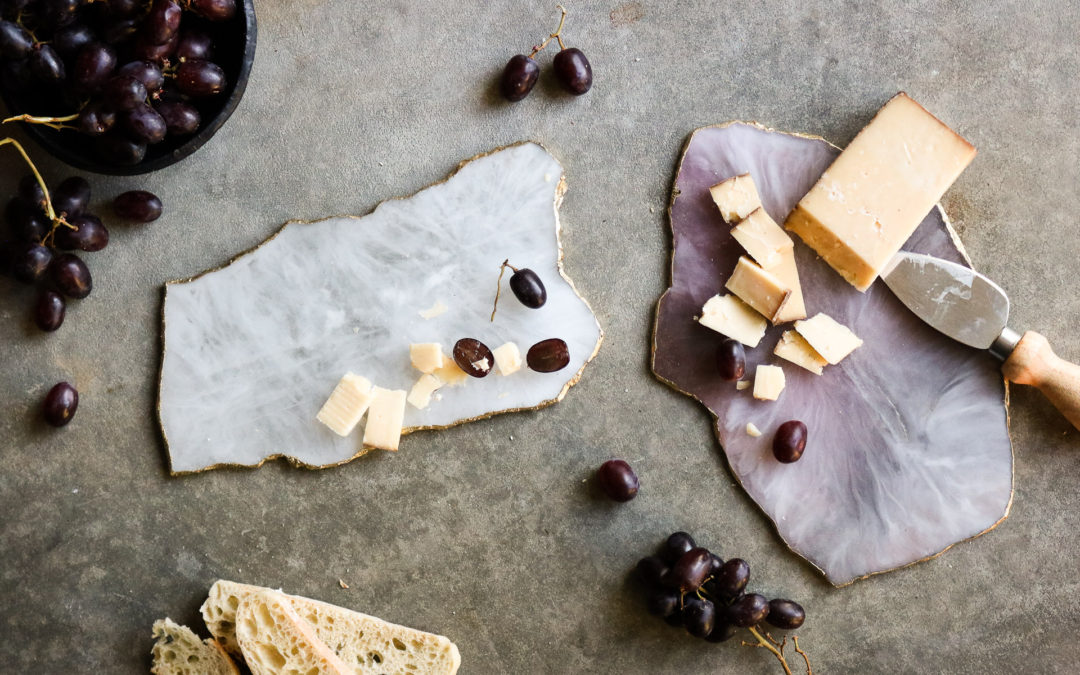
Today I’ll be sharing how I made DIY resin agate!
Hello Beautiful? How was your week?
OH my goodness can I just say…,this resin stuff is ahhmazing!
Originally I had actually planned on making some wall art! I’ve been really inspired by all the alcohol ink art and thought it would be a fun mix with resin but, after coming across some agate serving trays I was so taken away by them I knew I need to try making some from resin. Anthropologie sells some similar to the ones I made unfortunately they’re pretty spendy!
This resin couldn’t have been send to me at a more perfect time!
Thank you to my friends!
A huge thanks to my friends at Art Resin that were so kind as to send me some art resin to try! I thought about the concept of this DIY resin agate for a few weeks and finally decided that the best way to make them would be to create depth with layers. I did some research and found out that this idea would totally work with resin. You can let resin cure for 24 hours and sand it down lightly to add another layer or let it set for 3-5 hours and add more layers without sanding between layers.
*this article has affiliate links
New to resin + MUST KNOWS BEFORE WORKING WITH RESIN ?
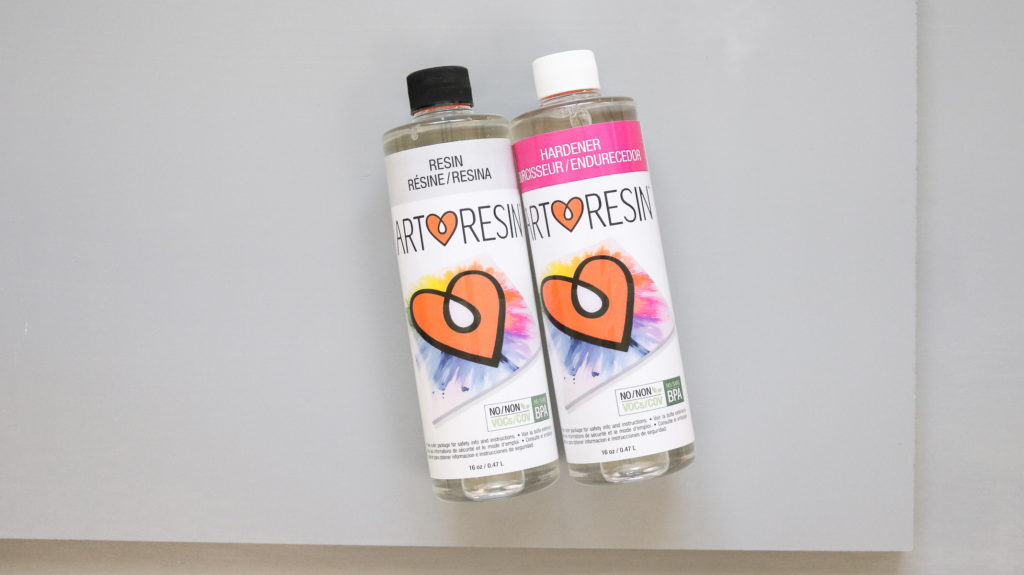
Resin is a two part formula. You will always have your resin liquid and your hardener liquid. You need to combine equal parts of both liquids together by gently stirring. When stirring your resin do not whisk. Always only gently stir to avoid creating more bubbles in the resin. Depending on the packaging directions stir your resin for the full mentioned time. My resin required a total time of 3 minutes mixing time. THIS IS REALLY IMPORTANT! If your resin isn’t mixed together completely it won’t set right and you’ll have a sticky mess. Make sure you scrape the sides and bottom while stirring.
FOOD SAFETY CAUTION!!
Here’s what the manufacture says about art resin! You can find more info here- https://www.artresin.com/pages/faq (Keep in mind this is just this brand of resin)
- Yes, once ArtResin is cured, it is fully inert and can be safely used as a food contact surface. ( caution: your resin must not have any additives to be considered food safe ( meaning no colorants). This means you would need a layer of clear resin with no color added over your resin agate to make it food safe )
- ArtResin has been vigorously tested by a third party for leaching and migration across worldwide standards and passed every test: when used as directed, cured ArtResin will not leach any substances into food that comes into contact with it.
HOW TO AVOID RESIN FAILS
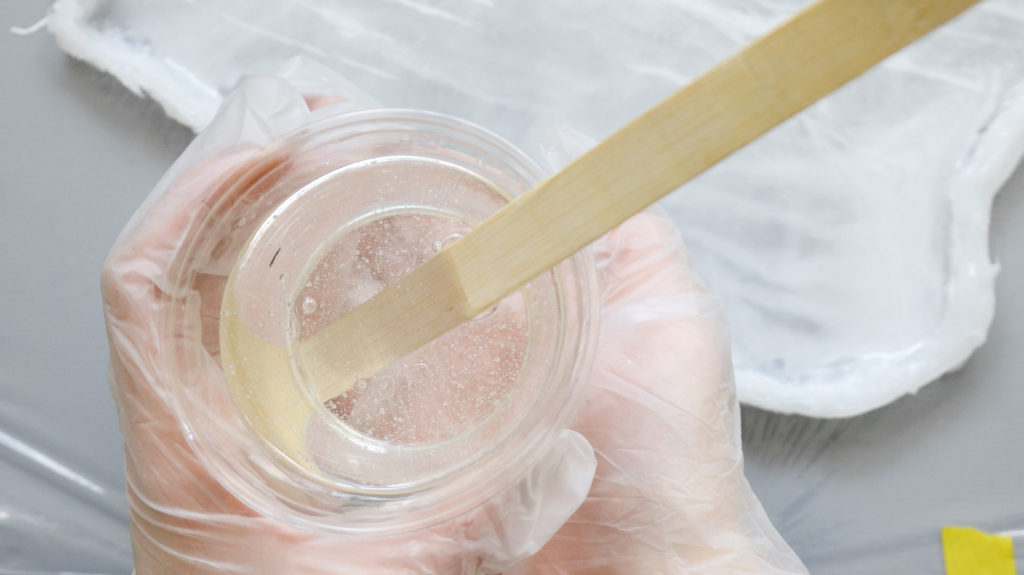
So I thought I knew it all before I started on this project. I was proved wrong when my resin decided to spontaneously bubble up on me. This was not a good start for my DIY agates. Apparently if your resin is too cold once combined it will get lots of tiny bubbles. So much bubbles not even a heat gun can help get them out.
I actually didn’t think my resin was cold at all. I stored it in a cool room on a granite table. I’m assuming the cold stone was enough to cool it off. Before mixing my second batch of resin I warmed the resin up in a water bath. ( just let the closed bottle sit in a warm cup of water) This definitely helped eliminate all the bubbles for the rest of the project.
If you’re not familiar with resin at all feel free to check out this article where I cover all the basics of working with resin for total beginners.
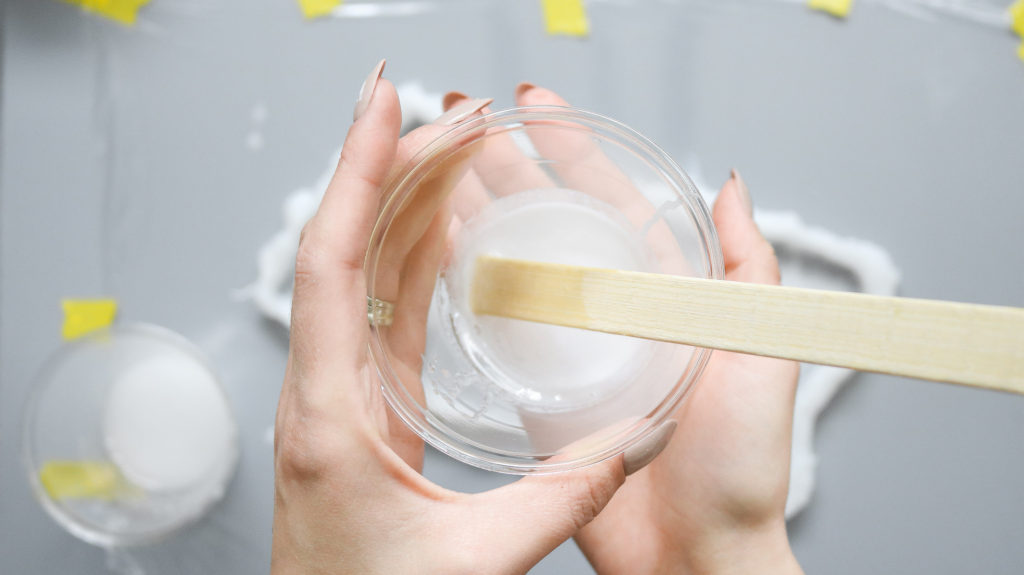
Here’s what my failed batch looked like. ( I didn’t add any white paint to it.)
Here’s what resin should look like once combined. Some bubbles are visible but overall it’s clear.
Adding color to resin
You can use acrylic paint, spray paint, enamel paint, colored powder, glitter, and so much more. The recommended paint to resin ratio is 10% paint and 90% resin. The more paint you add the quicker your resin will set. You can also shop at artresin.com . They have dyes and paints made specifically for resin. It’s actually pretty cool! you can make your DIY resin agate any color just be sure to stick to that 10% to 90% ratio as much as possible so your resin sets properly. Here are some affiliate links for glitter and paint.
Time Needed:
I used two different methods to create two colors of my DIY resin agate. The white one takes longer to make because you’ll need to let it cure a few hours between layers. The lavender resin agate takes a bit faster to make because I created the layers without letting them set. The time needed for your project will really depend on which method you choose to create your board with. Both resin agates take between 45 minutes to 1 hour to make without the setting times included. All in all keep in mind resin takes about 24 hours to set and a few days to cure completely.
Costs:
The costs for this project will vary depending on how much resin you buy. I purchased my cups and popsicle sticks at the dollar store to keep costs down but, overall I would have to say each cheese board costs about $20 to make. I had a 32oz resin kit. This is enough to make about 3 agates.
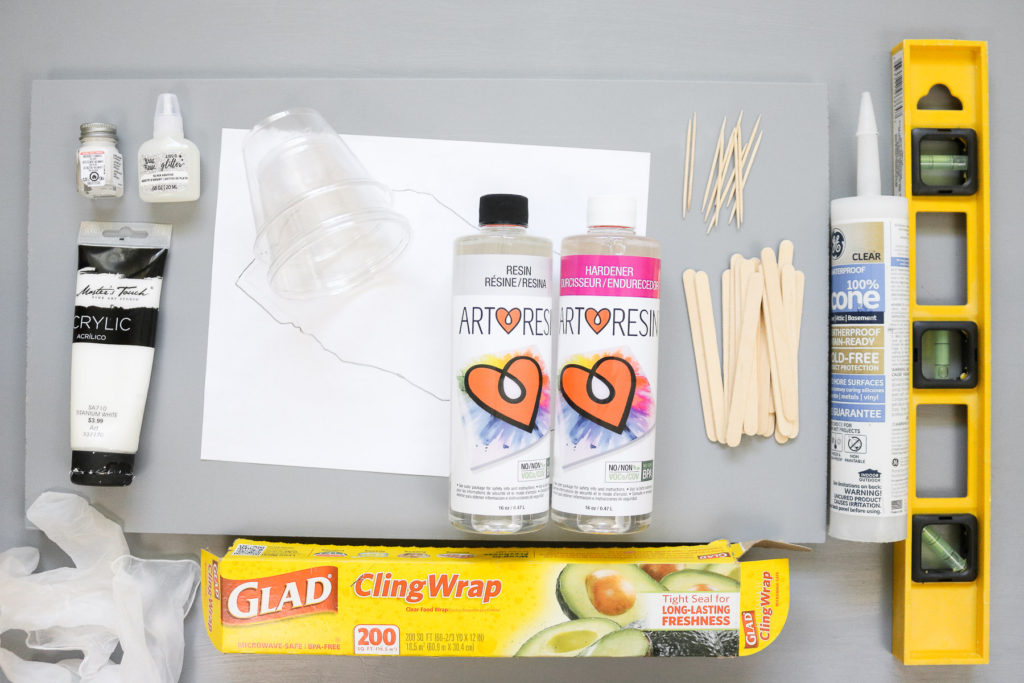
Supplies:
- heat gun to pop bubbles and melt the resin to help blend your colors easily : If you’re wondering whether you need a heat gun or if you can get away with using a hair dryer? Sadly I would have to say it wouldn’t give you the same results. A regular hair dryer will blow too much air before the heat from it starts to even pop any bubbles. Thus creating a mess of color instead of you being able to control where you want your colors. That said you can still try it. If you’re going for a very blended look this might be great.
- For the base you’ll need plastic wrap or try it on glass ( I’ve heard resin doesn’t stick to glass)
- silicone ( amazon sells the same one I used here )
- 1 8×10 paper + pencil
- smooth flat surface ( preferably a solid color so you can see what you’re creating)
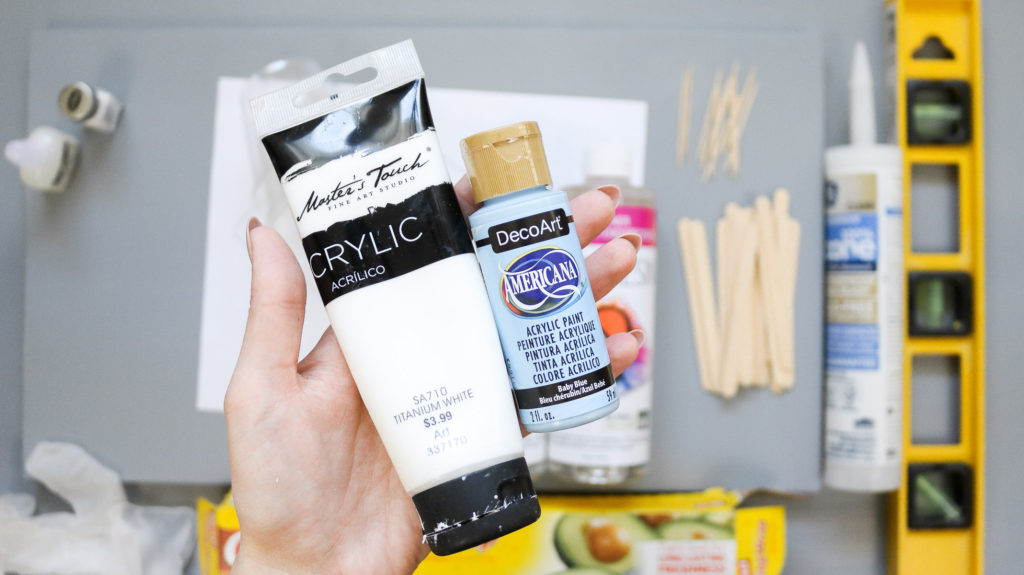
- Paints
- Clear Plastic cups ( do not use paper cups as the resin eventually leaks through the cups.. Bad experience!)
- Popsicle sticks and bigger mixing sticks
- level
- gloves
- artists knife
- Respirator – This Art Resin is non-toxic however with the addition of foreign products it can be toxic. Wear a respirator if needed.
- Art Resin – The resin will definitely be the priciest thing you need for this project. Just remember that this resin is food safe so it’s worth every penny. I wouldn’t recommend using resin that isn’t food safe for cheese boards. They also sell it in different sizes if you only want to make one cheese board.
Here are some affiliate links for products that are just like mine and some that are similar.
Gold Effect for the edges: Optional
I first considered gold leafing the edges on my agate. I’ve seen this done before and liked it but I really wanted something that looked like the edges were dipped in gold. After doing some research I learned about embossing. The downside to this idea is that I couldn’t figure out if this gold embossing stuff is food safe. That said I would recommend going over the gold with some clear food safe varnish or even the resin. ( I know they sell mod podge that’s food safe )
You’ll need:
- gold embossing powder
- clear embossing ink ( very similar to glue but it stays tacky for a long time. I don’t think regular glue would work)
- small detailed brush + fluffy brush
- heat gun ( you can not do this without a heat gun)
Here’s some affiliate links for embossing products. Amazon sells embossing kits that come with a heat gun. You can use the heat gun for resin art too. ( I use an embossing gun for my resin art)
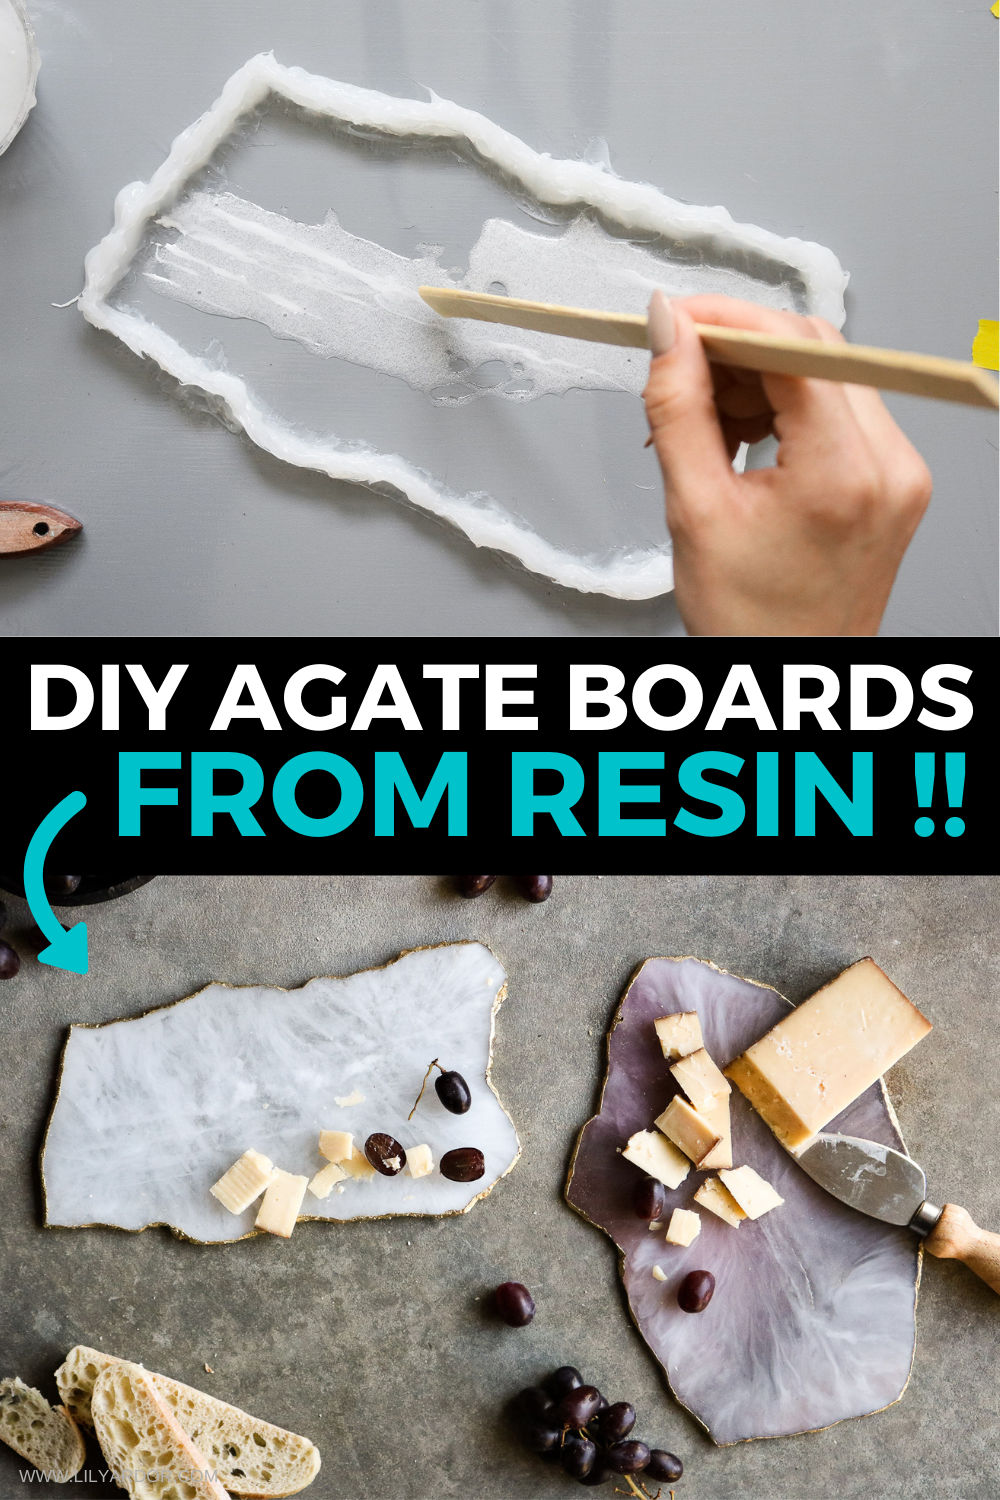
Making your molds for you agate board + Area Prep:
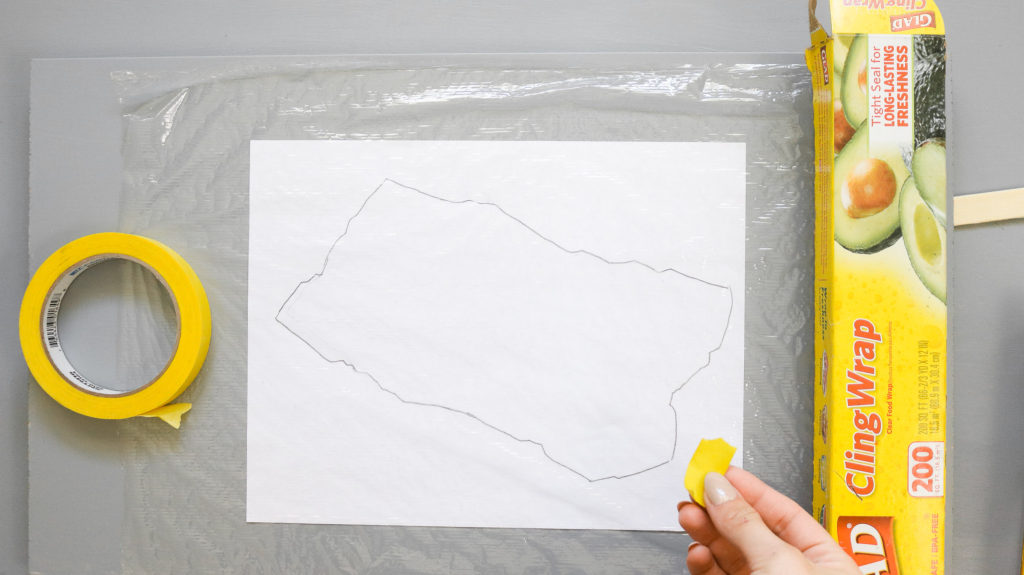
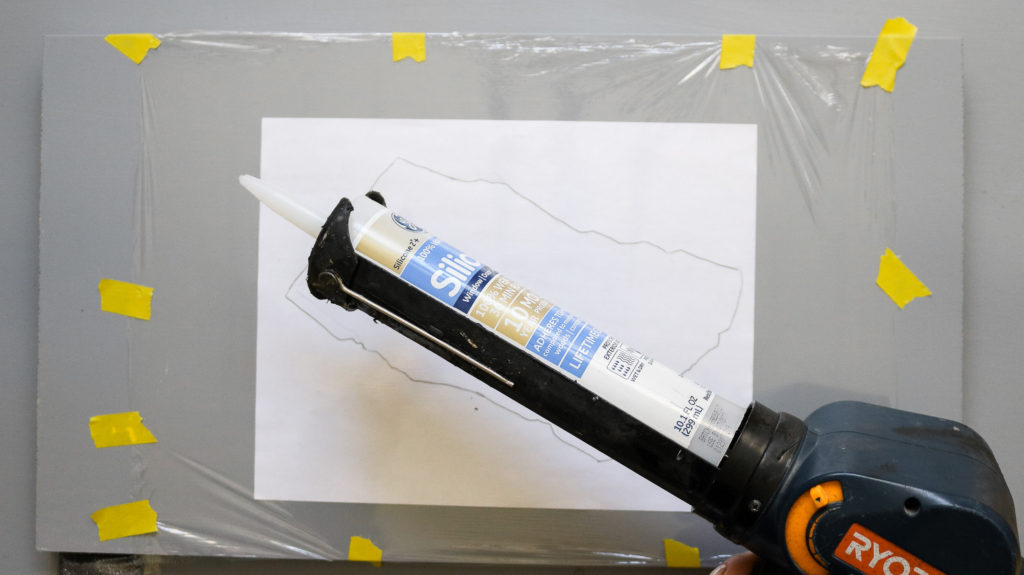
This is actually really easy to do. You will simply need to draw out a shape for your resin agate on a piece of paper. The size of my agate fit on an 8×10 piece of paper. I googled some images of agate serving boards to help get the shape I wanted.
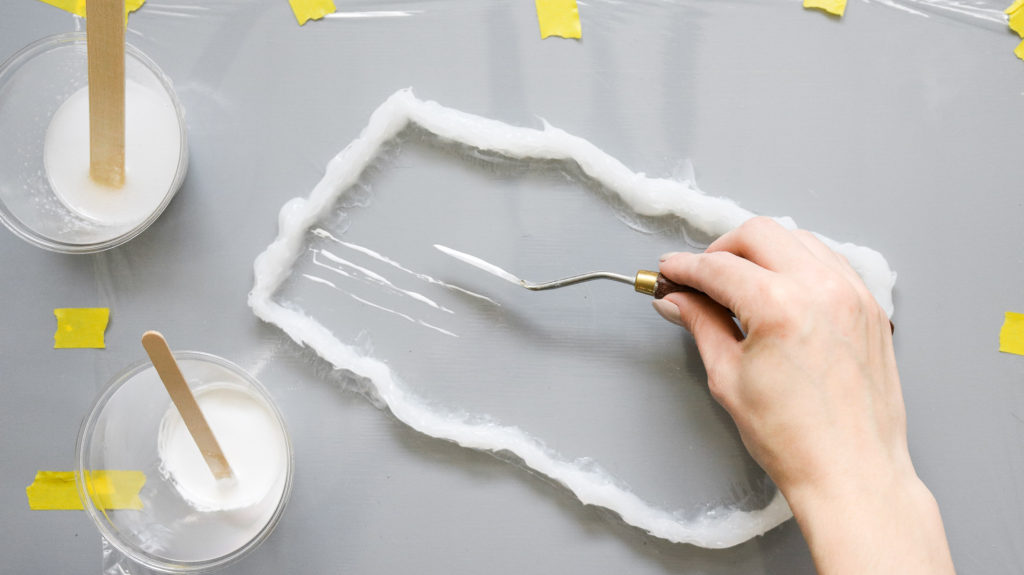
Once you have your outline ready lay the paper on a flat surface. Make sure your flat surface is level. This is important because when you start pouring your colors you don’t want them to keep shifting or for your agate to have an uneven thickness. Following that over your paper apply a layer of plastic wrap or set a piece of glass on top. Cut the plastic wrap to size and tape it off making sure it’s tight and without folds. Than outline the shape of your agate with silicone on top of the plastic making sure you don’t rip the plastic.
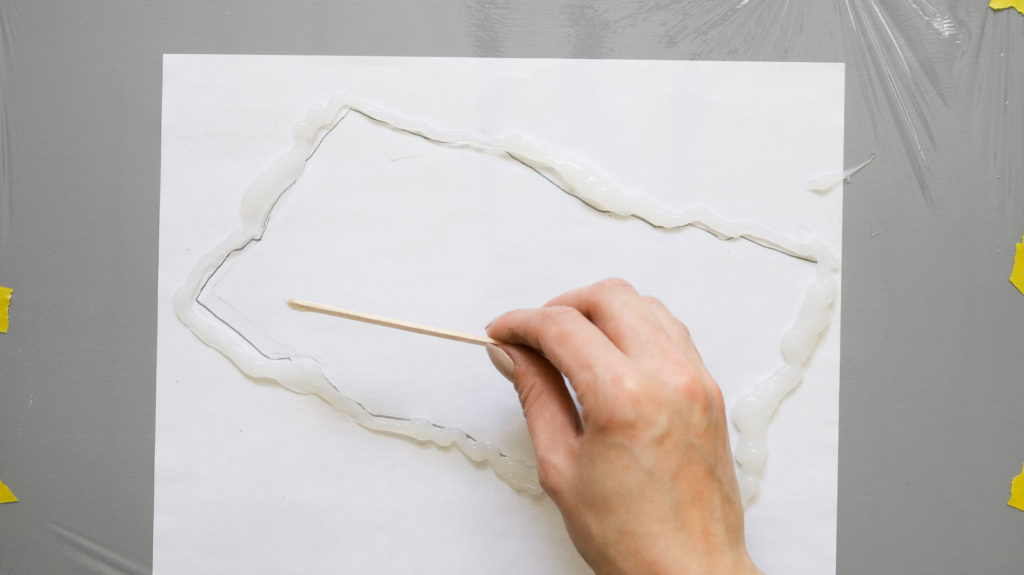
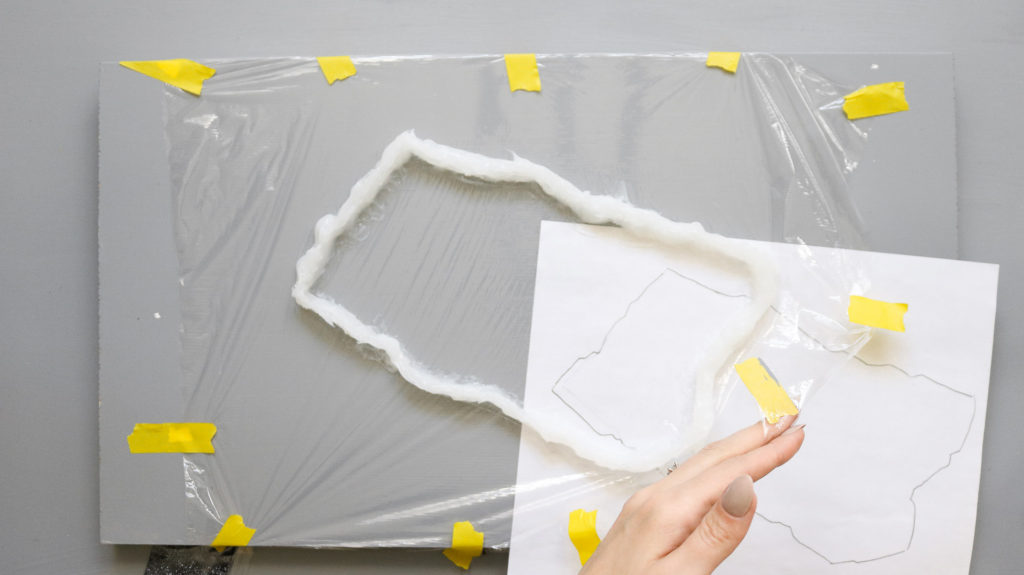
PLASTIC WRAP UPDATE!
Once you have your shape done use a popsicle stick to pull all the edges up on the inside. Make sure your silicone mold is high enough for the thickness of agate board you plan on making. Add more silicone if needed. Let your silicone mold set for at least 30-40 minutes before pouring any resin inside. ( UPDATE : I’ve tried this on plastic table cover instead of saran wrap and it works much better. Saran wrap melts too fast from the heat. ) 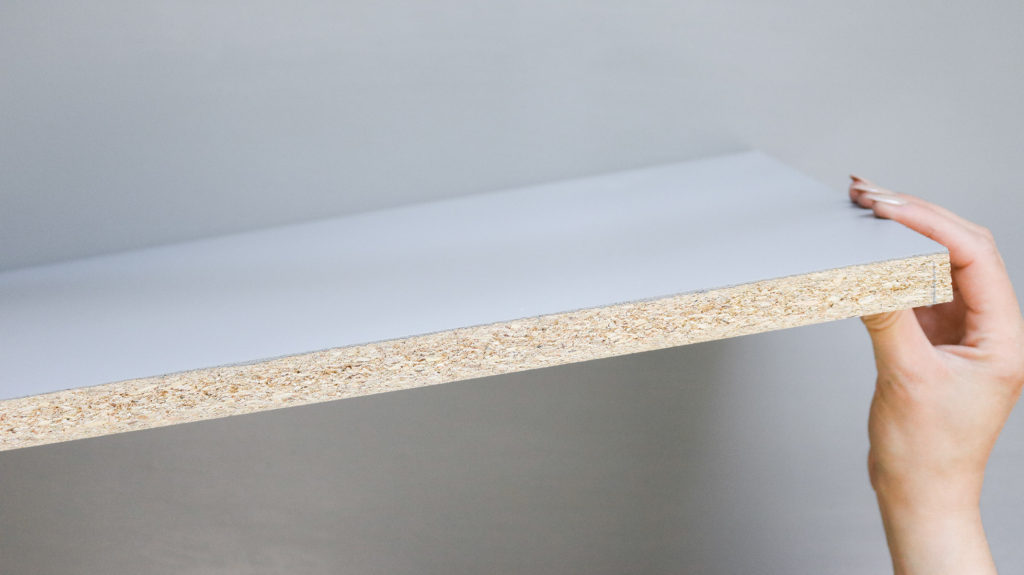
How to make the White Resin Agate Board :
This agate board is all about layers. It’s a really simple concept and you will only need clear resin and different shades of white resin. That’s it! I tried adding broken beads and glitter and it wasn’t looking too good. It started looking fake so I stuck to keeping it simple. Before starting this cheese board you will need to mix some resin. I mixed a total of one cup of resin. That’s half cup of resin liquid and half cup of hardener liquid.
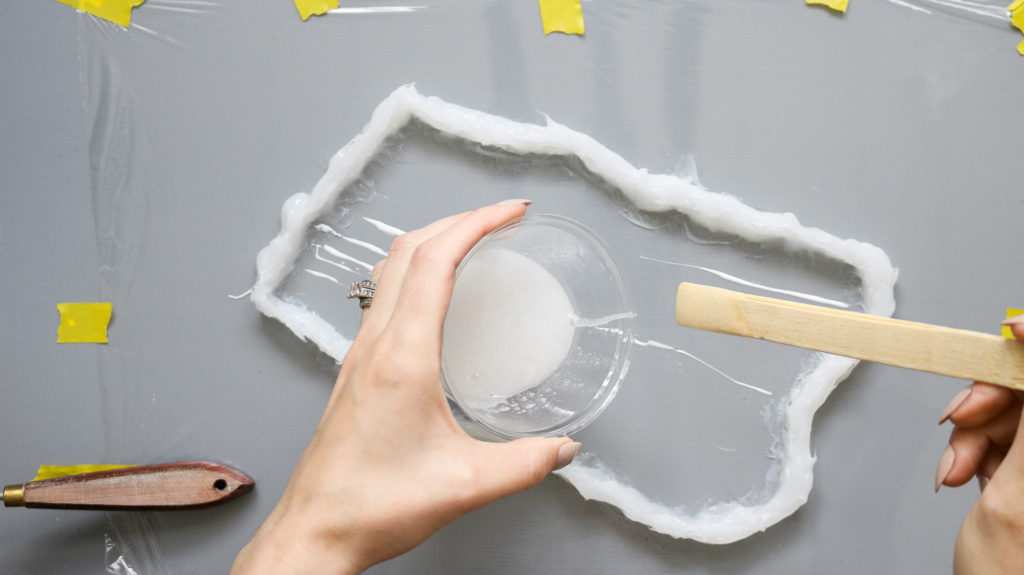
I combined the liquids and gently stirred for a total of three minutes. With this 1 cup of resin I created the first two layers for my cheese board. To begin in a separate cup I added about 1 tbs of the ready mixed resin and started by adding some white paint. The recommended paint to resin ratio is 10% paint to 90% resin.
CREATING LAYERS
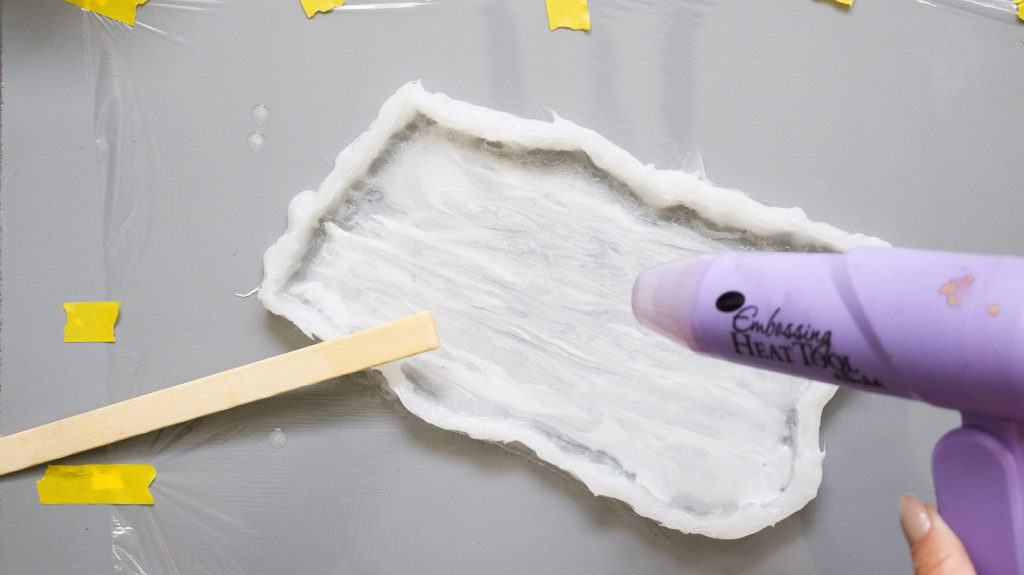
If too much paint is added your resin will set a lot quicker. Since I actually needed my first layer to set pretty fast I decided to take advantage of this and mixed in about 40% paint into that 1 tbs of resin. Than I used an artists knife to gently draw horizontal lines across the whole bottom of the cheeseboard.
Following that I gently added clear resin all around ( it doesn’t look clear because it’s the bad bubbly batch I decided to use any way) This was the first layer and I would say it was pretty thin. I used my heat gun on the low setting to gently melt the bubbles a bit. Make sure and move the heat gun around a lot as not to melt the plastic under. If you melt the plastic you will have ruined your project. Tricky tricky! I’m seriously regretting not trying this on glass ??. There, your first layer should be complete! 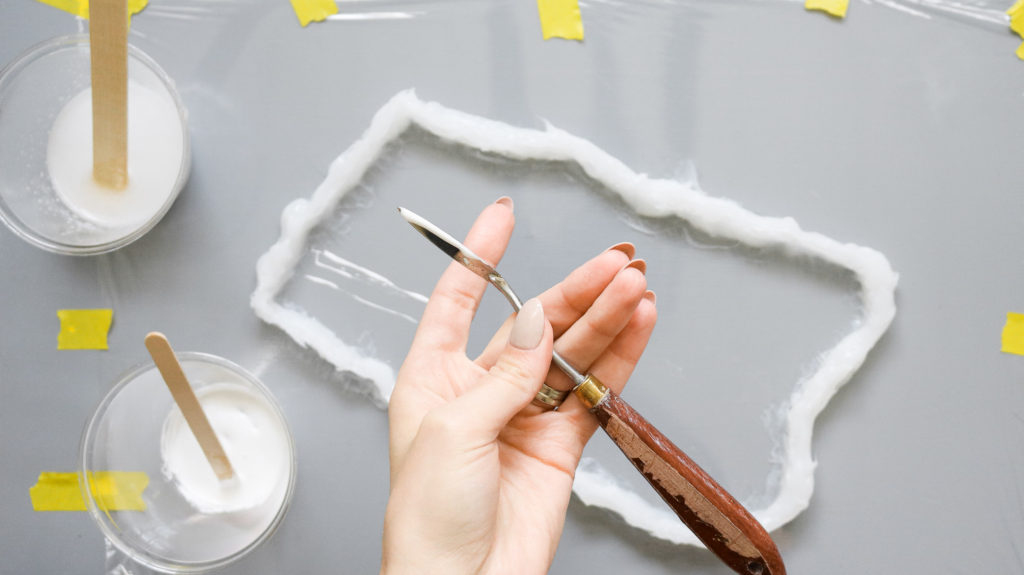
Creating the second layer on your white slice :
So the trick with adding too much paint to the base layer actually worked. By the time I was done adding clear resin all around in the first layer the white resin lines have set enough for me to start on the second layer. You will know your white lines are set when you can’t blend them with the clear resin that’s surrounding them. This took about 10 minutes time.
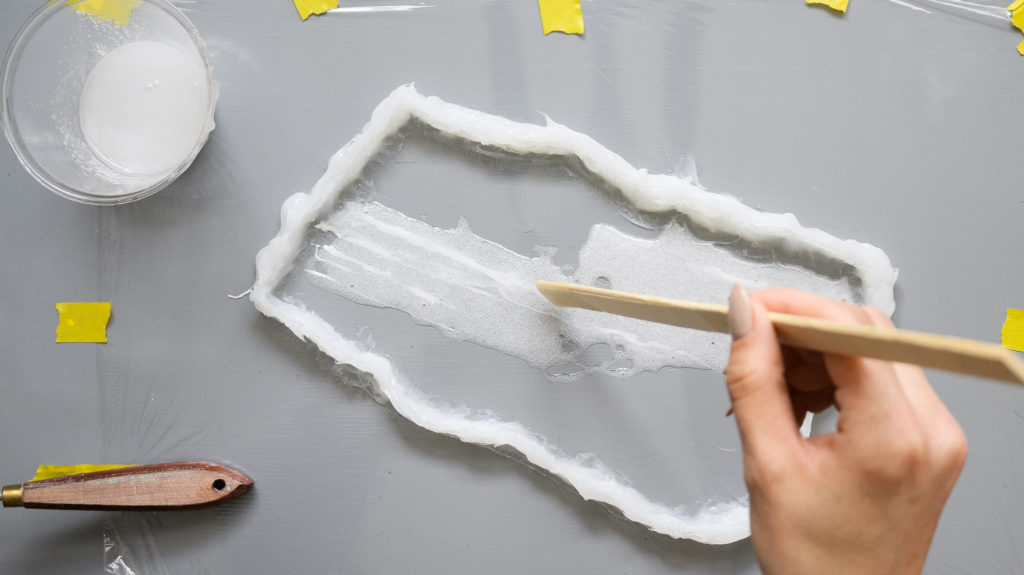
To create my second layer I mixed some more white resin. This time I actually did the correct paint to resin ratio. Just a speck of paint into about 1/4 cup of resin. I used this milky white resin to create diagonal lines. Then I gently poured clear resin between the lines and used my heat gun to pop any bubbles. I also used a stick to kind of gently pull my diagonal lines into the resin so they wouldn’t look like they were poured. Keep in mind not to mess with it too much as you don’t want to ruin the horizontal lines underneath. Once you’re done with your second layer you will need to let your cheeseboard set for 2-3 hours before adding your third layer. 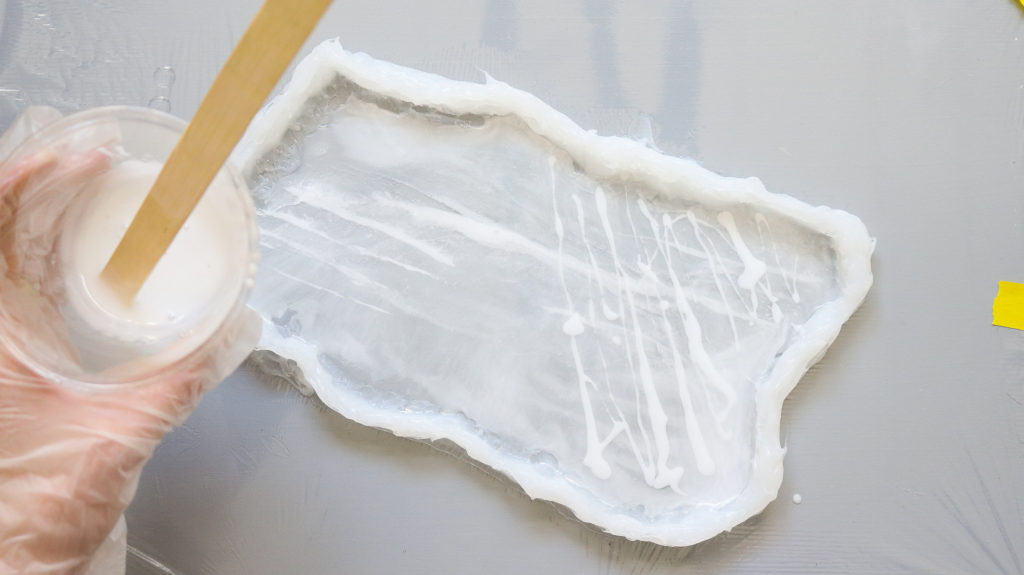
How to continue layering
If you’re wondering why I didn’t just continue to use the quick paint setting trick for the rest of the layers? I’ll explain why. Because the base layer was going to be under two more layers I thought it would be okay to have very opaque white horizontal lines, however the closer the layers got to the surface the more gentle the lines needed to look to give a realistic effect. Which means I needed to add less paint in resin for more transparent milky lines and longer setting times were involved.
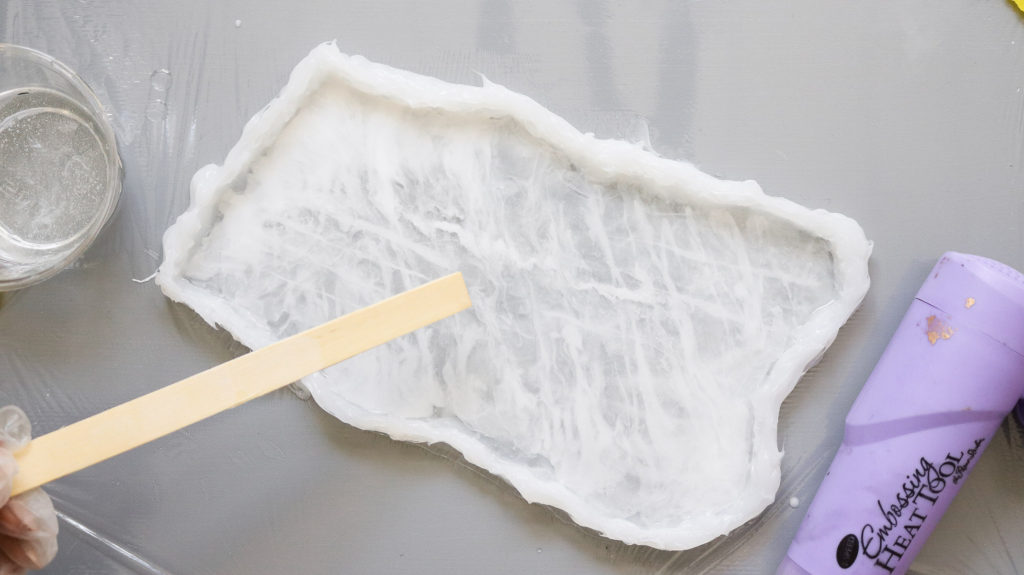
Here’s what it looks like with the second layer complete.
Adding your third and final layer to the white agate board!
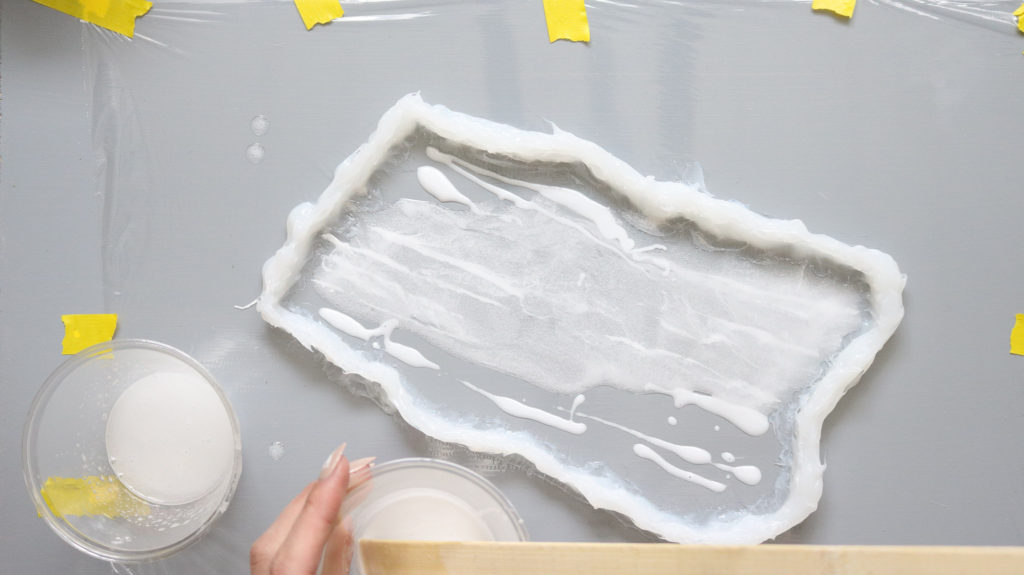
Okay after about 2-3 hours of setting time your resin should be pretty tacky. This is when you’ll know it’s ready for the third layer. I mixed half a cup of resin and mixed a small batch of white resin. For the third and final layer I made diagonal lines but this time in the opposite direction from the previous layer. I then gently added the rest of the clear resin in between and popped any bubbles with the heat gun. 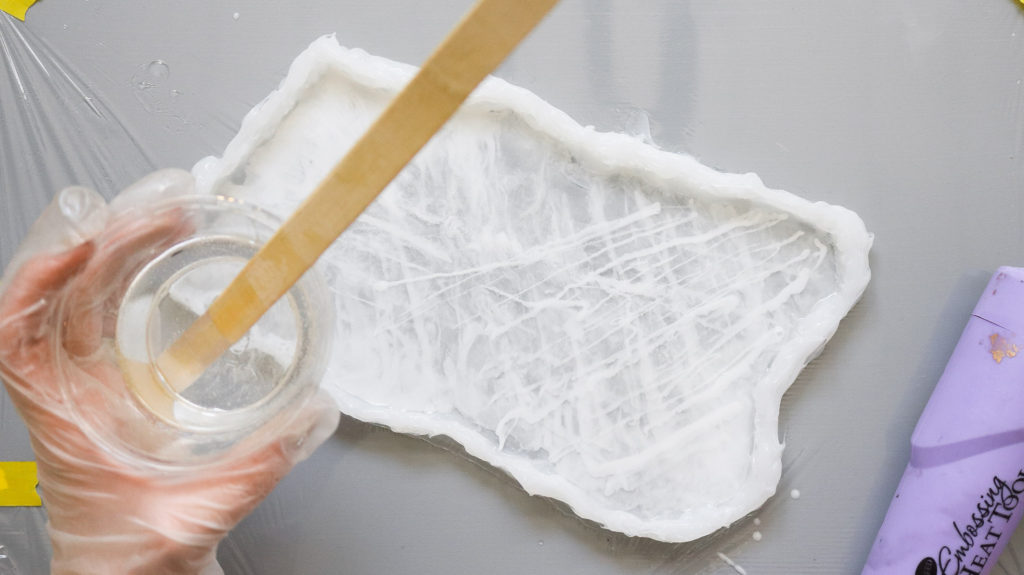 Video shows more footage ( scroll down for video).. I also added a tiny bit of very pail horizontal lines to the very tip top. That’s it!
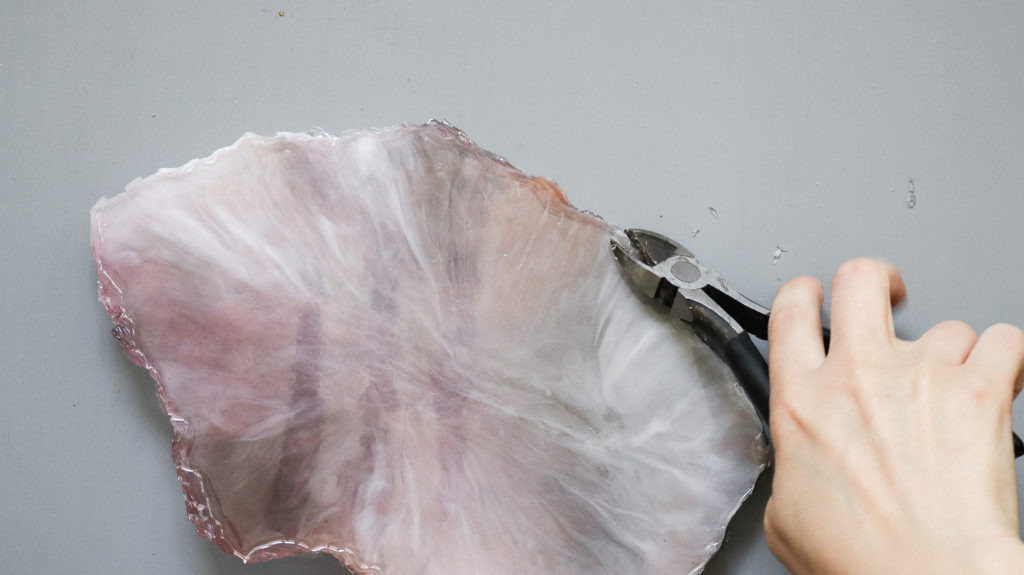
 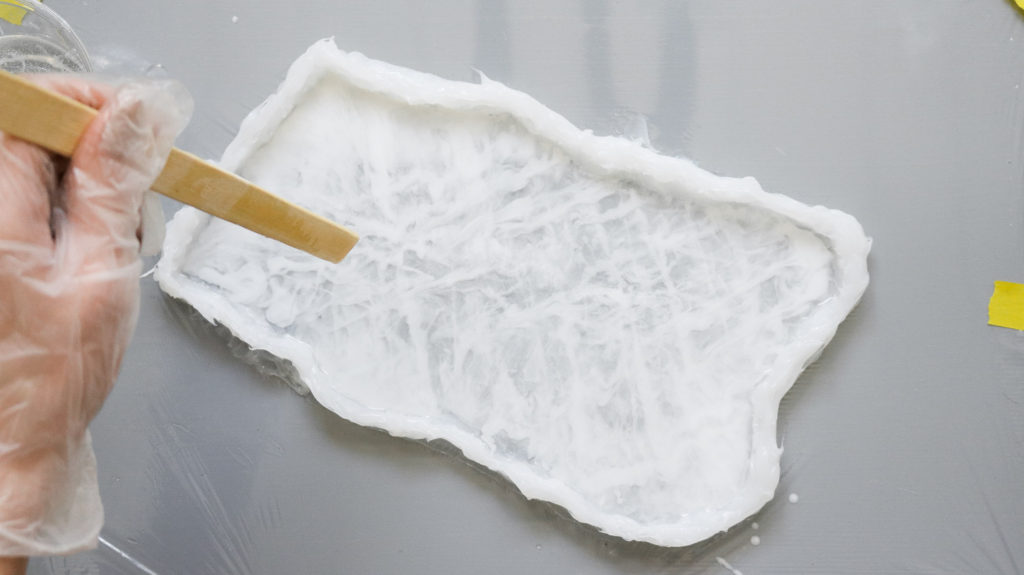 I waited 24 hours before removing it from the plastic and the mold should slip right off. Then simply use some clippers to trim your edges.
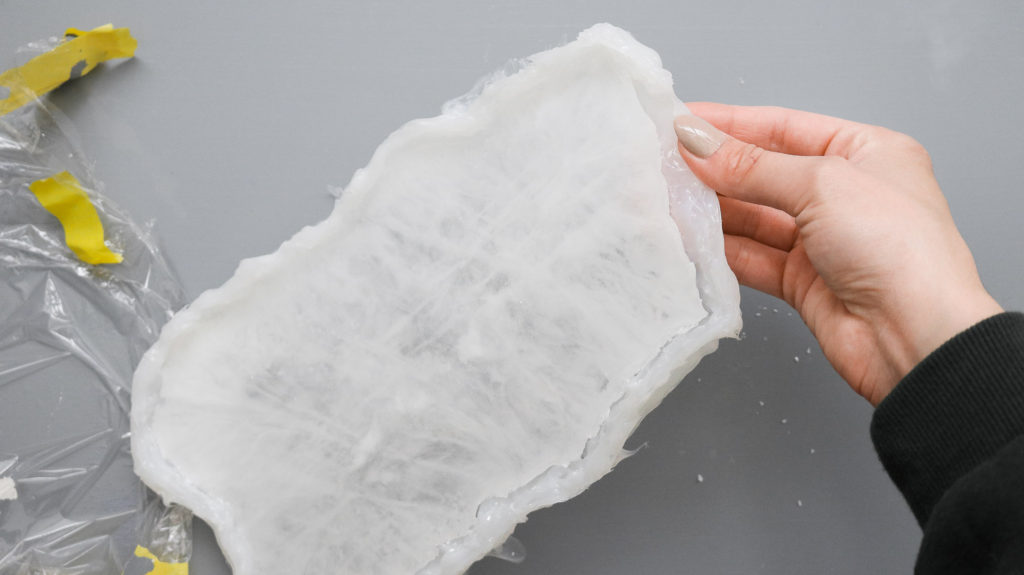
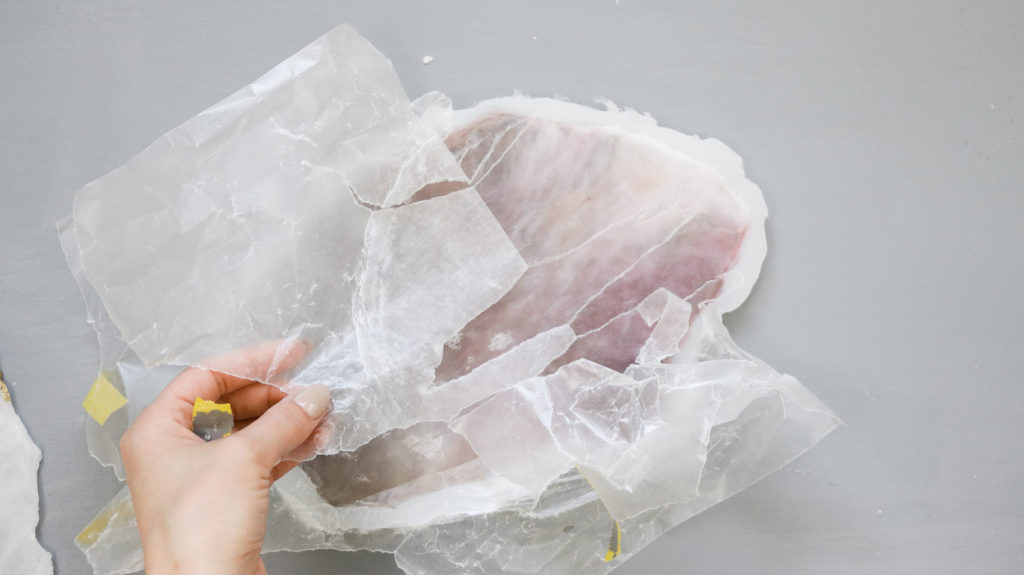
WHY Waxpaper won’t work as a base!
If you were considering trying wax paper as the base here are the results I got. The wax from the paper ended up melting into the resin which left the cheeseboard with a bunch of stuck paper. Not the best results. I ended up sanding it down later but the finish still looked rough and it took too much time to remove. 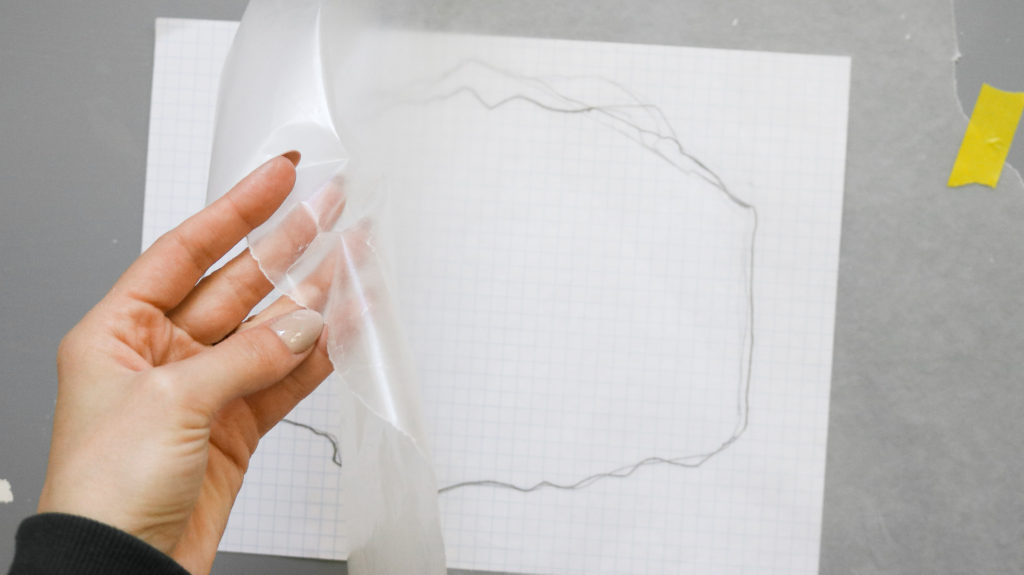
How to make a Lavender Agate Board! ( with no setting time in between layers)
I didn’t get a chance to take as much photos with this lavender cheese board however there is lots of video footage you can check out. (scroll down for video) Here are the colors I used for my lavender cheese board. ( note: I barely used the light pink at all. It ended up being to bright) 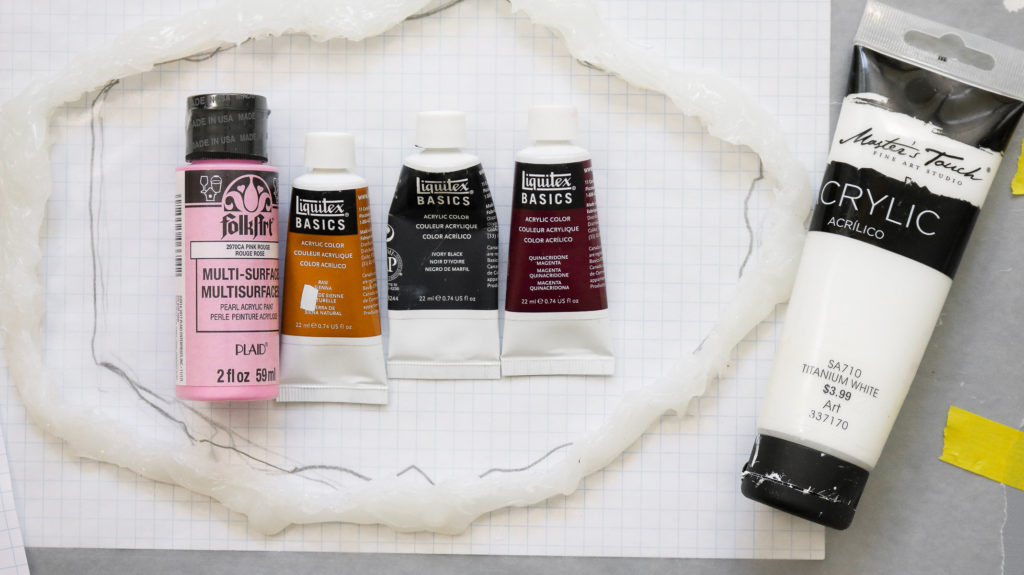 I used about a cup full of mixed resin for this lavender agate and separated it into cups. A few spoons into each cup and left about half a cup of clear resin. Then I only used a speck of paint to tint the resin and poured it onto the agate mold in sections with clear resin in between. The resin colors were really transparent. I used the heat gun to pop the bubbles and used my artists knife to blend the colors into each other a little bit.
 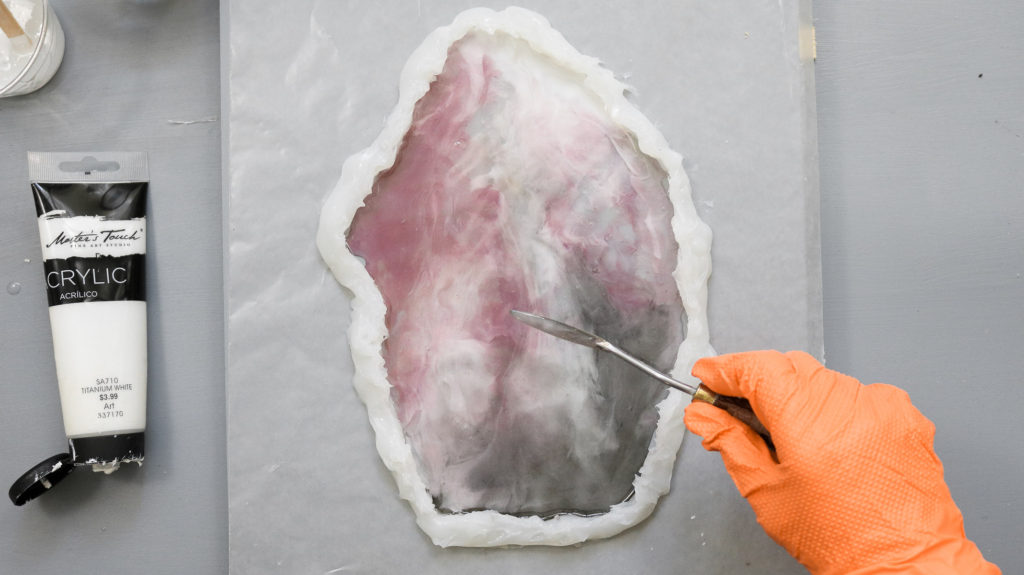 I ended up adding a little bit of burnt umber for more depth in color.
 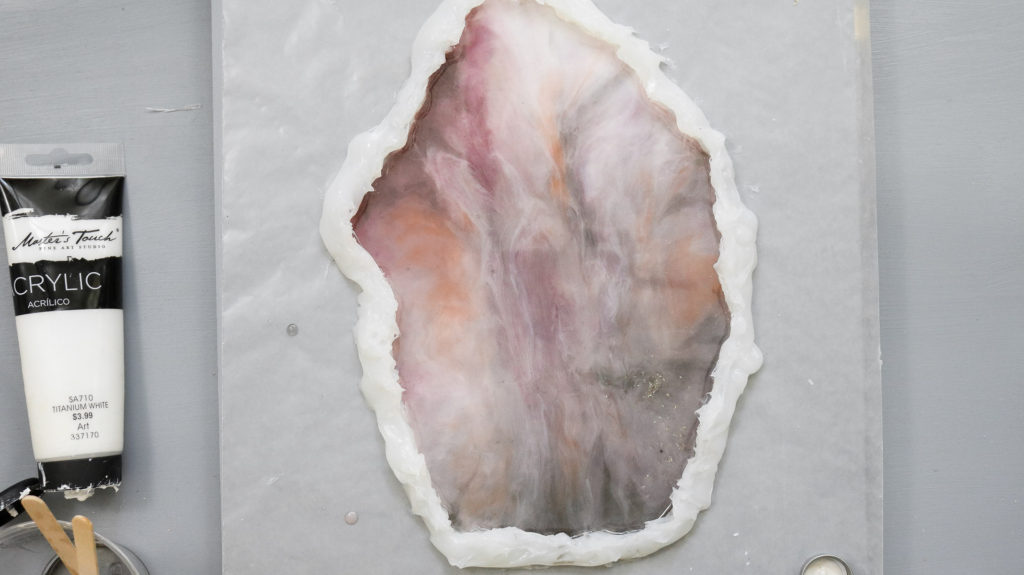 Then I poured half cup of clear resin on top of all the colors and moved the paint around a bit to make sure it was all flowing in one direction.
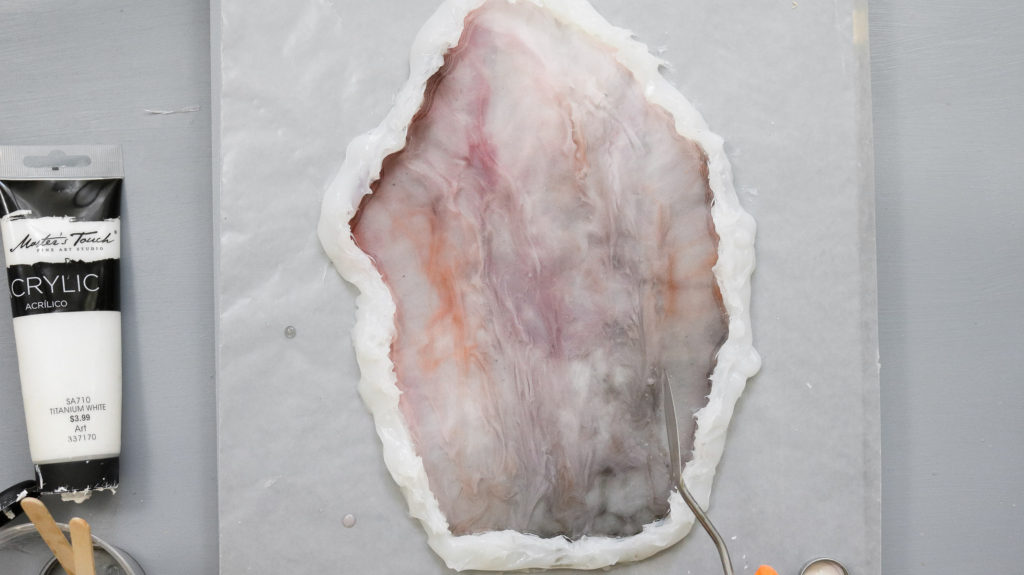
Finishing touches!
To finish this agate I used some very pale white resin and dipped a Popsicle stick into it. Then I added light lines to the top of the resin by dragging the Popsicle stick on top. Do this without moving the bottom colors too much. 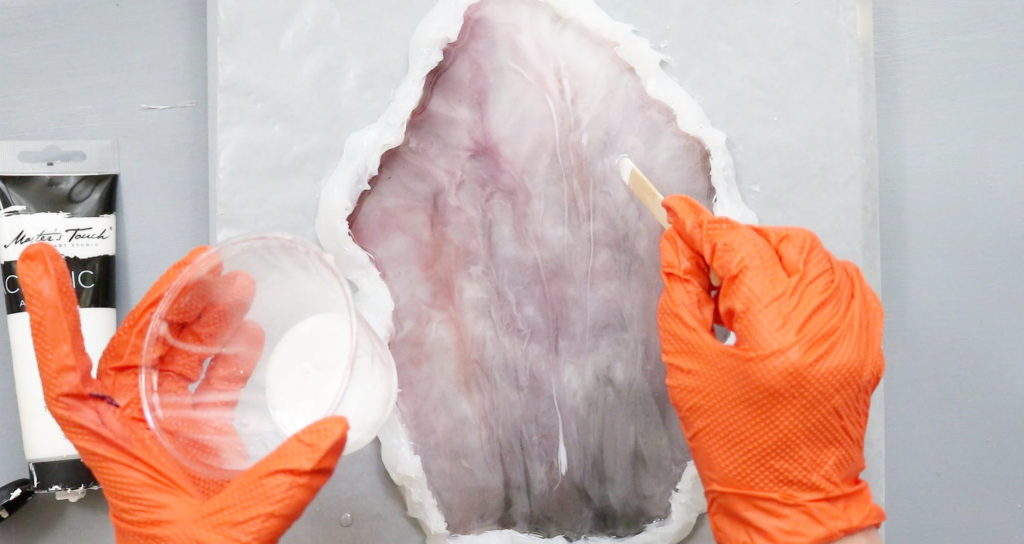 I kept adding white lines until I felt like there was enough depth. 🙂 That’s it! Let it set for 24 hours before removing the paper and trimming the edges. Don’t wait to long to trim the edges as it becomes really hard to trim once the resin sets completely.
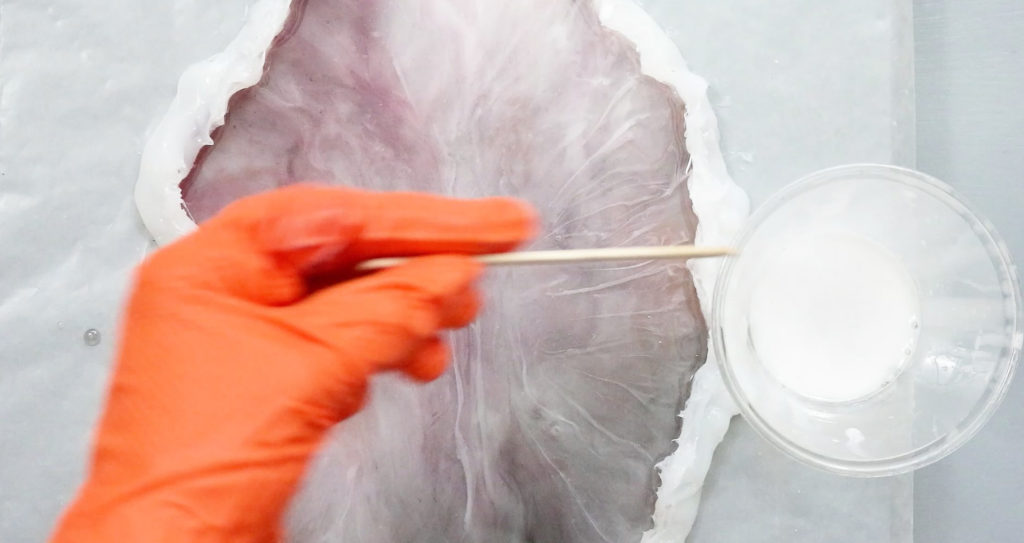
Adding the Gold Effect to your DIY RESIN AGATE! (optional)
 I had a hard time finding clear embossing ink the wasn’t made for stamping so I bought one with a stamp pad and only used the ink. ( ended up finding it at Micheals)
  Here’s the embossing powder I used.
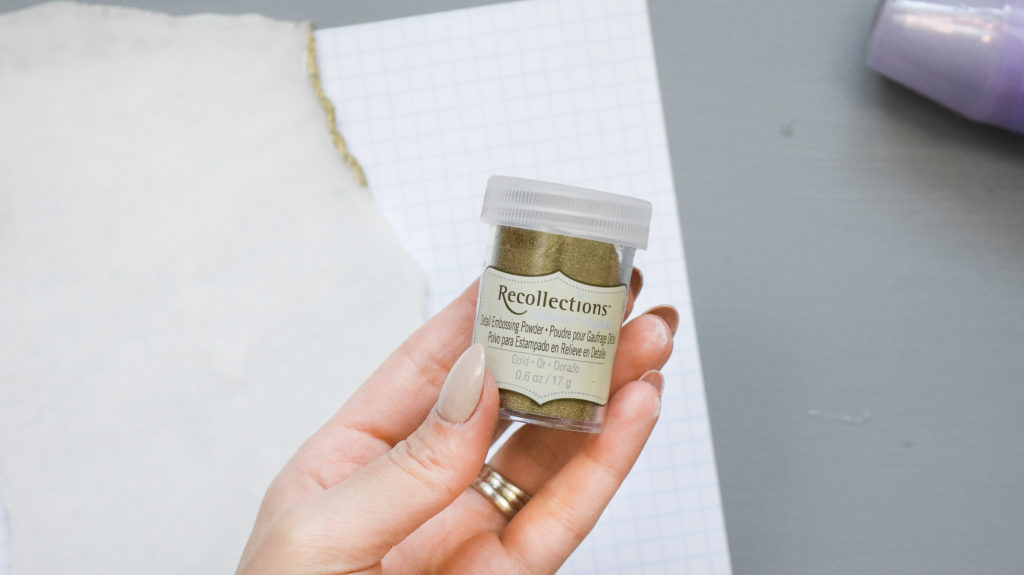
Instructions :
Adding the gold effect to the resin agates is little time consuming to do but the end result looks really cool!
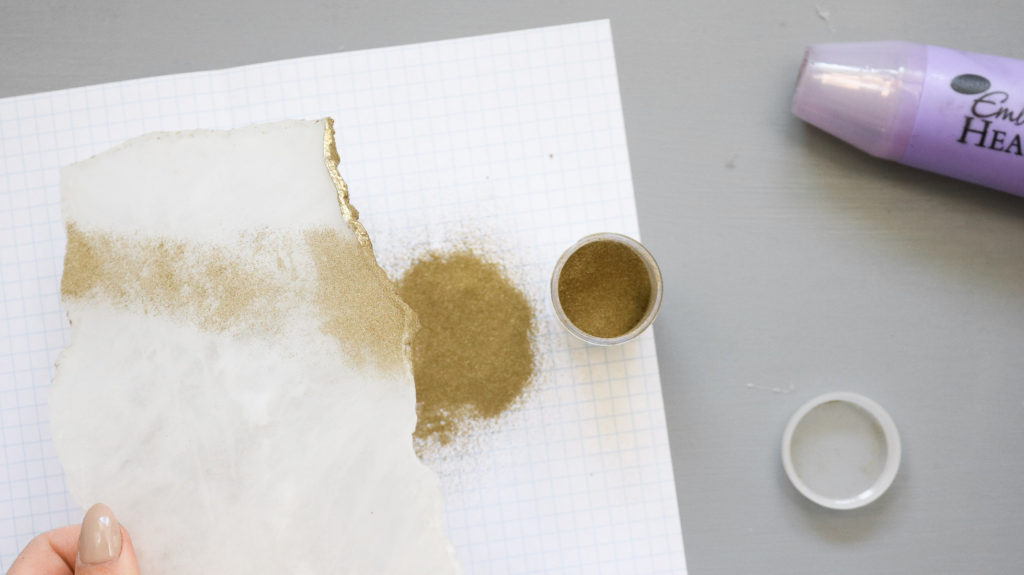
Start by applying clear ink all around the edges. Than over a clean folded piece of paper pour some gold powder on the area you’ve applied the ink on. Use a fluffy brush to remove any excess powder off agate. Pour the leftover powder back into the container. Then use the low setting on your heat gun to start melting the area you’ve applied the powder on.
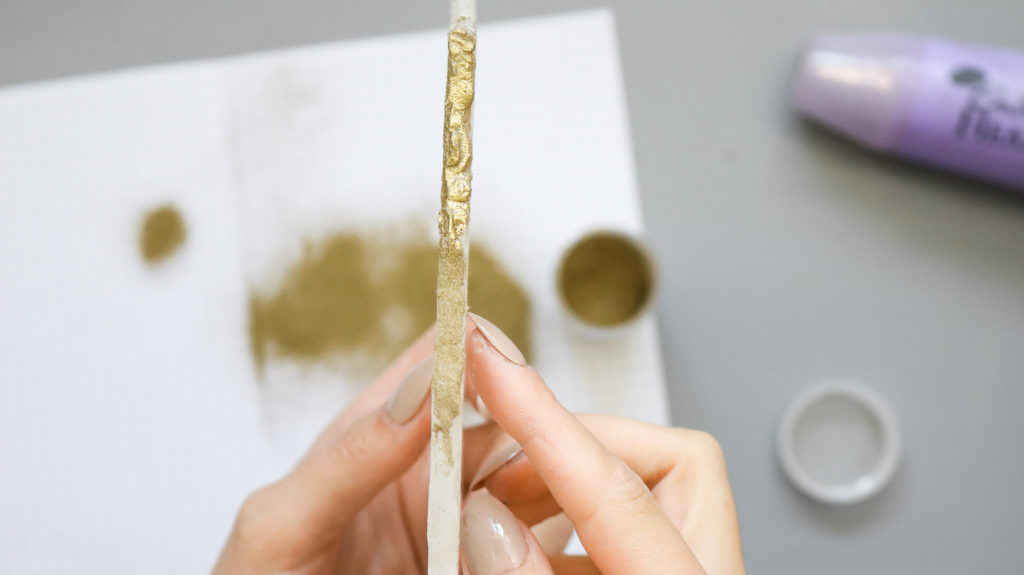
Once you start seeing the powder to melt and there’s a visible sheen you can turn your heat gun on high and melt the powder all the way. Repeat these steps in the same area if your gold looks spotty. I found myself doing two coats of powder to get that solid gold look. ( note: I’m not sure if gold embossing is food safe. Please take caution and seal it with a food safe sealant. You can use resin over it or I know mod podge makes clear food safe varnish. ) That’s it! I hope this inspires you to make our own DIY resin agate or maybe even small coasters! 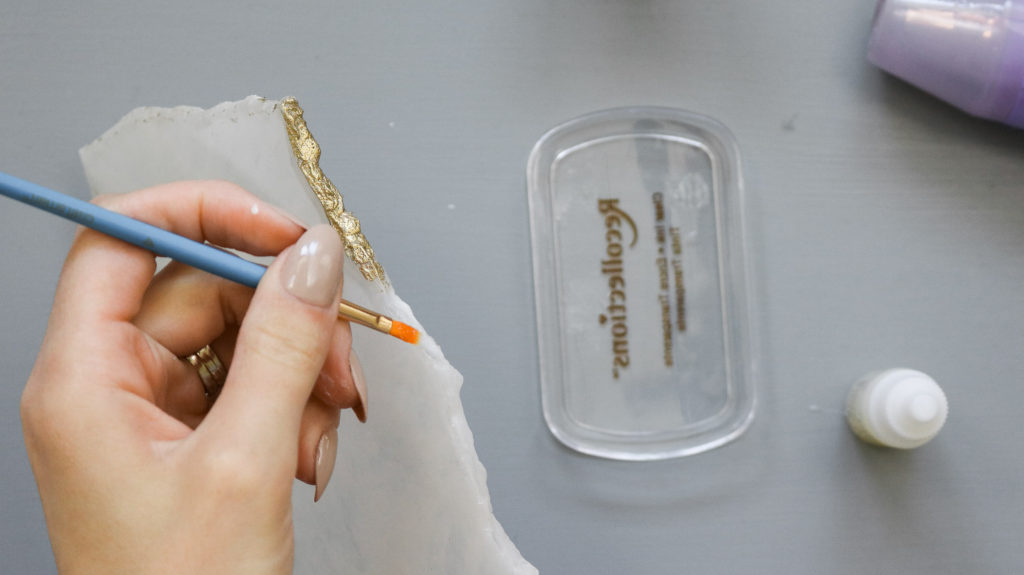
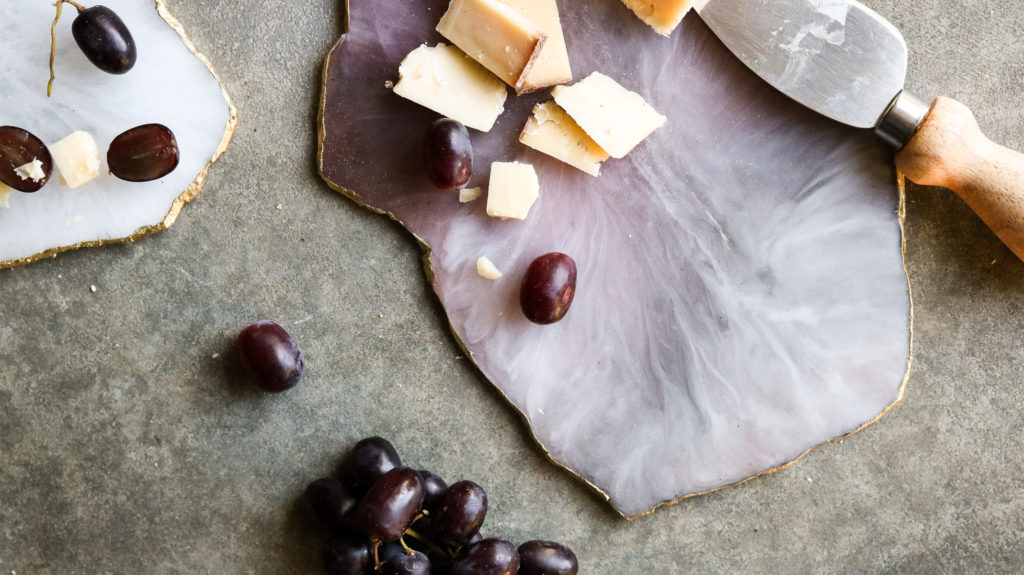
The completed look!
Here they are! I love my agates both equally?! At first I was thinking the purple had too much color for my taste but, it’s really grown on me. I would to try making another DIY resin agate using the same method but maybe with more color. Just curious to know how those layers would look in color. 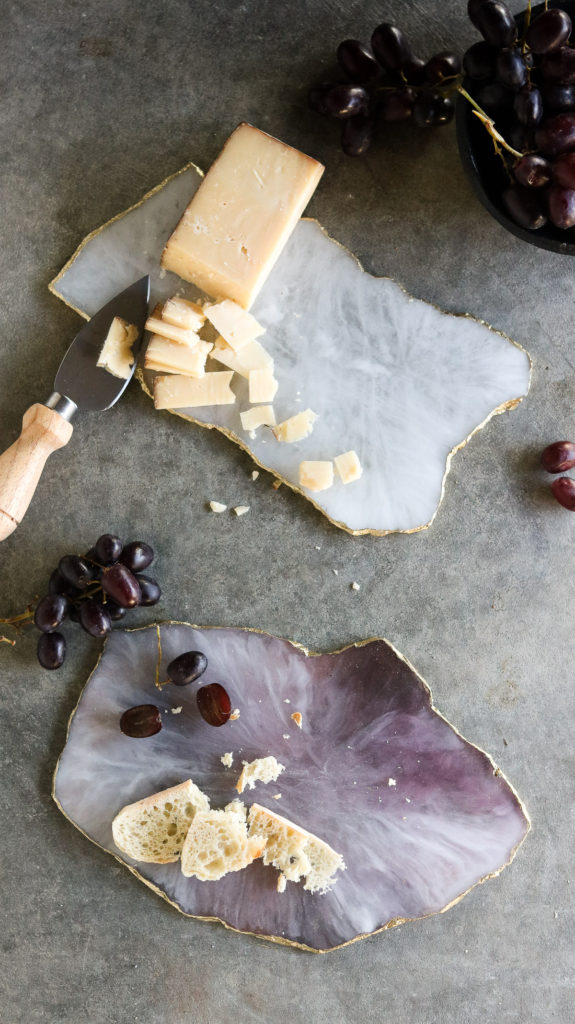
OTHER DIYS YOU’LL LOVE
- DIY RIVER TRAY WITH RESIN
- MY SECRET LEATHER PAINT TO PAINT YOUR OLD UPHOLSTERY!
- FLUID RESIN ART FOR TOTAL BEGINNERS!
- HOW TO GET GALVANIZED METAL EFFECT IN MINUTES!
- DIY FAMILY WELCOME SIGN!
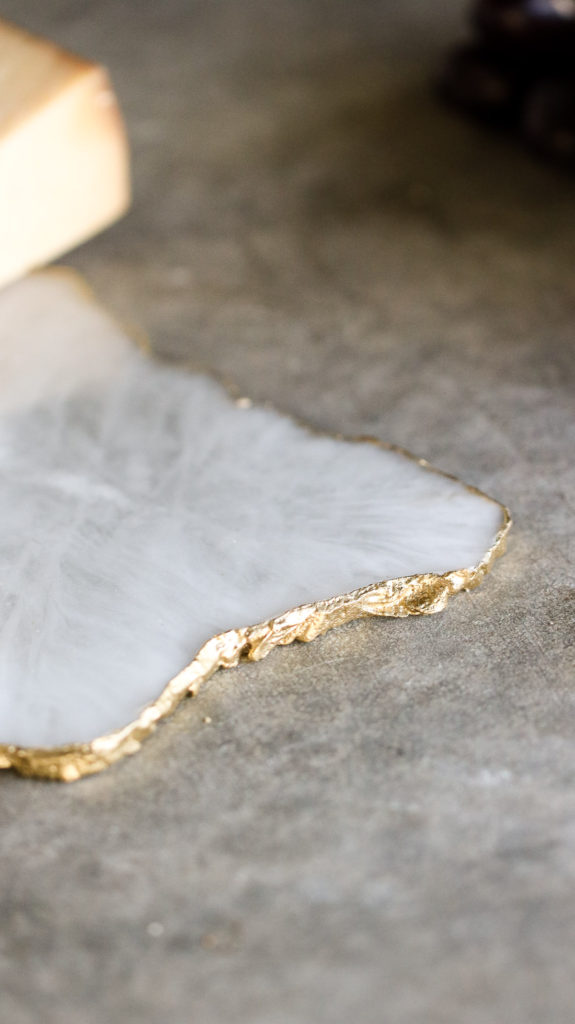
Here’s how the gold edges look. 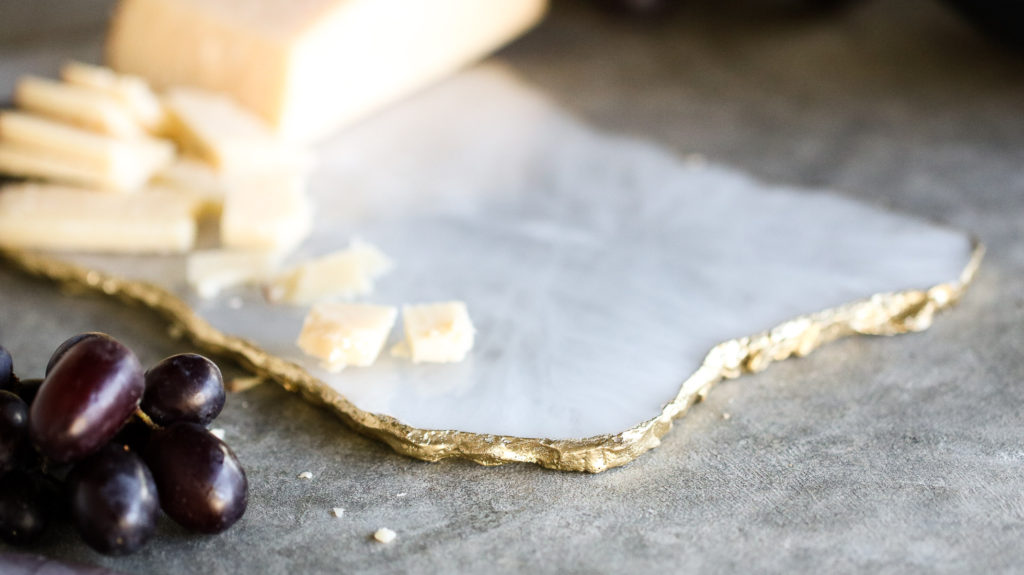 I love the depth in layers on this white resin agate! Who knew white could look so good. I think the layering really worked great for this DIY agate!
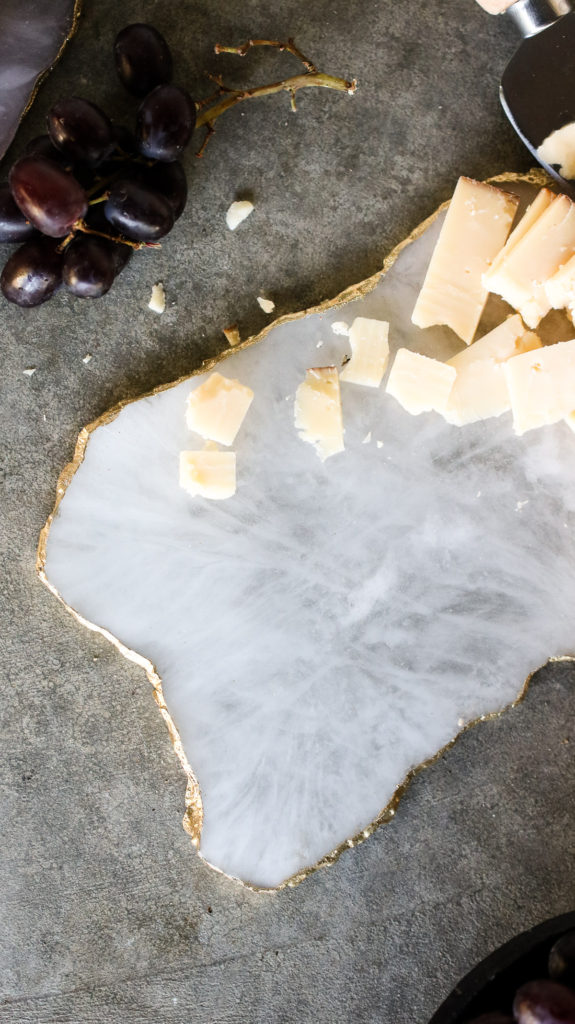
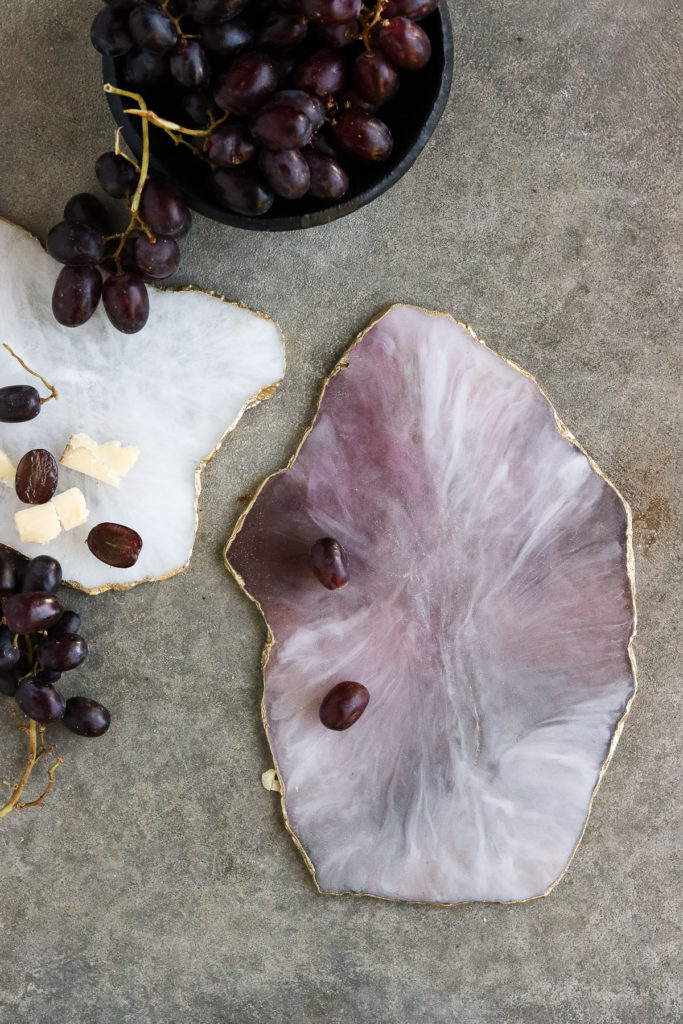
 I can’t believe this lavender pops so much and that this is a DIY resin agate and not a real one. It sure looks realistic!
I’m telling you the colors I mixed were very pale. I think since the colors are transparent the cheese board looks different depending on what background it’s laying on. 😀 That’s so cool! 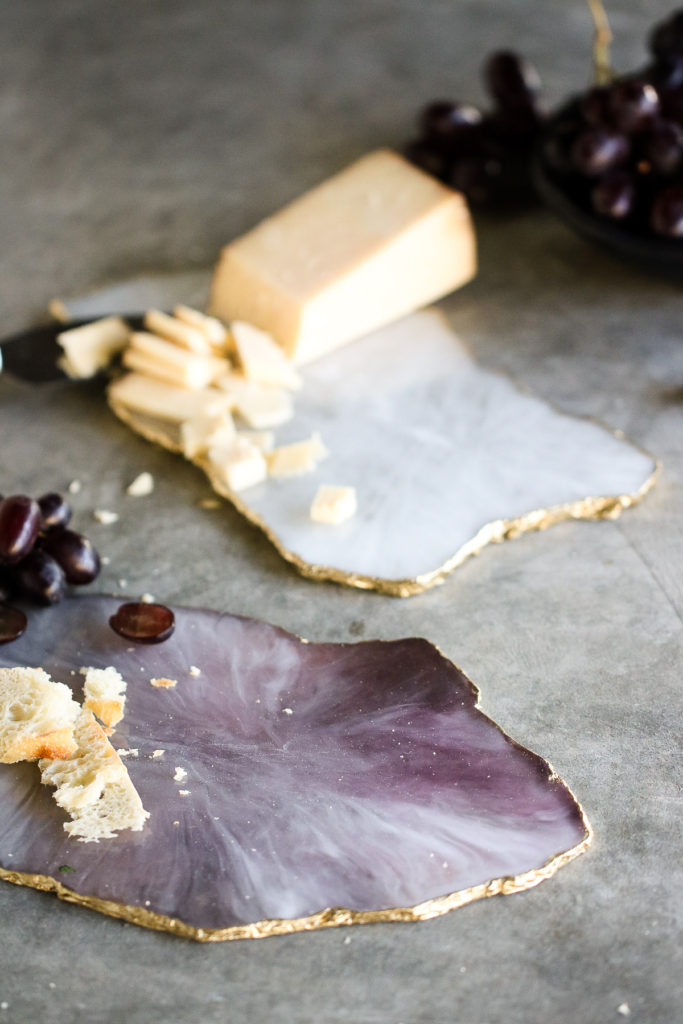
Check out the DIY resin agate video below!
That’s it! I hope you’re inspired to make your DIY resin agate. I love that you can make it any color! This DIY resin method can totally work to make cute coasters! They would make super cute mother’s day gifts! Happy Crafting everyone! I’ll see you next time!
Here’s a pin for you to add to your Pinterest board for later. You can add this to your 😃 or diy board. Click on the photo to pin!
xo, Lily-
Oh wow. These are stunning. I have a green agate cheese board I bought from West Elm and this seriously looks like the real deal!
WOW really! Thank you so much! I haven’t seen one in real life but I googled lots of photos before making them. I’m so glad to hear they look real!
These are so gorgeous!
thank you 😀 😀
Absolutely perfect I have been searching for a tutorial and recently come across yours! I’m so glad I did
YAY! I’m happy to hear this was helpful! Thank you Jessica!
Beautiful..thanku so much for a clear and precise tutorial. Understood every step 😆
One for the bucket list.
Cheers Kaz ☺
YAY!!! I’m so happy to hear that! Thank you and Happy Crafting!
I loved reading your article, it was easy to follow and understand.I have been searching for a cheaper alternative to these cheese boards for a while now. I am super excited to give this a go – thank you!
YAY!! I’m so happy to hear you loved this DIY! You go girl!
These are beautiful!! Going to have to try this out!
Thank you Megan! YAY! Happy Crafting!
Those are truly beautiful. The gold around the edges definitely makes it pop as well. I could see using this process as not only the cheeseboard but little jewelry trays for the bathroom or kitchen sink. Thank you for the ideas!
for the lavender one, what are the name of the paint colors you used?
I used pentart brand acrylic paint in the color purple. ( it looks more lavender then purple) Also it was over saturated I had to tone it down with black and a bit of white.
Is it supposed to be flimsy? Mines very flimsy and it’s been over 24 hours
Yes it should be for about a week. That’s how long it took mine to fully set. If you added too much paint to the resin it might stay flimsy.
Finally I found a diy how to do this!
Can’t wait to try this, thank you!
I’m glad you liked it! 😀
What color embossing powder do you use? I see several gold ones
I used the gold one. I would definitely recommended apply a clear finish of resin over it for food safety and durability unless you’ll be using it for decor purposes only.
Hey! Would you ever consider selling one? I really want to make one but just don’t have all the things
Sorry girl. I don’t make any to sell. If I ever do I’ll let you know. 🙂
Hi, how much resin did you use all up for one board?
About 1/3 of the resin I had for one board. That’s counting both bottles. You can make about 3 boards ( depending on the thickness and size ) From the 16oz resin kit. Hope that’s helpful. Let me know if you have anymore questions 🙂
Is the purple one food safe? It looks like you added a layer of resin on top (in the youtube video) but do you need another layer on top of that?
Yes you will need to add a layer of clear resin over them to make them food safe. 🙂
It’s gorgeous! You’re an amazing gal. Your instructions are clear and concise. I would like to sign up for future ideas, but I need to know if you charge for your fantastic ideas! Do you, I don’t like credit card
Surprises. Thanks again for your great ideas.
Hi Mary, Thank you so much I’m so happy to hear you like it. No I do not charge for my ideas 🙂 I send out newsletters when I can 🙂 You can sign up for newsletters on my main page ( it’ll be in the sidebar if you’re on a desktop and at the very bottom if you’re on your phone. ) https://www.lilyardor.com/