
DIY head planters! That’s what I’ll be sharing with you today!
So.., I envisioned my concrete head planters to be angelic but grown up. HAHA! Sorry I couldn’t find any other way of describing it. Instead I got a dude that looks like a roman emperor and a cool girl with dread locks! Not bad! I’ll take that!
Truth be told I was scared to start this project!
I stared at this revolutionary concrete mix for two weeks drowning in thoughts at the idea of sculpting something out if it! A little background on the subject… I have never ever attempted to work with clay or sculpt any sort of figure or object. The closest I got to sculpting was messing around with the clay wheel in high school for 2 hours. Let’s just say my first attempt was not successful.
I think this shapecrete concrete mix helped A TON as far as this project not being a complete fail because, It’s so easy to work with!
Before we jump in to this DIY I want to say thank you to the folks at Sakrete Canada for sponsoring this project. They sent me a pail of Shapecrete to try and I’m so glad they did! I had way too much fun creating with it! The possibilities are endless with this stuff! ( already have more projects planned ) 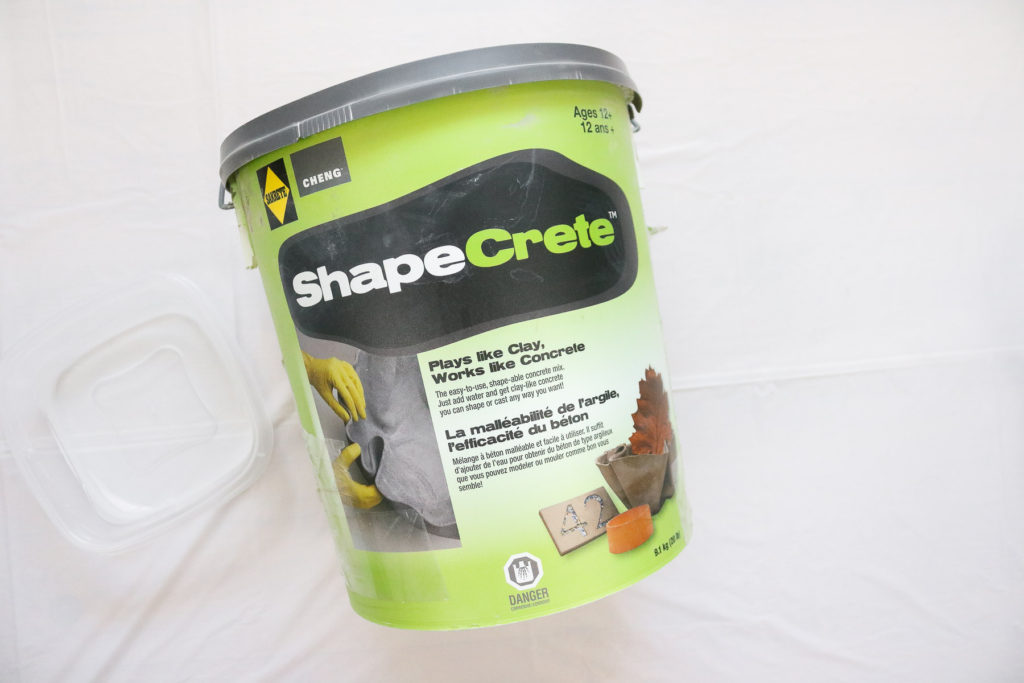
*this article contains affiliate links
Time Needed:
The first one took me about 2 hours to make and the second one was around 1.5 hours. I think the more you make the easier it is. Also.., I promise it’s a lot easier to make then it looks.
Cost:
$30-$35 Keep in mind you’ll have concrete left over if you make only one planter. You can probably make a total of three planters from one pail of shapecrete depending on the size of your planters.
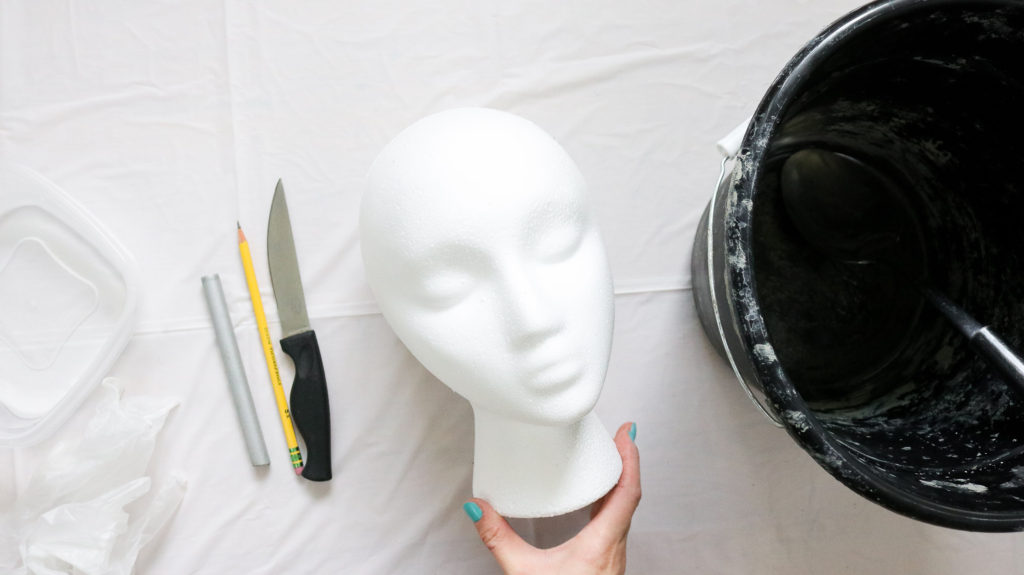
Supplies:
- Styrofoam head ( they sell male and female heads- amazon sells a pack of two here – https://amzn.to/2y43Djd )
- knife
- pencil
- water
- bucket + mixing stick
- gloves
- metal tube and some tape
- a plant or two
- Shapecrete Concrete Mix
If you are Canada based you can get the shapecrete here.
If you’re US based here’s a link to purchase the shapecrete.
Here are some affiliate links for Styrofoam heads.
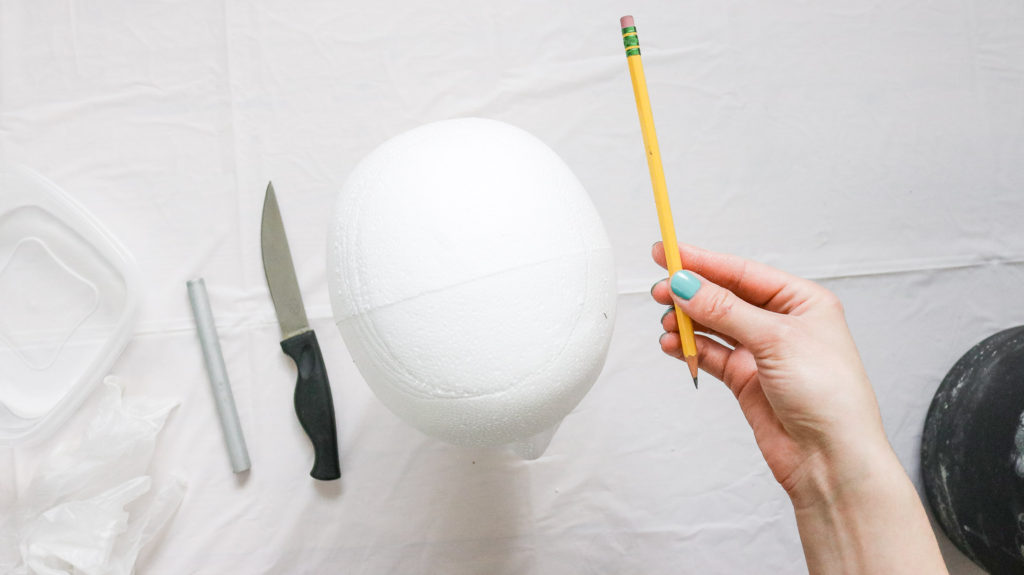
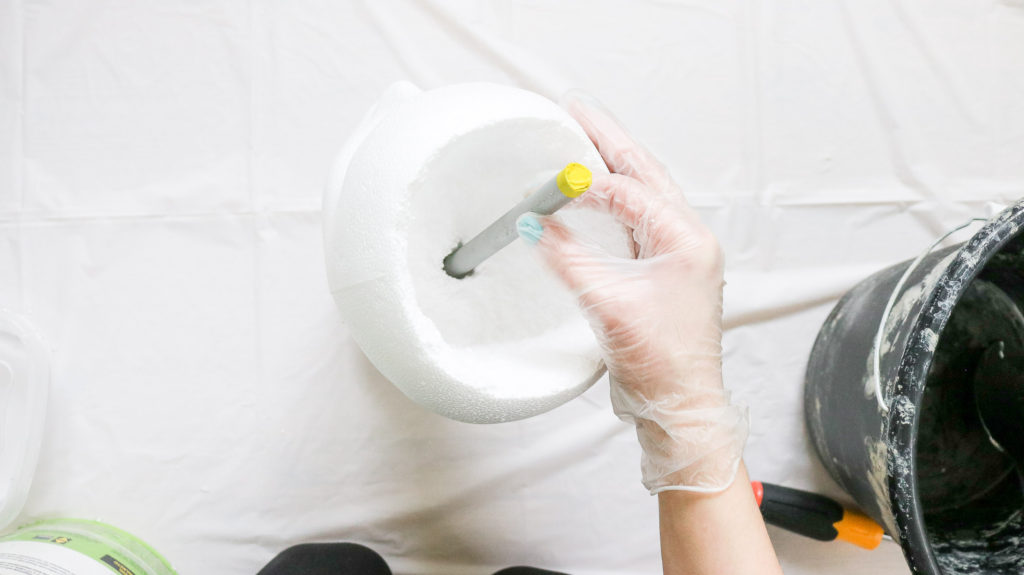
Prepping your Styrofoam head!
To make your head planter start by marking a circle around the top of the head. Make sure the circle looks even when looking at her head from the front.


Then use a knife to cut away the Styrofoam to make room for a plant.
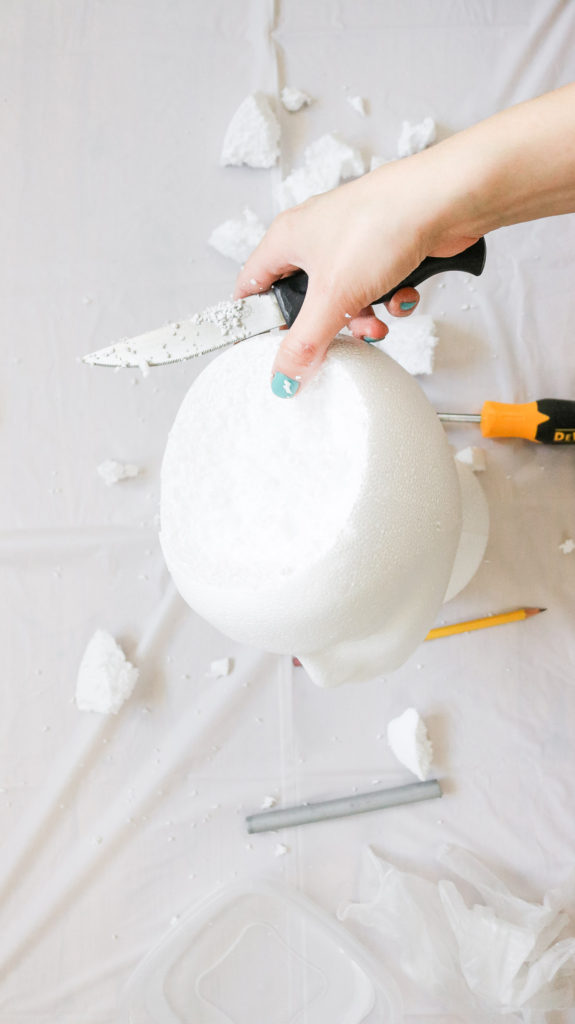
If you want your planter to have a drainage hole insert a small hallow tube into the head. Tape it off a bit at the top to keep the concrete from entering the tube when you’ll be coating it. The tube will help your water drain without soaking into the Styrofoam. (video shows more footage.. Scroll down for video) 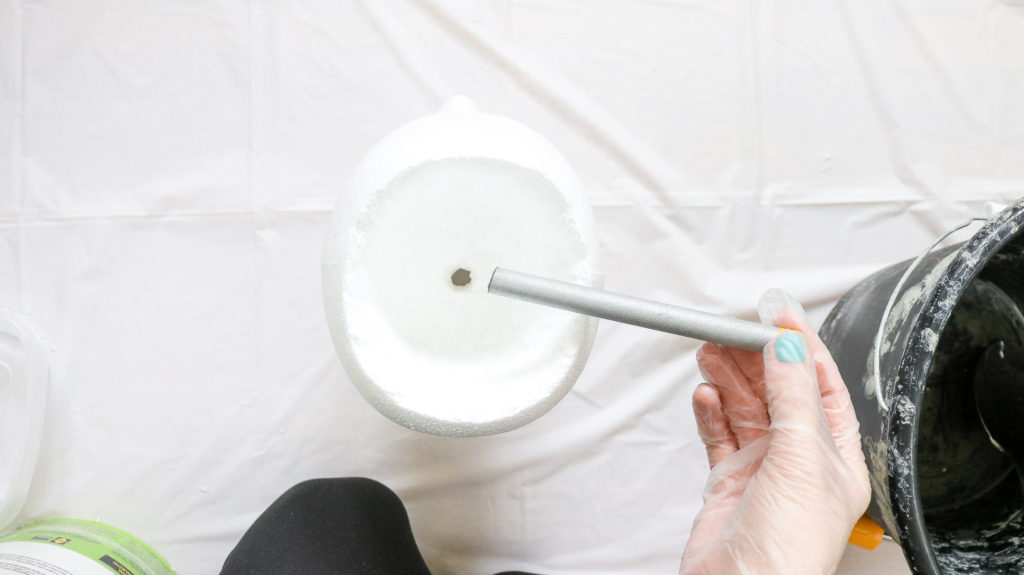
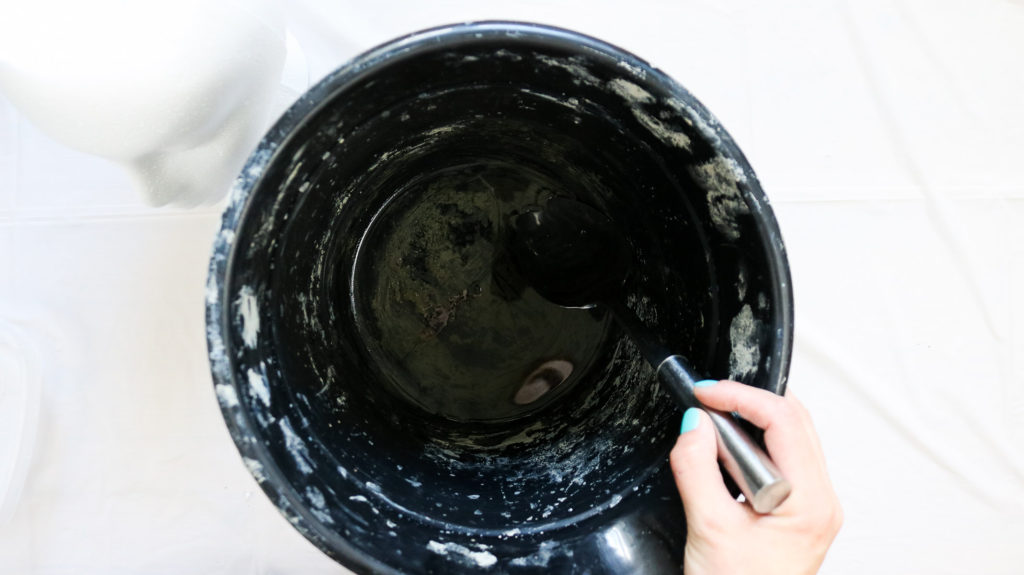
Mixing your concrete!
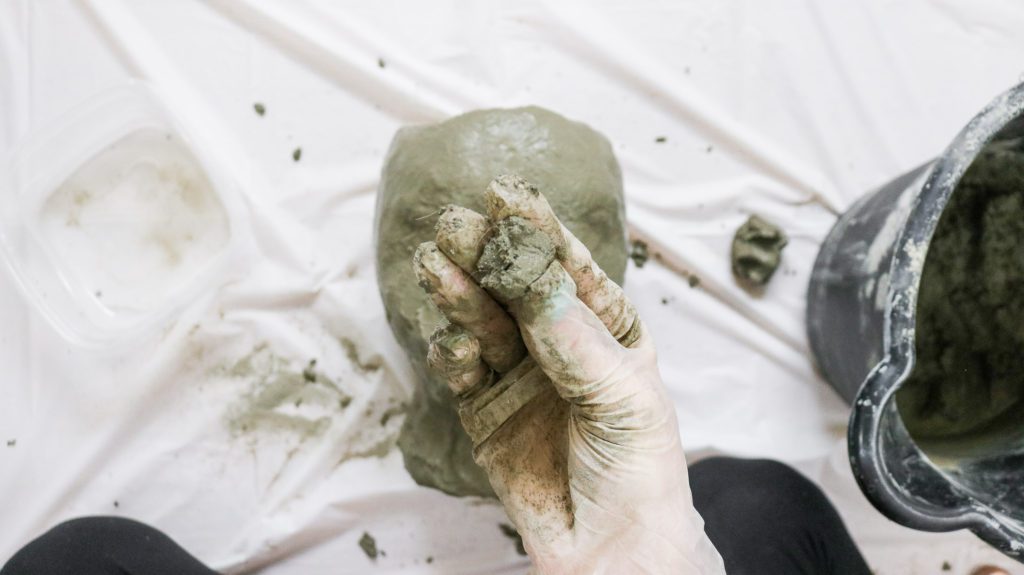
Next start by adding a little bit of water to your bucket and mix in the concrete. I used an old bucket that I got a while back from the $1 store and started with 1 cup of cold water. You can always mix more later. Make sure and wear gloves before working with concrete. It’s rough on the hands. To sculpt the face it’s best to have tight fitting gloves. If can’t get a hold of some fitted gloves use whichever gloves you can get as much as possible and once you get to the finer details like making the eyes and nose you can use bare hands for smoothing.
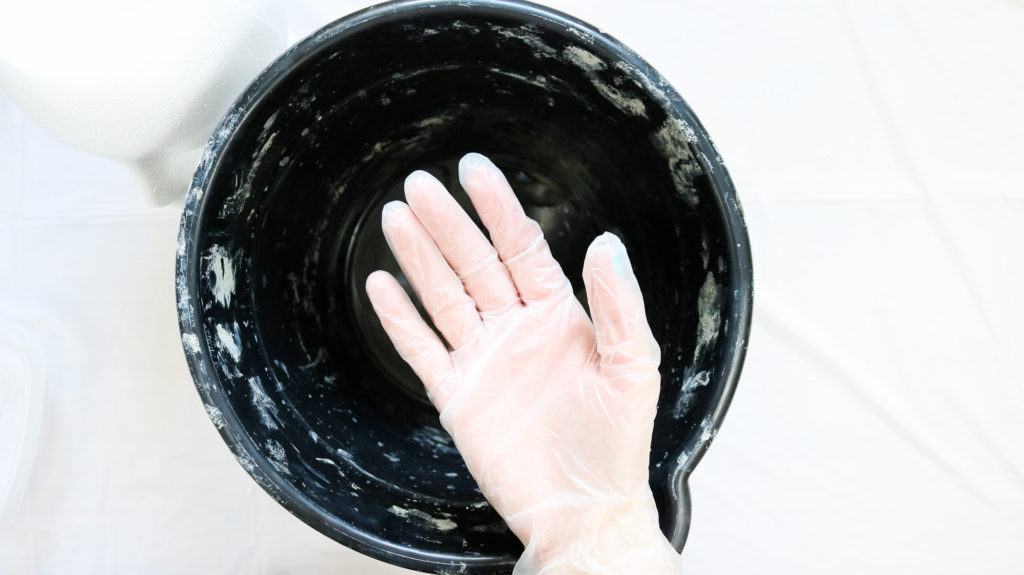
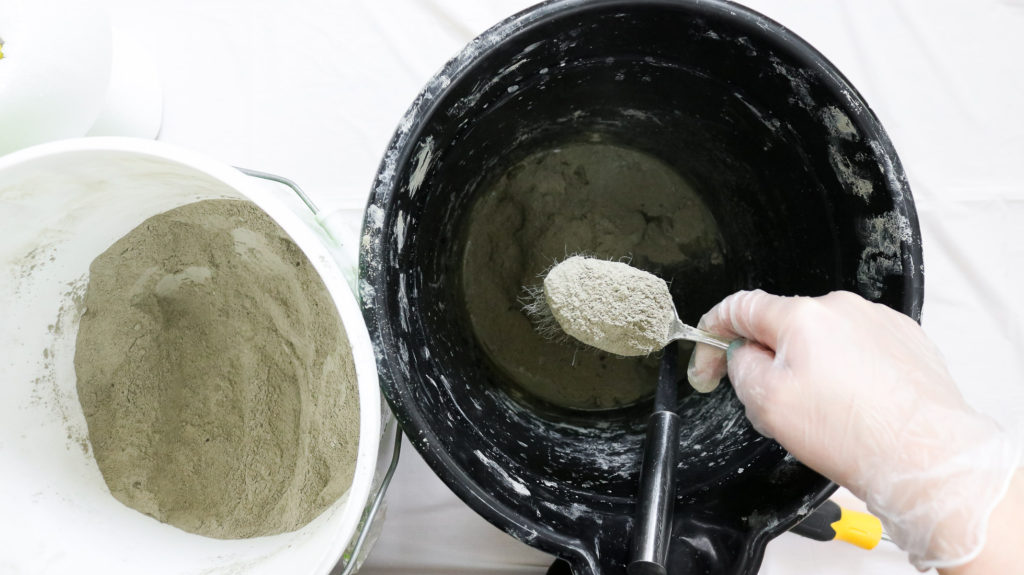
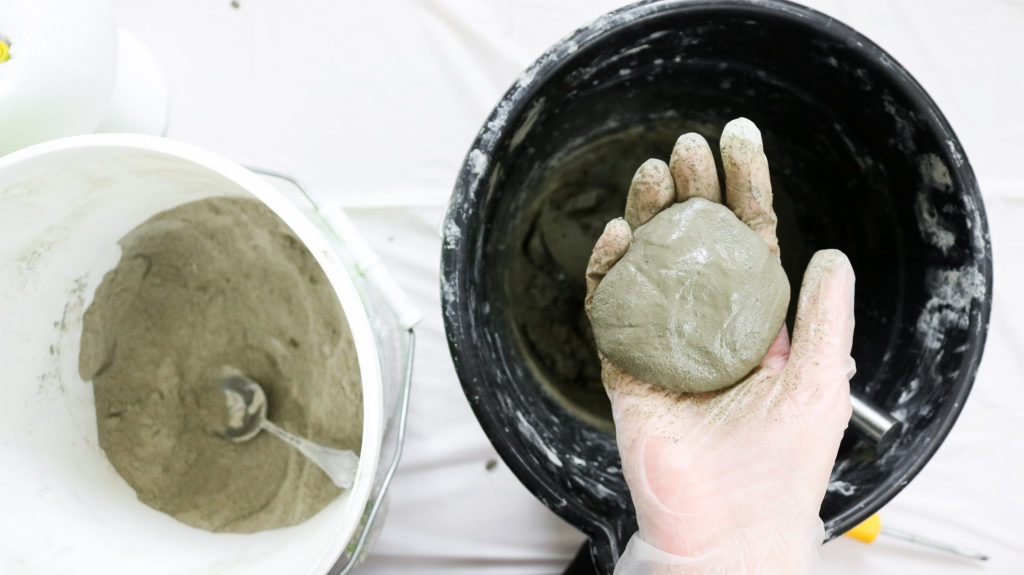
Here’s what the consistency of your concrete should look like once mixed.
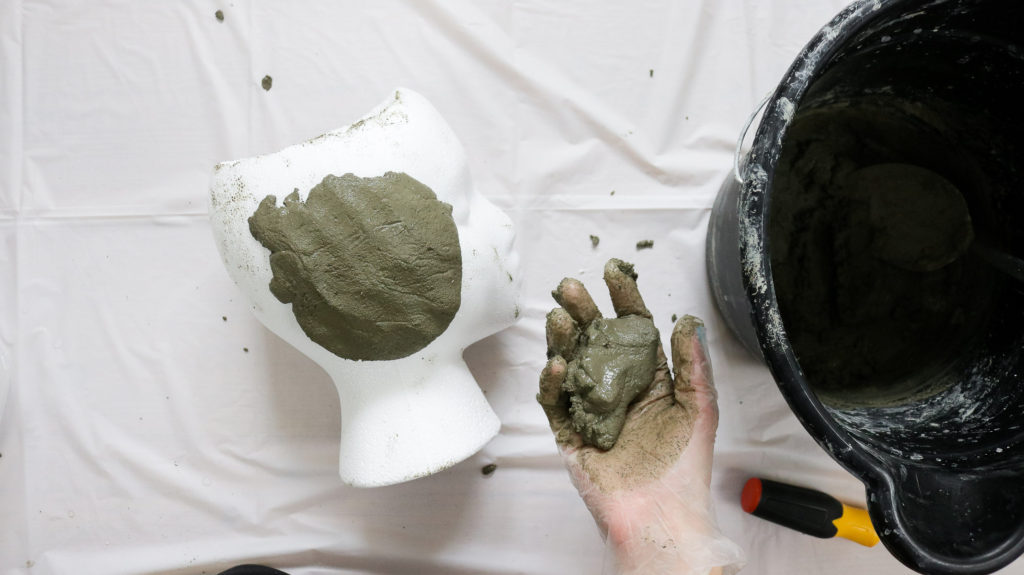
Sculpting and creating the main facial features!
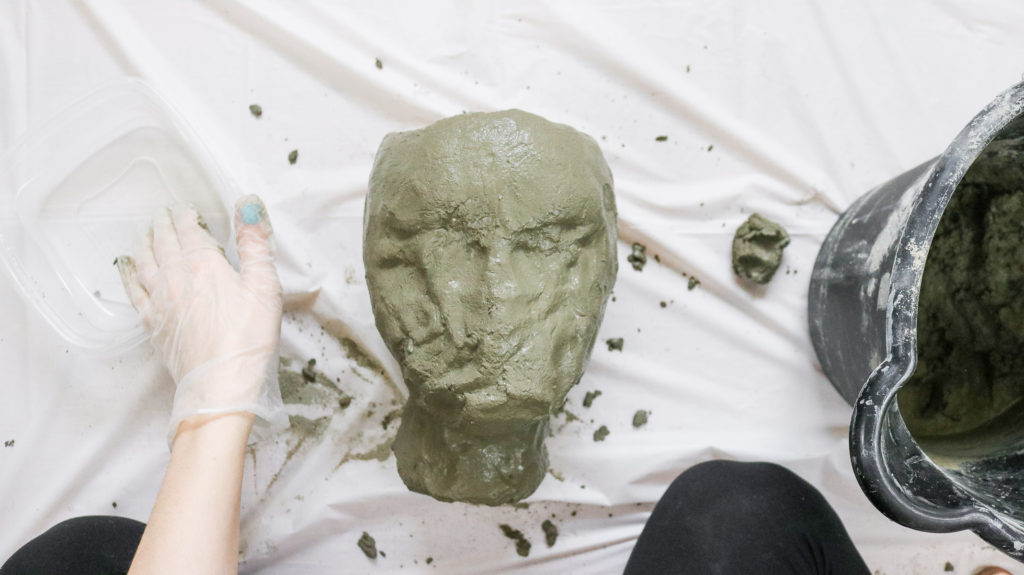
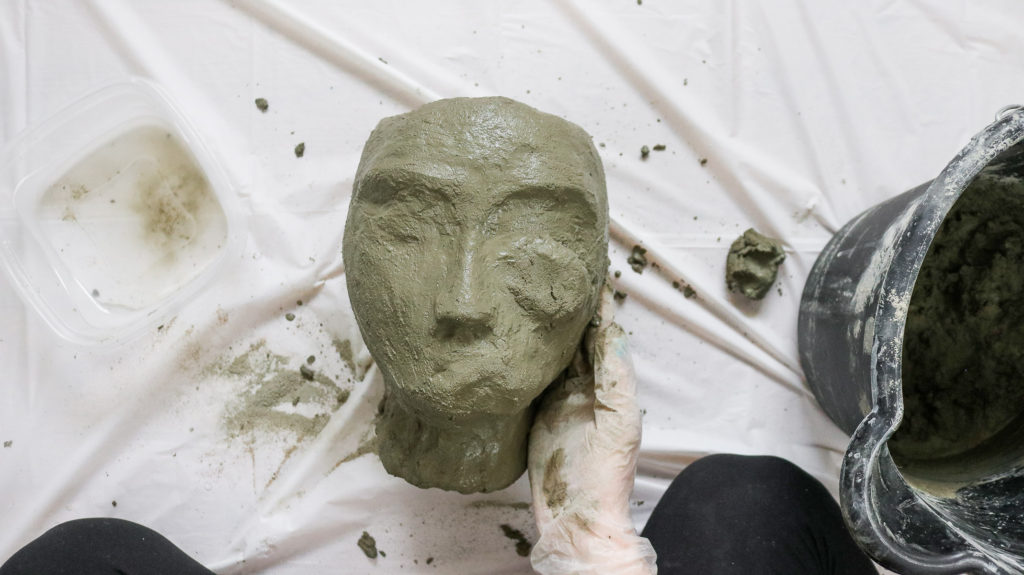
Okay now take chunks of concrete and start adding them to your Styrofoam head. Spread it out working your way all the way around keeping in mind where the eyes and nose originally were. Use your hands to do this. Your concrete coating should be about 1/2 inches in thickness all the way around. Don’t worry about it being perfect right now. You’ll be fixing that later.
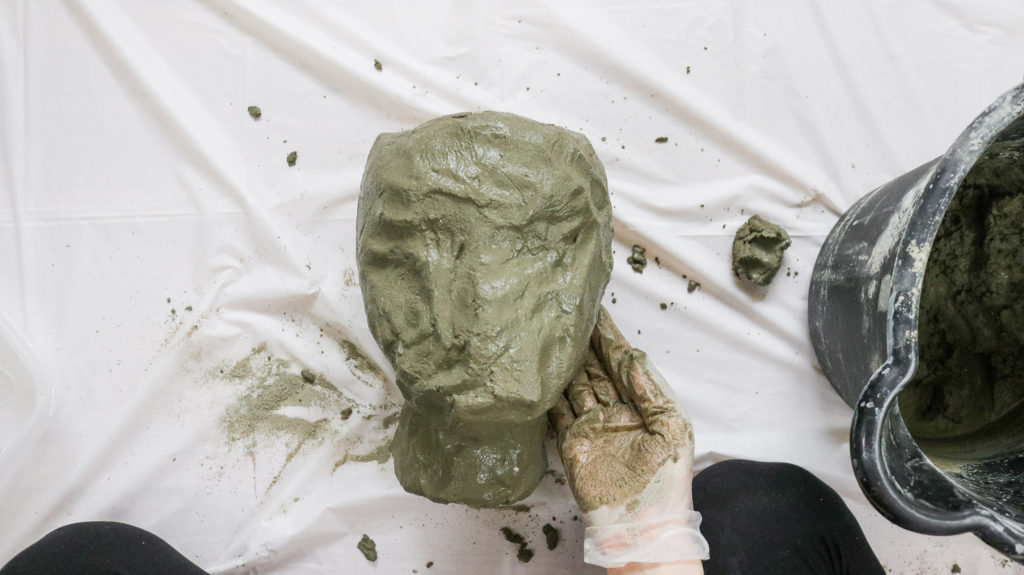
Once you’ve cover the whole head in concrete use your hands and dip them in water before smoothing out the face. Don’t worry about staying to close to it’s original Styrofoam shape. Instead create your own face with the Styrofoam working as a base to create your head planter. Don’t use too much water for smoothing because, it becomes mushy and is hard to work with. I learned it works best if you sculpt the main features of the face before going into the details. I created my eyebrow arches, nose, cheeks and eye shape before going into the details.
To bring out her nose I added a small ball of concrete to the tip of her nose and smoothed it out with my fingers. Use a few drops of water to blend if needed.
Then I did the same with her eyebrow arches. (photo below is showing the arches before they were smoothed out.)
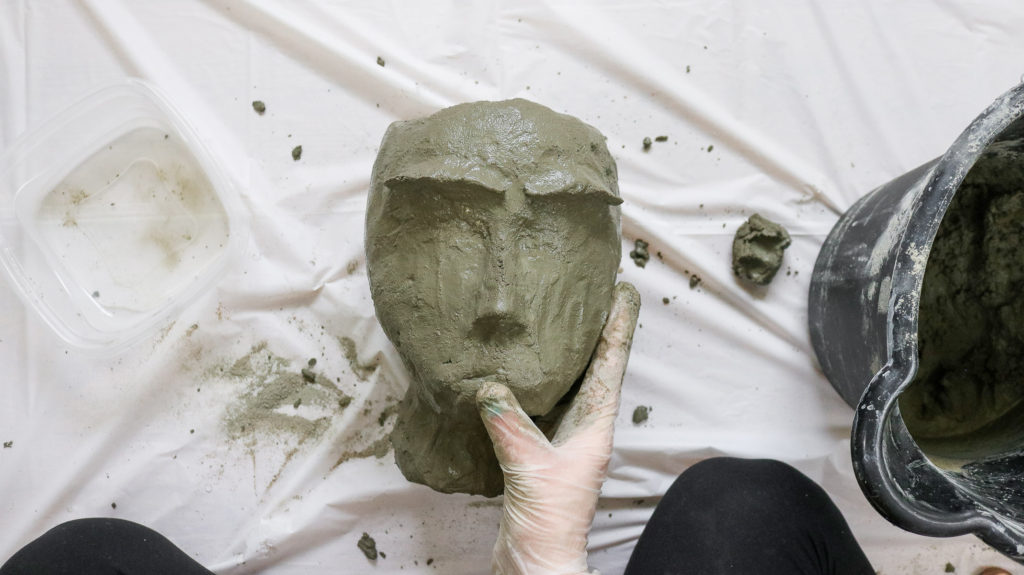
Here’s how they look after a little bit of smoothing out. (photo below)

How to add finer details to your head planter!
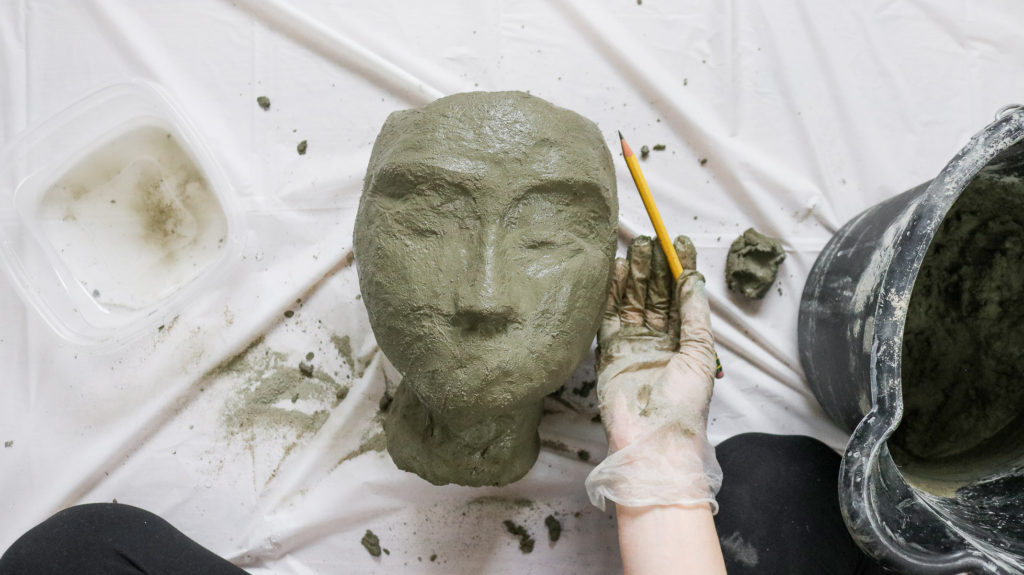
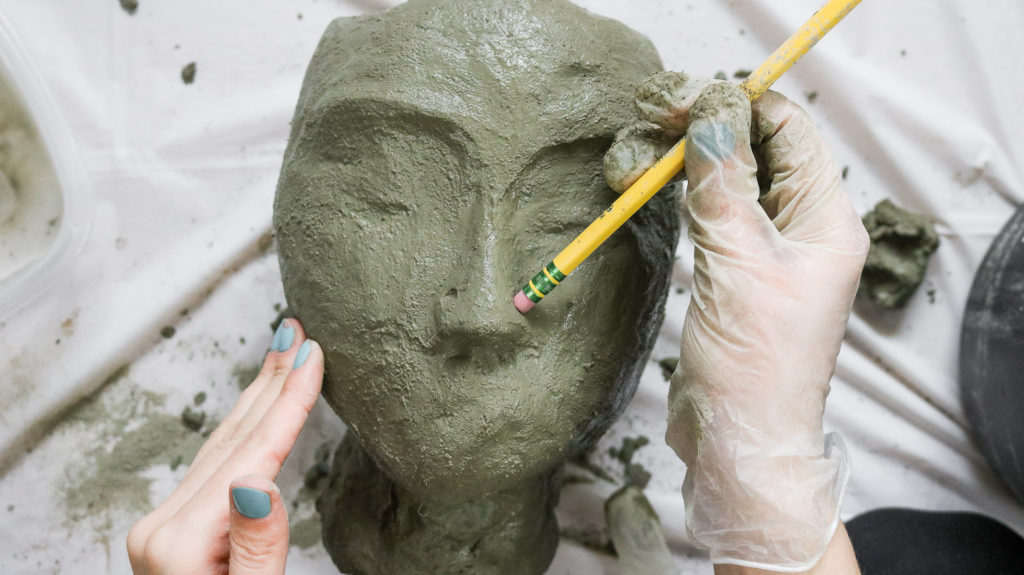
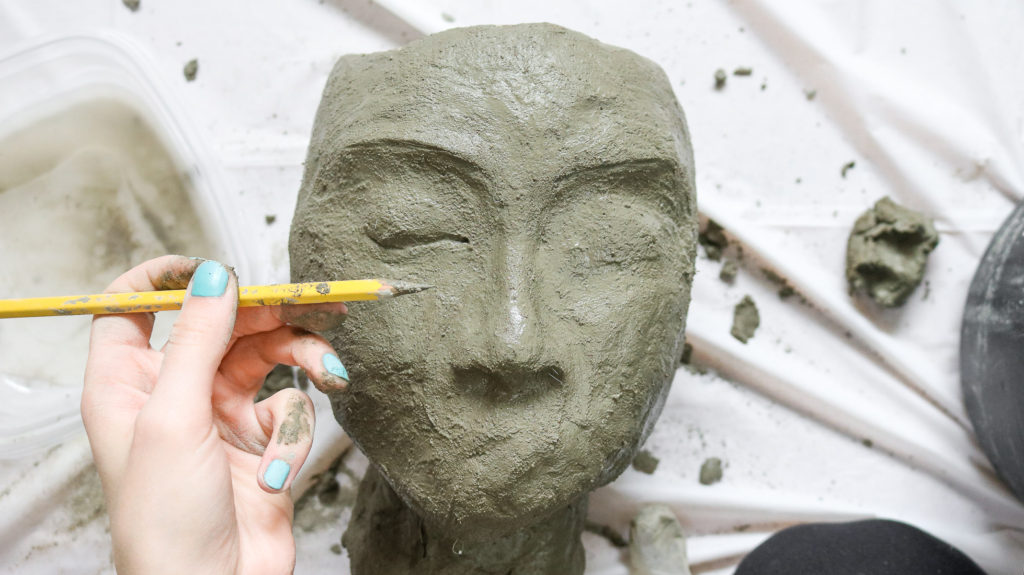
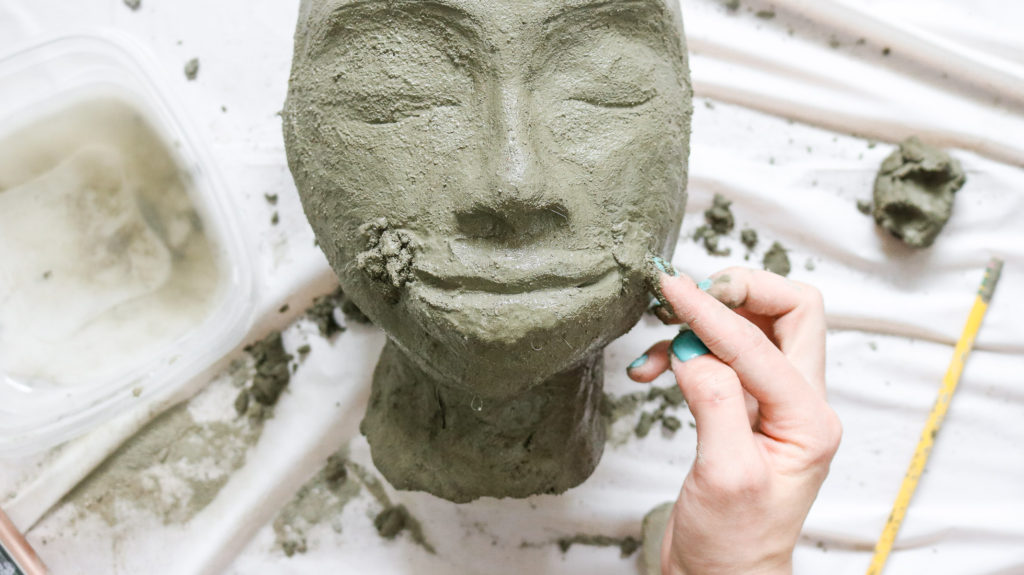
A pencil will be your best friend as far as details go. I could not do this with just my fingers alone. Once you have the face looking somewhat familiar to a face start by adding the eye brows using the sharp tip of your pencil. Very lightly draw them on and smooth it out with your fingers. You might need to use bare hands to smooth it out. Any folds in gloves will be in the way of creating detailed and smooth work.
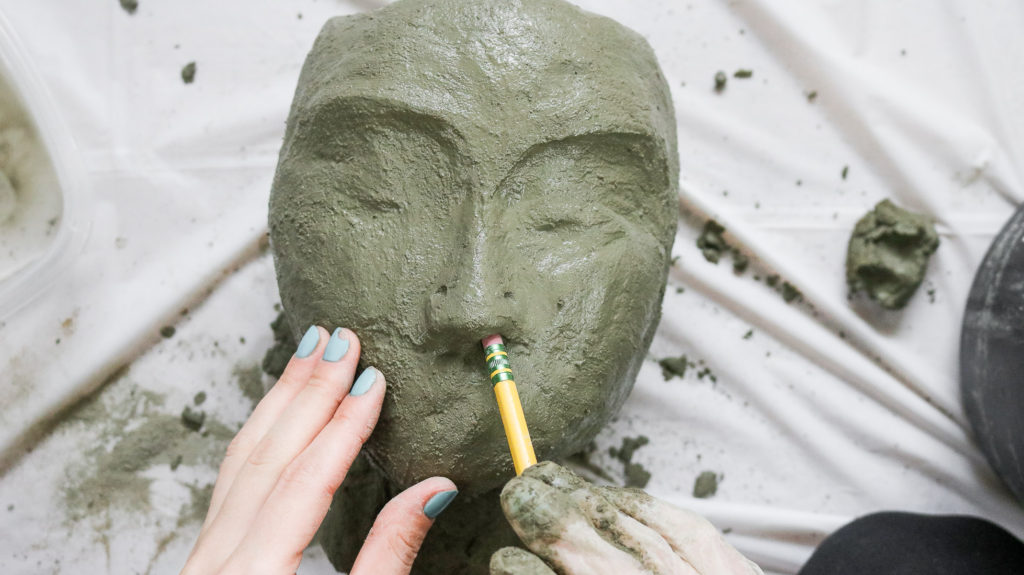
Creating the Nose!
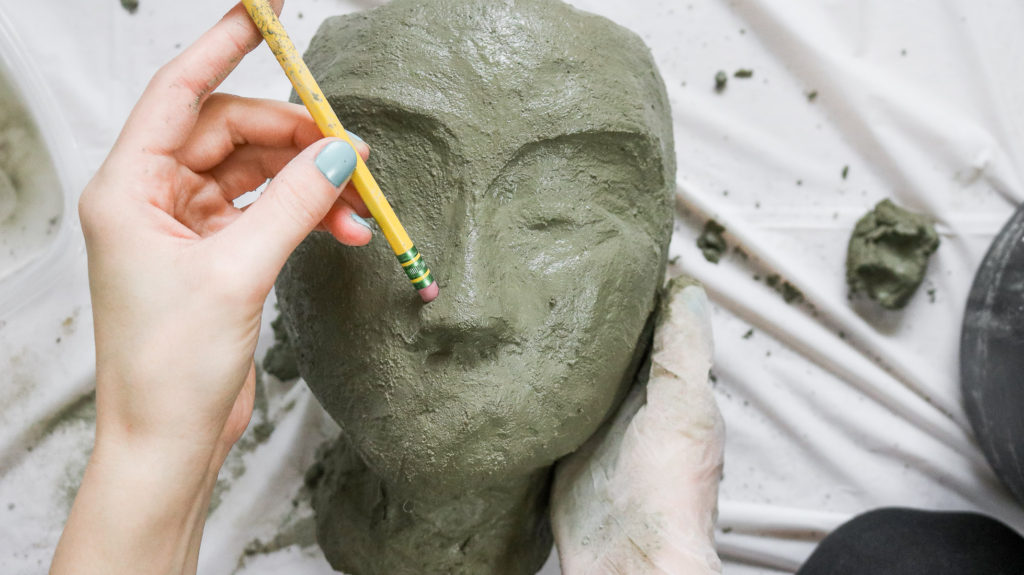
Then use the eraser side of your pencil and add indents to both sides of her nose as well as creating two nostrils for her. Following that as before use your fingers and lightly smooth it out.
Sculpting the Eyes and Lips!
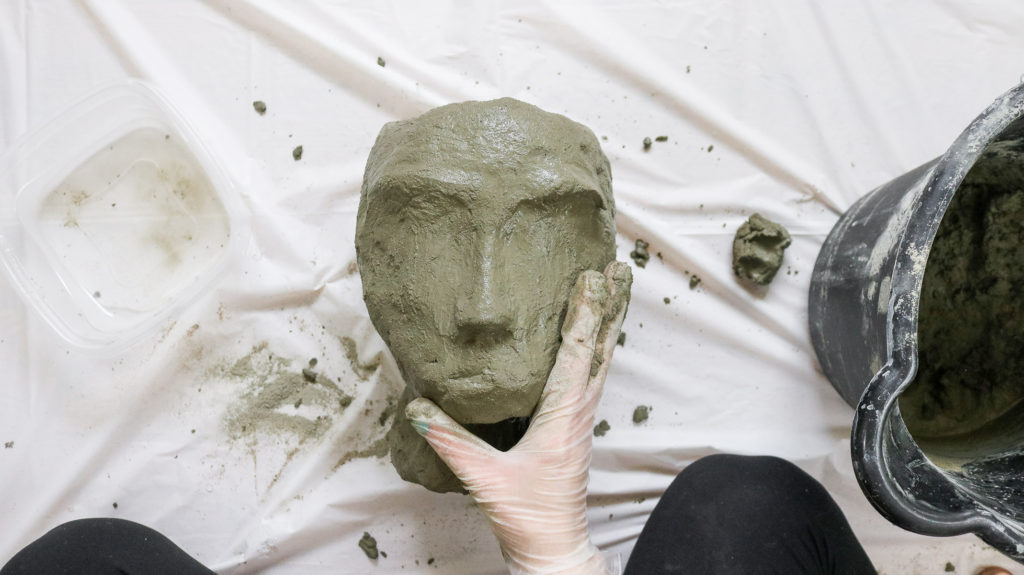
Once I was done shaping here nose I moved onto the eyes. Add two balls of concrete to her eye area and smooth them out a bit. Don’t flatten the eye area all the way. You need to keep the eye shape there.
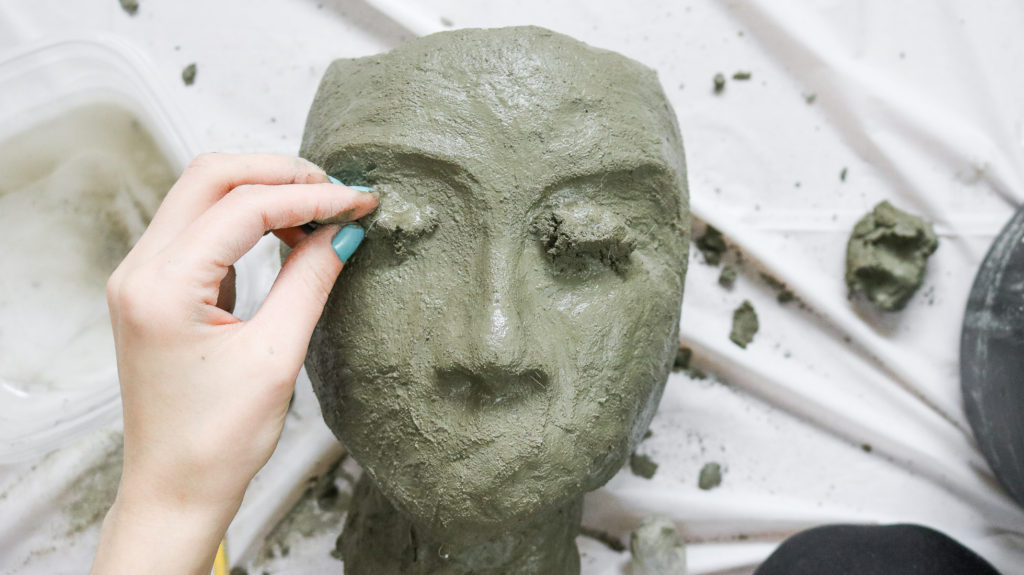
Since I was making her eyes closed I used the sharp end of my pencil to create her lid lines. I also think close eyes are easier to make if your making a head planter like this.
Next to make her lips I added concrete under her nose and smoothed out the edges a bit.
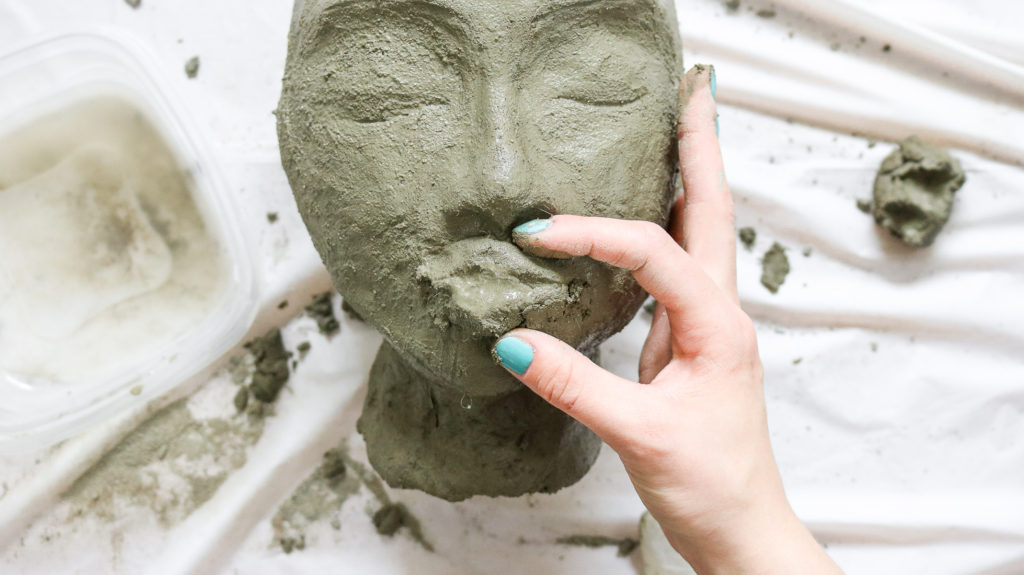
I used the pencil again to create her lip line and added a bit of concrete to the edges of her lips. LOL! She looked a bit funny at this point! But I didn’t loose hope! I noticed her chin was very small so I added A LOT of concrete to pull her chin out more and added way more concrete to create bigger cheeks. To finish sculpting her face I got into a comfortable position and kept adding, removing, and molding until I was happy with her face. This took about an additional 35 minutes off camera. Sorry I couldn’t get this on camera. I record everything on the floor and it’s so hard to sculpt while it’s that low to the ground.
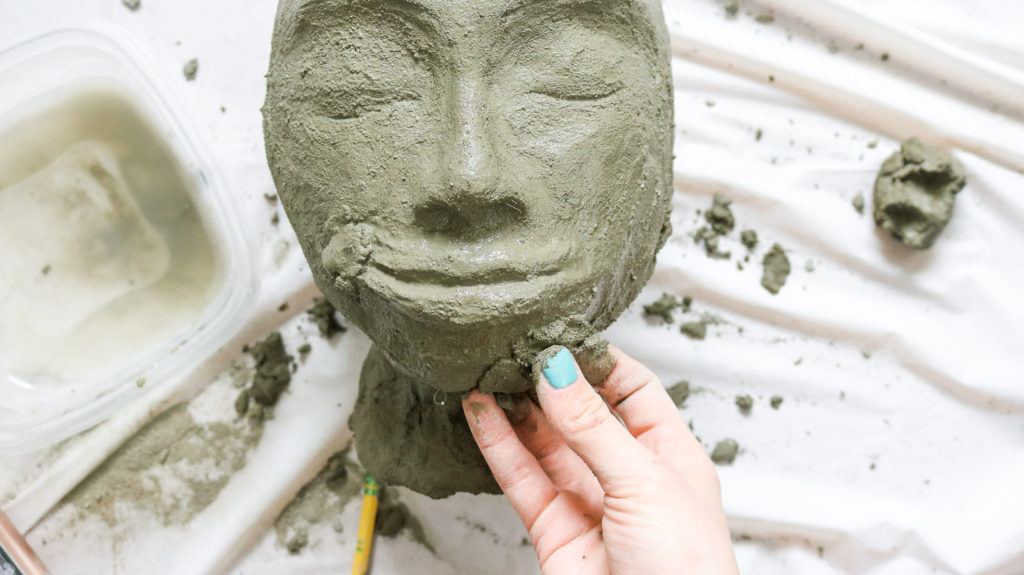
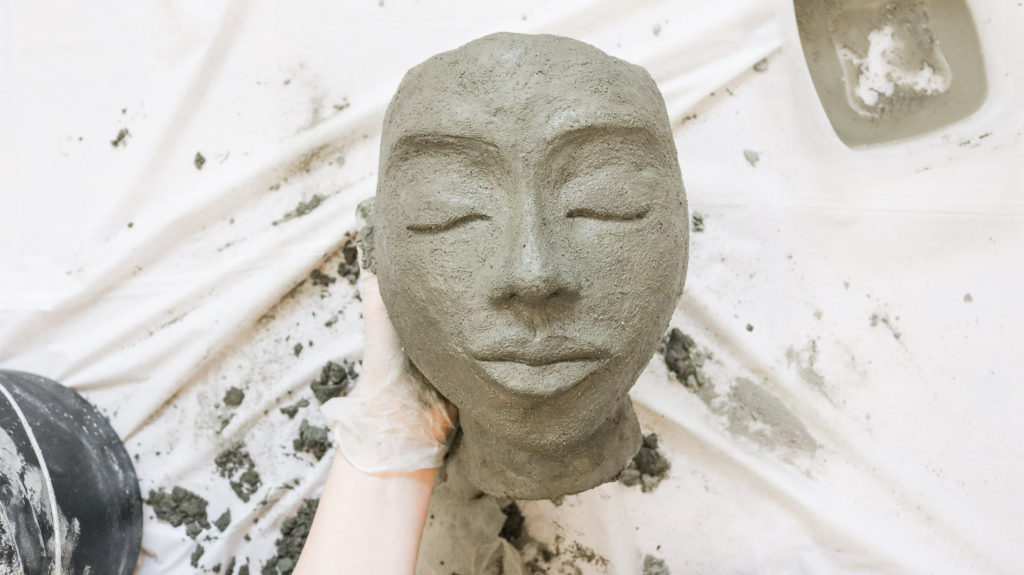
Here’s what she looked like once I was done.
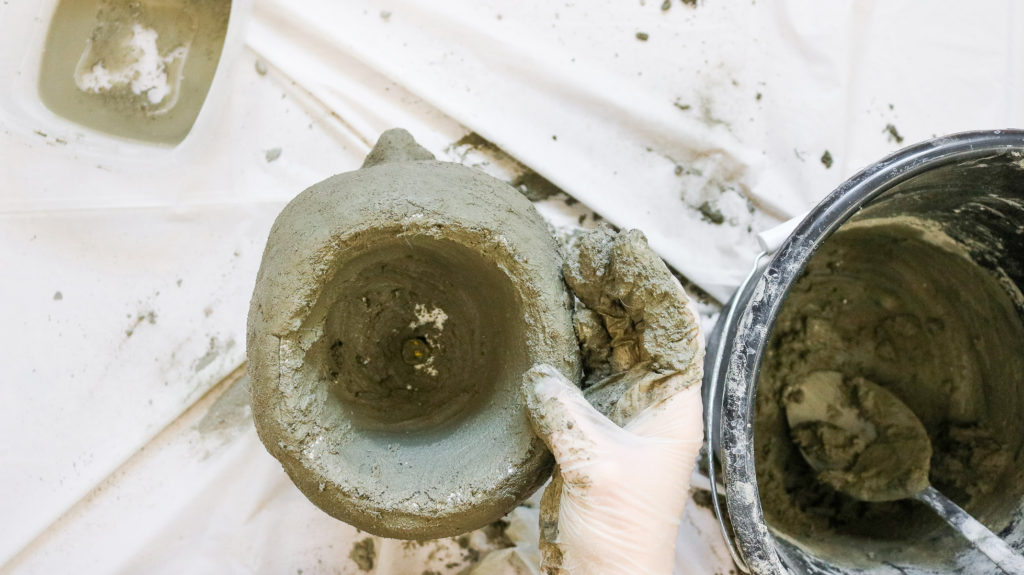
Then to finish it, coat the inside of the planter with concrete.
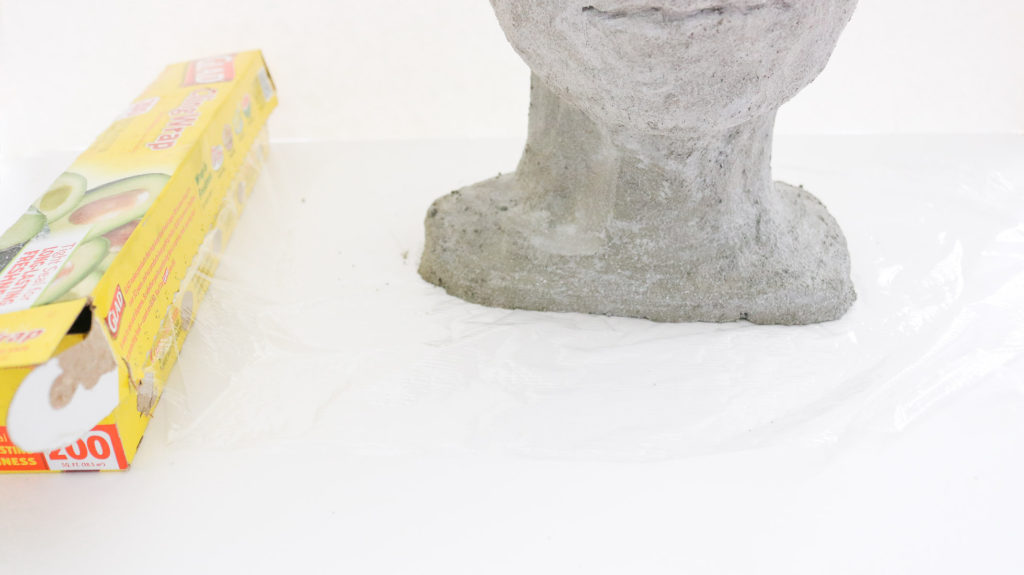
If you want to add a base like I did. Line a flat surface with saran wrap and and build your base on it. Once the concrete sets, it should come right off and not get stuck.
Optional : Paint Staining for Contrast!
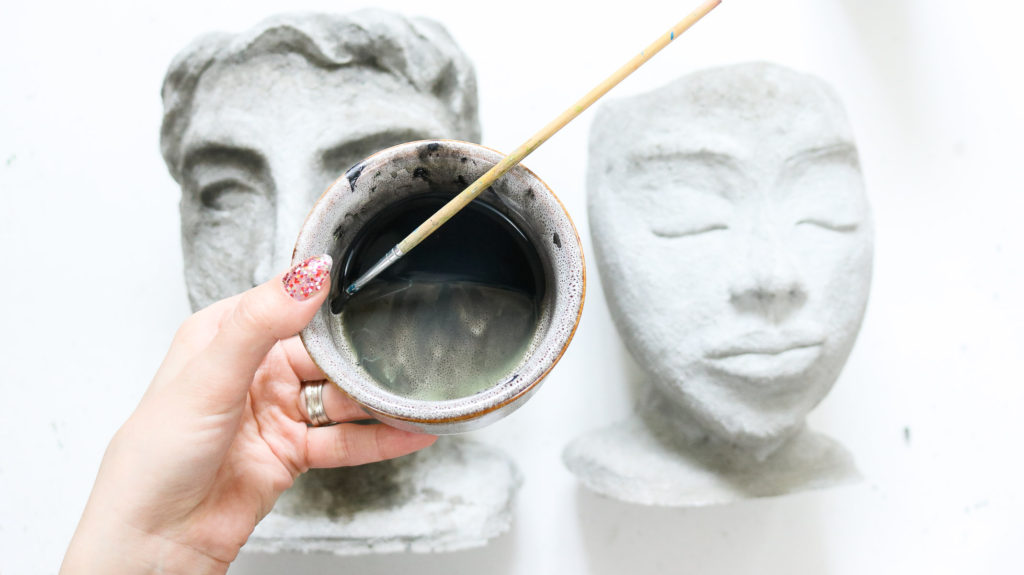
I decided to paint stain my head planters once they were set. To do this I simply watered down black acrylic paint with a lot of water and brushed it on outlining the facial features. Don’t forget to blend it out with clean water.
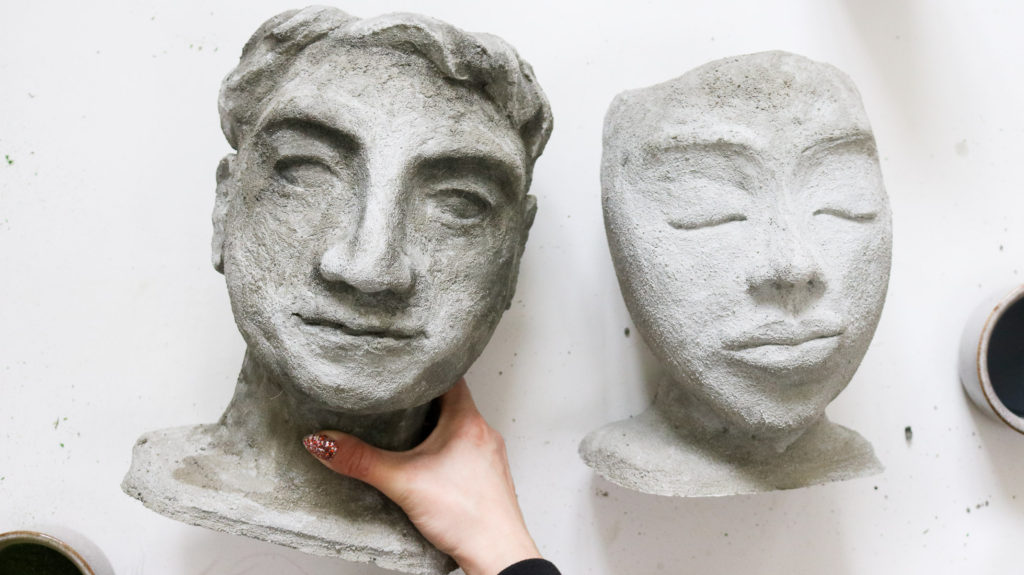
Here’s the paint stained planter vs one that’s not.
MORE CONCRETE DIYS YOU’LL LOVE:
- MODERN CONCRETE PLANT STAND
- HUGE CONCRETE GARDEN PUMPKINS
- SUCCULENT CONCRETE PUMPKINS
- HUGE CONCRETE EGG CANDLES!
- SMALL CONCRETE PUMPKIN CANDLES
Optional: Overgrown moss look!
Okay so to add more character I decided to give my head planter a mossy look. This method is not waterproof. This is only an effect. If you want real moss I’ve heard people blend moss with buttermilk and apply it. It should grow real moss.
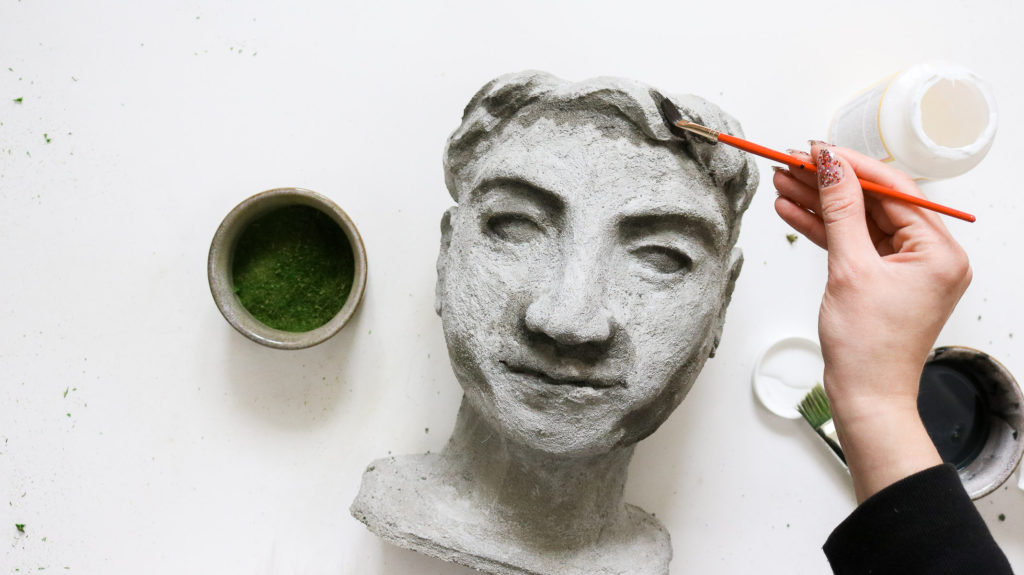
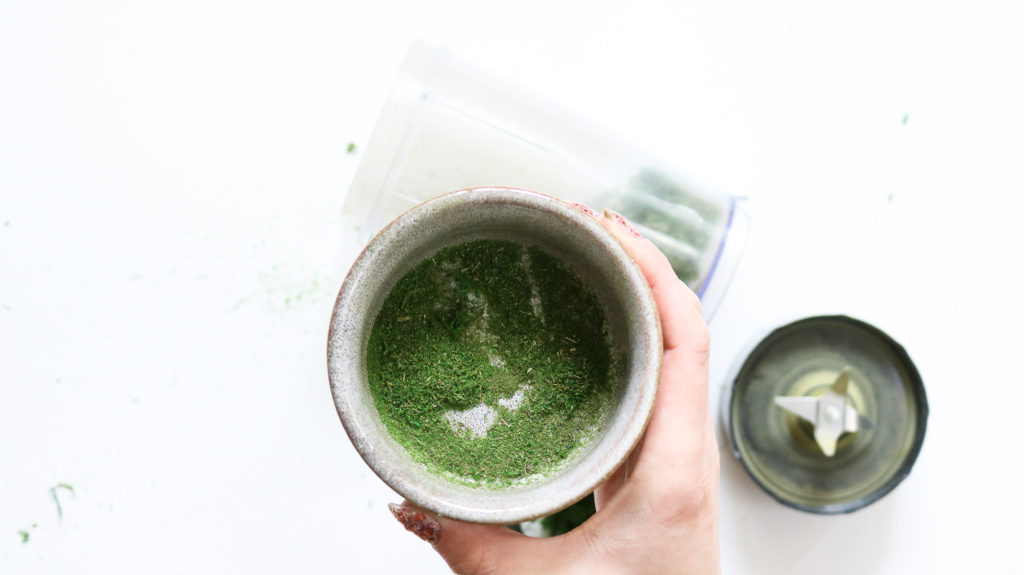
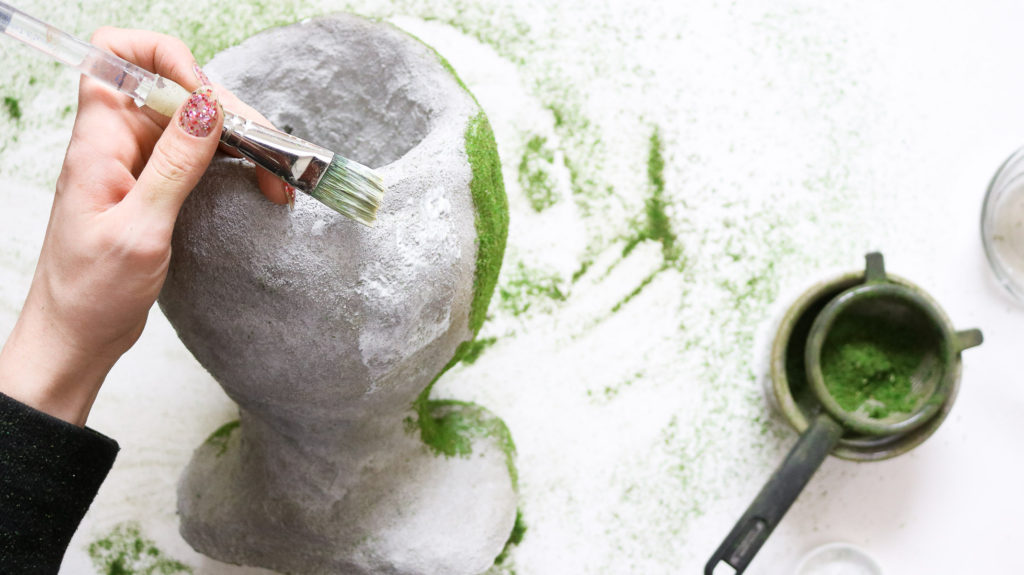
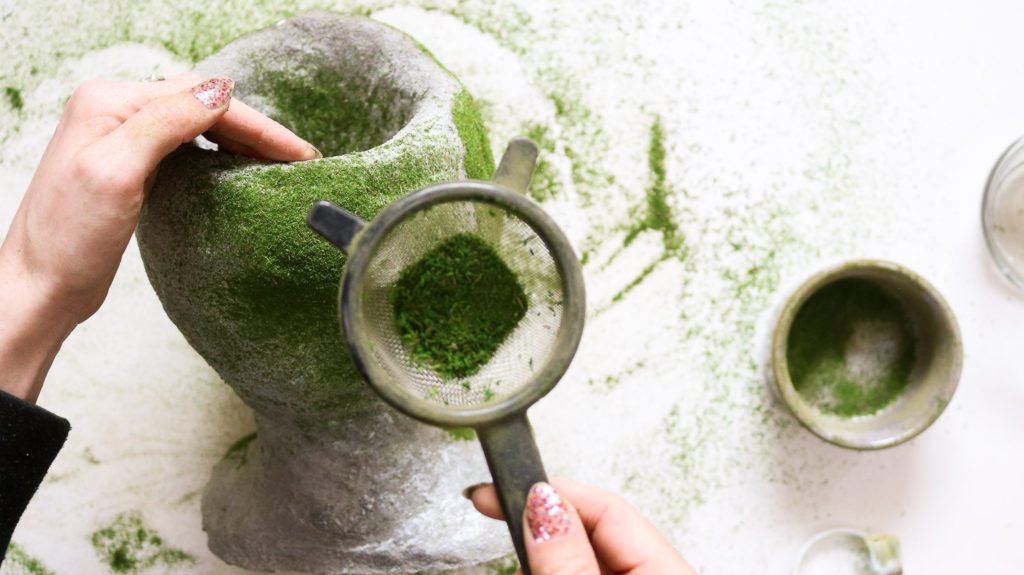
To apply my moss effect I blended some $1 store moss in an old blender. Than I sifted it through a fine sifter and was left with a fine moss powder. Following that I applied matte mod podge onto the planter and used my sifter to sprinkle moss onto where I applied the glue. The moss should stick right to it. That’s it! Super EASY! DONE!

Here’s how they look outside. My awesome neighbor let me use her beautiful yard for the photo shoot! She’s so sweet! Isn’t her yard amazing!
 I love her face!! She turned out so pretty!

And that hair!!! I want my hair braided like this!


I can officially say I made a MAN!! HAHA Didn’t think I’d ever be saying that!


I will say.. I do like his lips and dimples! LOL These head planters sure make some cute garden decor!

Here’s a quick video version of the DIY.
That’s it!! I hope this inspired you to make your own concrete head planters!
Happy Spring! I’ll see you all in the next post!
xo,
Lily-
You should have continued with sculpting in school because you did a amazing job with these!
This is the neatest thing I have seen in a lonnnggg time and
I’ve got to do this!!!!
Thank yo so much for sharing!!!
AWWWE thank you so much Debbie! You’re too sweet! LOL! Maybe I should have. I really wanted to try pottery class at one point but it was kind of pricey (out of highschool) and I was in the process of getting married. Gosh that was years ago. I was always so amazed at what happens to the colors once they go in the keln. It’s crazy how some come out completely different. Maybe some day I’ll still be able to try it. Happy Crafting 😀 😀 😀
It’s never too late! Follow your dreams!💜
Love it, can’t wait to them this!
Great work and very inspiring.
You mentioned use of a kiln…? Could you elaborate on that a bit…? Curious to know what might be required.
Also keen to understand how strong they feel after some time… eg, are they sturdy, or do they feel crumbly…? Does the nose or other protruding features feel like they might come off…?
Thank you so much for the step by step. You anticipated all my questions! These look so high end! You gave us confidence!
Thank you Debra! You are too sweet!
i just find a maniqui head and cut the part of the head and now is ready to put a plan one i take the hair out and plant to put a plant like hair look so nice you aidea is very cool too thanks to share
awesome! 🙂 so happy you liked it! Love that idea.
I loved the planters made of shapecrete.I have never seen it! Will try to find it.you did a great job!!!
Thank you Lilian 🙂
I’m really impressed with your instructions. I can’t wait to try to make some heads for my garden.Thank you for explaining how to make them.
These are amazing!! They look like they are from a garden shop!!! Love them!!
Thank you so much Lisa 🙂 I’m so happy to hear you loved them!
No one seems 2 b selling shapecrete..any idea about what 2 use instead? Love this idea..
Hi Brenda, OH NO!! They stopped making it. I found this article on qoura. Someone mentions a recipe. Maybe it’ll work. Here’s the link – https://www.quora.com/What-recipe-for-a-concrete-mix-like-Shapecrete
9 kmexcellent project, I loved it and would love to make these for my garden.
This is so amazing! Thanks for the instructions.
Thank you Cheryl! I’m so glad you like them 😀
Hi. Your concrete heads are awesome.
I want to make concrete cowboy boot planters.
Do you think the same process would work for the boots?
Would plain old quikrete serve the function as what you used? I dont think the quikrete is as costly as the stuff you used.
Any input would be appreciated.
Thank you.
Heather
Hi Heather, I’m so happy to hear you liked these! OOH that sounds so cool! Yes I think the same process would work great for boots. I’m not sure how quikrete works although I’ve worked with regular concrete and quick setting cement before and there’s definitely a difference between those and shapecrete. Shapecrete is a lot easier to work with as far as creating shapes or adding finer details. I hope this helps! Let me know how your project goes 🙂
Portland cement and concrete additive. Paint it on and it will stick to your boots. Add a little sand to your next layer and build it up to the thickness you want. Make sure you use gloves!
Fabulous! Cannot wait to try. Instructions were great, and your project examples looked wonderful! Good job!
Thank you Patricia 🙂 I’m glad the instructions were clear and happy to hear you liked them 🙂
String of pearl succulent and donkey tail succulent
What else could we use? An easy yet interesting item. I go more for the desert/ Ferry theme
Thank you for this tutorial, I’m always looking for ideas for my garden. Good job!
Your very welcome Gail and thank you 😀 I’m so happy you liked this idea.
These are amazing! I have always wanted one of those garden heads. Maybe I’ll try this,too. I’m like you, it’ll sit there for a while… to scared to start.
Thank you Pamela 😀 LOL! Right some project seem overwhelming until you start. You should totally make some! 😀 😀
Great tutorial! Since I made a cement leaf using a huge rhubarb leaf for the pattern, I have to try this. What a creative idea.
Thank you 🙂 WOw that sounds pretty. You should try it! You’ll love shapecrete.
Thanks for this tutorial. All my life I have wanted garden heads. Besides being so expensive they are hard to find. I hope to try this, this summer. To the woman who is afraid to try. Please don’t be. Even if they don’t come out perfect, funky heads would look wonderful. And you can say “I did it myself!”
Your very welcome Kim! Yes that’s so true all the cool stuff is usually so over priced. Let me know how it goes! Happy Crafting. 😀
lily, great job. I love the look. the seem so real not Barbie doll like, but with honest features. I am so excited to try this product now. I never dreamed it would be so easy.!! thanks so much for the great tutorial.
once again “out of the park”
Hi Angela, I’m so happy to hear you love how they look! Right! I can’t believe they’re that easy to make too. AWWWE thanks Angela your ssso sweet!
Thank you so much for sharing It is such a help when visualizing your artistic skills on video and giving me some hope/idea at attempting likewise. I have ALWAYS wanted to give my garden some sort of character
You’re very welcome Gloria. I’m glad this was helpful. 🙂
Goosey – Anything can be said in either a nice, helpful way or in a nasty way. Too bad you chose the latter. You don’t deserve the decent response you received from Lily.
I can see doing this for Halloween and making a medusa. So awesome, thank you for sharing.
OOOH yes. That would be so cool! 😀 Glad you liked it Gloria you’re very welcome.
I have used Shapecrete to make boots. You have so over simplified the actual usage of the product. There is so much more skill needed to produce a satisfactory product. Particularly for someone initially attempting a first time project. I feel you have provided a false sense of success on your blog. This product is designed for self experimentation not to promote personal satisfaction for a blog Sorry, you have only helped yourself.
Hi Goosey, I’m not sure what your experience was with shapecrete. I actually enjoyed working with shapecrete A LOT! It’s not hard to work with and like mentioned it melts like butter with a drop of water. I would not have been able to make these planters from regular concrete as I’ve never found concrete that is so easy to work with as far as creating shapes. They did take a few hours to make so it required lots of patience. I do think the Styrofoam as the base helped a lot as I feel this concrete is too soft to hold shape on it’s own. If I ever plan to make anything else I will make sure I have a solid base again. Did you apply this over the boots or try making the boot’s just with the shapecrete. It’s unfortunate this wasn’t helpful for you.
You are too kind my dear; what’s “unfortunate” is Goosey’s rudeness! What an unhappy soul Goosey must be. Your blog is fantastic and you’re so very kind to share your hints and tips! I’m super appreciative of your posts and surmise there are many more such as myself. Thank you!!
AWE Thank you so much Laura for all your kind words! 😀
Wow, you ARE an artist. Your creations look exactly like old sculpture pieces you would find in botanical gardens and museums. So beautiful🌿
AWE thank you so much Judy 😀 😀 I’m so happy to hear you love them!
Hi. I love this so much! I found you on P. I
pinned it, followed you, shared this on F & visited here to coment. Thank you so much for sharing how to do this. I have plenty of Garden Projects to keep me busy now, lol.
YAY! I”m so happy to hear you loved this idea! Happy Crafting and thank you so much for sharing! 🙂
I love these Lily! I want to try it! I shared it on my Facebook page https://www.facebook.com/enaidsilverwolf/
Thank you 😀
I got inspired when I saw your project. Finally sort of finished but it is real lumpy. The shapecrete didn’t mix up easily using the companies’ formula. I’m going to try a thin paste to paint onto the finished head to smooth it out. Have you tried that?
Hi Barbara, wow that’s not good. I didn’t seem to have this problem. Did you try dipping your fingers in water and going over it to smooth it out ( while it was still not set) . A thin paste sounds like a great fix. I haven’t tried it but i think that should do the job 😀
Thank you Lily!! I am so pumped!! I watched your video and loved it!! Thanks for your inspiration…I just ordered my Shape Crete on line a few minutes ago as it is not available in our local hardware…looking forward to making it as soon as I get it..thank you
YAY!! Awesome I’m so glad your going to make it!! Oh wow that sucks. Sorry to hear they stopped carrying it. I’m glad you could find it online. Let me know how it goes! Happy DIYing!
Can’t wait to try this! Thanks for providing good instruction, tips, photos. I’ll watch your video too. I love the woman one you did…turned out fantastic!
Thank you Kris!! I’m glad you loved it! Happy Crafting! 😀
I love working with styrofoam heads – I used “concrete” looking spray paint and just spray painted my styrofoam head to give it the effect of concrete — it looked pretty cool, but I think adding Shape-Krete would have added more dimension to it. You did a beautiful job with yours!
Love that idea 🙂 Thank you Virginia 😀 Glad to hear you liked it!
Hi Lily
I can’t seem to find the shapecrete product. I looked on line and they all say discontinued? Do you know how to get it or if there is a similar product on the market.
Kristol from Colorado
OH NO!! Wow that really sucks. I can’t find it anywhere too. So the one thing I noticed is the concrete mix had what seems like tiny fiberglass fibers. This seems to be the thing that kept it moldable and help the concrete sorta in place. My best bet would be to buy some fiberglass fibers ( I think they even make some specifically for concrete) amazon sells some and find a concrete mix that has a fine texture with at least 40 minute working time? Make your own mixture?? I dunno just an idea. I would use caution though because I’ve never worked with fiberglass so I can’t say how safe it is. Maybe with a little bit of research you can find a DIY on this ?
Do not work with fiberglass fibers. They will tear up the lungs if inhaled. If not sure, do Google fiberglass and safety. Do not ever use fiberglass for anything!!!
Hi Ciara, I think I found something. After doing a little bit of research I think I found a recipe on qoura and you’re right it’s not Fiberglass fibers I think it’s called PVA fiber ( not sure if it’s different from fiber glass) they are made for concrete. Here’s what I found — https://www.quora.com/What-recipe-for-a-concrete-mix-like-Shapecrete
Hi Kristol, not sure if you ever found a substitute for shaprcrete. I was doing some research online and I think I found a DIY recipe on quora – https://www.quora.com/What-recipe-for-a-concrete-mix-like-Shapecrete ( PS. also found out it’s not fiberglass fibers they use it’s called PVA fibers. Not sure if that’s the same thing or not )
Hi, Lily, what is the name of the plant used on the female head? I love how you did these!
I believe it’s called string of pearls! Thank you Kat 🙂
So glad you loved them 😀
I cannot wait for our next family holiday!! We always do a craft for fun. This is the next craft. It’s going to be to much fun. Thank You
What a fun tradition 🙂 Happy Crafting 😀
Great job on the heads. Maybe I misunderstood the product. I thought it was a pre-mixed product, ready to go out of the bucket ? I am reading this, and see you talking about “mixing it up”? Can you clarify please. I am very excited to try this….more so than any project Ive seen in a long long time. Way to go 🙂
YAY I’m so glad to hear you’re excited and happy to hear you liked them. Yes, It is a powder. You will need to mix it with water. 🙂
I’m bummed. Home Depot doesn’t carry the product anymore, I can’t find it on Amazon, and I don’t live near a Sutherland’s store. Has anyone found it anywhere else?
I ordered this online at Home Depot. It took about a week to get and picked it up at the lockers when my order was ready. In Detroit Mi area.
So i created one yesterday!!
It was so much fun, very therapeutic and it did take probably a few hours! Plus i mixed up 3 different batches since i wasnt sure how much i would need.
AWESOME!! I’m so glad you found some. YAY I feel that same way about this project it sure is therapeutic! Thanks for sharing this Tammy 🙂
Unfortunately they don’t carry it anymore. I’ve heard folks use quikrete and say it does great
I have been shopping around for shapecrete and cannot find a supplier….could you tell me where to purchase some….thank you.
Hi Barbara, I believe it’s been discontinued. sorry!
I made 2 yesterday.. so much fun… they are far from perfect but I love them..
YAY! That’s so awesome! They sound lovely! 🙂 So happy to hear you enjoyed it.
I saw styrofoam heads at the dollar store today. 😊
OH wow I had no idea they sold them there. That’s awesome!
Love your post would love to do one if I can find some shape crete
Thank you Randy 🙂 ! OH MAN!! Sucks they discontinued it. I’ll have to try and DIY shapecrete one of these days. 😀 😀
These are awesome gonna have to try making them. Surpurp job!
Thank you 🙂 Happy Crafting
Love it! So clever!
Thank you Charlotte 🙂
Love these! Your attention to detail in the project and how to instruction is great. You should be doing more and teaching.
Thank you so much Mary
I wonder if you could use a masquerade mask and put the concrete mixture inside the mask instead of having to shape the face. Then somehow attach it, plaster it to the styrofoam head after it’s dry. This might make a better face, if one isn’t very skillful in shaping the face like your method.???
I don’t see why not. sounds like a great idea.
I just ordered something called SCULPTCRETE on amazon that sounds like it would be very similar to shapecrete. The cost was about $25.00. I can’t wait to try these garden heads!
Thanks so much for sharing.
That sounds exciting! I’m glad you were able to find something that’ll work.