Organizing Challenges
Okay Okay I know I’ve only been talking about this organizing challenge for a whole month already and I’m so terribly sorry to put it away for so long! 😀 The house finally seems in order and since the kitchen was my first room I organized I’ll be starting with that. I know there’s better ways to organize your kitchen and there are still some areas that I would love to work on more. To be honest with you I totally suck at organizing! LIKE REALLY REALLY SUCK!! This wasn’t the easiest challenge for me mainly because this kind of stuff doesn’t come natural to me. I spend a lot of time prepping and taking notes before even beginning this challenge. I guess you can say I was scared to even start. LOL😂! Honestly I’m scared to even share this because I know everyone has different standards of clean and I hope you find some of these ideas helpful.
By the way I was totally inspired by Marie Kondo. Anyone else watch “tidying up” yet? She’s the sweetest lady ever and teaches how to de-clutter.
Two Things to keep in mind
I will warn you! Your house will feel upside down and messy at first but, I can’t say enough about the end result. It’s such a relief to have a little home for every little thing in your kitchen. There’s two motto’s I really stuck to throughout this challenge.
#1 If it doesn’t fit donate it.
#2 Create a little home for everything so you know exactly where it lives when you need to put it back.
I made a little video (scroll down for video) for you as well as took photos. I didn’t take a lot of before photos mostly because I get scared looking at them myself😂 and the before photos that I did take took a lot of convincing to share. I was going back a fourth on the idea of sharing them for a while and finally decided it’s in the past. My kitchen is not that messy anymore and at least I’m not just sharing the ugly, I’m sharing an organized photo after. I know it’s pretty bad and honestly even question how it got that bad. If it bugs you please ignore the ugly mess. You’ve been warned! RAW CONTENT! 😬 (no filter)
Free Organizing Checklist Guide
I took notes and made a kitchen organizing guide for you. When I wanted to organize my kitchen I was looking for a guide and couldn’t find one😐. Going through this article will definitely help with ideas however if you want a step by step guide to organize your kitchen with no extra ramblings😬! Download your guide for free by signing up to our newsletter down below! Not only will this guide help you prep it also has a category checklist. (how to organize your kitchen by categories)
If I wasn’t prepped I would properly be going crazy for sure. Shoot! LOL😂 it was crazy even with prep!
How to Organize your kitchen ( here’s how I did it)
Prep! Prep! Prep!
I’ll break this up into 5 categories!
- Small Narrow Bins
- Containers
- Dividers
- Shelves
- Labels
(Scroll down to see how I used all these 5 categories in my kitchen!)
Why you need all this?!
The bins will come in handy for all things tiny and small in your kitchen. Your containers will store dry foods as well as spices and other items in smaller categories. Your dividers will help from having high piles of stacked dishes and shelves help utilize space. Labels might seem like something you could get away with not having however, I highly recommend labeling as much as you can in your kitchen. It doesn’t just keep your mind at ease when putting stuff away (because let’s face it my memory isn’t the brightest) this also helps your kiddos and hubby learn where everything goes! WIN WIN! Teach them how to clean with ease! Your labels will do half the work for you😉!
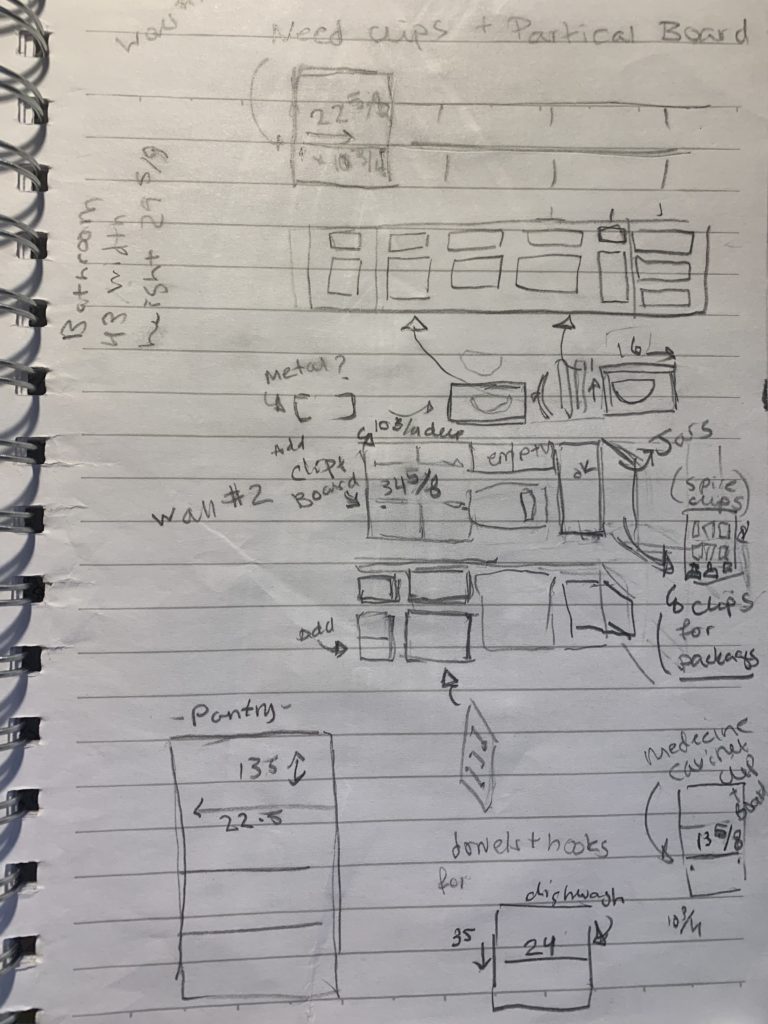
To help myself prep I actually sketched a quick little blue print of my kitchen cabinets and what I wanted inside (photo below). Yeah, I’m not the best at quick sketches. 🙈LOL!
Prep For Customized Shelving and Shelf inserts!
If you’re missing shelves or plan on making custom shelf inserts like we did in our super big cabinet (photo below) than don’t forget to take measurements of your cabinets. Length, depth and width! Although my blue print looks like a huge mess I couldn’t have pulled it all together in my head without it! Home depot sells particle board shelving that they can cut down to size for you in store. That’s what I did to all the cabinets that needed shelves. It was so much easier to transport smaller pieces since I have a smaller car and saves a ton of prep time for you.
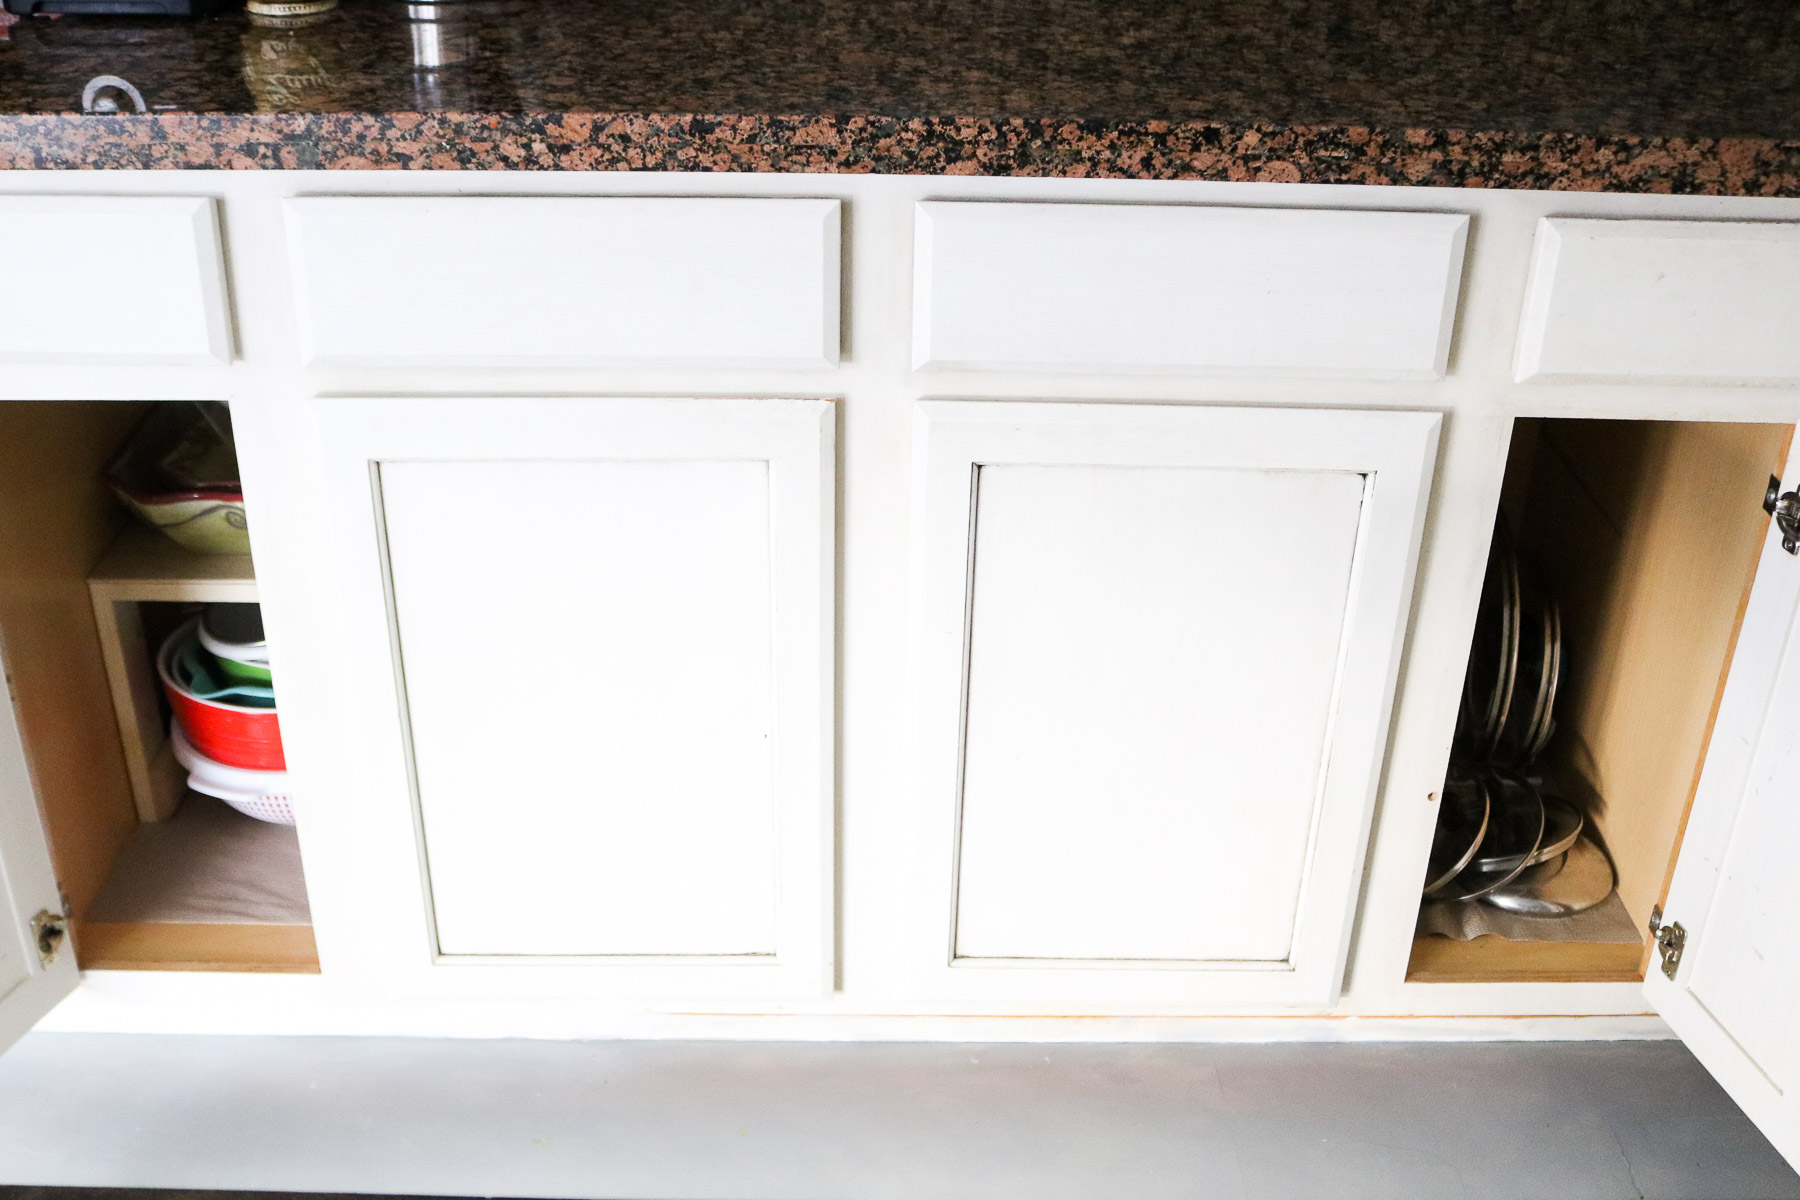
Here’s what I mean by big cabinet. Both doors that are open are where the cabinet starts and ends. This cabinet had no dividers and shelves at all making it almost impossible to keep clean. I would try and neatly pile my bowls in one section, my pans in the other and, cutting boards against the walls with no luck! This would be a huge mess most the time! For some reason it didn’t look clean even when it was clean! 😆HAHA does that even make sense?!
-
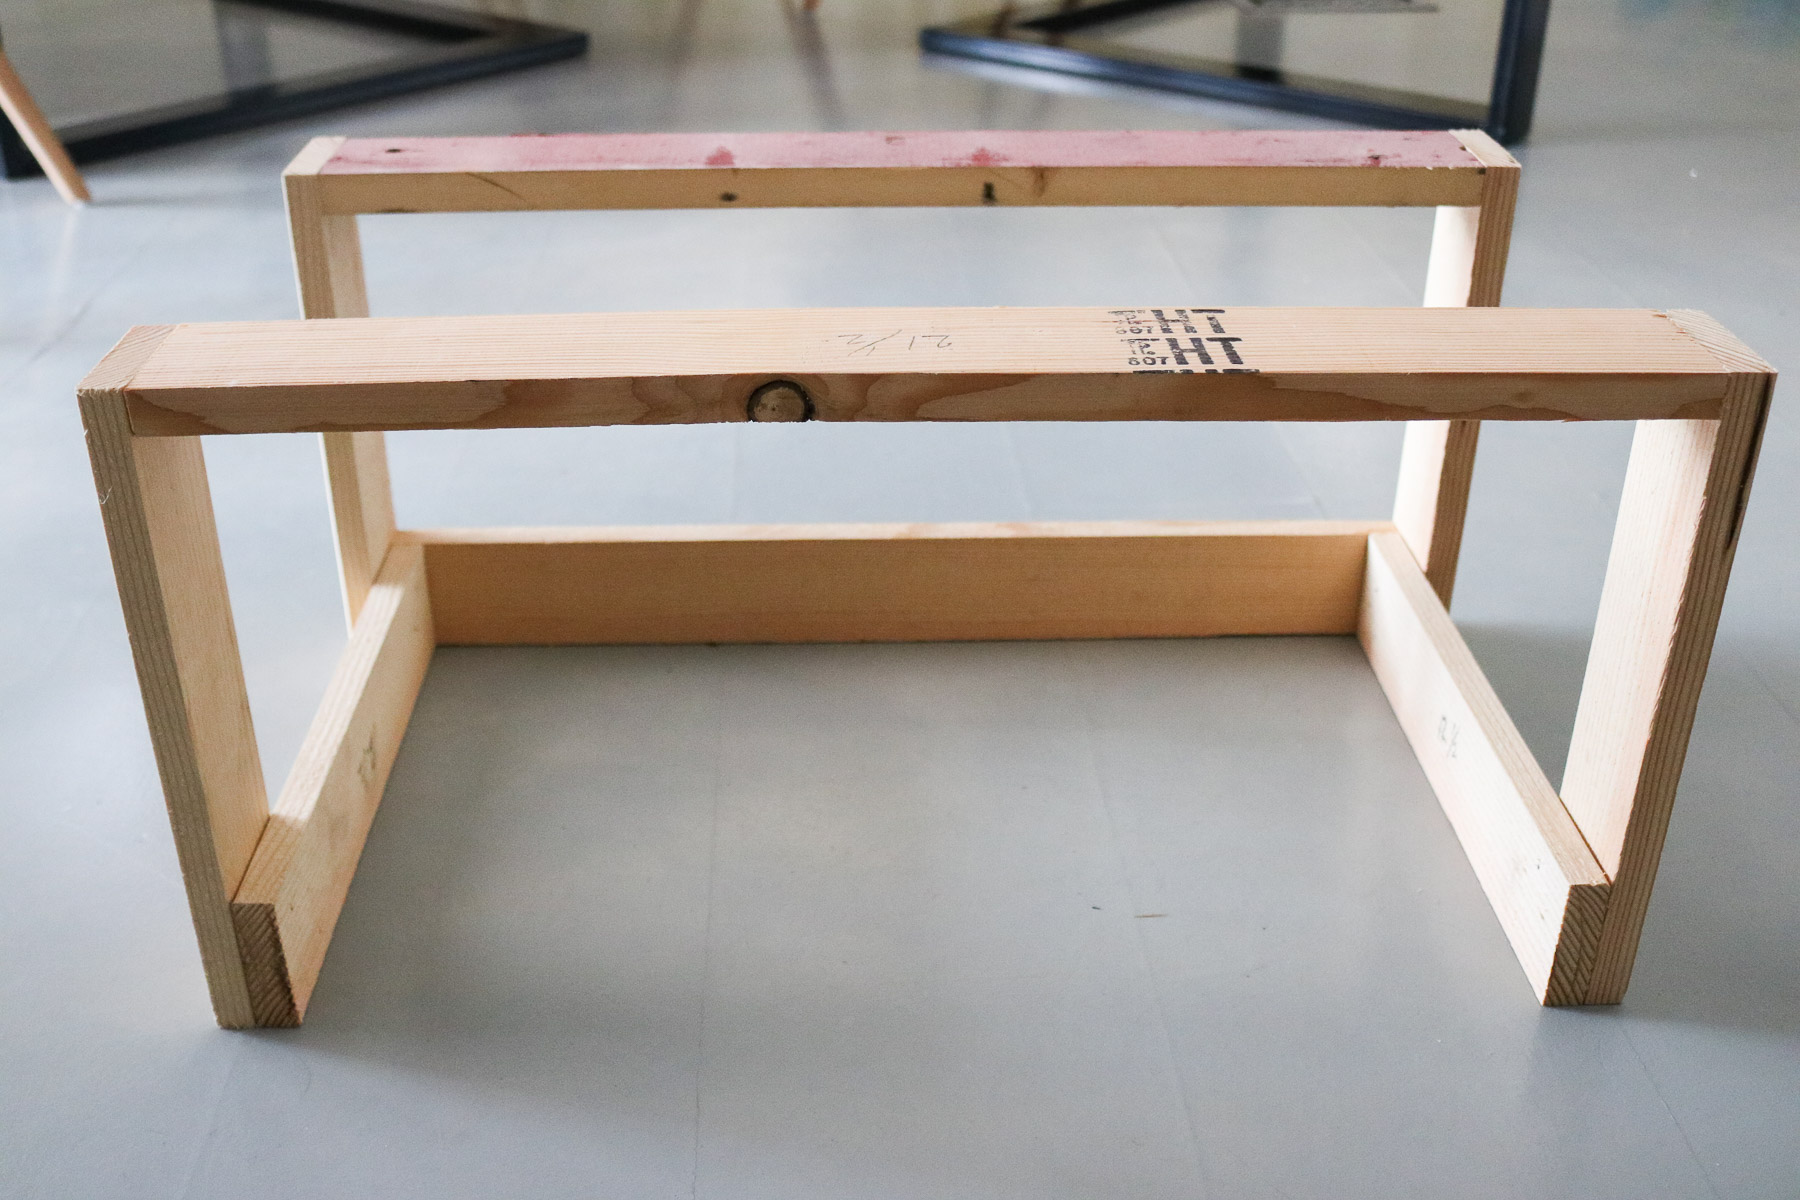
- So I decided I’d think of a way to make custom shelves to go inside. Here’s what the frame looked like.
-
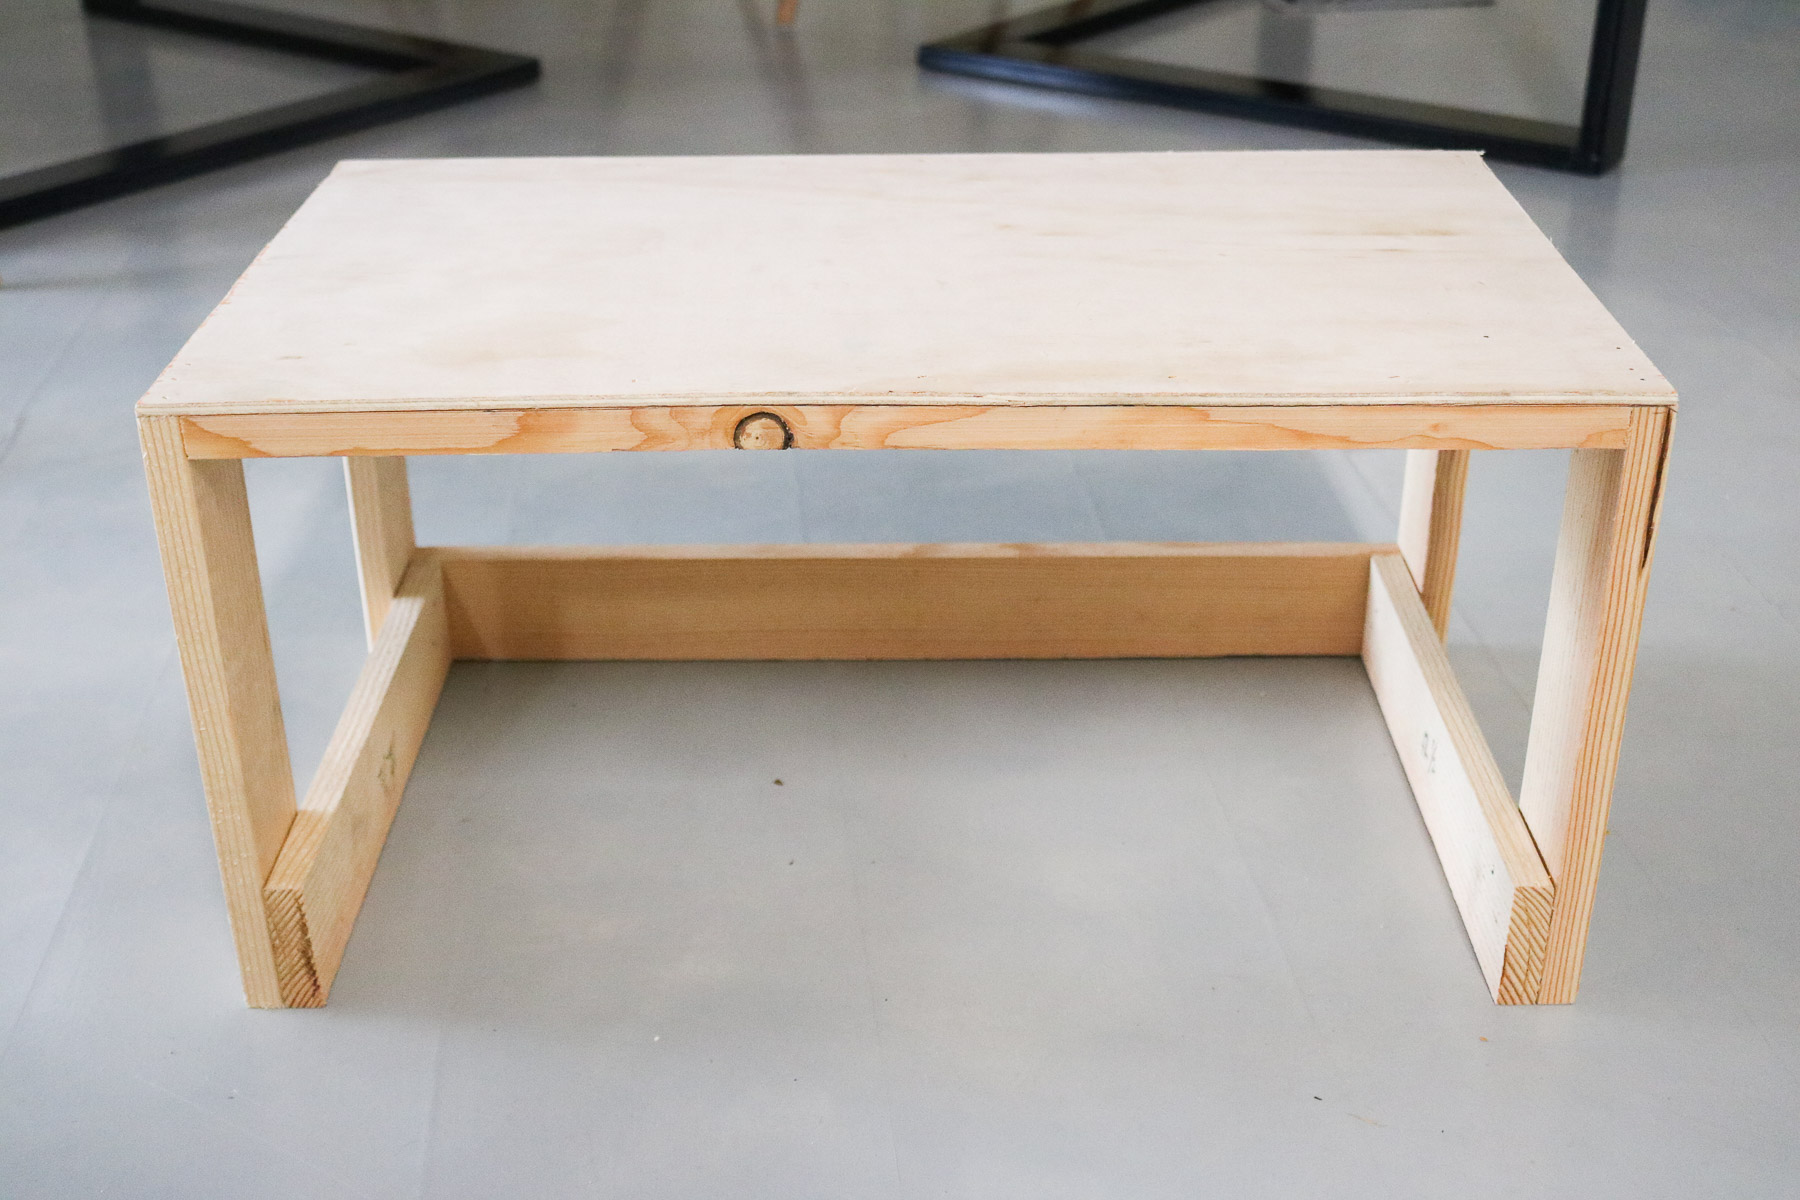
- Than we added some thin plywood on top.
-
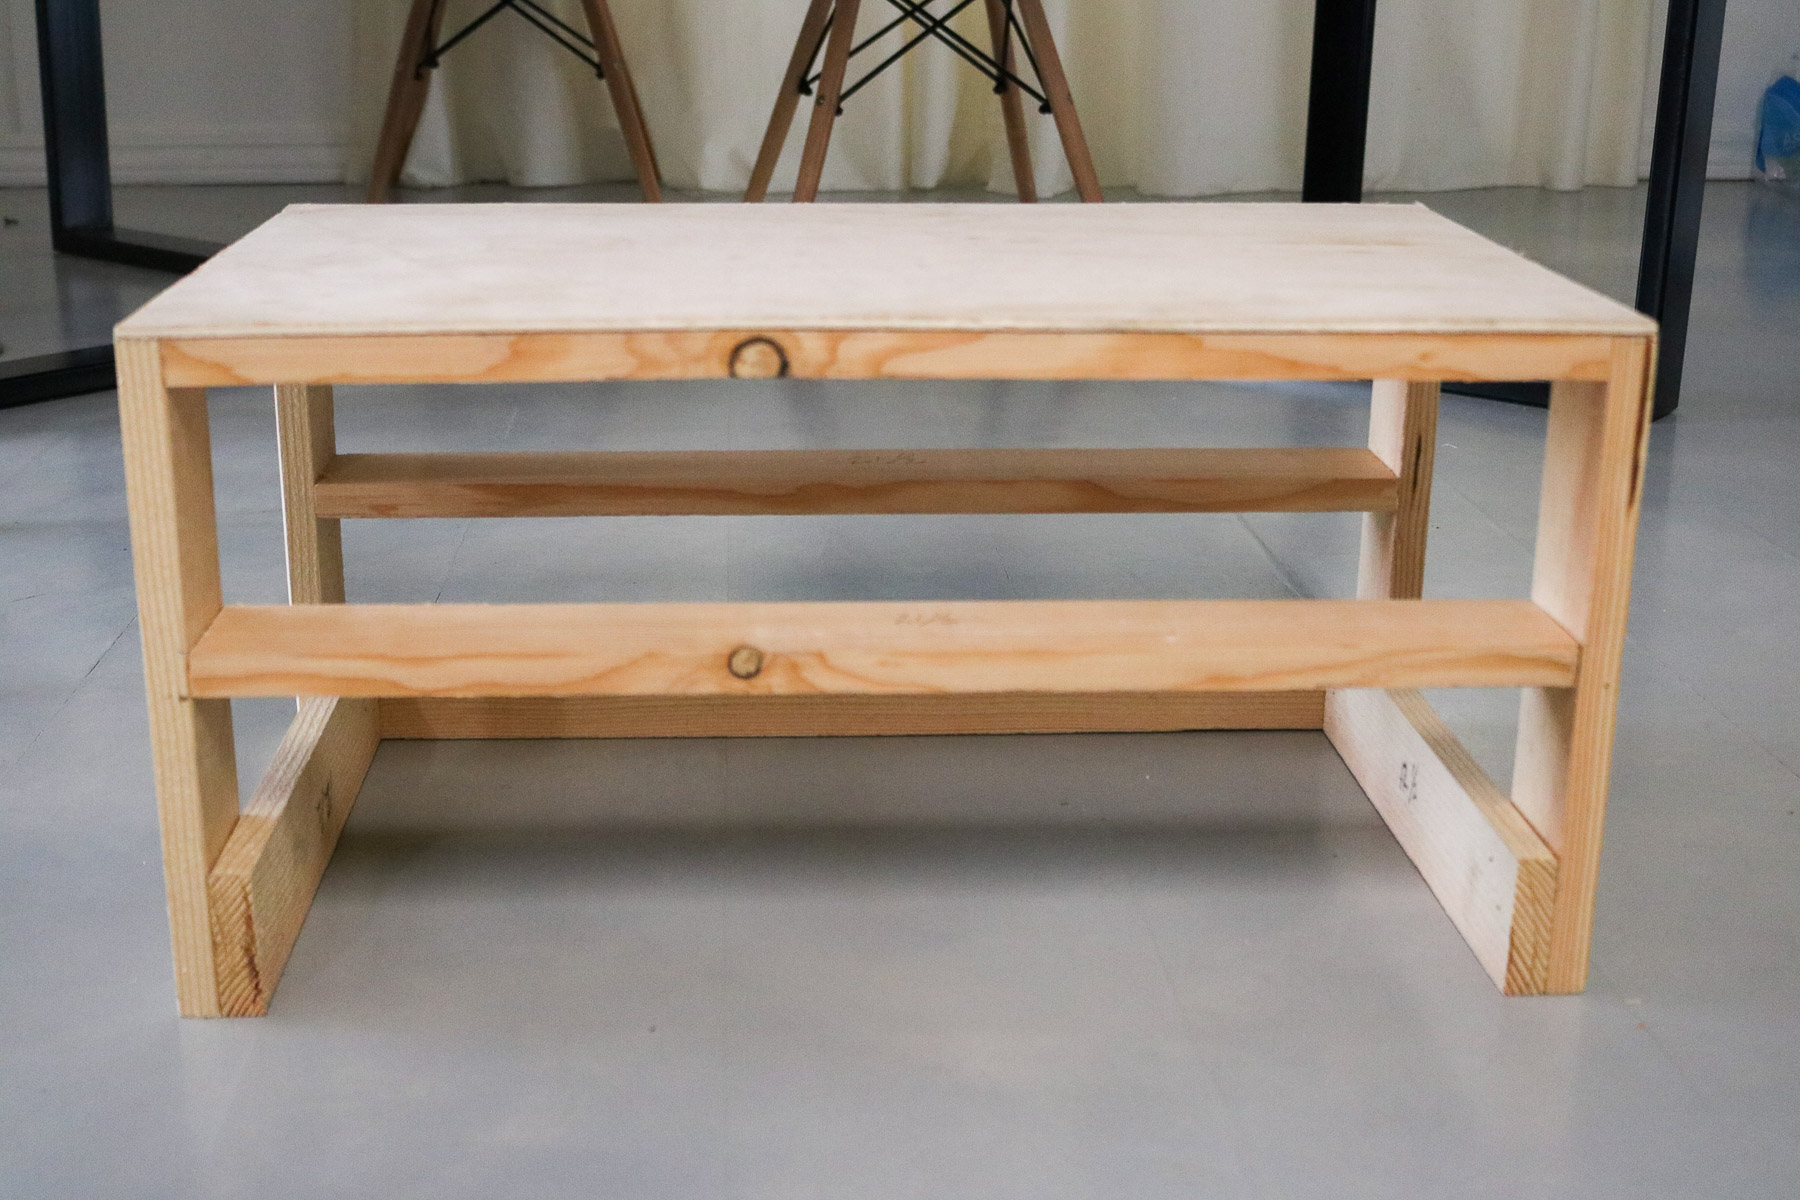
- Since this shelf was going to be used to store all my baking pans I needed more dividers so we added another shelf going across the bottom.
-
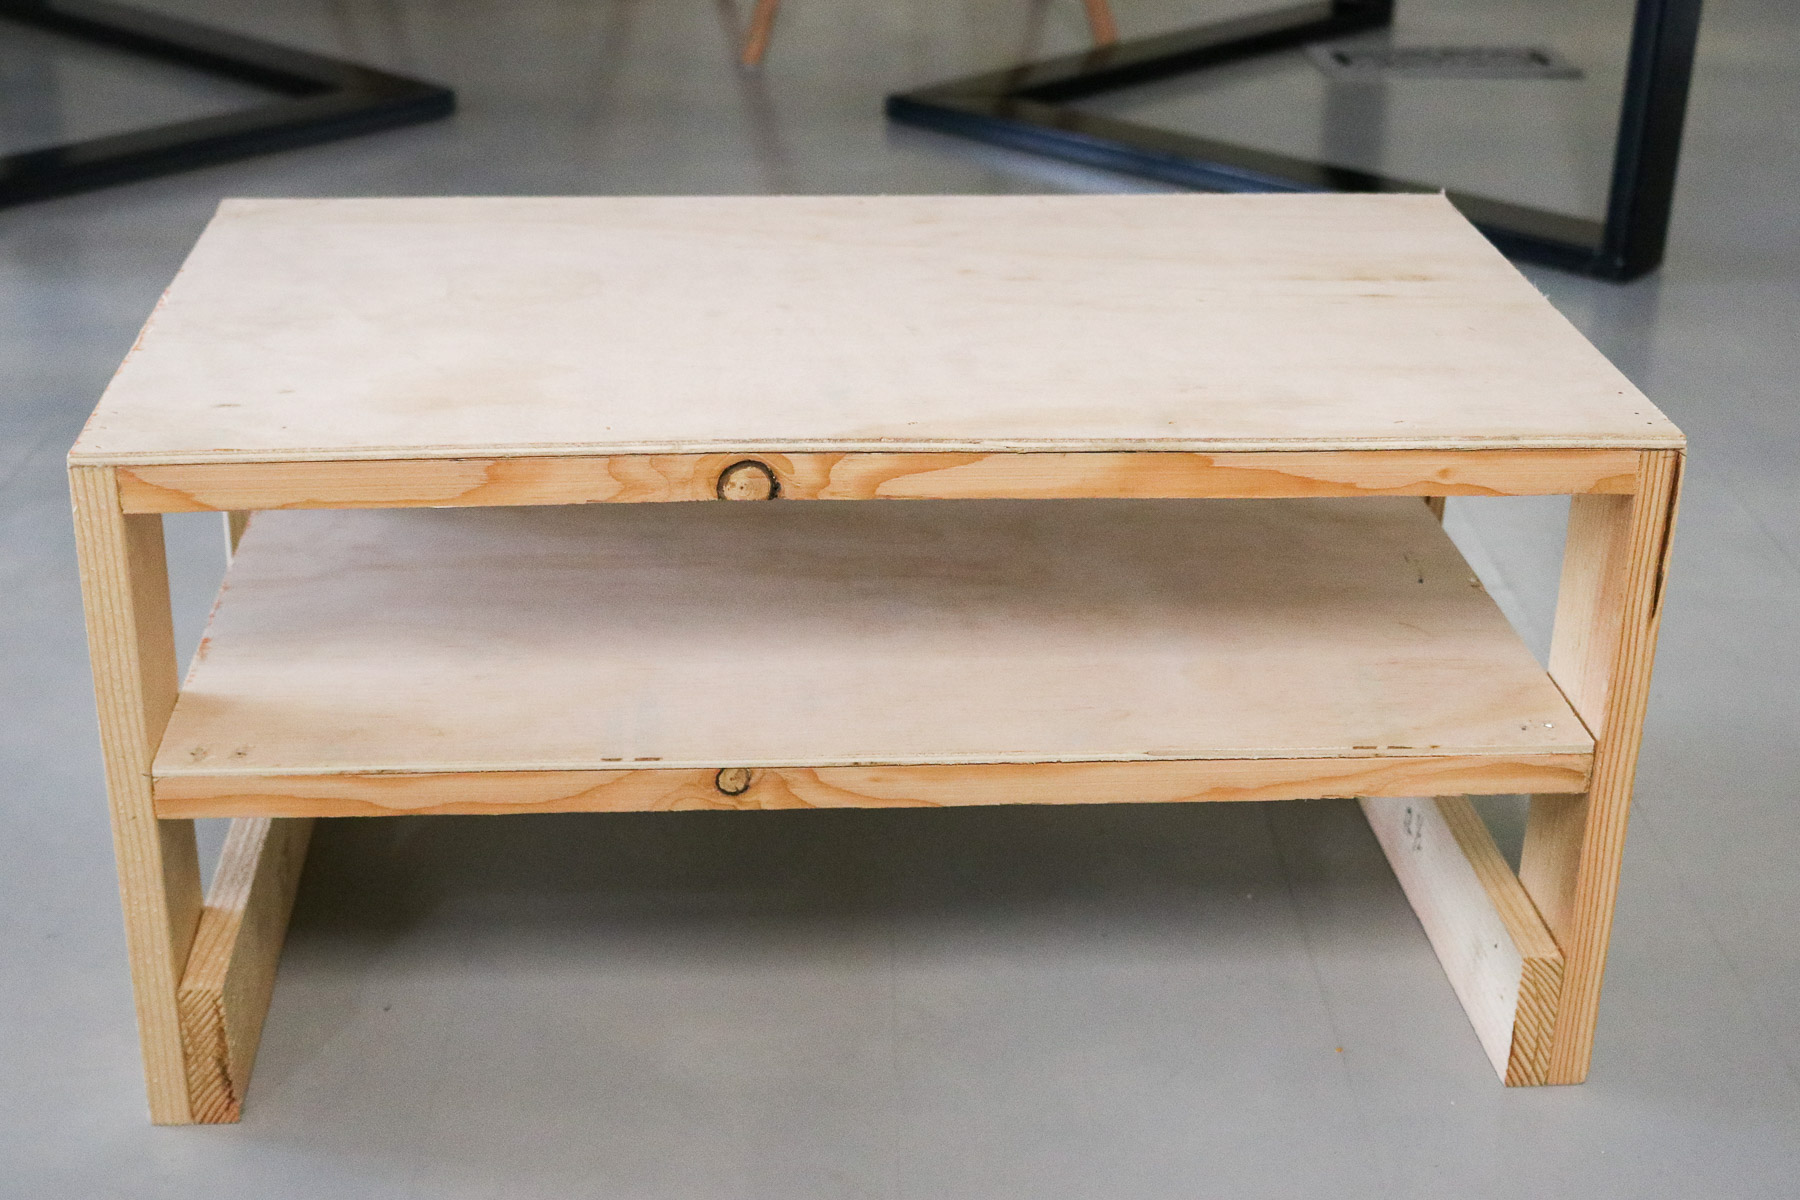
- And another piece of plywood.
We made two of these shelves. One on one end and one on the other. I used the cheapest wood from home depot. I think it’s called common wood. These shelves only ended up costing my about $8 since I already had the plywood pieces at home. (they sell this plywood for $15 a sheet) My awesome hubby helped and honestly couldn’t have done this without him! It took us about 2-3 hours to make both! The hard work definitely payed off! I can’t think of a better way to utilize space in a giant cabinet like this! 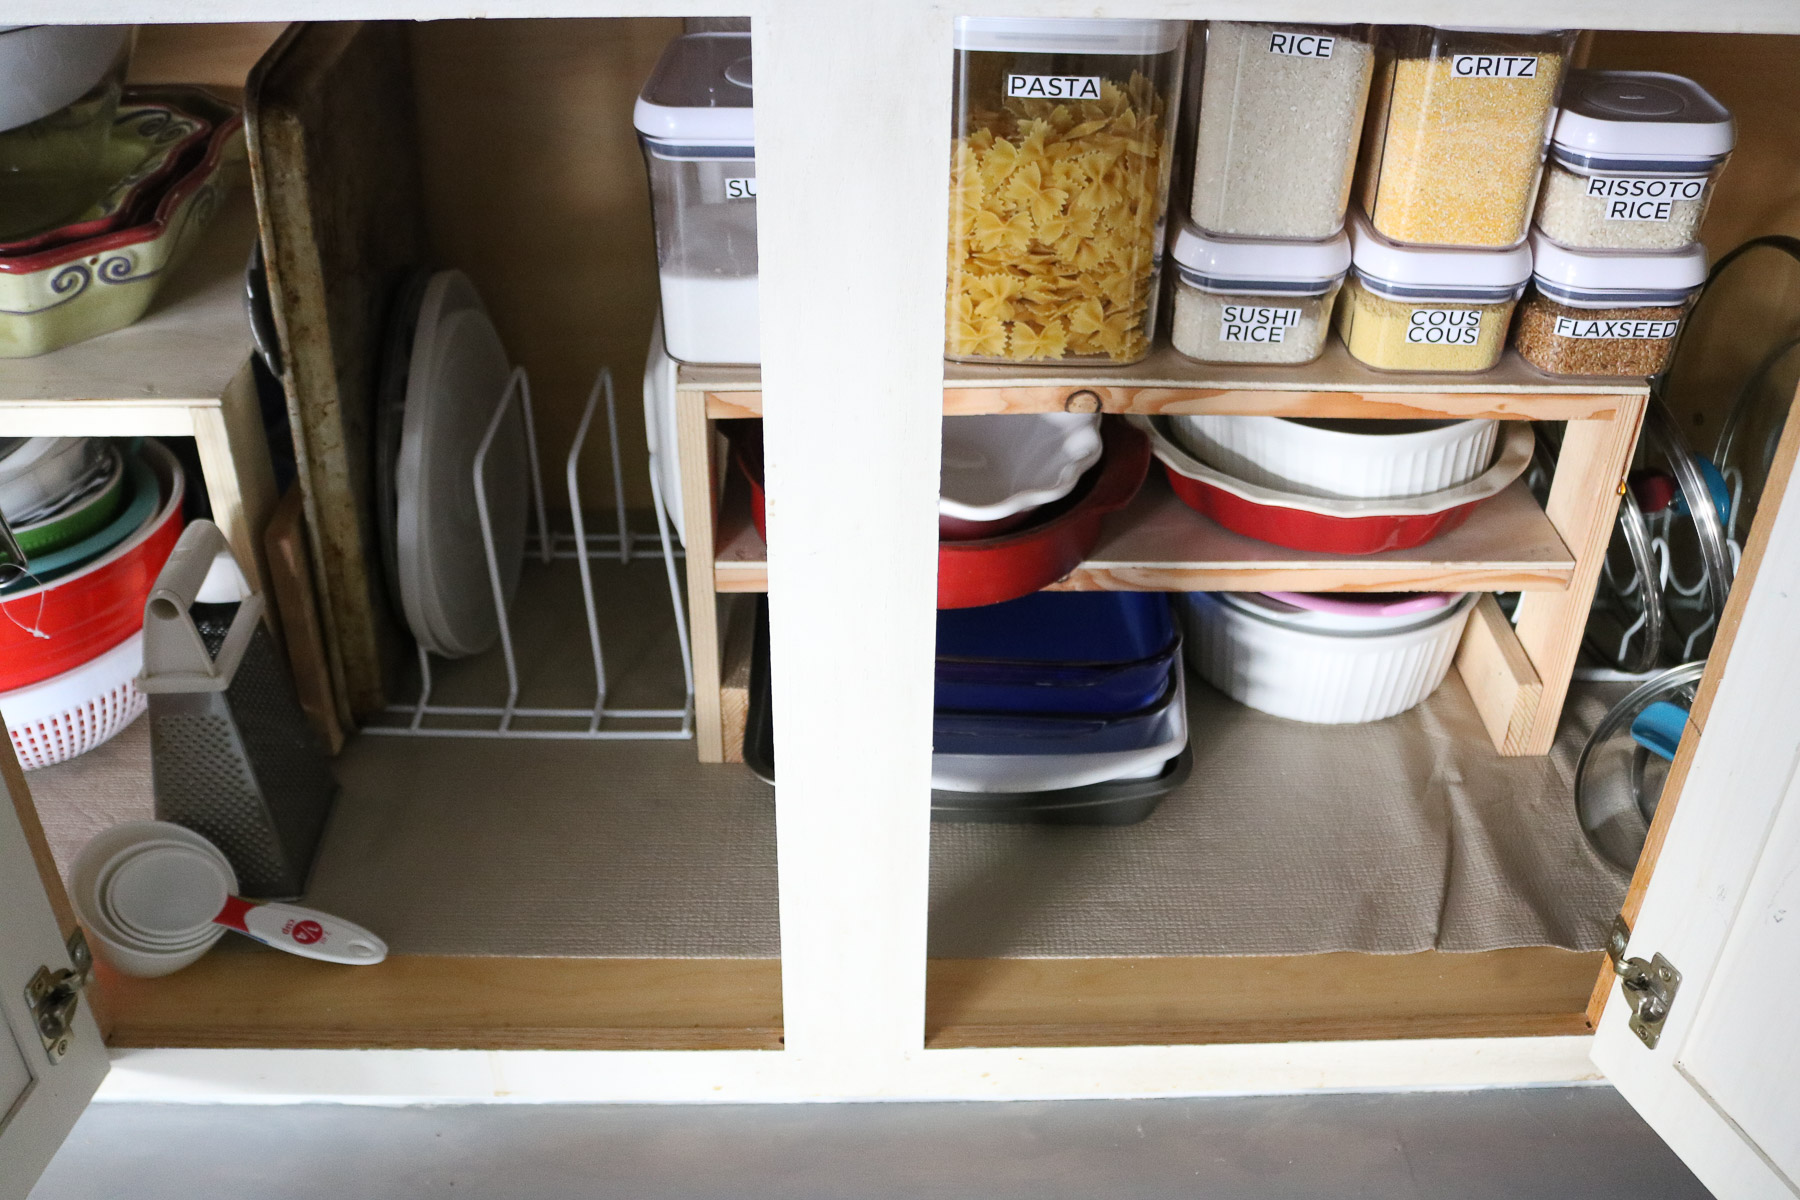
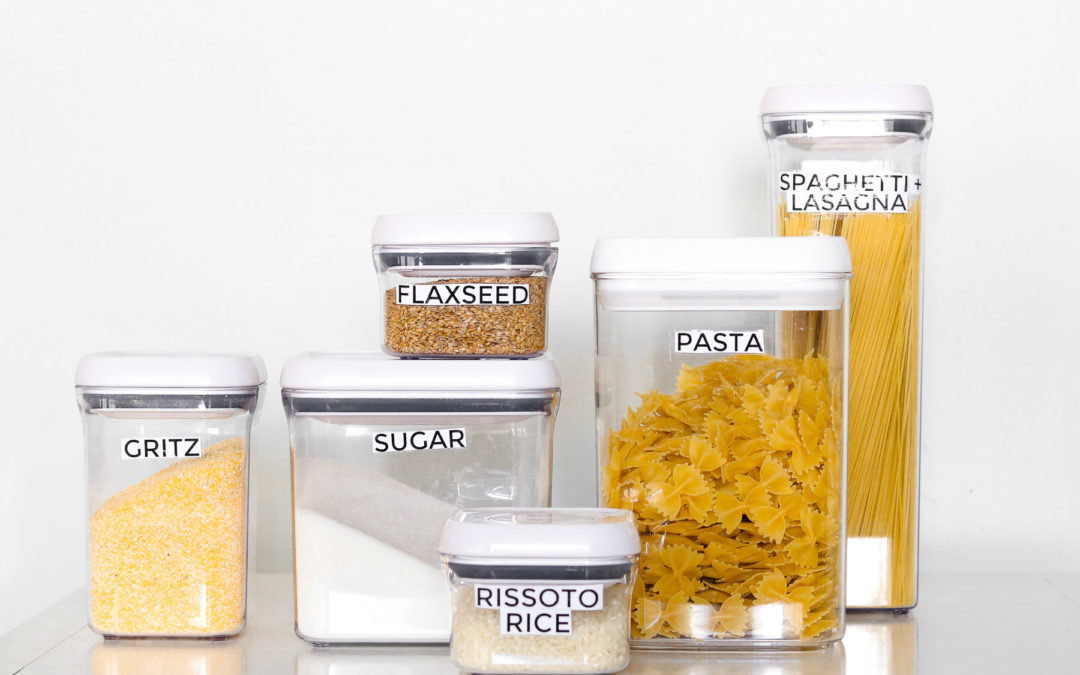
Oh my goodness these dry food storage containers are worth every penny!! I love the airtight seal! We store cereal in a few of these and it smells sssso fresh when opened!
The bought two types of storage containers. The OXO good grips which have a button that you push for an airtight seal. I purchased them in a pack of ten for around $100. I also got some that were a little more budget friendly but have a flip handle instead of a button. They still work just as great however than handle takes a bit getting used to. ( I’ve added some affiliate links for the two same ones I got – for more info about affiliate links please visit my disclosure policy)
These OXO button lids containers are $95.99 and free shipping for a 10 piece set.
Ideas to Organize your Kitchen Drawers with Dollar Store Bins
Okay, so I’ll go ahead and share all the photos of my drawers and than my cabinets. Some of these are still a work in progress. ( 😂 Testing Phase #1)
-
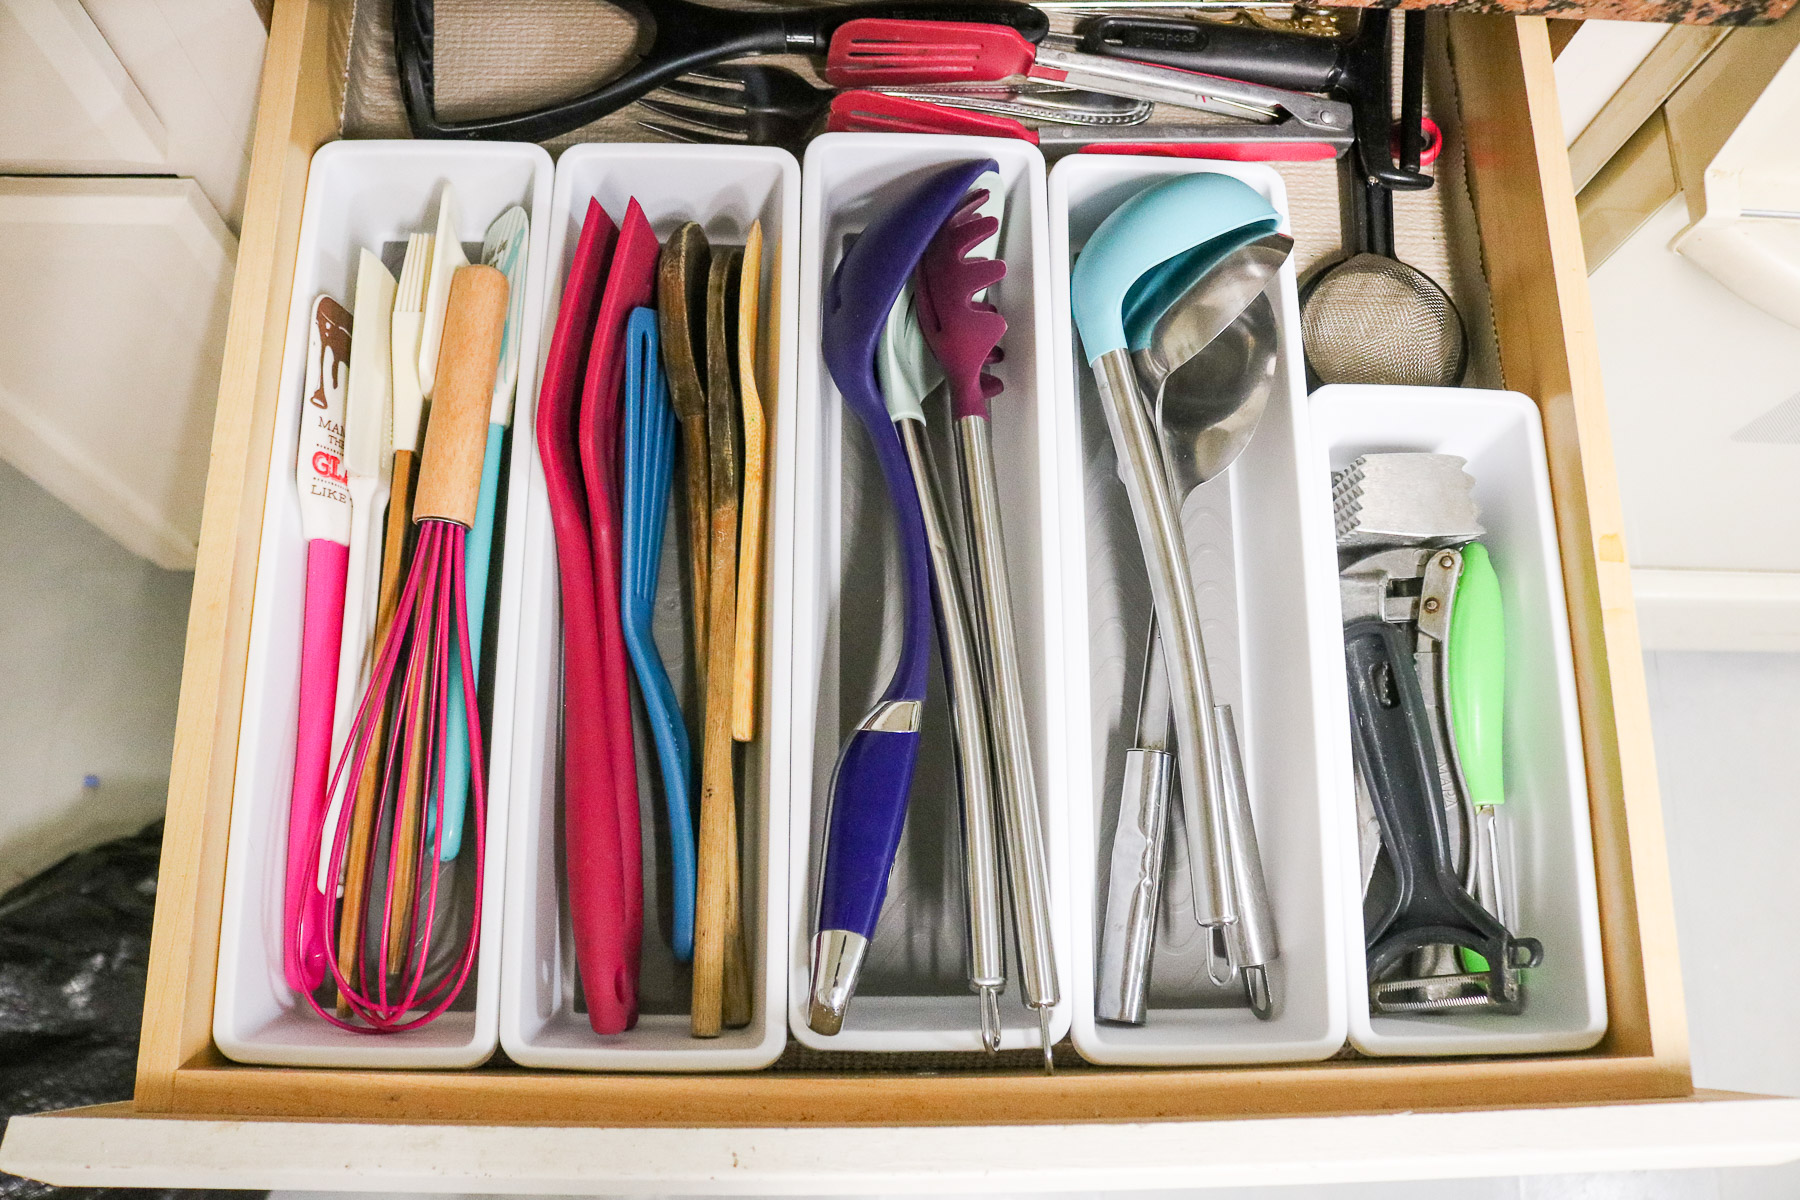
- Here’s how I store my utensils. I previously had a untensil jar but, I’m not a big fan lots of stuff displayed on my counter tops so this was a great alternative for me.
-
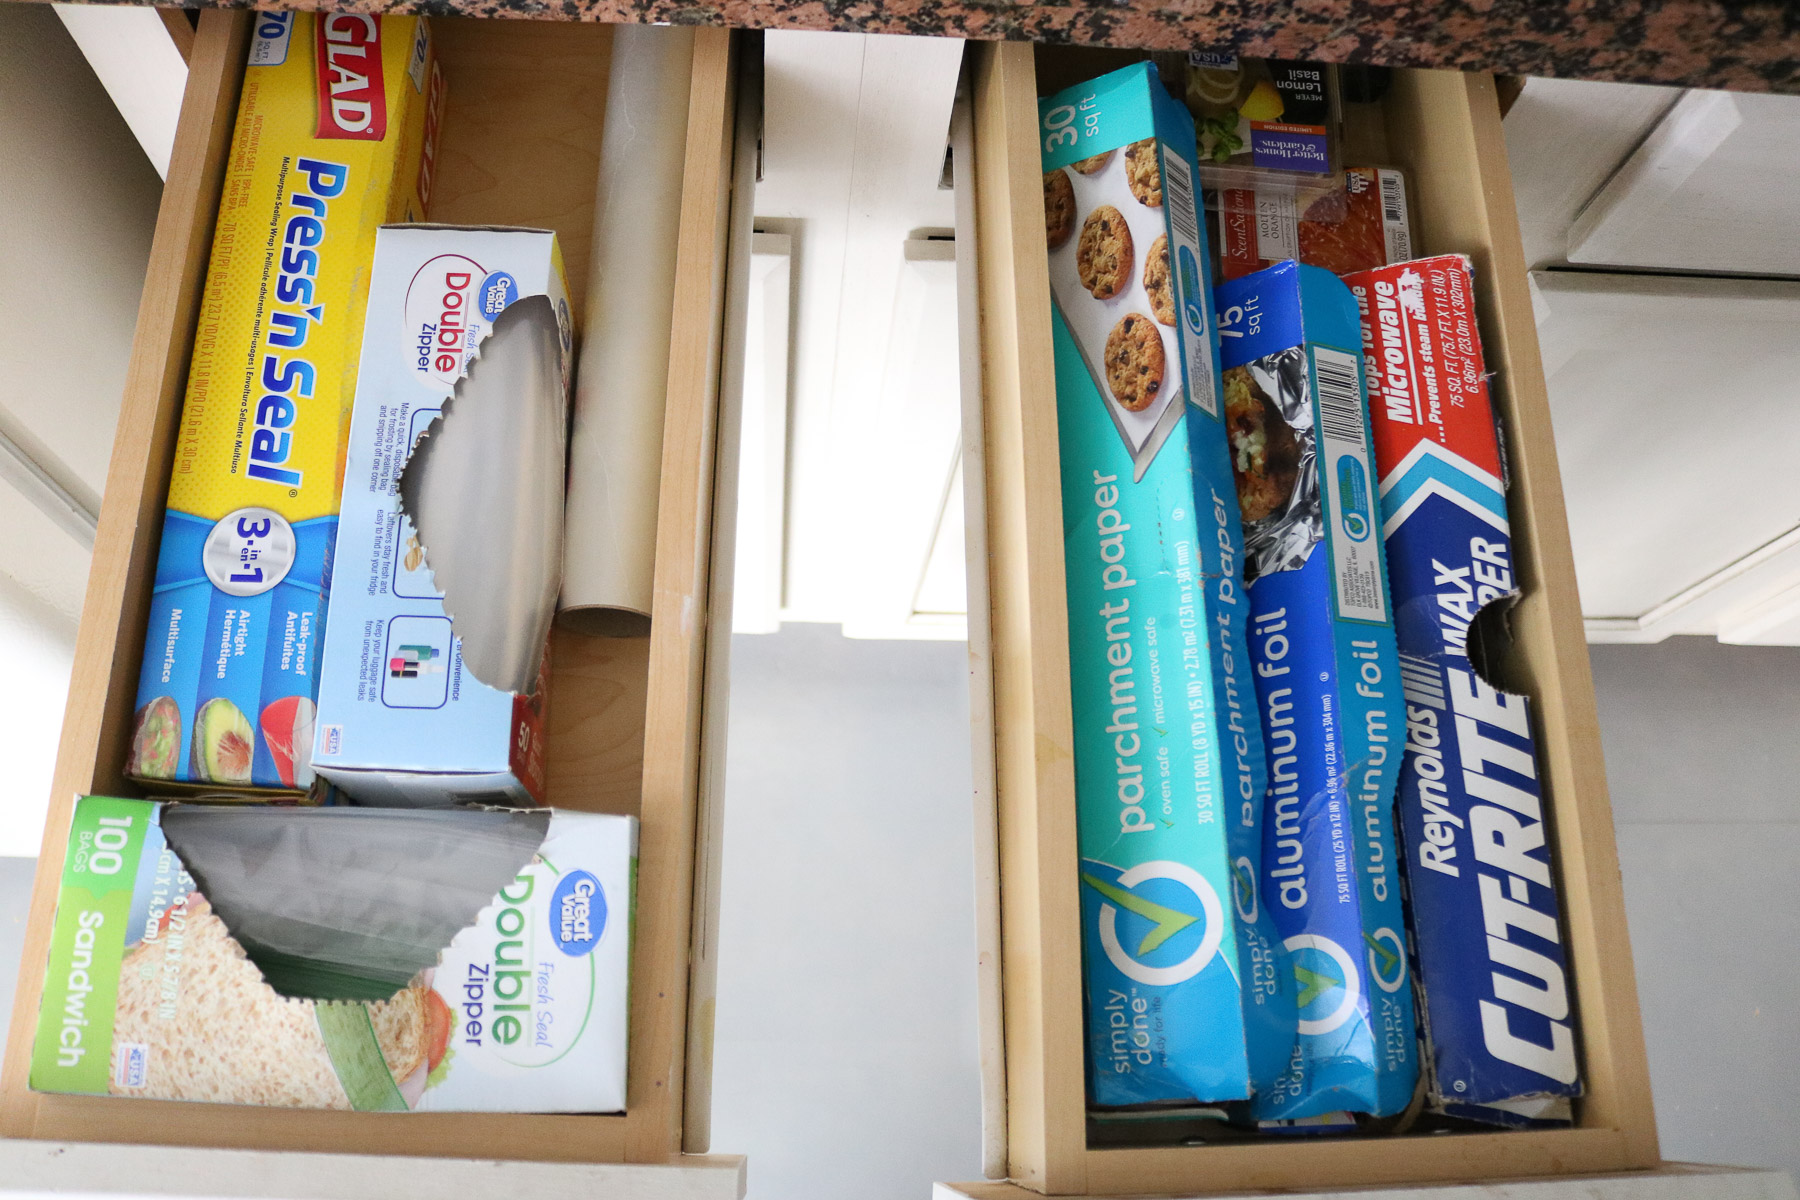
- I like to keep my plastic, wraps and zip lock bags all in one are and right next to my fridge. This makes storing food really convenient.
-
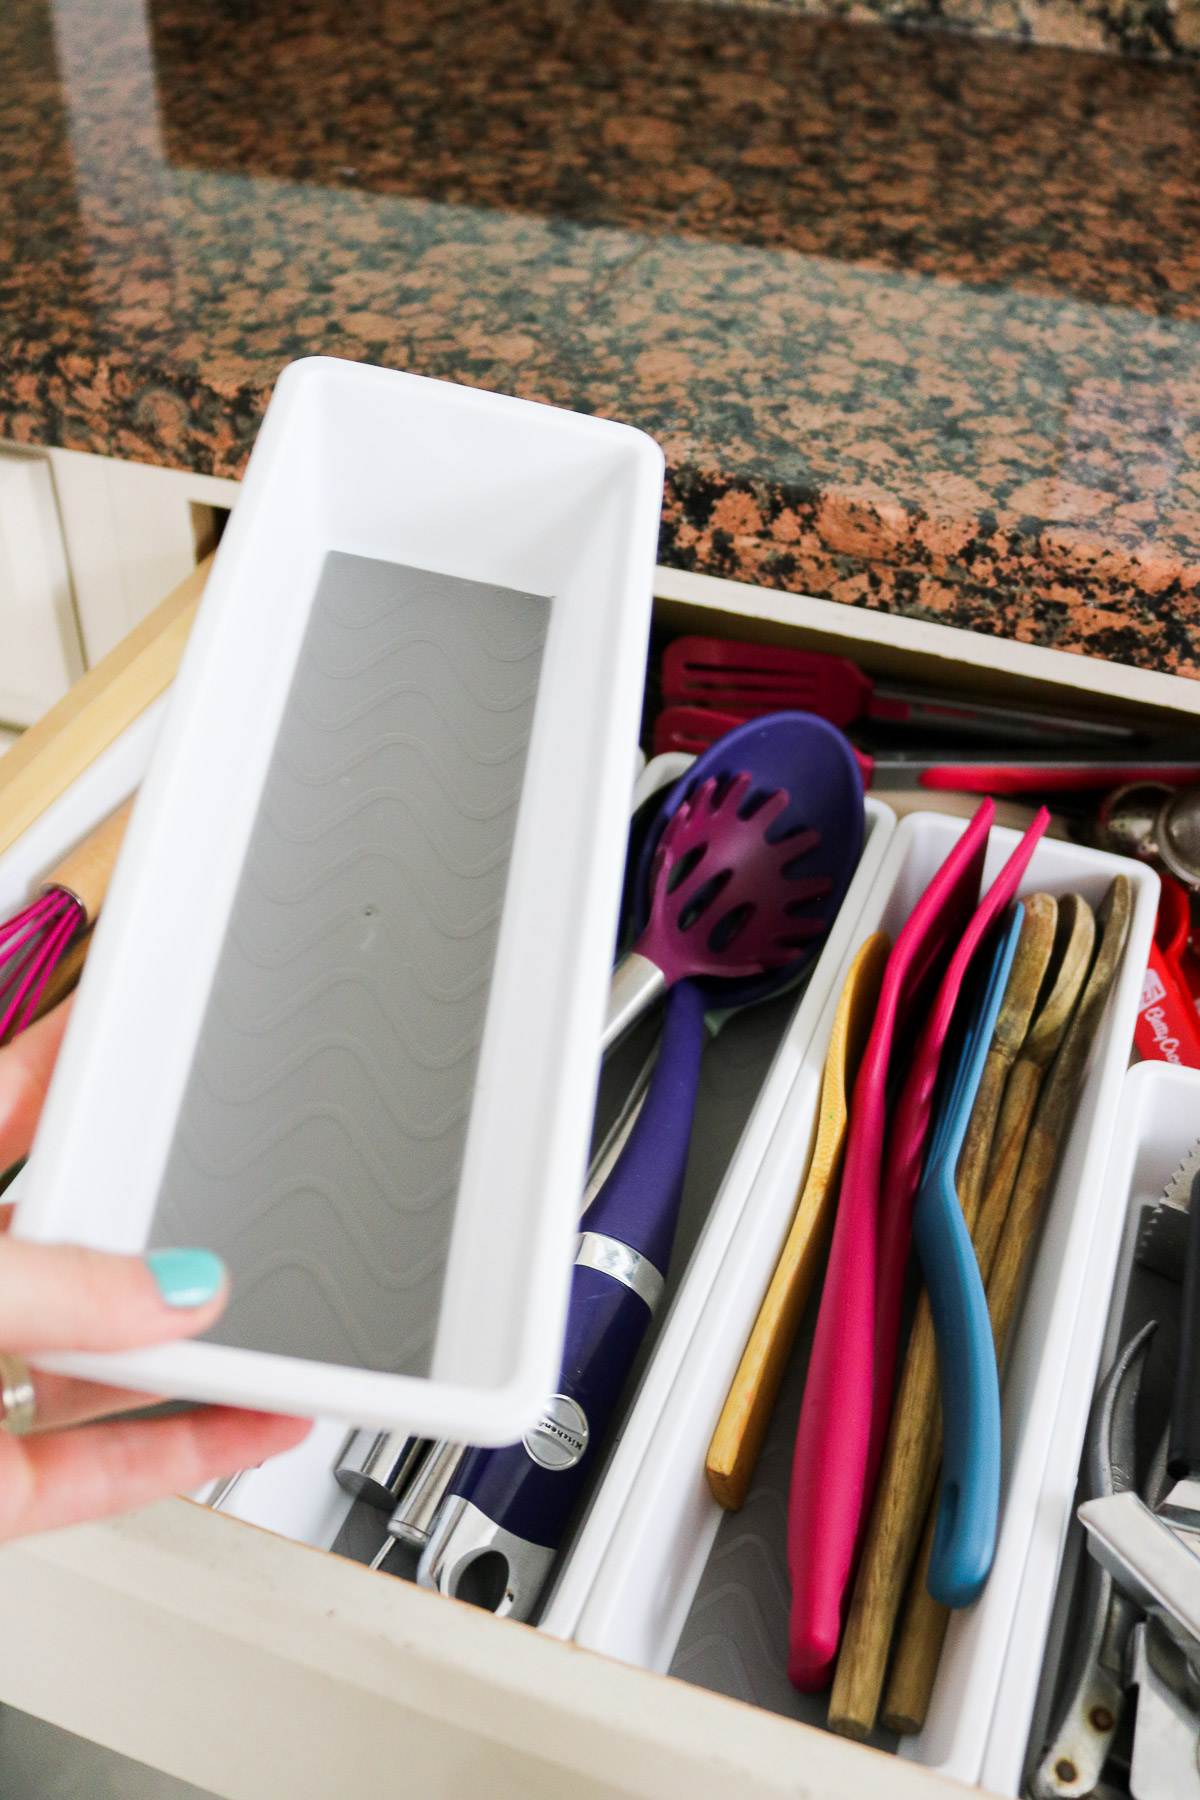
- Can I just say these white narrow bins literally made my organizing dreams come to life! ( ps: I bought out all the bins at my local dollar tree 😀 )
-
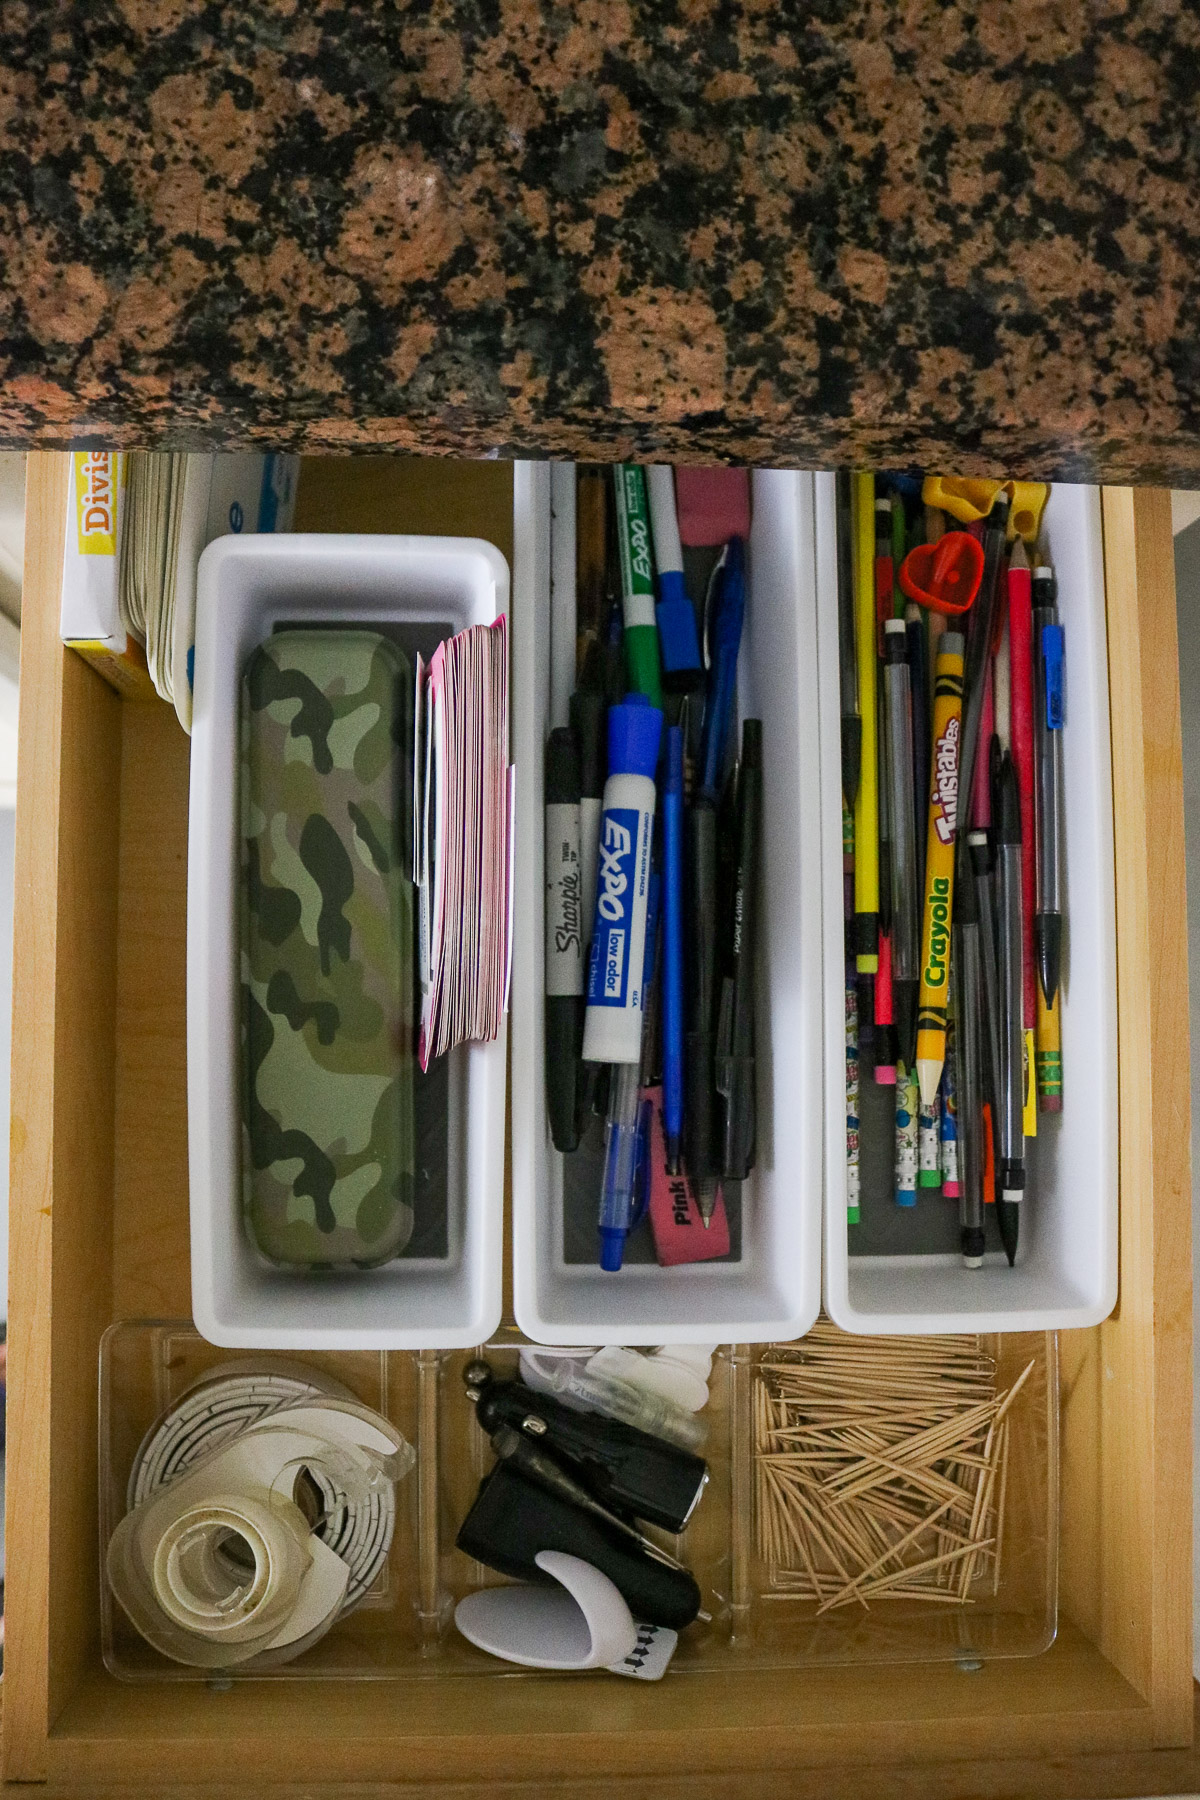
- Here’s what my miscellanous/homework drawer looks like!
-
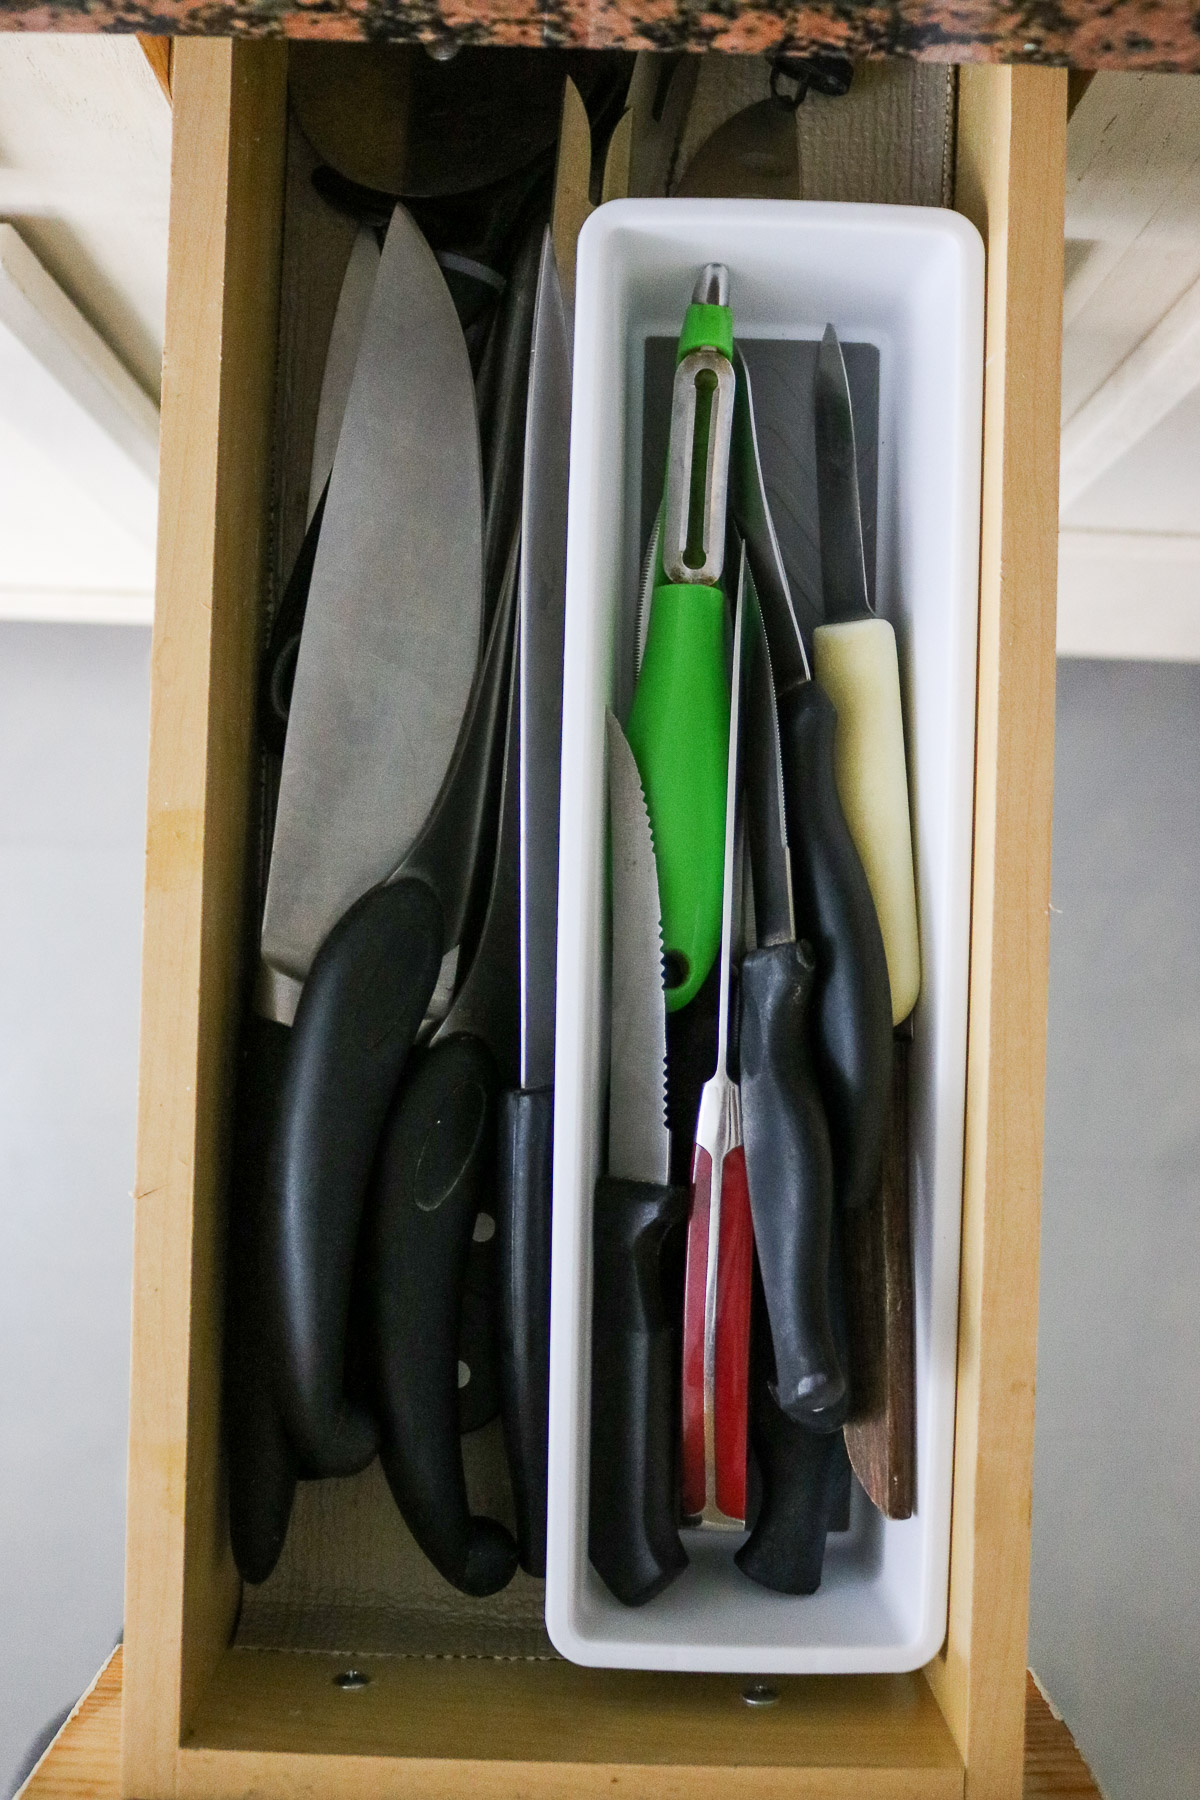
- Yes this one still looks like a mess but, it’s WAY better than it was before! I don’t like my knives displayed in a knife rack on my counter so I have them in a narrow drawer. I used to have them all piled in this drawer however I decided to store my smaller knives in a bin and the bigger knives on the side. It’s actually really helpful so far! I find myself saving a lot of time not having to dig for my small knives under the big ones. 😀
-
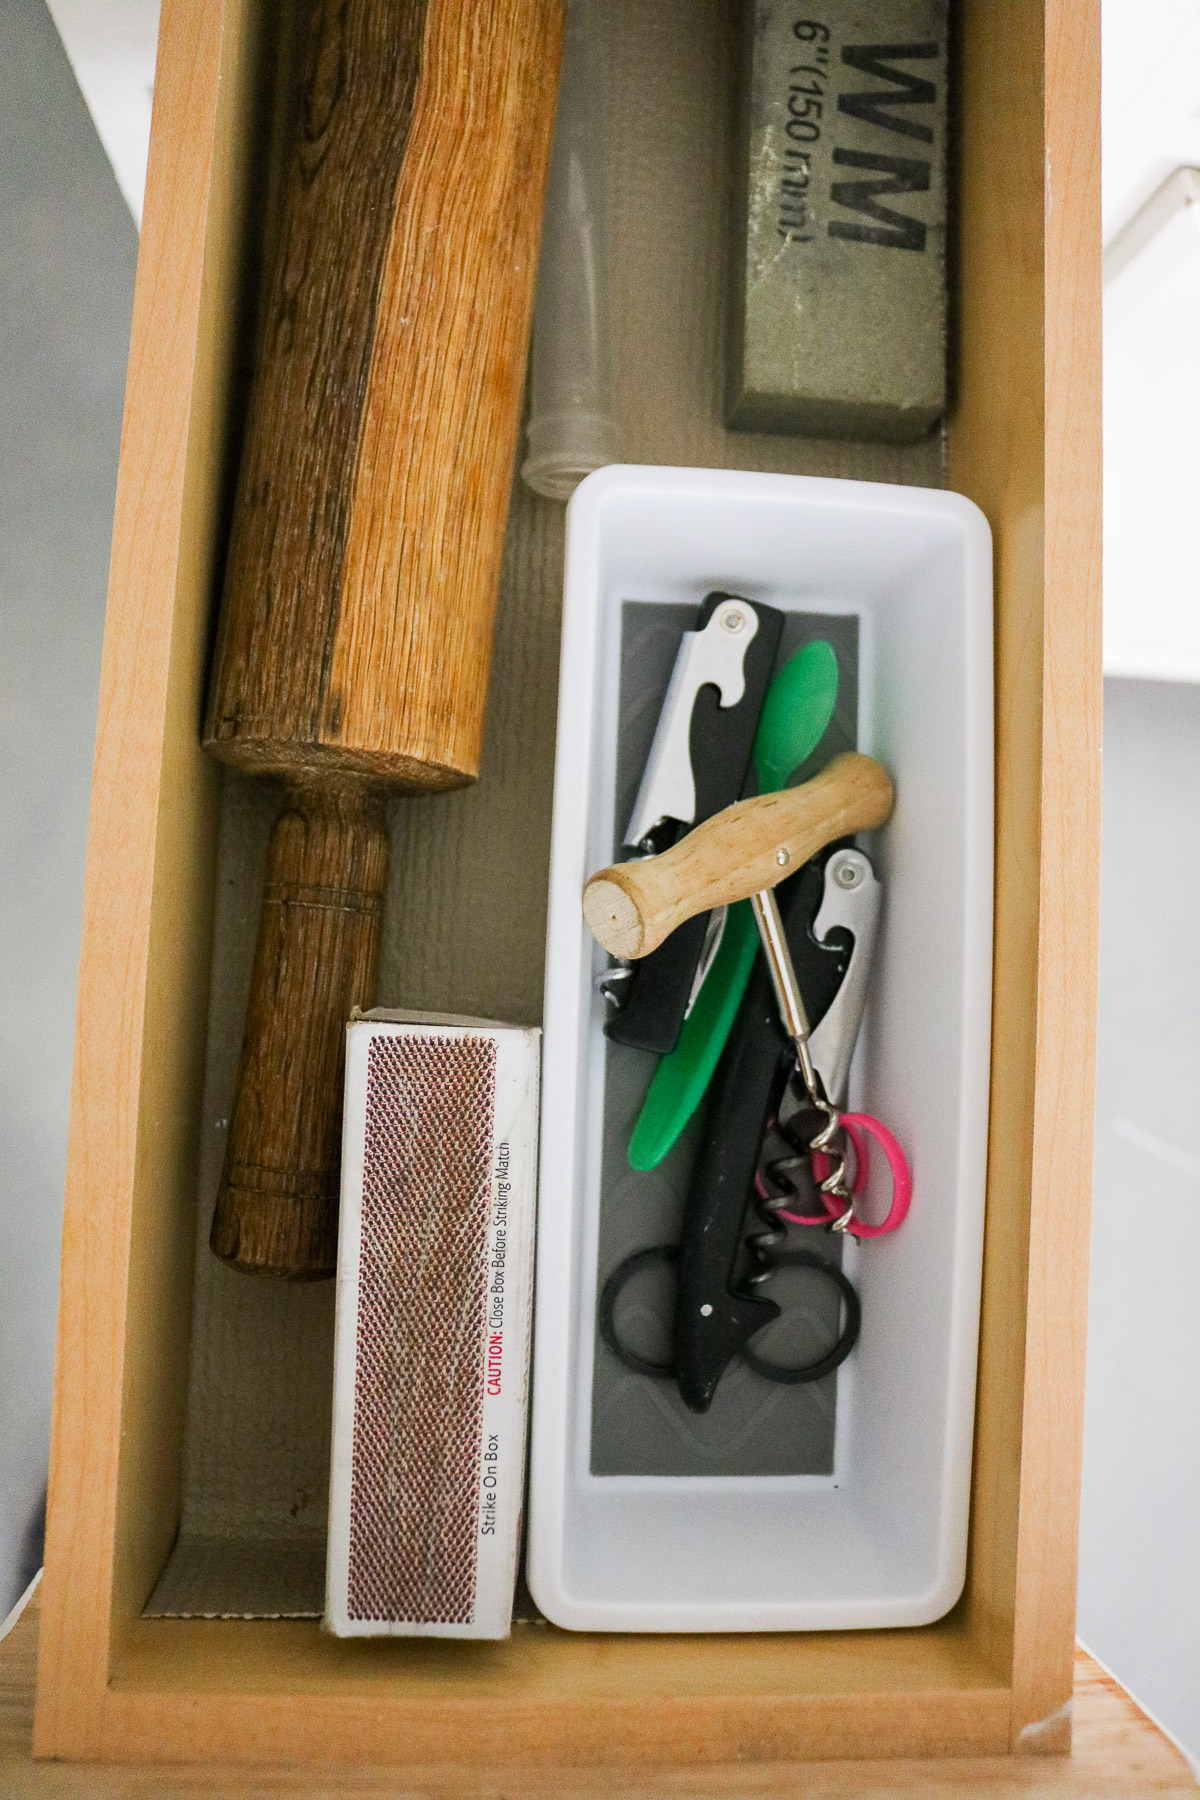
- Another narrow drawer. Not sure what to call this one but, I keep my cork screws in here and scissors (yes they’re missing in the photo)
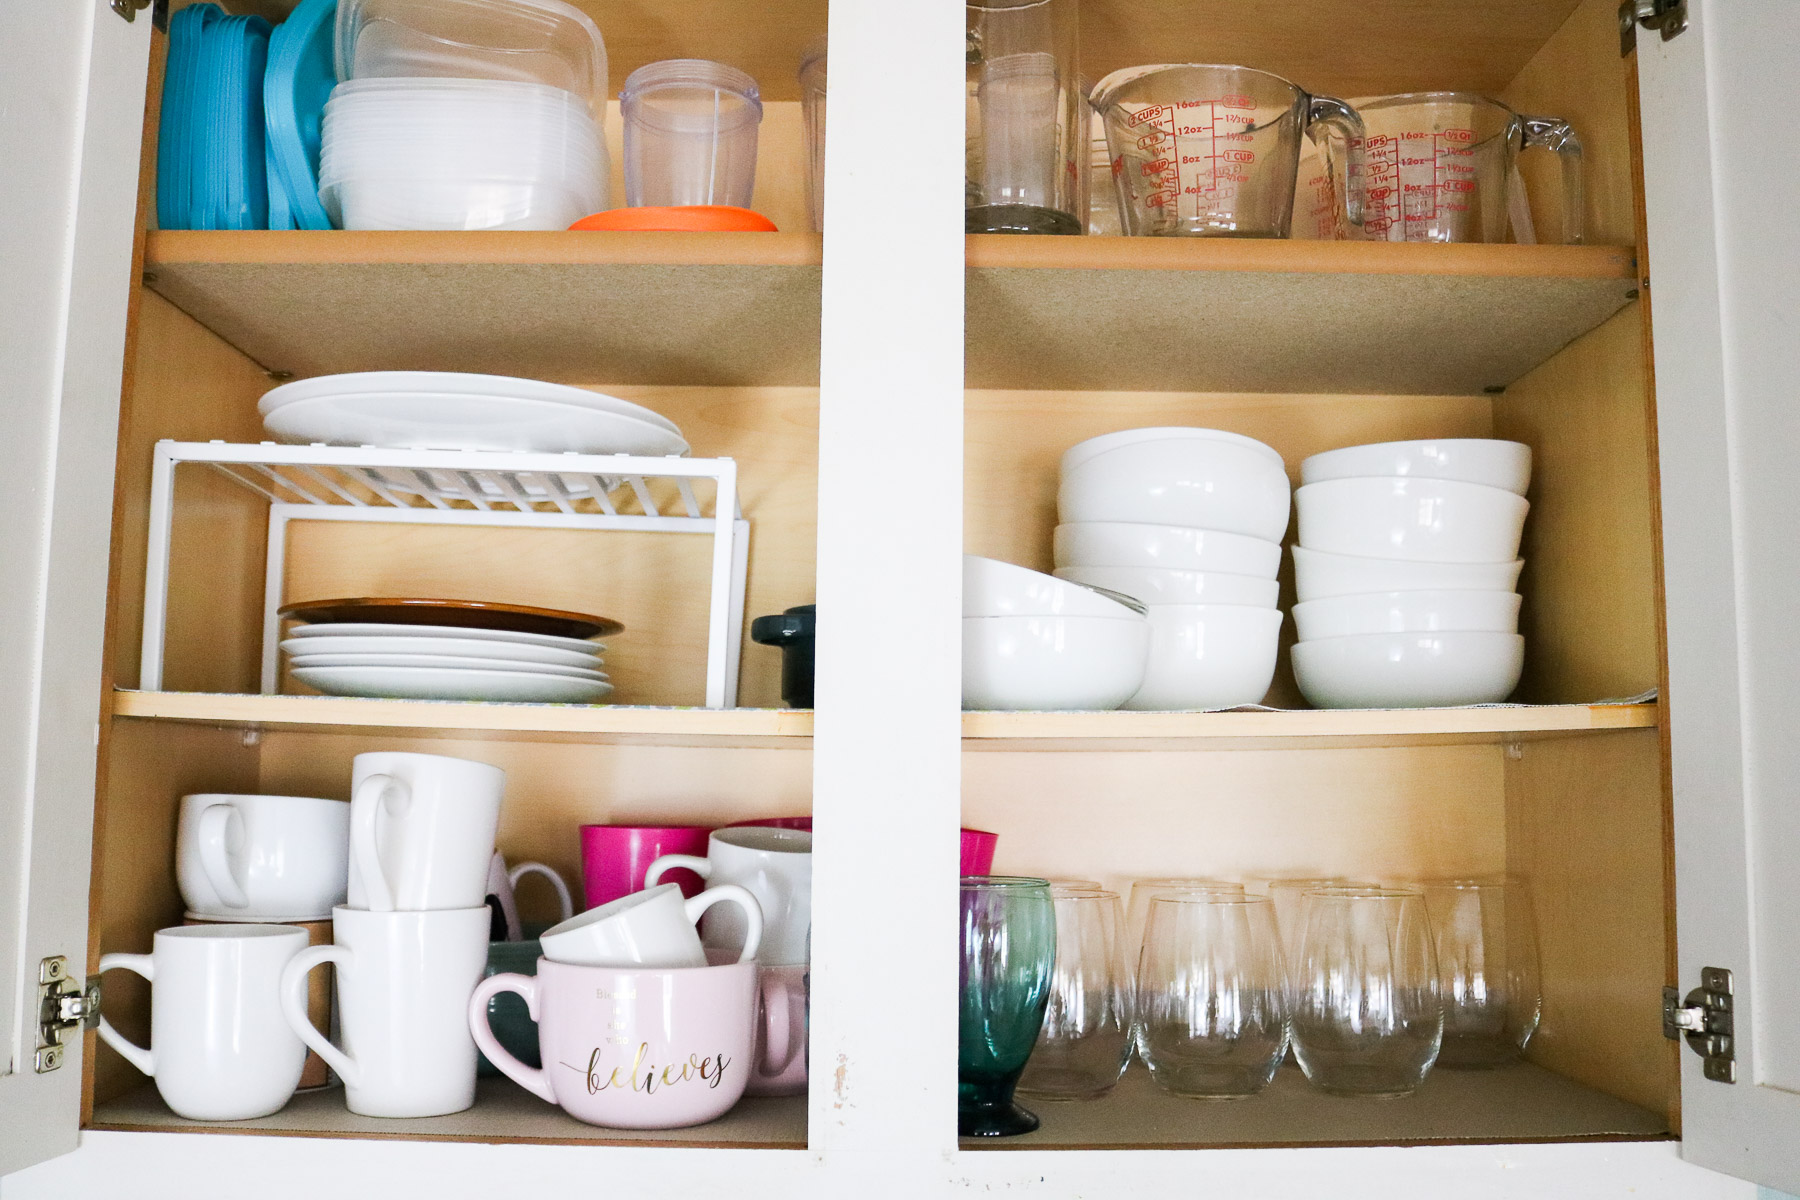
Ideas to Organize your Kitchen Cabinets
I’ll share all my cabinets that are above my counters than the ones below. 🙂
-
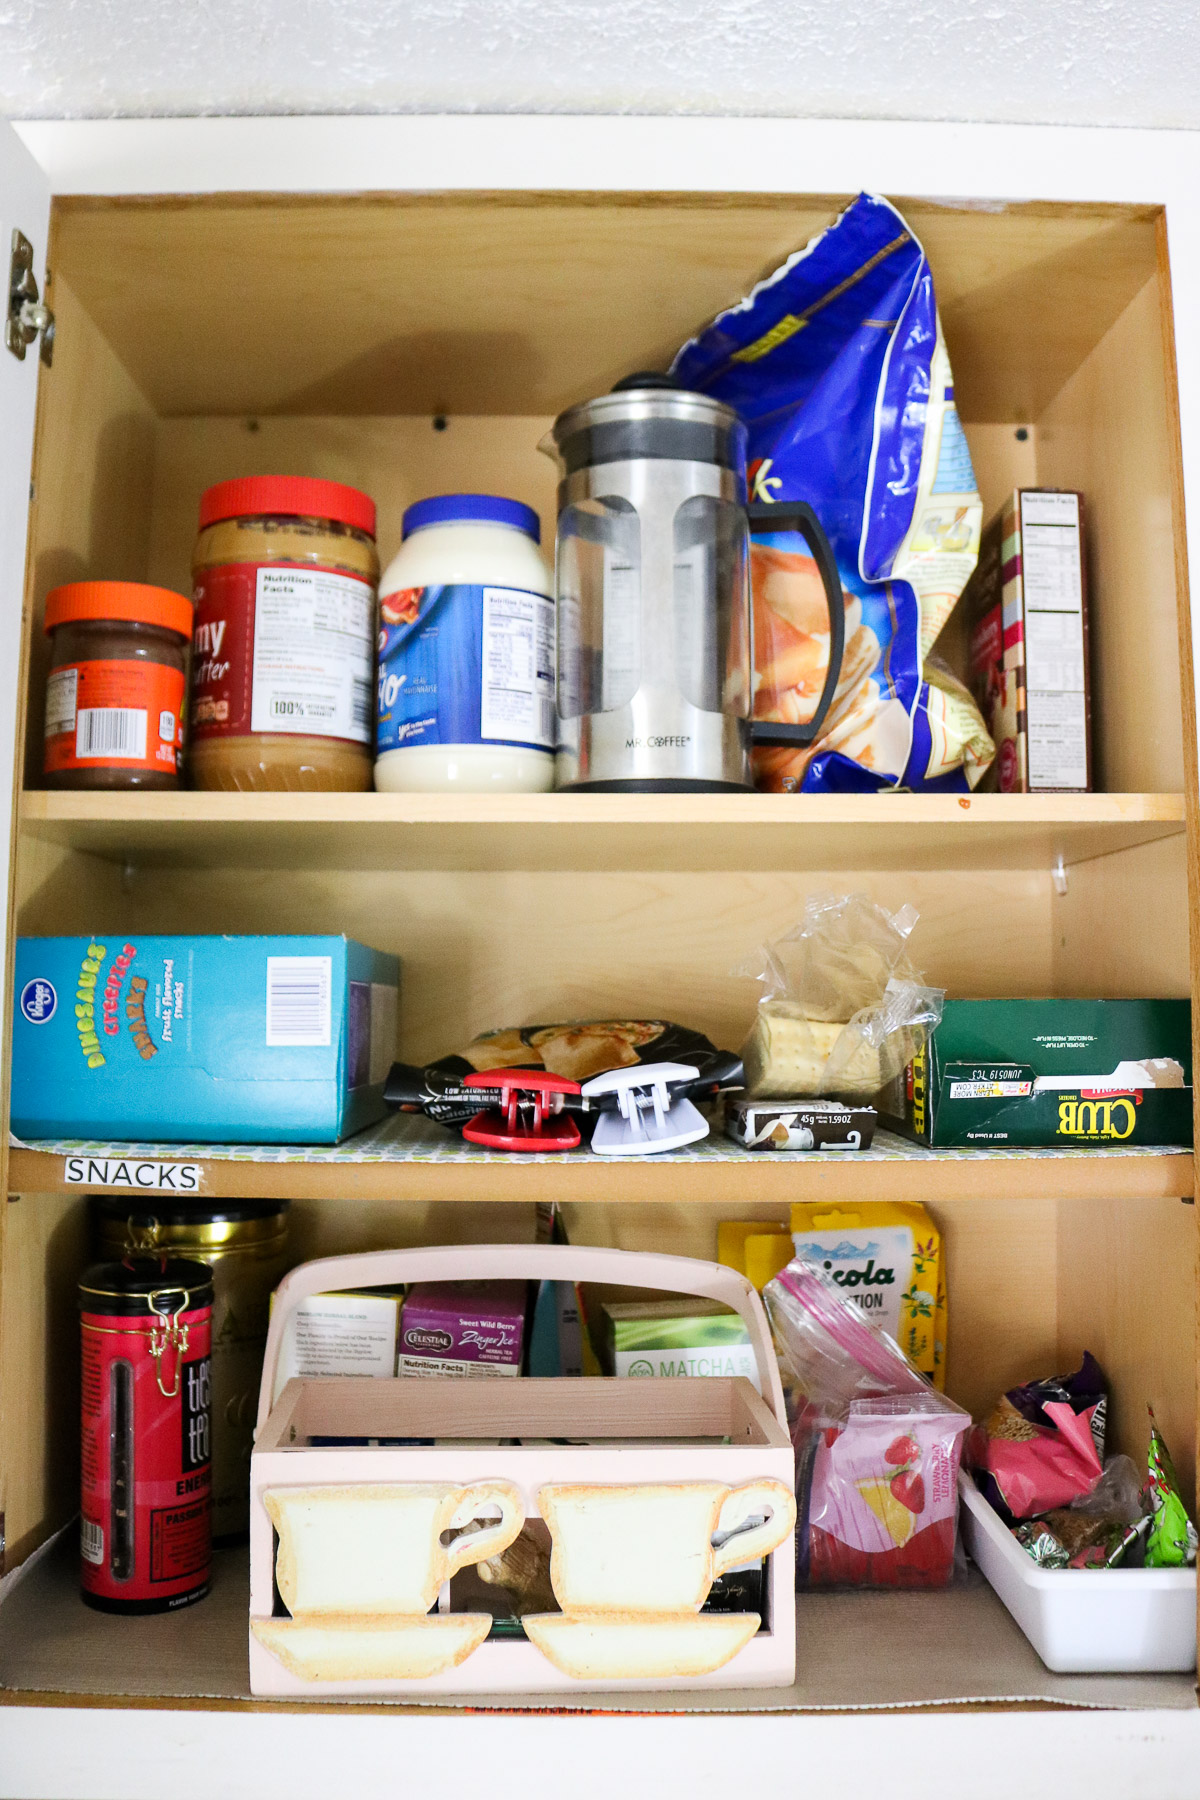
- I keep my tea on the bottom shelf because it’s used the most. My snacks are on the second shelf and more random stuff on top.
-
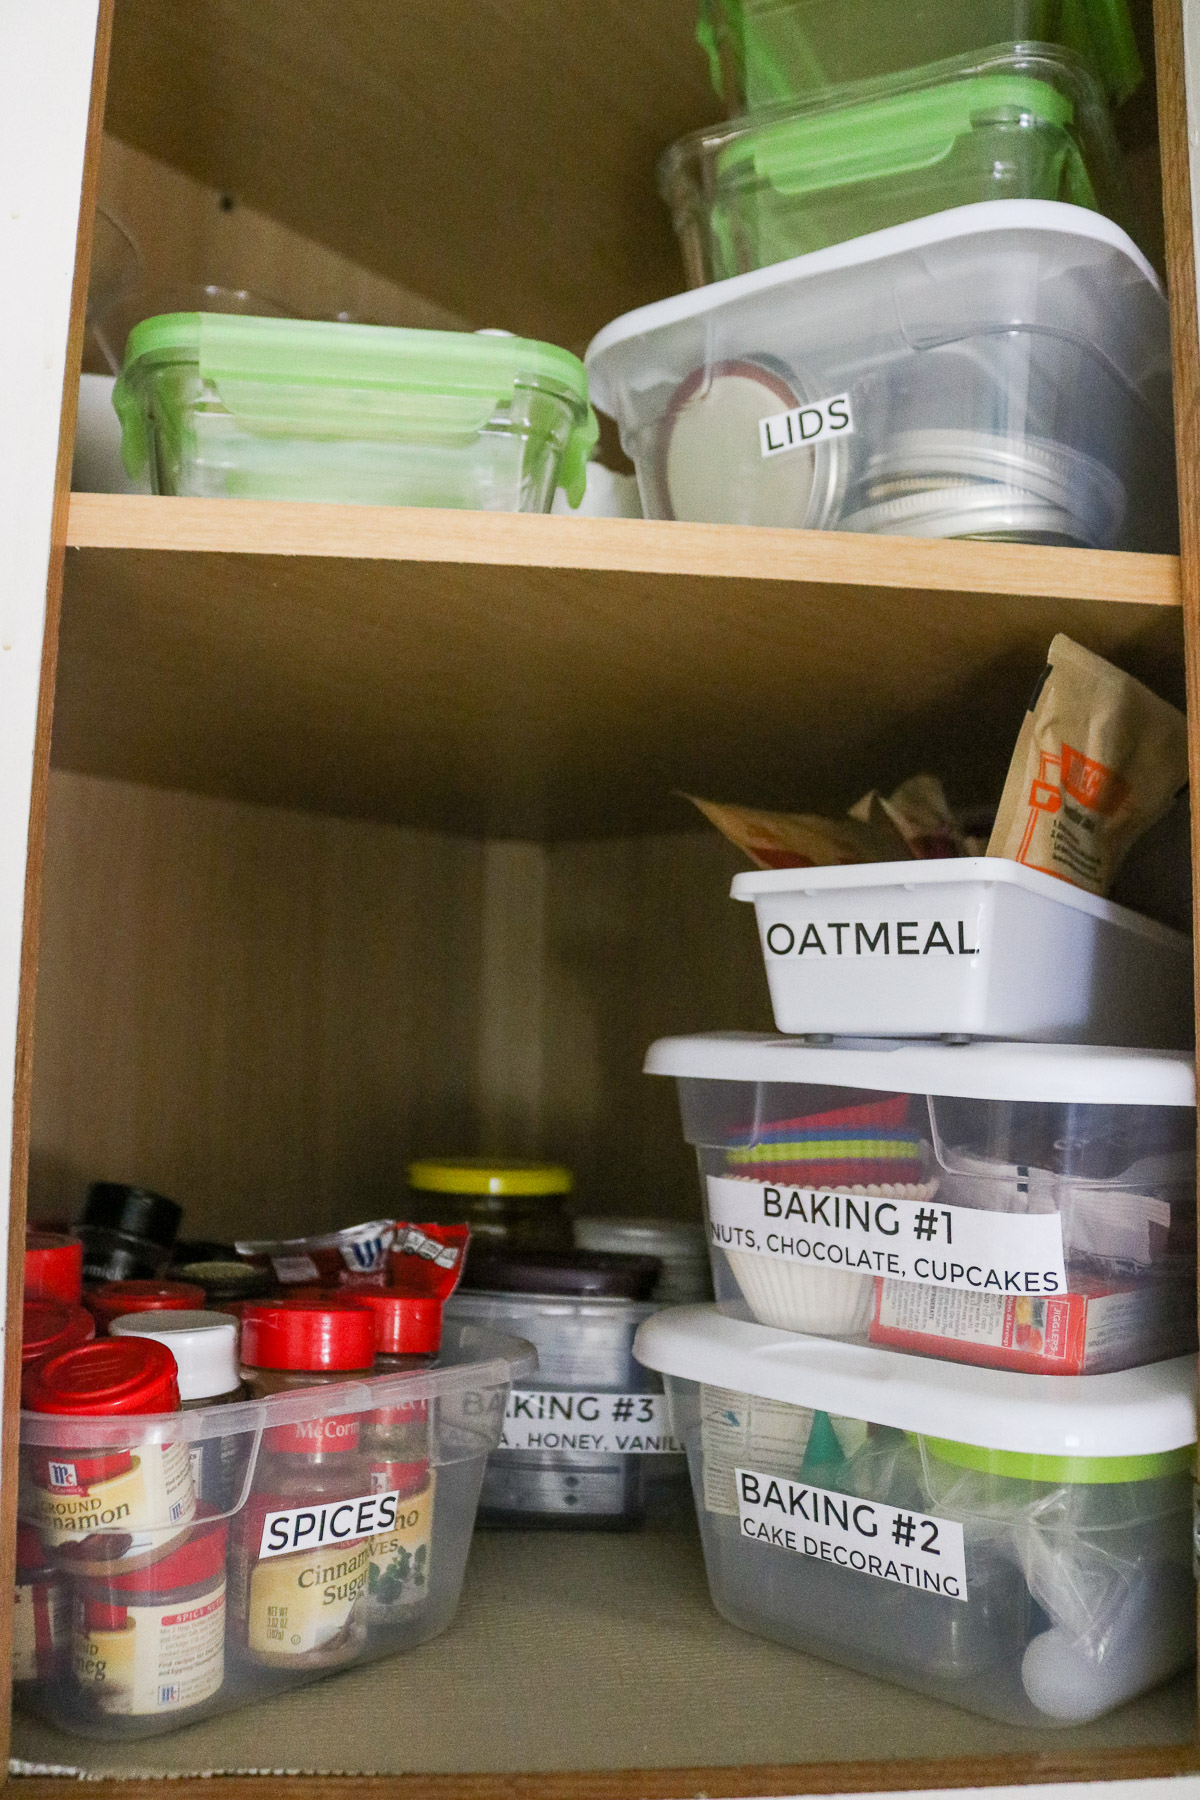
- Oh my goodness this is probably my favorite cabinet. The best decision I’ve made is to keep my spices in a plastic bin instead of neatly displaying them in the cabinet. It is so convinient to pull out the bin instead of having to dig through all the spices in the cabinet.
So, I didn’t realize this before but I had all my baking goodies all over my kitchen. Honey on one end, cocoa on the other, which made baking such a mess and hard to clean up. I just can’t say enough about these bins! They sell bigger colorful bins at the dollar store I prefer these since they are see through. You pull it out and put it back in! No pulling up your chair and digging through your cabinet. Also if you noticed the lids labeled bin at the top of the shelf, those sneaky little things made up for most of my miscellaneous drawer before this. I keep all my lightly used glassware behind the Tupperware.
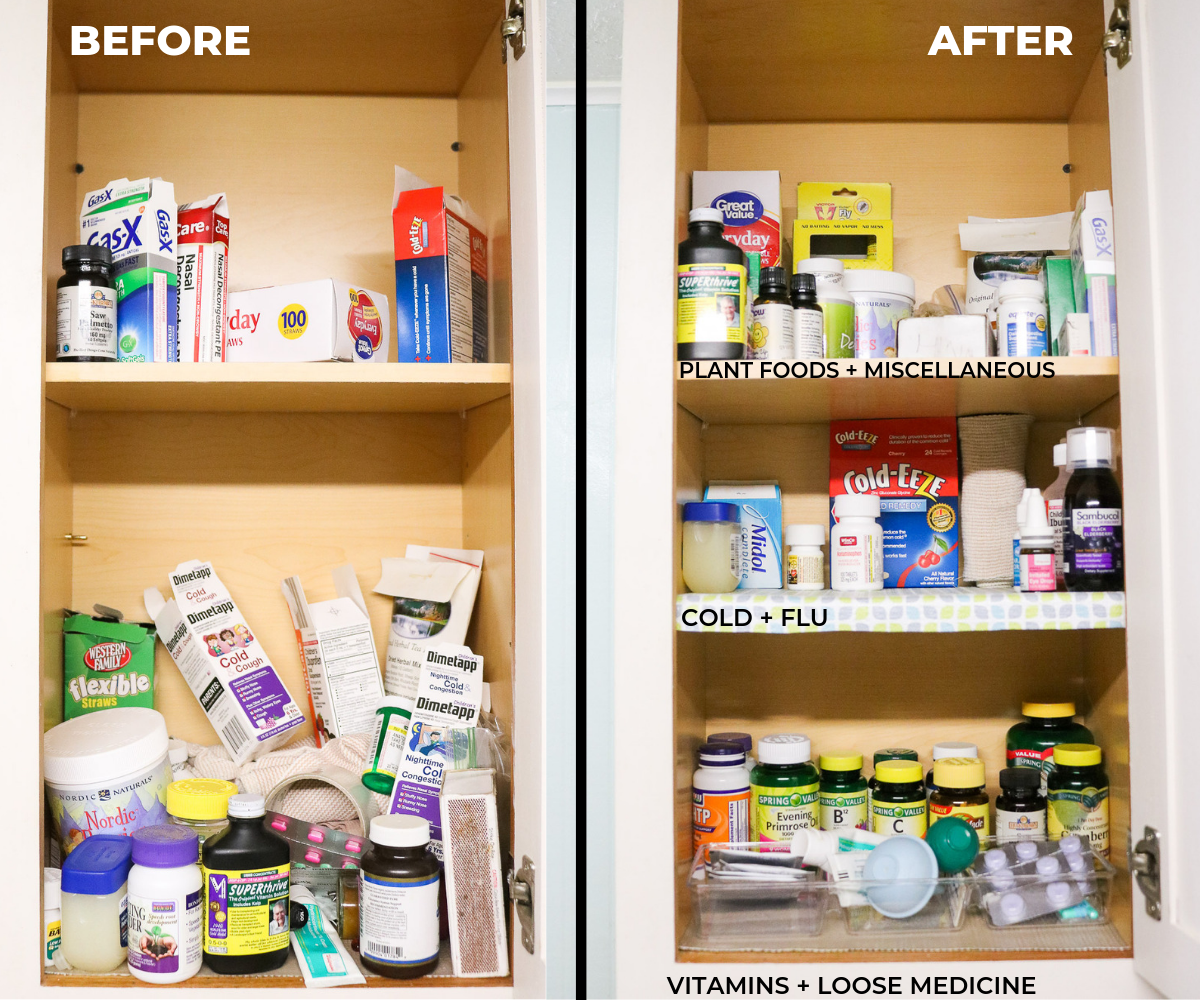
How did I live with a before like that! I don’t even know how I found my way around my medicine. 😂🙈LOL! I will say the additional shelf is a game changer. ( adding a third shelf was a favor I asked my hubby 3 years ago) I won’t go into that matter right now😬! LOL I’m just glad I got around to getting that third shelf up! 🙂
-
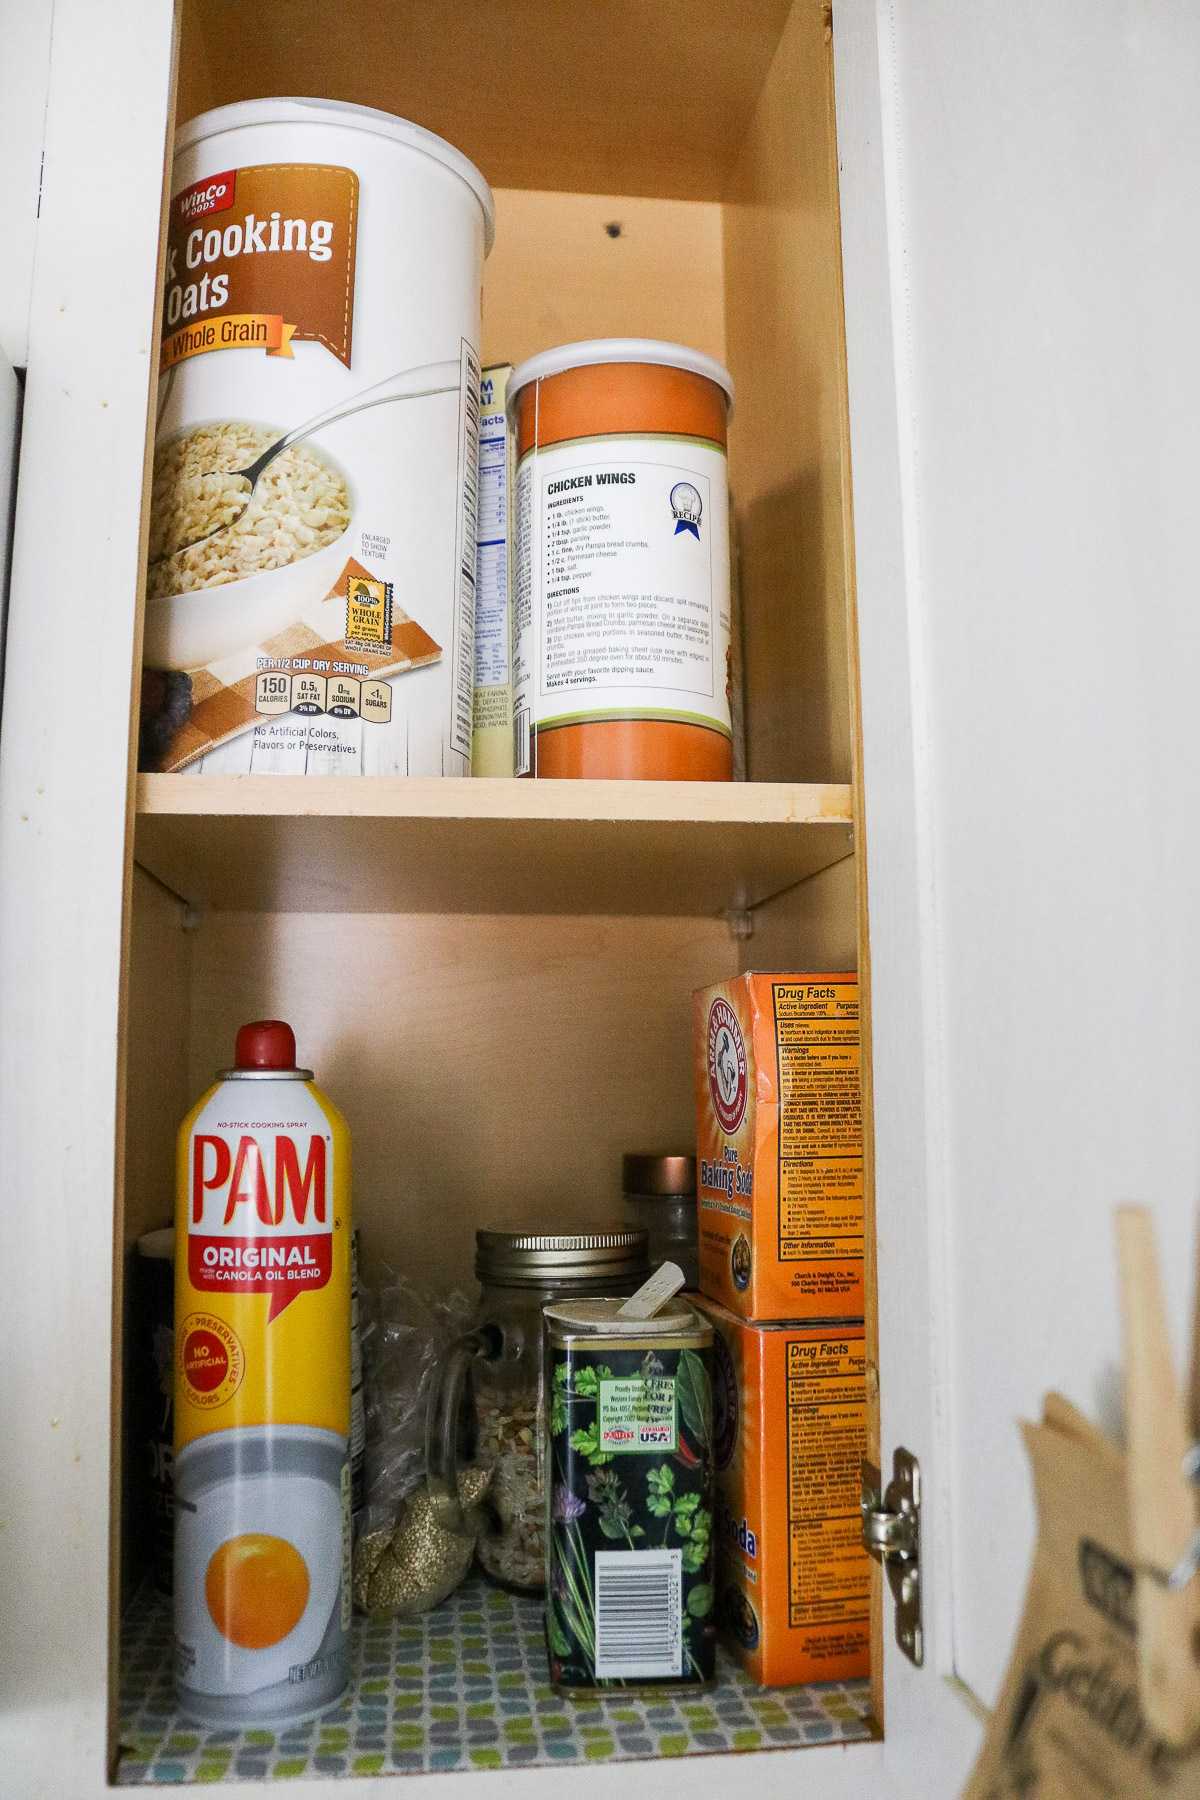
- This cabinet is right next to where I cook. I store pepper and sometimes oil here, I also store my dry foods that are sold in storage containers on the top shelf.
-
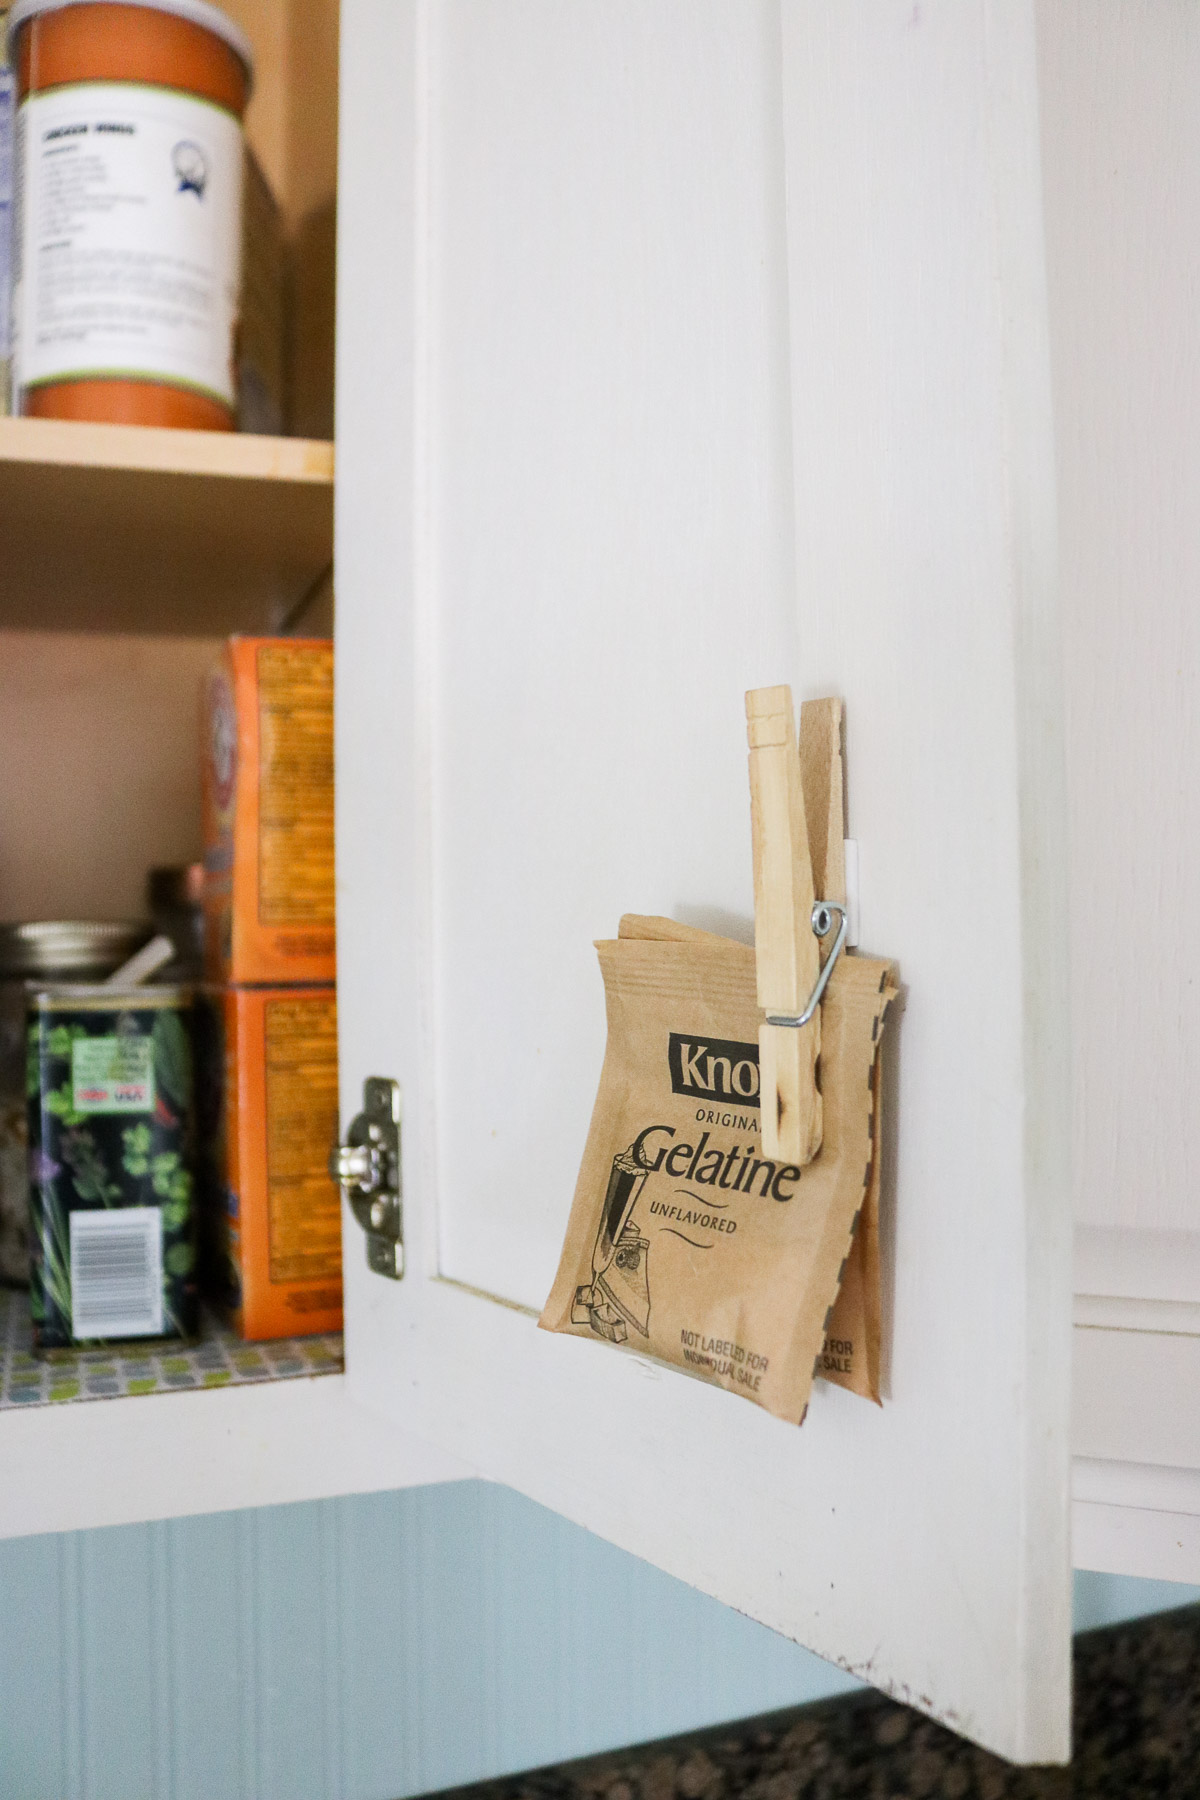
- It’s been about a month since I hung this clothespin up and so far it’s still up there. I used some dollar store double tape. I love this idea to hang small packets.
This cabinet used to only have two shelves. I guess it wasn’t too bad, but I wanted to utilize all my space so I added a third shelf on top. I purchased my metal divider at marshalls for $4.
Okay moving on to all my cabinets below the countertop.
-
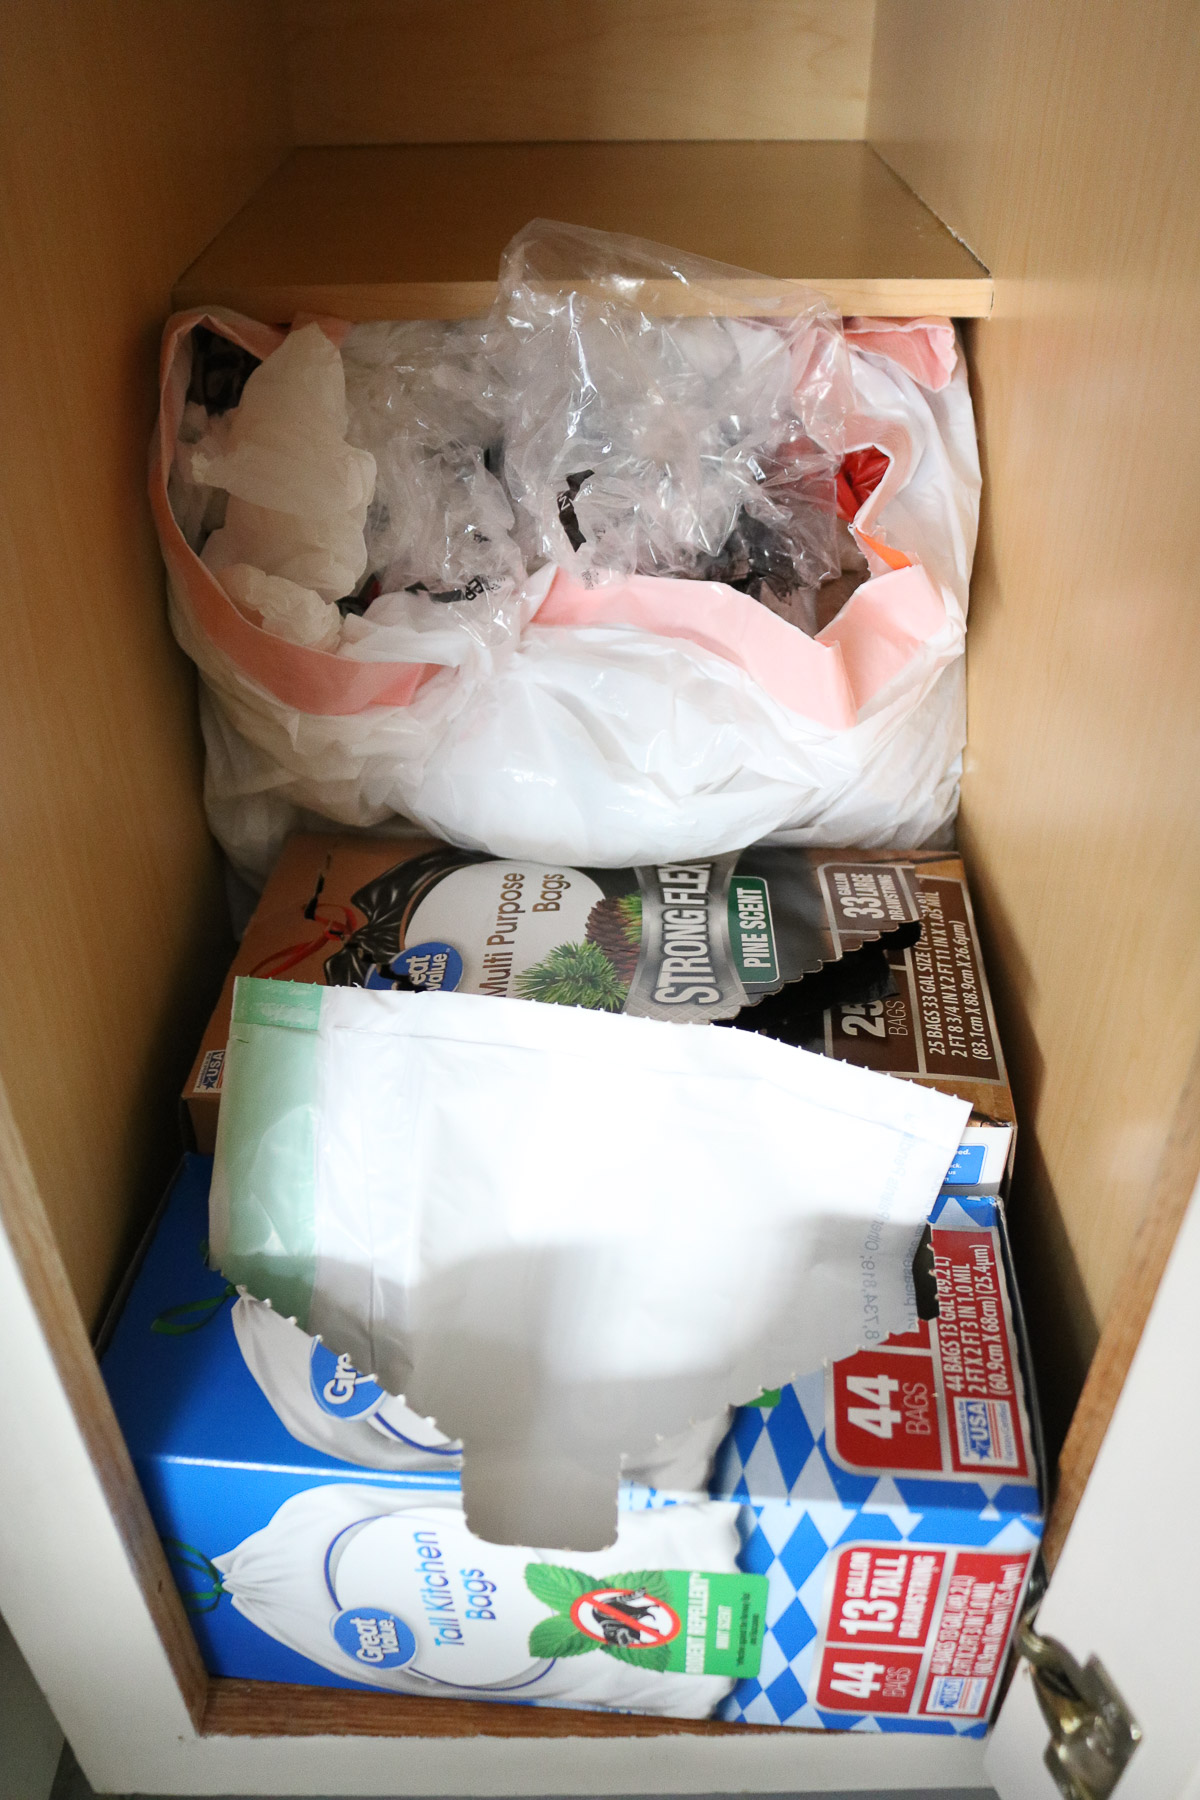
- Here’s my current situation with trash bags and recycled bags. My mom folds all her recycled bags into a little triangles I think I’ll try that sometime soon. It looks neater and takes up way less space.
-
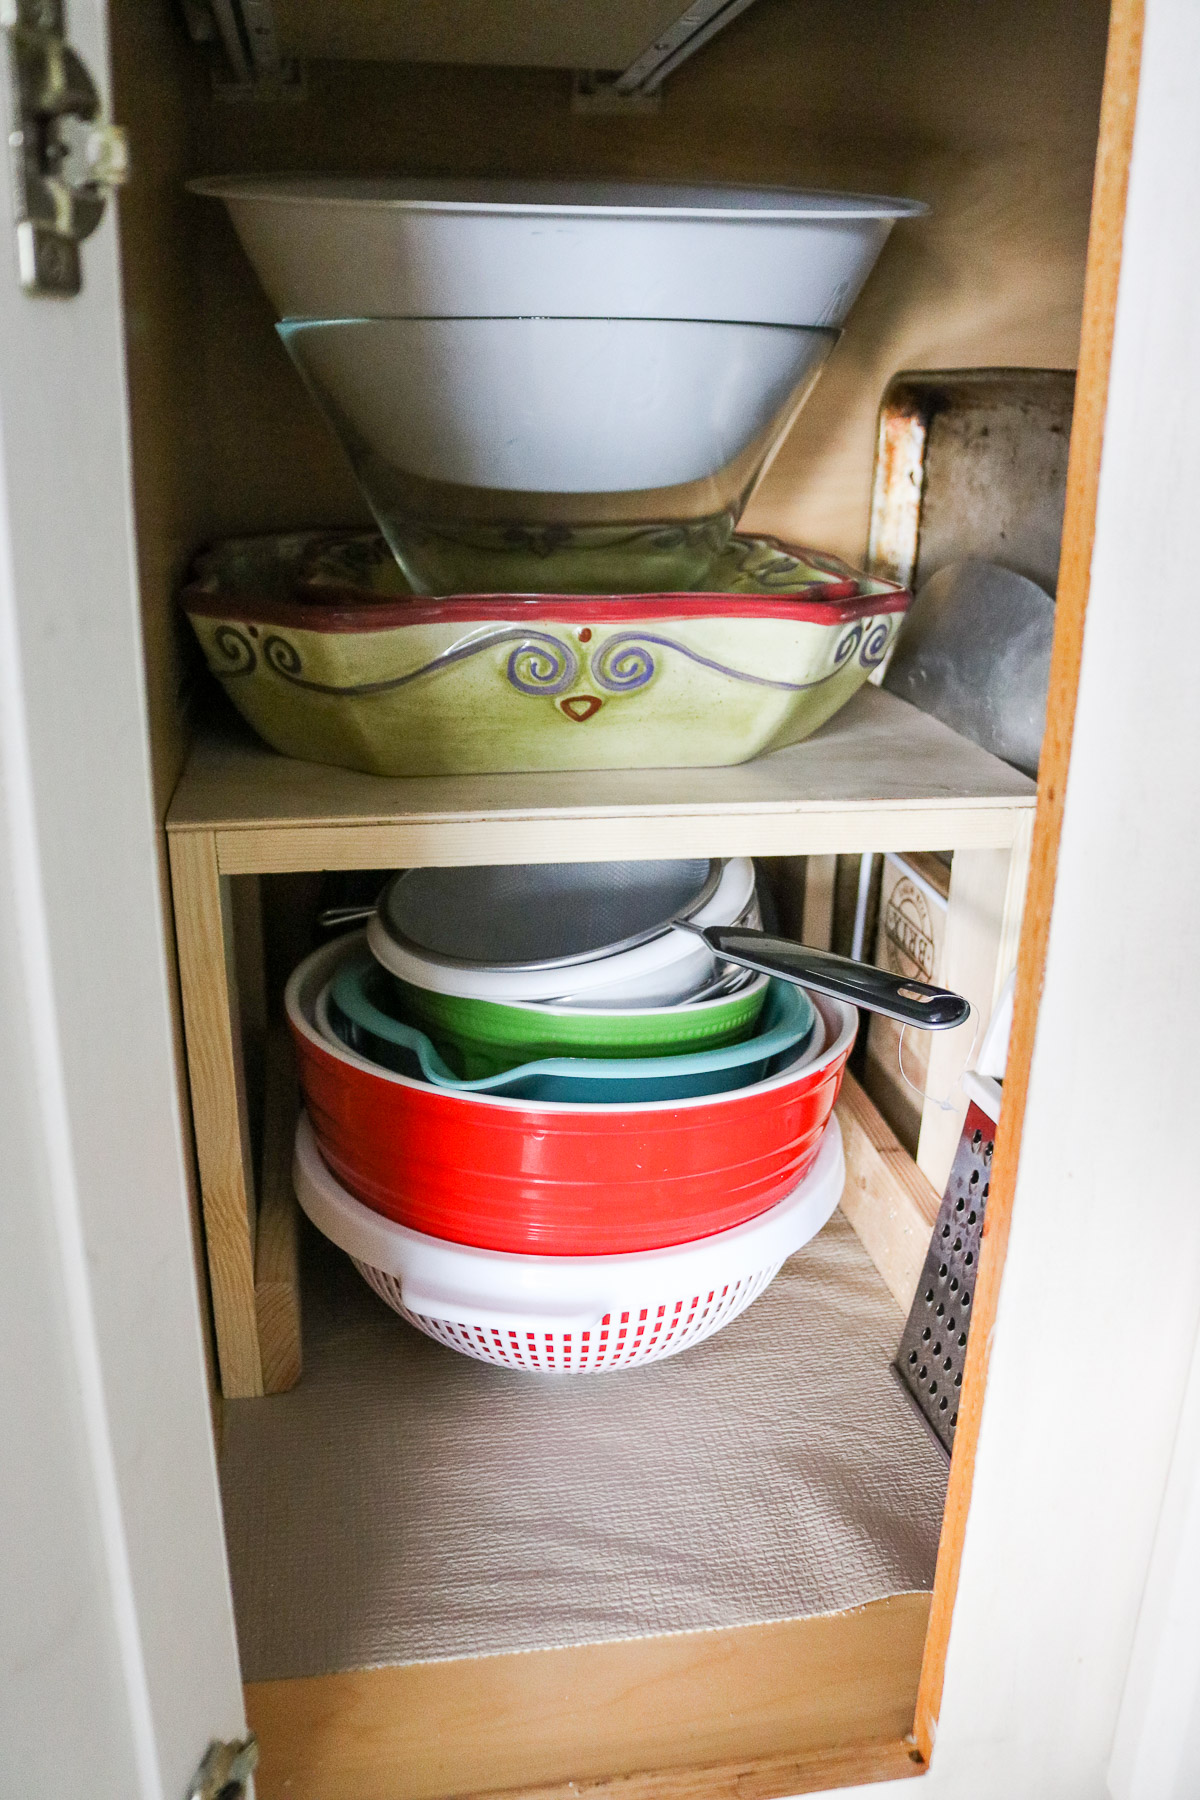
- A quick snippet of our custom shelf. This one we made for all our bowls.
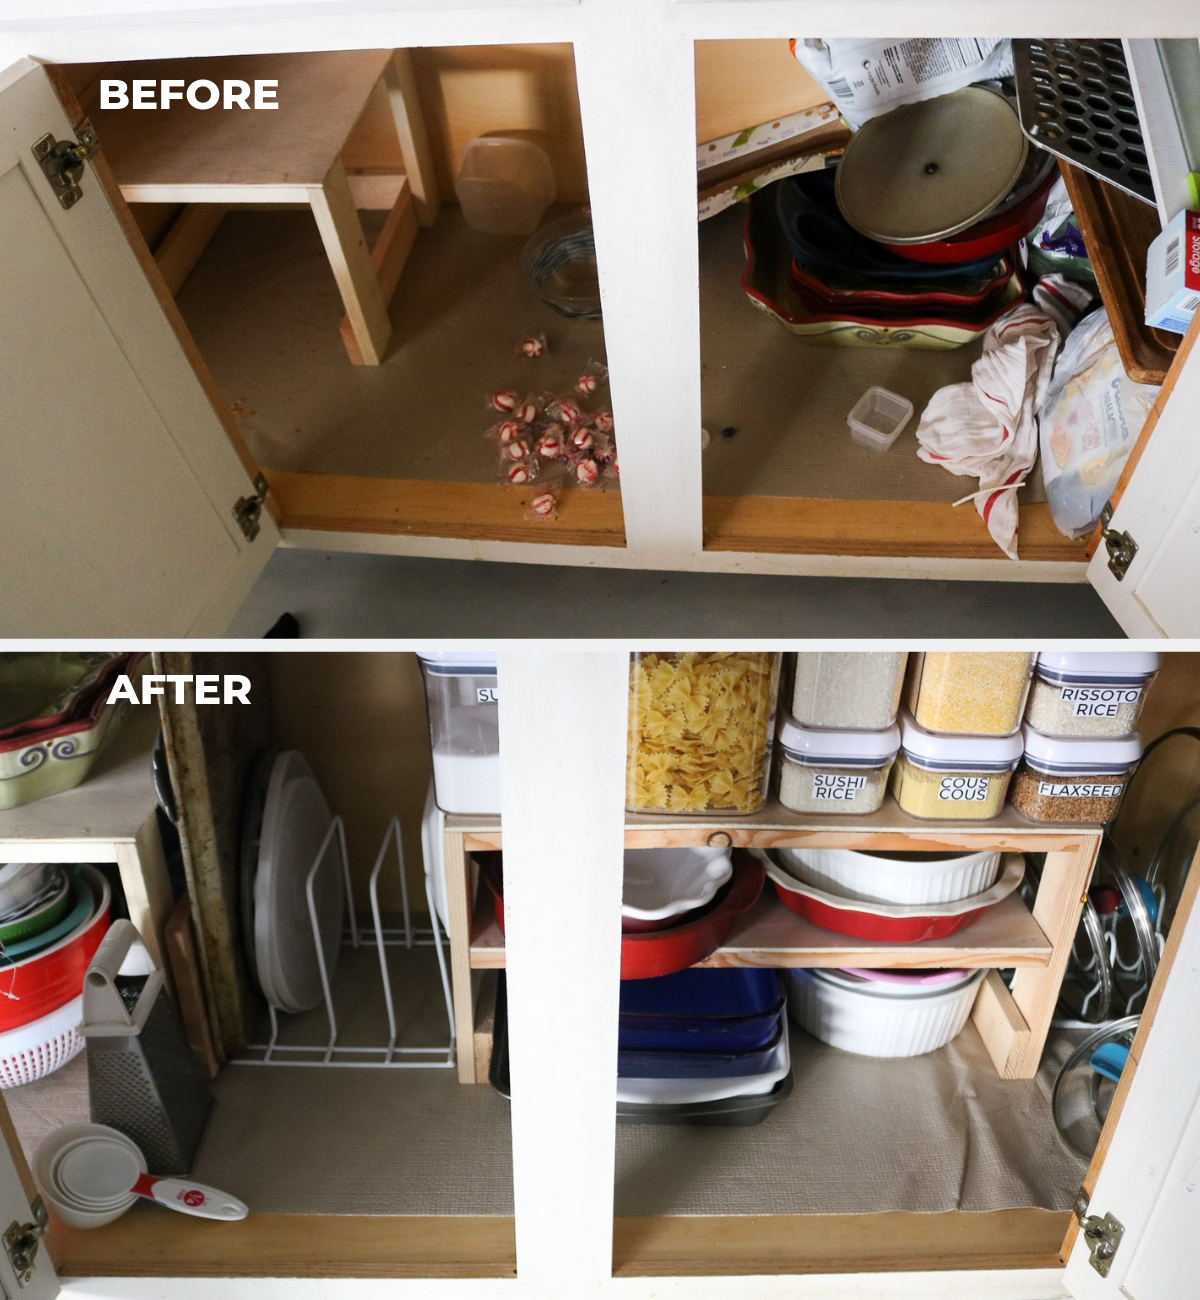
OH BOY! The before photo makes me cringe but, I’m in love with the end result in the giant cabinet. I think this was my biggest struggle to keep organized before.The before photo was taken while we were testing to see if the custom shelf would fit. Yes I ended up removing it to wipe everything down before popping it back in the cabinet.
-
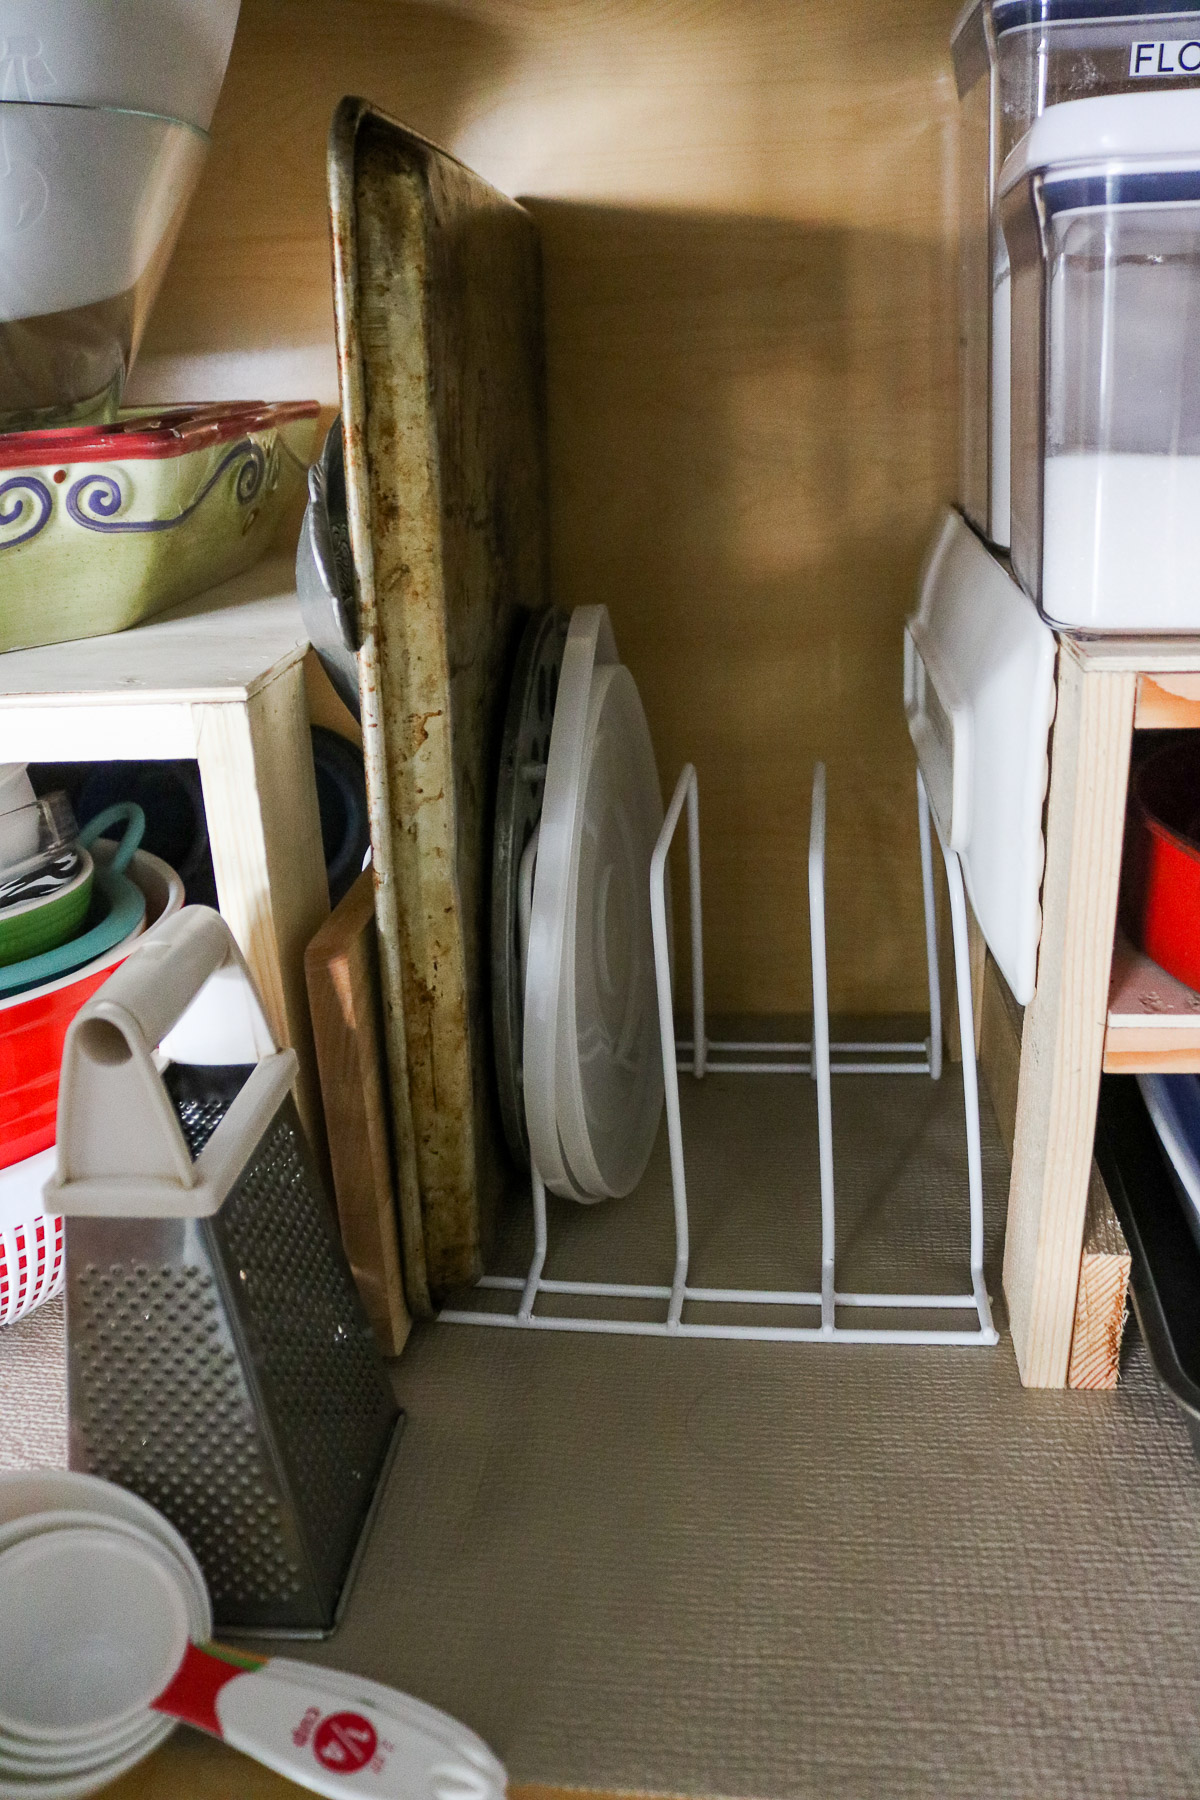
- I purchased this little metal divider at bed bath and beyond. It was about $7 and worth every penny. I love storing all my cutting boards and cookie sheets in here.
-
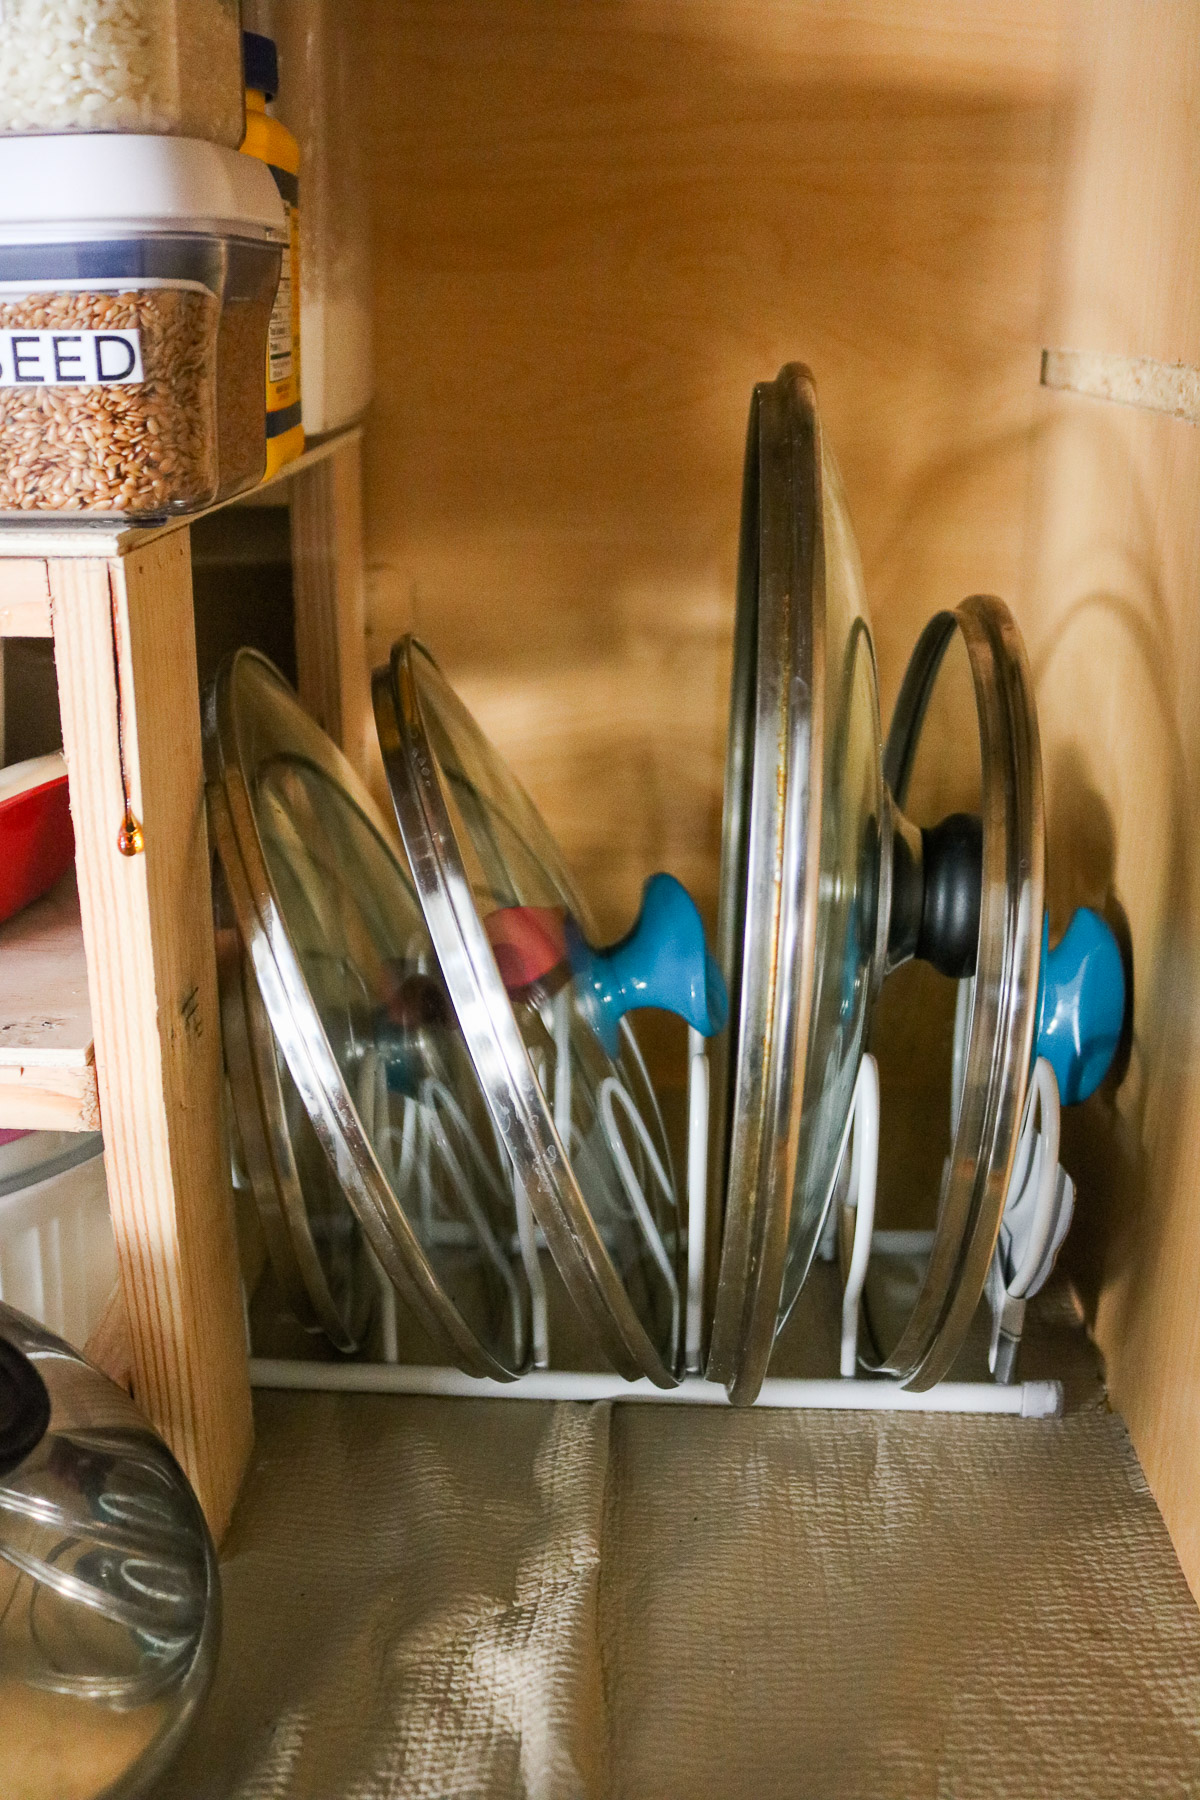
- I got this little lid holder at marshalls. It was around $5. Bed bath and beyond had one as well but it was $15. I can’t think of a better way to organize your lids.
-
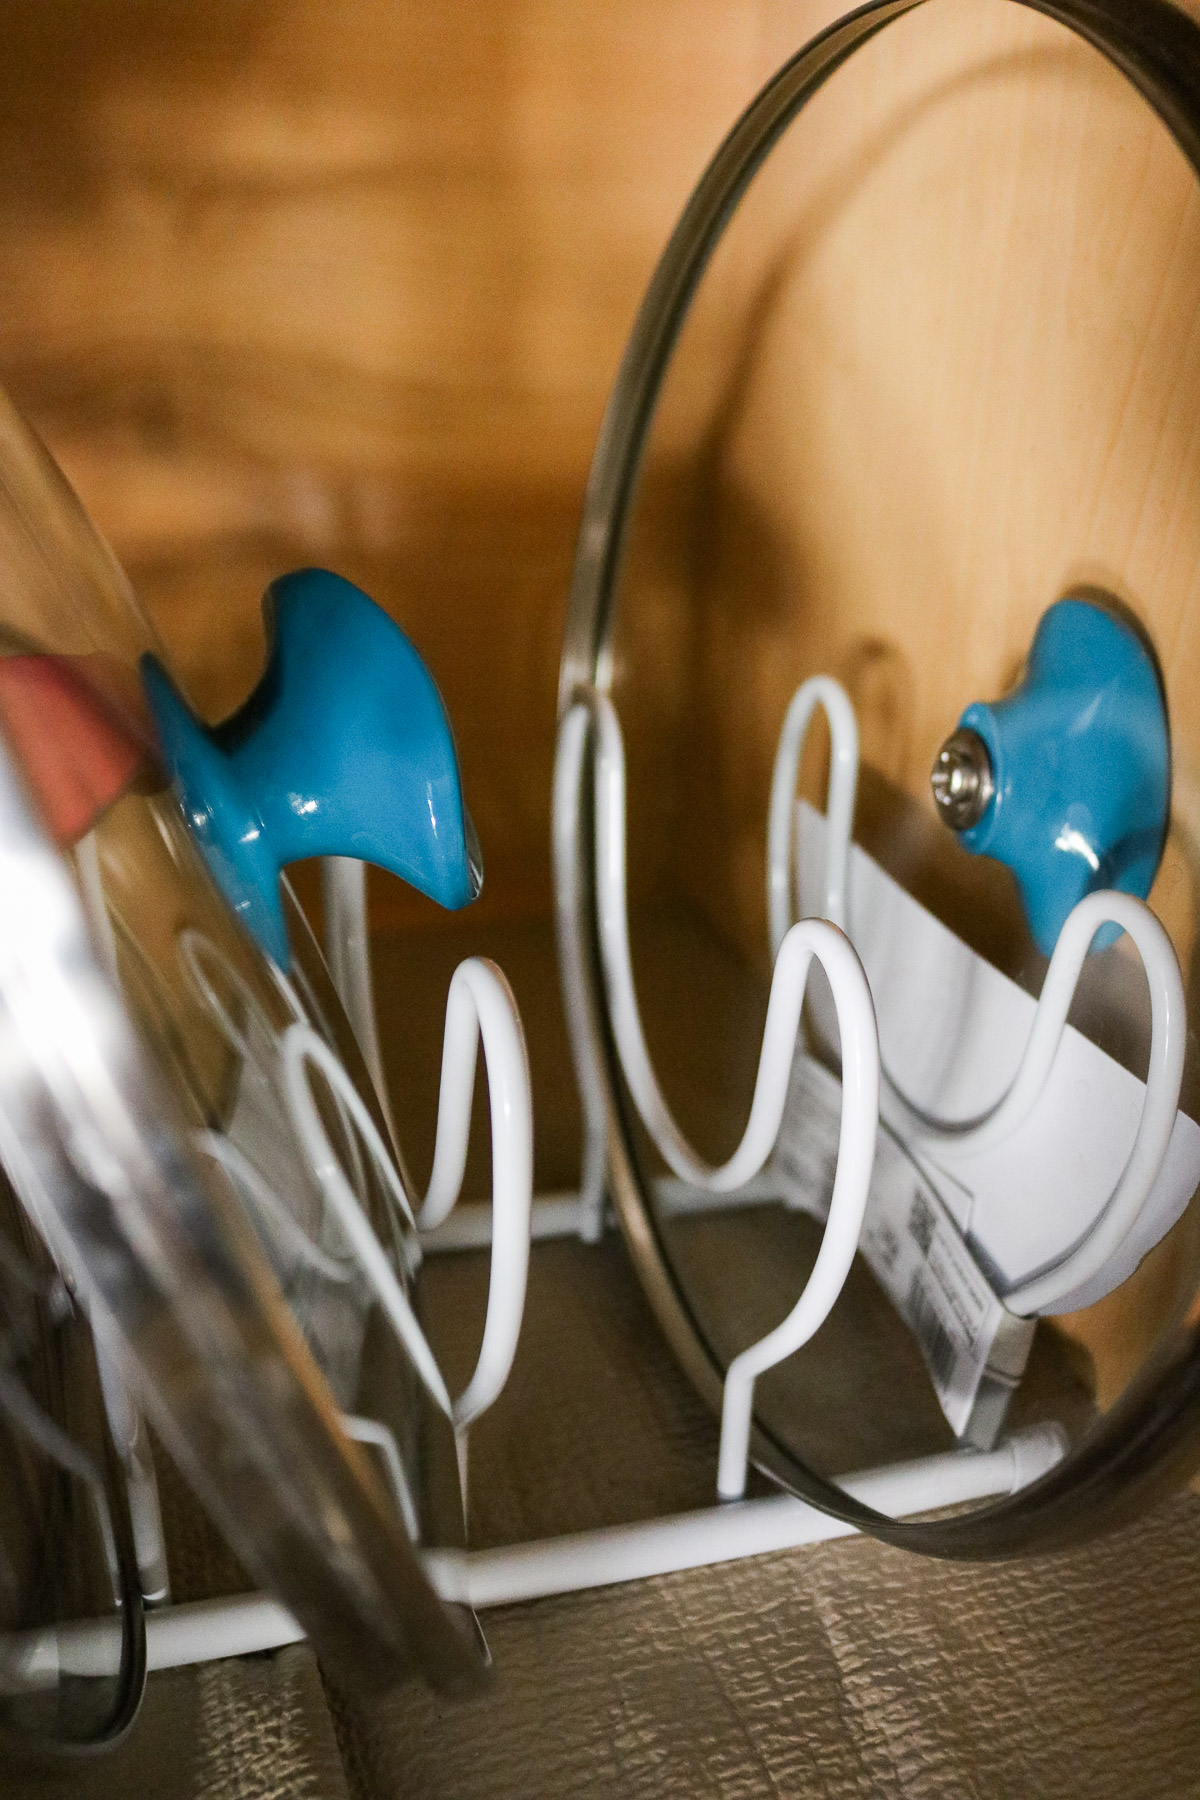
- Here’s a close up on that lid holder. The metal dividers have a nice little loop for your lid handles to fall into. I tried to make this work with a regular divider that didn’t have the loop and all my lids just kind of hung up there. I’m glad I found a divider that is actually meant for lids.
-
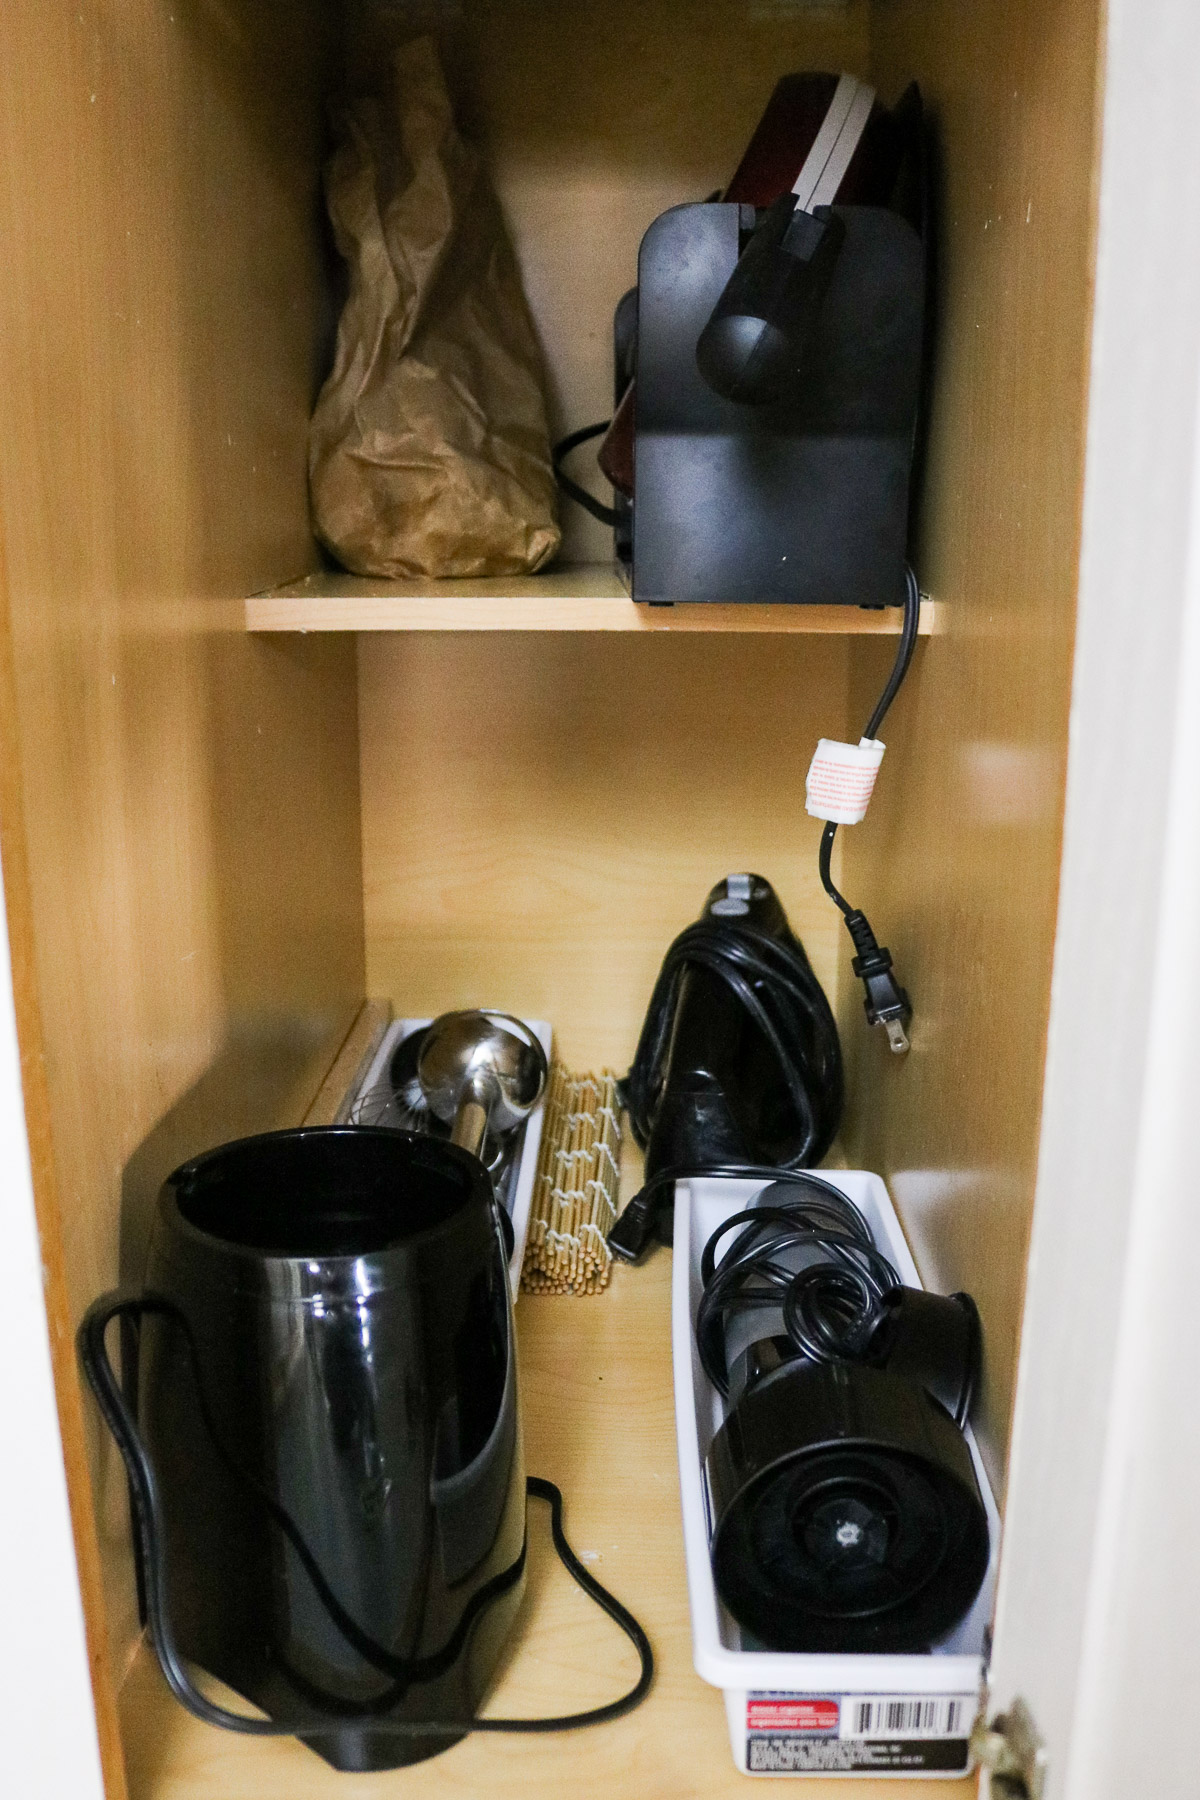
- I don’t have a lot of kitchen electronics so, I decided to keep all my small electronics in a bottom shelf. Loving this idea so far.
-
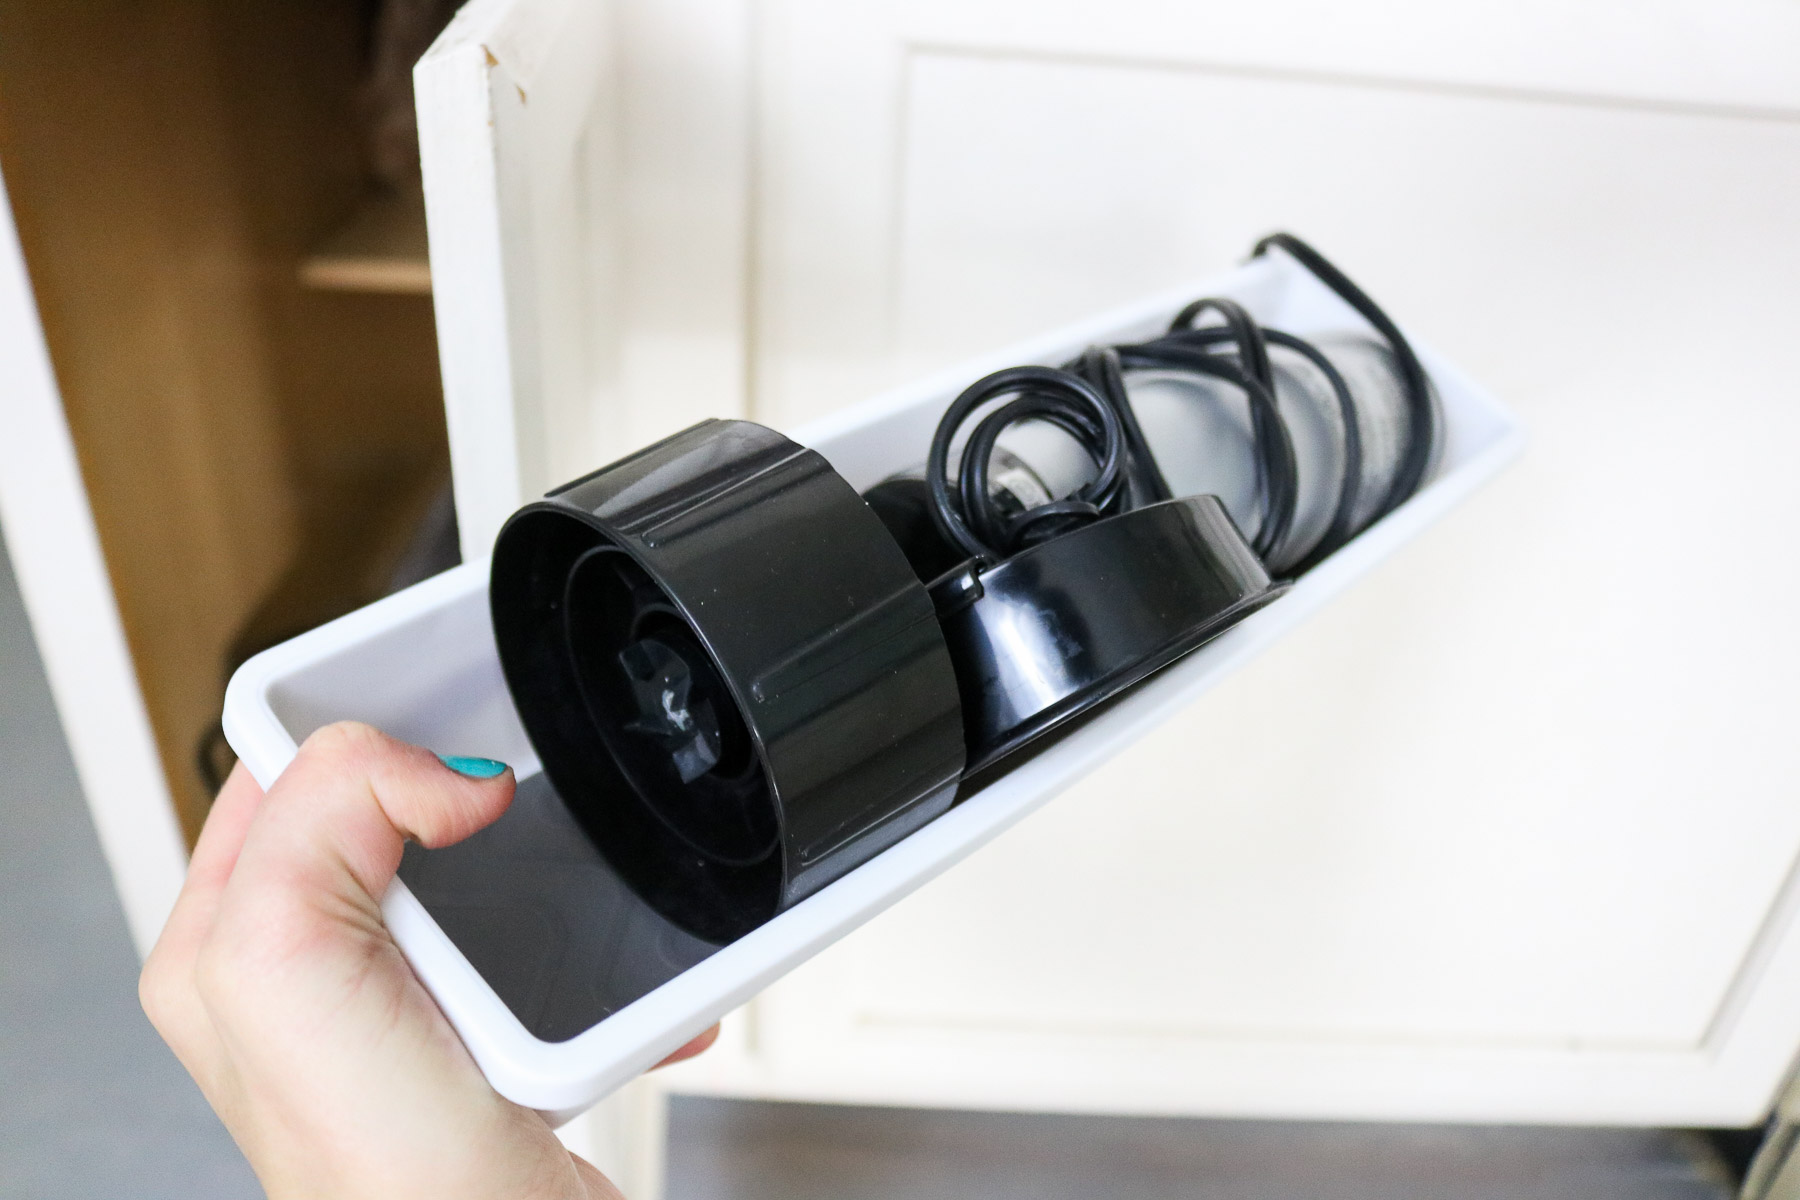
- All the accessories that are meant for my electronics are stored in these little bins.
-
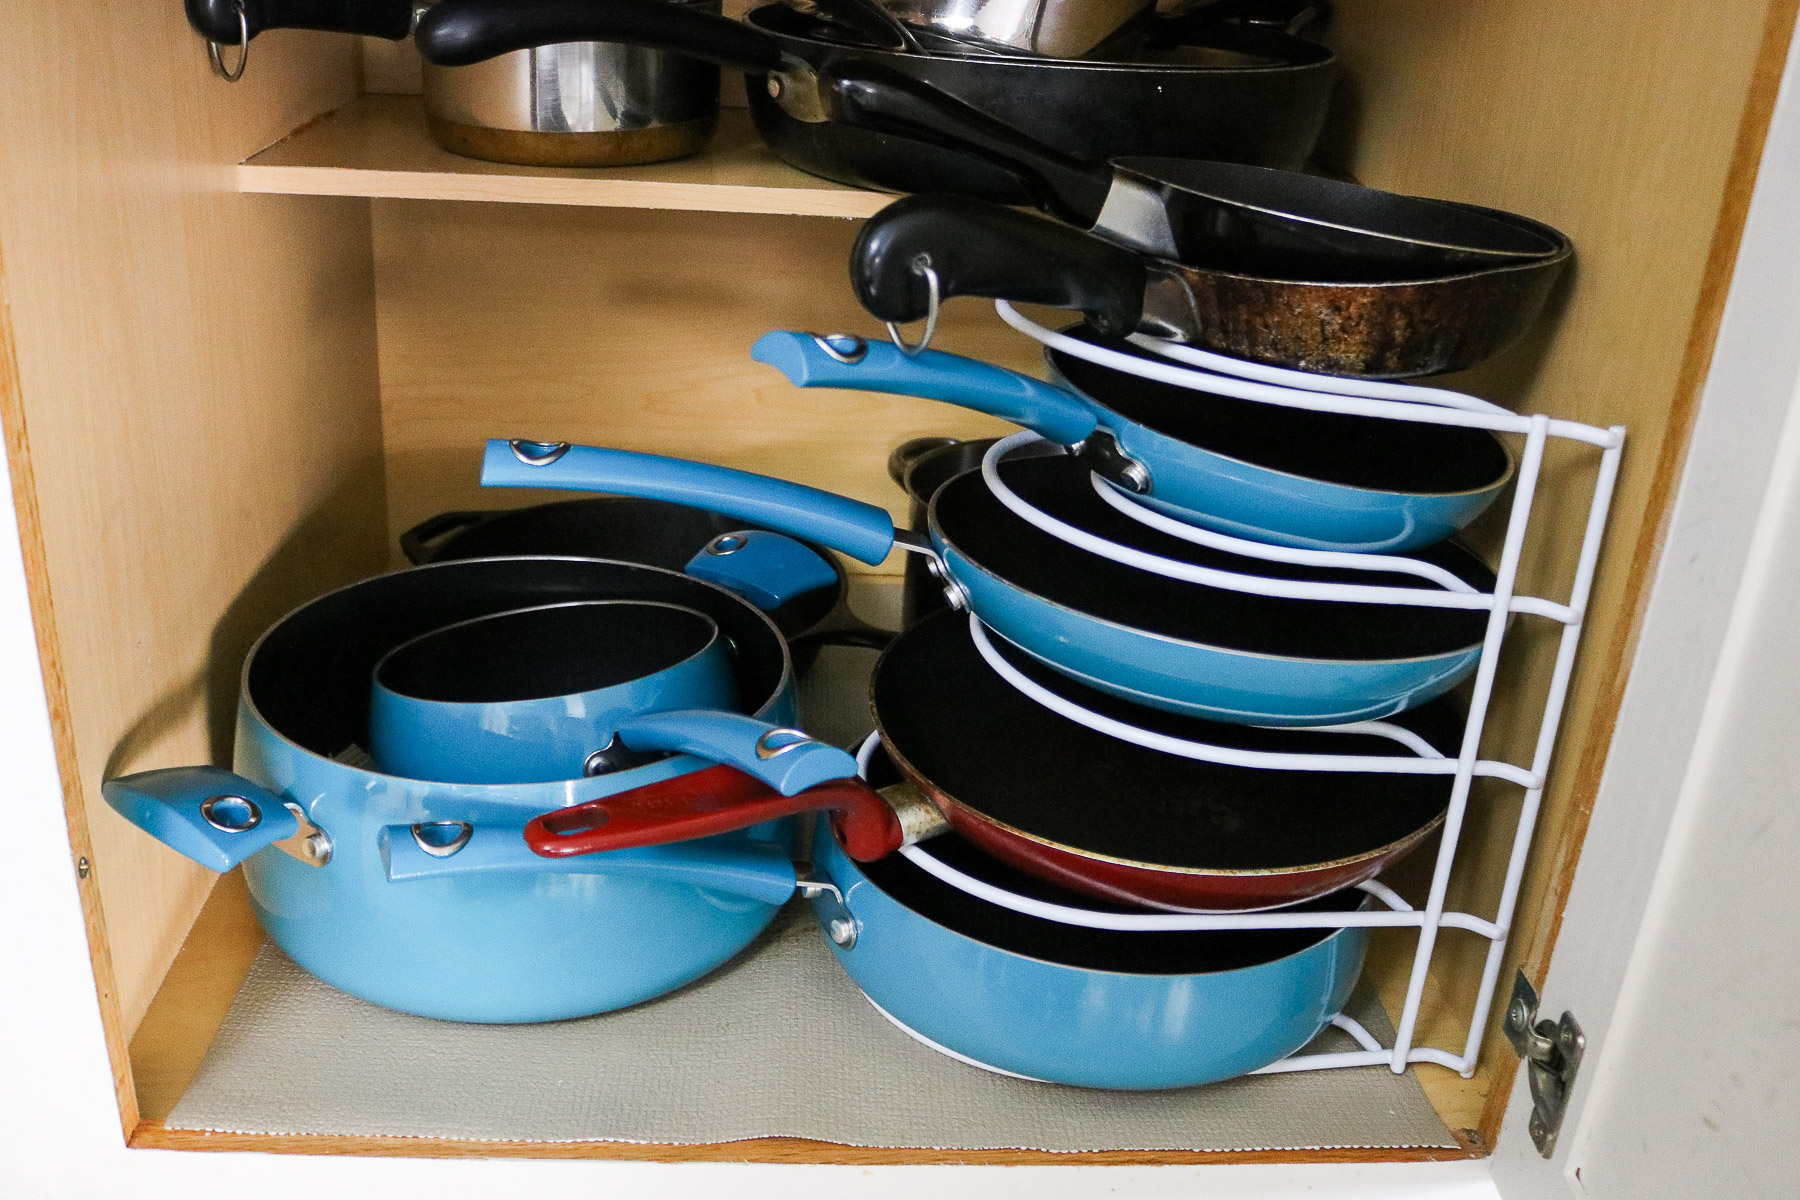
- I was so excited when I found this frying pan organizer. I purchased this new blue cookware set at bed bath and beyond recently and was pretty worried as to not get it all scratched up. Problem solved!
That’s all the photos I have. I totally forget to take photos of how I organized my canned foods and towels but, you can see that in the video. (below) By the way I’m loving the canned foods in the lazy susan. I used to have all my spices there and it was always a spicy mess! The video shows a few more things that aren’t shown in the photos. I hope you enjoy it!
If you haven’t signed up to get your free checklist guide you can do that here
I know everyone’s kitchen is so different and I hope this was somewhat relatable! I would love to hear your favorite tips for organizing. 😀
What’s your favorite way to organize your kitchen? What helps you keep it clean?
That’s all for now! 😀 😀 Thanks for tuning in!
xo, Lily-
You did an awesome job! Love your hand drawn diagram, I do the same thing! And keep it in your files for future reference. It is rather cathartic to finish a room. And I agree, everything must have a permanent home. I live alone so easy for me to stay neat and tidy, with a family, it takes a bit more. But stay after it and soon it will be second nature. Can’t wait to see what you do next. Keep up the great work. 🤗
Thank you Naomie it’s so nice to hear from you again. 😀 Oh gosh I couldn’t agree more. Ever thing feels in order although, I find myself going back in trying to change things and perfect it more. LOL in all honestly just wasting time. I need to stop 😀 I really enjoy cleaning the kitchen now. It’s so much more fun and almost therapeutic in a way. I can proudly say I’m a clean person now. HAHA 😀 The boys have been keeping up with it pretty good too 😀 so that’s been real nice. Oh yes I’m already getting good habits of putting things away where they belong, I tried to get this habit a few years back however I was unsuccessful because of the UN-organization! I hope to share the bathroom next. It’s not much to share since my bathroom isn’t really the traditional under the sink cabinet etc.. or pretty. It’s vintage olive green and hideous LOL I’m excited to remodel it! Well, it was nice to hear from you Naomie, I hope your weekend is going great and you are feeling well! 😀 hope to hear from you soon, xo -lily
Love this! Girl you did an amazing job at organizing your kitchen! WOW!!! You are inspiring me to start organizing my kitchen, specially with all of those tips and tricks! Thank you for sharing!
AWE thanks girl! Your to sweet! YAY! I’m so glad I inspired you. I can’t wait to see your kitchen 😀 😀