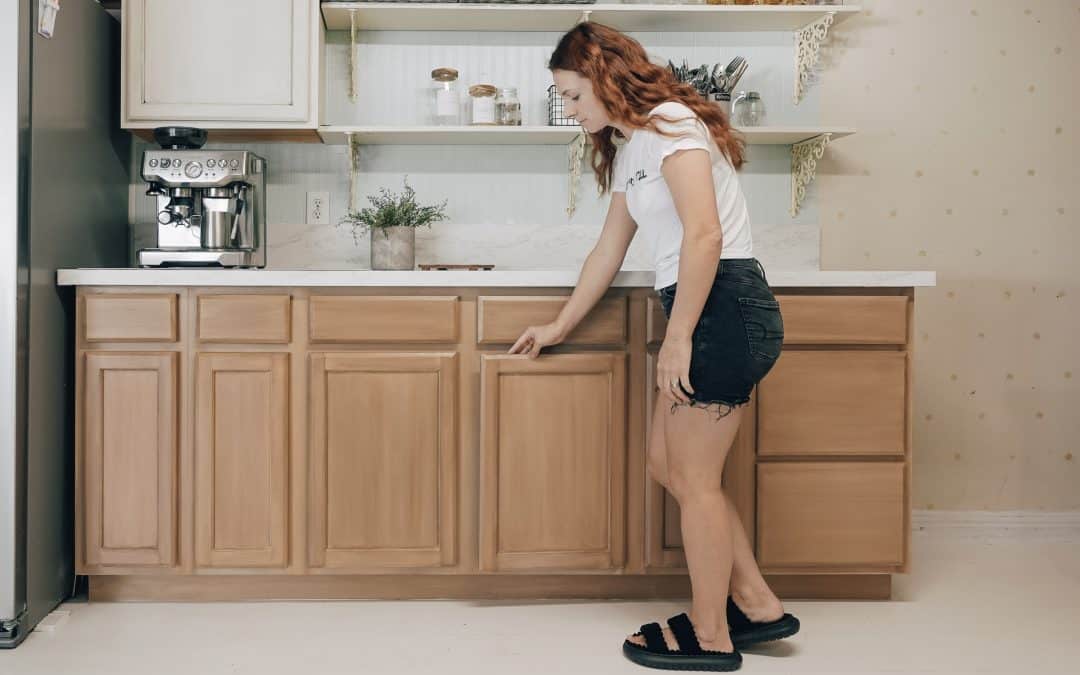
Revamp Your Kitchen Cabinets with a Wooden Twist: A DIY Transformation Guide
Hey there, fellow DIY enthusiasts! Welcome to the cozy corner of kitchen makeovers. I’m super excited to kick off my DIY series that’ll give your kitchen a fresh new look. We’re going to tackle it all, from painting your kitchen cabinets to giving those dated granite countertops a makeover, creating cool concrete tiles, and even adding a rustic stone wall with floating shelves. Let’s bring some character and warmth into your kitchen!
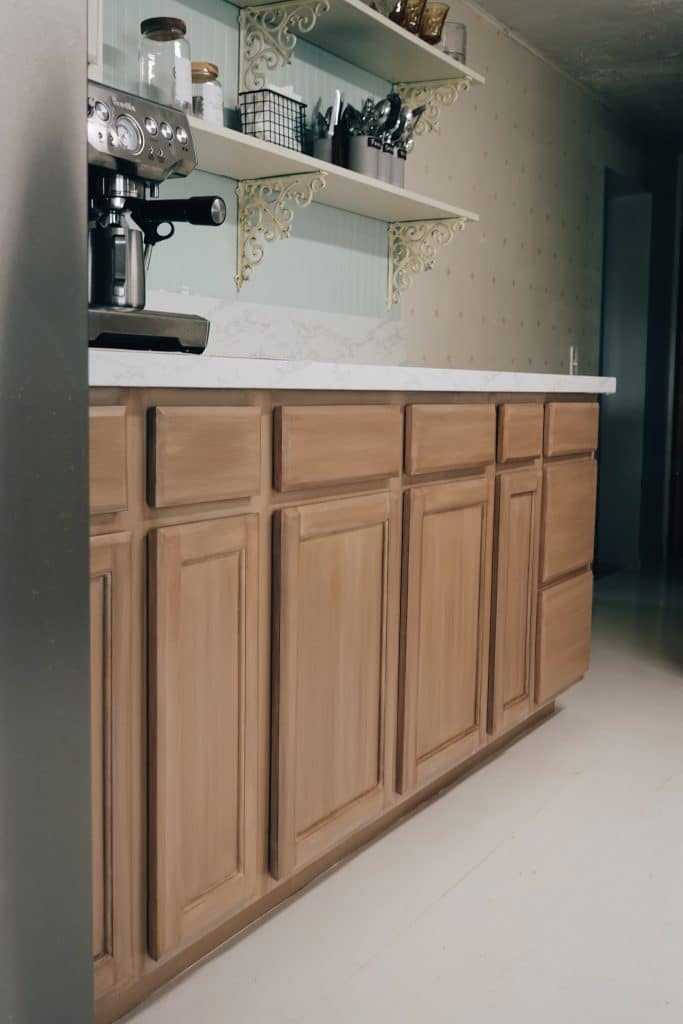
Painting Kitchen Cabinets to Resemble Wood: The Ultimate Transformation
Before we jump into the nitty-gritty of painting your kitchen cabinets to look like wood, let’s set the stage. We’ve all seen those eye-catching kitchen cabinet ideas, inspiring kitchen cabinet colors, and creative ways of redoing kitchen cabinets. This DIY adventure is all about personalizing your space, making it uniquely you. Get ready for a fun and funky wood-graining journey!
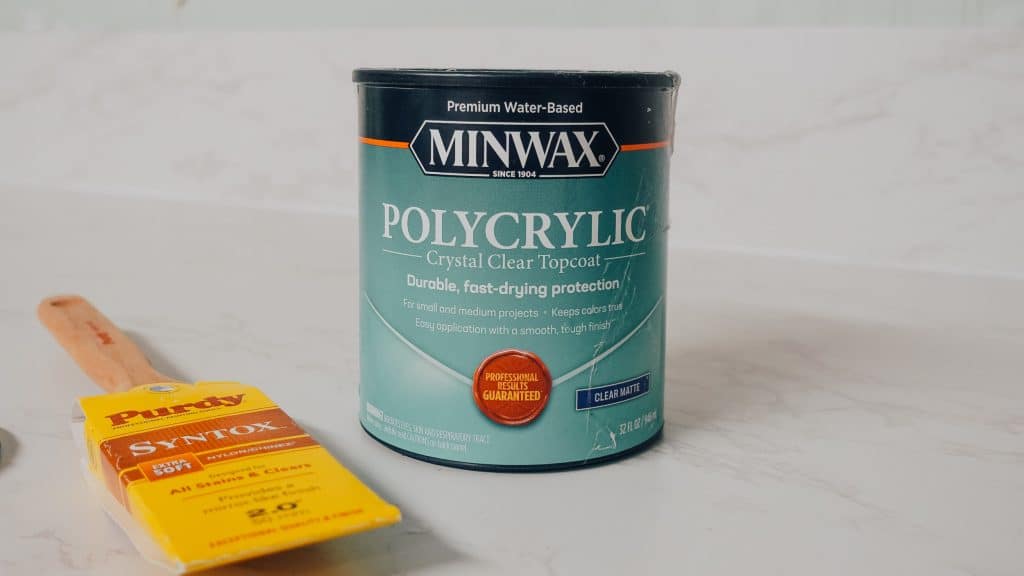
Supplies :
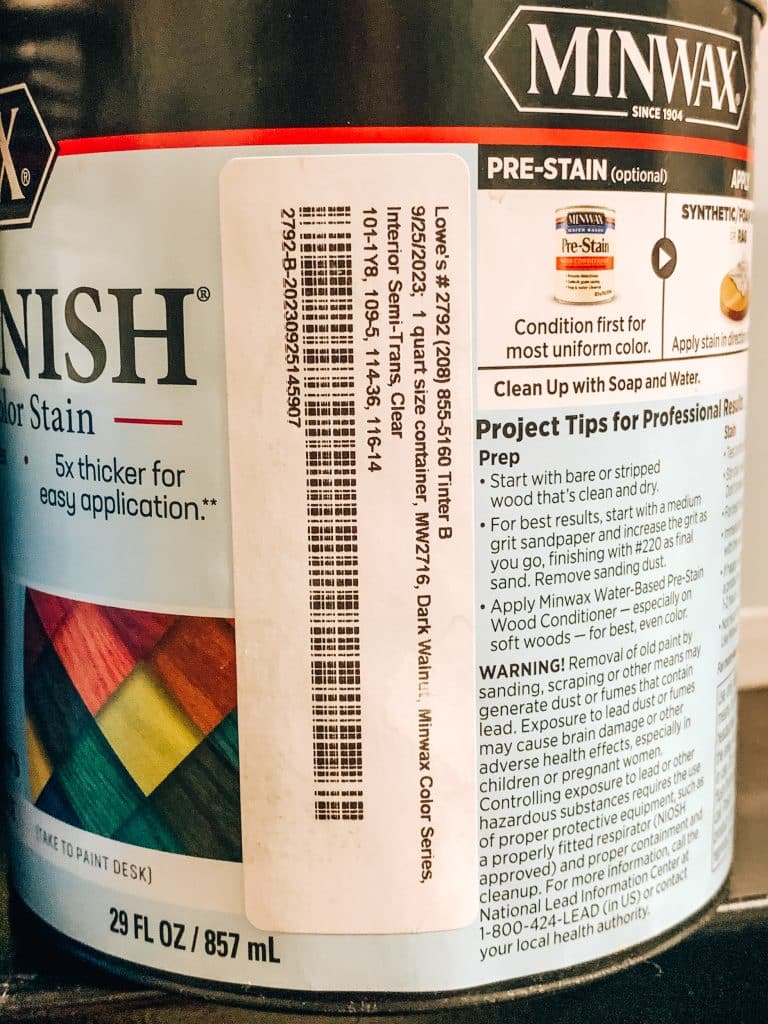
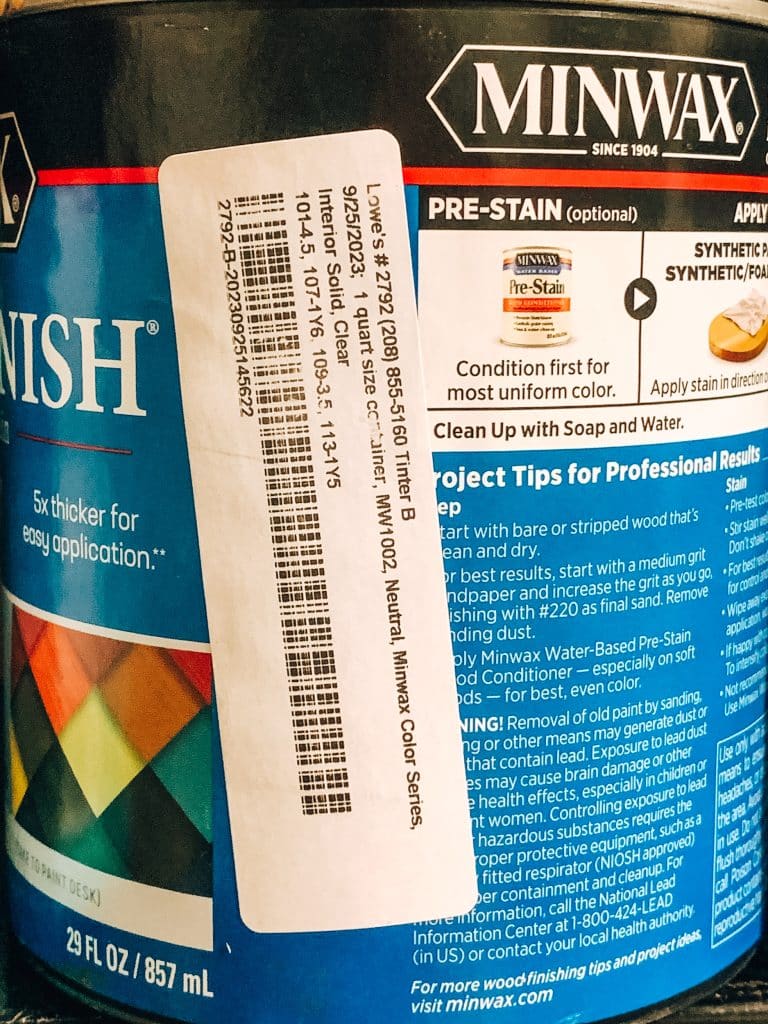
- Dark walnut minwax stain (water based )
- neutral color minwax stain ( water based )
- cheap brushed ( from lowes )
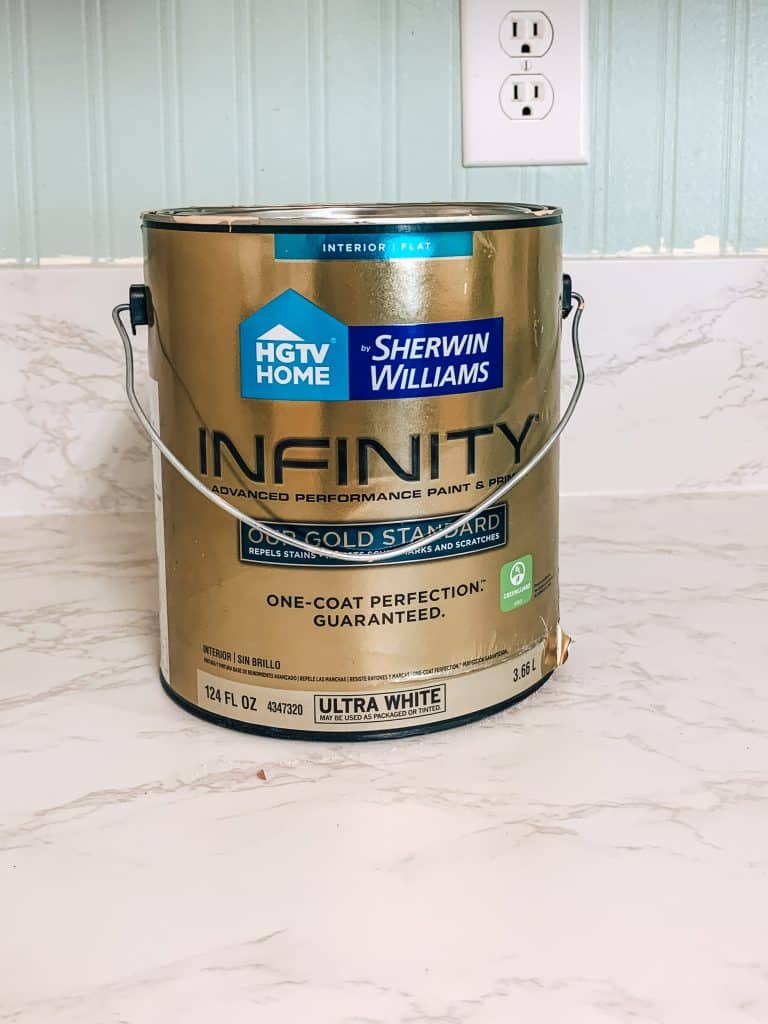
- peach base color ( brand sherwin williams )
- grip seal primer
- floetrol ( important for nice brush strokes )
- Minwax matte polycrylic
Prep for the Cabinet Painting Party
First things first, let’s get our prep game strong. I started by sanding down any loose paint and gave the cabinets a good scrub with 409 to get rid of grease. The secret sauce? Priming them with Seal Grip, which is basically the MVP that’s never let me down. It worked like a charm on my floors, and I swear, no cracks, no peeling – just pure awesomeness.
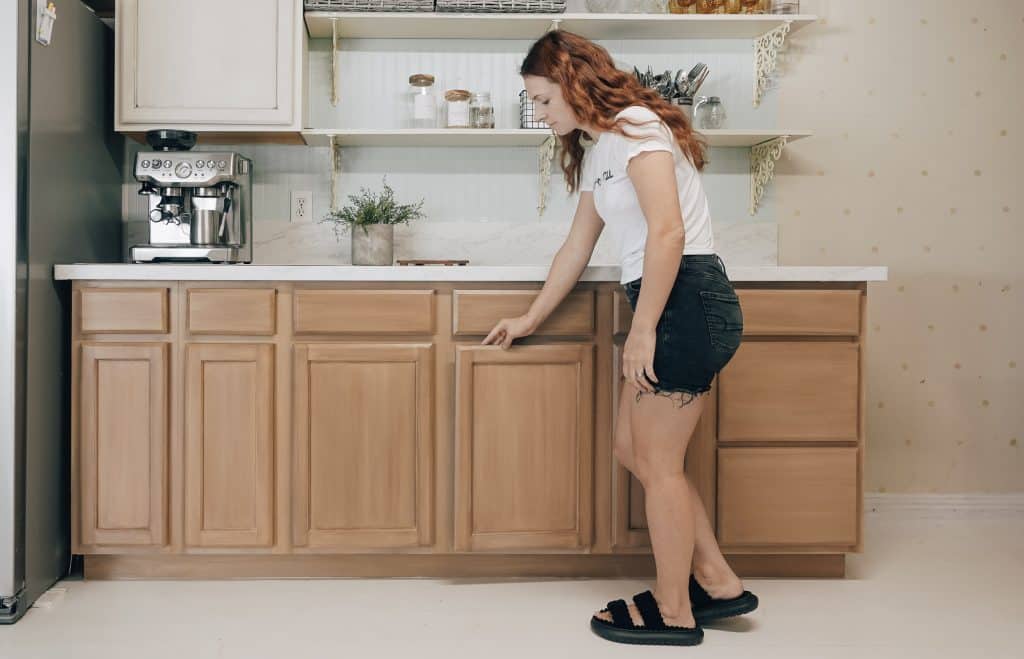
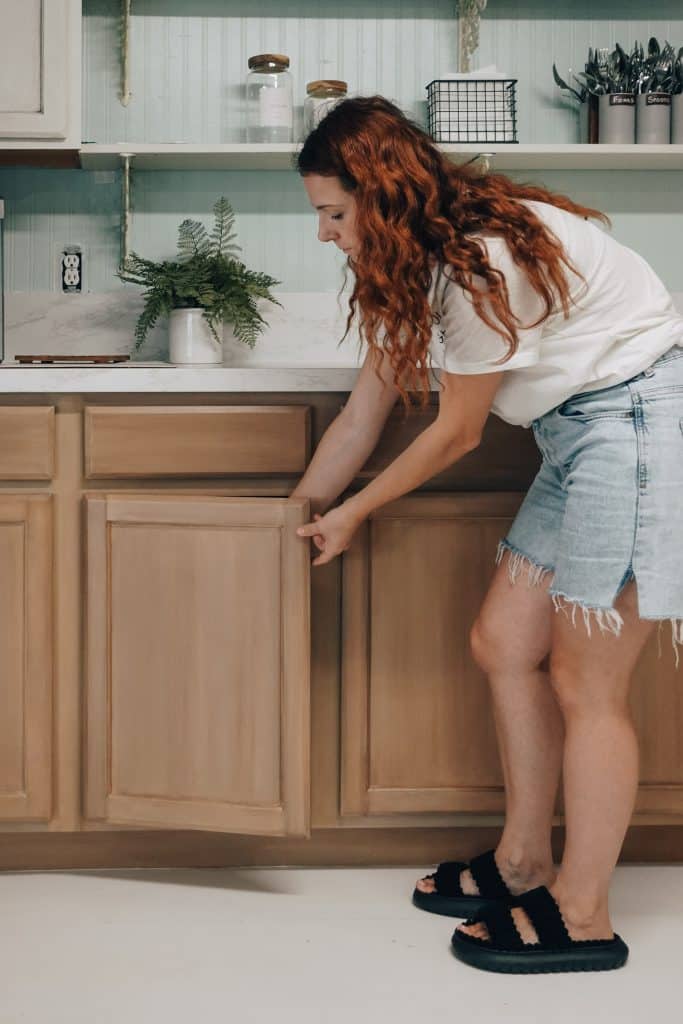
Four Easy-Peasy Steps to Achieving a Wooden Look
You can either take off the cabinets and paint them if it’s easier for you. Or can do it while they’re assembled. I found it easier to have them assembled because I could make the colors look cohesive. The cabinets look so different when painted outdoors and brought inside.
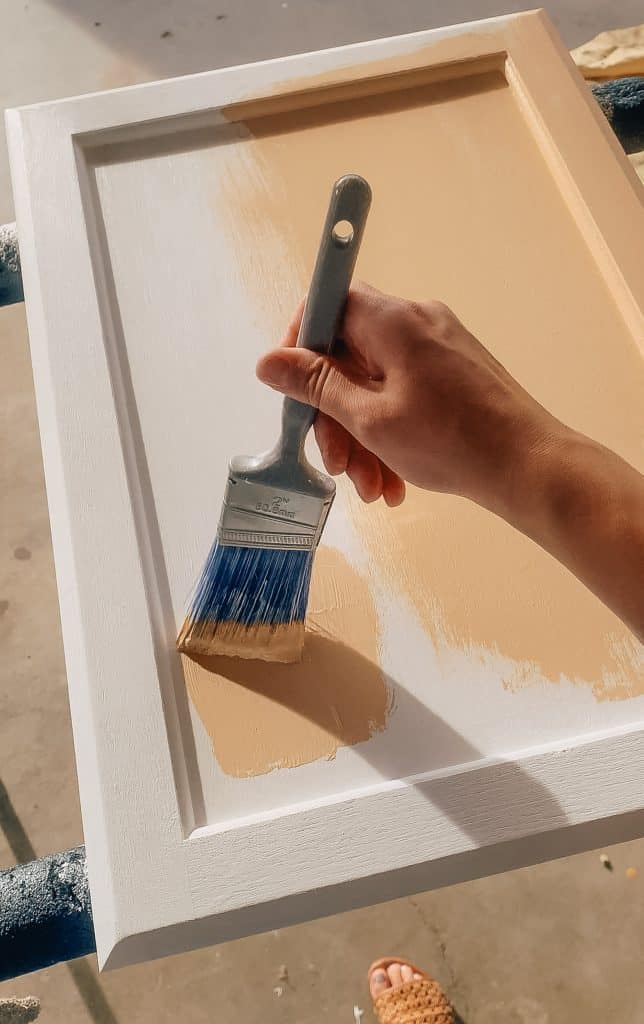
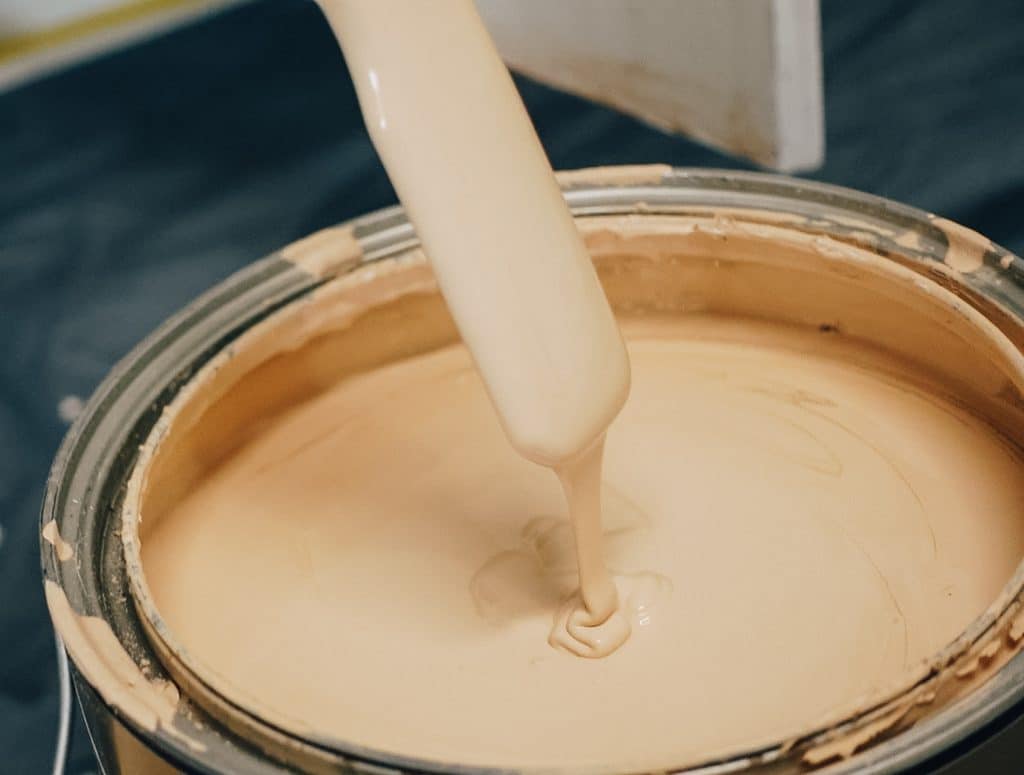
Step 1: The Peachy Base Color
First up apply an even coat of this peachy base color! I’ll even spill the beans on the color code so you can replicate the magic. I choose to go with sherwin williams for the first time. No regrets! Honestly the best stuff ever! Goes on smooth like butter. %95 coverage in one coat. Not thick and hard to work with and it’s sandable! Doesn’t roll up. ( not sponsored I just love it ) All step one to dry completely before moving onto step 2.
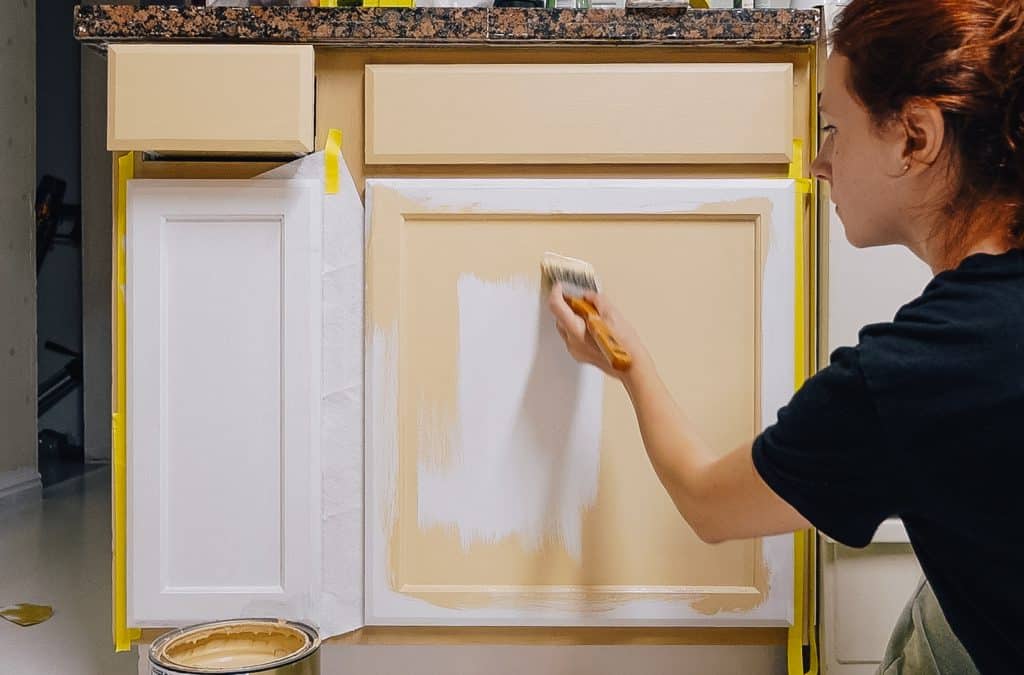
Step 2: Let’s Create Some Wood Magic
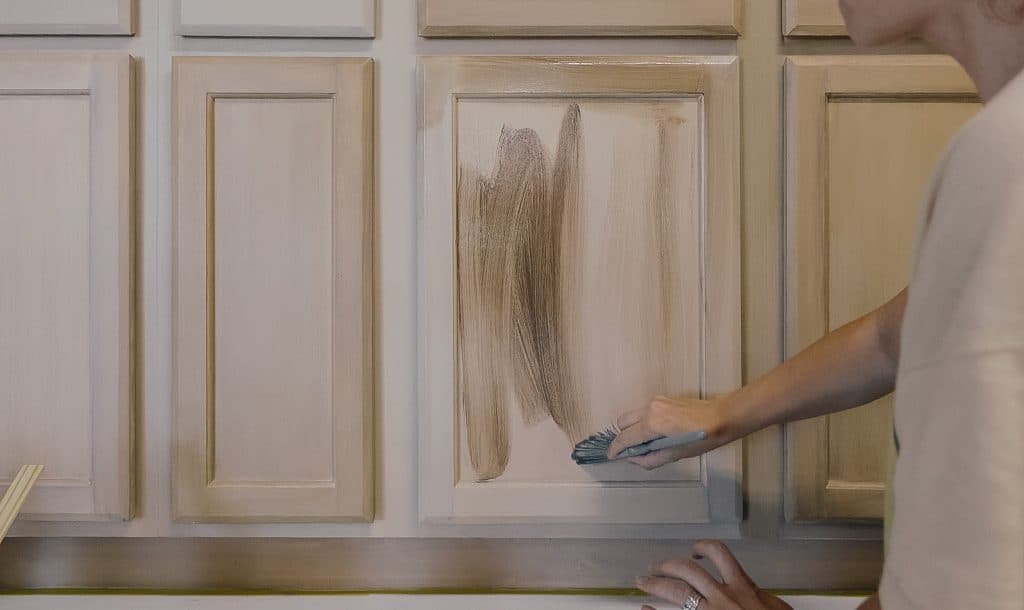
After the base color has dried, it’s time to work your DIY magic. Wet the surface and brush on the peach colored paint. Then gently dip your brush into water-based Minwax dark walnut stain. A little drop goes a long way. Check out the video to see how much I used. Apply it over the diluted paint, following the wood grain’s direction. This step gives you that lovely taupe undertone all the expensive wood has. Again allow to dry completely before moving onto step 3.
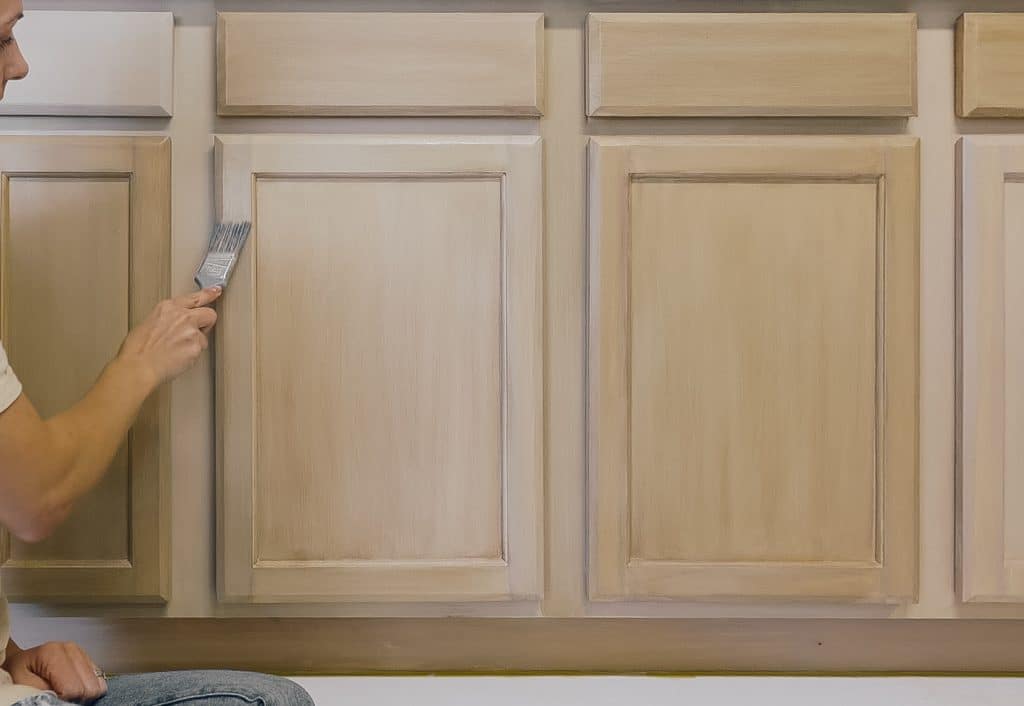
Step 3: Get that Grain!
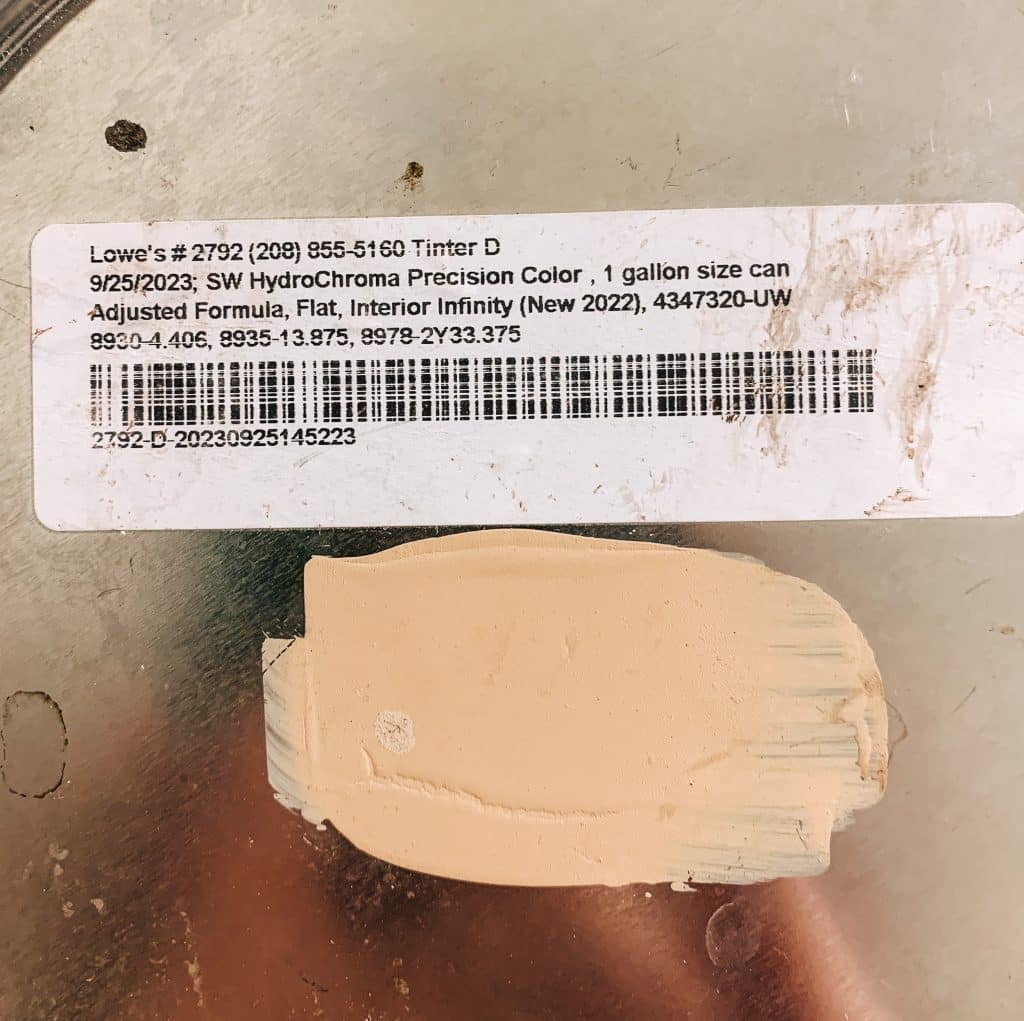
In this step, you’ll mix Floetrol with dark walnut and mustard color stain, creating a lighter and a darker shade. Light brown and deep mustard. No need to stress about getting the perfect color; it’s all about adding your personal touch. Adding photo of the color codes for the waterbased stains as well.

![]() touch.
touch.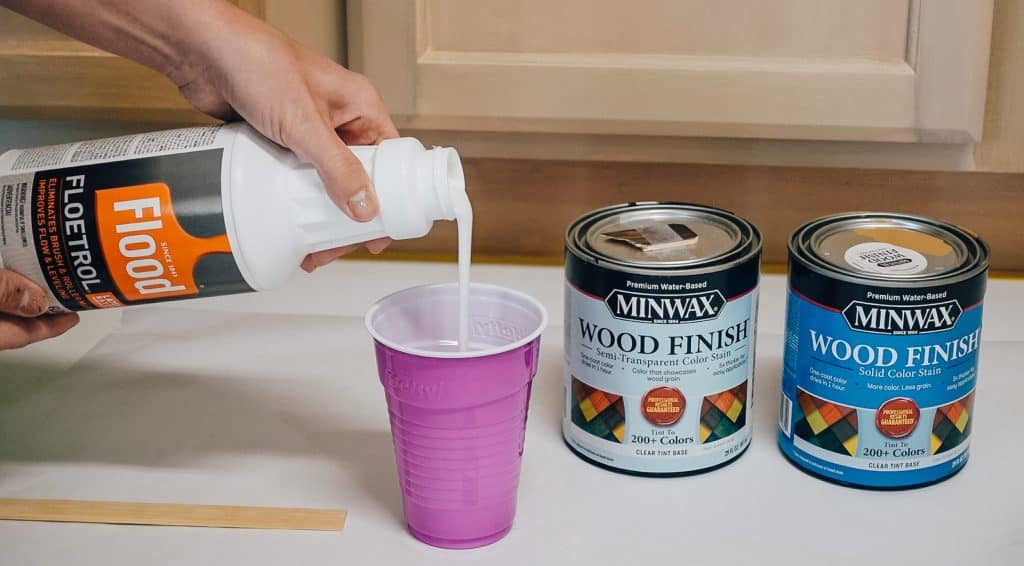
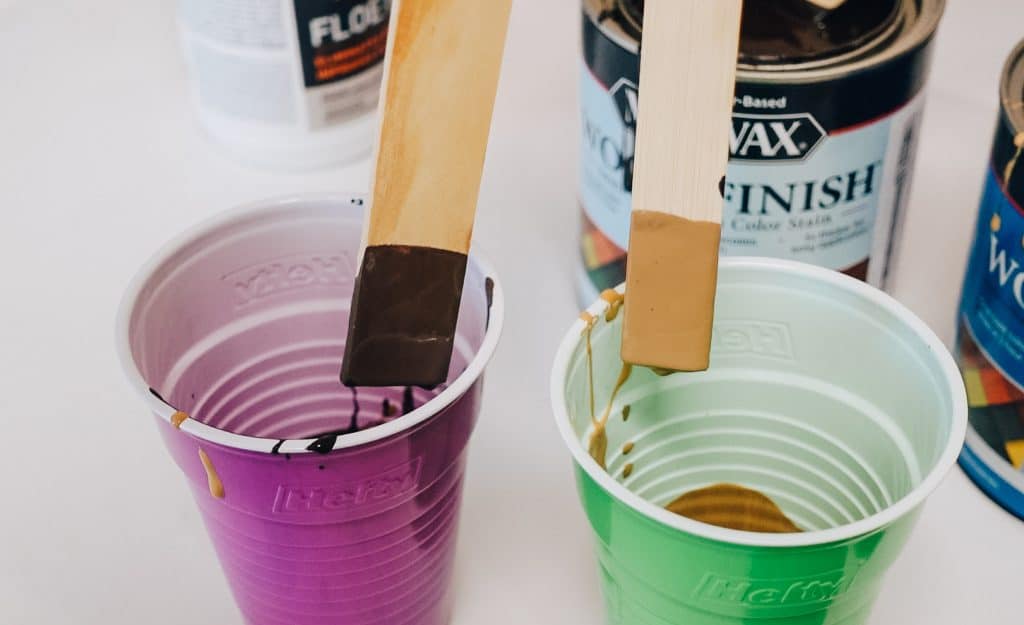
Once the previous layer is dry, moisten the area again and apply your mixed stain, starting with the light brown. Keep brushing and wiping. I like to apply it over the whole cabinet then wipe most of it off and keep blending. This ensures you have a moist base and the wood effect will be created more evenly. If it feels too wet wipe more down with a paper towel. Works best if the wood stain becomes the tiniest bit tacky and once you run the brush over it the effect sits in place. This means it’s the perfect wetness. Keep in mind you’ll have about 10 minutes of working time before it starts drying to much. Allow this step to dry for 24 hours before continuing onto the next step.
Step 4: Add a Hint of Mustard
Finally, apply the mustard stain and wipe most of it off, so the wood’s color tone changes without turning yellow. It’s about about building up layer. I know it doesn’t seem like much but it makes a difference.
Throughout the process, you can always refer to the video for a more in-depth demo. Videos are great when you want to see the whole shebang in action.
Pro Tips for a Smooth Finish! THIS WILL MAKE OR BREAK YOUR PROJECT!
1. Keep a wood planter or cutting board nearby to keep your color in check.
2. Don’t forget to wash your brush every two to three cabinets to avoid too much color change. ( the dark walnut builds up on the brush )
3. Finish each step on all the cabinets before moving on to the next step. One of the hardest things I struggled with was consistency. It’s easy to get carried away with finishing sections and forgetting how much brush strokes dips, or how runny you did it.
The Final Flourish: Choose the Right Finish
When it comes to sealing the deal, I trust Minwax products for a finish that stands the test of time. I’m not getting paid to say this, but their stuff has never let me down.
And when it comes to brushes, the Valspar All Stains brush paired with Minwax products will make your finish look like a pro did it – trust me, your guests won’t believe you DIY-ed it!
Stay Tuned for More DIY Goodness
Don’t forget to sign up for my newsletter to catch the rest of my kitchen transformation journey. I hope you enjoyed this Kitchen cabinet idea!
Next up, I’ll spill the beans on how I transformed my ugly granite countertops into beautiful white marble for just a $110!!!
So, grab your paintbrushes and let’s get creative! Your kitchen is about to become a masterpiece, and it’s all thanks to your DIY skills. Get ready for some crafting fun, and let’s make your kitchen cozy and fabulous! Happy DIY-ing!

Dollar Store Easter Centerpiece
Dollar Store Centerpiece If you love colorful Easter decor you'll love this centerpiece. Although I used dollar store Easter eggs you can always switch them out for dyed hard boiled eggs to give it a cleaner look. Best part about this one is your kids will LOVE it!!...
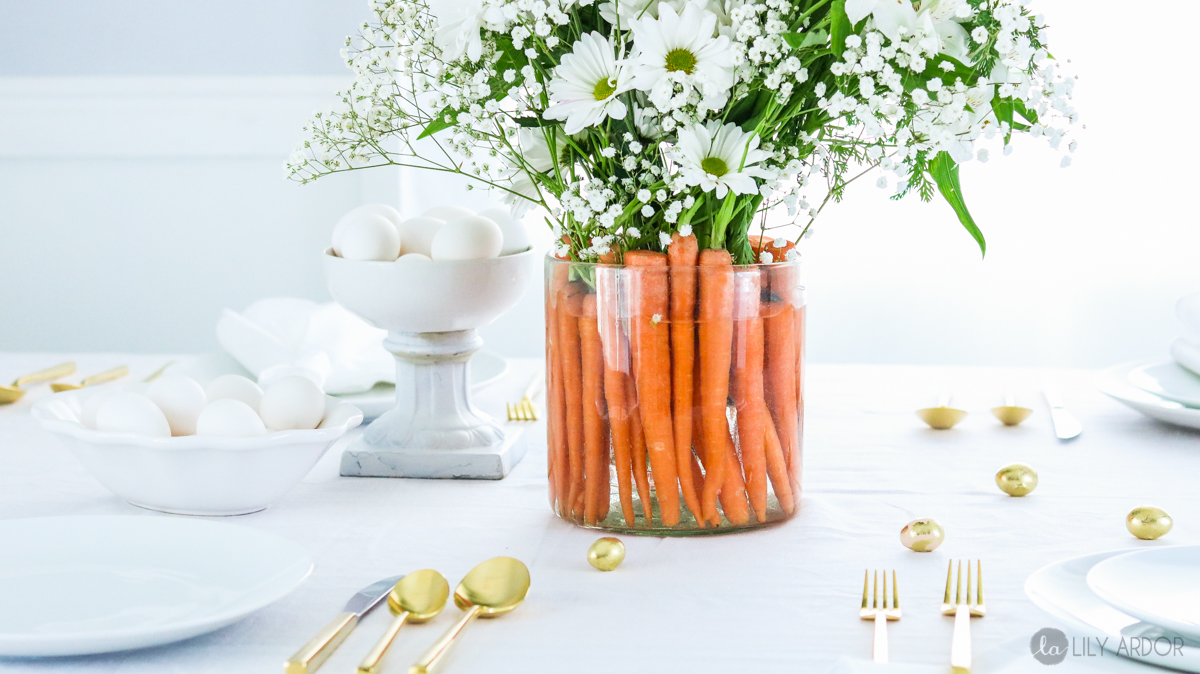
Easter Table Carrot Centerpiece
Carrot Centerpiece This carrot centerpiece has been around for quite some time now. I saw it first on pinterest only it wasn't a full vase of carrots it was just a handful at the bottom of the vase. I wondered how it would look if I were to fill the whole vase......
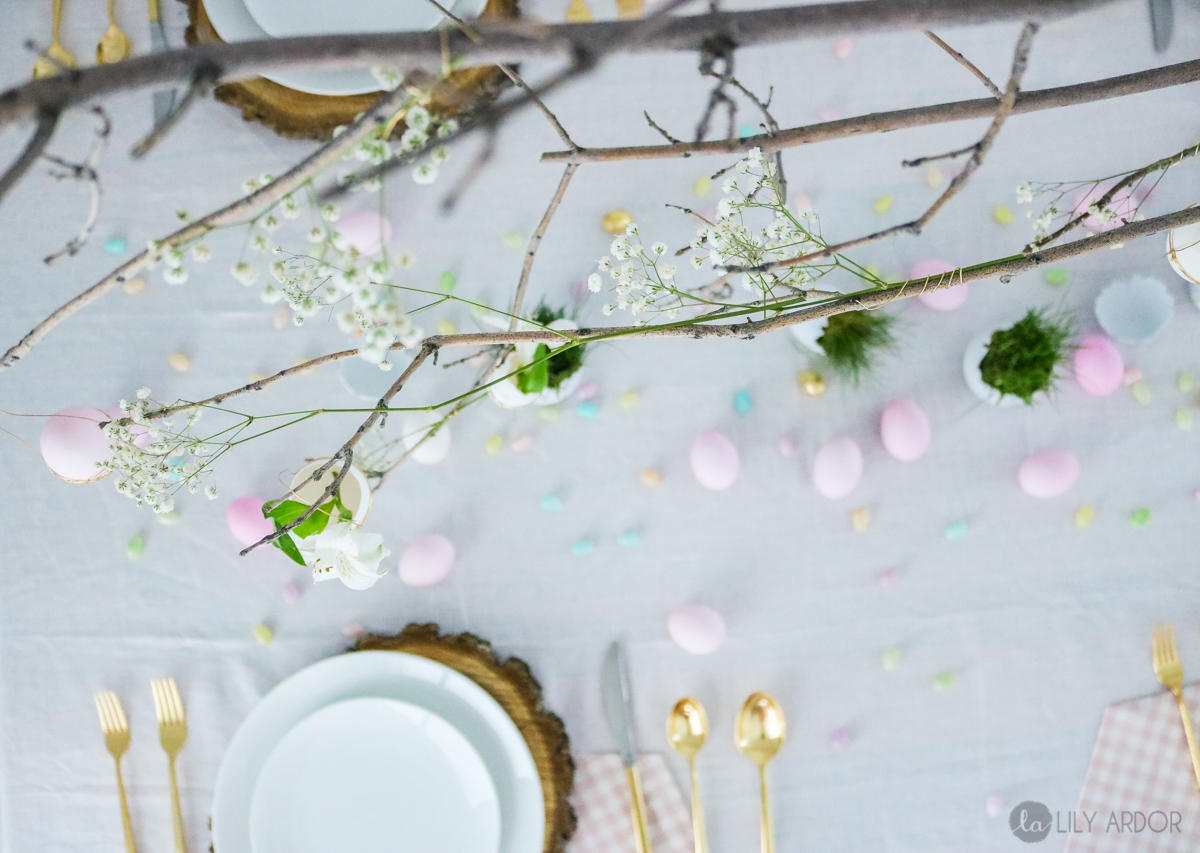
Easter Tree Centerpiece
Easter Tree This centerpiece is definitely a show stopper. It's super simple yet it transforms the room ssso much! I was inspired by the Easter tree trend going on on pinterest. From jelly beans being glue on to branches like ornaments to mini egg terrariums hanging...
Mini Easter Eggs + Creative Ways to Decorate
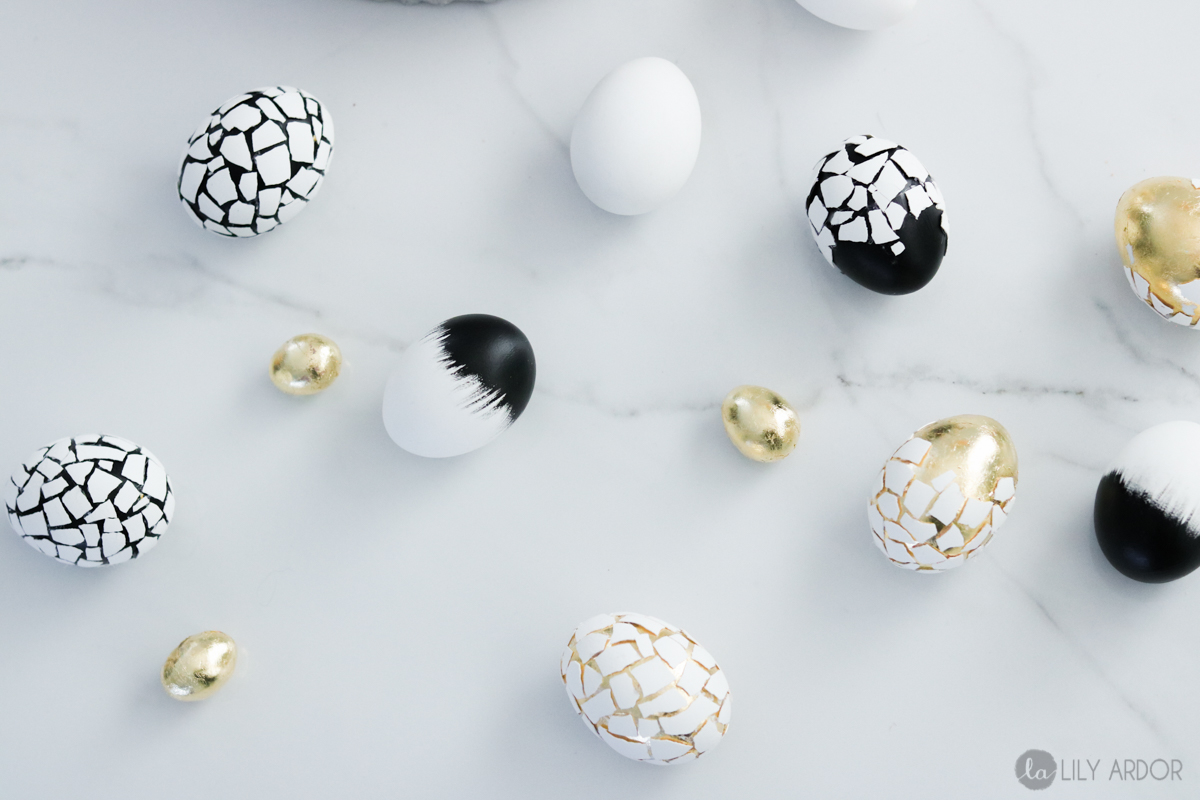
Easter Eggs on Trial Today I'm going to change things up a bit and share some fails. I don't usually do this and honestly I'm so used to sharing the good side with you guys that I forget there is a bad side to every DIY. These easter eggs weren't all that pretty at...
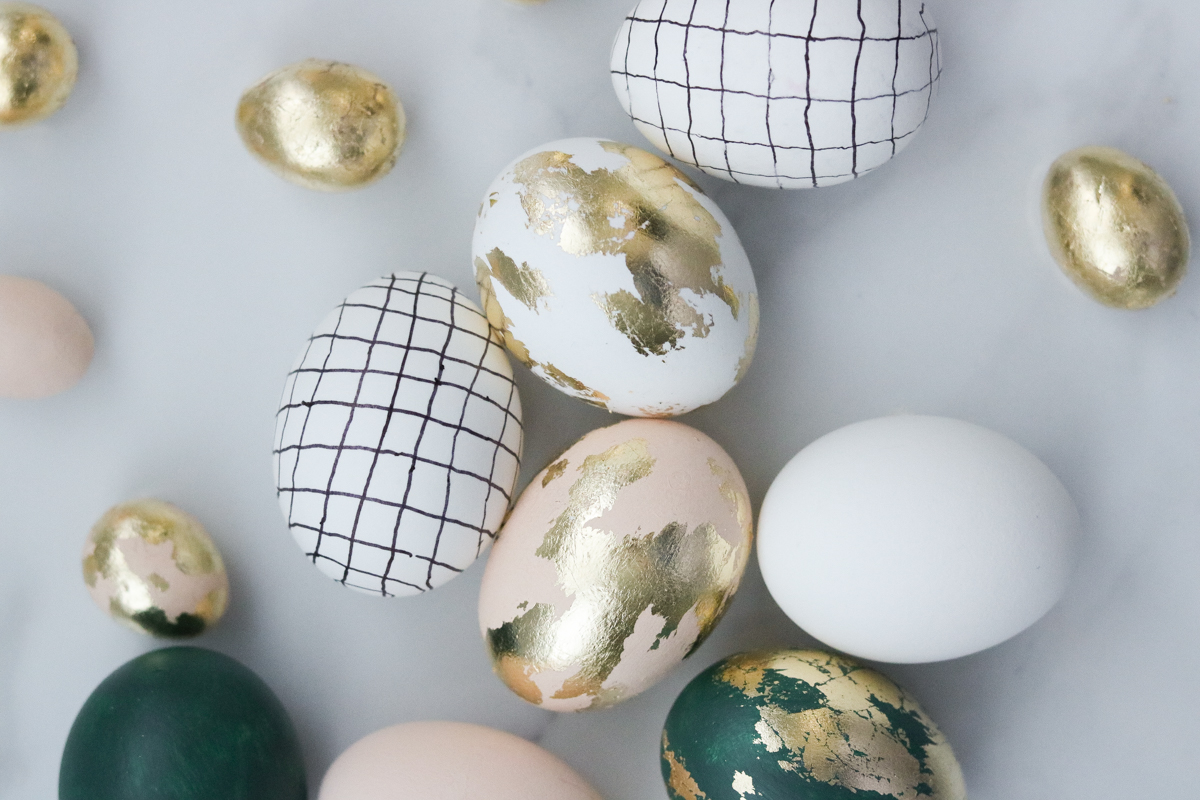
Handmade Crackled , Gold and Black Easter Eggs
Handmade Easter Eggs As years go by trends change from one extreme to another. What may have been weird a year ago is totally normal right now! That's said not just for beauty and fashion but, Easter eggs as well. I'm pretty sure I'll look back at these Easter eggs a...
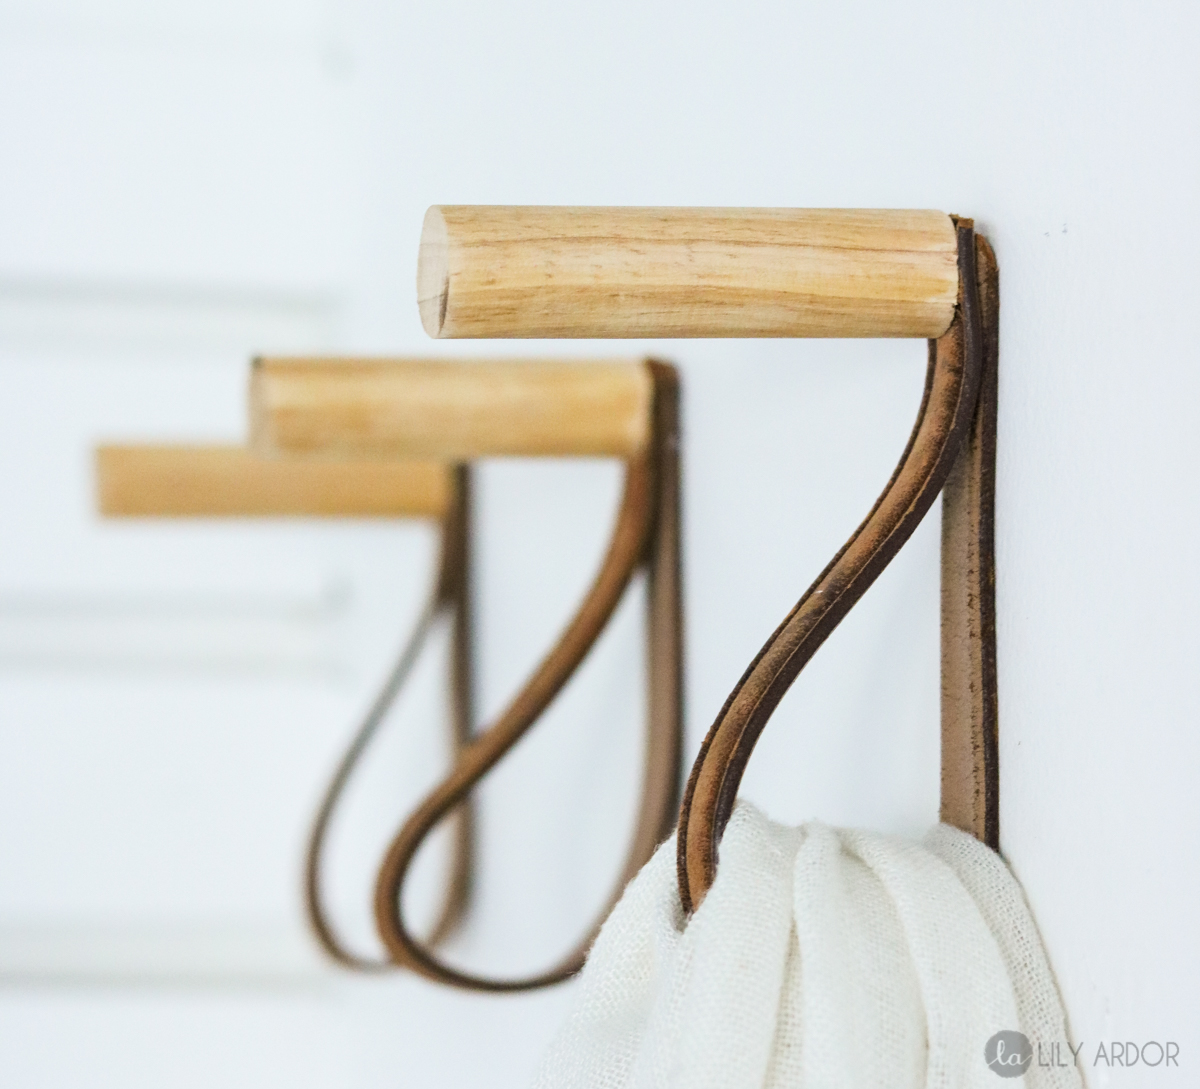
DIY Coat Rack – Hat rack – Wooden Hooks
DIY Coat, Hat, and Scarf Rack Hello, my lovely readers as many of you probably already know last week we transformed a little corner in our entryway into a real mudroom. With the intentions of making it as functional as possible I had to come up with some coat hooks....
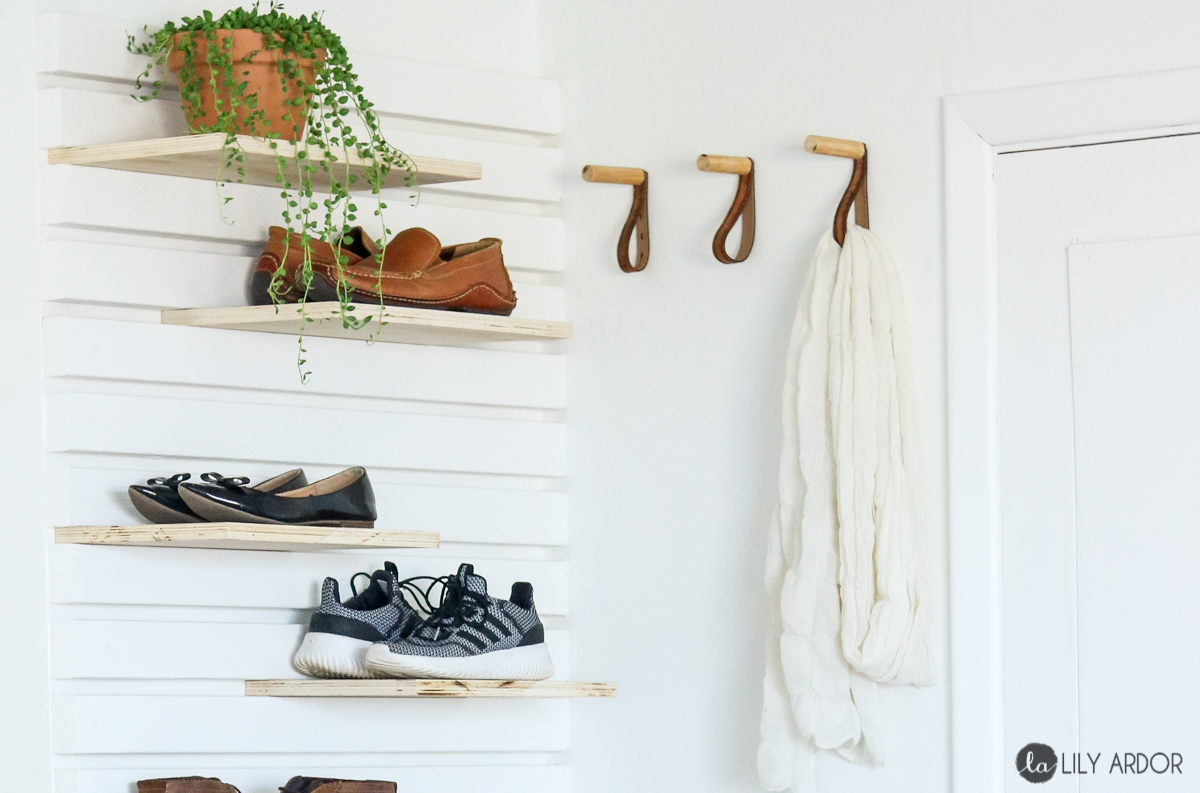
Entryway Bench Tutorial with a DIY Shoe Rack
Mudroom Ideas with Shoe Organization If your home has no entryway organization then you know it's extremely hard to keep clean. That was the case with us. Home from school and shoes are where?! Center of the living room of course! 😀 It's not that we didn't have a...
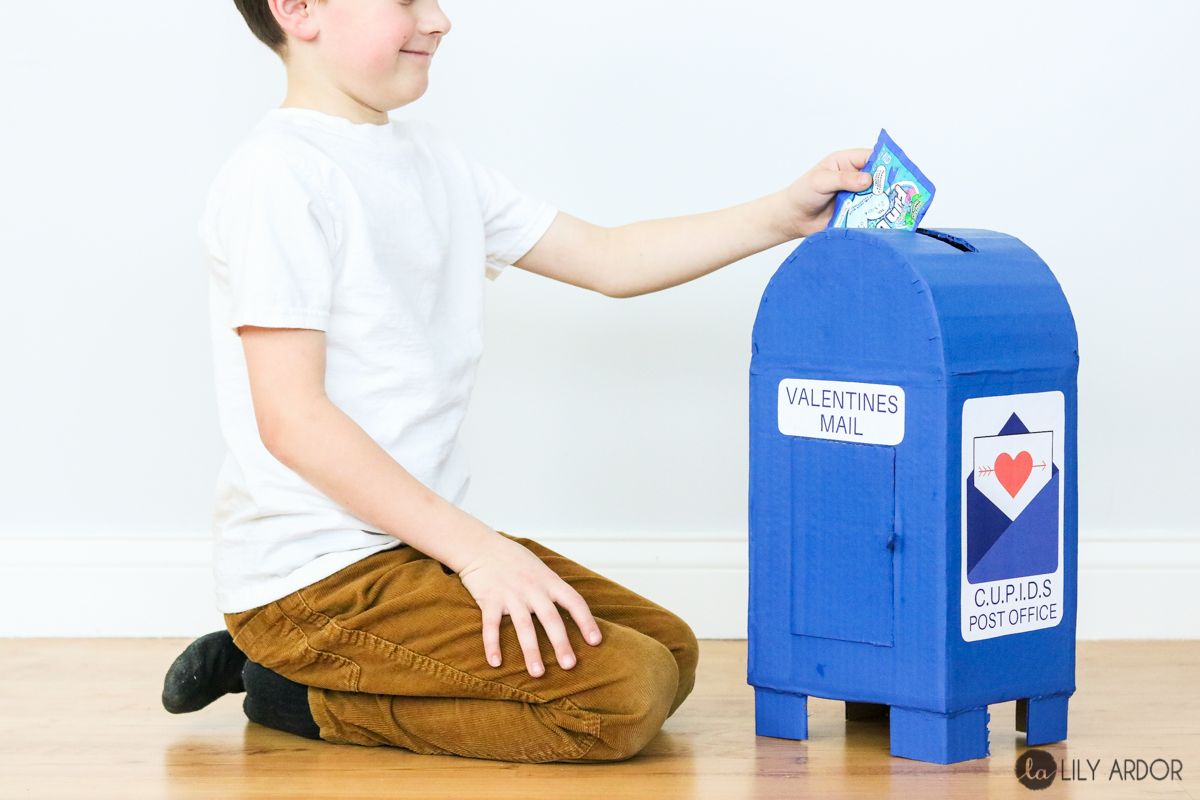
Valentines Box Idea
Valentines Mailbox So, I'm sad to say this is kind of a last minute post and I apologize for it being so late, but as they say, "better late then never. " Last week our little guy came home with a valentines project assignment he needed for school. I'm sure his class...
Laminate Floor Painted to look like Polished Concrete
Painted Floor Idea Before we jump into this floor painting DIY I wanted to give you a little bit of a background about our ex-floor. When we originally moved into this home our floor was laminate throughout most of our home. Seeing as it was laminate in the kitchen as...
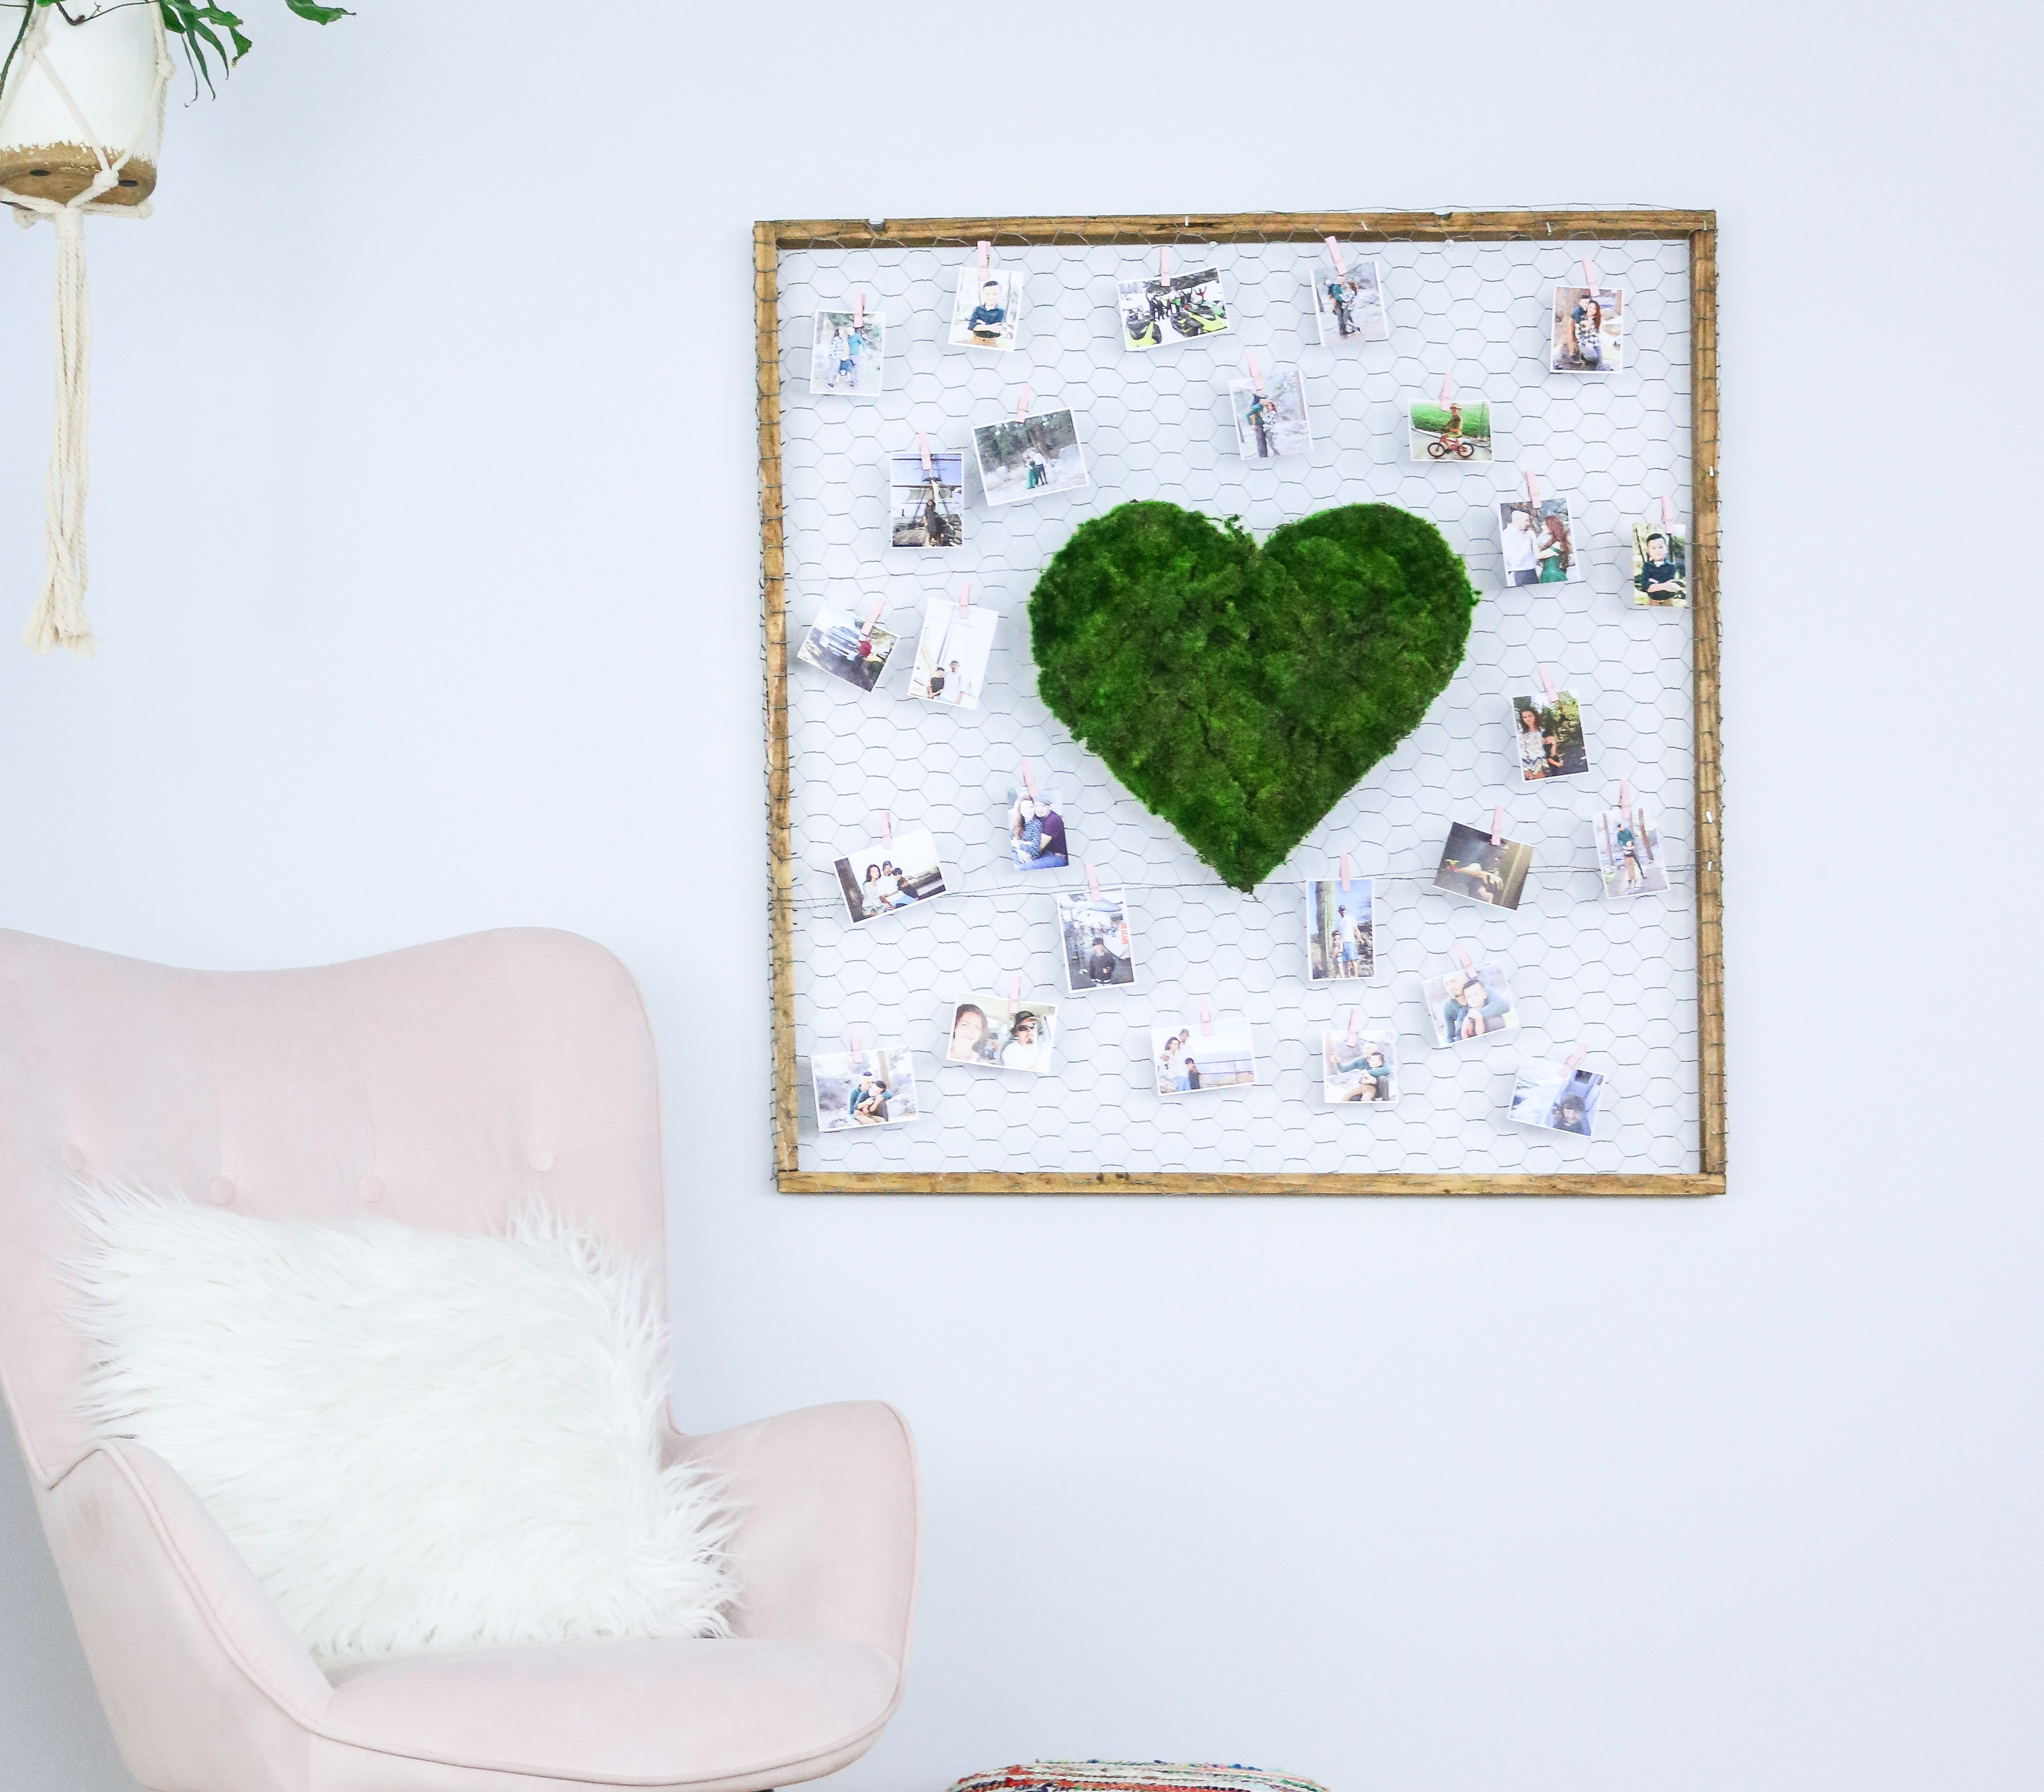
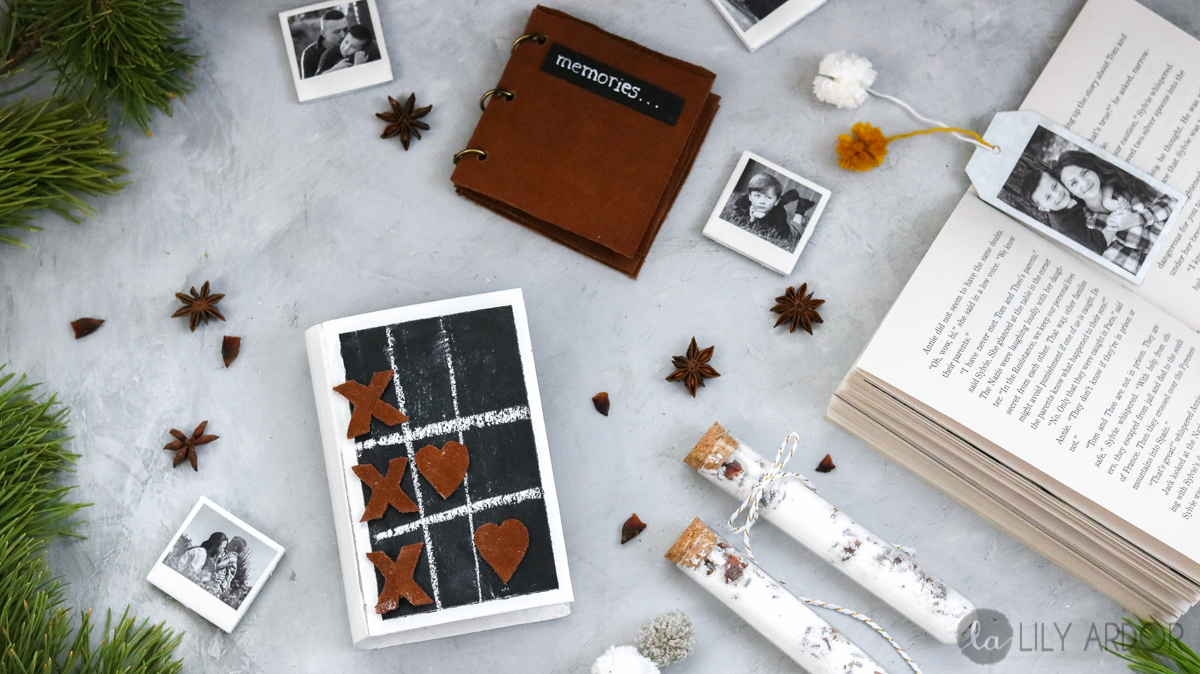
DIY Valentines Heart – Wall Decor with Photo display
Photo Display Idea I was debating on whether to decorate for valentines or not for a few weeks. I even had you guys vote on my Instagram and YES most of you voted that you don't decorate for Valentines. It was about 70% that voted no. I totally get it I'm the same...
DIY Storage Footstool
Easy Storage Ottoman With so many ottoman ideas out there, I fell in love with this bucket up-cycle idea. Although I had to go out and buy a bucket specifically for this footstool I'd say it still ended up being a pretty good deal. I think I'm a little too excited for...
5 Dollar Store Crafts
Dollar Tree DIY Home Decor Pinching Time I know that not a lot of you have time to do DIYS that take up days or weeks to make, so with these 5 DIYS I tried to focus on making them as quick and easy as possible. Plus they're super affordable to make and no one will...

5 Free Printables – Valentines
Valentines Printables #1 Me and You - DOWNLOAD HERE Well hello their everyone. I hope your having a wonderful week. First off I want to mention this is completely new to me. Sharing printables and all. Not that I haven't shared printable before. I'm just saying this...
DIY Wall Art for Large Blank Walls
Easy Wall Decor Idea All In White I don't know what has gotten into me! Maybe, it's the New Year giving me a kick or maybe, I'm just finally maturing. HAHA! I want everything very clean and simple in my home and by clean I mean white as far as the eye can see . That's...
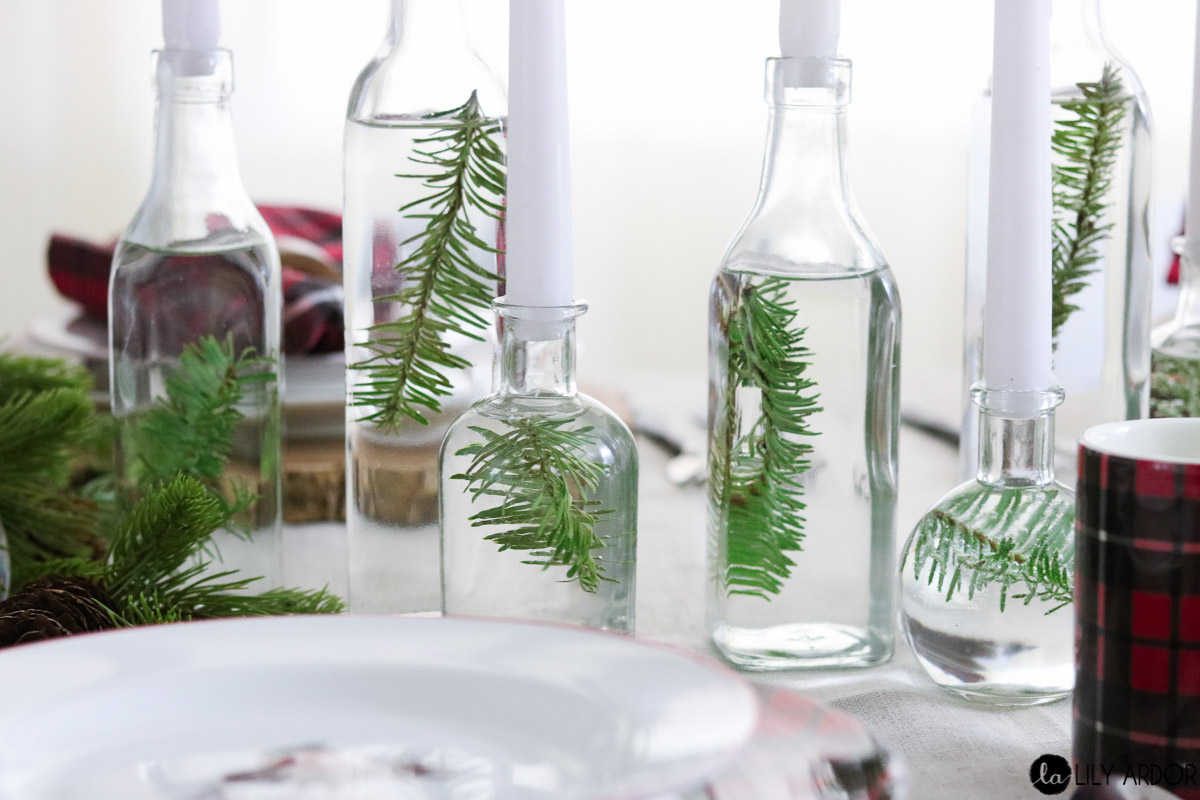
Easy Wine Bottle Centerpiece
What to make out of Wine bottles? Neutral Struggle So the past couple of weeks have been hectic as I'm sure yours have been as well. I feel like I can't catch up on anything and everything needs to be done as quickly as possible including any last minute DIYS. On the...
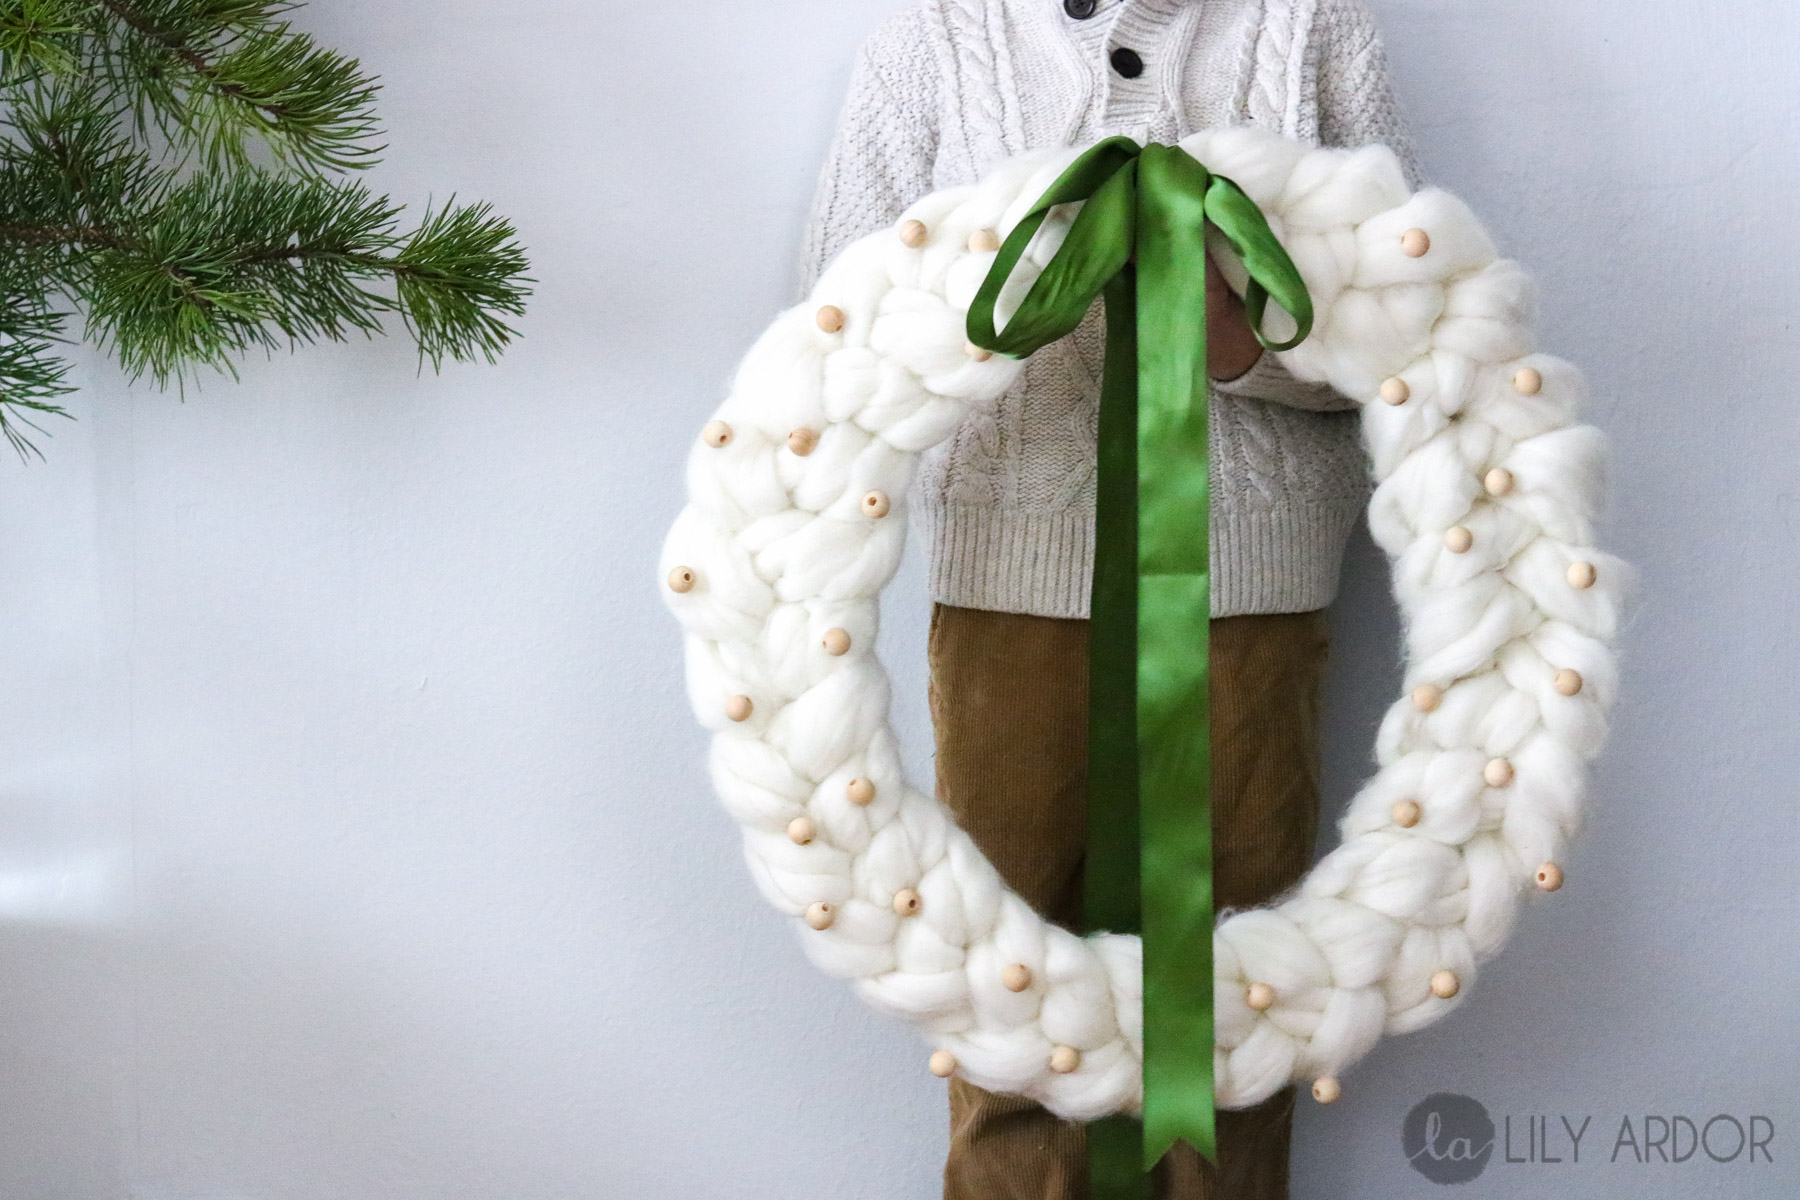
Chunky Knit Wreath (part 3 of chunky knit series)
Taking Yarn to the Next Level Am I the only one crazy about anything chunky knit!? These past few weeks it has really been growing on me. I don't know if it has something to do with the weather or if it's just a phase i'm going through, I want everything chunky knit....
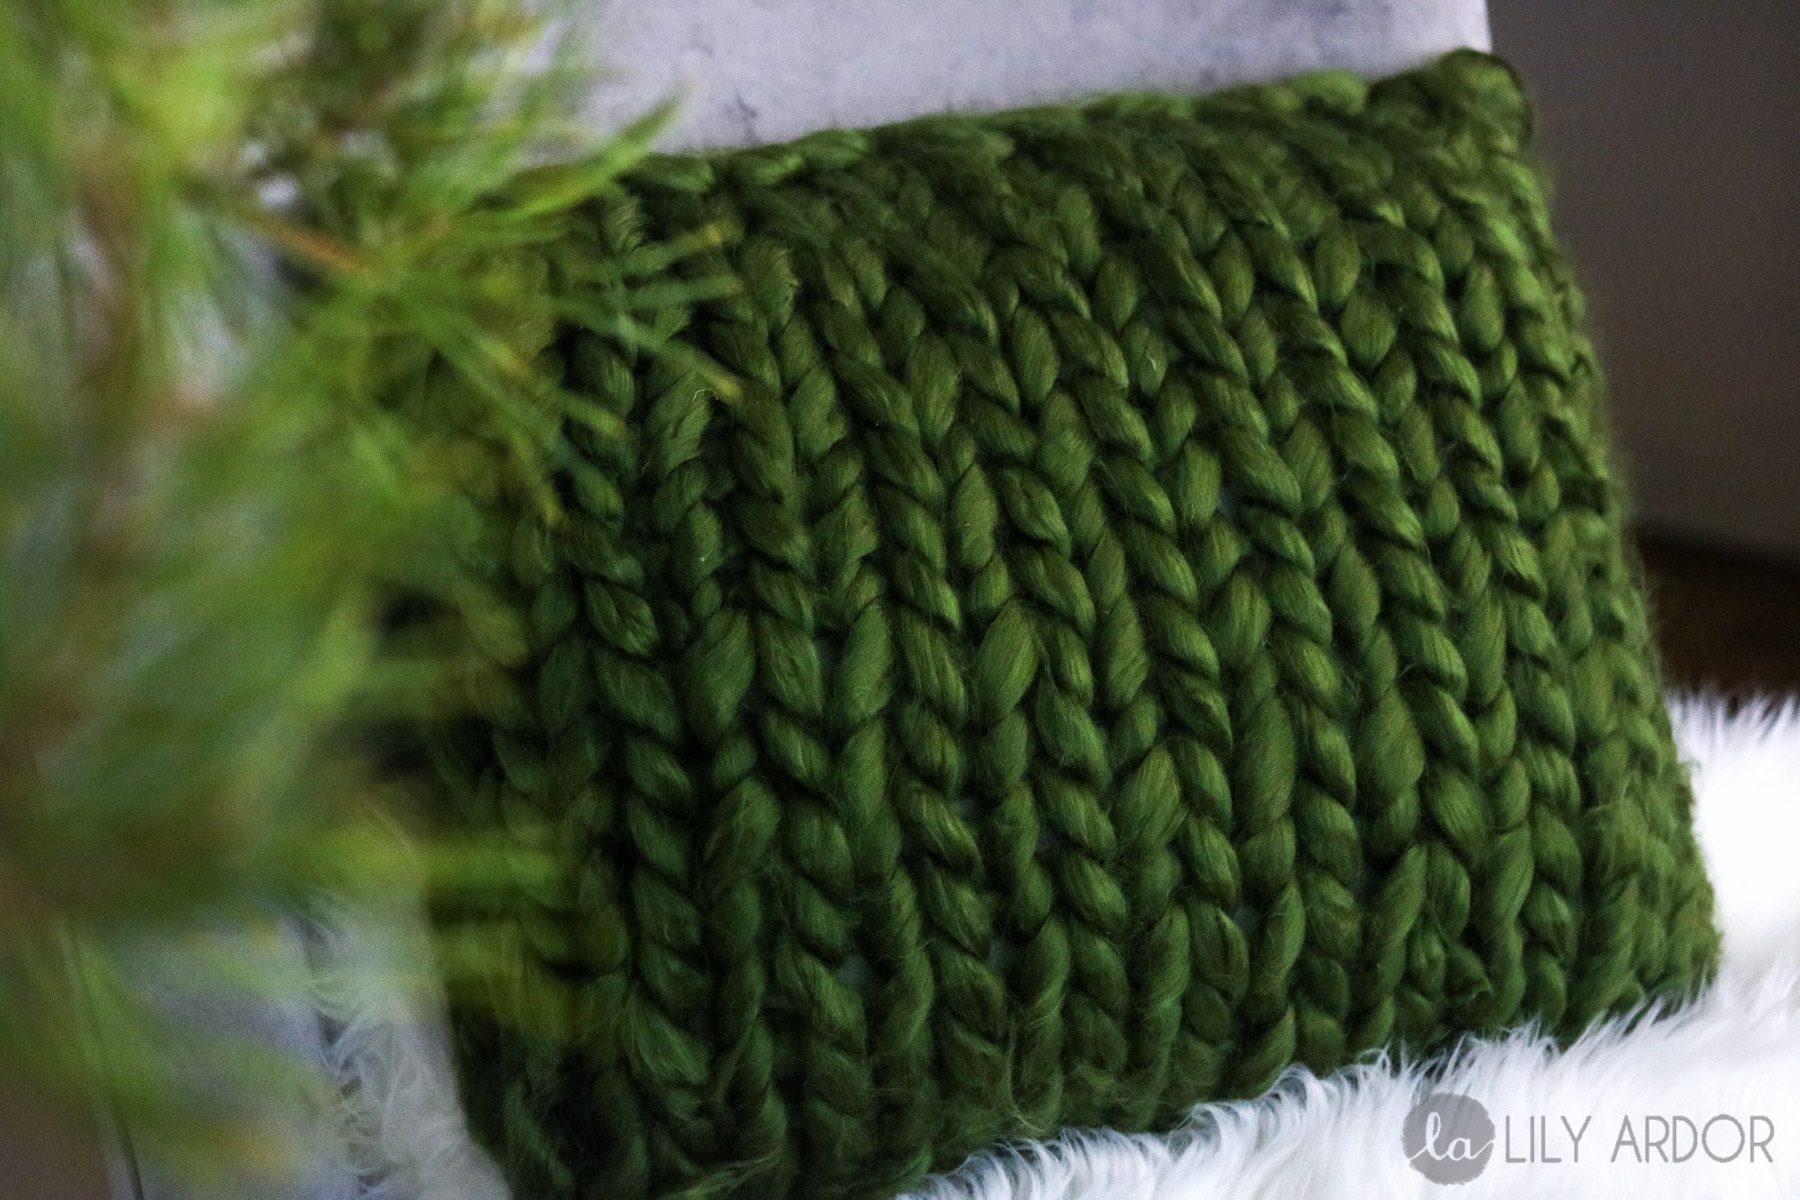
Chunky Knit Throw Pillow (part 2 of chunky knit series)
Home Decor Series A few weeks ago I showed you how to make a chunky knit blanket in 3 easy steps. I am absolutely in love with how it turned out so, I've decided to add a few more decor pieces to my home using the same chunky knit technique. This 3 part series will...
10 DIY Gifts – Stocking Stuffers
DIY Gifts Our DIY subject today is handmade gifts. I love handmade gifts. They're the most meaningful and thoughtful gifts someone could give. For these awesome DIYS I've teamed up with my wonderful friend from munchkintime.com. We'll be showing you how to make 5...
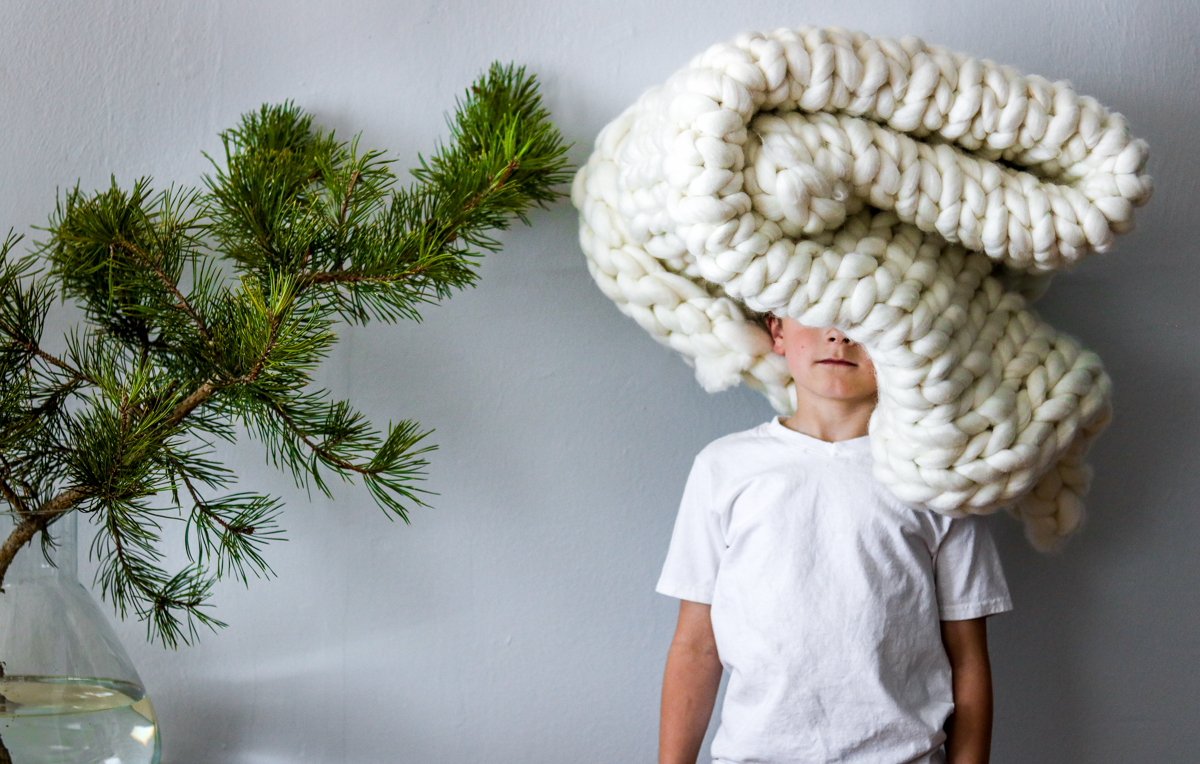
DIY Chunky Knit Throw Blanket
Chunky Knit Blanket DIY The chunky knit blankets have been all the rage and the moment I saw one I knew I wanted it!! Seeing as this was a year ago believe it or not, they were priced at $300-$600 a blanket. How crazy is that!! I set out to make one and, the first...
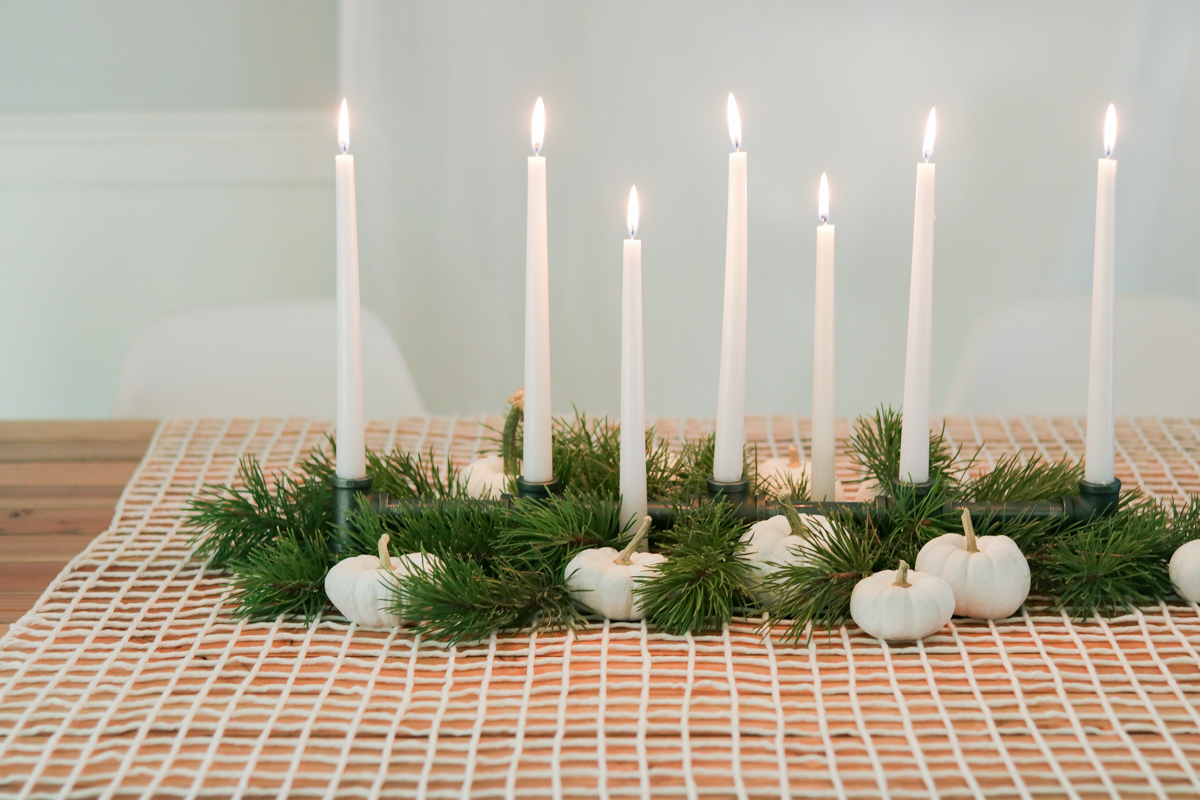
DIY Candle holder
Beautiful Industrial Candle Holder I love industrial home decor pieces. They bring the perfect amount of masculinity into the home. I always tend to over decorate and add too much femininity into my home decor. It's actually quite a struggle for me. So lately every...