DIY Gifts
Our DIY subject today is handmade gifts. I love handmade gifts. They’re the most meaningful and thoughtful gifts someone could give. For these awesome DIYS I’ve teamed up with my wonderful friend from munchkintime.com. We’ll be showing you how to make 5 crafty meaningful gifts and 5 delicious edible gifts to satisfy those sweet cravings.
I’m super excited to share this with you guys and I’m glad I could fit it in before Christmas. I had so many DIY’s planned for this Christmas season and I’m a bit disappointed that I ran out of time. However this one made the cut…HAHA or should I say ” time frame. ”
This project took a lot longer to prep then I expected. Gosh and those lines at the stores this time of year are crazy. I stayed in during black Friday just to avoid those lines and then unintentionally went in to run errands on cyber Monday.. HAHA! I didn’t realize it was cyber Monday until I saw the line at the check stand!
YEH!! It was about a 40 minute wait!
Well my week flew by and Wednesday wasn’t any better then Monday. Lines were still super long and associates on the floor were nowhere to be found to help with questions. Thank God Hobby Lobby had at least 3 associates every way I turned. Finished up my shopping their in no time. 😀 (Thanks Hobby Lobby! 😀 ) Enough about my week… How was your week? Did you avoid all the lines and shop online.
Here’s how to make the first 5 crafty gifts. Don’t forget to jump on over to Munchkintime and check out the other 5 yummy gifts.
Here’s a Quick Video
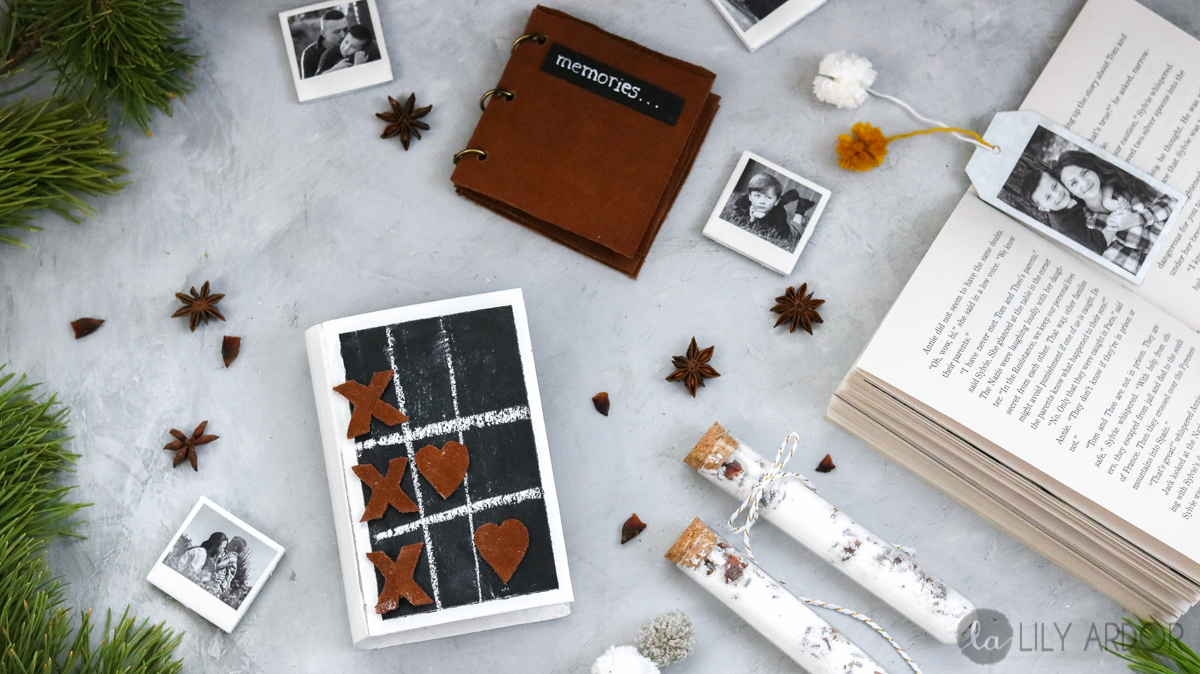
Here’s what we’re making
- Personalized Mini Polaroid Magnets
- Suede Leather Mini Photo Album
- Star Anise and Lavender fizzy bath salts
- Mini Tic-Tac-Toe booklet
- Rustic Metal Personalized Bookmarks
I didn’t take many photos during the process of making all these crafts because, I was so carried away with recording the video. I always try and remember to take photo’s during recording but, I can’t seem to remember. My apologies to those of you who prefer photos over video. I’ll try better next time. 😀
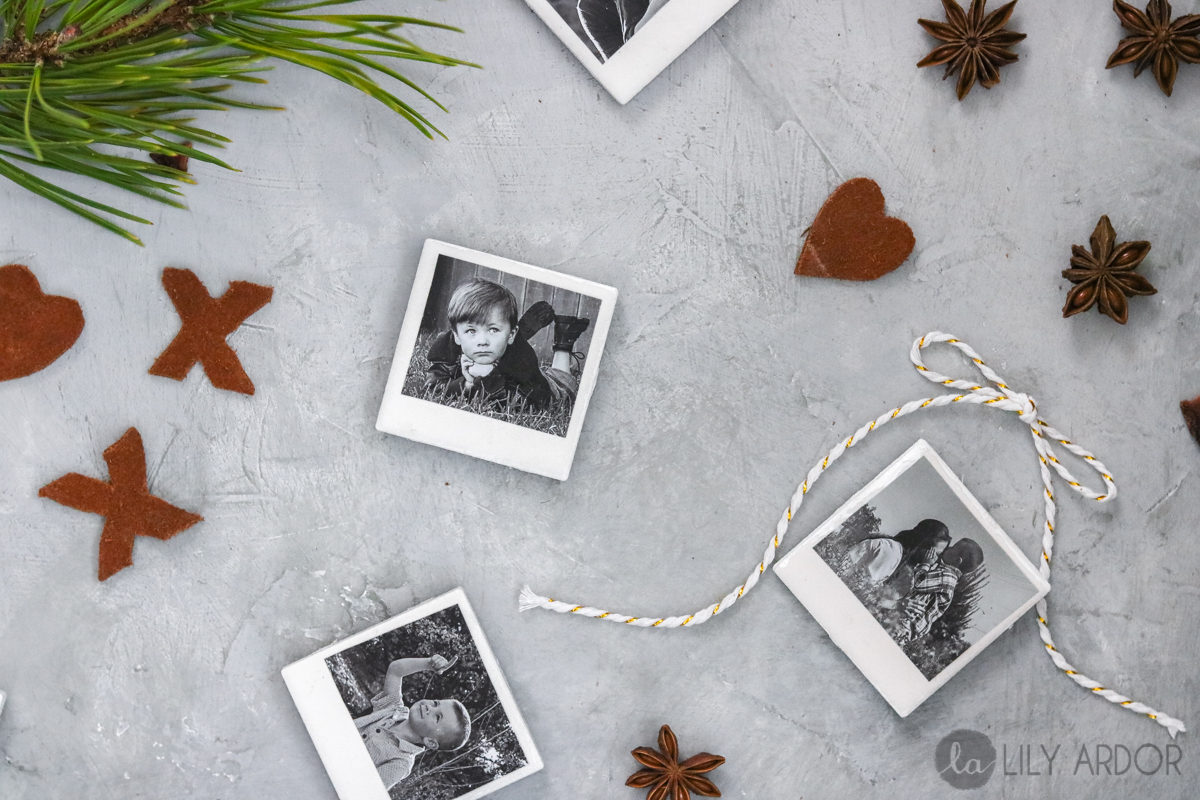
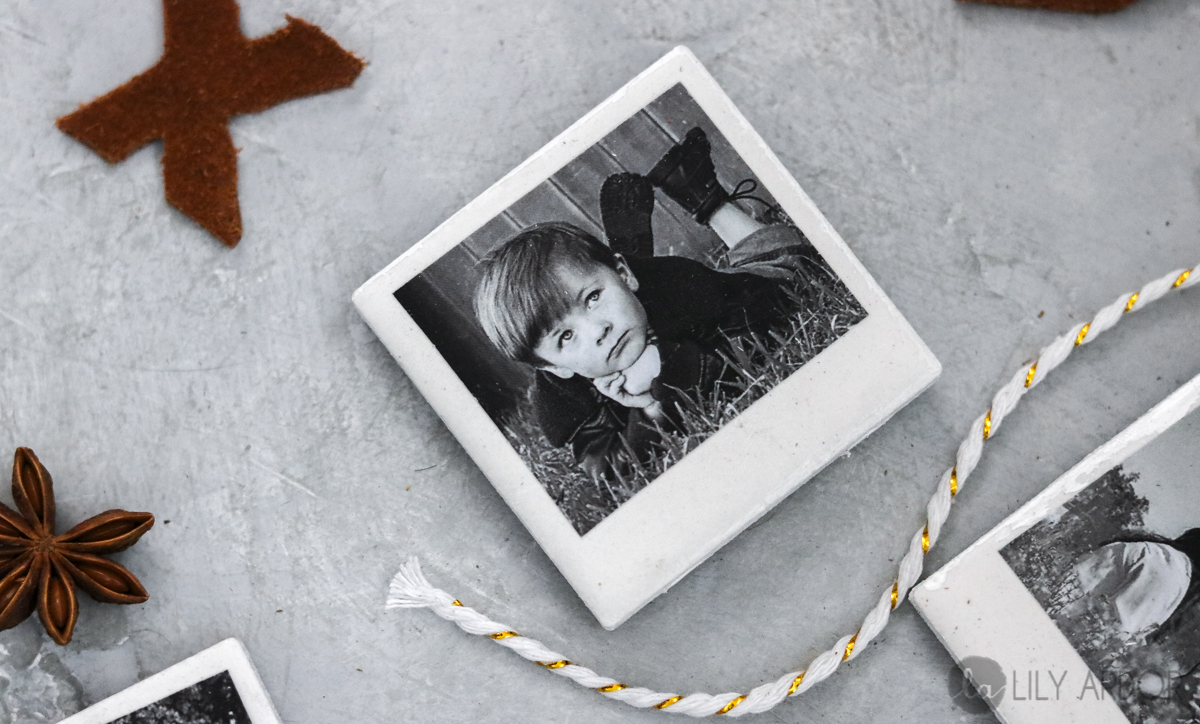
#1. Personalized Mini Polaroid Magnets
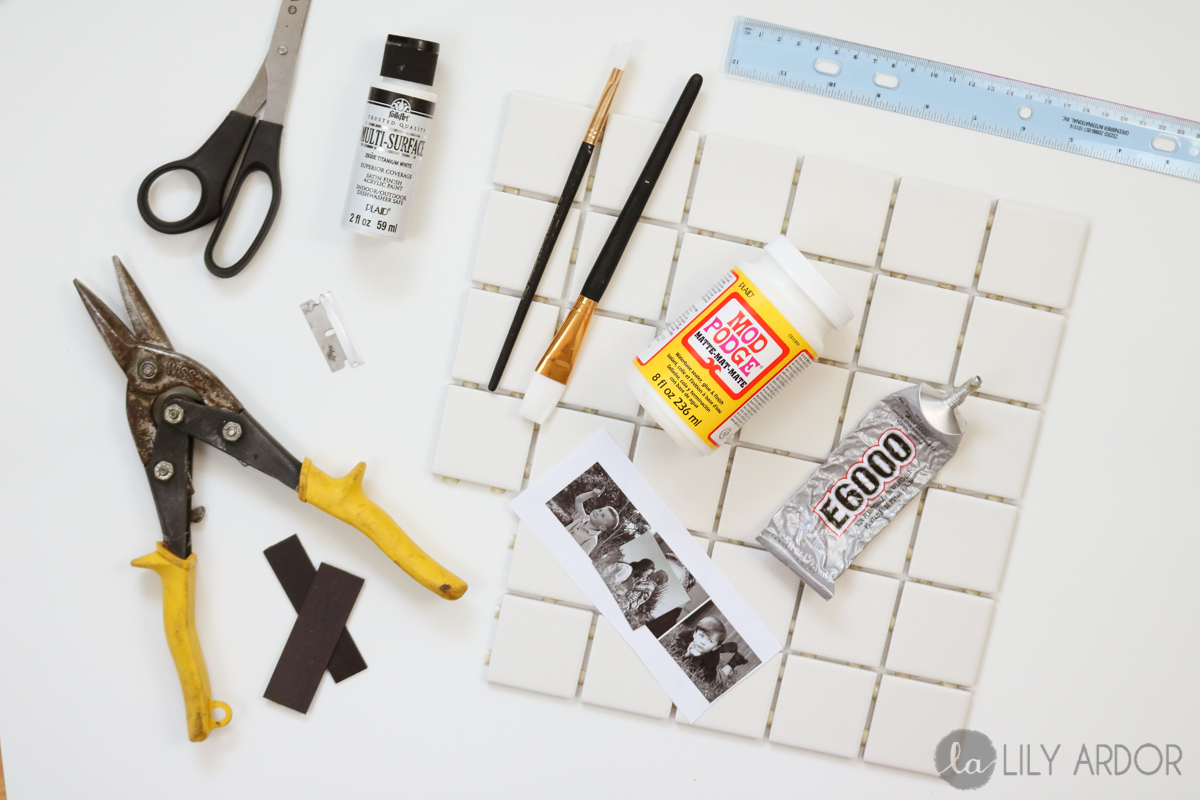
What you’ll need
- brushes
- mod podge
- E6000 glue
- photo prints (Try printing at your local library. I paid .75 cents for 3 pages of prints, and I didn’t even end up using all of them.. Not yet! 😀 )
- tin snips ( if you need to cut your magnets to size)
- magnets (I recycled some old magnets from my fridge… Those yearly calendar magnets work great)
- scissors
- white acrylic paint (This is totally optional- you don’t have to touch up your tiles on the back and sides)
- mini square tiles ( I got my tile at home depot. I believe it was back splash tile. This sheet of tile cost about $3 )
- ruler
- razor blade
Instructions:
To start off use your CAREFULLY use your razor blade to remove your tile and cut off any excess glue on the sides. If you choose to touch up your tiles with white paint do so at this time. Then cut your photos to size. I made sure to leave a bigger gap on the bottom to mimic an actual Polaroid. Then turn your photo face down and apply a good coat of mod podge. Following that attach your photo to your tile and gently rub out any bubbles. Then take your magnets and cut them to size with tin clips if needed. To finish it off take your E6000 glue apply some to your magnet and attach it to the back of your tile. That’s it!! Don’t forget to let them dry before trying them on your fridge!! 😀 😀 (cause that’s what people like me do. hehe 😀 )
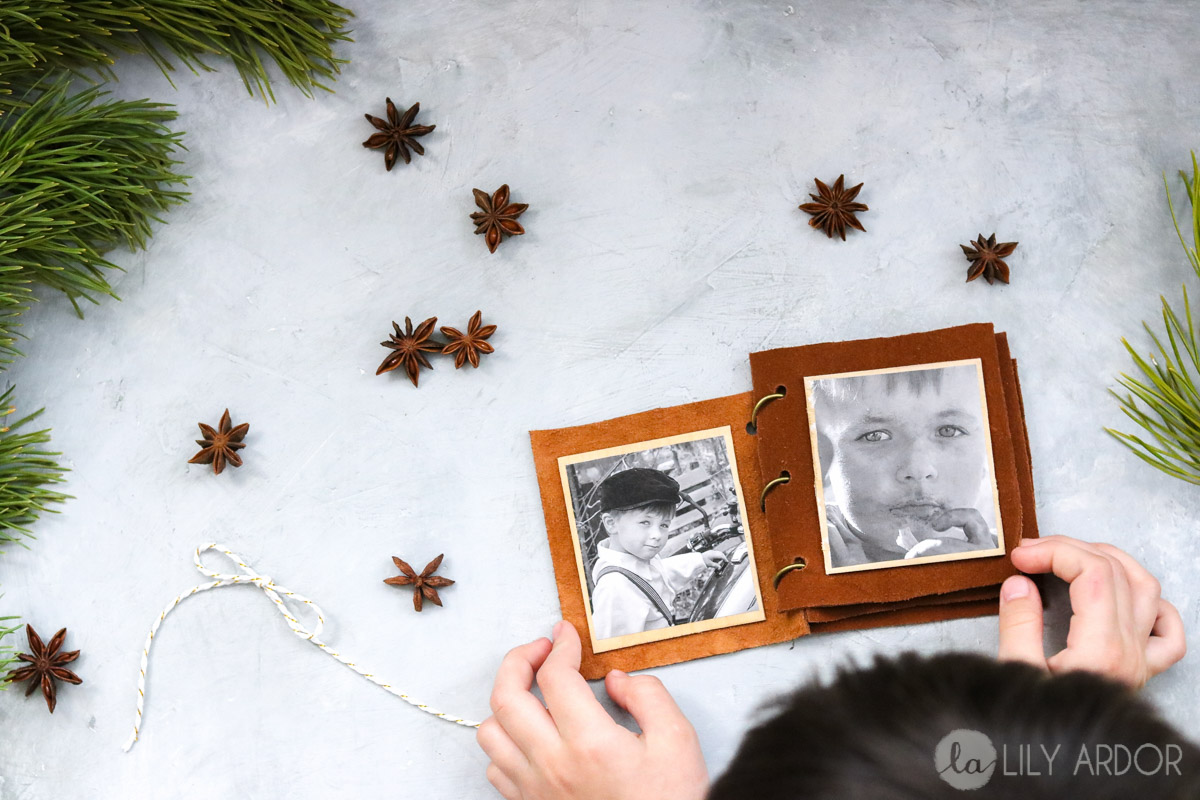
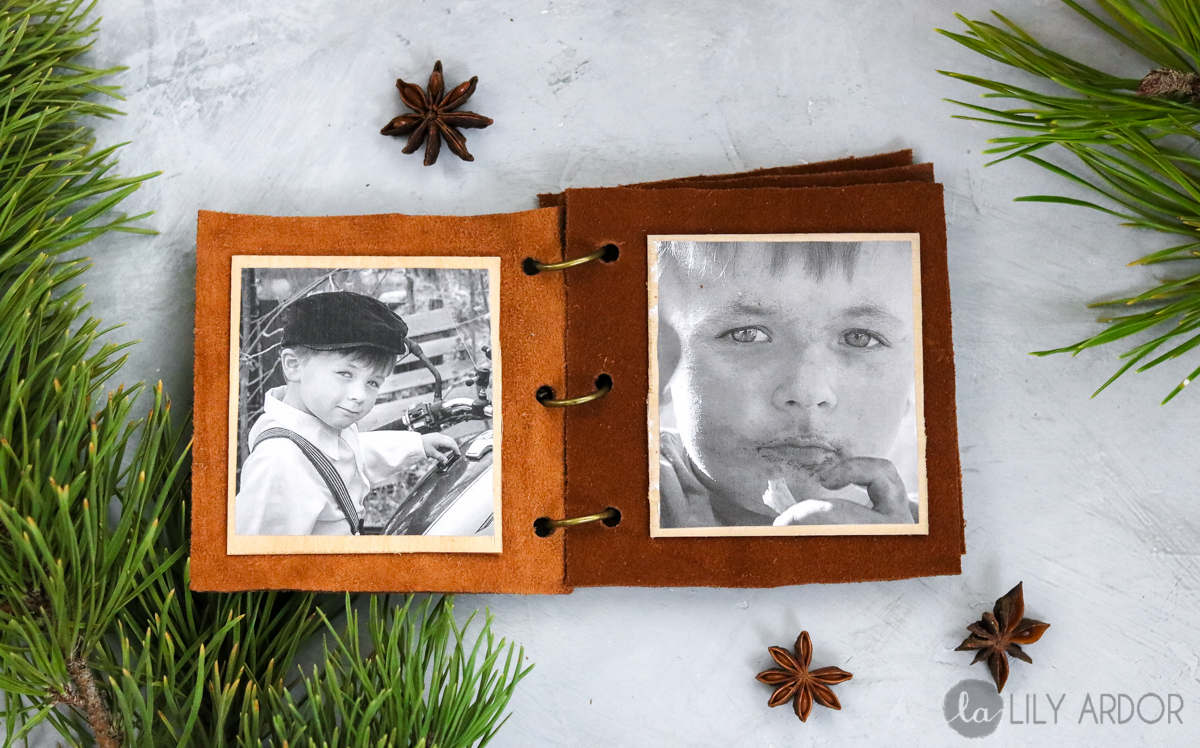
#2 Suede Leather Mini Photo Album
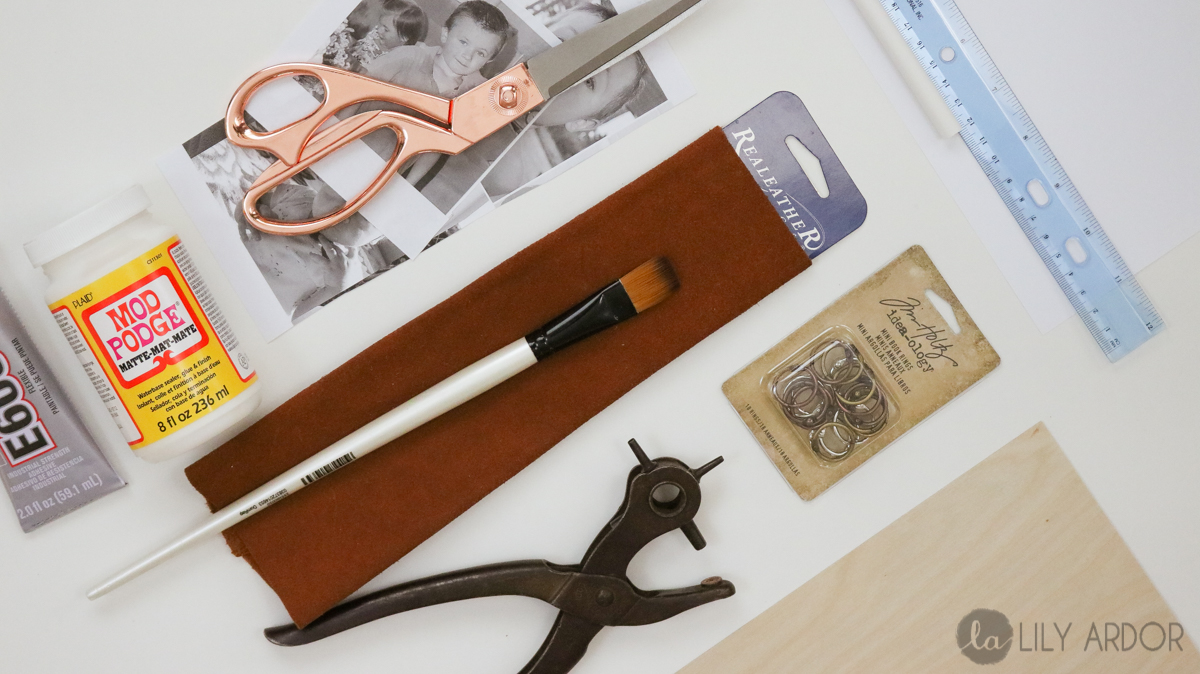
What you’ll need
- balsa wood sheet (in other words a super thin wood sheet sold at crafts stores)
- mod podge
- Brush
- E6000 glue
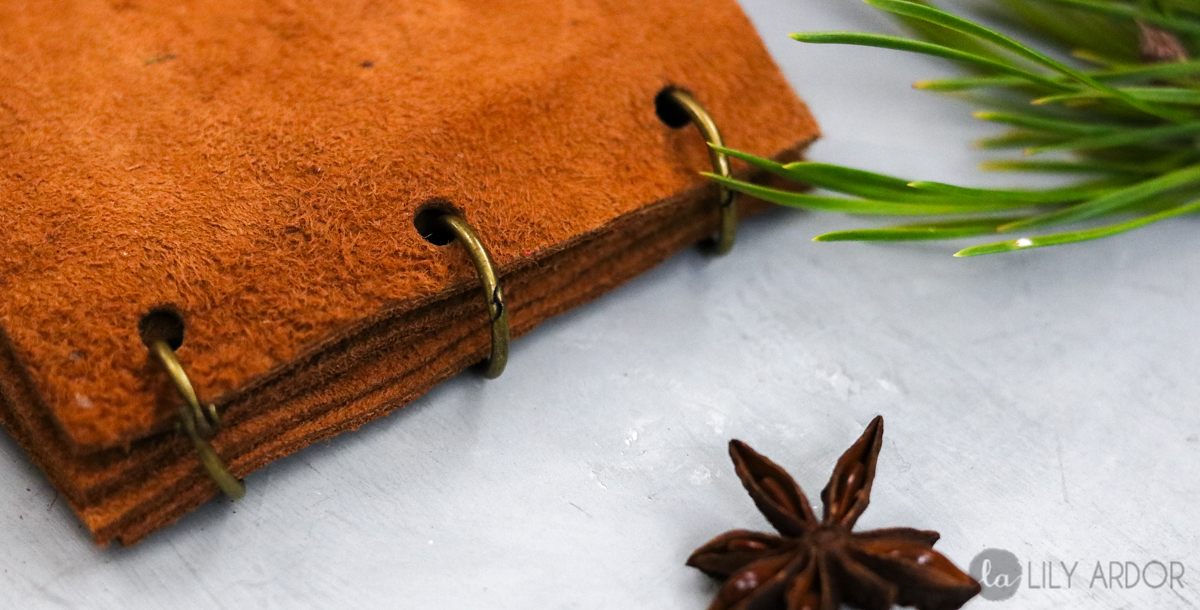
- Mini book rings (just to give you a heads up… Michael’s is the only place I’ve found these at. Hobby lobby doesn’t carry these rustic style rings. Oh and they’re even kind of hard to find at Michael’s) 🙁
- Scissors (How you like my new scissors. 😀 😀 Scored them babies for $5 whole dollars. 😀 )
- Suede Leather Trim ( I purchased my leather at Hobby Lobby. They have different colors. Don’t have a hobby lobby near you? Recycle an old leather purse or a coat! You can also watch out for something at goodwill 😀 )
- Leather hole punch (I borrowed this from my lovely neighbor. Tip: If you’ll be using real leather you can’t get away without using a leather hole punch.. TRUST ME!! I tried. Unless you want to make tiny x’s with your scissors instead of actual round holes )
- Paper
- Chalk
- Ruler
- Photo prints
- hole punch
Okay there is a bit more steps to this then the magnets but it’s still pretty darn easy to make. If you get way to confused watch the video. I promise it makes better sense then me. haha! 😀 To make it easier I’ve decided to break it down into steps. Hope it helps! 😀
Step1
To start, cut your balsa wood into perfect squares. ( if you purchase thicker wood use tin snips to cut it… The thinner balsa wood could be cut with scissors.) These will be your pages for your album. You can choose how many you want. Then cut your photos down to size and attach them with mod podge. Apply your mod podge on the back side of the photo then simply attach to the wood. note: also optional to seal the photo on top for added durability. If you choose to do so, make sure you do it once the you photo is dry. (OOOH OOH almost forget. Make sure you attach your photos to only one side of the wood, since you’ll be attaching the other side to your leather and it won’t be seen )
Step 2
At this point you should have your album pages ready to go onto your leather. For step 2 you need to use your paper to measure out a square on it and cut it out. This square will be used as a pattern to cut your leather pages. Make sure you have enough room for your ring holes on the sides. I also left additional room all around the edges just because I like the look of leather 😀 .
Step 3
Lay your paper pattern down onto your leather , trace and cut your leather squares out.
Step 4
Following that use a hole punch to punch holes in your paper pattern for your book rings. Then take your paper pattern lay it on top of each leather square and mark with chalk where the holes should be. Use your leather hole puncher to make holes where you marked them.
Step 5
To finish off your album insert your mini book rings and attach your wooden photo sheets with E6000 glue. That’s it!! 😀 That’s wasn’t to bad right?
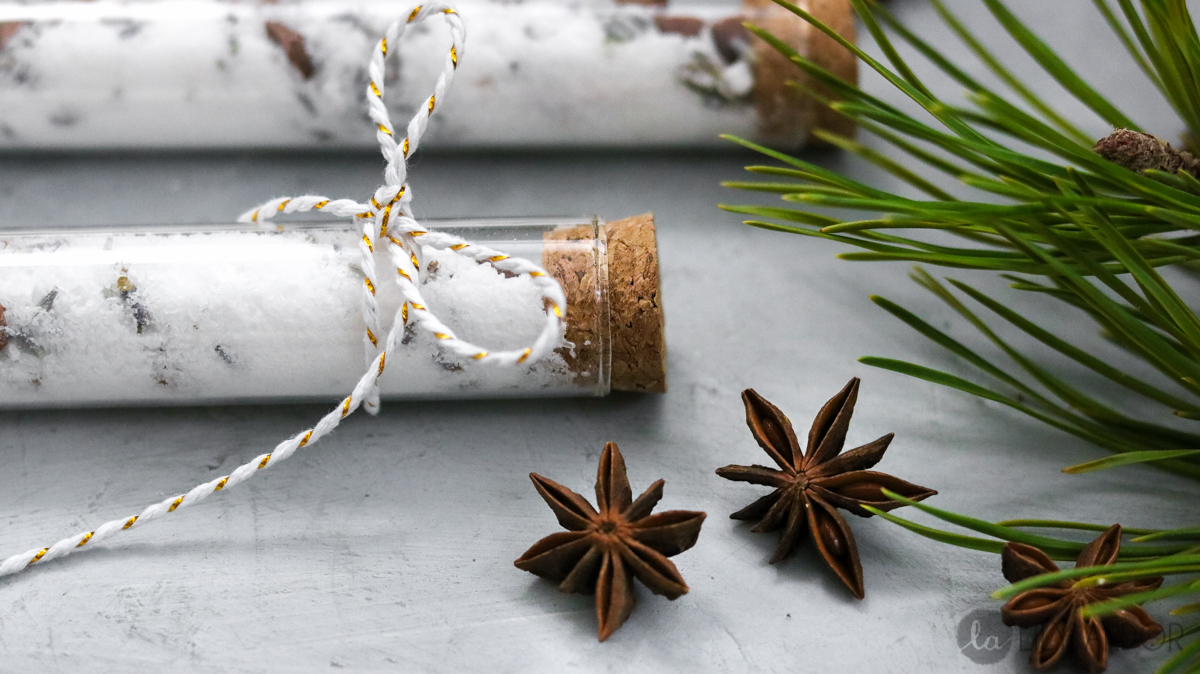
#3 Star Anise and Lavender Fizzy Bath Salts
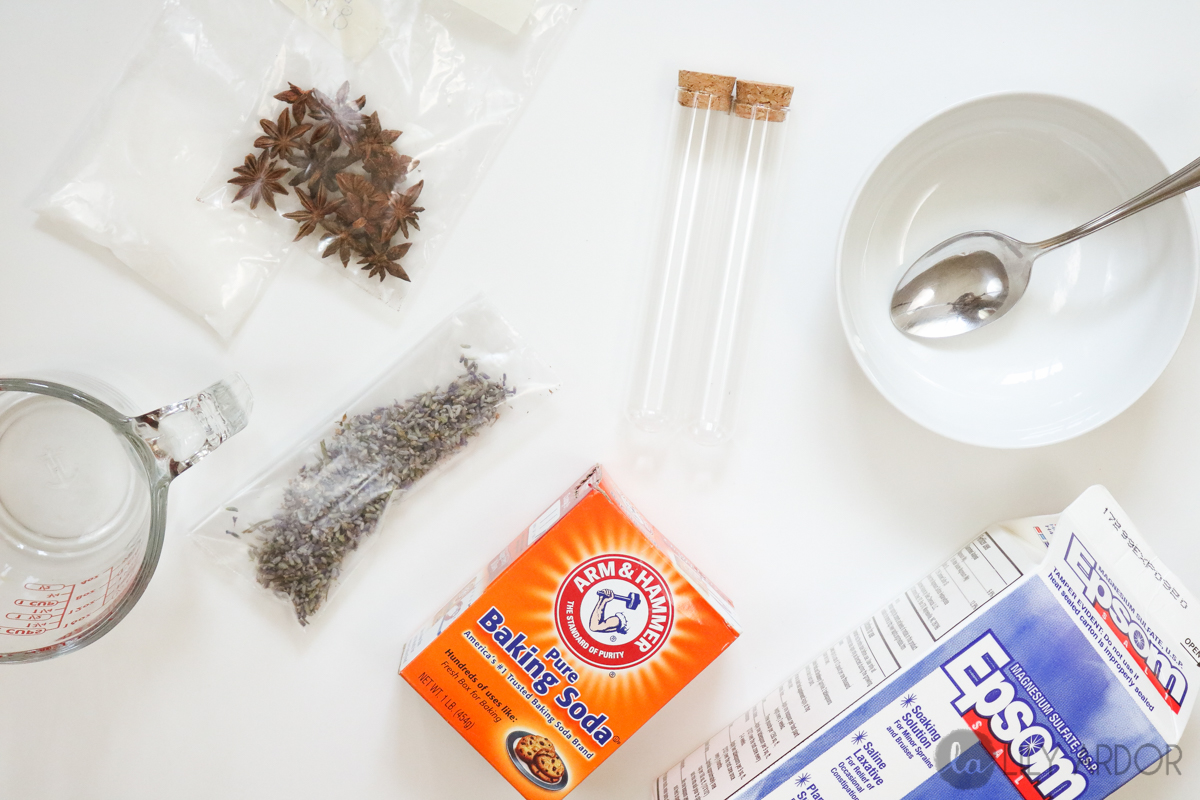
What you’ll need
- 1/2 cup baking soda
- 1/4 cup citric acid (I had a hard time finding this stuff locally. Walmart only sells it online and craft stores don’t sell it. I finally found it at an organic grocery store )
- 1/2 cup Epsom salts
- 1 tablespoon dry lavender ( I had this on hand but you can get away with using essential oils instead. Make sure to add one drop at a time. You don’t want it to fizz up on you. )
- 7 pods of Star Anise ( I also found this at my local organic grocery store. Turns out star anise is great for damaged skin and that’s just to name one… Google it. This stuff is incredible!! )
- glass vial ( I purchased mine at Michaels. Next to the cash registers. They were a $1 each)
- measuring cup
- bowl
-
spoon
Instructions:
I feel funny even writing the instruc
tions for this one because, it’s sssso easy to make. Just in case though… Here it goes! Measure and add all your ingredients to your bowl. Break the star anise up a bit before adding it to your mixture. Then mix everything up and use your spoon to fill your glass vials. That’s it!! I bet you can’t wait to hear it FIZZ!! 😀
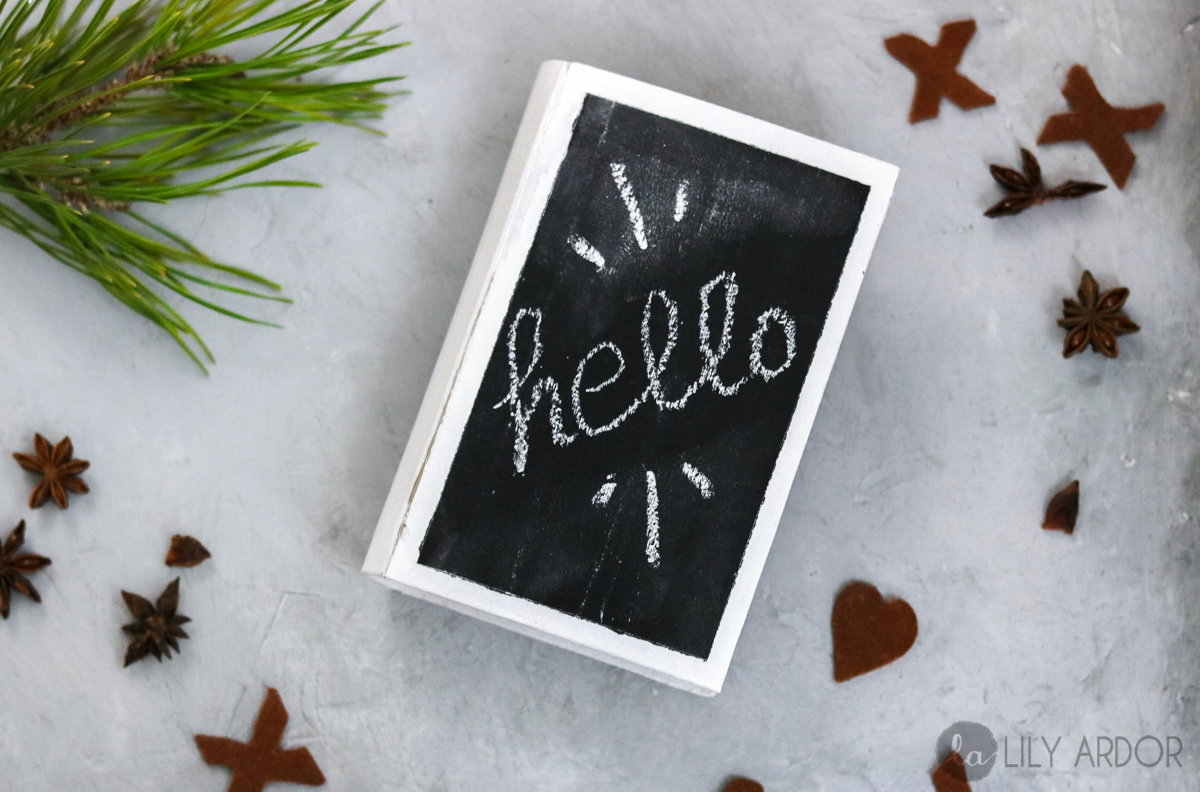
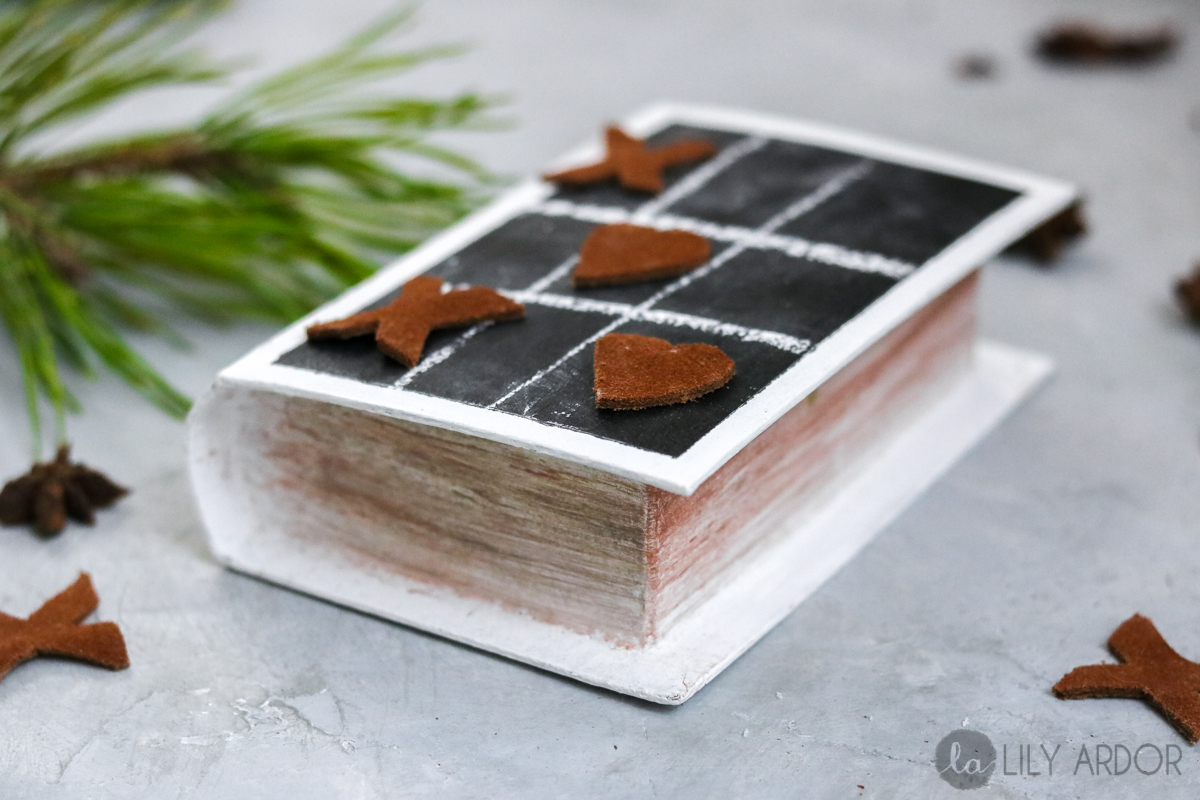
#4 Mini Tic-Tac-Toe booklet
What you’ll need
- Paper Mache Booklet ( I found mine at hobby lobby… I wish they had even smaller ones. I’m sure they have them online)
- Chalk paint
- brushes
- Mod podge
- Suede Leather
- Masking Tape
- Scissors
- Paint
- Ruler – Pencil
- Book page or paint (I decided to use an old book page for the inside of my booklet. You can use anything you’d like)
-
X ‘s and Hearts printables (I used hearts instead of o’s for tic-tac-toe…This step is optional. You can just use chalk to play the game instead)
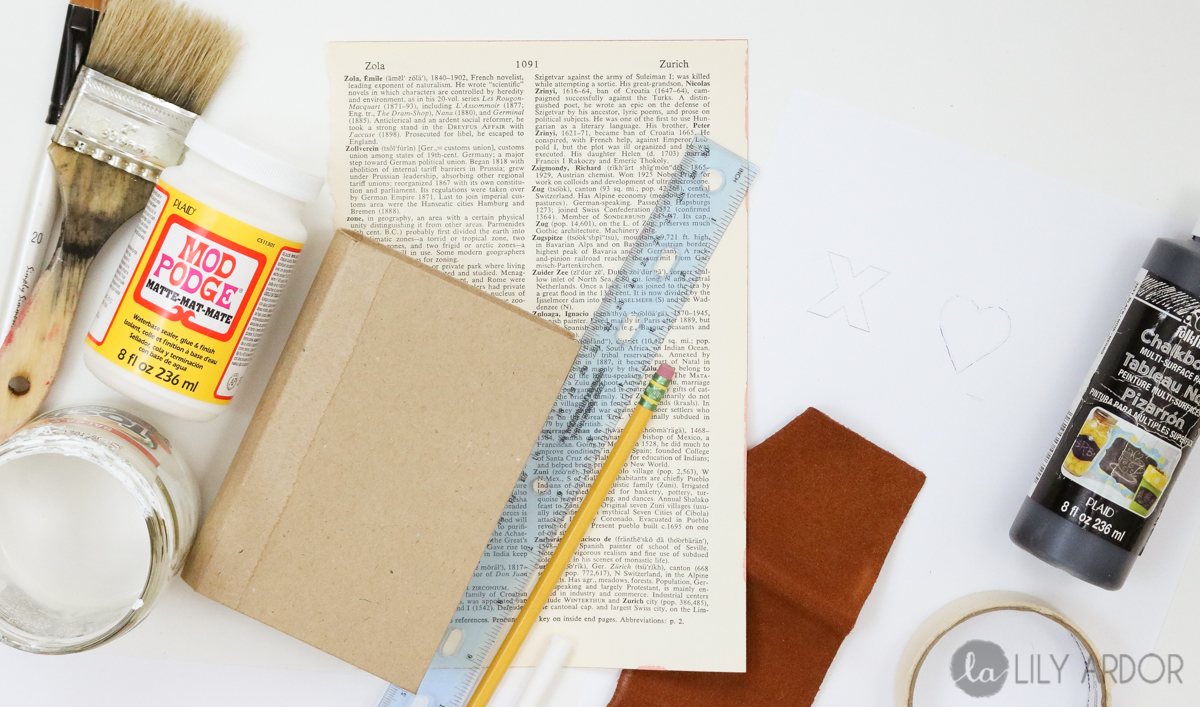
Instructions:
Okay as if tic-tac-toe isn’t already cool enough on it’s own! This secret little booklet has endless possibilities. Mom’s with energetic little ones this one goes out to you. This little booklet can carry a set of toys and has chalk and a chalk board to color on… Oh and almost forget tic-tac-toe!! How cool is that! PS. This isn’t only for kids… Adults love tic-tac-toe too! 😀
(Maybe I’m just thinking of myself as a mom! My little guy is overly energetic and sometimes those 2.5 hour church services aren’t exactly ones to sit out for a 3 year old. I would of loved this when my little guy was 3. Now that he’s 7, he’s adult enough to sit through church listening to the preacher. 😀 )
To start, paint your booklet. I used white paint. Once dry cut your old book page to size and mod podge it on the inside of your book. Following that tape off the top of your book if you want a white trim and paint it in with black chalk paint. You can also just paint the whole top of your book in chalk paint! 😀 To finish your booklet cut your shapes out of leather and that’s it.
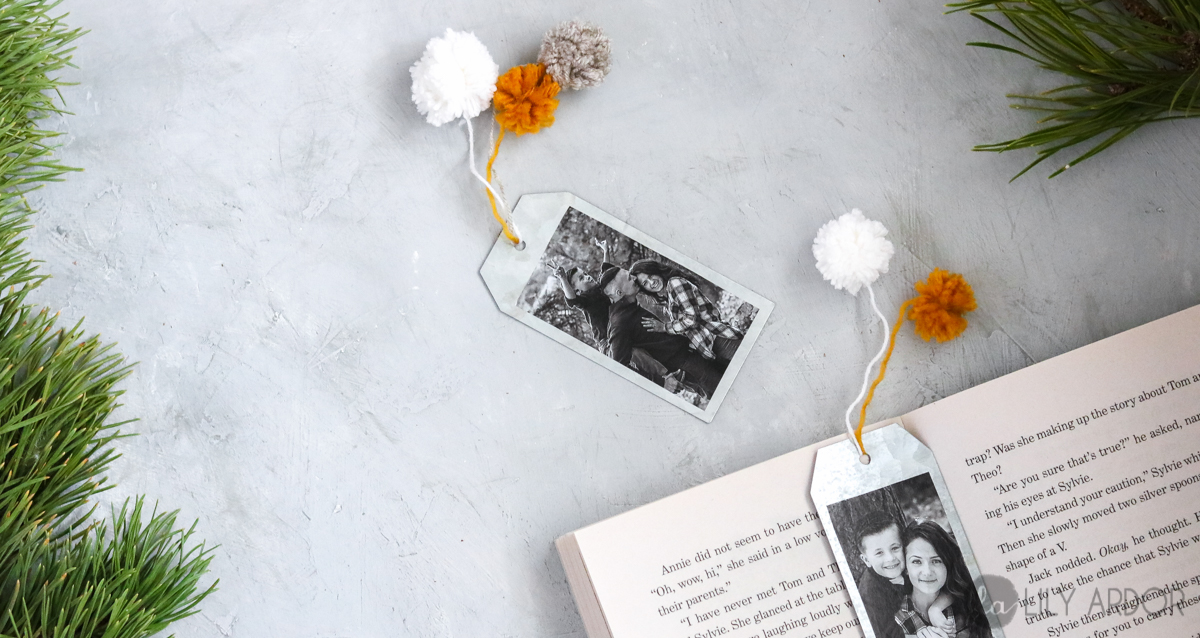
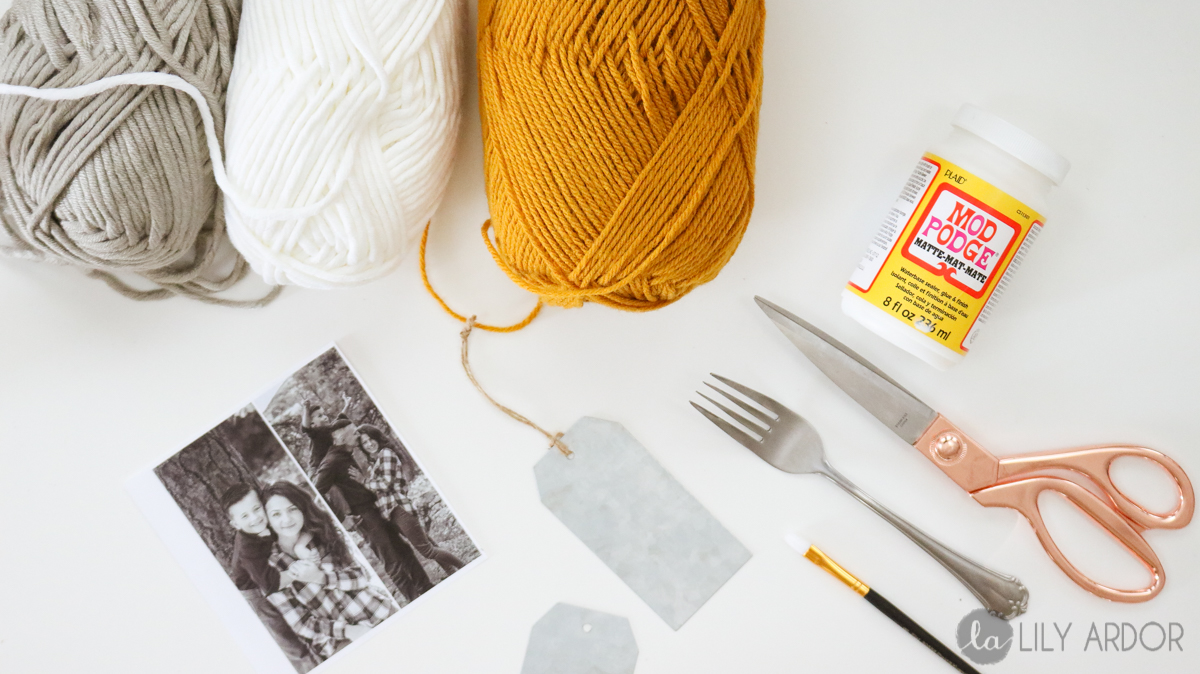
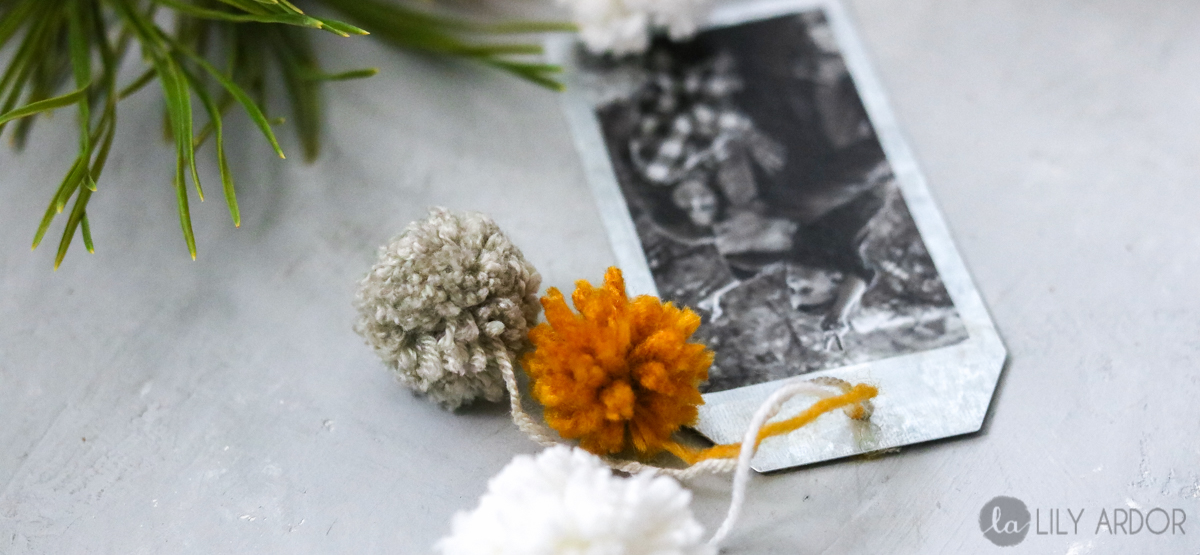
#5 Rustic Metal Personalized Bookmarks
What you’ll need
- Yarn
- Fork
- Mod podge
- scissors
- Metal tags ( you can use paper tags as well. I bought these at Michaels for .50 cents each)
- Brush
- Photo Prints
Instructions:
First cut your photos down to size and mod podge them onto your metal tags. Then to make your mini pom poms use your fork by wrapping the yarn around your fork 10-14 time. Keep in mind the more you wrap the bigger your pom pom will be. Weird right?! Anyways once you have your yarn wrapped cut it off leaving about 12″ inch tail. Then take the end you cut off and feed it through the center of your forks gap (careful not to let everything slide off the fork) . Do this twice. It should look kind of like a bow. When doing it the second time tie a knot instead of just feeding it in circles and tighten as much as you can. Then pull it off your fork and cut the looped edges of your bow. Spread your pom pom out a bit so it starts looking like a ball and cut off any pieces sticking out to form a perfect pom pom. That’s it. Gosh hope that makes since!
To finish off the book mark, feed your pom pom string through your tag hole and your can either tie it or hot glue it into place on the backside. (I hot-glued mine)
That’s it for today. My favorite gift is the leather album. What’s yours?
Oh I made this little memories sign for the album with wood and a white sharpie. I painted the piece of wood black.
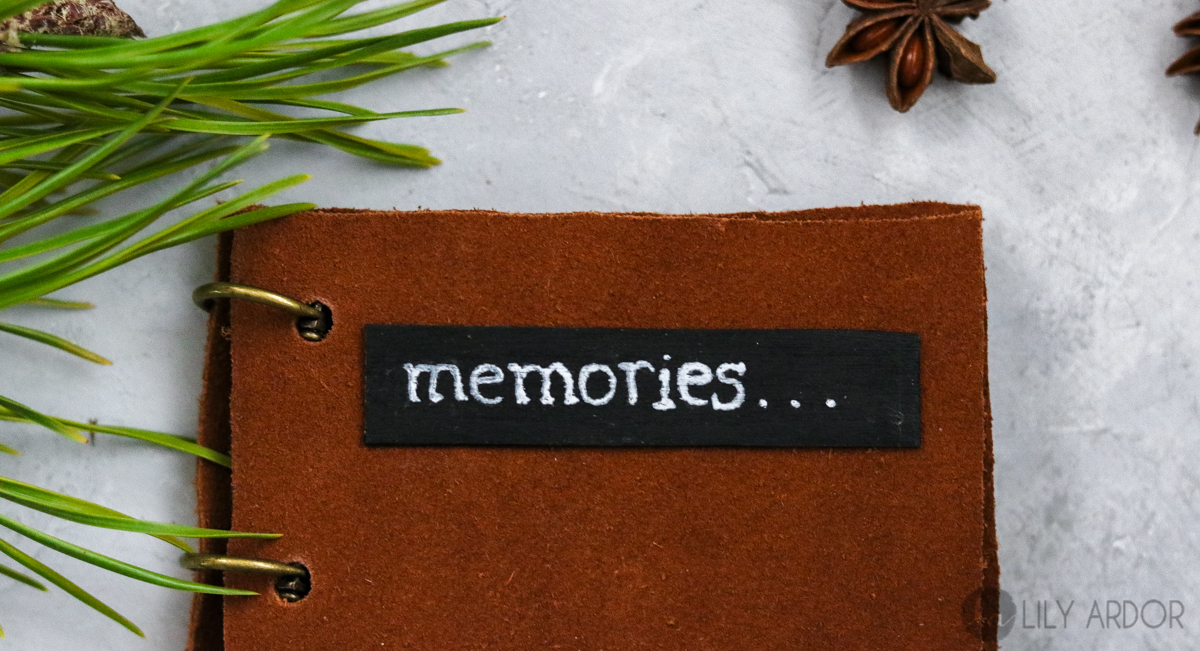
I love love love how it turned out! Those colors are ssso purdy!! 😀 😀
These rustic book rings went perfectly with the color theme.
How cute are these magnets! They’re so tiny. Little Ole is holding one in this photo!

These pom poms are adorable! 😀 I can’t wait to use these bookmarks.
Here’s how the inside of the book turned out! 😀 Love the rustic feel! 😀
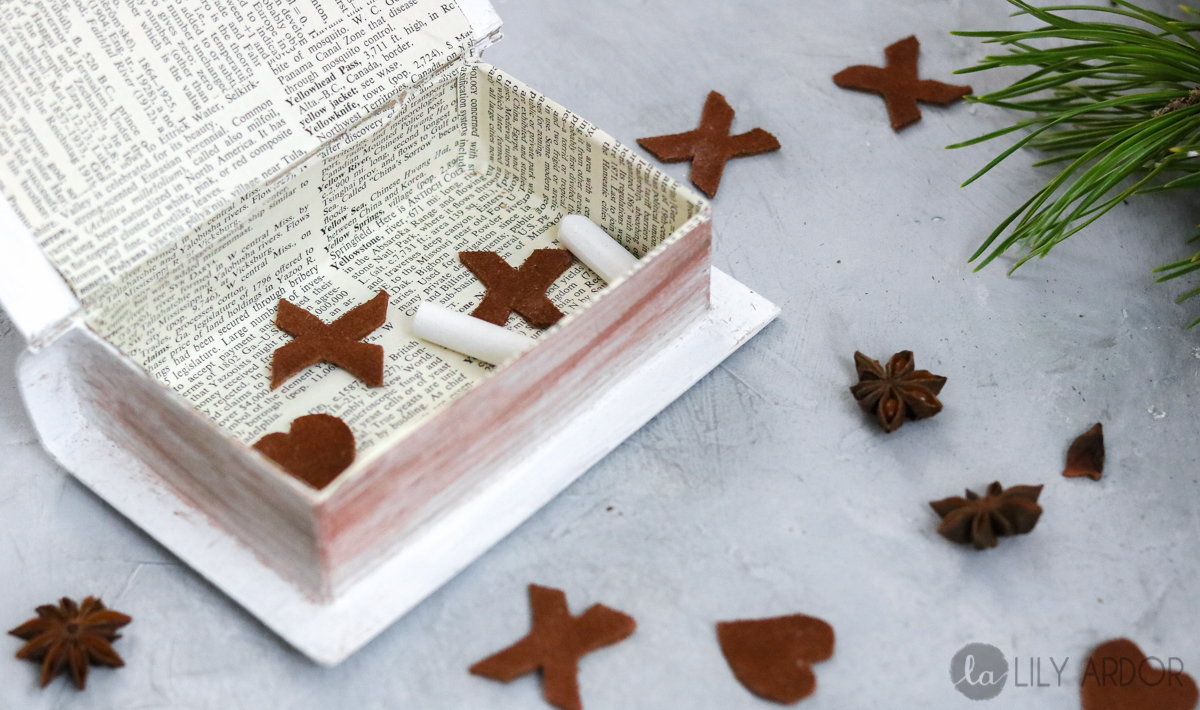
And I just can’t get over these X’s and hearts! Okay I admit it! I’m a bit obsessed over these DIY projects! Maybe I’m just surprised because, I wasn’t expecting much from these DIYS. They have definitely exceeded my expectations! I hope your loving them as much as I do! 😀
😀 😀 😀

Okay Okay that’s it! I promise. No more photos! I’m having to much fun with this! hehe 😀 I’ll see you next time!
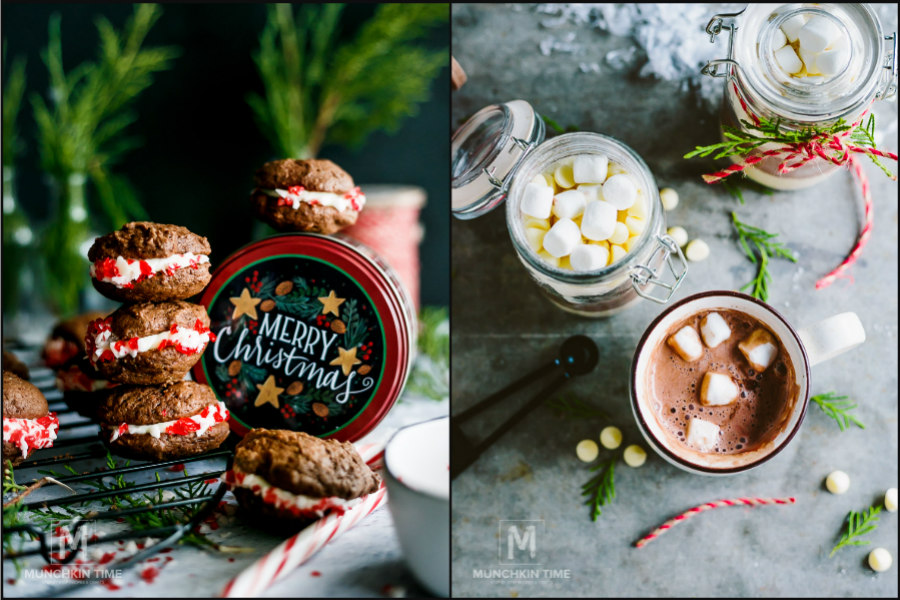
Check out Munchkintimes 5 tasty DIYS here –
When I originally commented I clicked the “Notify me when new comments are added” checkbox and now each time a comment is added I get several e-mails with the same comment. Is there any way you can remove me from that service? Appreciate it!
Oh man.. sorry to hear that. Can you scroll to the very bottom of the e-mail and see if there’s an unsubscribe option?
I consider something really special in this site.
Thank you 😀
Thank you very much for sharing, I learned a lot from your article. Very cool. Thanks. nimabi
I have really learned new things from your blog post. One more thing to I have seen is that in many instances, FSBO sellers may reject anyone. Remember, they’d prefer to not use your companies. But if an individual maintain a steady, professional partnership, offering assistance and remaining in contact for four to five weeks, you will usually have the capacity to win interviews. From there, a listing follows. Cheers
I’m extremely inspired together with your writing abilities as smartly as with the layout to your blog. Is that this a paid subject matter or did you modify it your self? Anyway stay up the excellent quality writing, it?s rare to see a nice blog like this one today..
Pretty section of content. I just stumbled upon your website and in accession capital to assert that I get in fact enjoyed account your blog posts. Any way I will be subscribing to your feeds and even I achievement you access consistently rapidly.
Thanks for the write-up. I have always seen that many people are needing to lose weight as they wish to appear slim and also attractive. Nevertheless, they do not usually realize that there are other benefits just for losing weight also. Doctors insist that obese people have problems with a variety of ailments that can be instantly attributed to their particular excess weight. The great thing is that people who’re overweight and also suffering from several diseases are able to reduce the severity of their particular illnesses by way of losing weight. It is easy to see a continuous but noted improvement in health whenever even a minor amount of fat reduction is accomplished.
Undeniably believe that which you stated. Your favorite justification seemed to be on the net the simplest thing to take into accout of. I say to you, I definitely get annoyed while other people think about issues that they just don’t understand about. You controlled to hit the nail upon the top as smartly as defined out the entire thing with no need side-effects , people can take a signal. Will probably be again to get more. Thanks