Painted Floor Idea
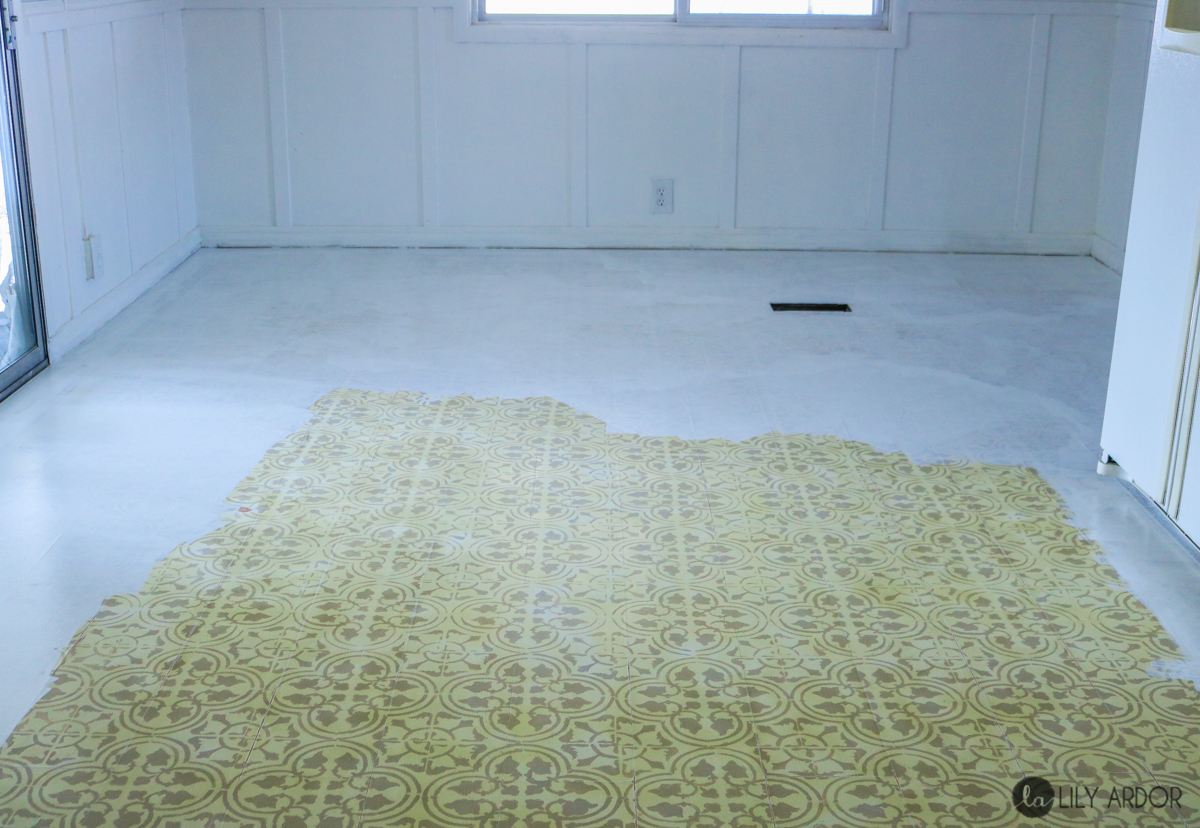
Before we jump into this floor painting DIY I wanted to give you a little bit of a background about our ex-floor. When we originally moved into this home our floor was laminate throughout most of our home. Seeing as it was laminate in the kitchen as well, it was in pretty rough condition. Especially right by the sink. My hubby used to be an over the road truck driver and would be gone for 3-4 weeks at a time. So, to kill some time I decided to paint my floor. After dreaming of pinterest stenciled tile floors I was ready to make my own.
I chose to go with white and a taupe color for the stencil. Gosh I dunno why I went with taupe. Now that I think about it!!! WHAT WAS I THINKING! I wanted a stenciled look but, subtle. Not to contrasted! HAHA lol I don’t think I knew what I wanted my self. I’m quite an indecisive person about 90% of the time and thanks to friends and family my decision making has improved drastically. 😀 😀
Here’s how the floor looked like before I painted it.
*This post contains affiliate links
Fast forward a few weeks of stenciling my kitchen and dining room were ready to seal the deal. I decided to go with an oil based polyurethane, AND OH BOY!! Biggest mistake EVER!! Already having a lot of yellow from the taupe shade I picked for the stencils the polyurethane turned solid yellow. So.., my floor went from being crisp white and taupe to an old linoleum looking floor you’d find in an old mobile-home. Which is kind of ironic because we live in a mobile-home/house.. LOL. Guess it’ll always be drawn to its origins! HAHA That said I finally got fed up with the floor when we had to do a photo shoot for our diy dinning table. The wood on our table has a lot of yellow hues and with the floor being so yellow it made me have second 🙁 thoughts about our table. So, for the photo shoot I went all out and painted some masking paper that I attached to the floor to look like concrete, which balanced the hues out. Oh course, Me and my hubby fell in love with how it looked and that’s how we decided to paint or RE-PAINT our floor once again.
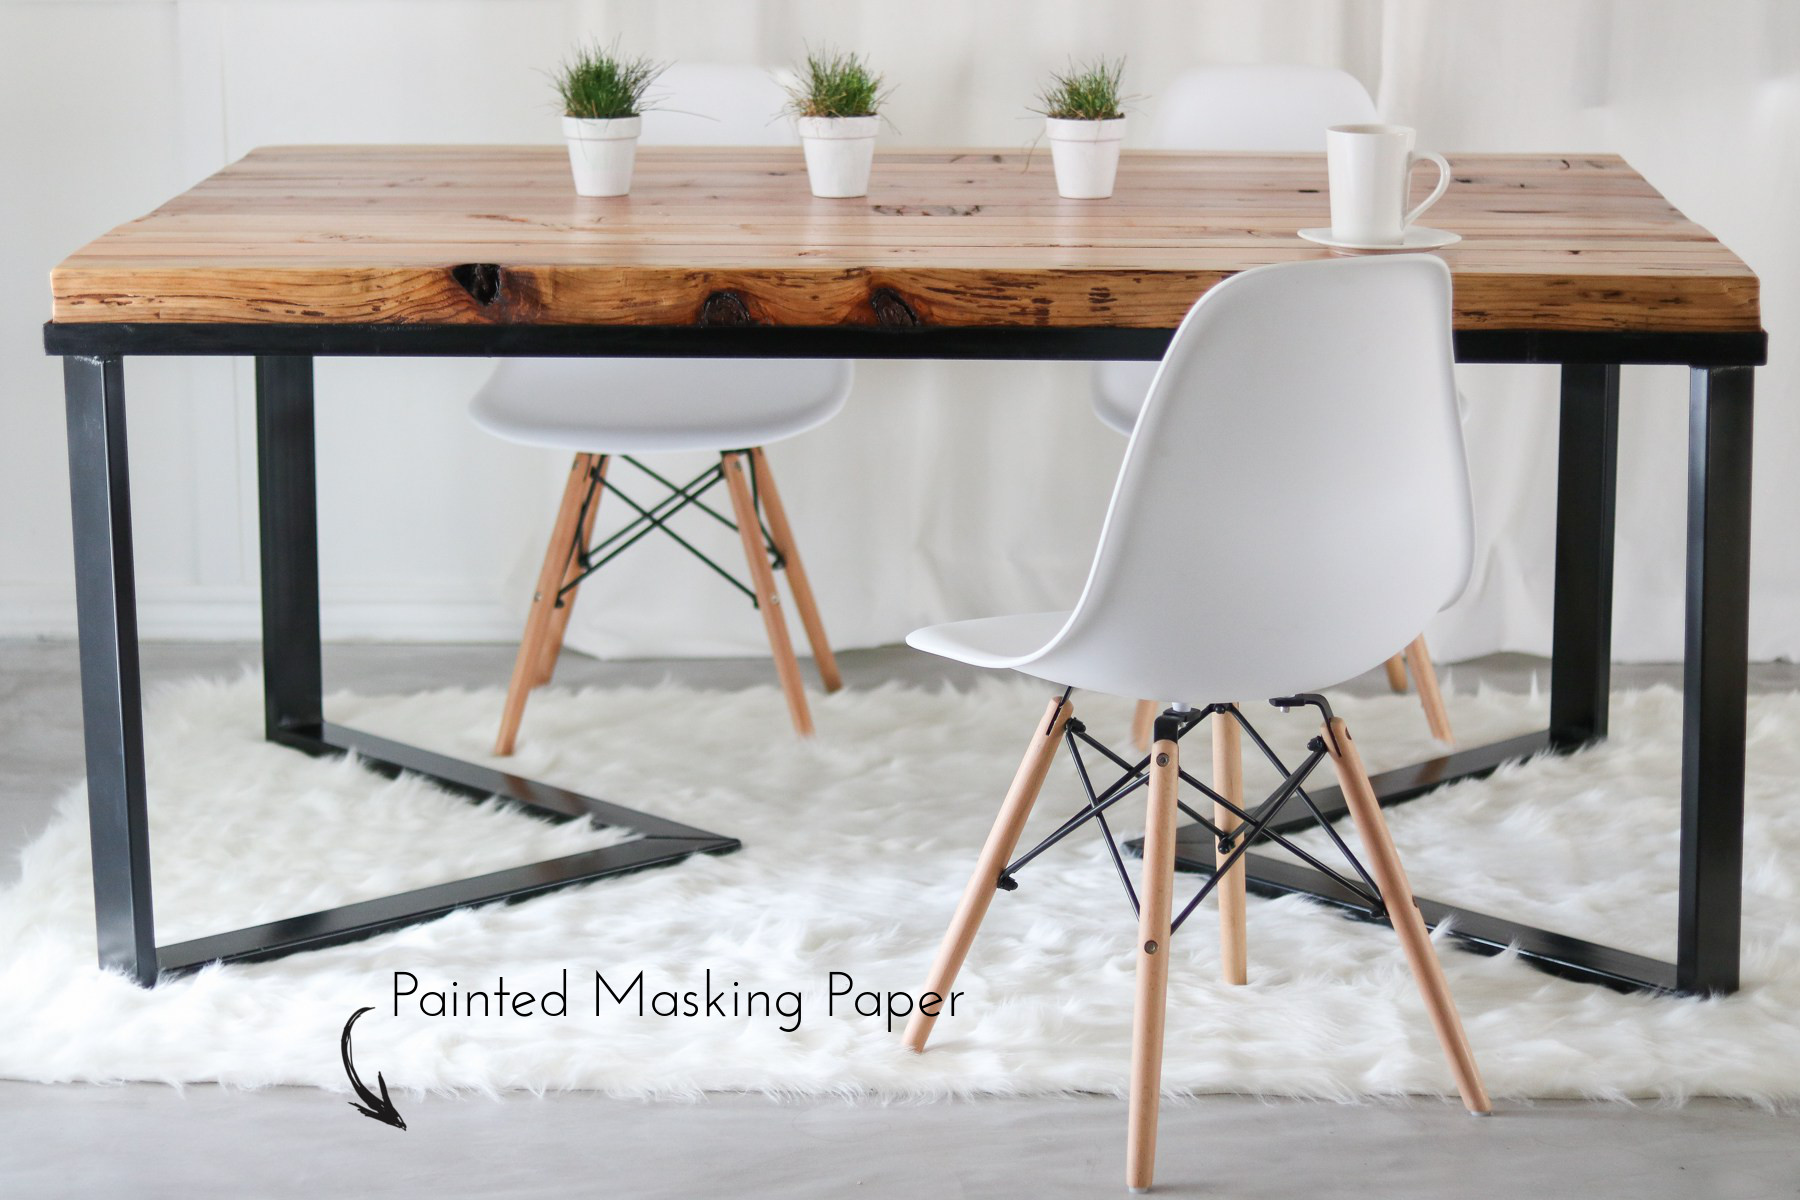
Here’s what that painted paper looked like.
If your wondering whether I worried about RE-painting the floor. HECK YES!! My biggest concern was that it would start peeling but, I still went for it and I don’t regret it a bit. I’ll give you guys an update in a few months on how it holds up.
If you’re planning on painting your floors for the first time, I would recommend to read every bit of this post. You never know you might learn something that’ll save you from a huge mistake. PS. Learn from my mistakes. 😀 😀
Here’s the video
Linoleum, Tile, or Laminate Painted Floors
Whichever floor you choose to paint keep in mind it will need to be sanded and here’s what I mean by sanded. Scratching the bonkers out of your floor will do it. Not sanding it to a smooth finish. SCRATCHING! I don’t know if I would do this on shiny tile but if you can scratch the tiles up before painting then I would go for it. Preferably with a sander unless your arms are super strong. I wasn’t blessed with such genes so I stick to my dual action sander. When I was painting my laminate for the first time I was pretty freaked out because my hardest sandpaper barely put a scratch in it. I gotta say, that stuff is pretty hardy. Since our floor was already painted, this time around I used 120 grit sand paper because, I didn’t want to scratch off the paint completely. Polyurethane sands easier then laminate. Gosh, if I can re-call correctly I think I used 80 grit sand paper the first time I painted my floors.
Polished Concrete Flooring
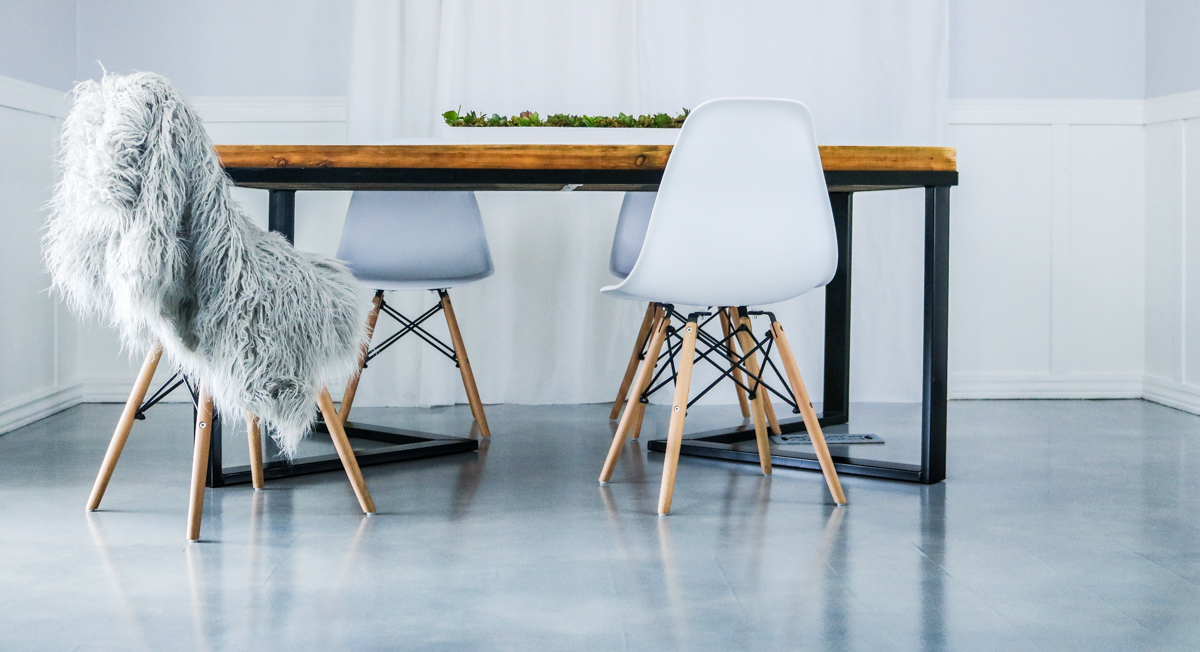
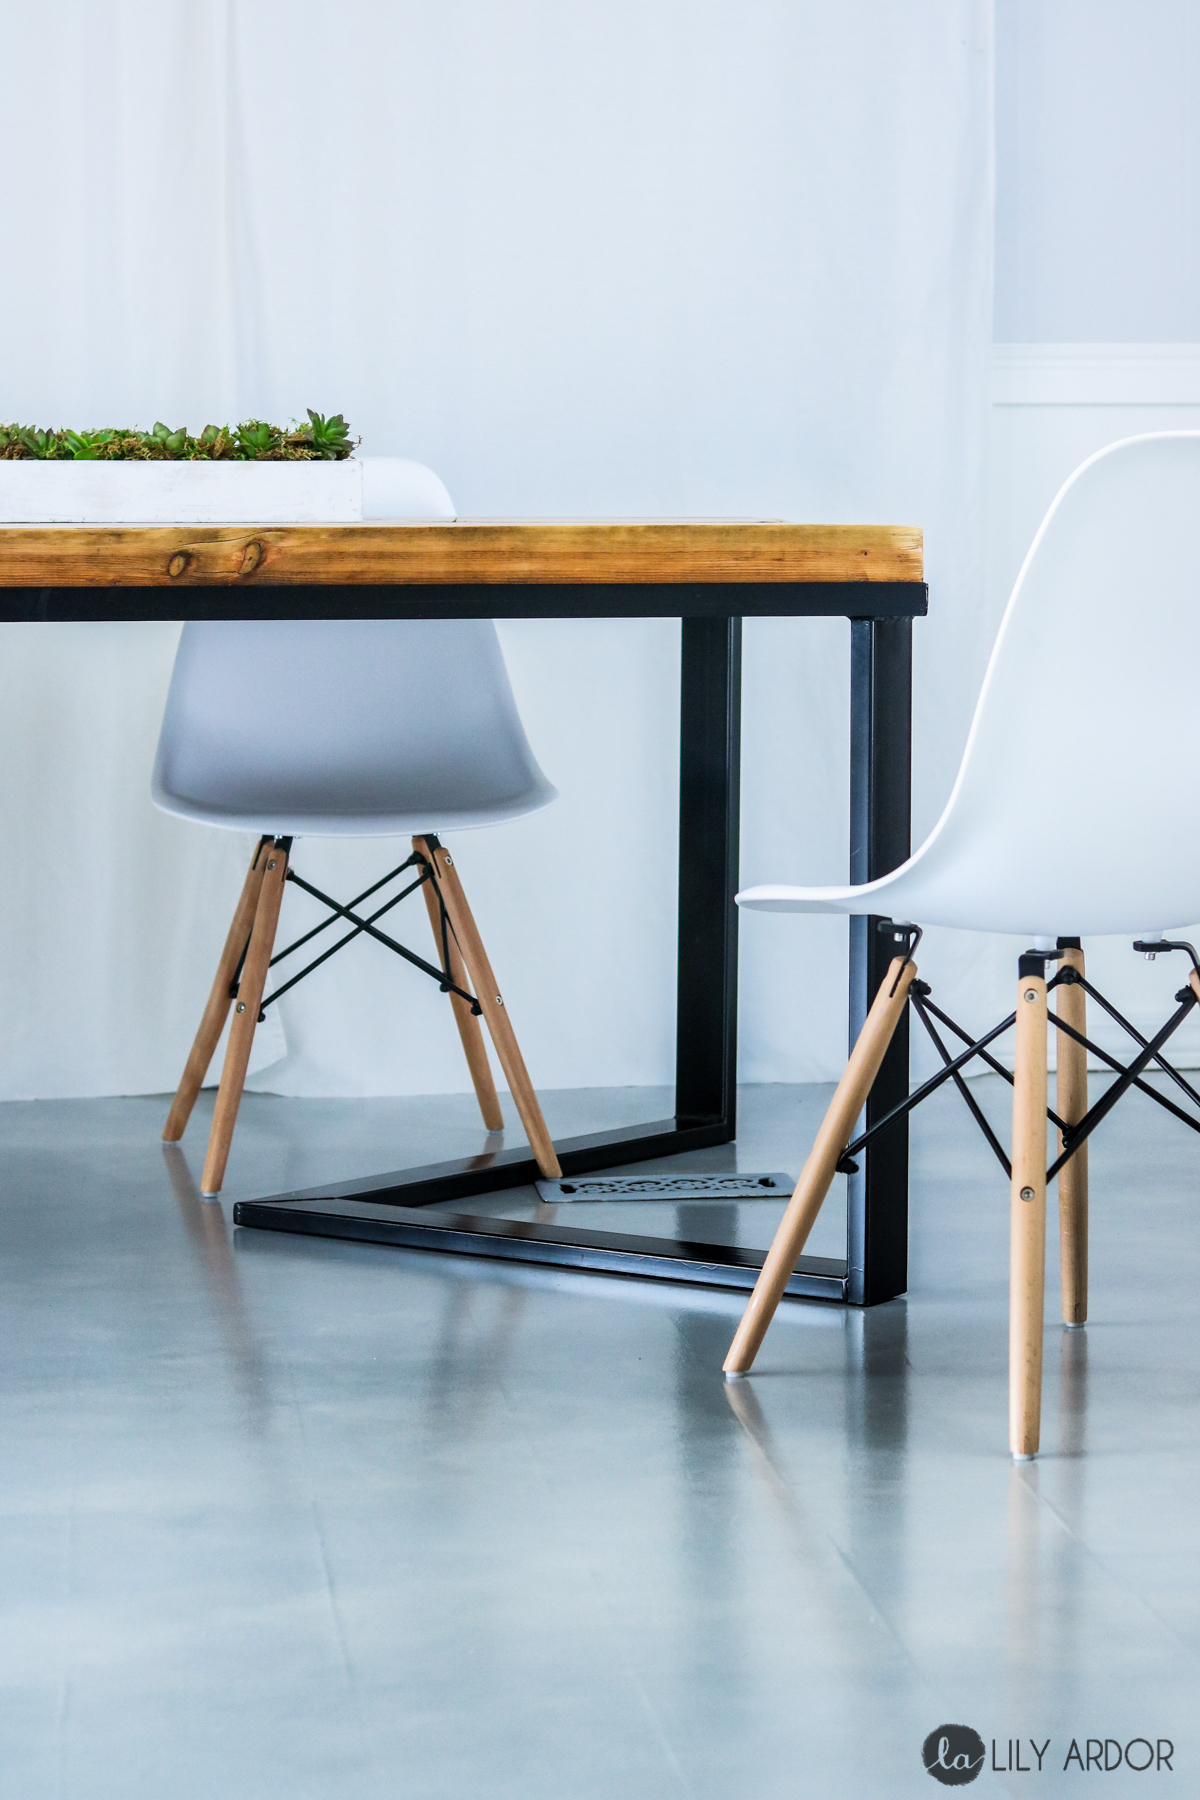
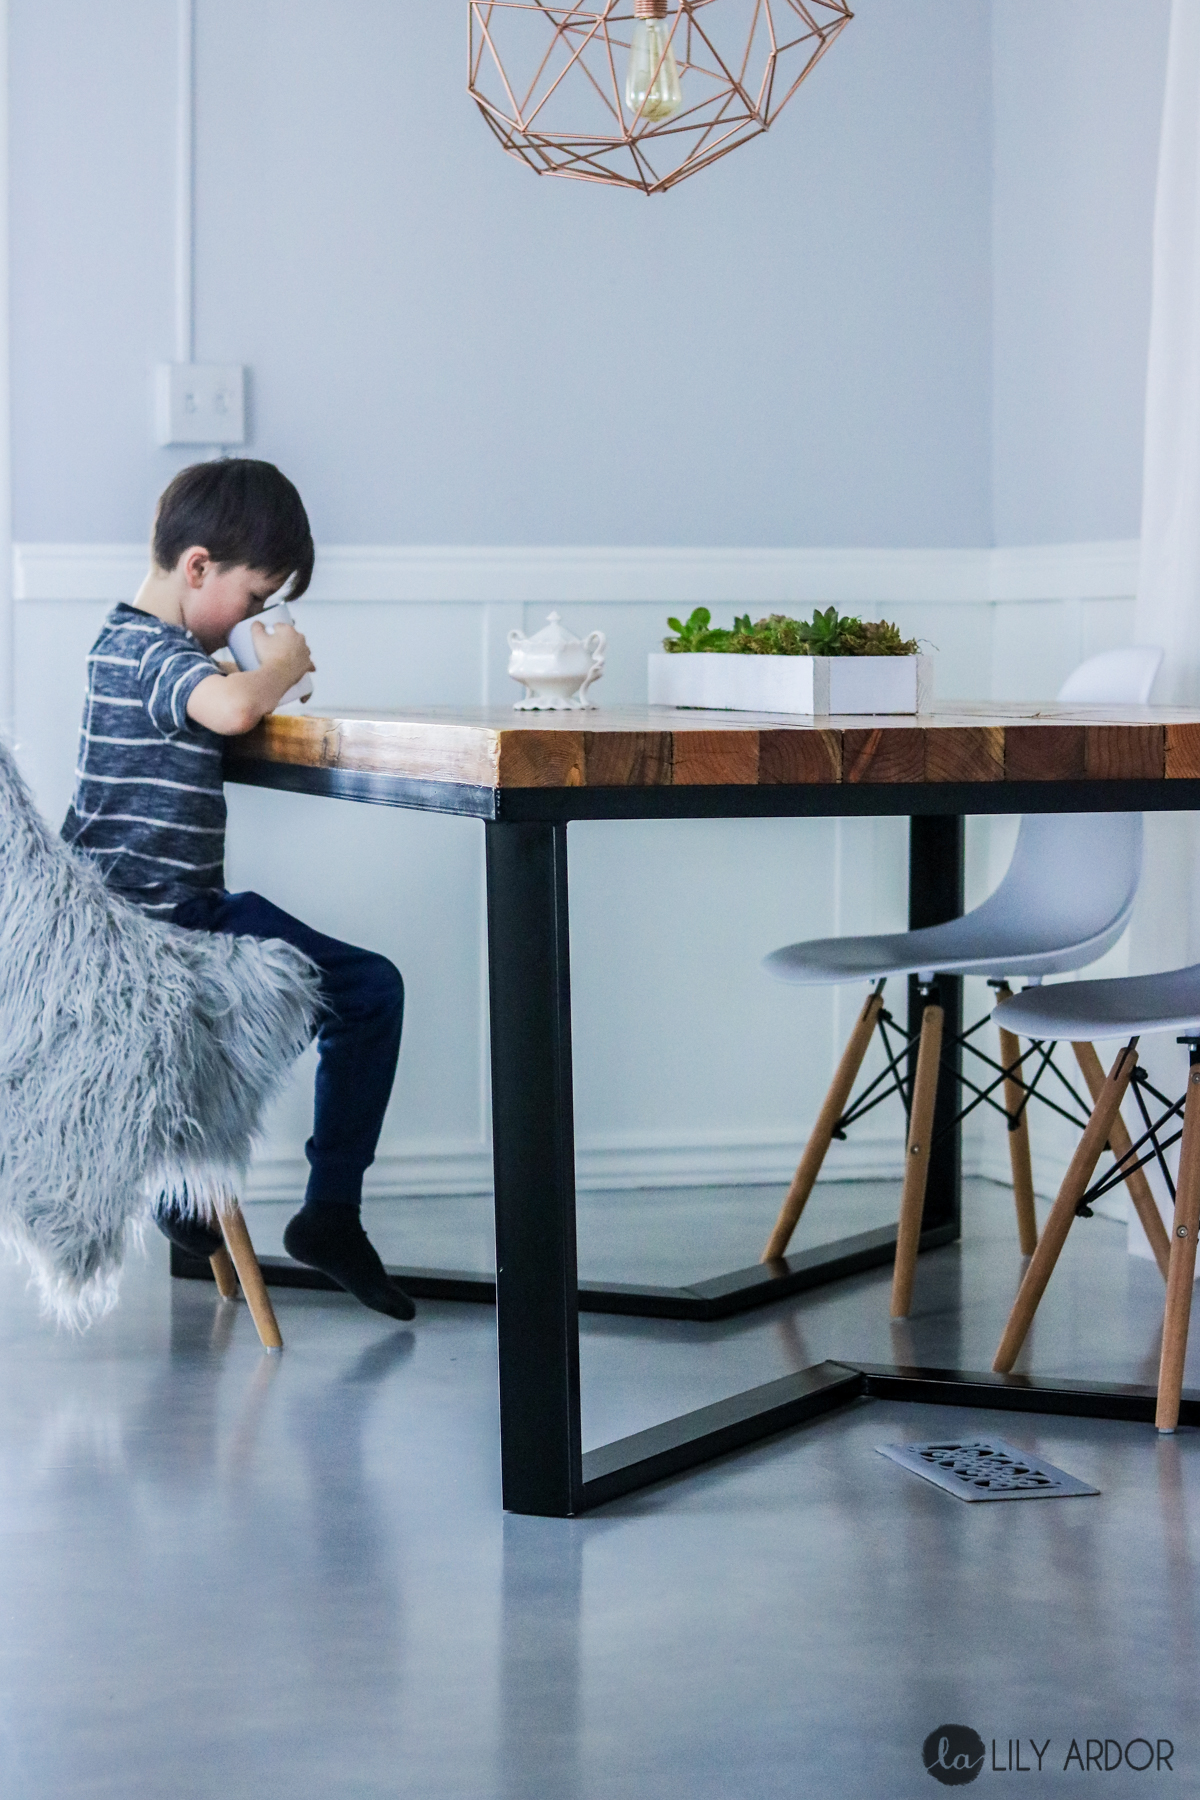
I’m sure you’re starting to put the pieces together on why we chose to go with a polished concrete look for our floor. Most people cover their concrete with wood finishes, or pretty tile. In our case we simply couldn’t afford to pull the whole place up. Since this is a mobile home and the floor has a lot of movement installing tile was out of the question as well as installing new wood floors. It’s to costly for the condition this house is in. Gosh, it would be like a domino effect. Replace the floor and the whole house crumbles. HAHA! Why a concrete look? Let just say… I LOVE a good modern industrial look in any home! Plus cool tones are my fav.
Prepping your floors
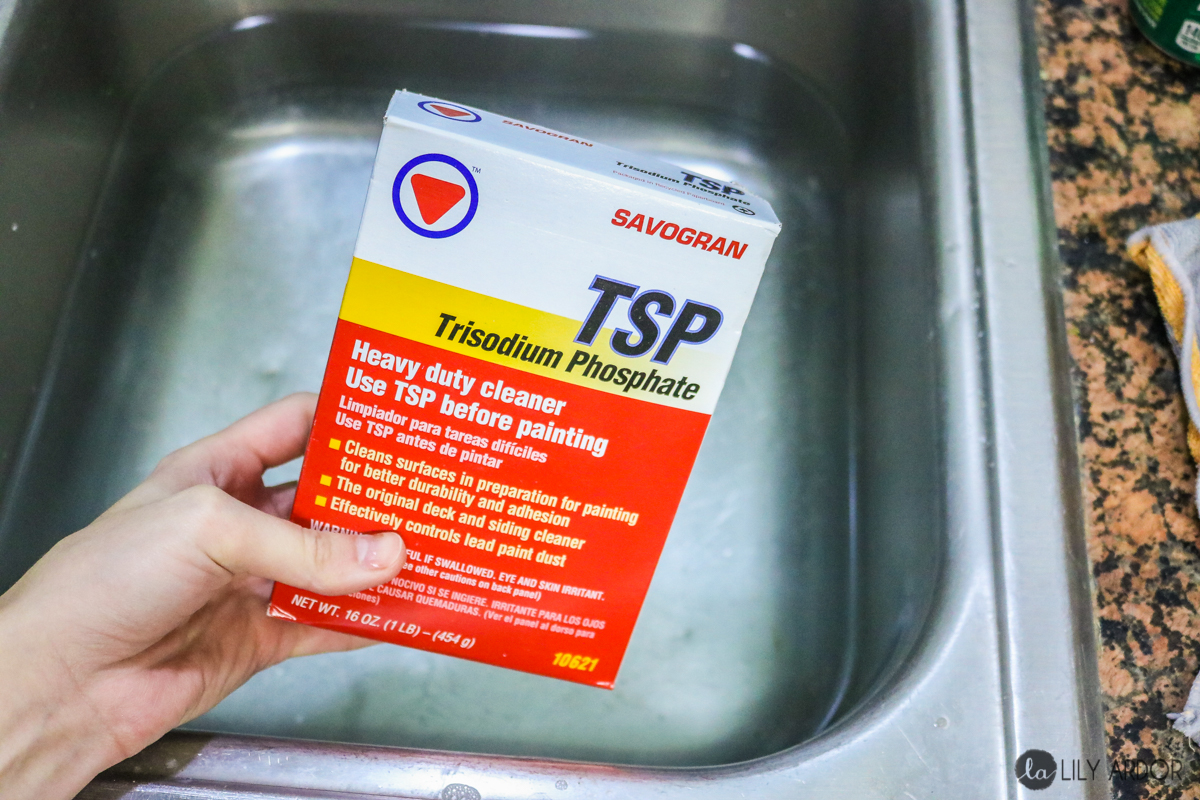
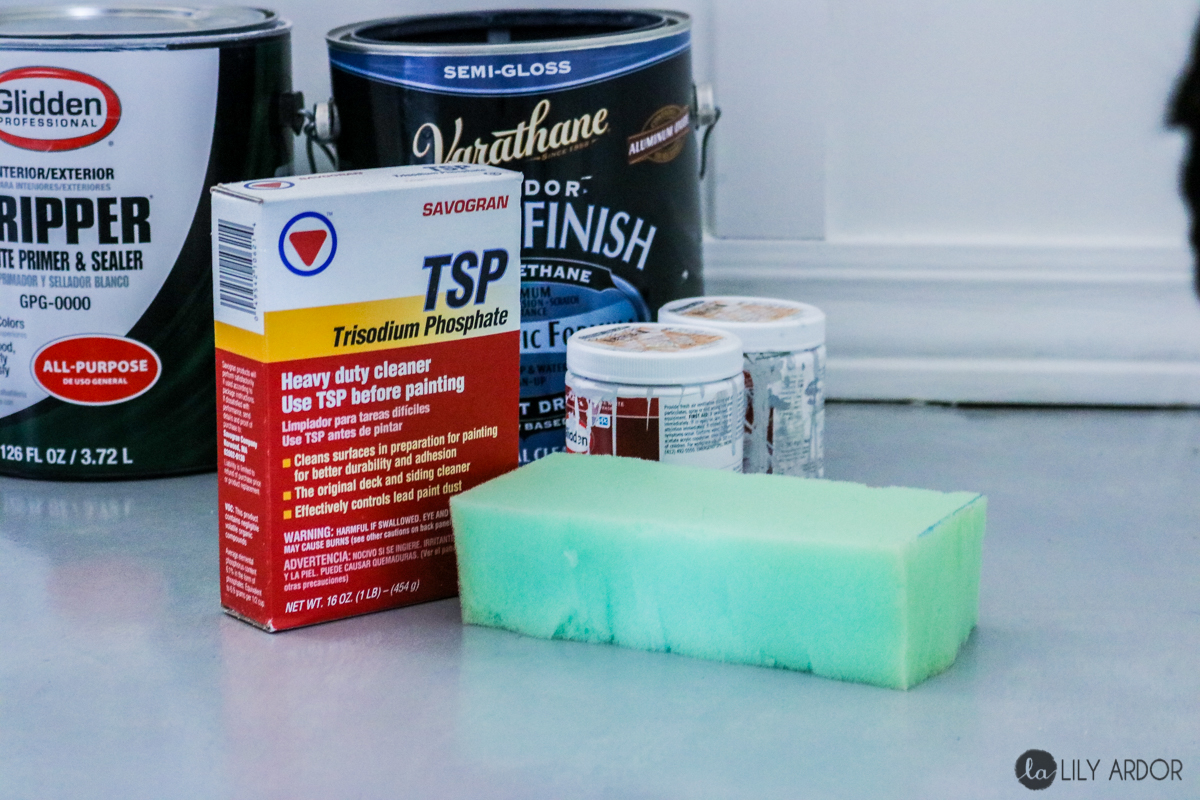
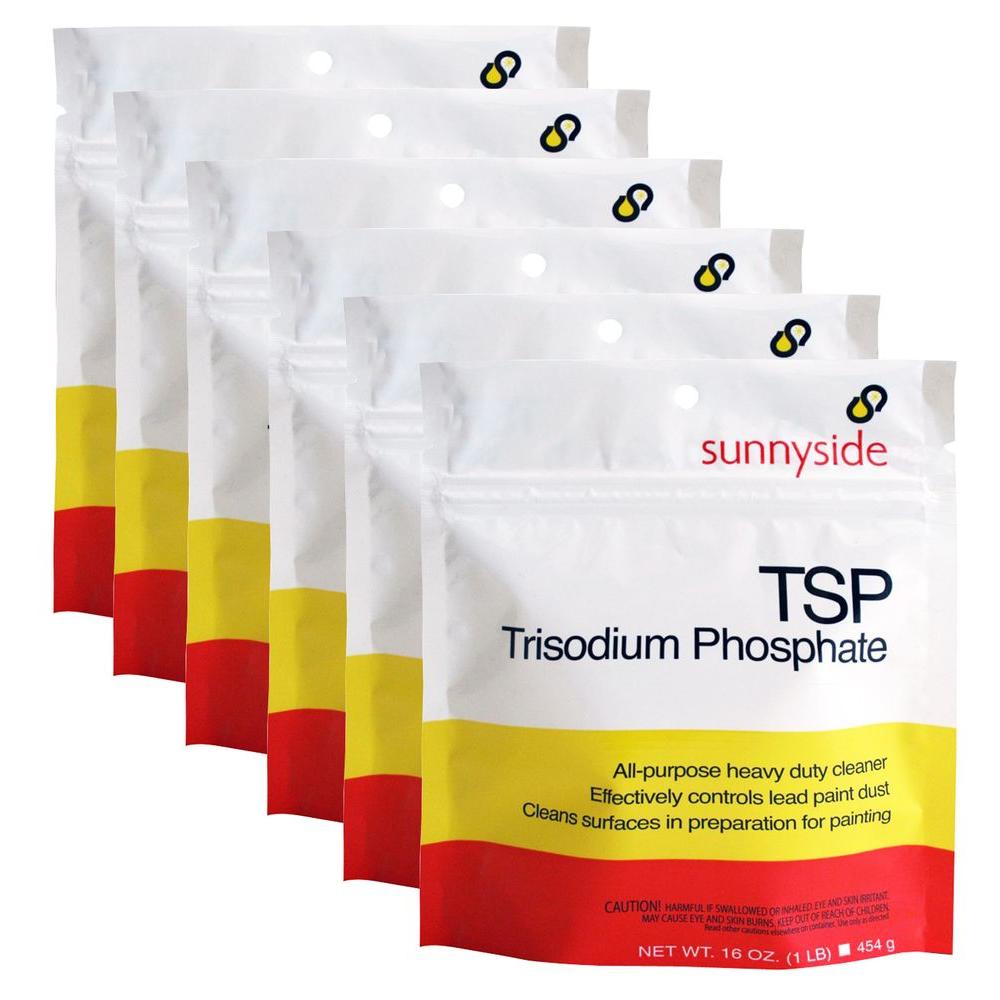
I used tsp to clean my floors. I don’t think I used this the first time I painted my floors but it’s better to be safe then sorry. It removes all oils and residue. I washed my floors once with this and once with just plain water. Don’t forget to let your floor dry completely before primering. Preferably overnight that’s what I did. You can get tsp here.
Here’s what you’ll need 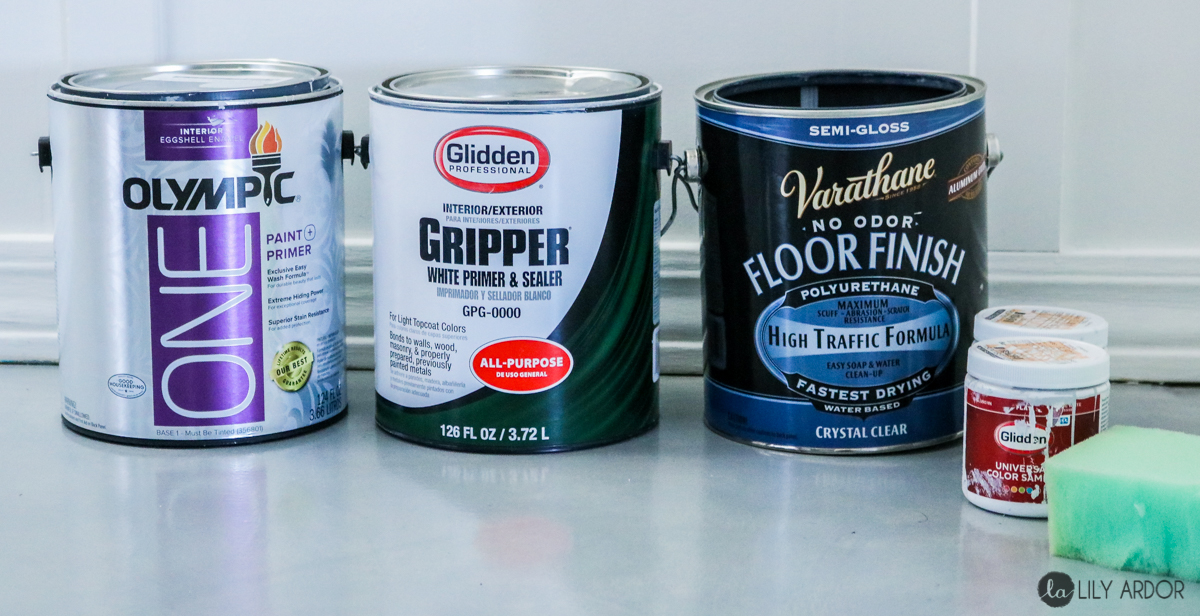 Primer
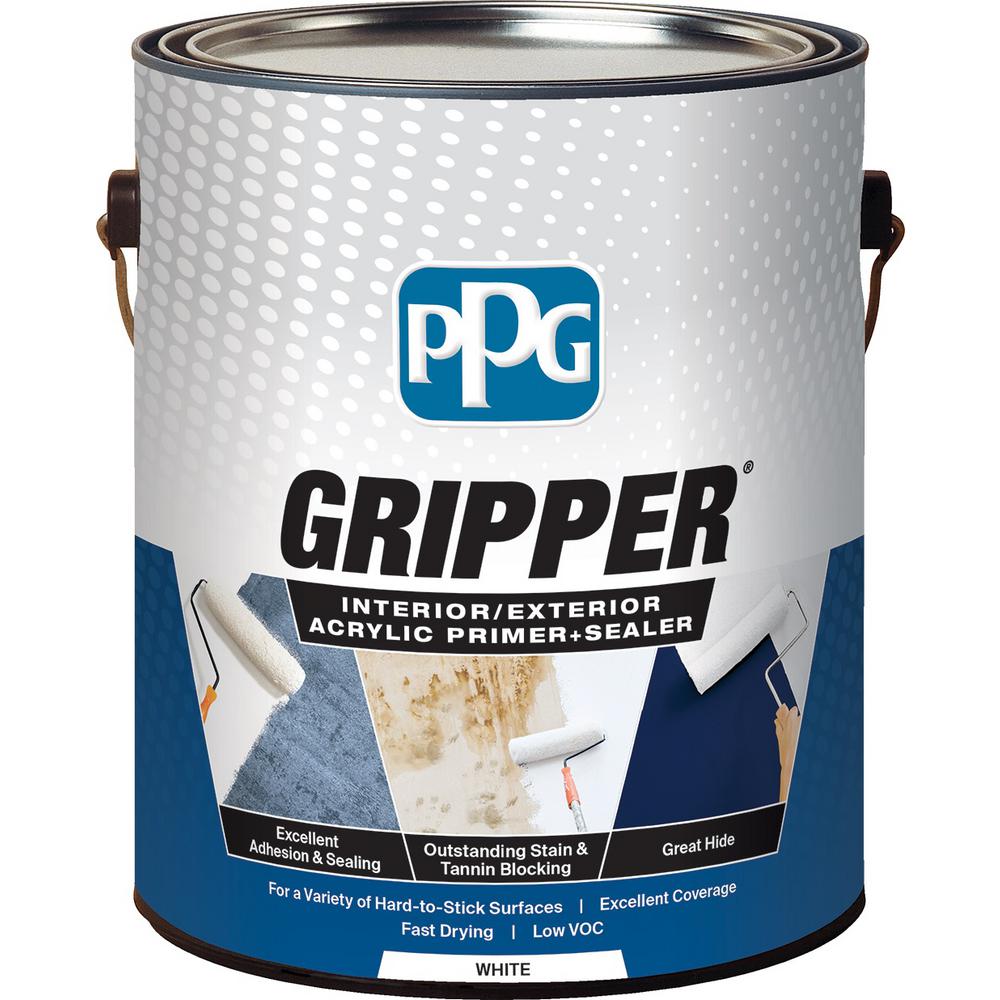
Let’s talk primer. It’s a must have for this project and depending on what primer you get 60% percent of your durability will rely on it. The better your paint is gripped onto your floor the longer it will last. You can always touch up your clear coat on top but, if you choose to go with a bad primer your chances of good durability are slim. I was recommended this primer by a homedepot associate. (middle can) The glidden gripper. I’ll tell you what, it is one tough cookie. I applied my first coat and after 3 hours of dry time I couldn’t scratch it off with my nail. 😀 😀 I ended up doing two coats of primer in total. As I’ve mentioned above your floors must be completely dry before primering. I let my washed floors dry overnight just in case before primering. ( This step is important for the primer to adhere correctly)
If you’re looking for Glidden gripper PPG now owns Glidden and I wasn’t able to find Glidden Gripper primer however here’s PPG gripper primer.
Paint
It’s always good to use good quality paint. I’m not going to say Olympic One is the best brand of paint out their but, it’s one of my favorite for the price you pay. I was going to go with the PPG brand but, since I had the perfect gray color left from painting my wall I decided to save a buck. 😀 Whatever you do DO NOT use high-gloss paint or anywhere near gloss. Eggshell or flat works best for this. I used eggshell. The reason you don’t want to use a gloss finish paint is because you want your floor finish (top coat) to adhere good to it and if it’s already glossy your floor finish will have a harder time adhering to it. If you’re looking unfortunately Olympic One doesn’t sell paint anymore.
Paint for your Concrete Effect
In total I used 3 shades of gray. A cool gray a warm gray and of course the base gray. I used some testers for the cool and warm gray. I did run out of the cooler gray because, I used it the most on top of the base gray to create the effect. So I had to make another run to the store to buy more. Keep in mind you don’t need much to create the effect. You’ll also need a sponge a spray bottle with water. Any sponge will do. I didn’t even use a real sponge. I used some foam padding my hubby found from a previous upholstery project and it worked just fine. 😀 😀
- Base shade: By Olympic one – called: Spring thaw. ( Olympic doesn’t sell paint anymore but, here’s a similar color in ppg called spring thaw as well)
- Cool tone gray: By Glidden- called: Philosophical gray
- Warm tone gray: By Glidden- called: Sutton place gray
Here’s what my sponge (padding) looked like. 😀
Floor Finish
This floor finish is a game changer. Yes it looks like a gallon of milk but, I’m not complaining I’d rather have that then a gallon of yellow apple juice. 😀 😀 HAHA. That said I was a bit worried about the durability of this floor finish since it is water-based. The reason I went with an oil based the first time around is because I was told the durability was better so I steered clear of water based sealers. Turns out this water-based stuff is pretty darn strong.
My hubby has a habit of gliding across the dinning room floor to the fridge on his chair and so far it’s held up good. 😀 😀 By the way those of you wondering I did three coats of this varathane floor finish.
This is how milky the floor finish looks. Don’t worry it dries clear.
Yey!! Bye yellow floors. Just to give you a heads up if your planning on whipping out this project in like two days. It’s impossible unless your maybe doing a small area. I don’t mean to burst your bubble but, reality is between the dry times and the final coat curing for 48 hours you’d be lucky to get it done in a week. I’m saying this because my plan was to have it done in 3 days and that didn’t happen. 😀
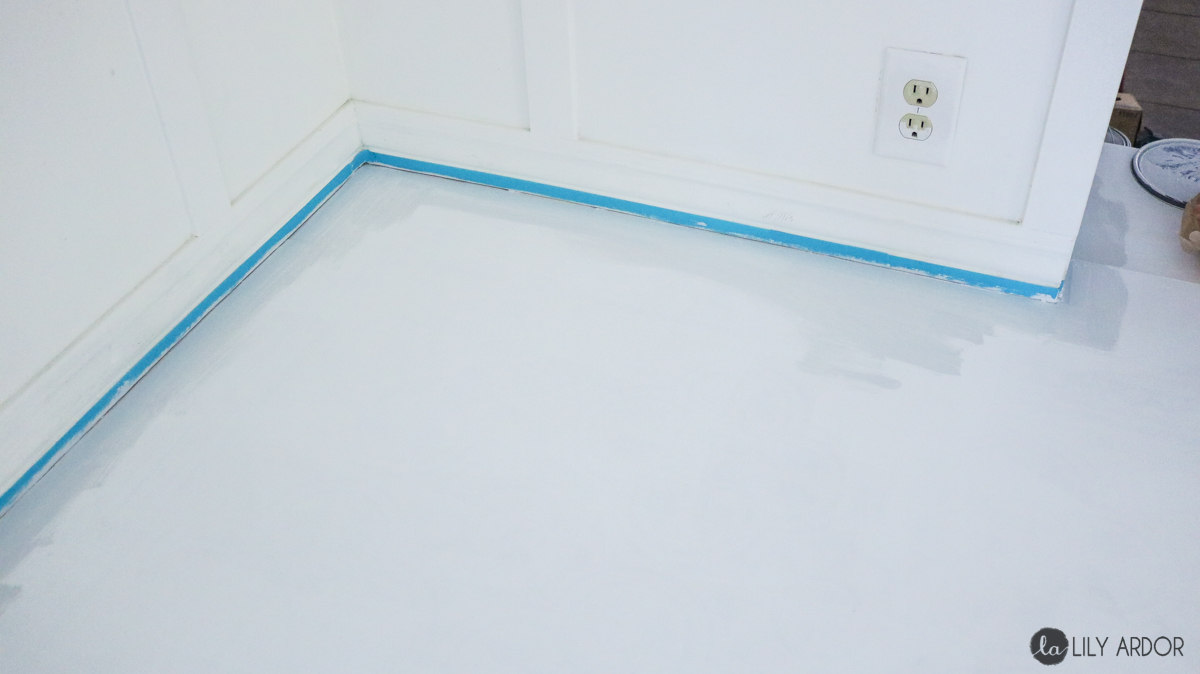
Primer going on
I let my primer dry overnight and taped off my edges before giving my floors an coat of the base gray color. ( I only did one coat of light gray)
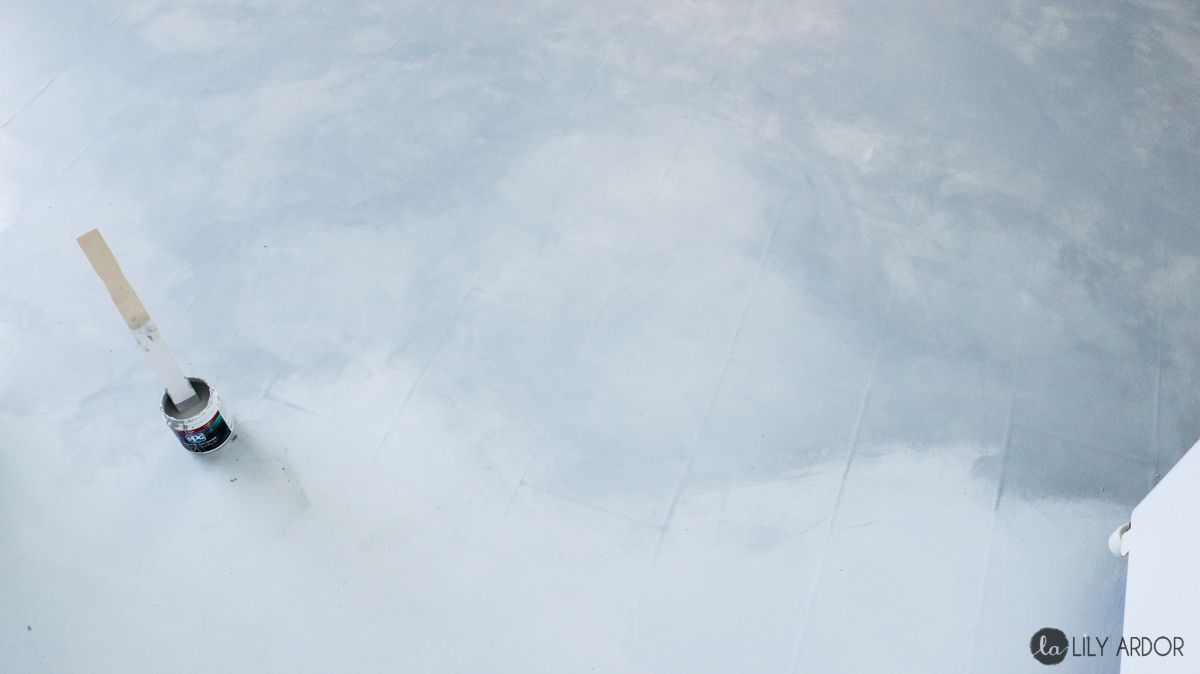
Creating the Concrete Effect
Technique #1. (more detailed- working smaller areas at a time)
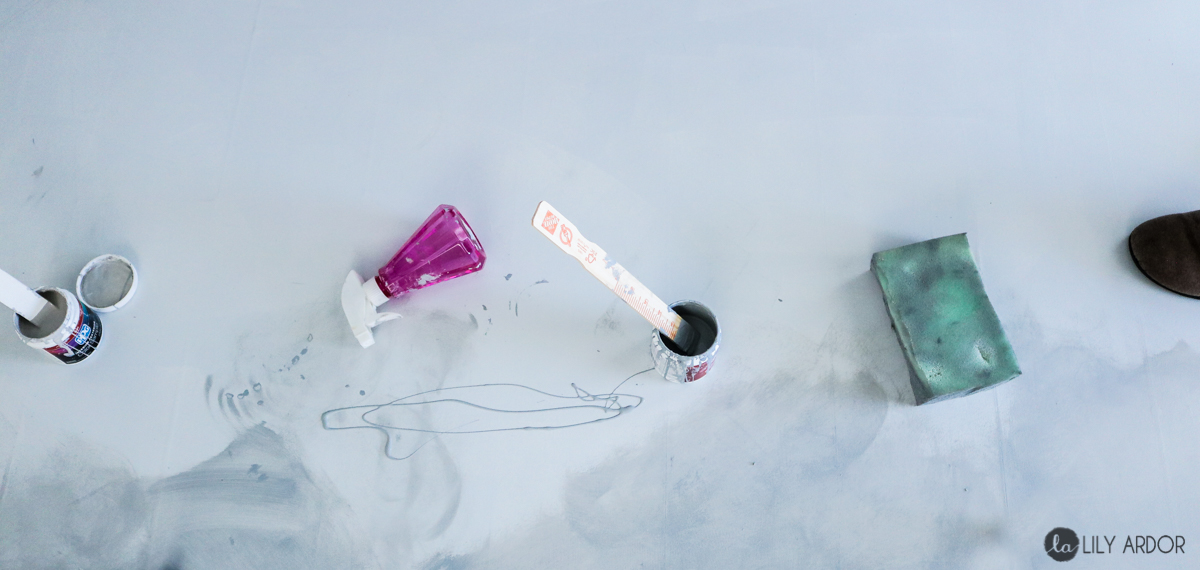
For the concrete effect I mostly only used my two tester colors. The cool gray and warm gray. I’d have to day I used the cool gray the most.
To create your concrete effect you’ll need to simply drizzle a bit of your cool and warm gray and blend with your sponge. Before starting I got my sponge wet and drained it out as much as possible. This helps the paint rub around easier. If your sponge is too wet it’ll create brush strokes. The goal is to avoid brush strokes. You need a soft cloudy look. 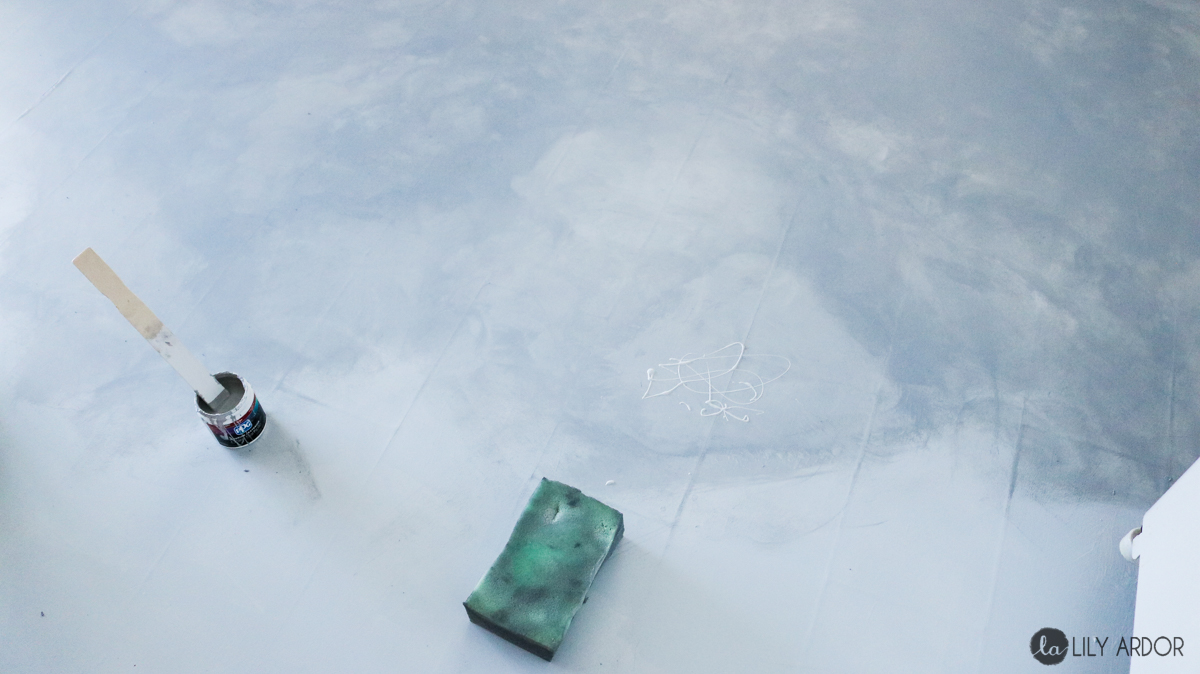
Keep in mind when blending the two colors into the floor don’t blend them together too much you only need a blended transition between the two gray colors.
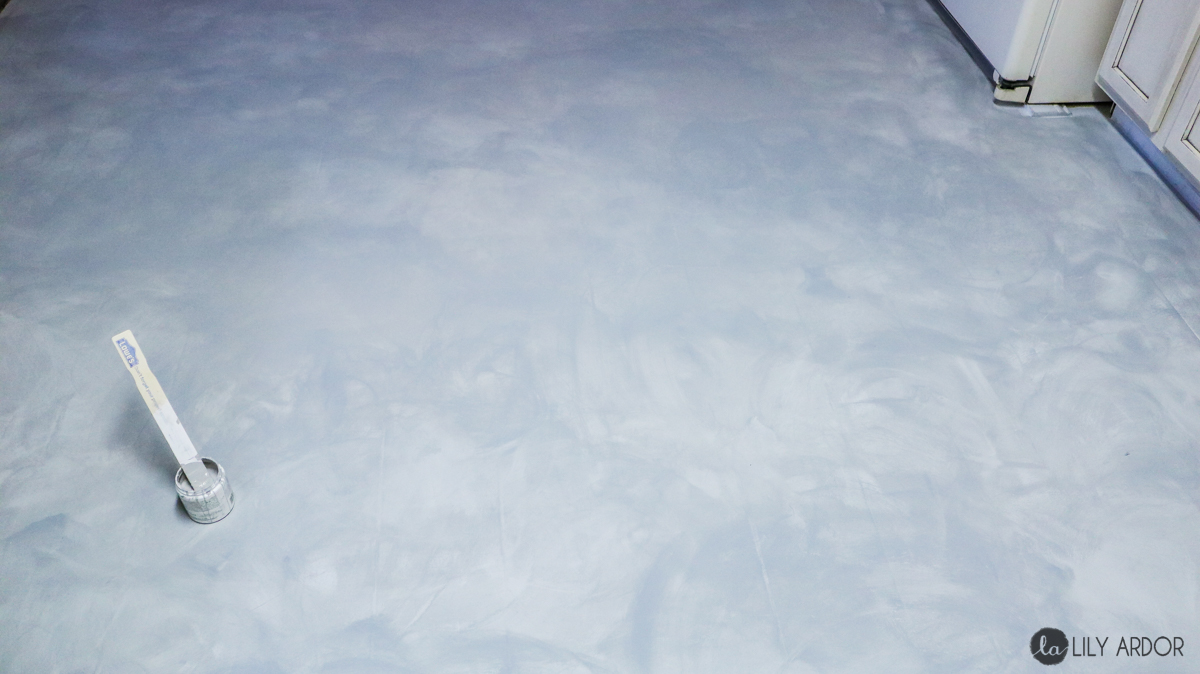
You can go over spots that stand out to much and add the warmer color to soften the look. (that’s what I did in the photo above once it was a big dry) 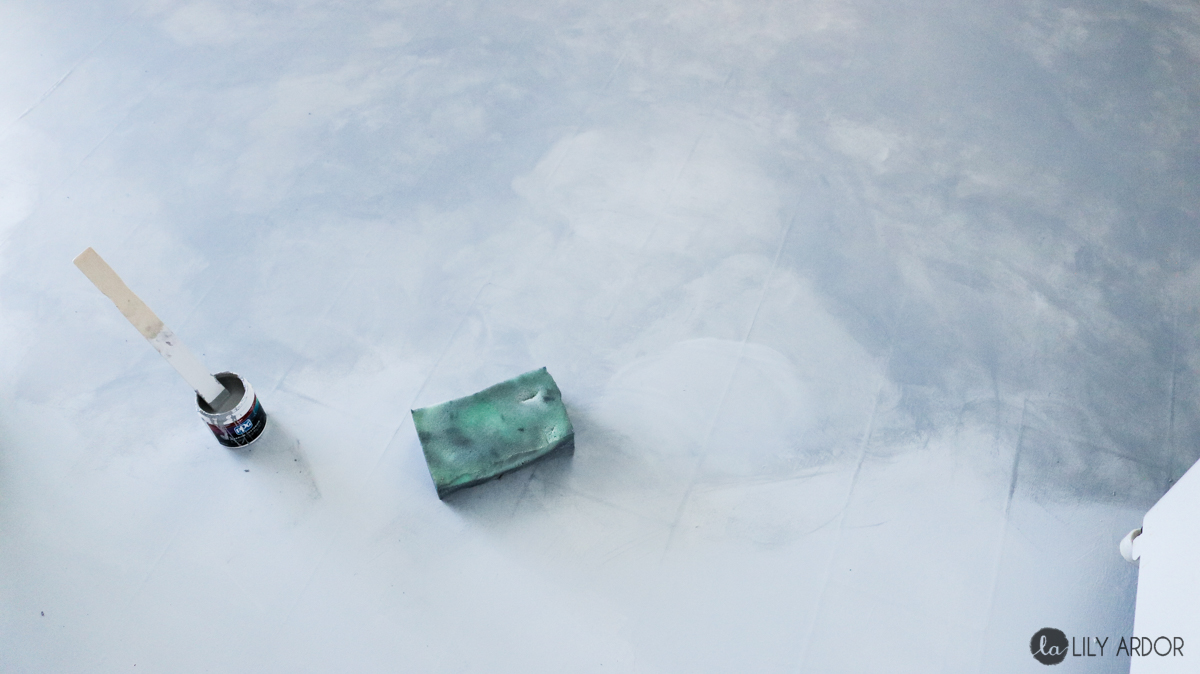
Here’s how that little patch looked like once done and blended. Also once your sponge starts getting dry add a spritz or two of water per 2 sqft area. (To add more contrast in the end I went over once the whole floor was dry and blended in a few spots of the base color gray on top.. This really gave it a 3d effect. It’s all about creating that cloudy texture)
It’s pretty easy once you get the hang of it. Even if your having a hard time keeping brush strokes at bay it still looks pretty cool. I’m not gonna lie. My floor has plenty of visible brush strokes but, it has a more of a cloudy look rather then a brushed on look.
Technique #2 (less detail- Looks great in huge rooms)
Honestly I was only going to add the 1st technique because I like it so much but, for those of you painting huge areas this might be faster. The final visible difference is one has more detail vs the other it’s especially noticeable close up. From far away they both look really good. For the second technique we rubbed the cool gray onto the floor very messily. With plenty of water. Once it was dry I went over with the warmer color and a bit of water and blended out the brush strokes. This required a few times going over because I missed a few spots but, it seemed faster this way. (it’s okay if your paint is see through when you add water- it’ll add dimension)

Here’s what it looks like once you start blending the warmer color on top. (photo below in the top area is where I was beginning to blend)
I am hoping this all made sense but, If I confused the heck out of you,LOL then just get some different shades of grays with a sponge and rub your floor with those grays. That’s all their is to it. I know I can sometimes go into too much detail and probably make things more confusing. 😀 😀
Applying your Floor Finish
You don’t need to let your concrete effect dry overnight before applying your floor finish. I think I waited about 5 hours before applying my floor finish. I was very anxious to get it done. 😀 I applied three coats of the floor finish and let it cure 48 hours before displaying any furniture on it. Make sure all furniture that has sharp edges or is heavy has felt pads. You don’t want to leave indents in your floor.
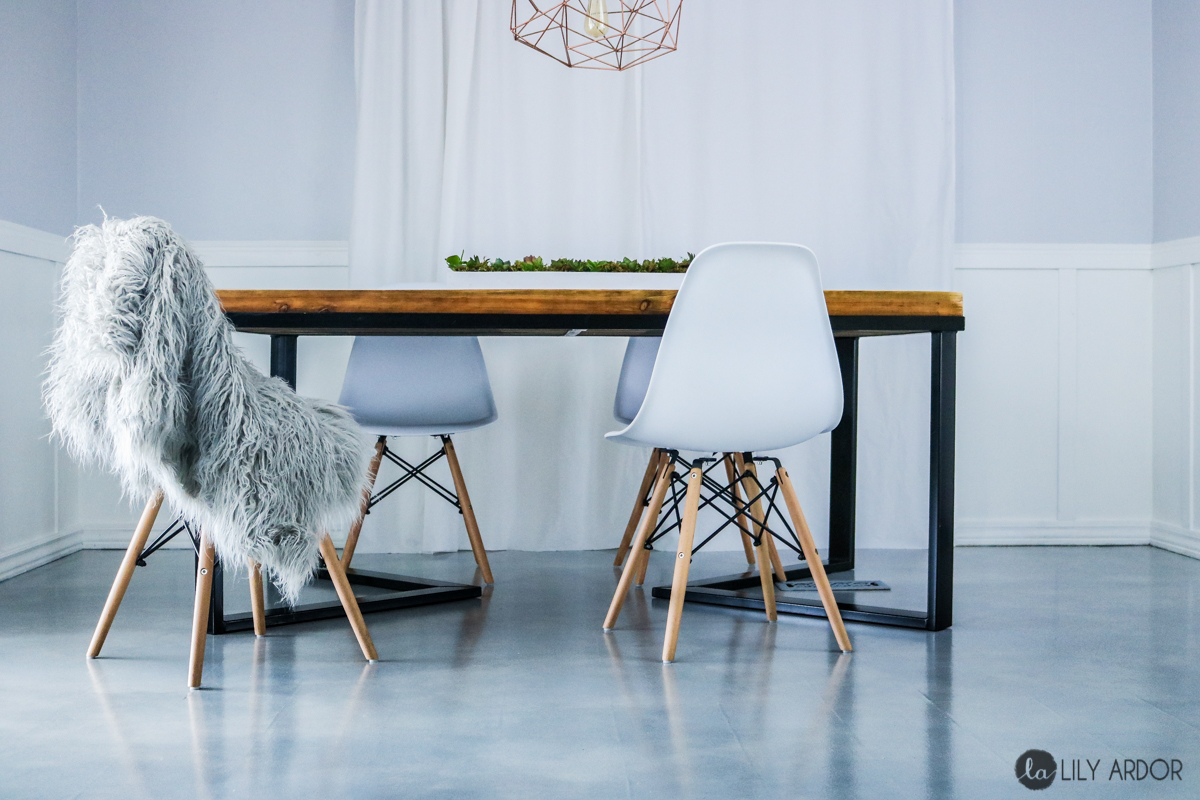
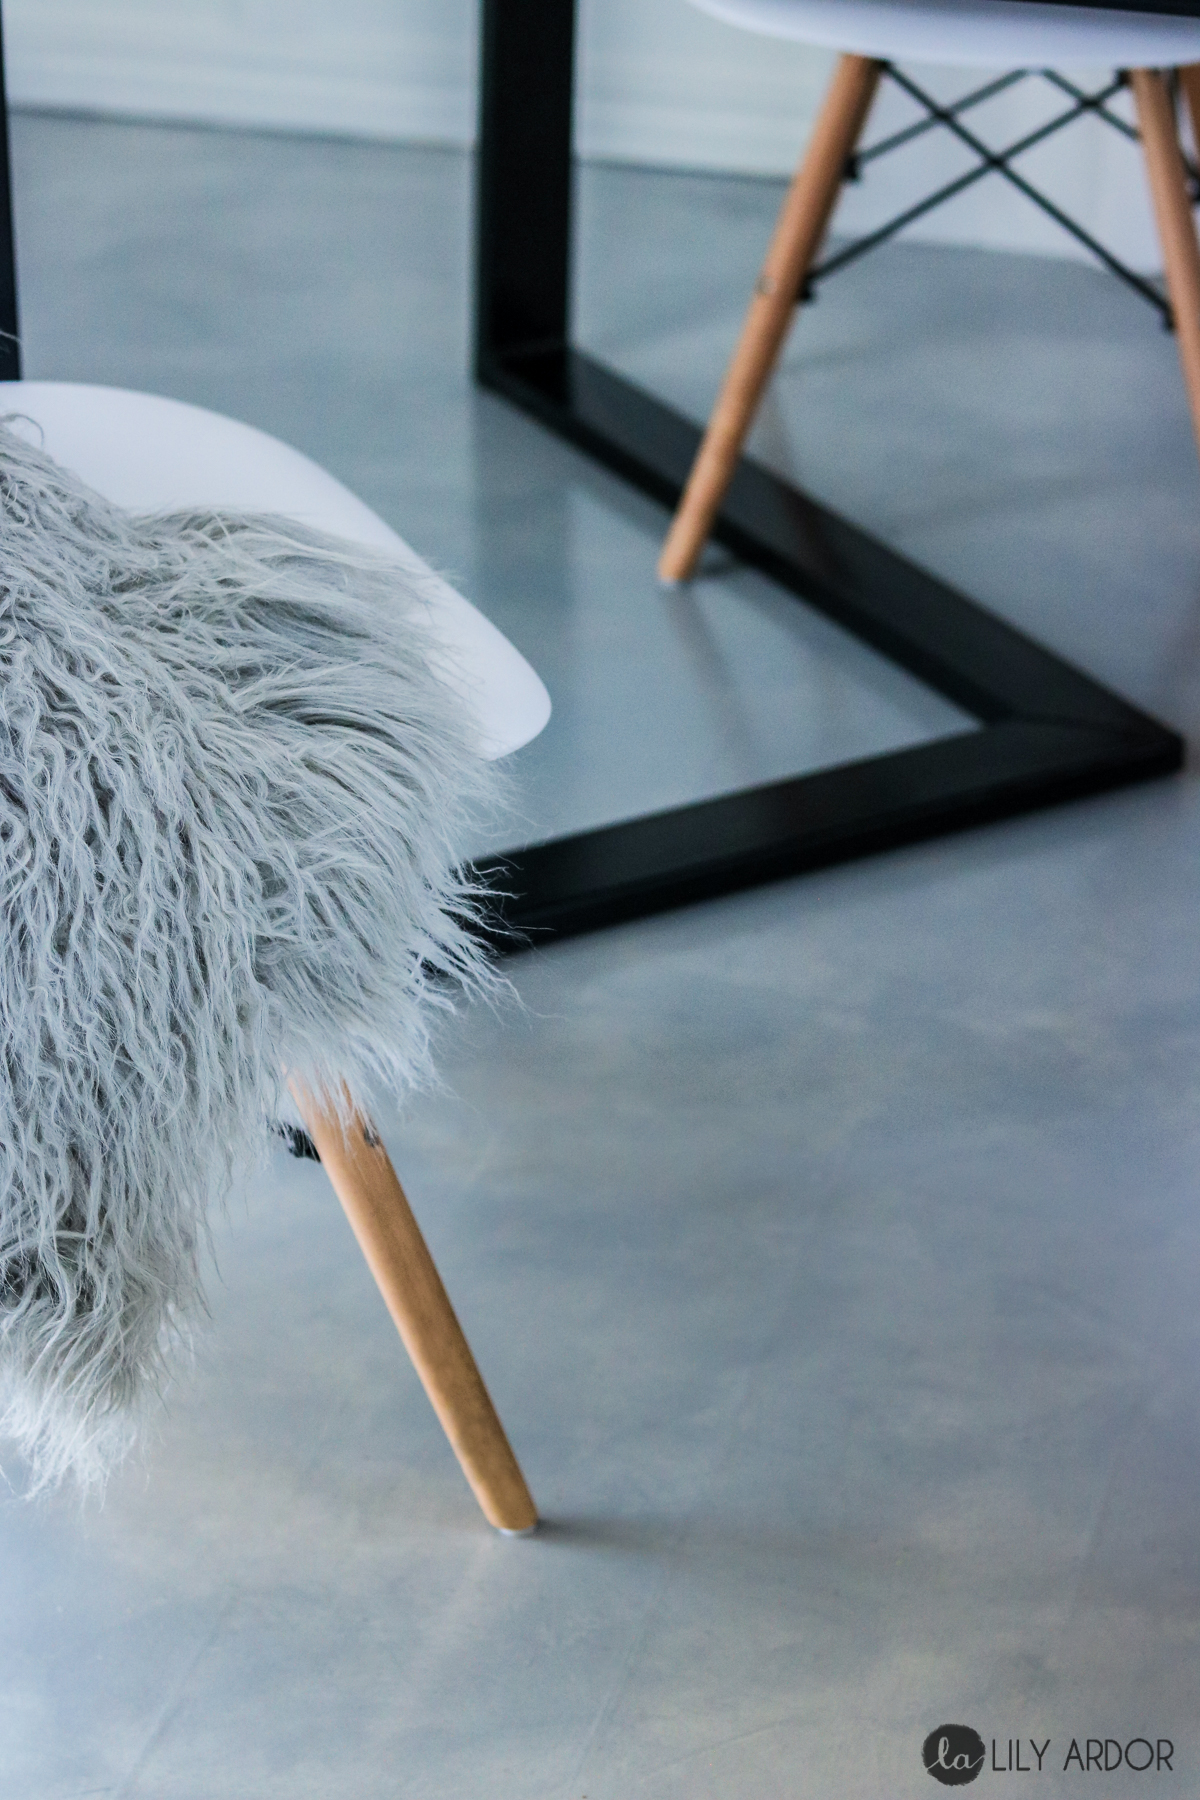
That’s it!! Easy right! LOL No not exactly but, worth every effort. I’m in love with my new floor and the different hues of blues and grays. It brings the perfect balance to my dining room. At least I hope I’m not seeing things. Let’s hope I like this floor longer then the last one. HAHA!
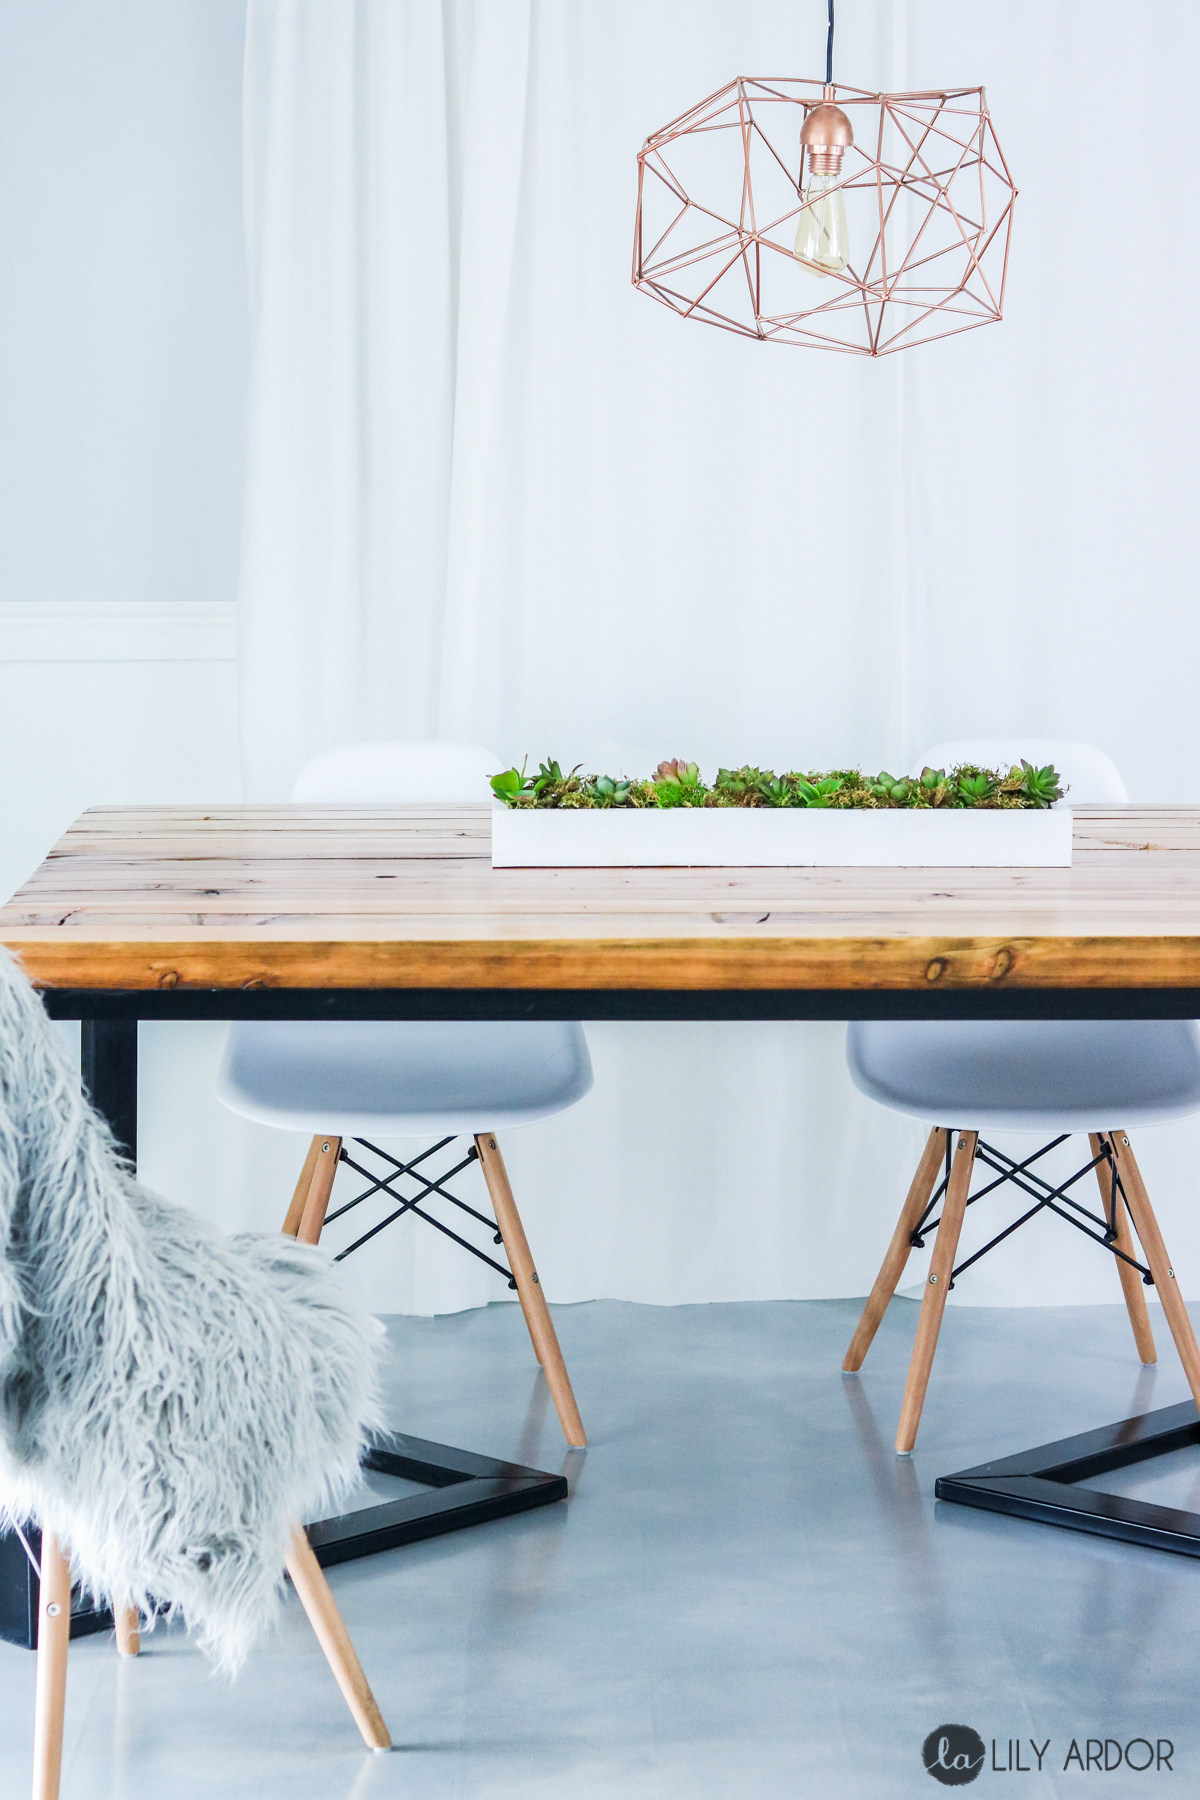
Final Look
By the way this centerpiece was something I put together last minute. I totally forgot about a centerpiece for the photo-shoot. This one probably took me like 10 minutes to make and I’m loving it. HAHA! It’s always the unexpected ones that your heart grows found of! 😀
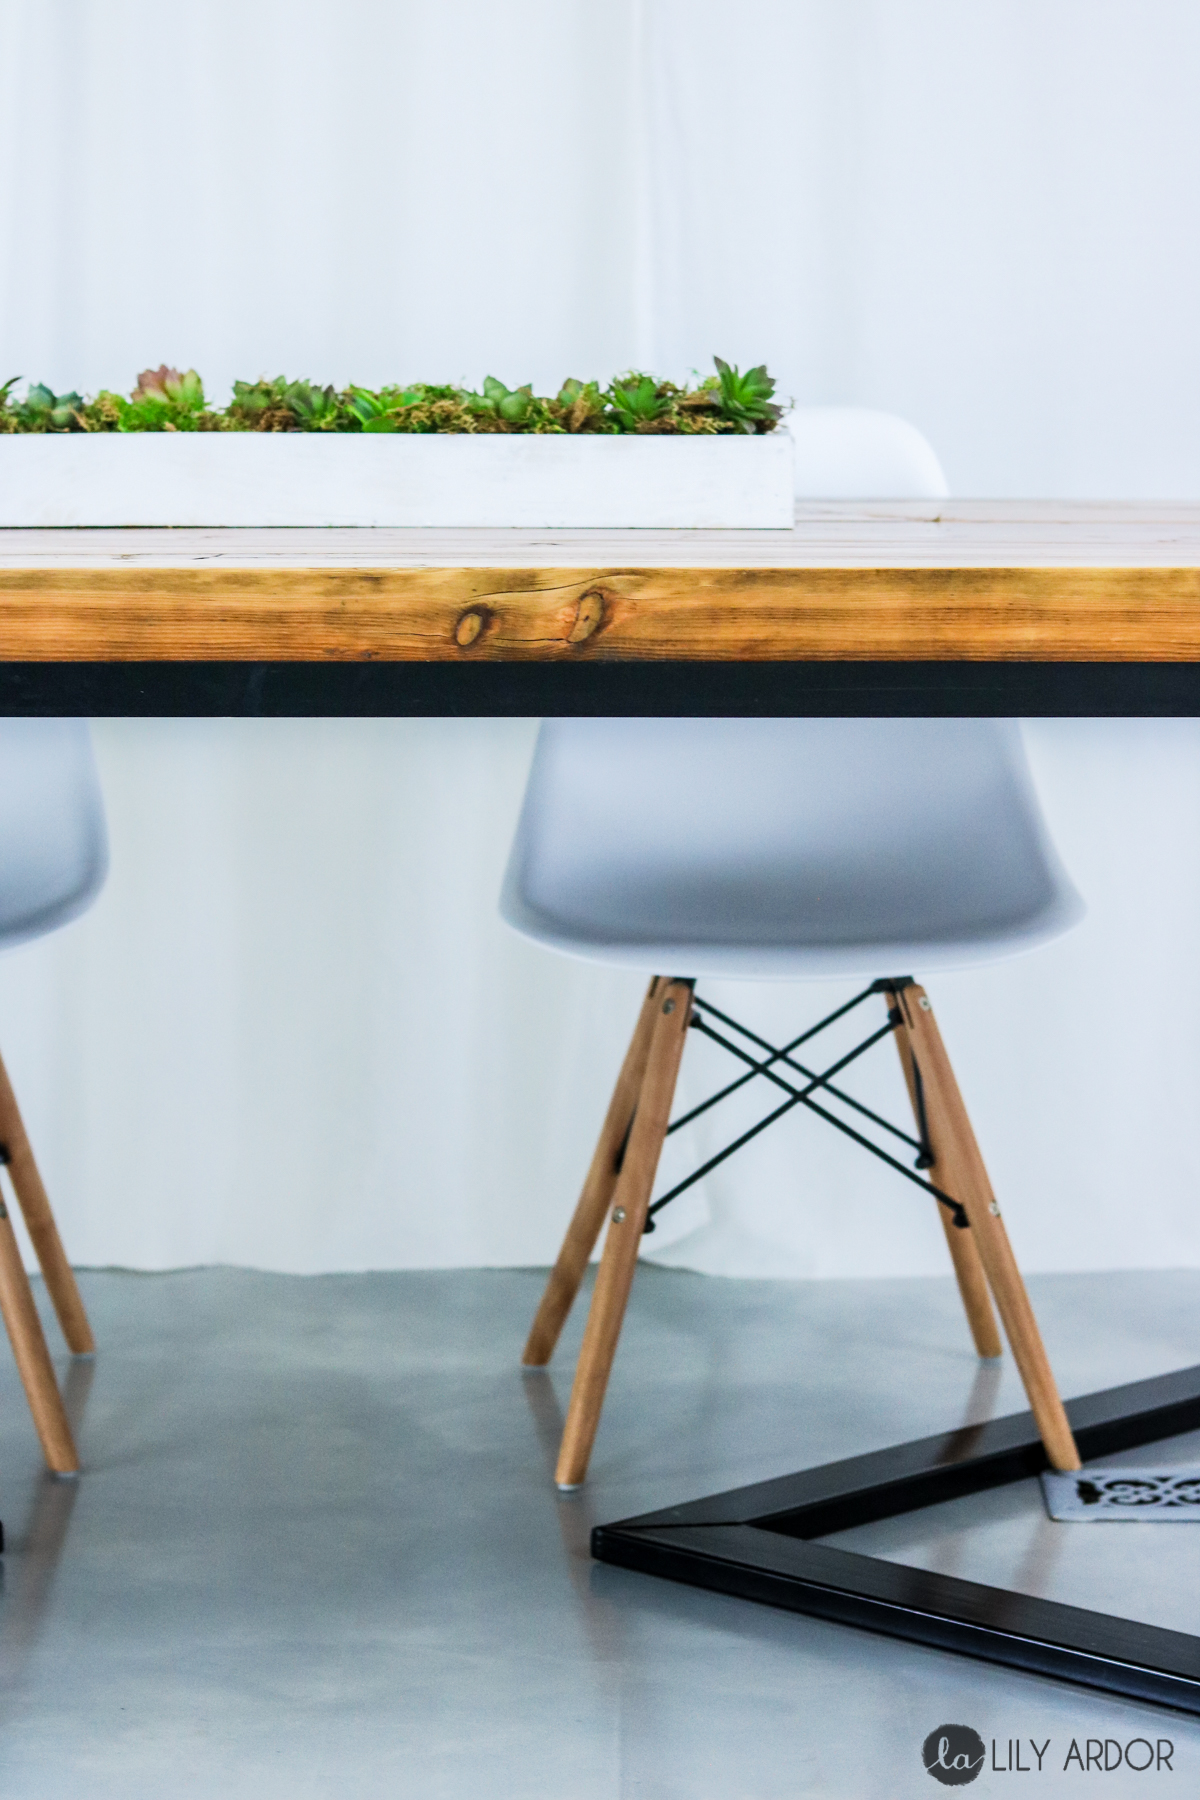
I am too excited to start taking photos with this floor. How fun is that background!

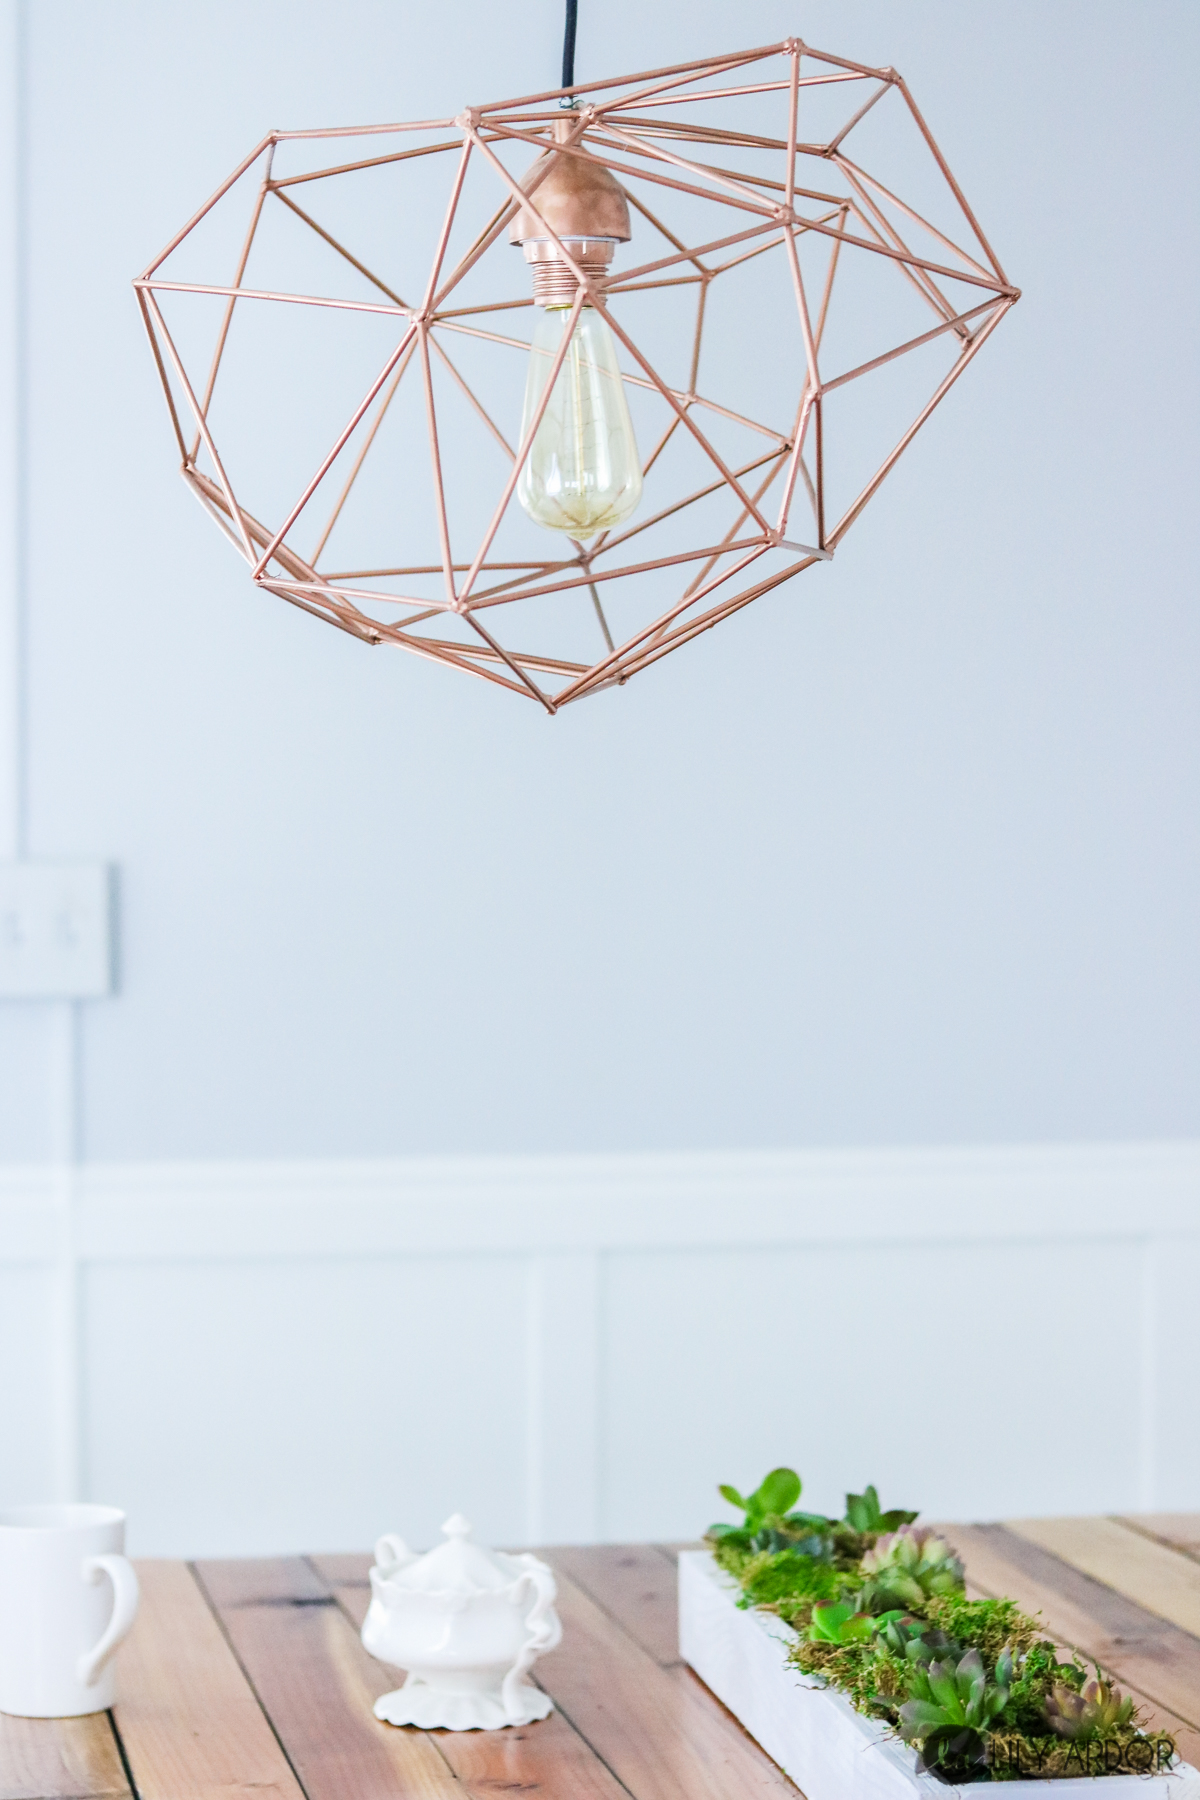
If your wondering where I got my pendant light, I made it. You can find the tutorial here. It’s super easy to make. I made it using straws. No welding required! 😀
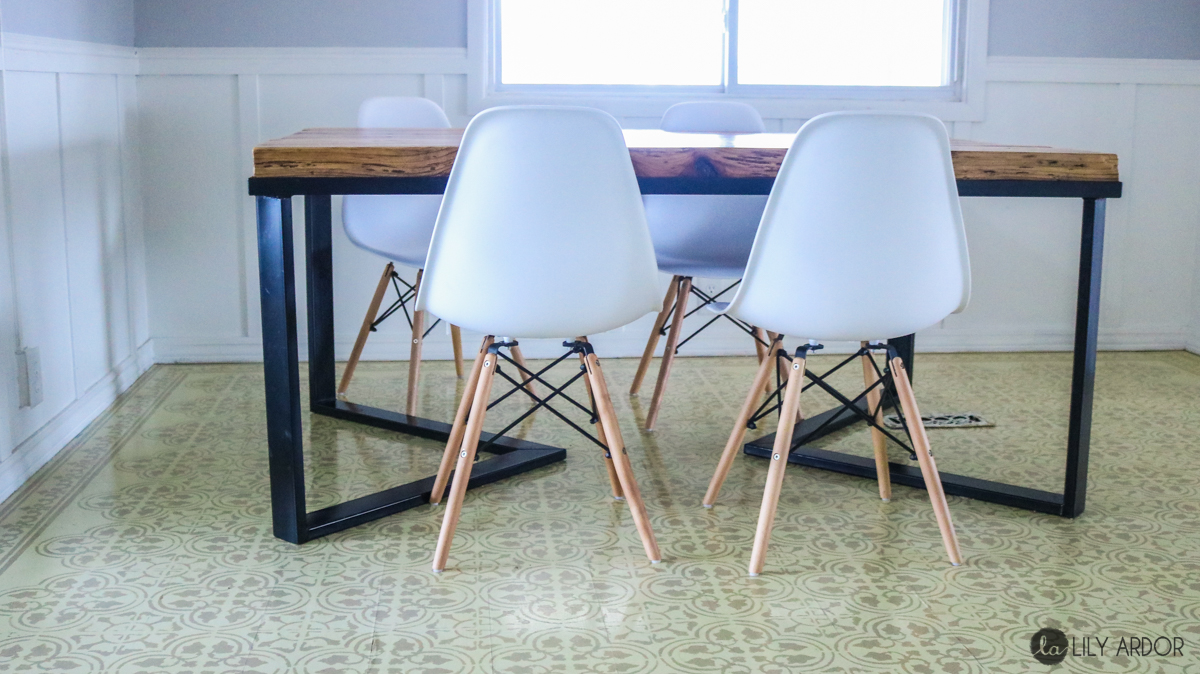
(PS. All photos are featuring the #1 technique)
That’s it for this painted floor tutorial. I hope you liked it! 😀
Here are some homedepot affiliate links for the products I used to make this project. (If you purchase anything from my affiliate link I might get a small commission. However this DOES NOT result in any additional charges to you. For more info read my disclosure policy)

![]()


The floors look so incredible, like brand-new installation! I love it!!
AWe thank you Kelly. So glad you liked them 🙂
I *adore* that look! The chairs are amazing as well!
Thank you Amy so glad you liked it 😀 😀 YEs I’m in love with the chairs as well
Thank you
I enjoyed your enthusiasm
And how well the floor turned out
Thank you
Hi, Love it! Could I do this with my laminate wood flooring? It’s pretty clear that you stated that it can be done, but I just want to make sure. Thank you.
Yes lol! I painted my wood laminate floor. 🙂
hi there, can you give us an update on your new floor? it’s looking great! I’m just curious about how long it’d last cause I plan on doing this on my business place. Thanks
Hi Suzie, the floor is still holding up good. There’s scratches in some areas but no peeling. It has also lost some of it’s sheen but that’s about it. 🙂
It’s holding up great. There’s cracking in a few areas ( no peeling) where the laminate flooring had originally started warping but other than that looks great. The clear coat has also lost most of it’s shine but I don’t mind it.
Hi Lily. Thanks for the detailed instructions on how to paint floors to look like concrete. I followed them almost to the letter. Just finished painting my retail floor and it turned out fabulous. Wanted to extend my gratitude because the only other recommendation was to rip up the laminate, donate it to Habitat for Humanity then install new flooring. FYI: I did it over cork floor and the results are amazing. Thanks for sharing your technique.
That’s awesome! I’ve never heard of cork floor! so happy to hear this helped!
added to the blog –Cool tone gray: By Glidden- called: Philosophical gray
Warm tone gray: By Glidden- called: Sutton place gray