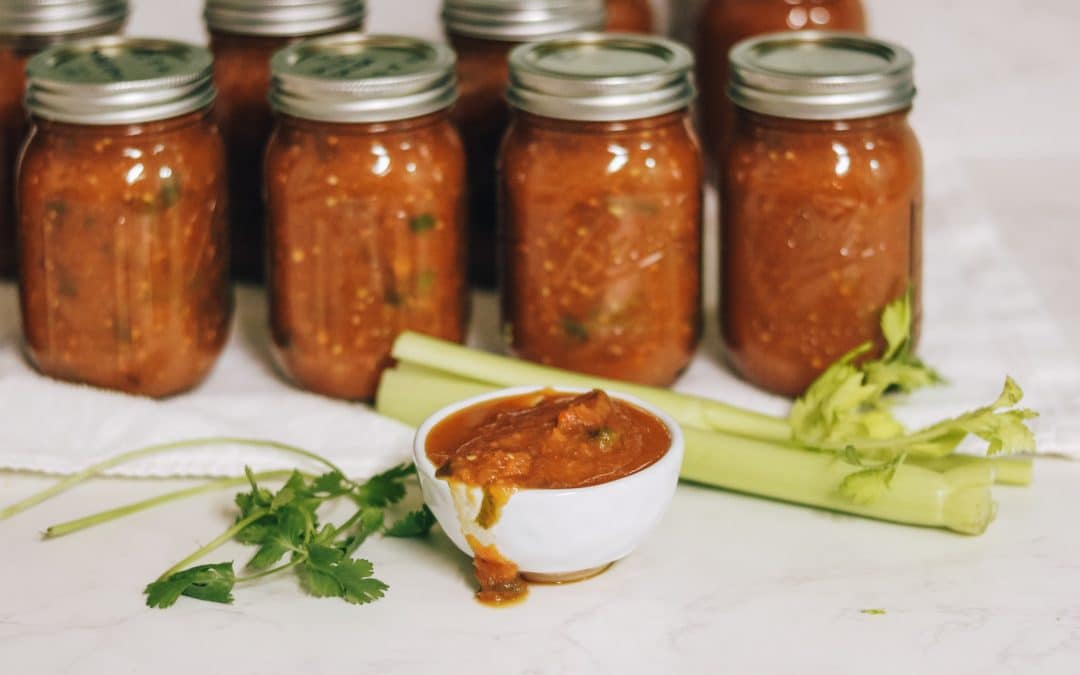
Canning Salsa Recipe: A Taste of Tradition with Fresh Green Tomatoes
A Versatile Recipe Passed Down by Generations, Perfect for Preserving Your Last Harvest
Hi everyone I know canning can be a daunting task! I’m here to show you how easy it can be! I’m not a fancy cook and like to keep things simple. Also I hate following recipes so having to write one down is a task for me if you know what I mean. I’m so used to whining it while cooking.
Today I’m sharing about our seasons last tomato harvest! Preserving the bounty of your last harvest can be a fun, especially when you have a cherished recipe passed down through the generations. My mother-in-law’s treasured canning salsa recipe, which is perfect for utilizing green tomatoes and ensures you have a taste of summer all year long. My hubby comes from a family of 12 kiddos so shes had here fair share of recipe trials and I kid you not here stuff is good!
Here’s a quick video of the canning process –
The Green Tomato Advantage
Now this work with both red or green tomatoes however… using green tomatoes in your salsa recipe offers a unique advantage—no peeling required. Unlike red tomatoes, One of the advantages of using green tomatoes in your salsa recipe is that you generally don’t need to peel the skins. Green tomato skins tend to blend well during cooking and blending, resulting in a smoother and flavorful salsa. Unlike red tomatoes, where the skin can be more noticeable and might need to be removed for a smoother texture, green tomatoes can be used with their skins intact.
This not only simplifies the canning process but also adds a unique texture to your salsa. So, when making salsa with green tomatoes, you can typically leave the skins on and enjoy the extra flavor and convenience they offer.
Another fun fact! Green tomatoes give you salsa a beautiful tart flavor. You won’t even need to add lime or citrus to give it a tangy flavor! AWESOME RIGHT!
So go ahead and rip those green tomatoes! Making salsa with them is a breeze!

Here’s a photo of my last harvest of the season. I got about 66 tomatoes, mostly green. I think this was roughly 3/4 of a bucket.
THE EASY CANNING METHOD! NO SPECIAL TOOLS!!
Before diving into the recipe, Let’s go over the different canning methods available. Some popular options include hot water bath canning and pressure canning. I don’t own any fancy kitchen gadgets or giant pots so I’ll be showing you how my family has done it over the years! It’s much simpler and way easier!
You need to make sure the jars are hot, pour in the boiling salsa, then immediately seal the jars. THAT’S ALL there is to it! When done correctly, this method preserves the salsa for about 1 year to 18 months. You’ll know if the canning was successful by checking if the lids have sealed properly. If not, refrigerate and consume within two weeks. With my last batch, I did ten pint jars, and all of them sealed perfectly. The key to successful canning is ensuring the neck of the jar is clean before sealing. This method has been tried and true, passed down through generations, from my great-grandma to my mother-in-law. If you are concerned and aren’t sure about this method you can also boil the can salsa in a hot bath for an additional 15 minutes.
Keep in mind this method doesn’t work for everything you can. I can my jams like this and broth. I do not can stuff like meets, pickles , whole tomatoes etc like this. We use a different method. Let me know I can share more about it. Also no special kitchen gadgets needed.
The Recipe!

Ingredients
Method
- Chop the tomatoes into large pieces and start cooking them on medium heat. Add a bit of oil to the bottom of the pot to prevent sticking. As the tomatoes release their juices, keep stirring.
- If you're using red tomatoes you'll need to peel the skins. Trust me when I tell you there's just no way around this. Your salsa will not taste good if not peeled. It's super easy. Score your tomatoes with a knife in and X shape and leave them in a boiling water bath for a few minutes. Then transfer them into ice water to cool. The peel should slide right off!
- Chop the celery, jalapeño, and add them to the pot. Add Salt and Sugar
- Use a hand blender to achieve a smooth consistency. Let it boil for 30 minutes
- Add the chopped onion, bell peppers, and cilantro. Let it cook for an additional 15 minutes.
- Rinse your jars and wipe down the lids. Microwave the wet jars for 4-5 minutes.
- For the canning process, ensure your salsa is boiling, remove a hot jar from the microwave using a towel, and place it on your work surface that has a towel layed out. It's important not to let the hot jar touch anything cold during the process and after you've sealed it until it cools off. Use a scoop or ladle to fill the hot jar with salsa, making sure the rim is clean before sealing it. It's ok if you get drips on the edges just be sure to wipe it clean before sealing. Don't let the others jars in the microwave cool off. I usually heat them again for 30 seconds before pulling one out.
- Set the sealed jars aside, and within the next 25 minutes, they should seal. You'll know they've sealed when you push on the lid at the top in the center and don't hear a popping sound or see it pop. It should get sucked in from the pressure..
Notes
That’s it!I hope you enjoy this delicious recipe! Wait at least two weeks before eating. Best eaten after two months.
Don’t forget to refer to the video for easy instructions if you’re ever in doubt.

Keep in mind if you use all green tomatoes your salsa may vary in color. However adding in the red bell pepper will help bring back some of the red color in the salsa.
MILD OR SPICY!!
You can add more jalapenos for a spicy flavor. This recipe is very mild. For a spicy salsa I would probably do about 10 jalapenos.
A few things I should mention. If you choose to chop your jalapeno and add it in instead of blending it you won’t taste how spicy your salsa is right away. It’ll be a few months before the seeds diffuse the spice into your salsa. How do I know?? LOL because I’ve done this and was wondering why my salsa wasn’t spicy at all right away.
Be sure not to remove the seeds that’s what gives it the kick. If you remove the seeds it almost gives no spice at all. I tried that too 🙁 .
I hope this helps preserve your last harvest! The flavors are so bright you can taste summer tomatoes in a jar all year long!
IDEAS FOR EATING!
- Serve with fried eggs for breakfast!
- Serve with savory crepes! ( this is our favorite) Let me know if you’d like a recipe!
- Serve with chicken burritos – lime and avocado flavored! ( also our fav)
- Serve with grilled chicken and white rice!
SO many more ideas but hopefully this gives you a jump start!
I love easy recipes and struggle with going out of my way to make specific things! I try and do with what I have usually. Using stuff I have in the fridge. You can tweak the recipe according to what you have. I’ve done this without bell peppers or celery before and it still tastes amazing! Hoping I made this as easy as possible for you. Us moms are busy! Sharing all the tips I can to make life easier for you! Love you all! See you next time! And if you’re totally new to canning maybe this will give you the courage to can some salsa! And if you have a ton of green tomatoes here we go! The best salsa you’ll ever try!
XO,
Lily
OTHER RECIPES YOU MIGHT LIKE –
EASY BAKED POTATOES ! ( chop and bake – ONE DISH MEAL )
CREAM CHEESE SAUCE! ( FOR POTATO )
*disclosure. Please do everything from my blog with caution. None of my Posts, recipes, or DIYS should be taken instead of expert advice. I simply share what works for our family and hope you enjoy and find it helpful.

Walnut Meringue Cake
Today I'll be sharing something that's a little different than what your used to. YEP! It's a cake recipe. I'll be blunt. I was overly worried about doing this recipe because it's a little out of my comfort zone but, thanks to my lovely friend over at munchkintime.com...

Age metal in 10 minutes
Aged Metal Farmhouse Decor! I don't like to overload my house with a lot of rustic pieces however, their are some must haves. Joanna Gaines is a fine example of farmhouse decor. She is one of my favorite home decorators. I'm sure you've heard of her.., If not!! AHH...

Chunky Knit Planter
Chunky Knit Inspired Planter So every time winter comes around pinterest is swarming with chunky knit which gives me knit fever! Since I've already gotten a chance to make a chunky knit blanket I wanted to try this with a different medium. In other words I guess you...

Star Garland + Easy Homemade Air Clay Recipe
Easy Star Garland DIY Hi everyone, Christmastime is here and over at our house crafting is in full bloom. This week I got a chance to work on some tin can home decor projects that I can't wait to share with you. Today I'll be sharing this star garland DIY that I made...

Space Saving Christmas Tree
Christmas only comes around once a year and if you have a small space it doesn't exactly help with decorating. The home we currently live in has plenty of space for a tree however, there was a time we lived in a tiny 800 square foot home that didn't leave much space...

Christmas Wreath
Our Alaska Trip I can't believe Christmas is almost here. Summer flew by in a zippie and yesterday was one of our first days with real frost. I say real because my car windows actually froze over😬. I gotta be honest I'm not a big fan of the cold but I don't mind a...

Easy Cake Stand
2 Step Cake Stand As the holidays are getting closer dessert is on my mind a little more and more each day! When I was a kid my mom would bake all sorts of desserts. From meringue layered cakes to the fluffiest sponge cakes you'll ever try. She loved baking and...

Pressed Floral Hoops
Pressed flowers in tulle If you're looking at persevering some flowers or making some floral wall art than your in the right place. Last time I did a similar project to this was for mother's day and it's still one of my favorite projects. I've been asked multiple...

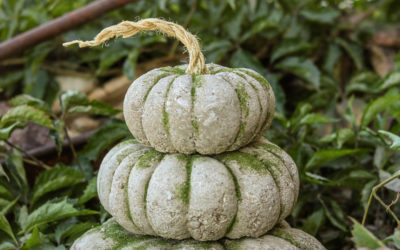
Pumpkin Candle
Mini Concrete Pumpkin Votives These little concrete pumpkin candles were inspired by a DIY I did a few weeks ago. I really loved the idea of industrial fall decor and decided to make some indoor pumpkins instead of the outdoor ones I made last time. Since my last...

Holiday Table Decor
Versatile Holiday Table decor Can I just start off by saying this holiday table decor isn't only convenient but, also has endless possibilities. You can switch out the apples for pumpkins in the fall or freshen it up with some lavender sprigs for a cute Easter table...

Simple Fall Berry Wreath
Back to the basics Simple Fall Wreath Hi crafty humans, I hope you all had a fun week! I'm pretty sure your schedule is super busy and the last thing you'd want to do is add more hard work to your weekend. That's why, I am ssso excited to bring you some quick...
DIY Concrete Pumpkin Idea for fall
Here's a fun Pumpkin idea for your fall decor! Of all the pumpkin ideas I would have to say these concrete pumpkins really stuck to me. They are super versatile and take under an hour to make. If you plan on making a small one pumpkin it will probably only take you...

Rice Stuffed Chicken Thighs
A family favorite chicken dish YAY! My first recipe on the blog. Don't worry I'll still be sharing DIYS/crafts as well as recipes from now on. Since the first day I started my blog my hubby constantly reminded me that he would love it if I shared our family recipes....

How to paint a rug! DIY Reform rug
Why I painted my rug! Those reform rugs are so beautiful but also sso expensive!. I've been wanting a burgundy rug for about a year now. Originally this was supposed to be a rug dyeing project but after finding out I would need to boil my 9x12 wool rug in...

How to paint your microfiber couch to look like real leather!
DIY Leather Couch on a budget! Ok so I've wanted a real cognac leather couch for a while now. Painful truth is my dream couch has a price tag of $2,800. As much as I would love to just go out and get one, it's about $2,700 above my budget. YEP!! $100 🙈 was my budget...

DIY Macrame Rope Rug
Giant Doily Inspired Rope Rug Summer is flying by way too quick. It's been a busy couple of months and I still have some big projects planned before the end of summer seeing as they can't be done indoors. It's been awfully hot here too so that's been keeping me...

HOW TO POUR RESIN | DIY Resin FLuid art!
Resin Art Pour So this resin pour was probably the most fun I've ever had with art! Not to mention it's also probably my quickest art piece as well. I've had this DIY on my to-do list for so long and I'm so happy to have teamed up with hobby lobby to bring you...

DIY Plant Stand + EASY Faux Marble effect!
DIY Modern Marble Plant Stand I find myself constantly needing plant stands. If I could get at least a dozen I think I'd call it good! Half of my plants stand on my piano and the rest are scattered all over my window seals. I don't mind that I just feel like they're...

Cute Cactus DIY Plant
Cute Cactus Decor Last Friday was the first day of this Cactus DIY journey. Where do I even begin🙈. This cute cactus definitely took me for a spin. Jumping into this DIY I knew it would be a hard one since I've never seen anything like this done before but, I sure...

DIY BEER Hair Mask
A DIY Hair mask that works! I've had terribly damaged hair for a while now and this DIY hair mask has given it the needed boost. Here's the reality. Once I started experimenting with hair coloring I couldn't stop. The first time I tried coloring my hair was when I was...