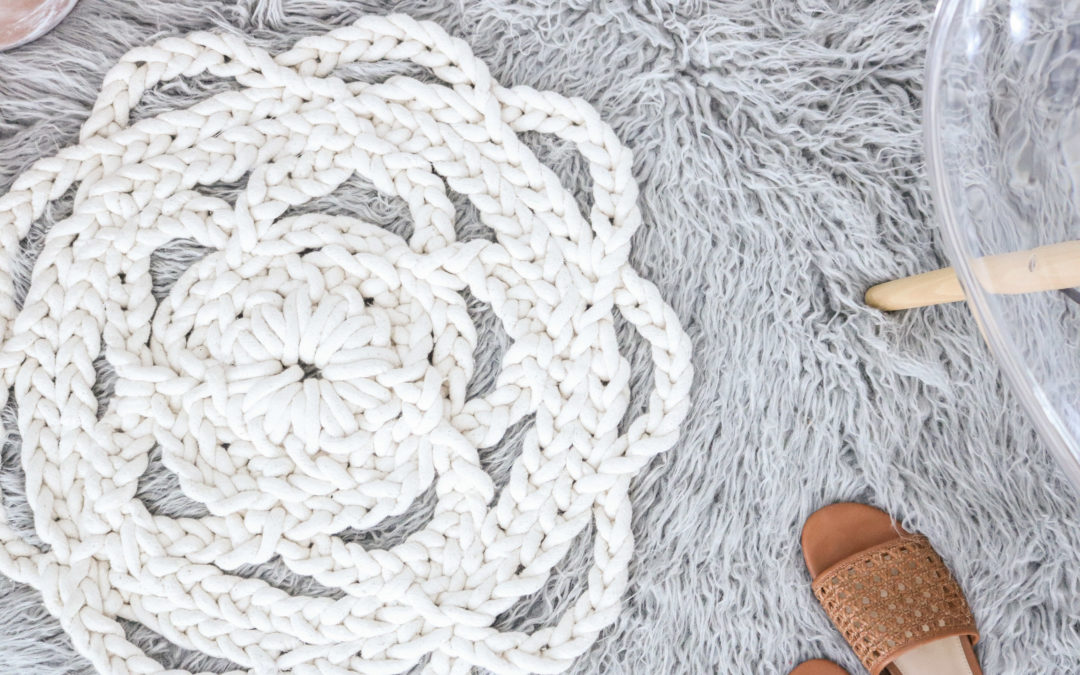
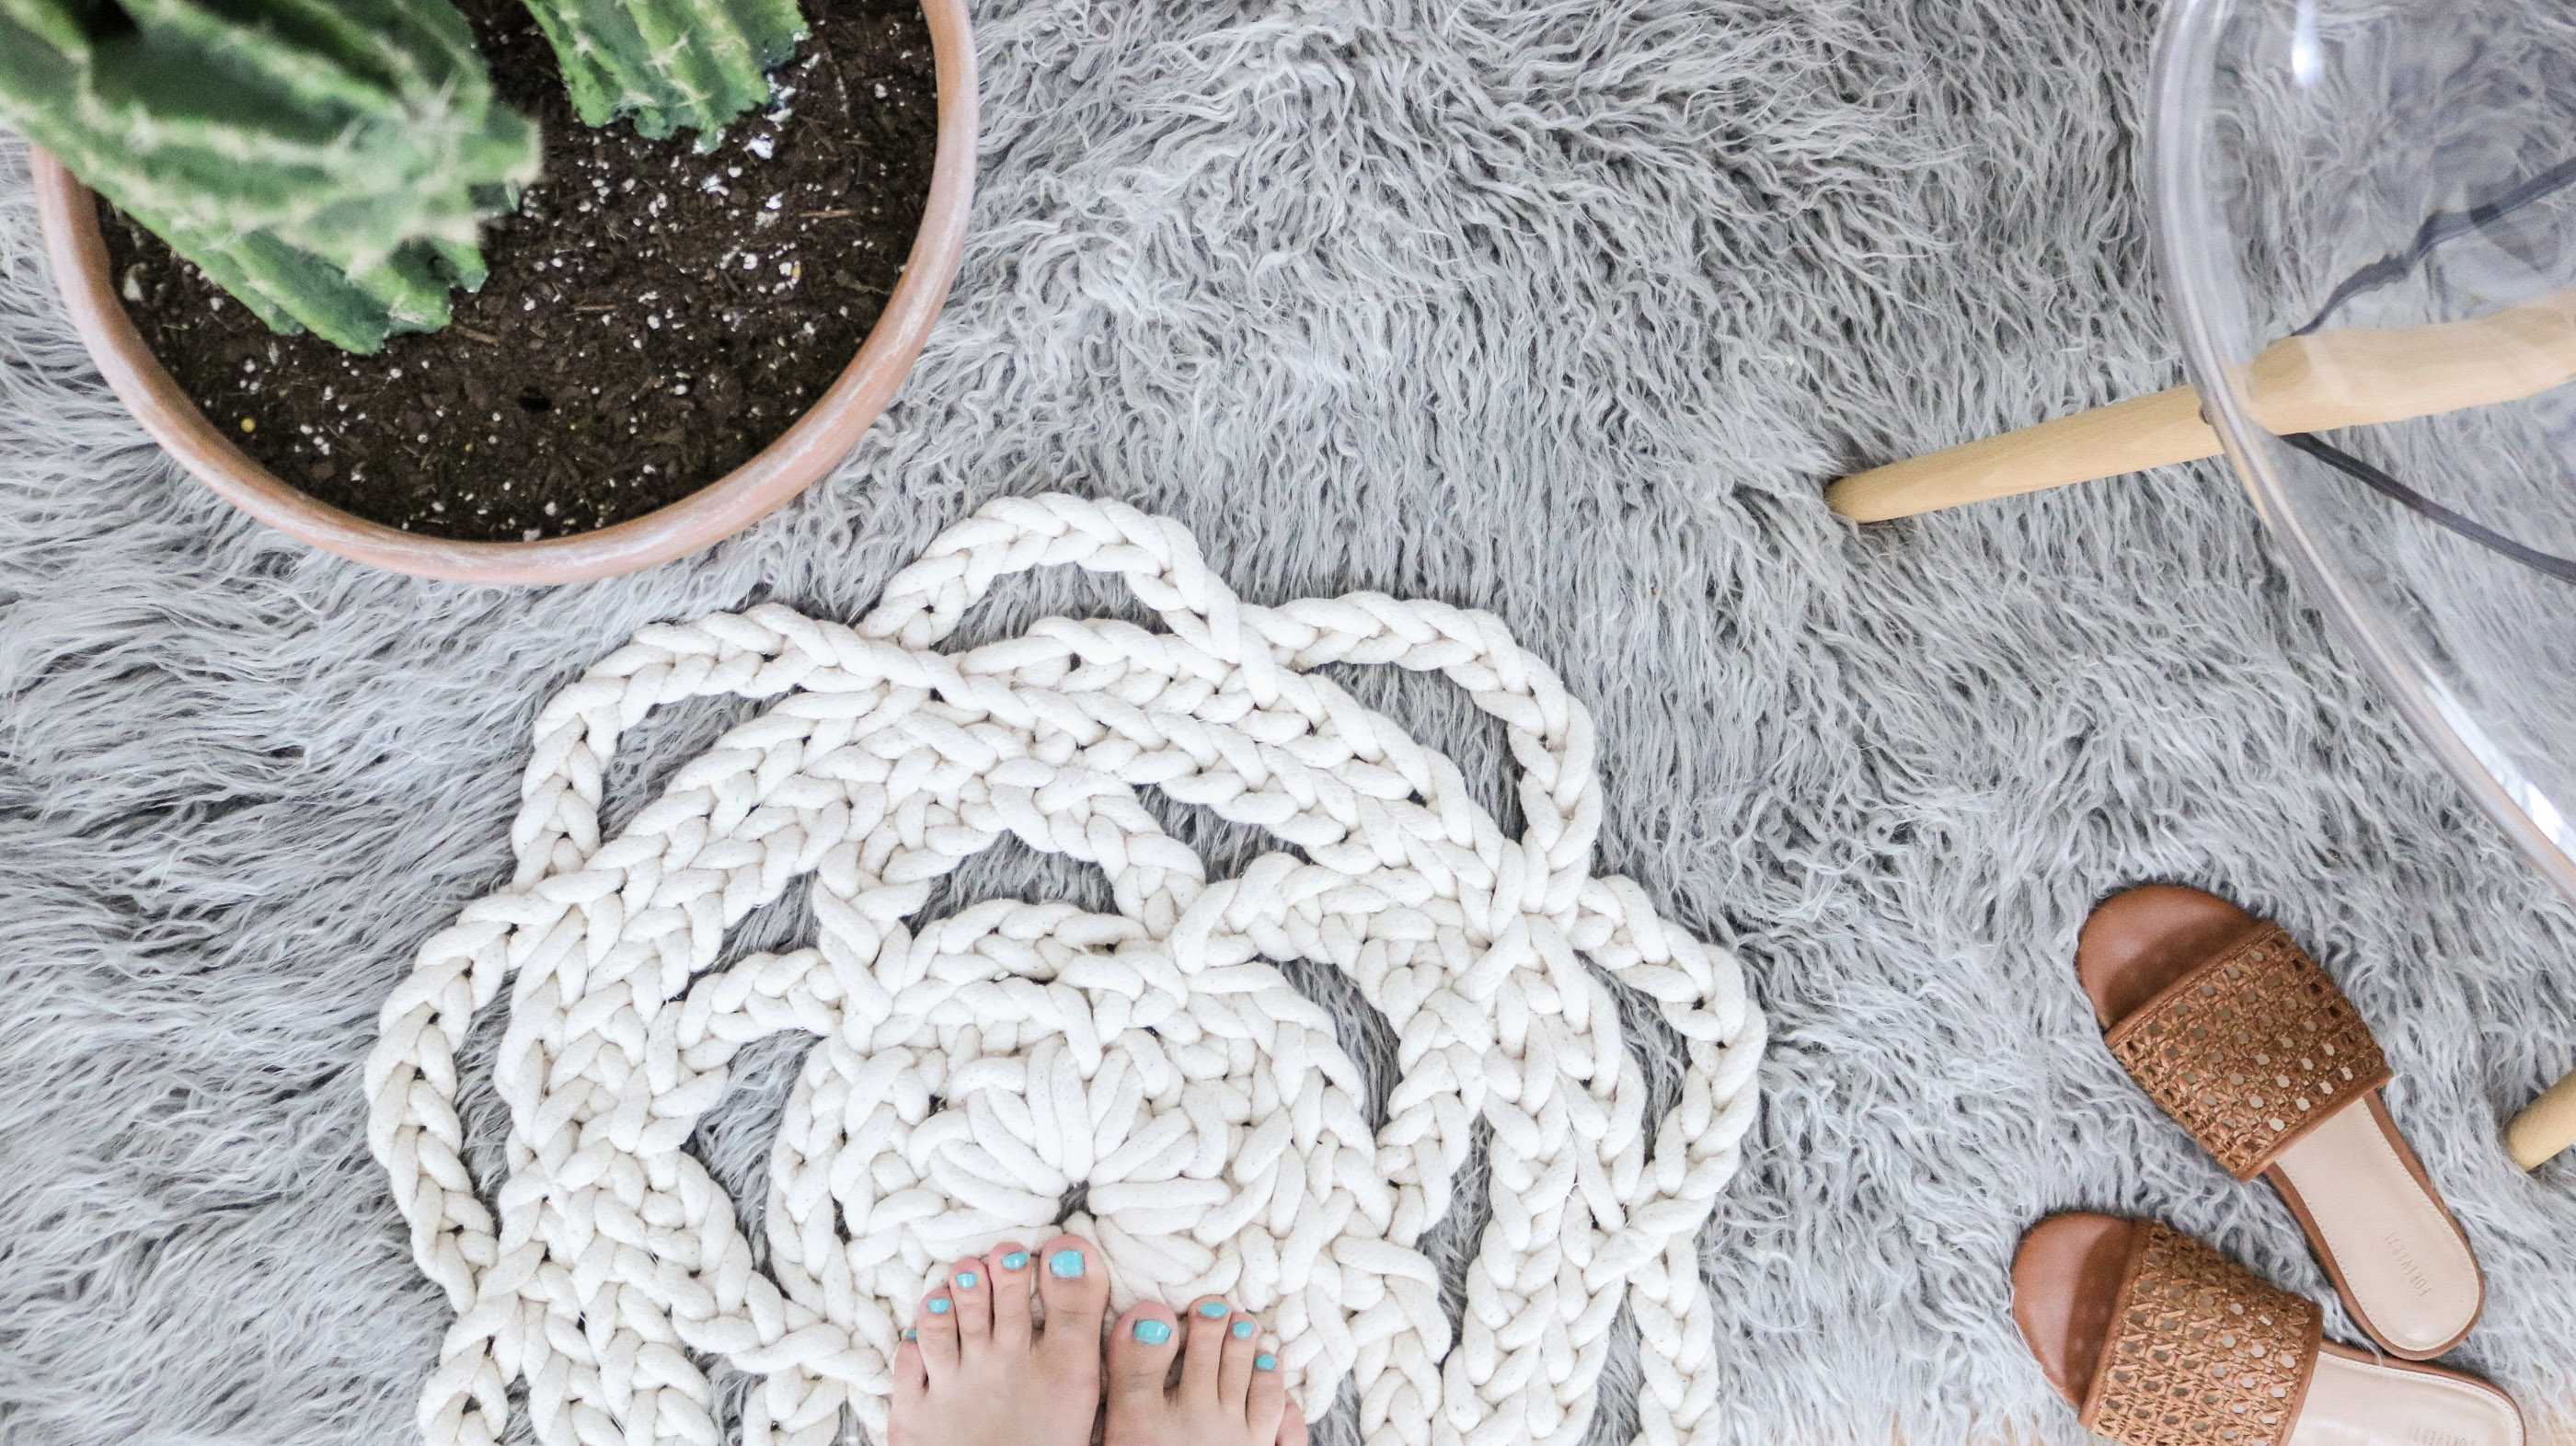
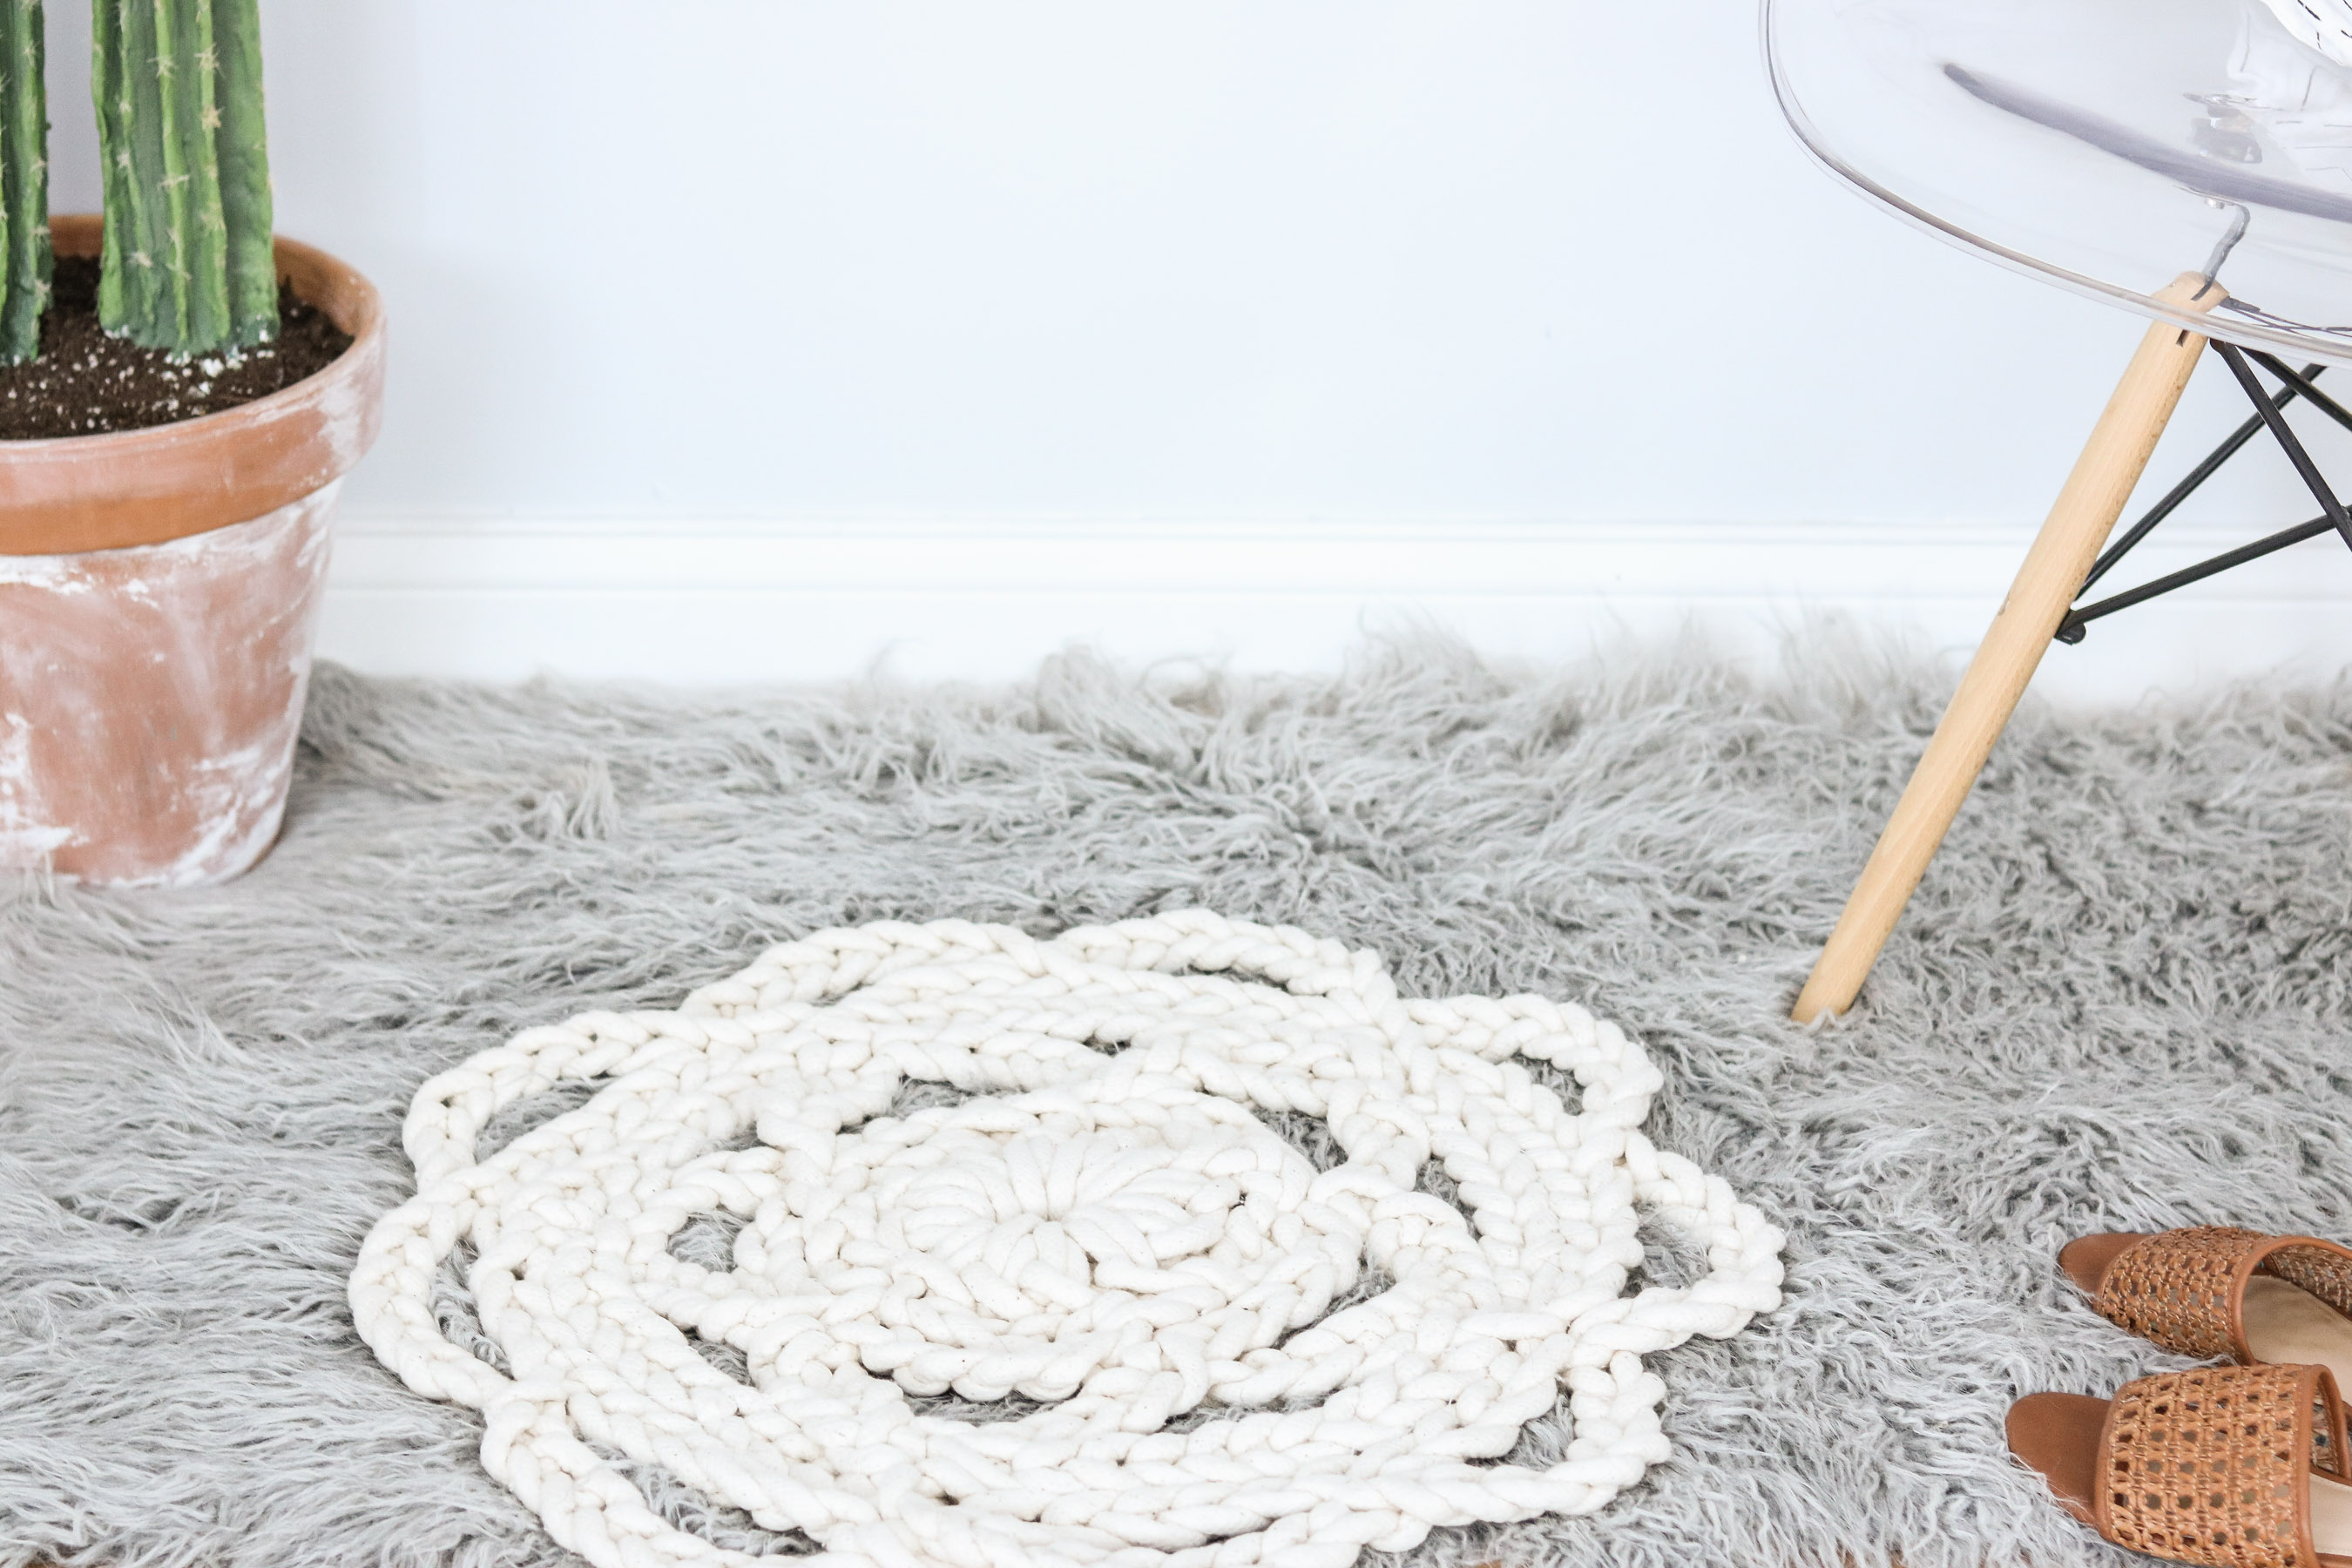
Giant Doily Inspired Rope Rug
Summer is flying by way too quick. It’s been a busy couple of months and I still have some big projects planned before the end of summer seeing as they can’t be done indoors. It’s been awfully hot here too so that’s been keeping me indoors a bit more as well. A few weeks ago I made a trip to Joanns and bought some cording to make this doily rope rug.
How’s your summer going, any big projects planned?
I don’t know if this would be considered crocheting but since I used my fingers not hooks I’m guessing it’s some form of macrame intermixed with crochet. By the way if you love to crochet this DIY may be a bit on the weird side LOL🙈. I have no idea how to crochet and unfortunately don’t understand crochet terms at all. Yes even after watching 20+ youtube videos I still couldn’t get the hang of it. I’m sure a lot of this tutorial has many similarities with crocheting and if you’re familiar with it you can totally use a doily pattern and up size it.
Here’ the GOOD NEWS for those of you that don’t know how to crochet this DIY rope rug does not require any crochet knowledge. If you know how to make a loop and tie a knot you should be good to go! YAY! 😃 I’ve broken this DIY up into 10 easy to follow steps.
Why I picked cording over rope!
When I decided to make this rug I knew I needed something to work with that was soft and bendable enough to settle in nicely. I knew rope wasn’t an option because it wouldn’t settle in the way I wanted it to. If I went with thinner rope maybe it would of worked but with the thickness I had in mind cording was my best bet. With 50 yards of cording the rug size turned out to be about 2.5 ‘ to 3’ in diameter. Not exactly huge but, perfect for a bathroom rug or next to your bedside.
Was it expensive?
Let’s just say it wasn’t cheap. For 50 yards without a coupon my total was around $50. I used my 40% off and payed around $27 for all my cording. So in conclusion for a small bathroom rug it’s a little bit over my budget. If you’re on a tight budget you can always use recycled t-shirts or rags. 😍
(for the coupon you can google joanns coupon to get one. They usually always either have a 40% or 50% off one item)
What you’ll need
50 Yards Cording or thinner rope.
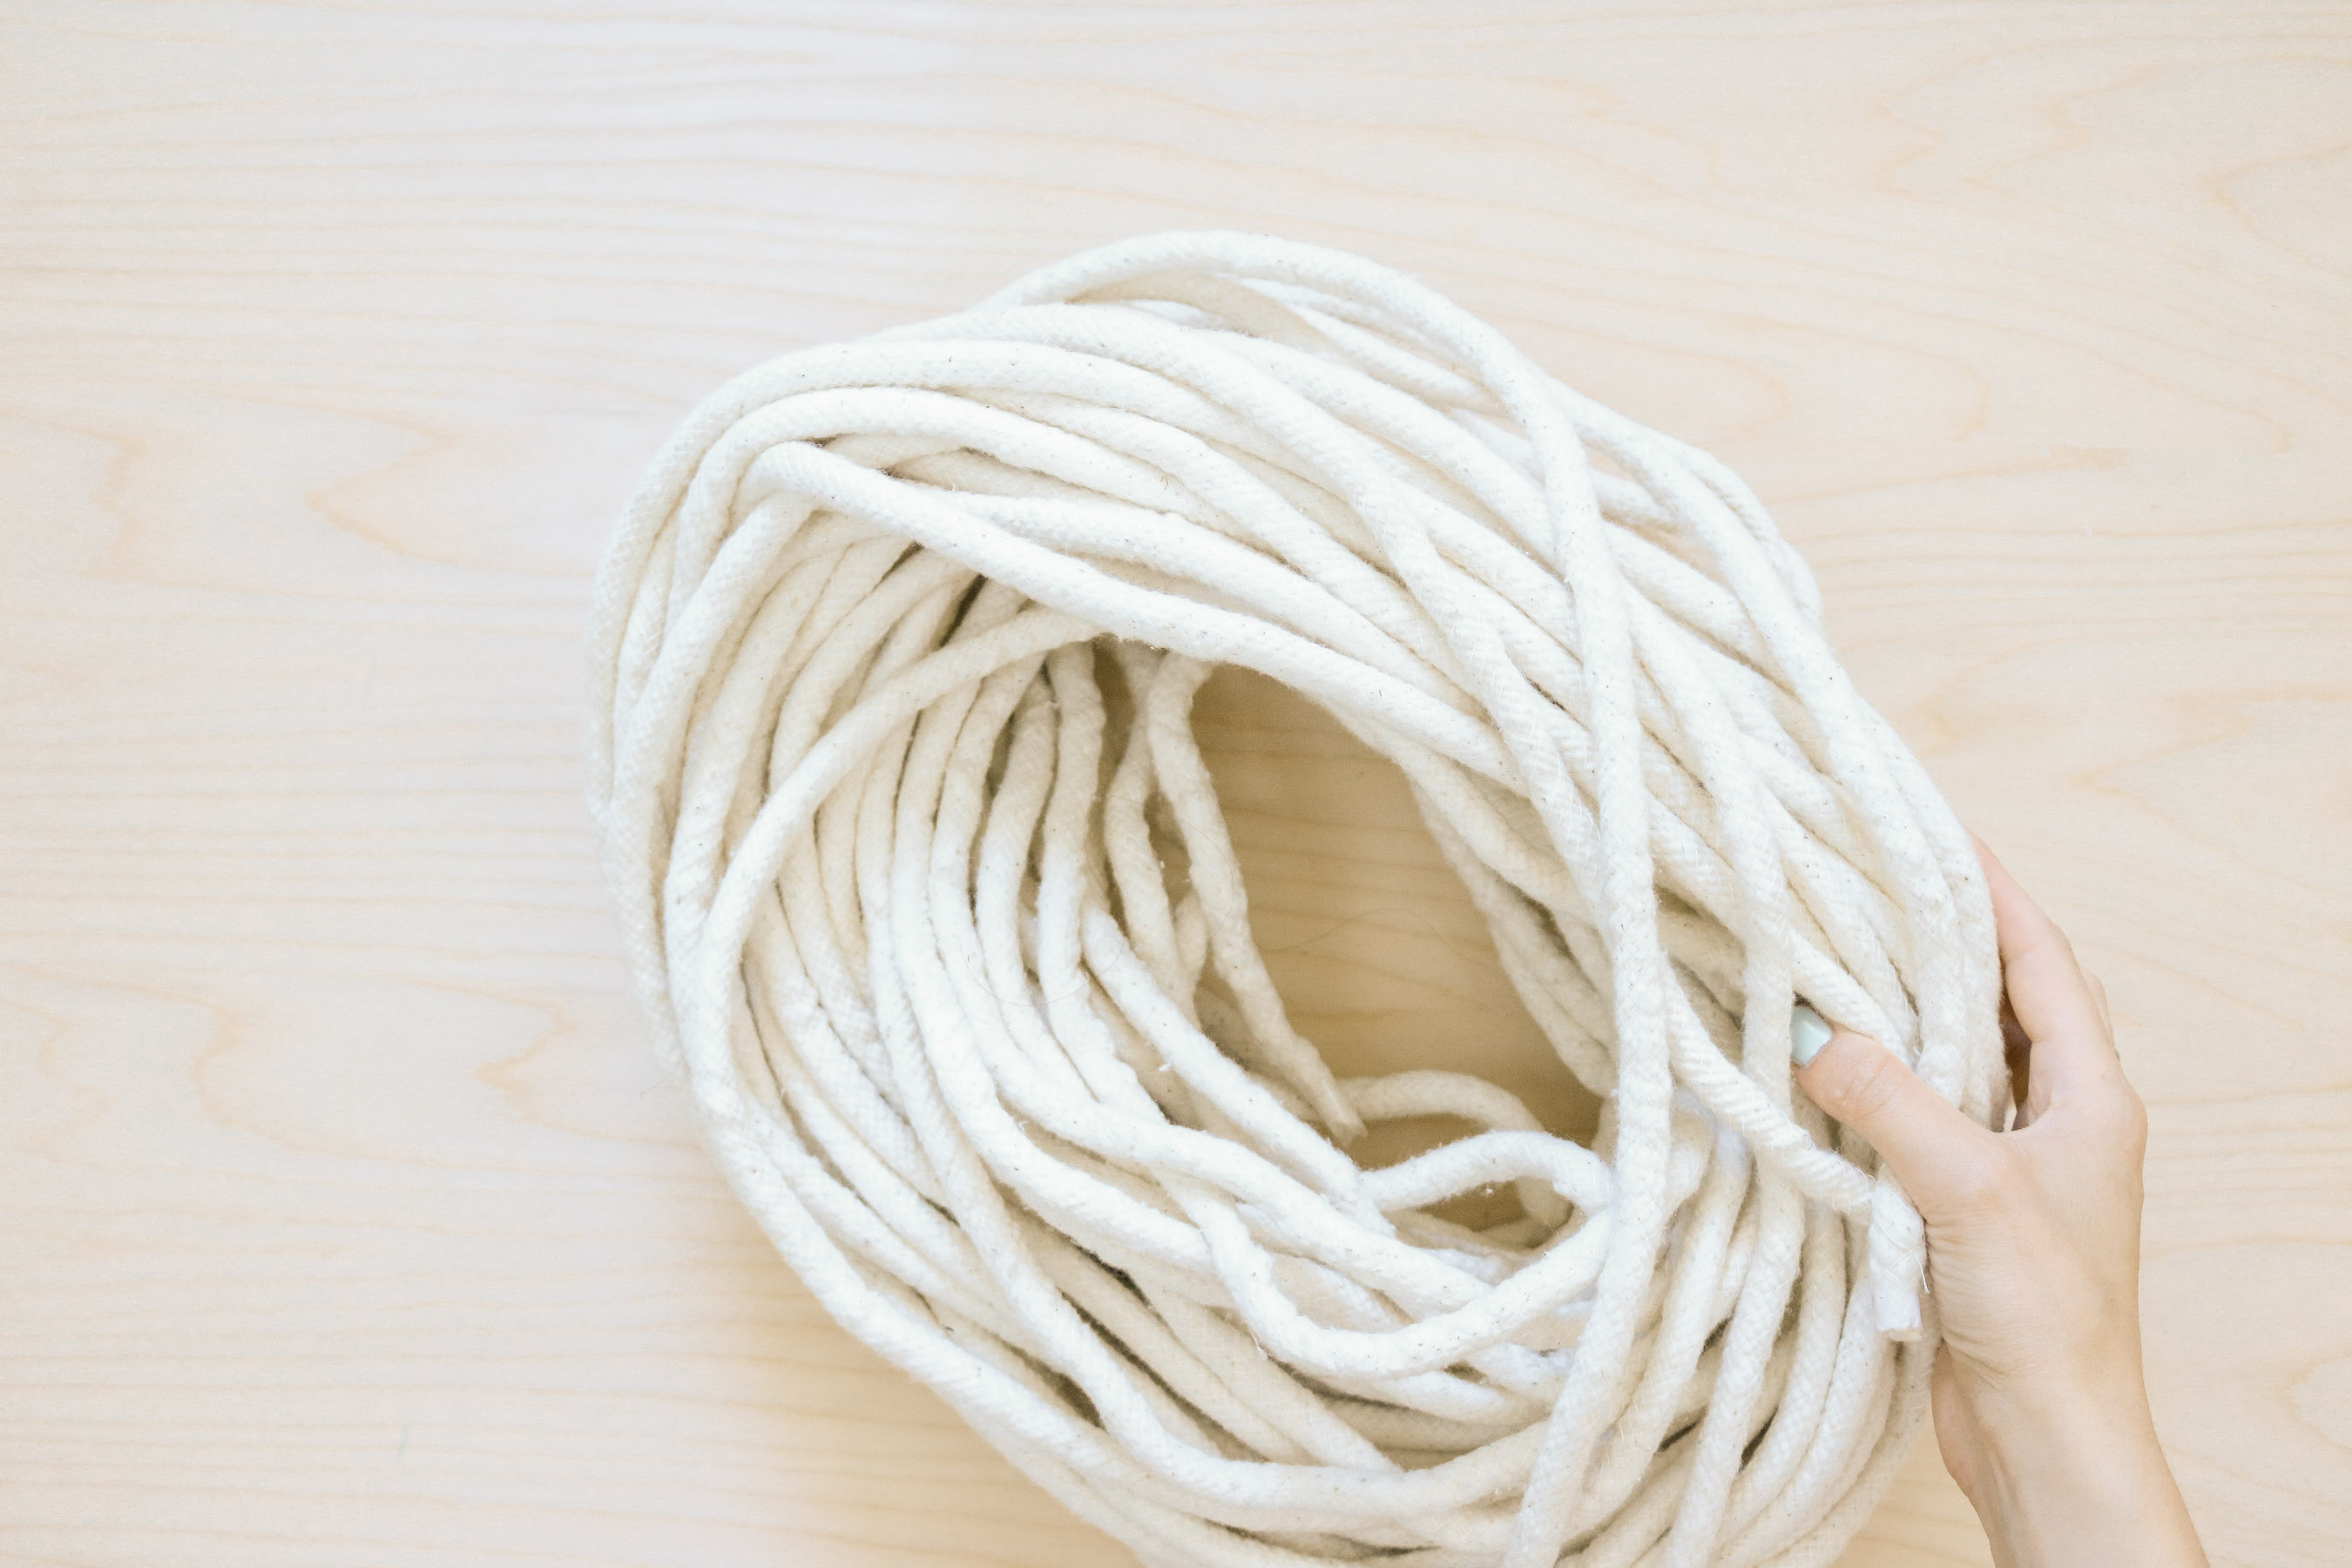
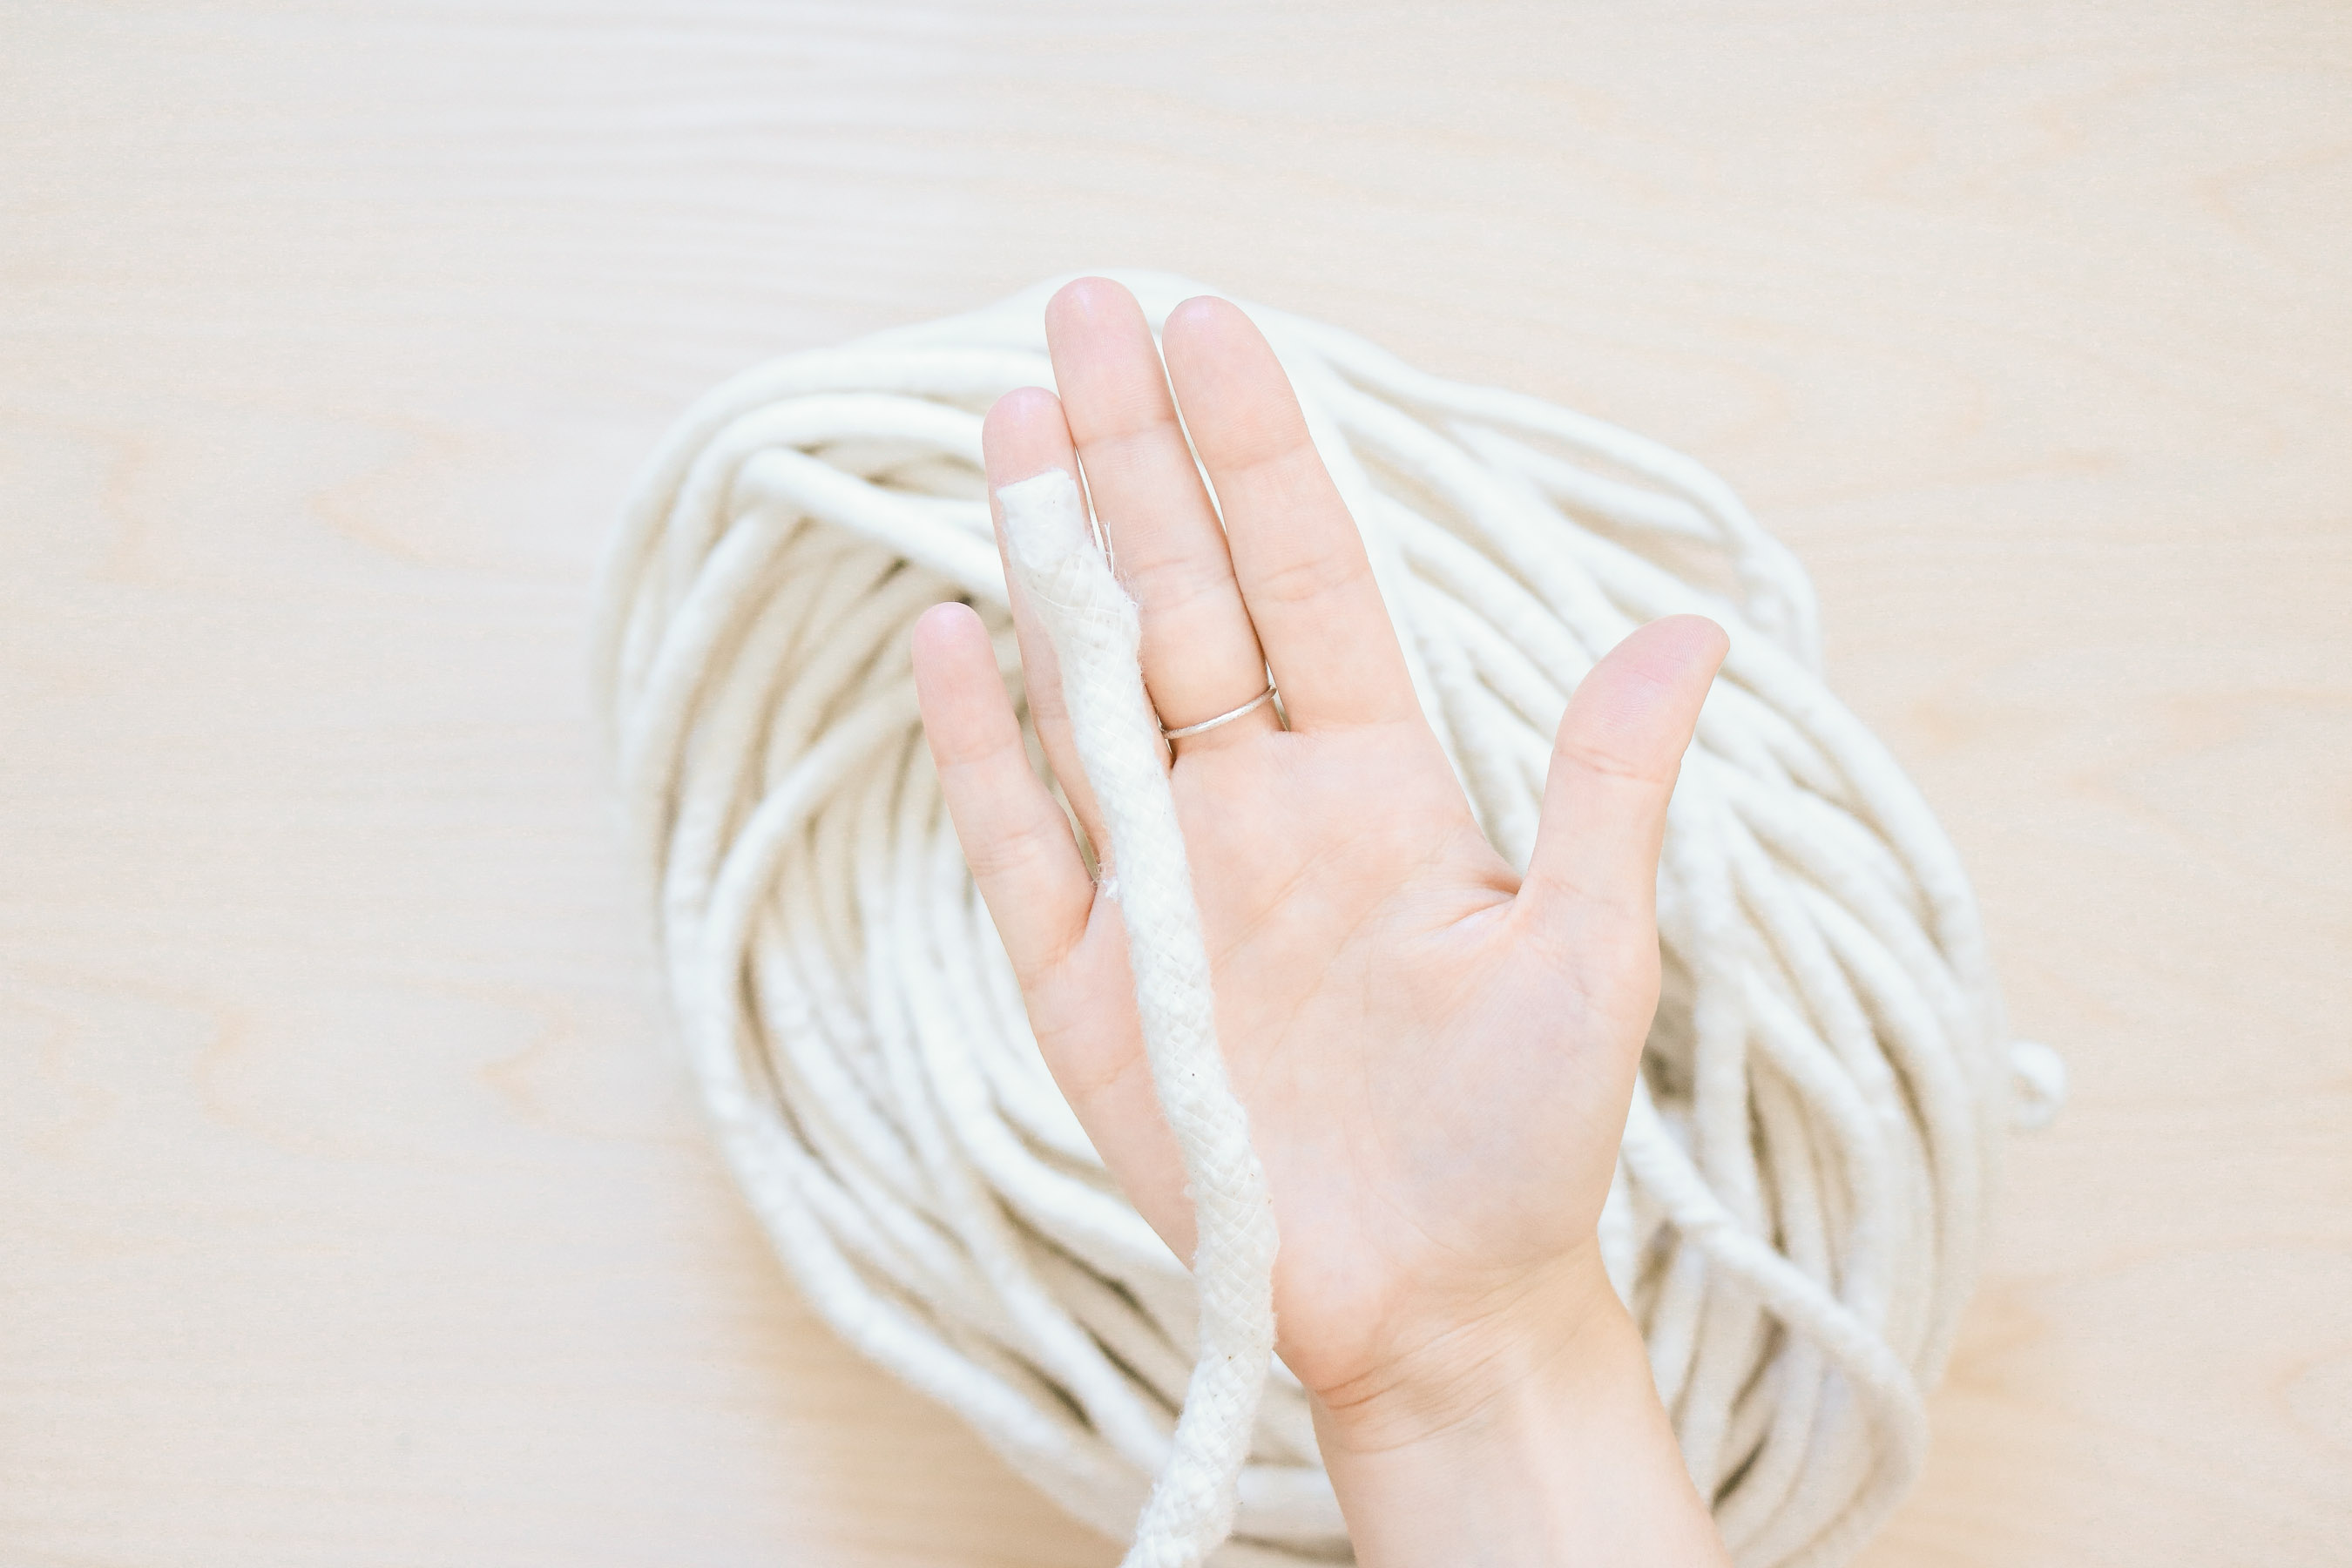
Since this cording wasn’t very thin I used my fingers to make the rug and didn’t need a crochet hook.
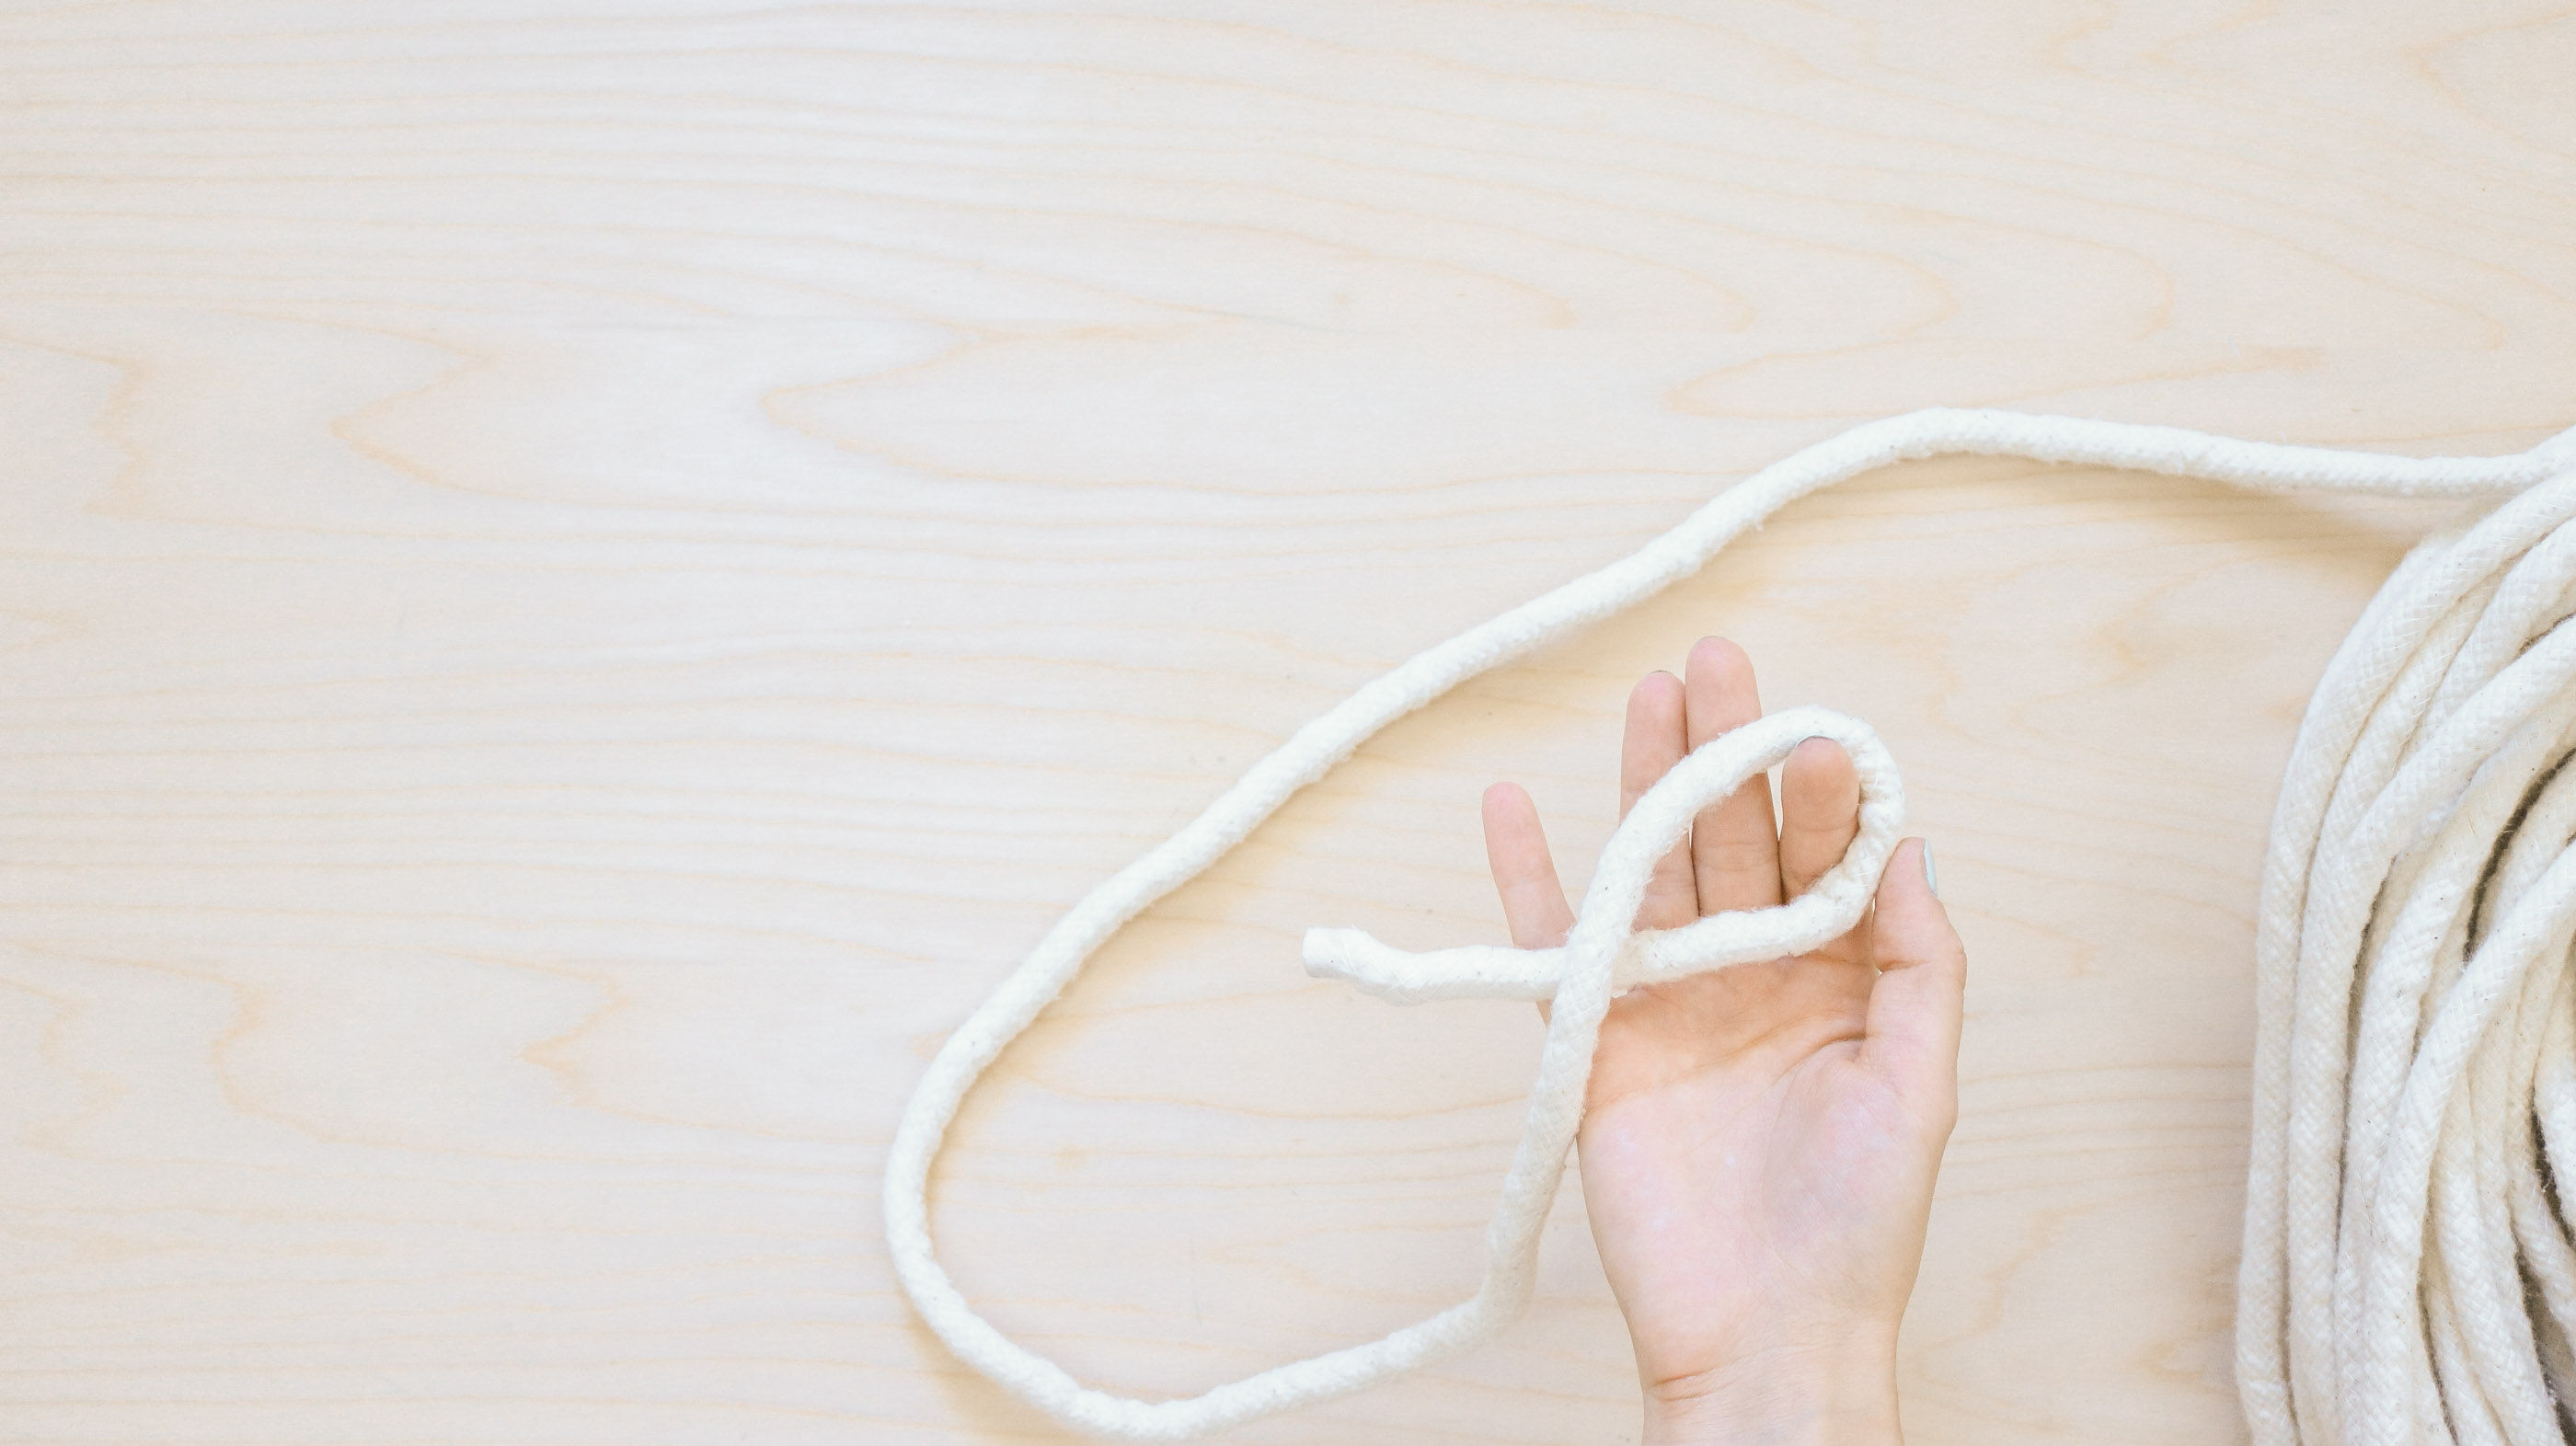
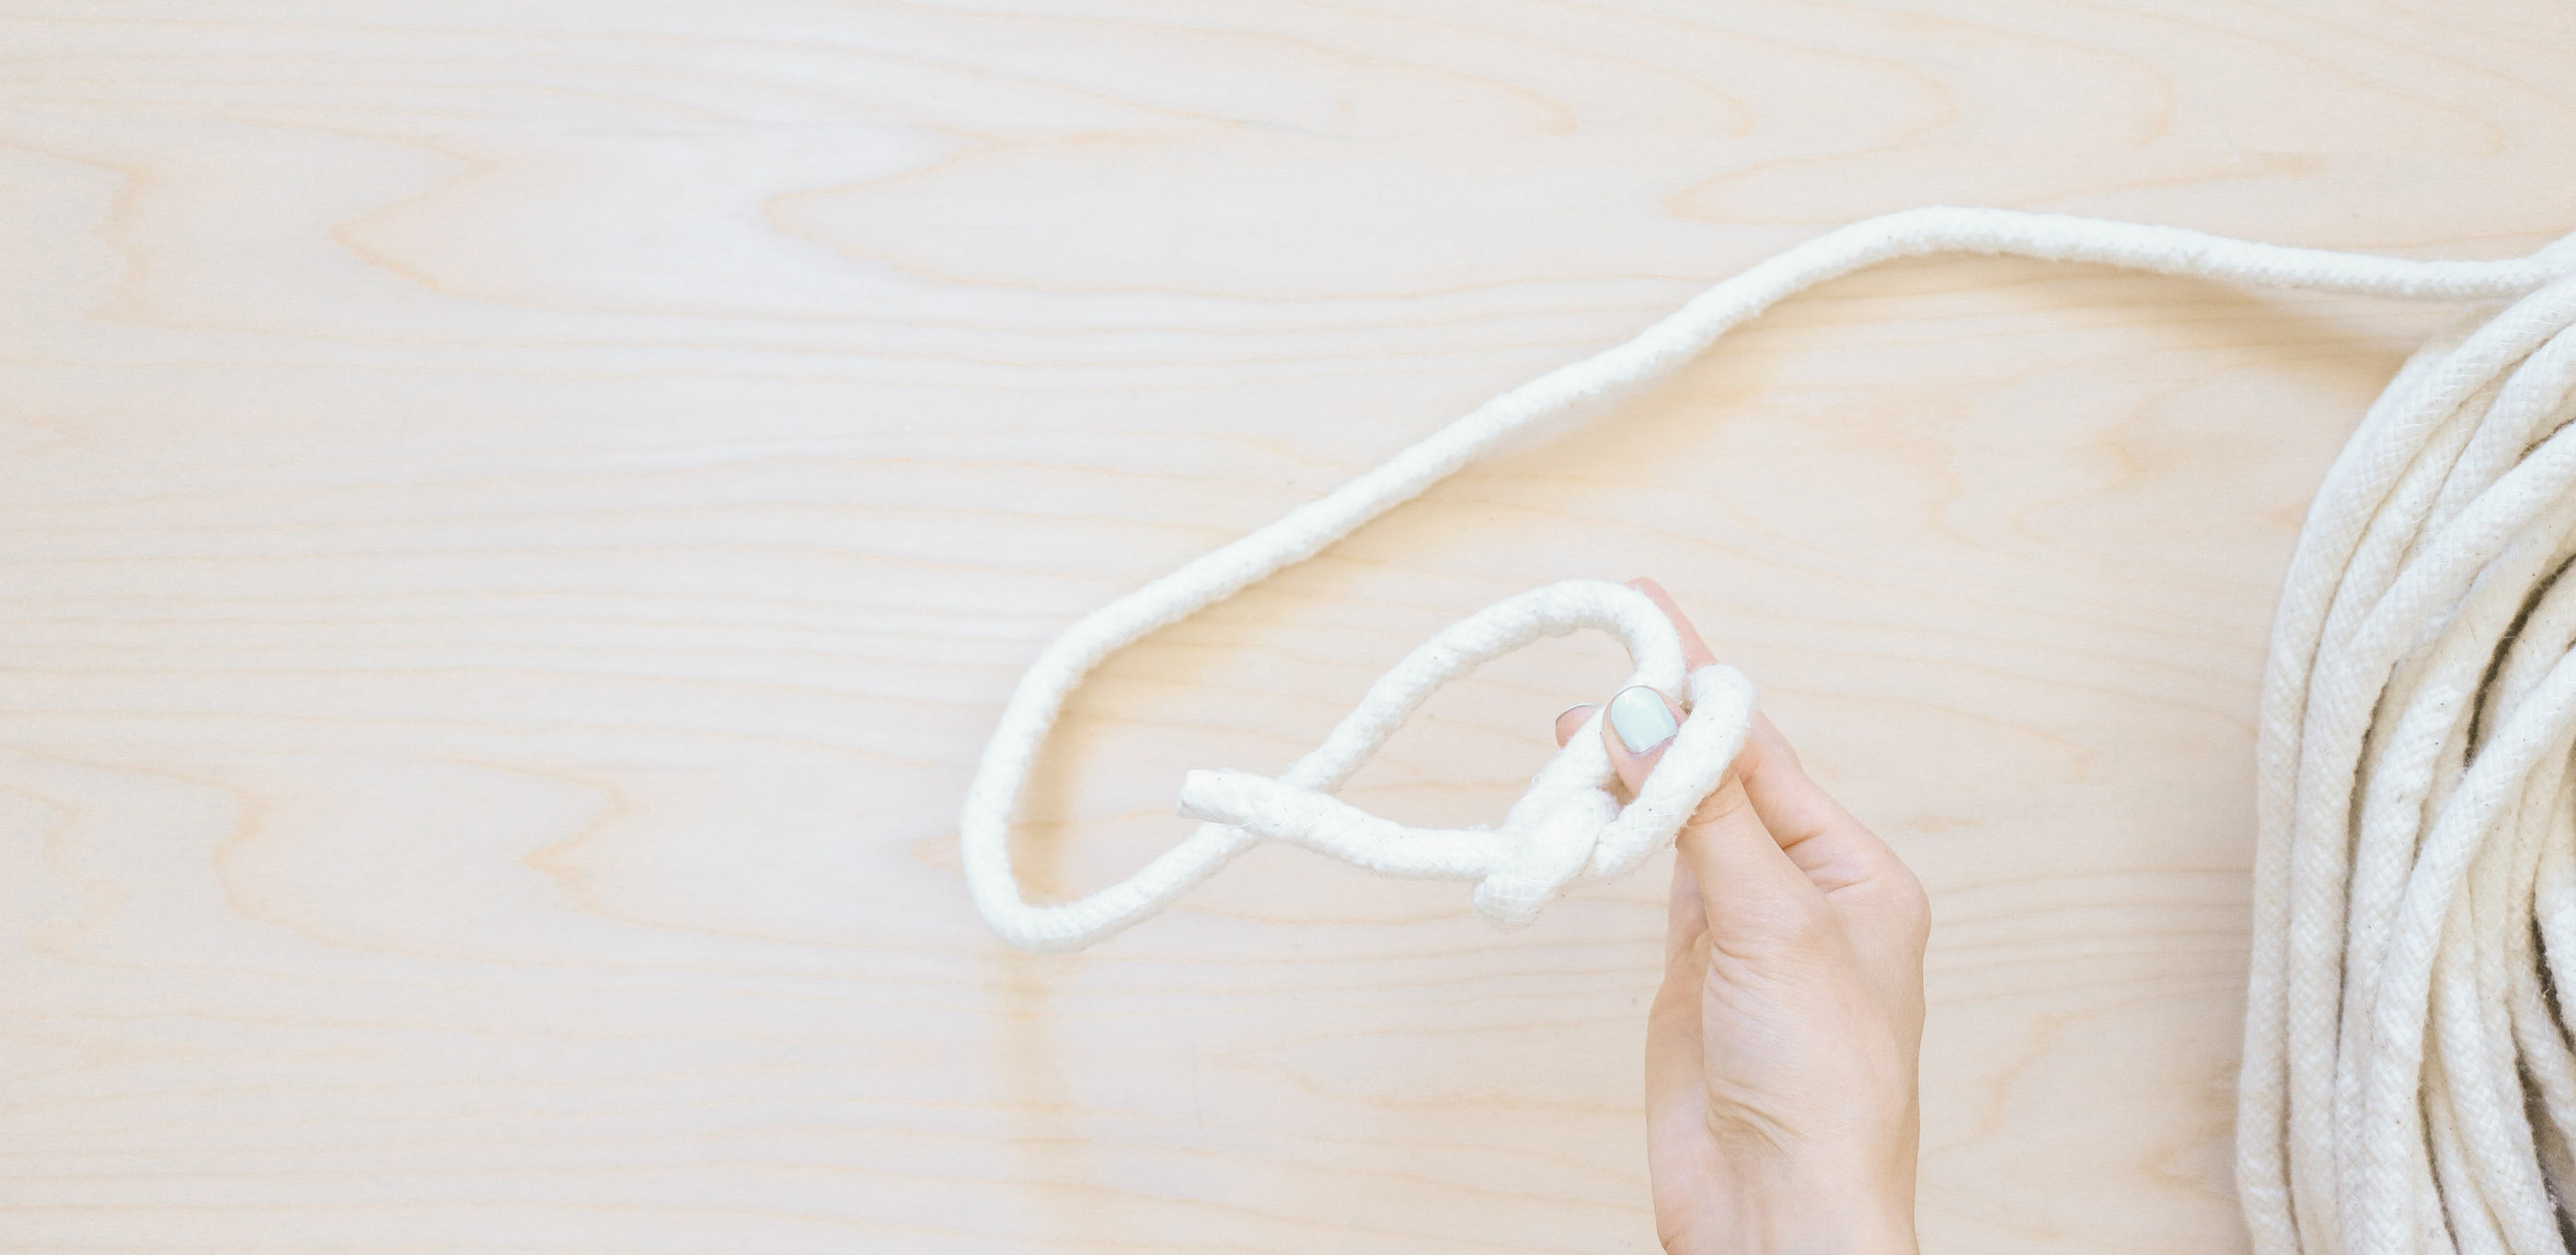
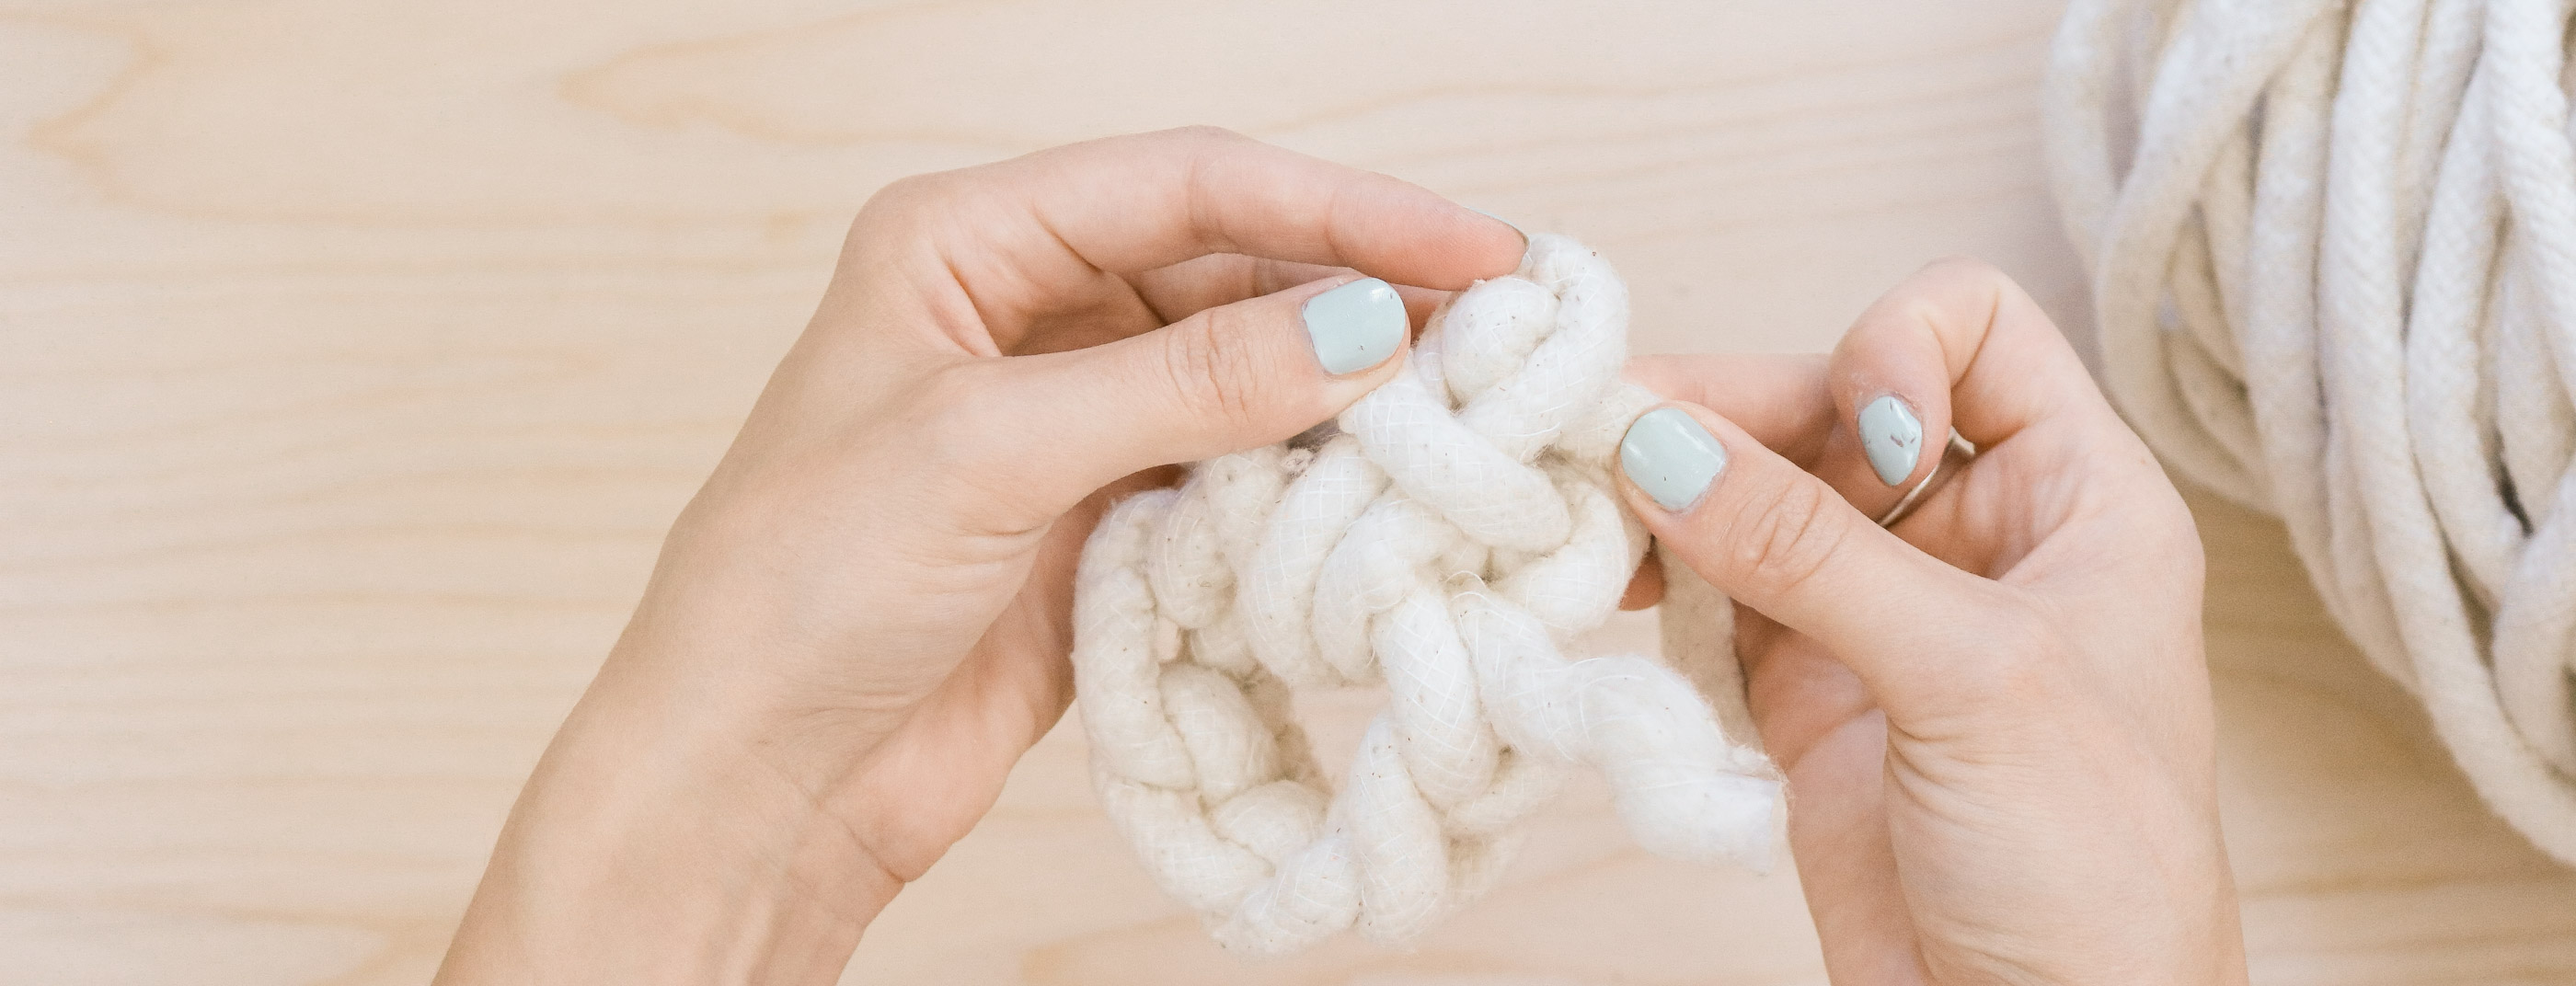
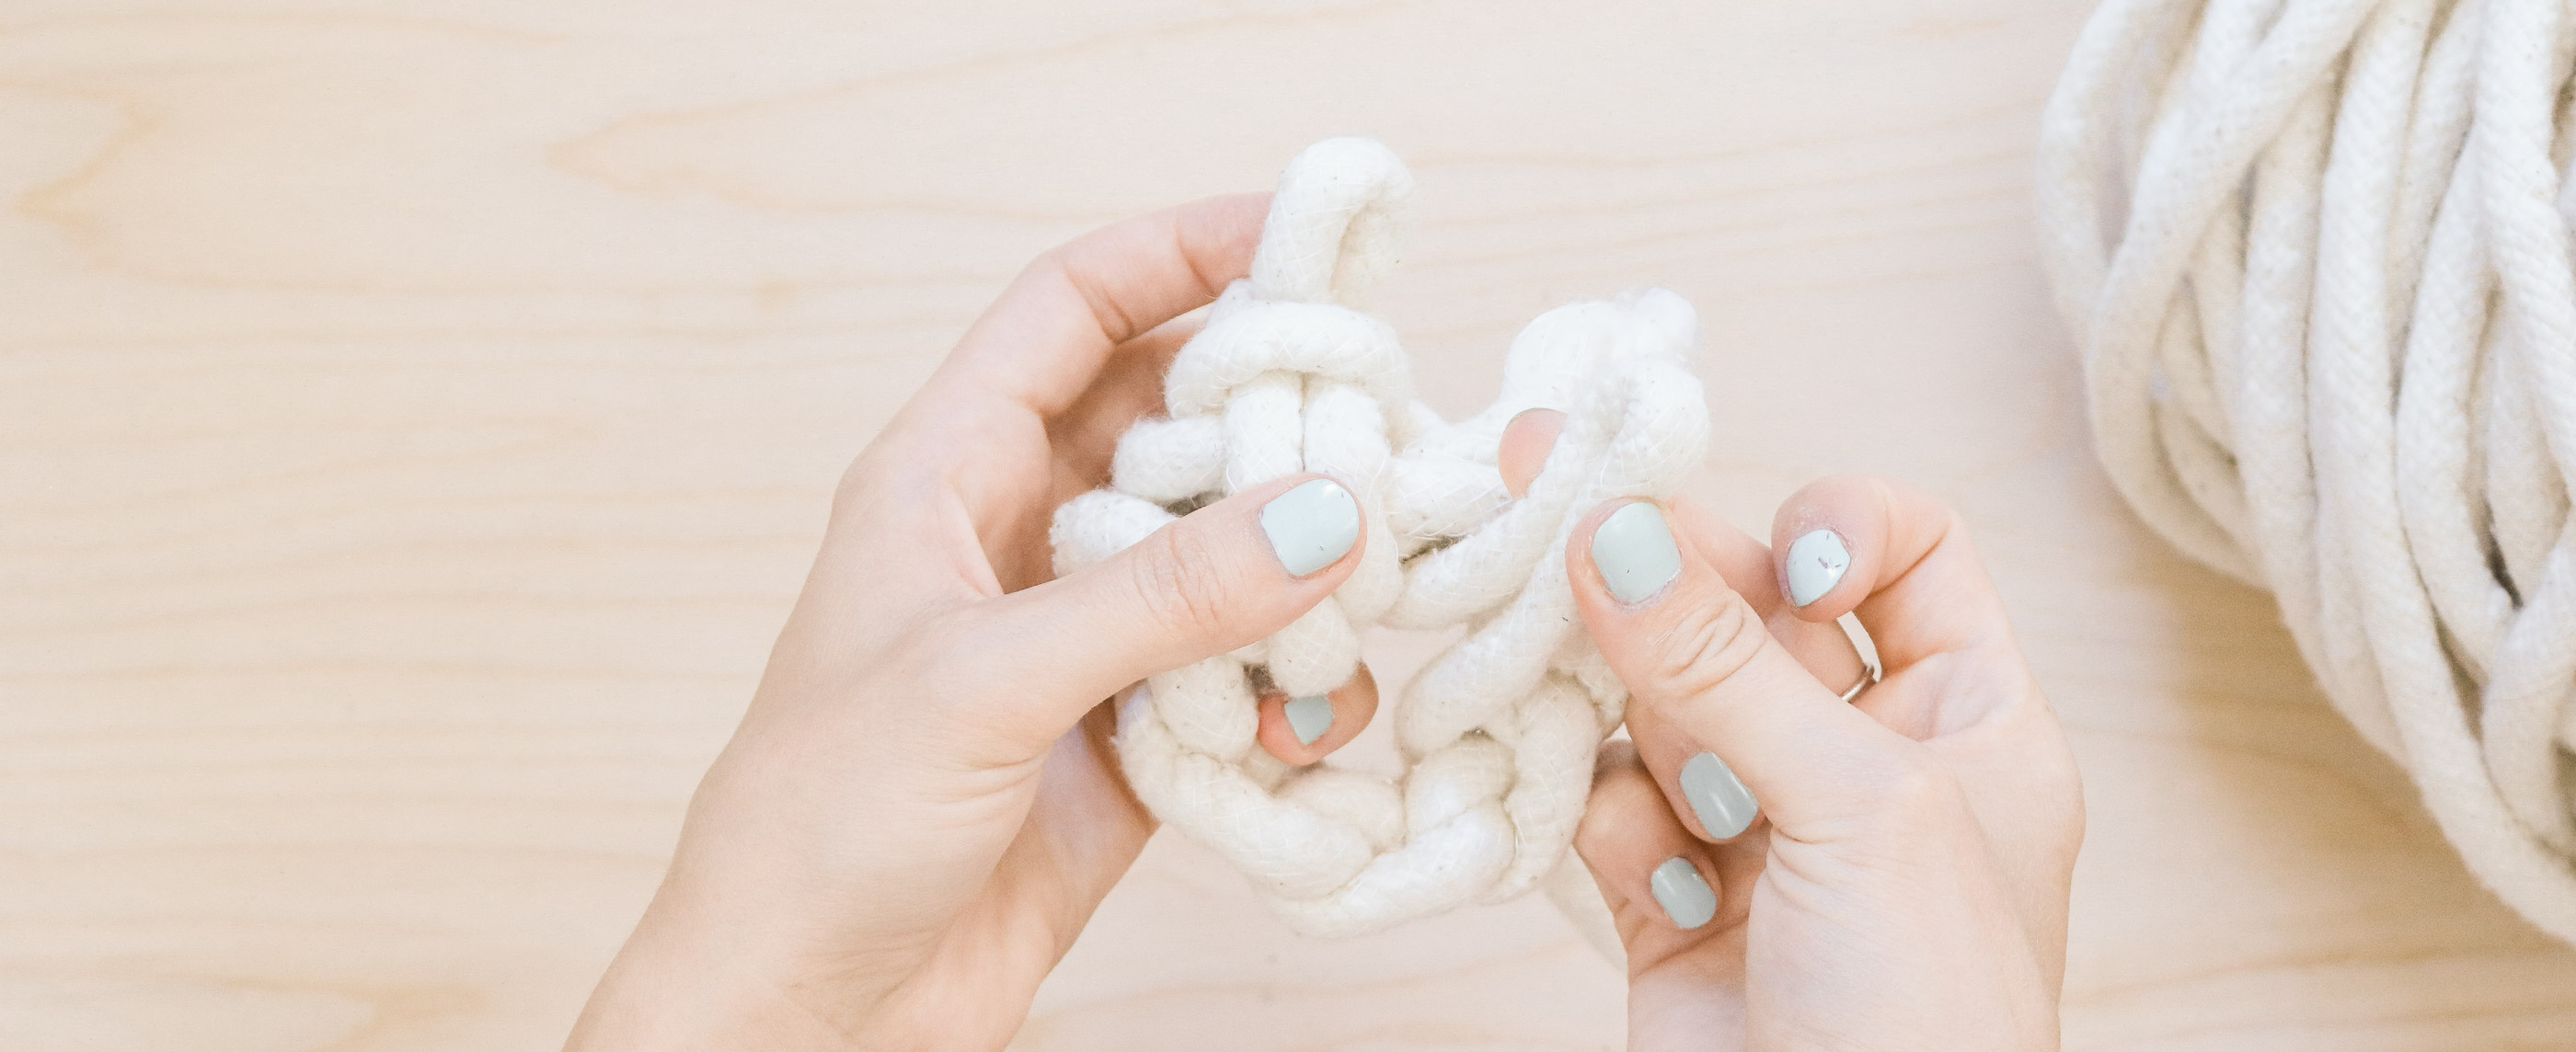
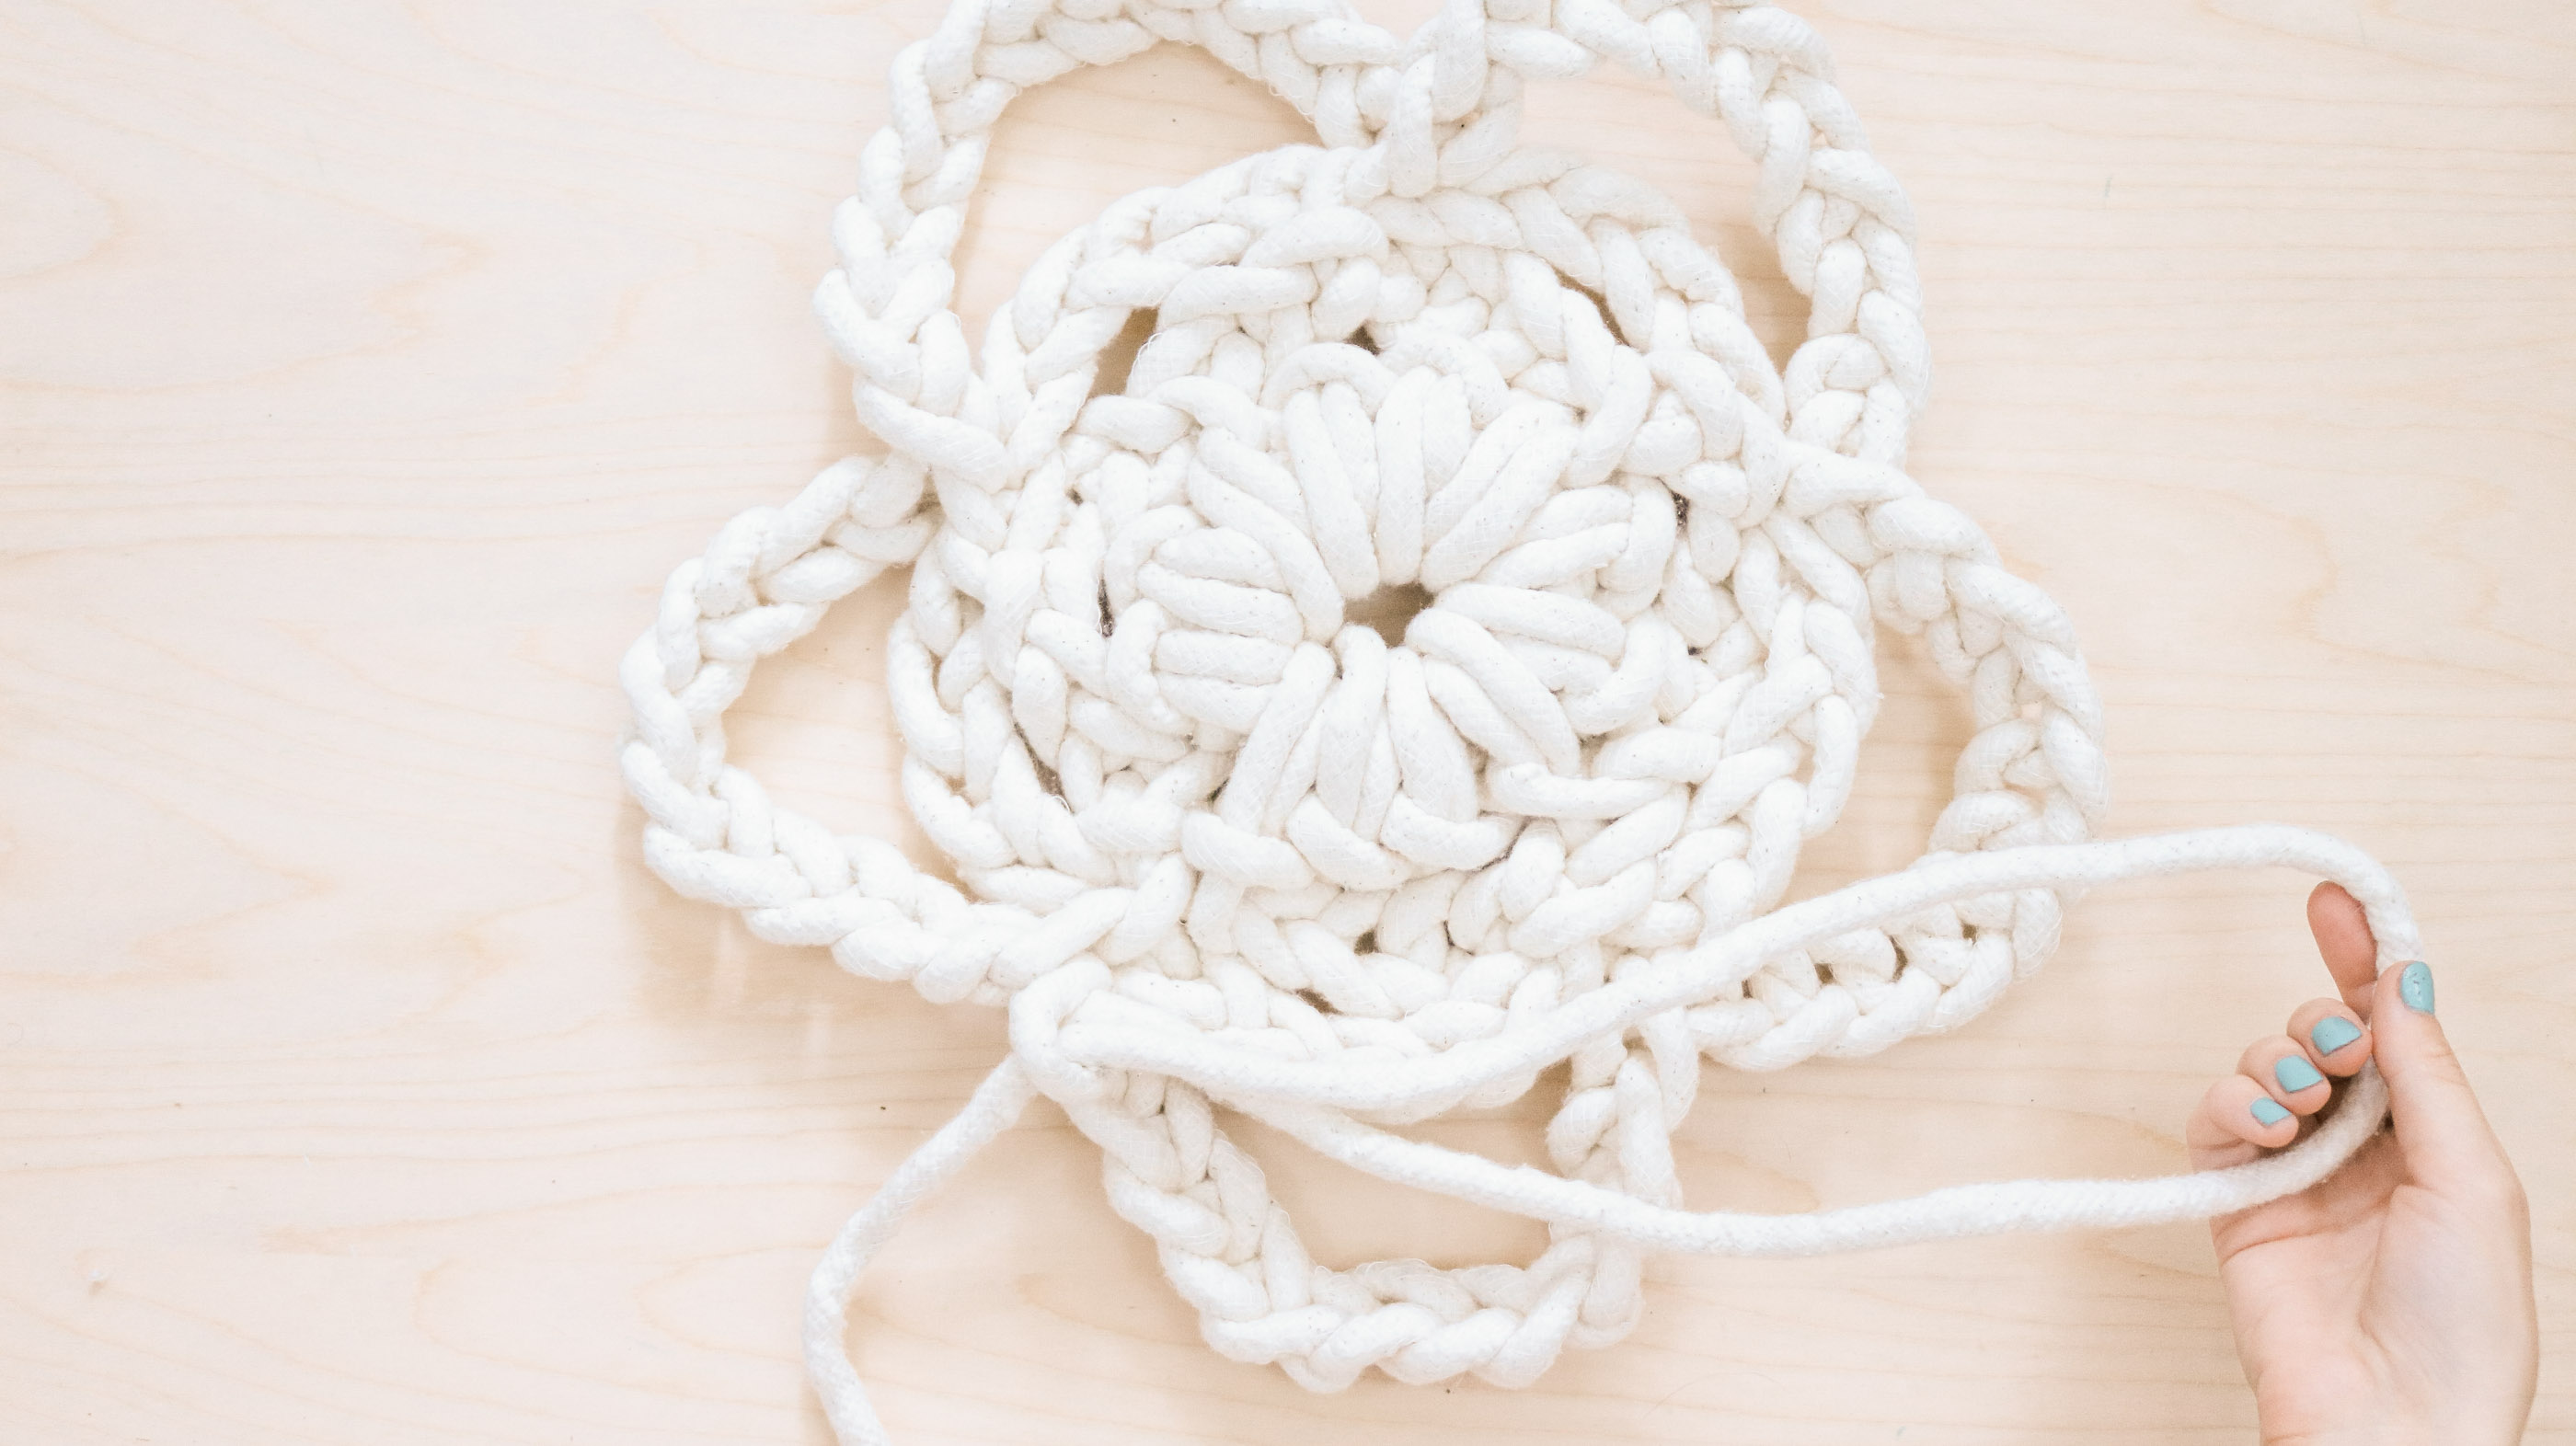
Step one – Creating your first loop!
To begin you’ll start with making the center of your rug for this you’ll need to create your first loop. Follow the photos instructions to make one.
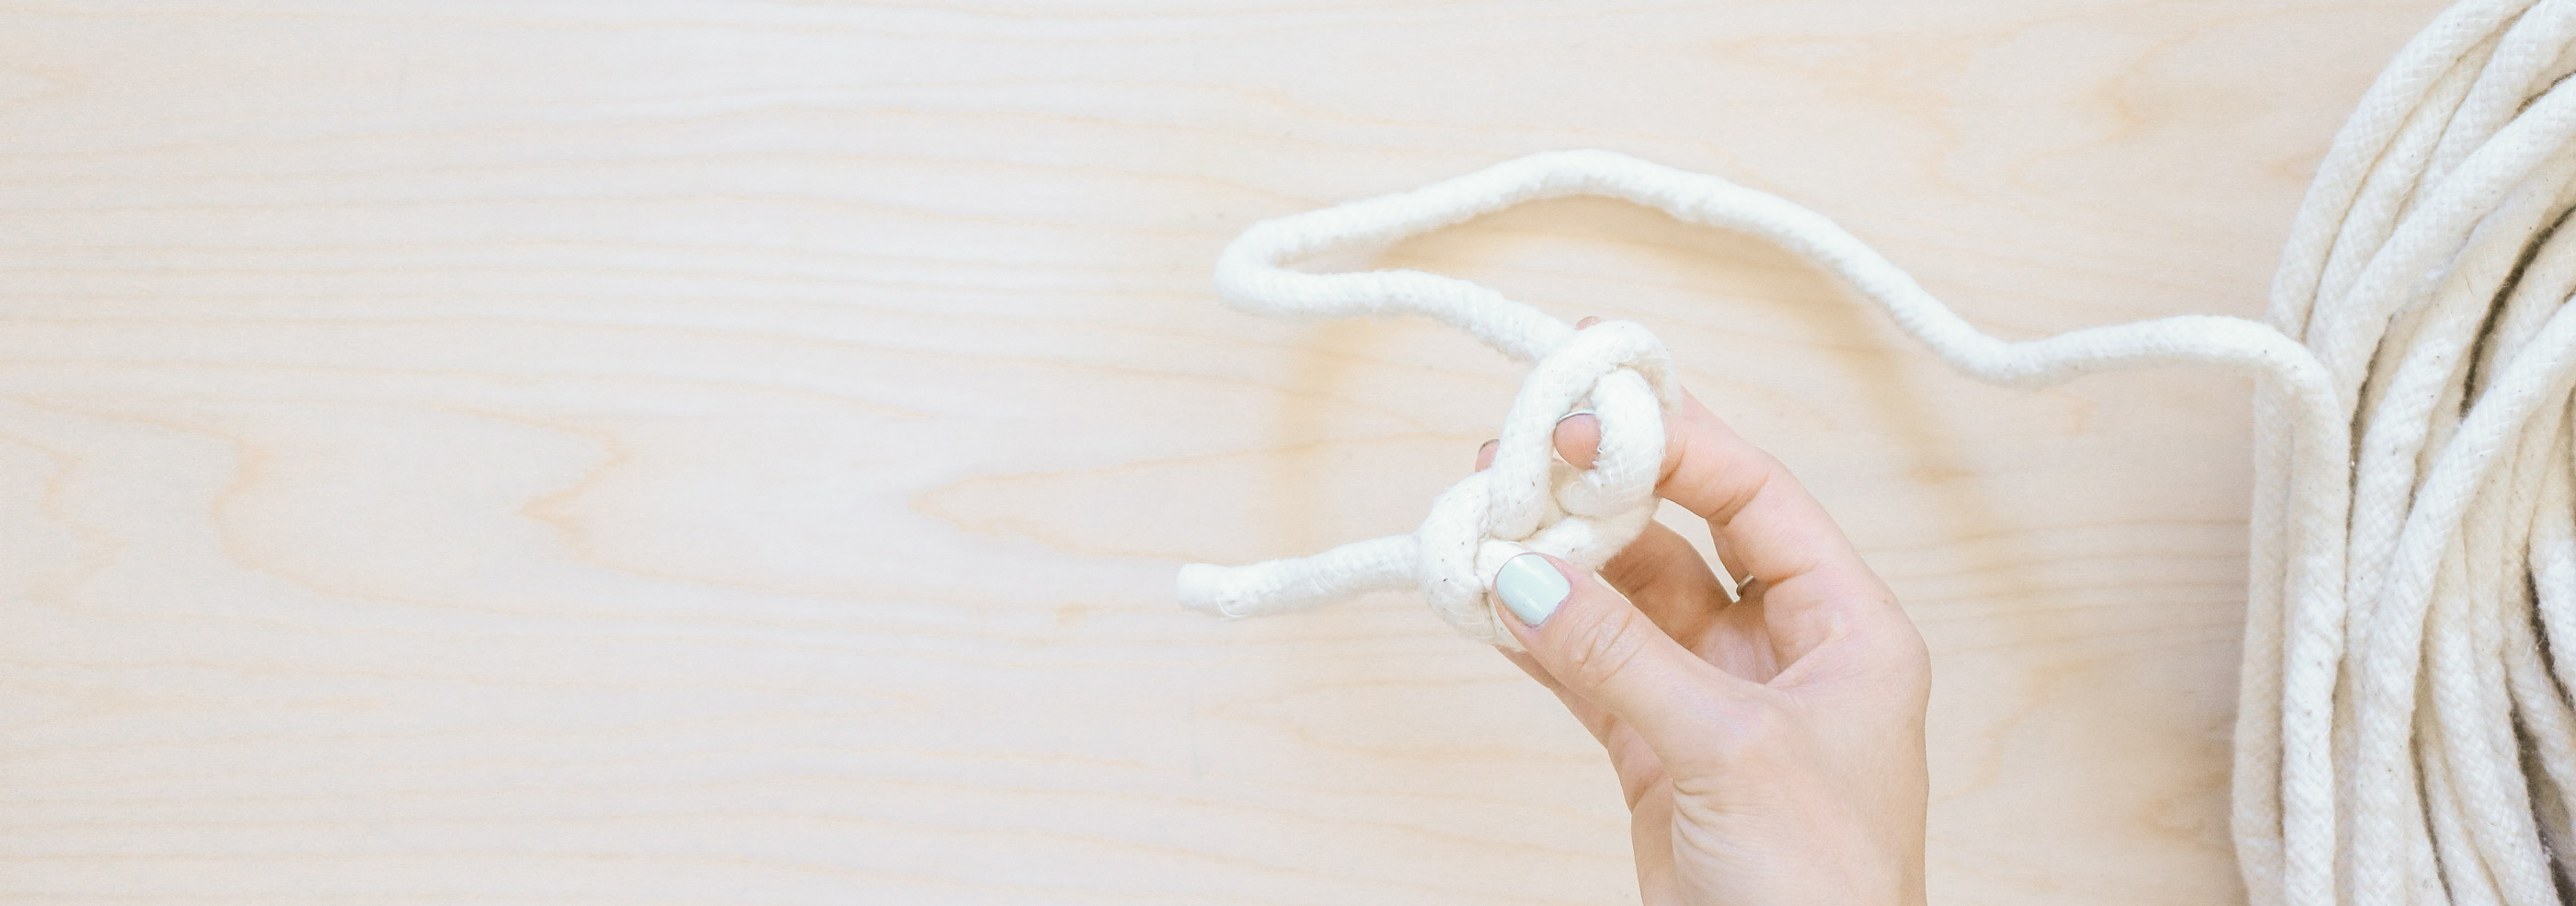
Step 2 – Making your braid!
Following that you’ll need to create a string of loops. It’ll kind of look like a braid. You do this by simply sticking your fingers through each loop and pulling out cording to create new loops. 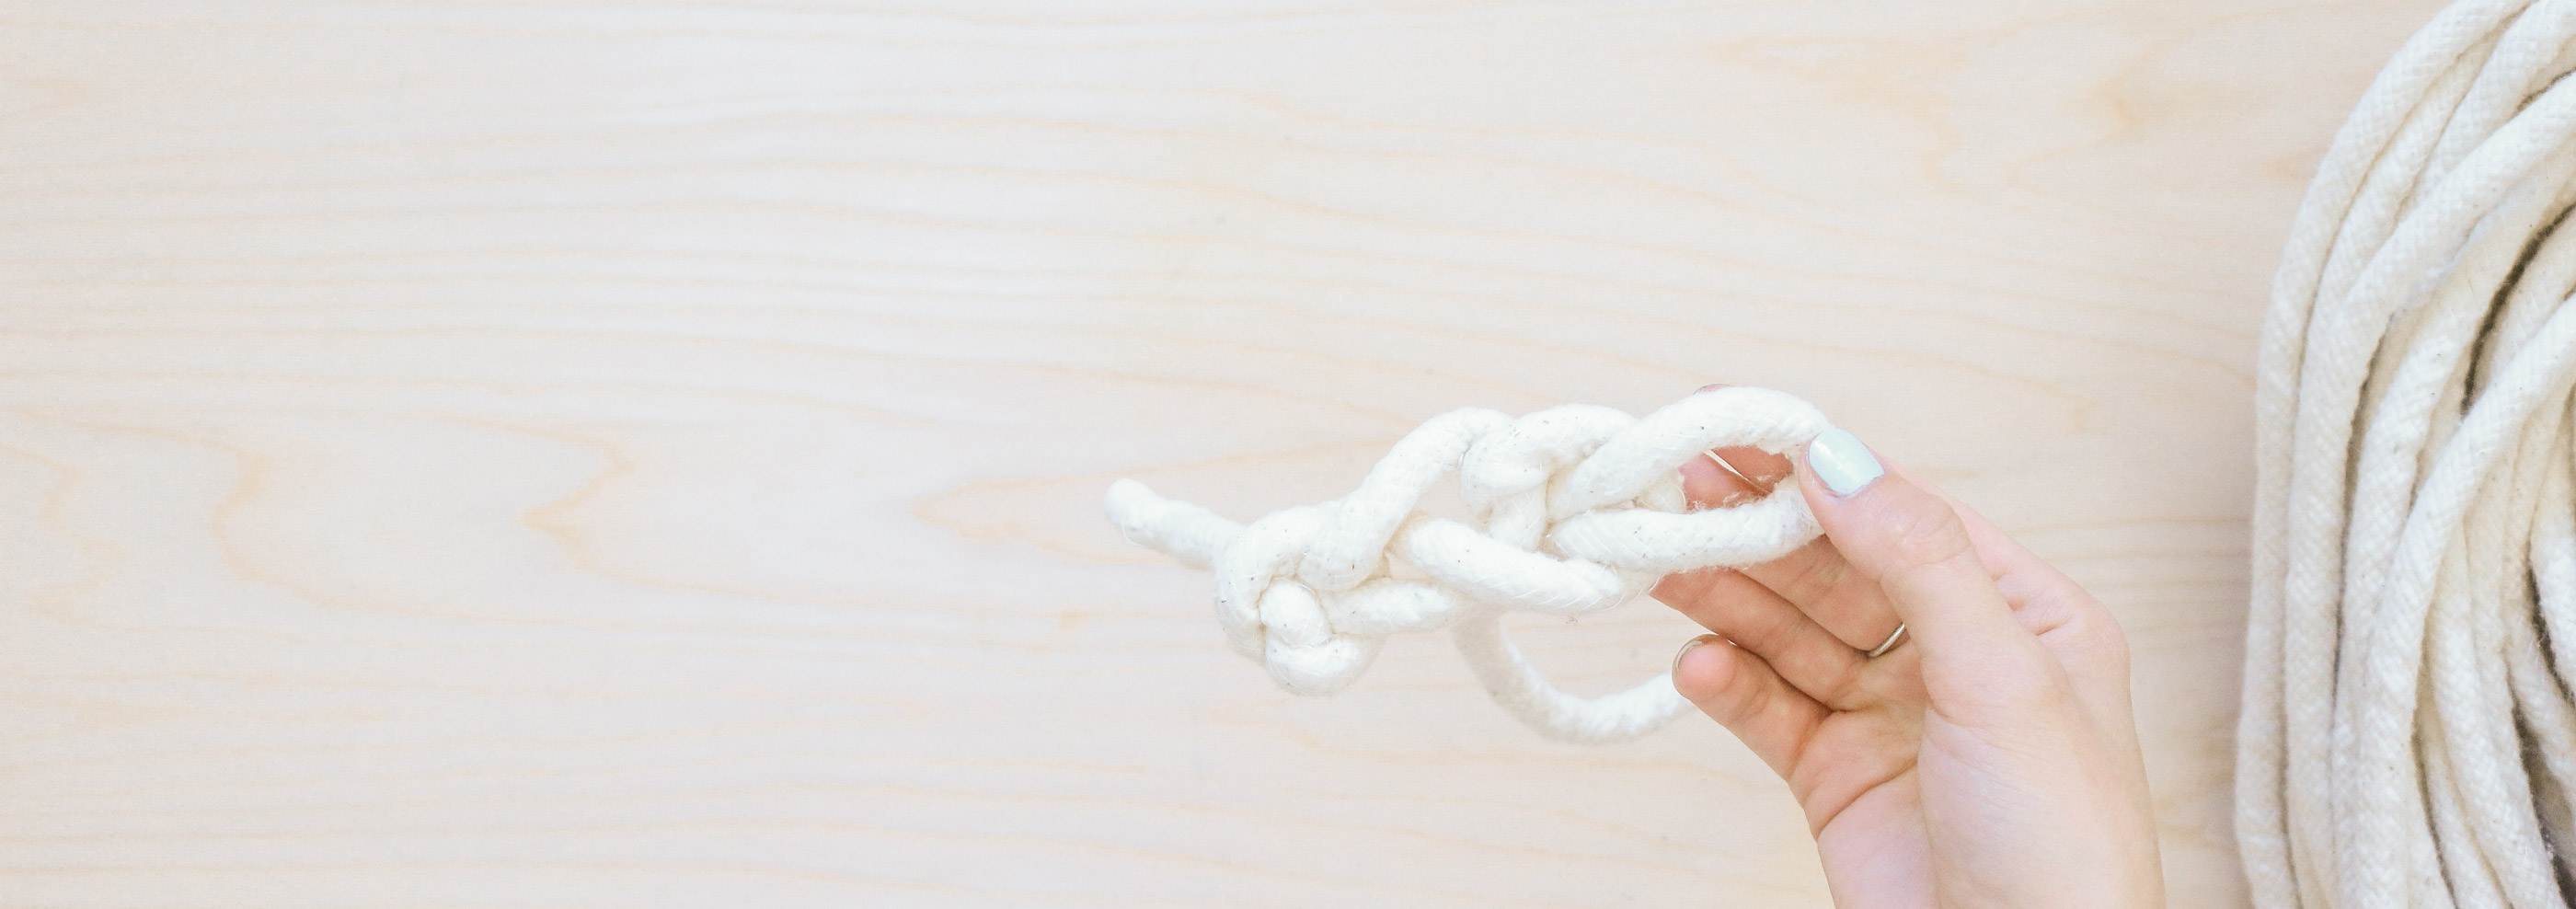
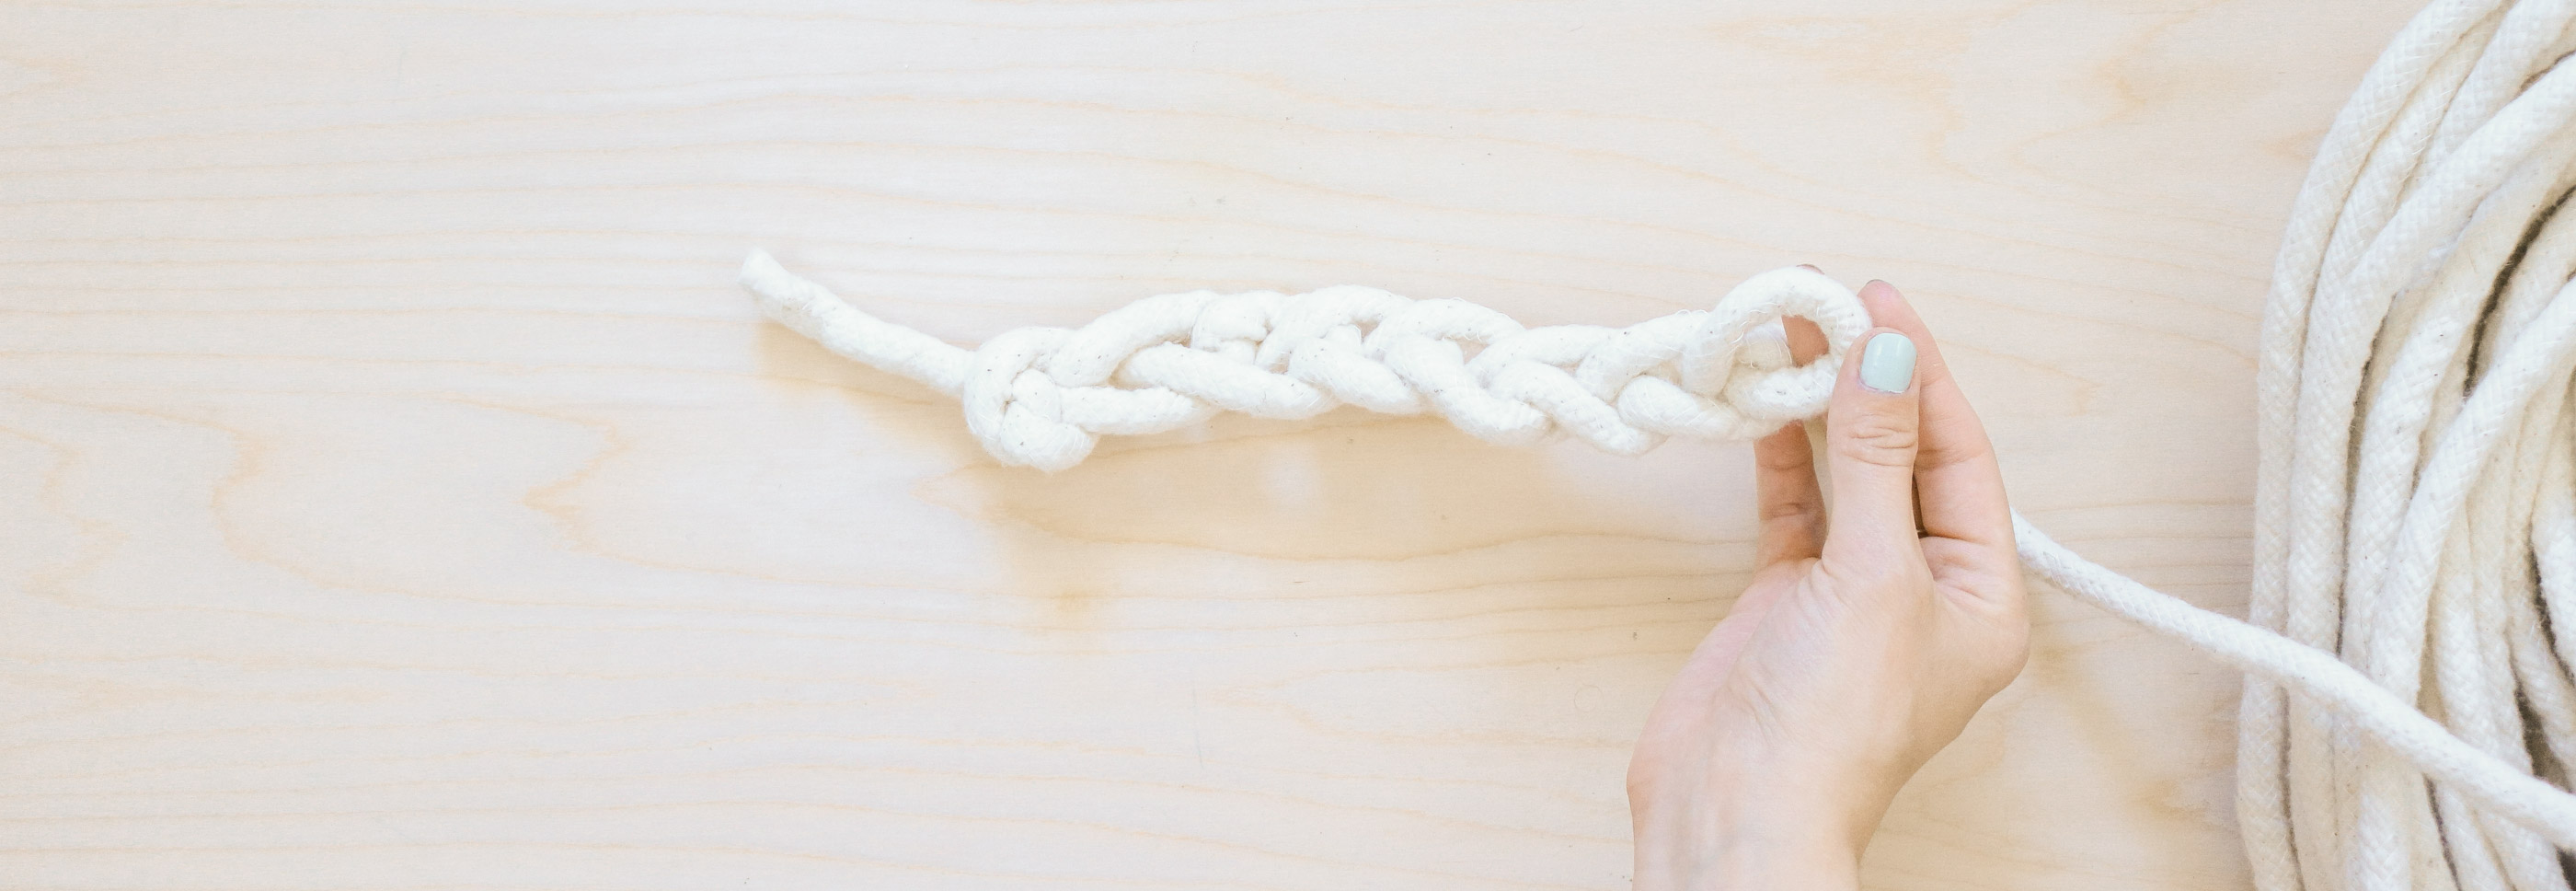
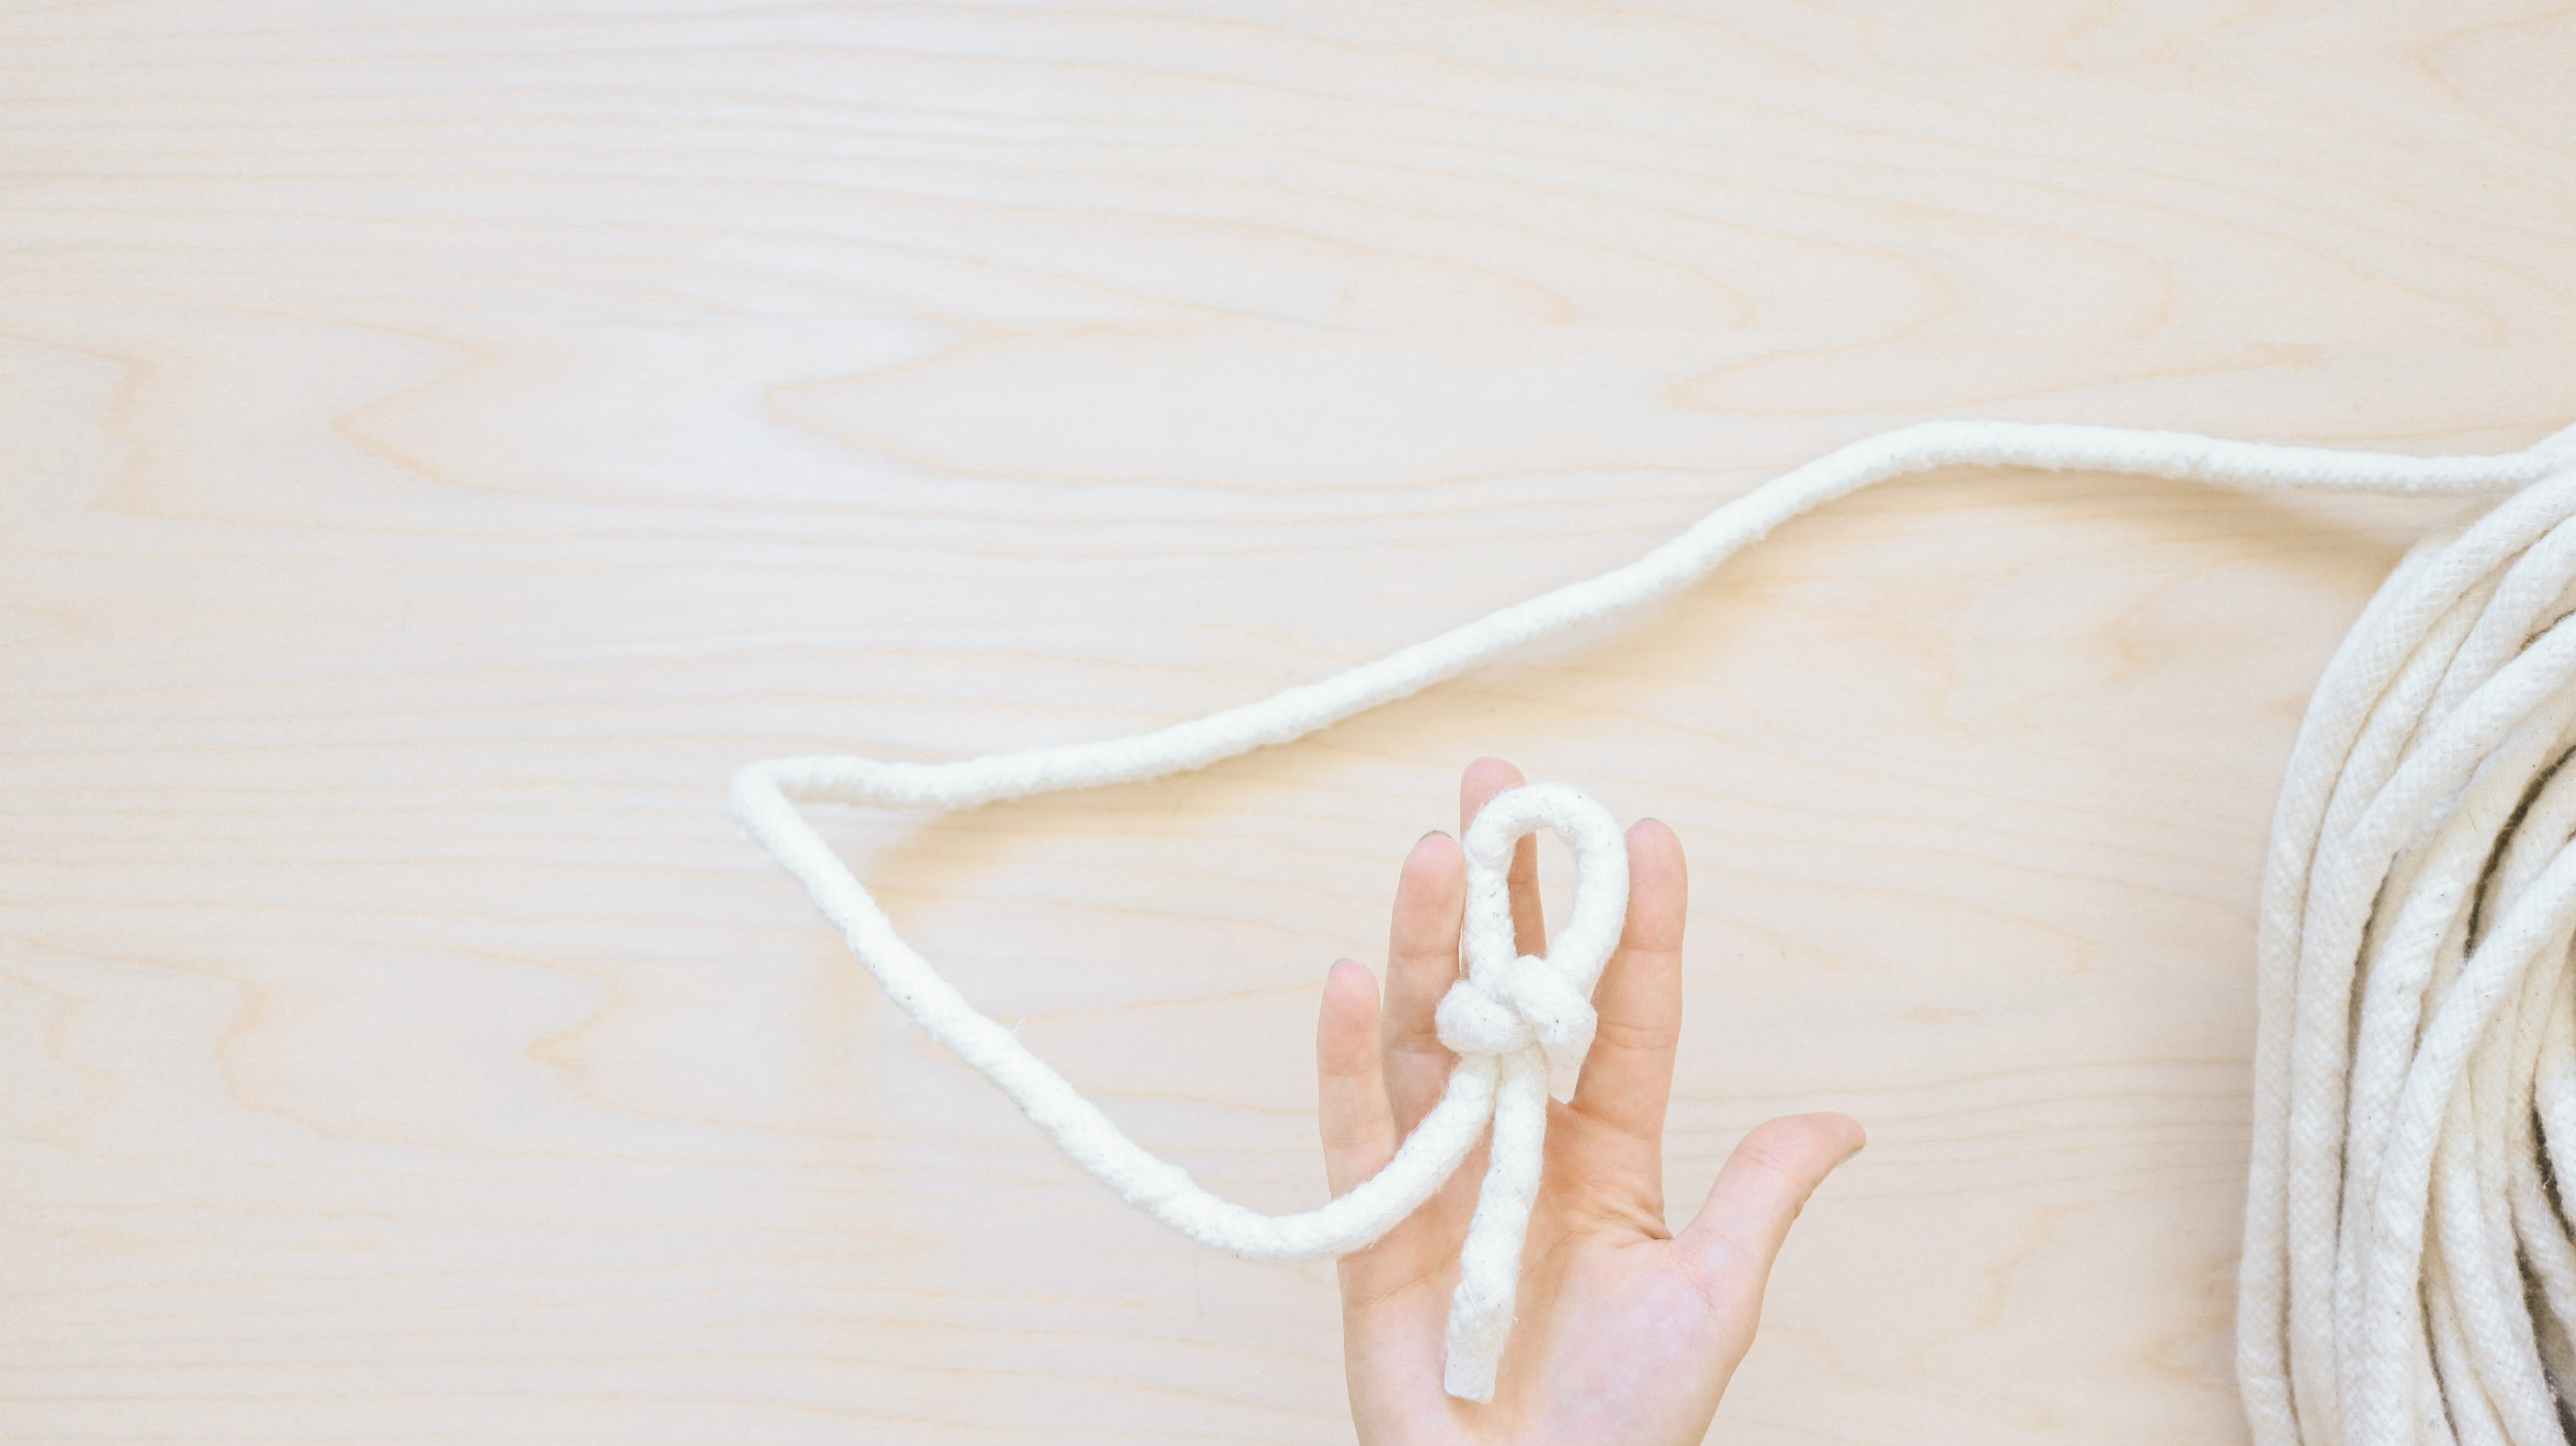
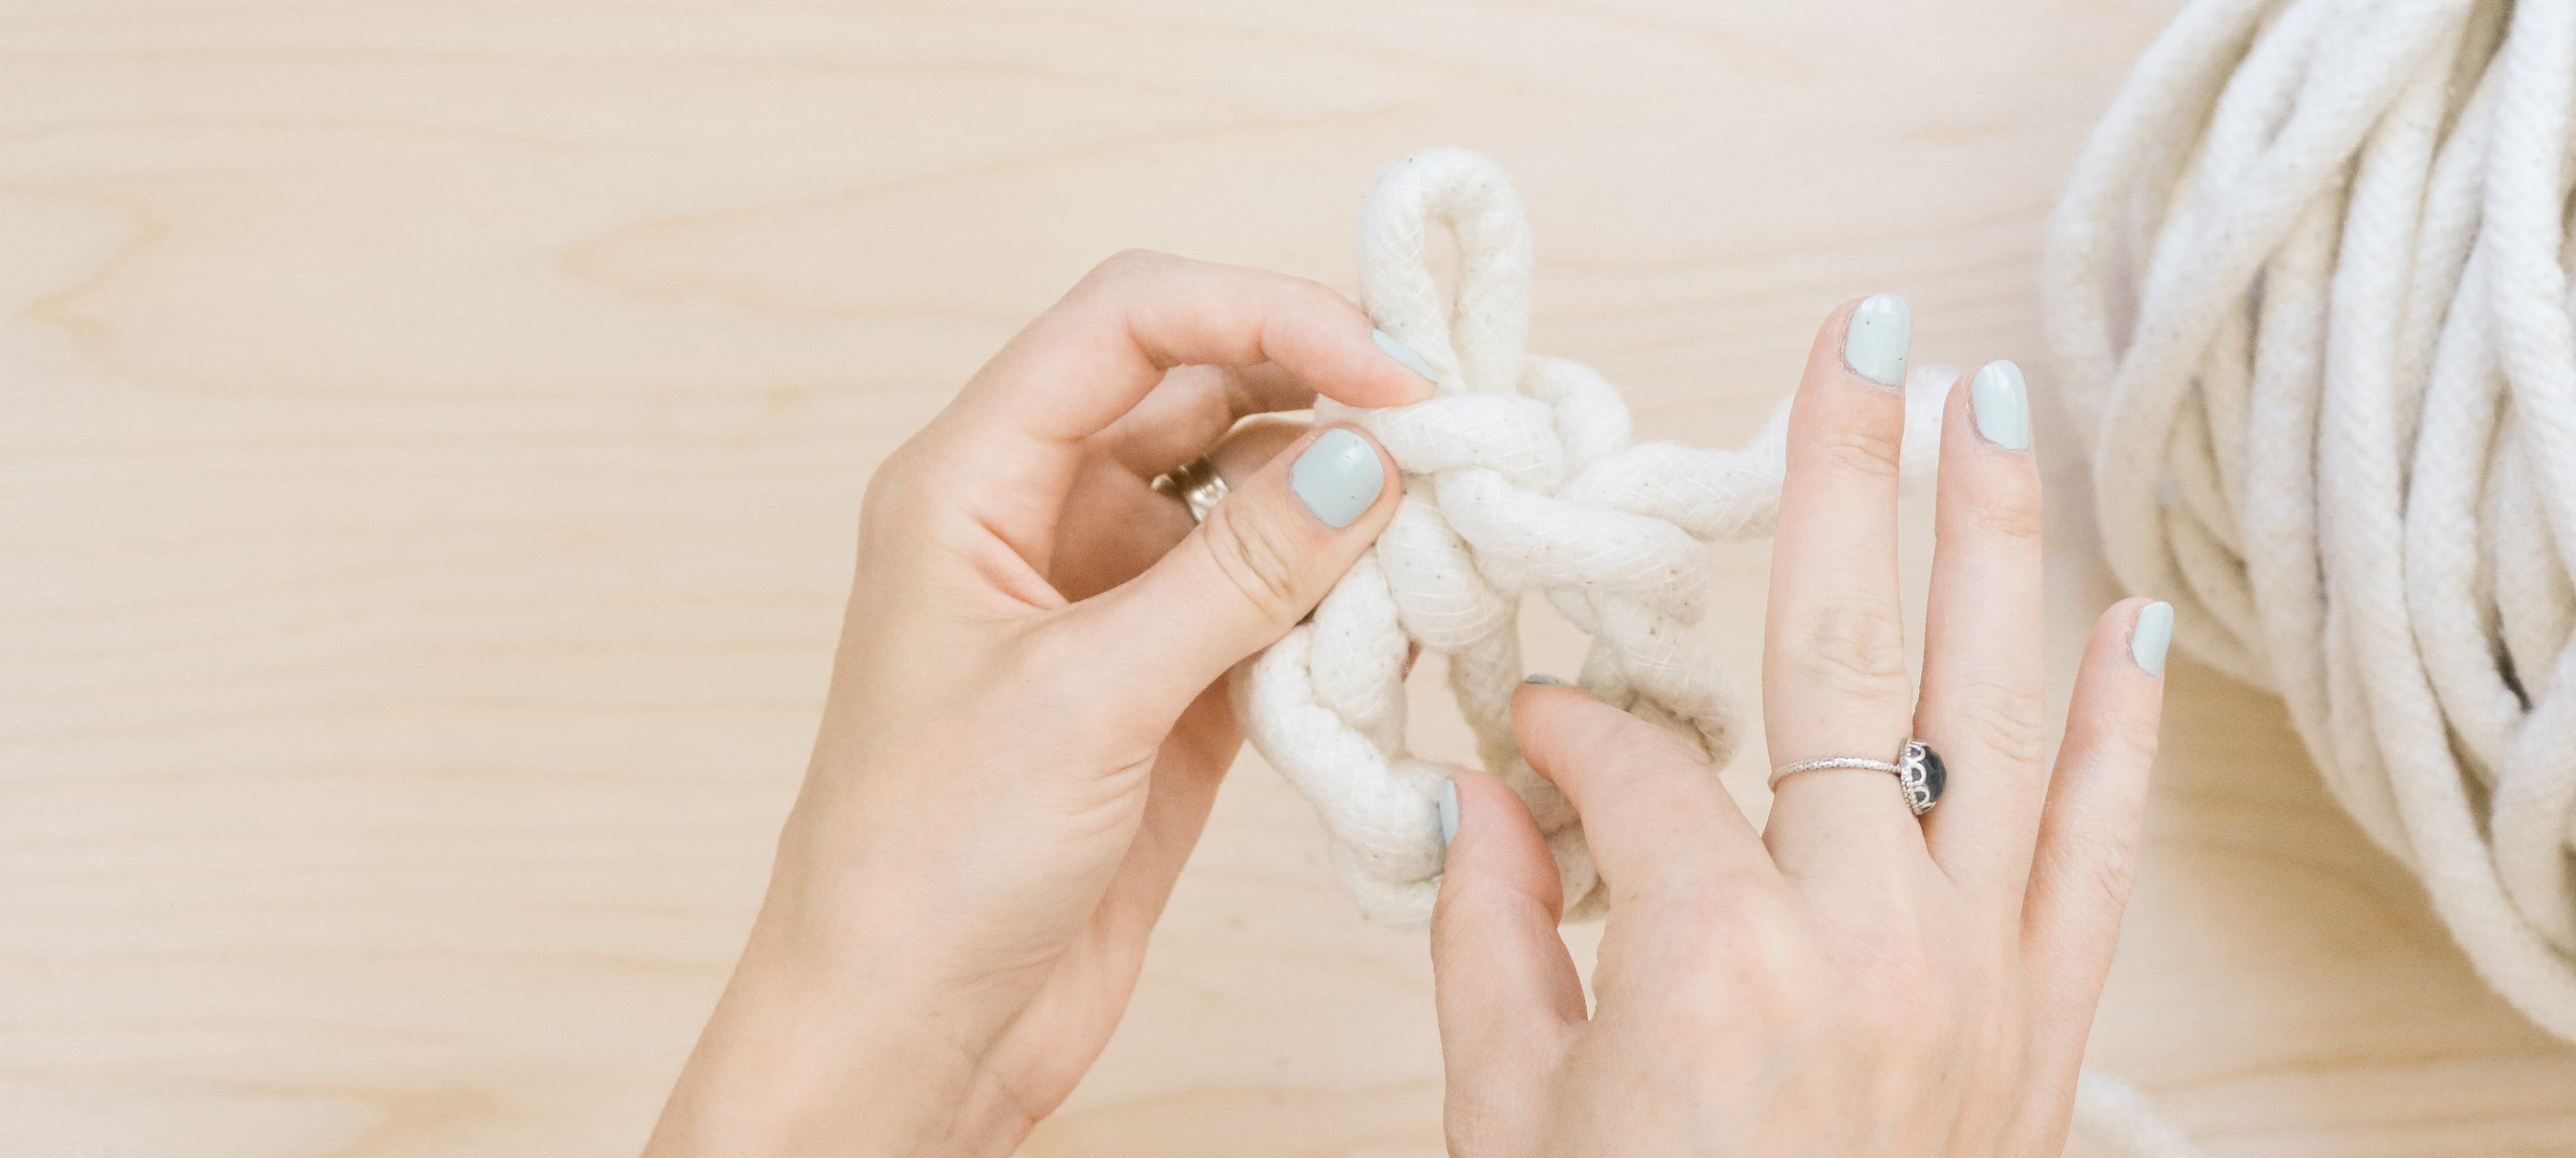
Step 3 – Turning your braid into a circle for the center!
Once you have a strand of loops (total of 7 loops) you’ll need to turn it into somewhat of a circle for the center.
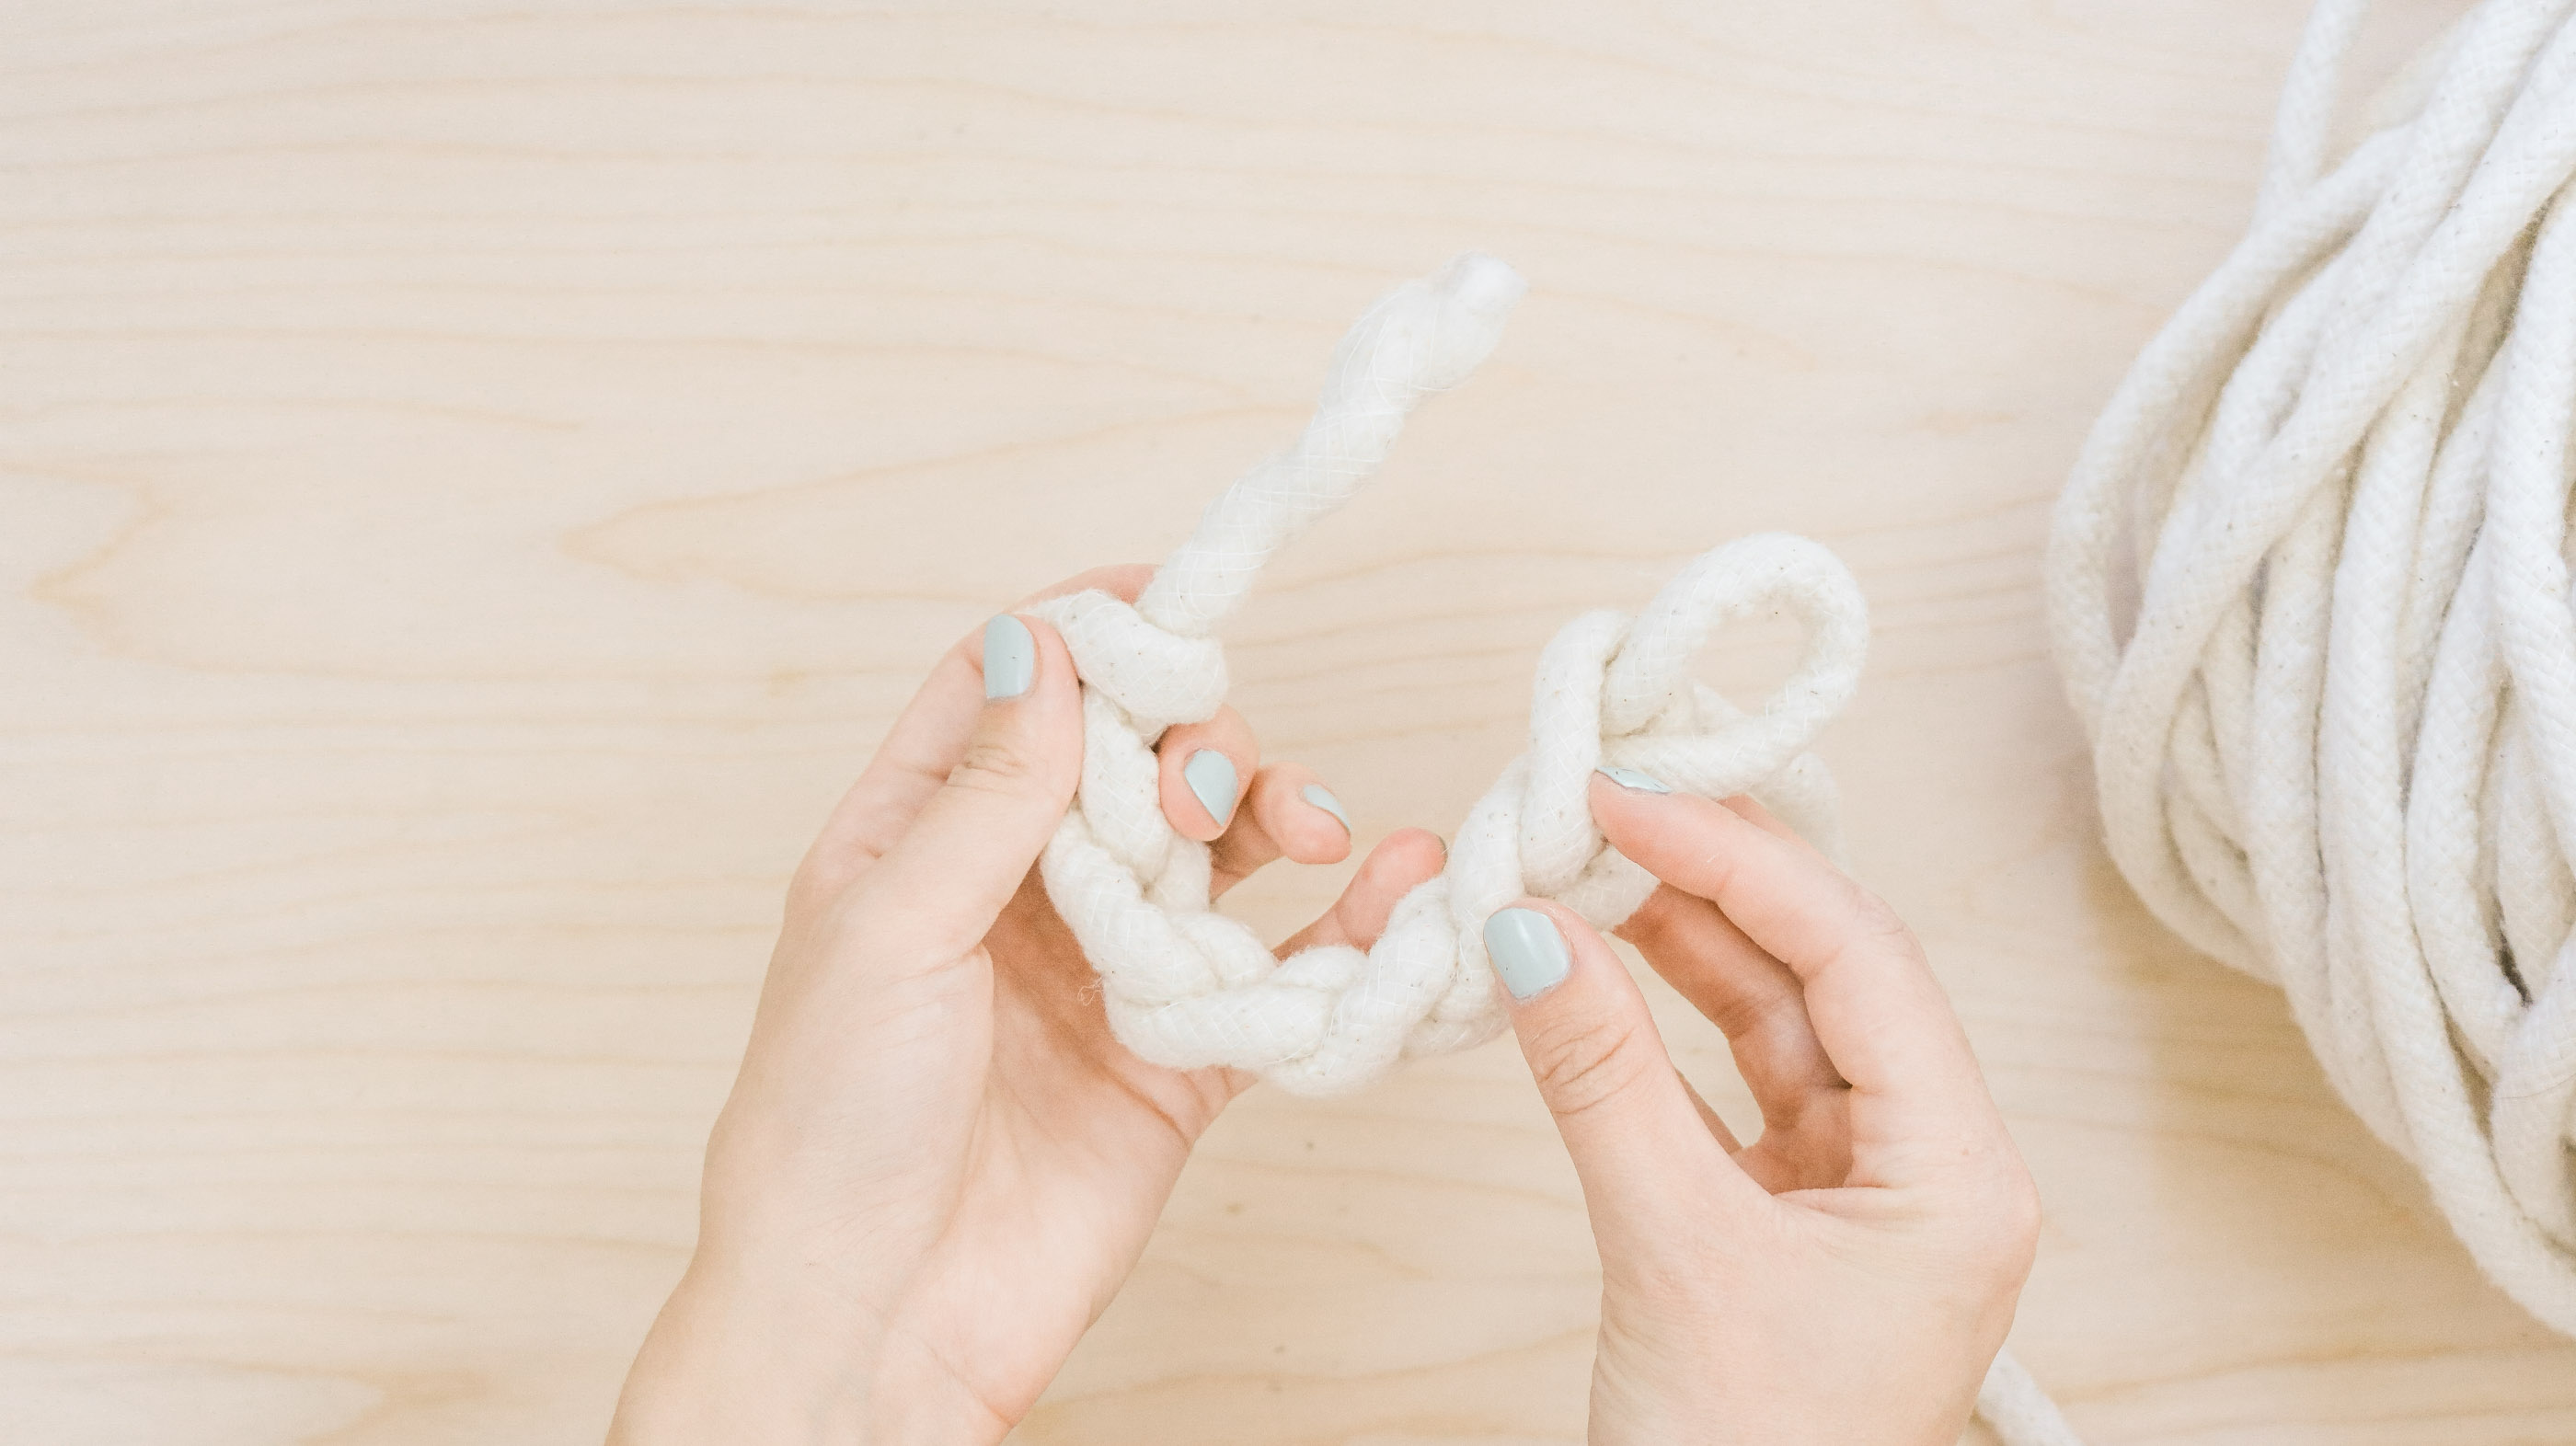
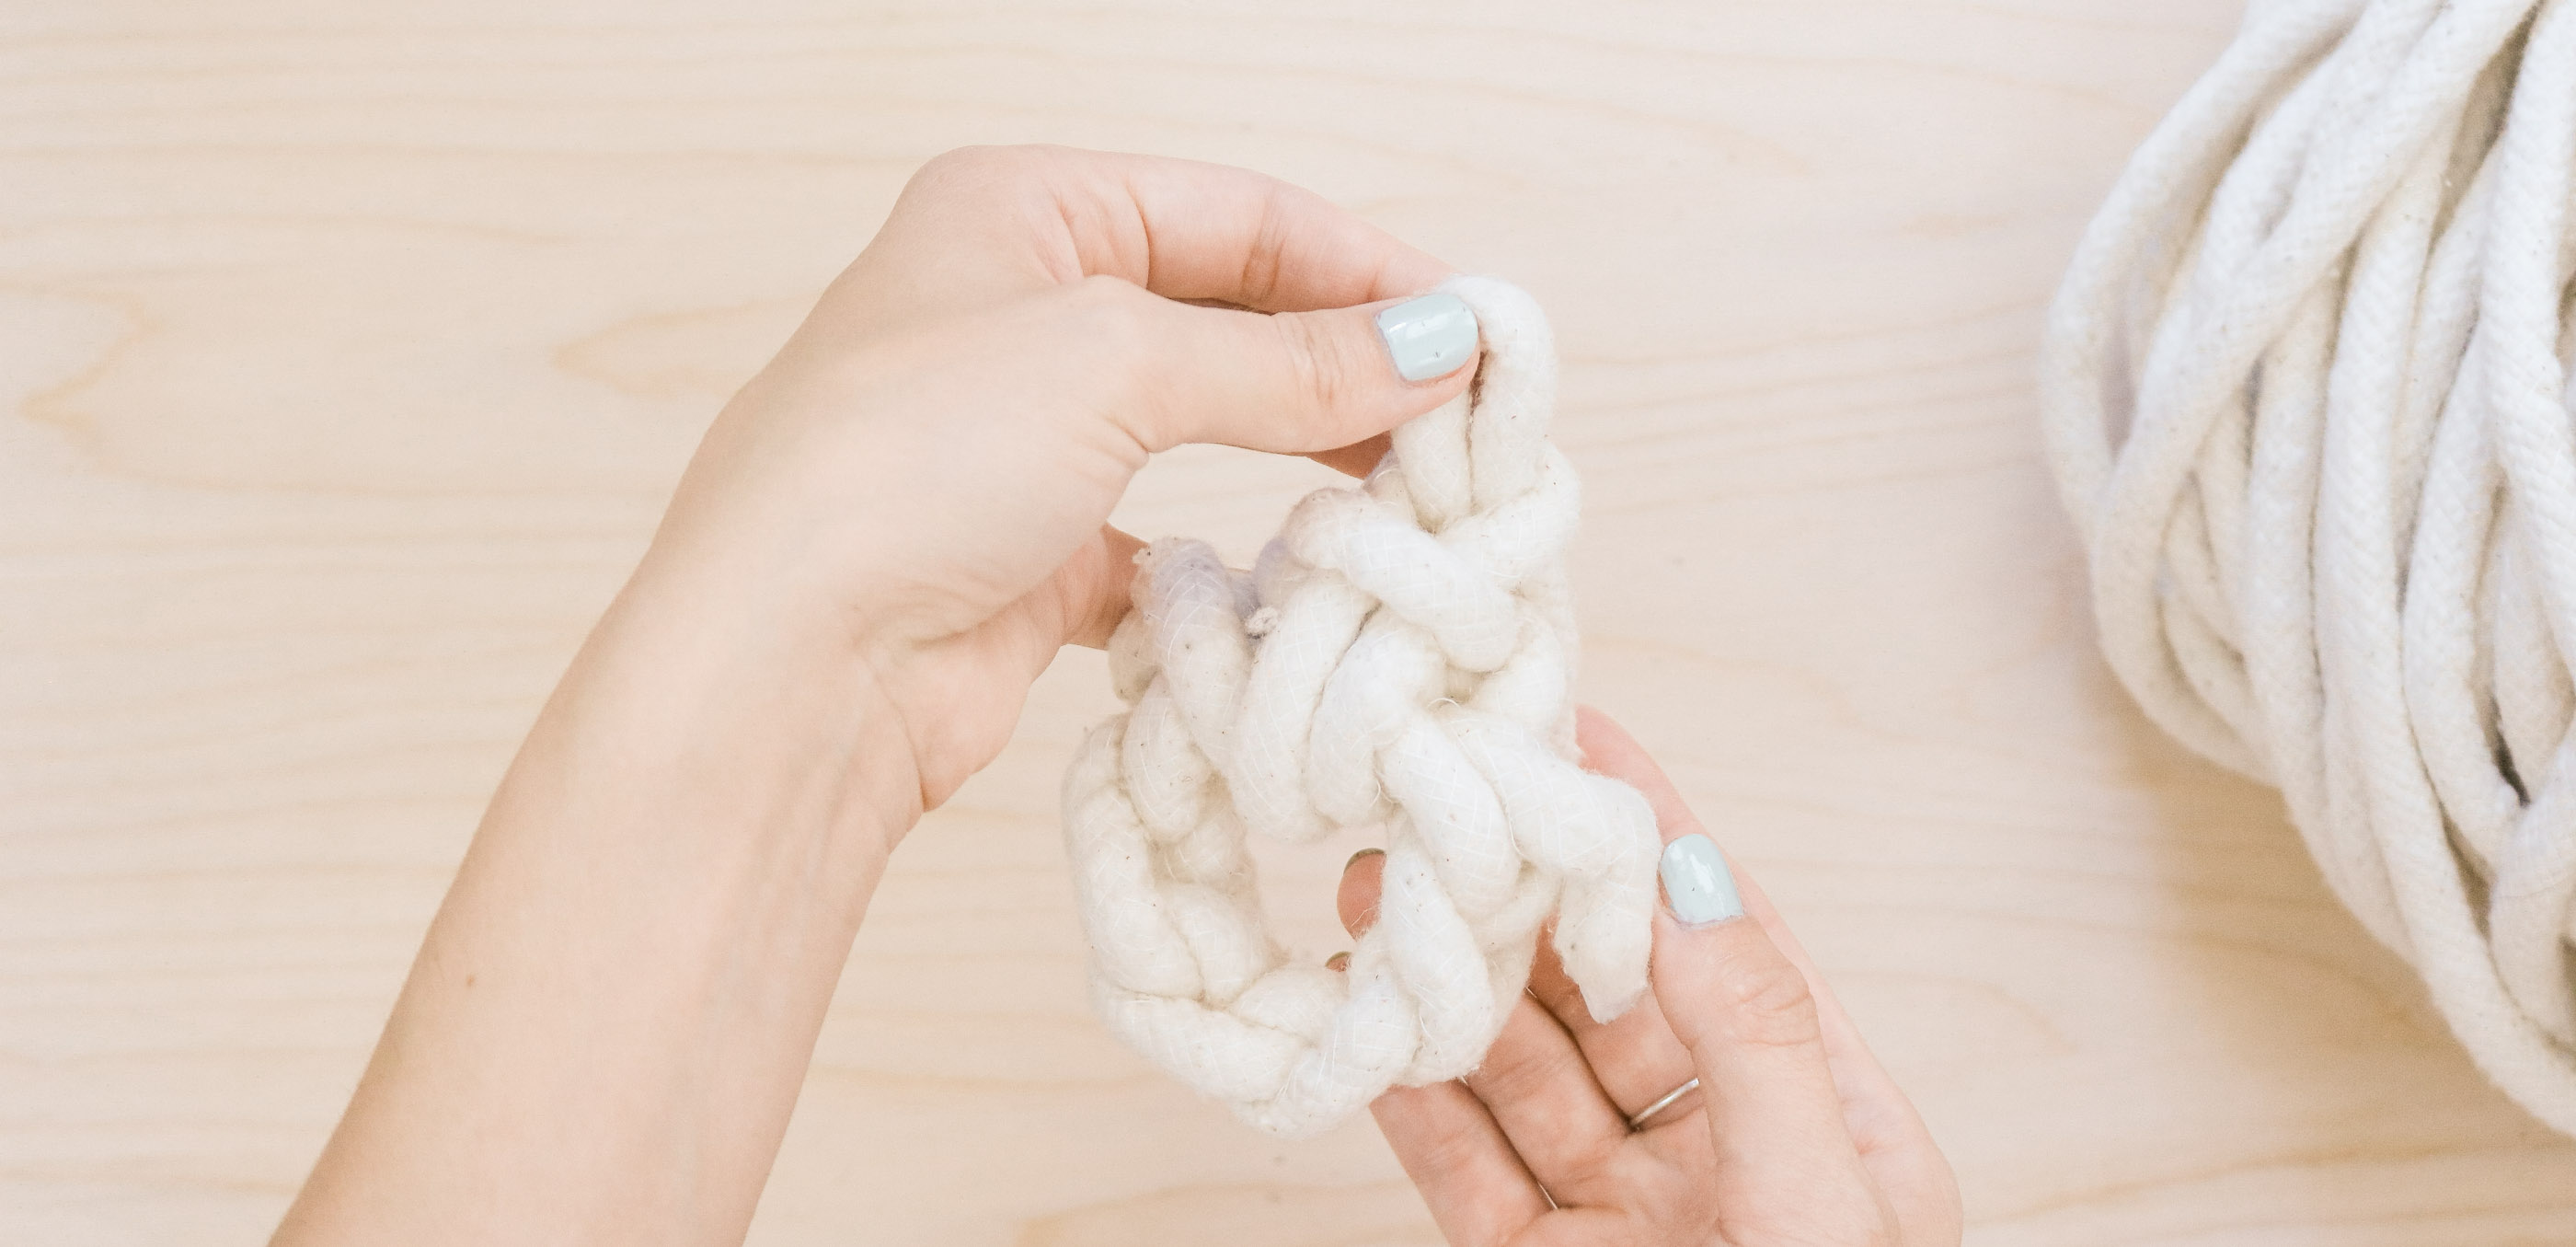
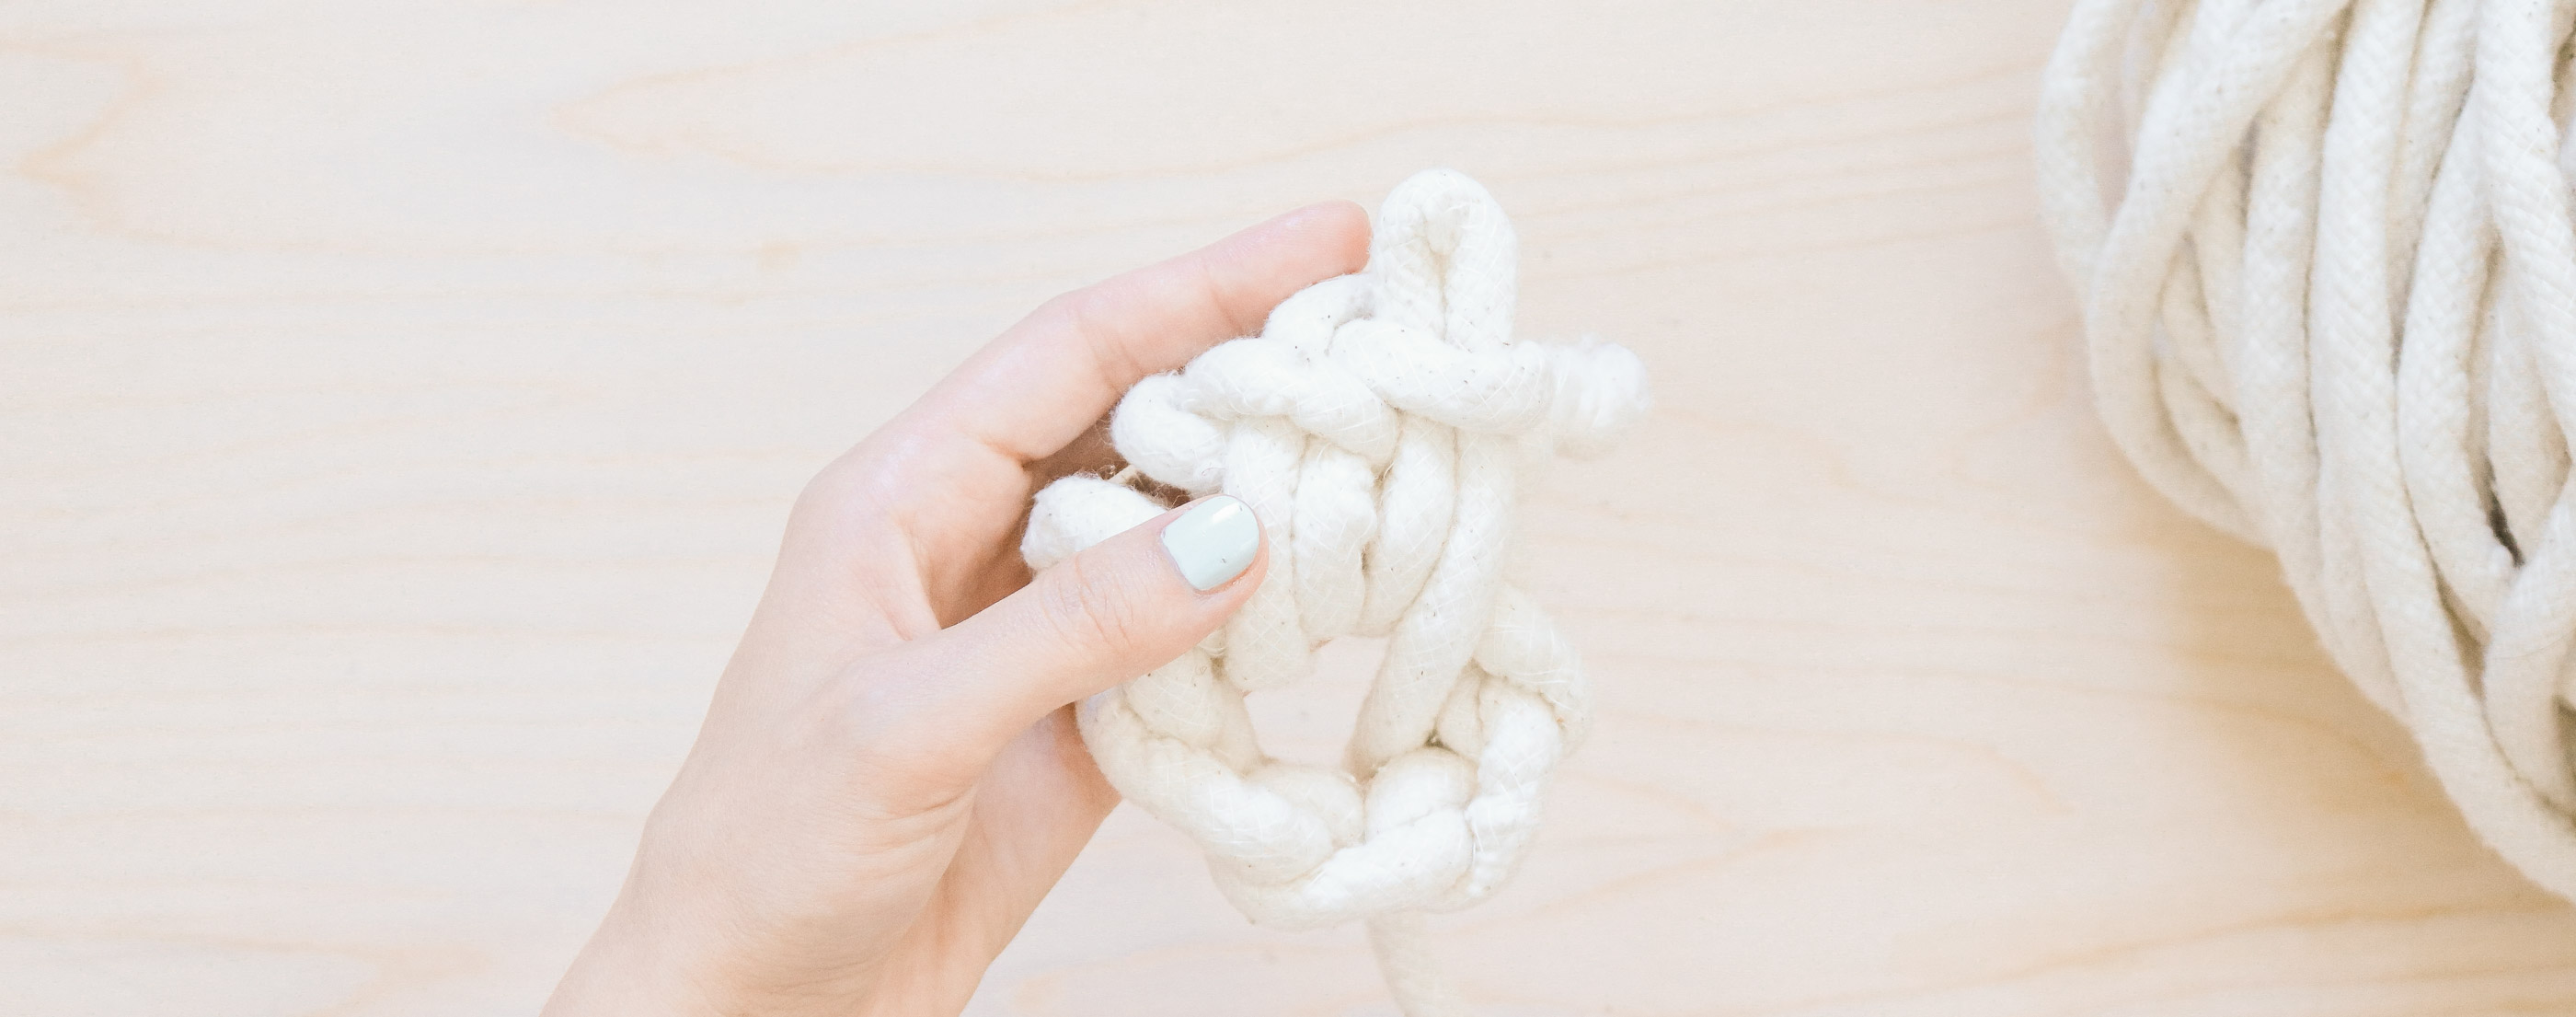
Take your tail end and stick in through the second to last loop. (NOT your last loop) (like in the photo below) You should be left with a loop on the edge and your tail end sticking out on the side. 
Following that stick your fingers into that loop and pull out a new one ( photo below)
Here’s what it should look like once you’ve pulled out a new loop. (photo below) This is the last step for your circle. We’ll be using it as a base for the next steps. (building a pattern on top of it) 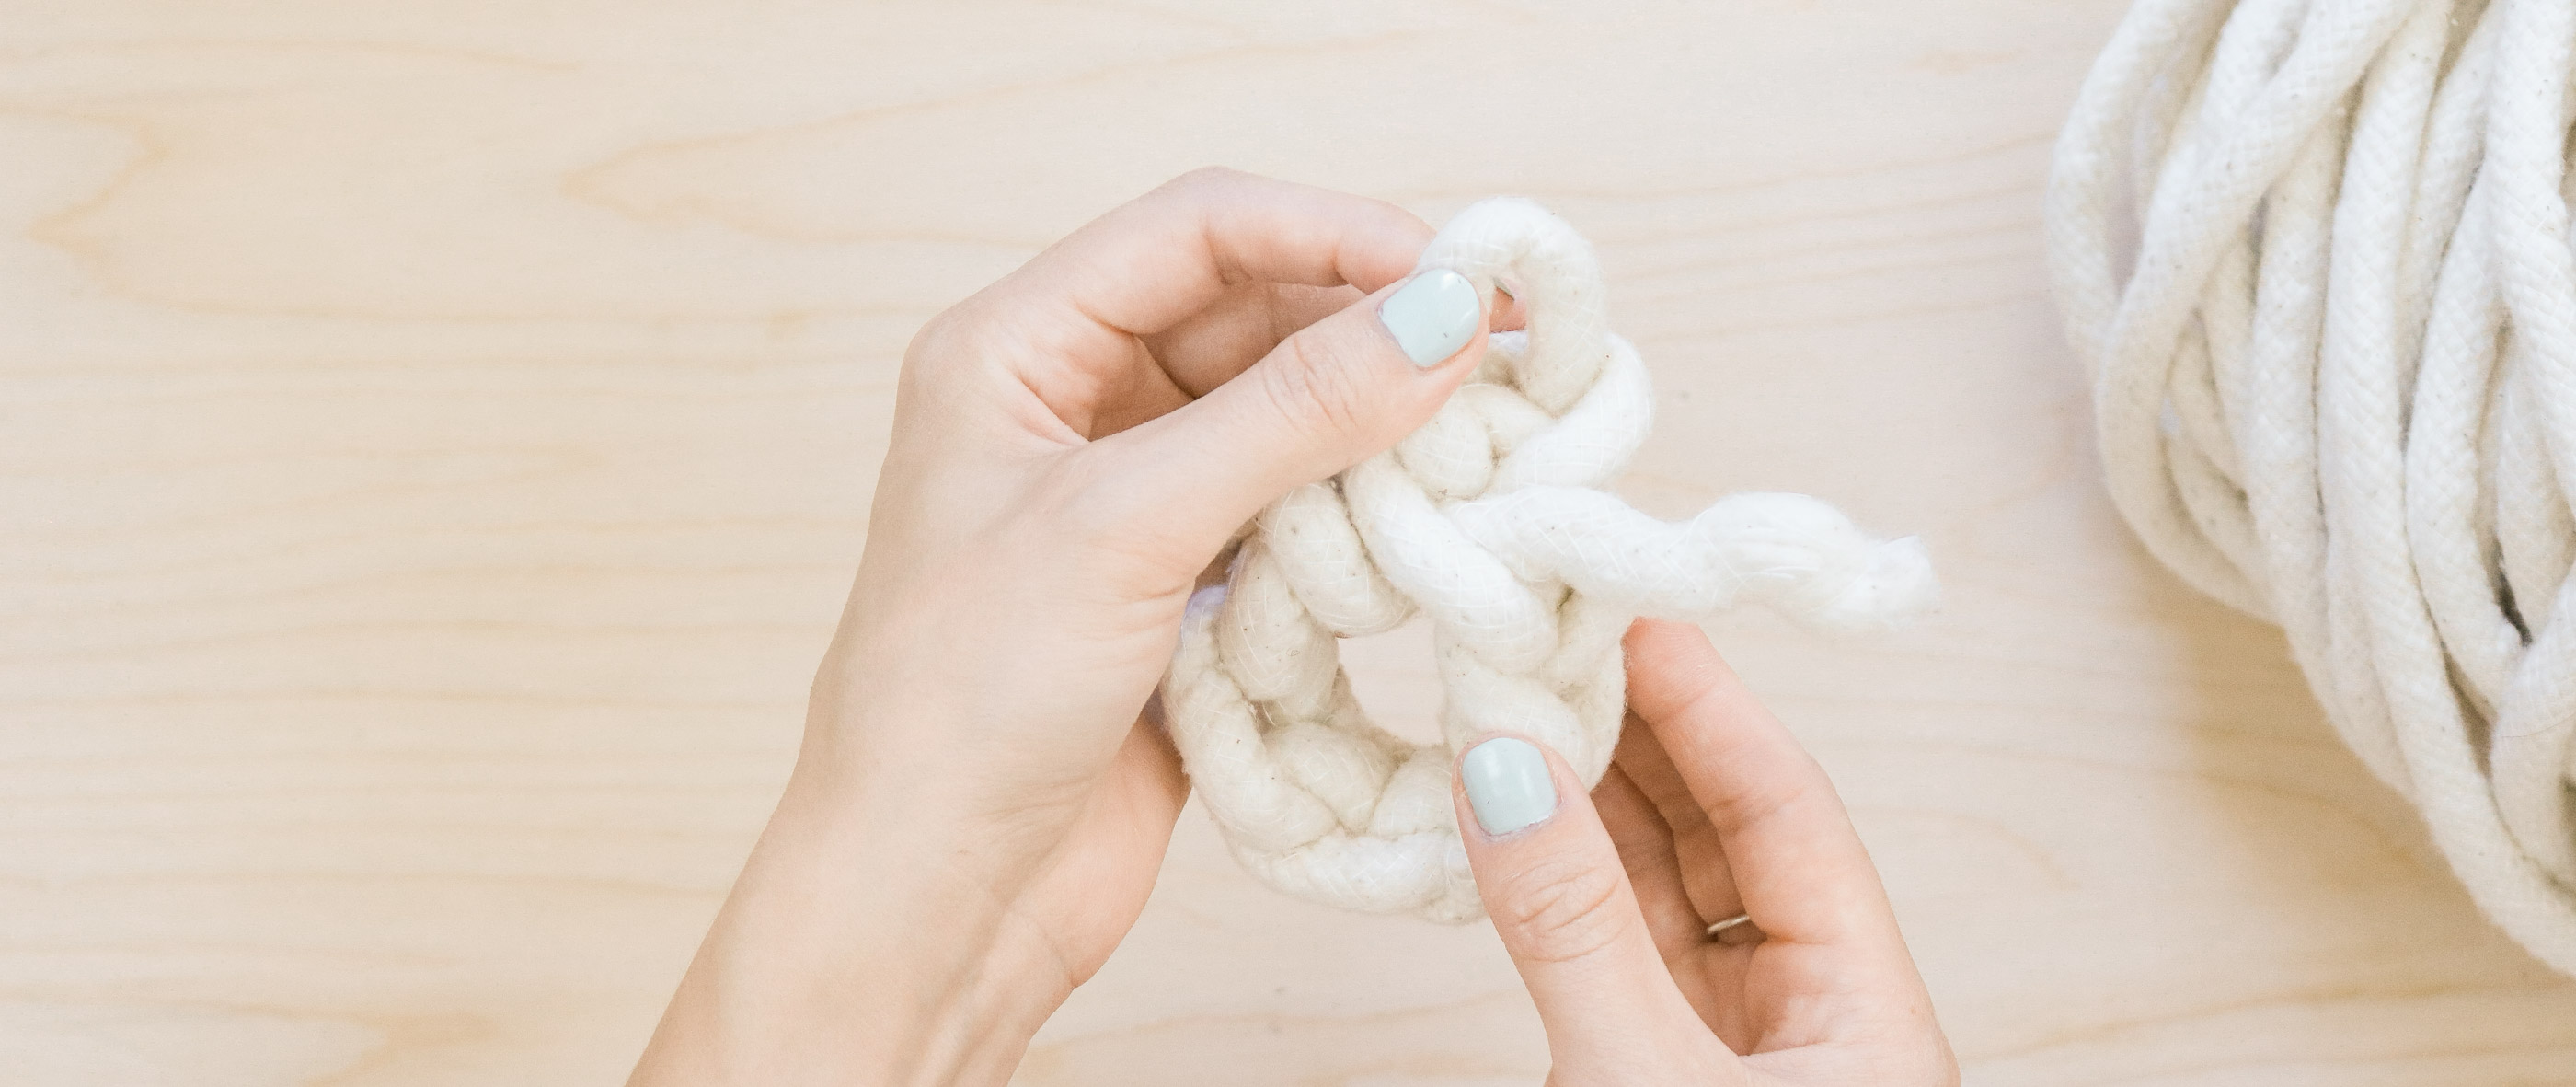
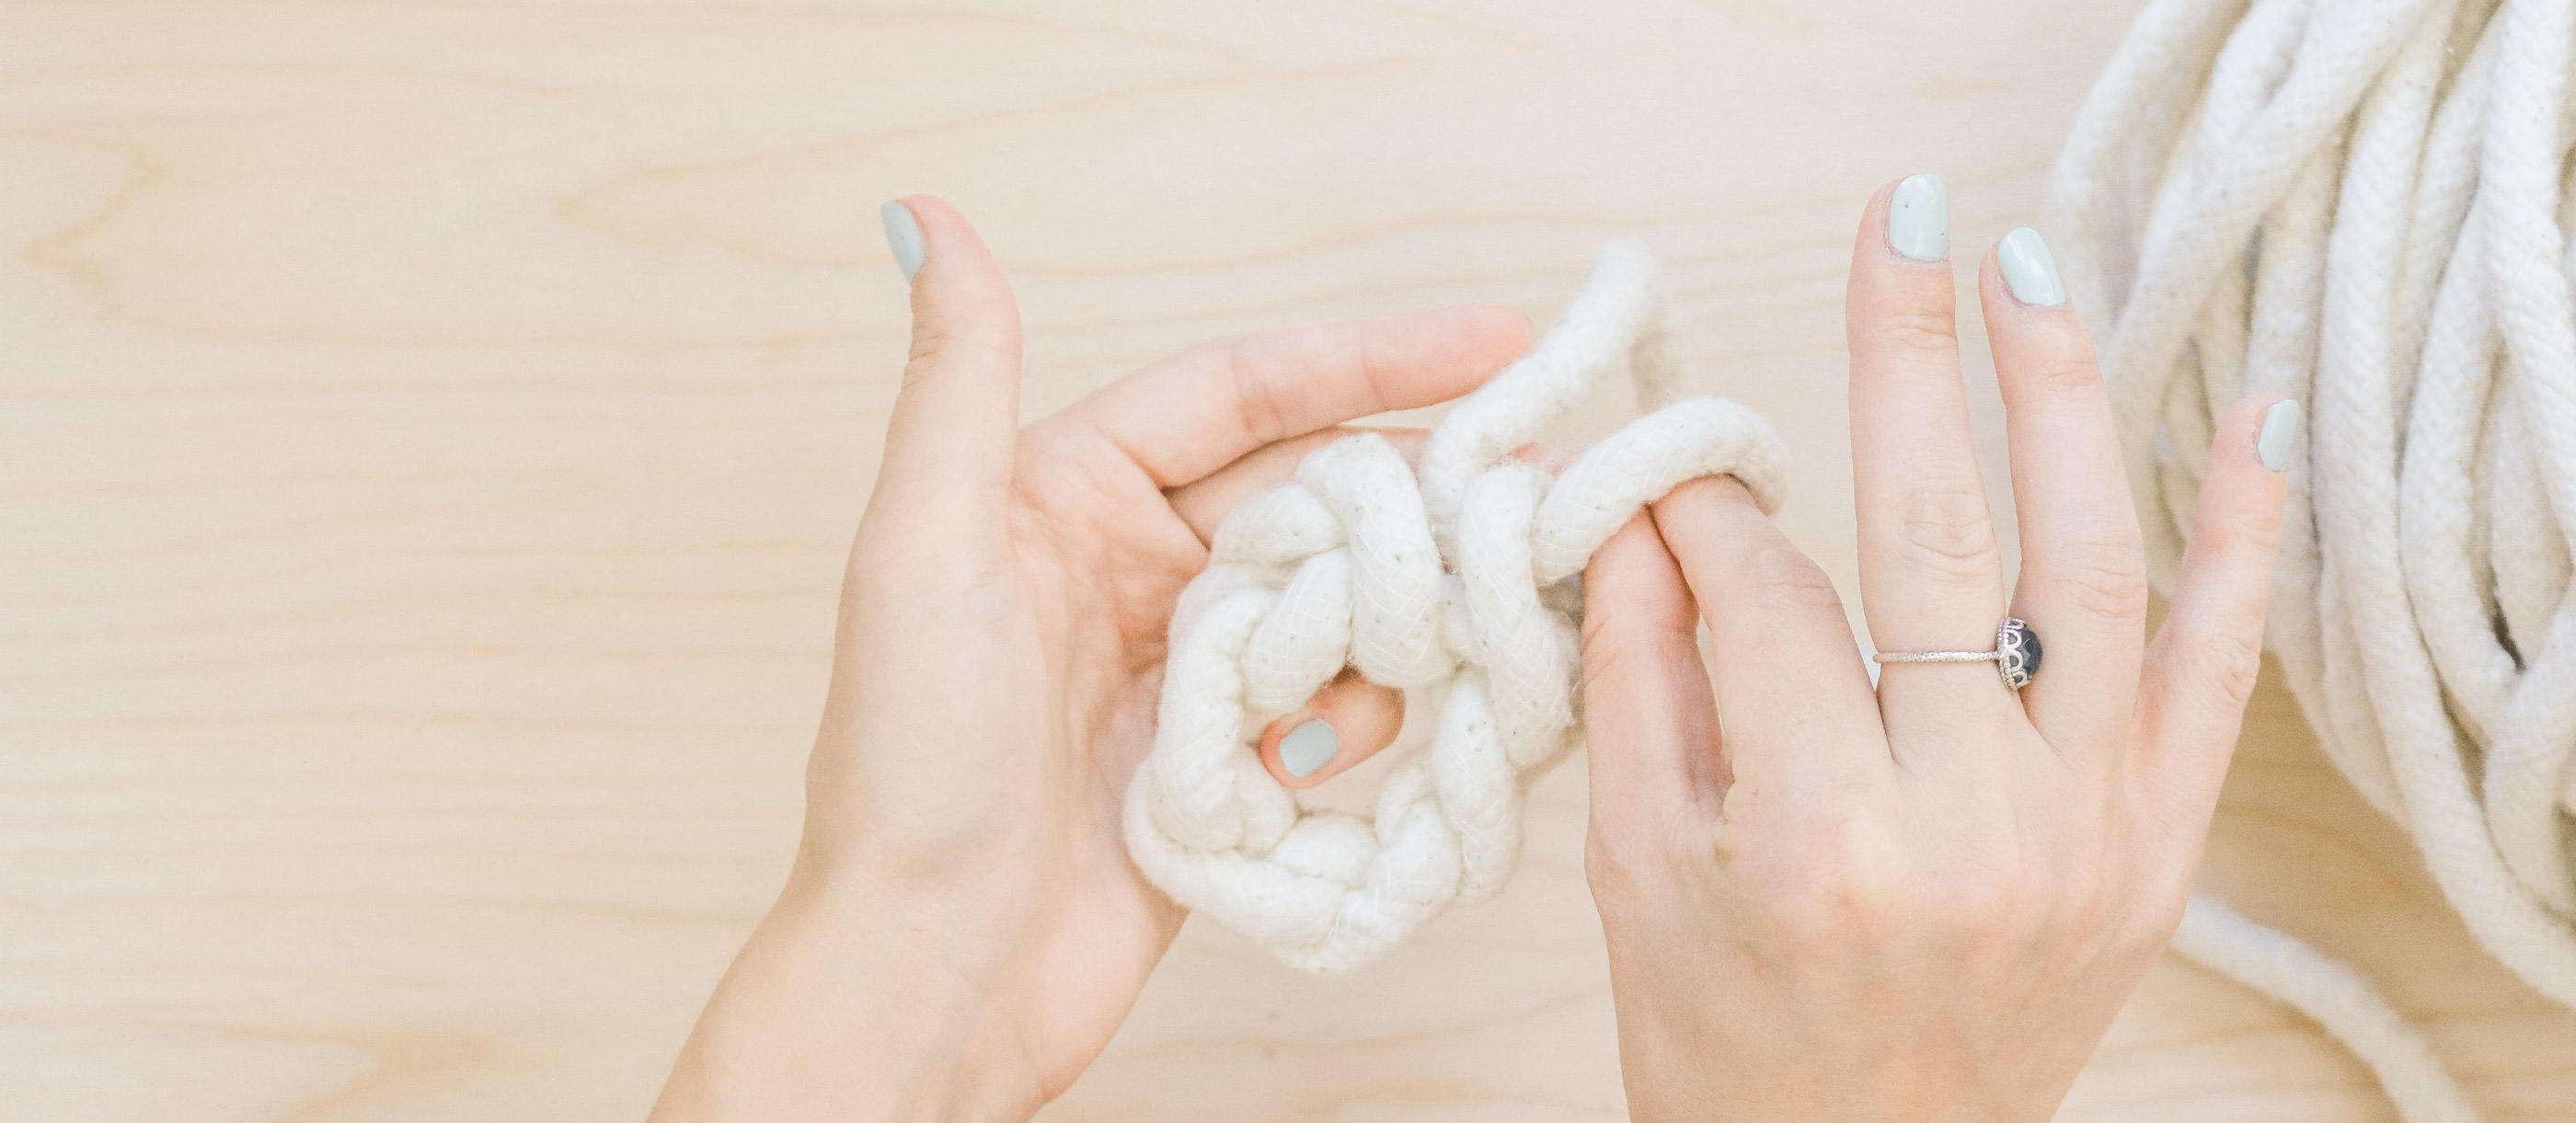
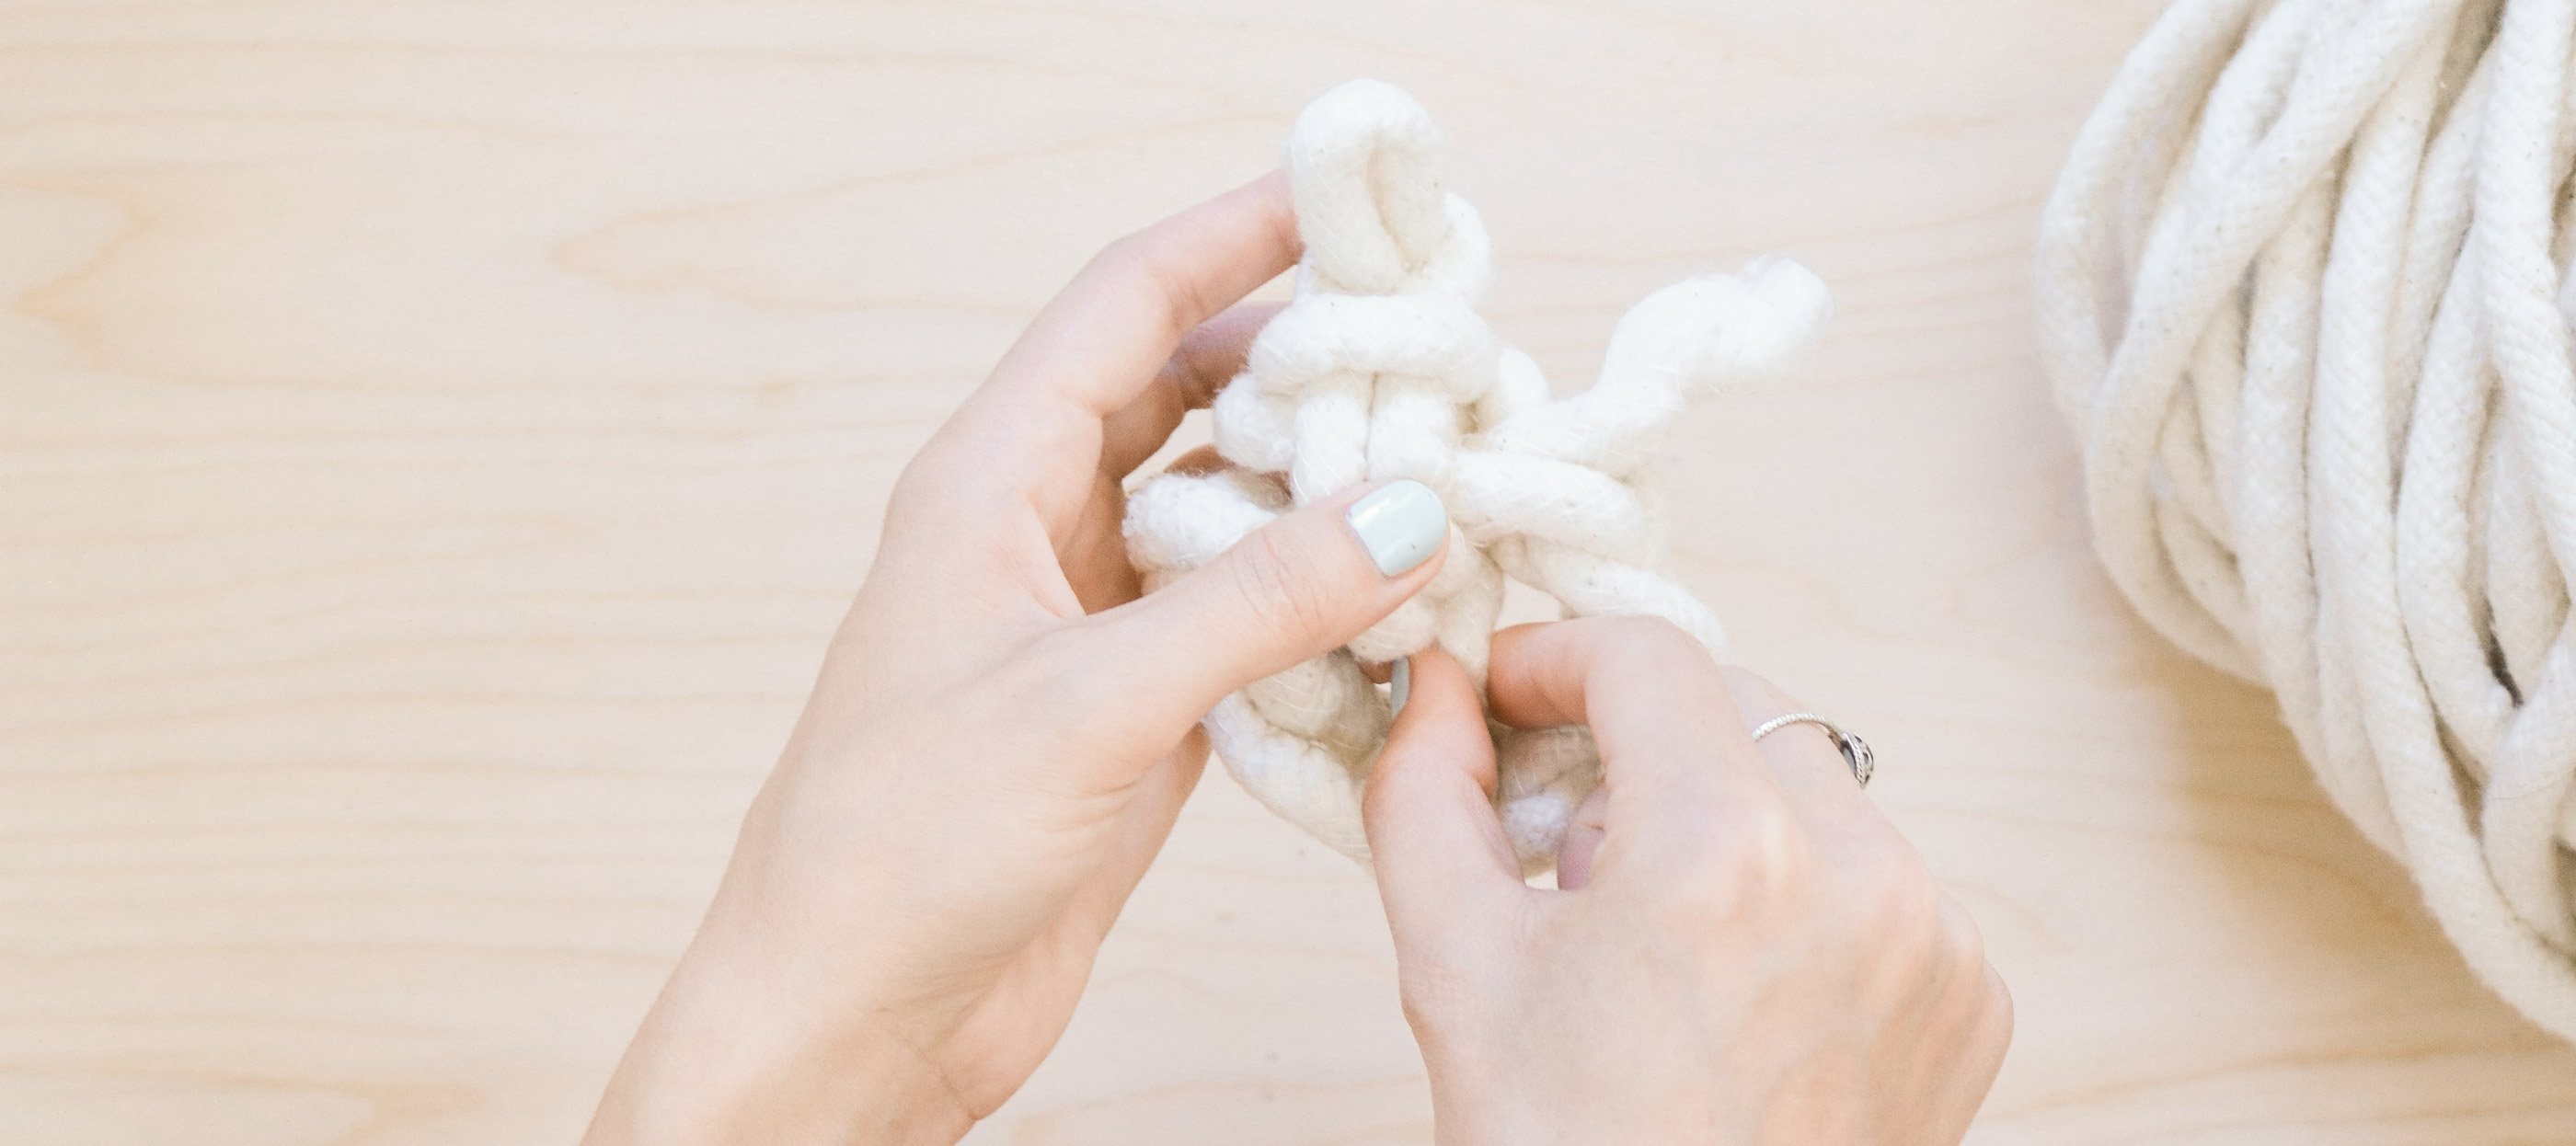
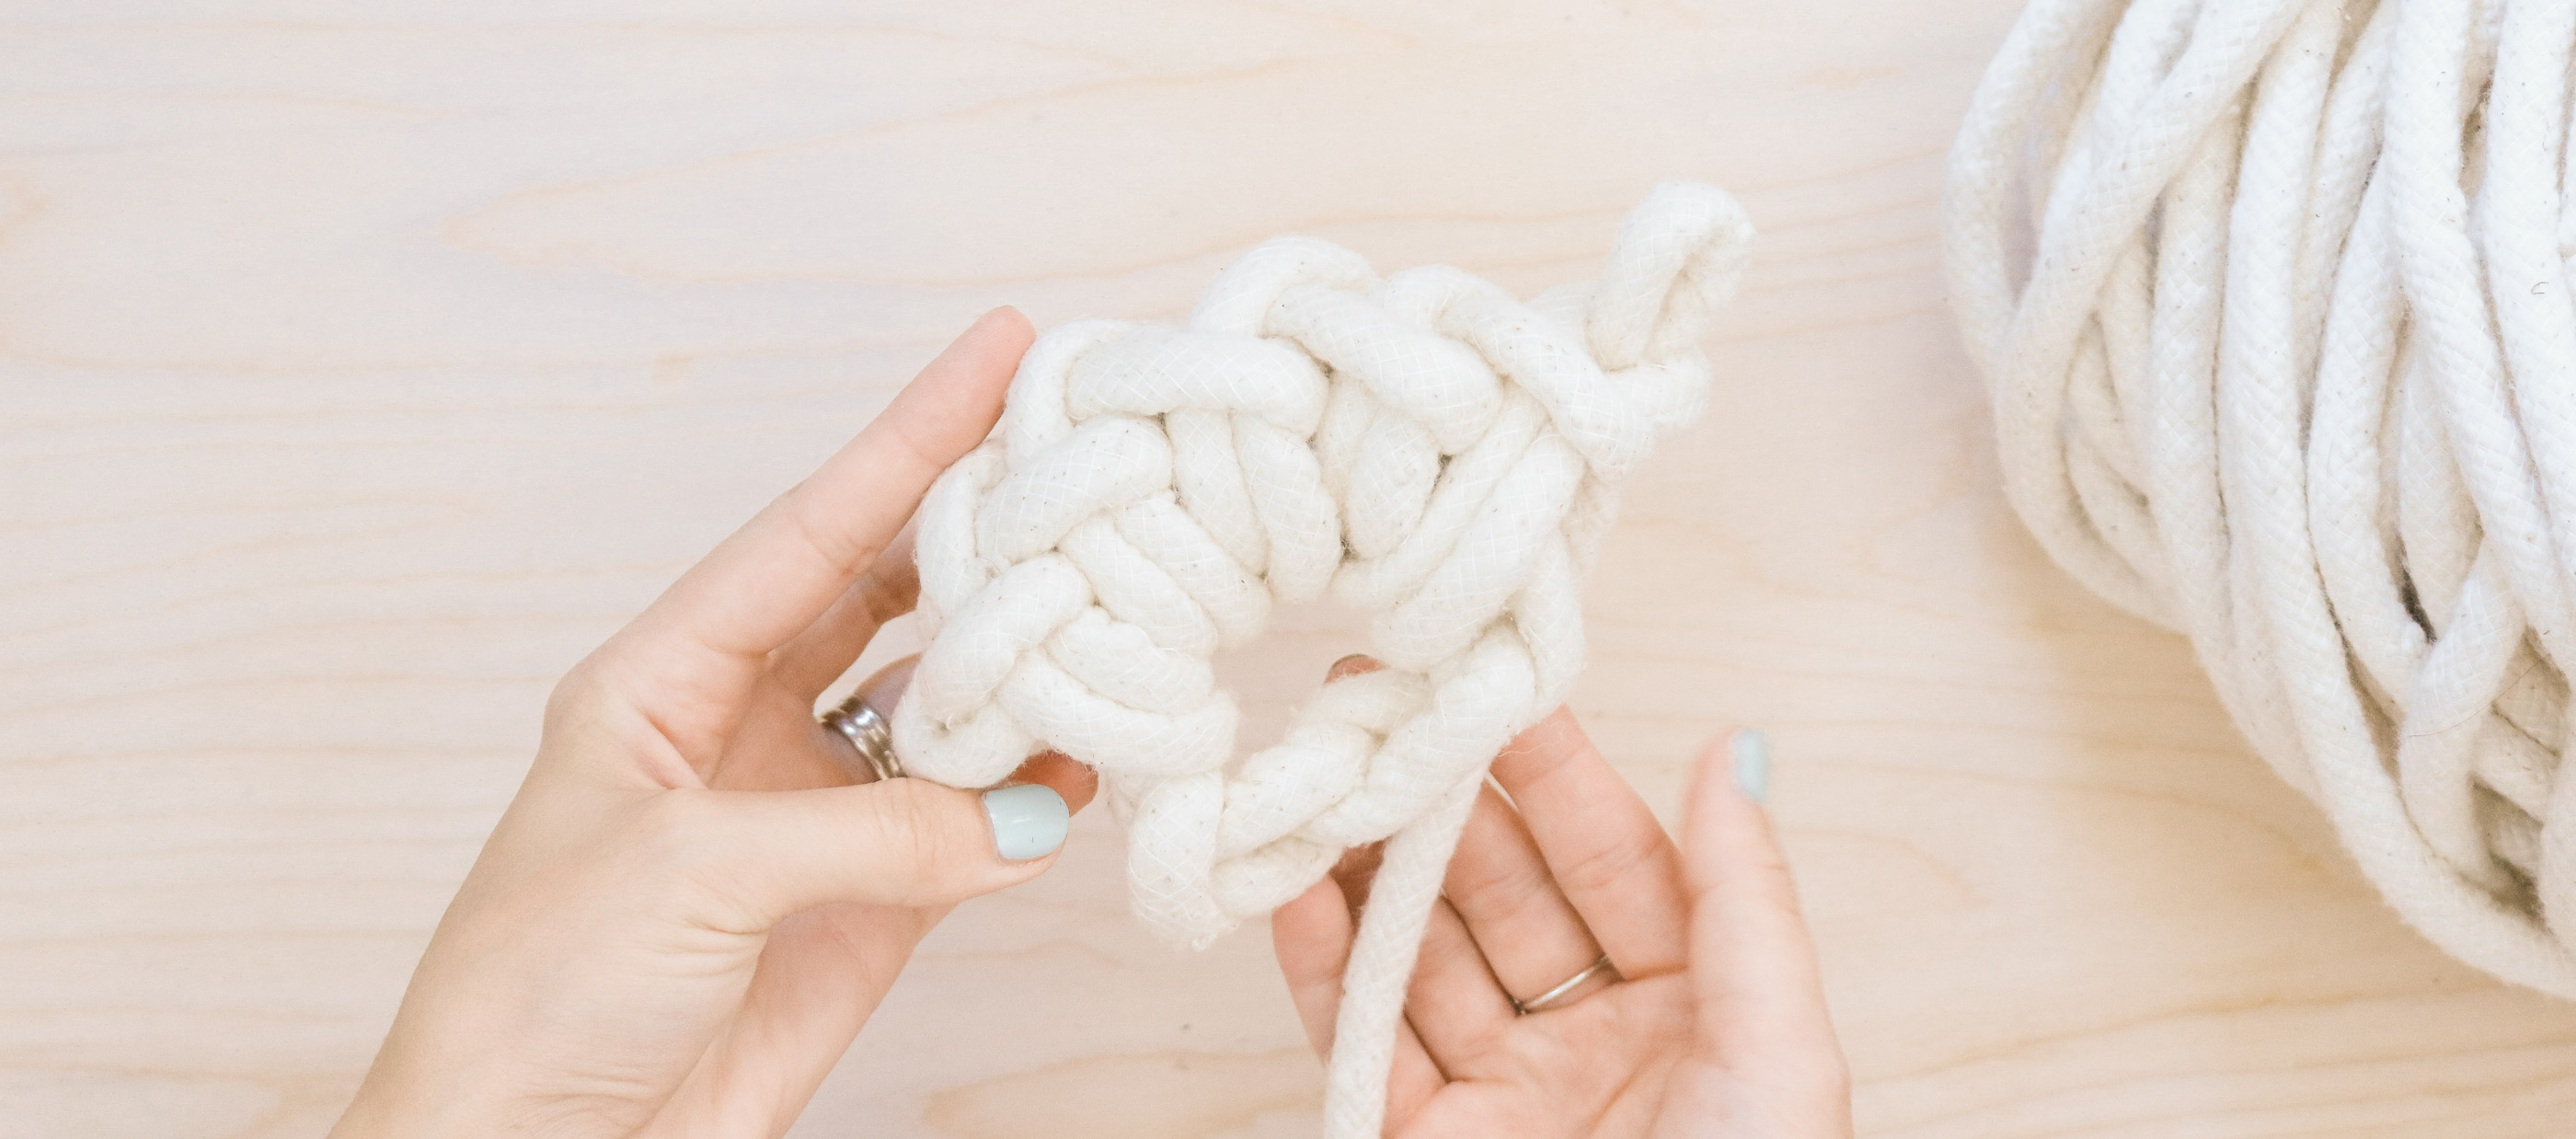
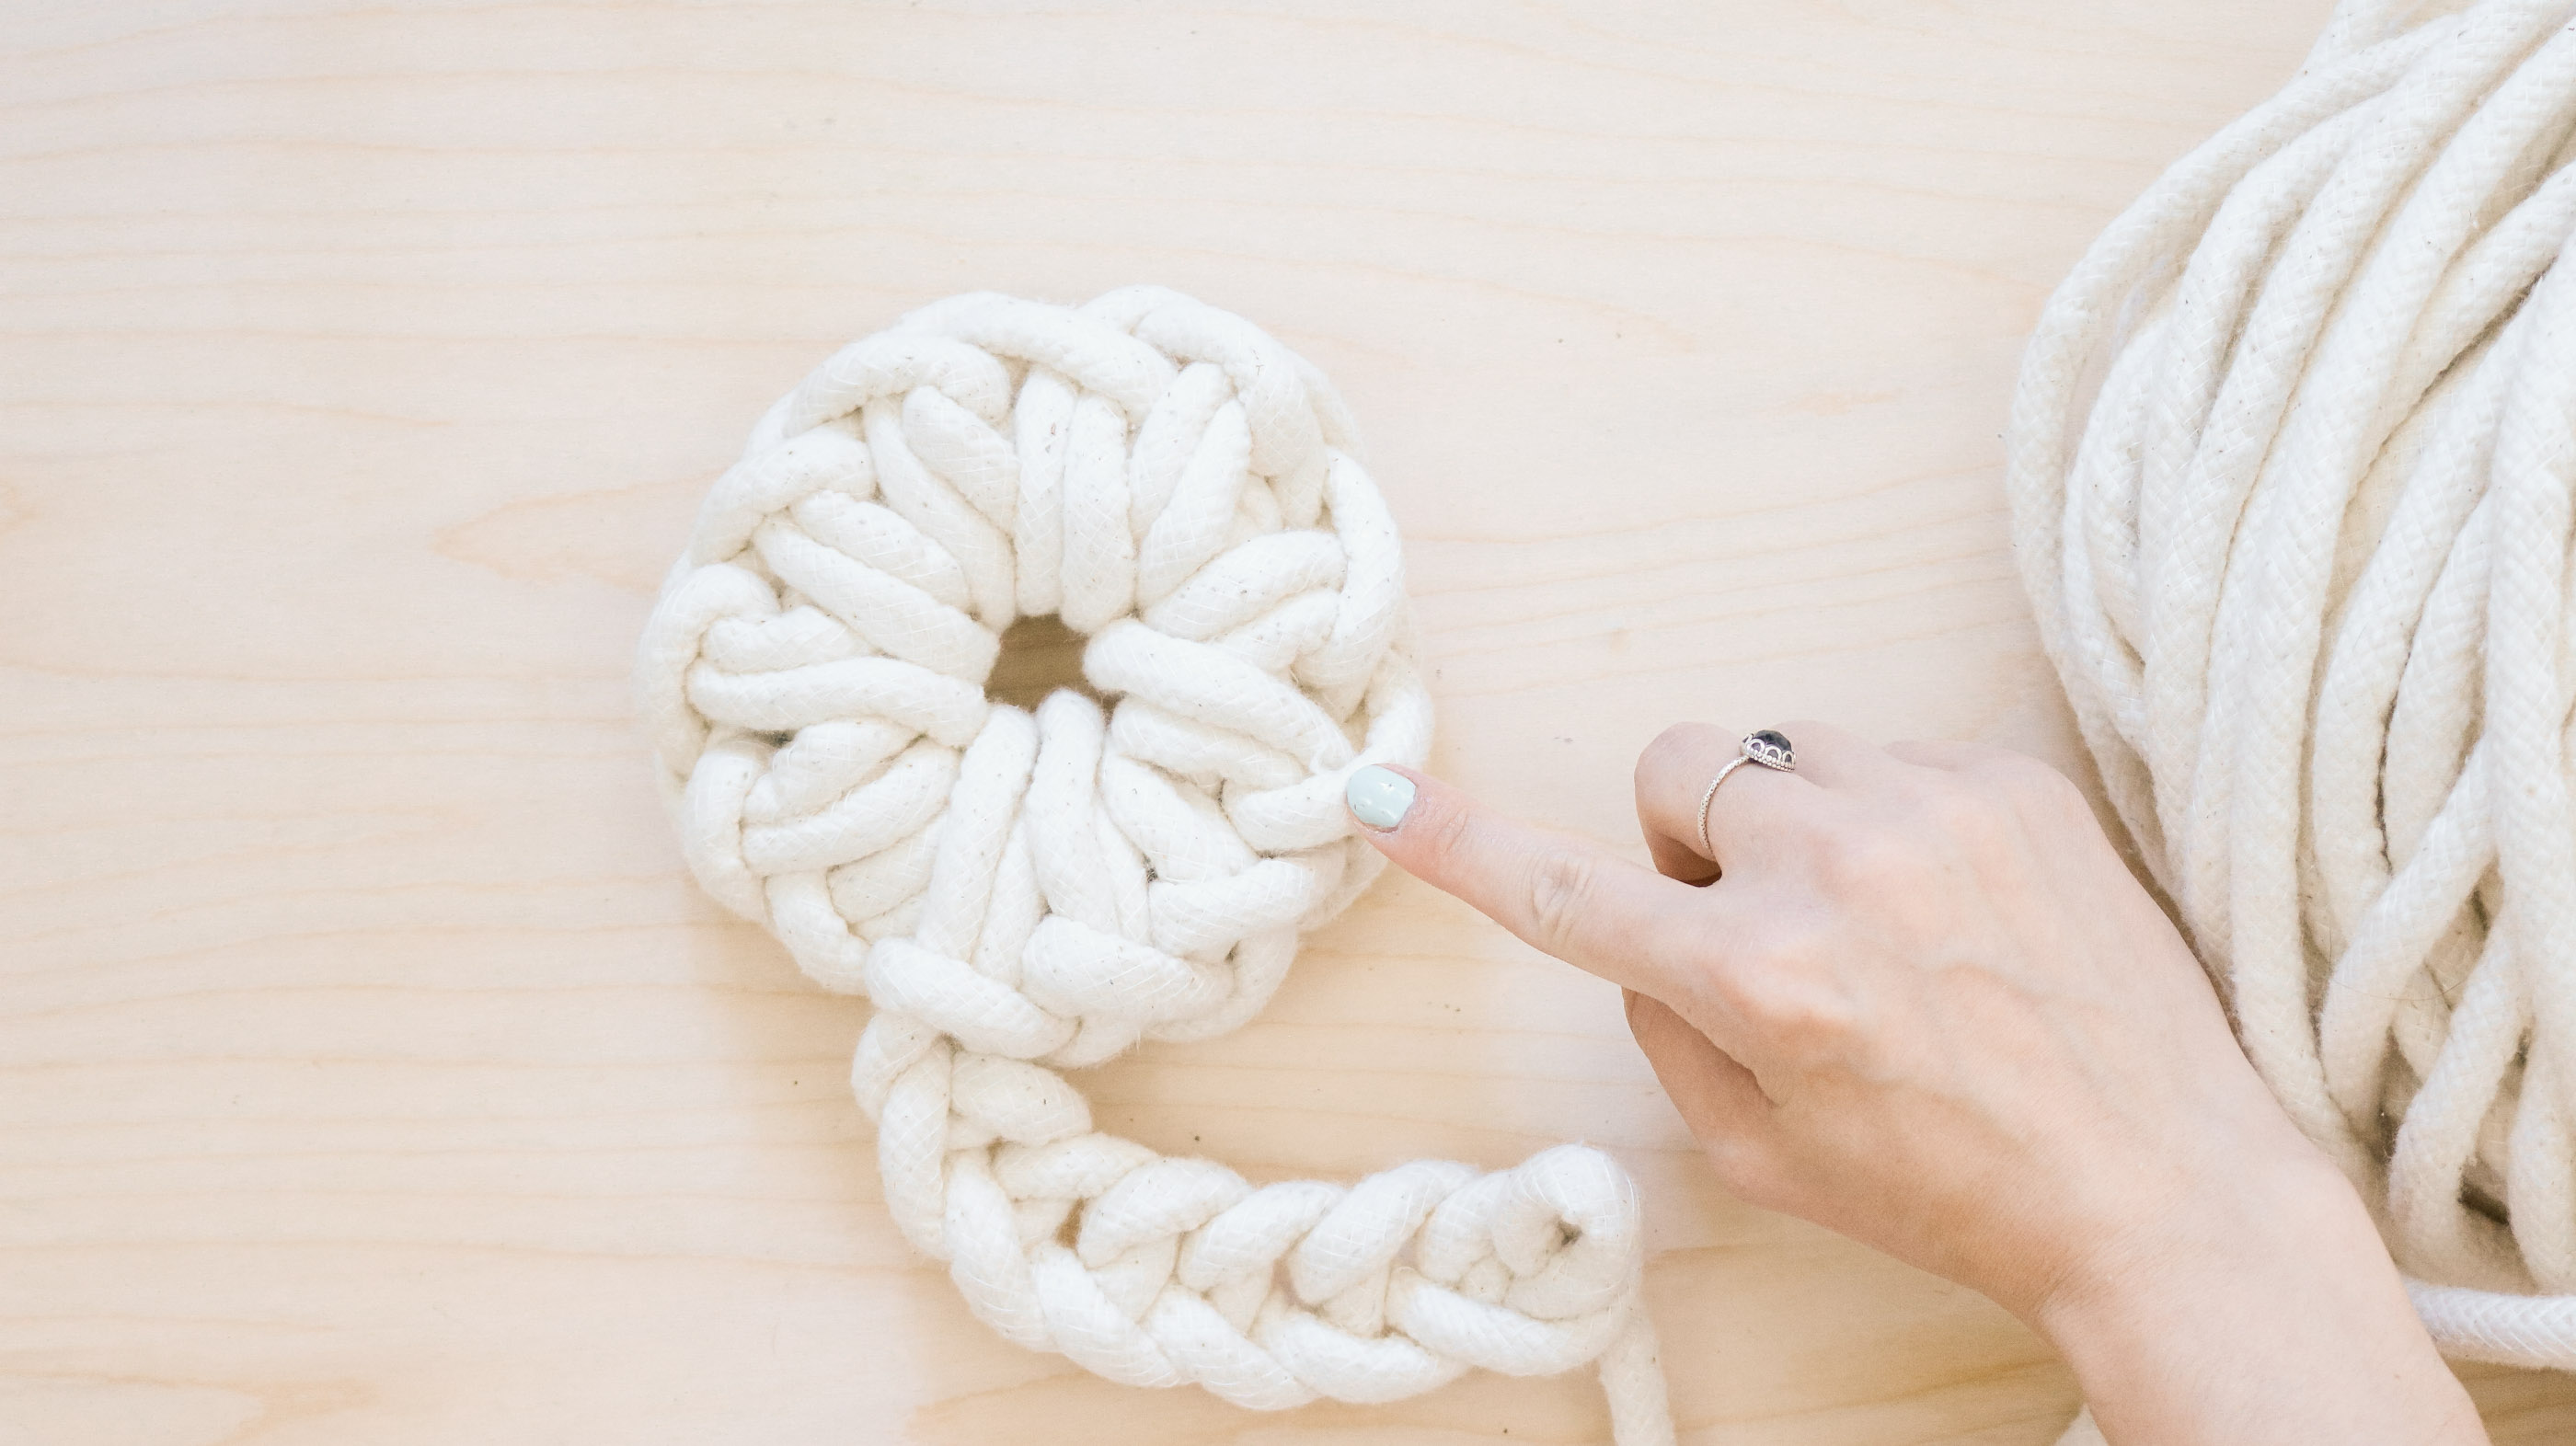
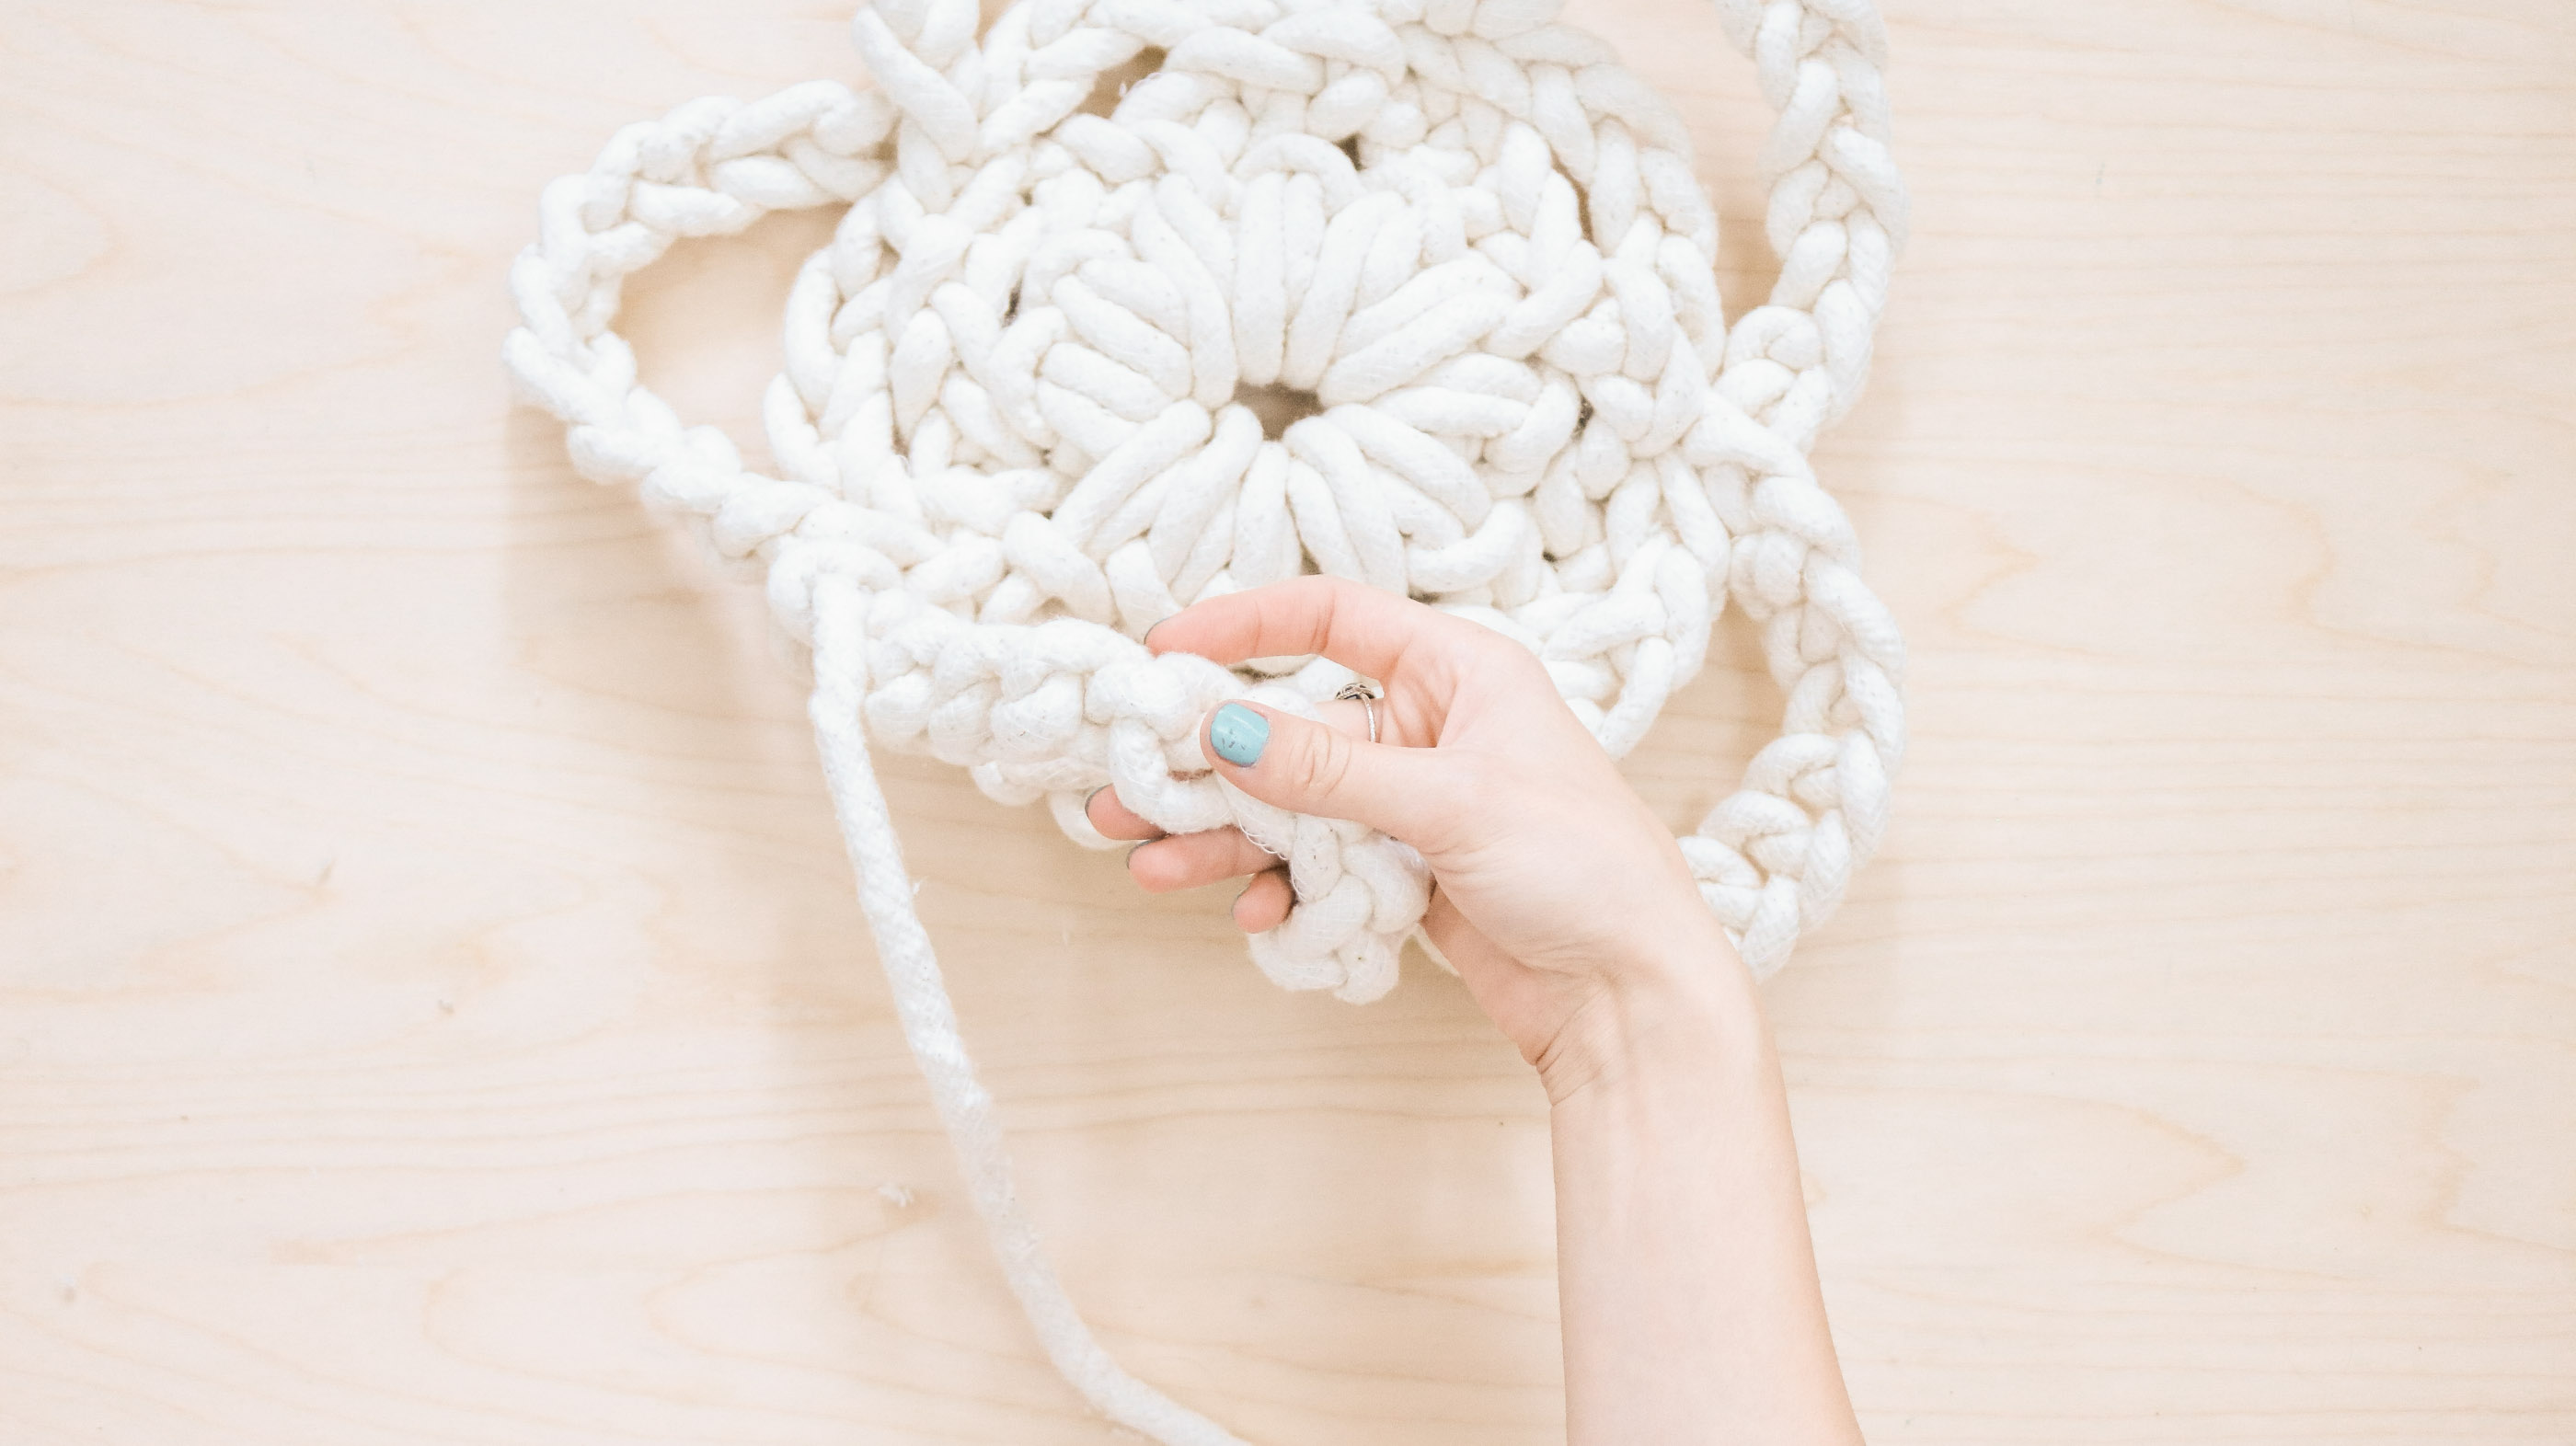
Step 4 – Completing the center of your rug!
Okay this part is a bit tricky and took me a few tries to get but I like to think of it as wrapping a rubber band or hair tie around the round braid. For this step you need to make sure your rope is under your circle. Stick your hand through the center of your circle and pull out a new loop. (since this part is tricky I’ll caption the photos with their own steps. )
Step 1 – Pull a loop from the bottom

Step 2 – New loop goes through old loop!
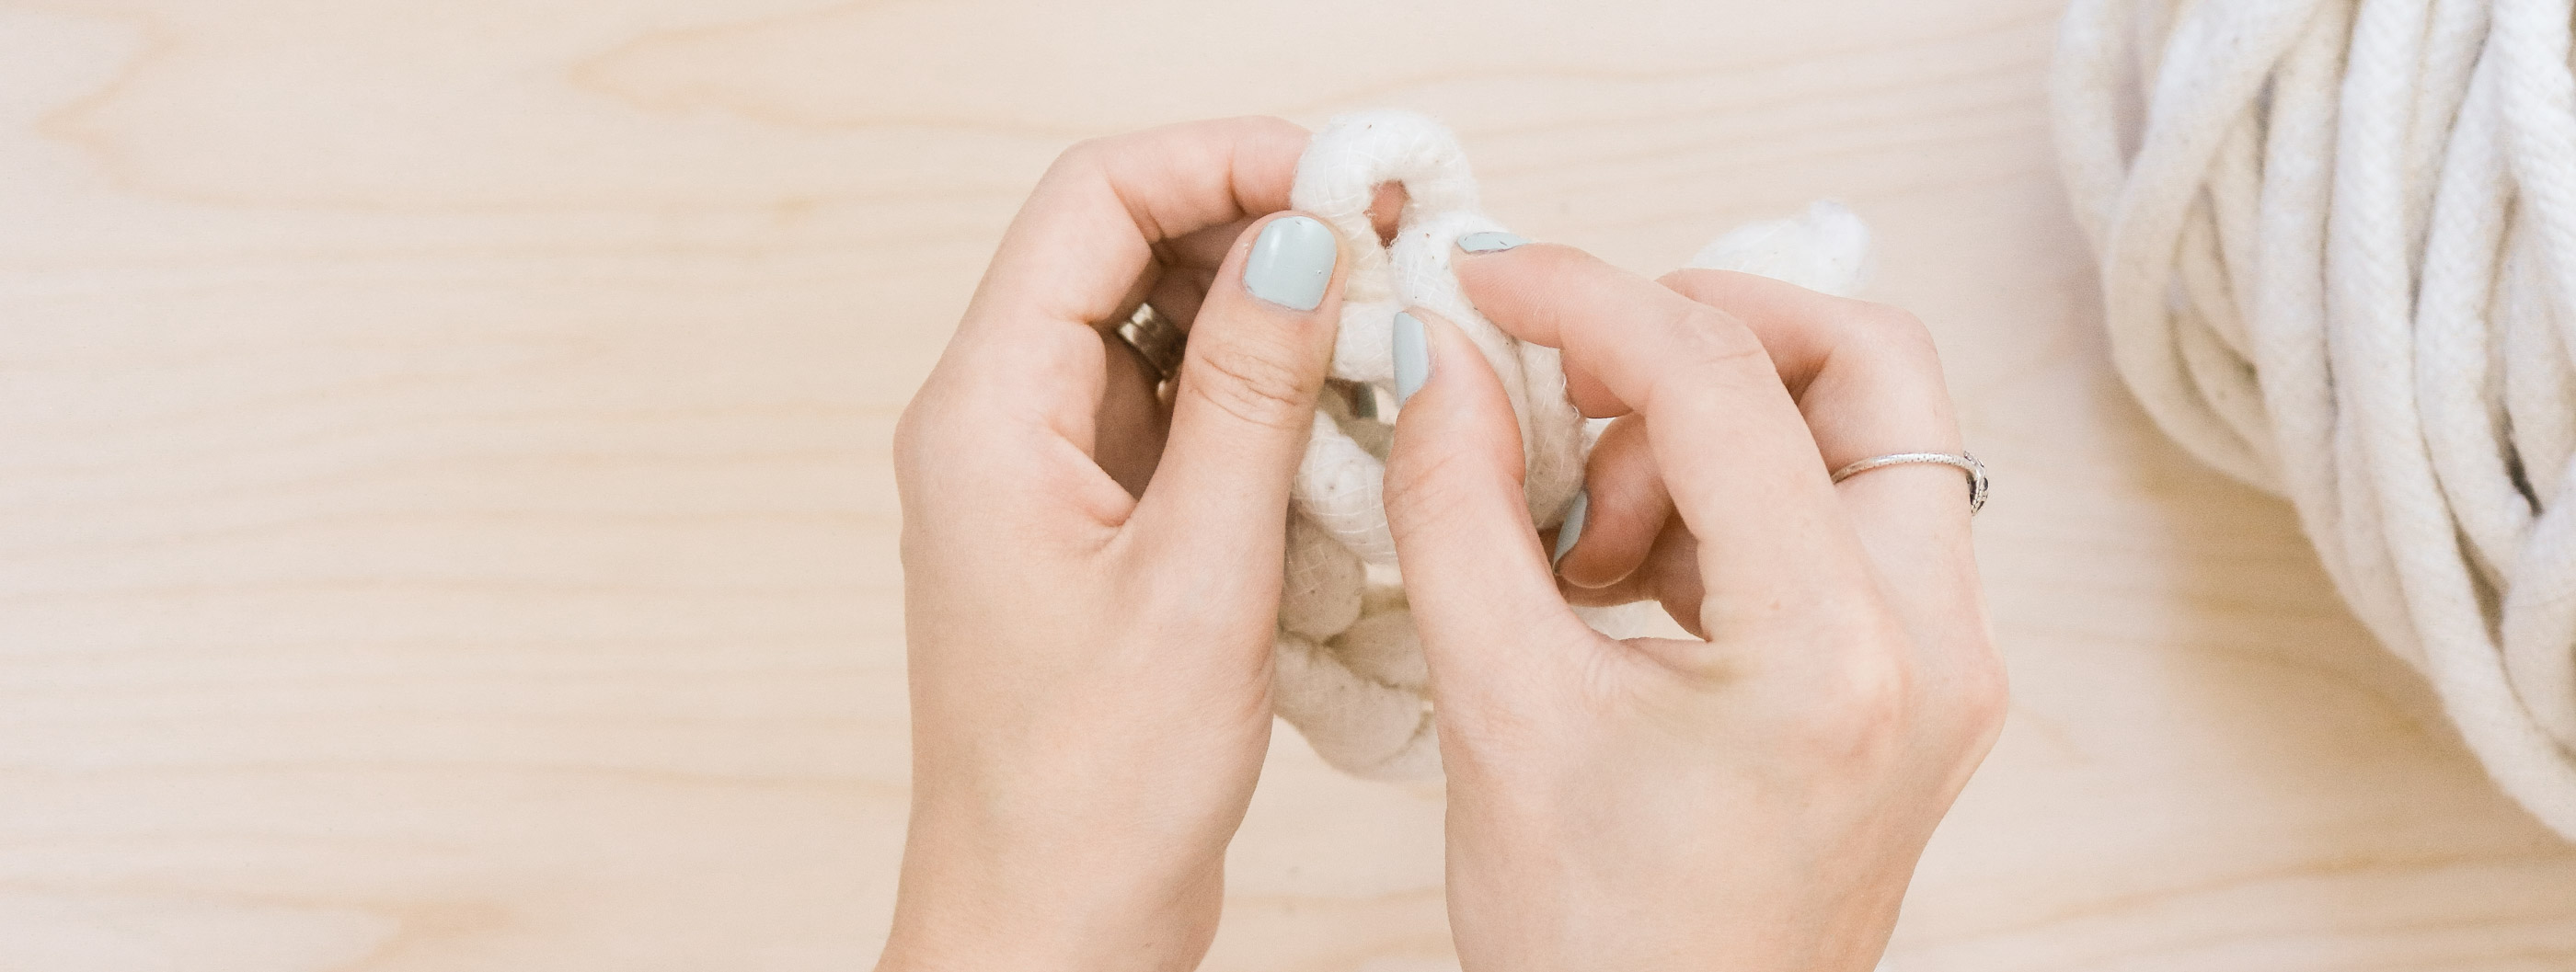
Step 2 – Photo showing me sticking my new loop through the old loop.
I tried to keep my loops as tight as possible.
Okay at this point you should have one loop sticking out from the edge of your circle and cording in the center of your circle. Take the cording wrap it under and around your braid and create a new loop to go into the previous loop you made.
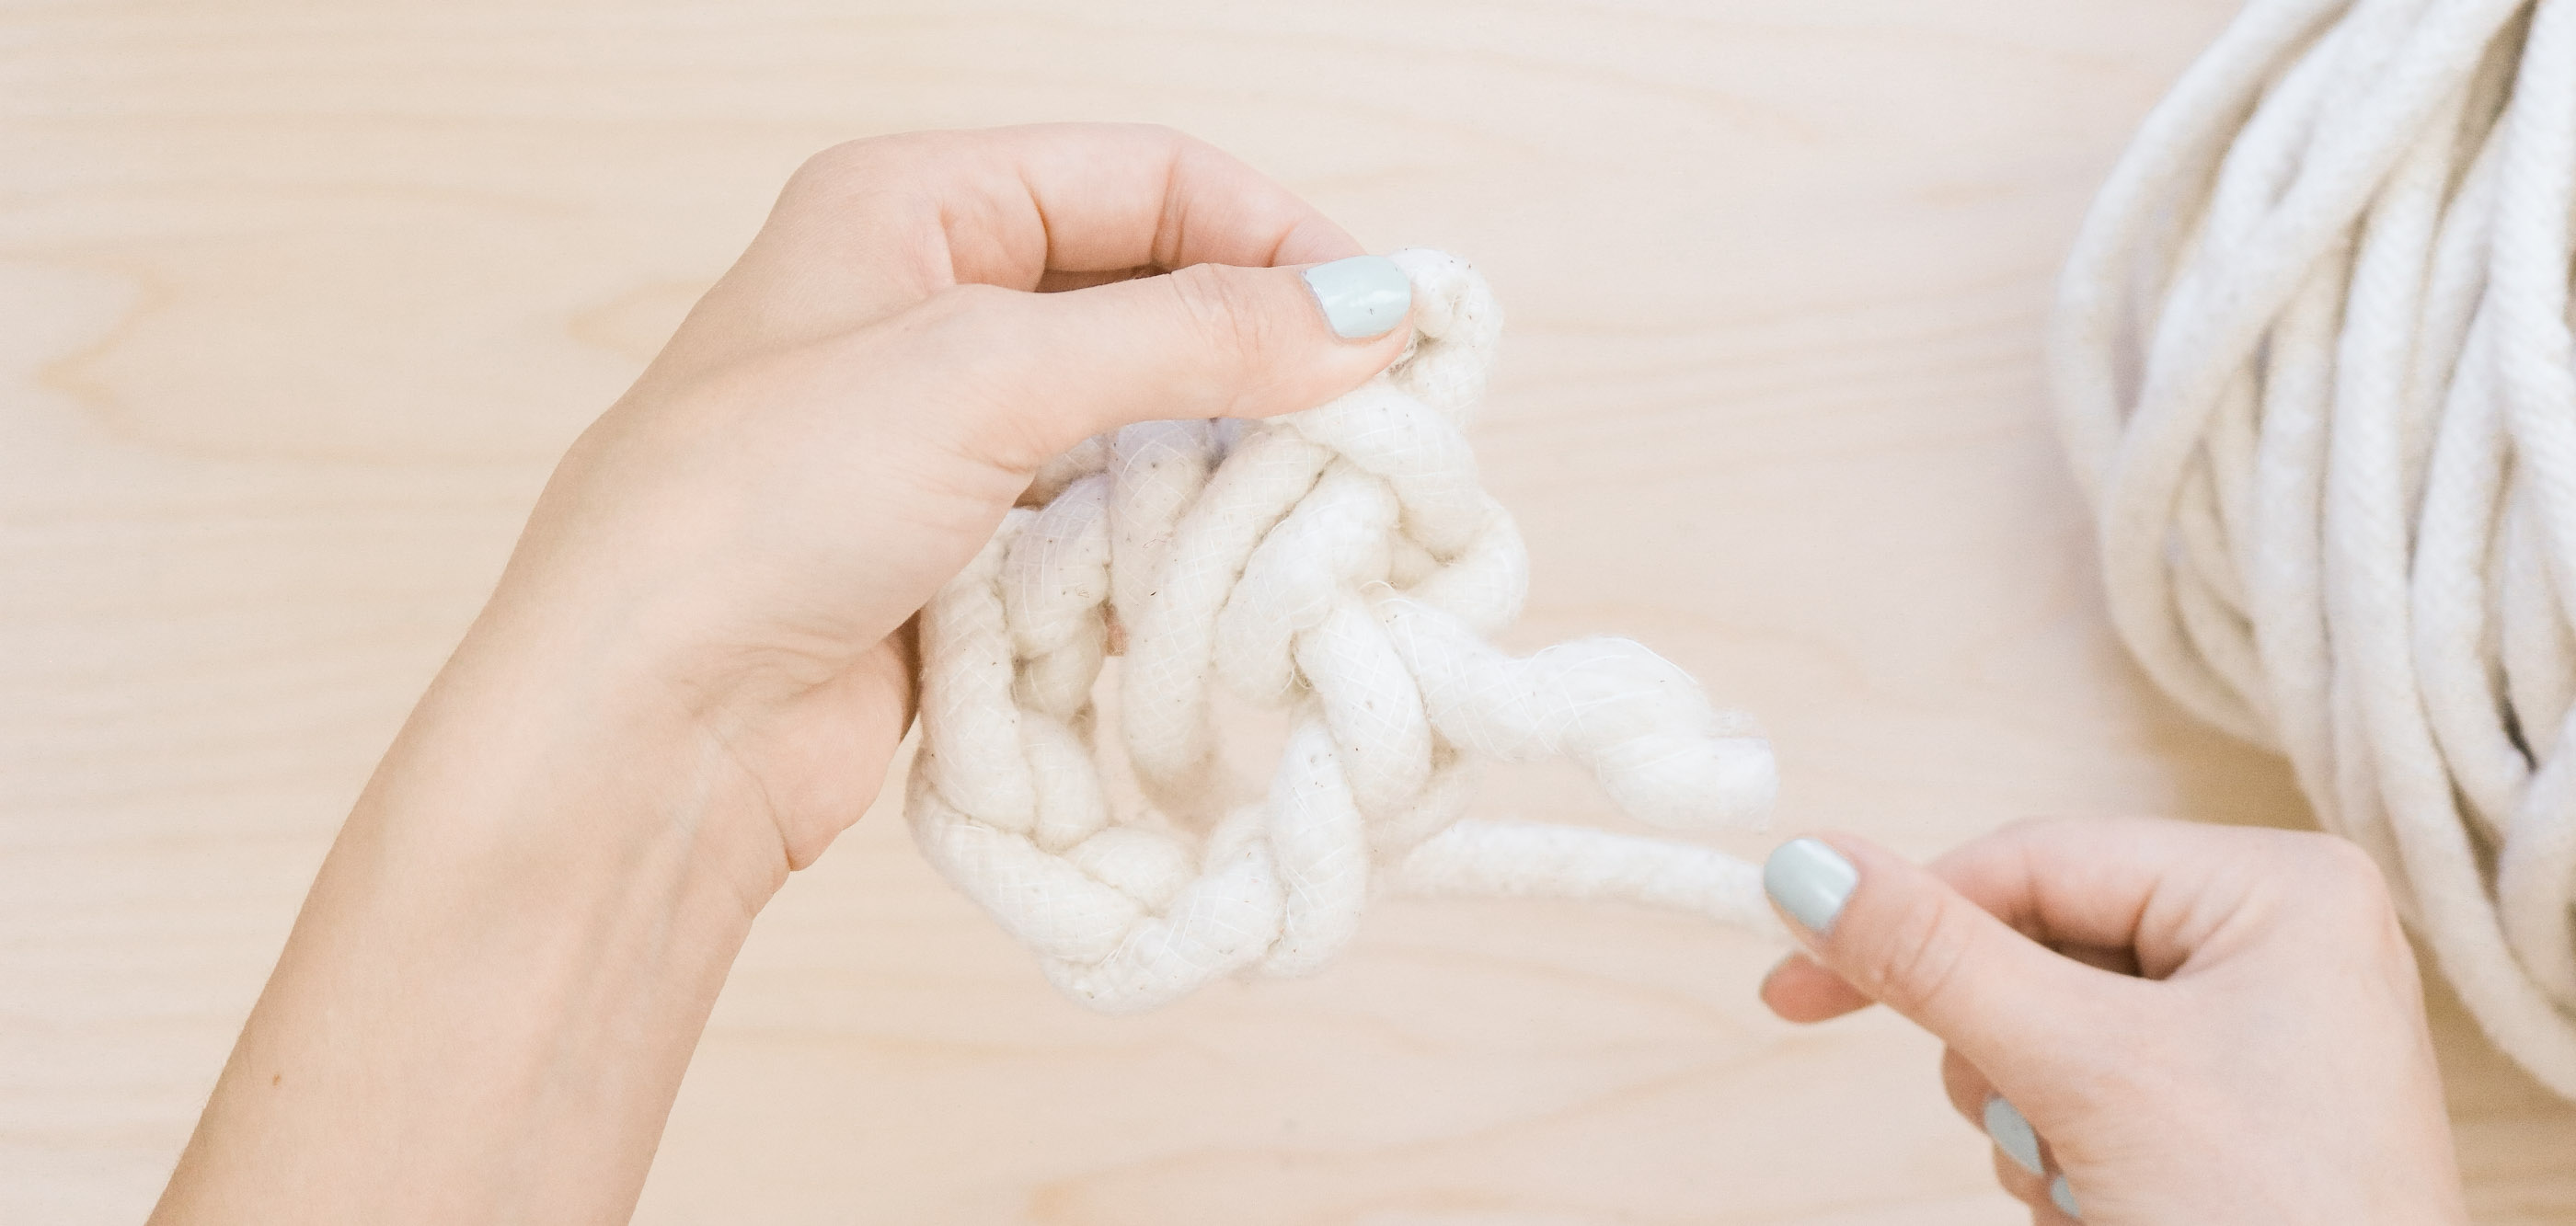
Step 3 – wrapping the cording under and around.
Step 4 – Creating a new loop to go in the previous one.
Step 5 – Inserting my new loop through the old one.
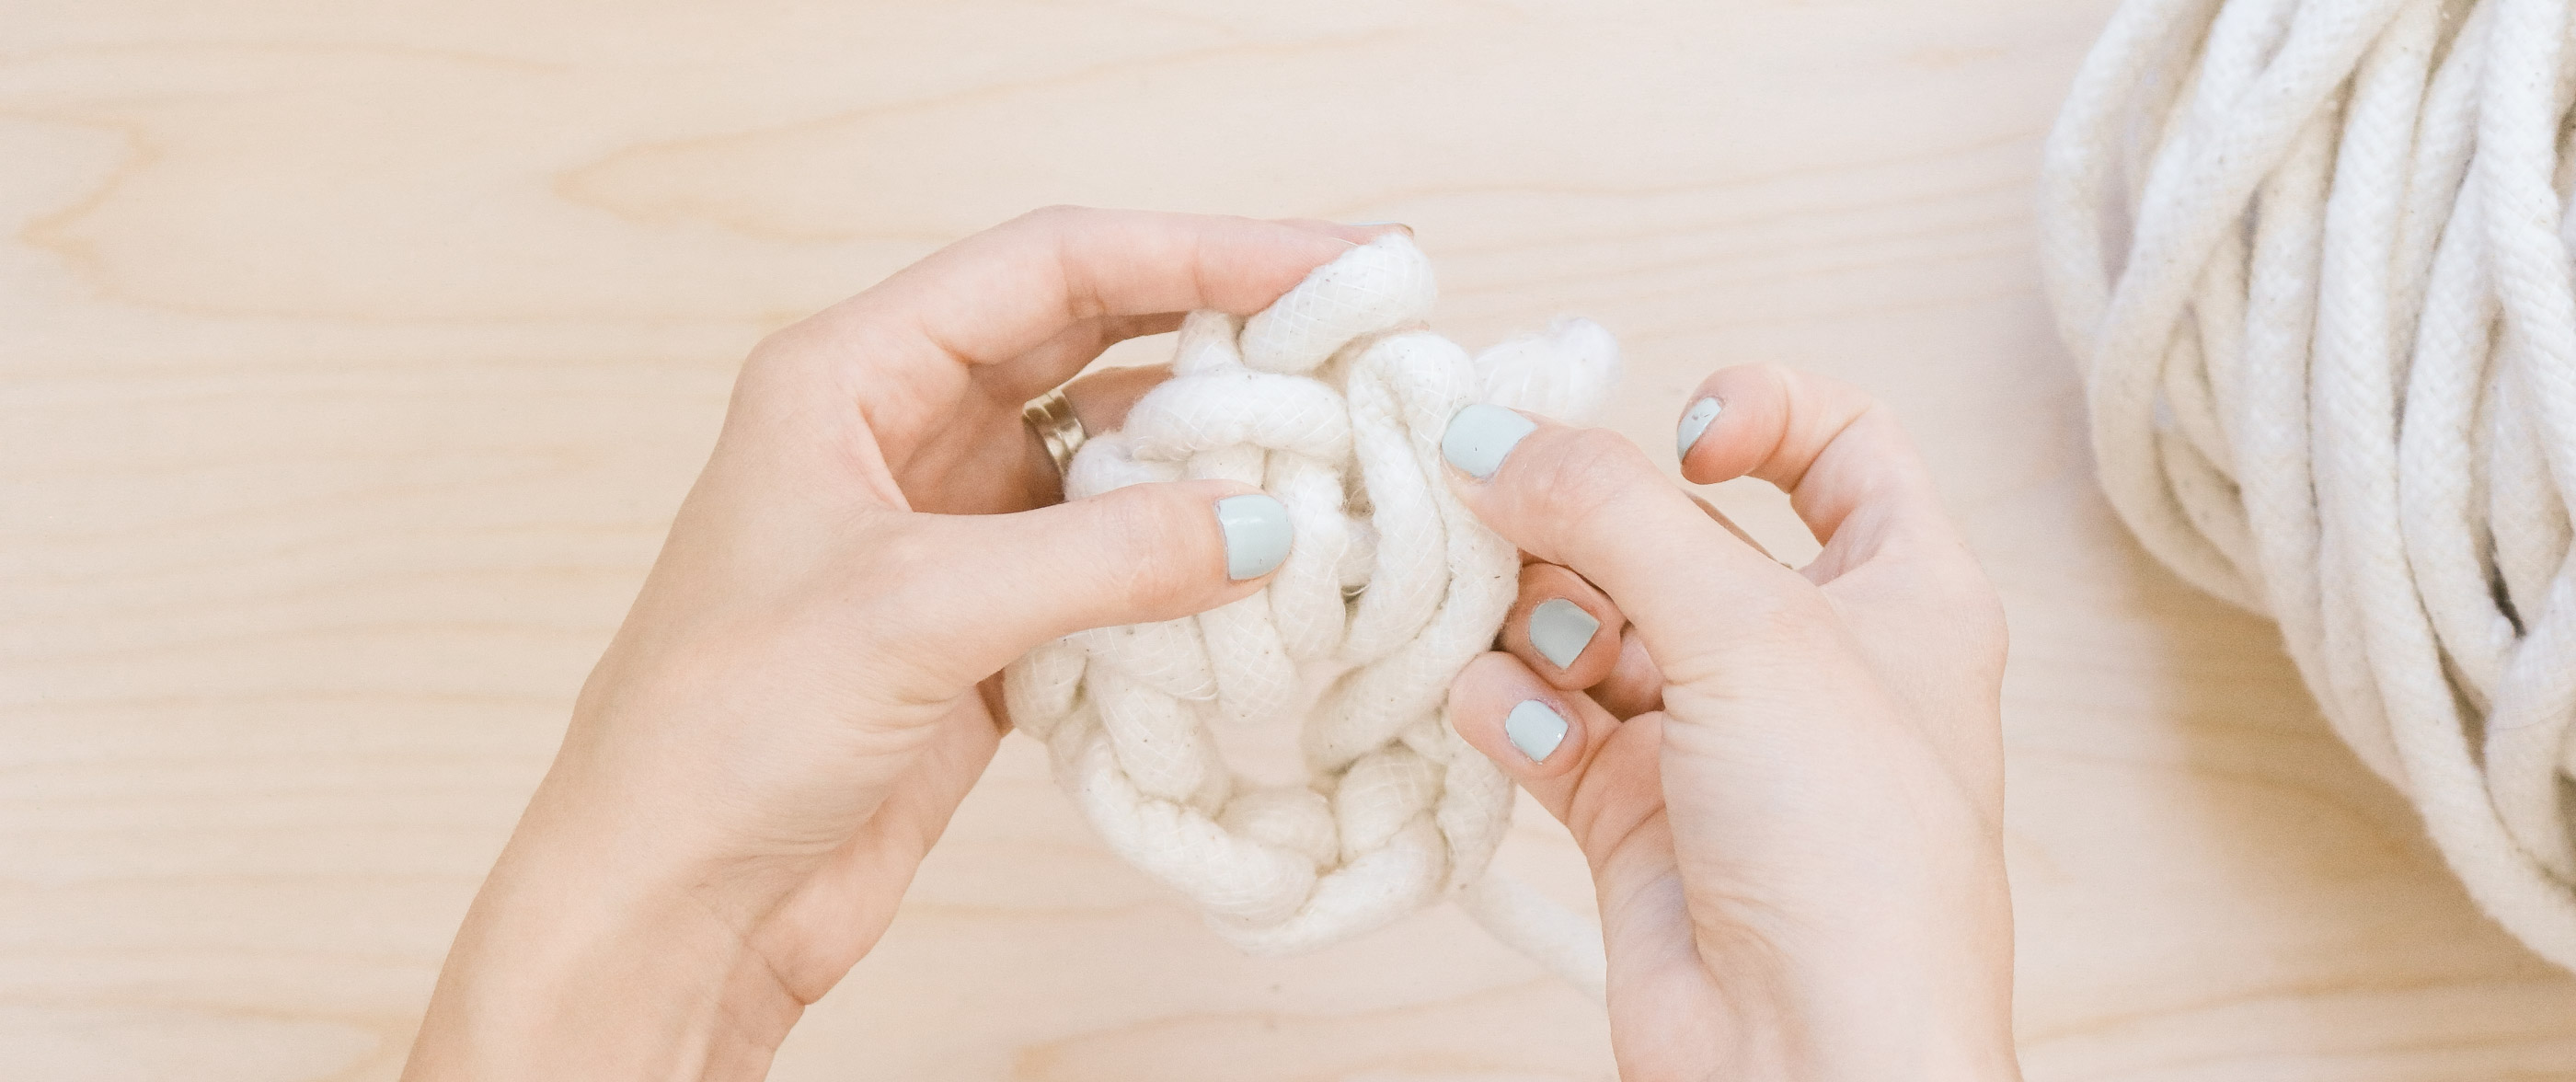
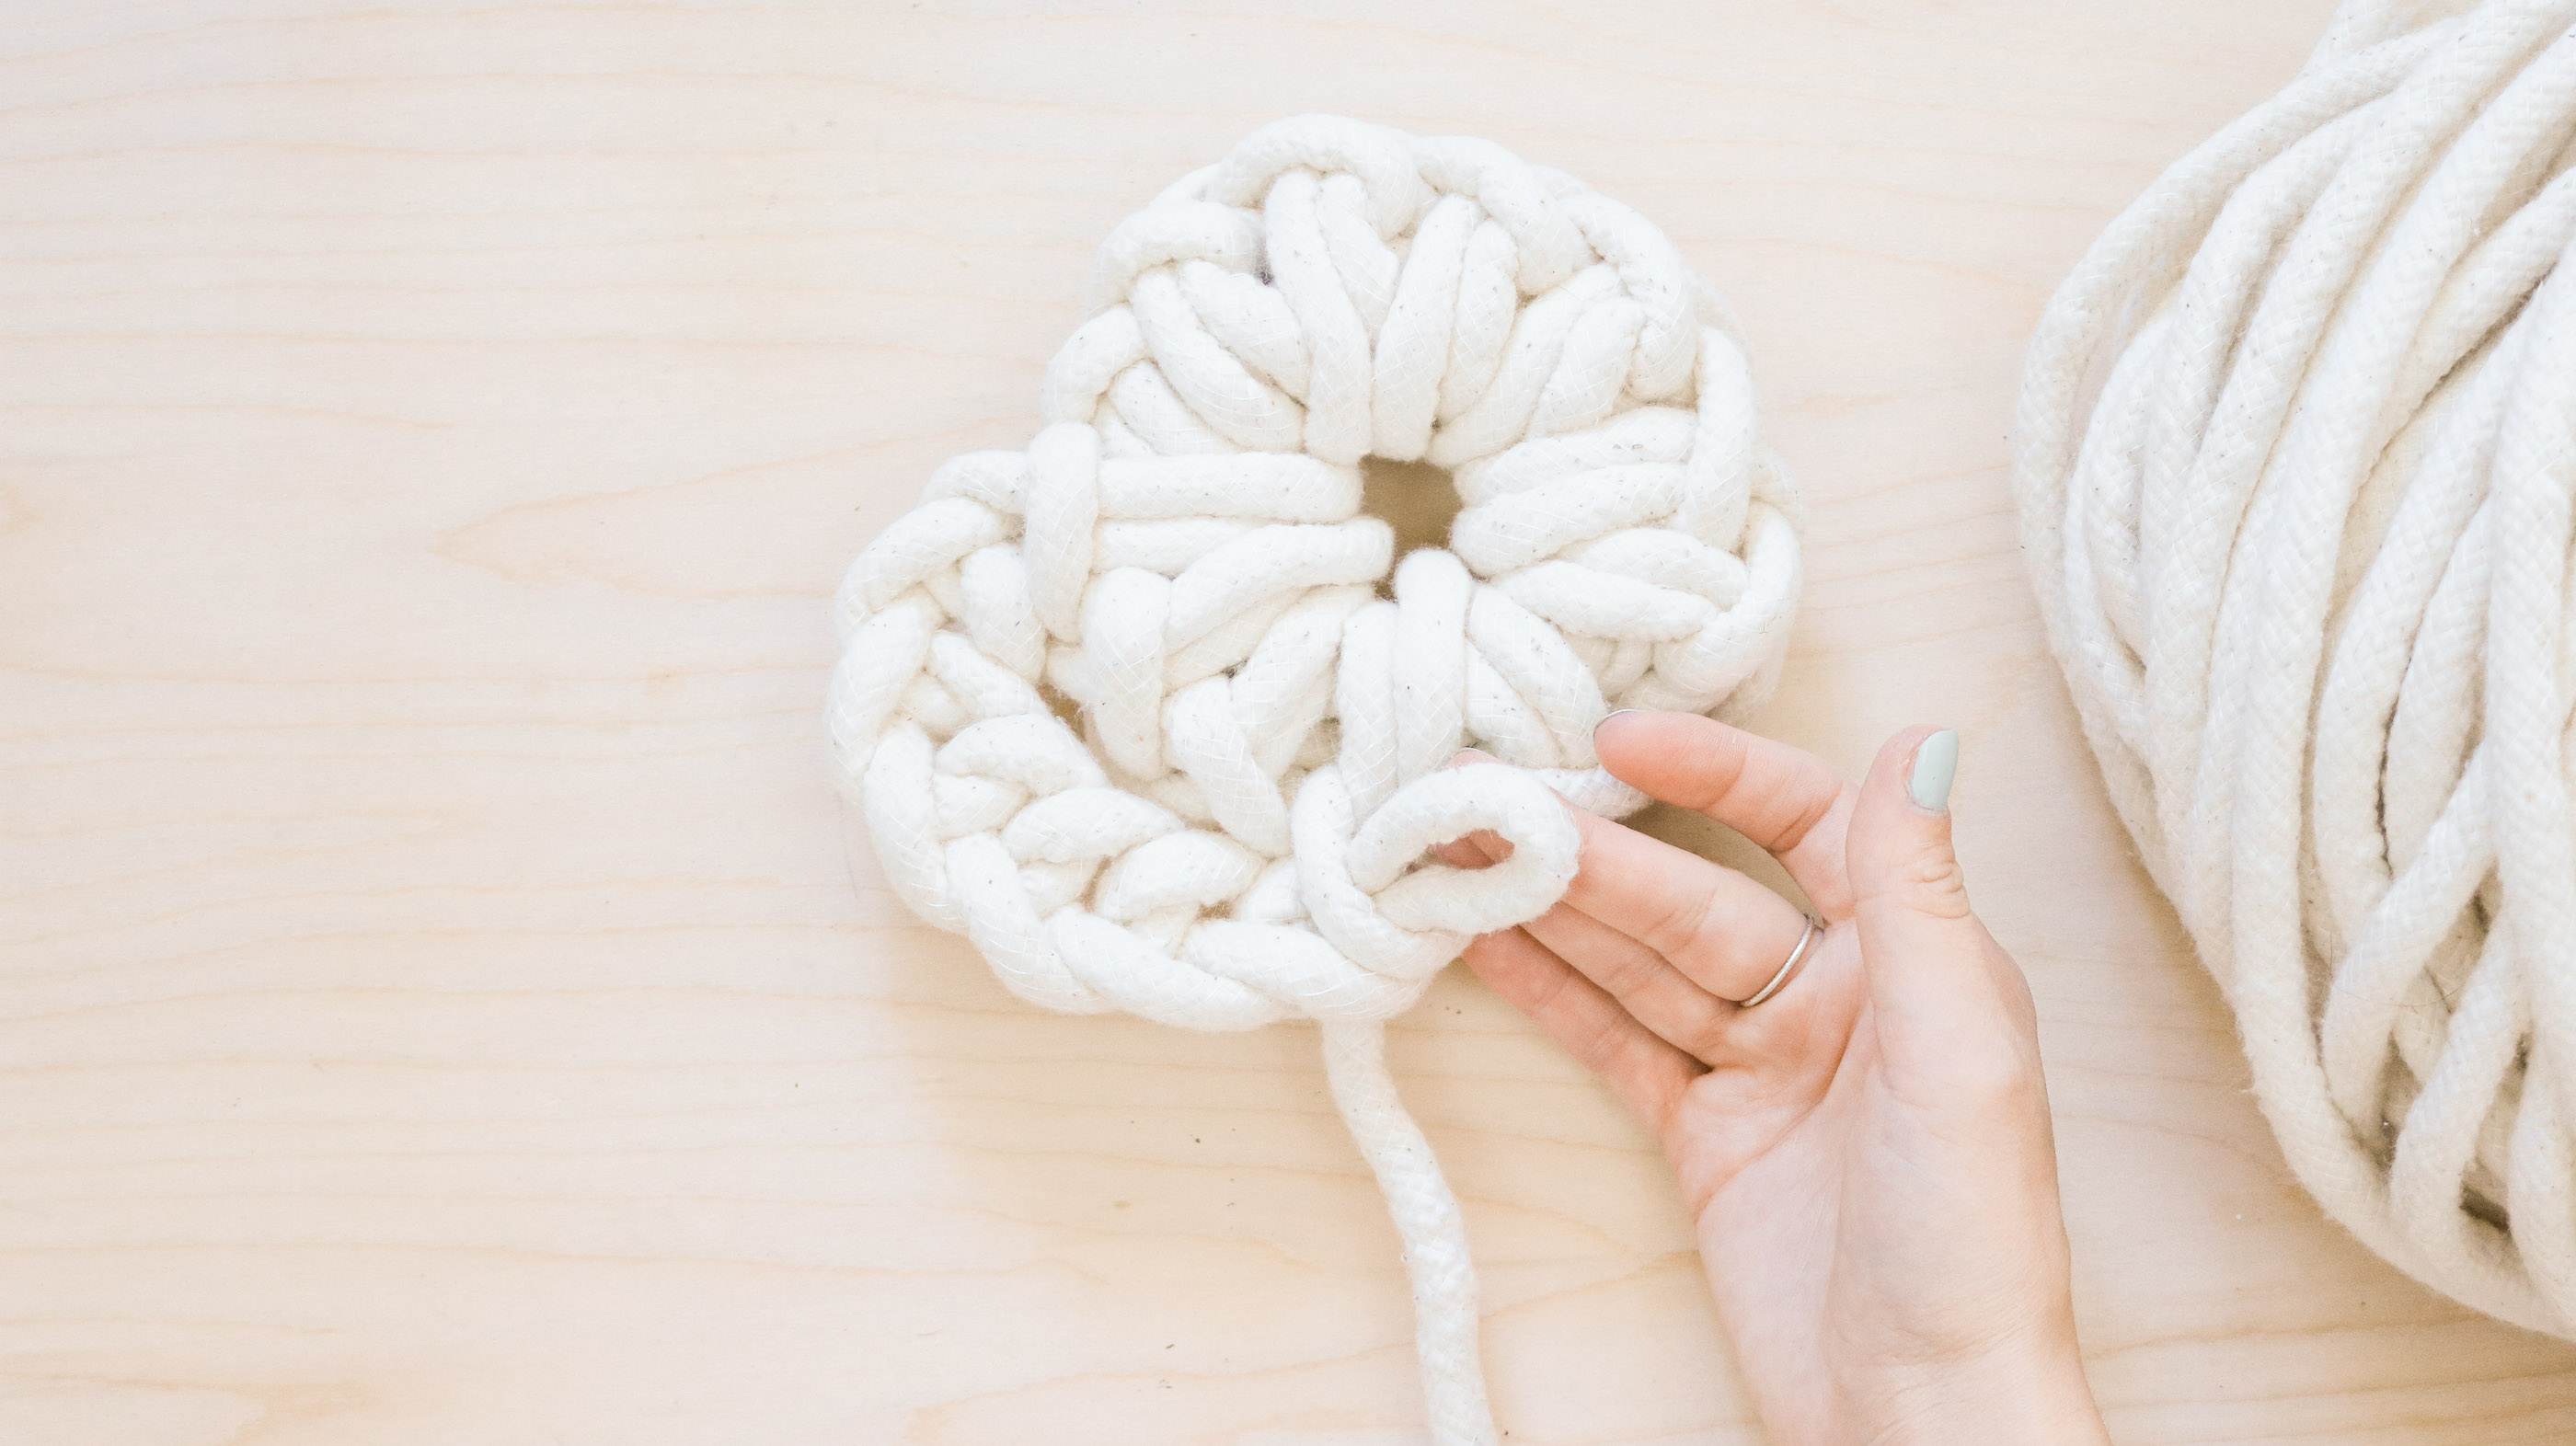
If you’ve got the hang of this than the rest of the rest should be super easy because it’s simply repeating the steps. Keep in mind you should always have a loop on the outer edge of your circle. Keep repeating steps 1-5 (photo caption steps) to go all the way around your braided circle to complete the center of your rug.
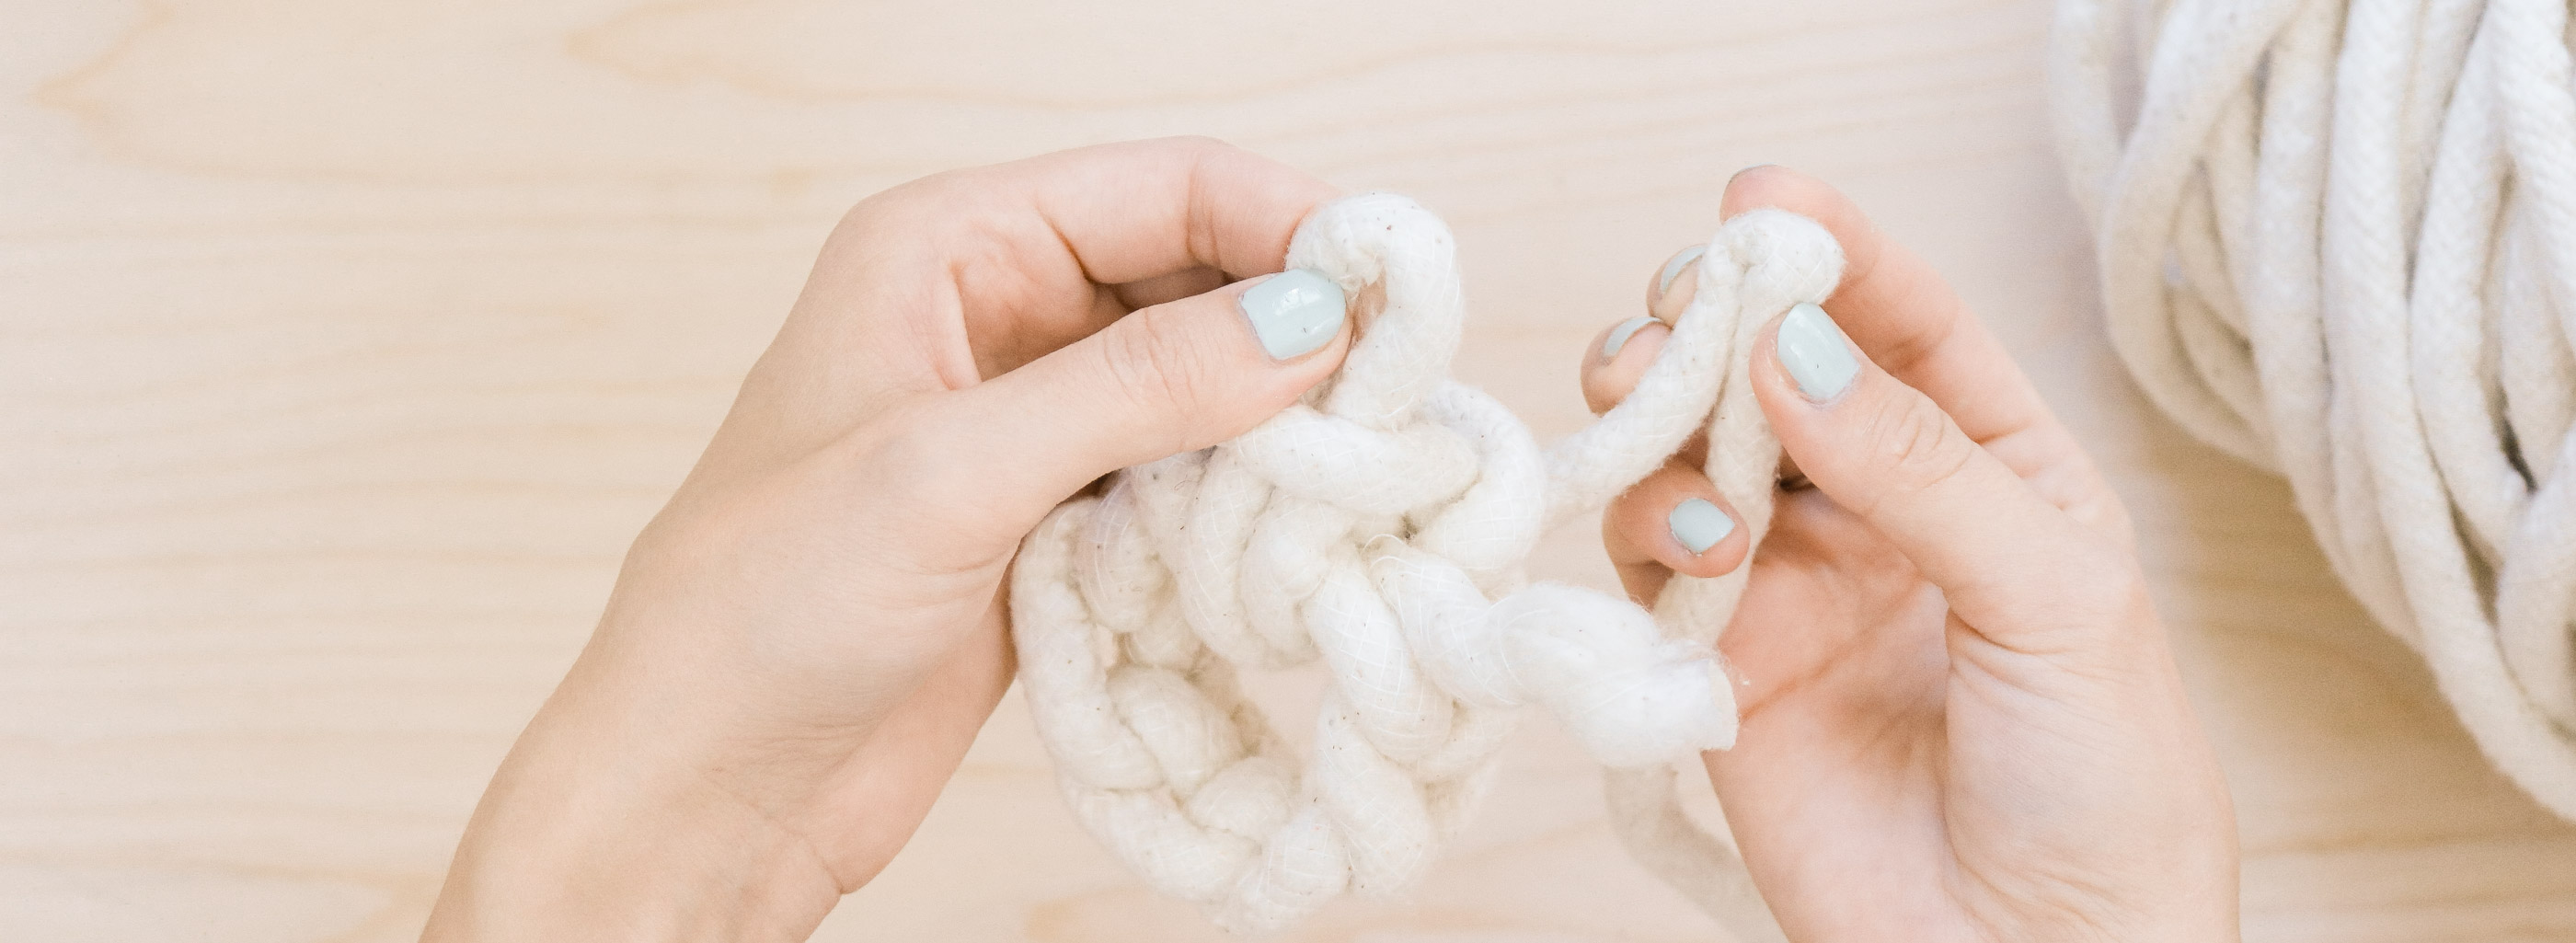
Step 1 – Pull a loop from the bottom
Step 2 – New loop goes through old loop!
Next Step would be # 3 – wrapping the cording under and around than (step 4-5) creating a new loop to go in the old one.
Here’s what it should look like when you keep repeating steps 1-5 going around your braid.
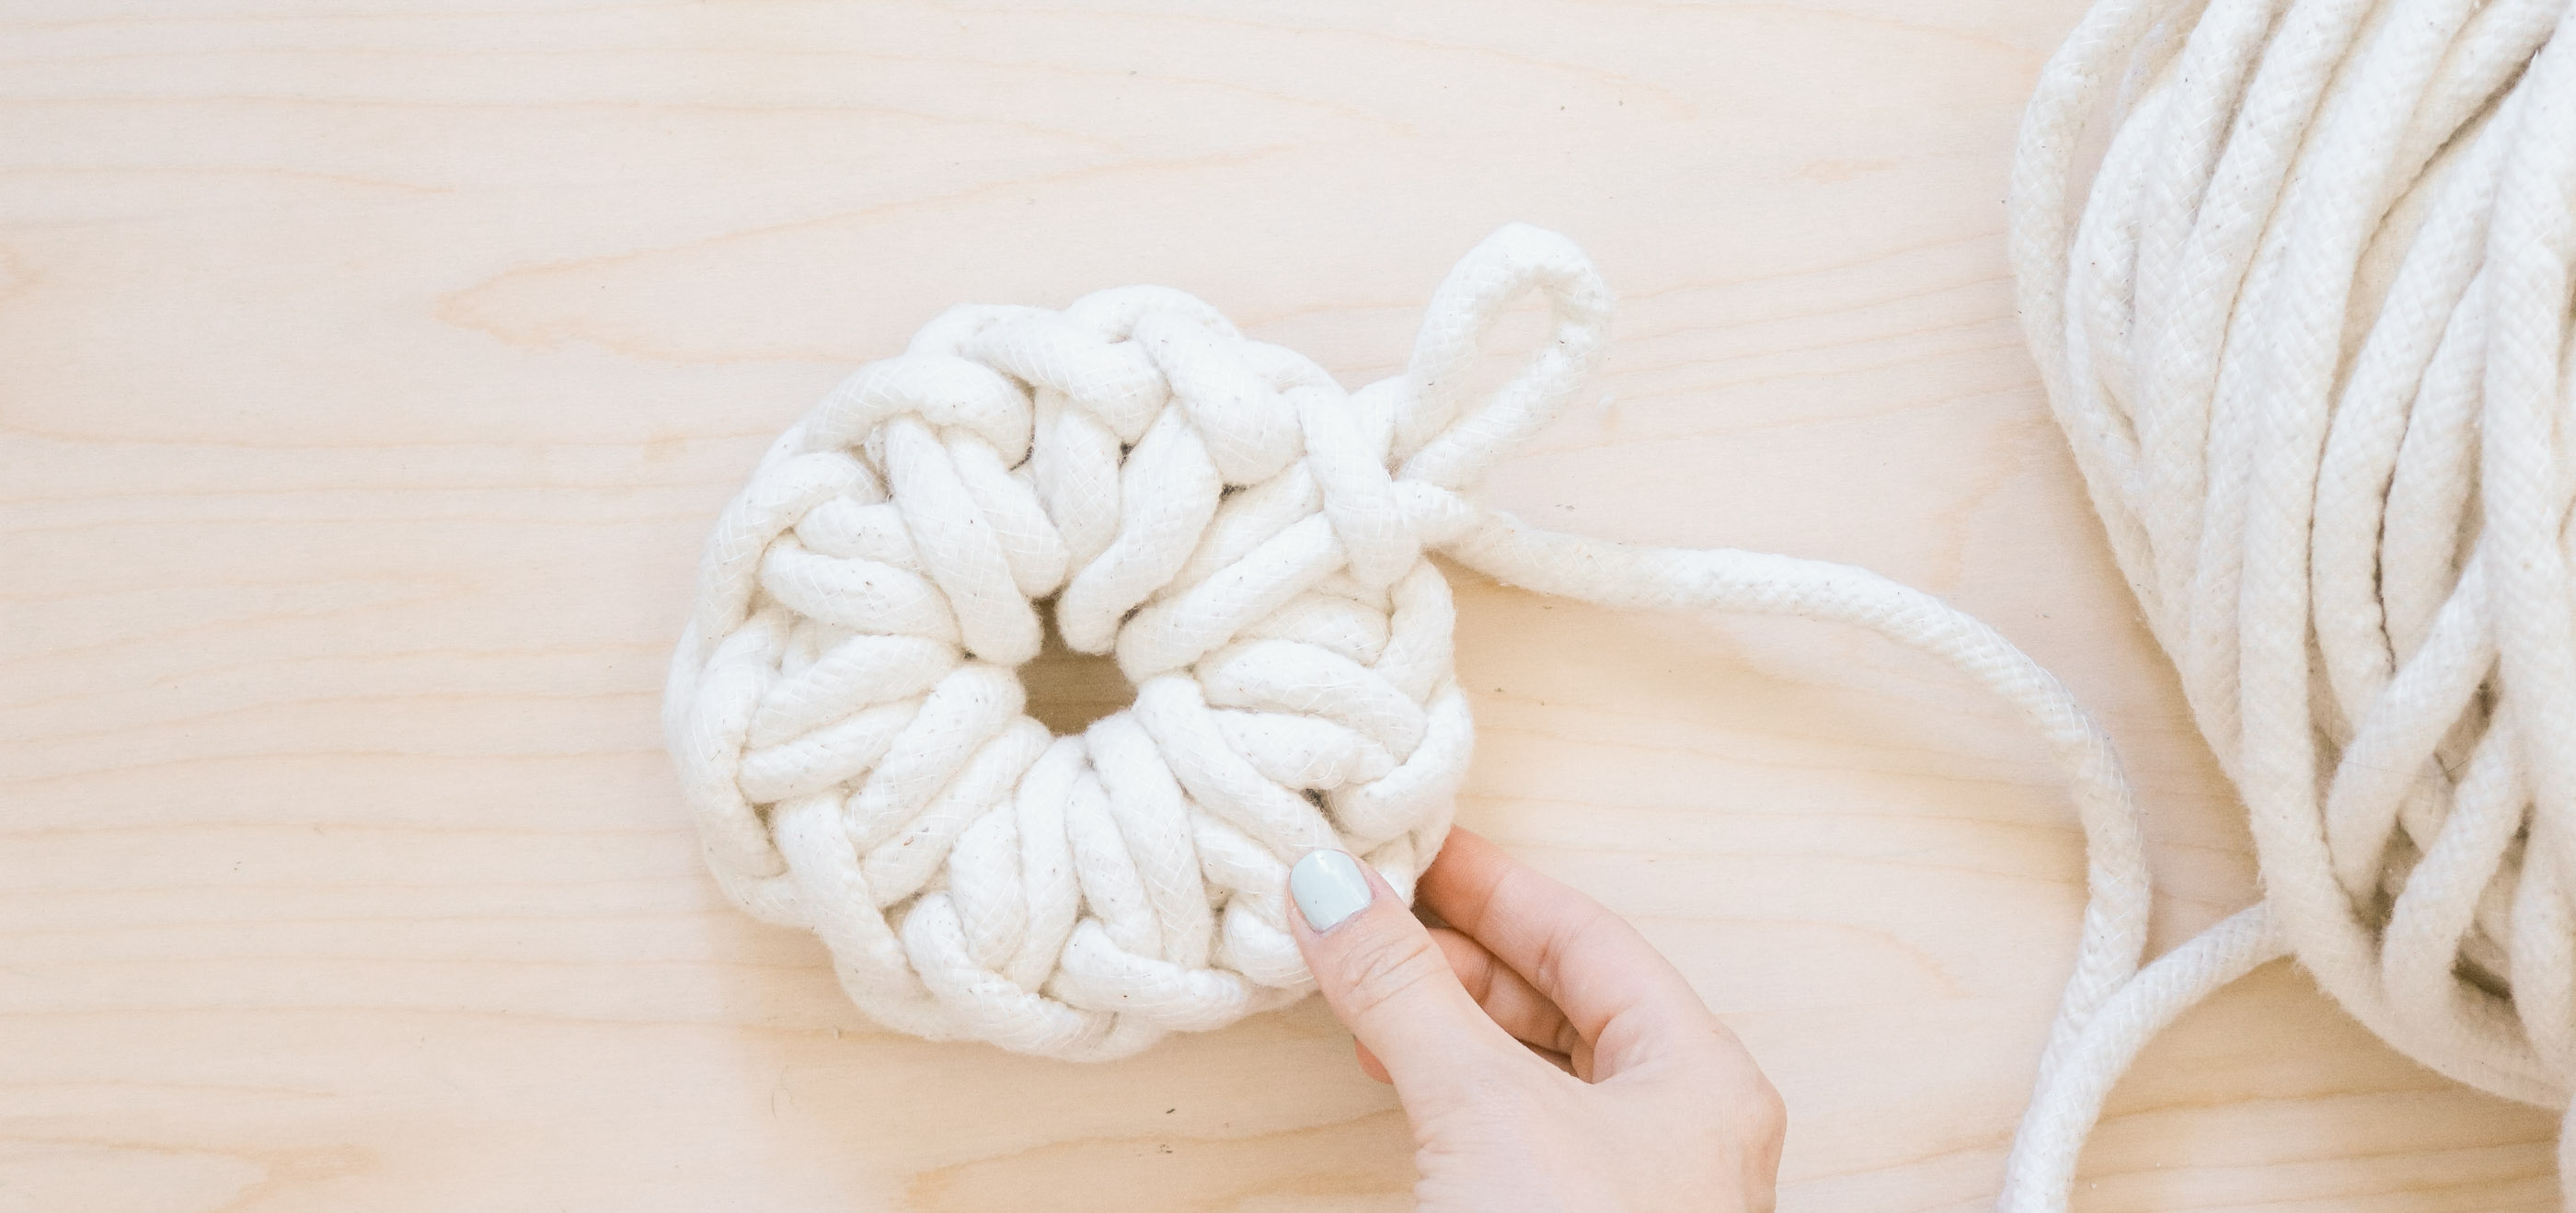
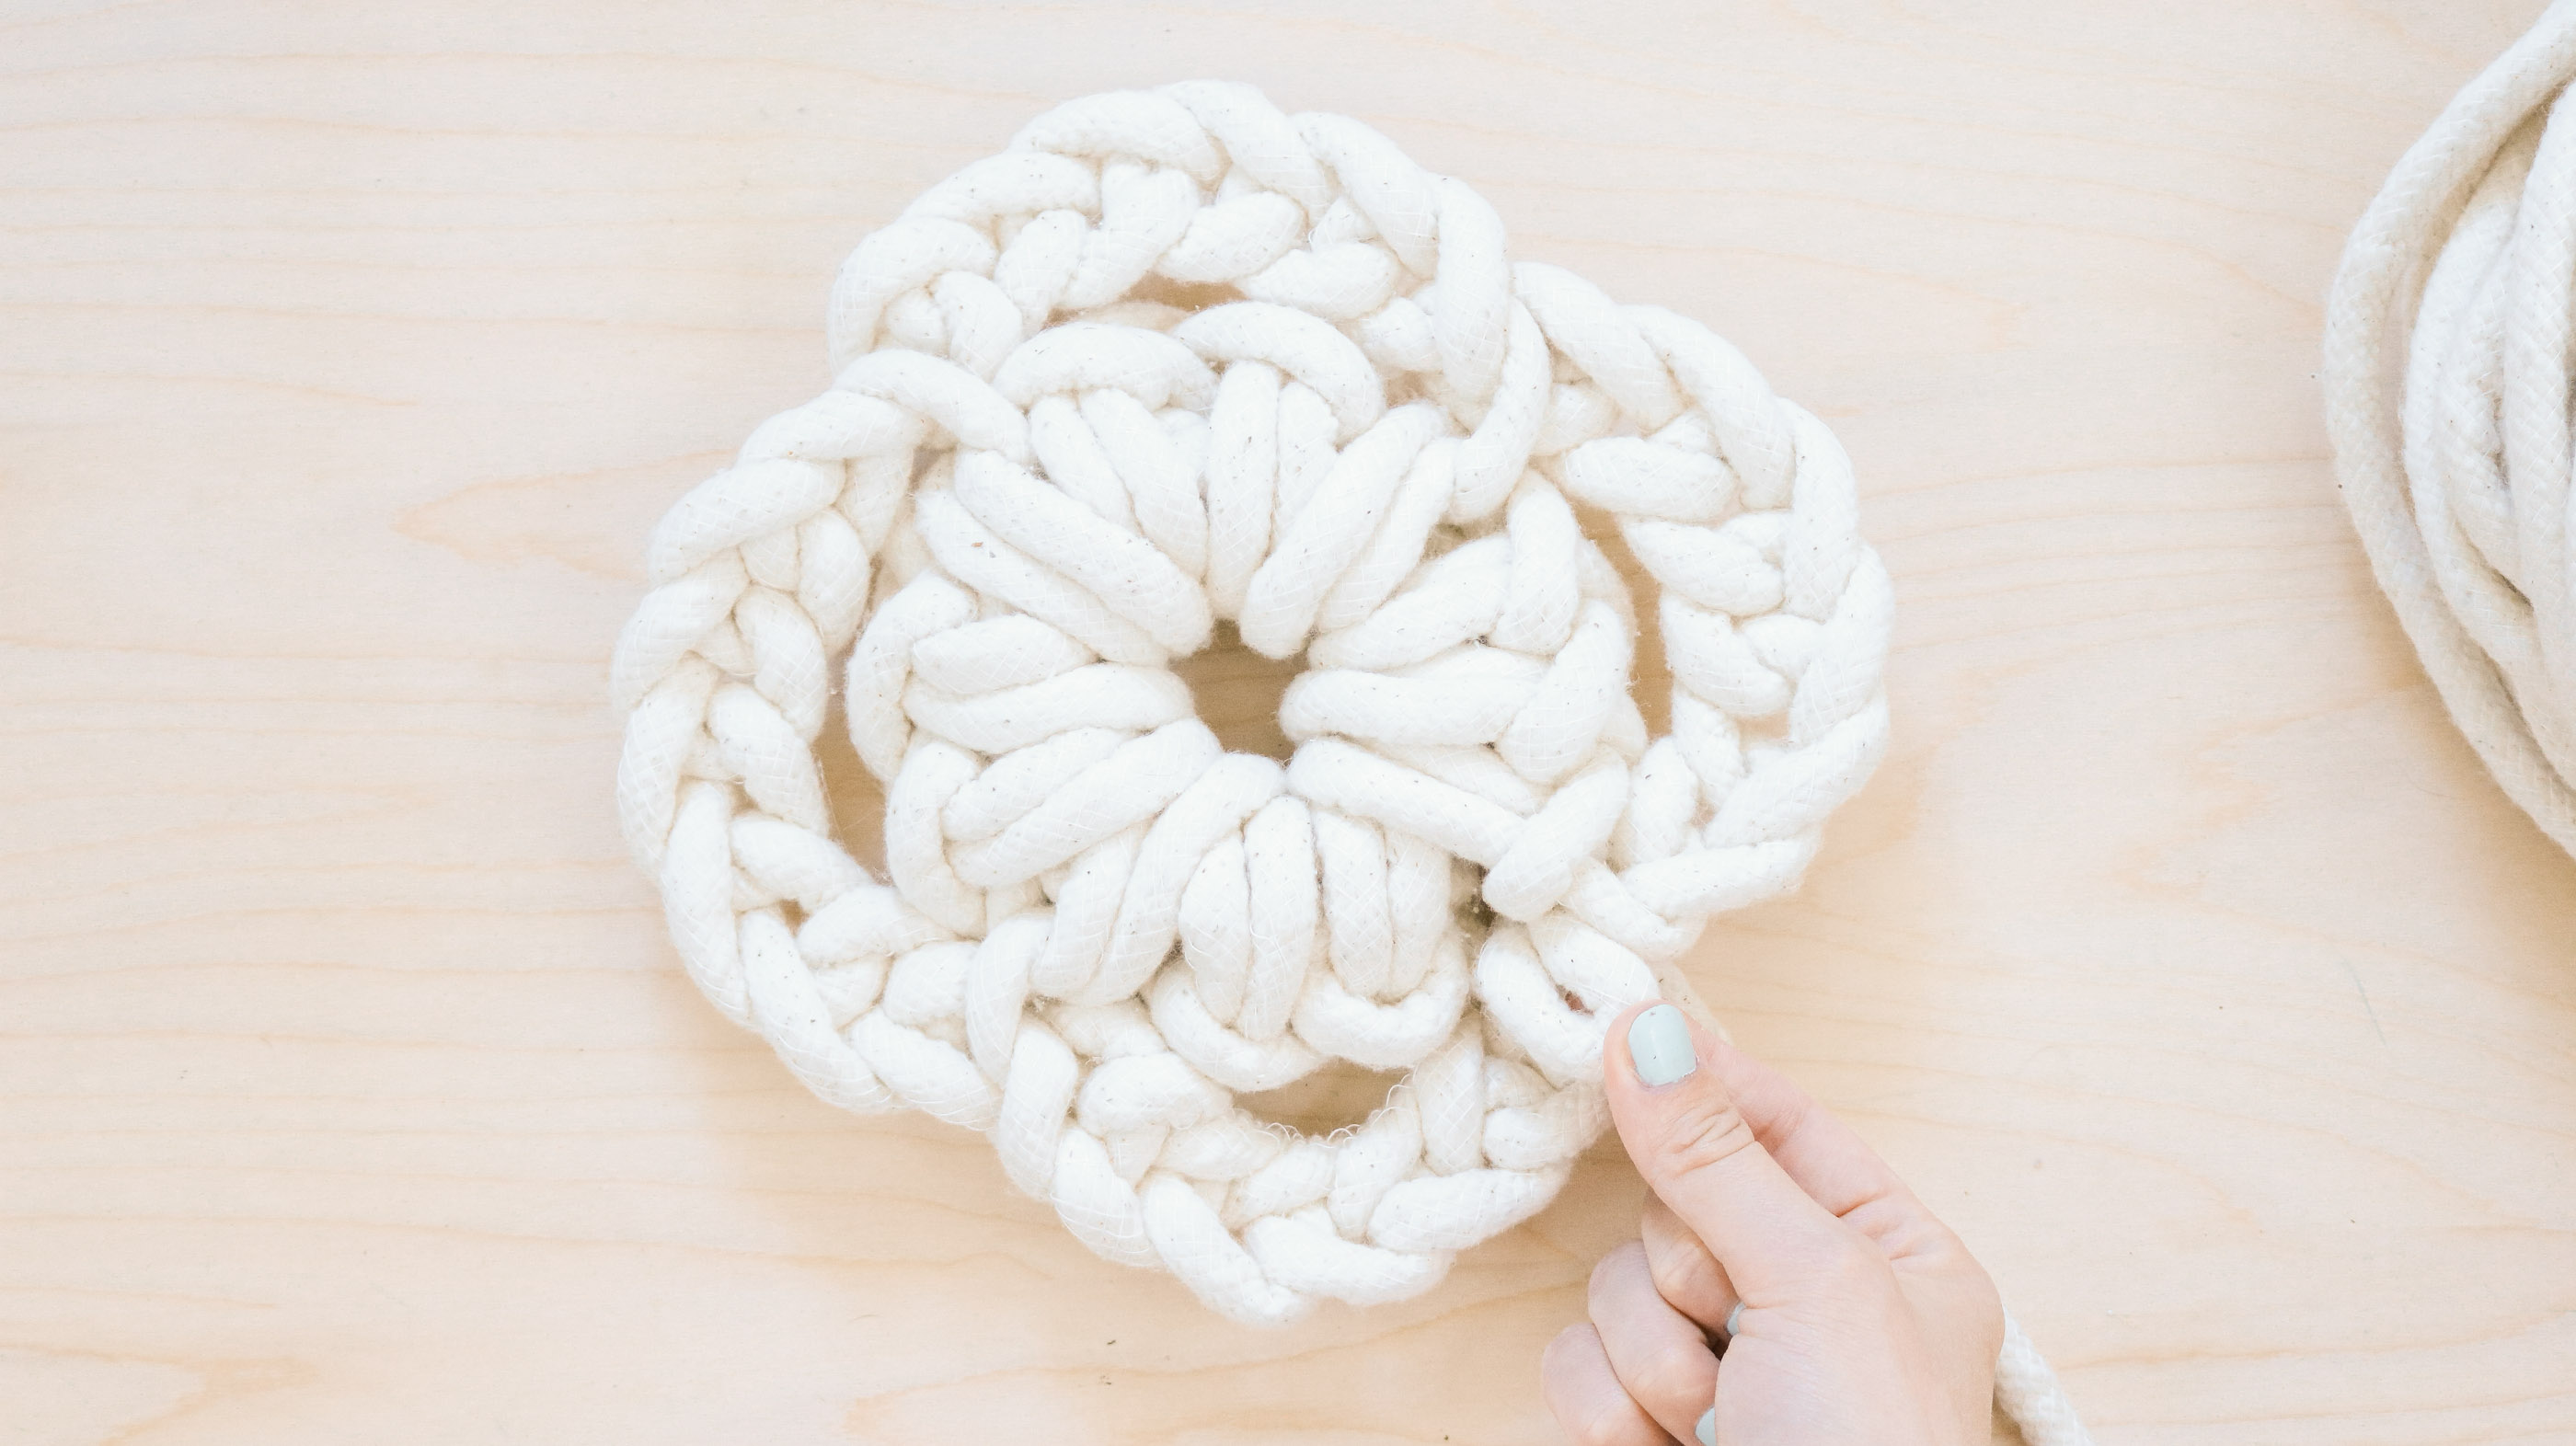
Once you’ve completed going all the way around your braided circle here’s what it should look like with one loop sticking out from the edge.
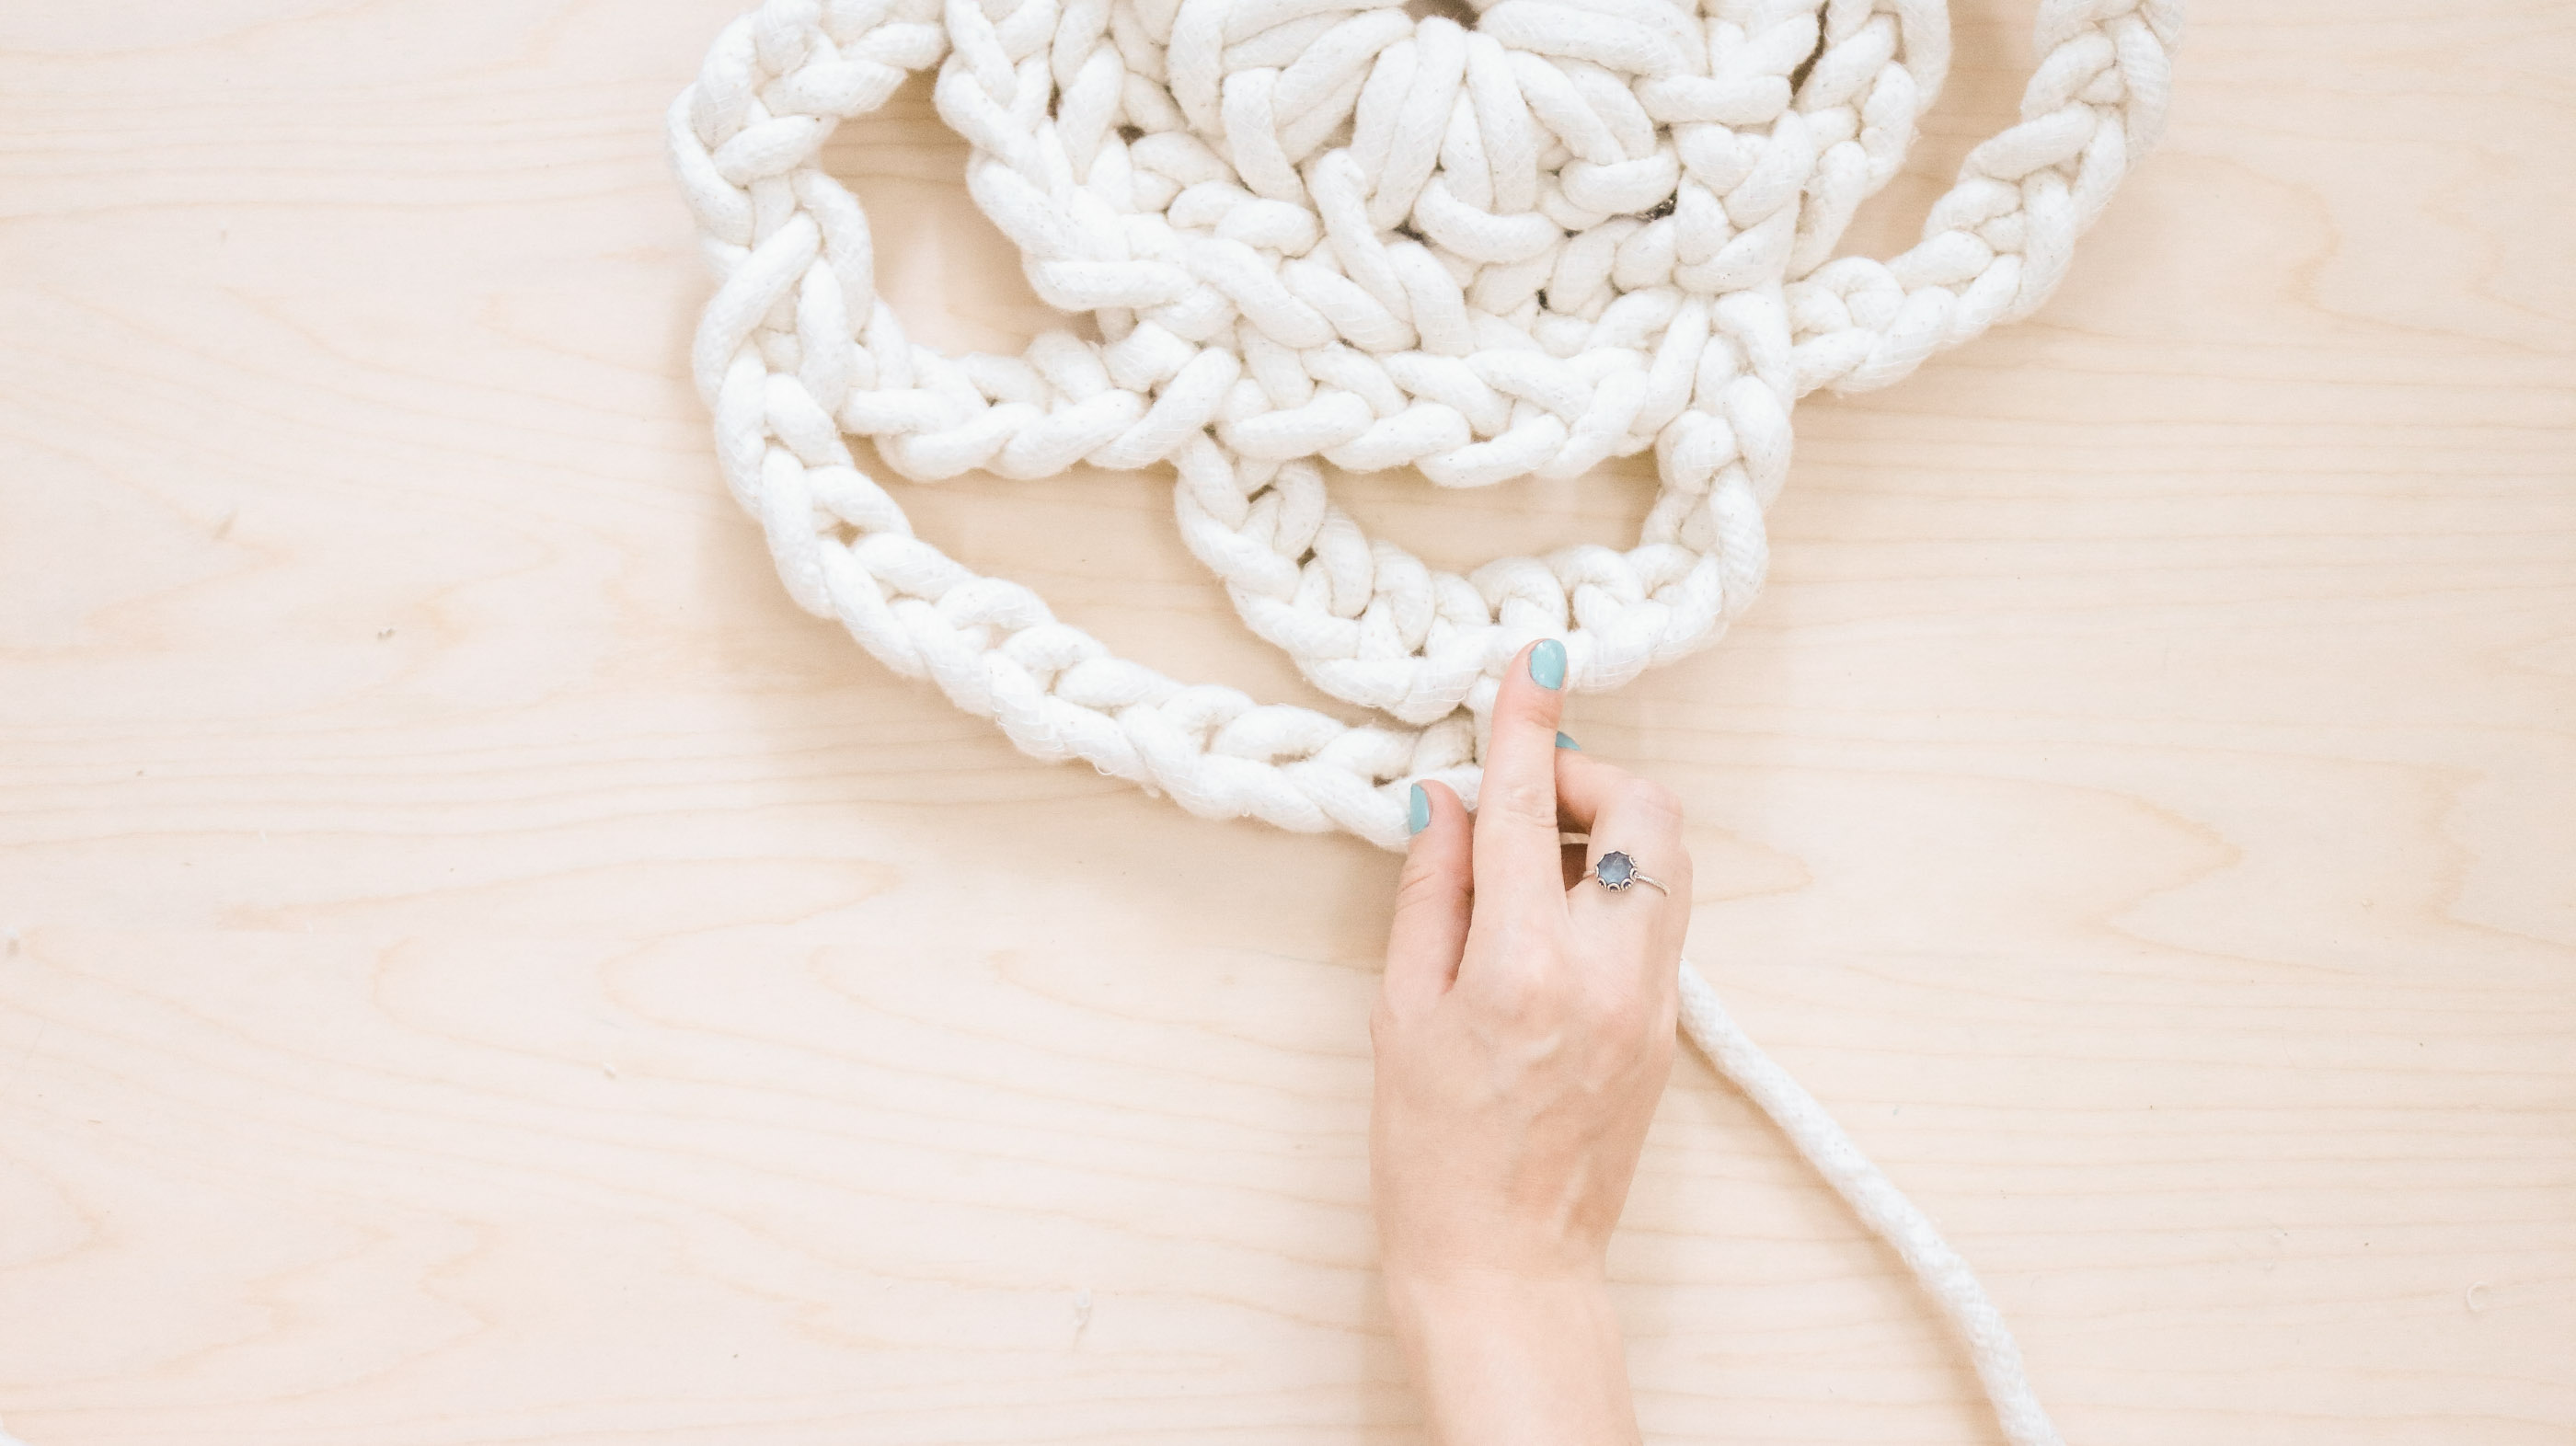
Step 5 -Building up your rug!
Here’s where it gets easy. For the rest of the rug you’ll simply by creating braided sections and connecting them. This will all be done by making loops.
Pull out a total of 8 loops through the loop you had on the edge.
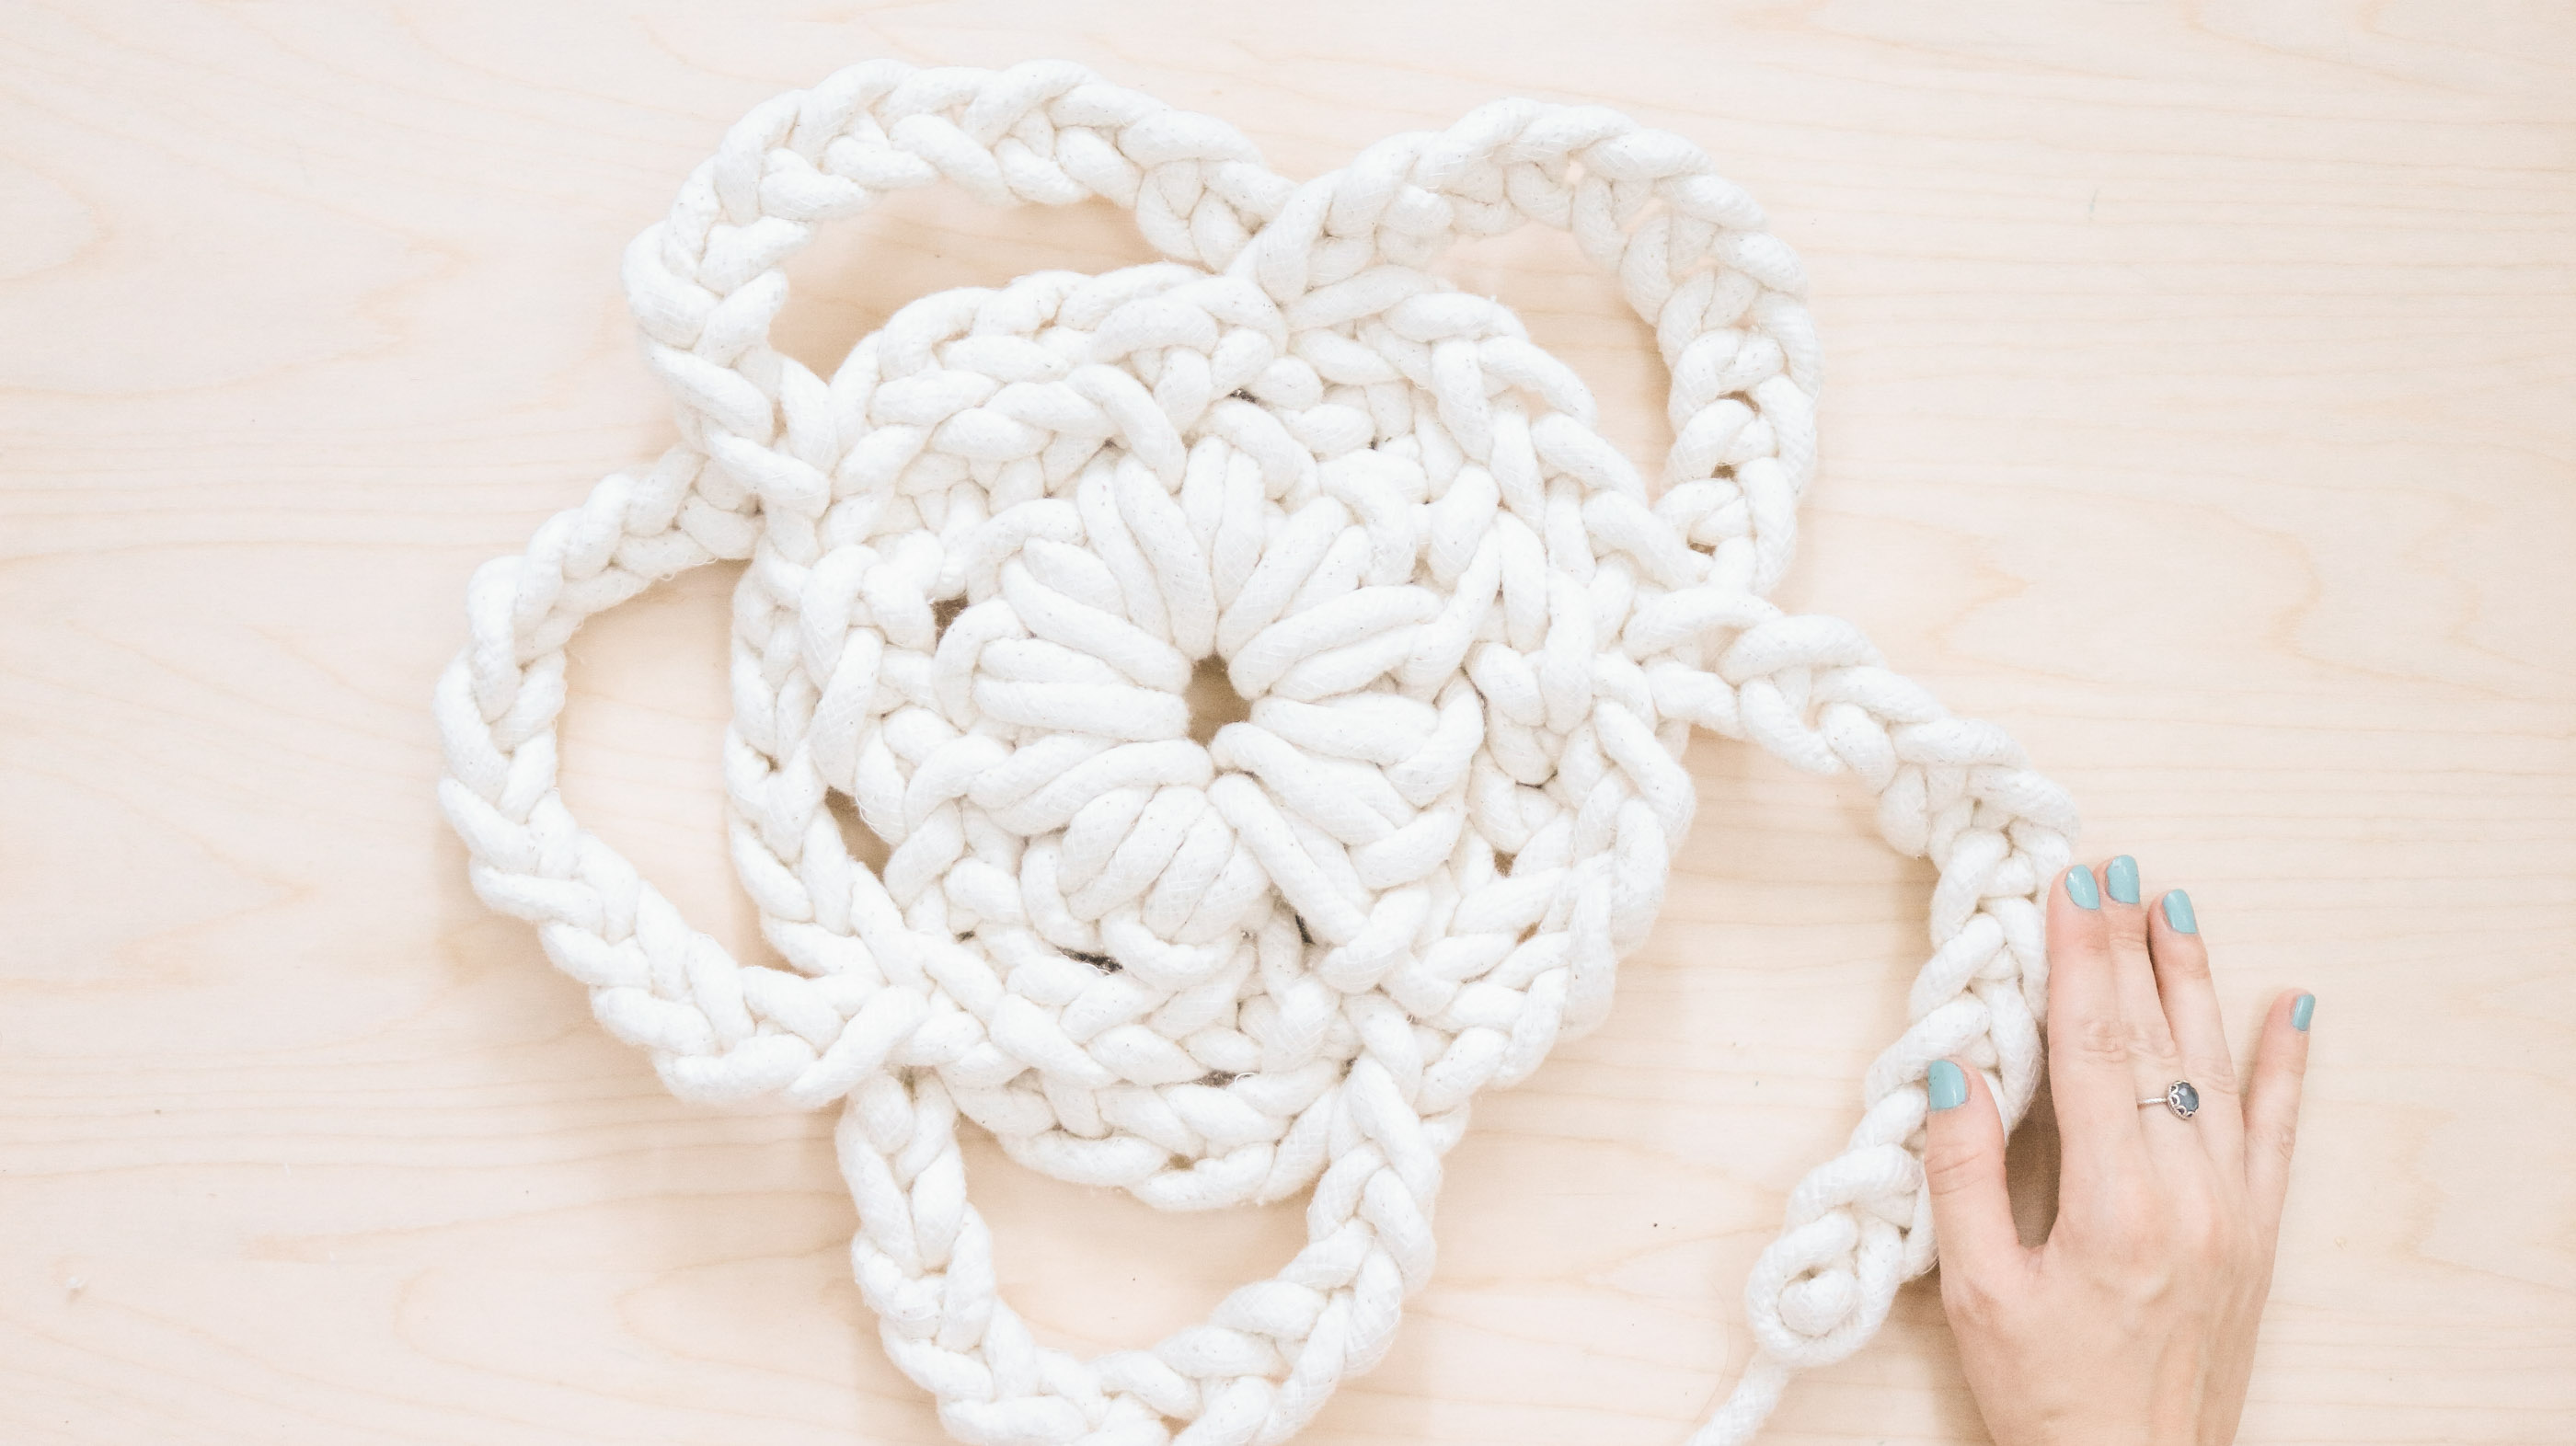
Use the last loop from your strand of 8 and stick it into the edge. Than make another 8 loops starting at the last loop and keep going around your center connecting braided sections. (if you’re really confused you can watch the video here)
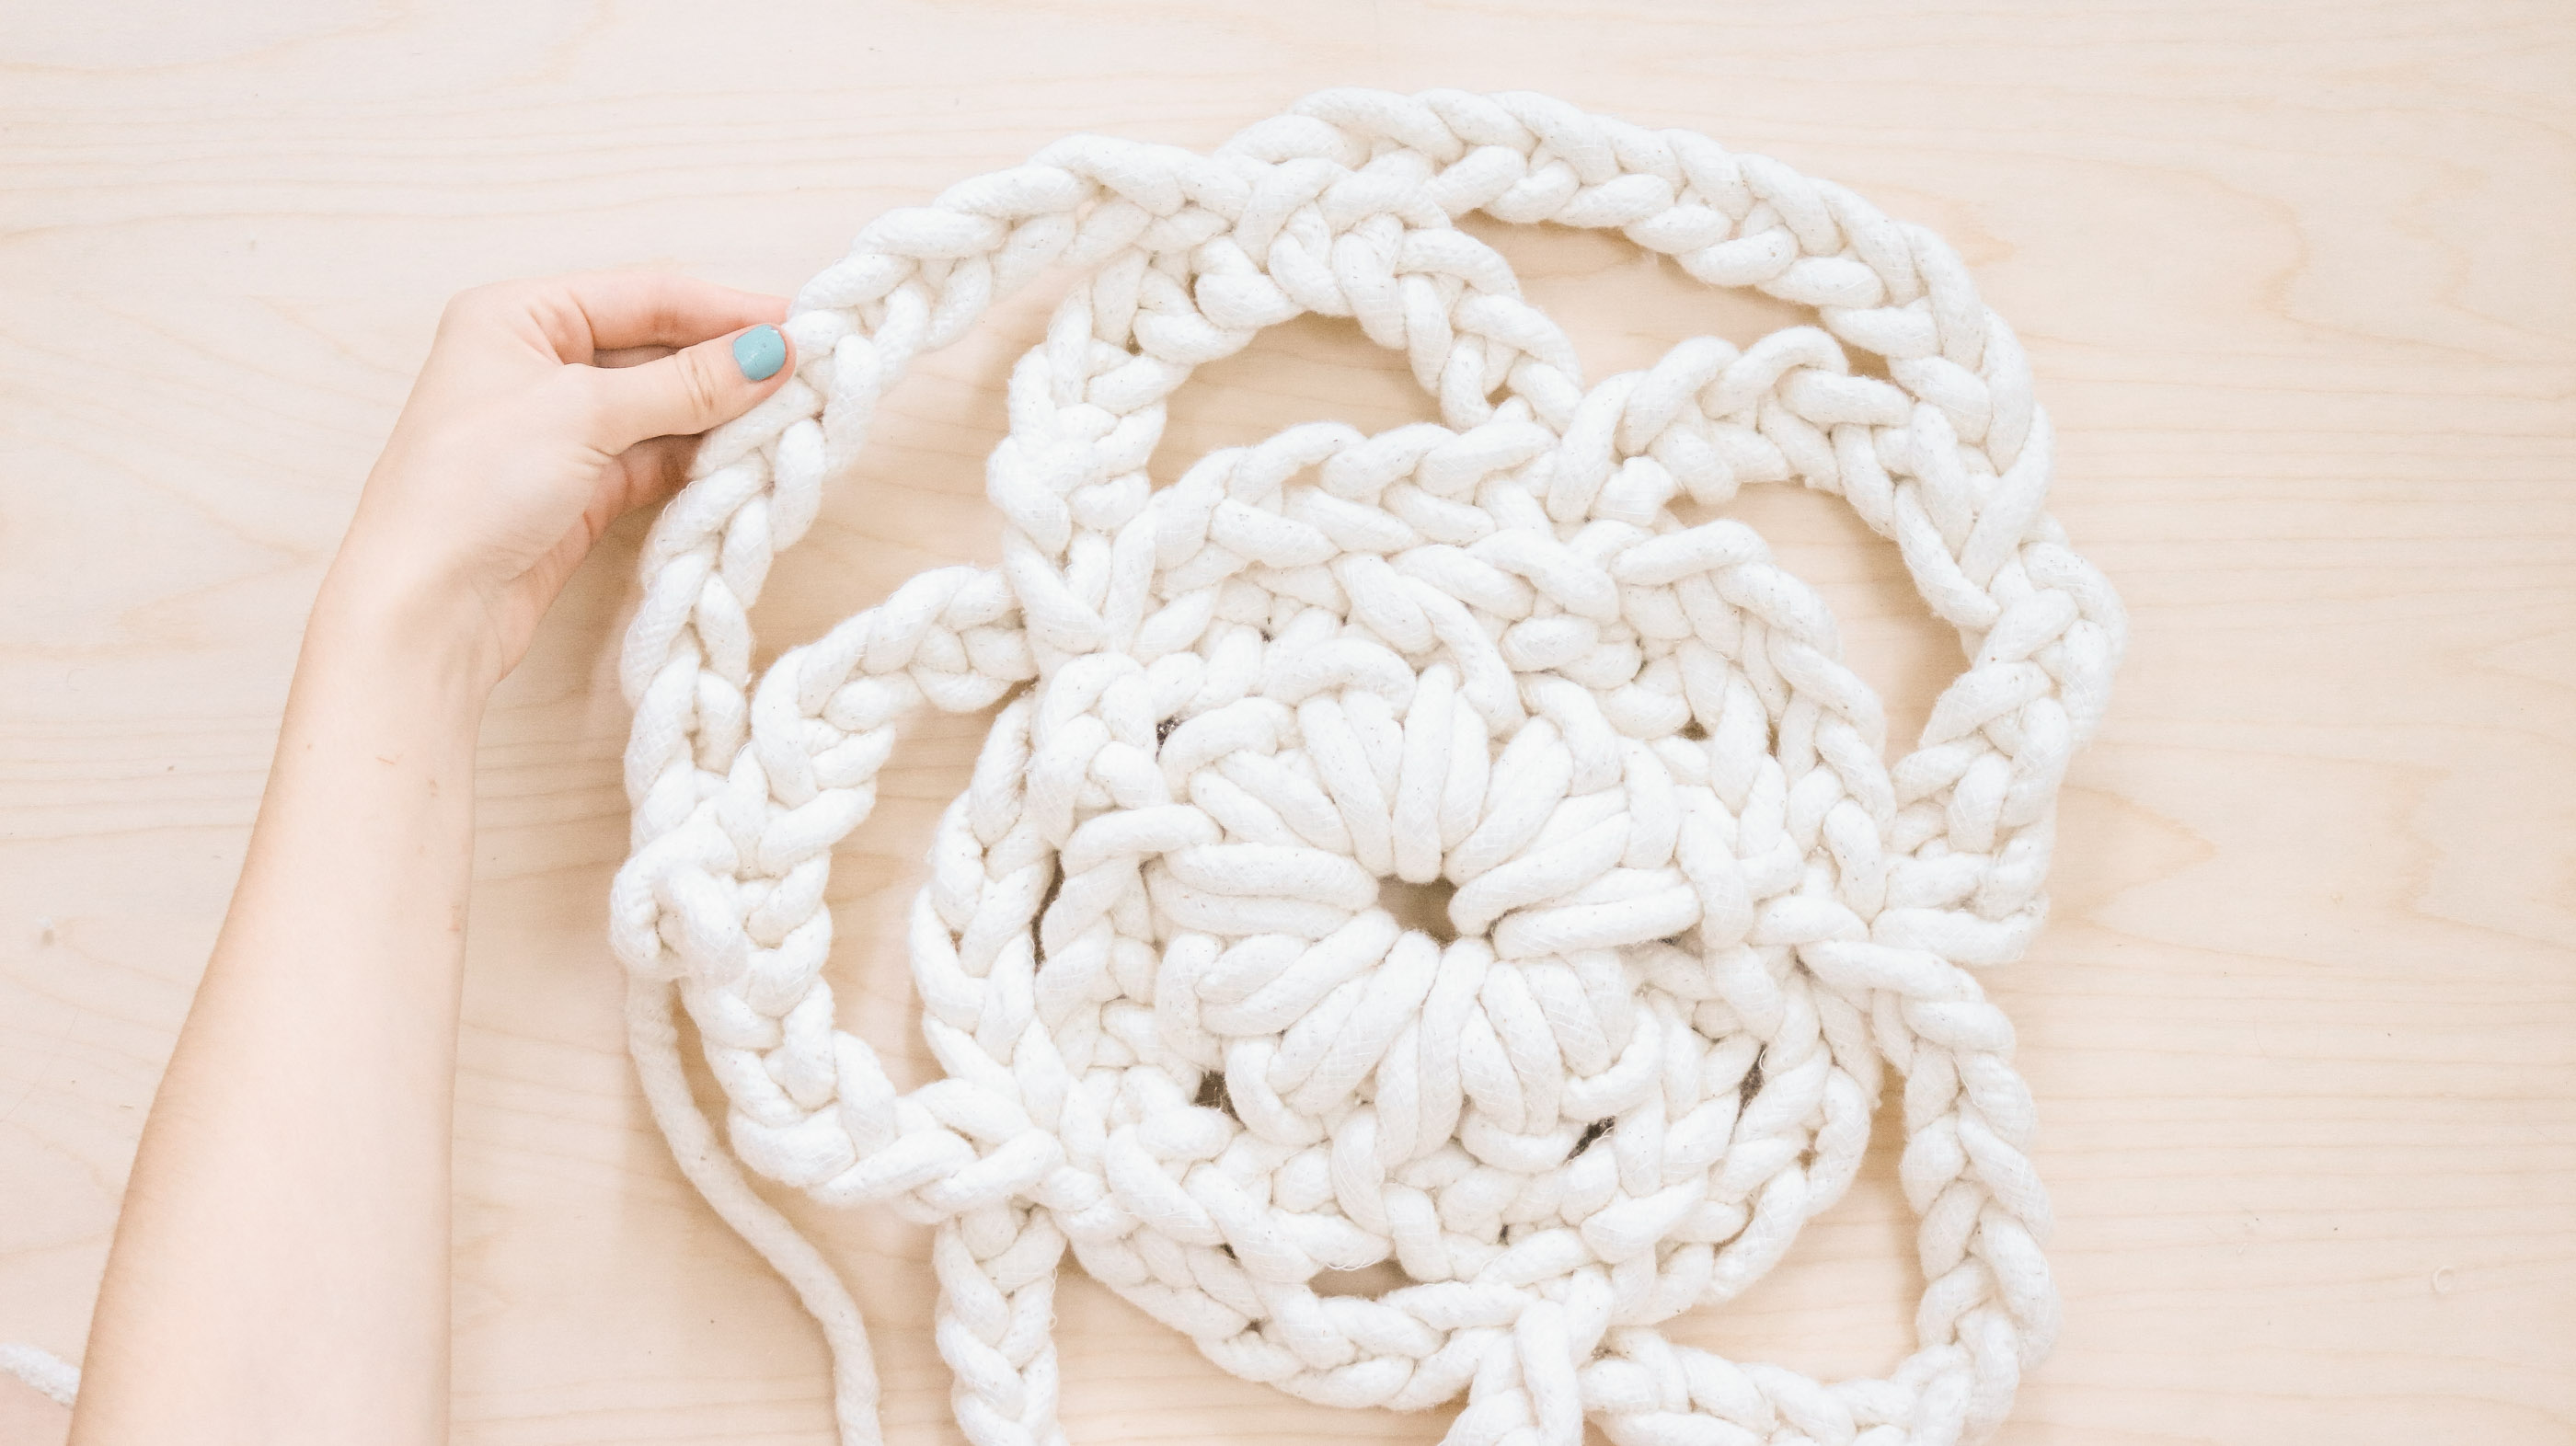
Step 6 – Adding a flower effect!
I did a total of two braided rows with connected sections going around the center of the rug then I moved onto making the flower effect. To create your flower effect it’s the same technique except for you’ll be making a longer braid for each section. For my flower pedals I did a total of 12 loops each. Make sure your sections are spread apart as evenly as possible. If not your pedals will look uneven.
Step 7- Converting your Rug back to a round shape!
Okay so this step is vital! Believe me I’ve tried everything to avoid this. The reason you need to pull all your cording through is because for the next step you’ll need to start braiding your sections starting at the center of each pedal. If you started braiding a section at the end of your last pedal you would have an uneven rug or wouldn’t be able to go back to an evenly round shape. This keeps the pattern even and will bring your rug back to a circle shape.
Once you pulled through all your cording, take the cording fold it under half your flower pedal and pull out a loop at the center of your pedal. (I know this sounds confusing the photos below show what to do)
Here’s what the backside should look like. 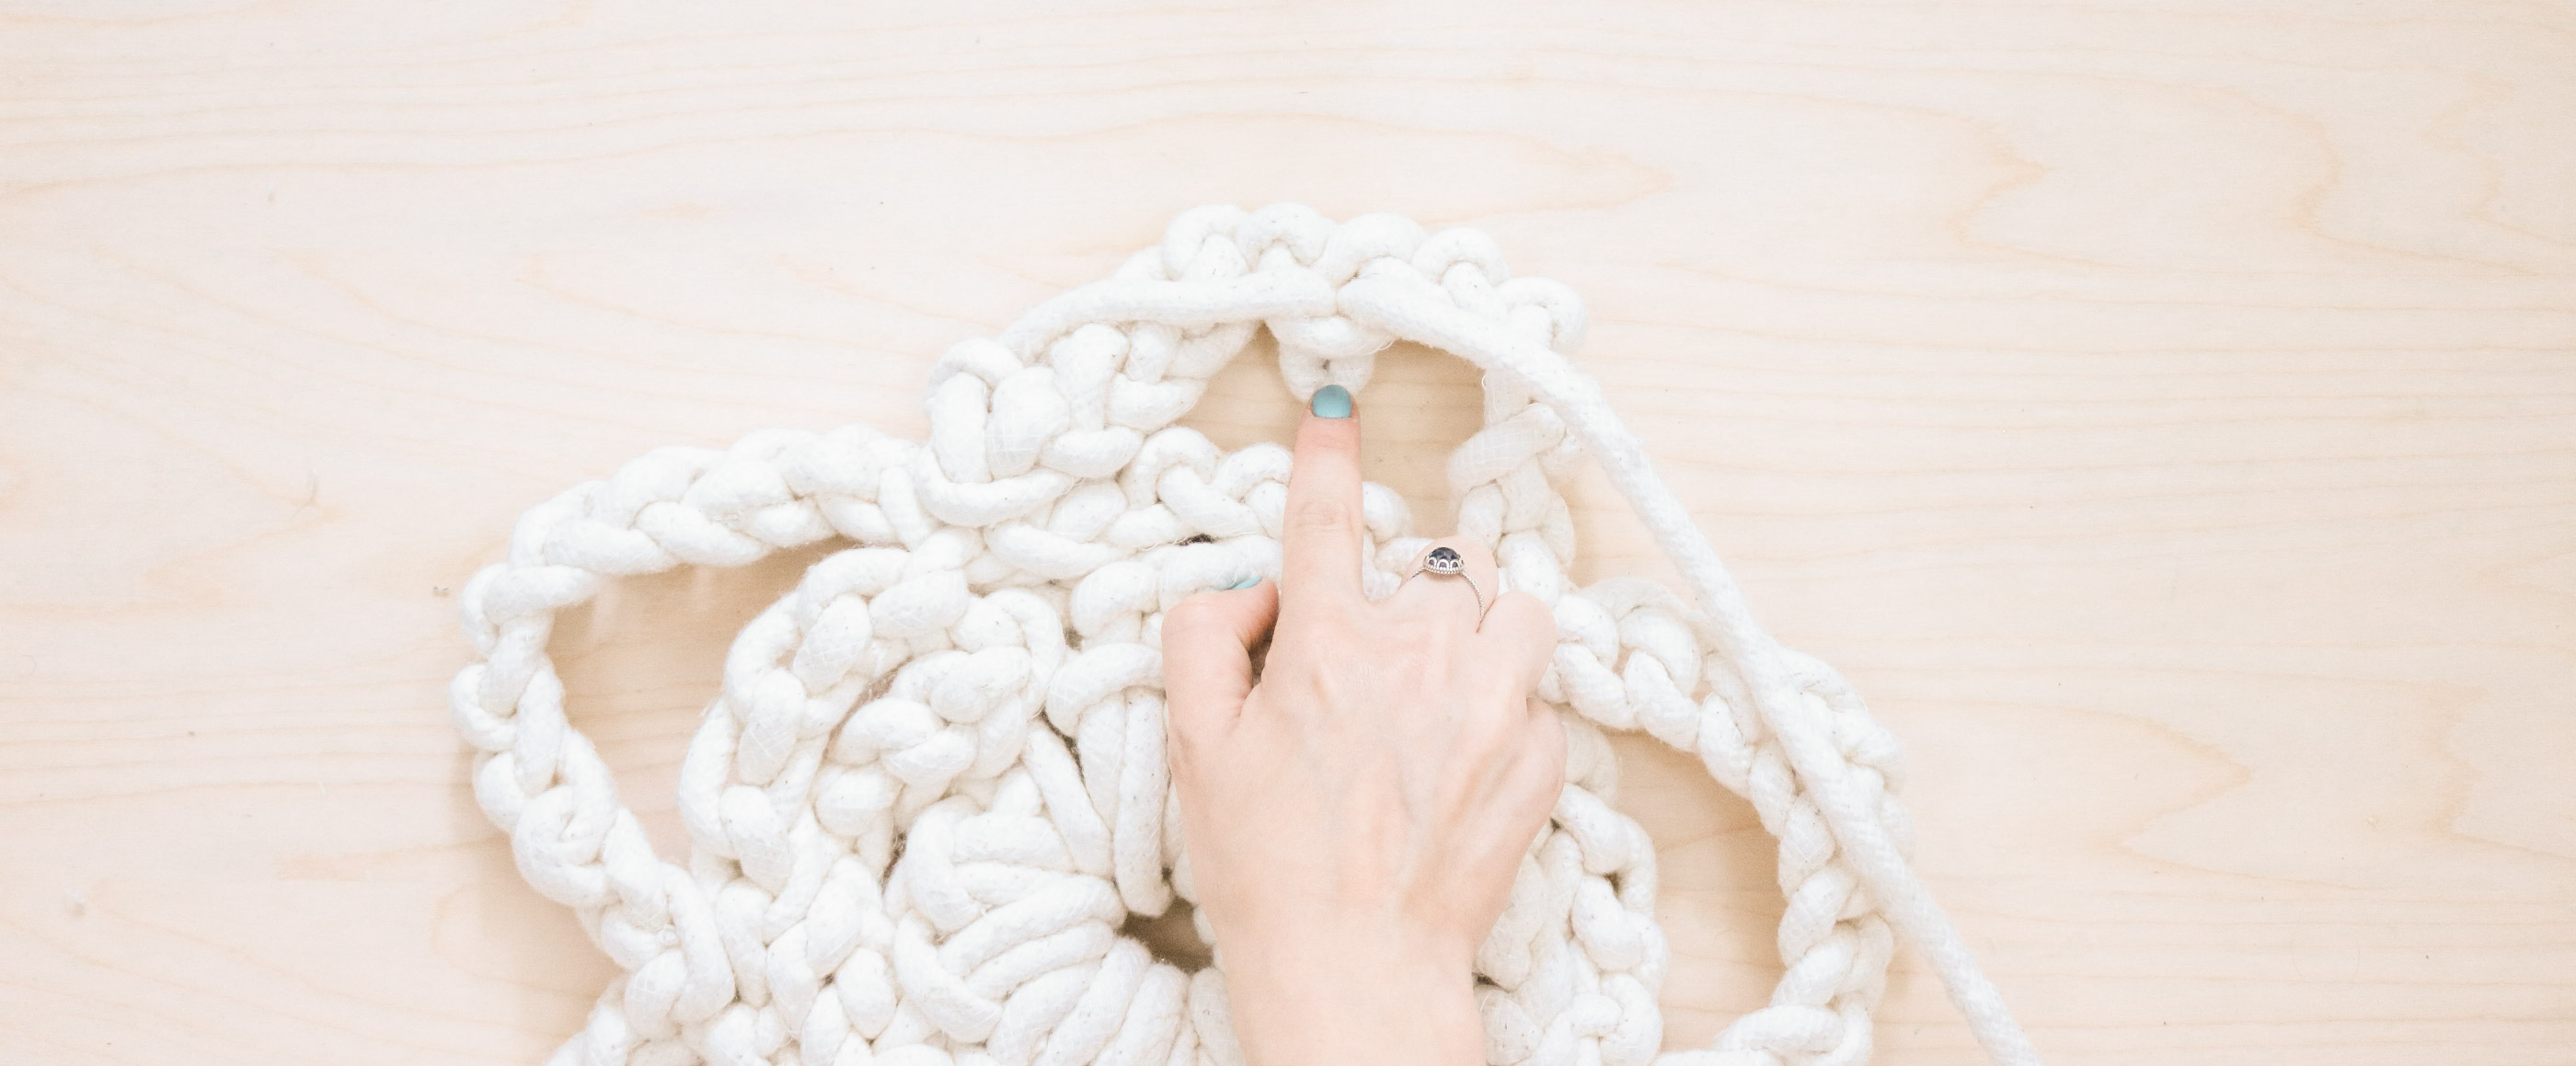
Step 8 – Adding Sections to turn it back into a circle!
So these next few steps are pretty easy. All you have to do is create braided sections long enough to be attached at the center of each pedal. My sections were 12 loops long.
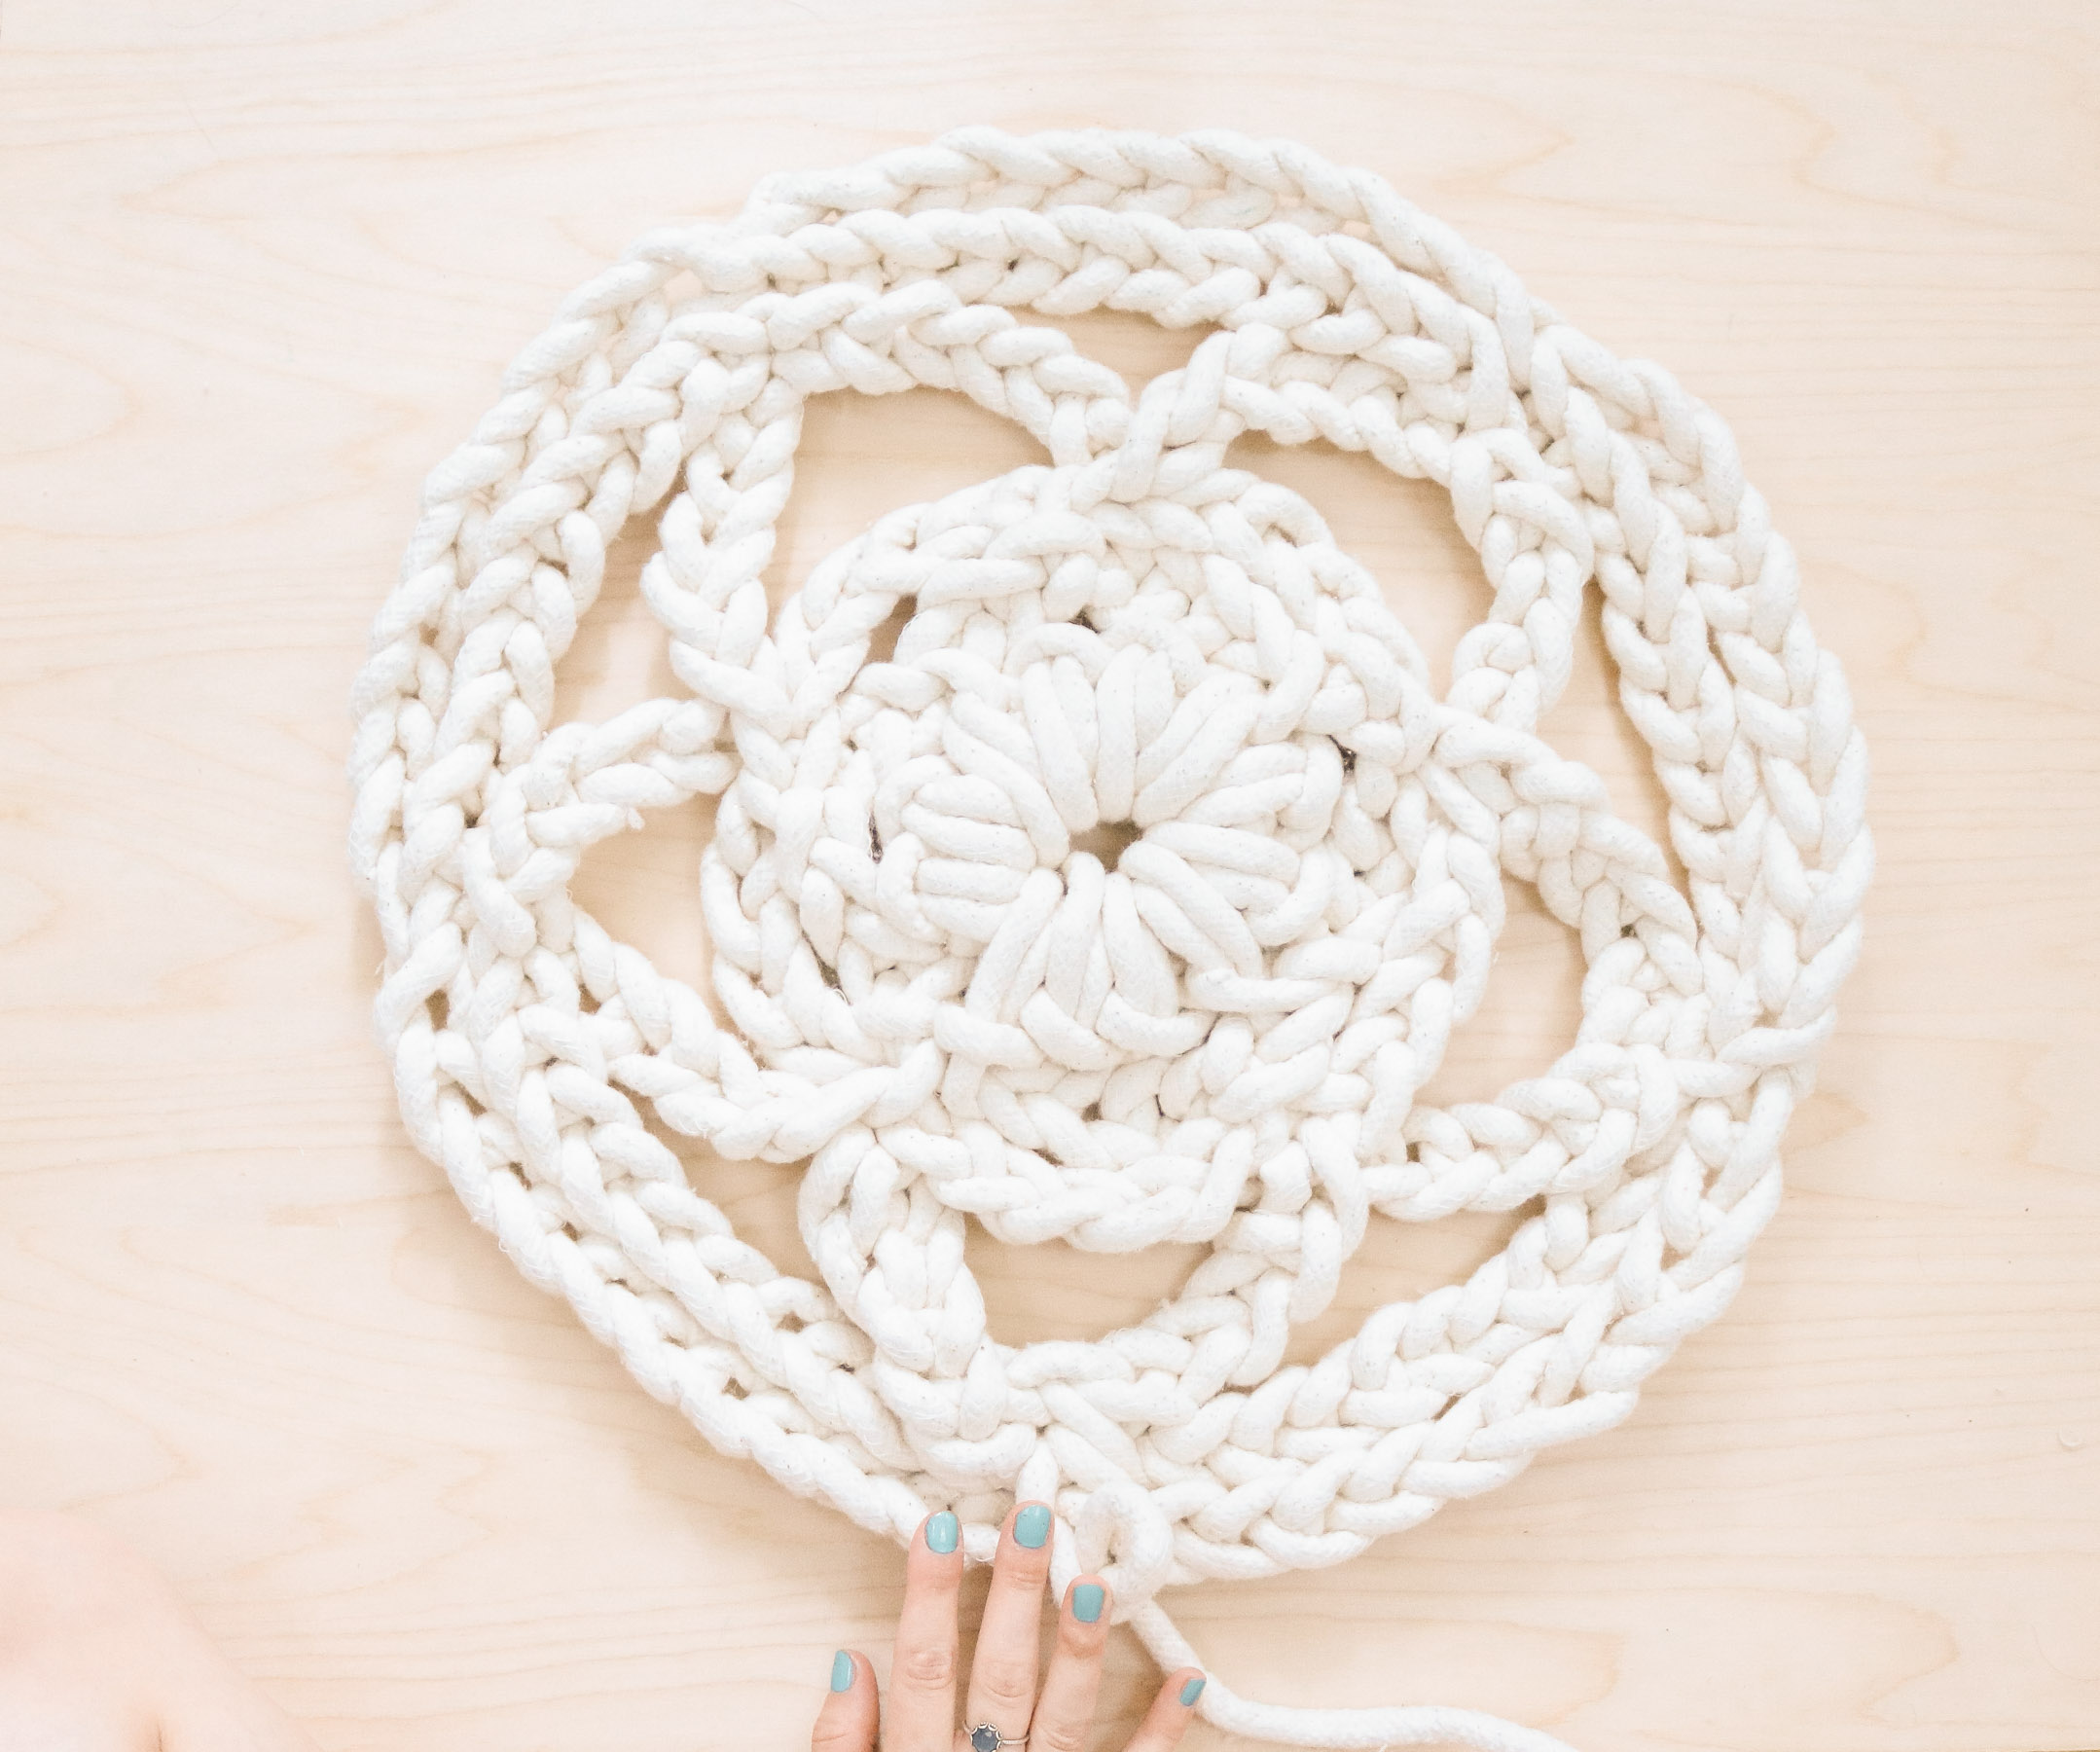
I did two rows of braids going around my flower.
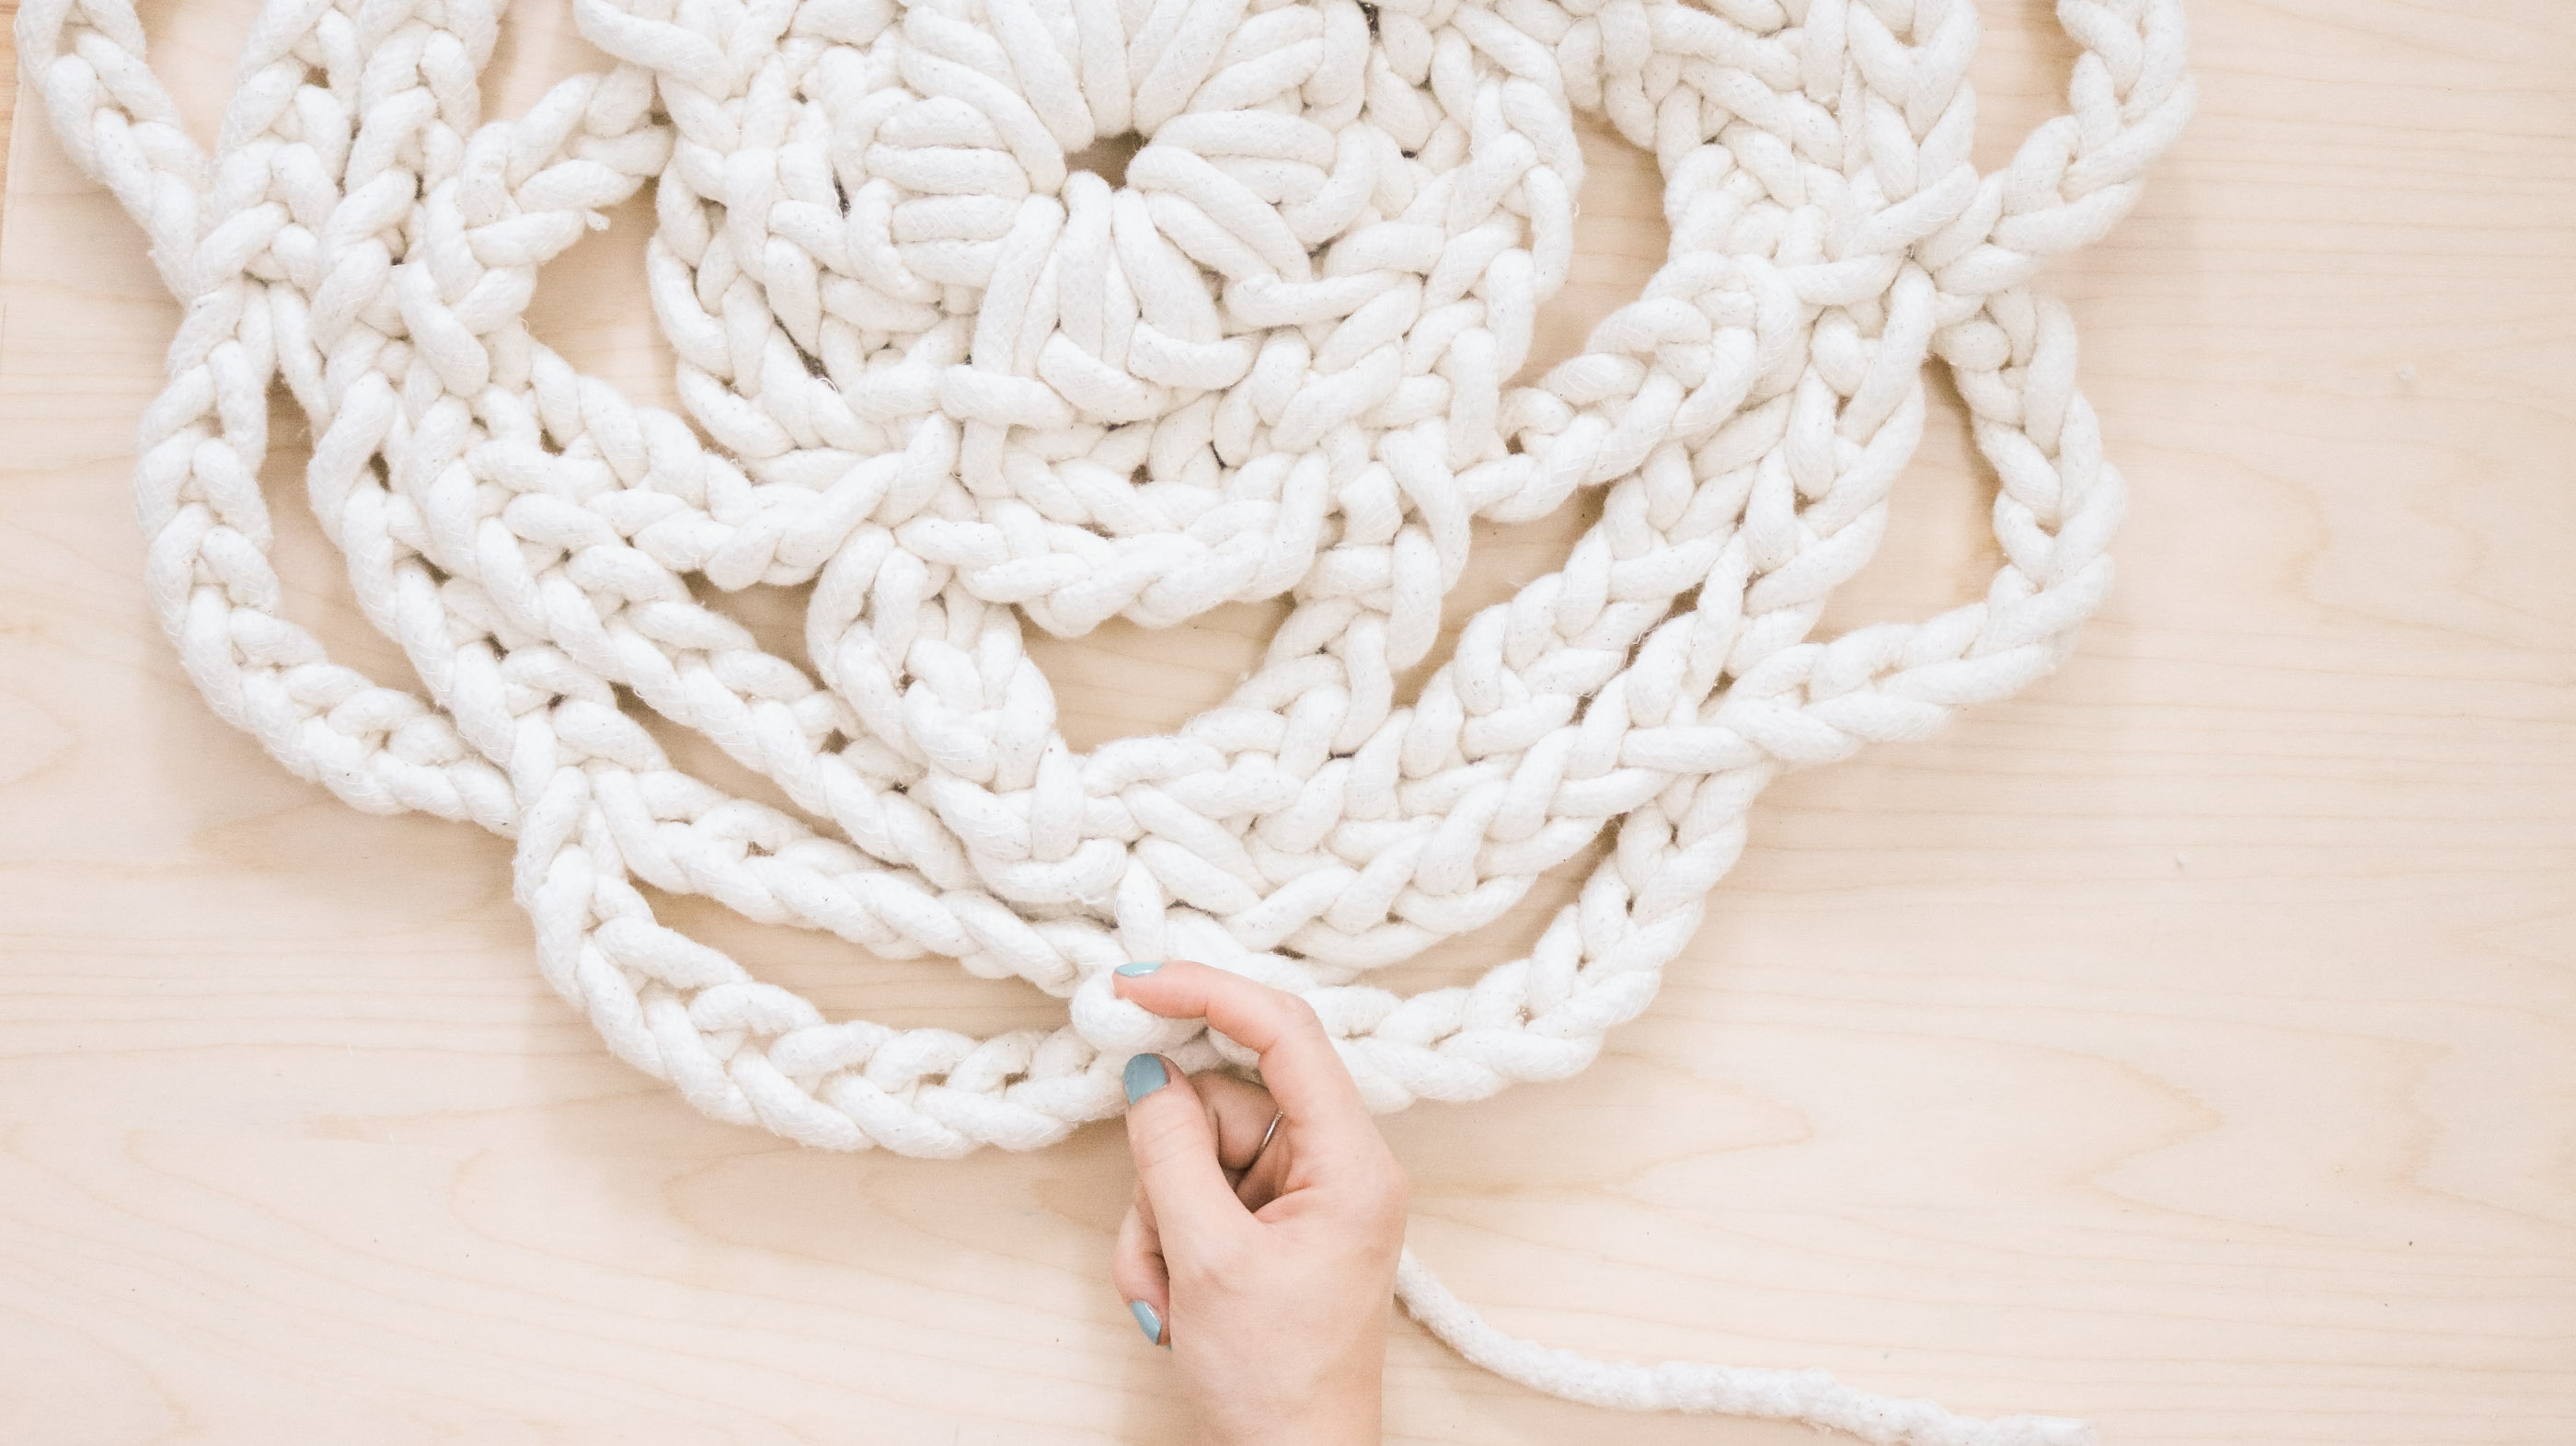
Step 9 – Finishing off the edges!
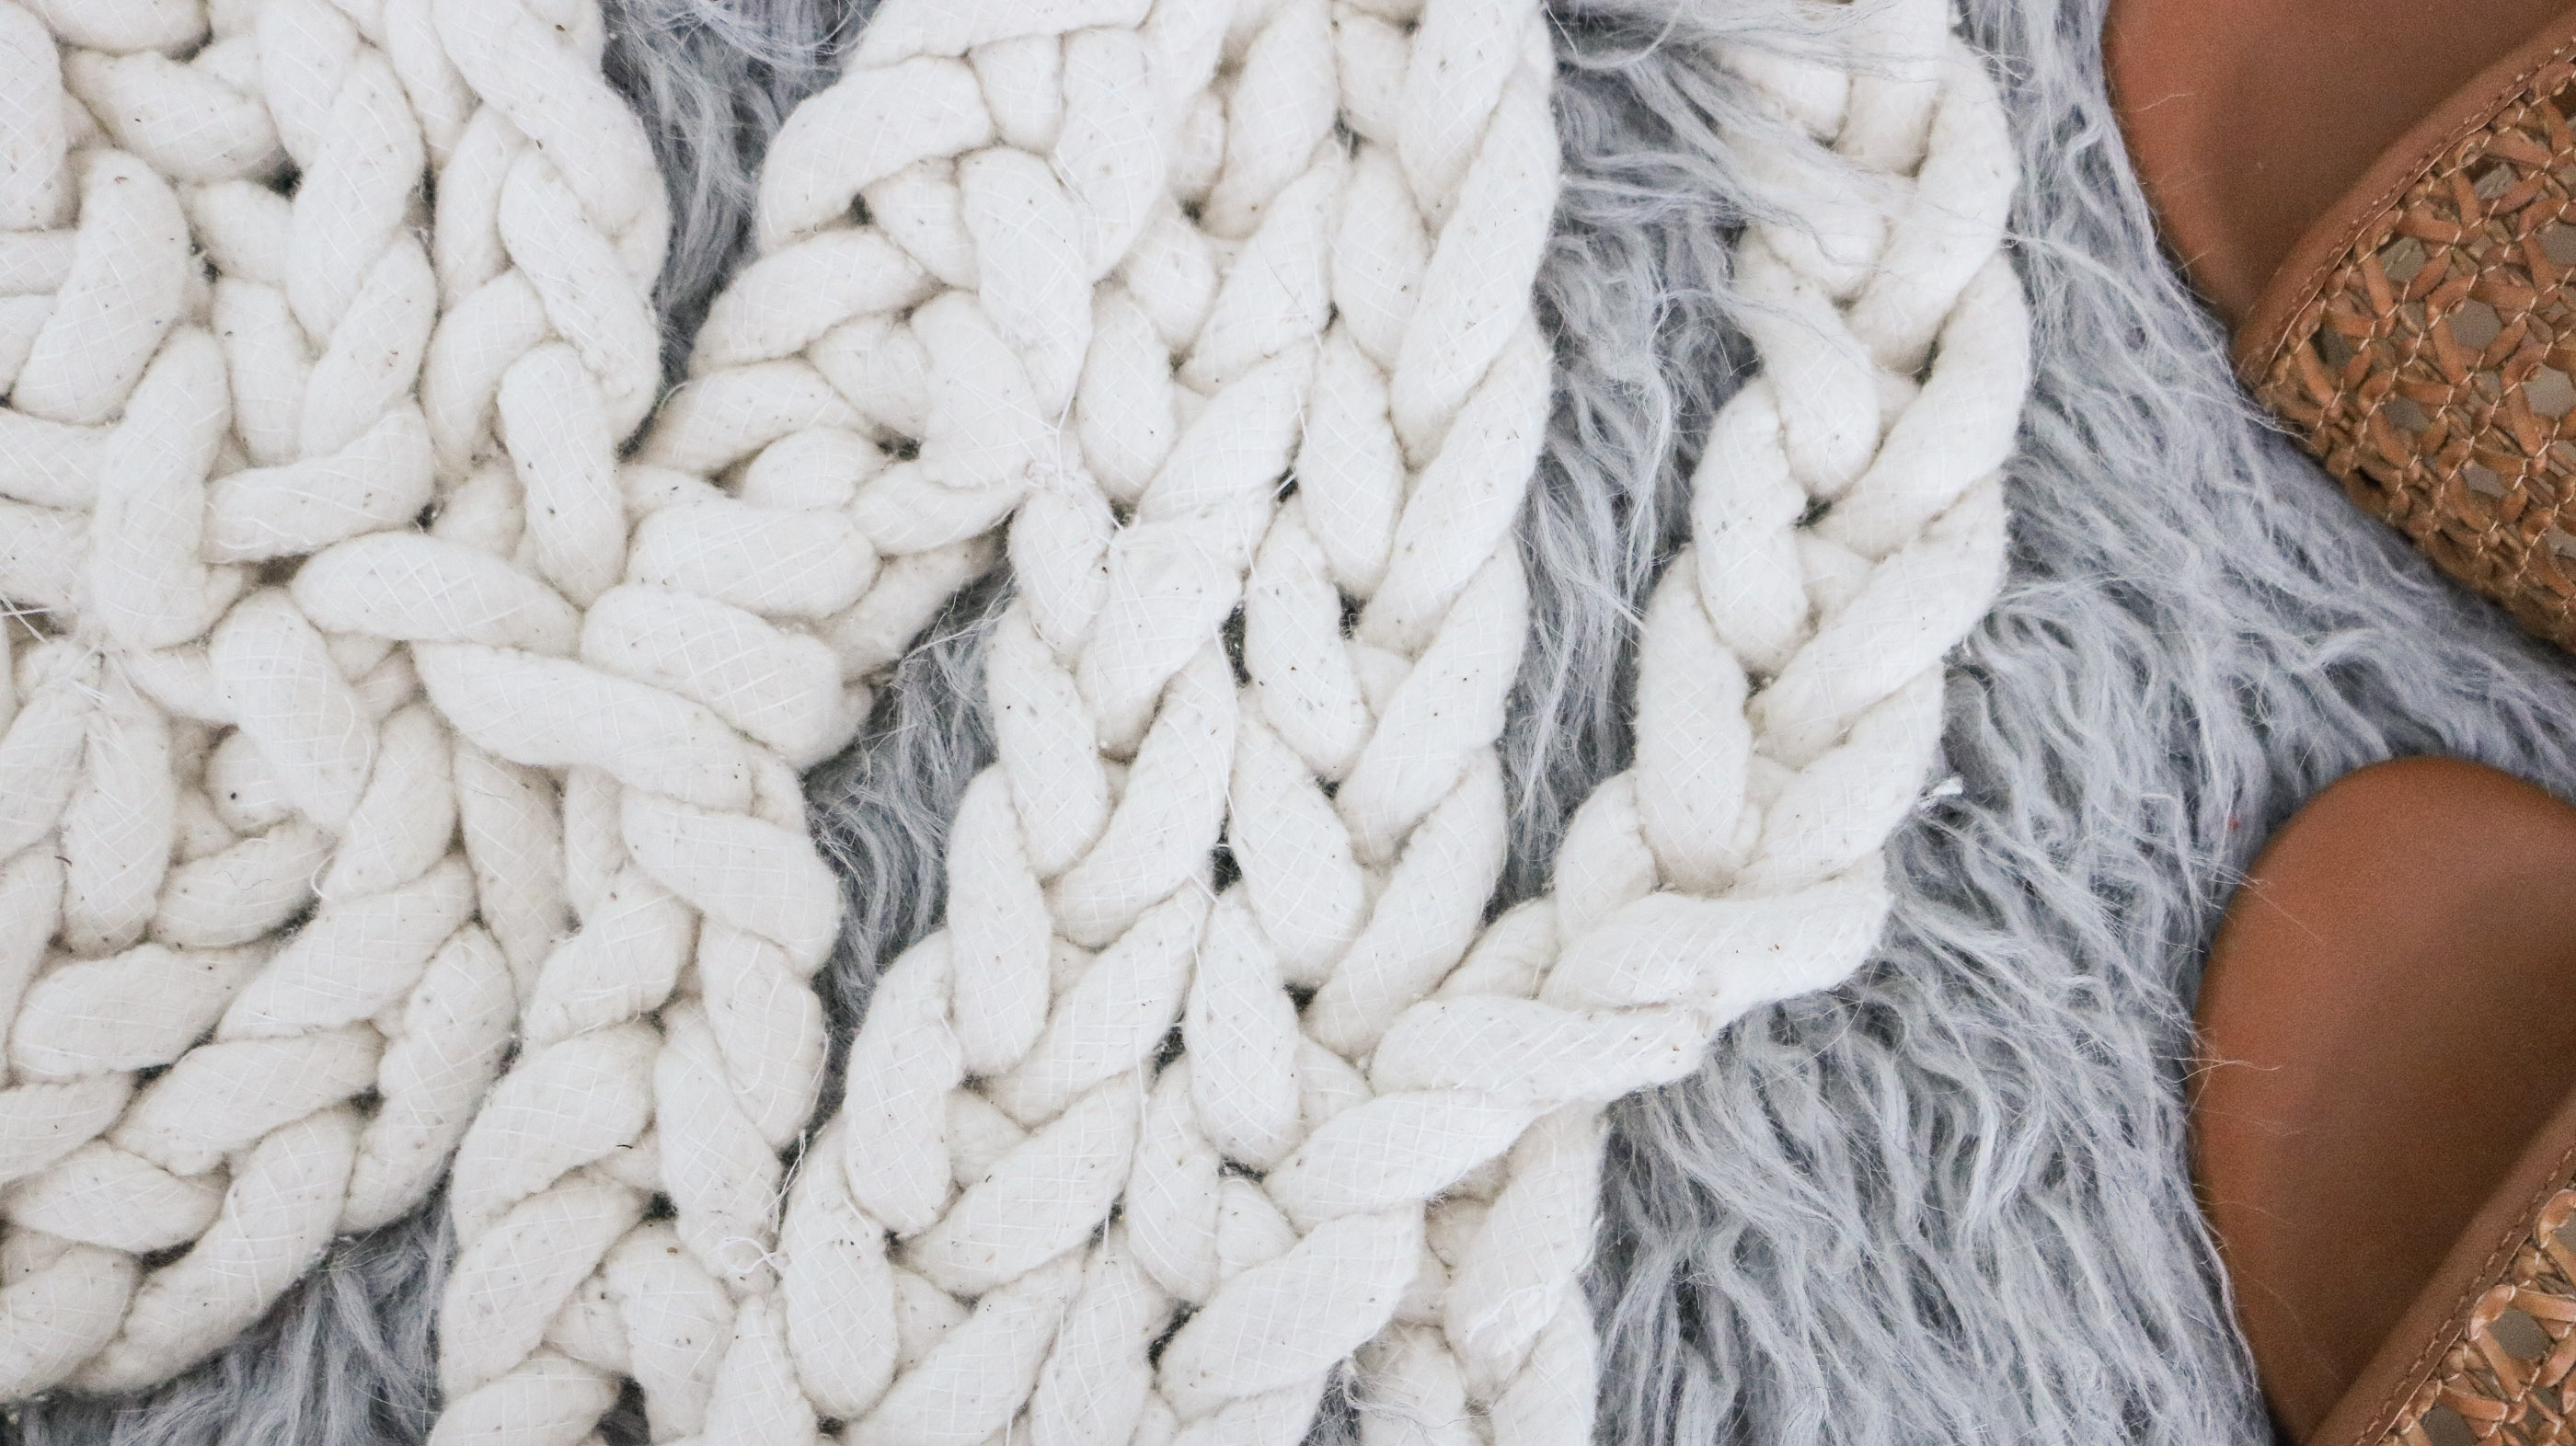
Since I decided to finish off my rug with small scallops to mimic a doily I did braided sections of 9 loops and attached them around the rug. You can keep making a bigger rug if you’d like. I ran out of cording otherwise I probably would of added at least two more rows.
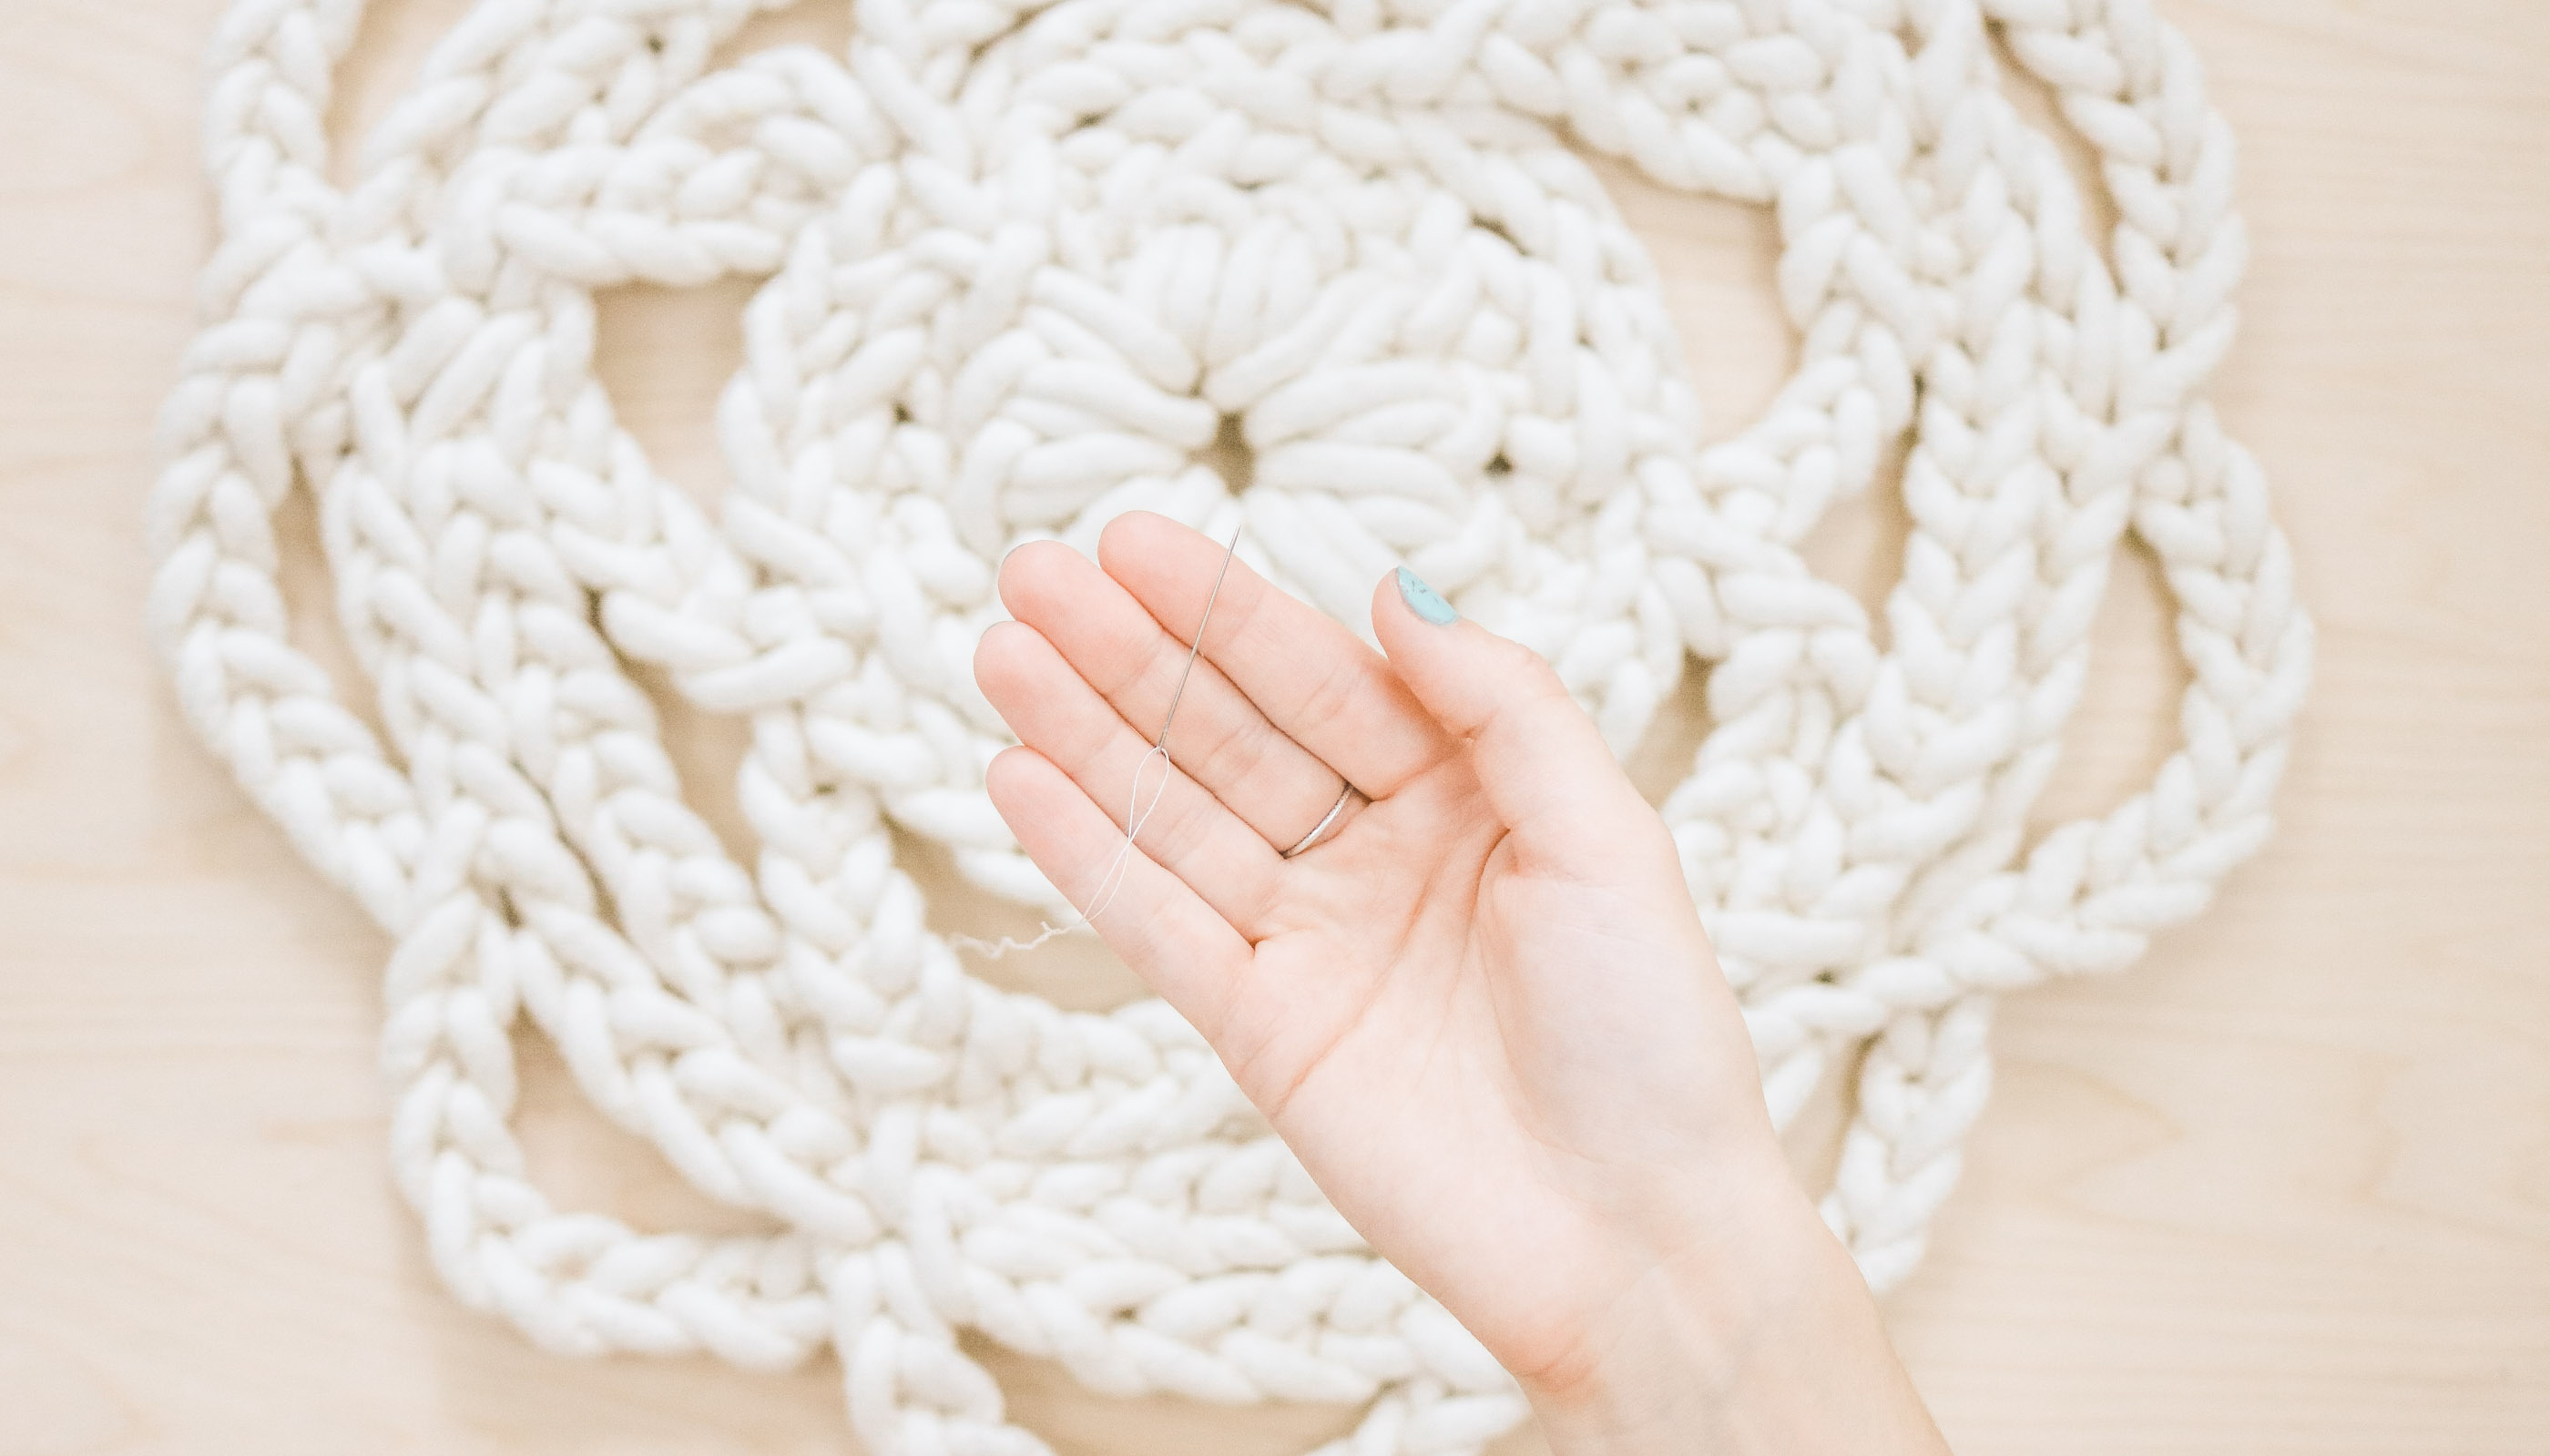
Step 10 – Bringing the whole rug together!
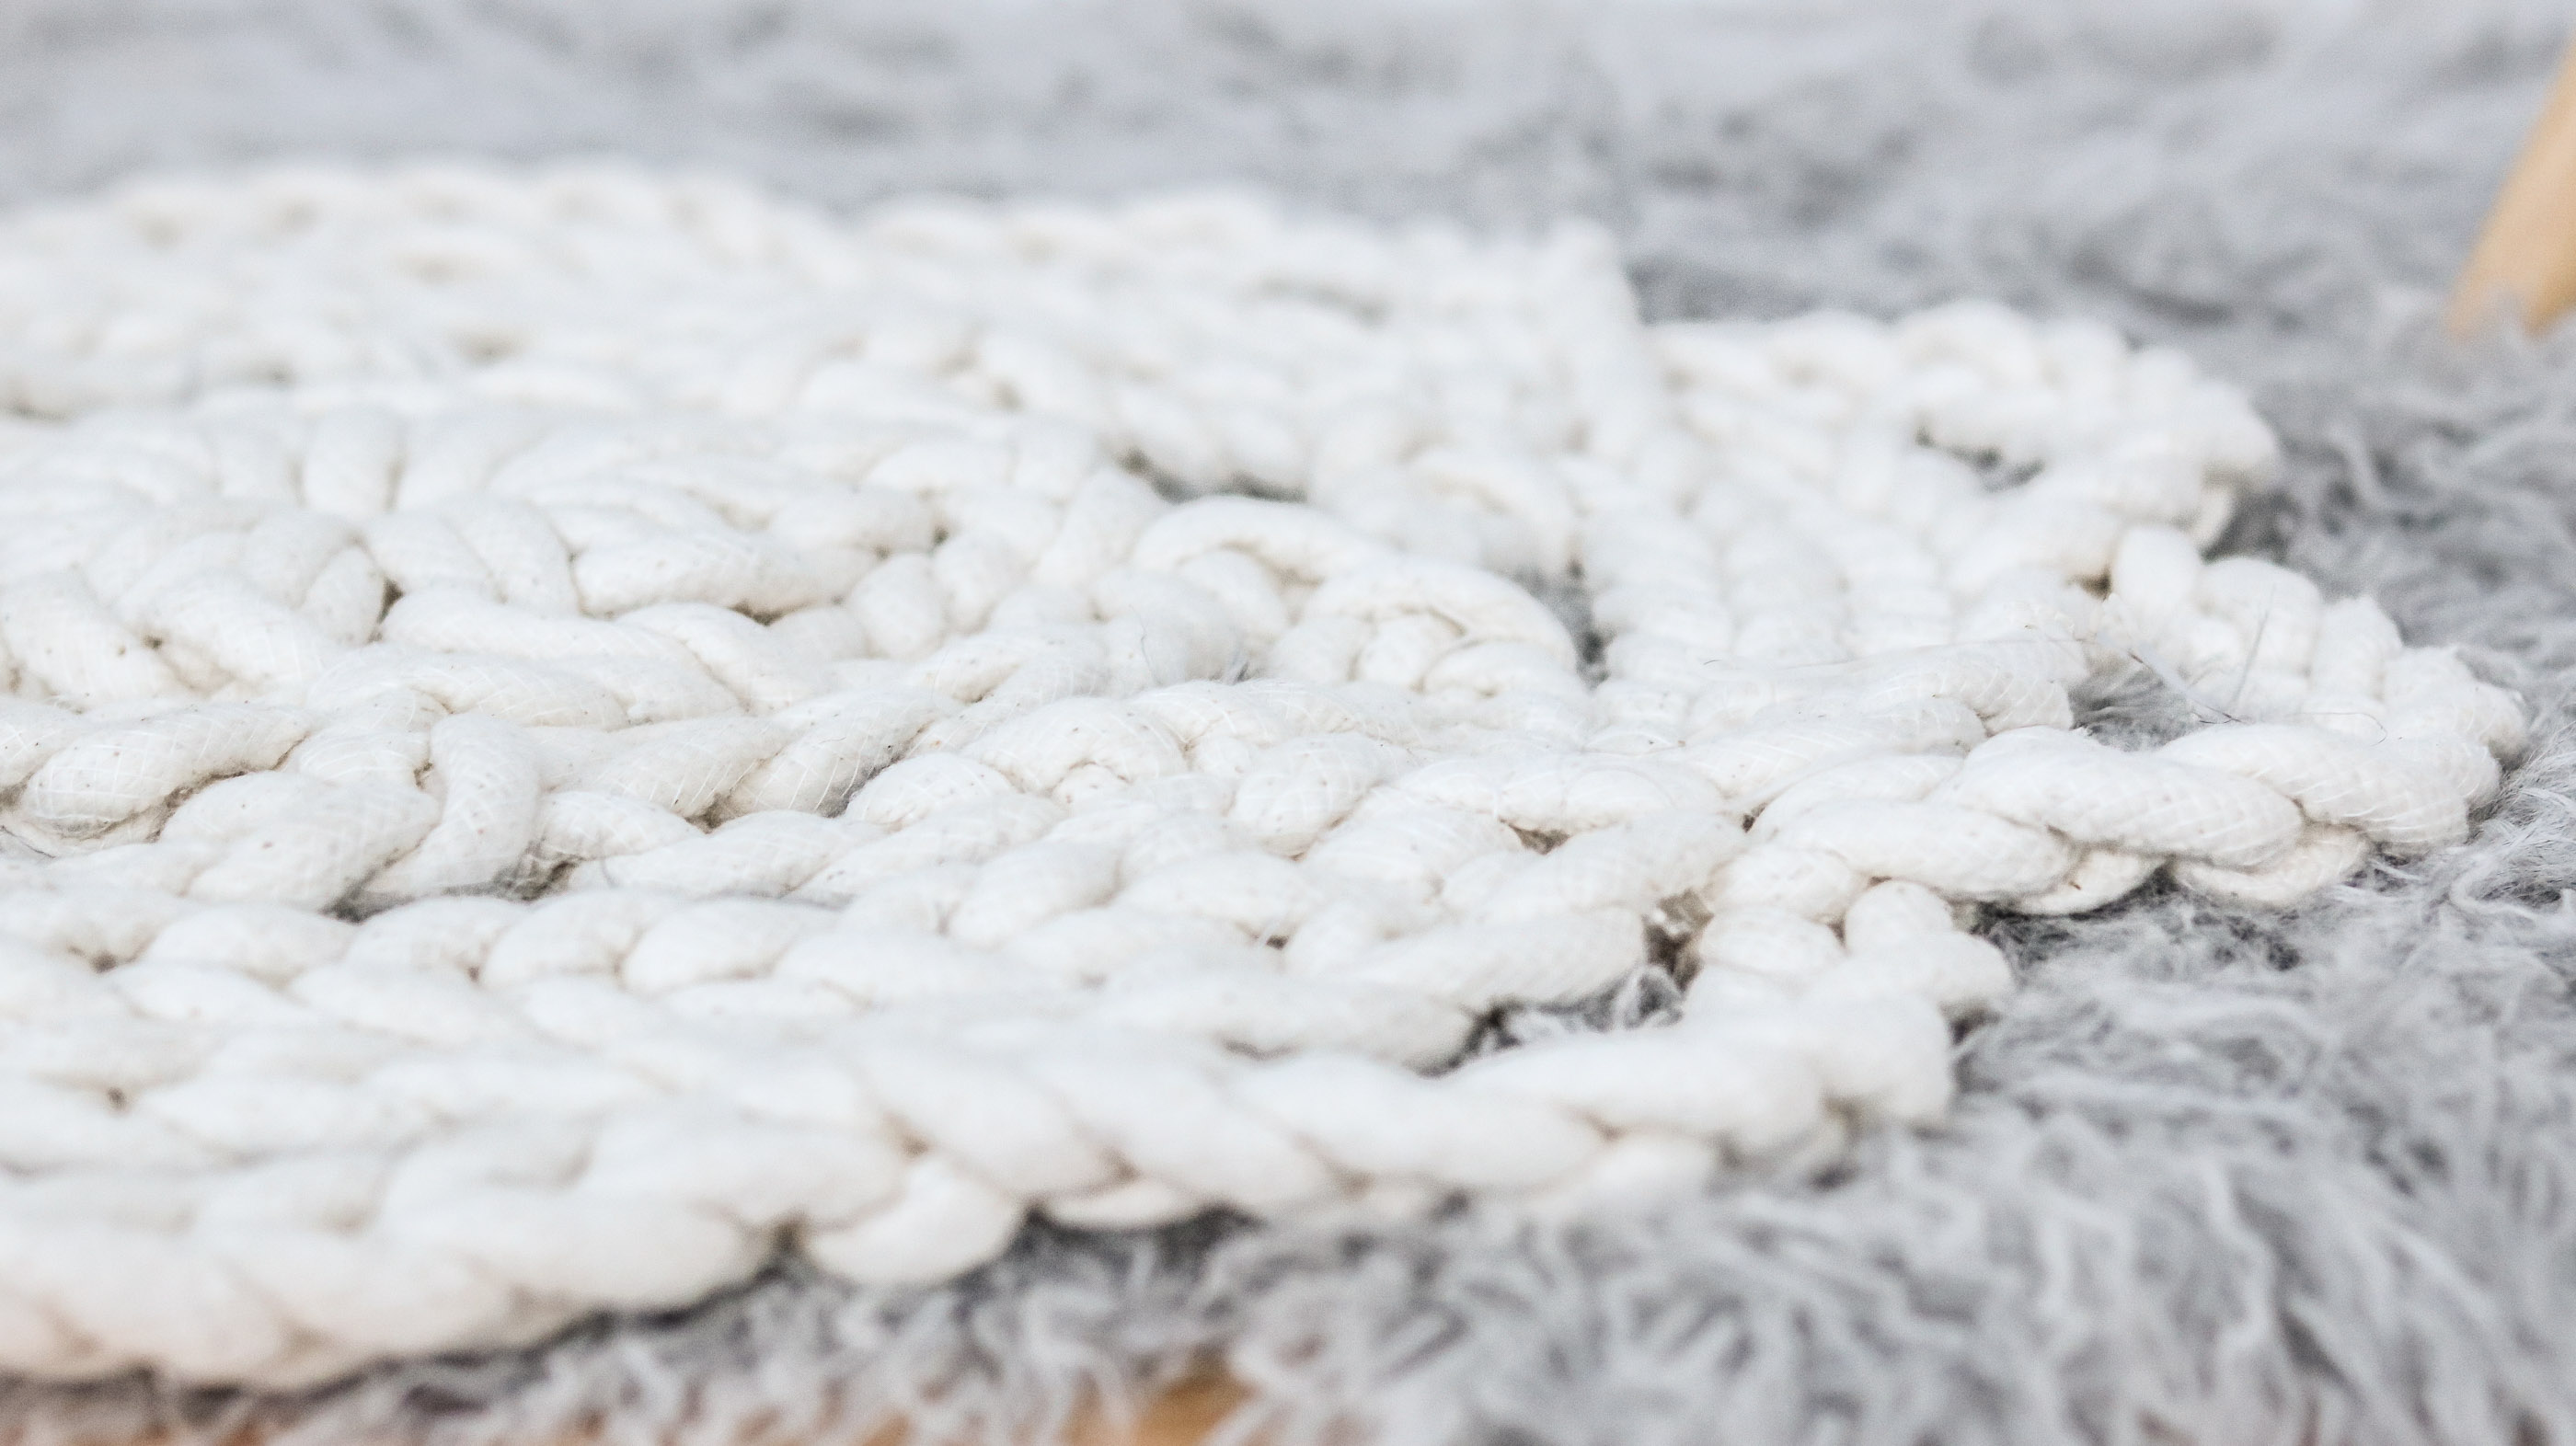
This is totally optional but in my personal opinion it really brings the whole rug together and makes it look like once piece instead of chunky messy braids. I simply used a needle and thread and sewed spots that needed to stay together.
Here’s a video tutorial!
That’s it! It so cozy and cute!
Here’s what the stitching looks like close up!

Happy Crafting! I hope your having an amazing weekend!
Wow girl this is AMAZING!! I love the pattern you chose, too! It’s so cute 😍
Awe thanks girl! 😀 I’m so glad you liked the pattern. 🙂
This is awesome! At first, I thought this was crocheted, but now that I see it’s finger knit, I love it even more. Beautiful job! I definitely need to get me some of this cording. I haven’t seen anything like this at my local JoAnn’s. Will need to dig deeper.
YAY! so happy to hear you liked it. LOL I can’t crochet at all I’m glad I was able to figure it out without having to learn crocheting. Joanns sells it by there badding 🙂
Thanks for this, your rug turned out beautifully!
Did you do anything to seal the material against getting dirty quickly?
Thank you so much. You can spray it with waterproof spray. This helps keep liquids out. I didn’t do anything. I washed it in cold water and let it air dry.