Resin Art Pour
So this resin pour was probably the most fun I’ve ever had with art! Not to mention it’s also probably my quickest art piece as well. I’ve had this DIY on my to-do list for so long and I’m so happy to have teamed up with hobby lobby to bring you this tutorial. Honestly I was a bit intimated by resin jumping into this DIY. I’ve watched so many youtube videos and it all seemed a bit overwhelming. I had so many unanswered questions and did so much research before starting but, truth be told it’s more fun than scary! Once you see those colors blend and do their thing you’ll be wanting to make another one immediately!
I think the time constraint was what really freaked me out at first. I usually like to take my time when creating artwork. After reviewing a few options for my resin I found a resin that has a 45 min work time which isn’t bad at all. Honestly I think if I had more work time I’d be over saturating my canvas with too much color. I’m glad the time constraint helps me keep it simple.
If you’re like I was jumping into resin pour.., freaked out with a zillion questions! Than I hope to help you feel more comfortable about the subject of fluid resin art. 🙂
Before we jump into this tutorial here’s the video version if you love videos. 🙂
(by the way if you plan on working with resin I would recommend reading the rest of the blog post there are a lot of tips and tricks you don’t want to miss)
What kind of resin should I use?
Picking the right one for pouring epoxy resin art!!
This could make or break your artwork!
Your epoxy resin could make or break your project. If you aren’t really familiar with resin here are some basics.
You’ll usually have a liquid hardener and the liquid resin. Your resin will not start hardening until you add your hardener. There are a lot of different types of resin for different projects. Jewelry resin, table resin, art resin, casting resin etc..
I love reading reviews on everything I buy and when it comes to resin I’d say I’ve read my fair share of reviews to know that casting resin (its’ cheaper) would not work for my art pour. Casting resin (photo below) is made for creating jewelry and other knick knacks. It sets a lot quicker than Art Resin and will not give you enough time to create your artwork. Even though casting resin might say it has a working time of 30 min (that’s what I read on the label) in most cases it’ll start setting in as little as 10 minutes (from the reviews I’ve read) So with all that in mind I knew I didn’t want to risk buying the casting resin.
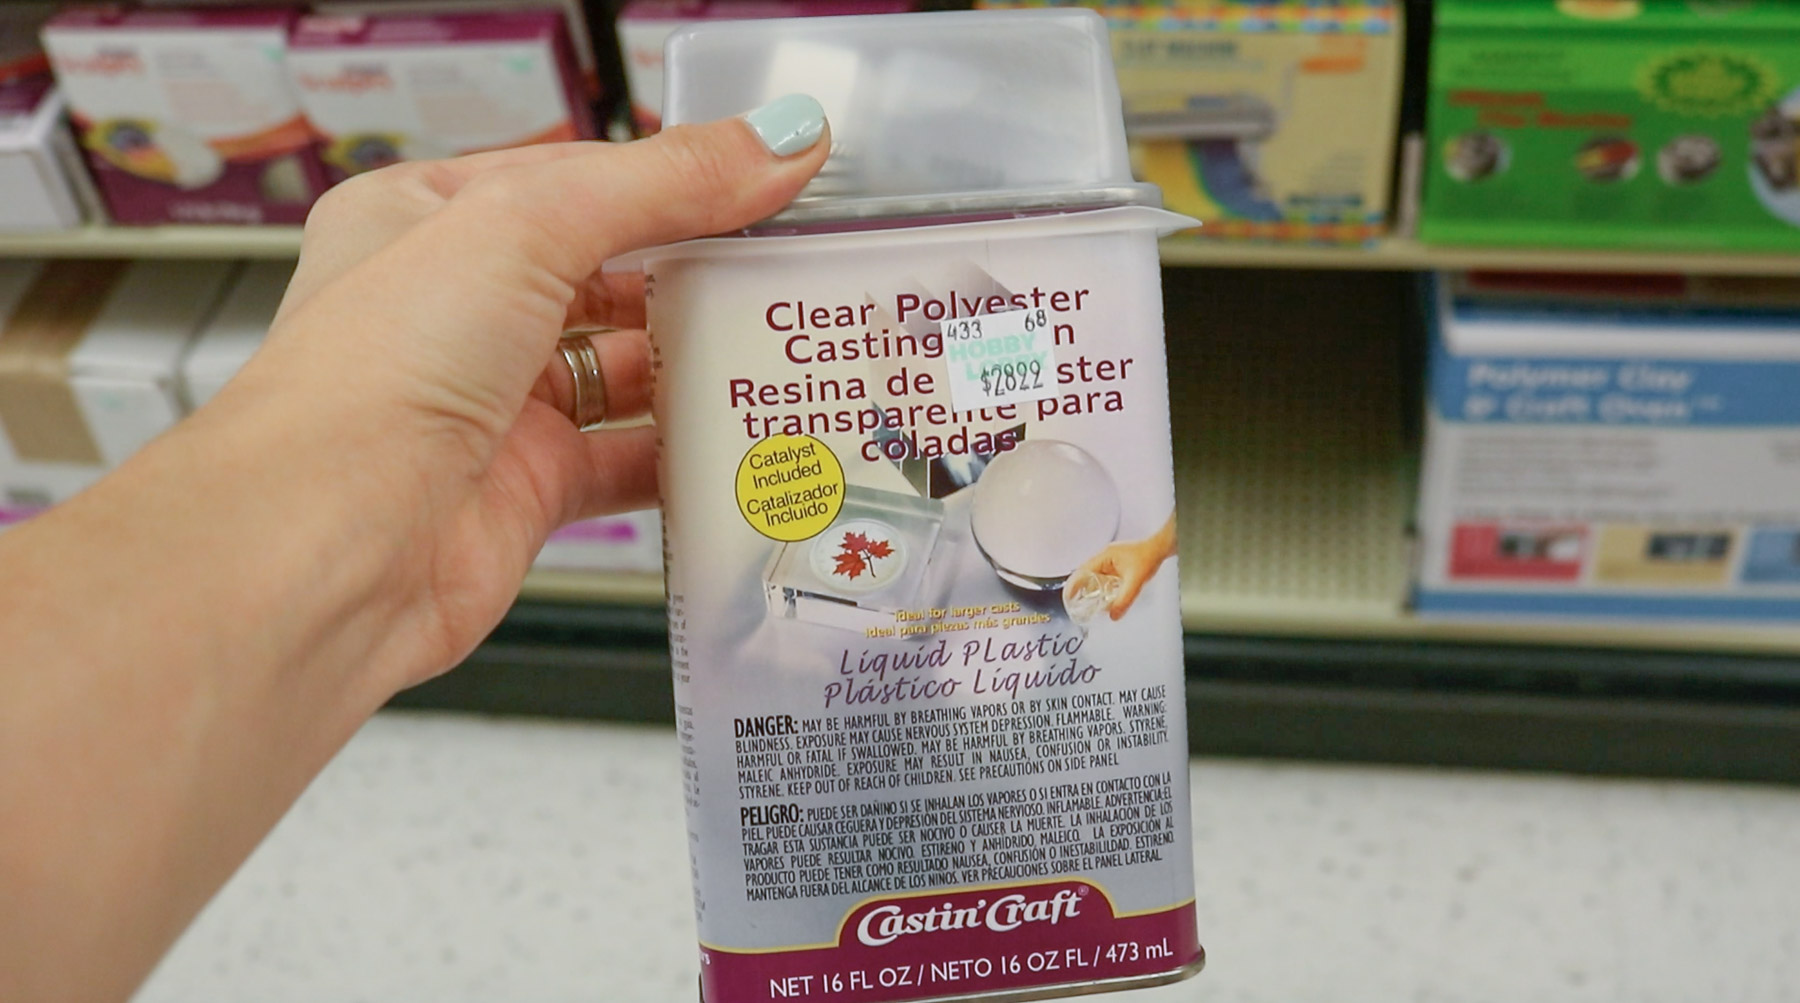
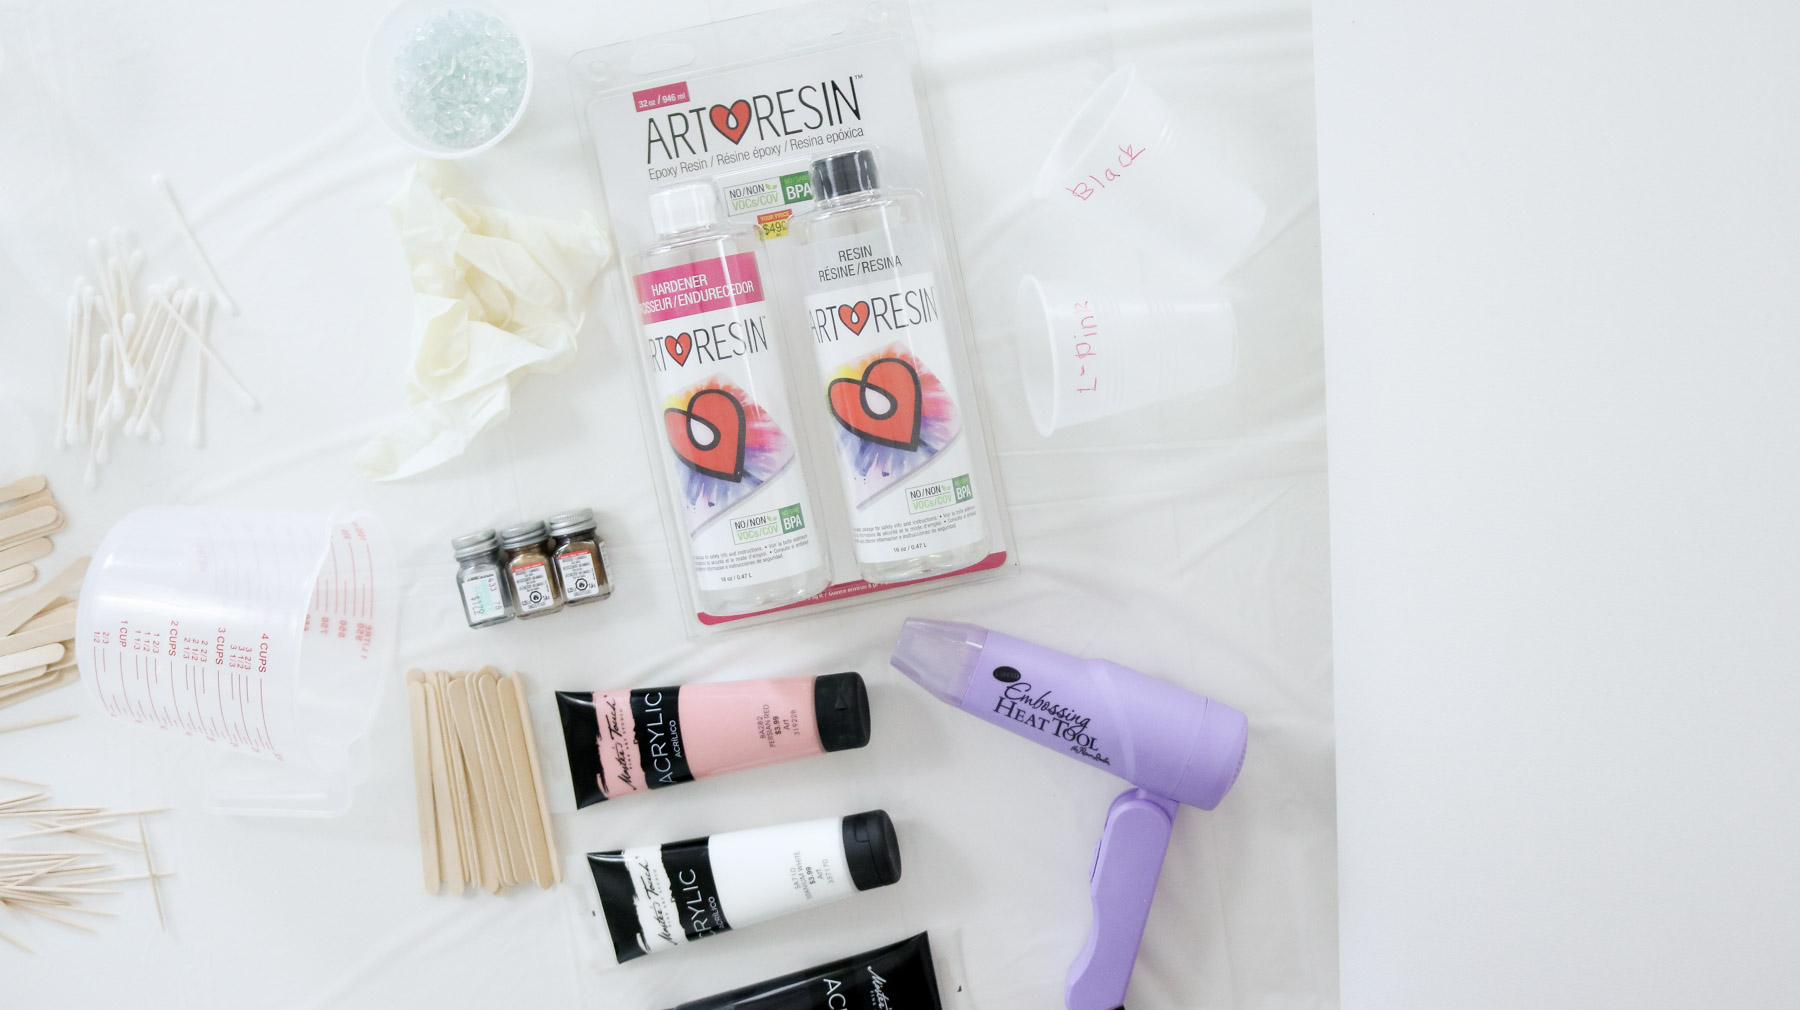
Here’s a photo below showing the resin I went with. (art resin)
Shop art resin in bulk –
What you’ll need to make resin pour art:
- toothpicks
- resin (here’s where I got mine)
- ice cream sticks
- heat gun (I got mine at hobby lobby for $13 with their 40%off coupon –> you can get the coupon here)
- acrylic paint (here’s where I got my paint)
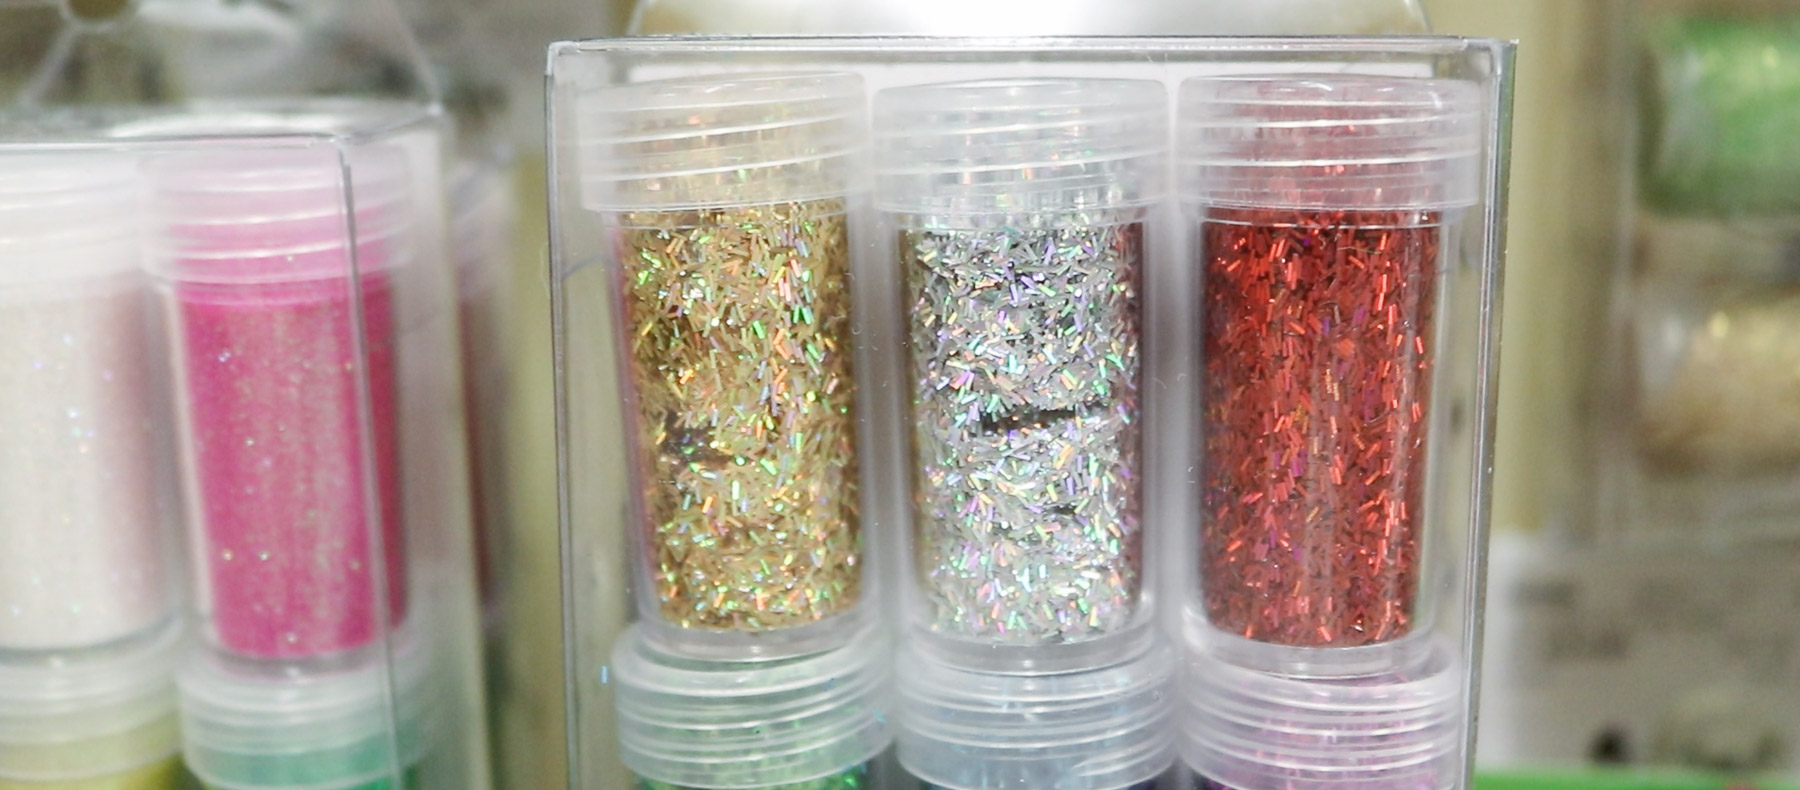
- gold pigment or spray paint or in my case I used some little model car enamel paints
- lots of gloves
- 2 measuring cups
- A canvas or piece of wood. (if you plan on adding rocks or crystals I would probably us wood)
- plastic cups
- broken crystals (or glass pebbles)
- paper towels
- plastic table cloth
- level
- tape
- straw
Basic questions about resin pouring answered!
What can I add to resin? Acrylic paint?
So the nice thing about working with resin is that there is a a wide range of mediums that could be added to it. From what I’ve learned you can use acrylic paints, spray paint, enamel paint, pigments, glitter, inks… I’m not sure if you can add alcohol inks but if I ever give it a try I’ll let you know. When picking your acrylic paint make sure they are more on the pigmented side. The more pigmented the better. It means you won’t need to add a lot of paint to your resin to get your desired color. Also keep in mind the more paint you add the faster some resins will set. I’ve learned this from experience.
How much paint can I add to my resin?
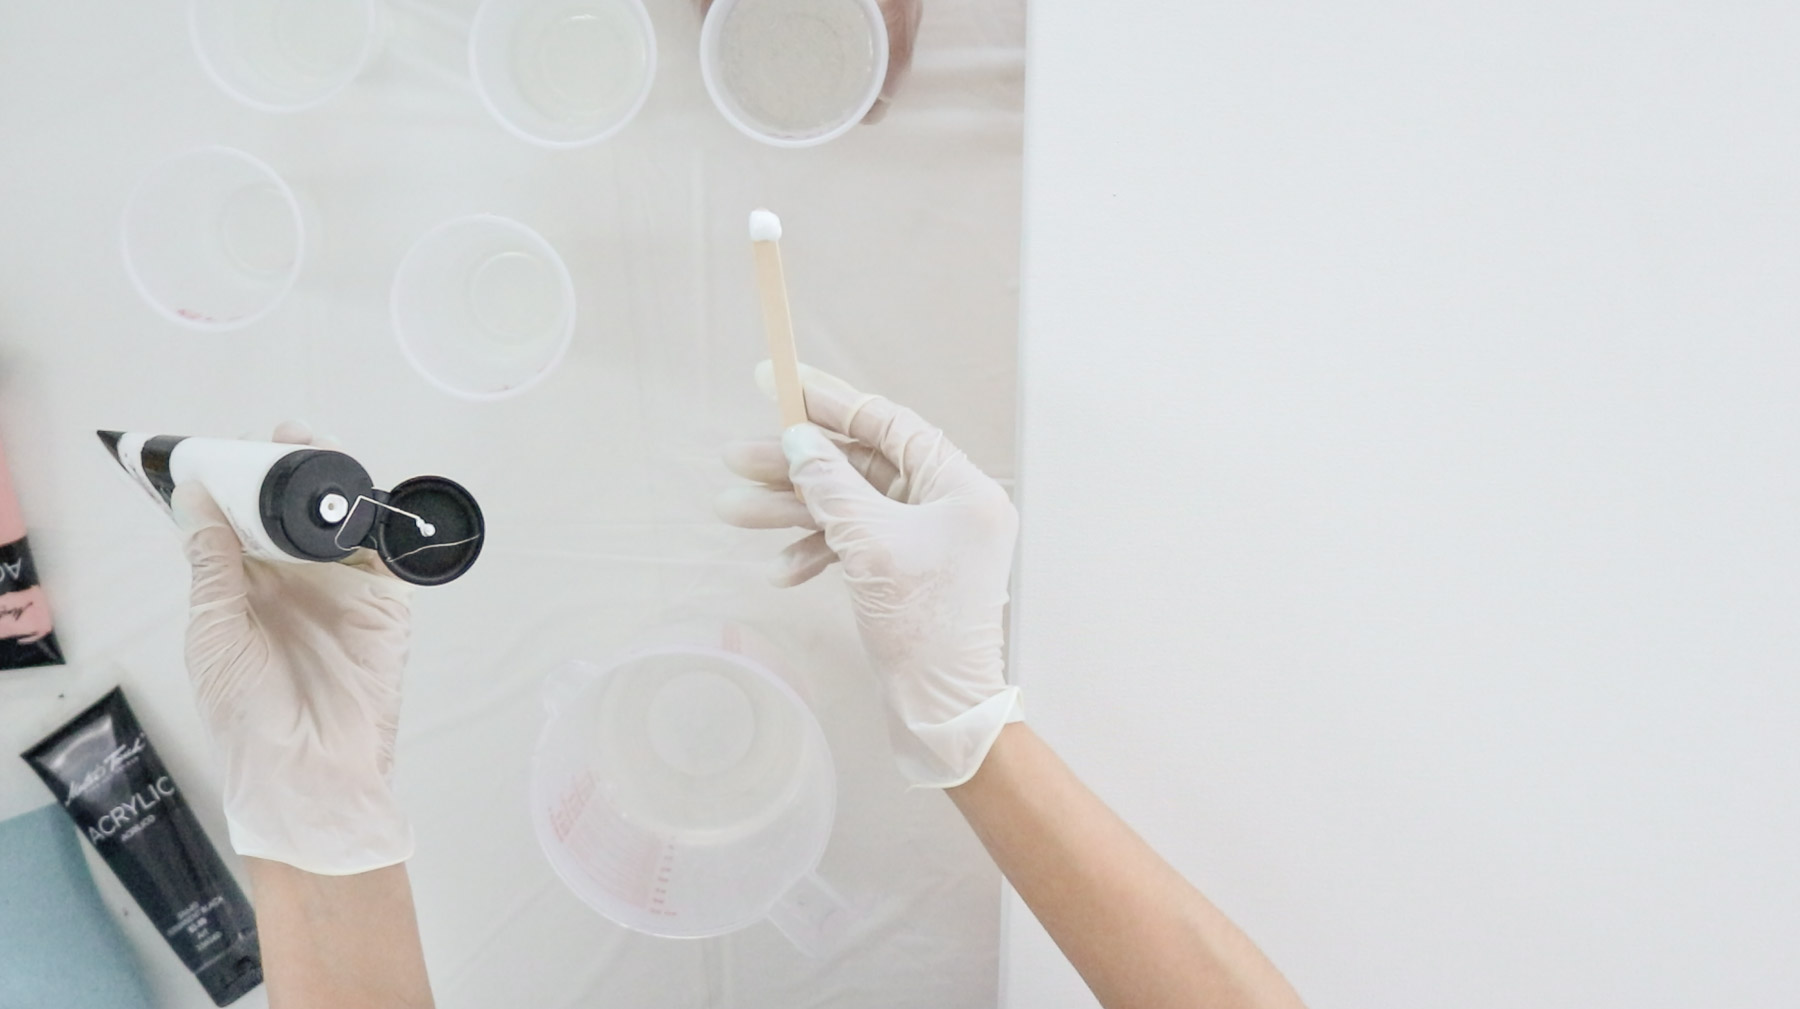
I’ve found that it is recommend to use a maximum of 10% paint per whatever amount of resin you have. You don’t need to measure it out. I just eyeballed it and made my color by adding a drop of paint at a time until I reached my desired color.
Do I need a heat gun?
I first tried out my resin on a little piece of would to practice the art piece I was going to make. It was about a 6×12″ piece of art. I didn’t have a heat gun but thought it went pretty well. Than for my big piece of art I got a heat gun and it was a complete game changer. Once you add your colors use your heat gun to warm the colors up and they’ll blend ssso nicely. Plus the heat gun will eliminate any bubbles rising up.
How long does resin dry?
So the resin I worked with dries to touch in about 24 hours. If you plan on shipping it somewhere I would recommend waiting at least 48-72 hours.
How much resin do I mix for my artwork?
For my painting 18″x24″ I mixed a total of 3 cups. That’s 1 1/2 cups of resin and 1 1/2 cups of hardener. You combine the two liquids and stir them. The art resin I used has a website I went on that helped me calculate how much resin I need. Even though it calculated for me to do 15 oz I did about a cup more and I’m glad i did. 15 oz just didn’t seem like it would be enough.
Things to watch out for…
- Mix your resin for a total of three minutes. This is really important. If you don’t mix it good enough it will not dry and you’ll have a sticky mess.
- Make sure your art piece is level before pouring. While working on your art you won’t really notice that’s it’s slightly not level until you let it cure overnight in which case your colors can shift or run off your canvas.
- Make sure your area is prepped and lined with plastic. This project does get a bit messy.
- Your resin will having bubbles coming to the top once you’ve poured it out on your canvas. You will need some sort of heat to pop the bubbles. (heat gun, blow dryer or torch) If you use a torch move it quickly about 2-3 inches above the surface. It should not burn your canvas or resin as long as you don’t hold it in once spot for too long.
Making your own realistic looking crystals!
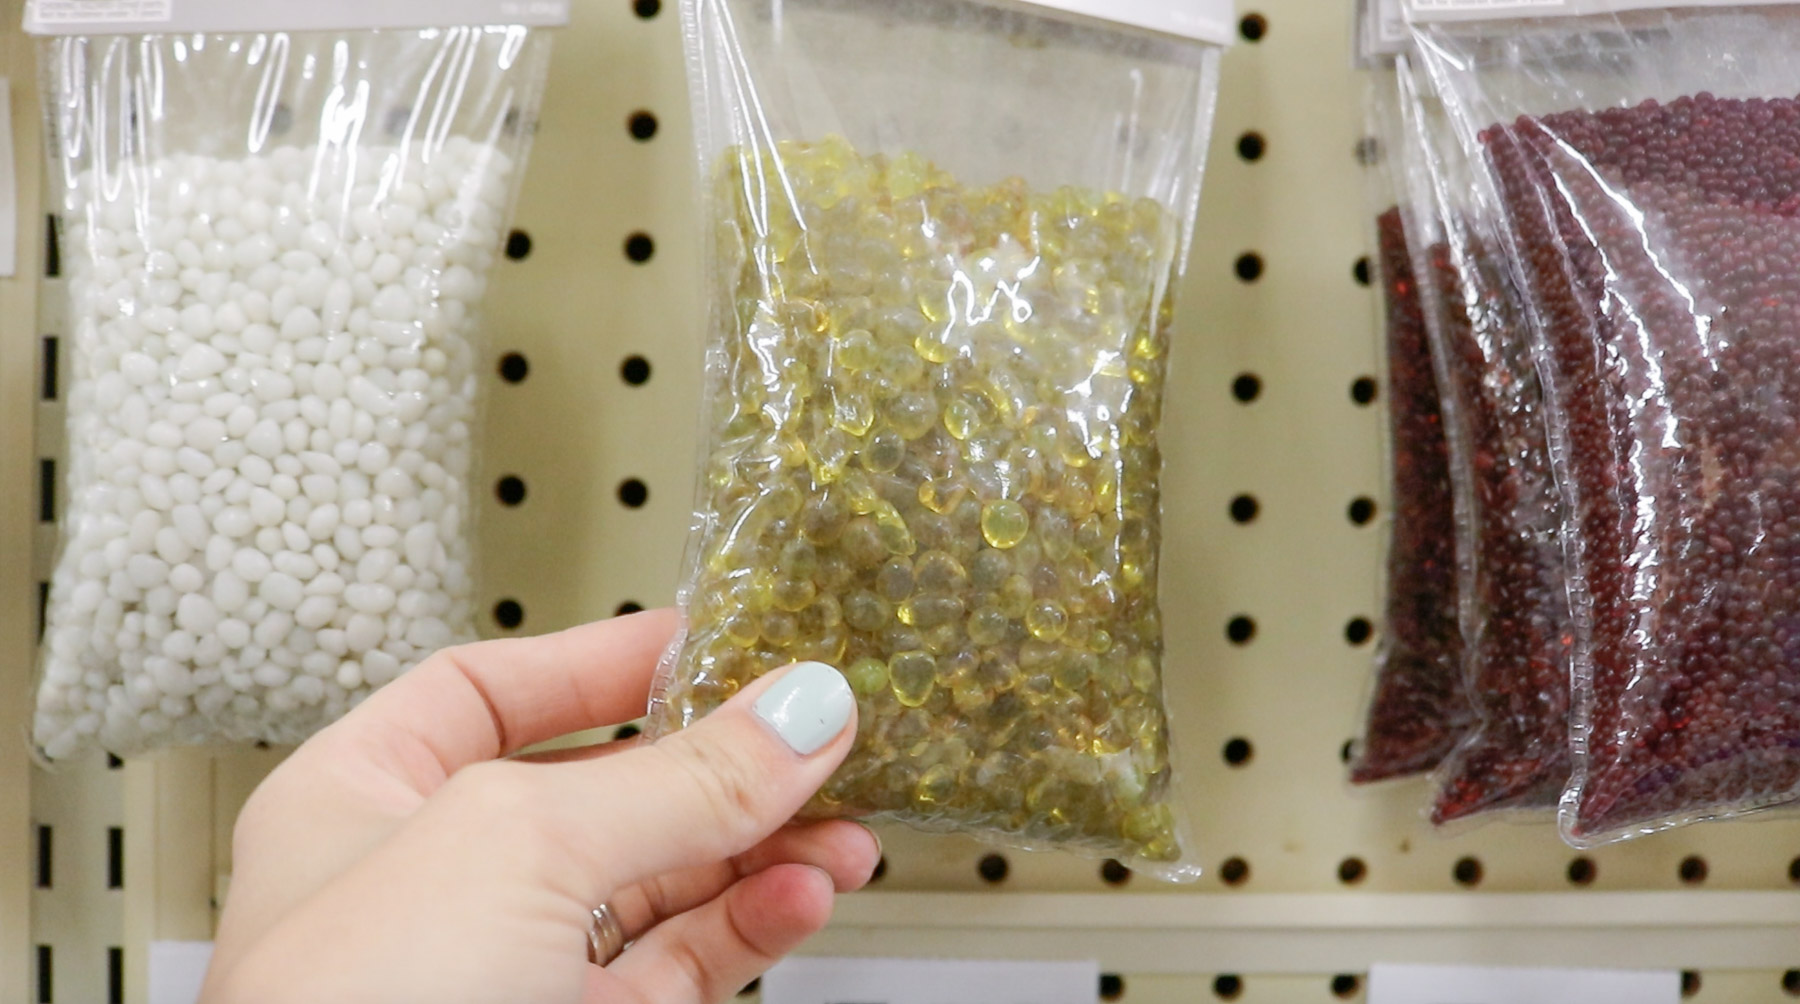
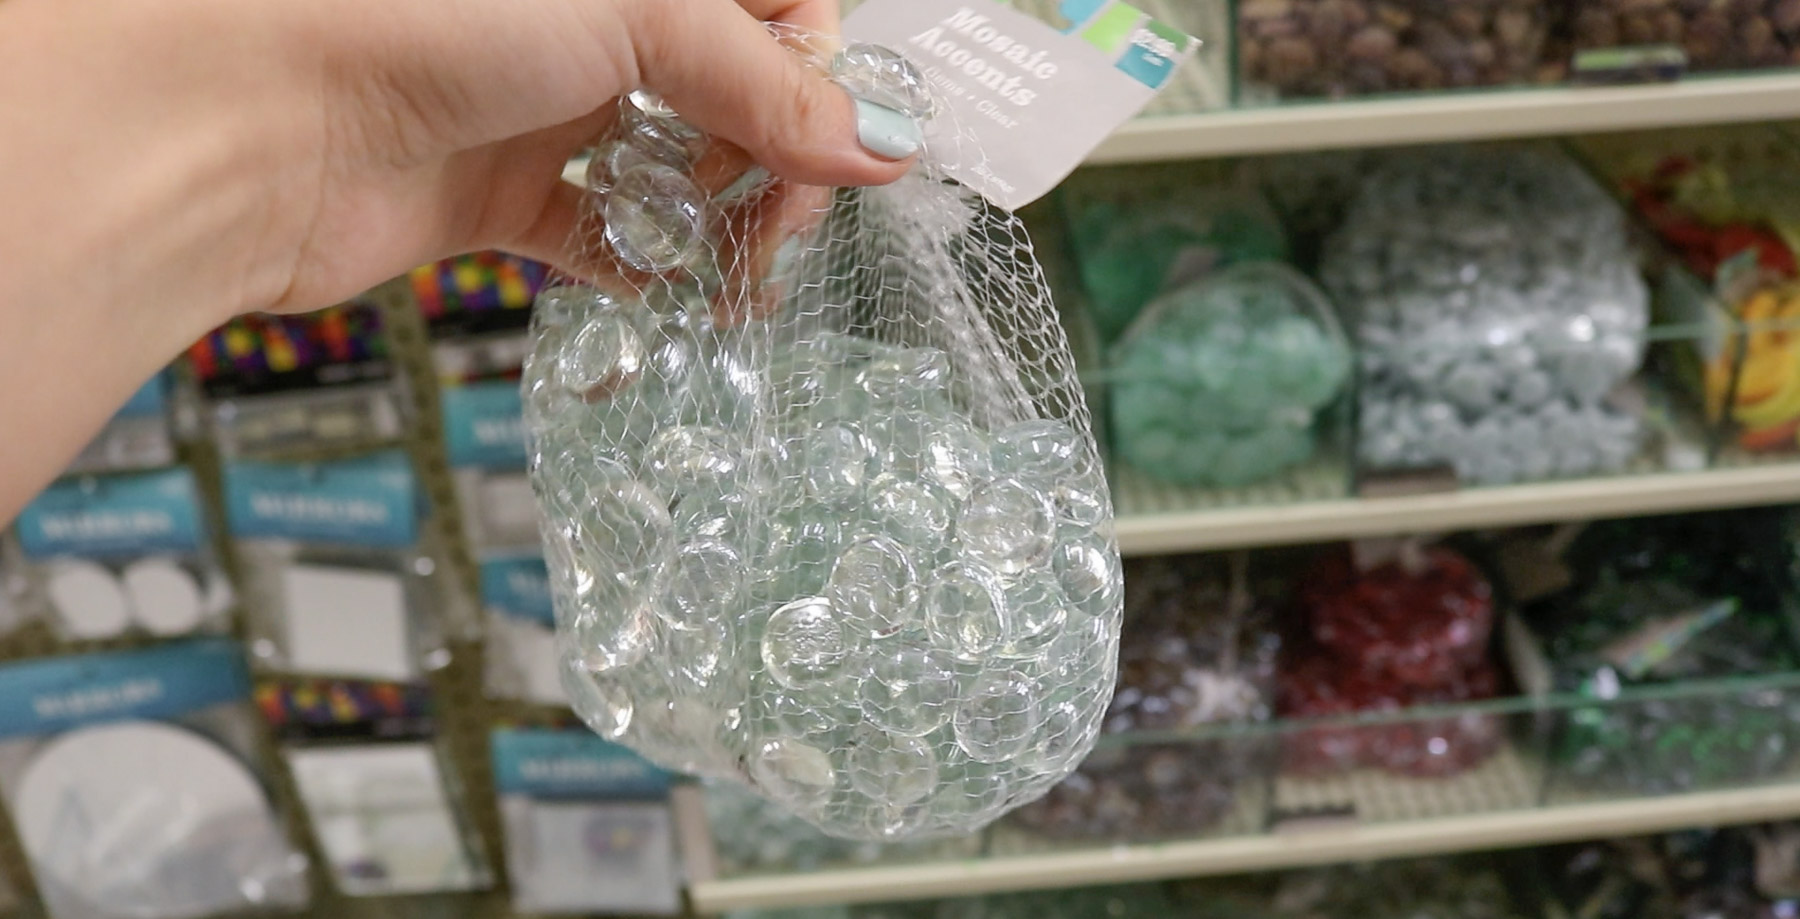
So I had a hard time finding realistic looking crystals. I came across some small glass rocks but they weren’t very shiny and didn’t look like crystals at all. To make my crystals I bought some glass pebbles.
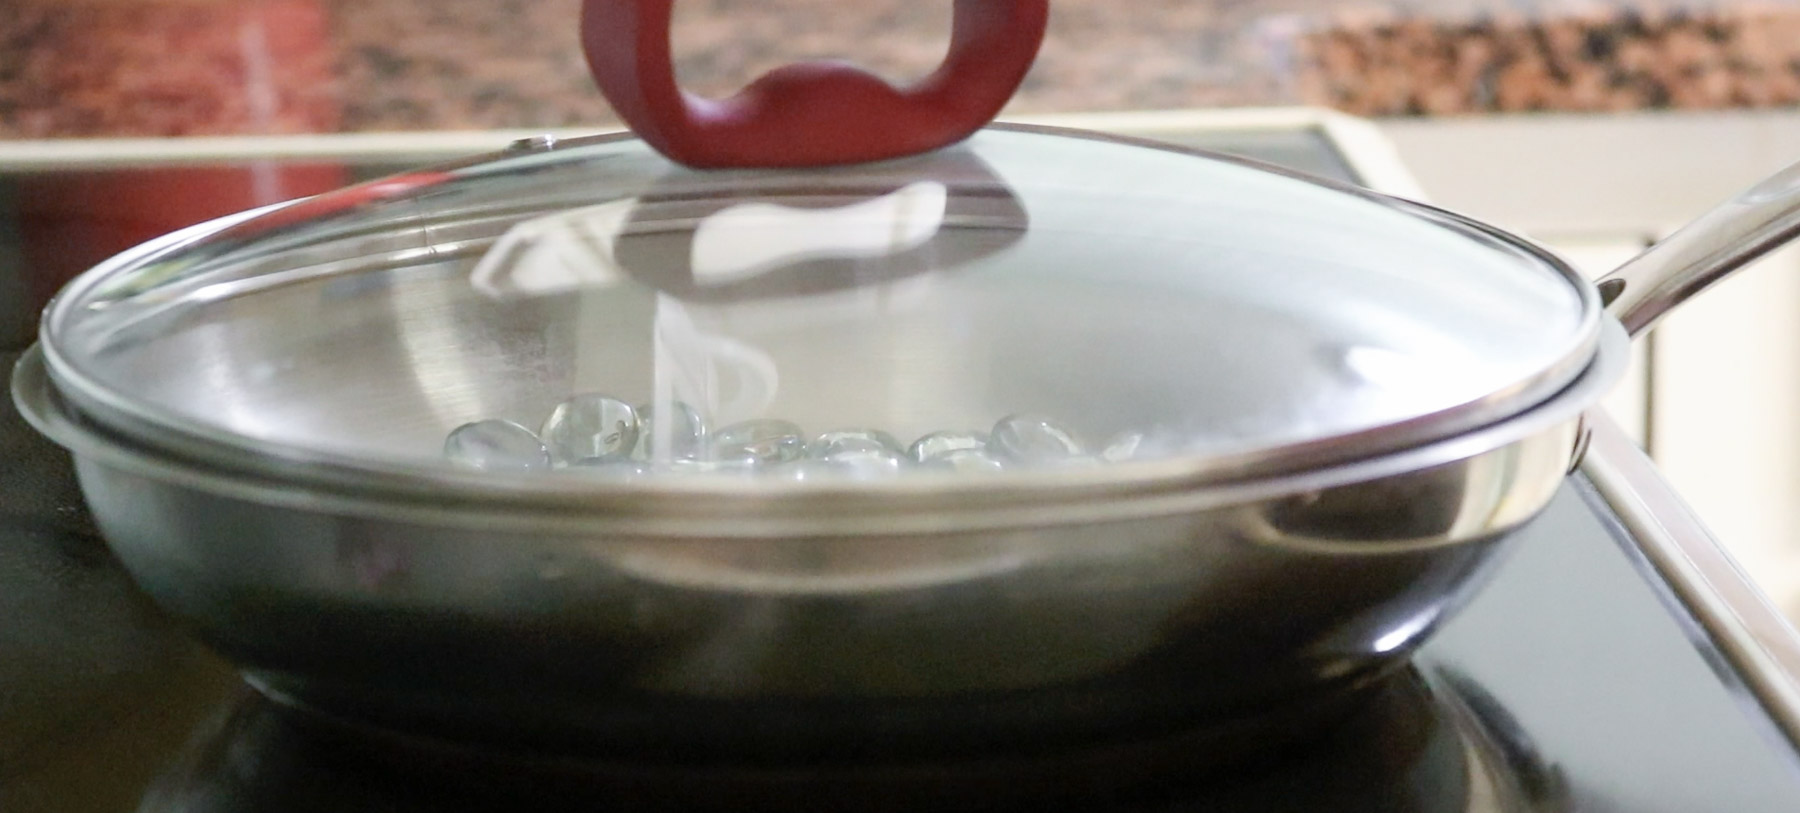
I dropped some in a pan and heated them up on low-medium heat for about 17 minutes.
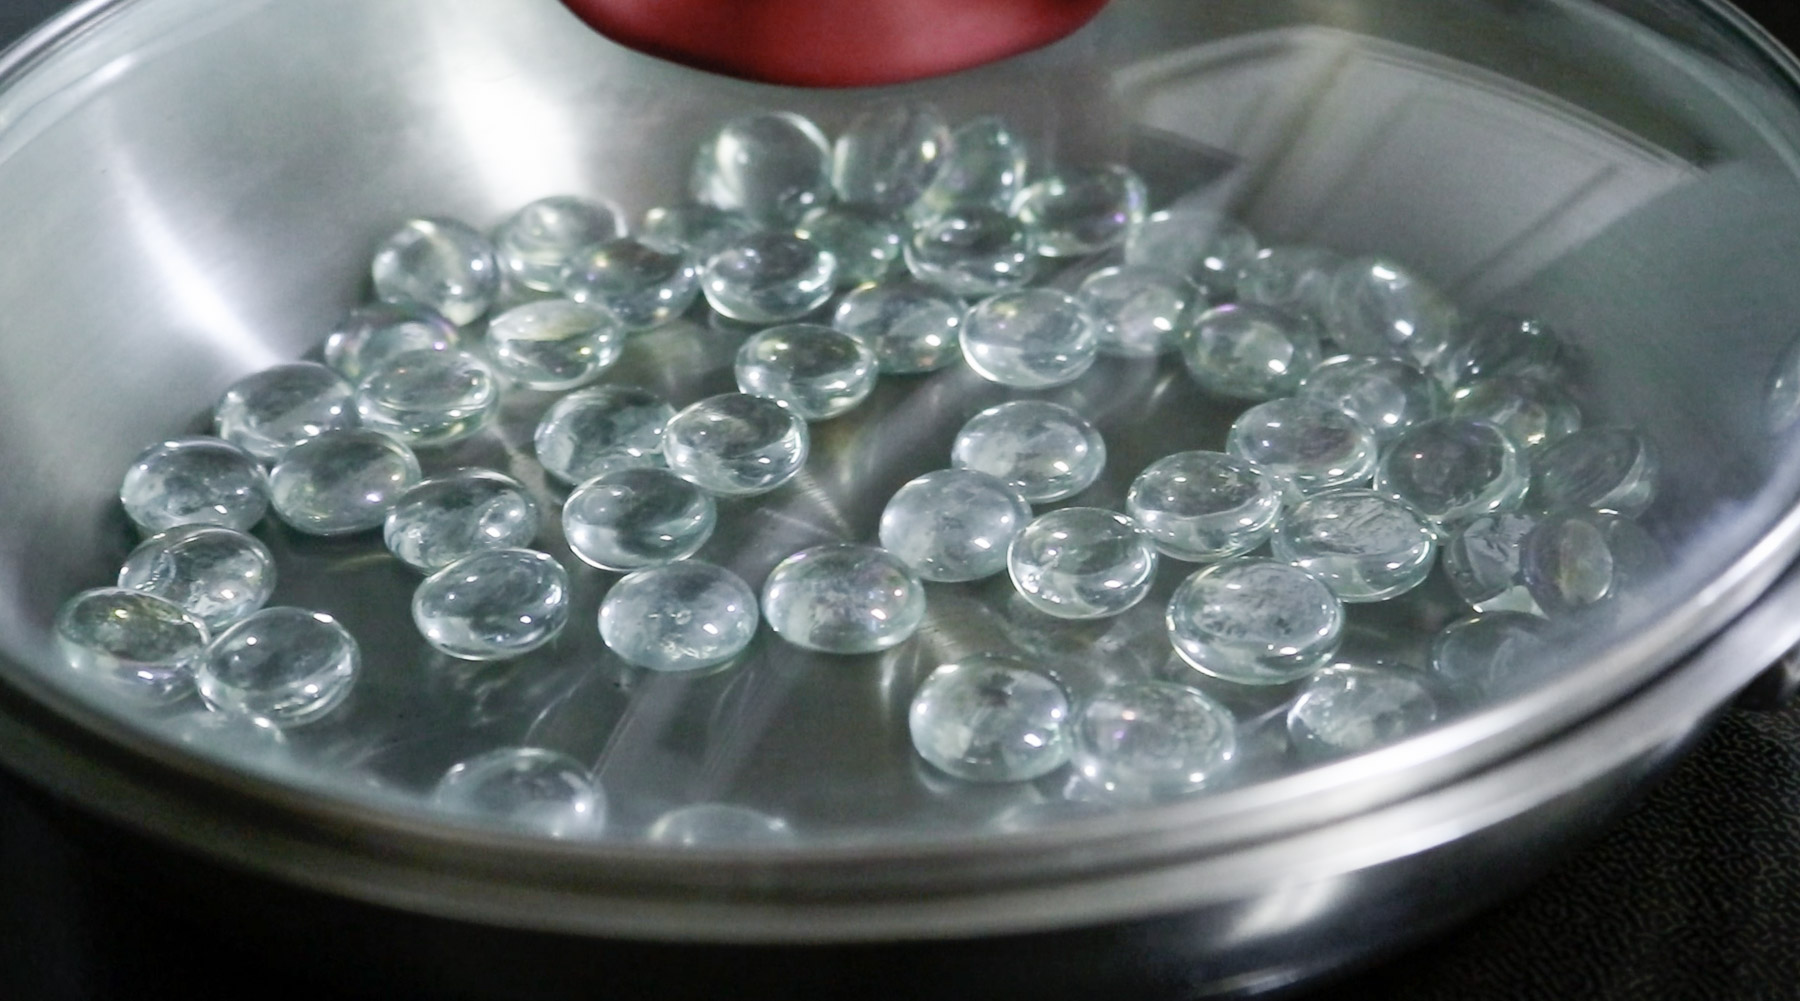
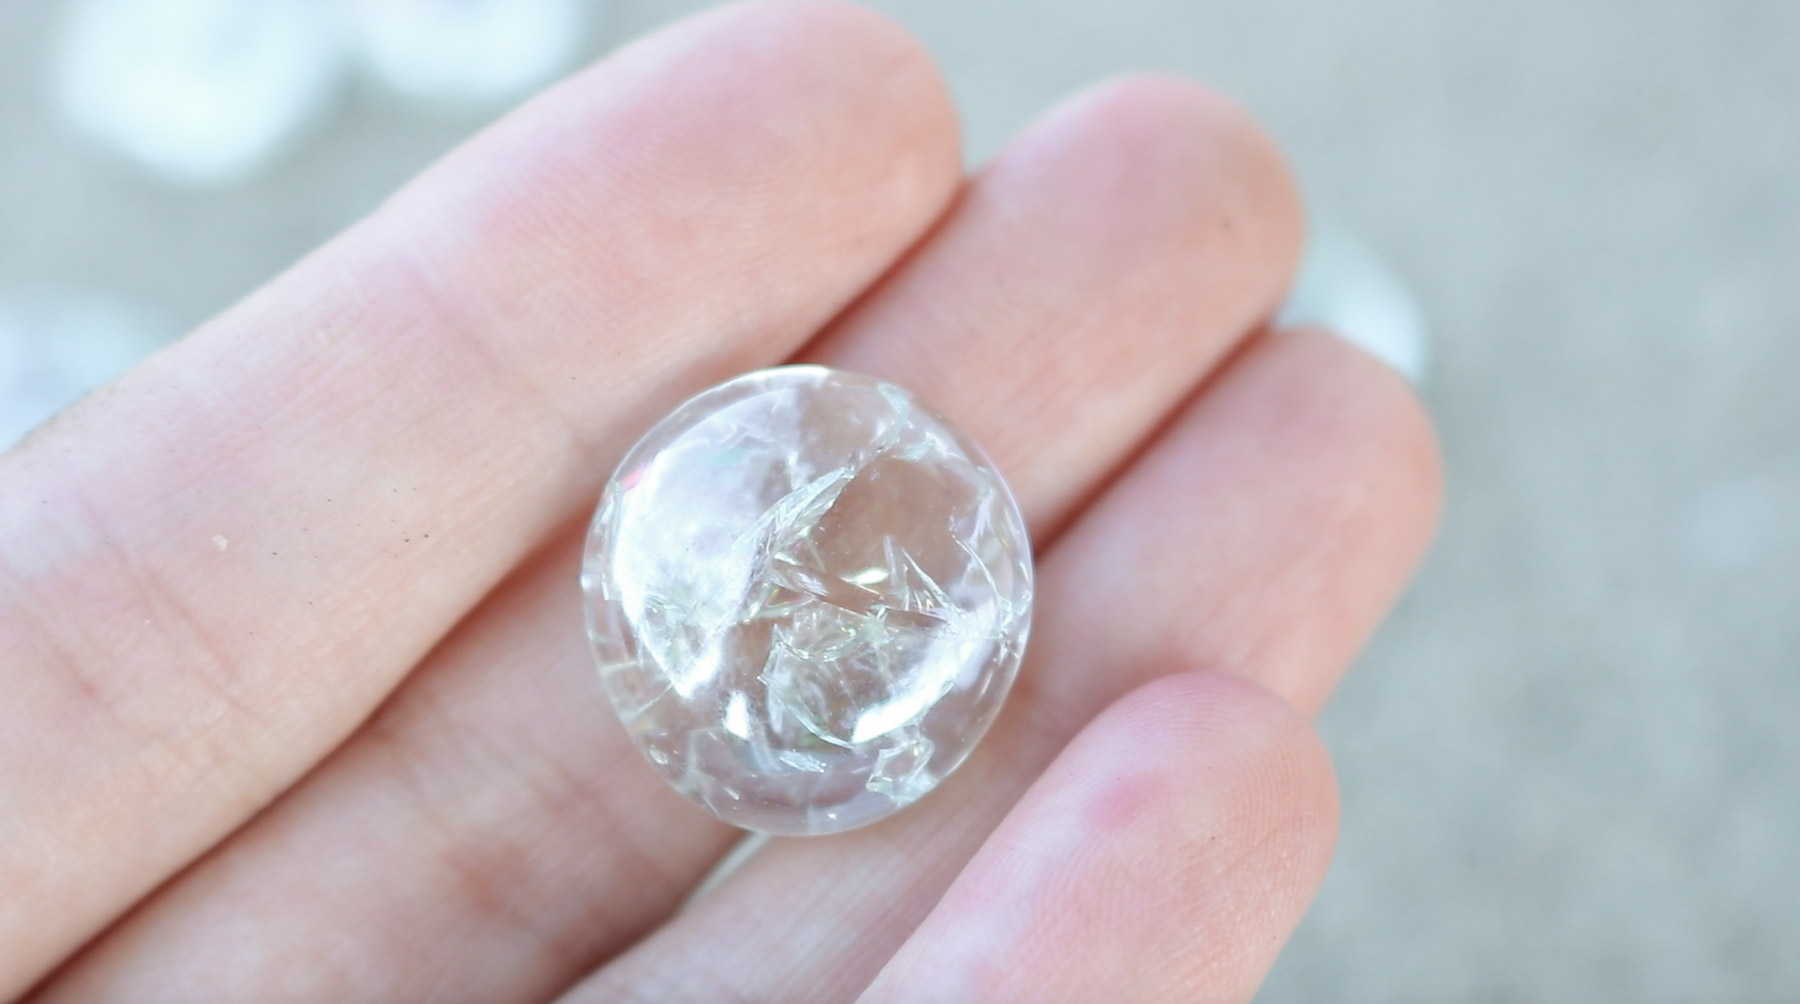
Than I dropped them in an ice bath and let them set for about 3-5 minutes.
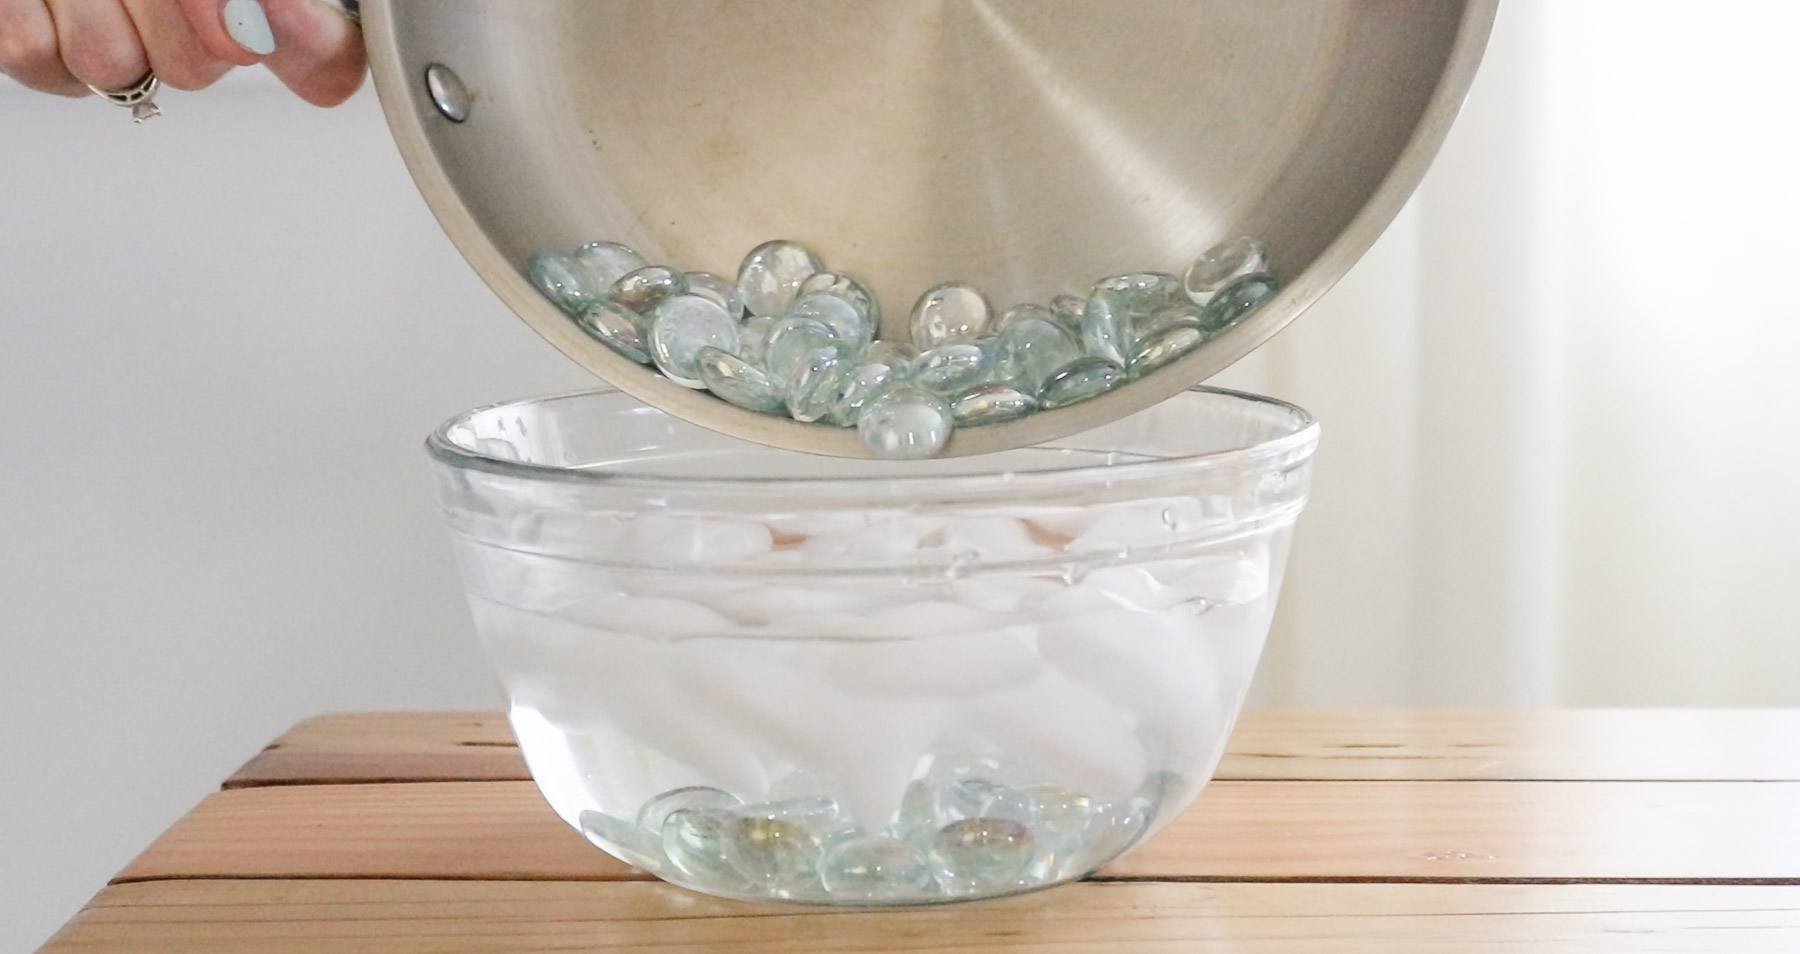
Once you pull them out they should have cracked inside. This will make it easier to break them. You can always try just breaking them with a hammer and not go through the process of heating them up but I find it breaks differently creating very sharp shards that way.
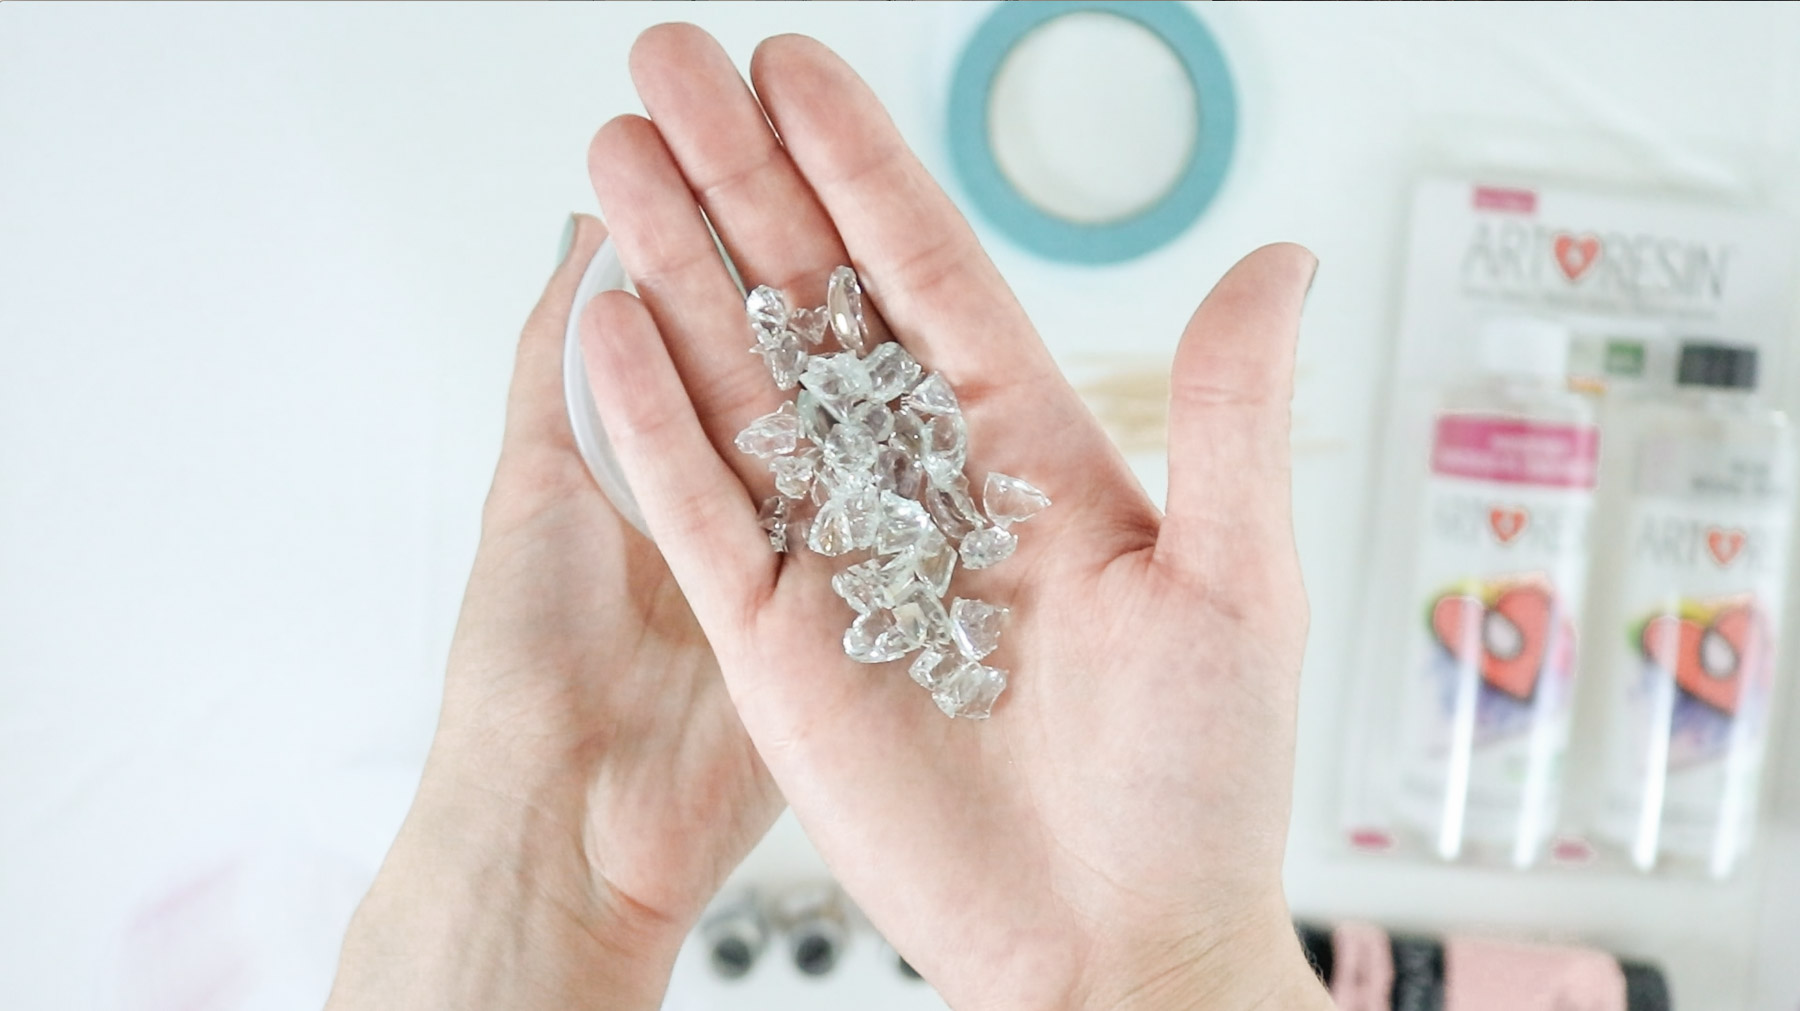
Than to break them use a paper towel and add some in the center. Fold over your paper towel and use a hammer to gently break them. Keep in mind these will still be very sharp so be careful. (NOTE: This project is not kid friendly at all. CAUTION: ONCE YOUR ART IS DRY keep away from children it may be really sharp)

Step 1 – Prepping your area for the resin paint pour!
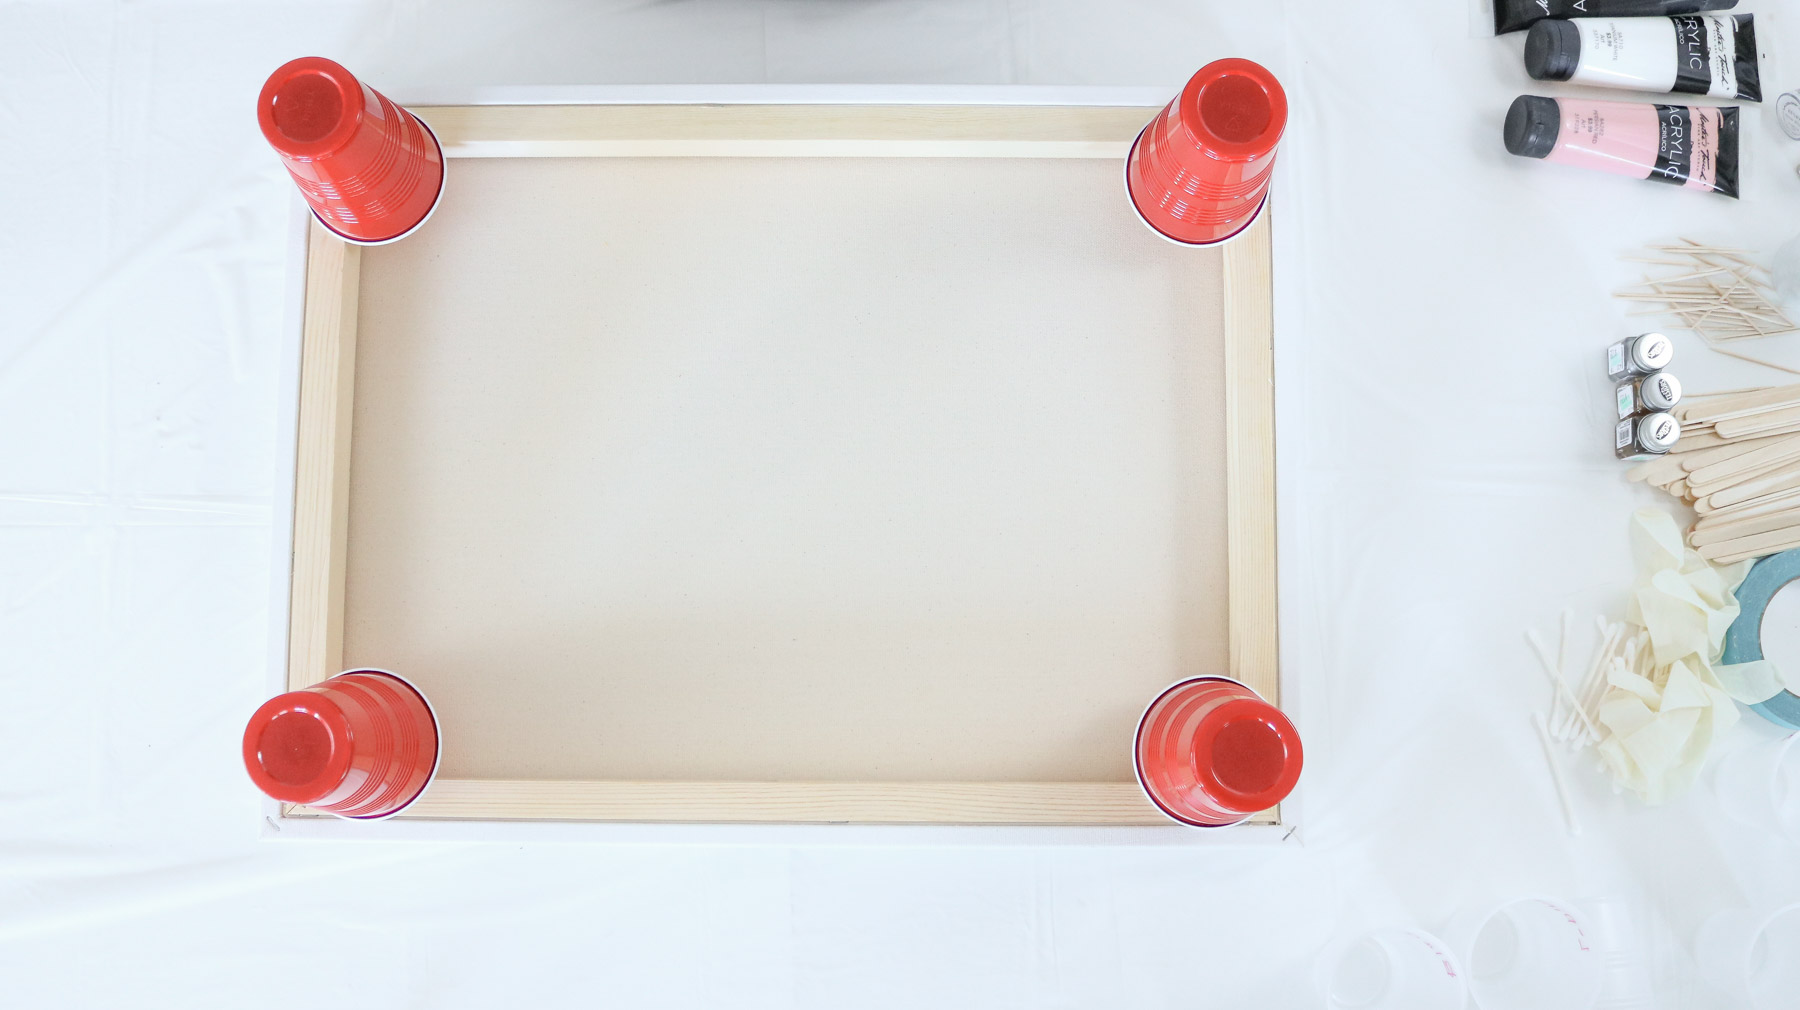
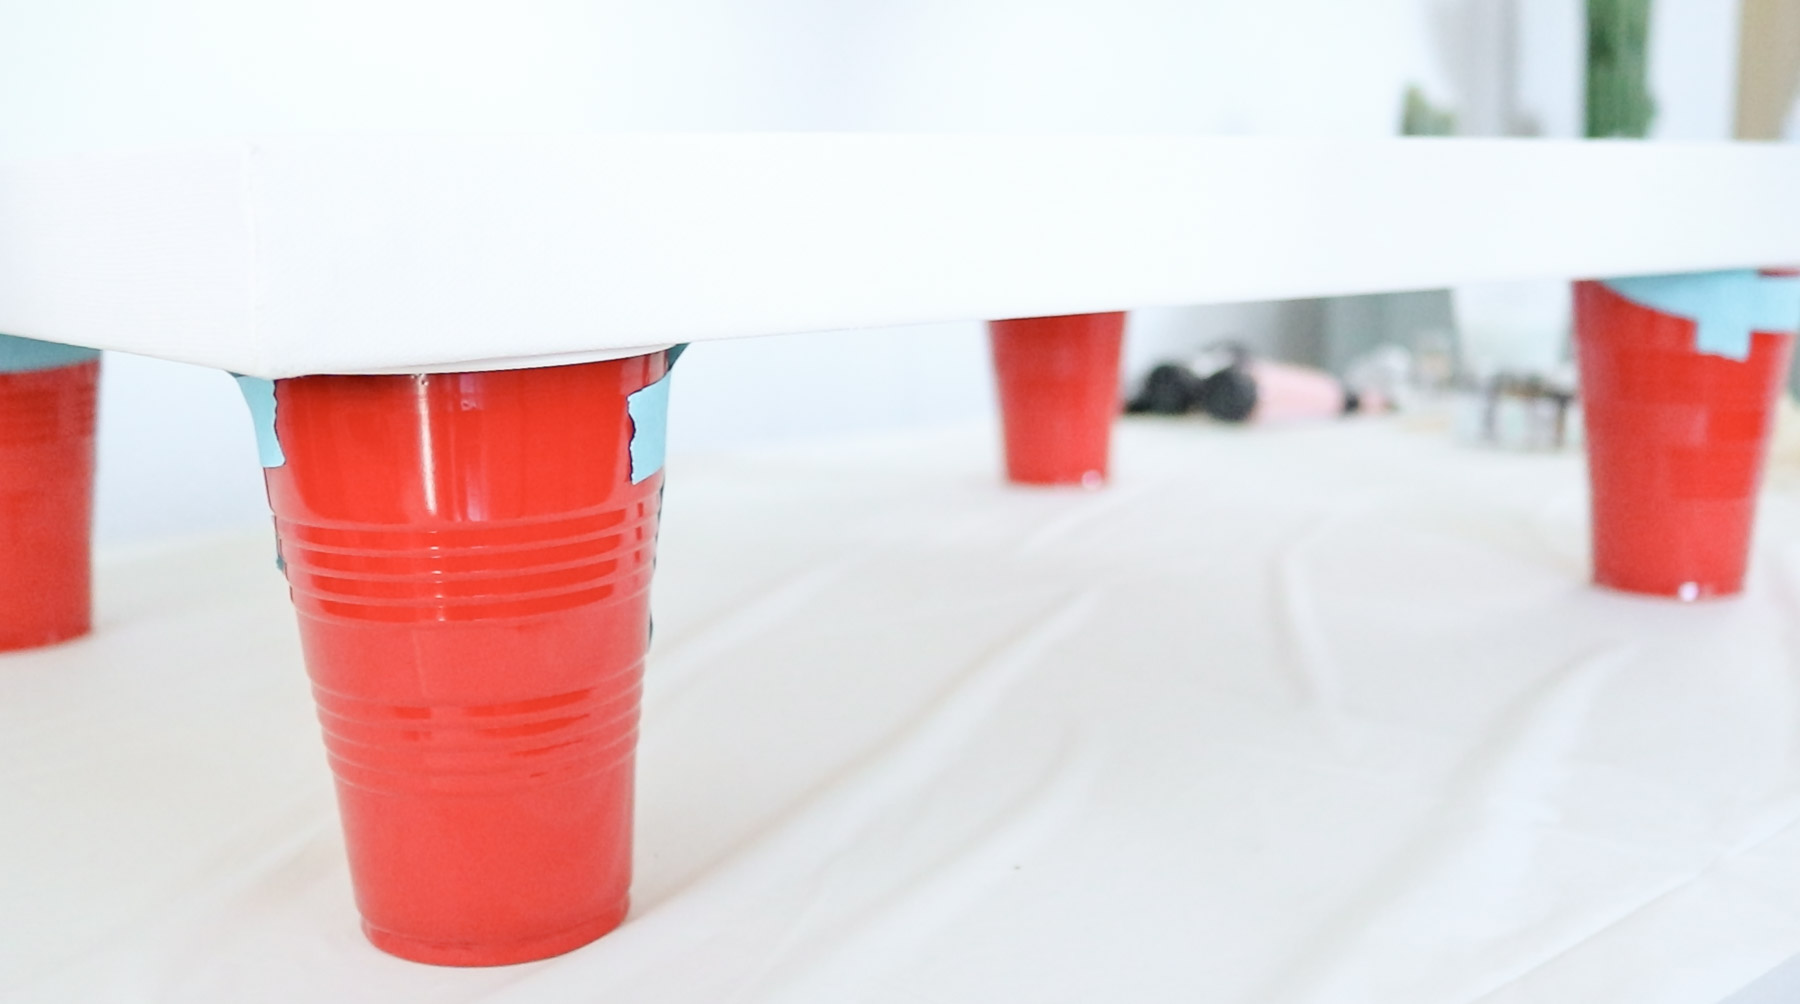
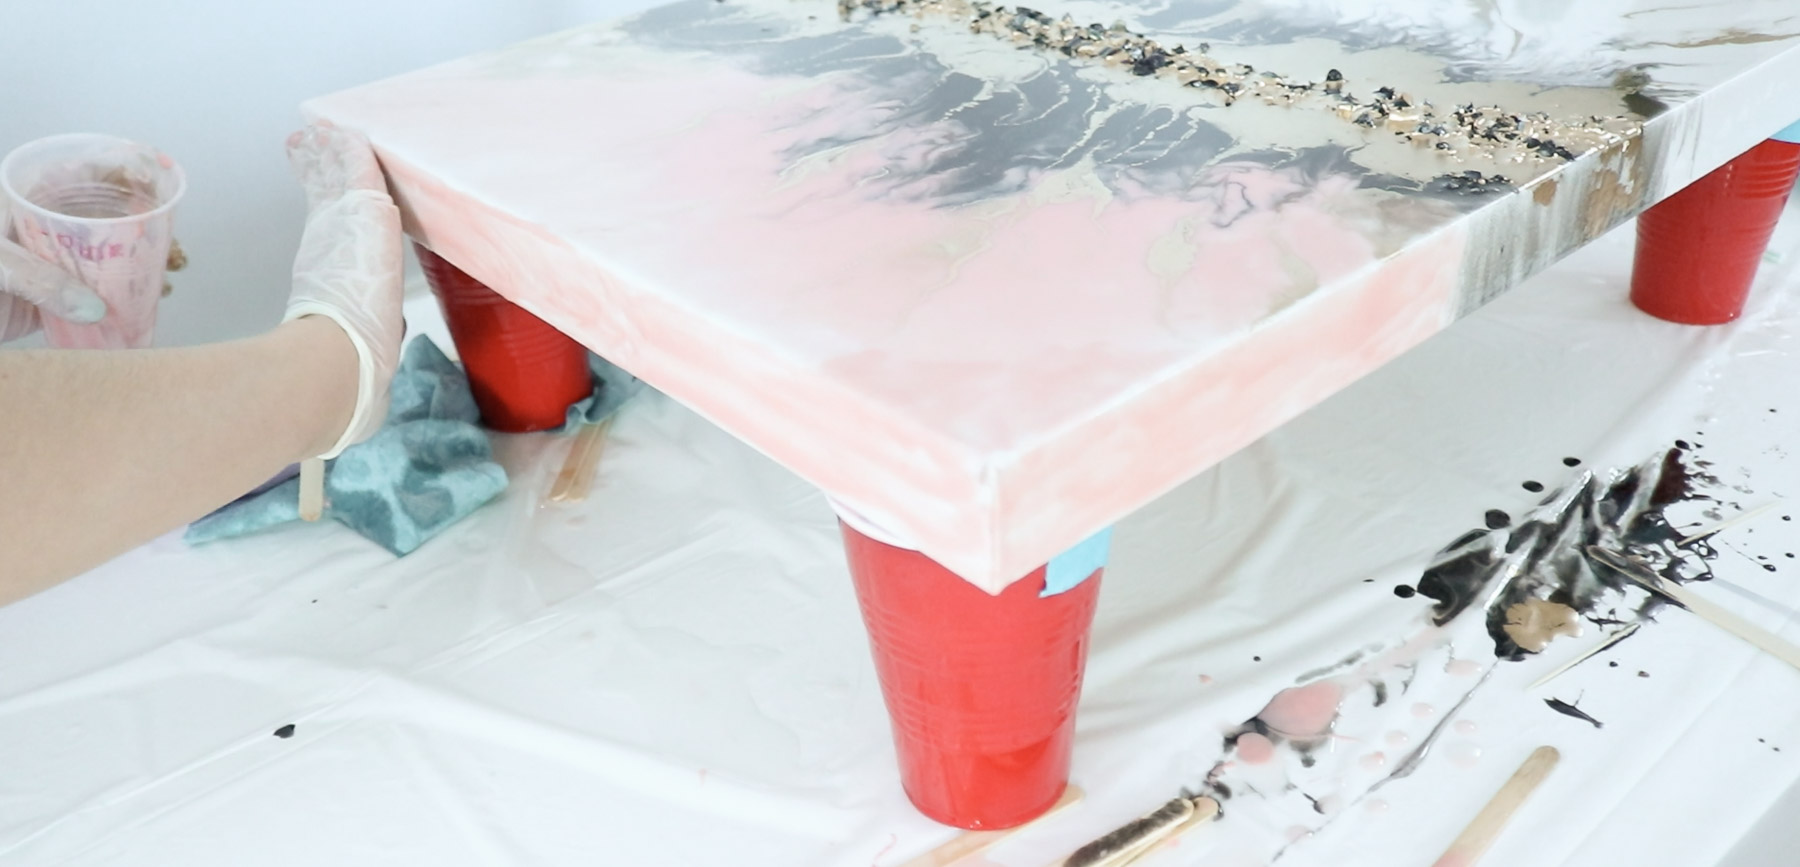
To begin you’ll need to make sure the area you’ll be working in is covered in plastic and you’ll need to prop up your canvas/wood. To prop it up you’ll need 4 plastic cups.
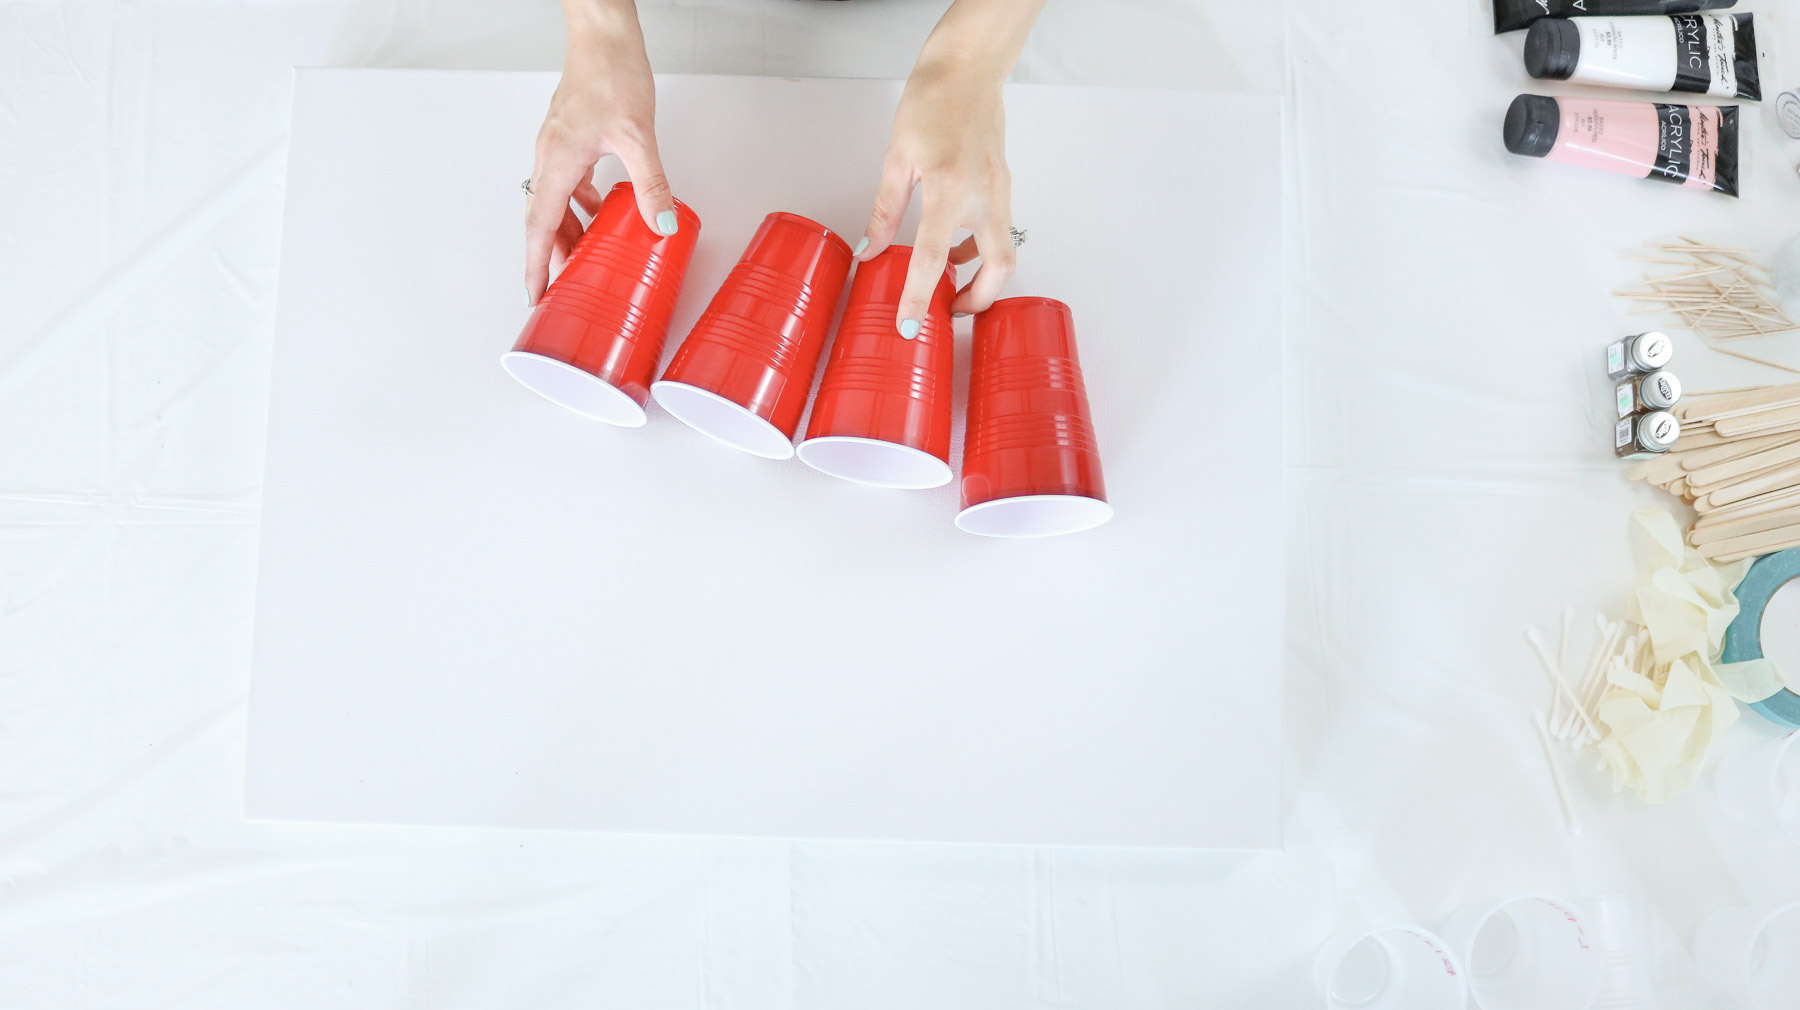
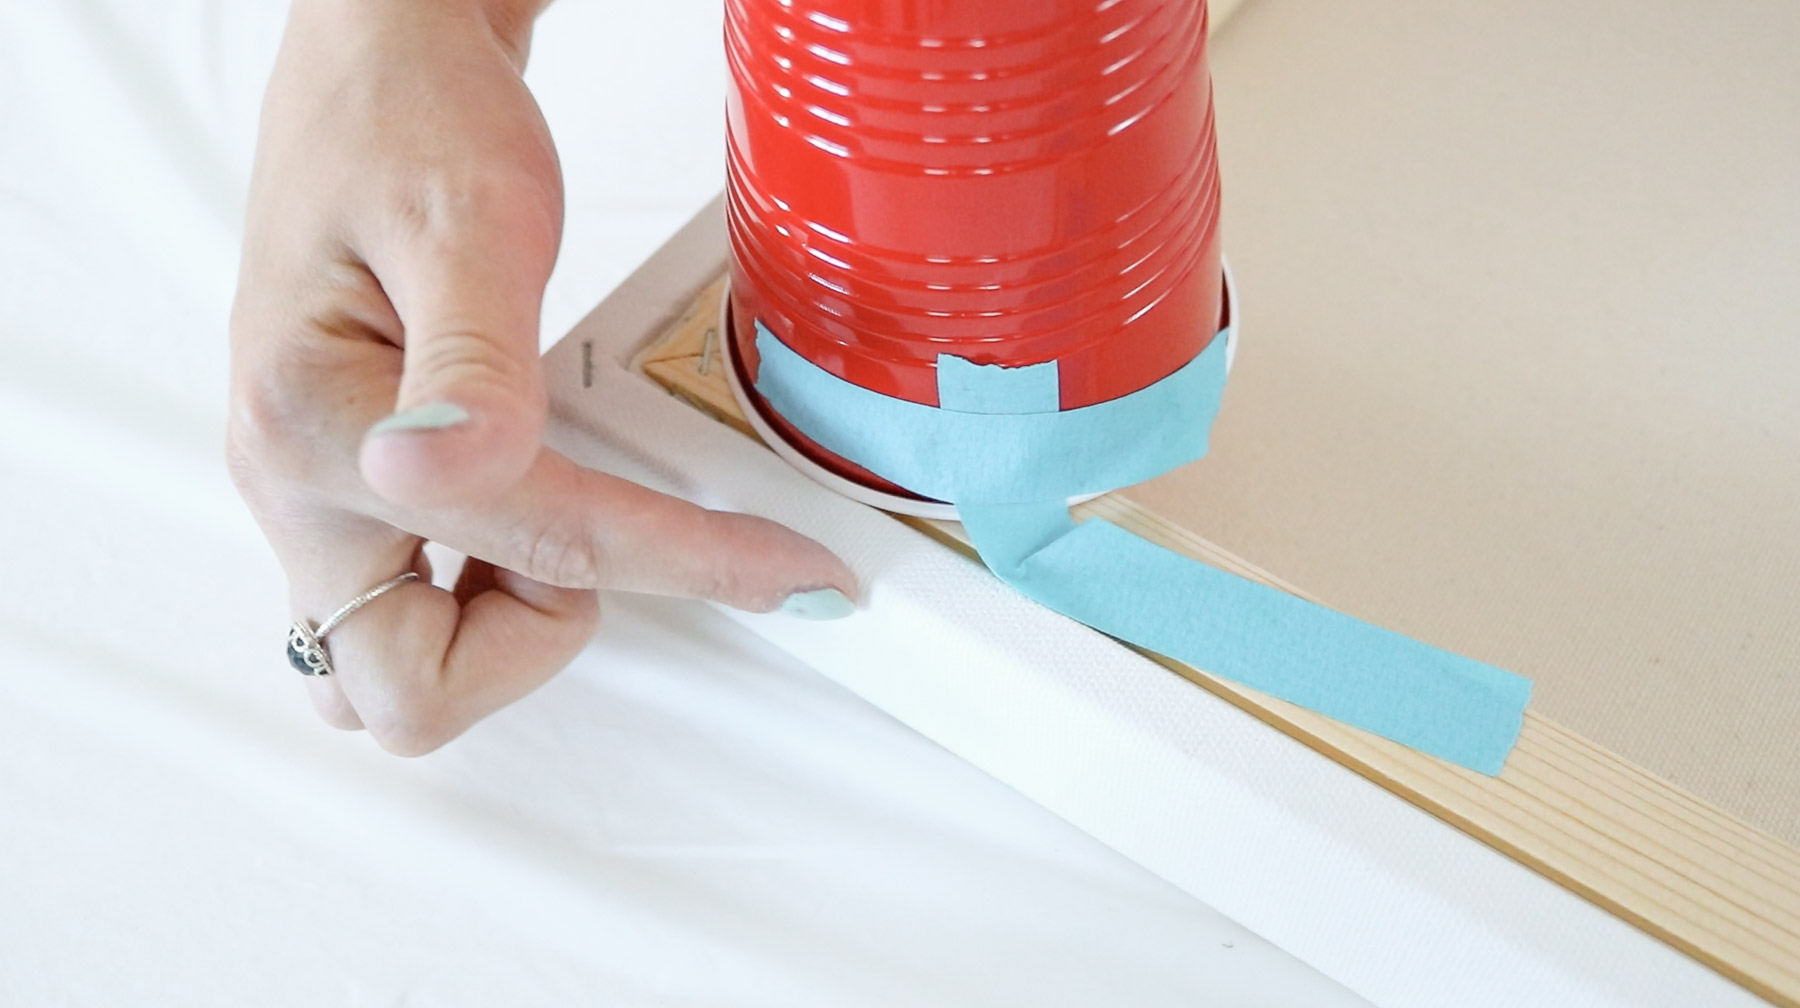
Flip your canvas over and tape 4 plastic cups on each corner making sure they aren’t to close to the edges since your resin will be pouring over.
 Like this..
Than make sure your canvas is level.
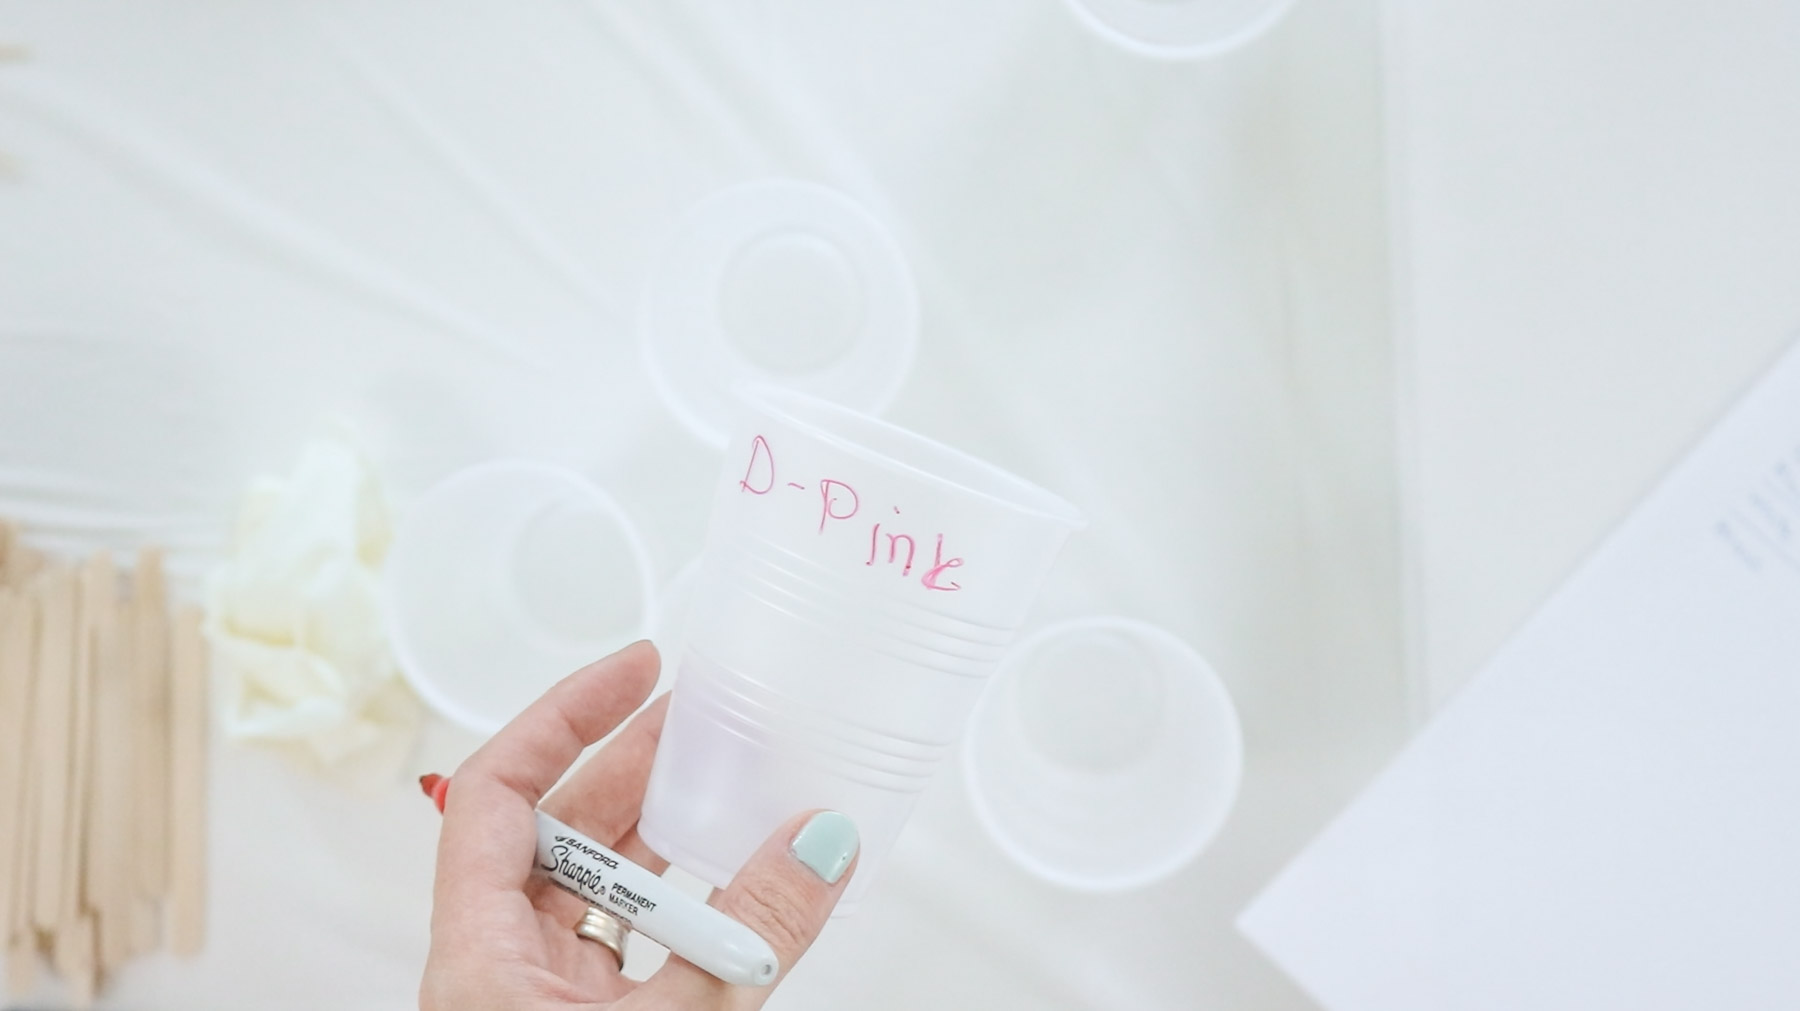
Following that draw a rough draft of what you want your painting to look like and approximately what colors you’ll need.
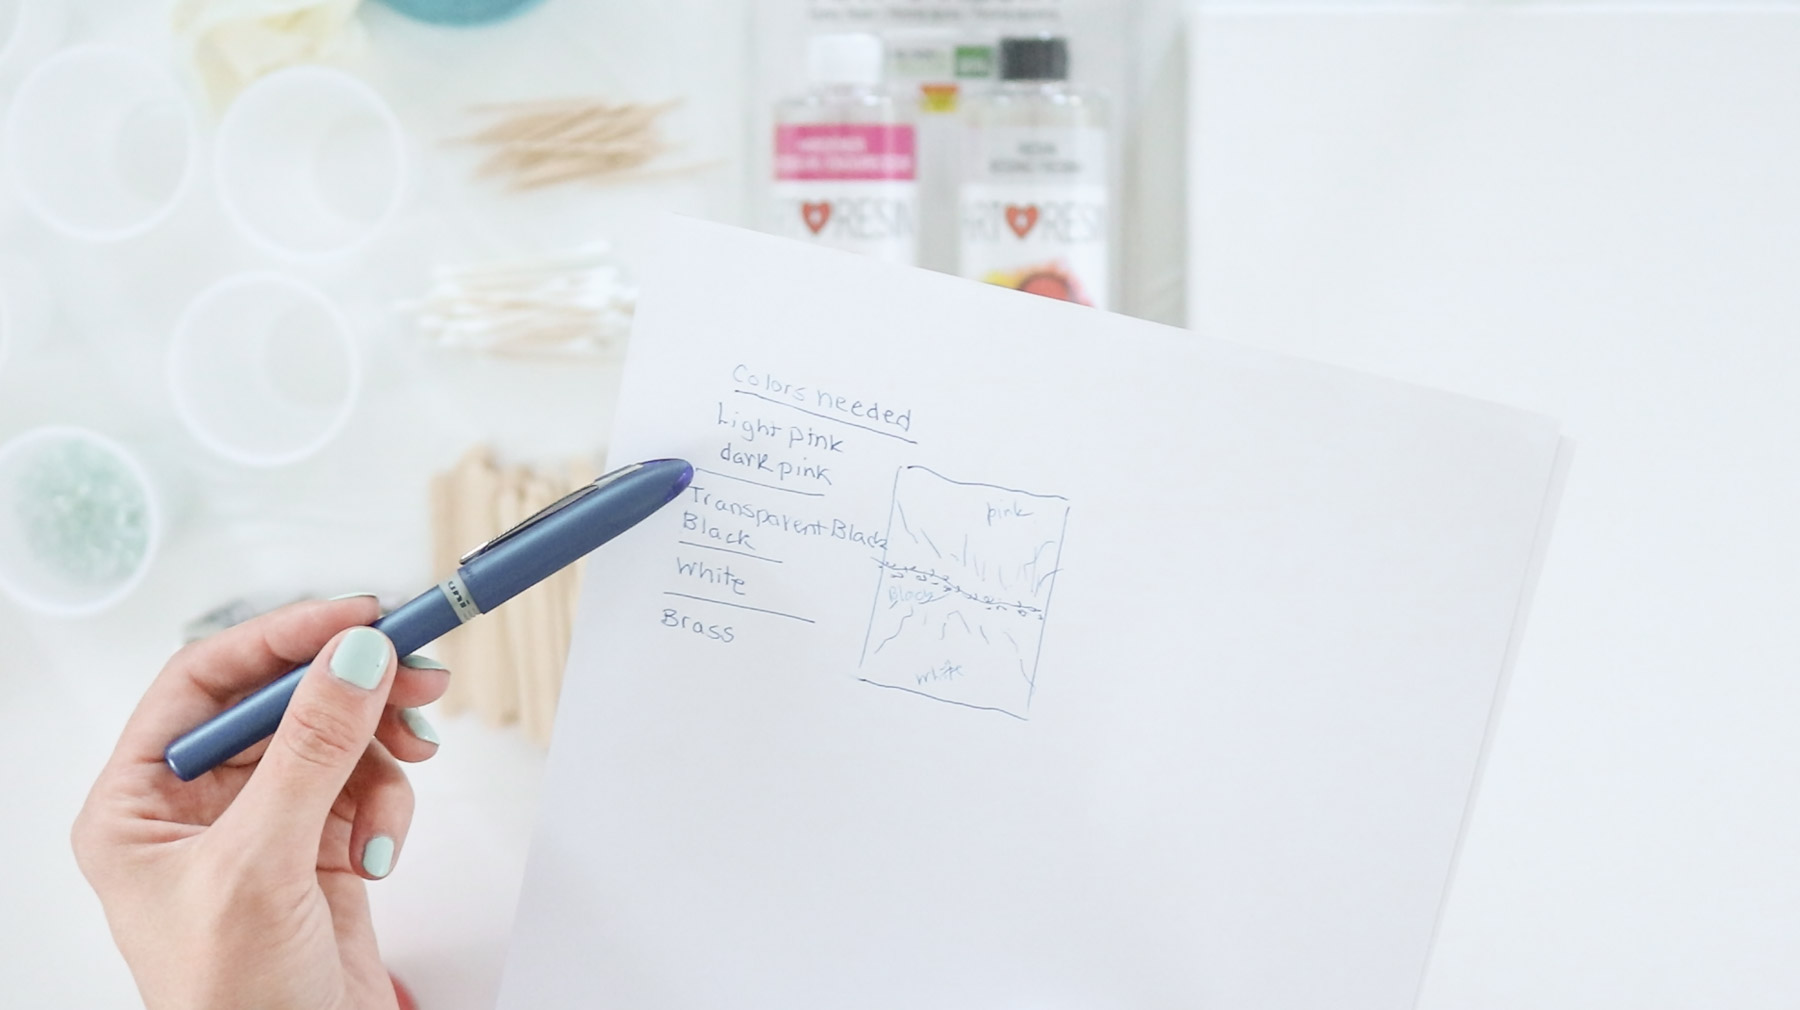
Than mark the colors on your plastic cups so there’s no confusion.
Step 2 – Mixing your resin!
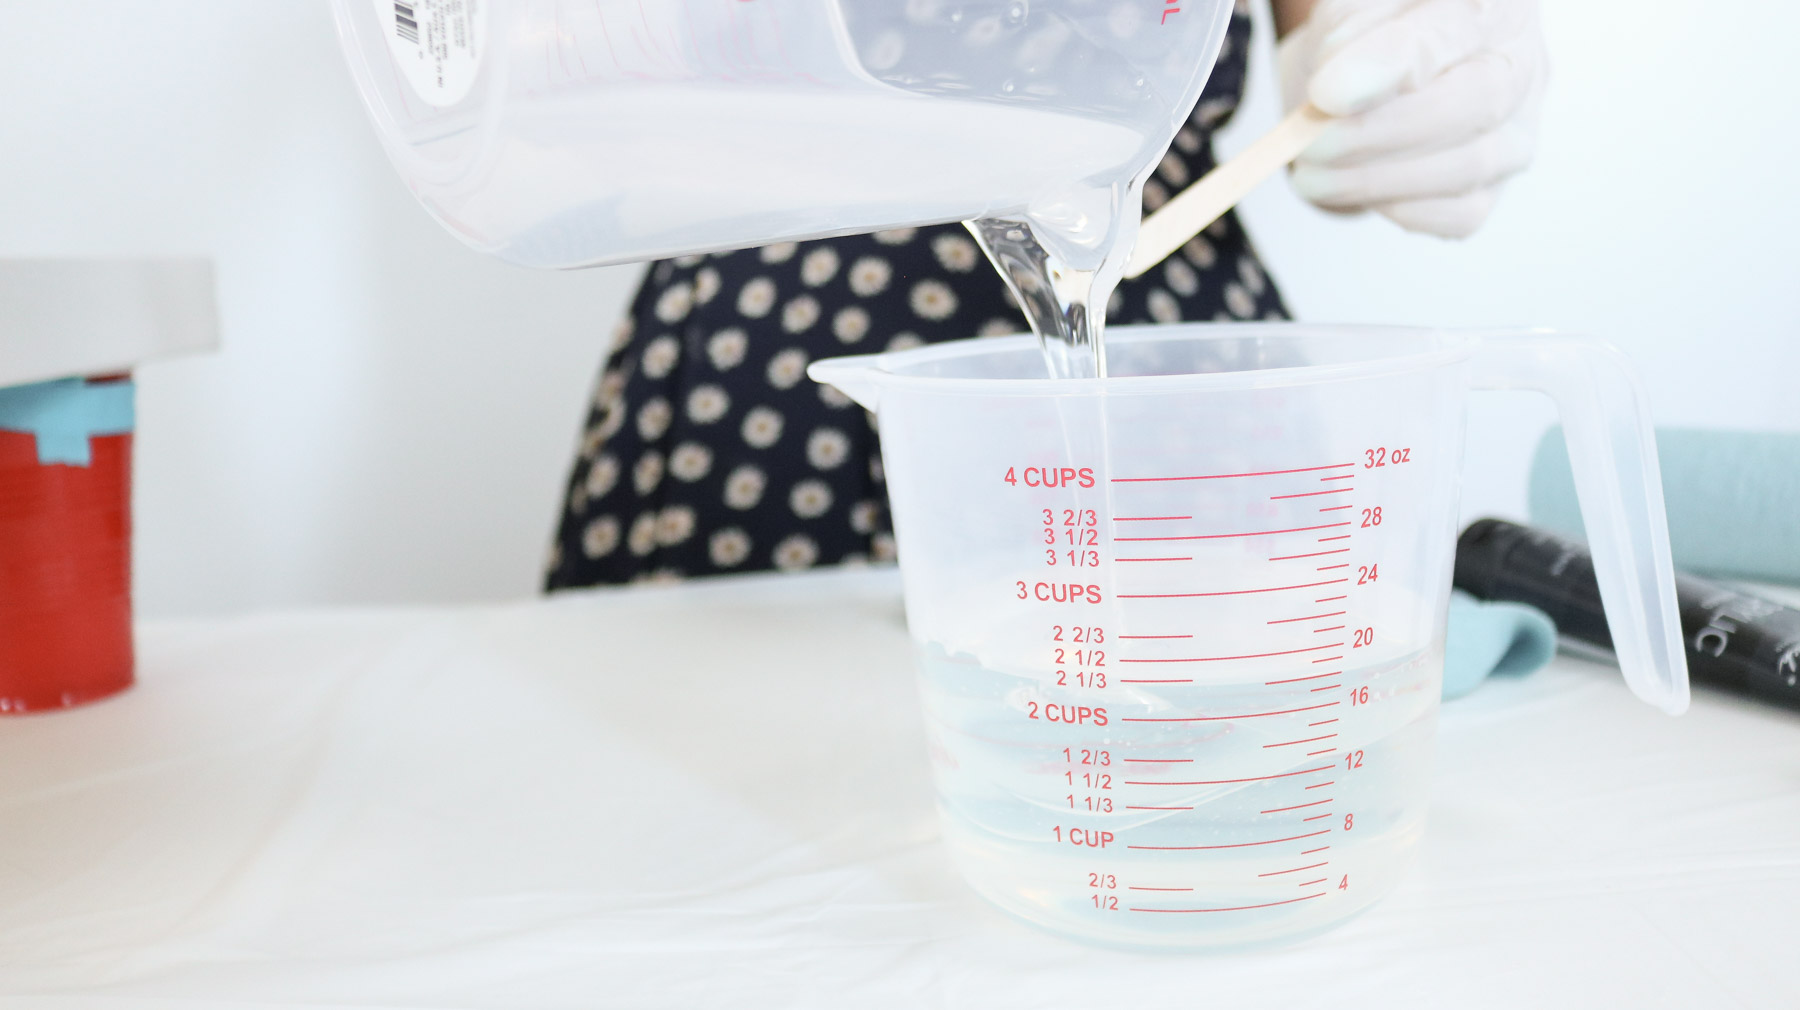
My resin required equal parts of resin and hardener. I used two measuring cups to make sure I poured the exact amount. Than I combined them and stirred for a full three minutes. Once you’ve mixed your resin keep your eye on the clock you’ll have about 45 minutes to complete your art piece. Start adding resin to your cups leaving some clear resin for a base coat. For my acrylic resin pour I mixed a lot of white and pink since I knew that would take up the majority of my canvas.
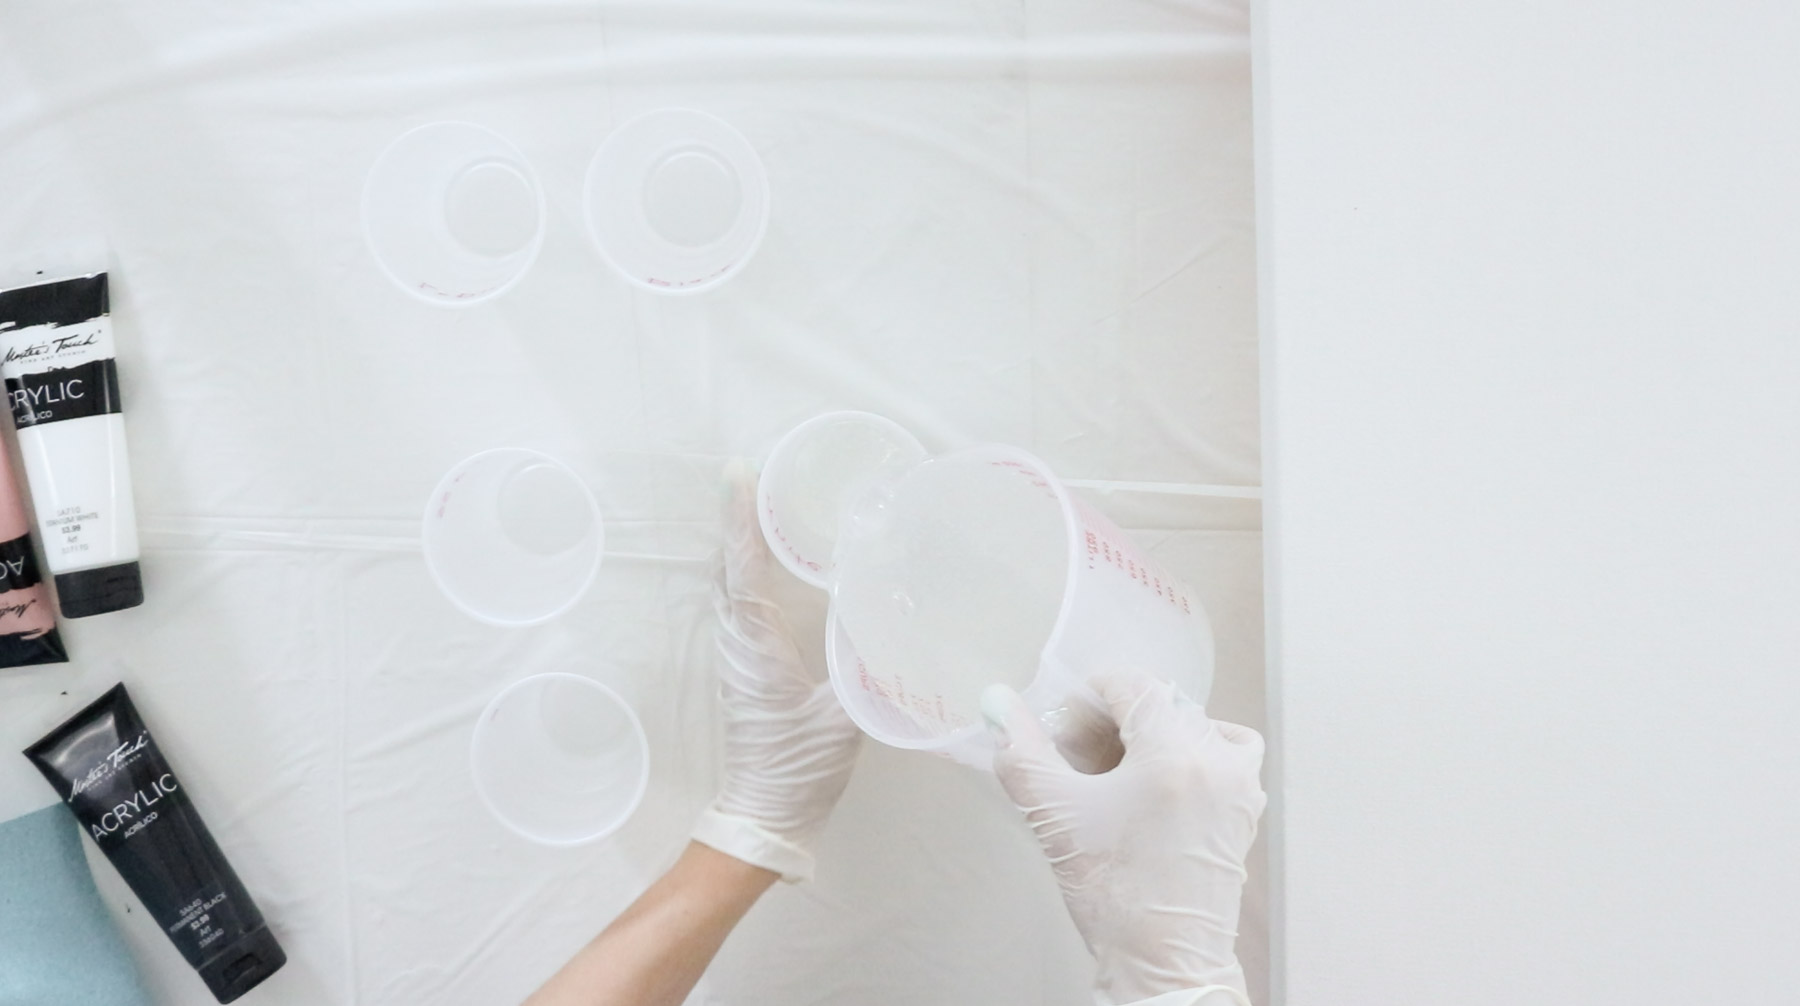
I added a drop of paint at a time to the resin to get the desired color.
Step 3 – Pouring your expoxy resin!
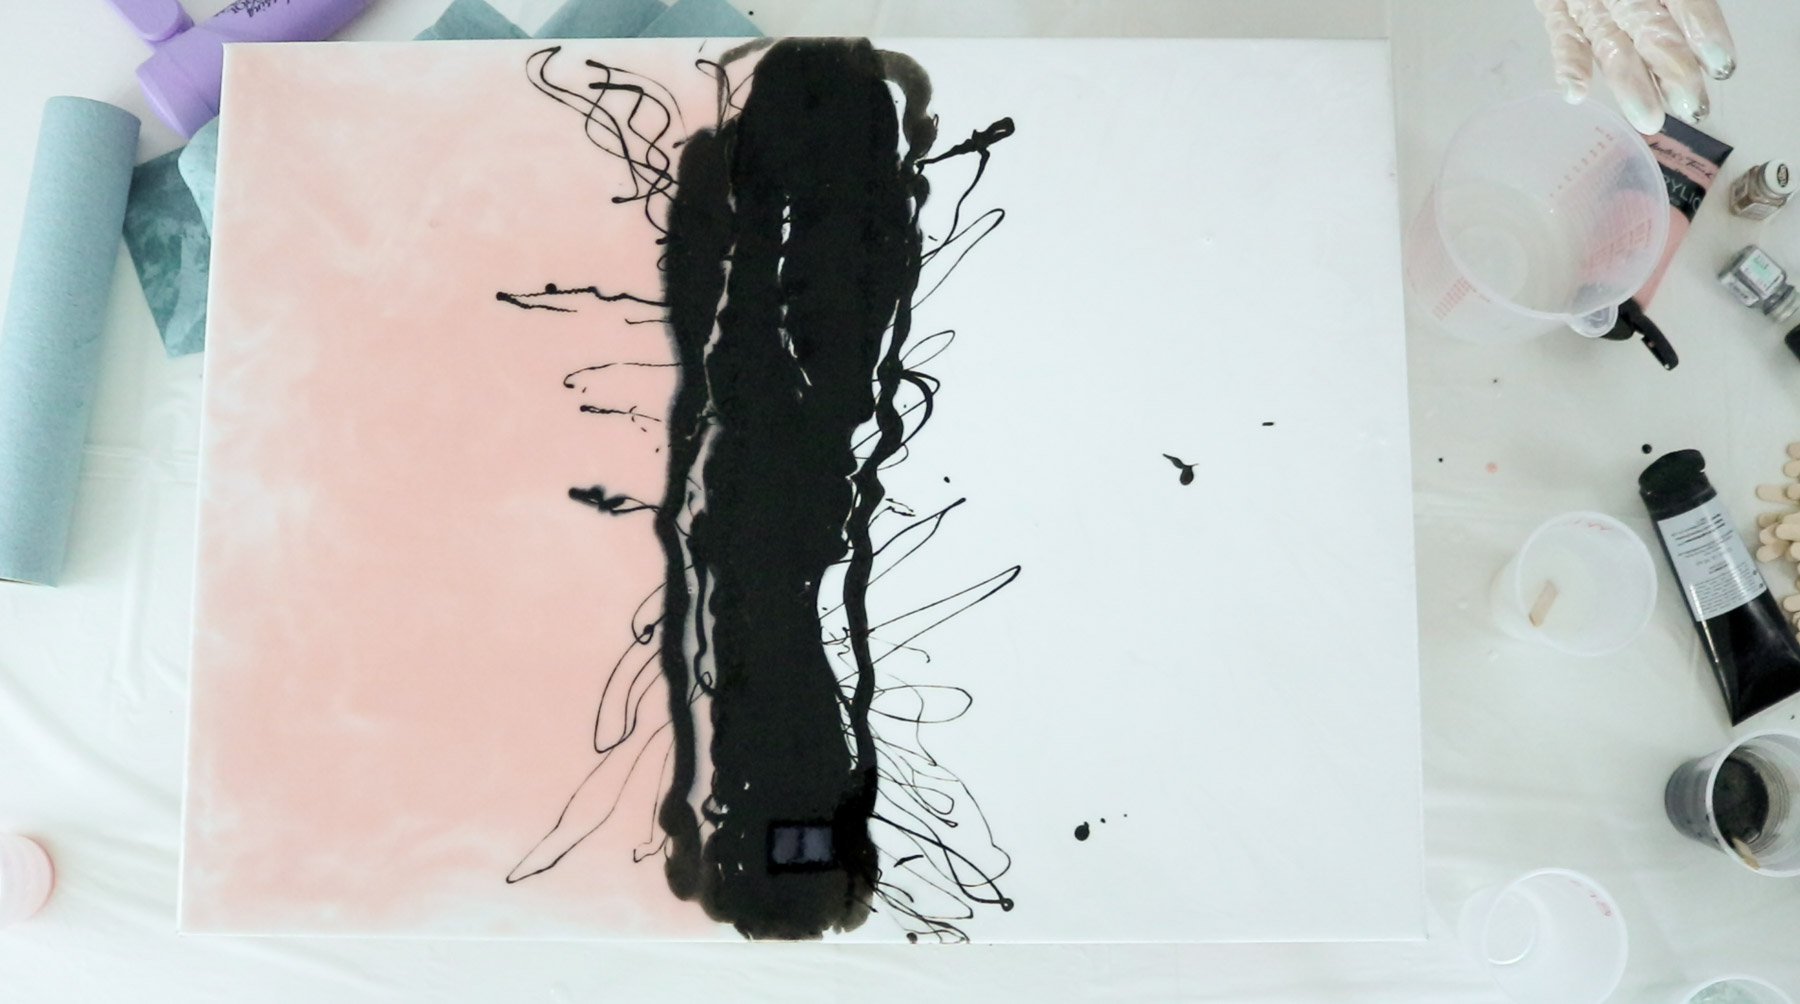
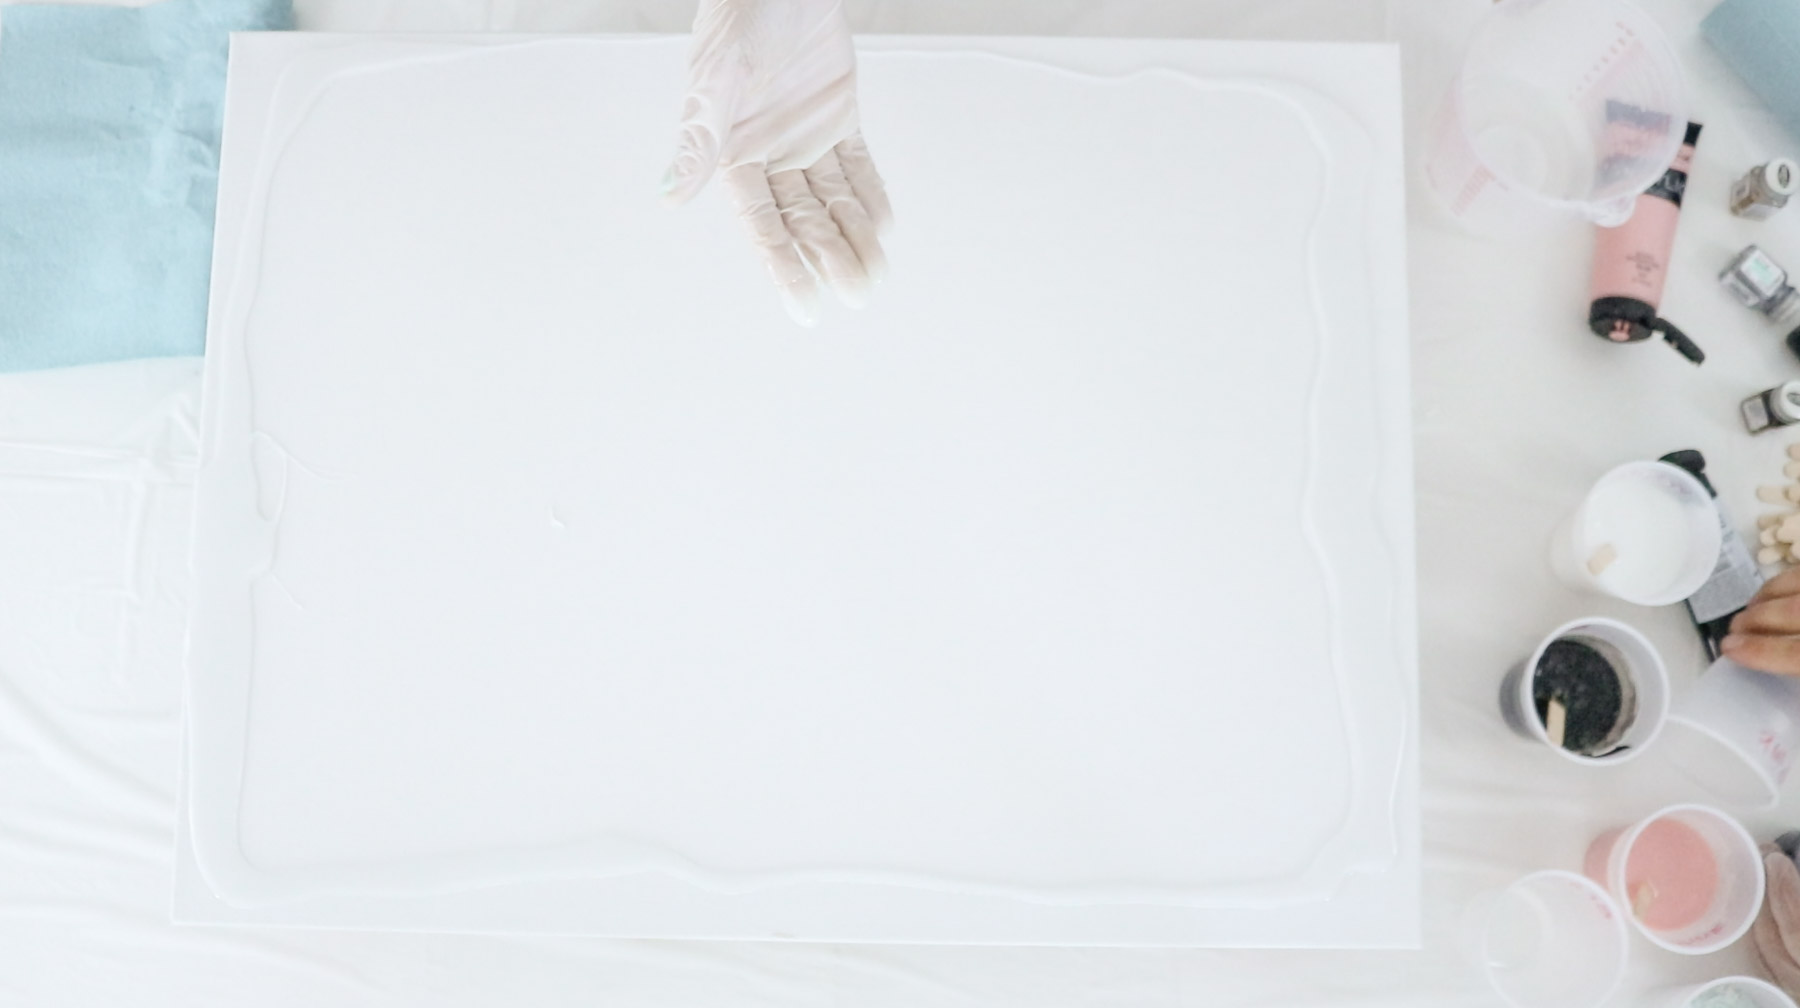 Start off by giving your canvas a base coat. Don’t be scared to rub the resin around with your hands. Make sure you get the edges as well. You don’t need a lot of resin for this step just a tiny bit. (thin layer) Following that I divided my canvas in half and poured pink on one side and white on the other.
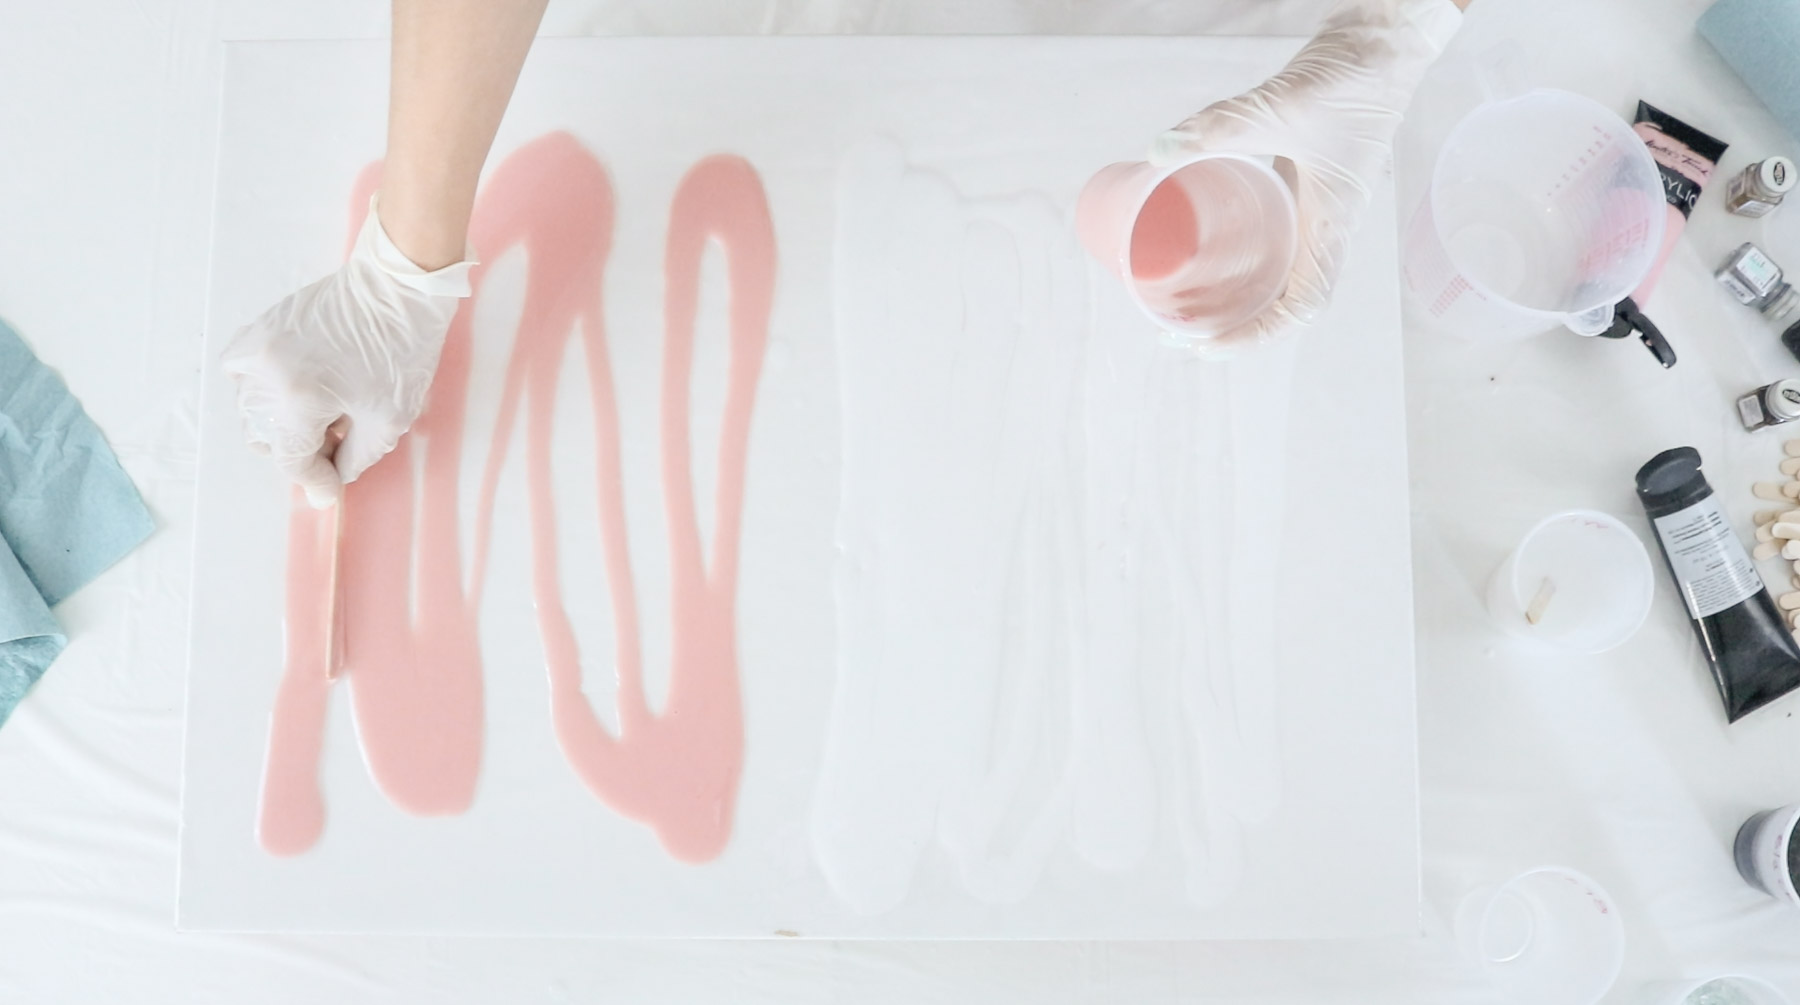
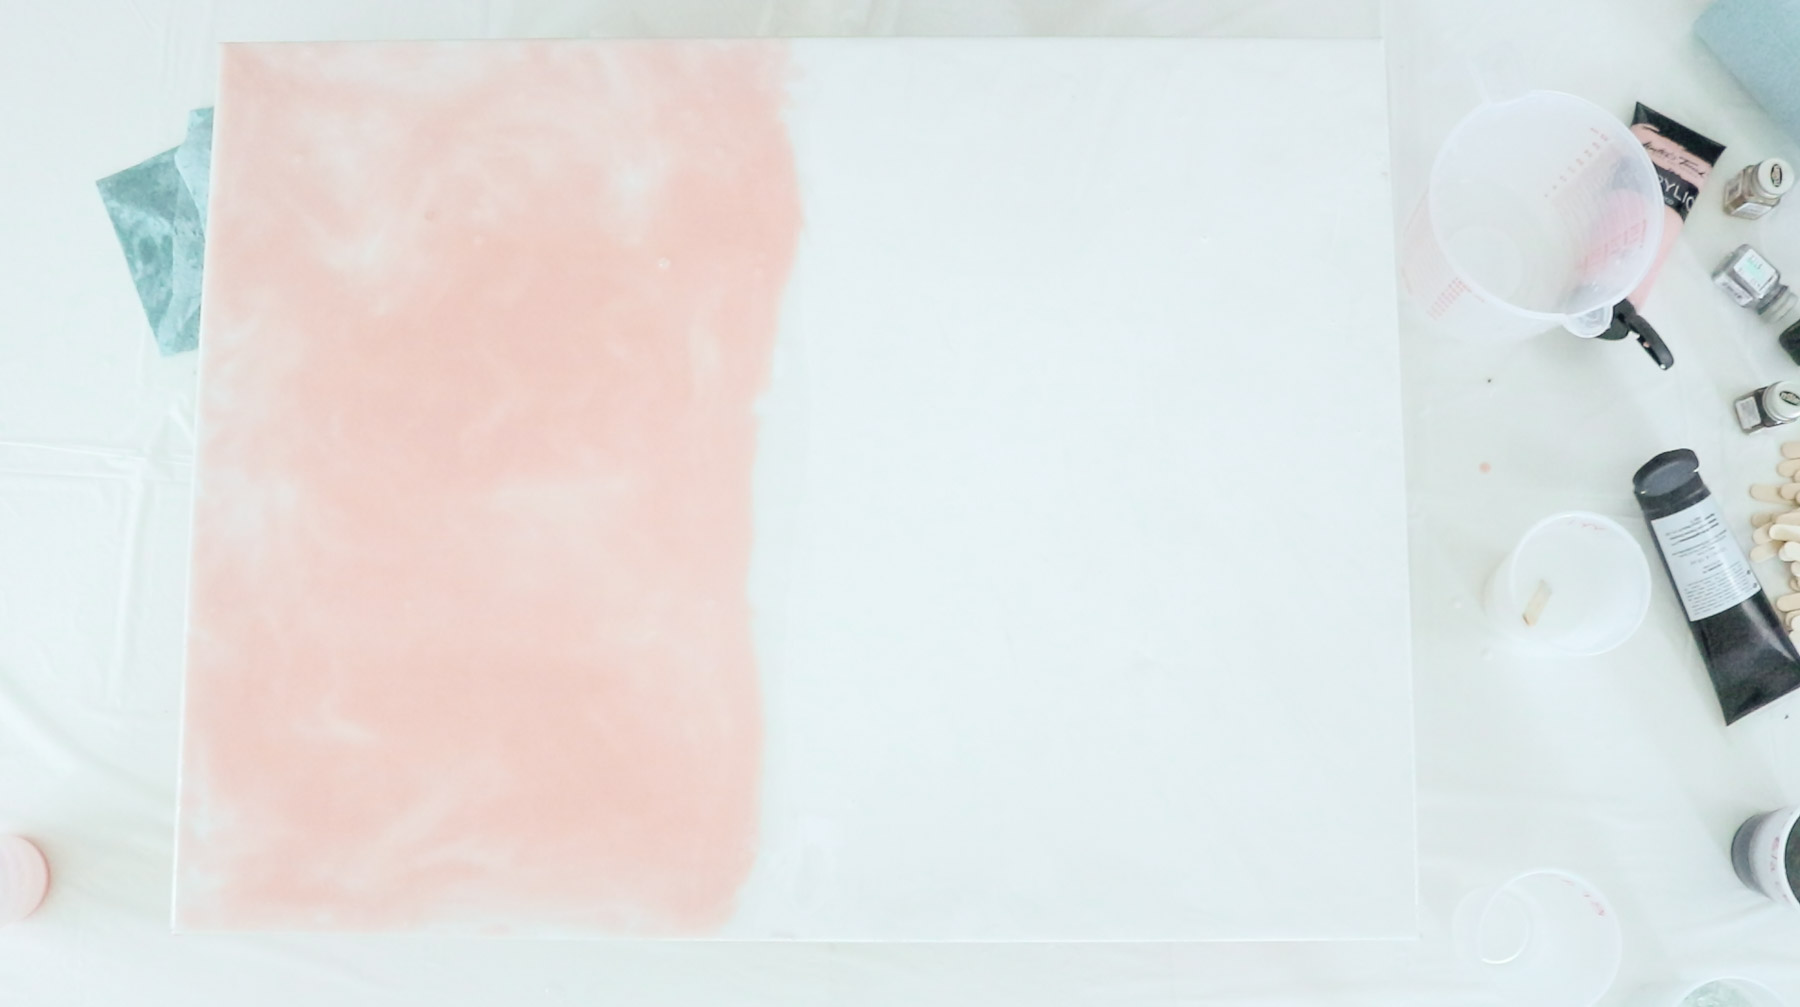
I also rubbed the colors in using my hands. (this is why you need lots of gloves)
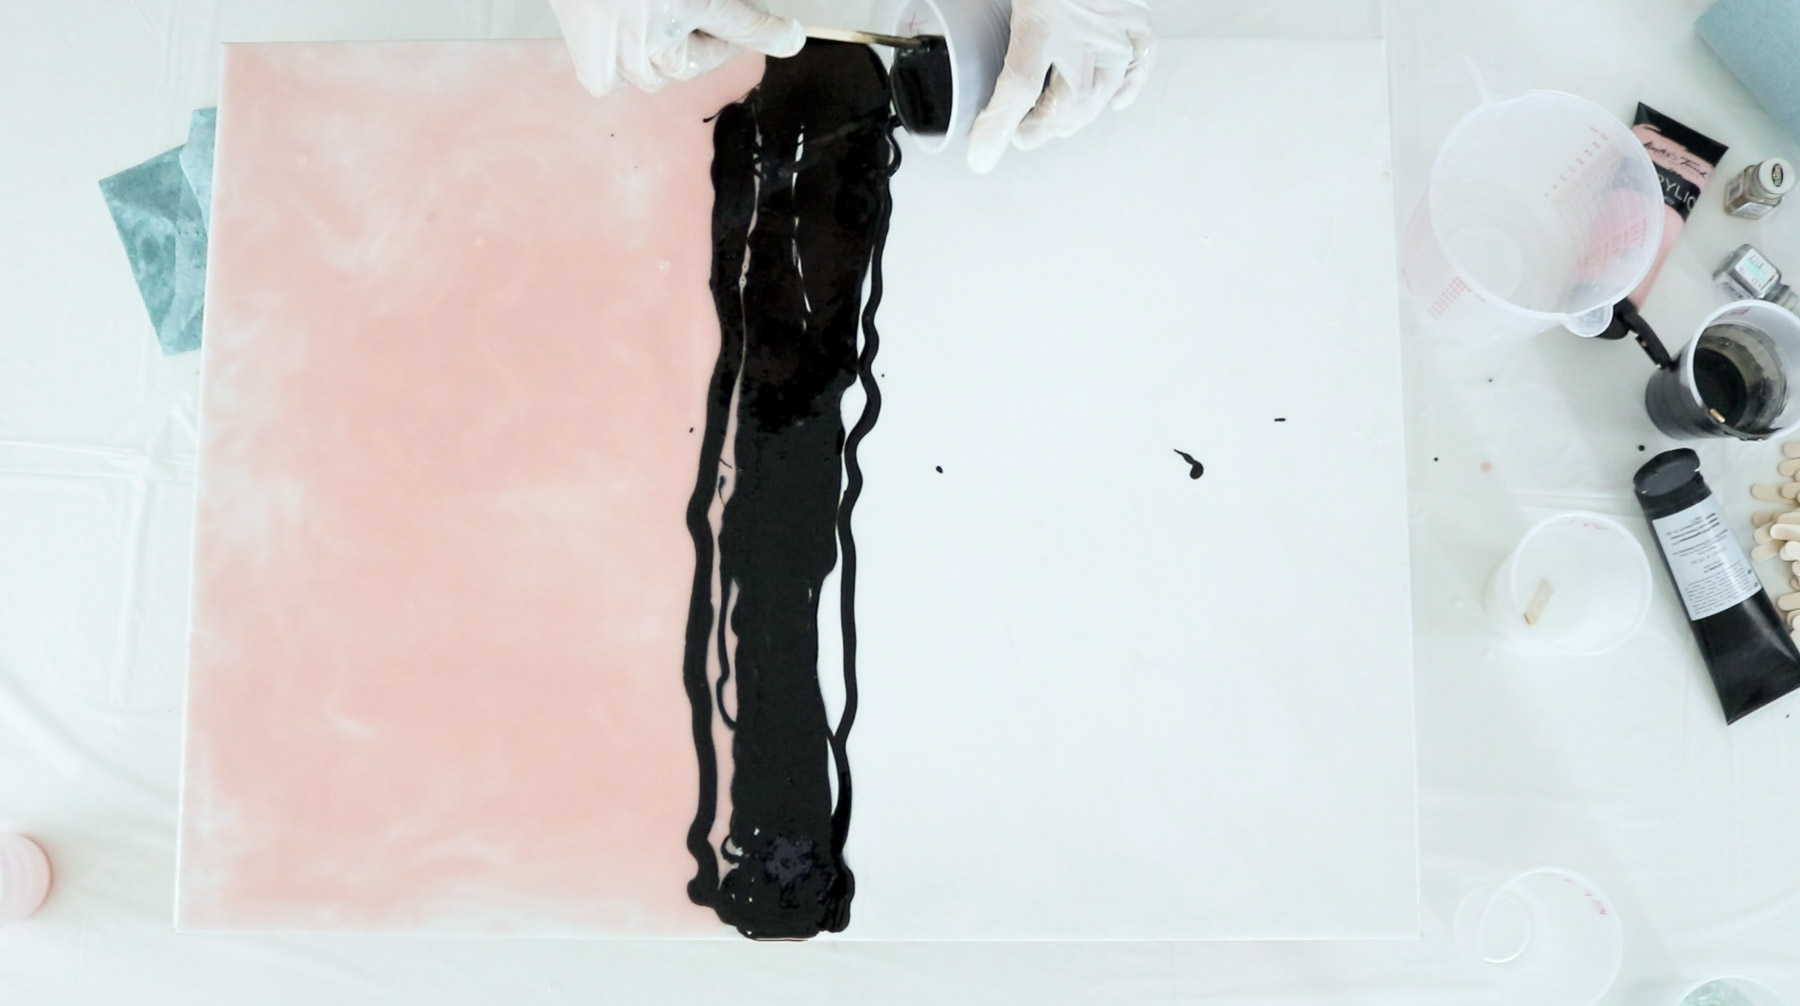
Than I poured a big black line in the center.
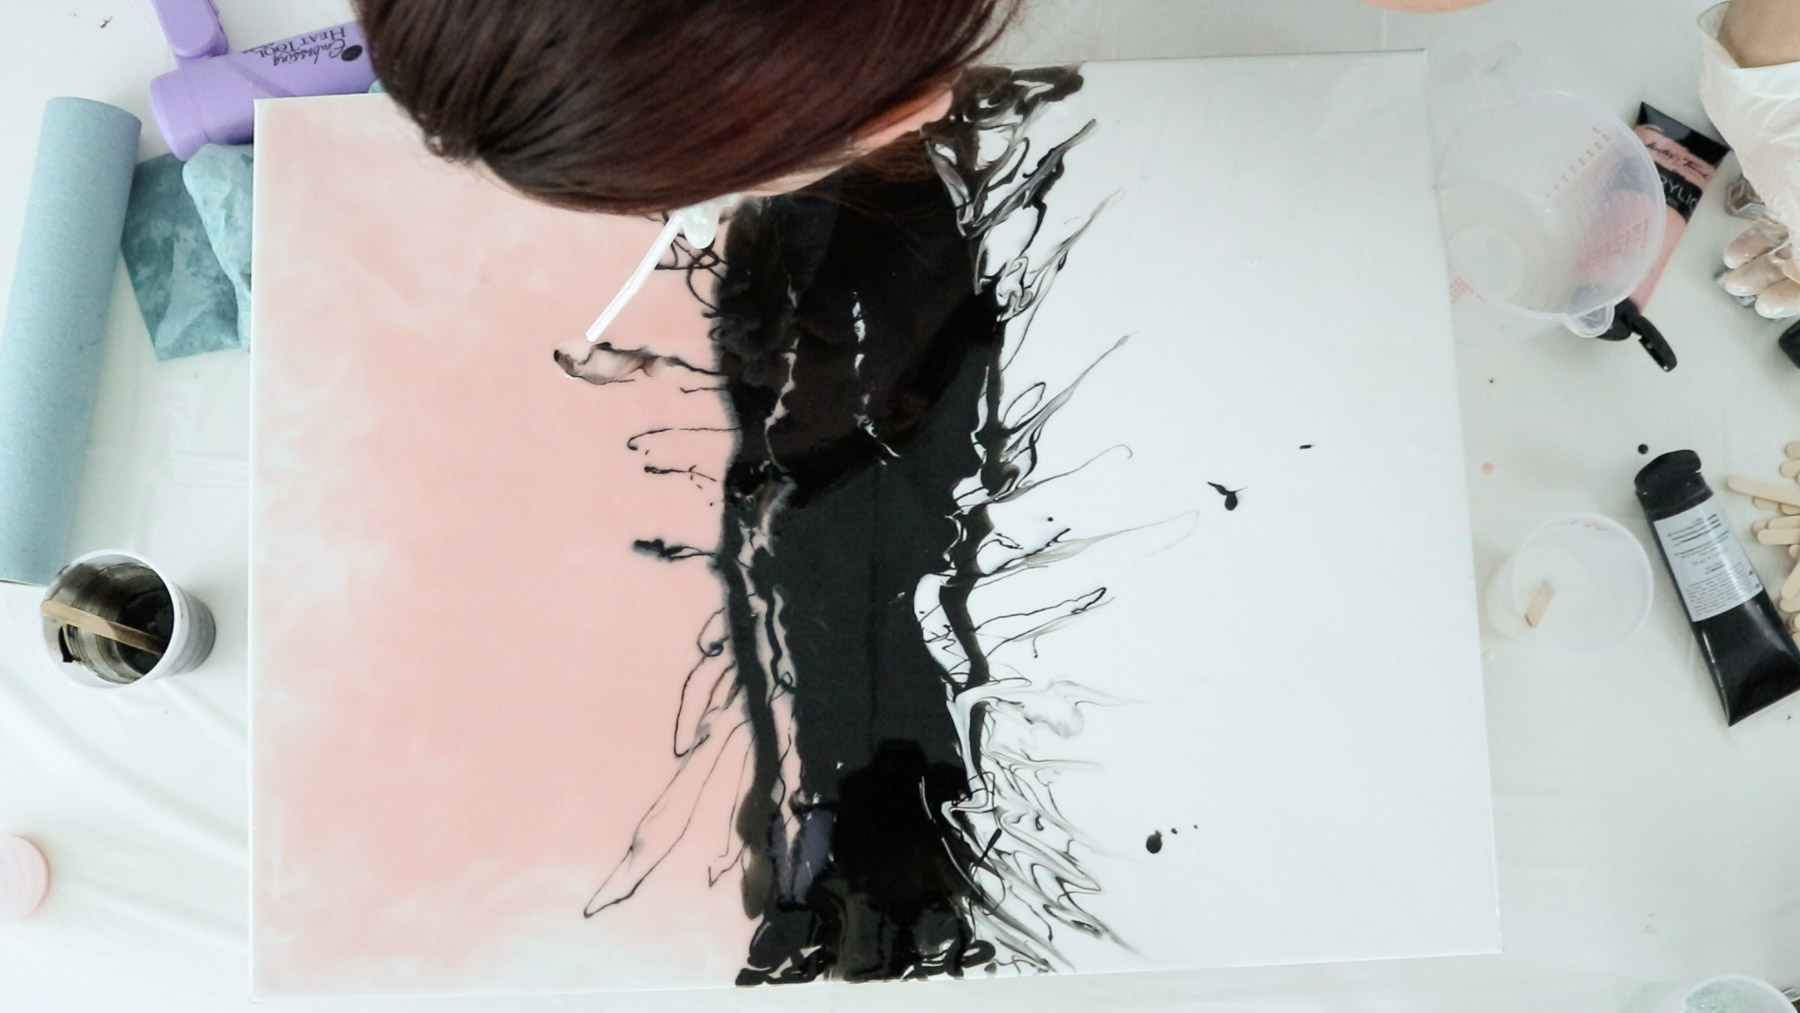
Following that heat your whole canvas up with your heat gun to help the colors blend.

I than added some bursts just by using my ice cream stick and dripping it around.
And I used a straw to blend out the bursts.
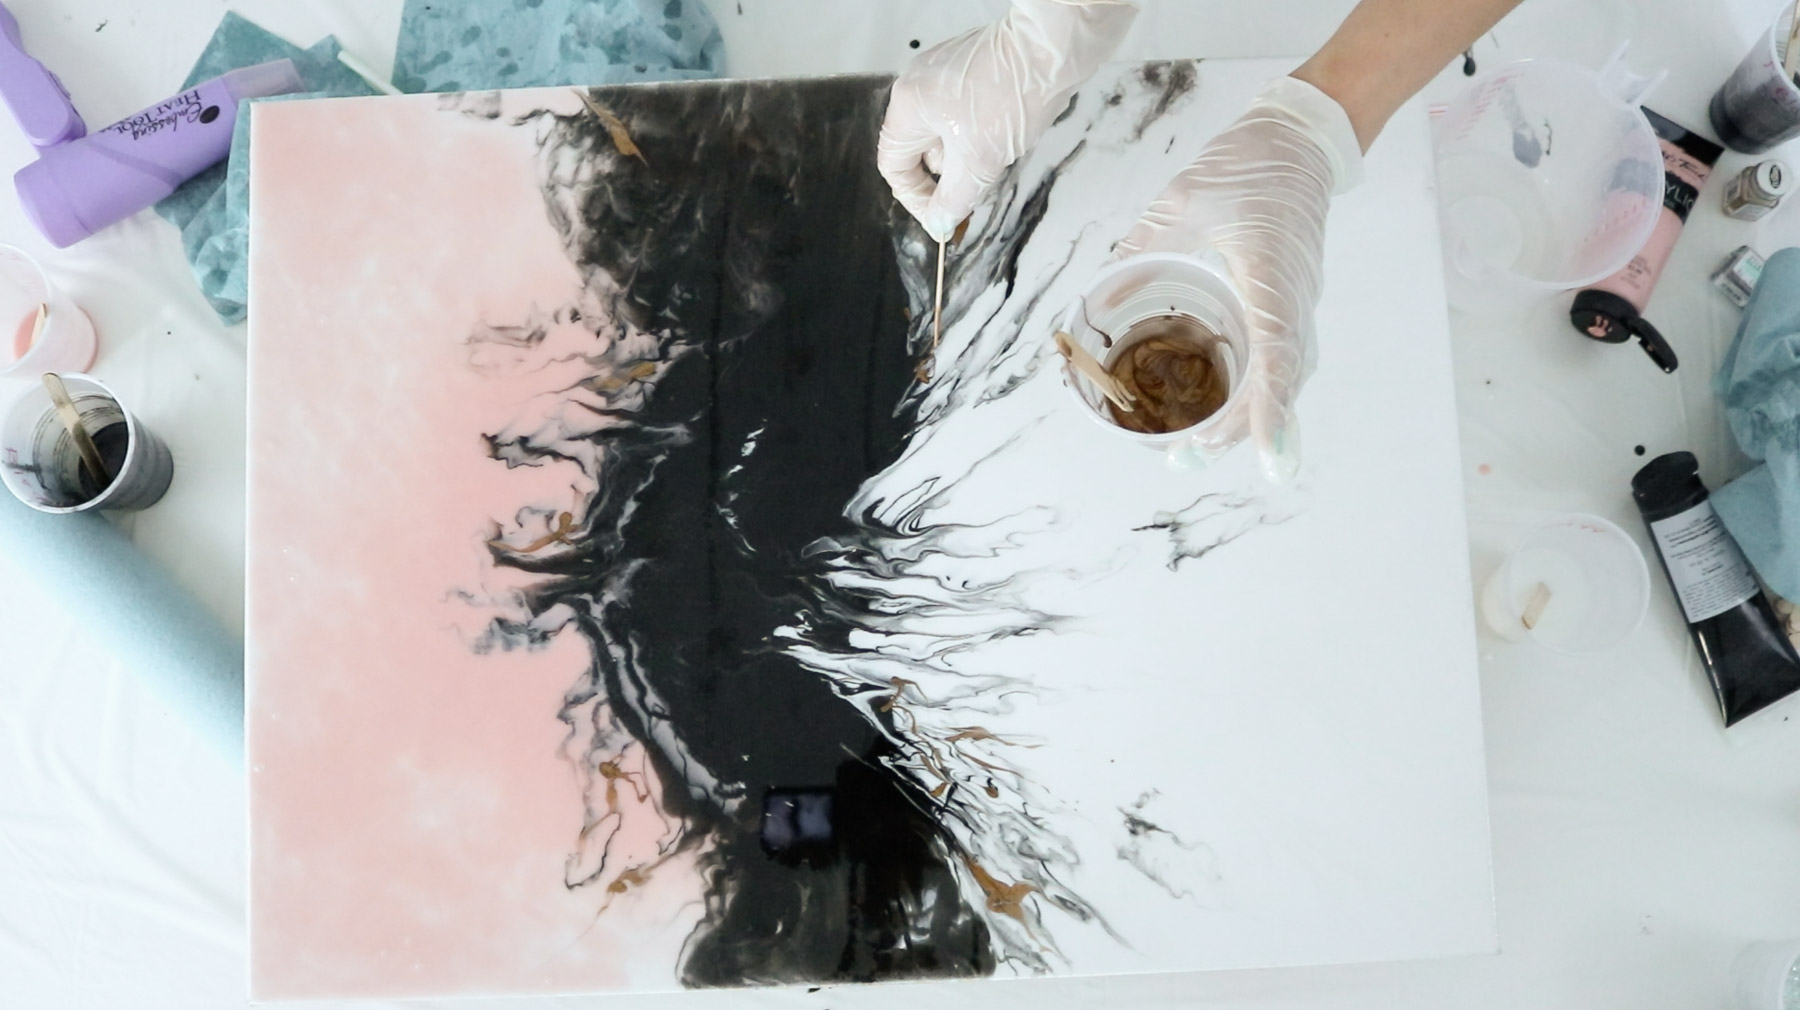
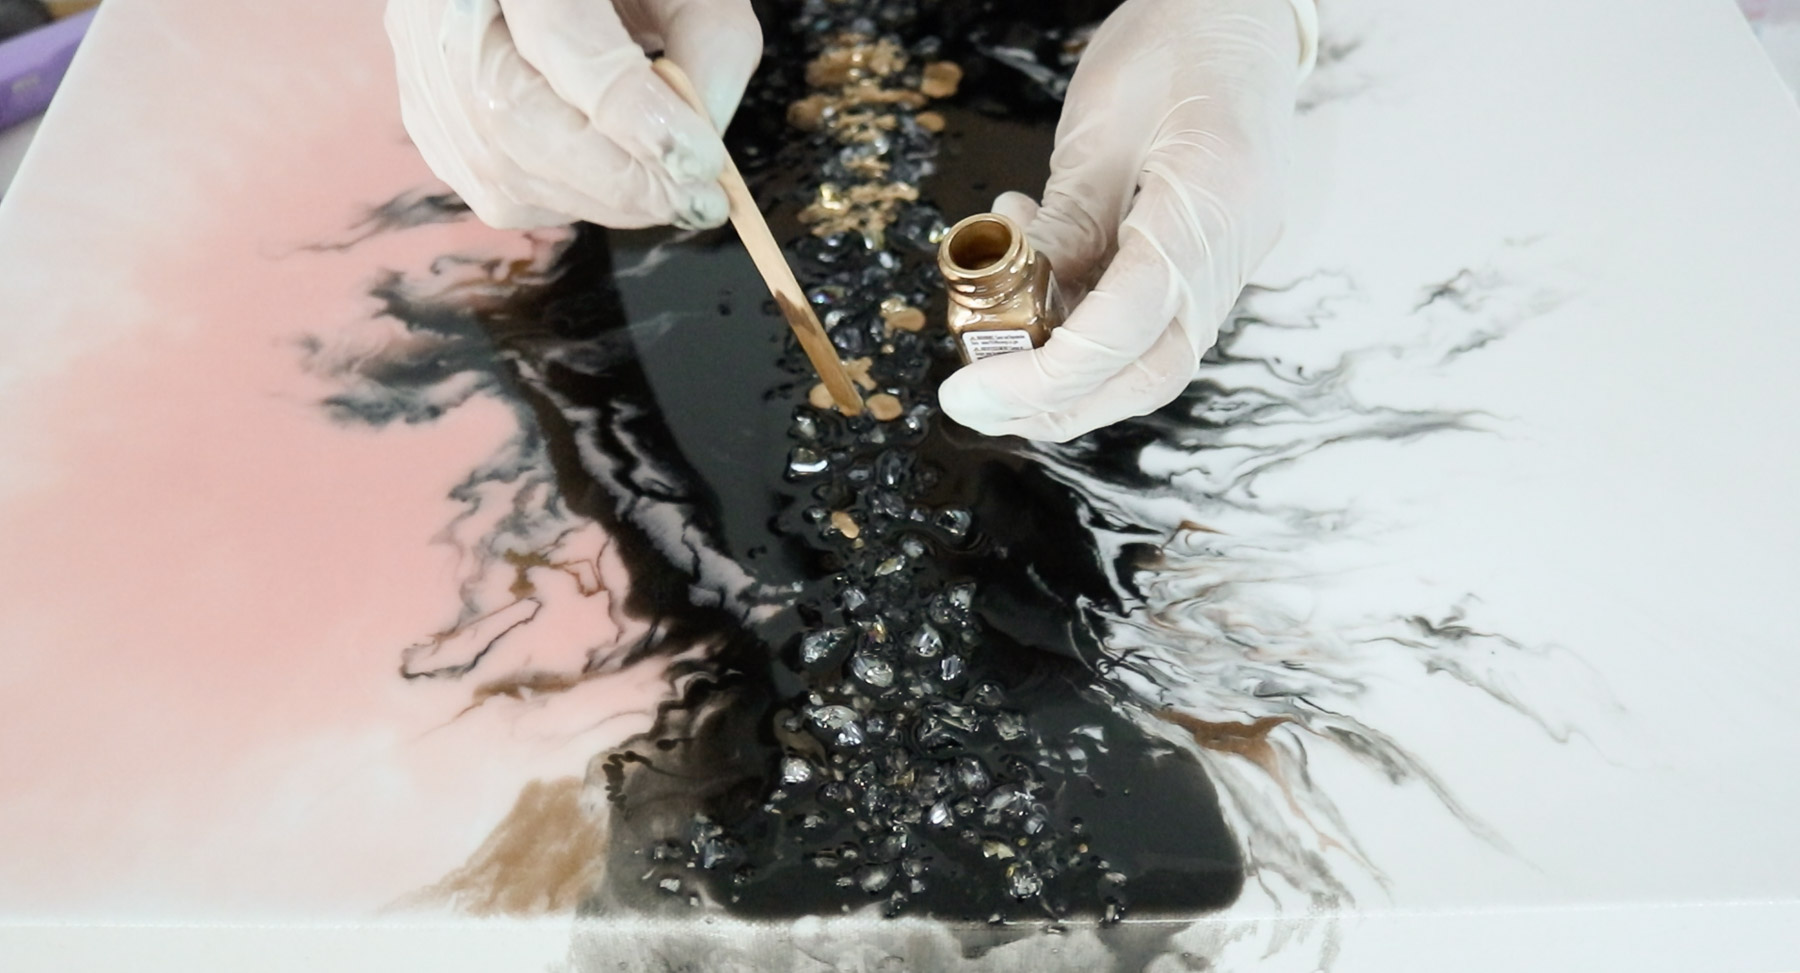
Adding Some Metallic
Following that I added some brass that we made with the enamel paint by adding it to some resin. I used a toothpick to add little details.
Step 4 – Finishing off your epoxy acrylic pour with Crystals
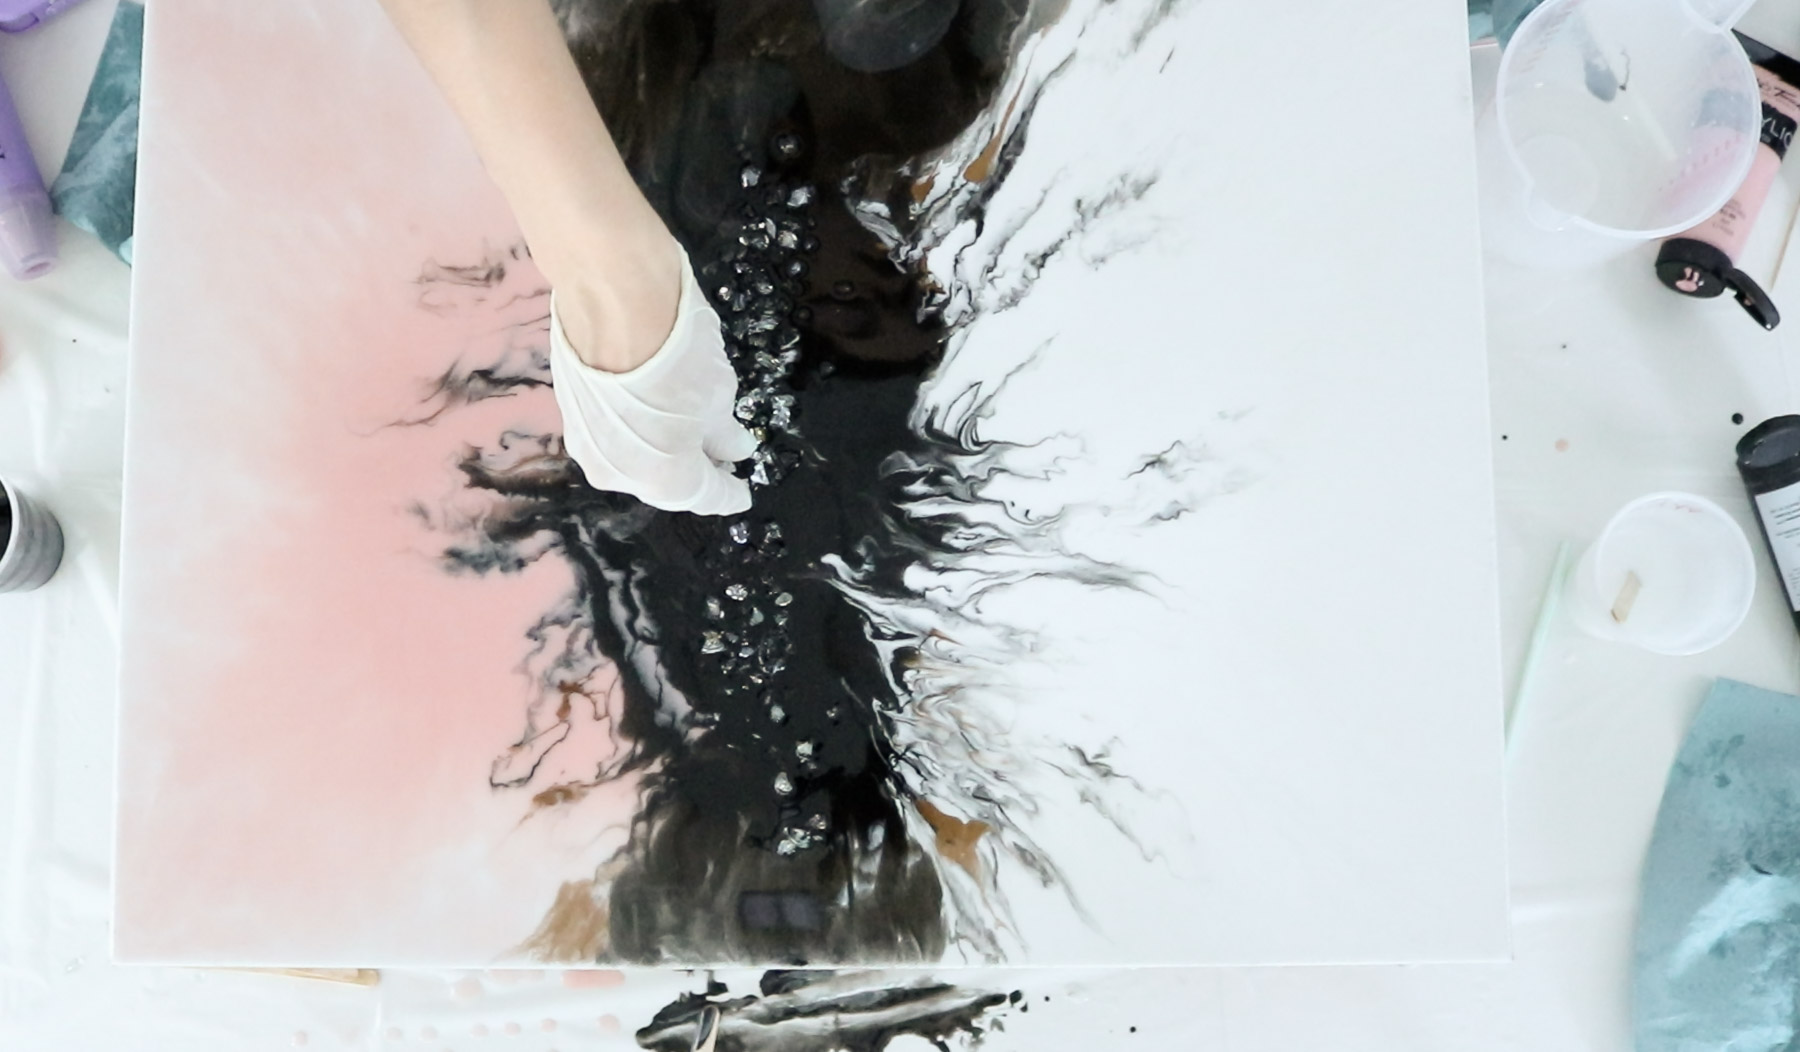 To add your crystals simply drop them down onto your artwork making sure they are all touching the resin. The resin will act as glue.
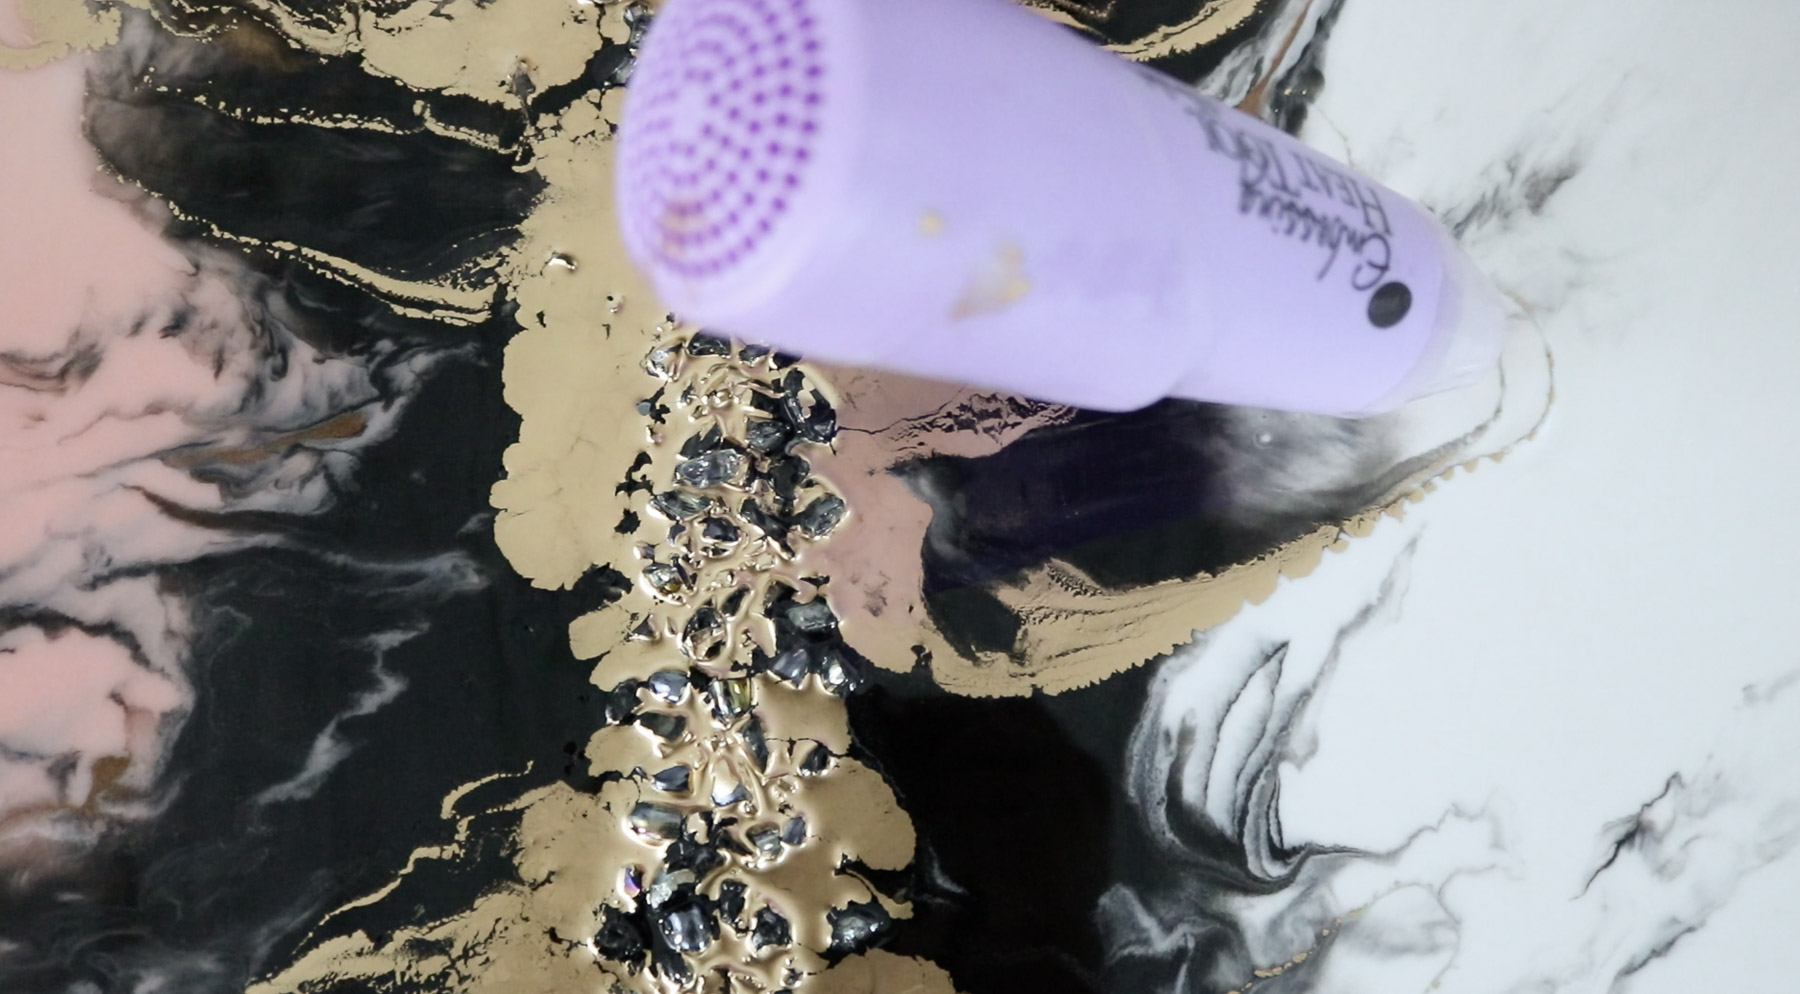
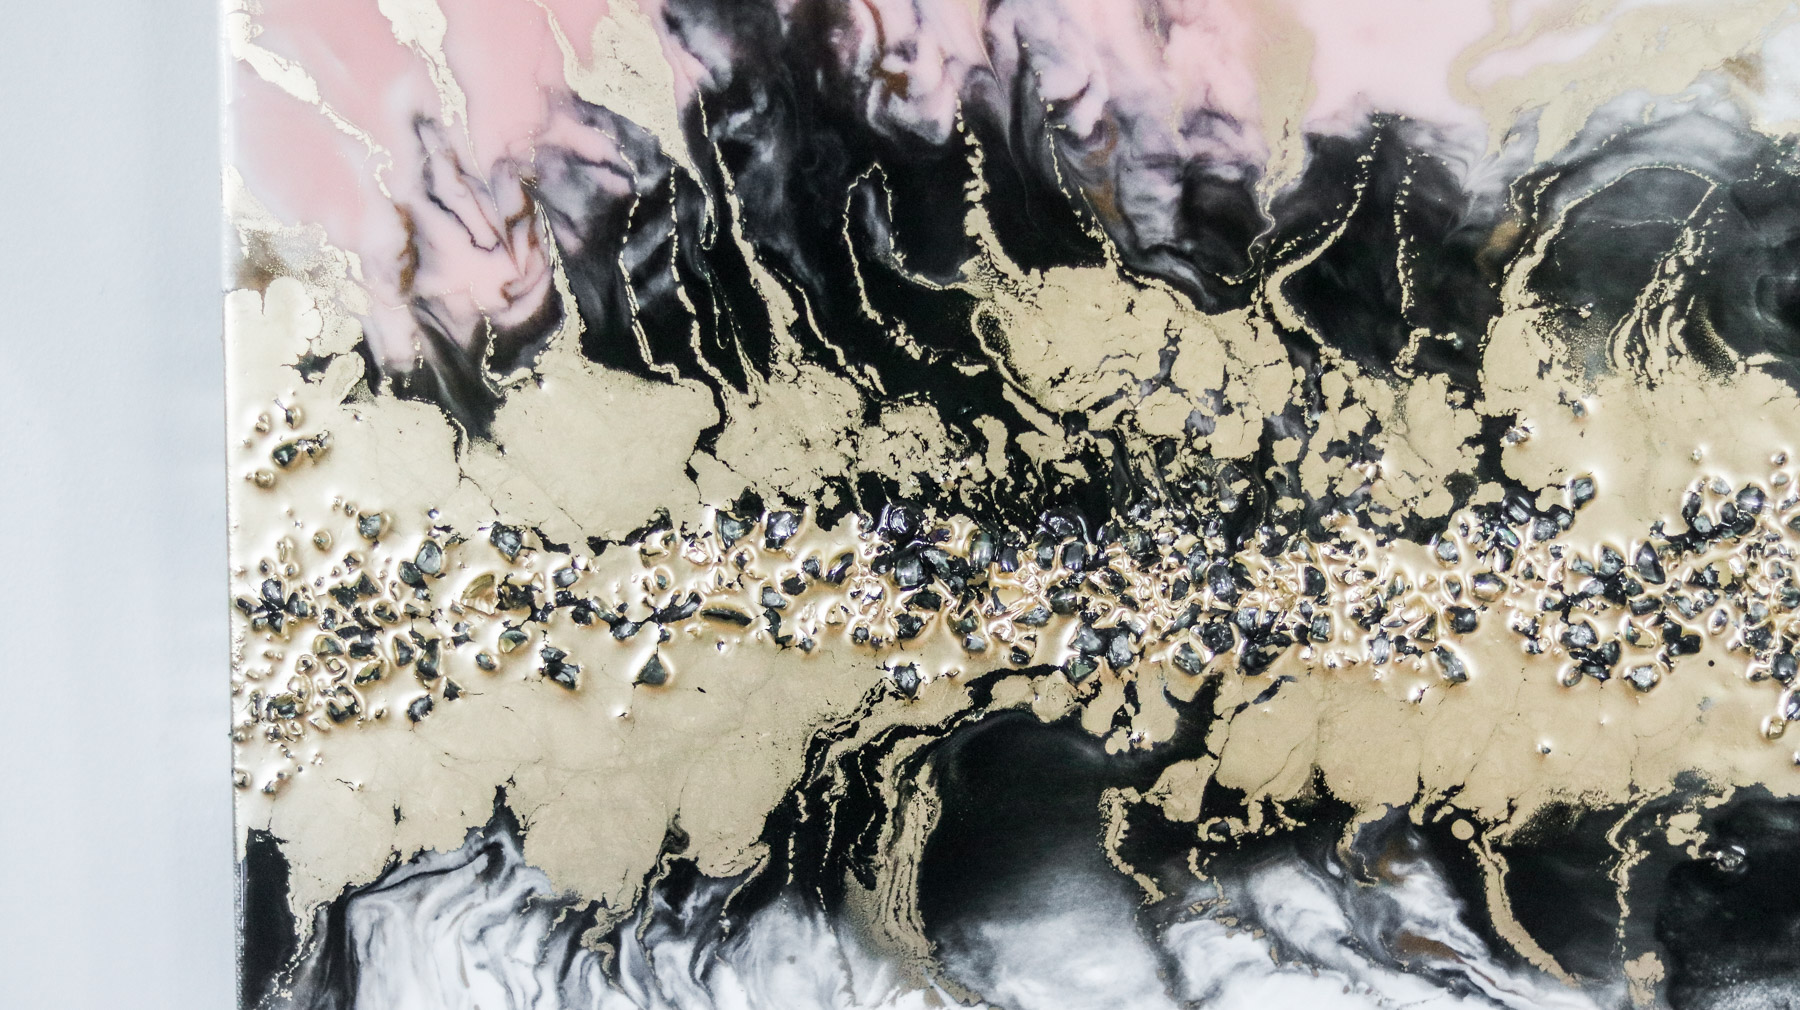
Step 5 – Adding your gold
I dripped my gold directly out of the bottle without mixing it with resin. I wanted the gold to sit on top of the resin creating depth and texture. Careful a little goes a long way with the enamel paint. Once you heat it up it’ll really spread. I did about 5-7 little drops per every 2 inches. (photo below- look how much it spread)
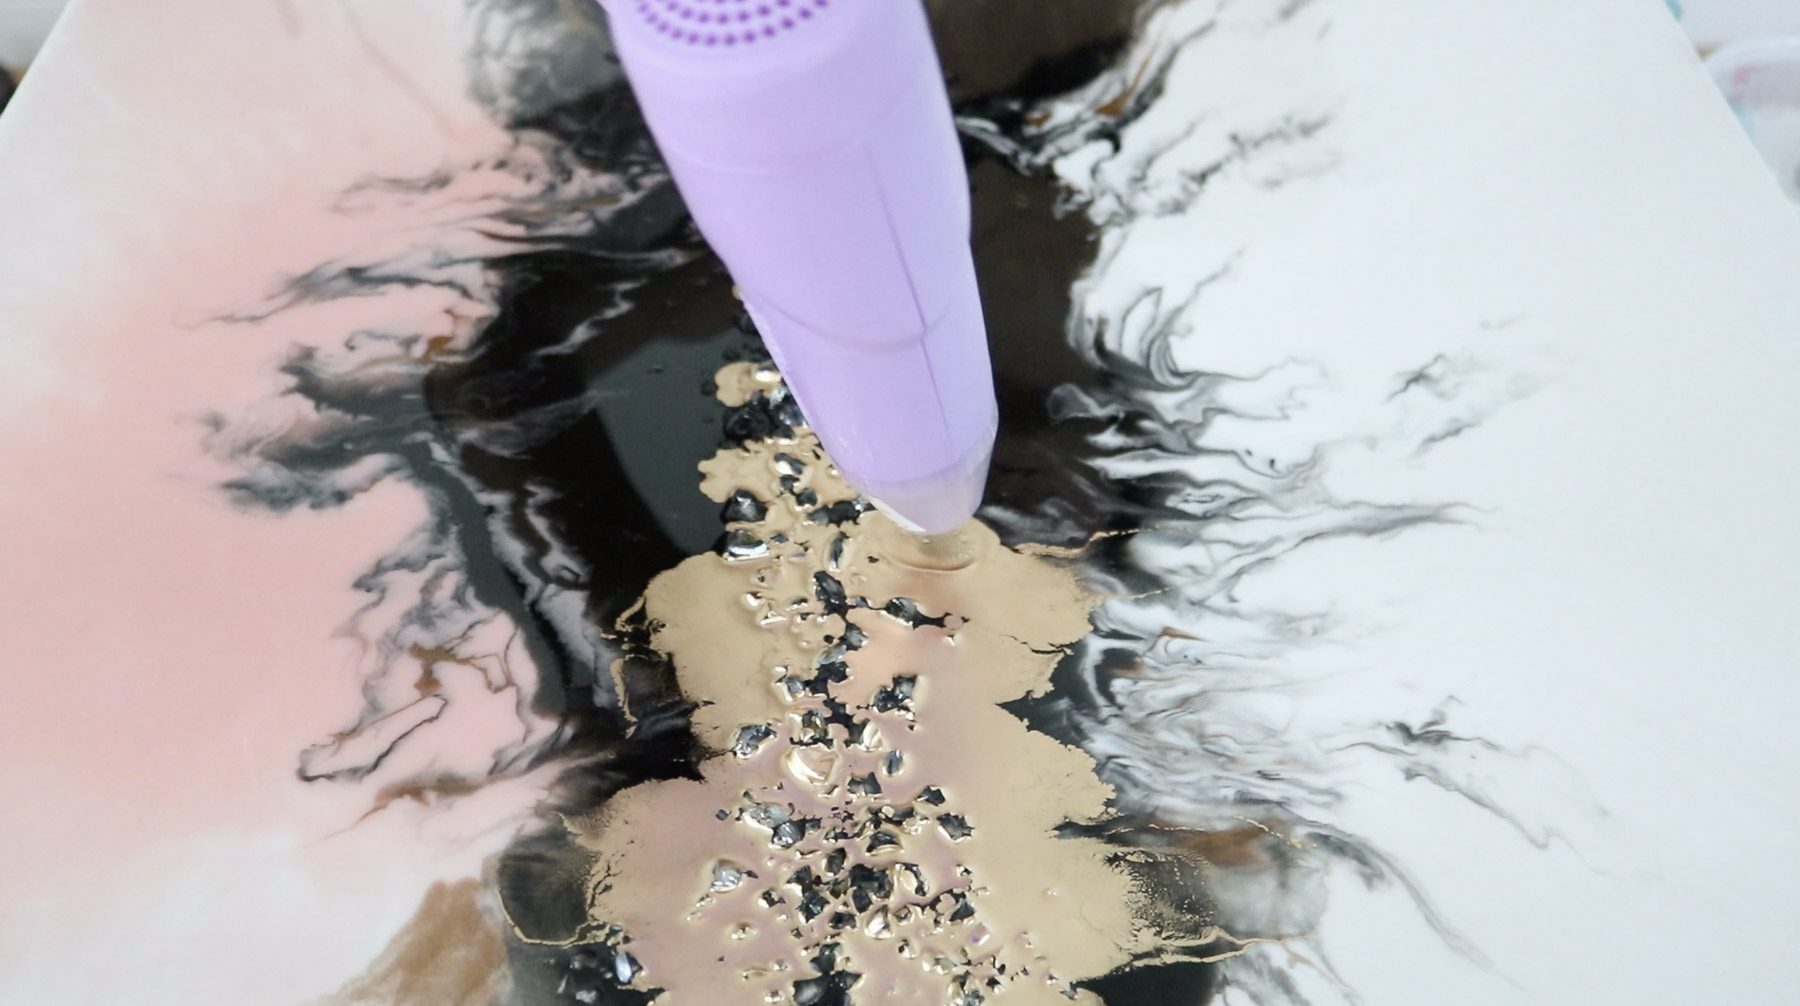
I used my heat gun to melt away the gold making sure to pull away from the center as it heated. (do not touch the resin with your heat gun or hold it too close. (It will burn the canvas if held too close) The heat gun gives off a little bit of air. Just enough to move the gold around. I would hold it on the gold for three seconds to heat it up and move the heat gun away from the center. (as it pulled the gold away) This created bursts of gold.
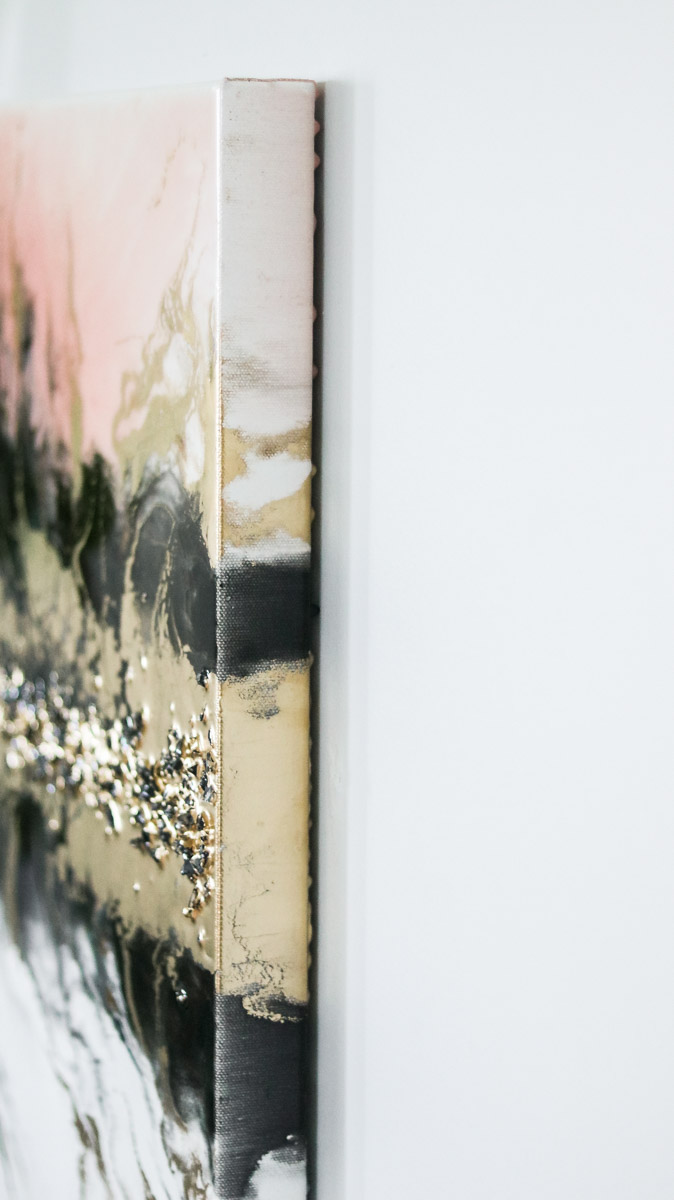
For your last step fix up your edges. While working on your art don’t worry to much about the edges. Once you get to your edges the resin will should start hardening at this point. You should be able to just rub it onto the edges. Don’t worry about leaving finger strokes on the sides. They should melt in as the resin settles or if the finger strokes are bugging you you can always heat it up a bit with the heat gun and it’ll melt right into place. That’s it!
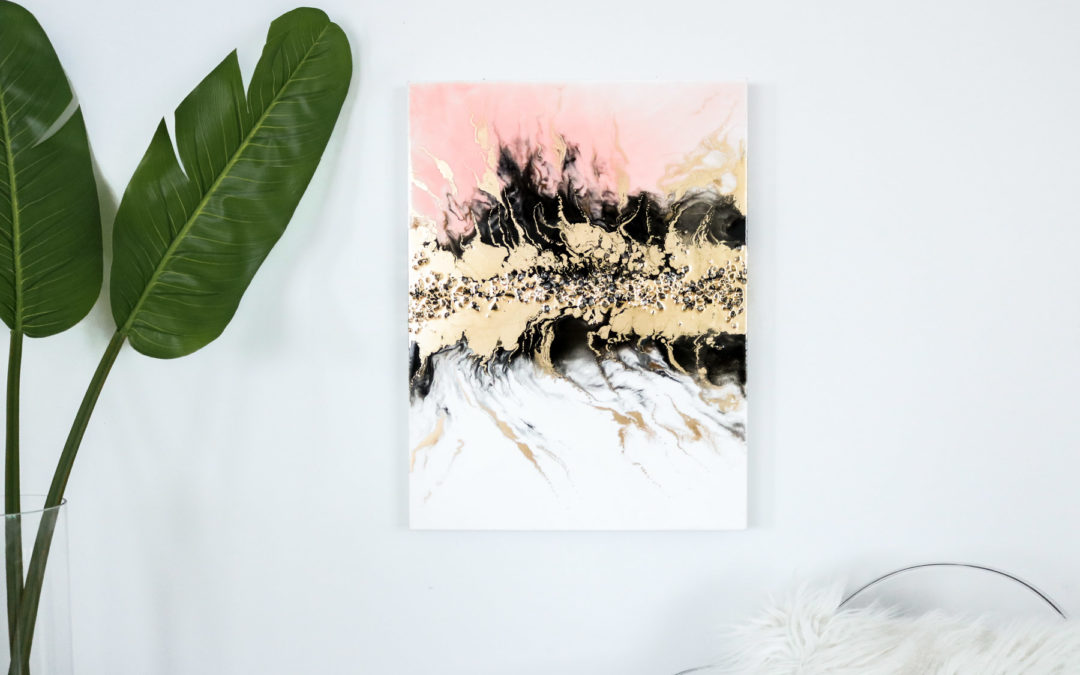
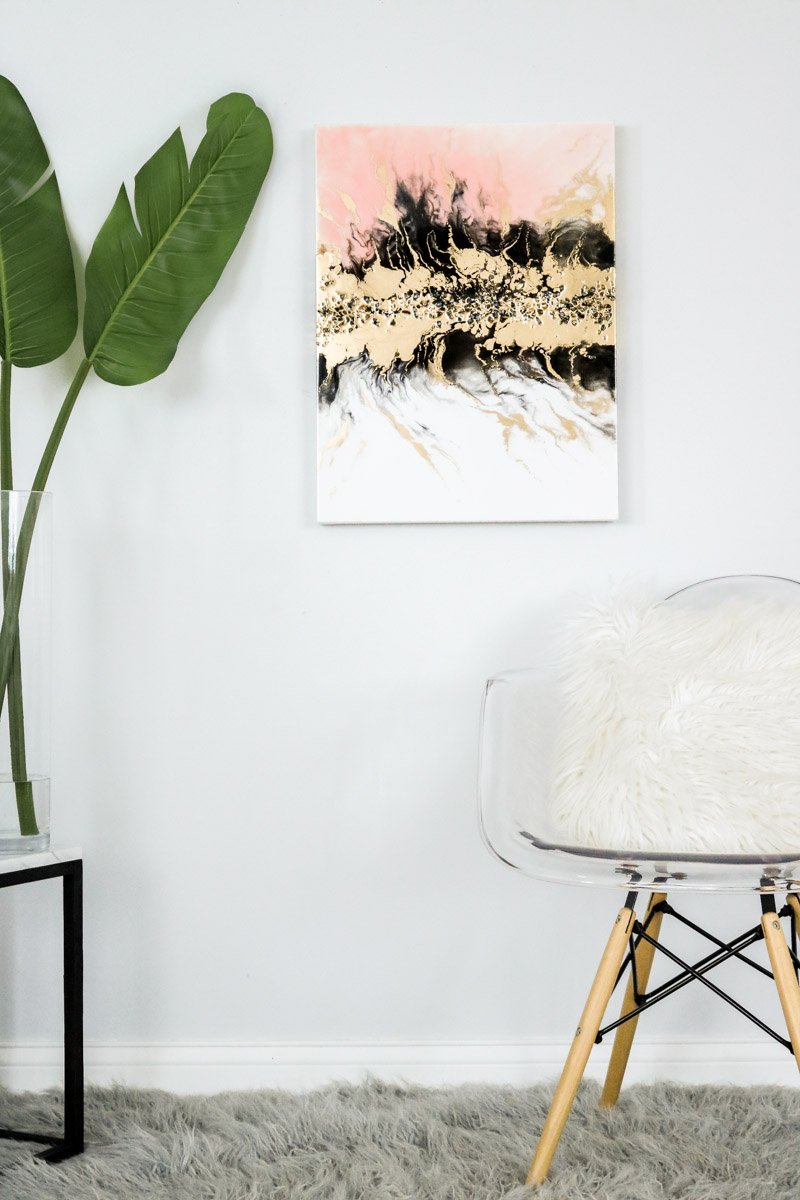
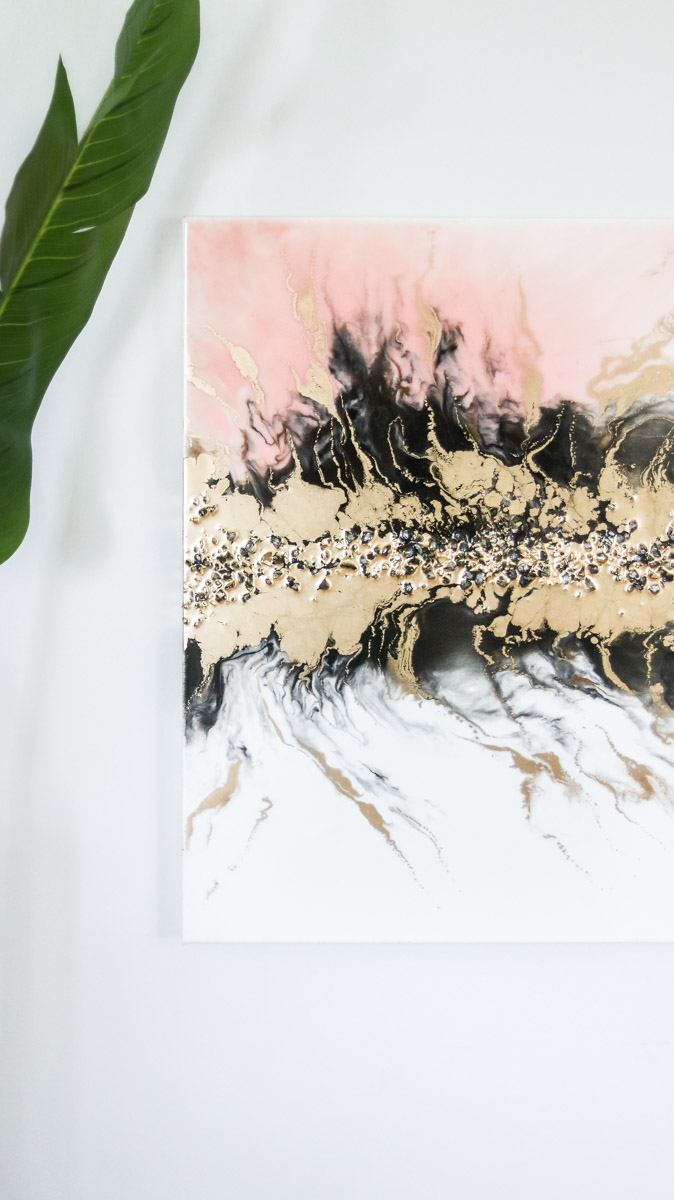
I am in love with how this turned out! I can’t wait to work with resin again! That was sso much fun 🙂 . By the way how cute is that chair. Oh and if your wondering where I got my giant banana leaves they were at hobby lobby 50% off. ($5 a piece what a steal)
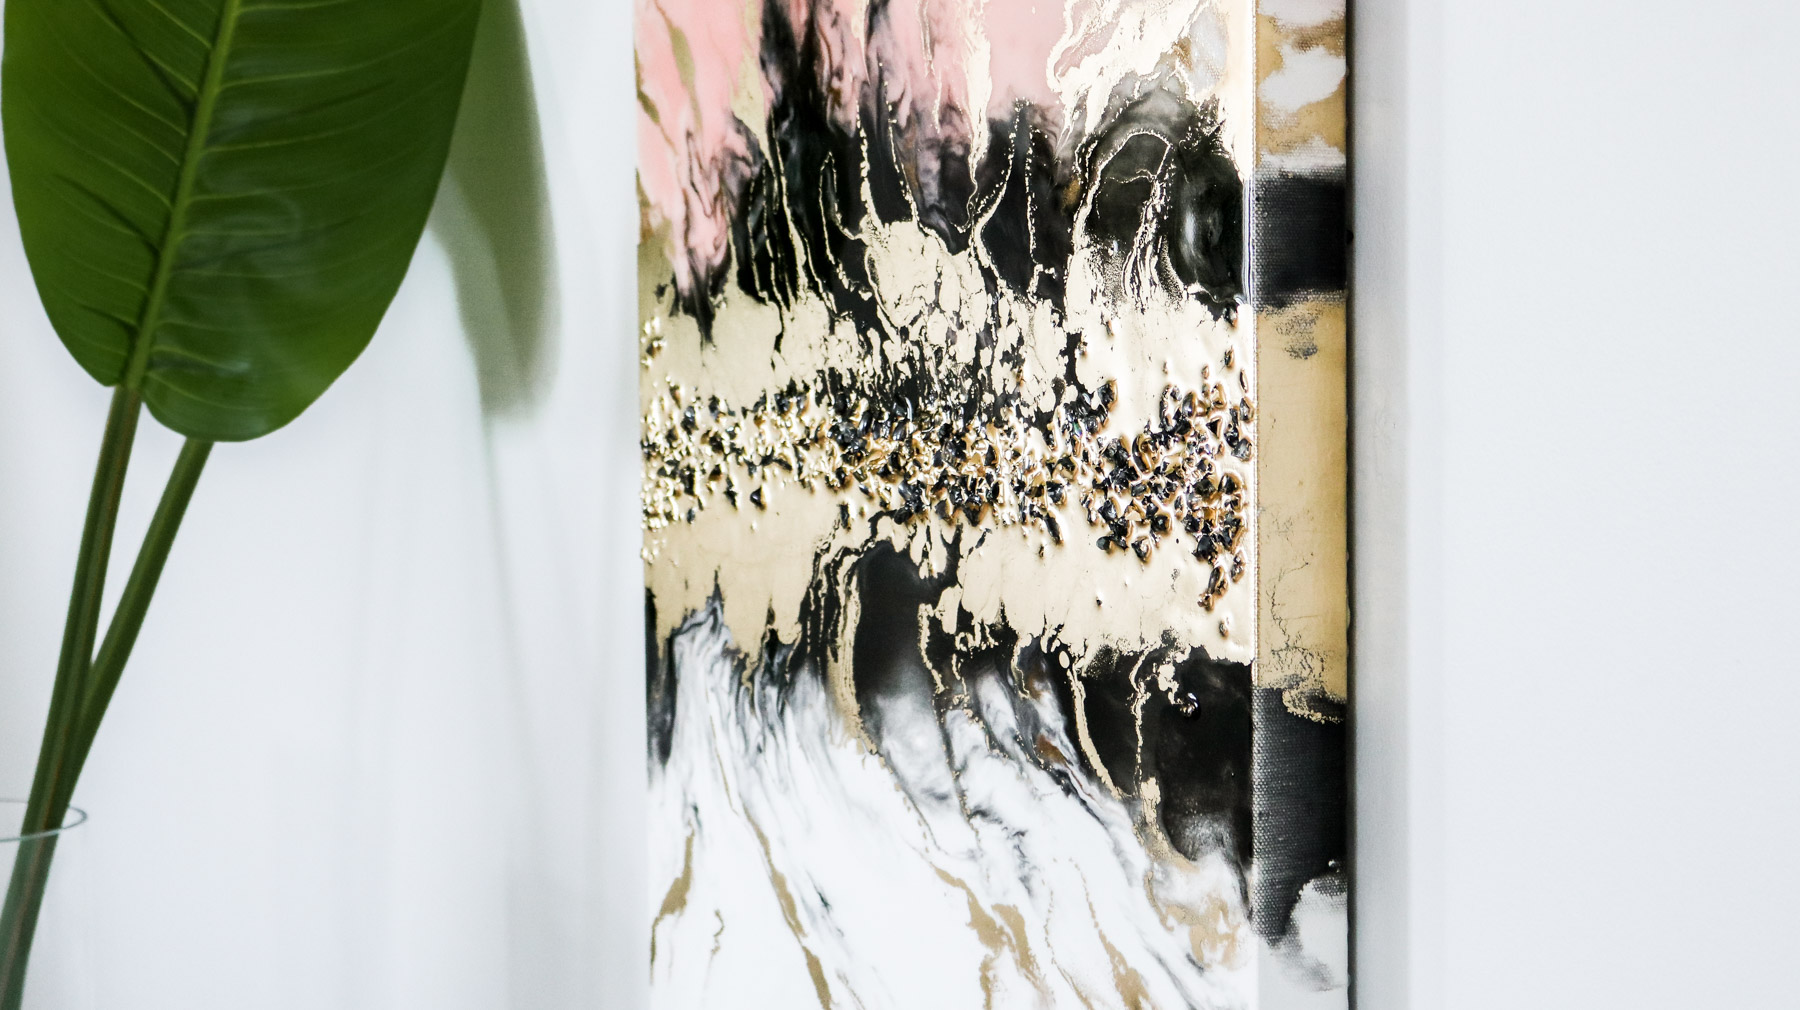
Look how shiny it stayed. Isn’t that amazing!

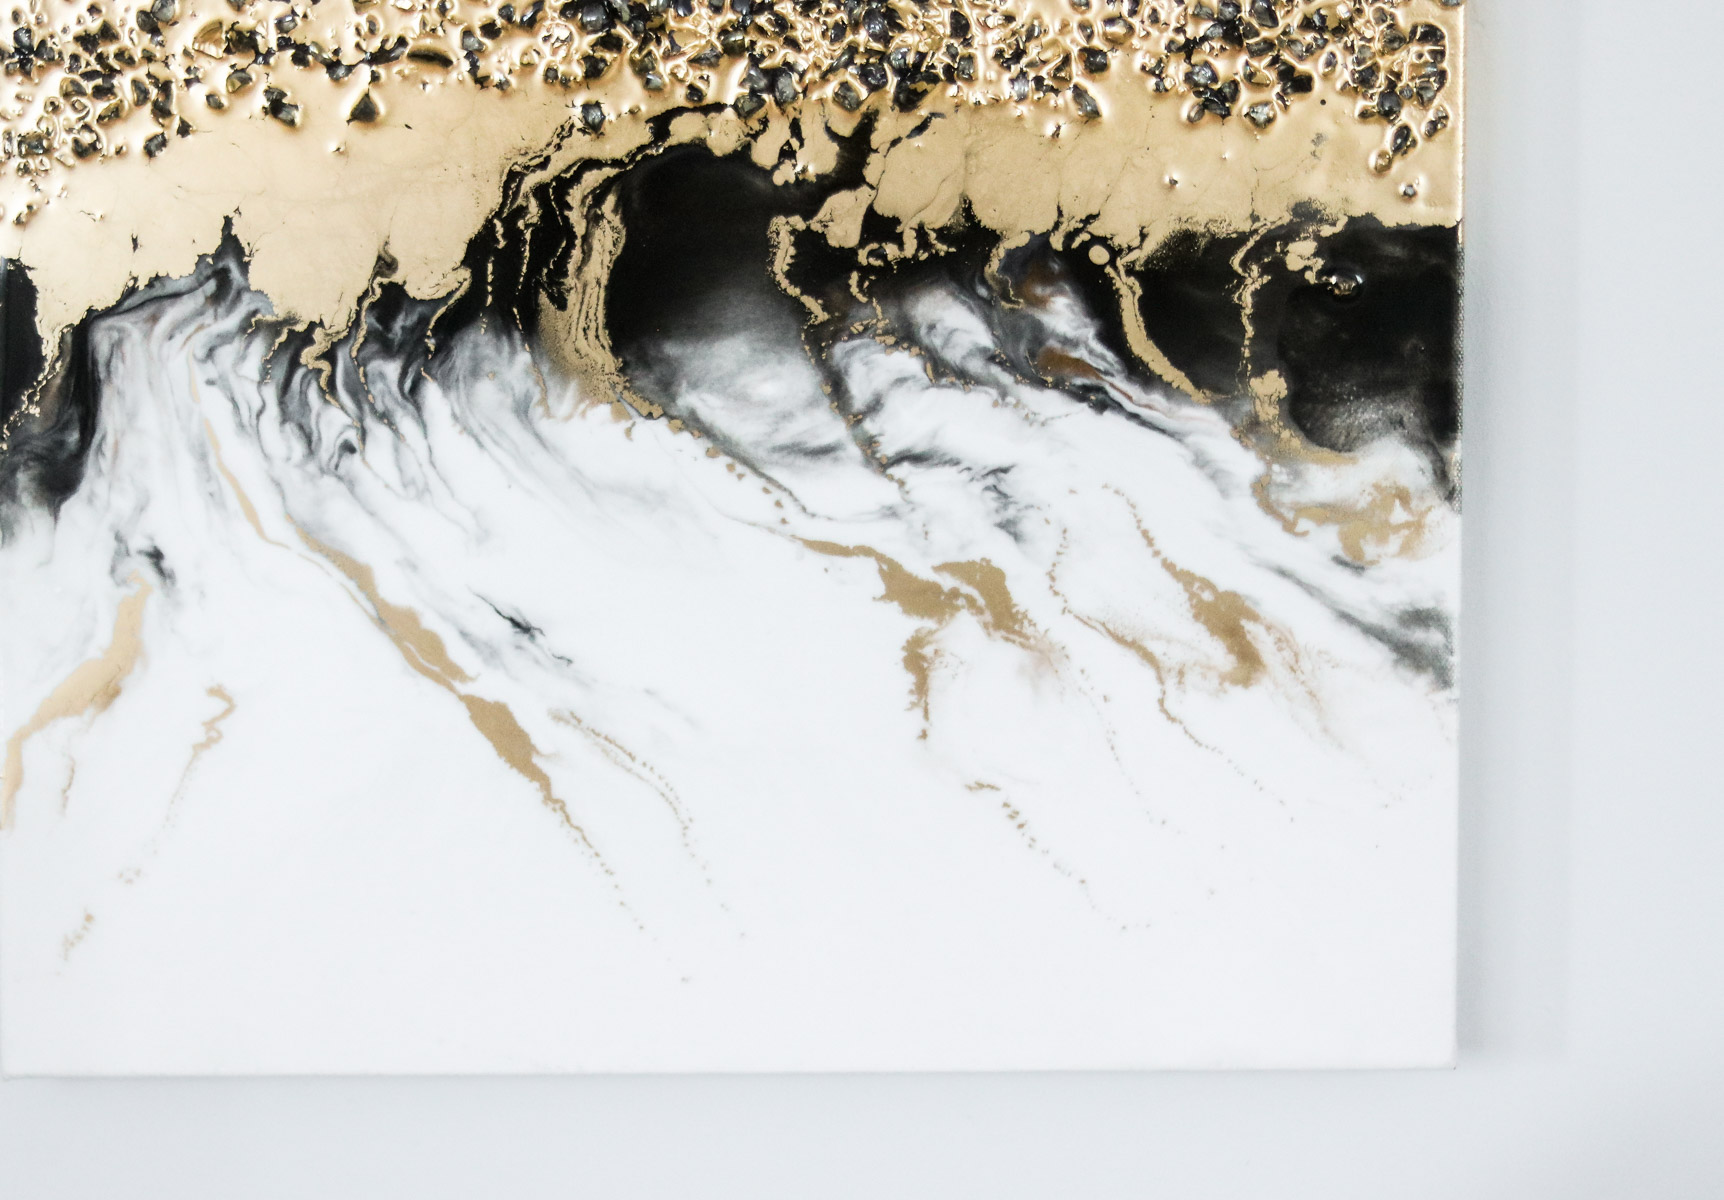
So we were debating on what this abstract looked like and some of my friends were saying it looks like a mountain range.. 😍 What do you think it looks like?
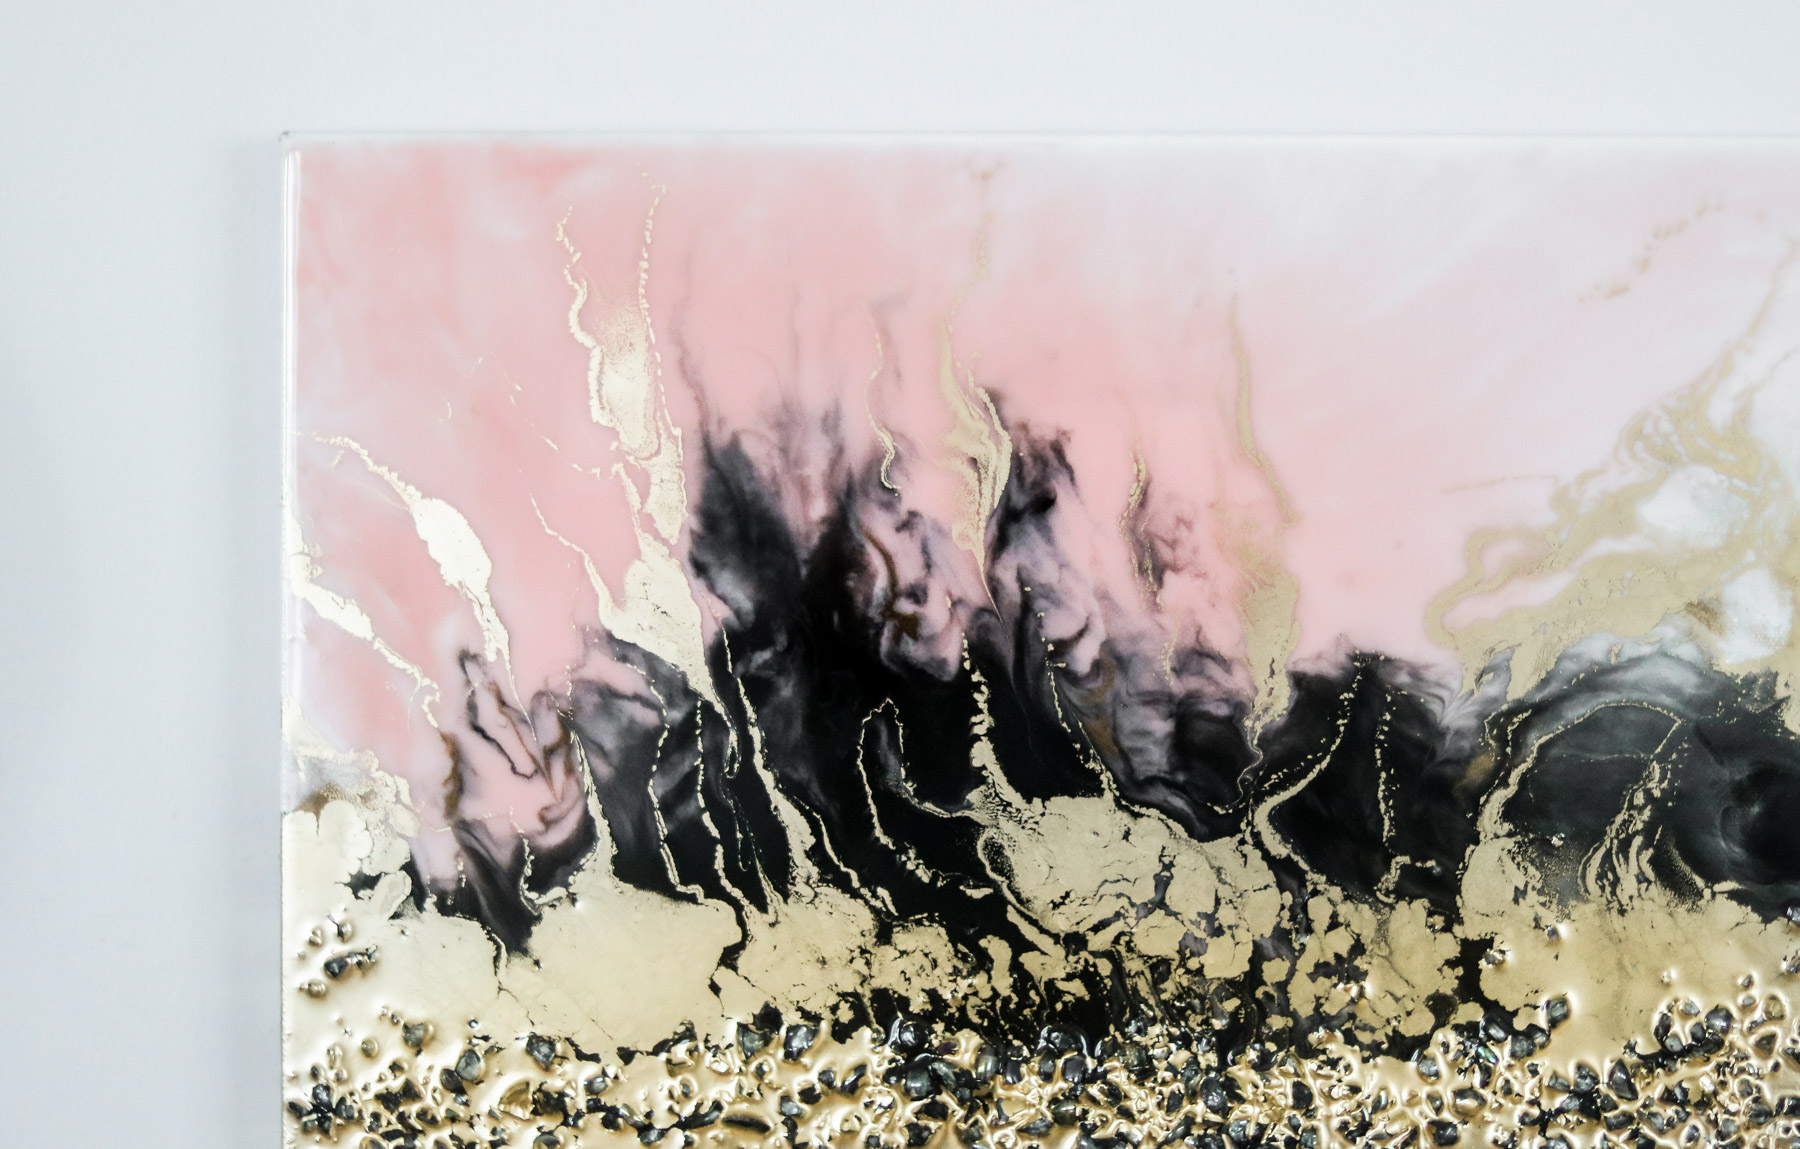
I love how these pinks turned out!
Just a heads up it does drip which gives your edges a bit of a drip effect. Resin is totally sandable so that’s an option if it’s bugging you.
I think my favorite part of all is this marble look on the white! 🙂
That’s it for this DIY. I hope you enjoyed it. My bedroom will look sssso fresh and modern with this resin art. We’re working on a new feature wall in our bedroom where this art piece will be hung. As soon as I have it up I’ll snap some pics and post it. 🙂
I hope you enjoyed this resin pour DIY. Have a great weekend everyone! Happy crafting!
shop resin art in bulk :
A huge thank you once again to hobby lobby for sponsoring this tutorial 🤗!
Special thanks to my awesome hubby. Couldn’t have done this without him😊. (PS. all the cool close up scenes in the video were video taped by him! Isn’t he amazing! )
You might also like –
Wow, Lily! This project looks amazing! I love how it has the modern look to it! Also, thank you for answering so many questions in the video, that is so helpful! =D
Awe thanks girl 😀 I’m so glad you loved it! YAY I’m glad the Q&A is helpful. 🙂
Hej I have a quastions I use acryl paint to my resin but the pigment go down and it looks bad, what I am doing wrong? Sorry for my english. 😉
Did you use the same brand acrylic paint? It should work with any acrylic paint but I found the basics brand to work best. No worries I understand you 😀 😀
How did you fix glass pebbles? Because they are very sharp…
I left mine sharp. You can sand them down a little once your art dries or use broken pebbles they sell at the store but they’re not as shiny.
Could you have poured another layer of resin over the glass
IF you mean over the set resin. 🙂 Yes you can pour as many layers as you’d like 😀
Hi Lily,
Love the resin pour art! A hint on leveling your surface:
I found push pins are adjustable whereas the solo cup are not. Large push pins make the job easier 😉
WOW!! that’s awesome I’ll have to check some out. Thank you for sharing this tip Patricia. Where did you buy yours?
I purchased my Giant push pins on Amazon in 2 packs of 12 each. Very affordable too. Less than $10 dollars & free shipping. I don’t Paint or do my Resin Art without them! Beautiful Piece, by the way! I follow your YouTube channel & this “tutorial” I have saved, shared, liked & memorized!! You’re an amazing Artist! Thanks for sharing your expertise!!:)💯❗🌈🎨❤💜
That’s awesome! I never would of thought to use that. Also didn’t know those exist! AWWE thank you so much Jennifer! I’m so glad you loved my art! You are too sweet! 😀
Awesome tutorial!!! Appreciate all the details! I’ve worked with art resin and wondering if you had problems with the side drips sticking to the plastic cups? Do you know if the resin will stick to the yellow art cones? I struggle most with the resin that drips on the sides…🤷♀️
Thank you Angela. Yes it does get stuck to the cups. I recently learned it’s best to tape the bottom of the canvas with tape. Once the resin sets and the drips are created on the bottom you just remove them with the tape. Hope this makes sense.
Any grocery store with an office section carries a little plastic box full of clear push pins. Office Depot carries the larger ones with a longer stem.
Awesome I’ll check them out. Thank you Patricia. 😀
to Break the marbles, it’s much easier to put them in a pan in the oven @ 400 degrees for 20 min. Drop in an ice bath using a metal bowl. Carefully fish out the ones that didn’t break & put them back in the oven for another 10 min. Then, use a new ice bath. Much safer also.
Thank you for the tip! Will need to try this next time 😀
Does the new heat gun produce electric odour… while using ?
I didn’t get any odor from it 🙂
I see a lava flow in the mountains of Fairyland. Ok, that’s just me. I love these colors. I have been reading up on resins for a while and admit to being intimidated. I had a pour not dry and was left with a mess. But today I’m going to try again. Thank you for this easy tutorial. Wish me luck!
THank you 🙂 Oh no!! I’m sorry to hear that! I’ve had resin not set before too. It really sucks. I hope your resin pour goes perfect! 😀
Love the resin art. Could you recommend what kind of wood to try this on and if it would need to be treated in any special way prior?
Thank you Naila, I think the wood I used was pine. I think just dry wood in general should work. I don’t think it needs to be treated any special way although I’m not sure how they treat the wood sold in stores. WOW sorry wish I could be of more help.
Aw, this was a very nice post. Finding the time and actual effort to produce a really good article… but what can I say… I put things off a whole lot and don’t manage to get anything done. Normal I blig about finger rings gold design
Thank you !!! I’ve tried to follow many tutorials. But hands down yours is the best!
I’ve had my supplies for a long time and I’m a little intimidated to start I just repainted a room with pinks and greys so even your set work match’s my idea I’ve had some so long !! Again many thanks up in Alaska freezing lol
Mary
Hi Mary, YAY! i’m so happy to hear this! OOH pinks and grays sounds so pretty.
Oh my gosh girl! I’ve Been talking to my sis up there in AK and she says it doesn’t seem to want to warm up. LOL! Hope you get some nice weather soon.
Beautiful!! Great description too!
Thank you I’m so happy to hear you liked it!
How much did all of the supplies cost you?
I think it was as little over $100. The resin was the priciest 😀
Very pretty.
$100 is too much for me for that piece. That’s my disappointment with resin. It is expensive. But fun to work with.
You don’t necessarily need a heat gun, can just use blow dryer. Some people just breathe onto small pieces and say the warmth will pop the air bubbles.
It is pretty pricey I agree! I wish it was cheaper.
Awesome job on the tutorial! I LOVE and appreciate the detail! SO often tutorials lack many details sue to the presenter assuming readers/viewers are at the same knlowledge level as themselves. Ugh, frustrating! But you did a very good job, thank you!
I too have spent many, many hours researching and trying to learn all the ins & outs to resin, wow, it has been exhausting!
Anyhew, I thought I’d share a little trick with you…I use my rock tumbler to remove the sharp edges from my homemade glass shards. I don’t leave them in for as long as other projects, i.e. faux beach glass, but just long enough to smooth so that I don’t get cut too much.
If you don’t have one, it’s definitely an item for your wish list, esepecially if your dabble in mixed media that includes glass or rocks. I use mine for all sorts of projects, and even though I only use it periodically, it sure is nice to have on hand. I got mine for under $50 at Harbor Freight, it is a small 3’lb unit, and I love it!
So again, thanks for posting! I’m definitely ready to try this resin & acrylic pour project!
OOH I’ve never heard of a rock tumbler. That’s awesome! Thank you so much for sharing Andrea. I’m definitely adding it to my wish list. OH YAY! I’m so glad this was helpful! That’s so nice to hear.
I use glass chips from the floral dept at Hobby Lobby. Easy inexpensive and they look great.
Firstly,Thank you for the detailed step by step explaination and the encouragement you generated for your viewers and readers.
Soon I will be venturing into a resin pour,with 5 colours,dark blue,turquoise,white,black and either silver or gold?
I will appreciate if you can help me, I know any form of oil residue is enemy of resin and it leaves little craters on the canvas, how does then one get cells?
I am wondering,
If I mix my acrylic paint with liquidex medium,and use it to color my resin will it be ok?for, normal acrylic pours use of mixers like Elmers glue floetrol are used which help cells to form,can I use the acrylic paints mixed with one of these be OK for resin?thank you.
Hi, thank you I’m am so happy to hear you liked this tutorial. Gosh honestly I’ve been wondering that same thing. I’m not really sure how to get cells and I don’t know if floetrol would go well with resin. I would recommend watching a few youtube videos to see how to get cells. I know if I plan on making are with cells that’s where I’ll be learning probably. 😀 😀
If your using a wood board do you pre treat the board first with anything?
I would paint it white first or a base color. Not sure what you mean with pre-treat.
Wow thank you sooo much for the tutorial, I have to try this!:)
Did you add resin to the black or something else?
Yes black in the art piece is resin mixed with black acrylic paint. There is no black acrylic paint alone. I hope this makes sense. 😀 Let me know if you have anymore questions.
Do you let the base coat in clear dry before applying the colors? Do you use the mixture of resin and hardener both with the black paint or just resin ? How much paint do you use with the resin mixture in cups?
No I do not let the base coat dry. I colored resin on top right after I pour the base. Yes I use the resin with black paint. It really depends on how much resin you have in a cup. The recommended amount of paint per resin is 10% paint at most and 90% resin. I usually just eyeball and add a few drops of paint until I get the desired color. You’ll know you added to much paint if you’re resin becomes thick stretchy and gloppy (pretty much starts setting to quick)
Wow. This is the FIRST time ever, where complete instructions are given. Excellent instructions! Thank you. Usually, almost always, artists leave information out. Perhaps there’s an assumption. Peace. Linda
YAY that’s good news! I’m glad it was easy to understand! 😀
Hi! Thank you so much for this helpful tutorial. I just had a quick question about the base coat used. Do you add white acrylic paint and resin to the base coat or only resin? Thank you!
Hi Megan, it was just clear on the base coat. 🙂
Awesome 👍 Thanks for the tutorial
Awesome tutorial with solid information. I hate to mention this and wouldn’t say anything if it was one or two times in your article but you use “than” about 10+ times and in every instance the correct word was “then”. If made all your hard work on an otherwise stellar article, very hard to read. I do this strictly because YOU are very talented and would love to see you succeed. Blessings.
Thank you Deborah, thank you for the tips. I will try and do my best to keep track of the right then’s and where they go. English isn’t my first language so I tend to confuse them all the time.
What an awesome tutorial! Also the picture quality is top-notch, I really enjoyed reading through the whole article and will try this project soon :-). All the best!
Thanks, I have just been looking for info approximately this subject for a long time and yours is the best I have discovered till now. But, what in regards to the conclusion? Are you certain concerning the supply?