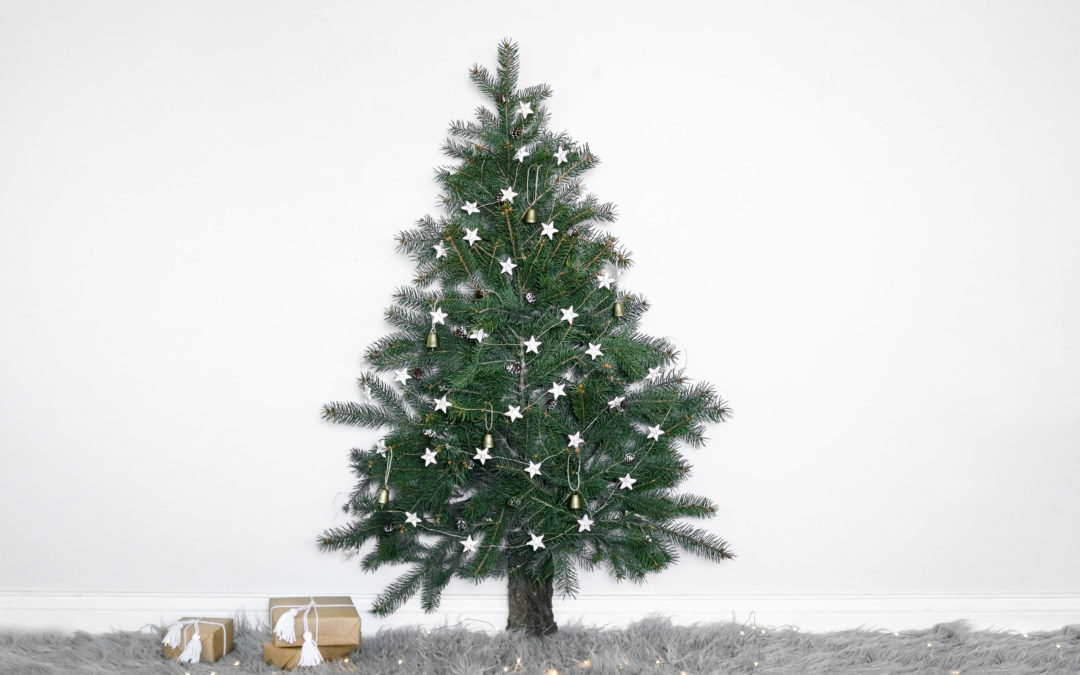
Christmas only comes around once a year and if you have a small space it doesn’t exactly help with decorating. The home we currently live in has plenty of space for a tree however, there was a time we lived in a tiny 800 square foot home that didn’t leave much space for a festive Christmas tree. Every corner was taken and if it wasn’t taken a Christmas tree wouldn’t fit. This year for those of you that are struggling with space I came up with this quick and easy space saving Christmas tree DIY. It takes about an hour to make and even better, it can be re-used yearly. There’s a few options to this Christmas tree that make it pretty fun. You can make it using faux pine branches or real pine branches. You can make it fluffy or slim to match any style you want. Best of all you don’t need a ton of ornaments and lights. Save money live better! LOL ( as quoted by walmart) Here’s a fun idea… If your family loves going out and cutting down the perfect Christmas tree every year you can do this as a family project. You still get the real Christmas tree smell and it actually lasts for a good 3 weeks. Than simply remove the dead pine branches after Christmas and save the wooden base for the following year. A new Christmas tradition if you live in a tight space?! 😬. It’s a great family project and your kiddos will love it. If you don’t have time to make a tree every year than just use some faux pine branches sold at any craft store. A few more ways you can make it is by up-cycling an old tree.. (from a thrift store etc) OR if you’re on a tight budget the dollar store sells mini Christmas trees that you might be able to salvage for this project. My favorite part about having it made from faux pine is that it’s super easy to set it and if you were to ever move into a bigger home you can still always use it in your bedroom or kids room. AWESOME! RIGHT! Quick video version
TIME NEEDED: About 1 hour
TOTAL COST: $10 – $30
Your cost will really depend on whether you want to make a live tree or faux tree. Your faux tree might cost a bit more but could be reused. Here’s some faux pine I found on amazon (*affiliate link). They look realistic and have great reviews. 30 pieces for $15. You can check them out here.

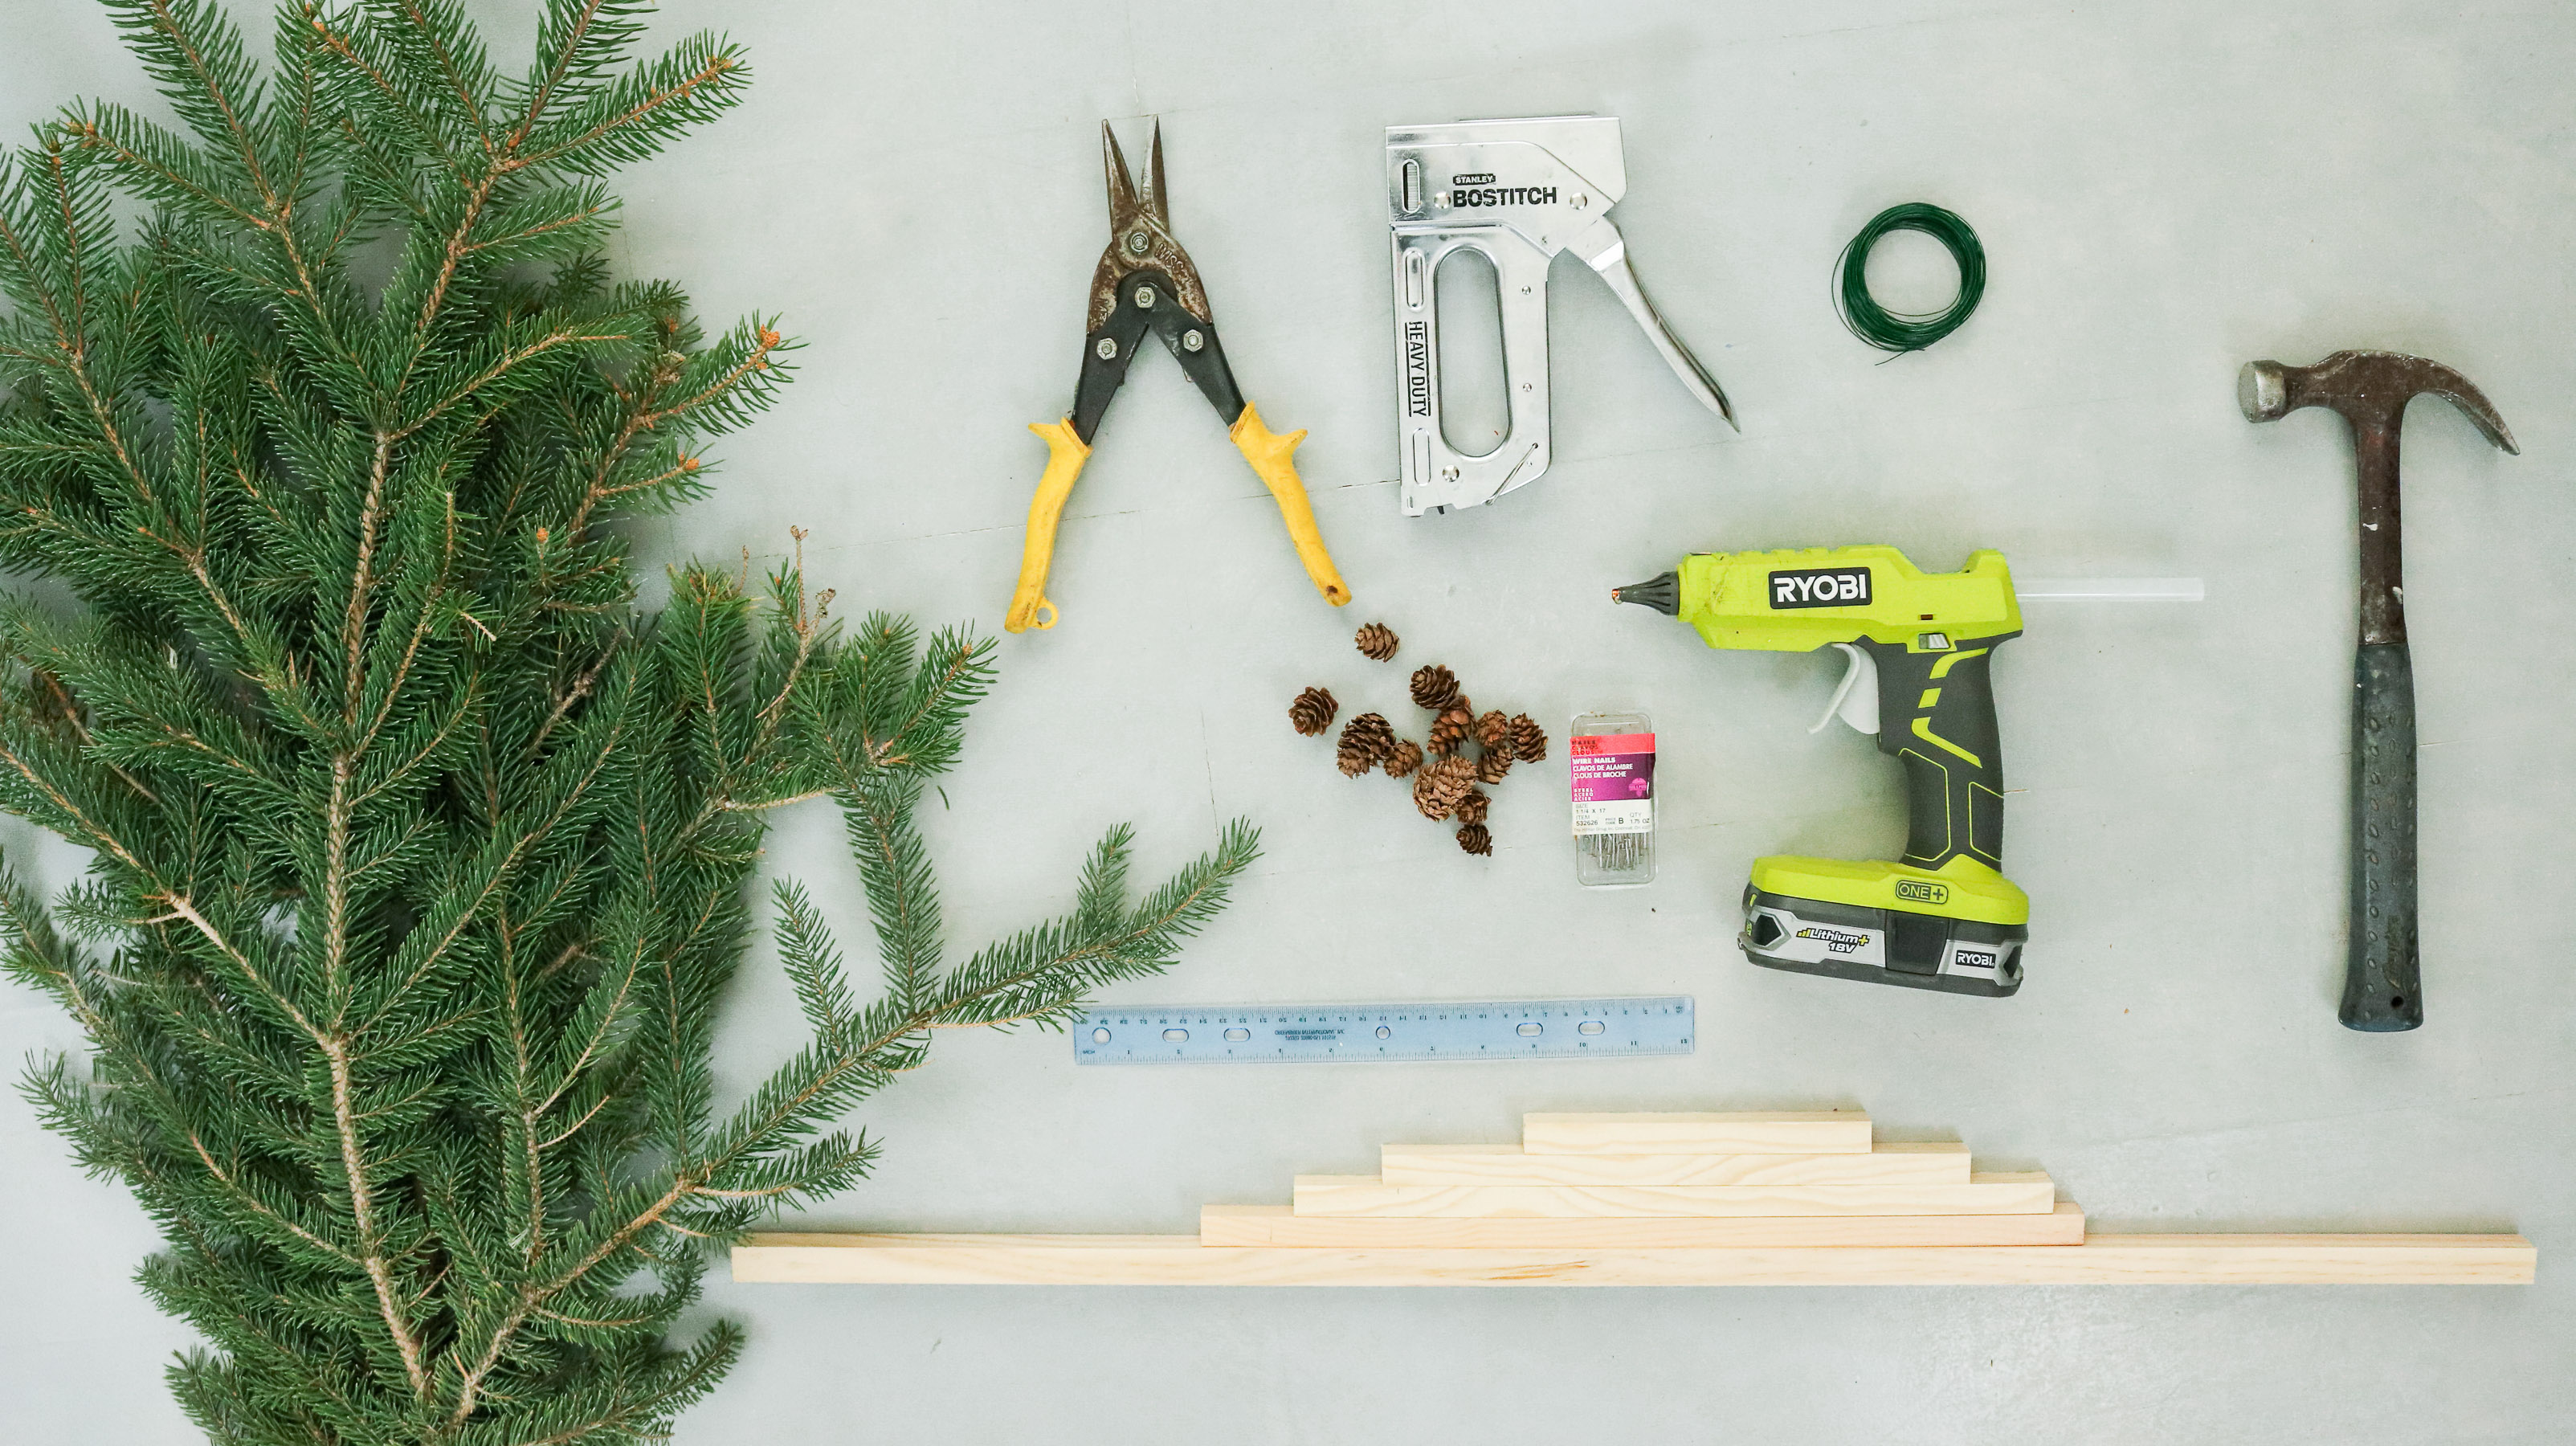
SUPPLY LIST:
- 2 dowels that are 5/8″ x 36″
- 1 dowel that is 3/4″ x 36″
- Floral wire
- Nails
- hammer
- Ruler (optional)
- Wire Cutter and gardening sheers
- Hot Glue ( here’s a link to my favorite glue gun )
- 3m hook
- Tree decorations of course 😁
- (I know there’s a heavy duty staple gun pictured however you will not need one. I get the job done using floral wire)
- Pine Sprays ( I used some from a real tree that I got from my awesome neighbors yard)
Step 1 : Building Your base!
Okay so the idea is to build your base using some dowels. You can totally use bigger wood if you plan on making a bigger tree however keep in mind you’ll need to securely mount it to your wall (don’t want any accidents) I used my 3/4″ x 36″ dowel for the vertical part of the tree and my 5/8″ pieces to create the layered tree effect. You can use a ruler to make sure they’re evenly apart before securing them. Than simply use some small nails and add two nails offset to each other. Here’s the sizes you’ll need to cut your 5/8″ dowels –> 7″,11.5″,15″,and 17,5″.  Make sure your nails aren’t longer than both your dowels. You don’t want to nail it to your floor.
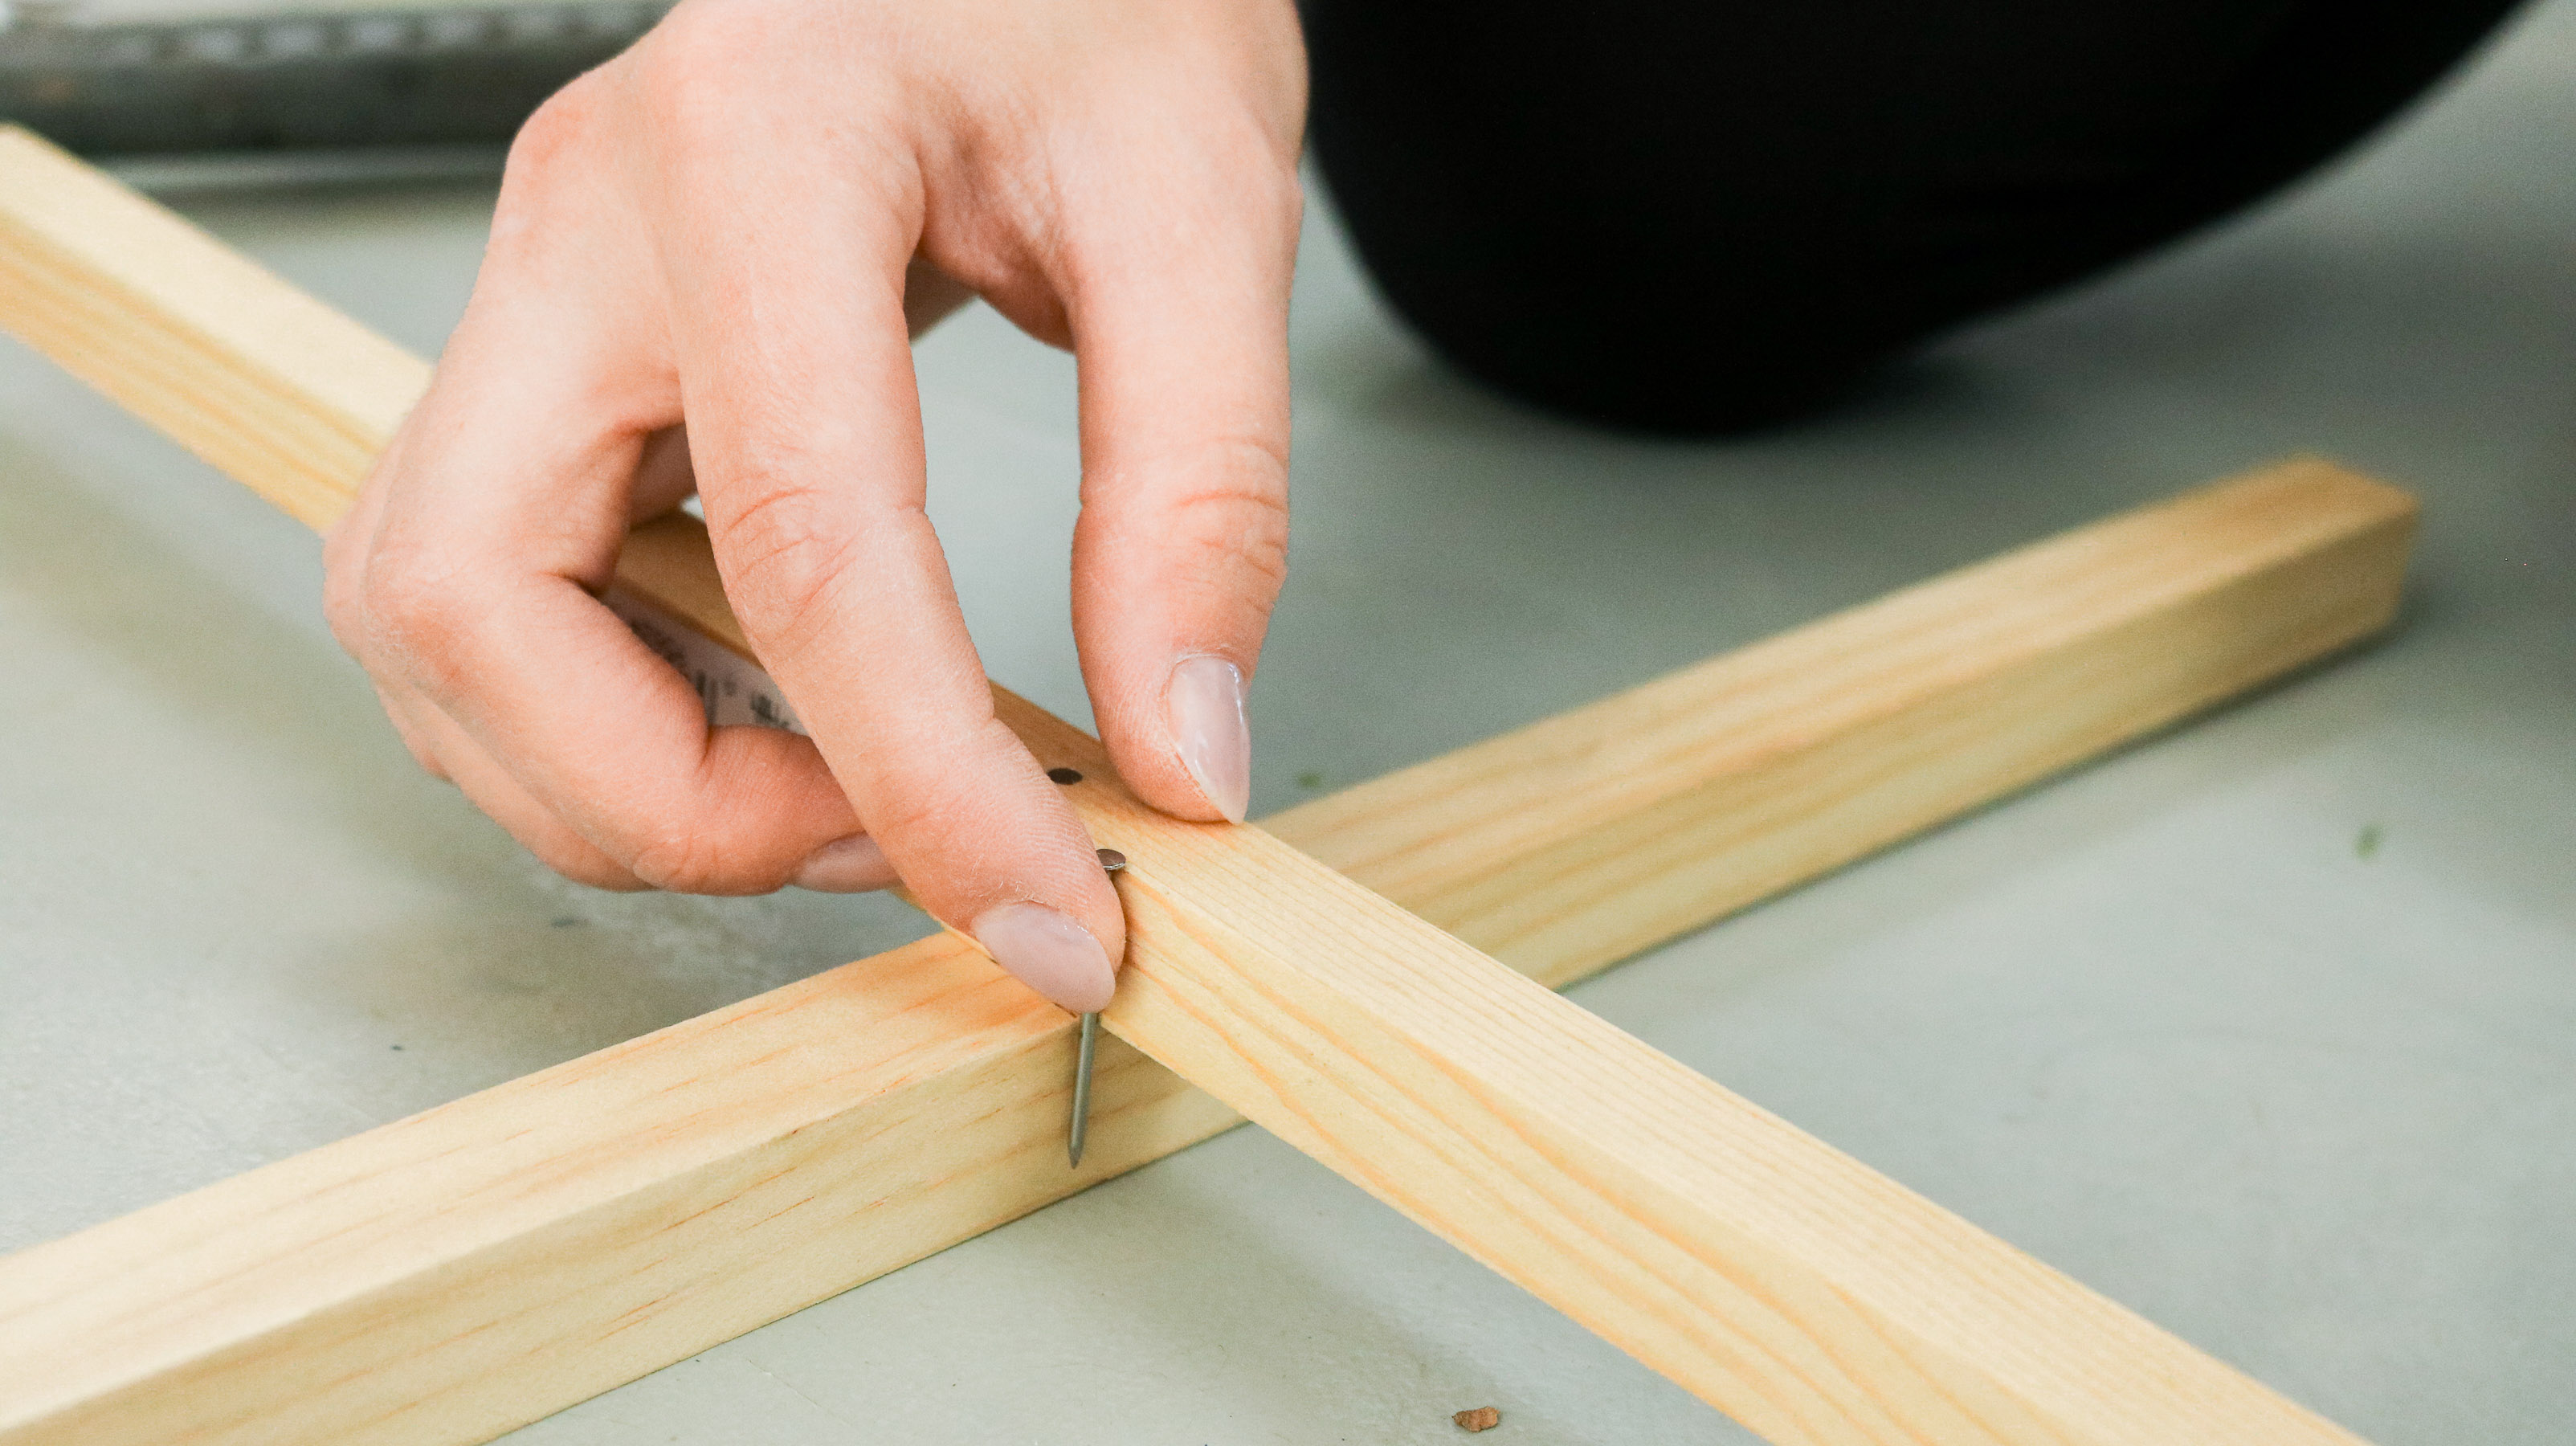
 Here’s what the two nails should look like in the center.
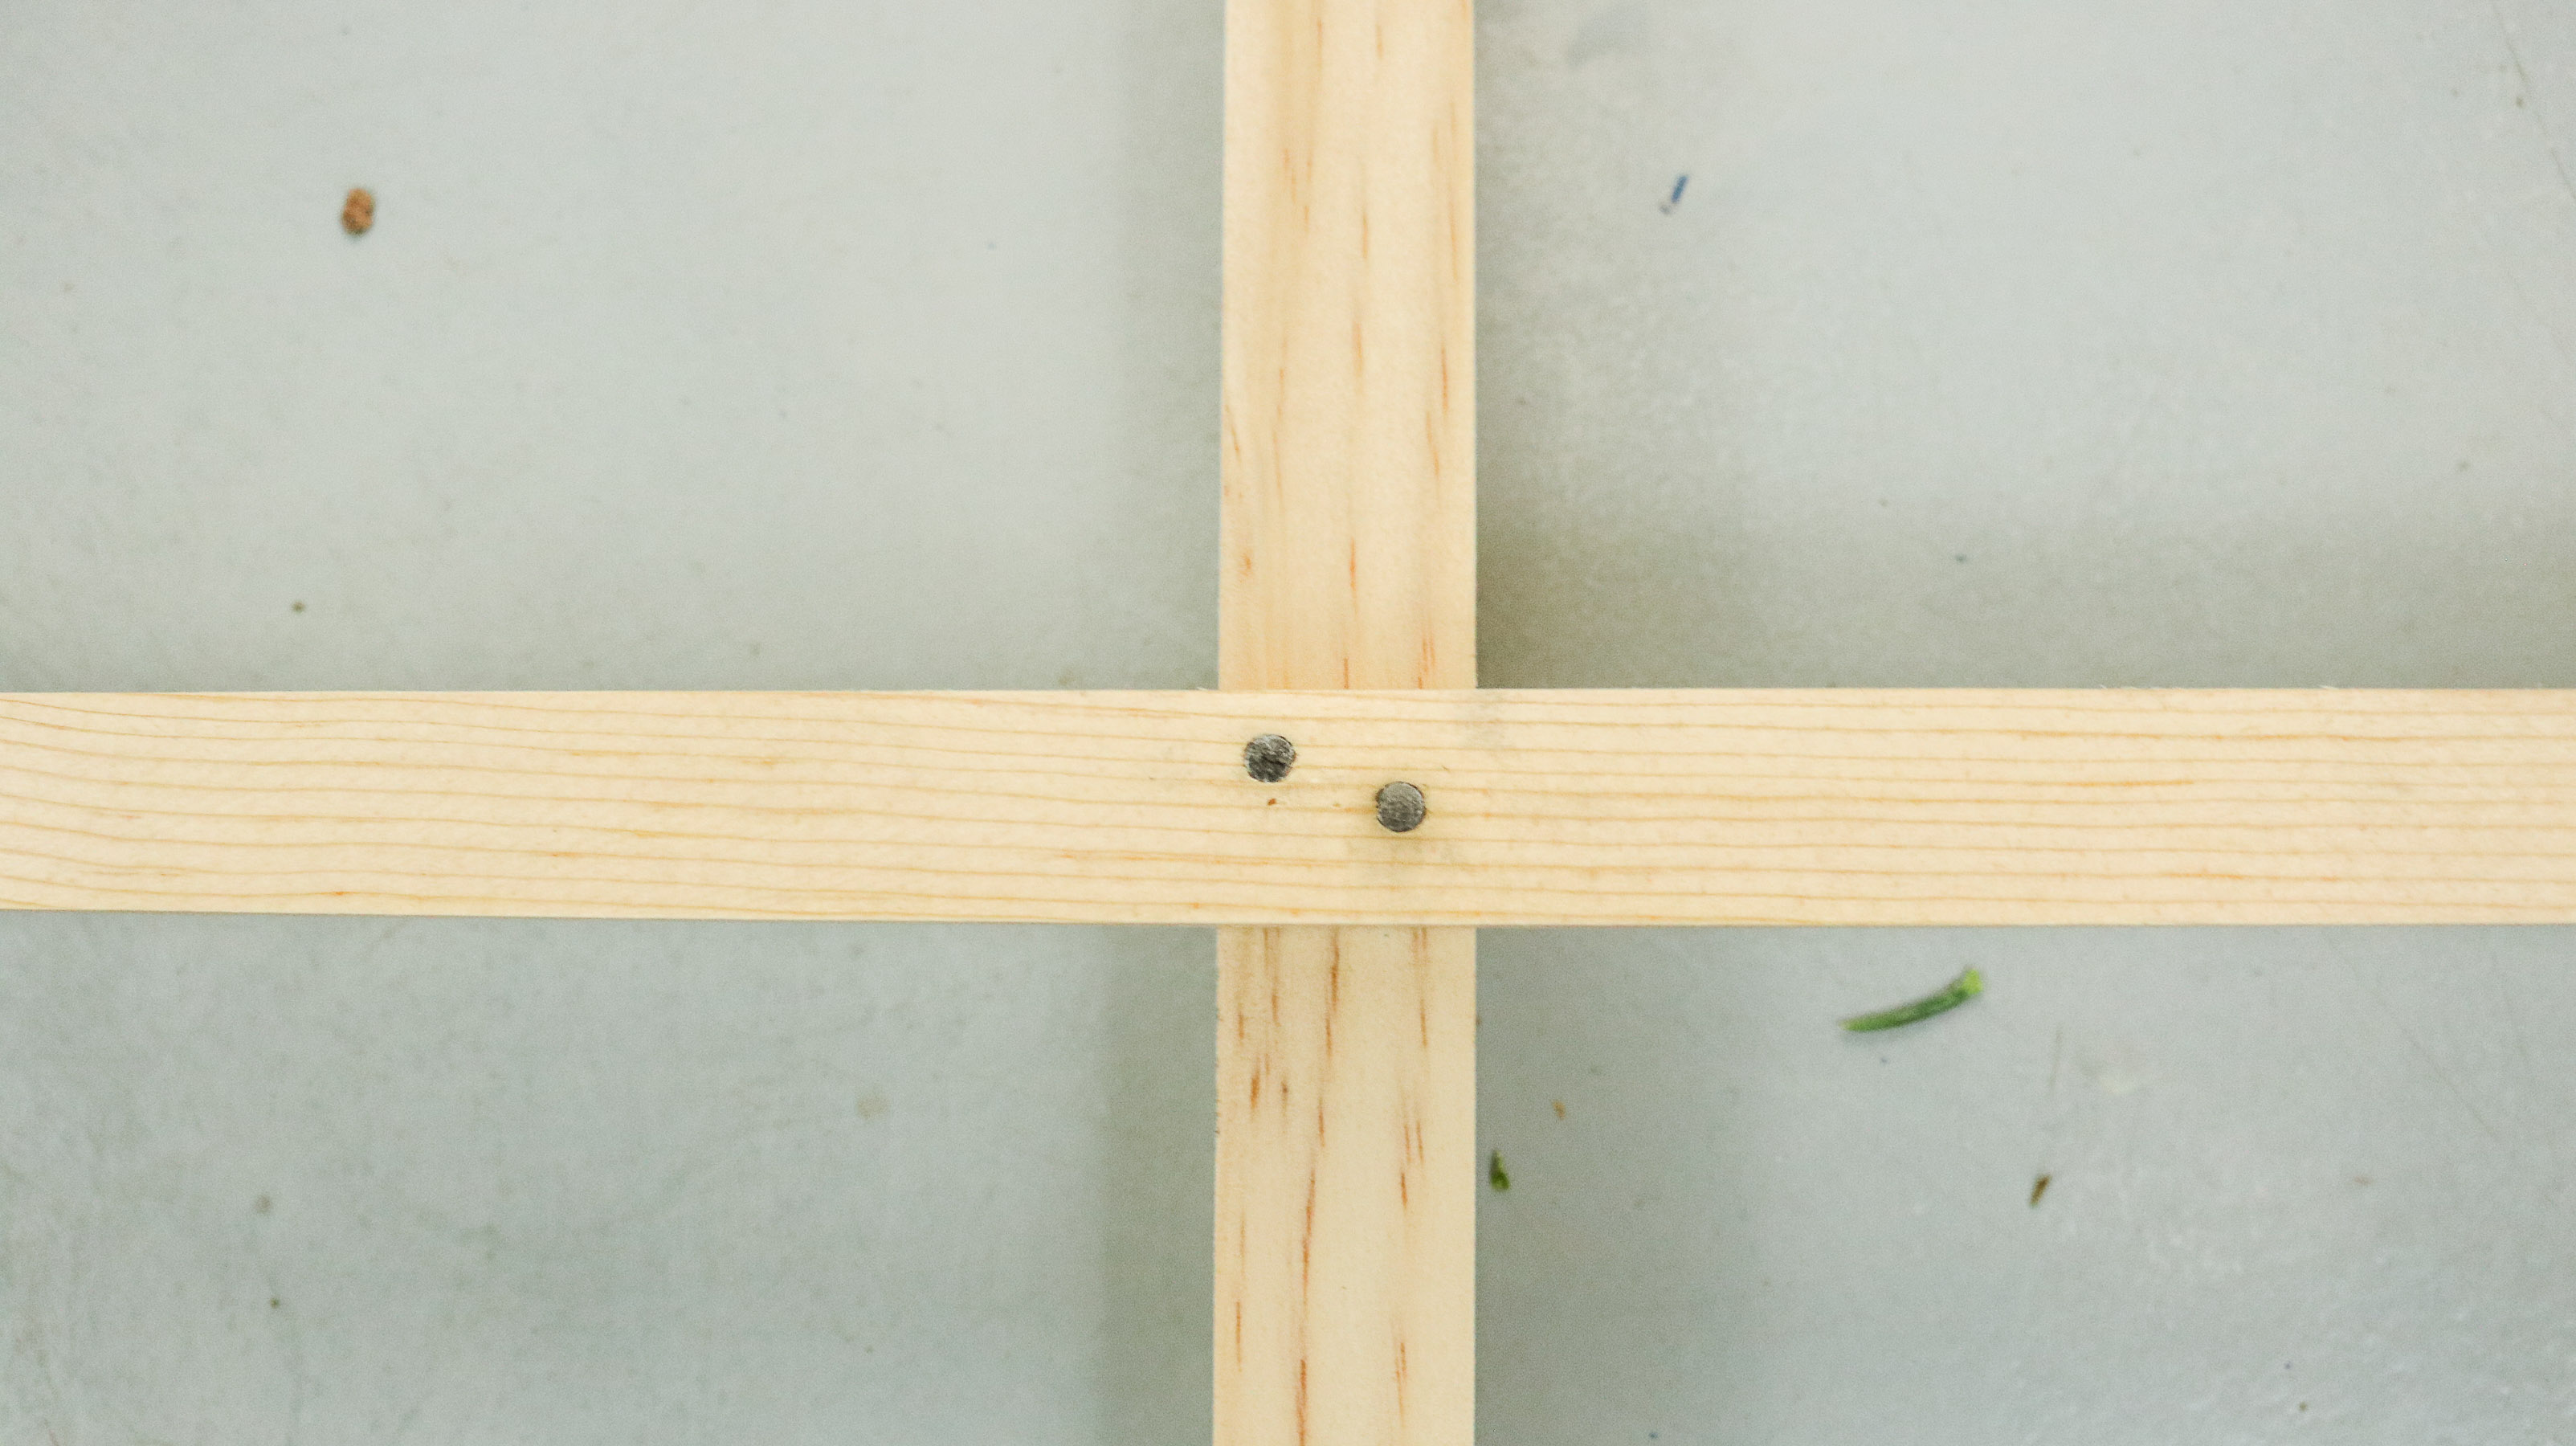
Step 2: Adding your greenery!
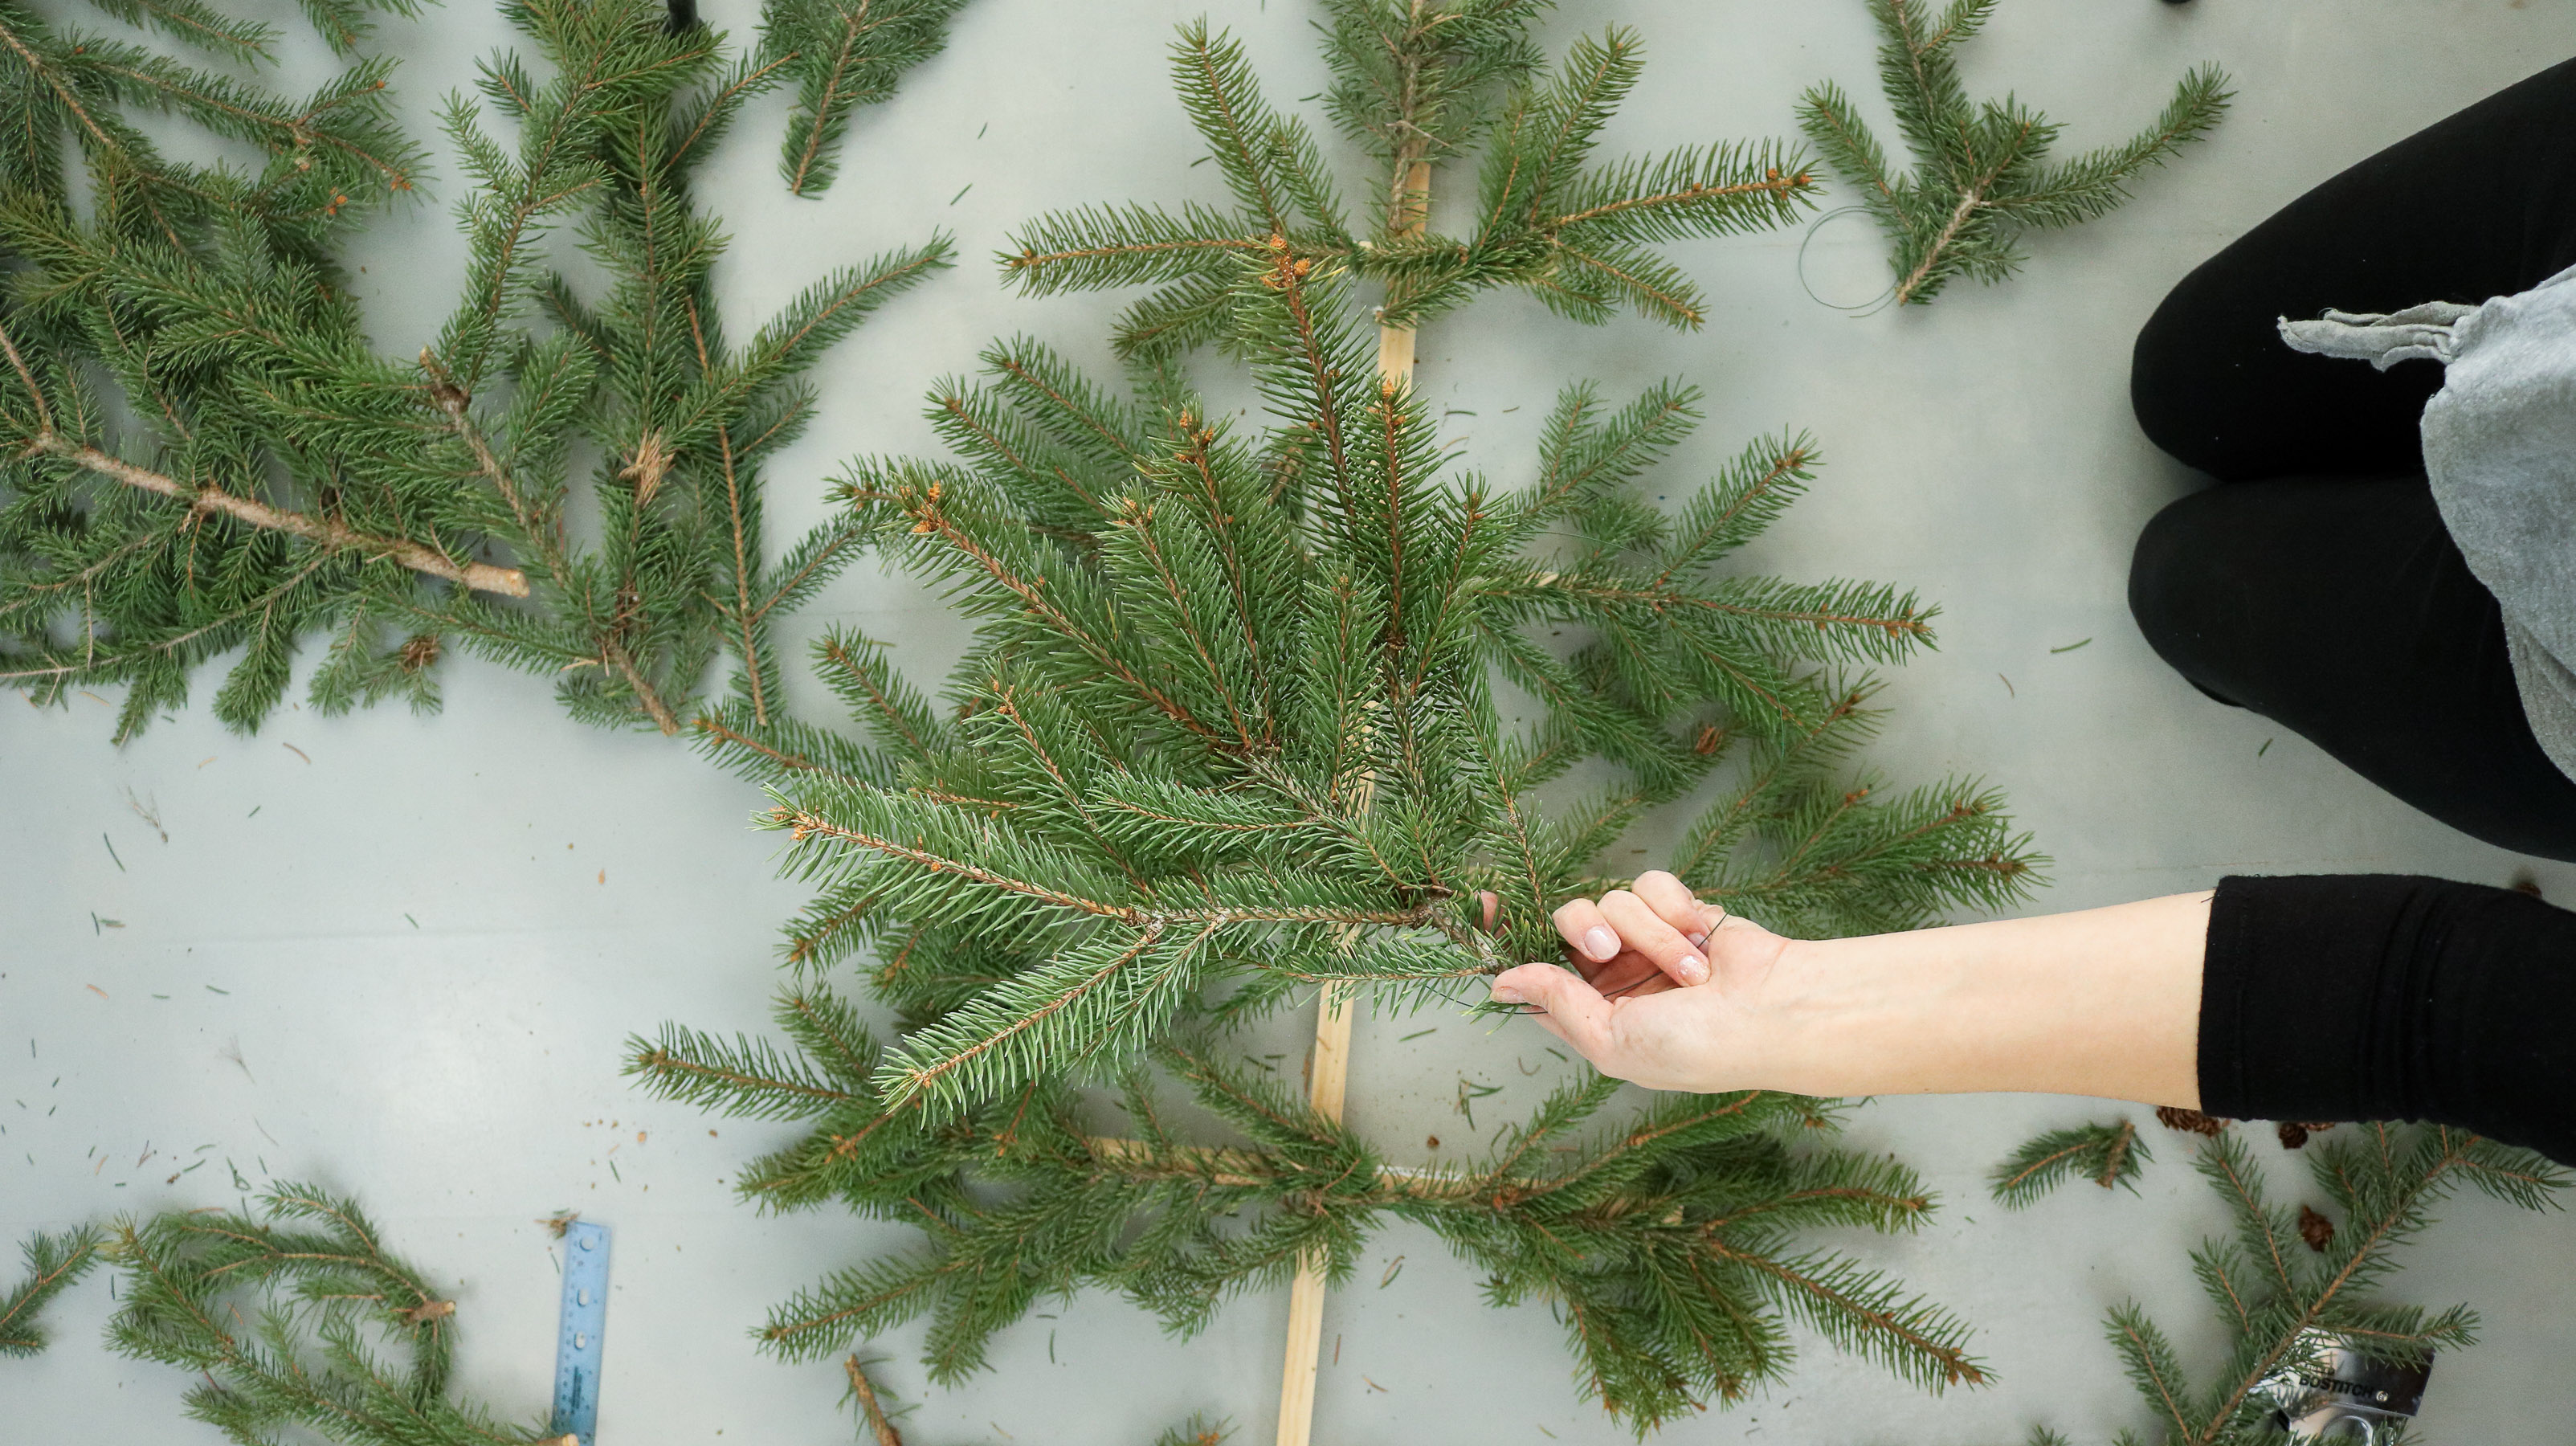
If you plan on using faux pine it might differ just a tad from these instructions however, you’ll be attaching your branches to the dowels the same way. To begin simply lay your branches onto your base just to see how fluffy or thin you want the tree. 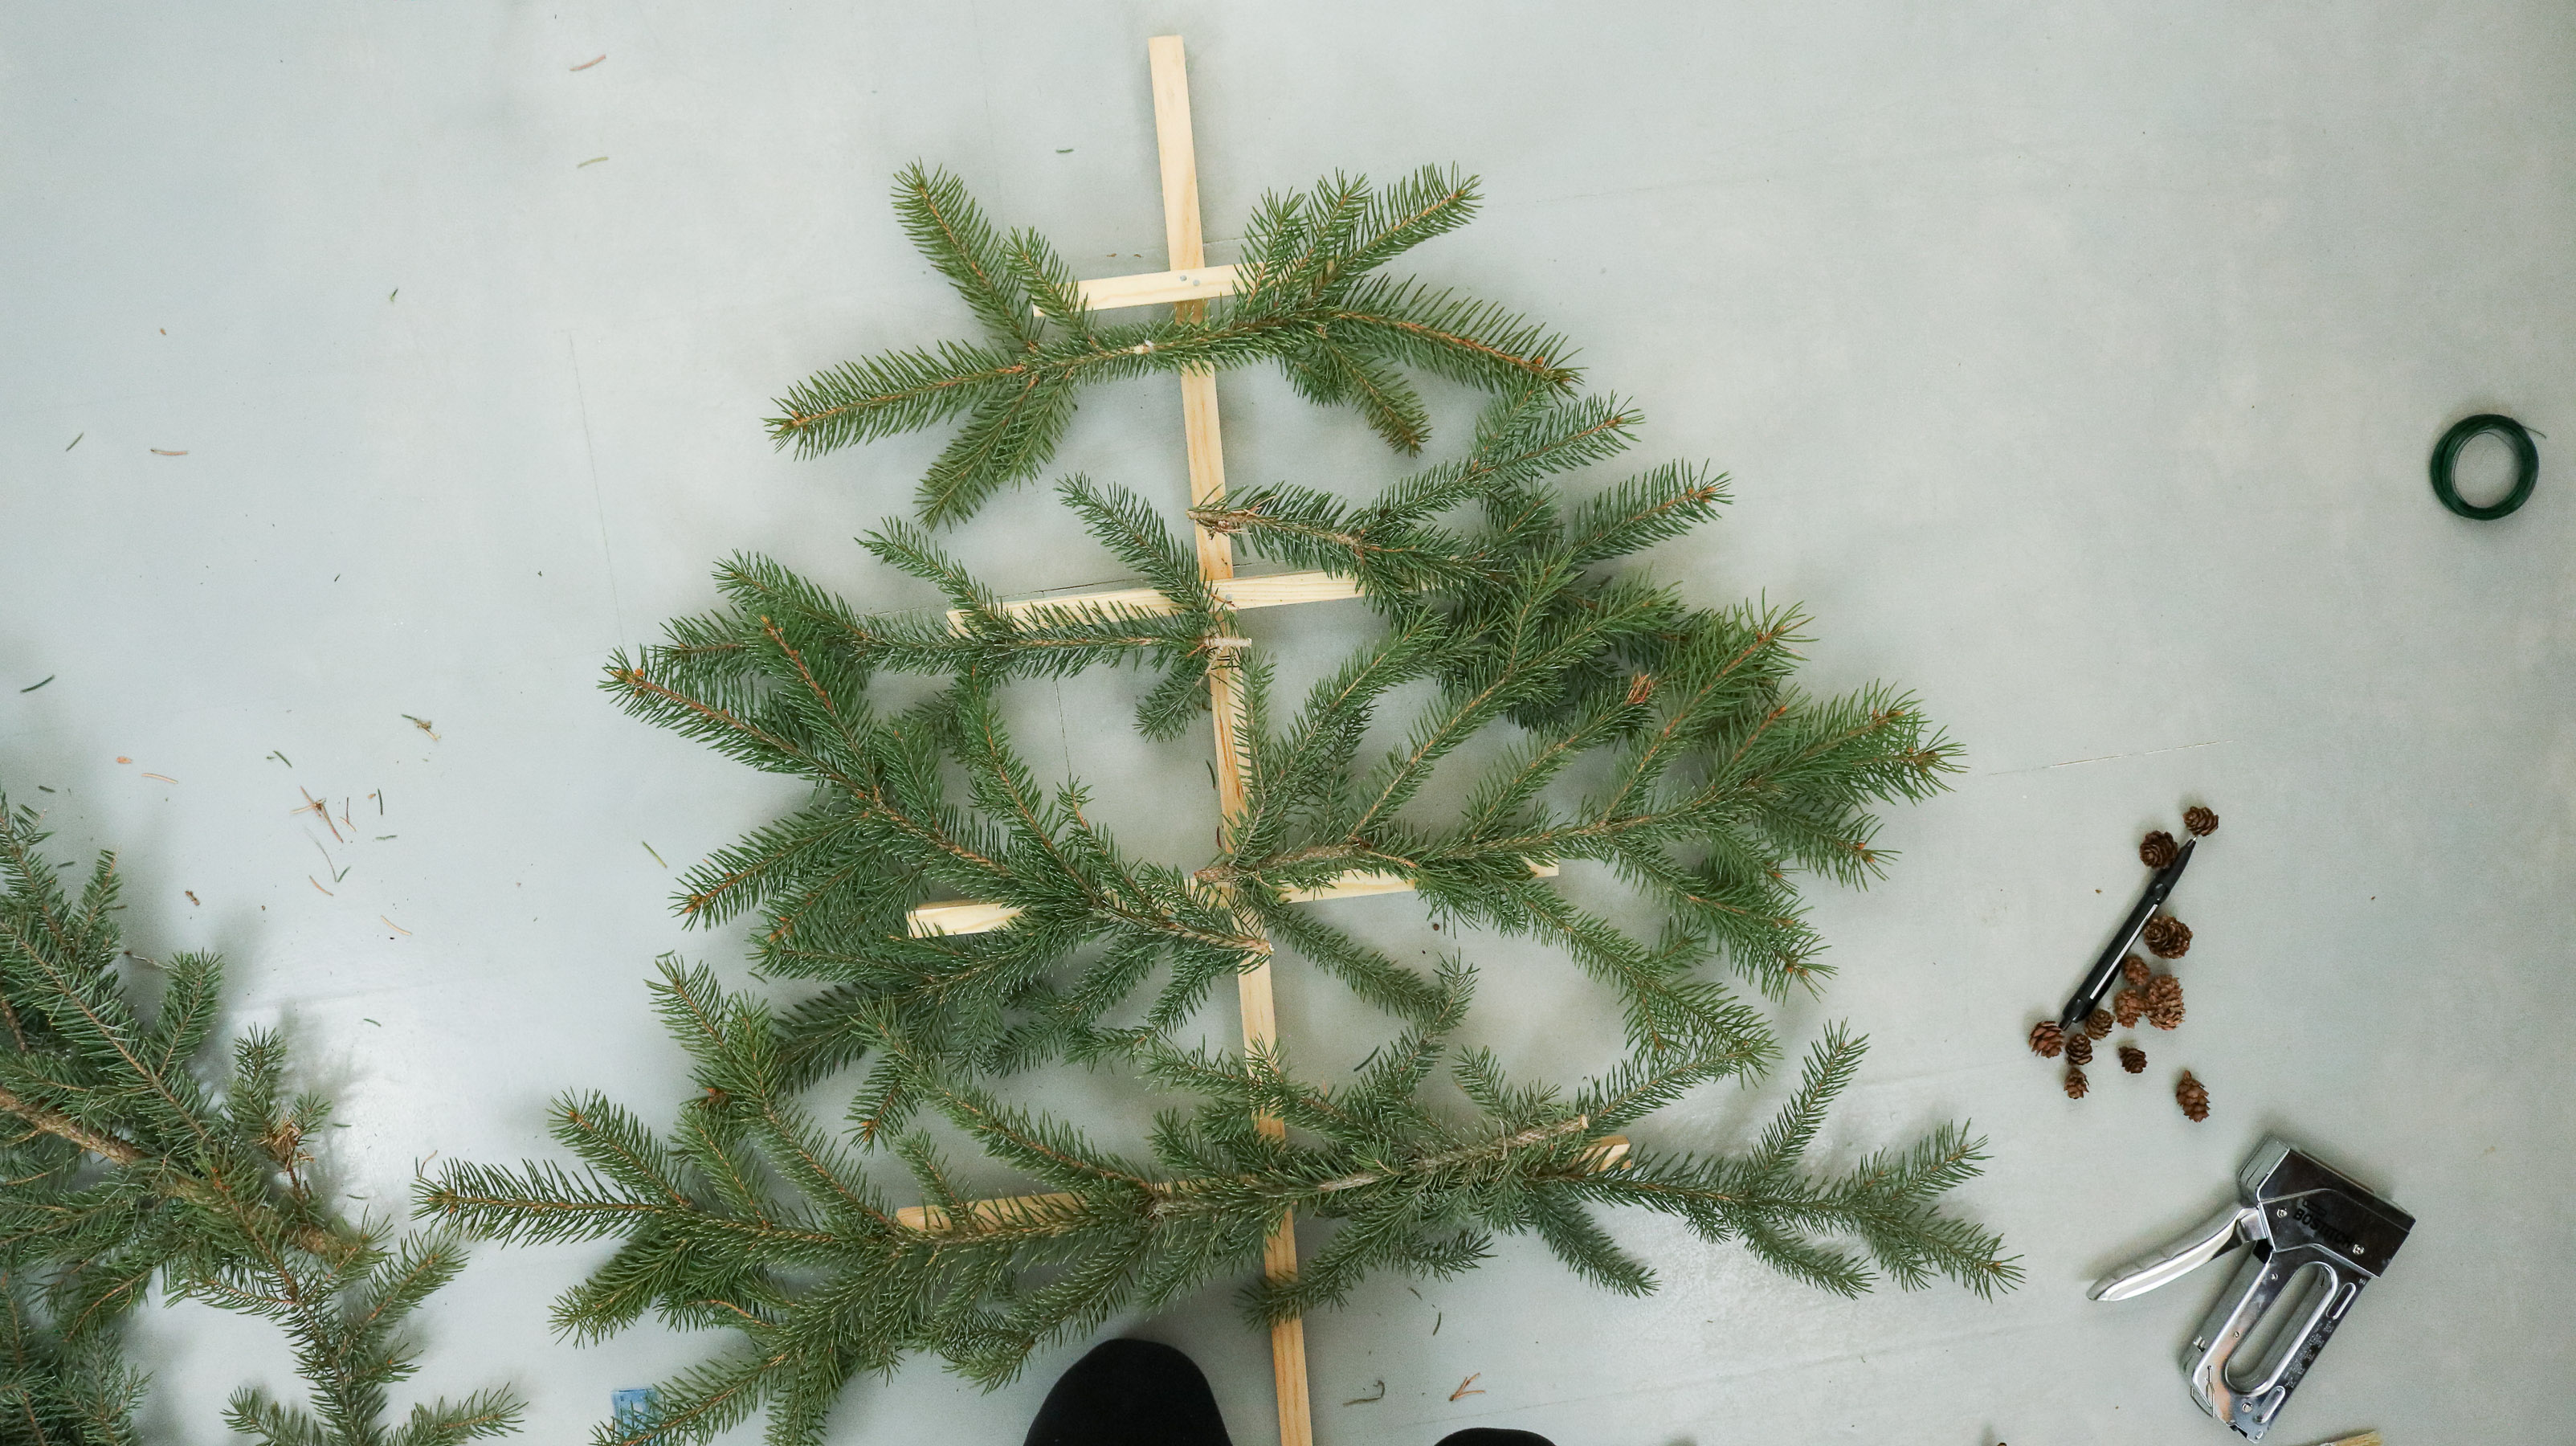 Than one by one start attaching them to your dowel with wire. Try and secure each branch in two separate spots. Closer to the center and on the edge.
 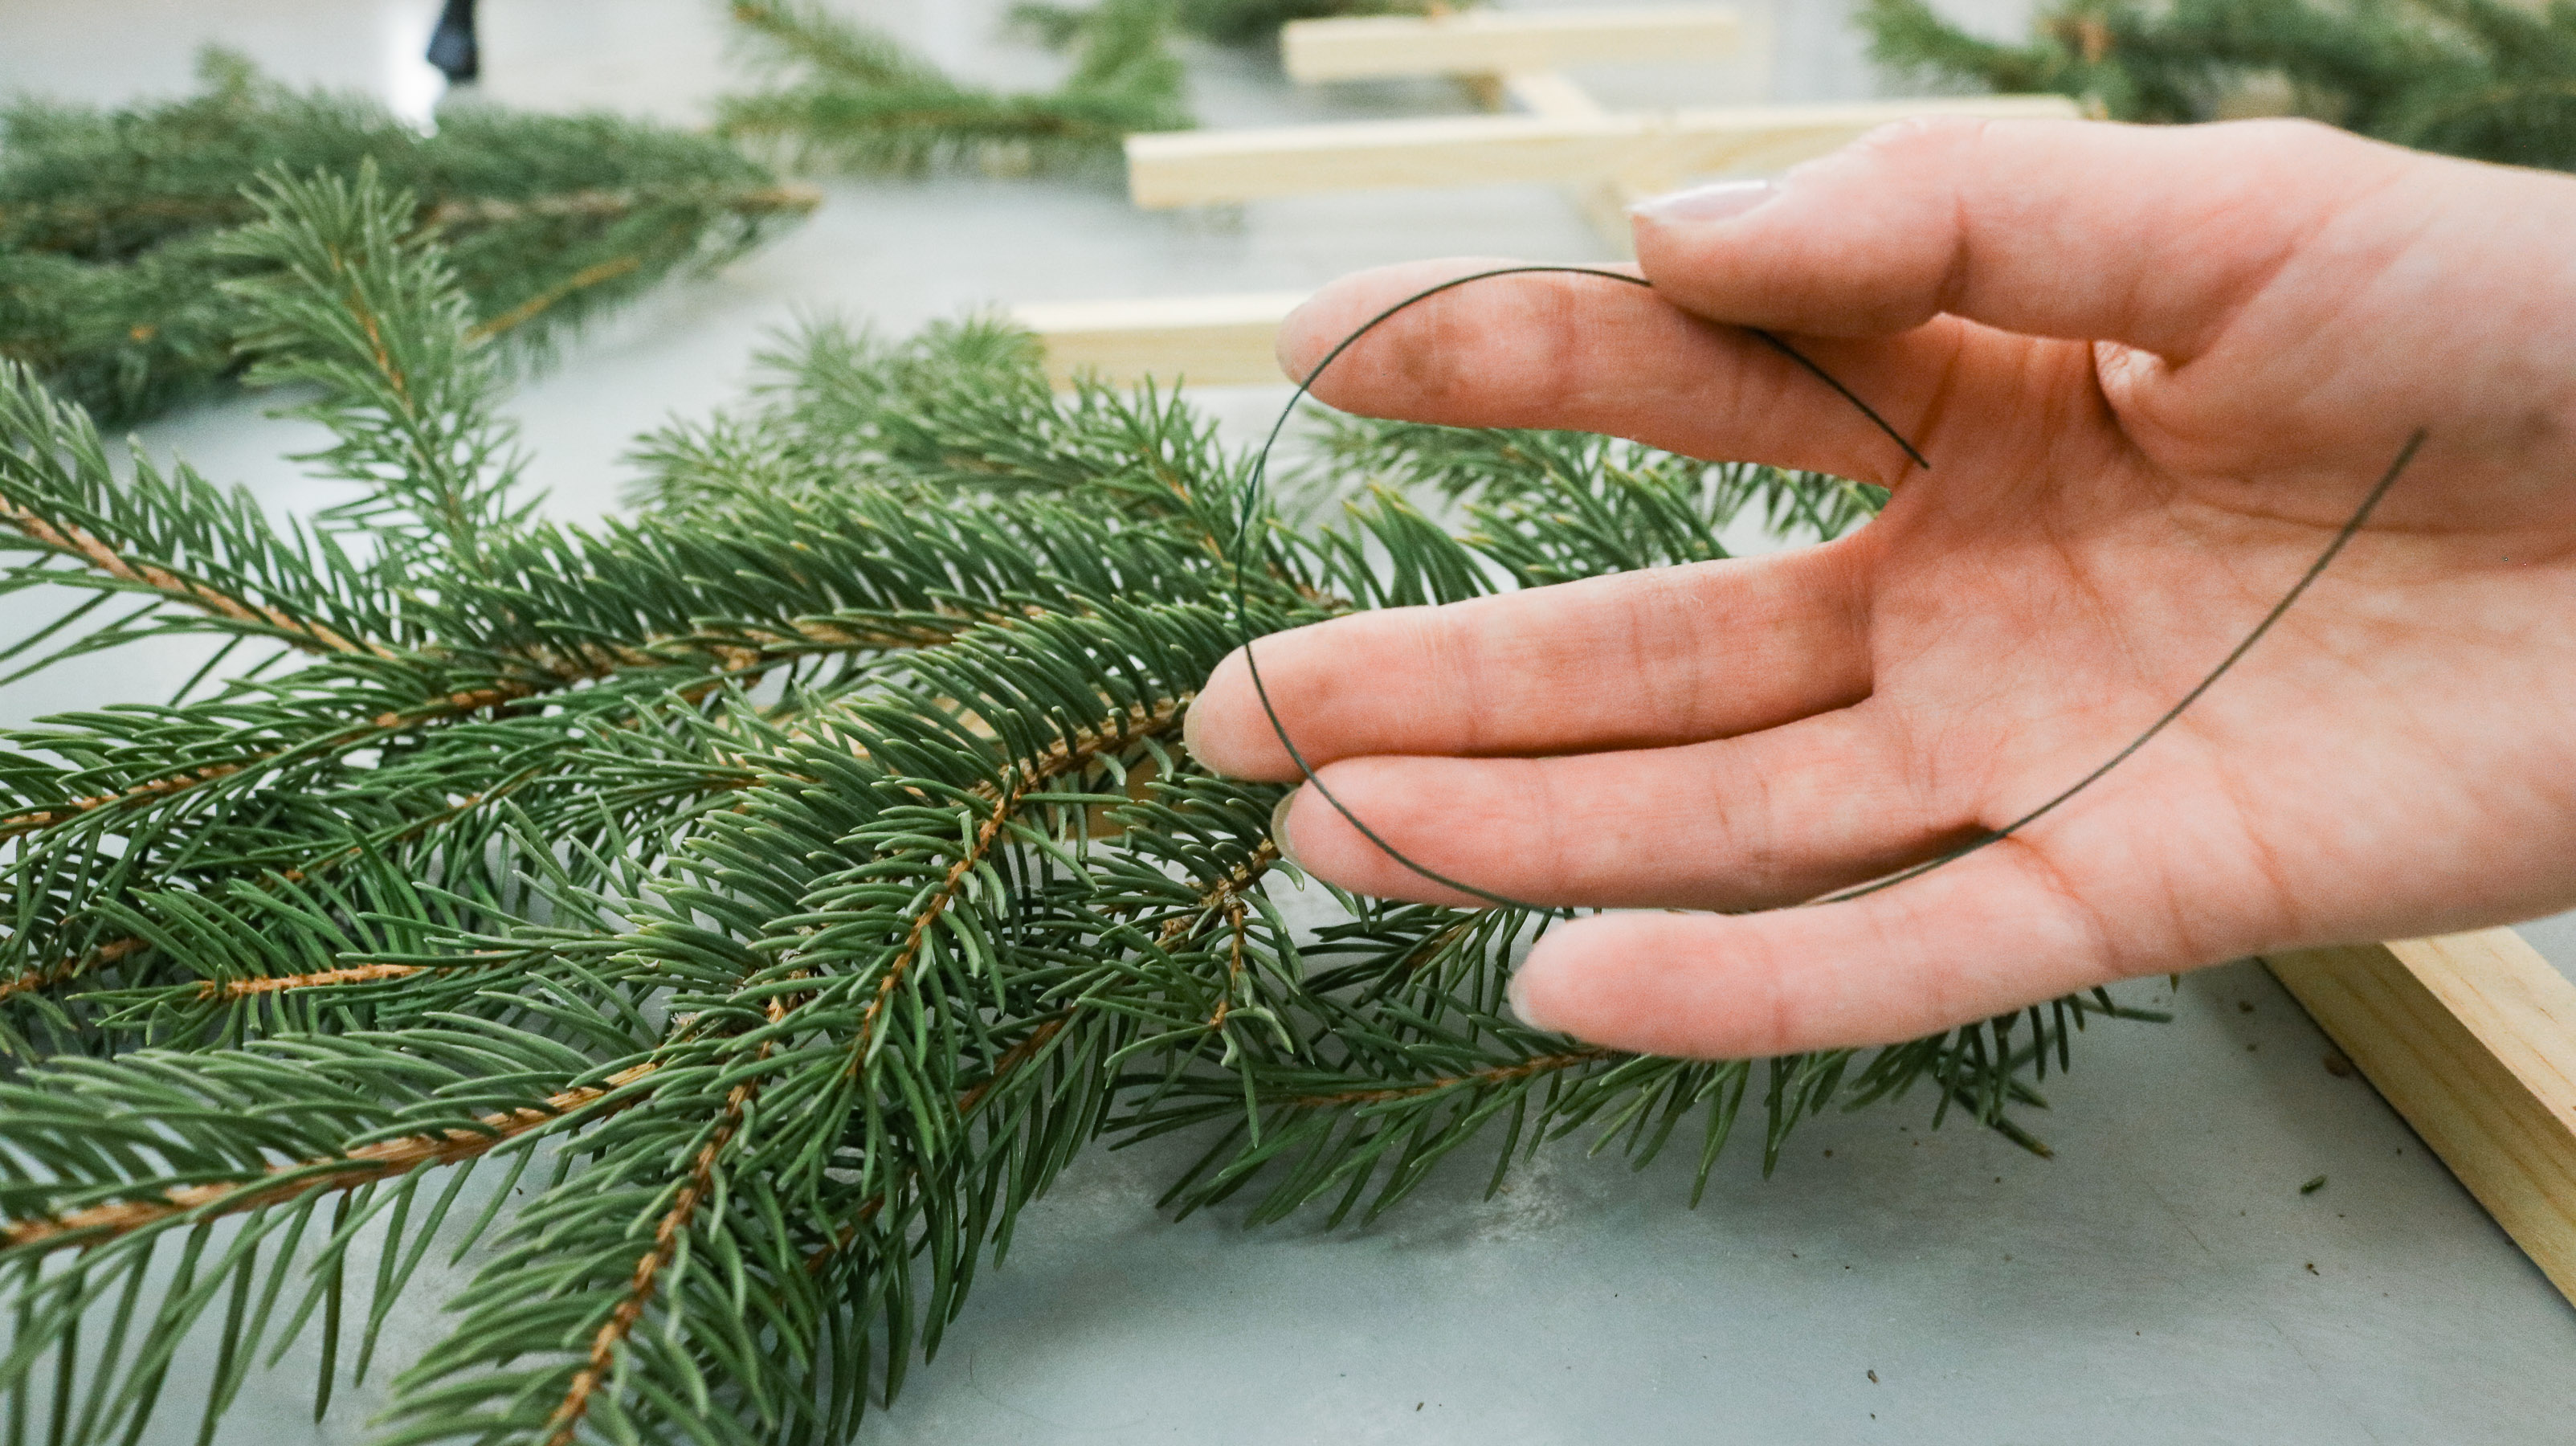 Here’s a close up showing how the wires are wrapped around the branch and dowel.
 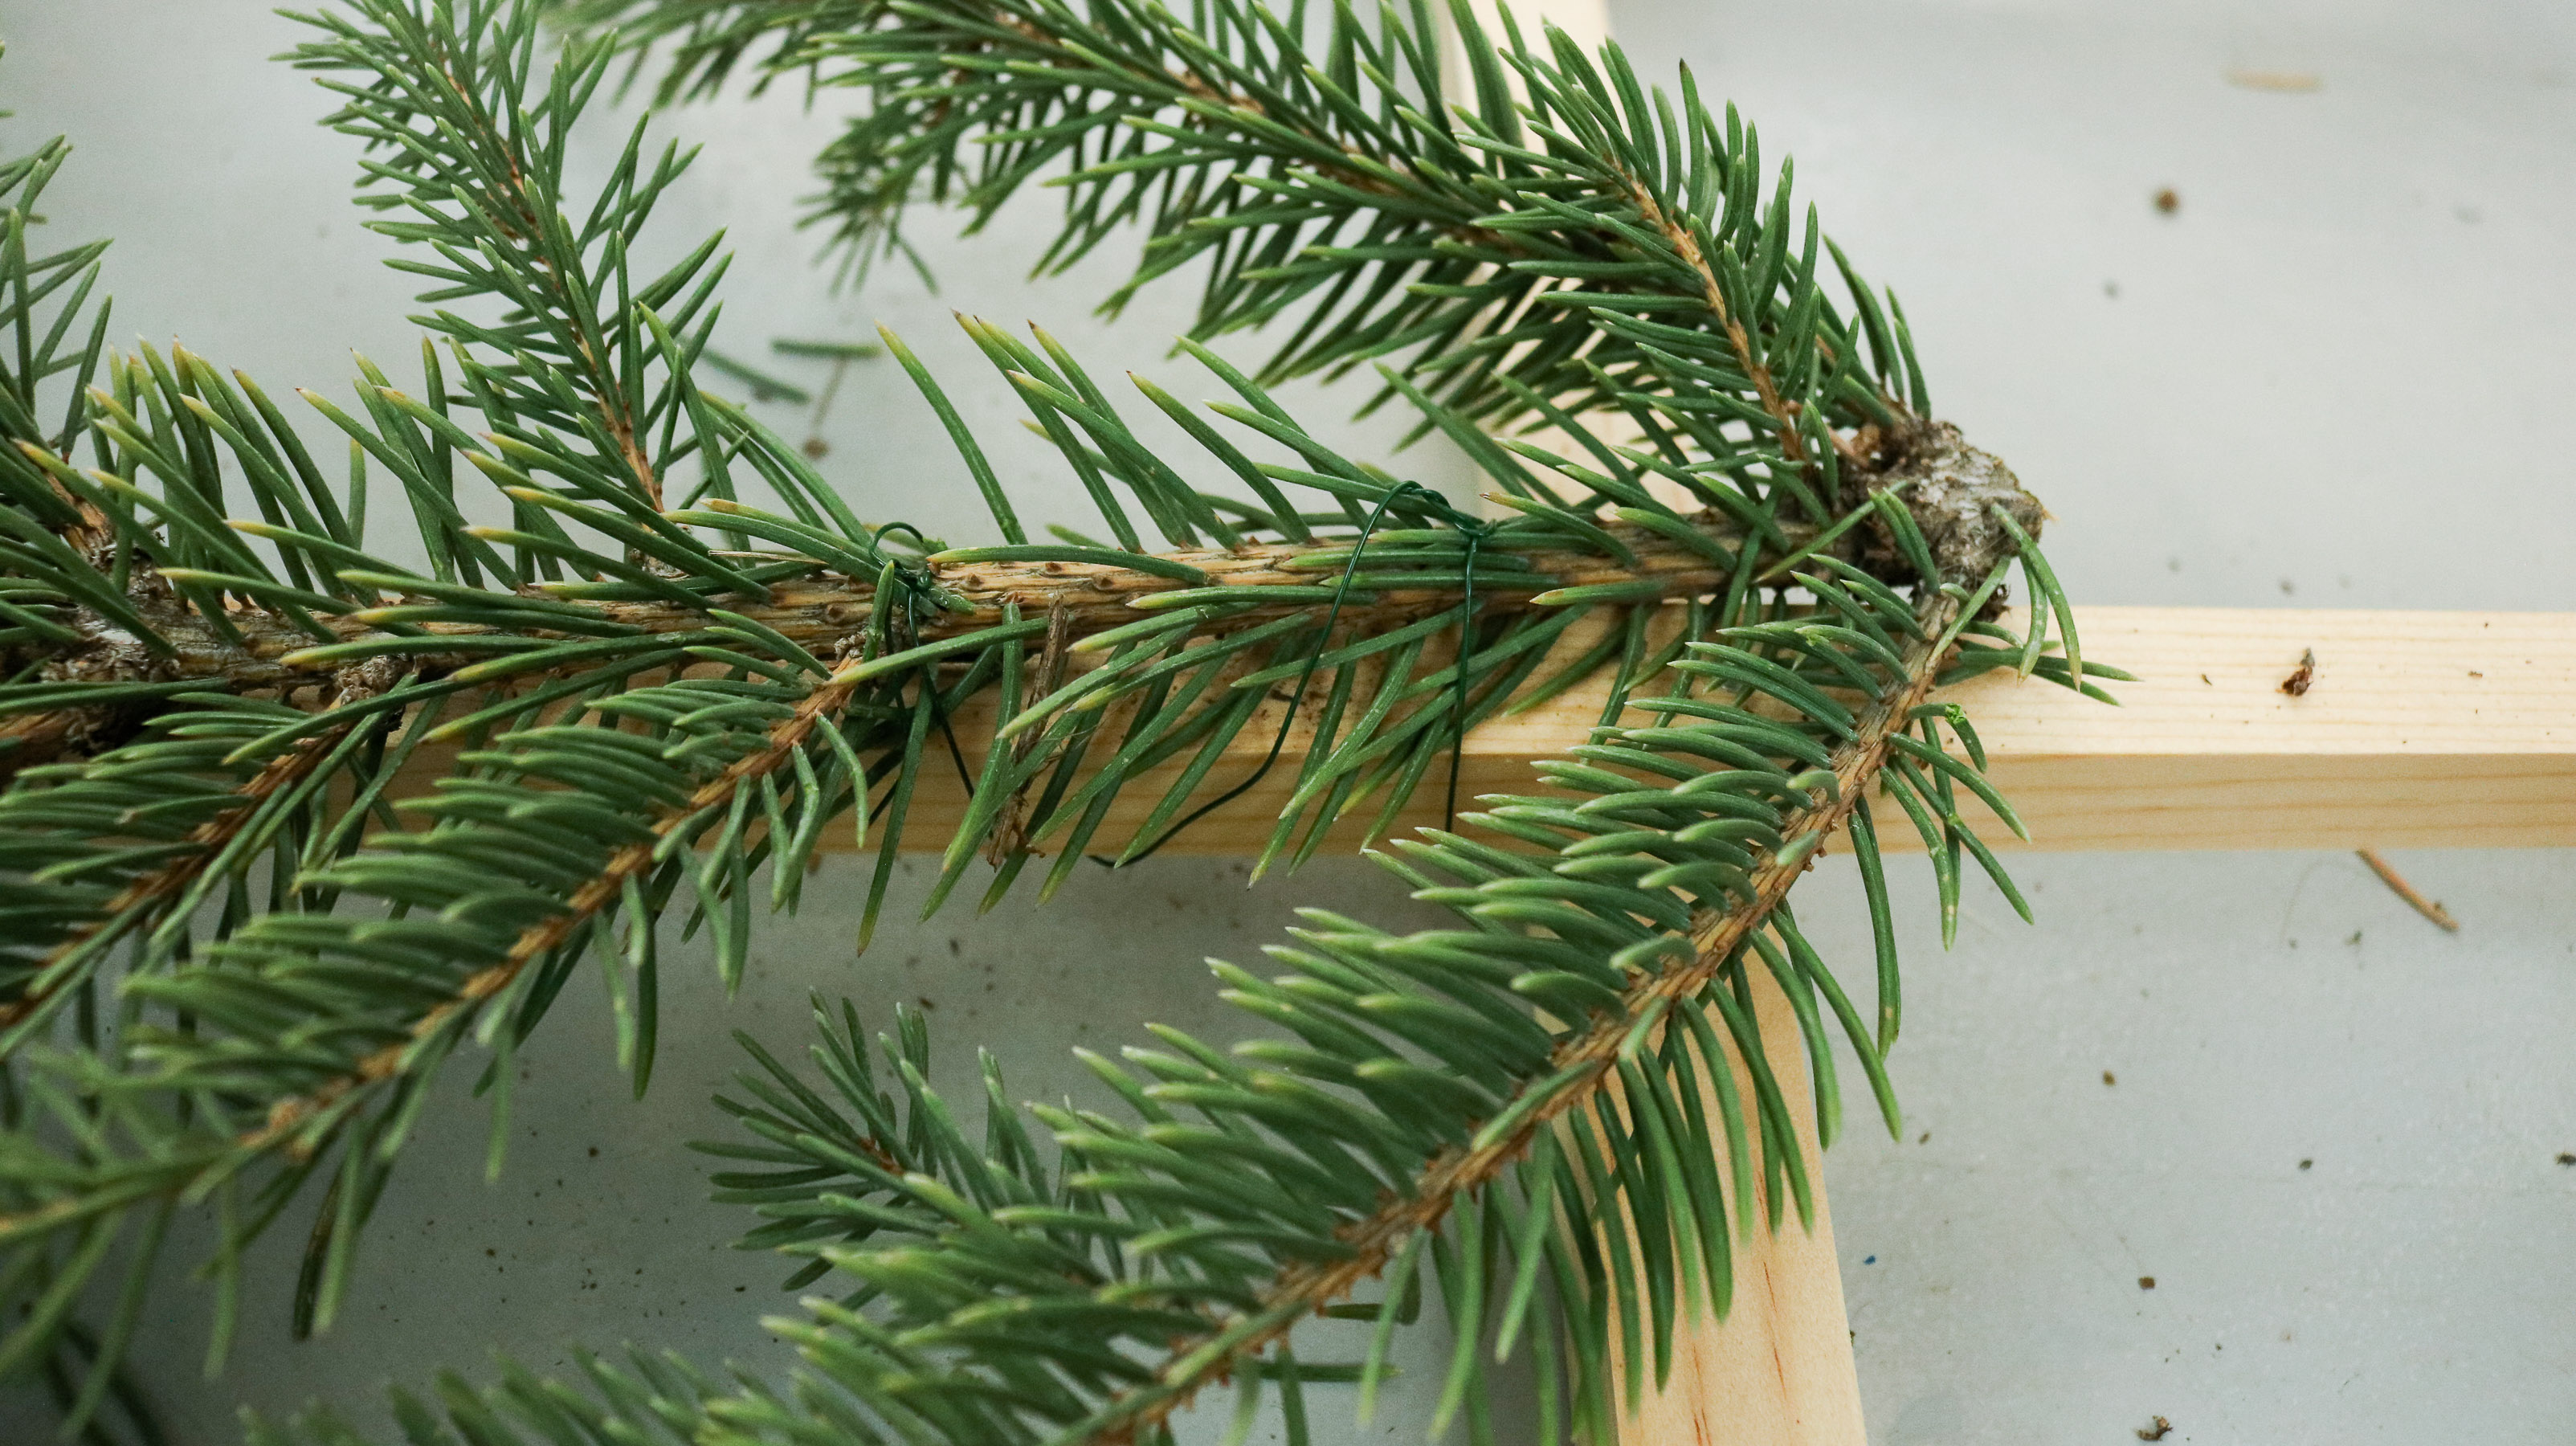 Okay here’s what they all look like secured. If you’re doing faux pine you’ll still be adding branches the same way. The idea is to built the outer edges first to get your over all shape than fill in the center of your tree.
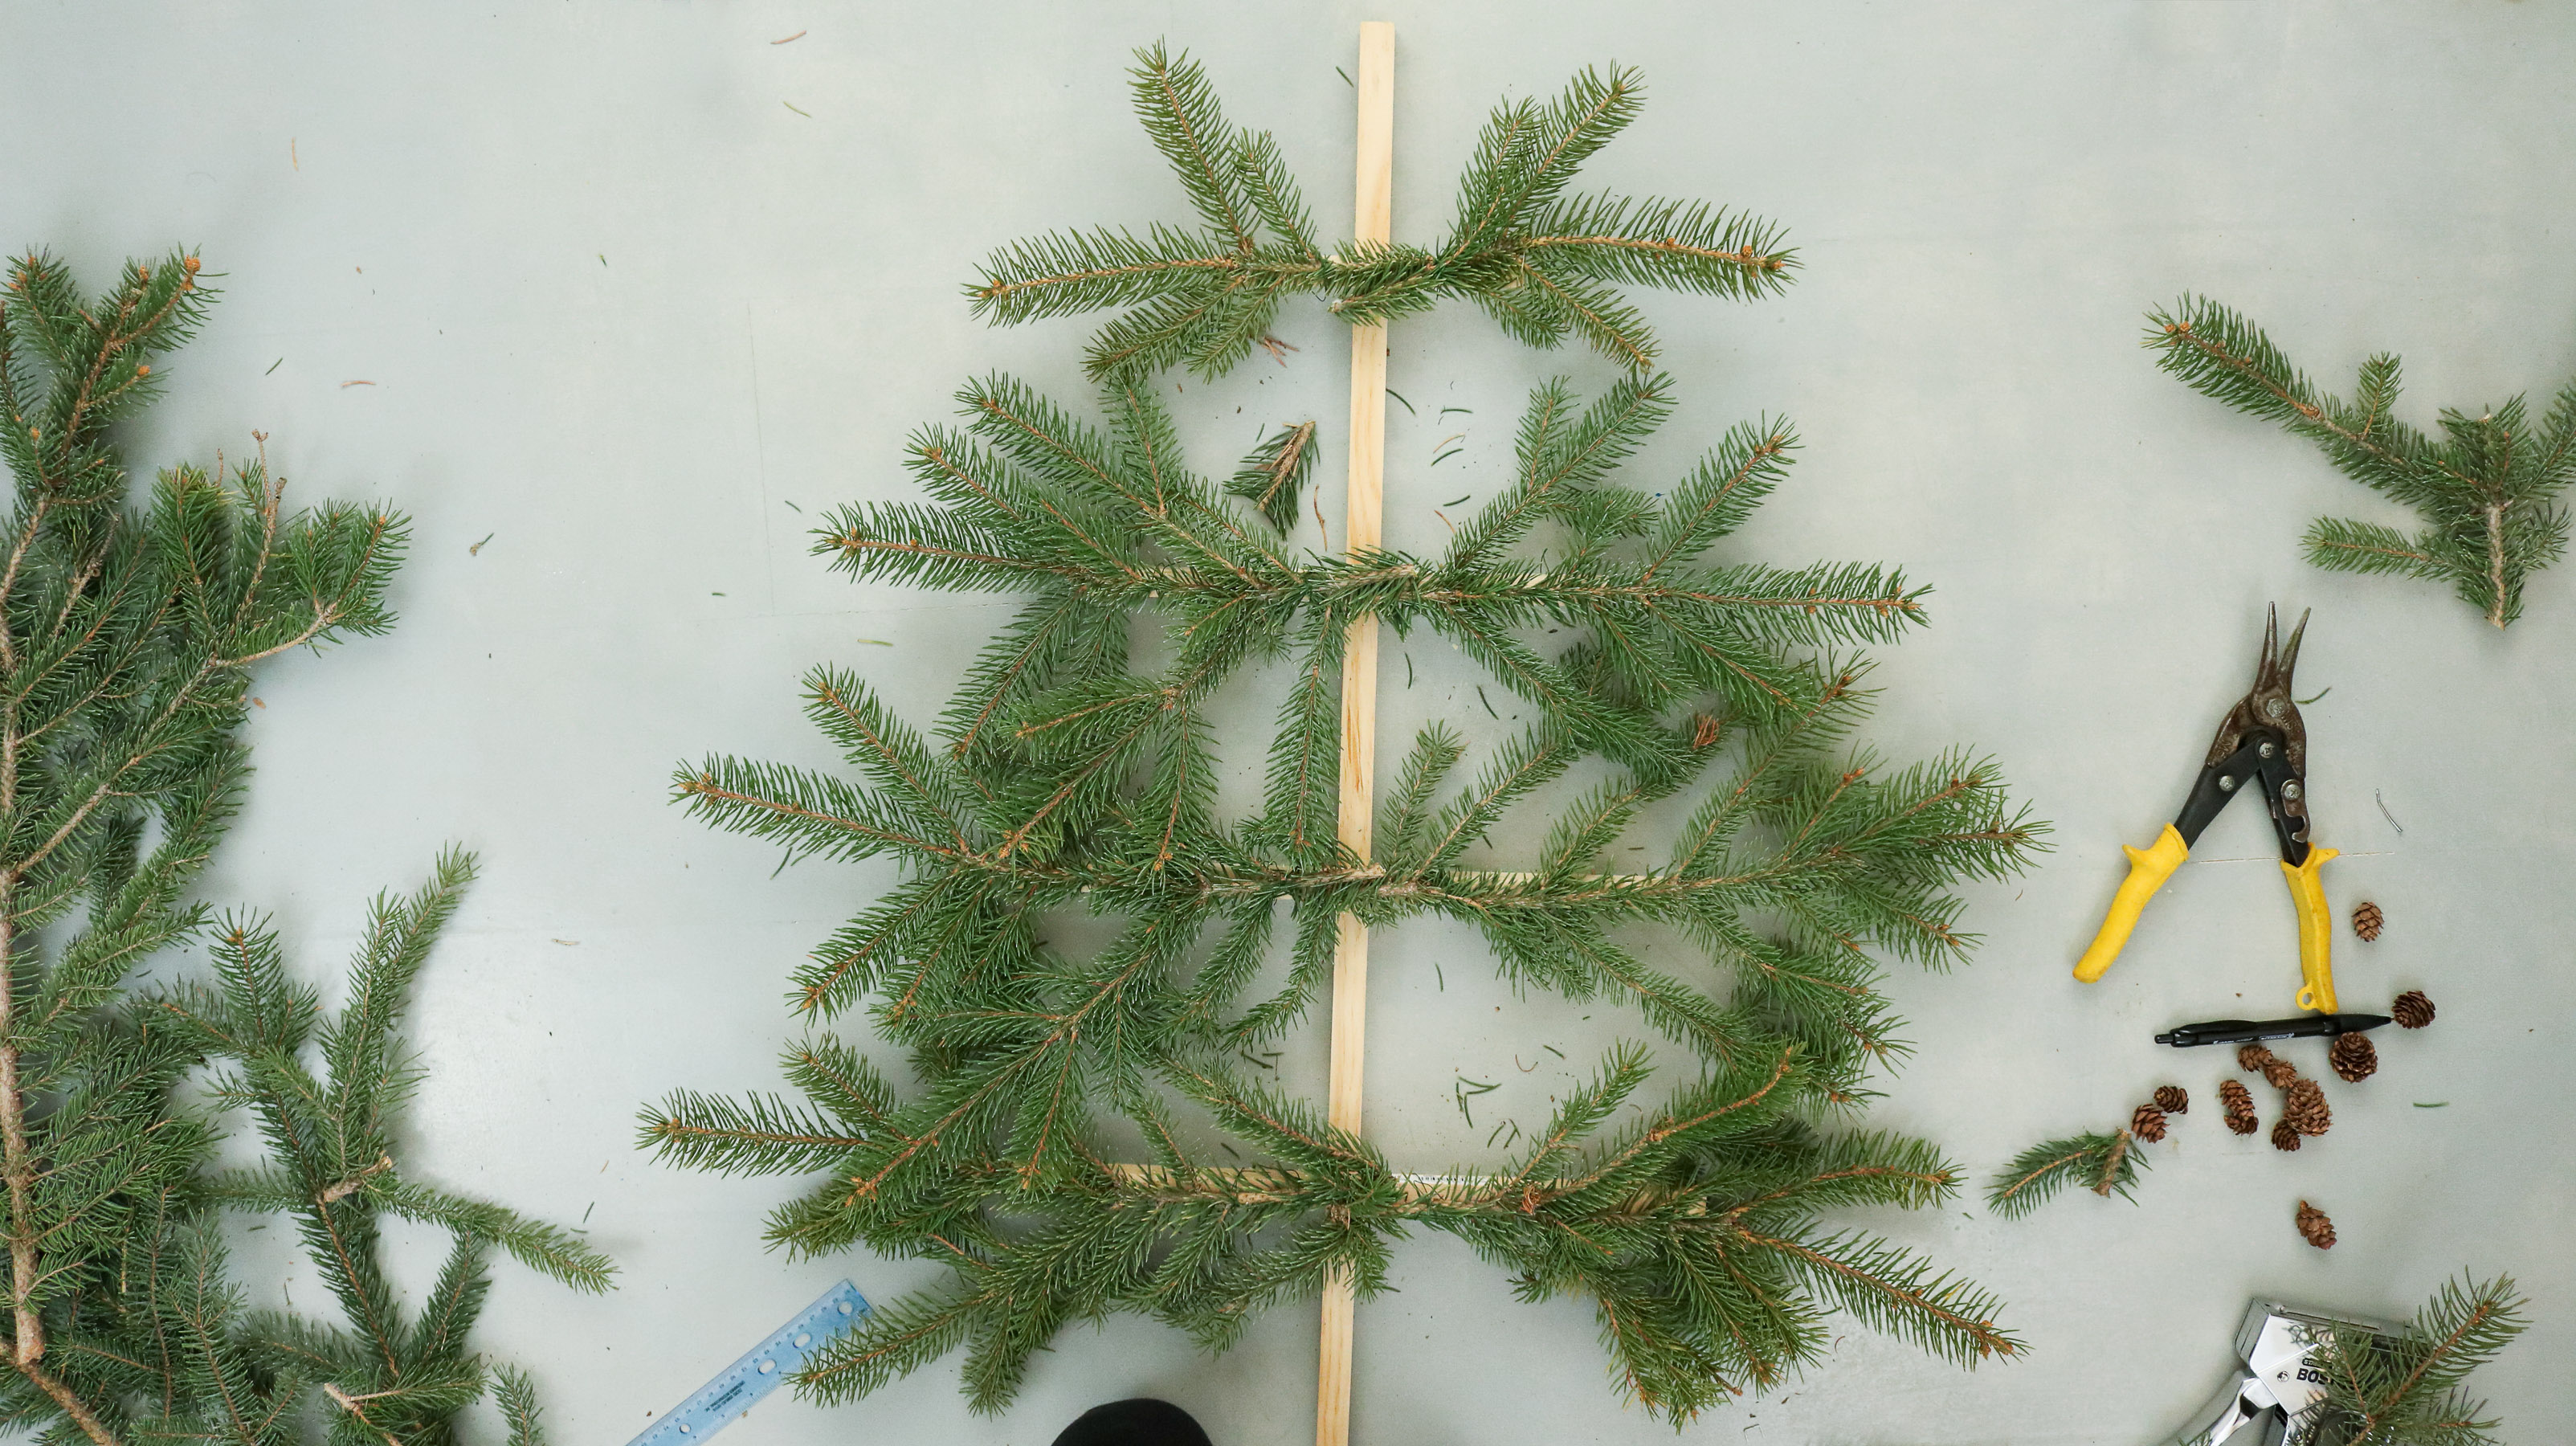
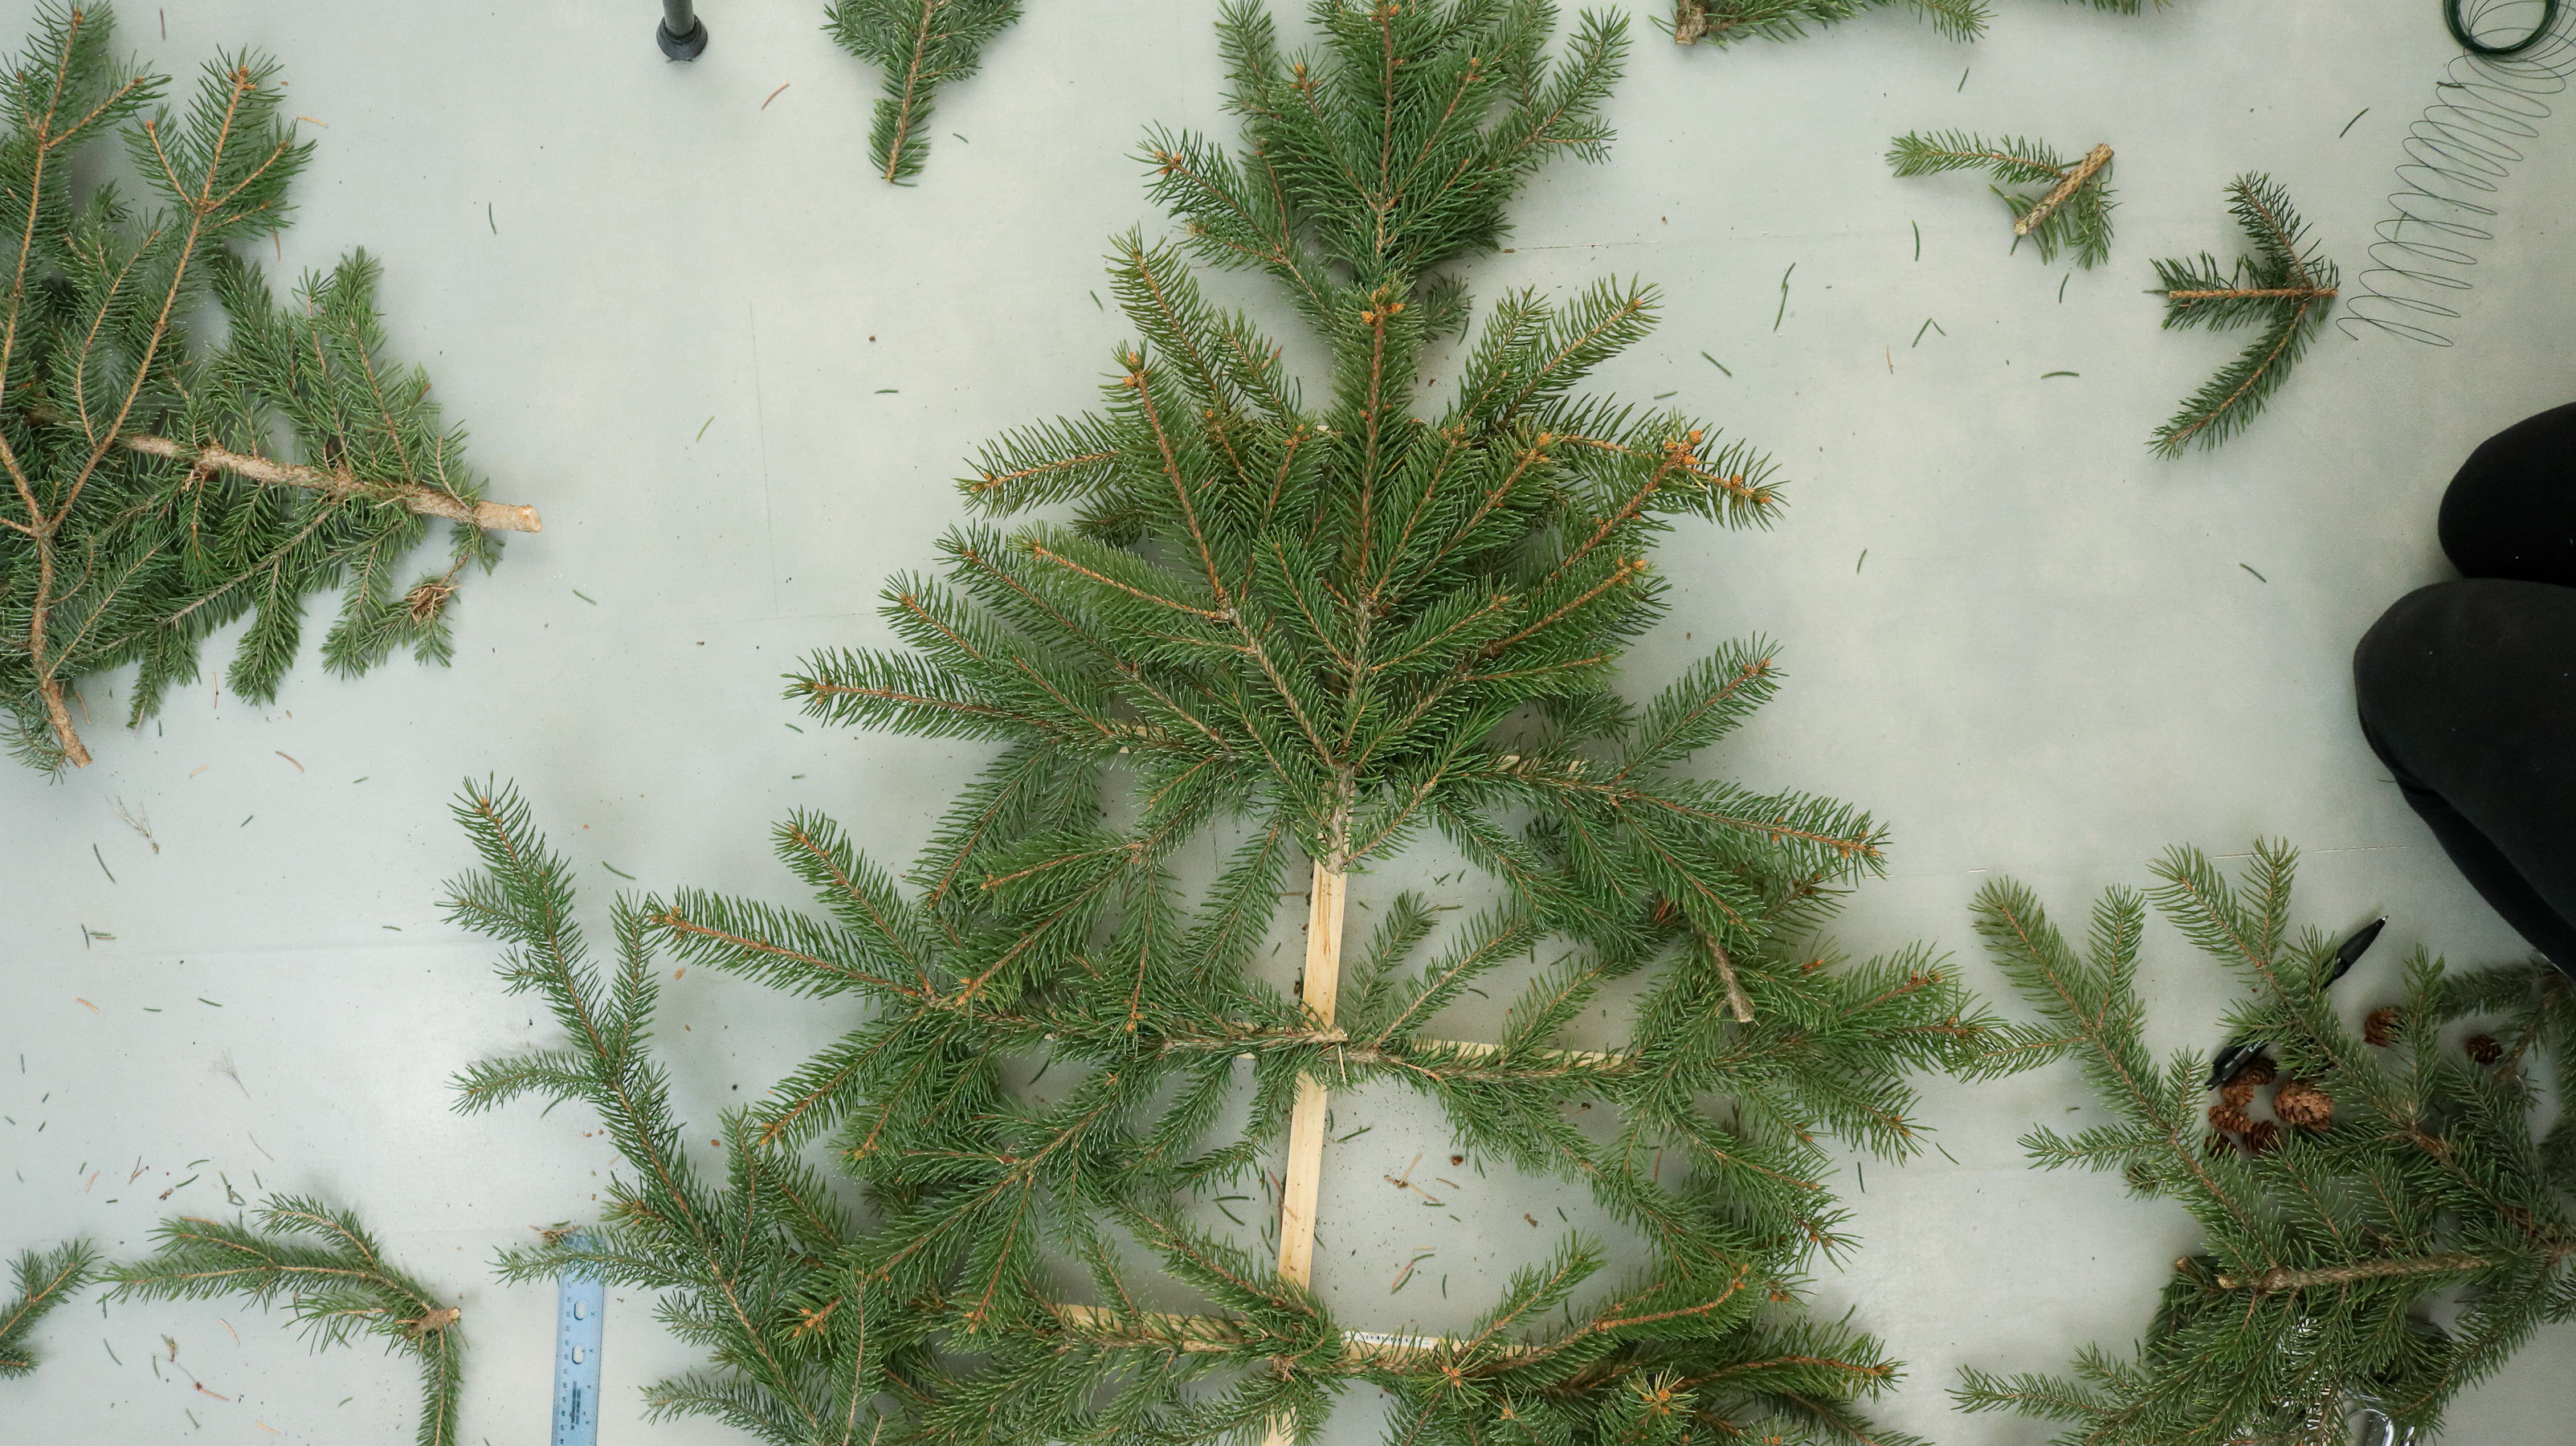
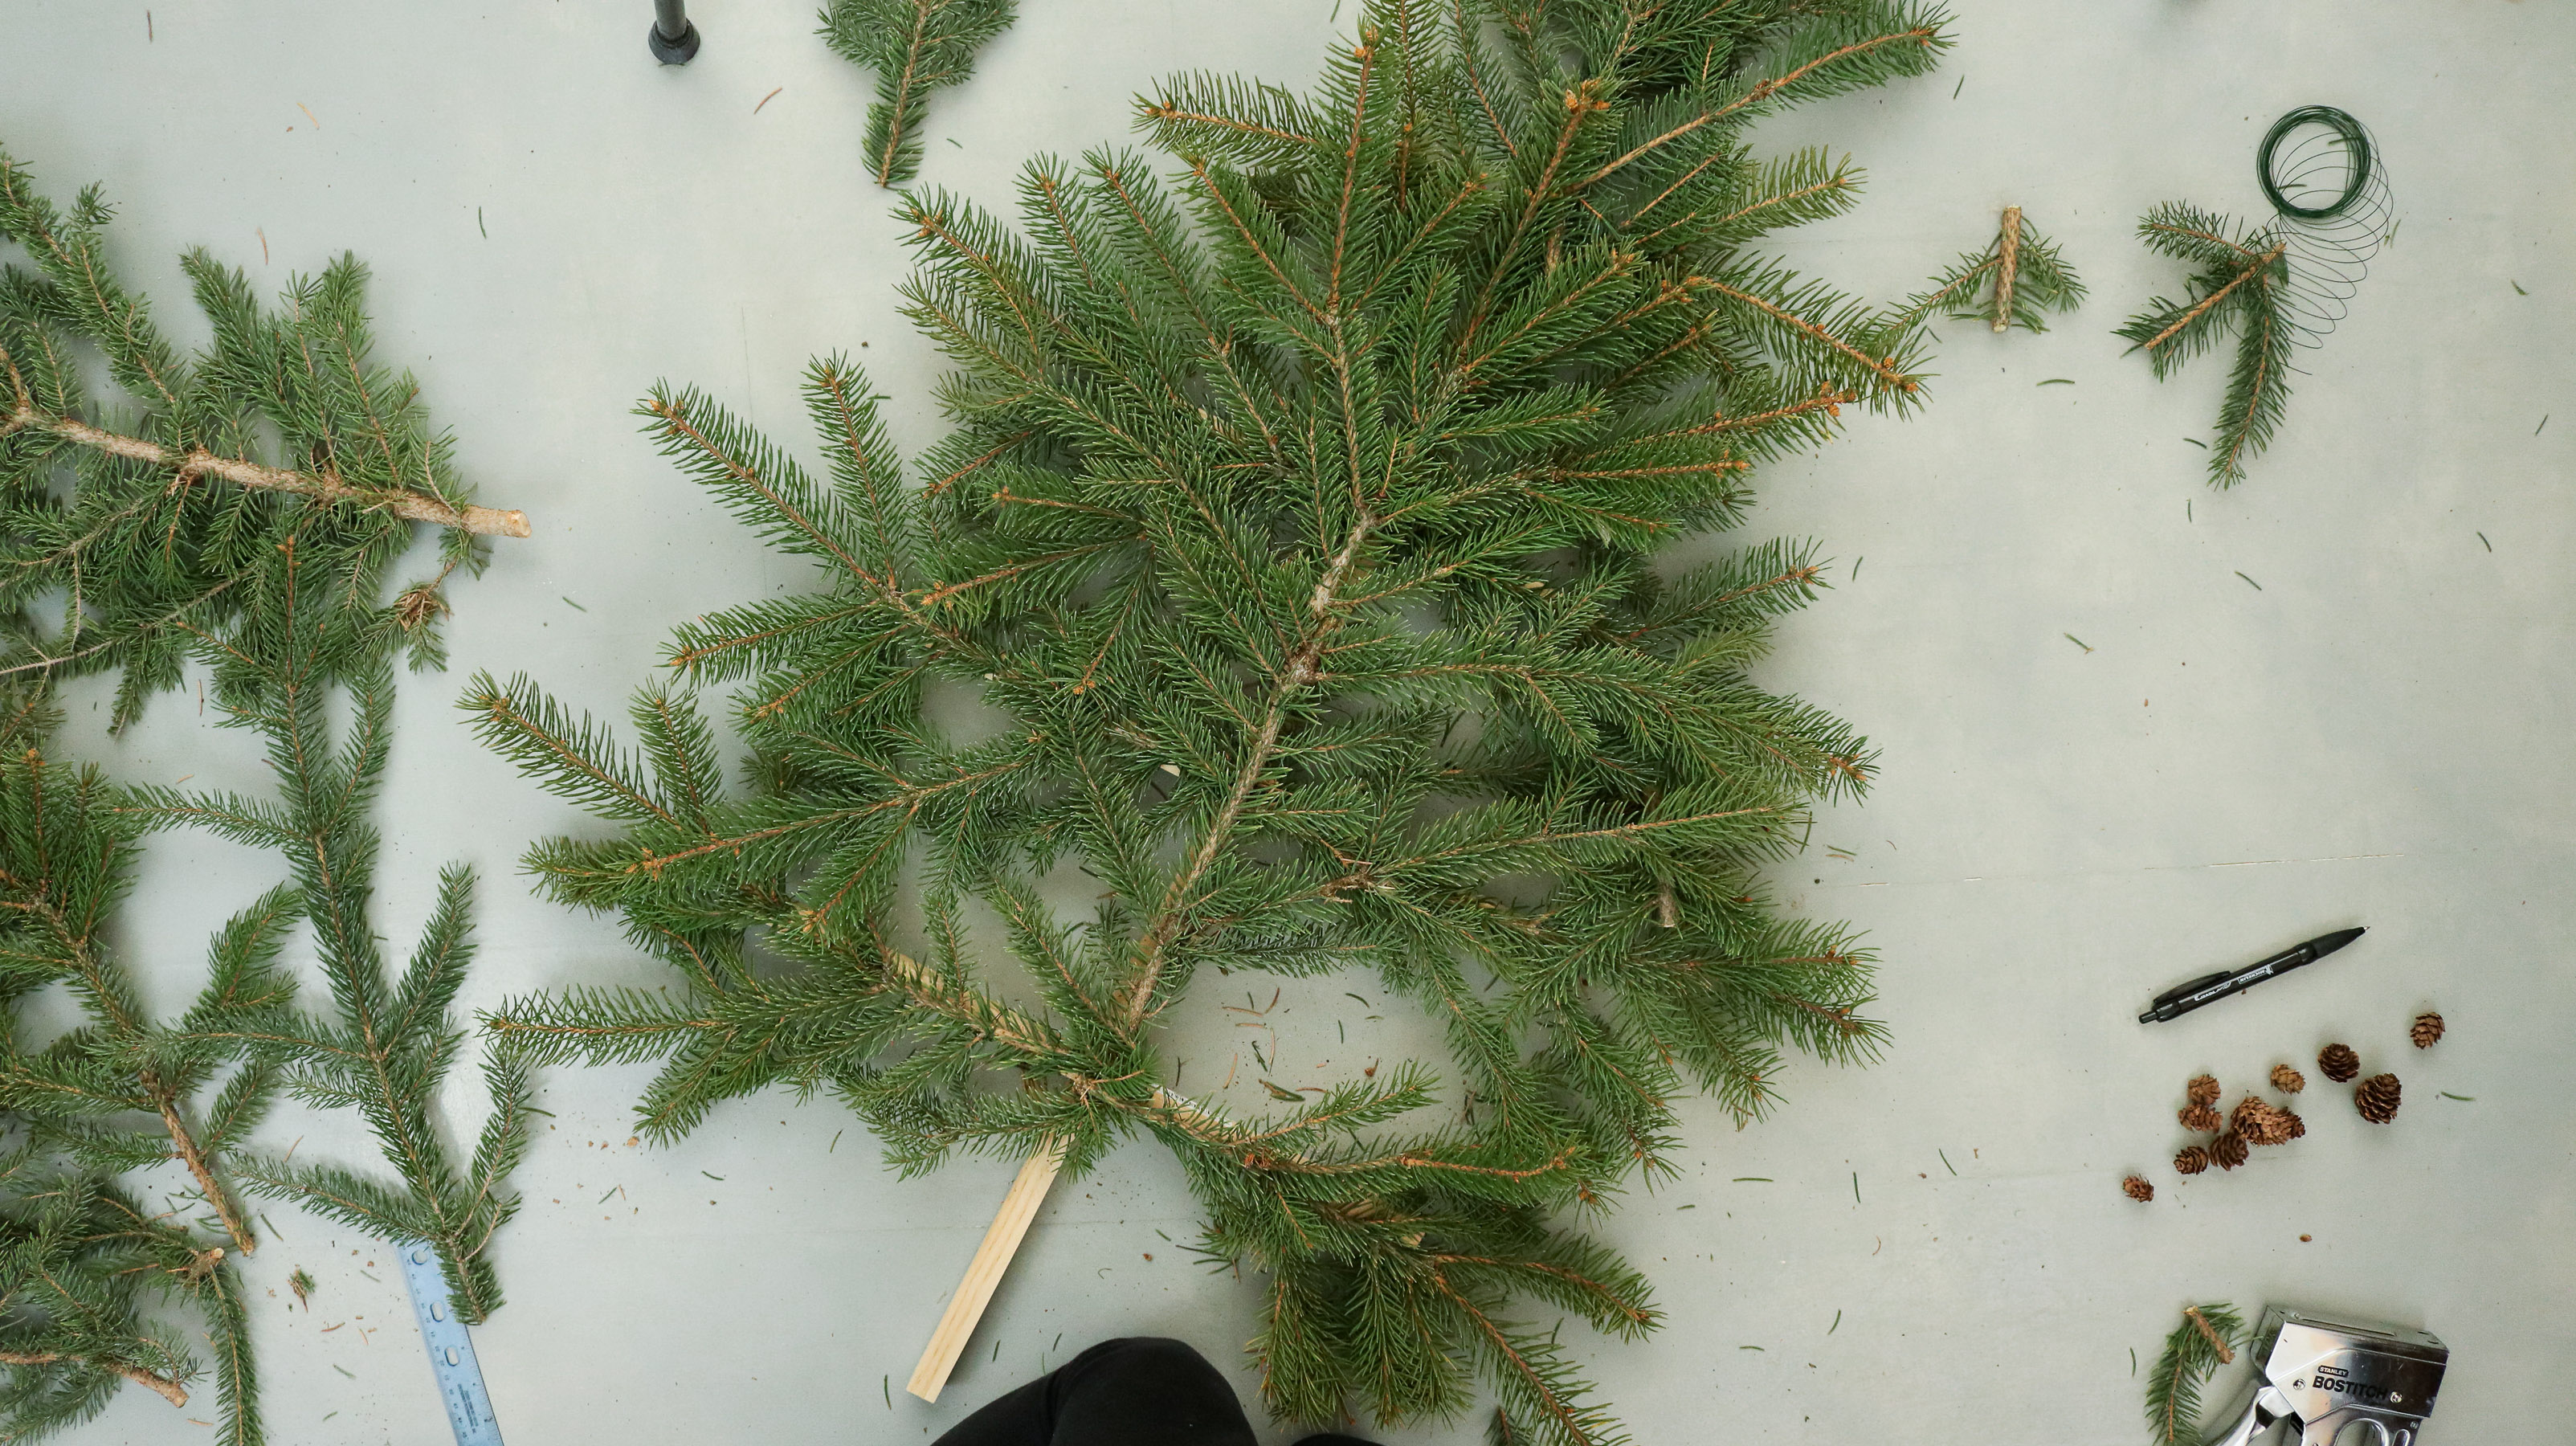
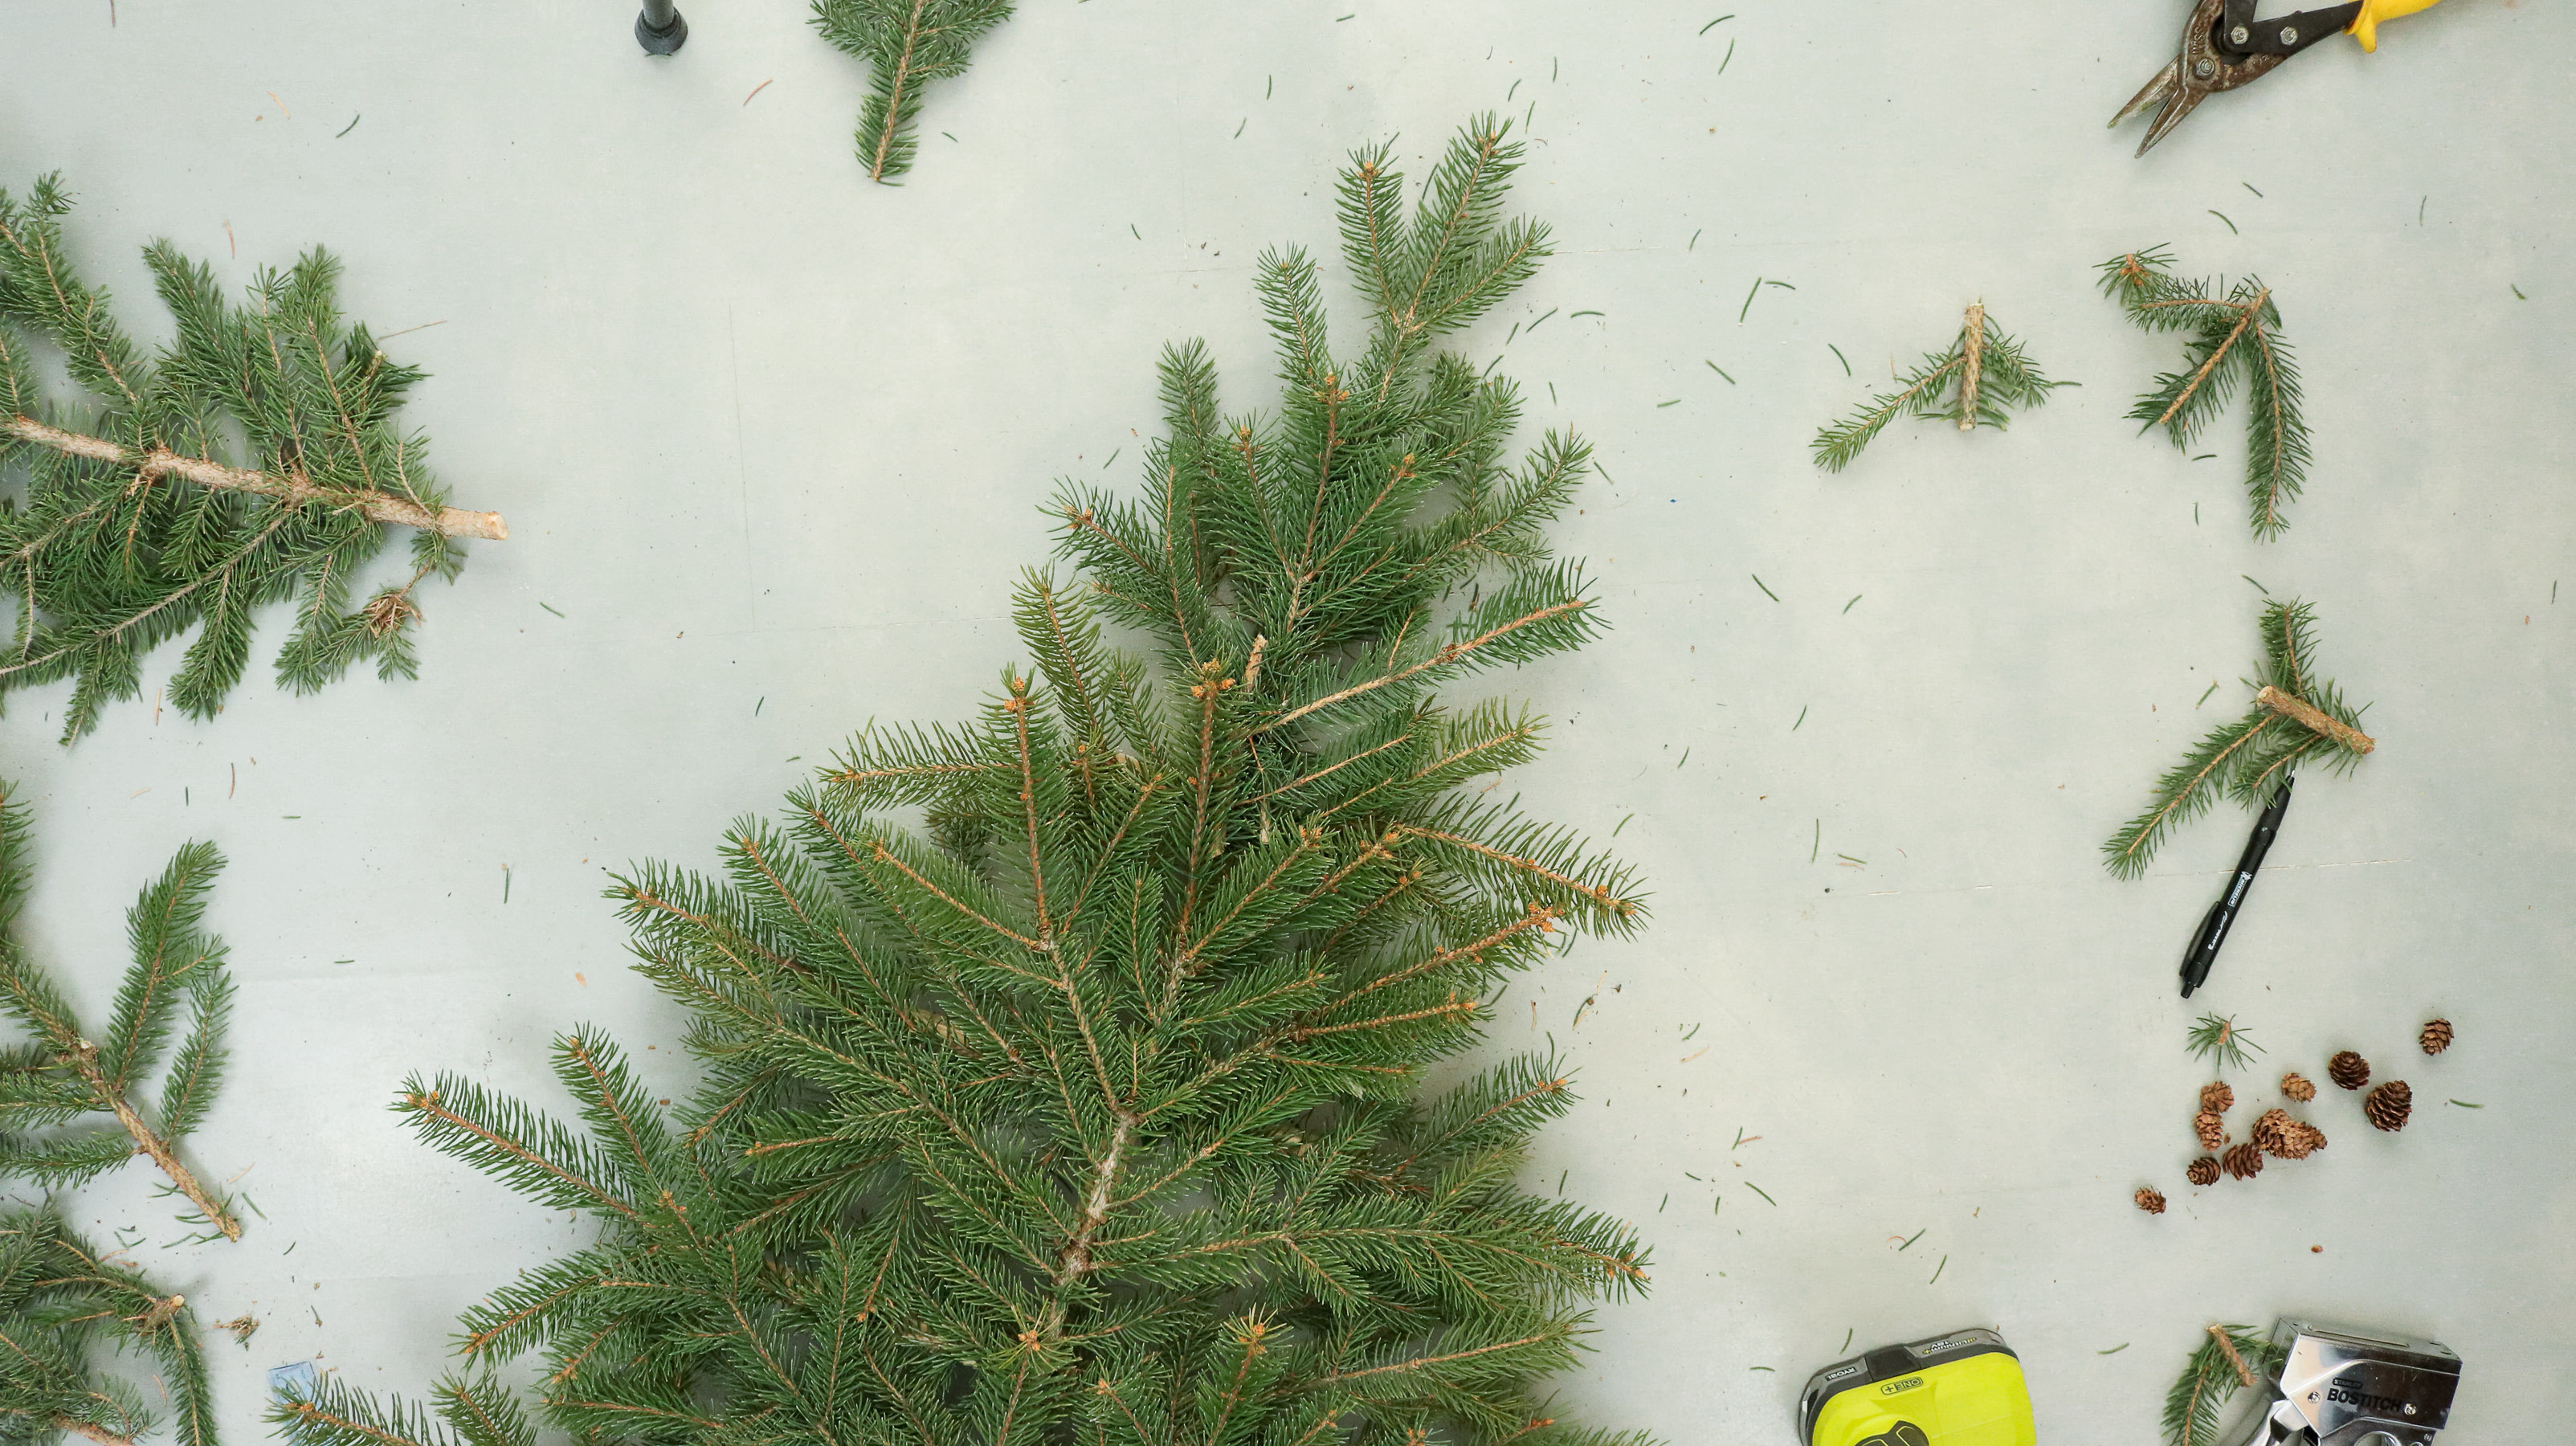 Keep adding to the center of your tree until it looks full. Try and keep the branches from dropping down. You want them to sit in an upwards position fanning out from the center. Also, here’s what the back looks like once it’s complete.
 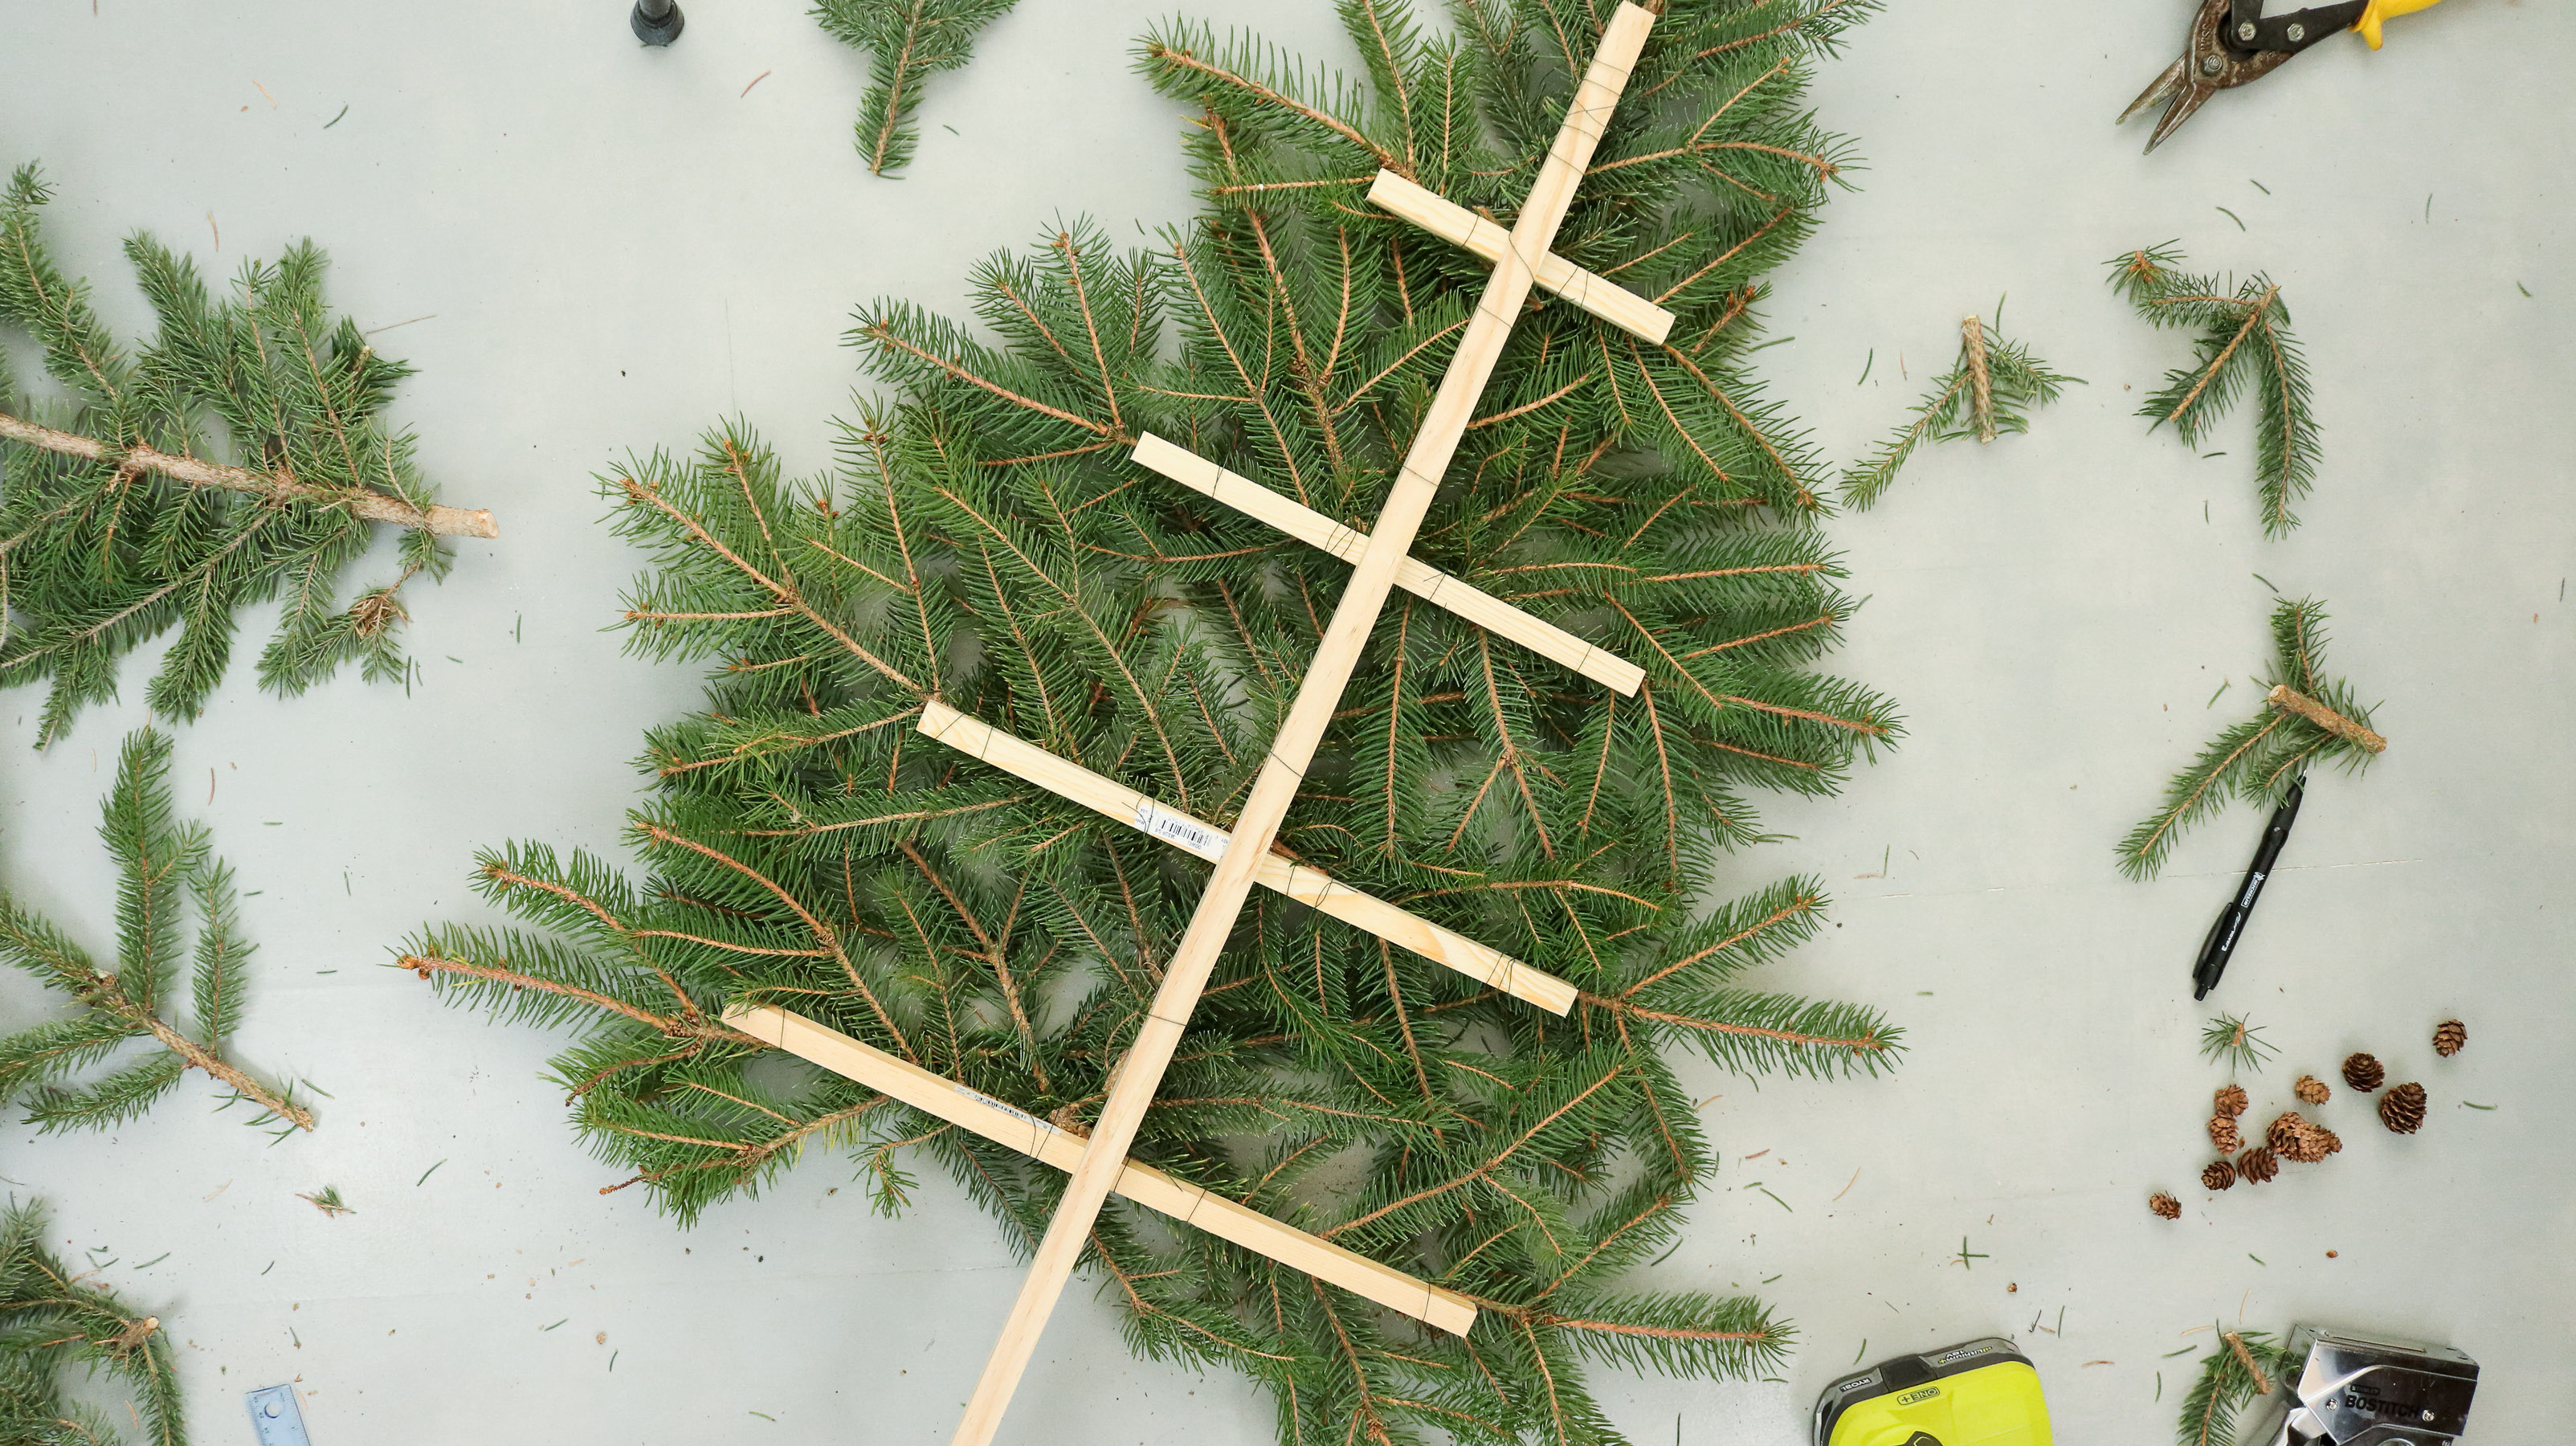 You can add Christmas lights to the back of the tree. I just wrapped some in a zigzag pattern up and down the dowels.
 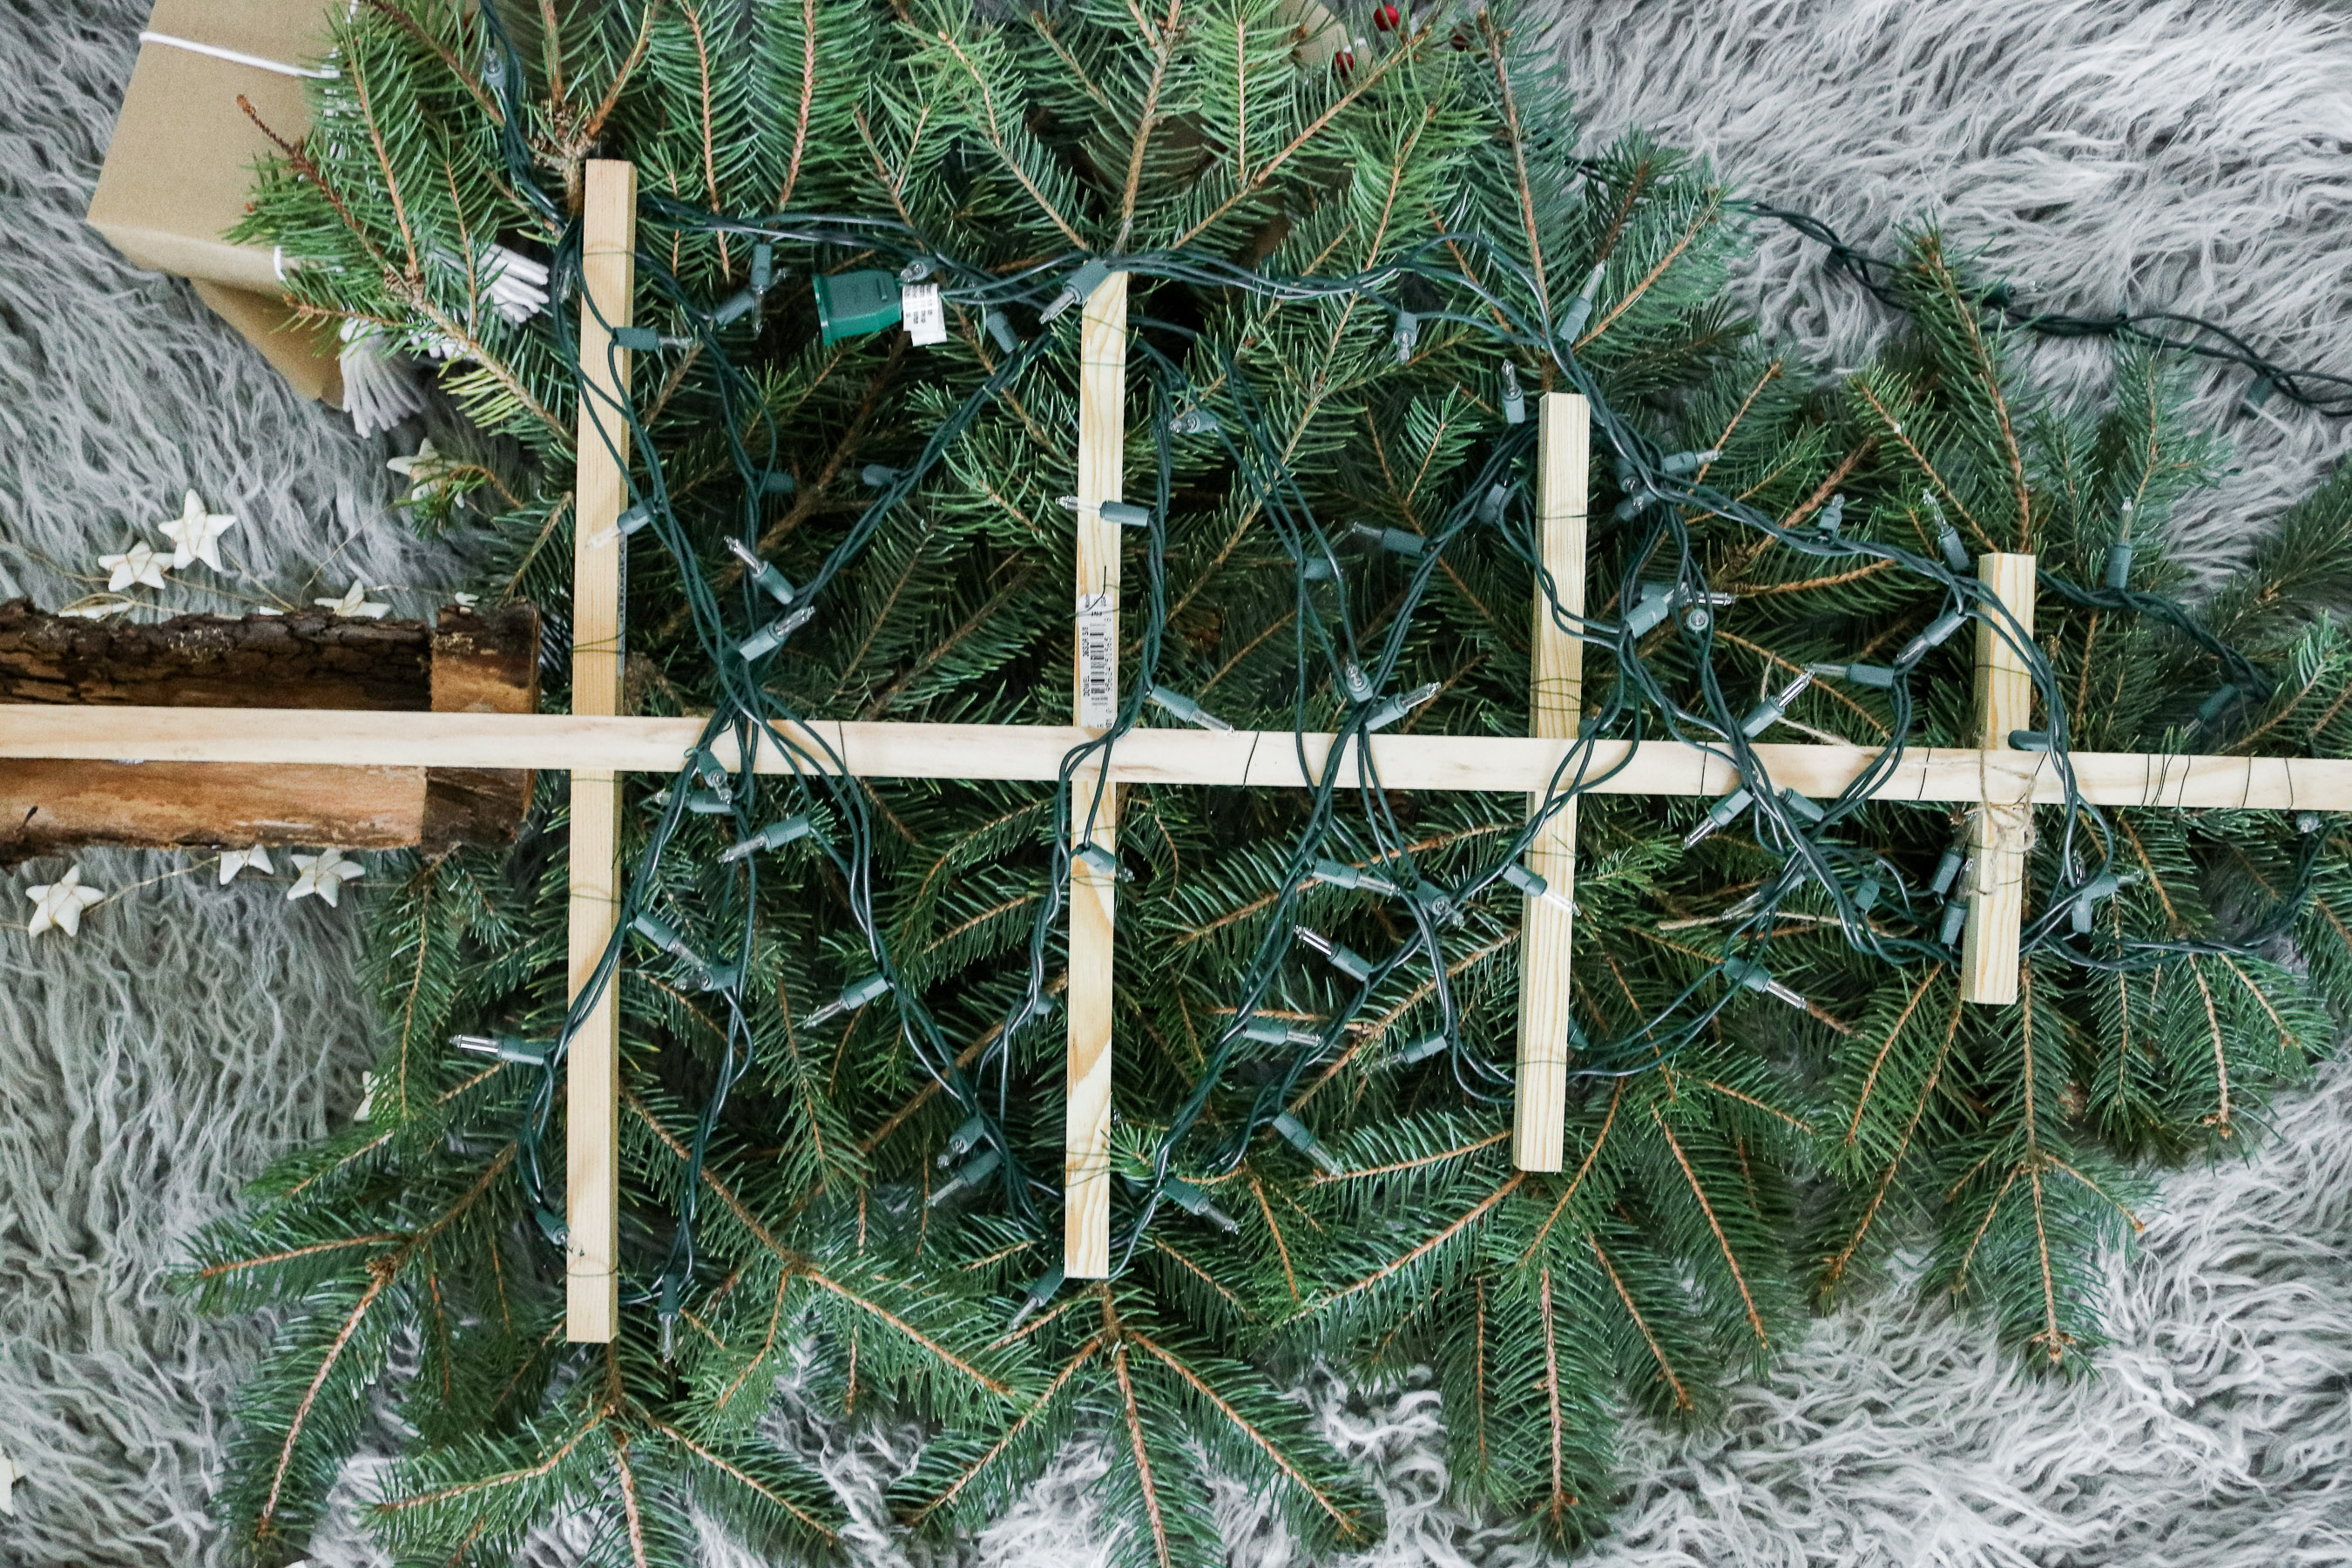 That’s it. I hope this helps with your Christmas decor .
  I’ve been frosting everything with 3D paste. Loving the snow effect 😀
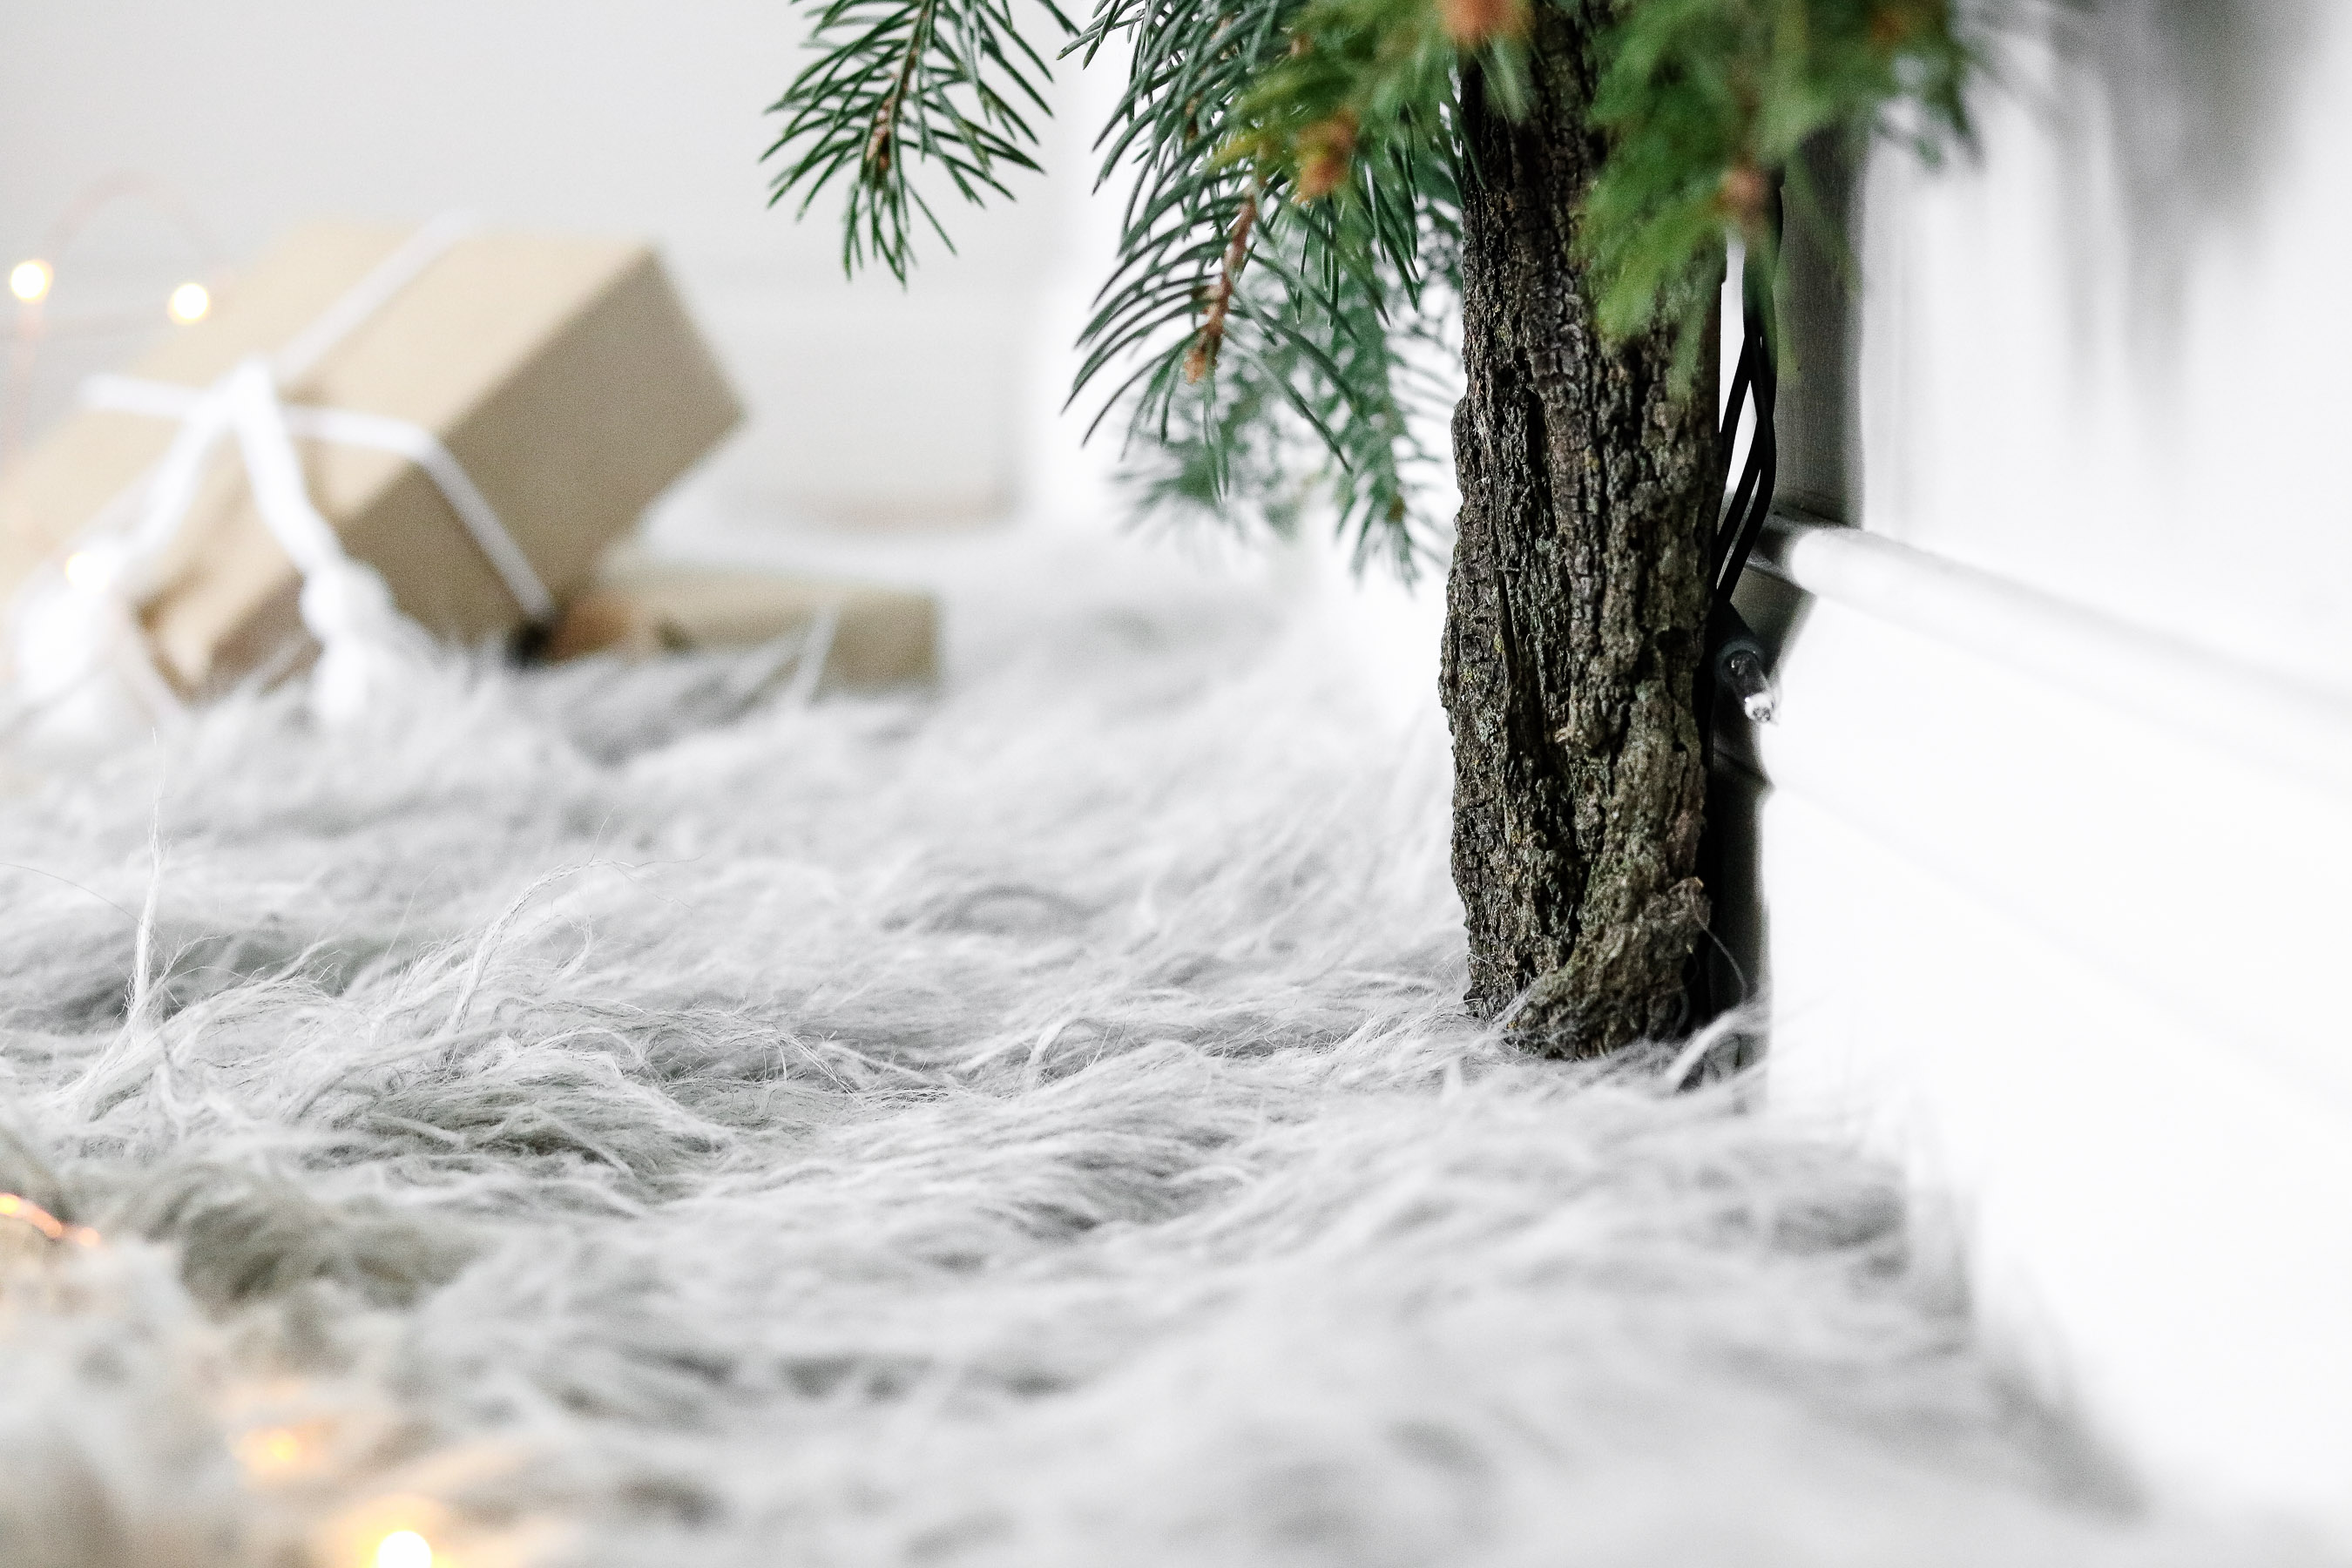
  Look at the texture on that bark! 😍😍
 If you’re wondering where I got this super cute star garland I actually made it using some homemade white clay. (baking soda recipe I’ll be posting soon, so stay tuned)
 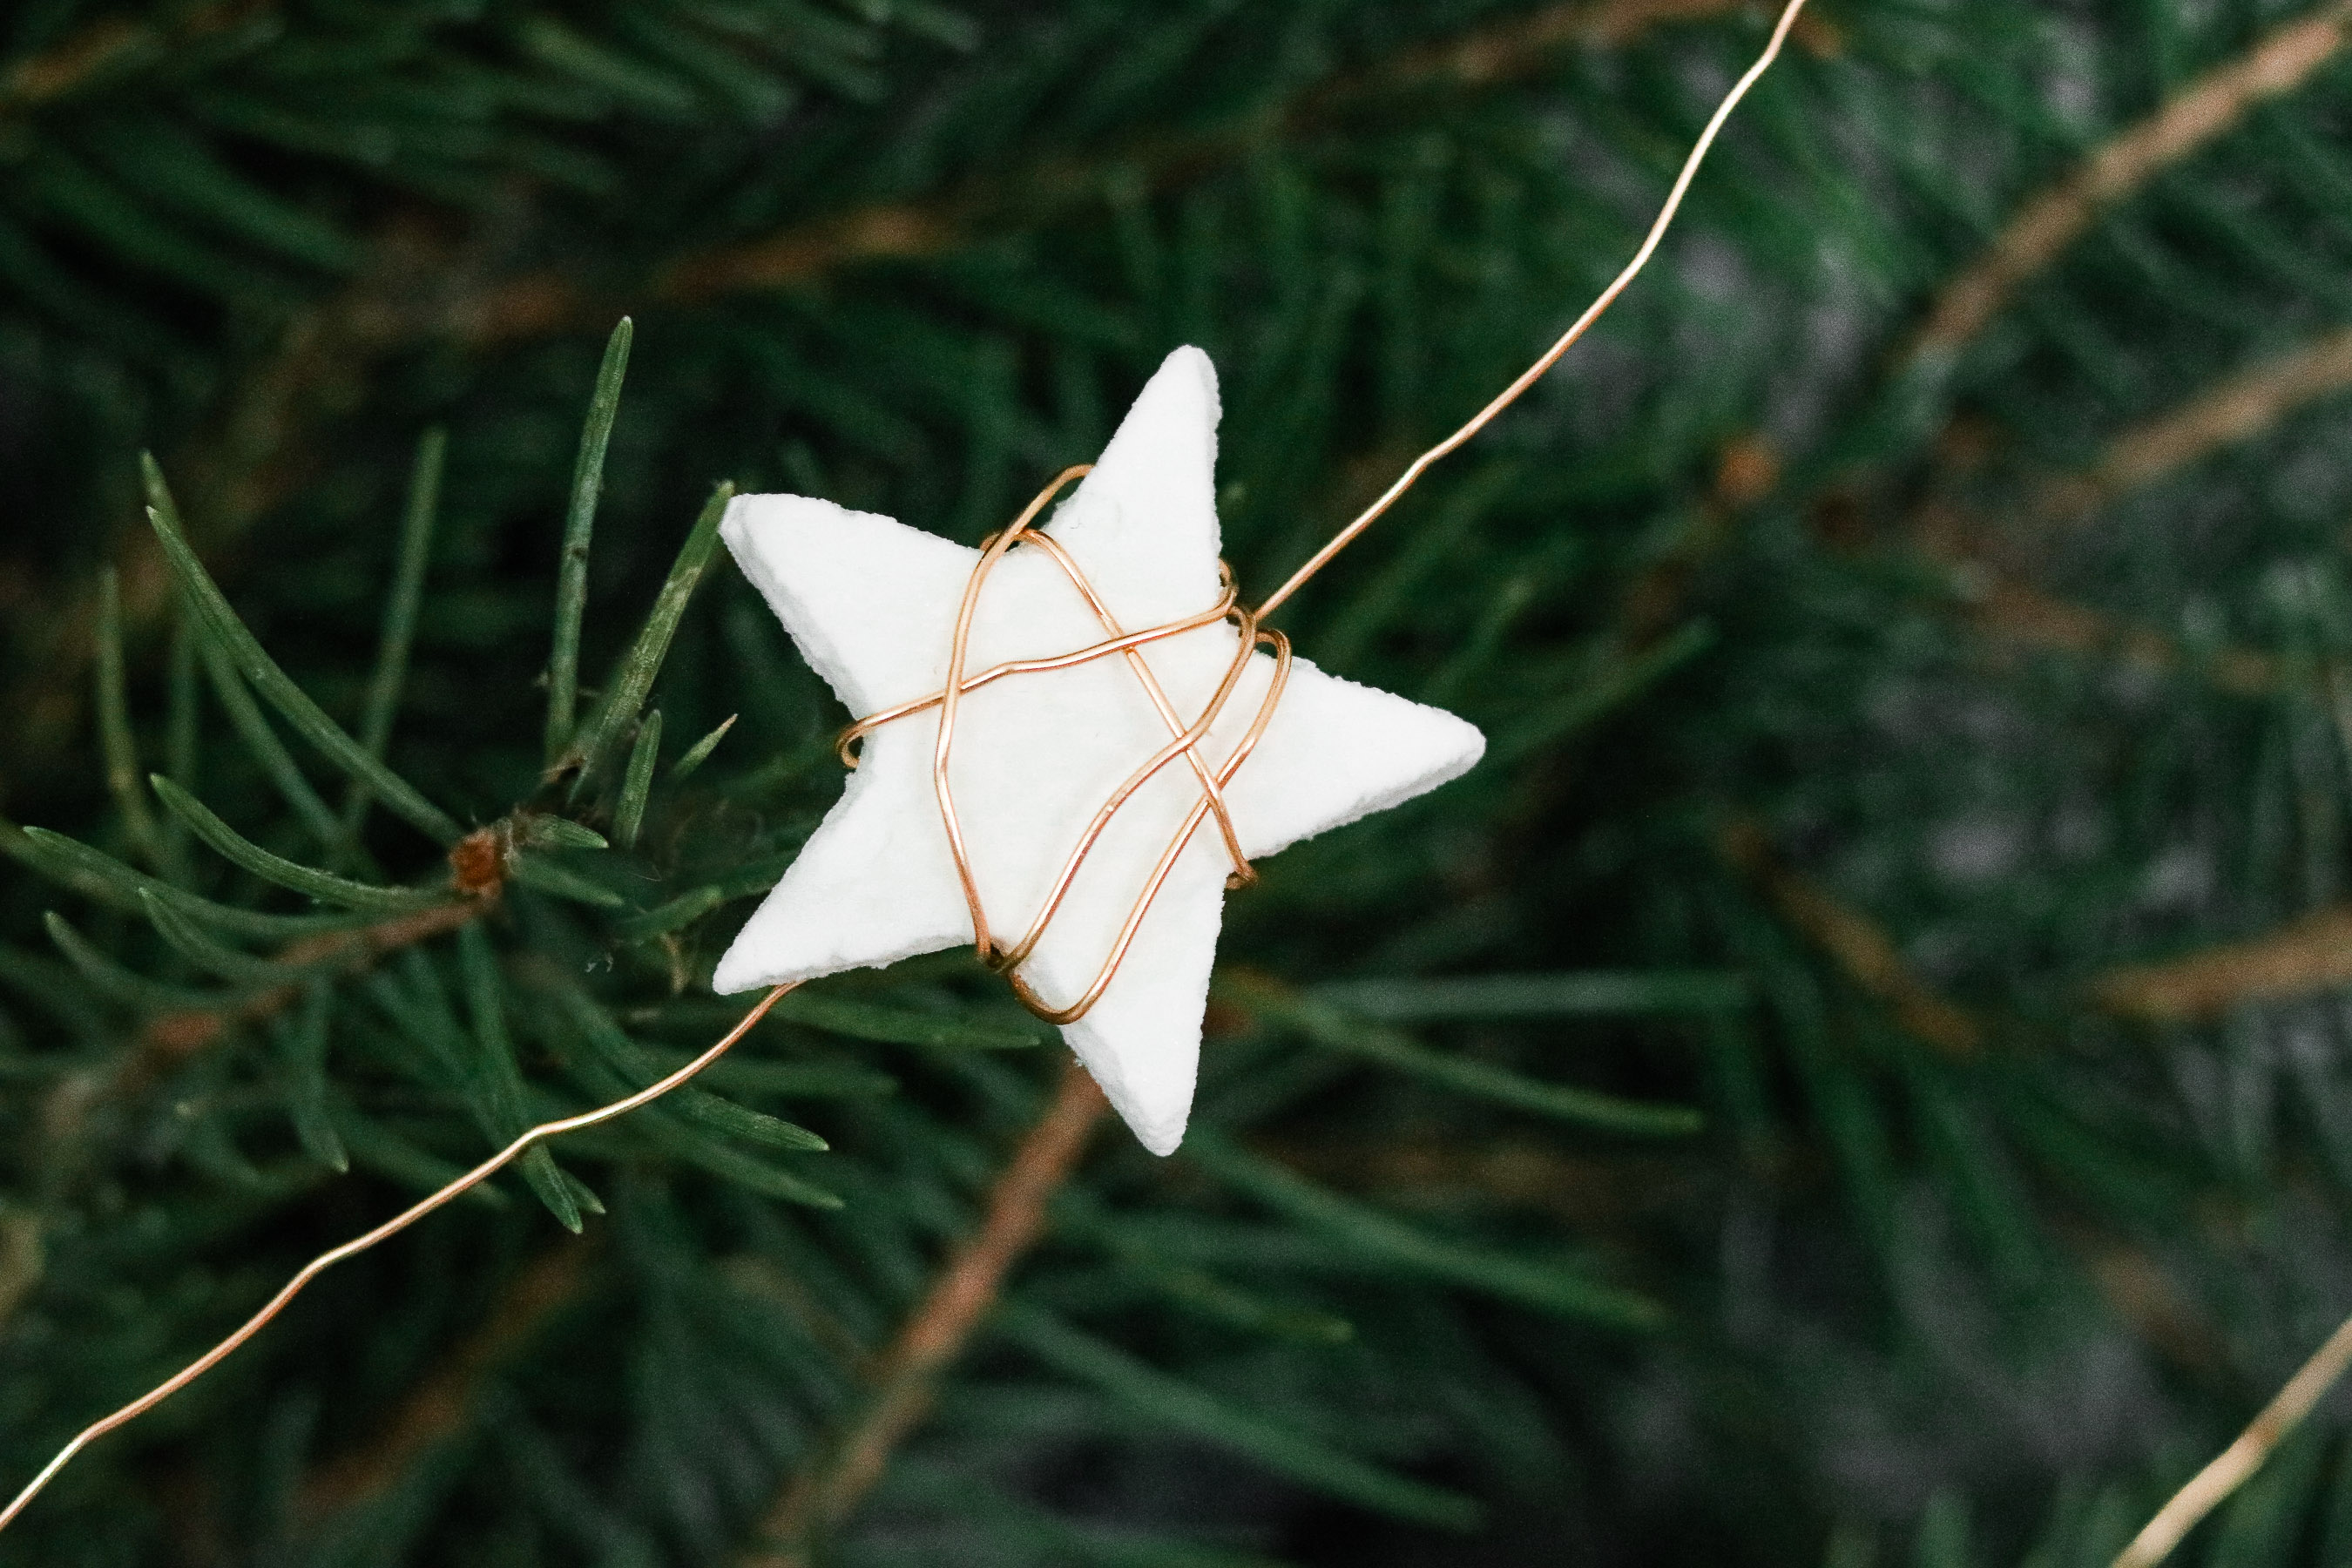 I got these little vintage bells at hobby lobby. Aren’t they the cutest! 😀
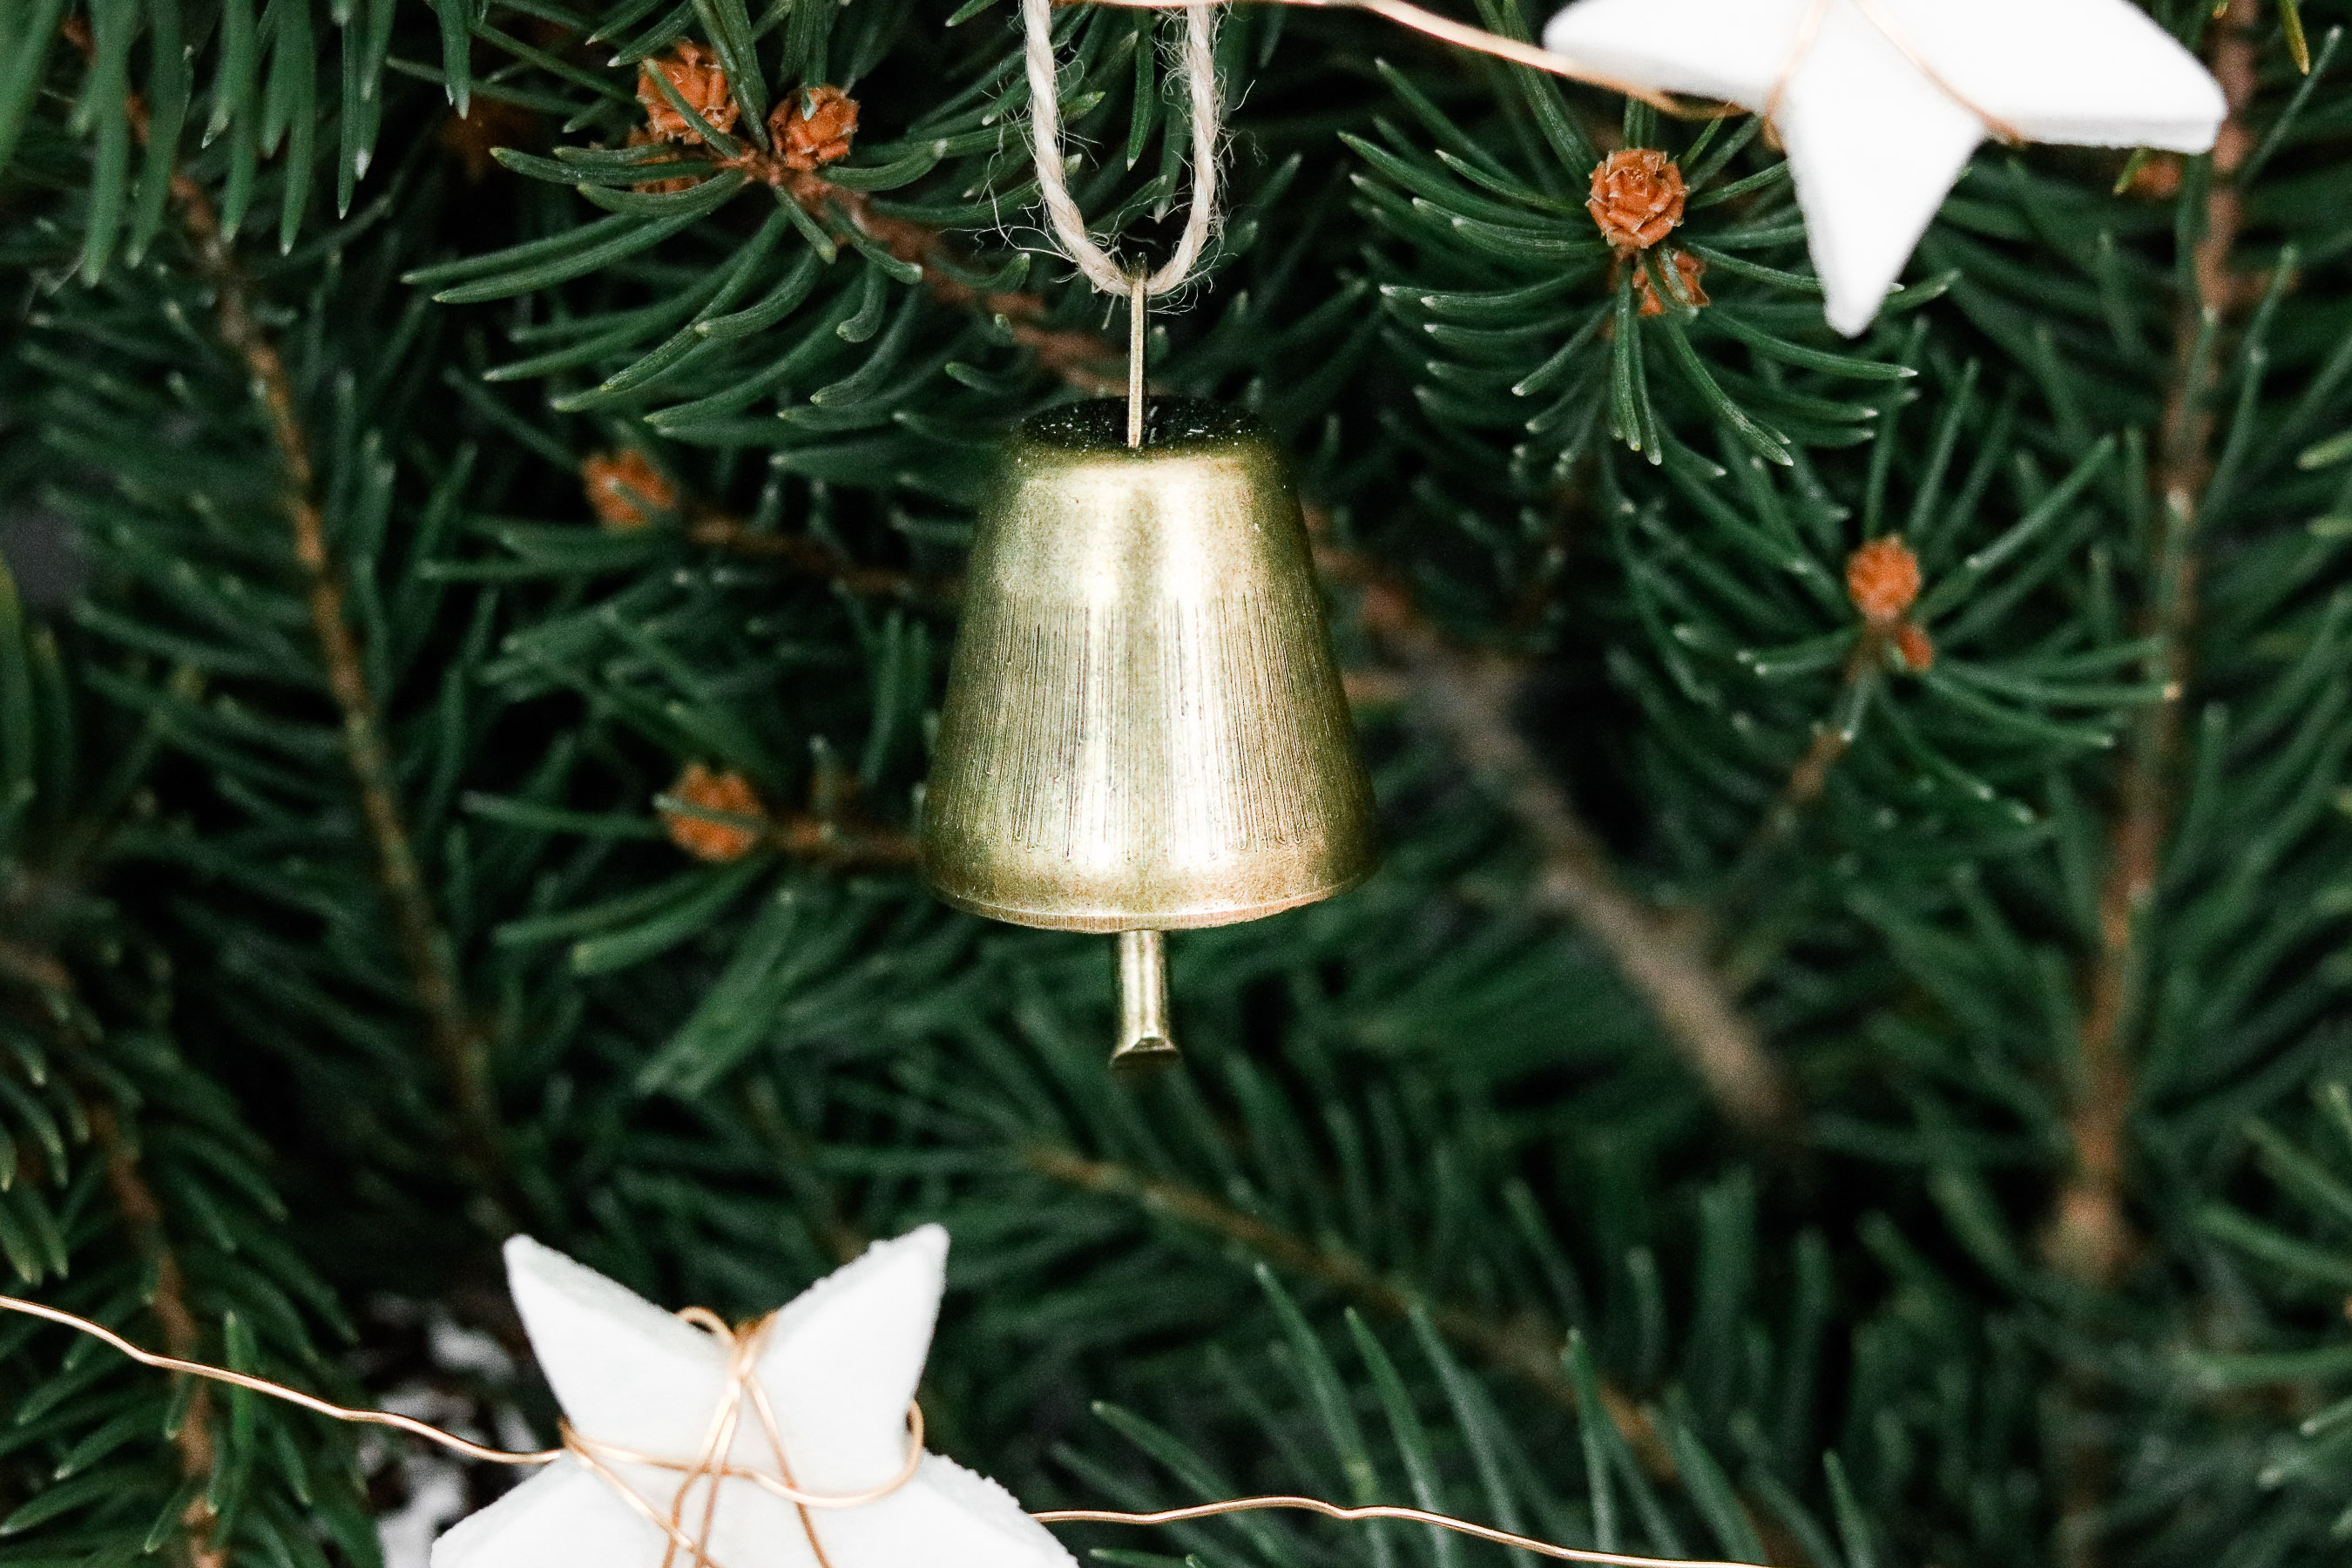
 I made little tassels from yarn to decorate my gifts. 🙂
 Here’s how I attached my tree to my 3m hook :D. Just some twine that I tied around my dowel.
 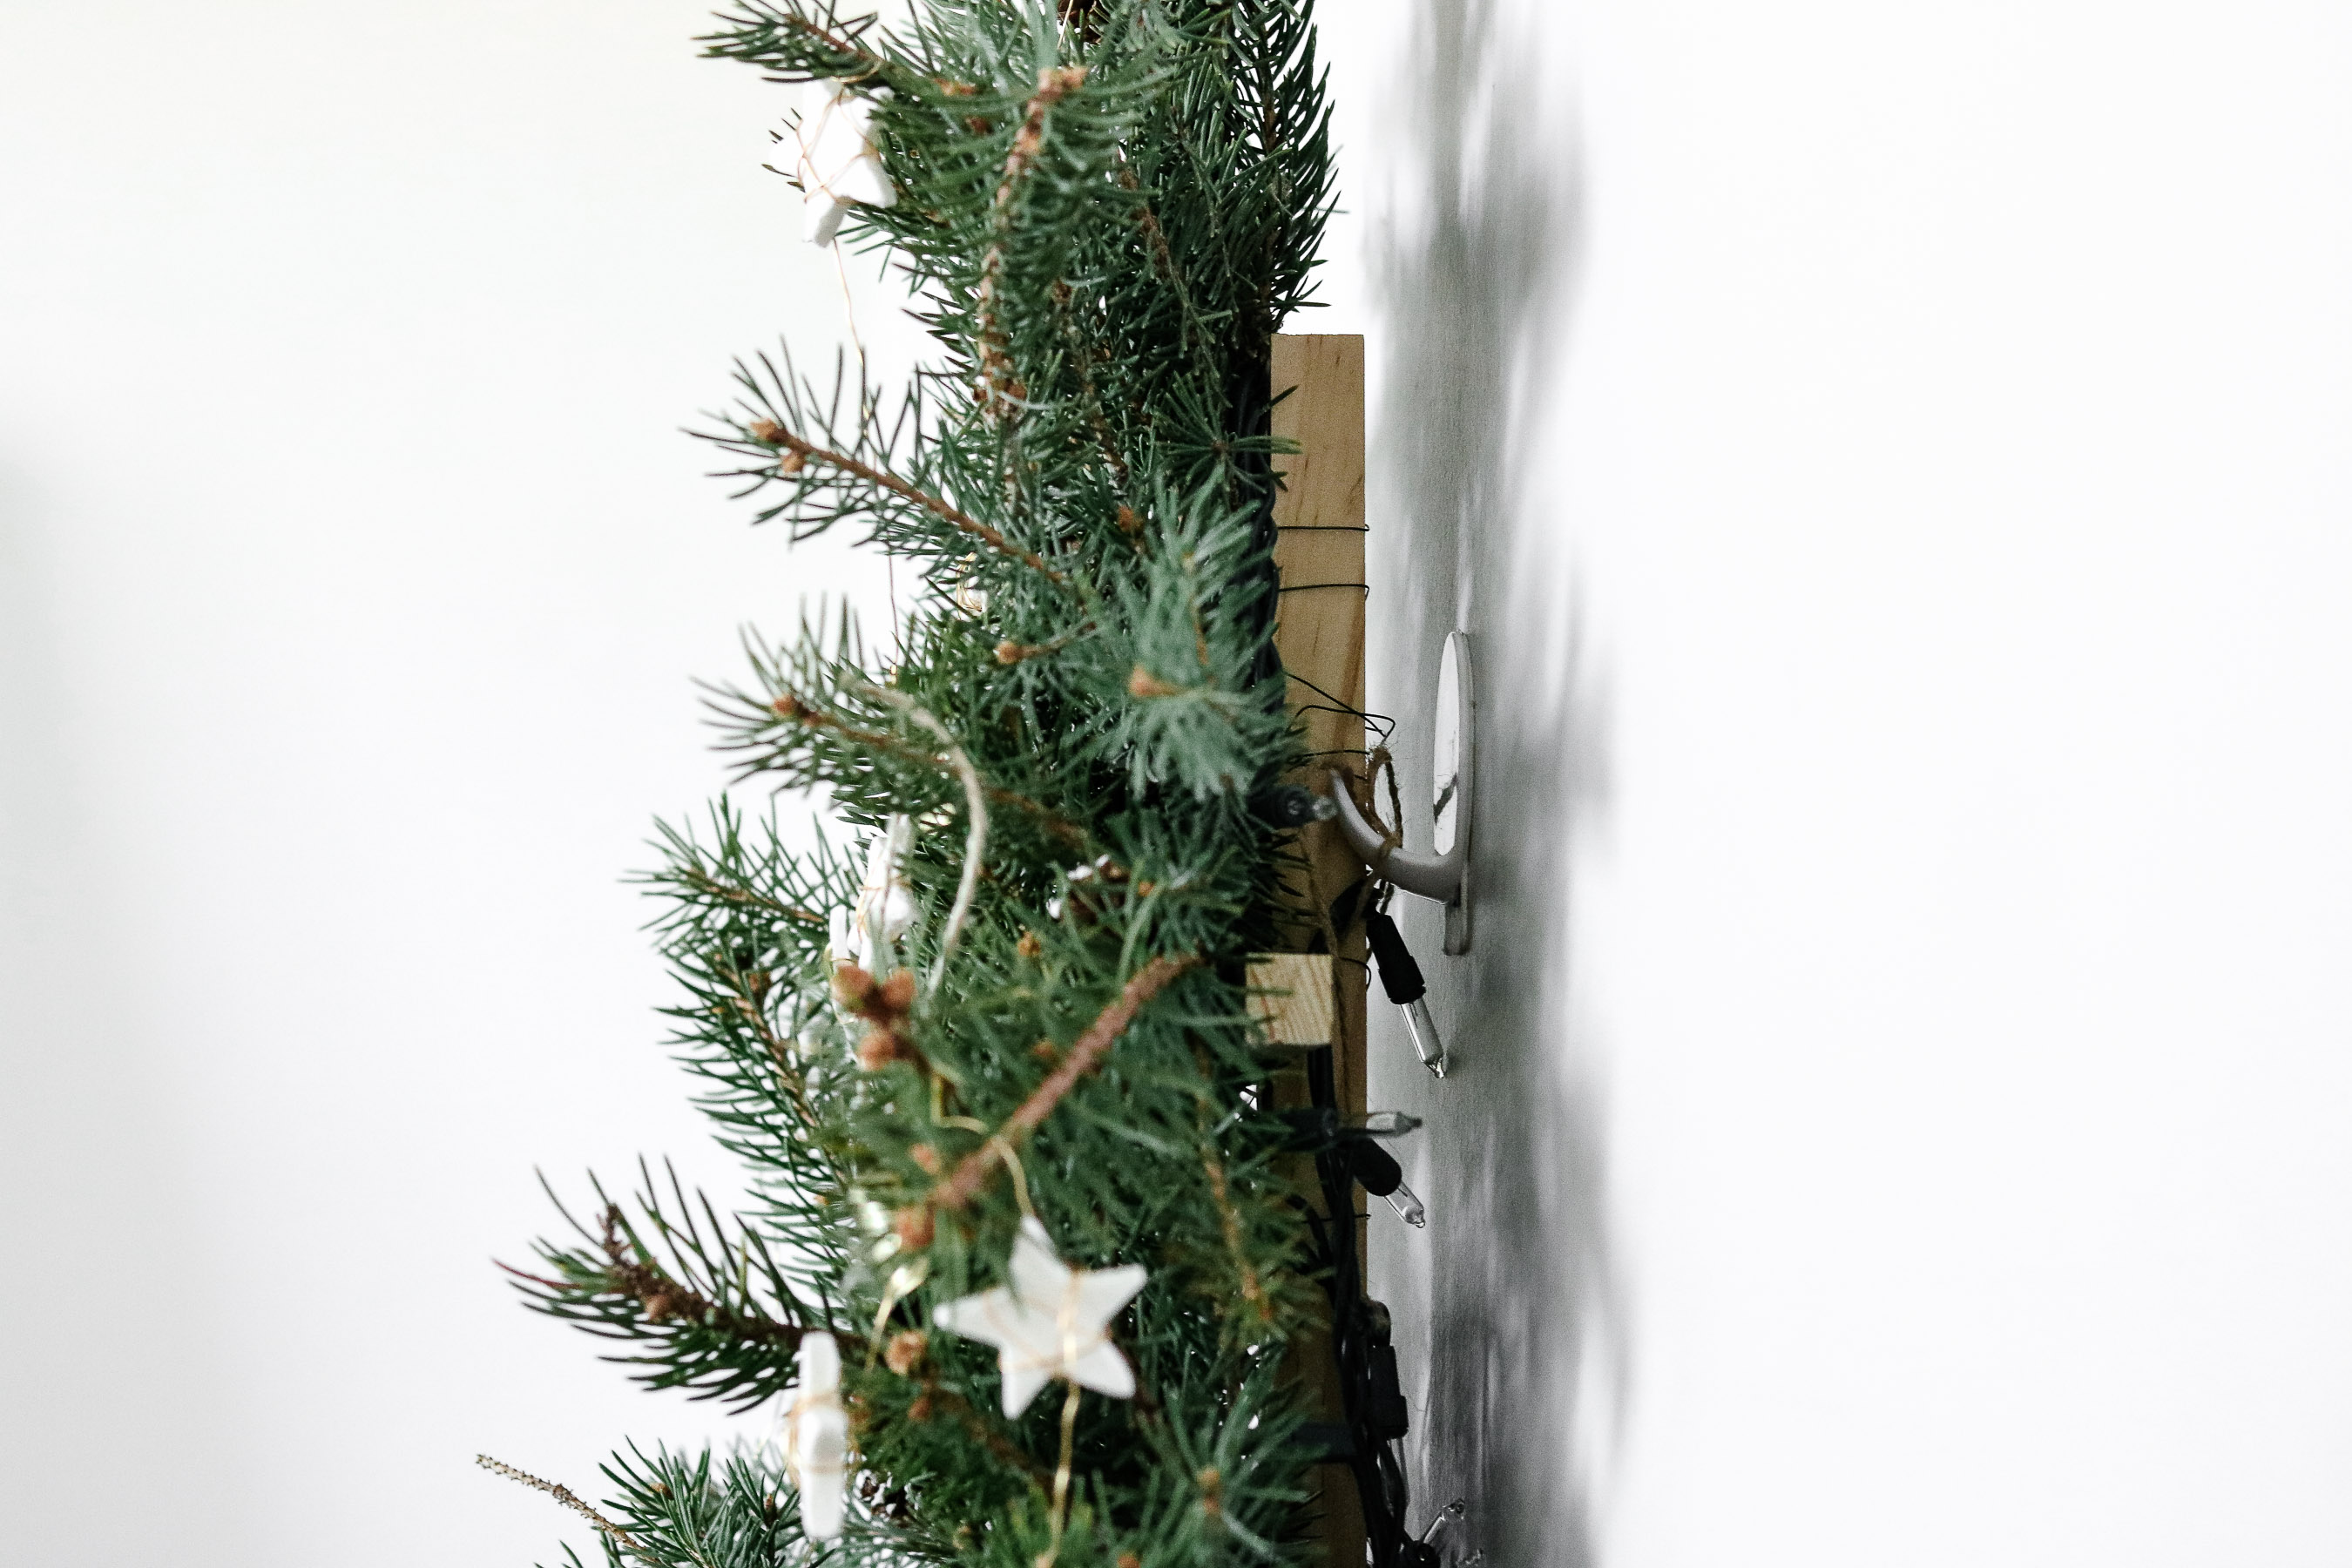 That’s it. I hope you liked this DIY 😀 😀 Let me know what you think down below in the comments. 😀
 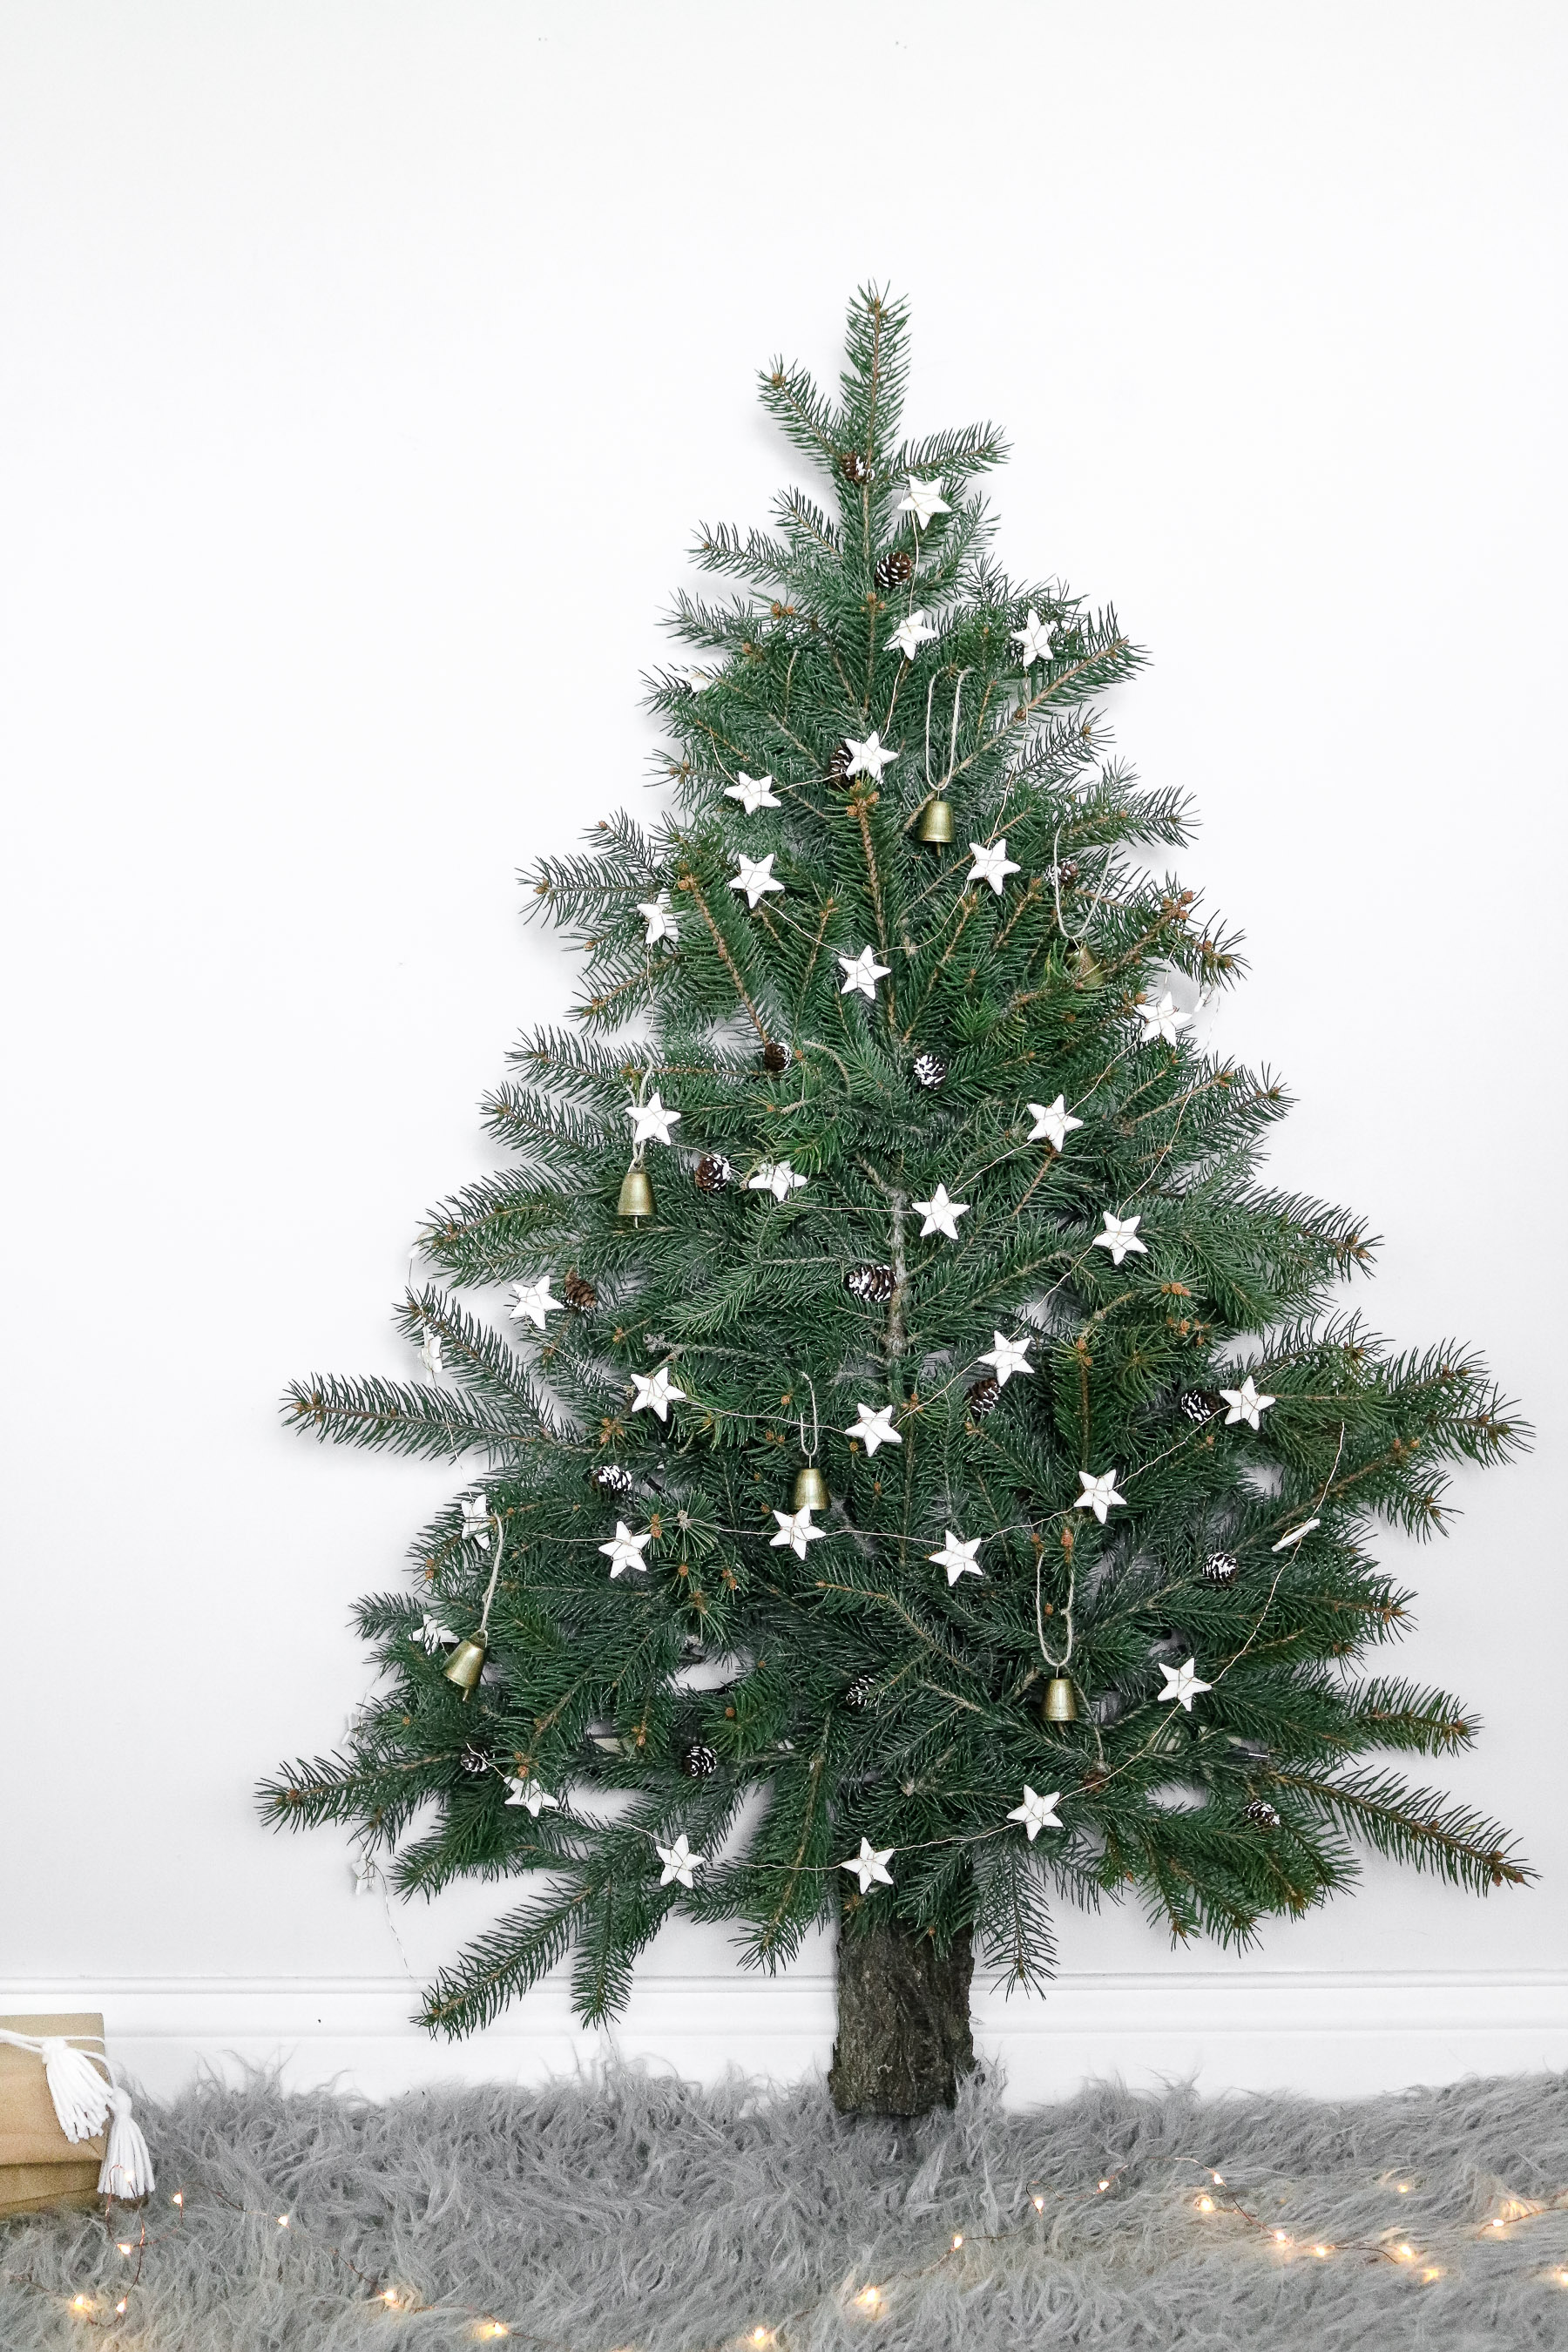 Happy Friday! I’ll see you next week!
Genial! Me encanto, saludos desde Argentina… Good Job!!
Thank you 😀
Looks great!! One year about 2 days before Christmas, before Pinterest, our tree died. So I had to come with something for the family. I did something similar but with the leftover garland that I had. I love your idea, even for the outside of the house! Thanks for sharing your great tutorial. Merry Christmas to you!!
Thank you 😀 OH wow that’s terrible. We had that happen to us once to because we put the tree right next to our wood stove 🙁 bad idea. It died within a week. OOOh that’s awesome love the idea to use garland and yah I didn’t even think that but this would look so cute for outdoors on the front of the house maybe. 😀 AWWE Merry Christmas to you too 😀
Do you do anything to help minimize the pine needles from falling or looking dull?? Making this today
No I actually didn’t do anything to it at all. You can mist it with some water but I’m not sure how much it would help. Mine lasted really well for about 2.5 weeks (didn’t look dull or drop much needles until than). Make sure it’s not hung right next to your heater or wood stove it does dry out the tree quite a bit faster if it’s hot.
Is that real bark? Did I miss something?
Yes it’s really bark I glued on top of the dowel.
How many of the pine sprays did you use
Hi Melissa. Sorry I’m not exactly sure. I just kept adding until it was full. Used sprigs from a pine tree in the yard.
This is a creative idea. I would like to try!
Thank you Emiy 🙂