
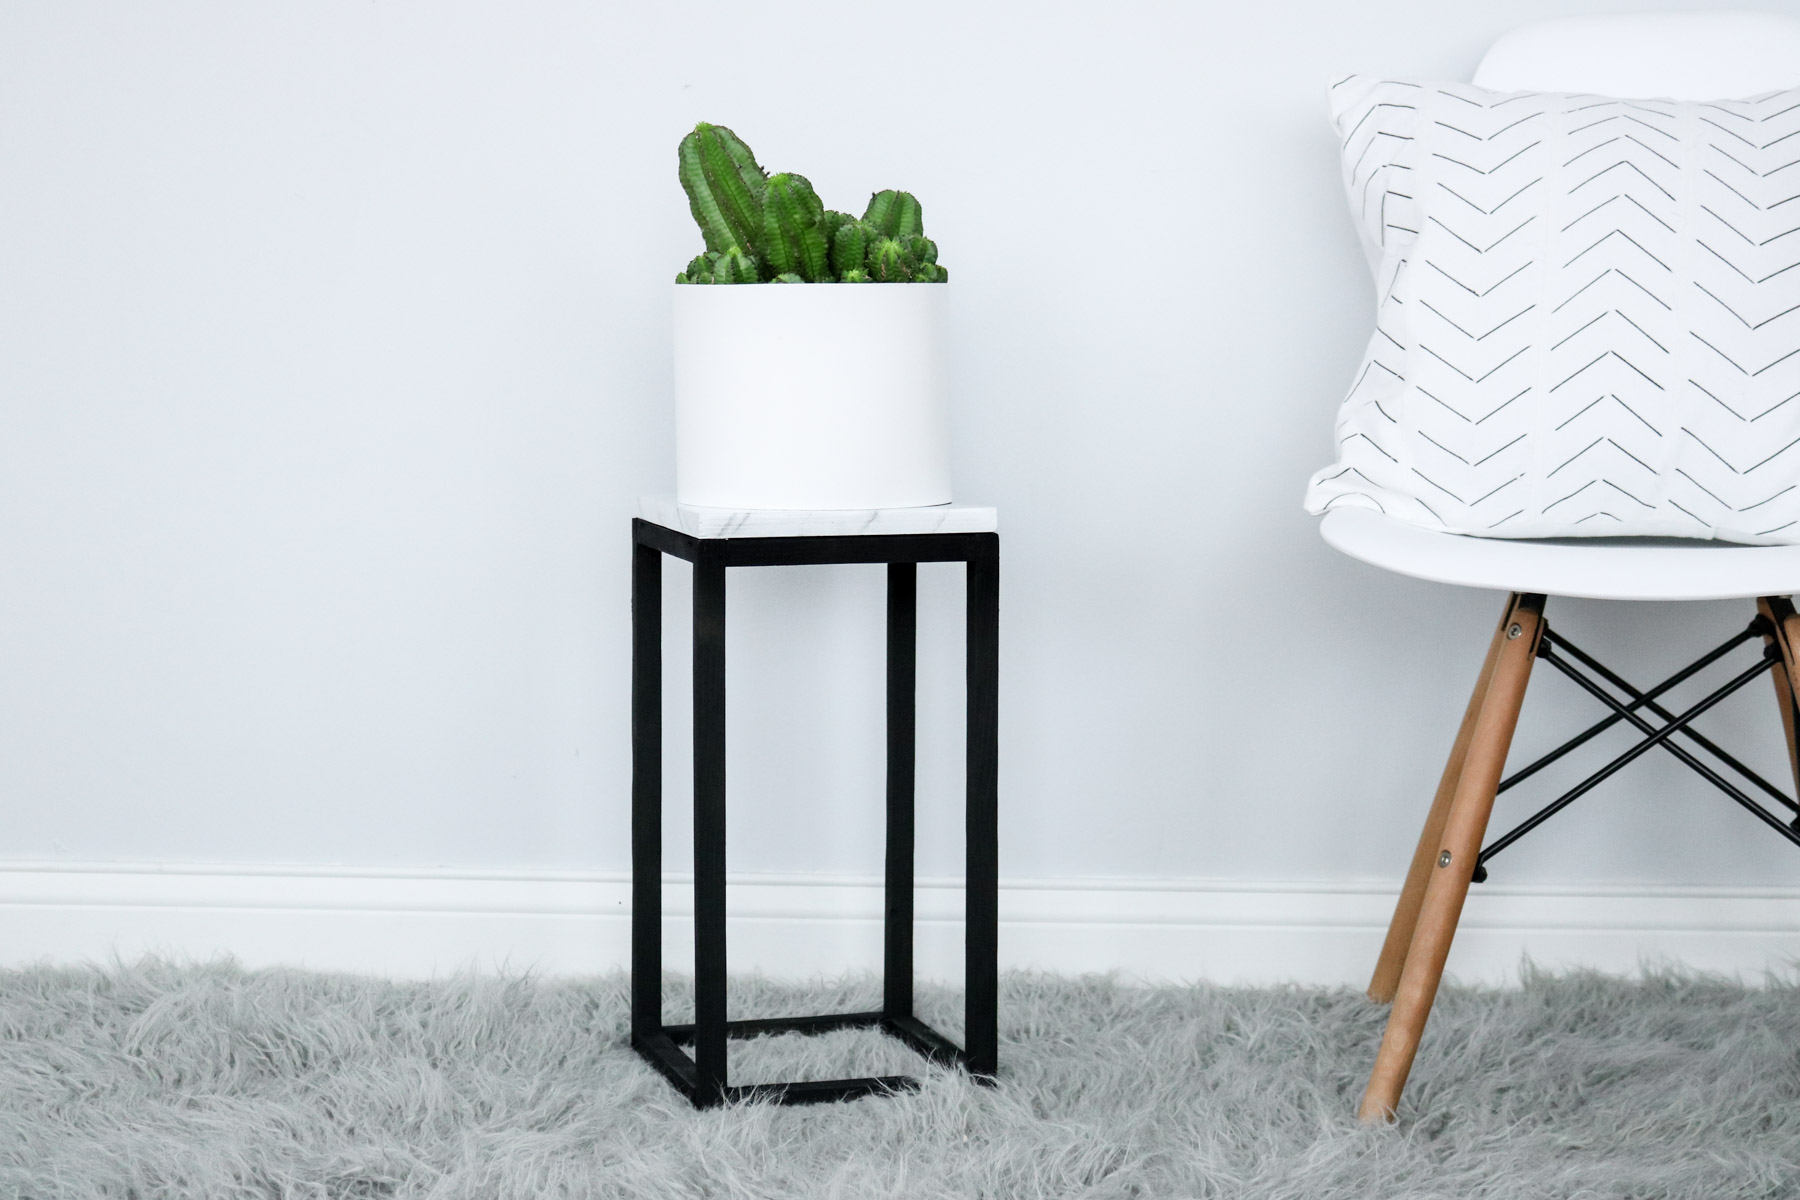
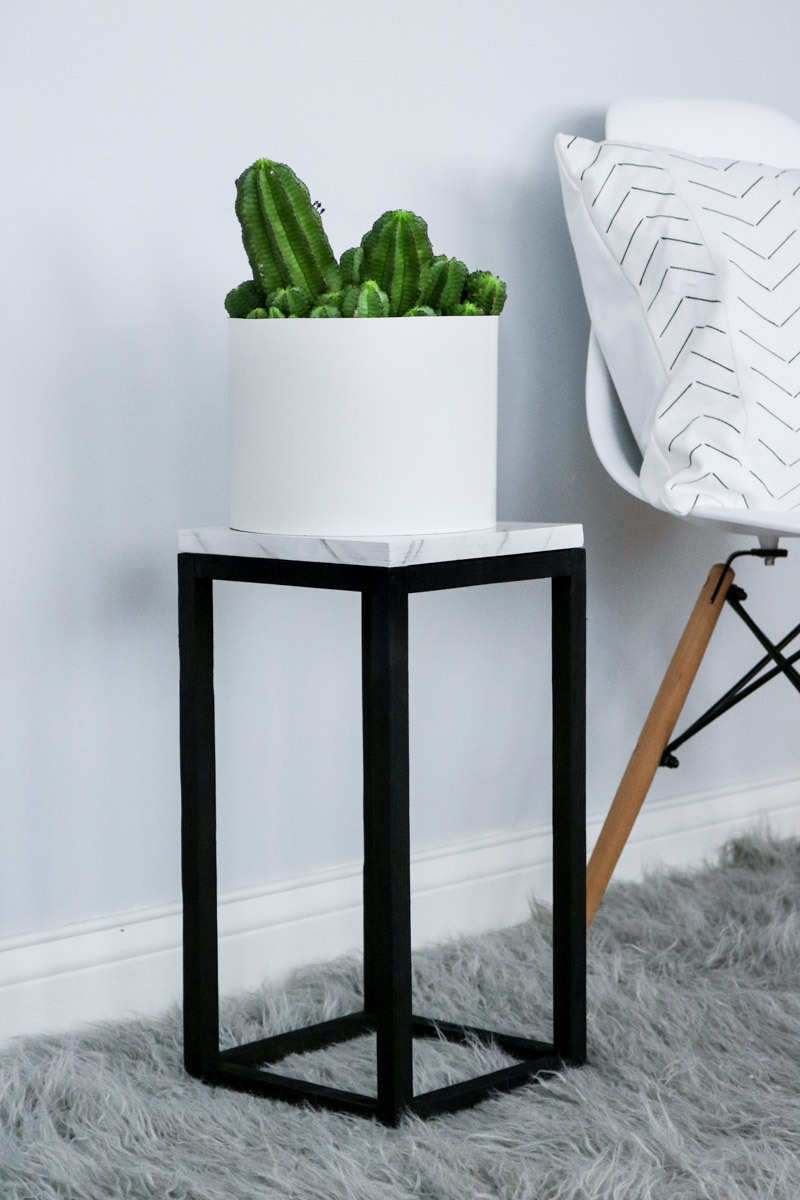
DIY Modern Marble Plant Stand
I find myself constantly needing plant stands. If I could get at least a dozen I think I’d call it good! Half of my plants stand on my piano and the rest are scattered all over my window seals. I don’t mind that I just feel like they’re not really visible on the window sills and once winter hits I move them all to my piano which looks really crammed. I call it my jungle corner in the winter time! LOL 😂
Ok originally I really wanted to make the popular wooden dowel west elm plant stand but, I realized there’s already like a million DIYS on that specific plant stand. So I decided to go with something different but, If you want let me know in the comments and I’ll still make one. 😬 For this plant stand I wanted something modern and simple. I had so many ideas like maybe 🤔giving it handles or having an X on the bottom. 😁 Those were all crossed off the list and I decided to keep it simple by just making a framed box with a marble top.
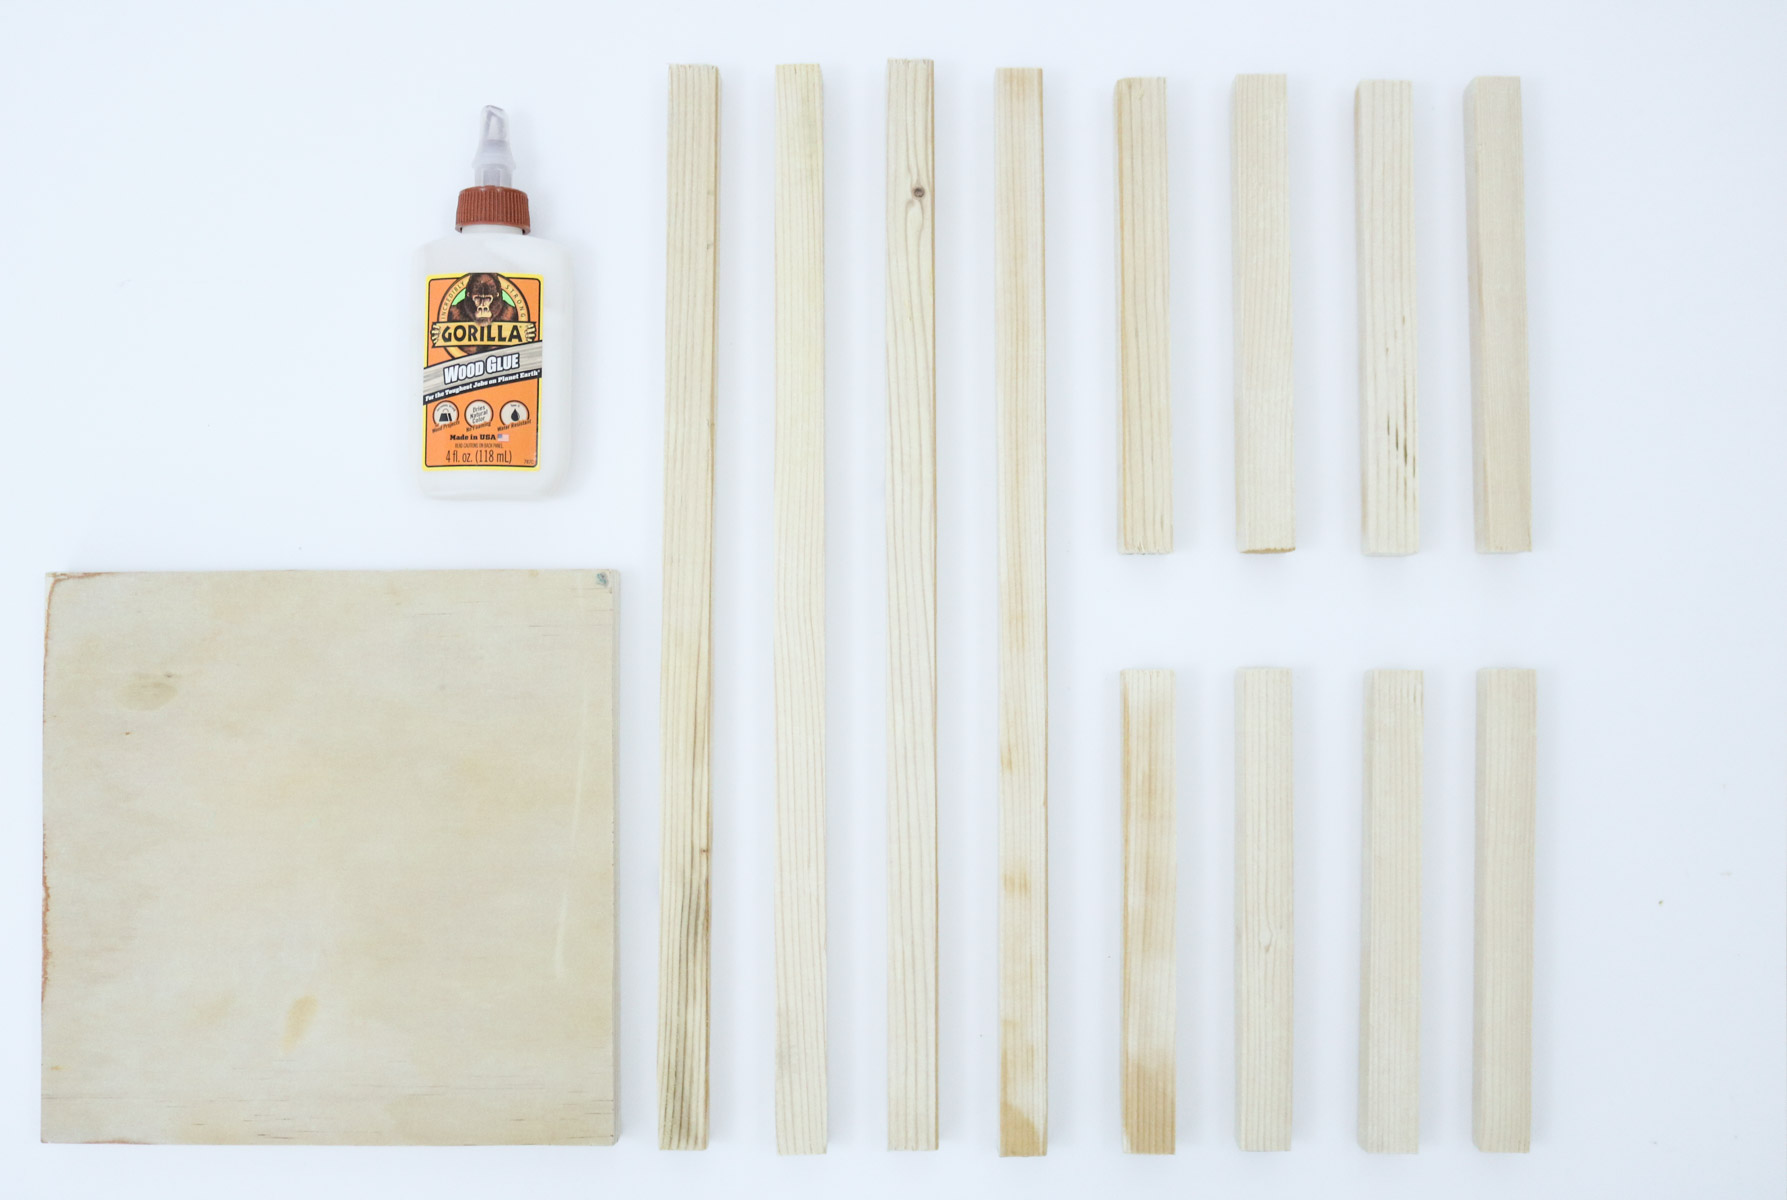
Wood pieces
- 8x 7.5 inch in length dowels (3/4 inch thickness)
- 4x 17 inch in length dowels (3/4 inch thickness)
- 1 wood square 3/4 thickness
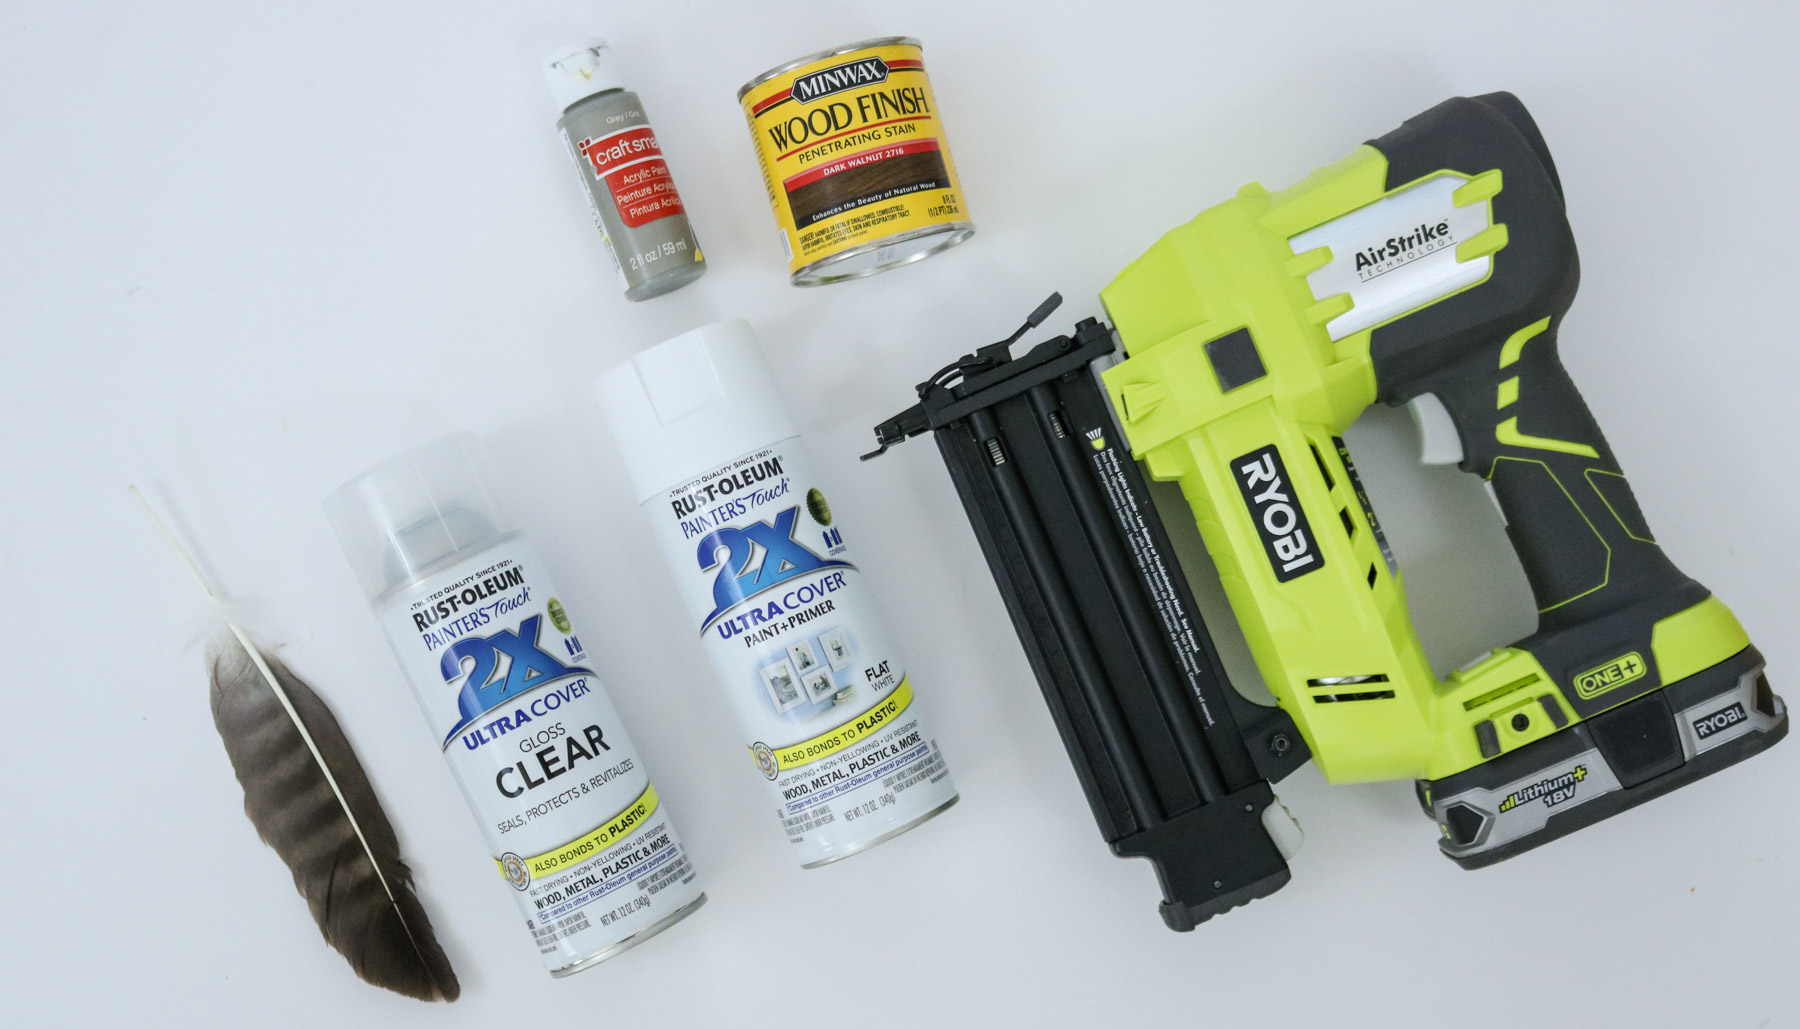
Supplies
- sponge
- gray , black and white acrylic paint (wood stain optional)
- White spray paint (clear coat optional)
- Feather and brush
- brad nailer
- wood glue
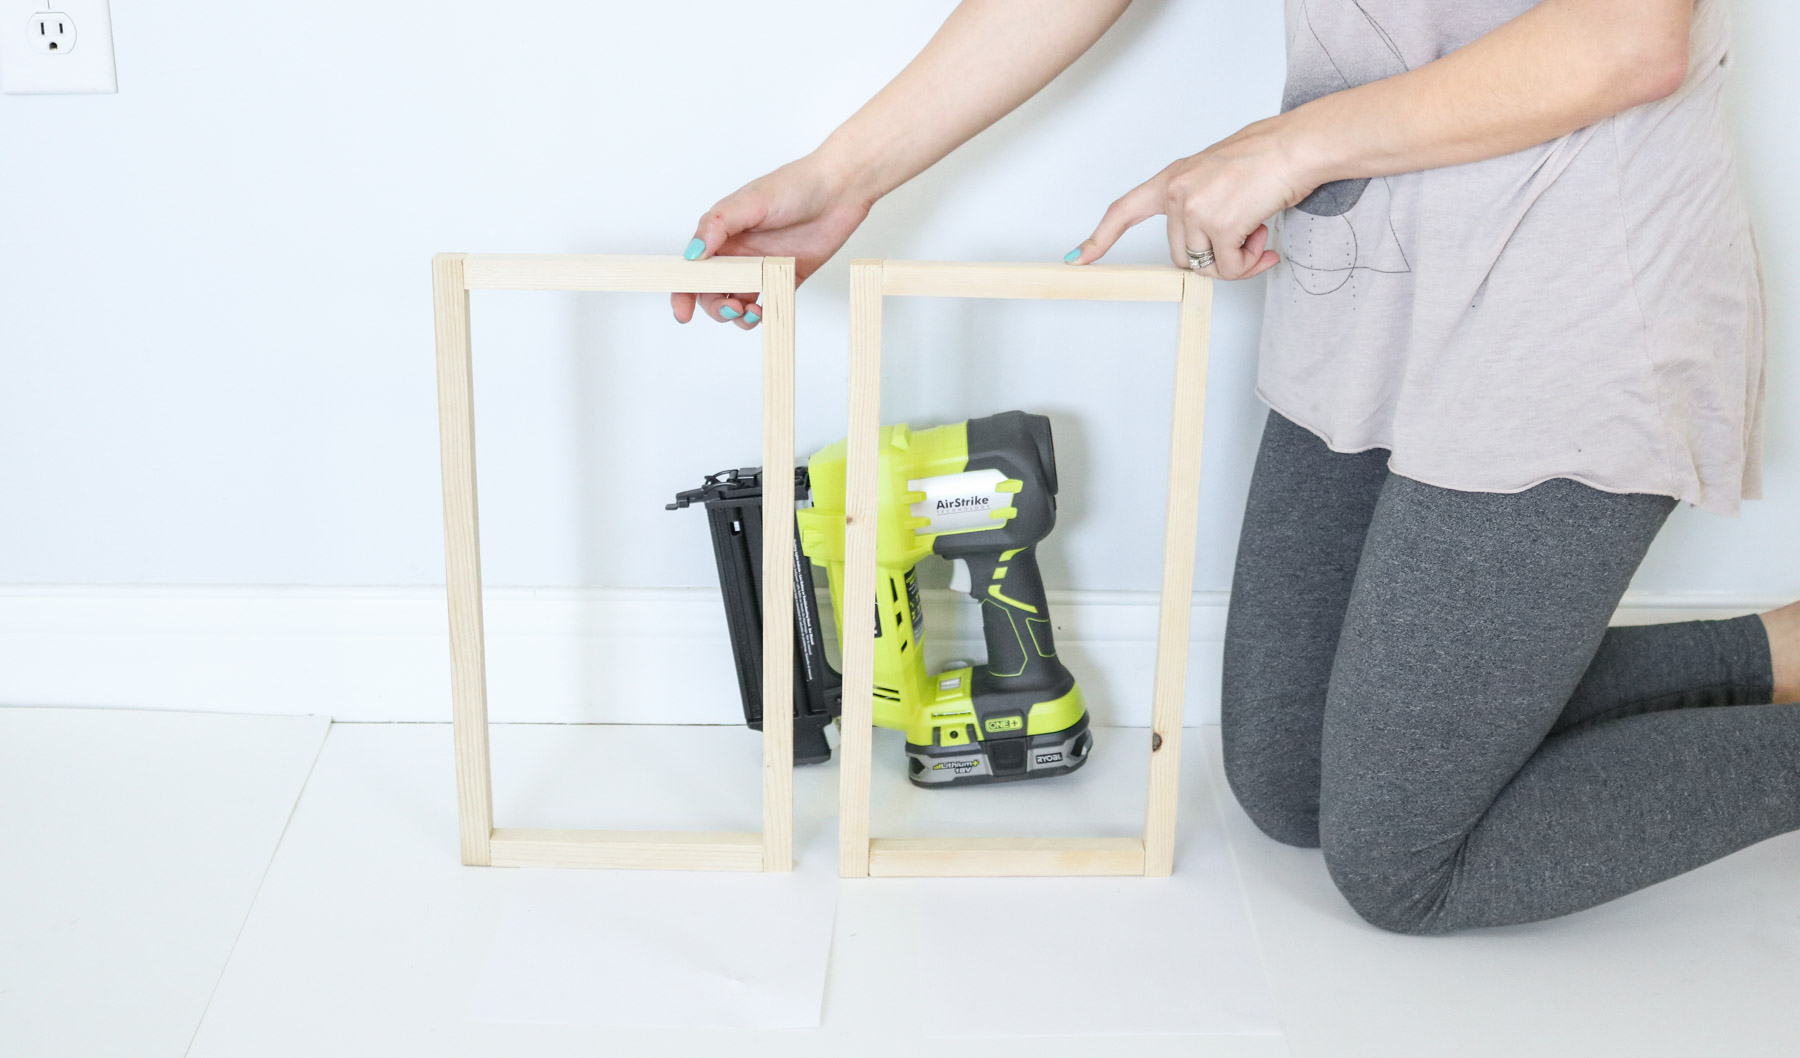
To begin start by connecting your dowels with glue to make two rectangle shapes.
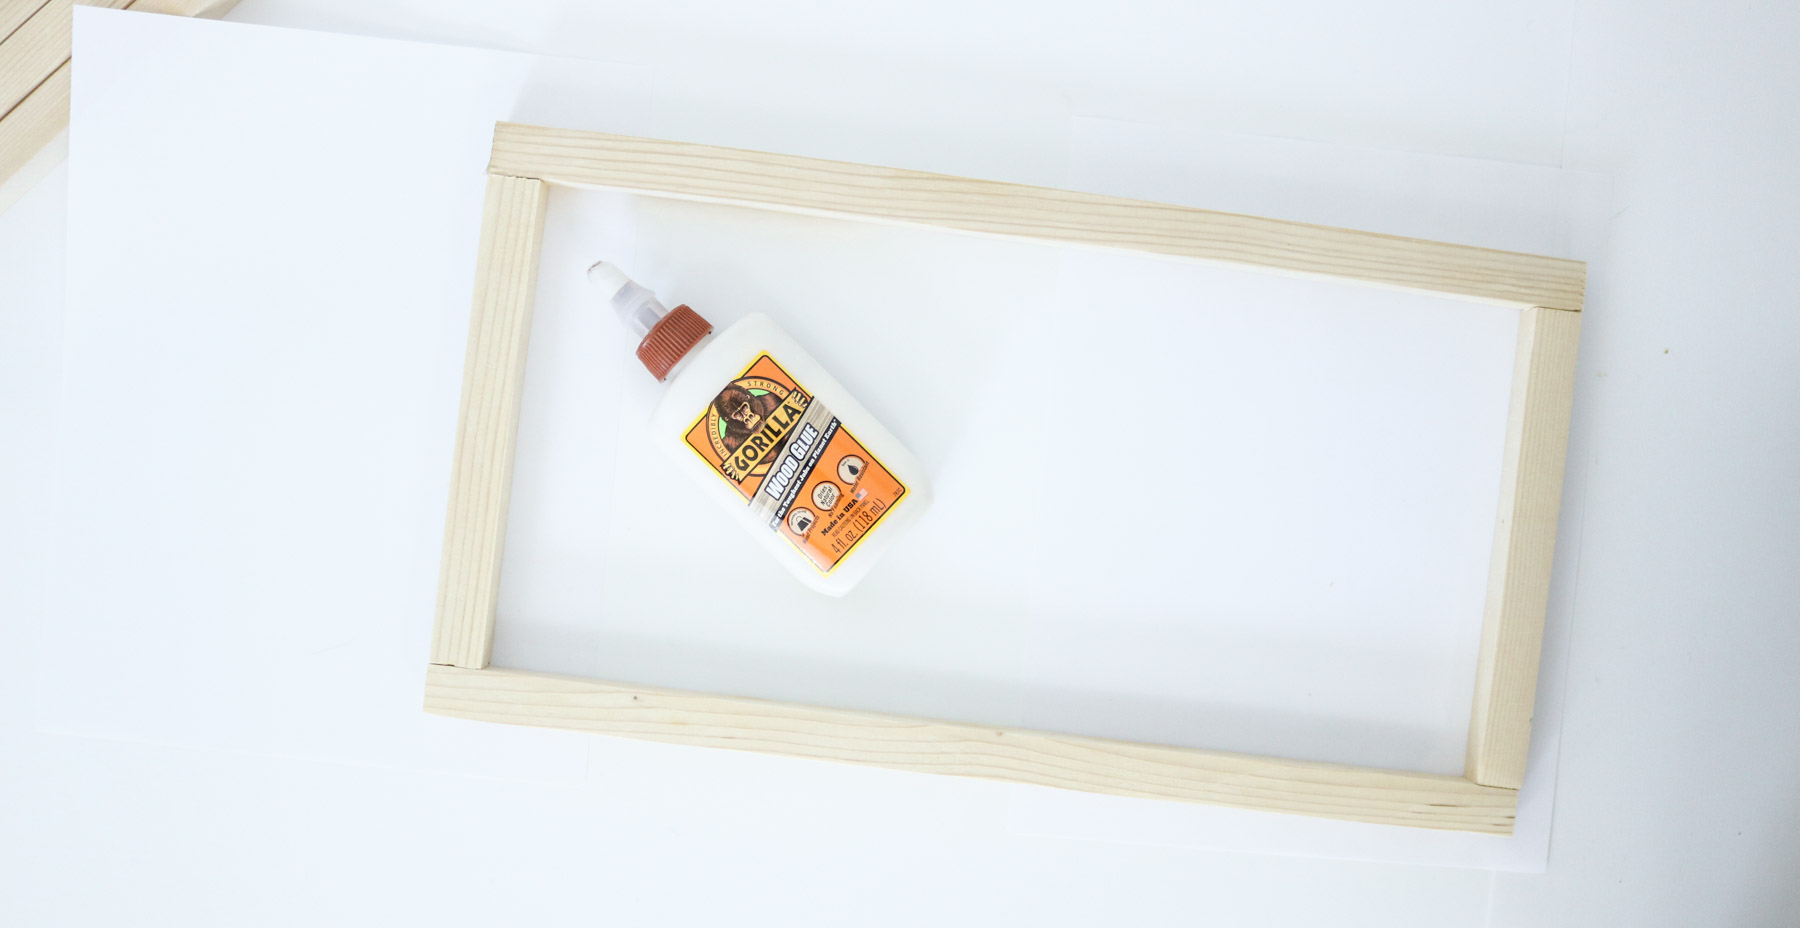
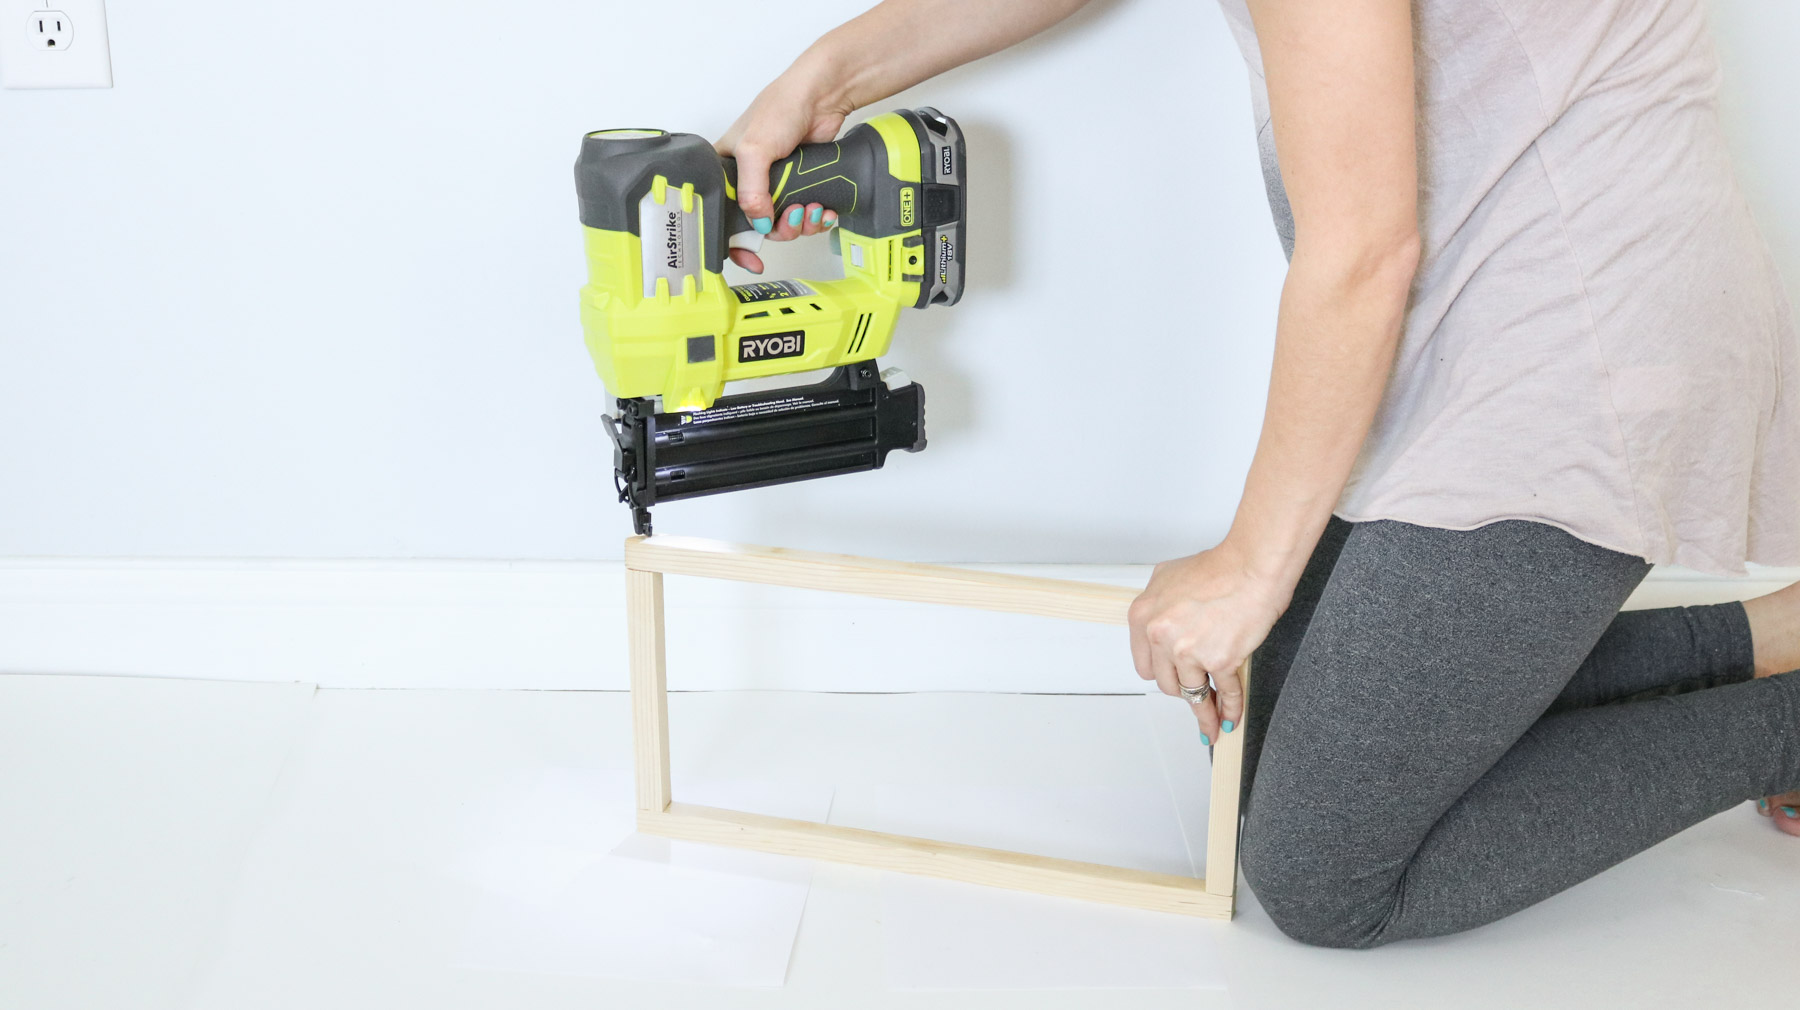
Than secure them with your brad nailer. ( I let my glue set a little)
Here’s what they both should look like.
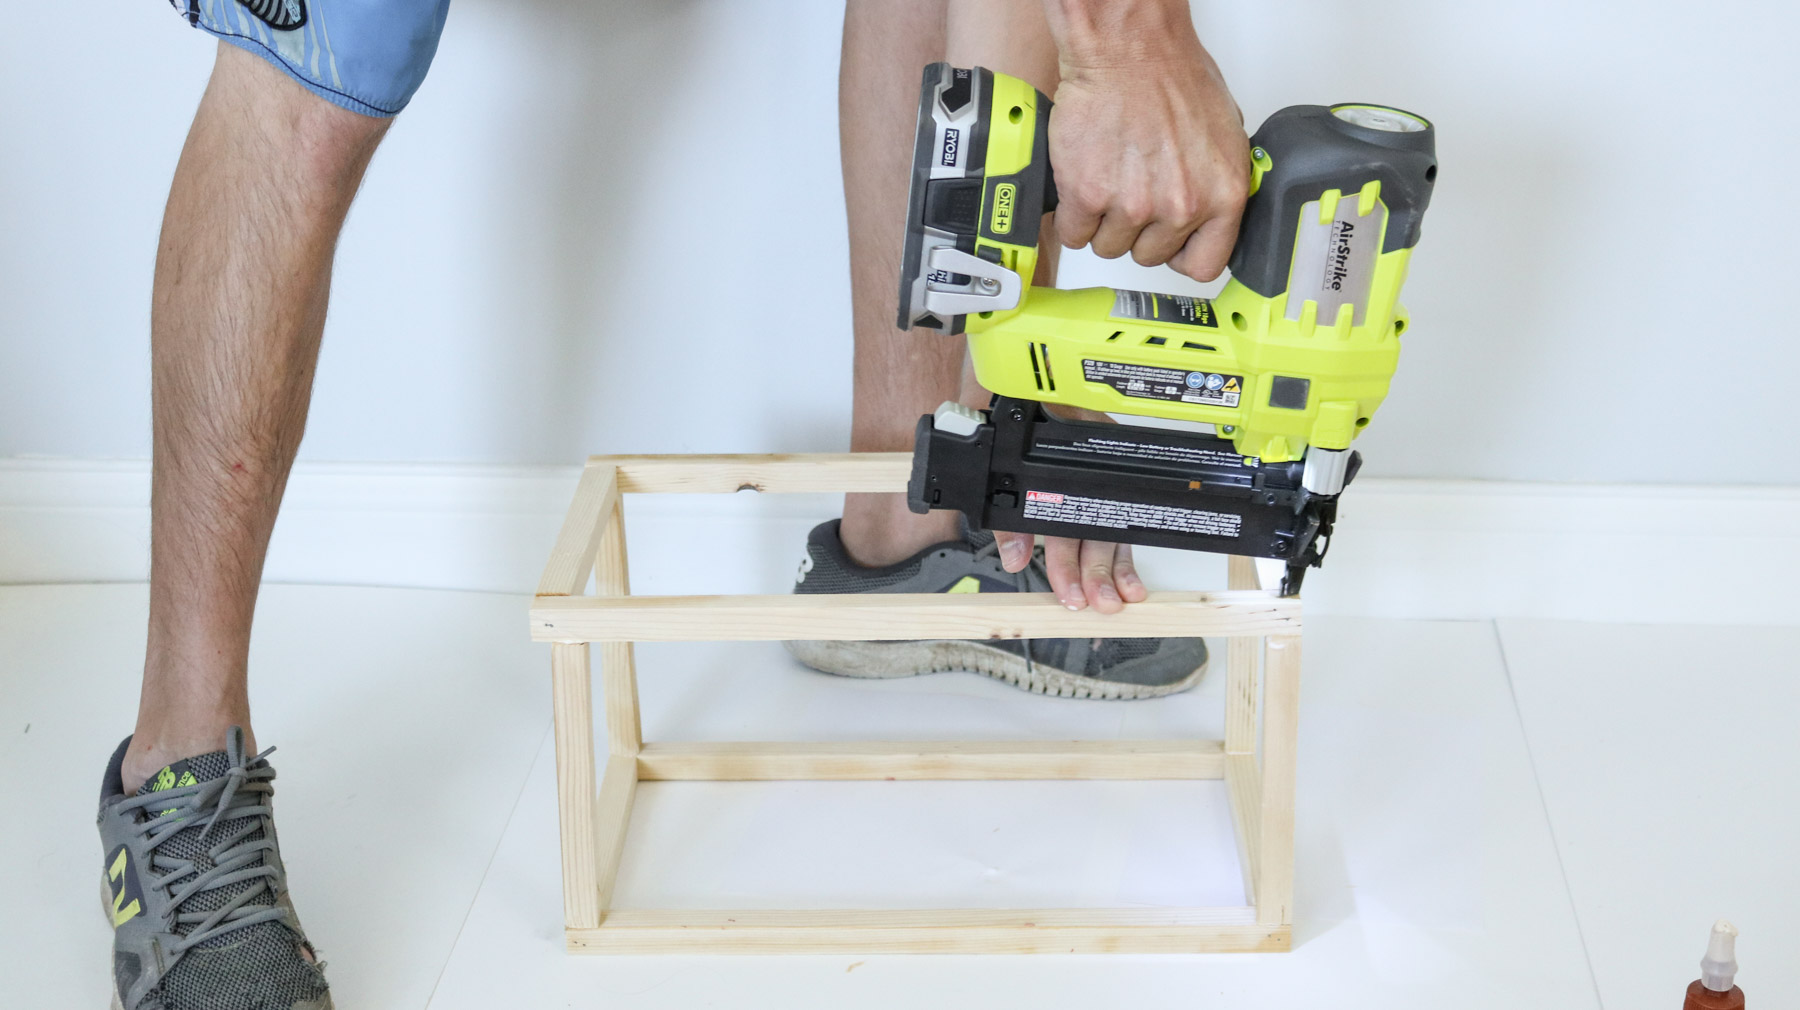
If you have an extra set of hands it would help if someone held while you nailed the rest together. I had to use random props to do this.
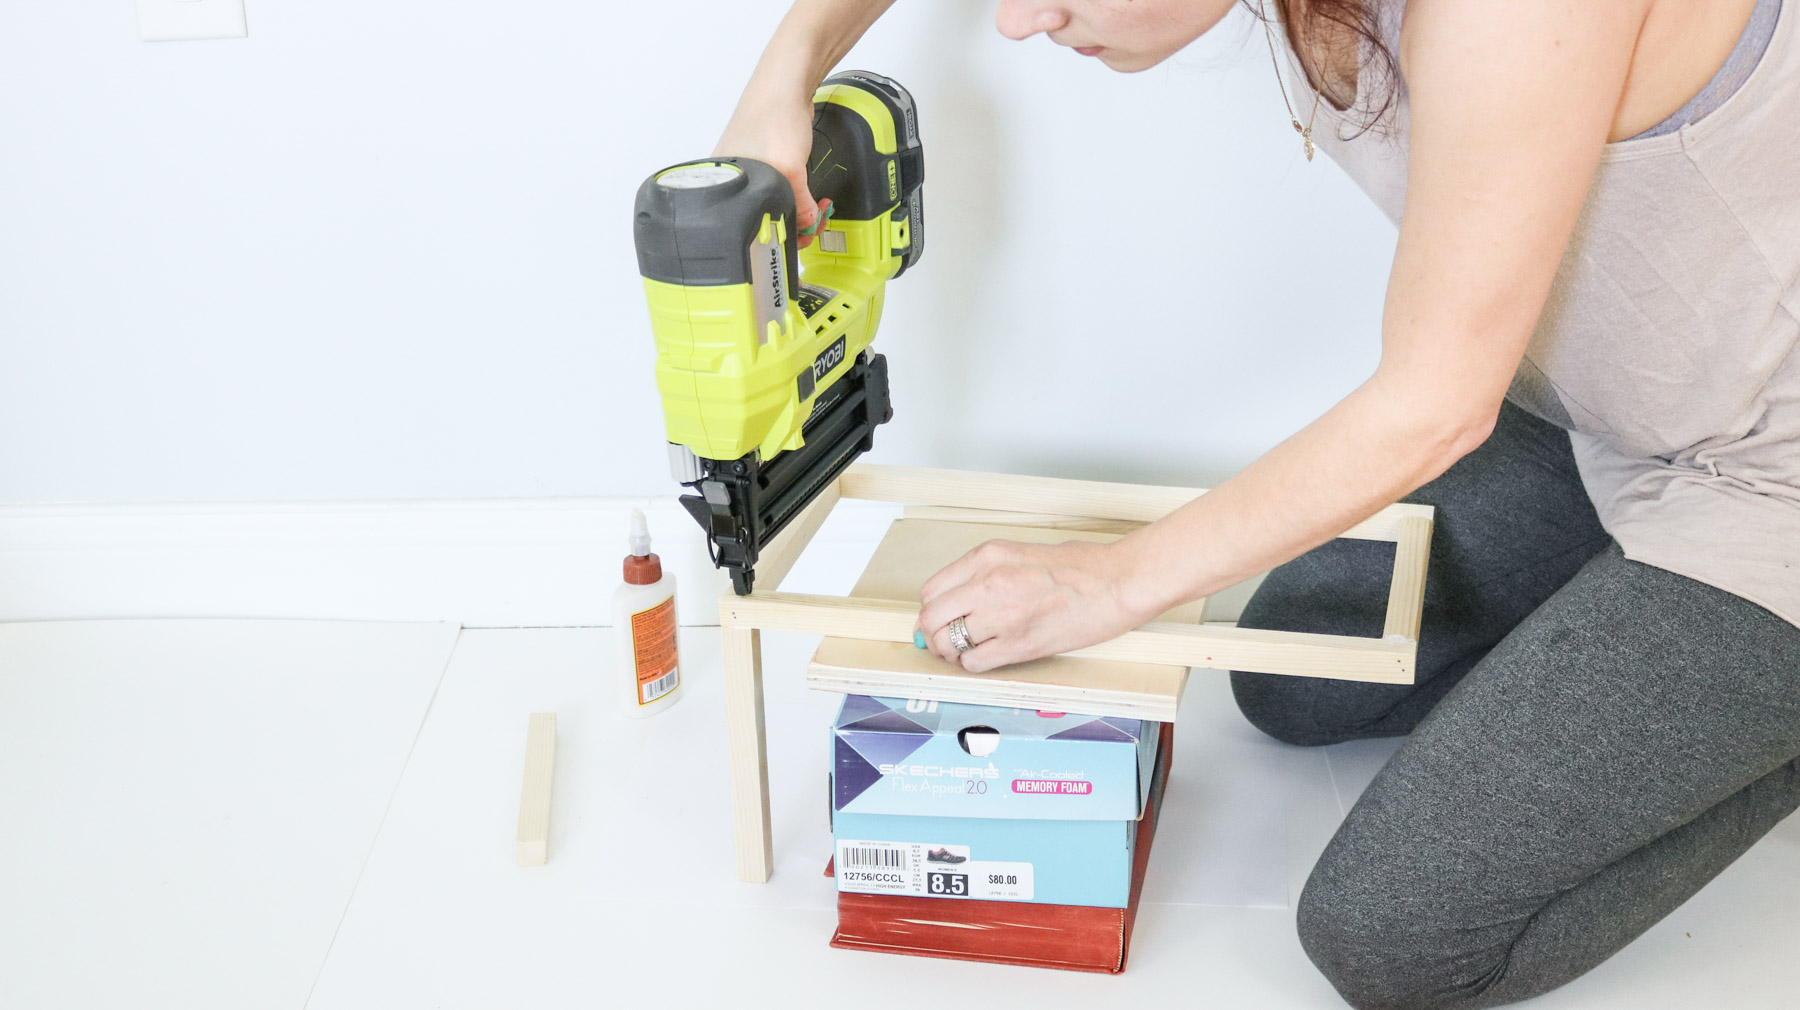
Hubby jumped in at the end and helped which sped up the process a bunch.
Following that instead of staining my wood I decided to paint it black. 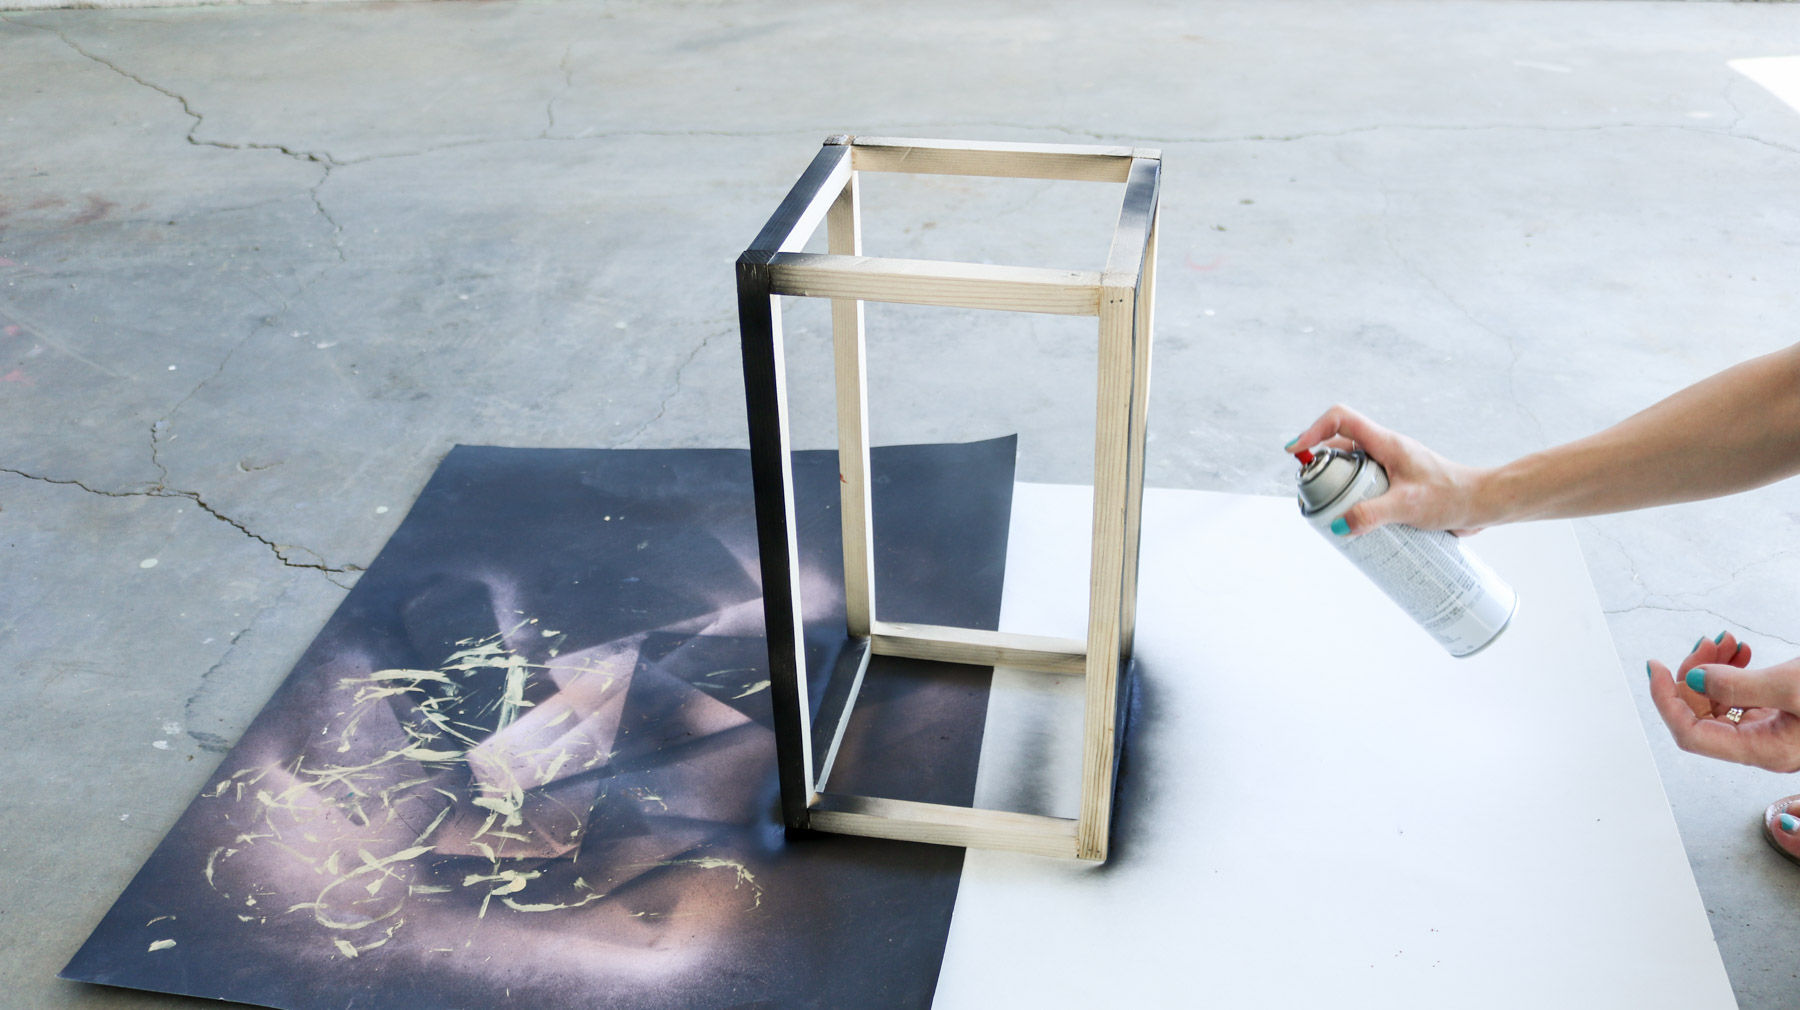
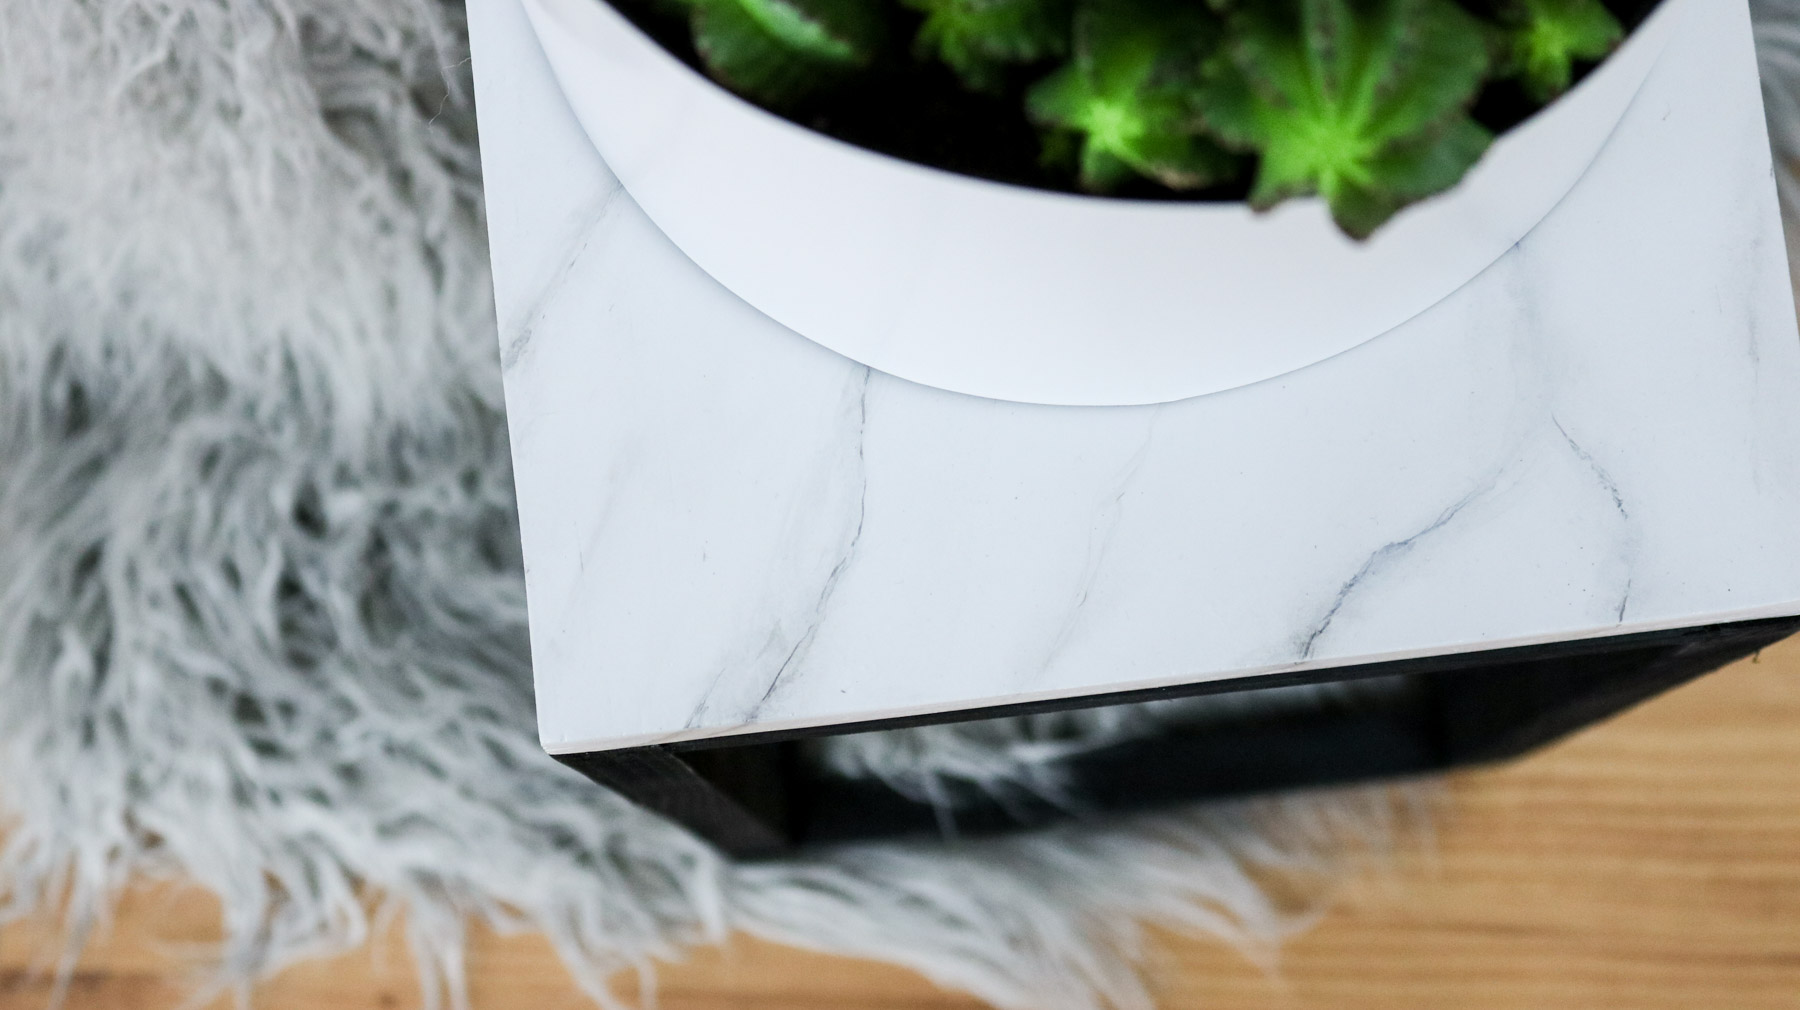
Than I spray painted my top white. You can paint it with acrylic paint if you’d like. I used spray paint since it gives it a smoother finish. Also keep in mind if you choose to go with a solid piece of wood it would look more like marble. I regret using a piece of plywood since the edges were rough and it kind of throws off the whole look.

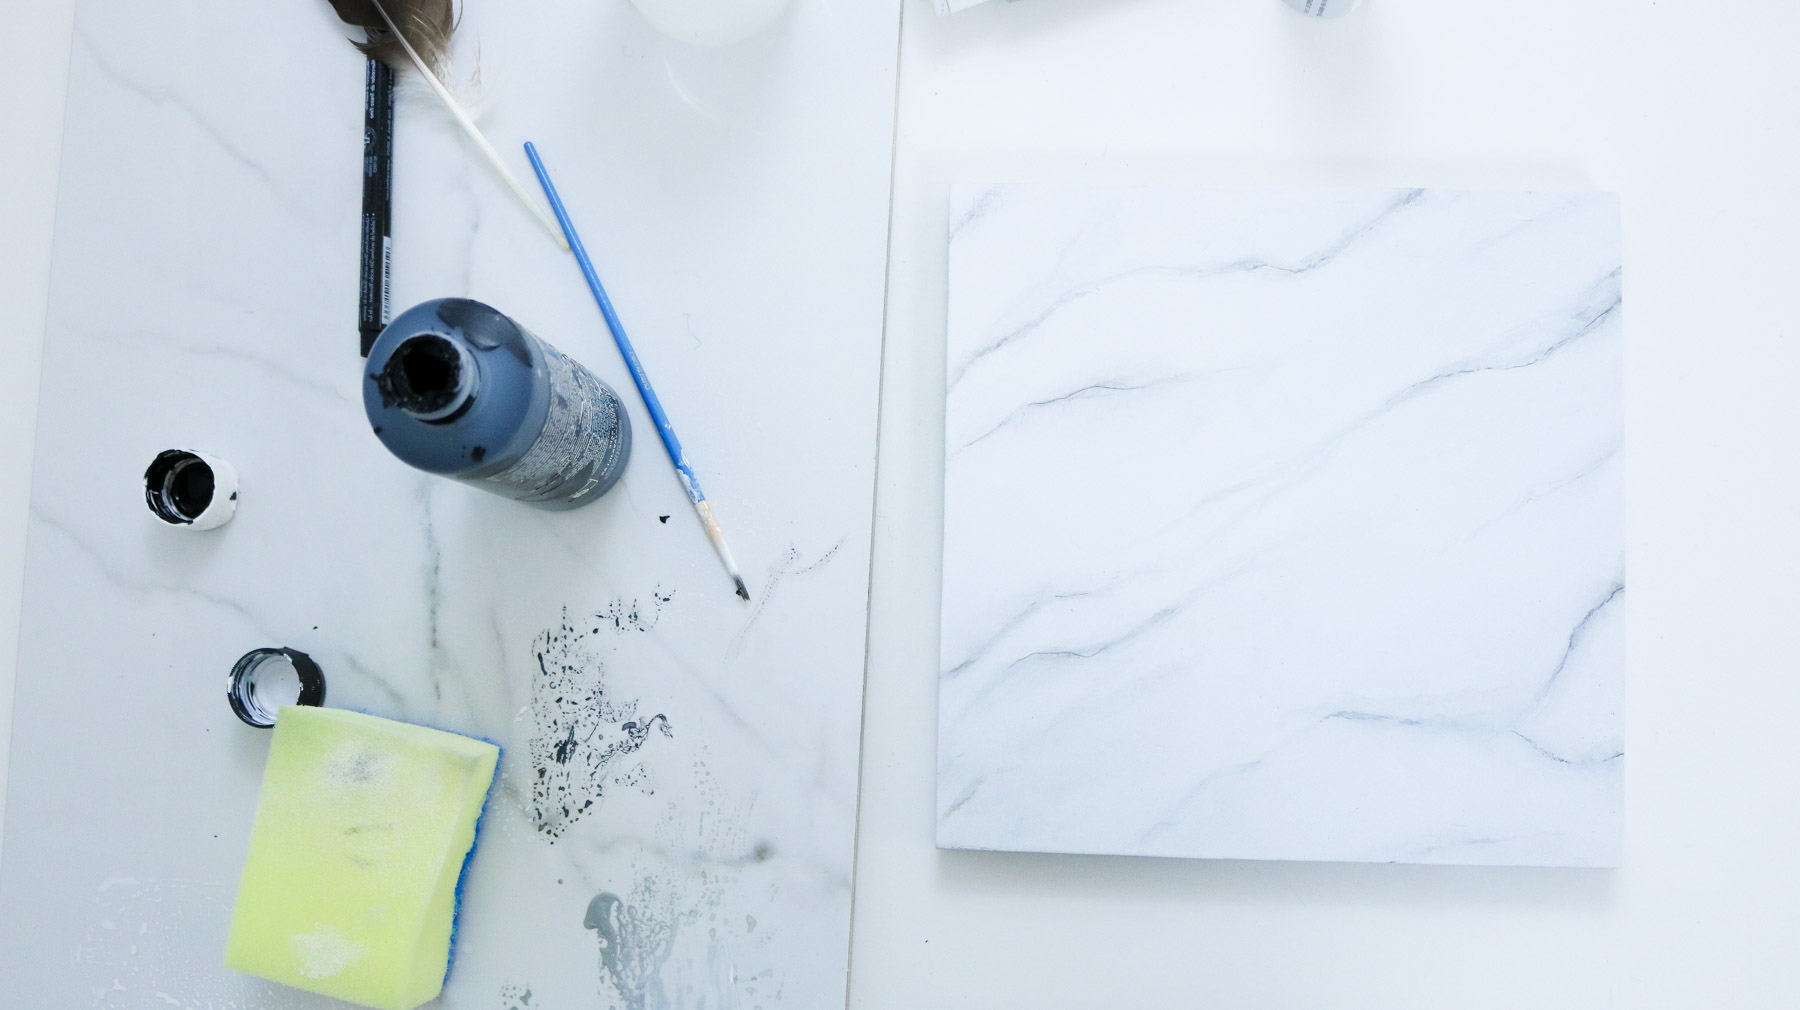
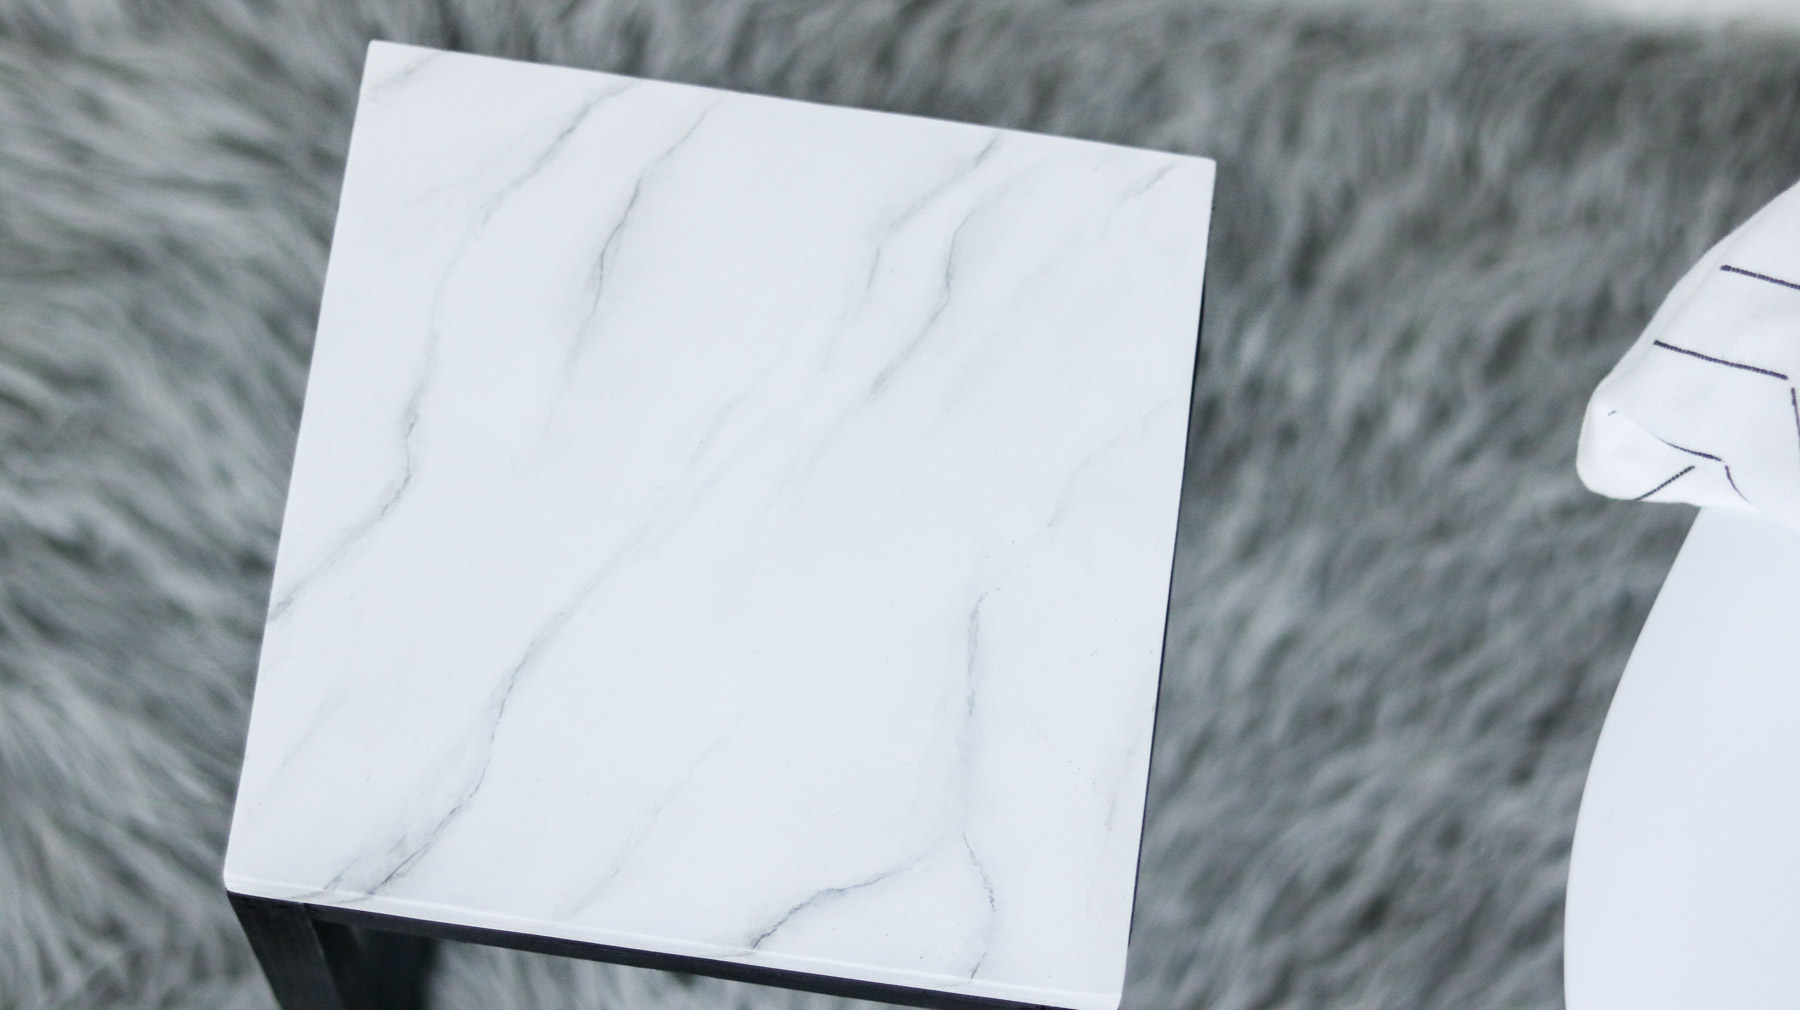
Creating your faux marble look!
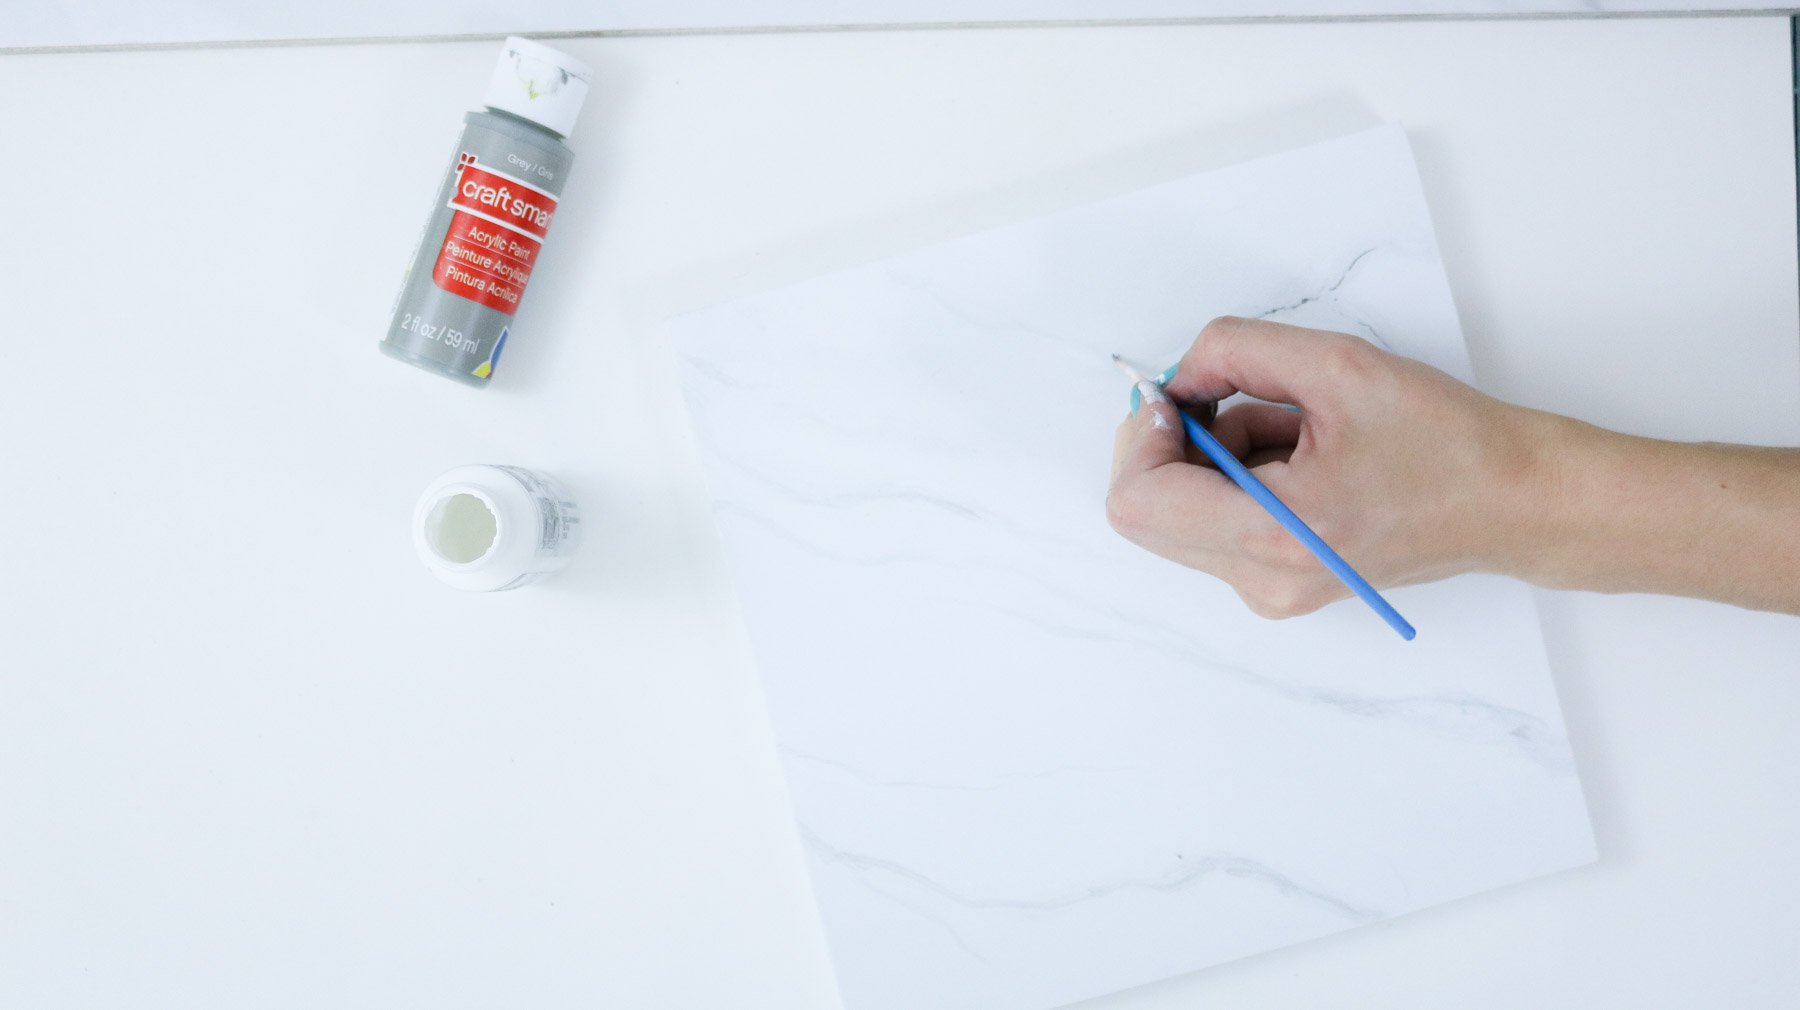
Make sure and let your paint dry all the way before creating you marble look. You’ll need a feather and some diluted gray paint. I diluted my paint with water. Simply dip your feather into the paint and drag messy line across the surface making sure the lines all kind of go in one direction.

Following that take a clean sponge apply a dab of white acrylic paint and a bit of water.
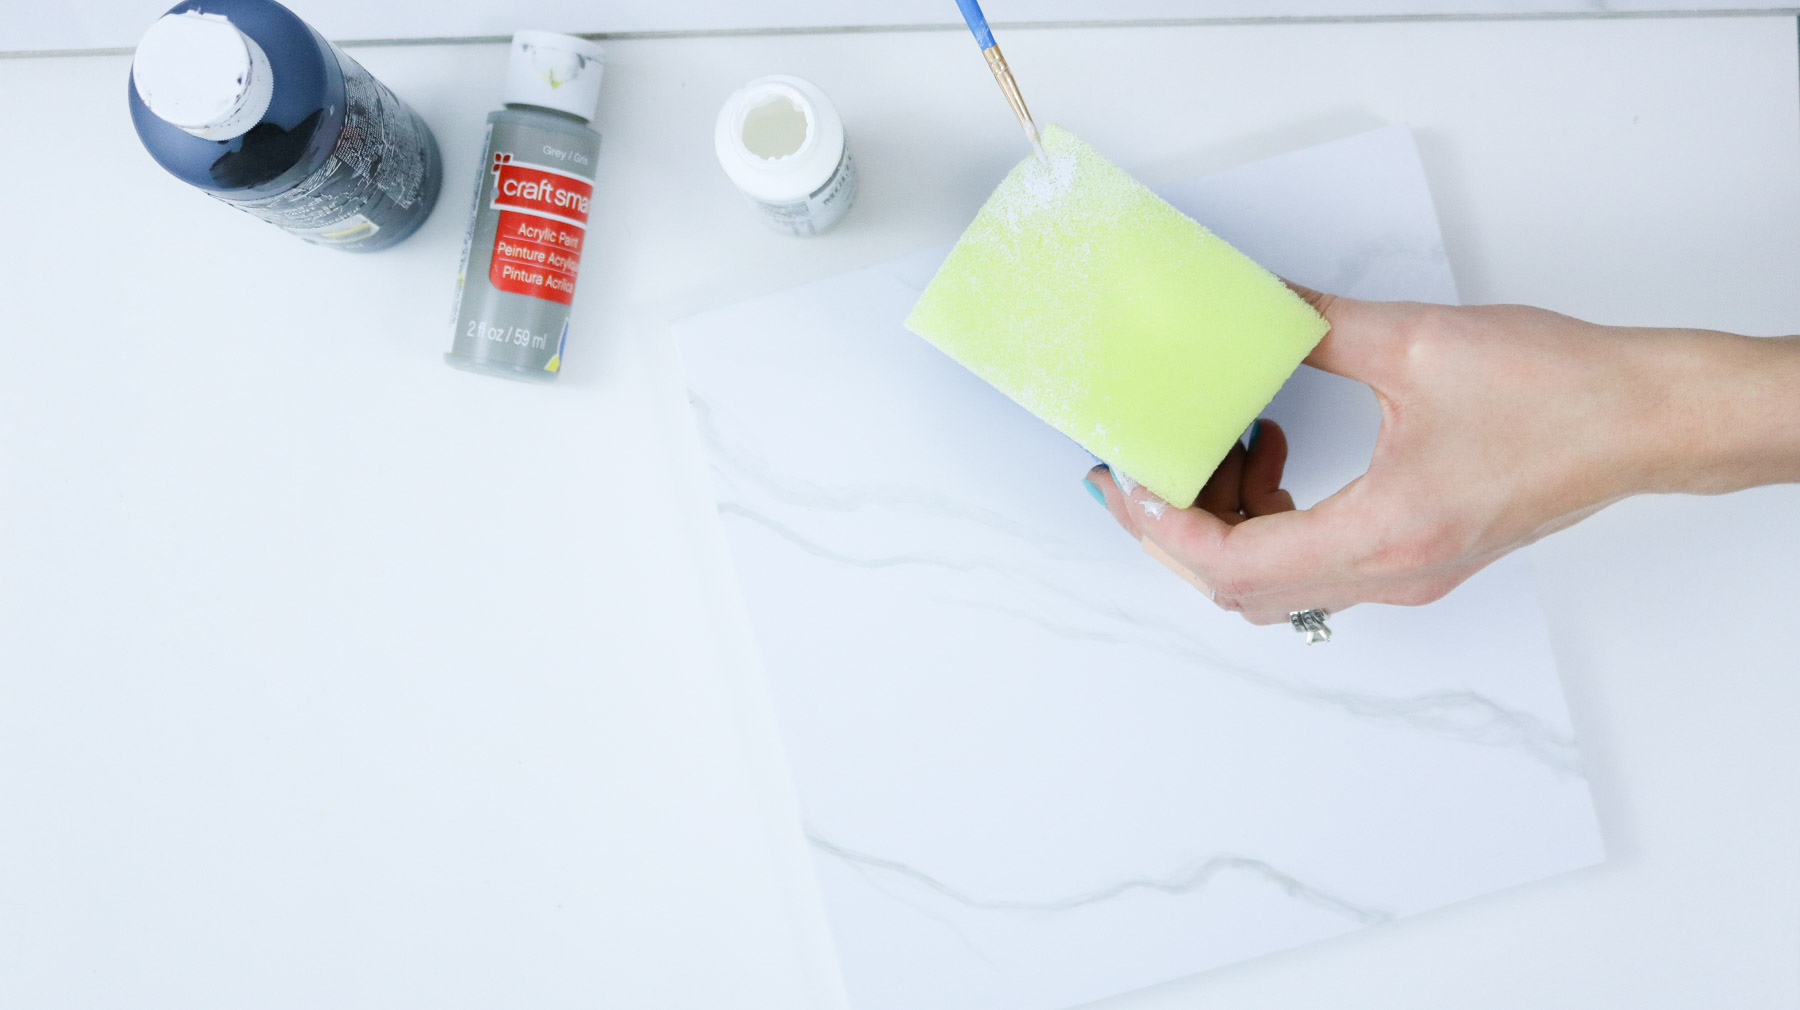
Dab into the lines to blur them out. Make sure to keep it well blended.
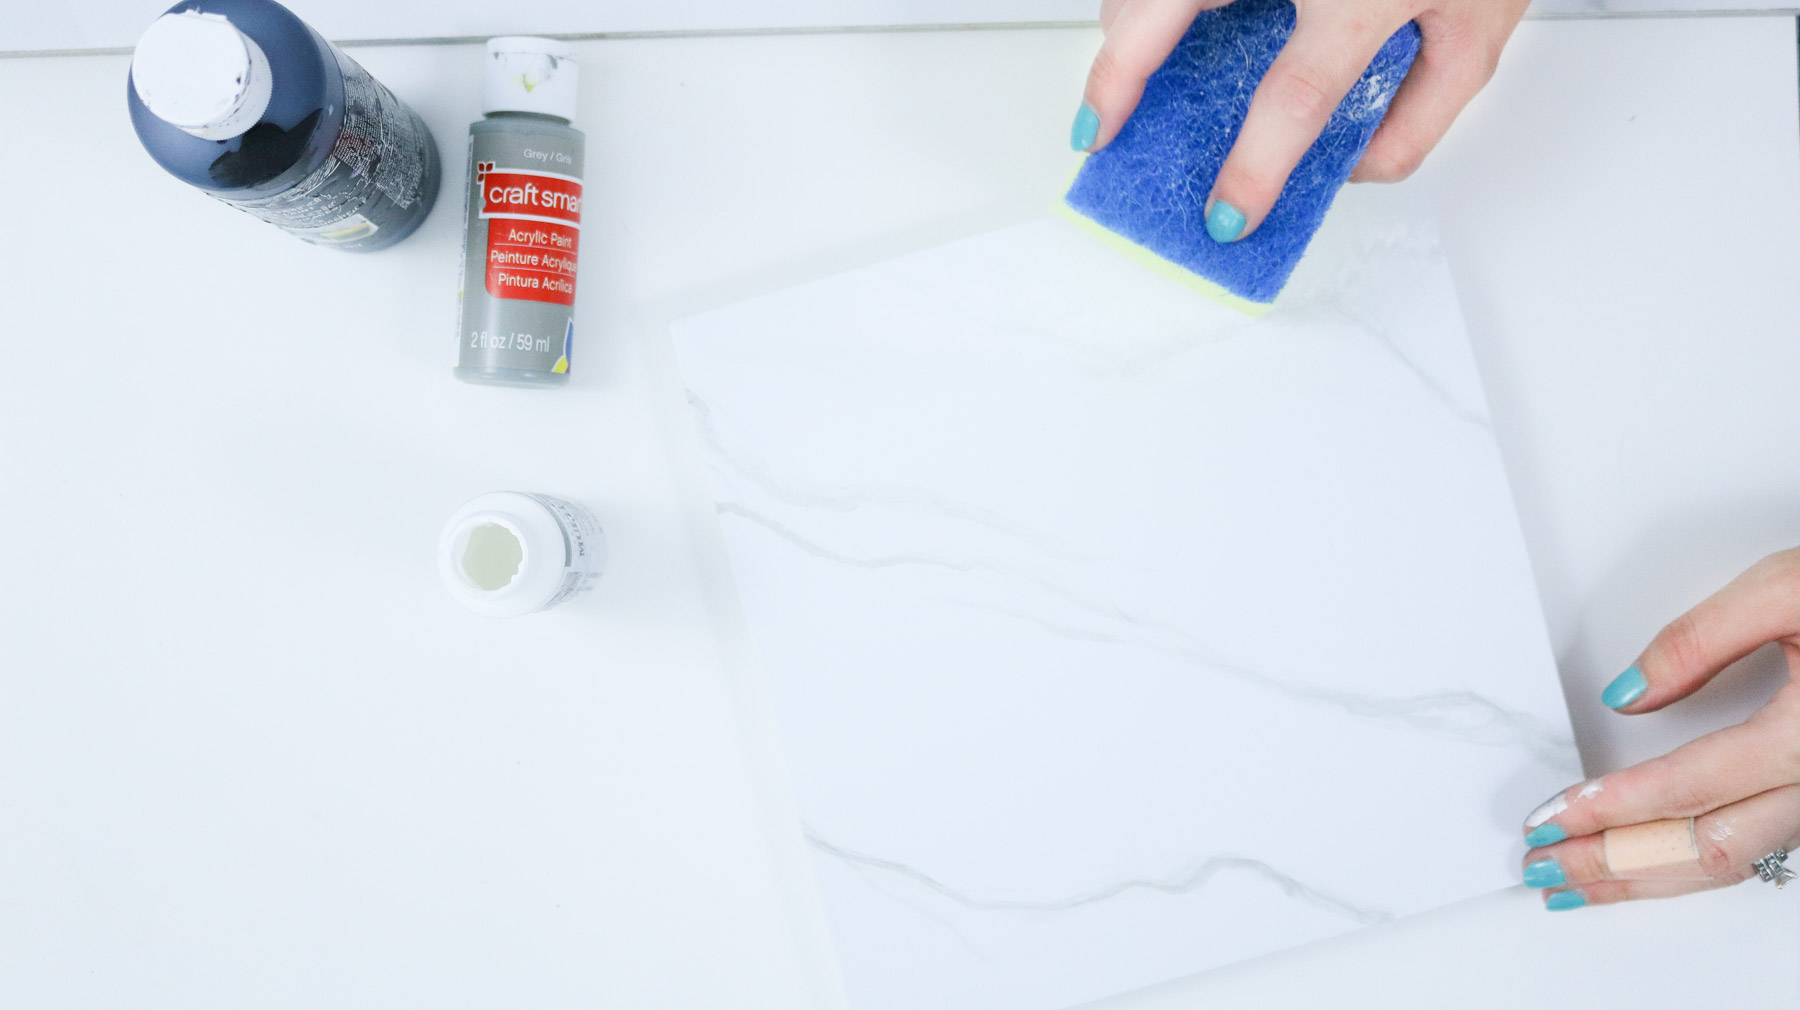
And last but not least take some very diluted black paint and use a fine brush to bring out the darkest parts of your lines. Use a damp sponge to blur it out a bit as well. Work in little sections since the black will dry pretty quickly and you still want to be able to slightly blur it out.
Here’s a quick DIY video
And that’s It!! I love the clean look! What do you think?
MAN I wish I used solid wood. The edges throw me off so bad! 😫 😑SQUINT! 😊aghh much better 😂😉
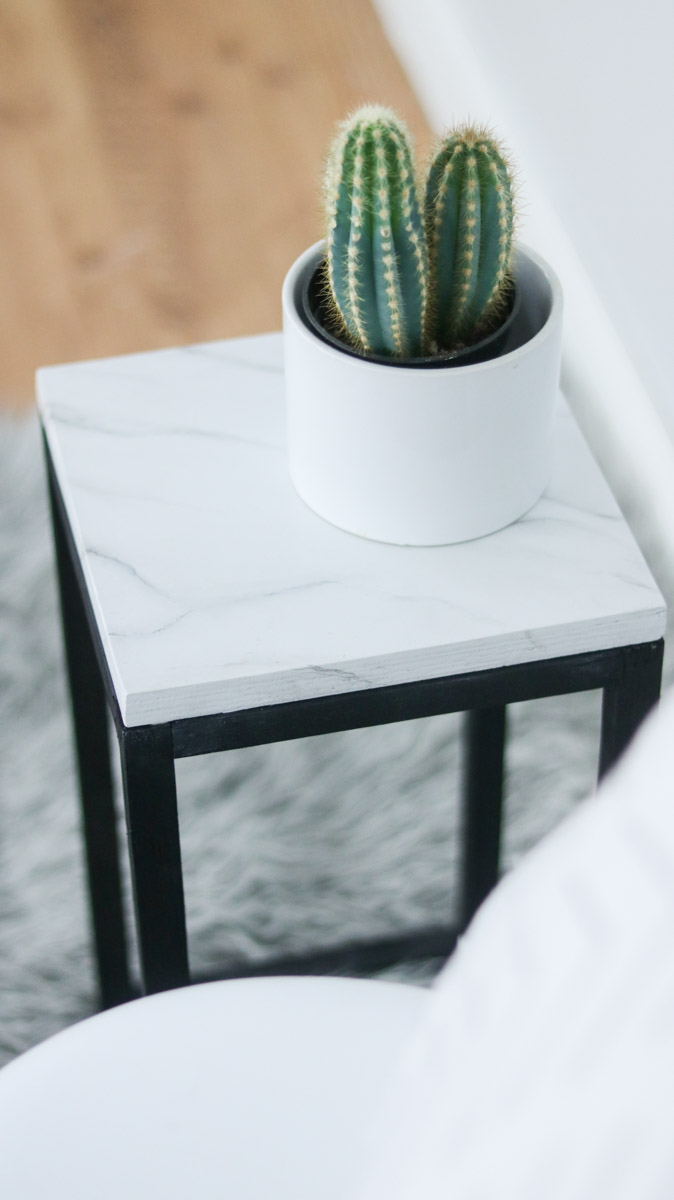
I love how the marble turned out! Not at all what I was expecting. For some reason I was thinking it would be ssso hard!
I hope you enjoyed this DIY. That’s it. Have a great weekend everyone! Happy crafting! Special thanks to my awesome hubby and Toni for helping behind the scenes. Your the best Toni🤗🤗
👍 love all your dyi’s
You’re awesome 😊
😀 😀 So happy to hear you love them! THANK YOU Tina! You’re too sweet!
lily what a great piece! i absolutely love it. i adore the modern feel to it. and its so versatile, you could make it work with any style just by changing the paint. but i love the moderness of it. it looks so chic. good job girl.
AWE Thank you Angela. So happy to hear from you. I hope your summer is going well. OH YAY I was really aiming for a modern clean look! Glad it looks modern. 😀 😀 😀 THANK YOU 🙂
That feather trick is total genius! Amazing idea! 🙂 Lisa
I’m so glad you liked it Lisa Thank you 😀
Wow, looks so beautiful! I love this marble effect that’s actually so easy to create!
Awe Thank you Sean. So glad you liked it. YES it’s super easy! I thought it’d be a lot harder.
I love the look of these! Where did you get the wood? (the dowels and the square) I would love to make these, but having trouble finding these sizes! Thank you!
Thank you Denise 🙂 I got the wood dowels from hobby lobby as far as I remember and the square was from a previous project I had left over plywood that we cut down to size. 🙂
What type of spray paint did you use for the top and legs?
Rustoleum white flat 😀
You did such a beautiful job. I have to try to make this asap! What are the measurements of the square piece of wood? (I may need to buy it pre cut) Do you remember? Also, Where can I buy a feather? Thanks in advance
Thant you so much 😀 I think it was about 11 by 11 inches. Any craft store should sell a feather or try amazon.
Hello There
I love this! Is it possible to make it taller and the base bigger for large plant pots. Thanks
YES of course. I think it would work great if it were bigger too. Happy to hear you loved it! 😀