
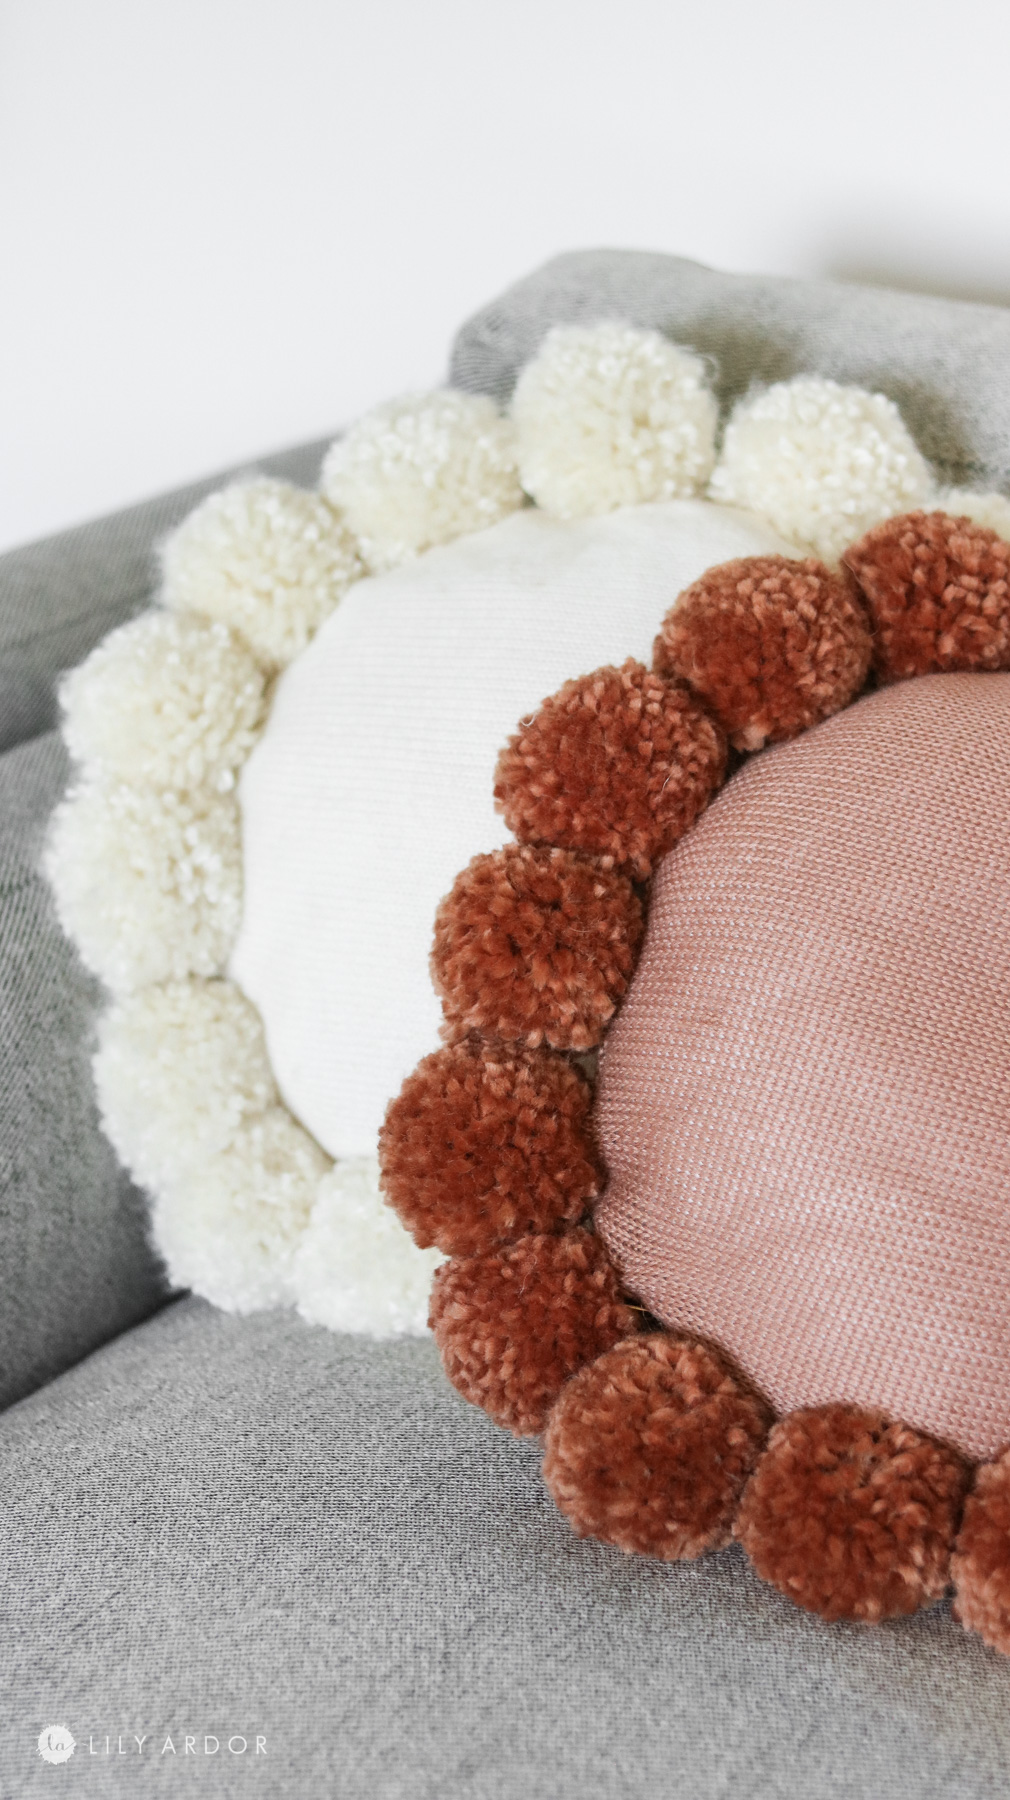
Hi Everyone! Jumping on here to share my latest DIY round throw pillows.
Lately I’ve been taking things real slow. This means less DIYs but, I promise I’ll be catching up soon.
I feel like everytime we do a huge renovation project I find myself wanting a long break. OH MY GOSH that’s right I haven’t shared that we did our DIY wall yet. I know I send out a newsletter catching ya’ll up to speed but, I didn’t get a chance to share it with you on here yet.
-

- before the wall
-

- after (ps: yes our ceiling slants up. )
Last month we ended up making a wall in our living to divide the living room and the office. This project seemed like it took forever. We left the opening in the middle for some barn doors that we plan to make. In fact that’s one of the reasons I haven’t been as crafty lately because, we were planning on making the barn doors and realized our hardware wasn’t going to work. While waiting on the correct hardware to get shipped in I decided to quickly whip out these super cute throw pillows. So here we are 🙂 !
Total Cost:
Let’s talk about these pillows. I’ve been seeing similar ones around the web for a while now. I was actually thinking to purchase a few until I realized how expensive they are. I found some on etsy for $160 each. And I thought DANG way out of my budget. I’m not going to lie they take a little bit of effort to make but, not impossible. They won’t look exactly like the ones from etsy but it’s pretty close. This is totally doable while watching your favorite netflix show. Each pillow cost me around $24-$27 dollars. However I should mention I made the pillow insert myself which took about $10 off each pillow. I think if you purchase your own it should be around $36 a pillow which is still way better than $160 each.
This post contains affiliate links. Visit my disclosure policy for more info.
Supplies you’ll need :
- 15″ pillow insert ( made my pillow insert. If you don’t want to make one you can get the same size here- https://amzn.to/2Xw4LoQ )
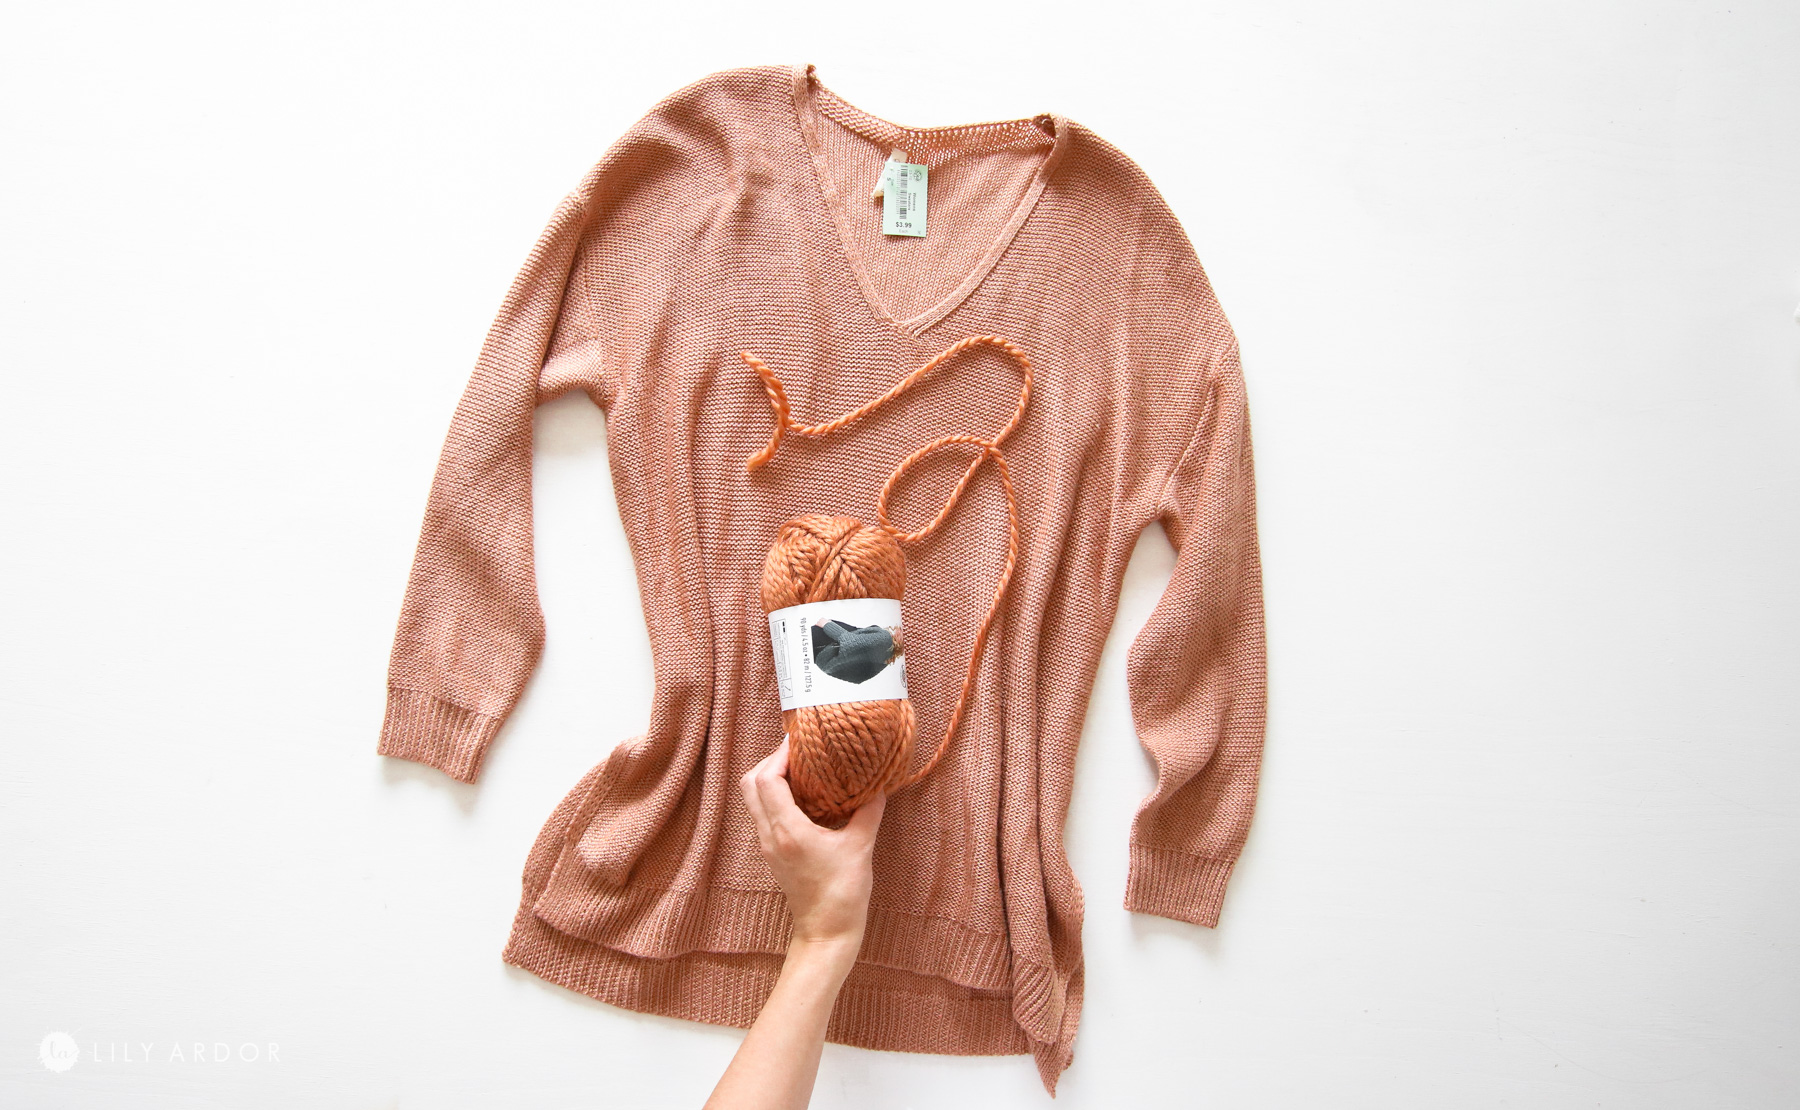
- thrifted sweater
- zipper ( about a 8″ or 10 inch should) ( Amazon sells packs if ten for a good deal if you’re making more than one pillow – https://amzn.to/2M6QfyA )
- needle and thread if making the no zipper method
What’s needed for pom poms!
- 3-4 skeins of yarn ( I got my yarn at michaels . I used the color harvest. You can also find some pretty umber colored yarn on amazon. I found a similar color here – https://amzn.to/36yLzei )
- pom pom maker kit (my poms poms were about 3 inches in diameter) I got my pom pom maker at hobby lobbyhobby lobby. You can get the same one on amazon for cheaper – https://amzn.to/2zFDEj4 )
- scissors – Here’s a link for this scissors I used – https://amzn.to/2Xxrf8W – If you do sewing/crafts these are worth every penny! Had them for so long and they’re still as sharp as the day I purchased them )
OTHER HOME DECOR DIYS YOU’LL LOVE :
- HOW TO PAINT YOUR COUCH TO LOOK AND FEEL LIKE LEATHER!
- TRANSFORM OLD DOILIES INTO WALL ART
- ENTRYWAY BENCH USING 2X4’S
- DIY AFRICAN MUDCLOTH THROW PILLOWS
Tools Needed:
- Basic Sewing machine
How to Pick the right sew machine?!
If you’re looking for a reliable sewing machine. Brother and Singer are both great brands. They can definitely get pretty pricey. It A few things to watch out for in a sewing machine is the basic straight stitch and a zig zag. If it has the ability to finished off a bottom hole that’s a plus.
My first sewing machine ever was just a basic $80 sewing machine I purchased from walmart. I was able to make complete clothing pieces just using a straight stitch and the zigzag option. Granted this sewing machine couldn’t sew through thick fabrics like denim I didn’t find I really needed that option when I just started sewing. In fact if you really need to you can sew denim. It just might need a push by hand on the thicker areas. Here’s a link for the singer version of the sewing machine I used – https://amzn.to/3gqETTY )
Intermediate Sewing Machine!
If you’re looking for something more heavy duty you can go with a singer heavy duty sewing machine. I own this exact sewing machine at the moment – https://amzn.to/2TJsyRd and LOVE IT! It’s more pricey and definitely sews smoother on fabrics then my previous cheaper one. I notice when sewing really thick fabrics like carhart denim it needs a little help by hand here and there but, other than that it’s a really great and smooth sewing machine!
Time needed:
Because I ended up making my own pillow inserts this took me a bit longer. If I counted the time it took me to make just the pillow with pom poms I would say it took 1-2 hours to make. It also depends on whether you decided to add a zipper. I do think it takes a little longer to make with the zipper.
Okay lets do this!
DIY Round Throw Pillow From a Thrifted Sweater
I’m going to try and go into as much detail as possible. I’ll be showing both methods. With a zipper and without a zipper.
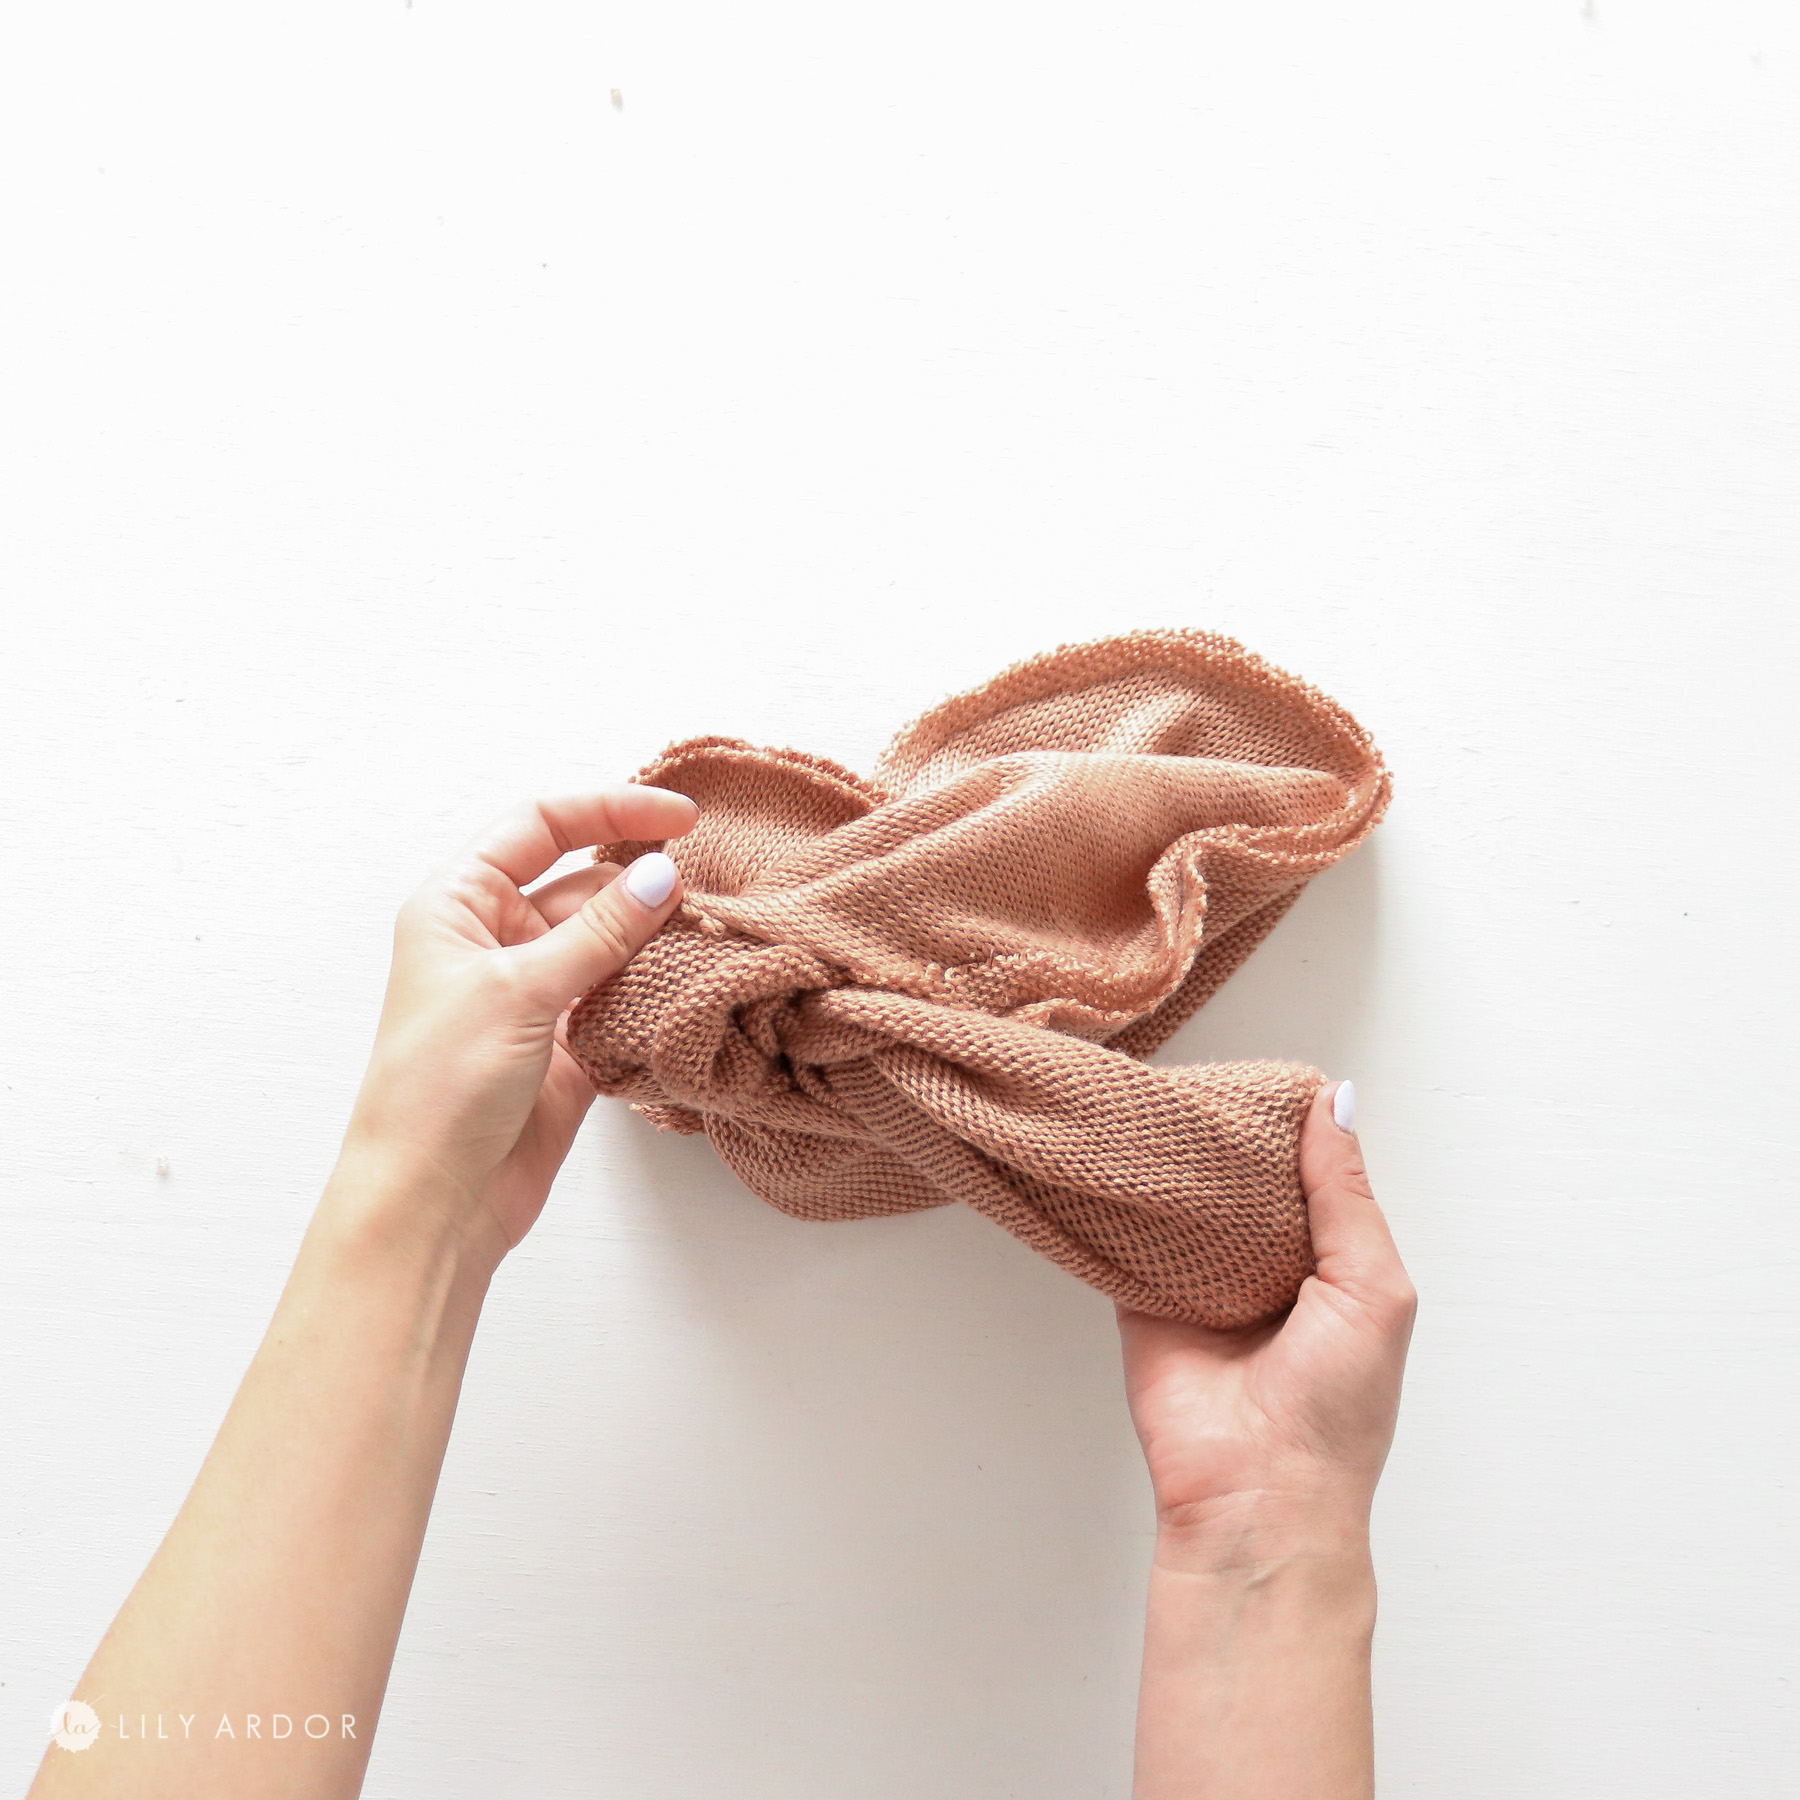
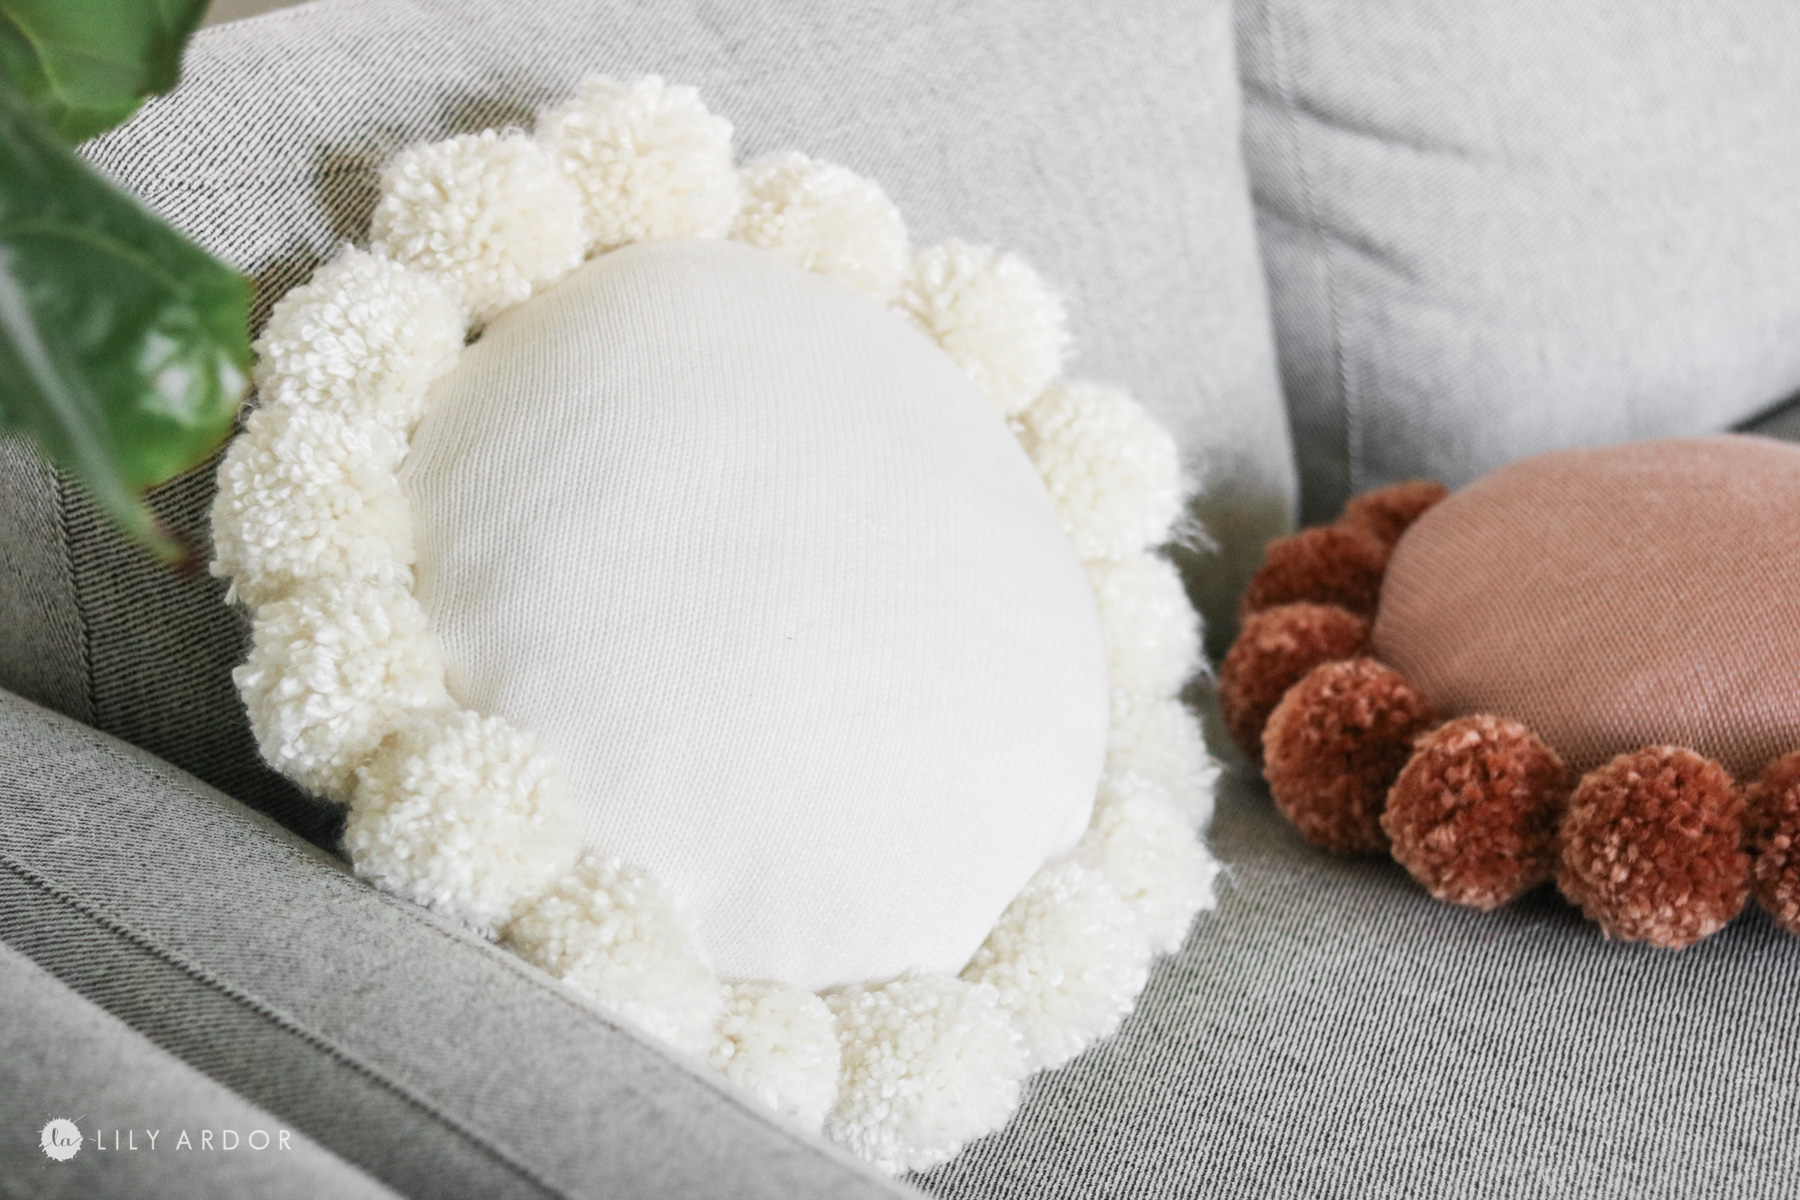
I picked up this sweater at my local thrift store for around $4 and was lucky enough to find somewhat matching yarn. I feel like this colored yarn is very seasonal and is probably sold more in stores during autumn.
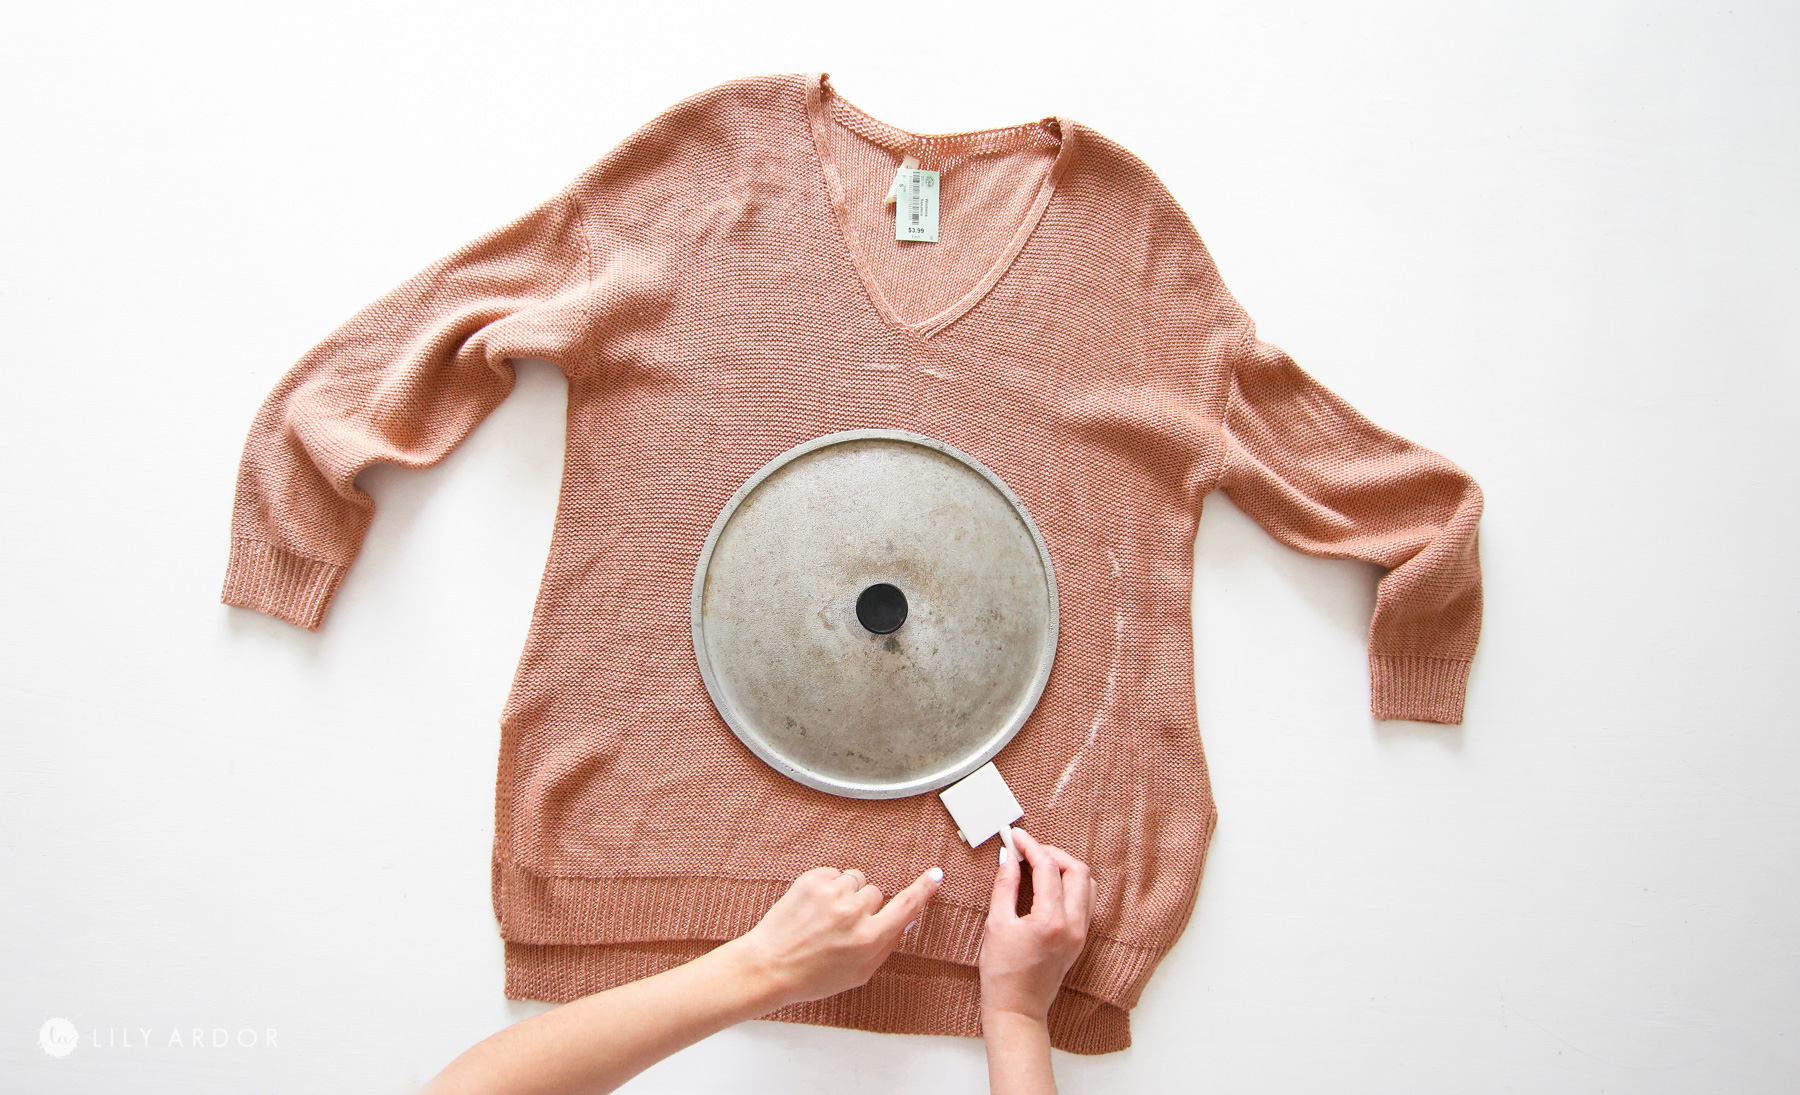
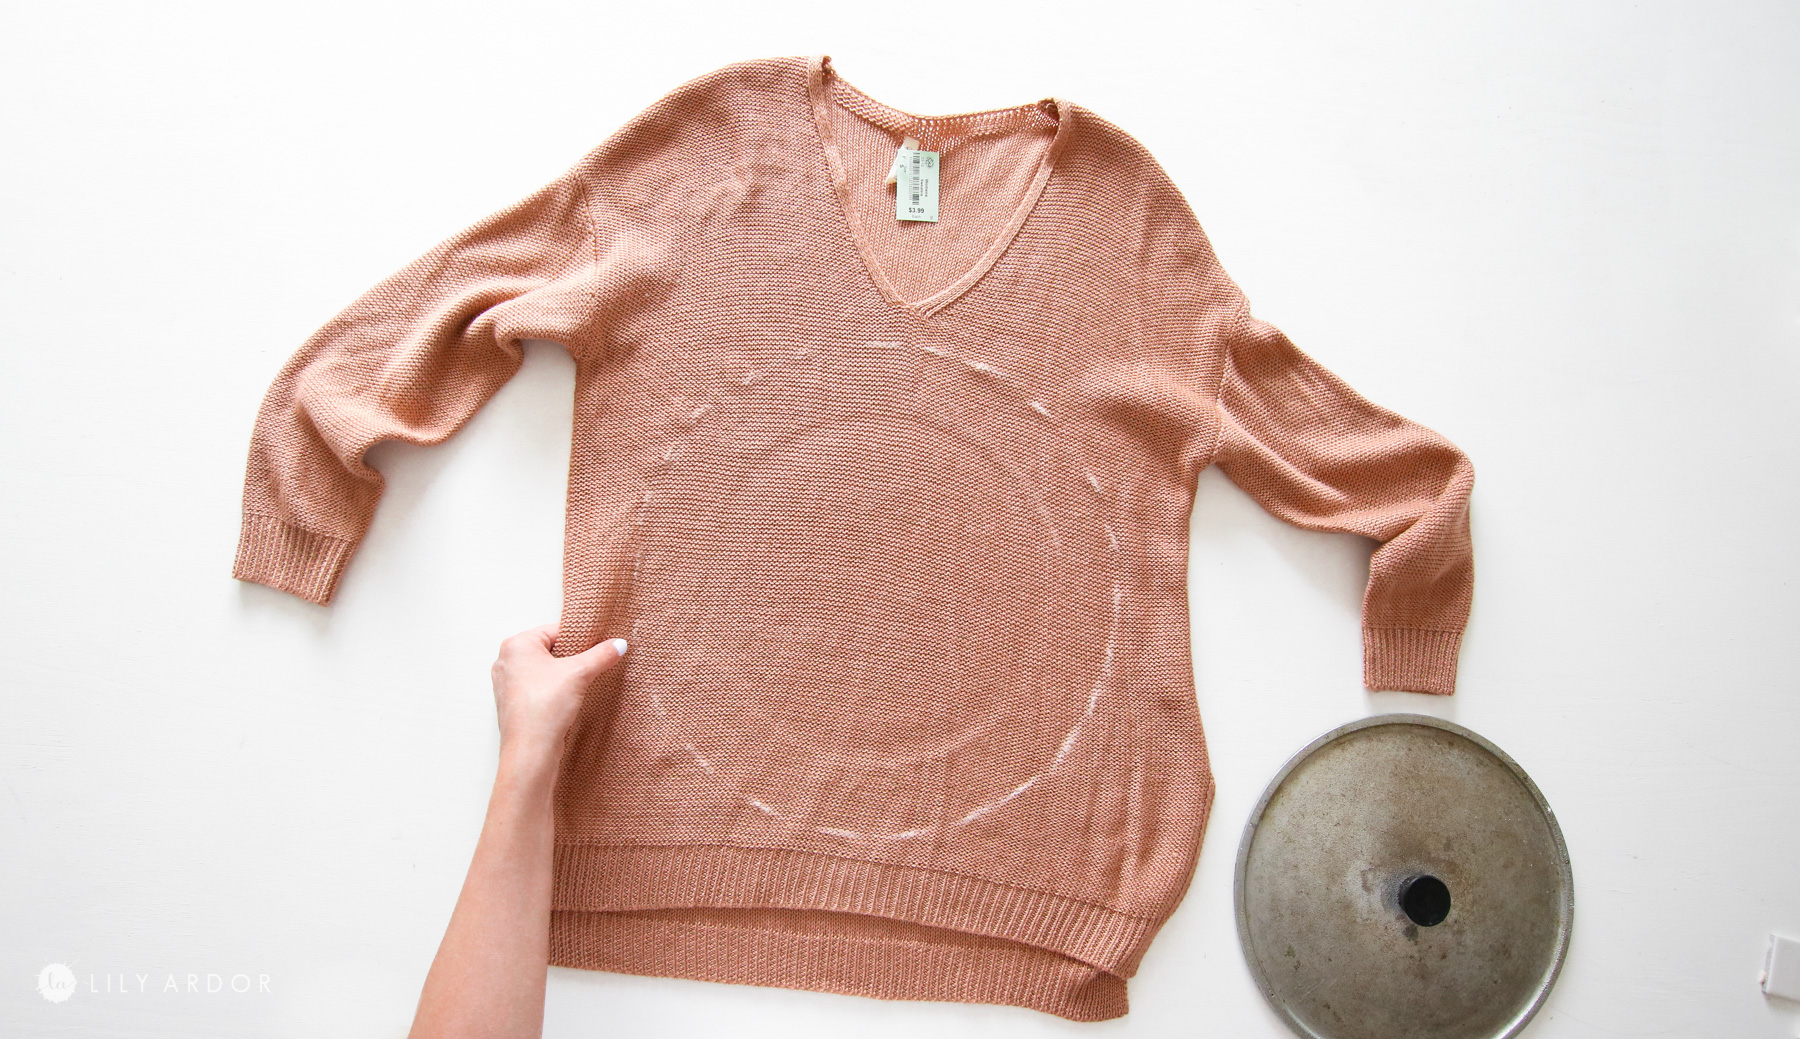
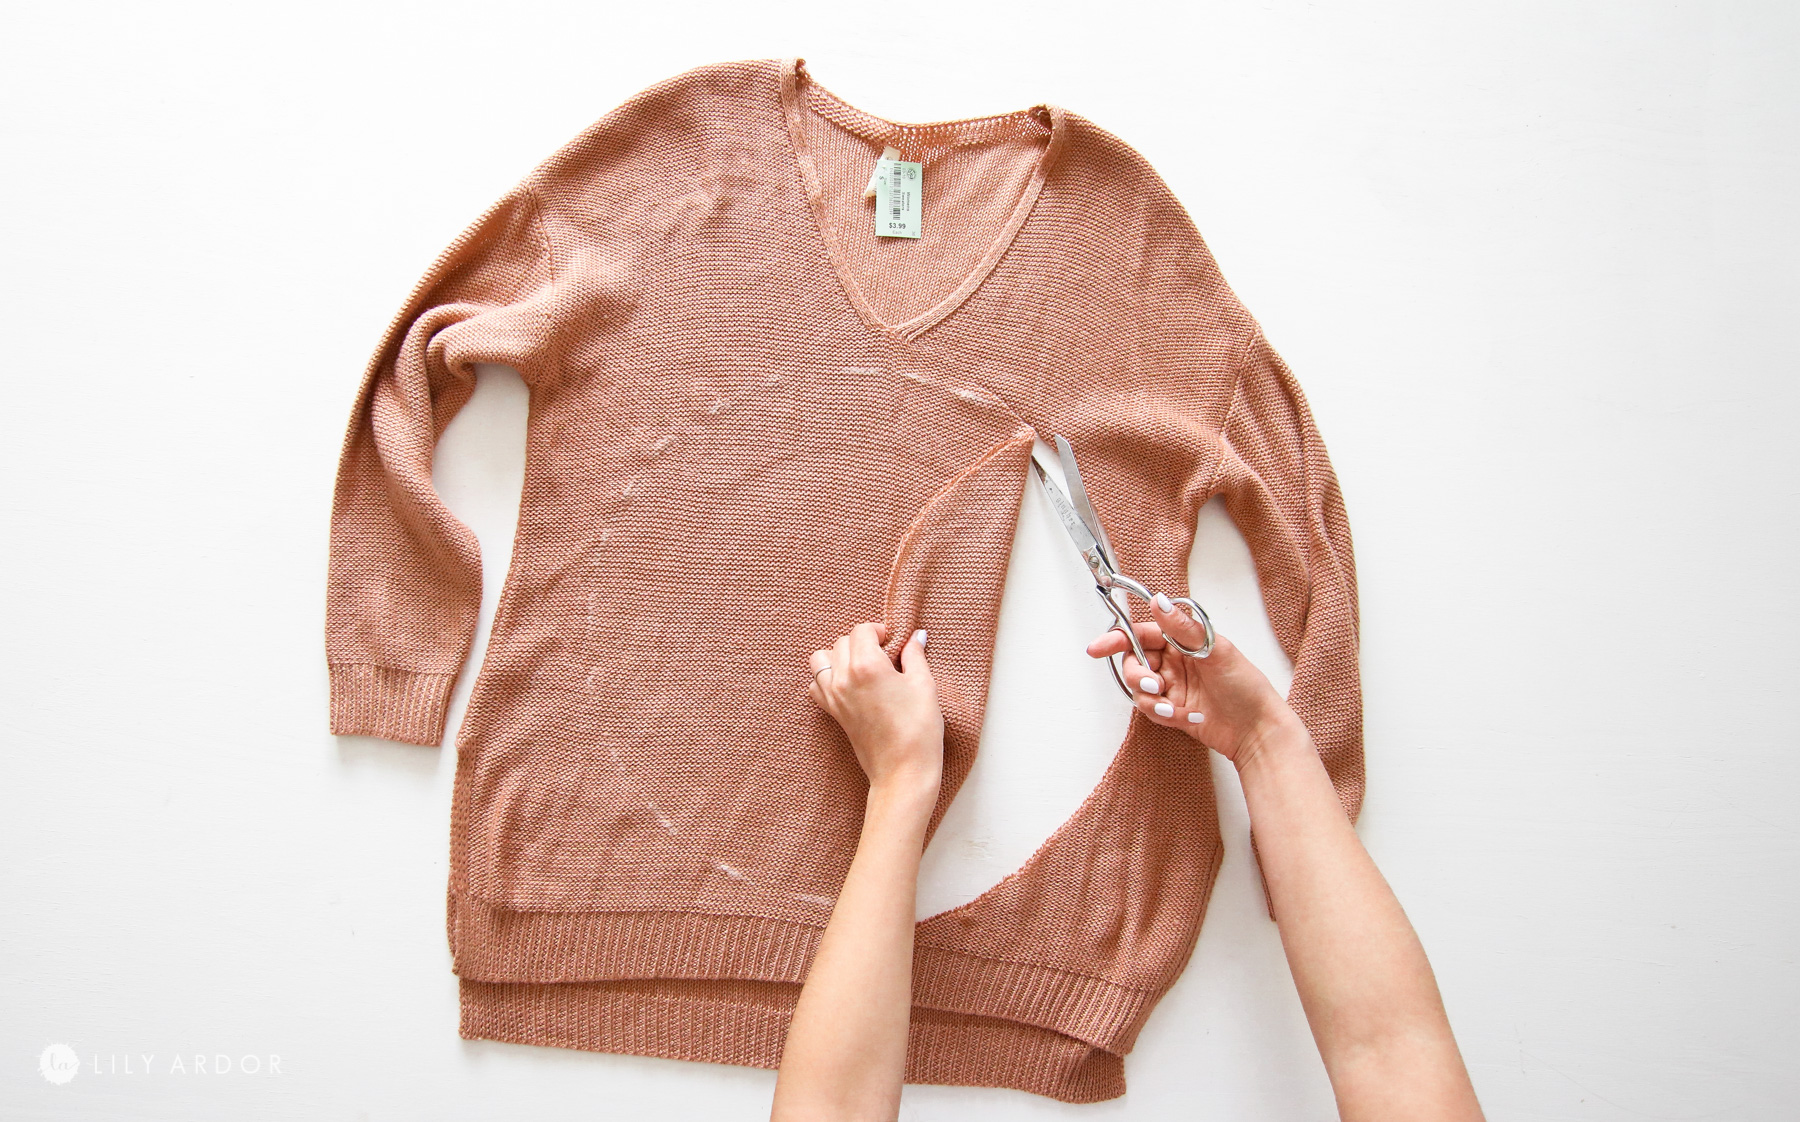
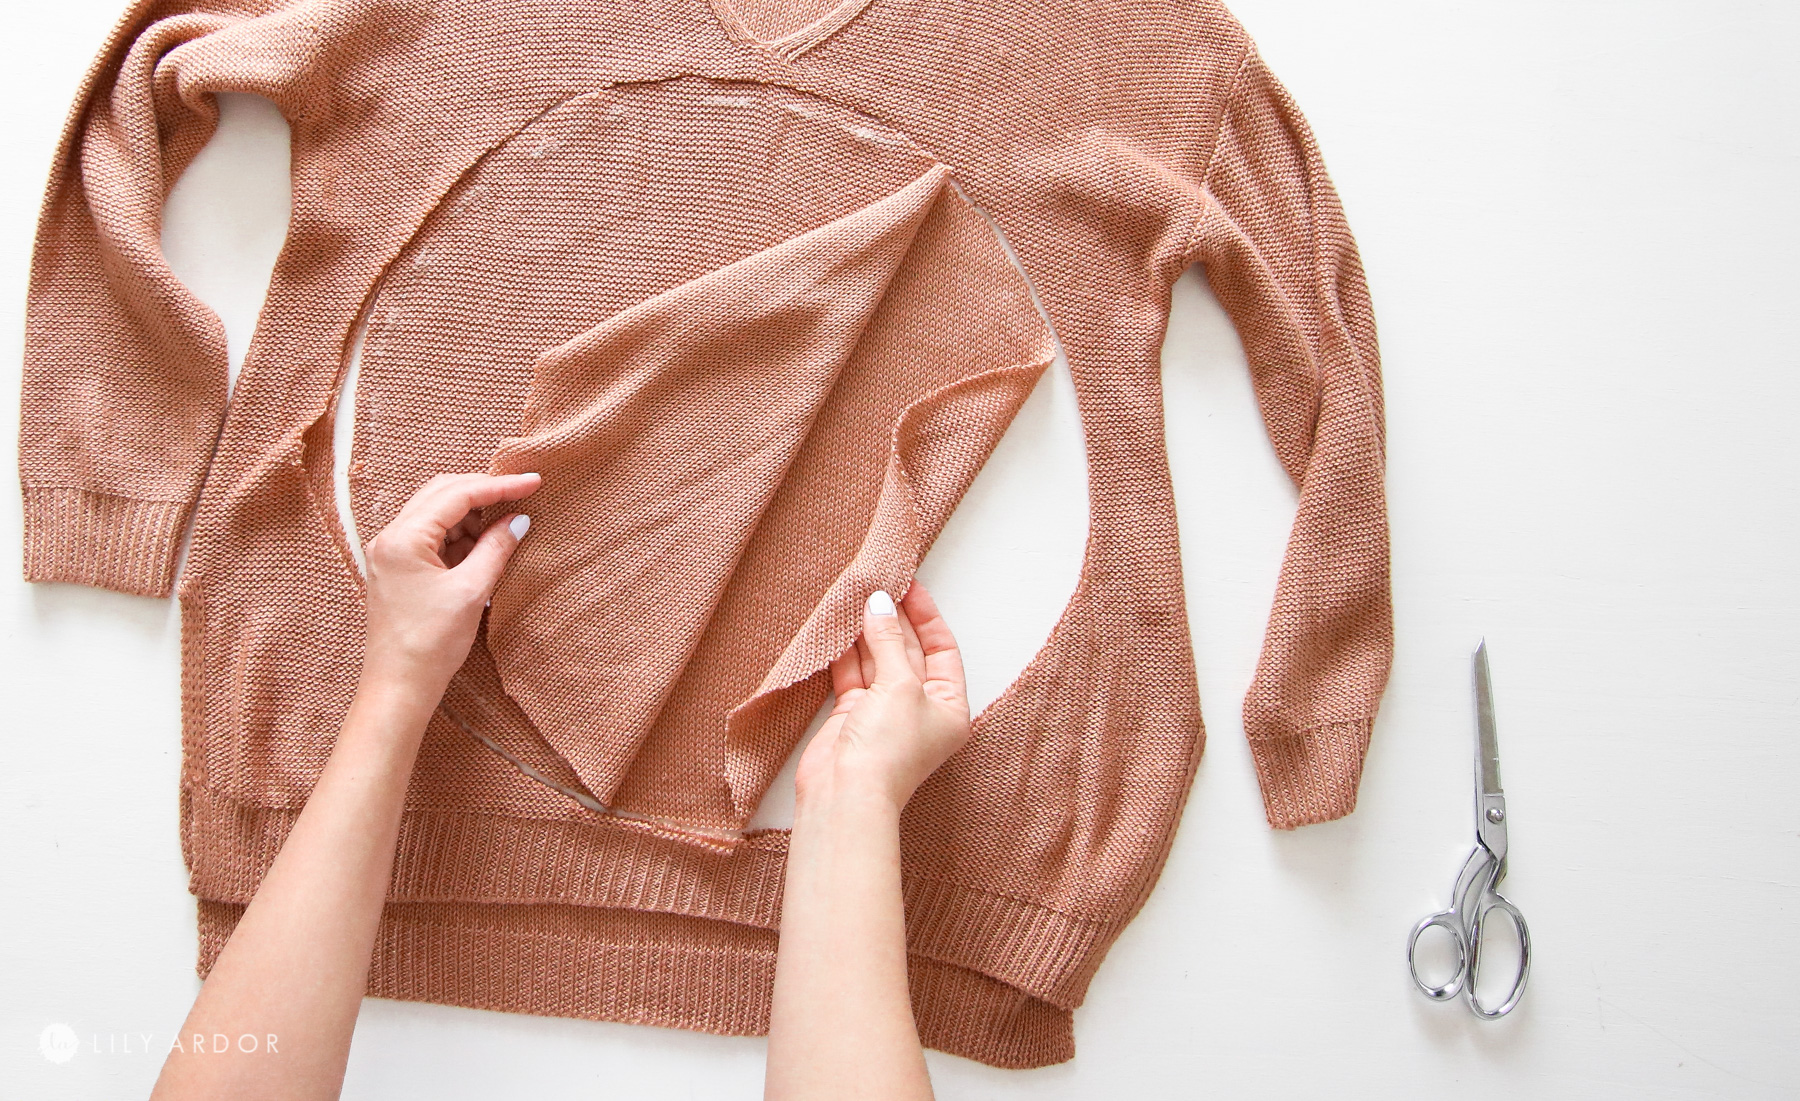
Cutting out your round pillow shape!
I found that the easiest way to get the perfect round shape was by using a lid from one of my pans. I flattened out the fabric and lay my lid on top. Because my lid wasn’t quite big enough and I wanted the diameter of my pillow to be around 14″ I used a tile and moved it around the lid to make a wider circle. Keep in mind you’ll need this to go over your pillow insert. Make sure your measurements are just right so you don’t have an overly loose or tight fit. My round throw pillow insert measured about 15″ inches so I cut my throw pillow a tad smaller about 14.5″ inches in diameter. I would even go as far as cutting it 3/4″ of an inch smaller then your pillow insert. Since knit has a nice stretch to it this will give it a nice tailored fit.
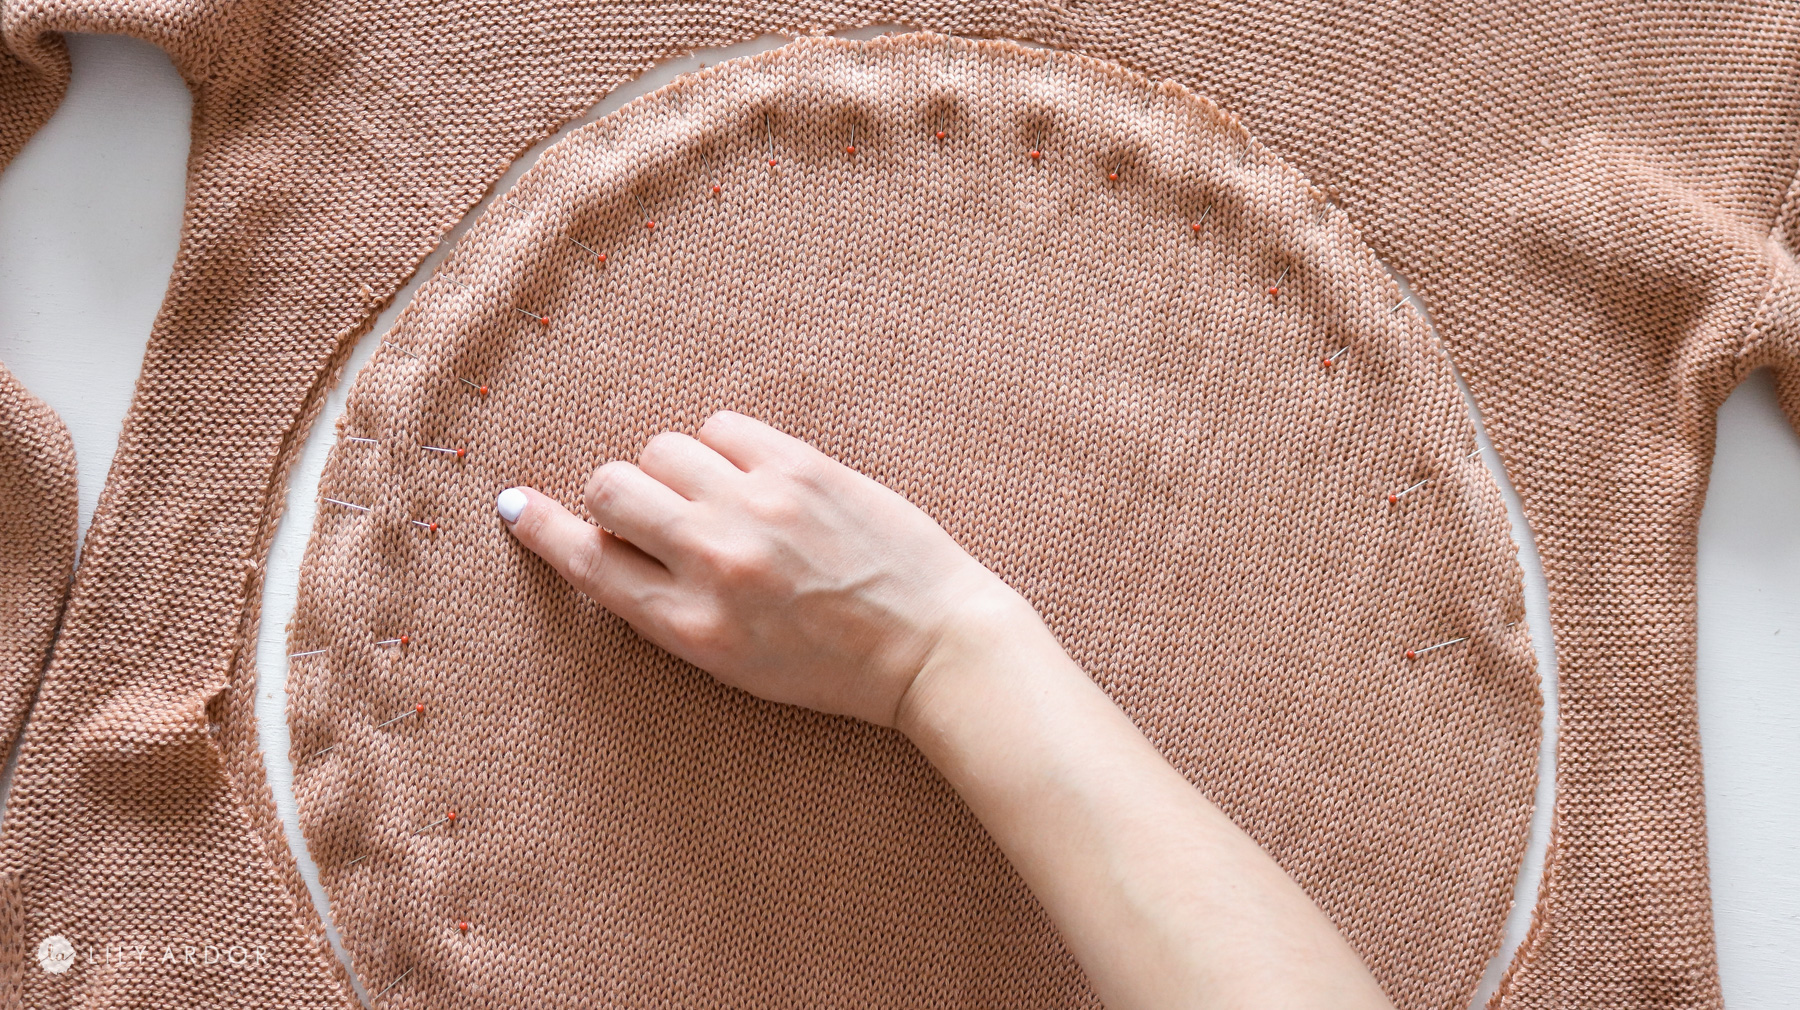
First up NO ZIPPER METHOD!
Before you start pinning anything make sure your fabric is facing the way you want it to. Whatever you have on the inside will end up being the outside of your pillow once done. So in other works the outside of your fabric should be facing each other.
Pin the fabric together along the outer edges working your way around. Make sure to leave an open gap to fit in your pillow insert ( about 8-10 inches) or about 4 inches if you plan on adding stuffing directly into the pillow. A word of caution if you decid not to use a pillow insert knit tends to show off all the lumpy texture and it can stretch a bit when adding the stuffing. This was my plan originally but, the lumpiness and oval shape wasn’t cutting it for me so I opted out for a pillow insert.
Now add a straight stitch along where you pinned. You can remove the pins as you go.
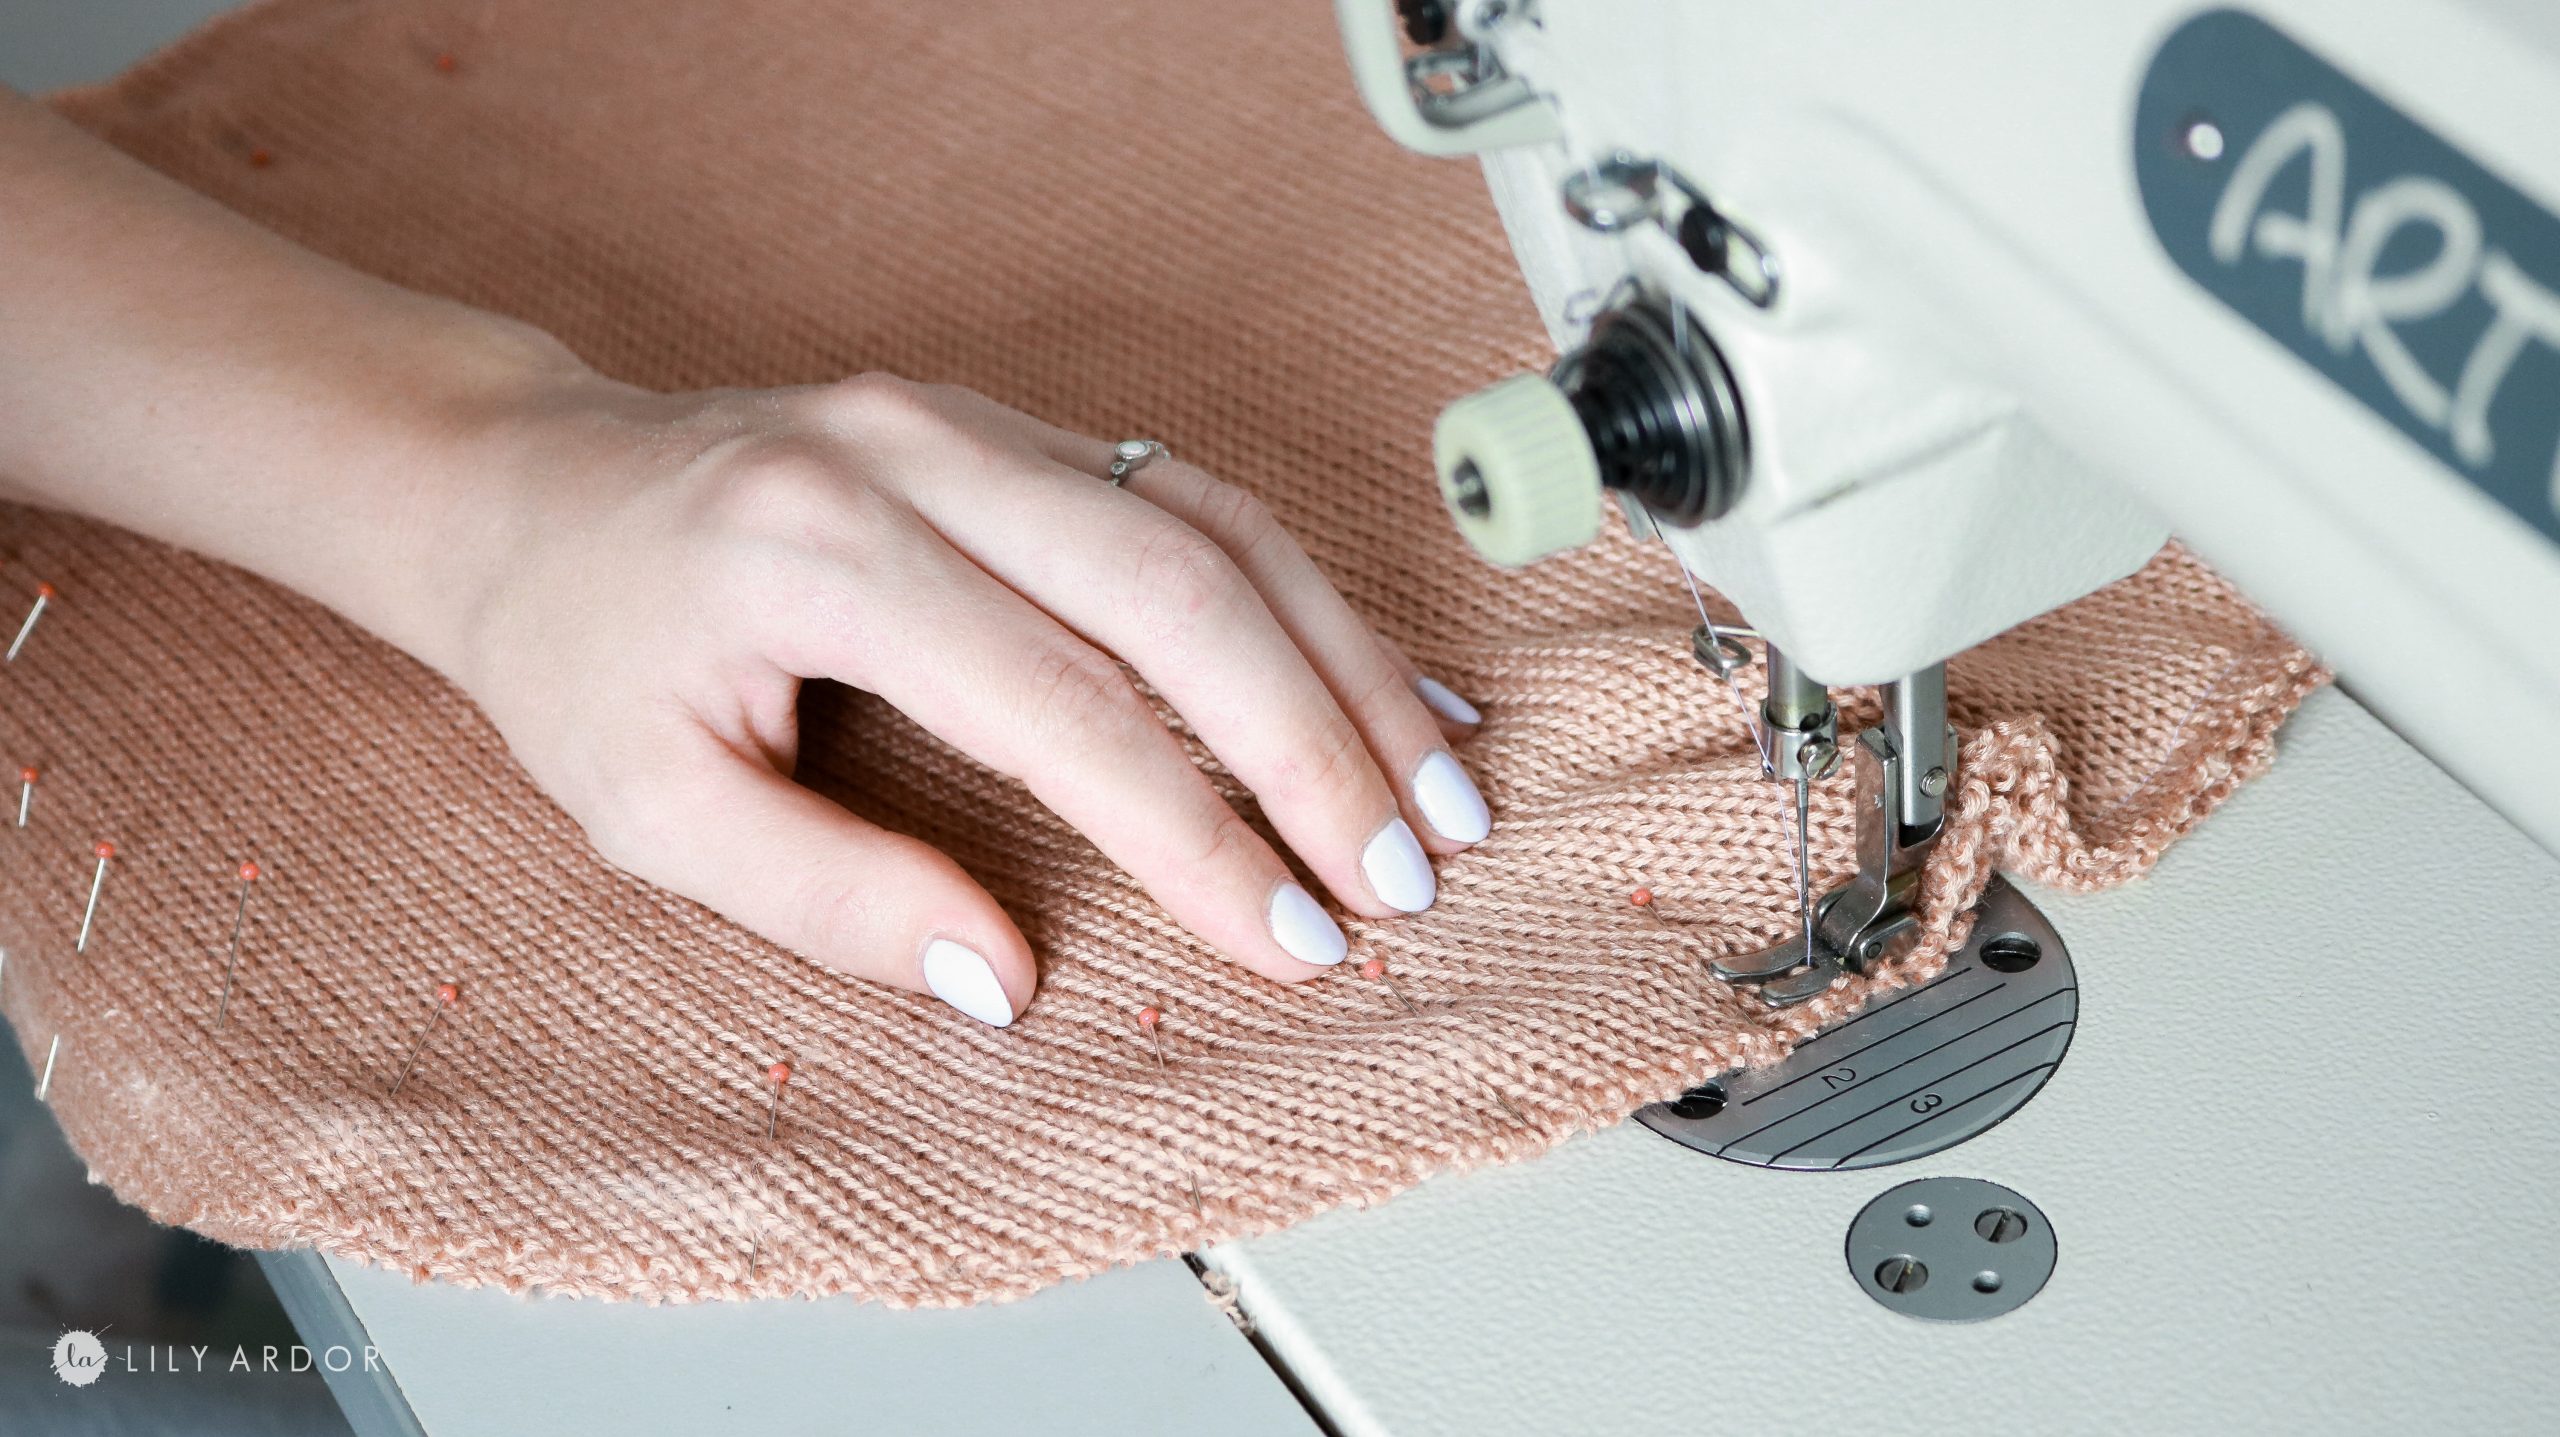
Don’t forget to leave a gap ( photo below)
OTHER HOME DECOR DIYS YOU’LL LOVE :
- HOW TO PAINT YOUR COUCH TO LOOK AND FEEL LIKE LEATHER!
- TRANSFORM OLD DOILIES INTO WALL ART
- ENTRYWAY BENCH USING 2X4’S
- DIY AFRICAN MUDCLOTH THROW PILLOWS
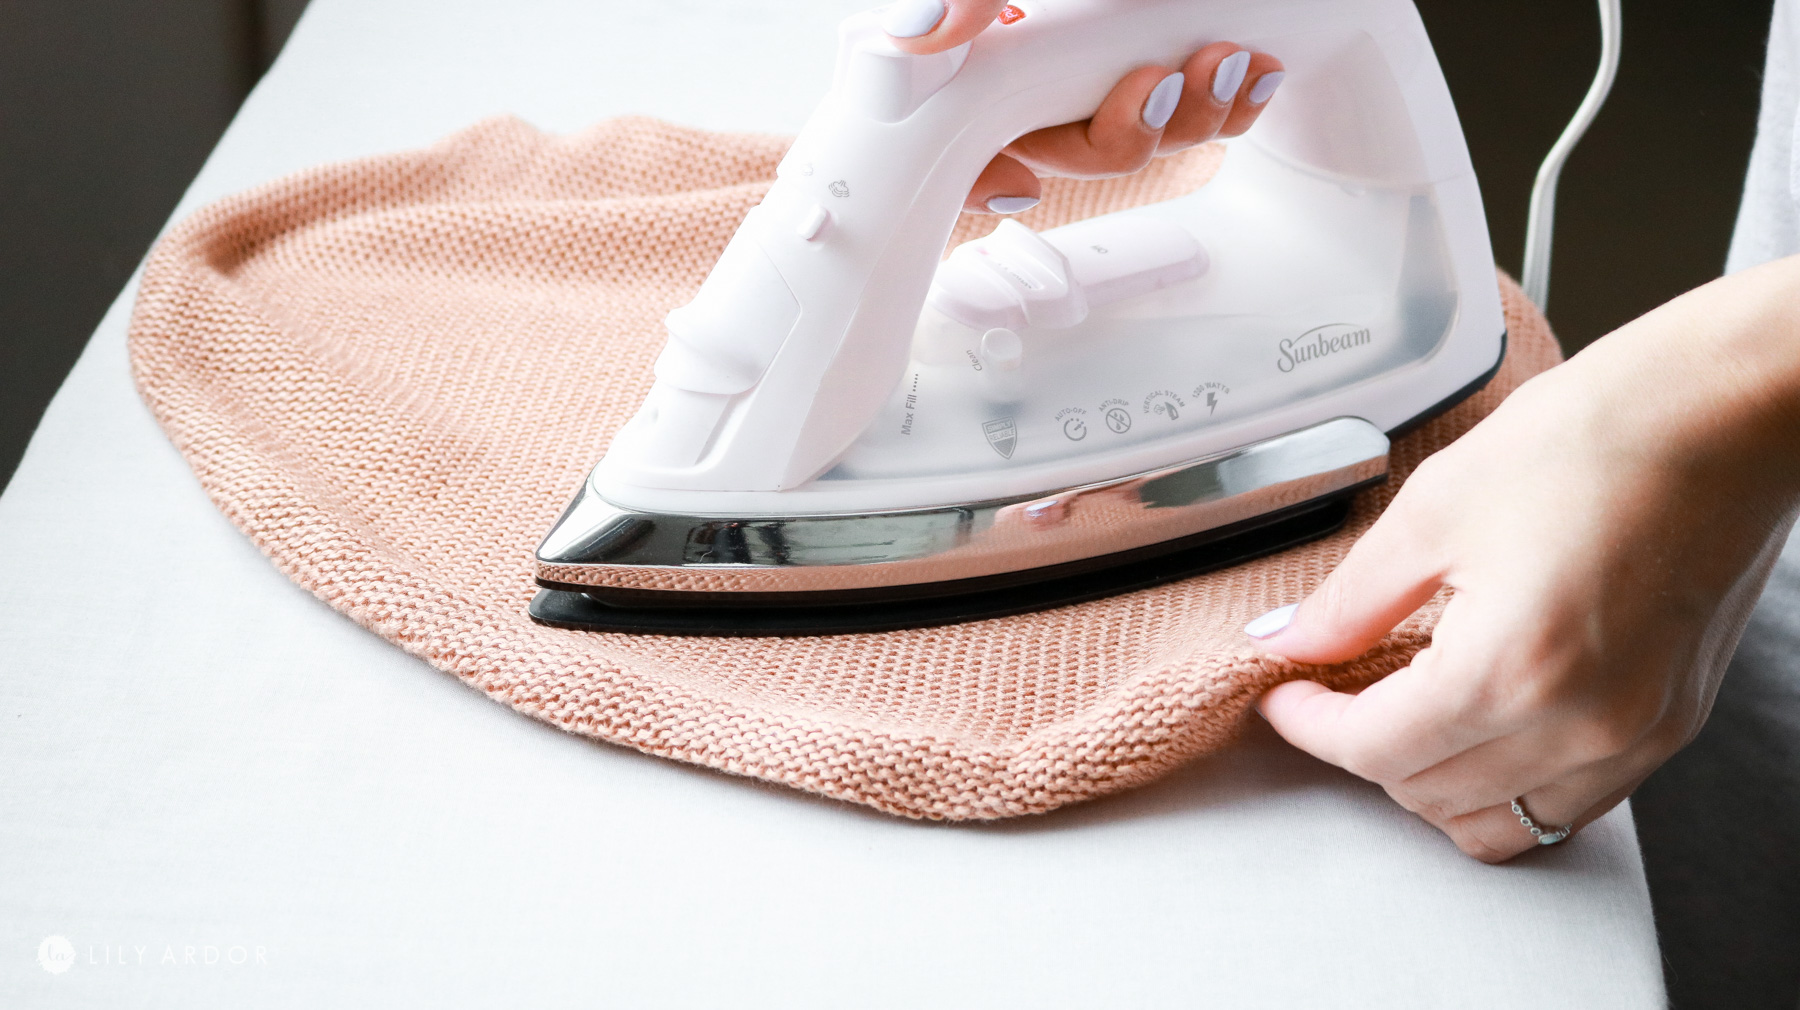
ADDING the stuffing and finishing off the round pillow!
Okay now turn your pillow inside out and iron it.
I love to iron out all my sewing projects. This makes all the new seams settle in nicely.
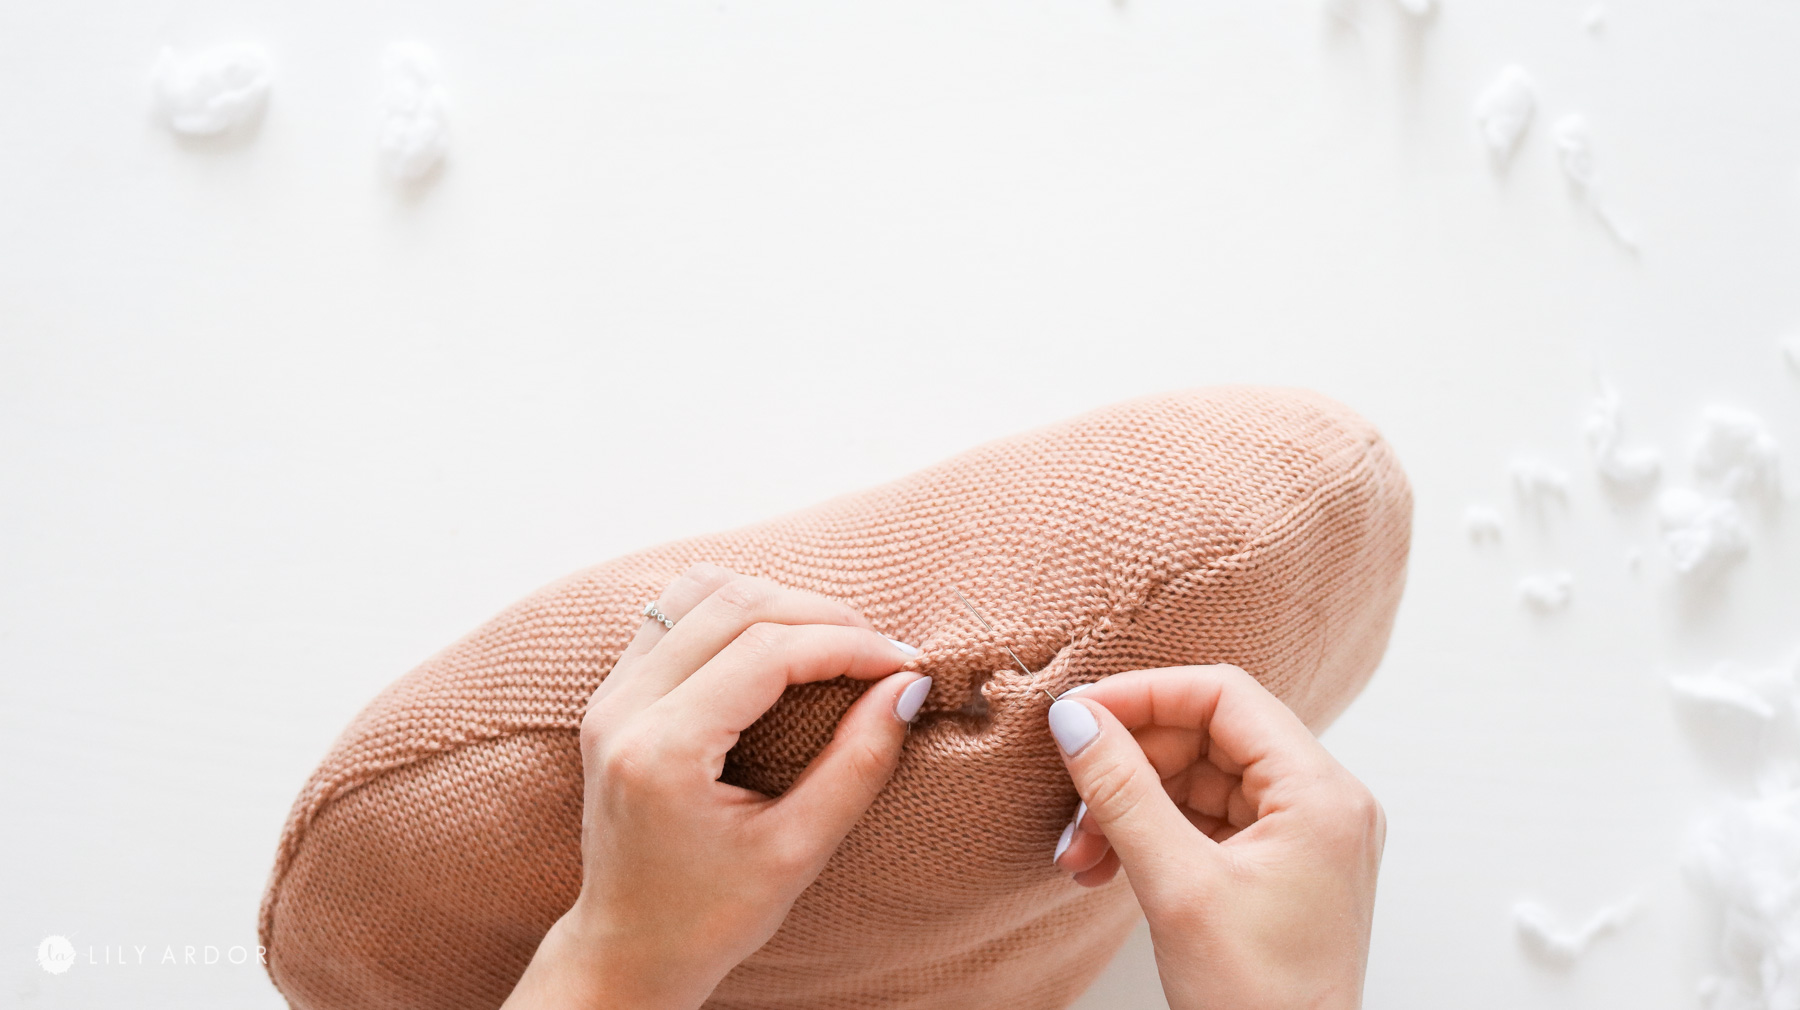
Now use the gap you left in your pillow seam to add your throw pillow or stuffing and stitch up whatever is left with a needle and thread.
The Zipper Method !
Okay if you’re doing the zipper method don’t freak out. I know it always seems a bit scary at first. I’ll break it down into 3 steps for you to make it easier. If you still have question you can check out the video version to this DIY hopefully that’ll help.
I only had about a 7 inch zipper which ended up being a tad too small but with the help of my hubby I managed to squeeze in the pillow insert.
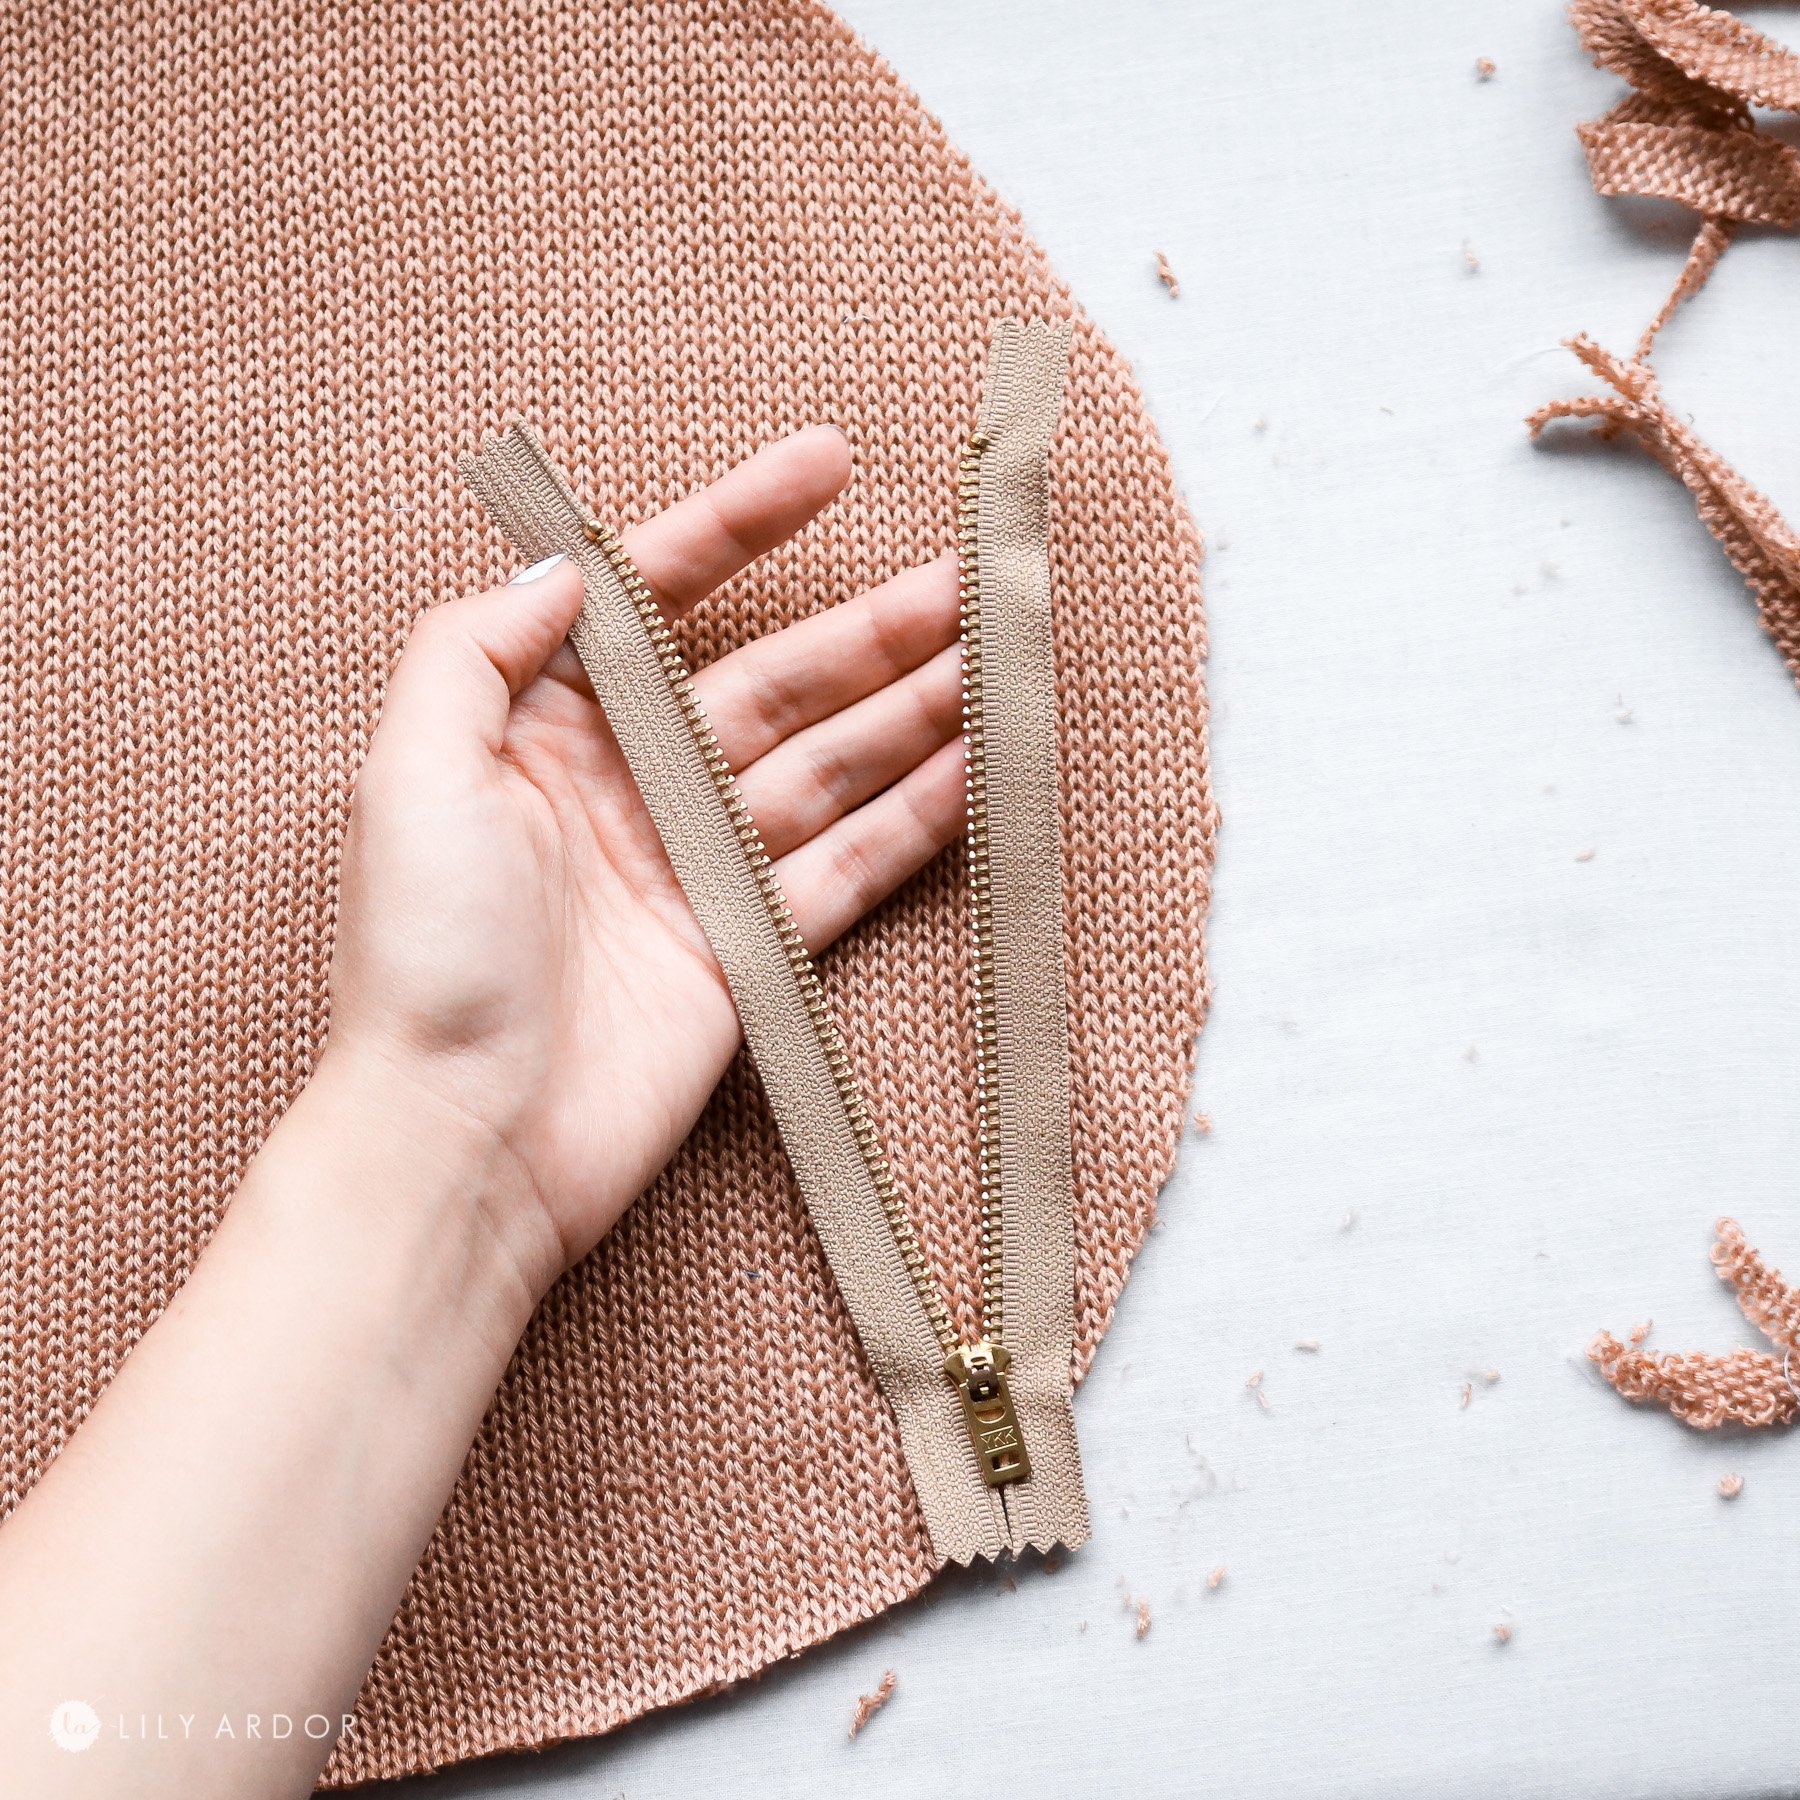
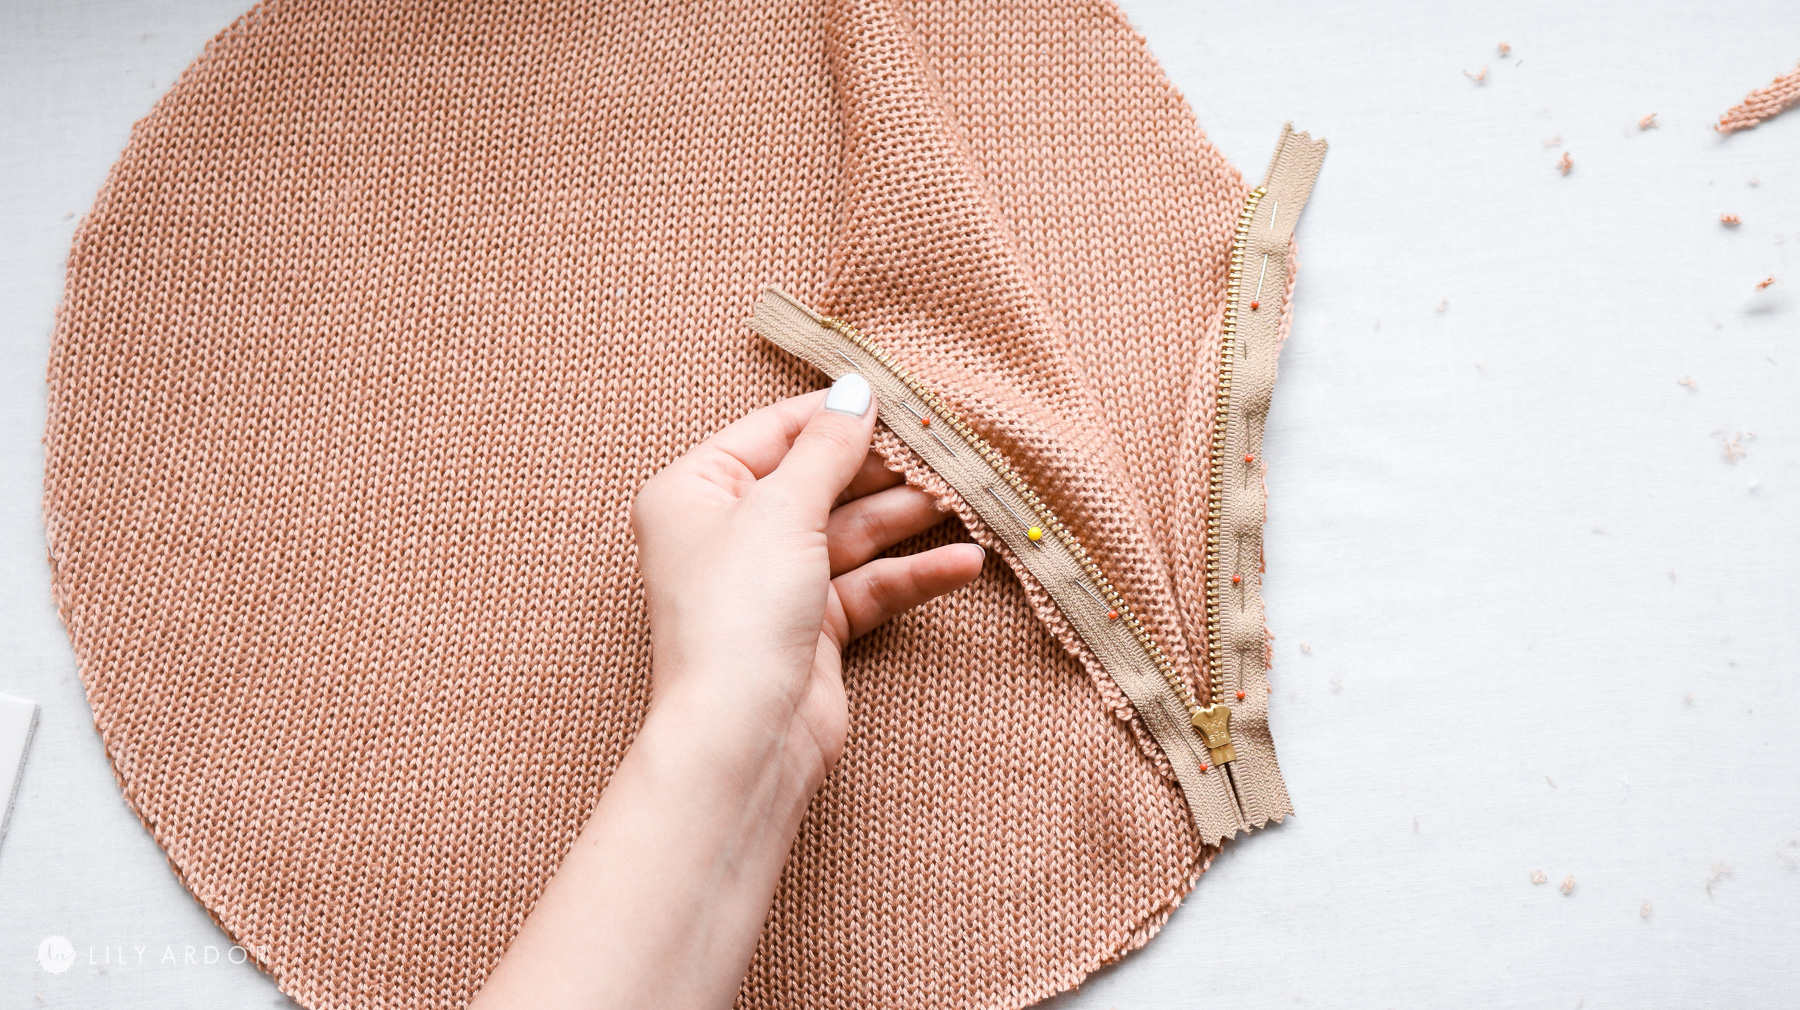
Step 1: Correctly attaching the zipper!
Right after cutting your fabric. Lay it out flat making sure the top ( whatever you want visible once done) of your fabric is facing each other. Next flip your zipper face down. The Zipper pole should be facing down and pin both sides of the zipper while unzipped to the edges of your pillow ( photo below for reference). The zipper should be pinned curved with the fabric. This will help keep it a round throw pillow.
Here’s a TIP THAT ALWAYS SAVES MY BUTT!
If you’re confused about the pinning process it helps a ton if you pretend the pins are already seems. Turn the pillow over and try zipping it up to see if you pinned it correctly. ( more shown in the video )
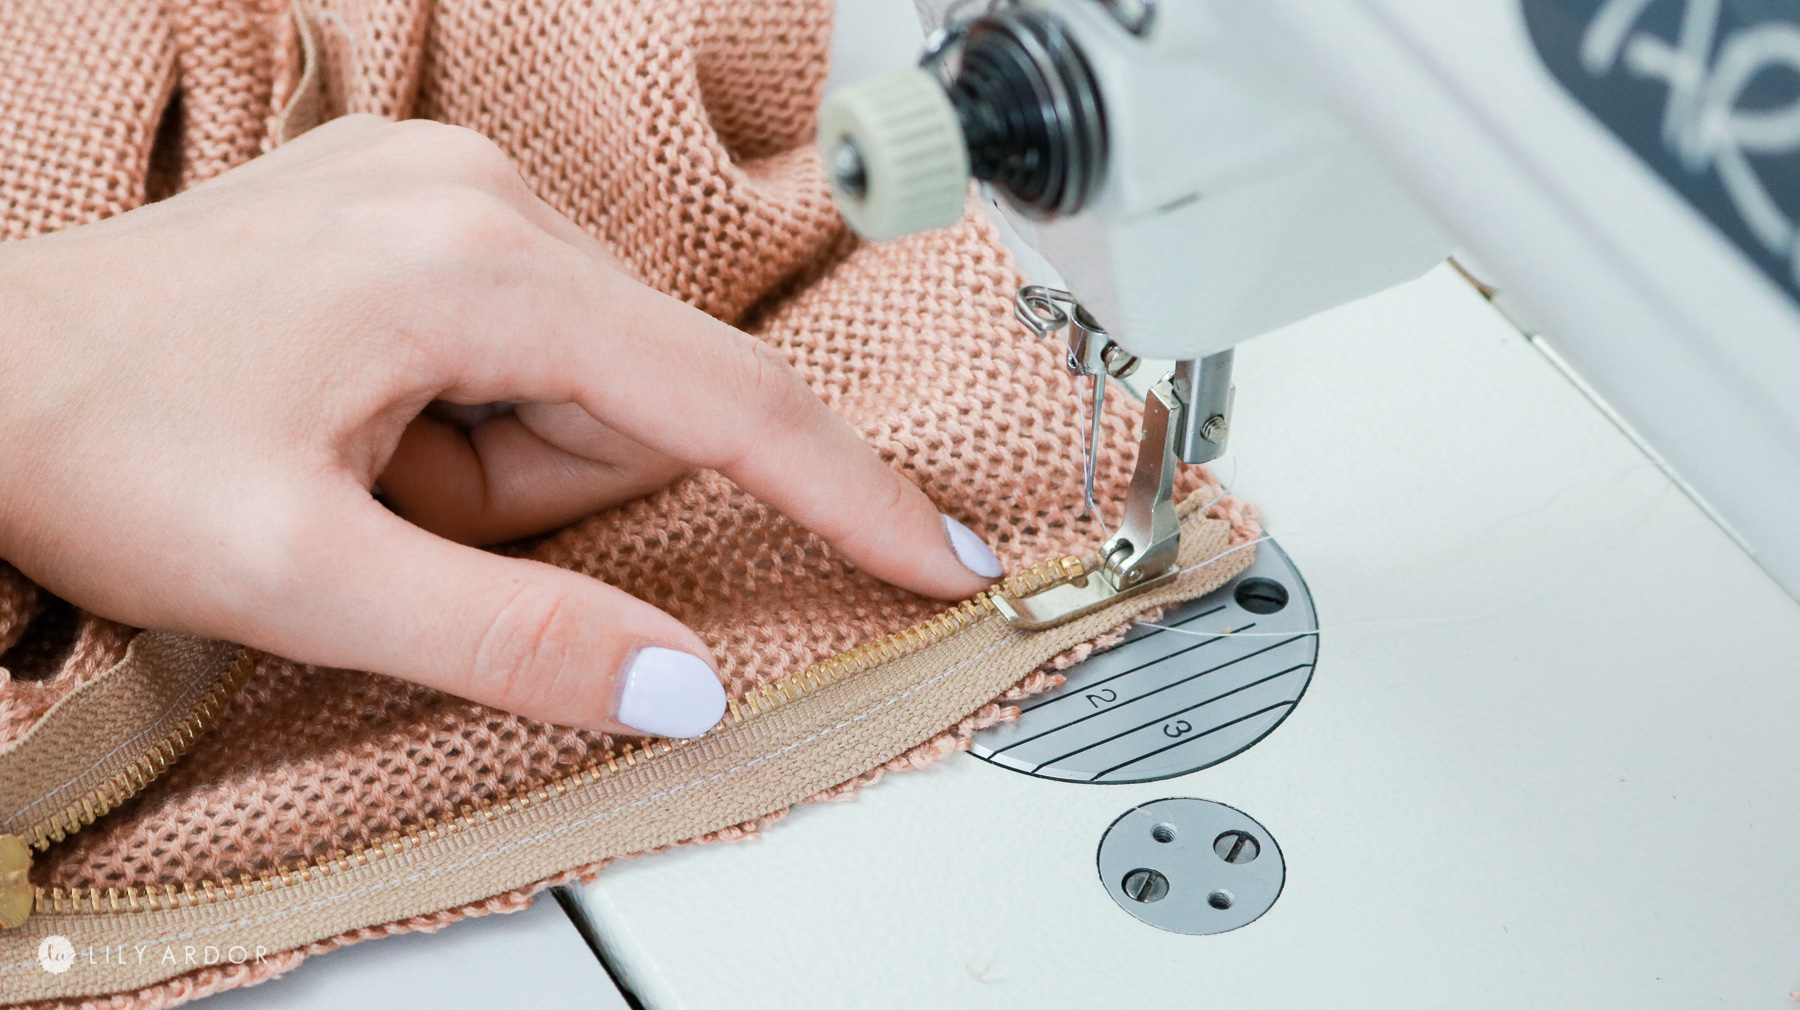
Step 2: Securing the zipper!
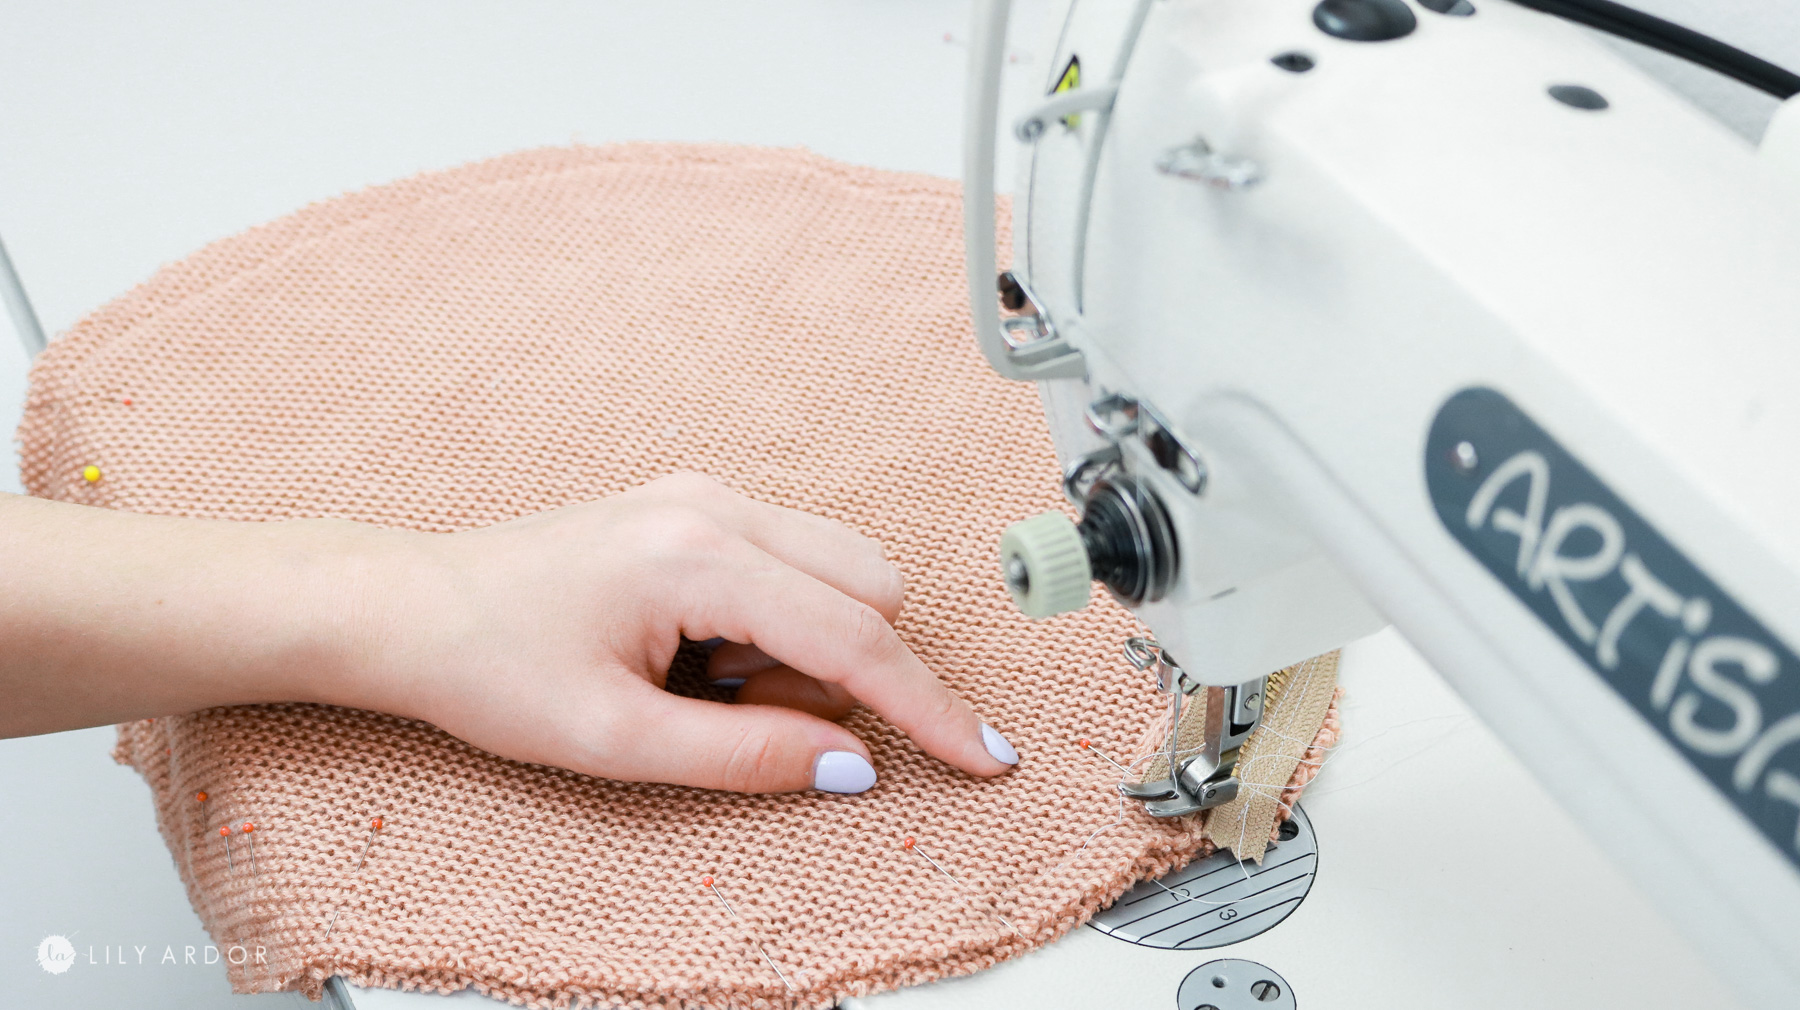
Now sew a straight stitch alongside the zipper teeth . Try and get your seam as close to the zipper itself as possible without sewing on the teeth. The seam shouldn’t be more than 1/4 inches out.

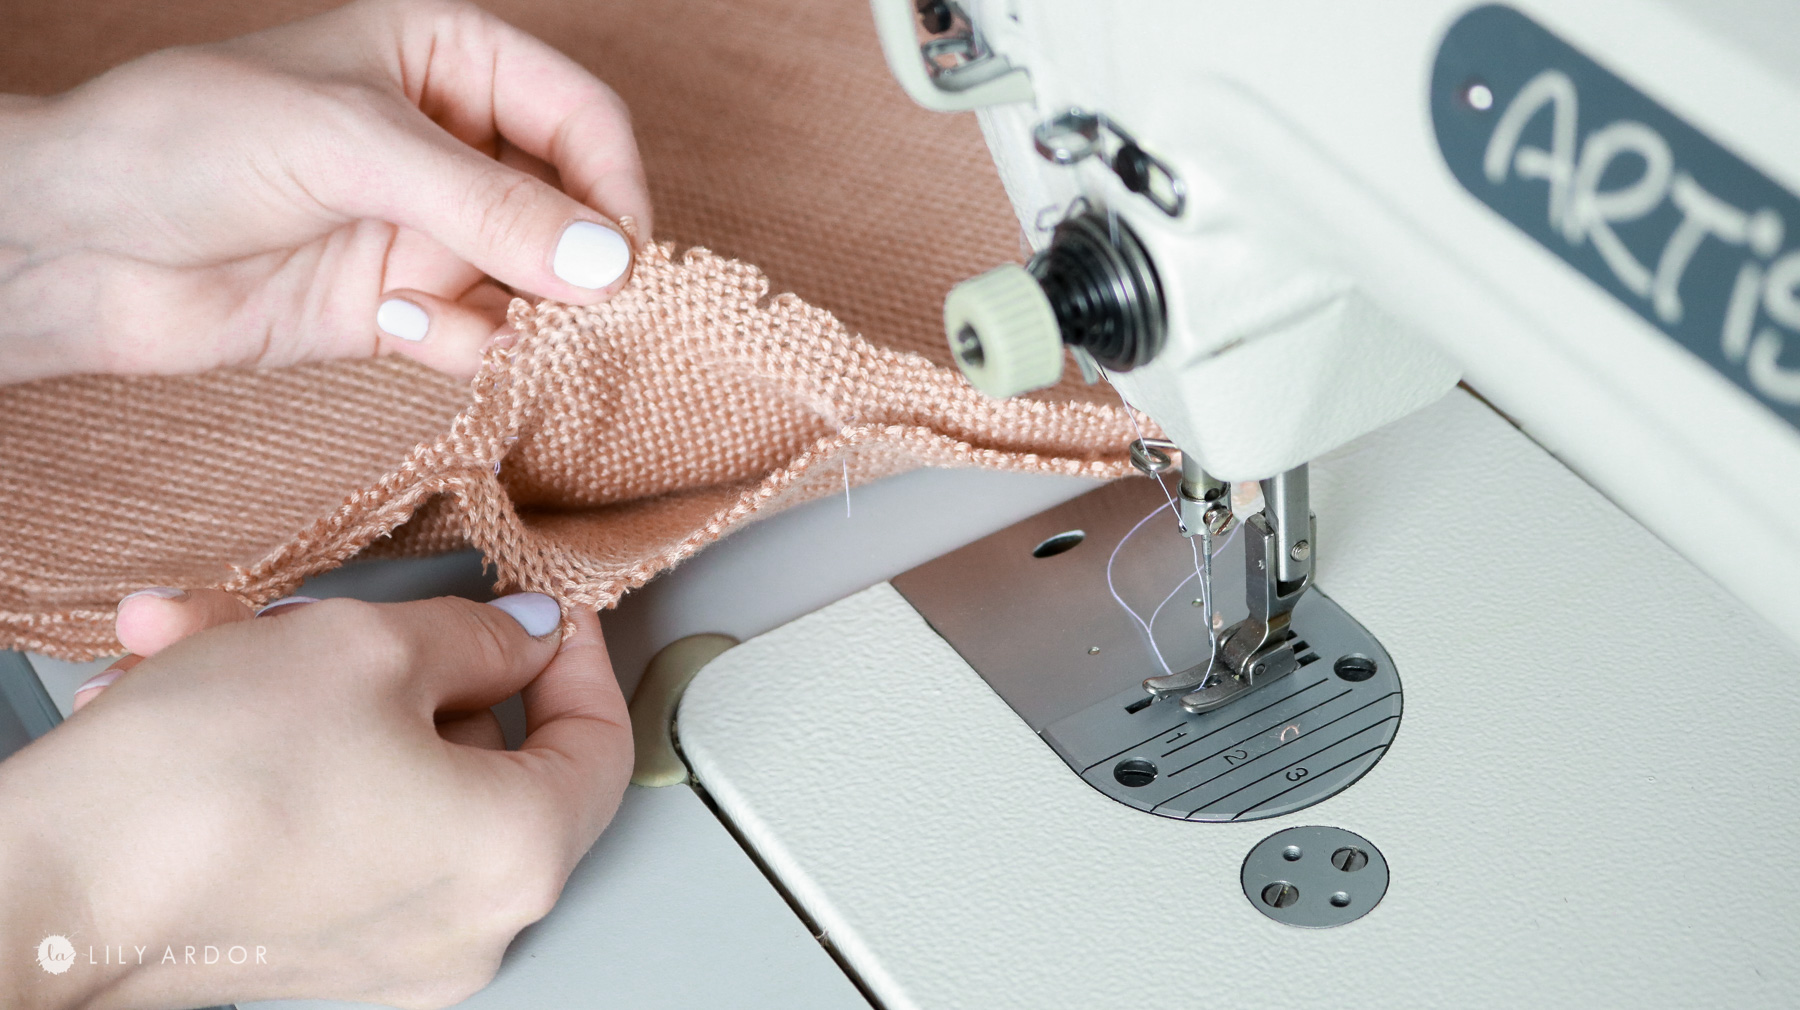
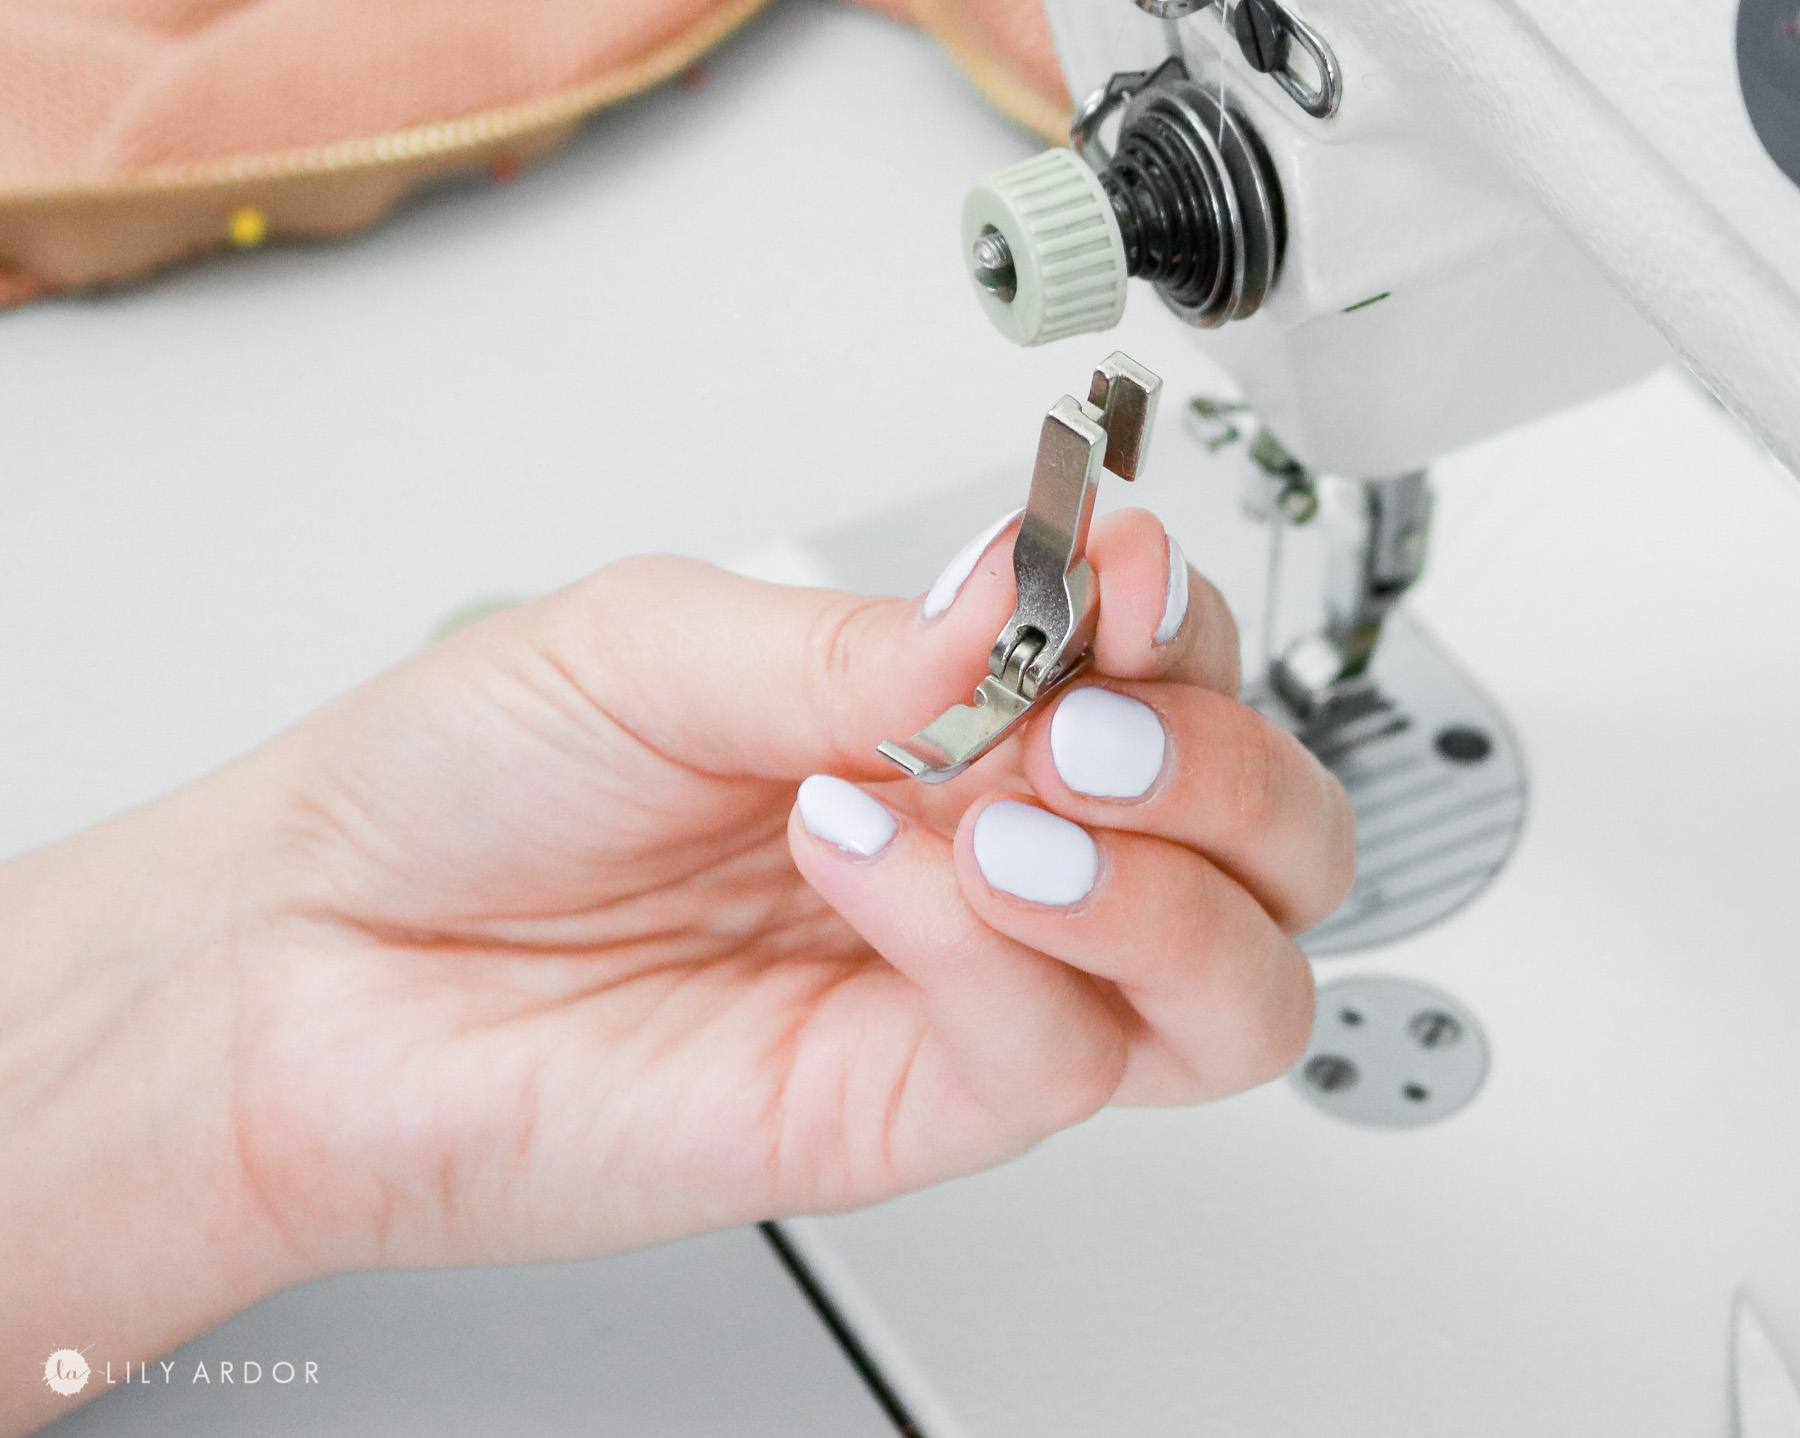
TIP: How to get a close stitch!
If you want to get all fancy you can pull out a narrow zipper presser foot ( photo below) This is made to sew on zippers to get as close to the zipper as needed. It isn’t required for this project. You can totally get away with the regular presser foot. My sewing machine actually came with this presser foot in the accessories bag and most sewing machines do as well.
Here’s a quick snippet of the narrow presser foot in action. You can see the previous seam done with the regular presser foot ( white threaded seam) look how much closer this presser foot lets you come to the zipper.
If you used the narrow presser foot this is what your zipper will look like once installed. ( photo below) You’ll see a little bit more of your zipper fabric if you used the regular presser foot.

HOME IMPROVEMENT DIYS:
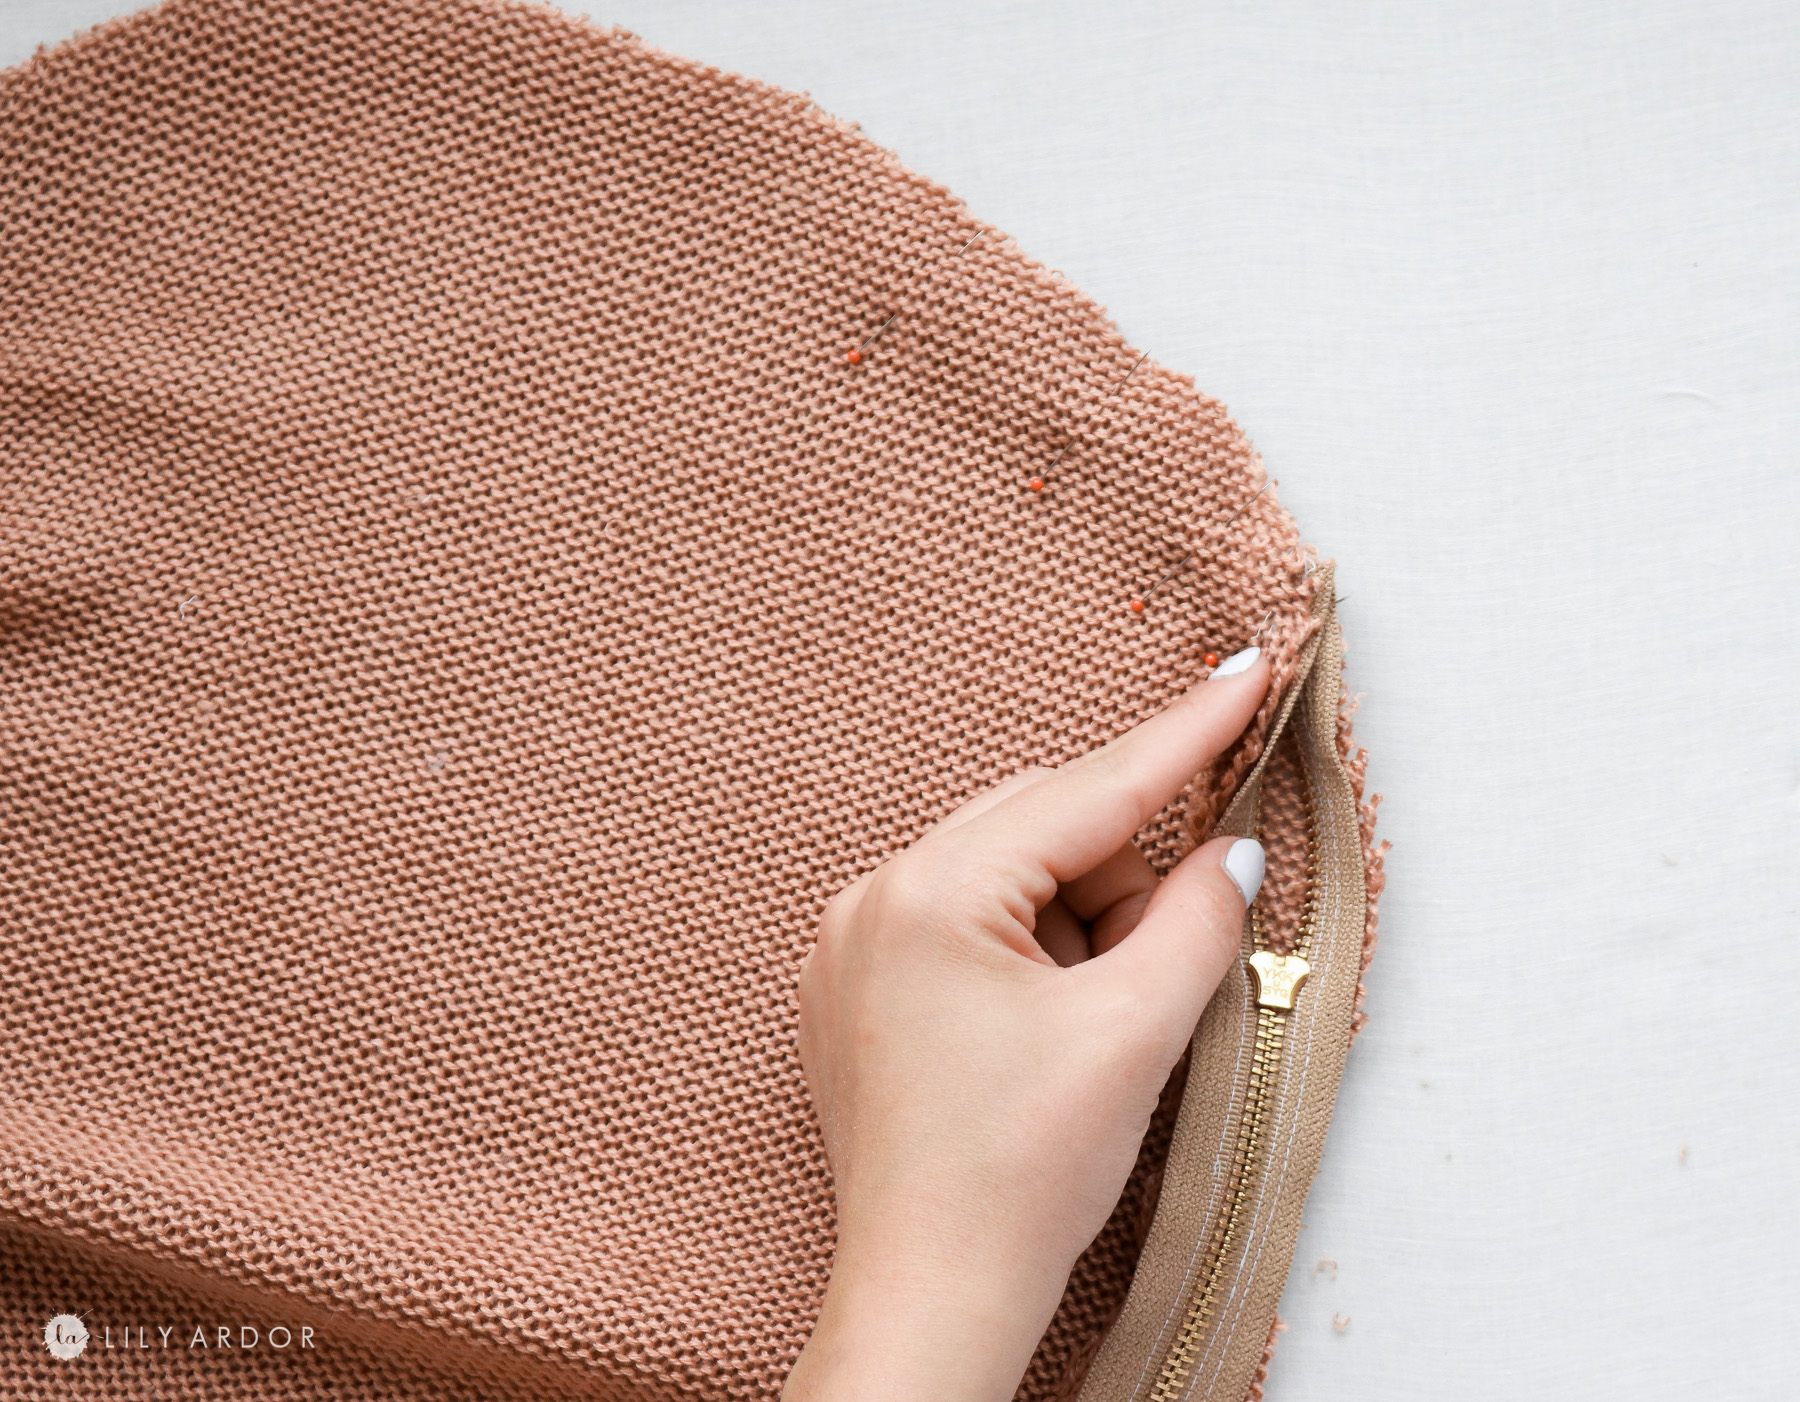
Step 3: Finishing off the pillow!
Now while the top of your fabric is facing each other just like it was when you were attaching the zipper pin the rest of the edges around the pillow. You will need this seam to end right before the zipper starts on both ends of the zipper. Petty much just sew a seam as close as you can get before the zipper starts and ends. Be sure to leave your zipper unzipped a bit this will help you open it once your done sewing up the pillow.
That’s it. Finish unzipping the zipper and you should be able to turn your pillow inside out. You can now insert you pillow insert. You might need to squish it a bit to fit it in.
YAY! Finally! DIY THE PERFECT POM POMS!
This was definitely the most exciting part for me!
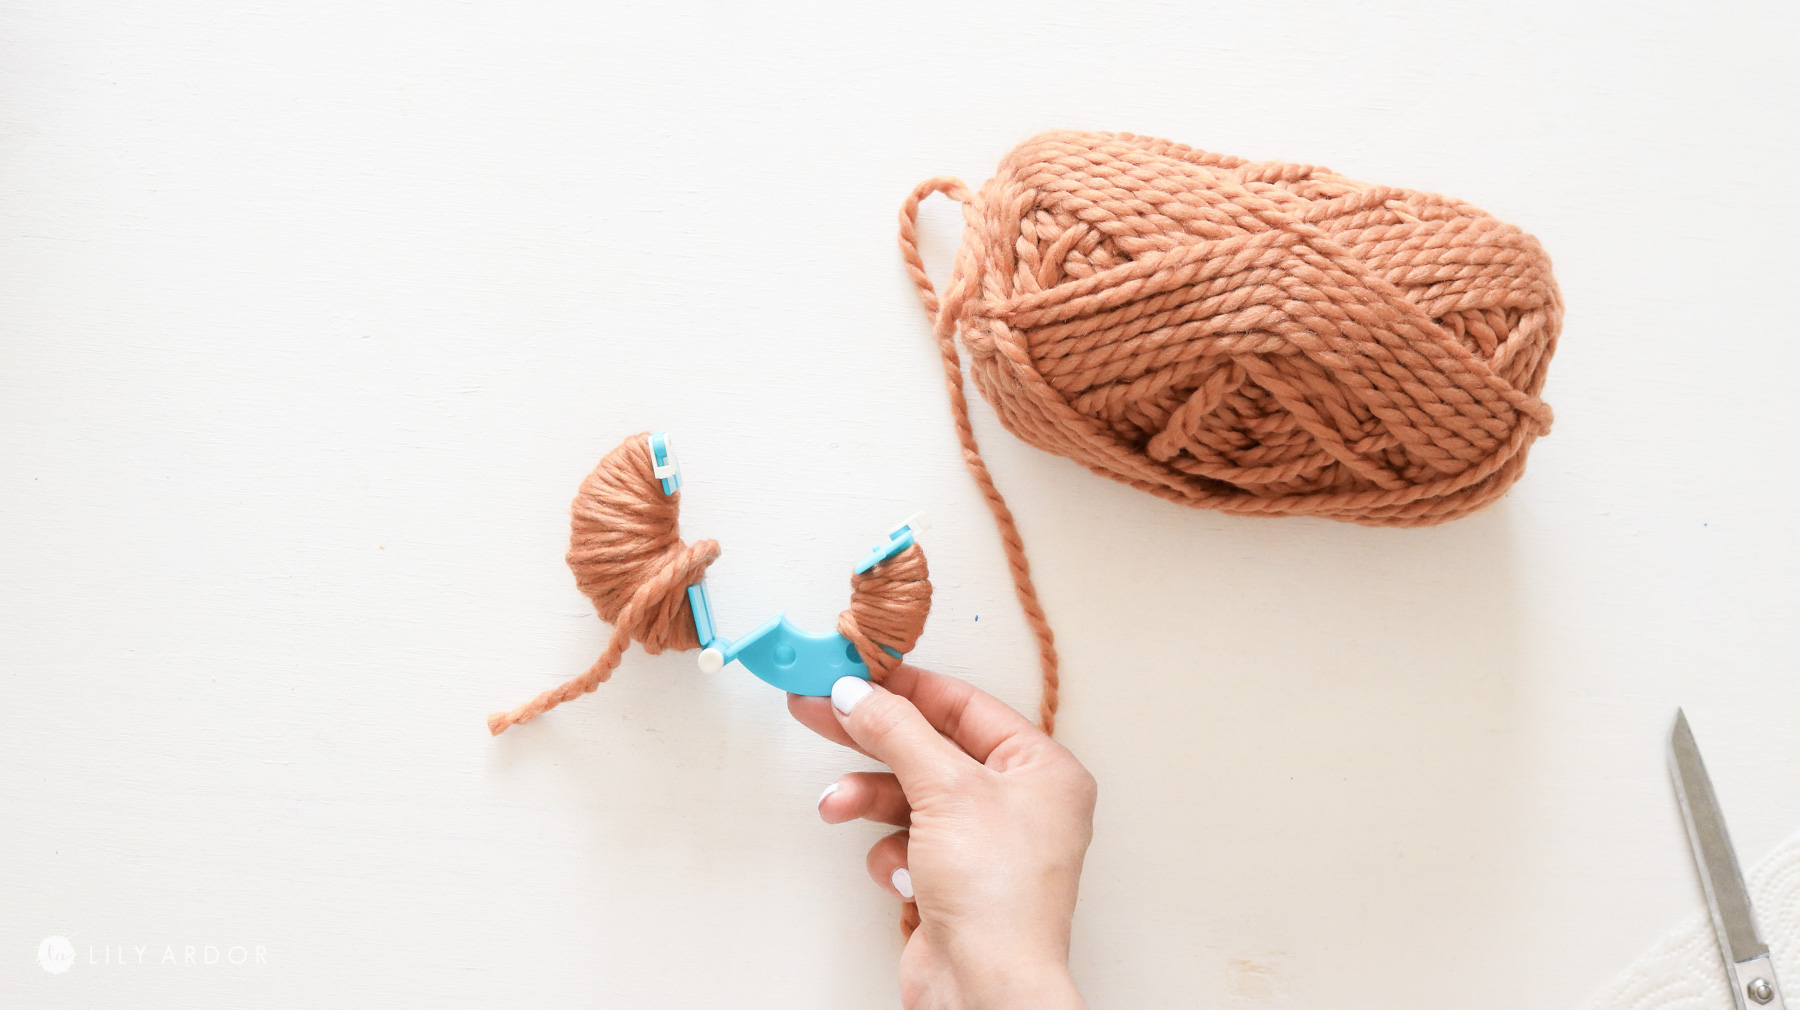
I got a pom pom maker kit at hobby lobby. You can also find the same one on amazon for a lot cheaper. I was so excited to try it because I’ve heard so much about it. The kit came with 4 different sizes to make pom poms. I ended up picking the blue colored pom pom maker that made my pom poms about 3 inches in diameter. I wanted my pom poms to be fairly big.
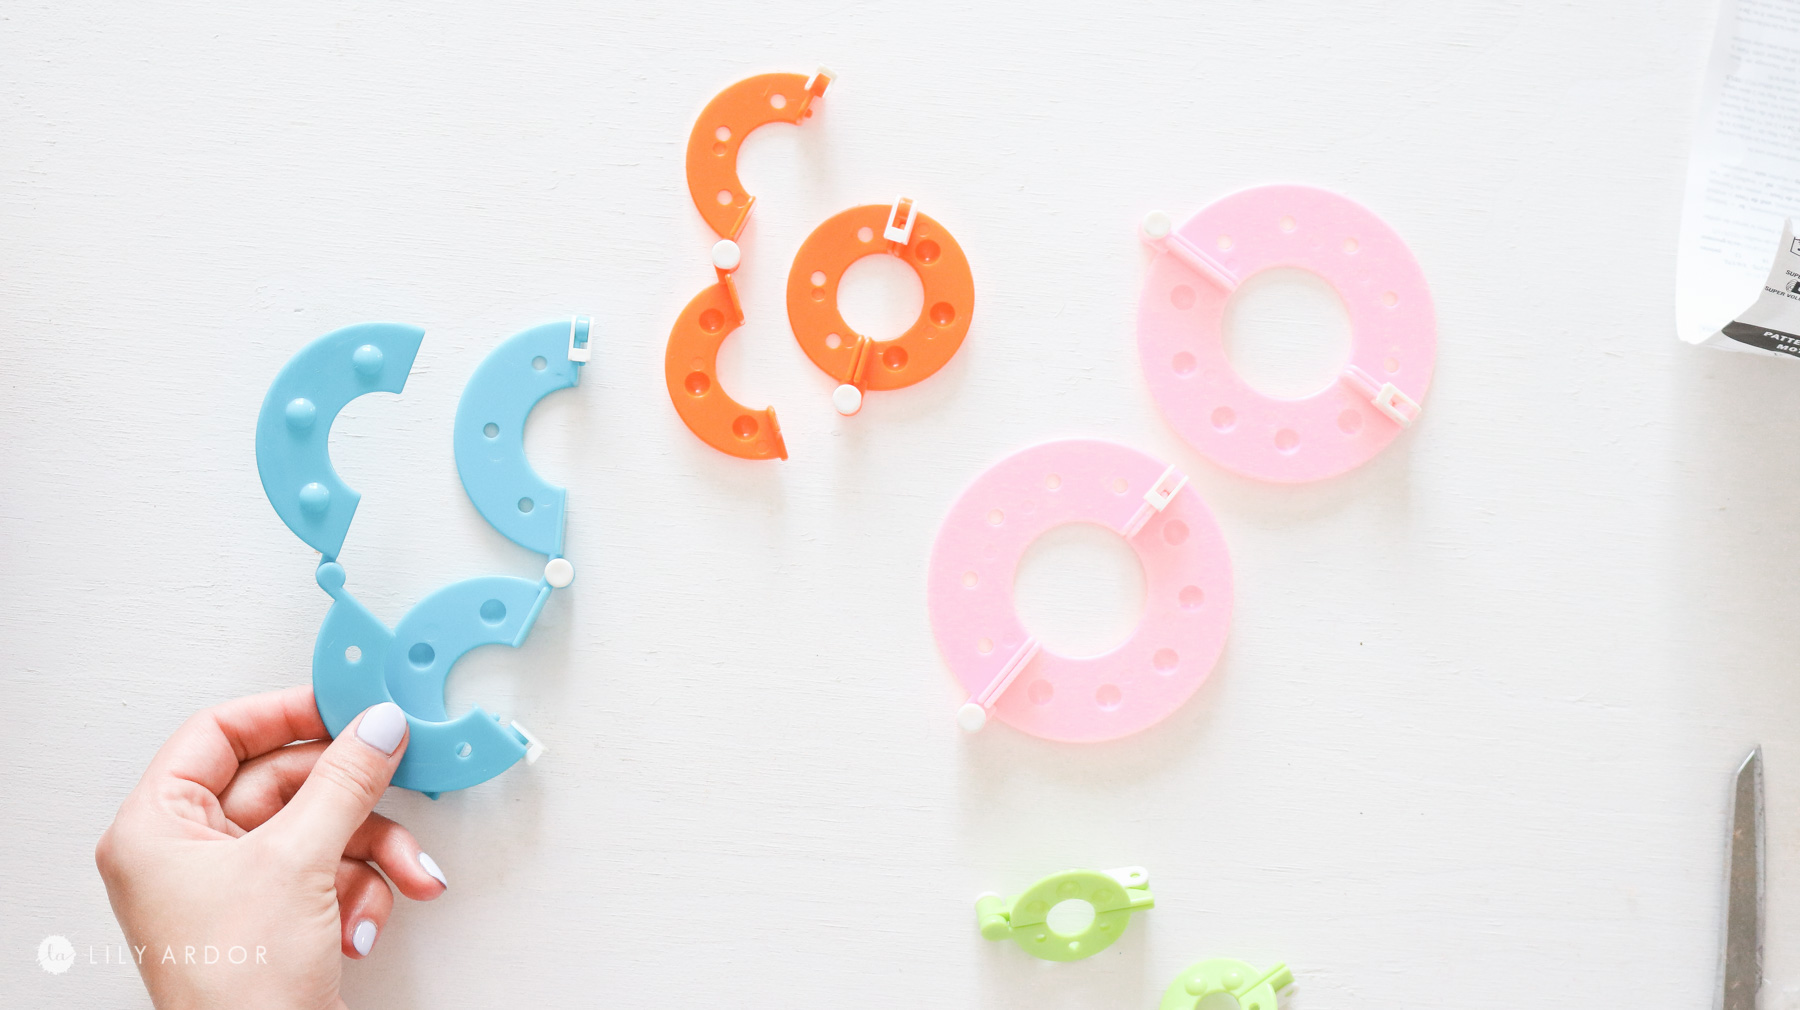
Step 1: Preparing your pom pom kit!
Each color has two pieces of plastic that open up. You’ll notice 3 holes on one side and 3 nipples on the other half of one plastic piece. You’ll need to lay the two plastic pieces against each other with the nipples fitting into the holes on the other plastic piece. It’s easy I promise. Check out the photos below.

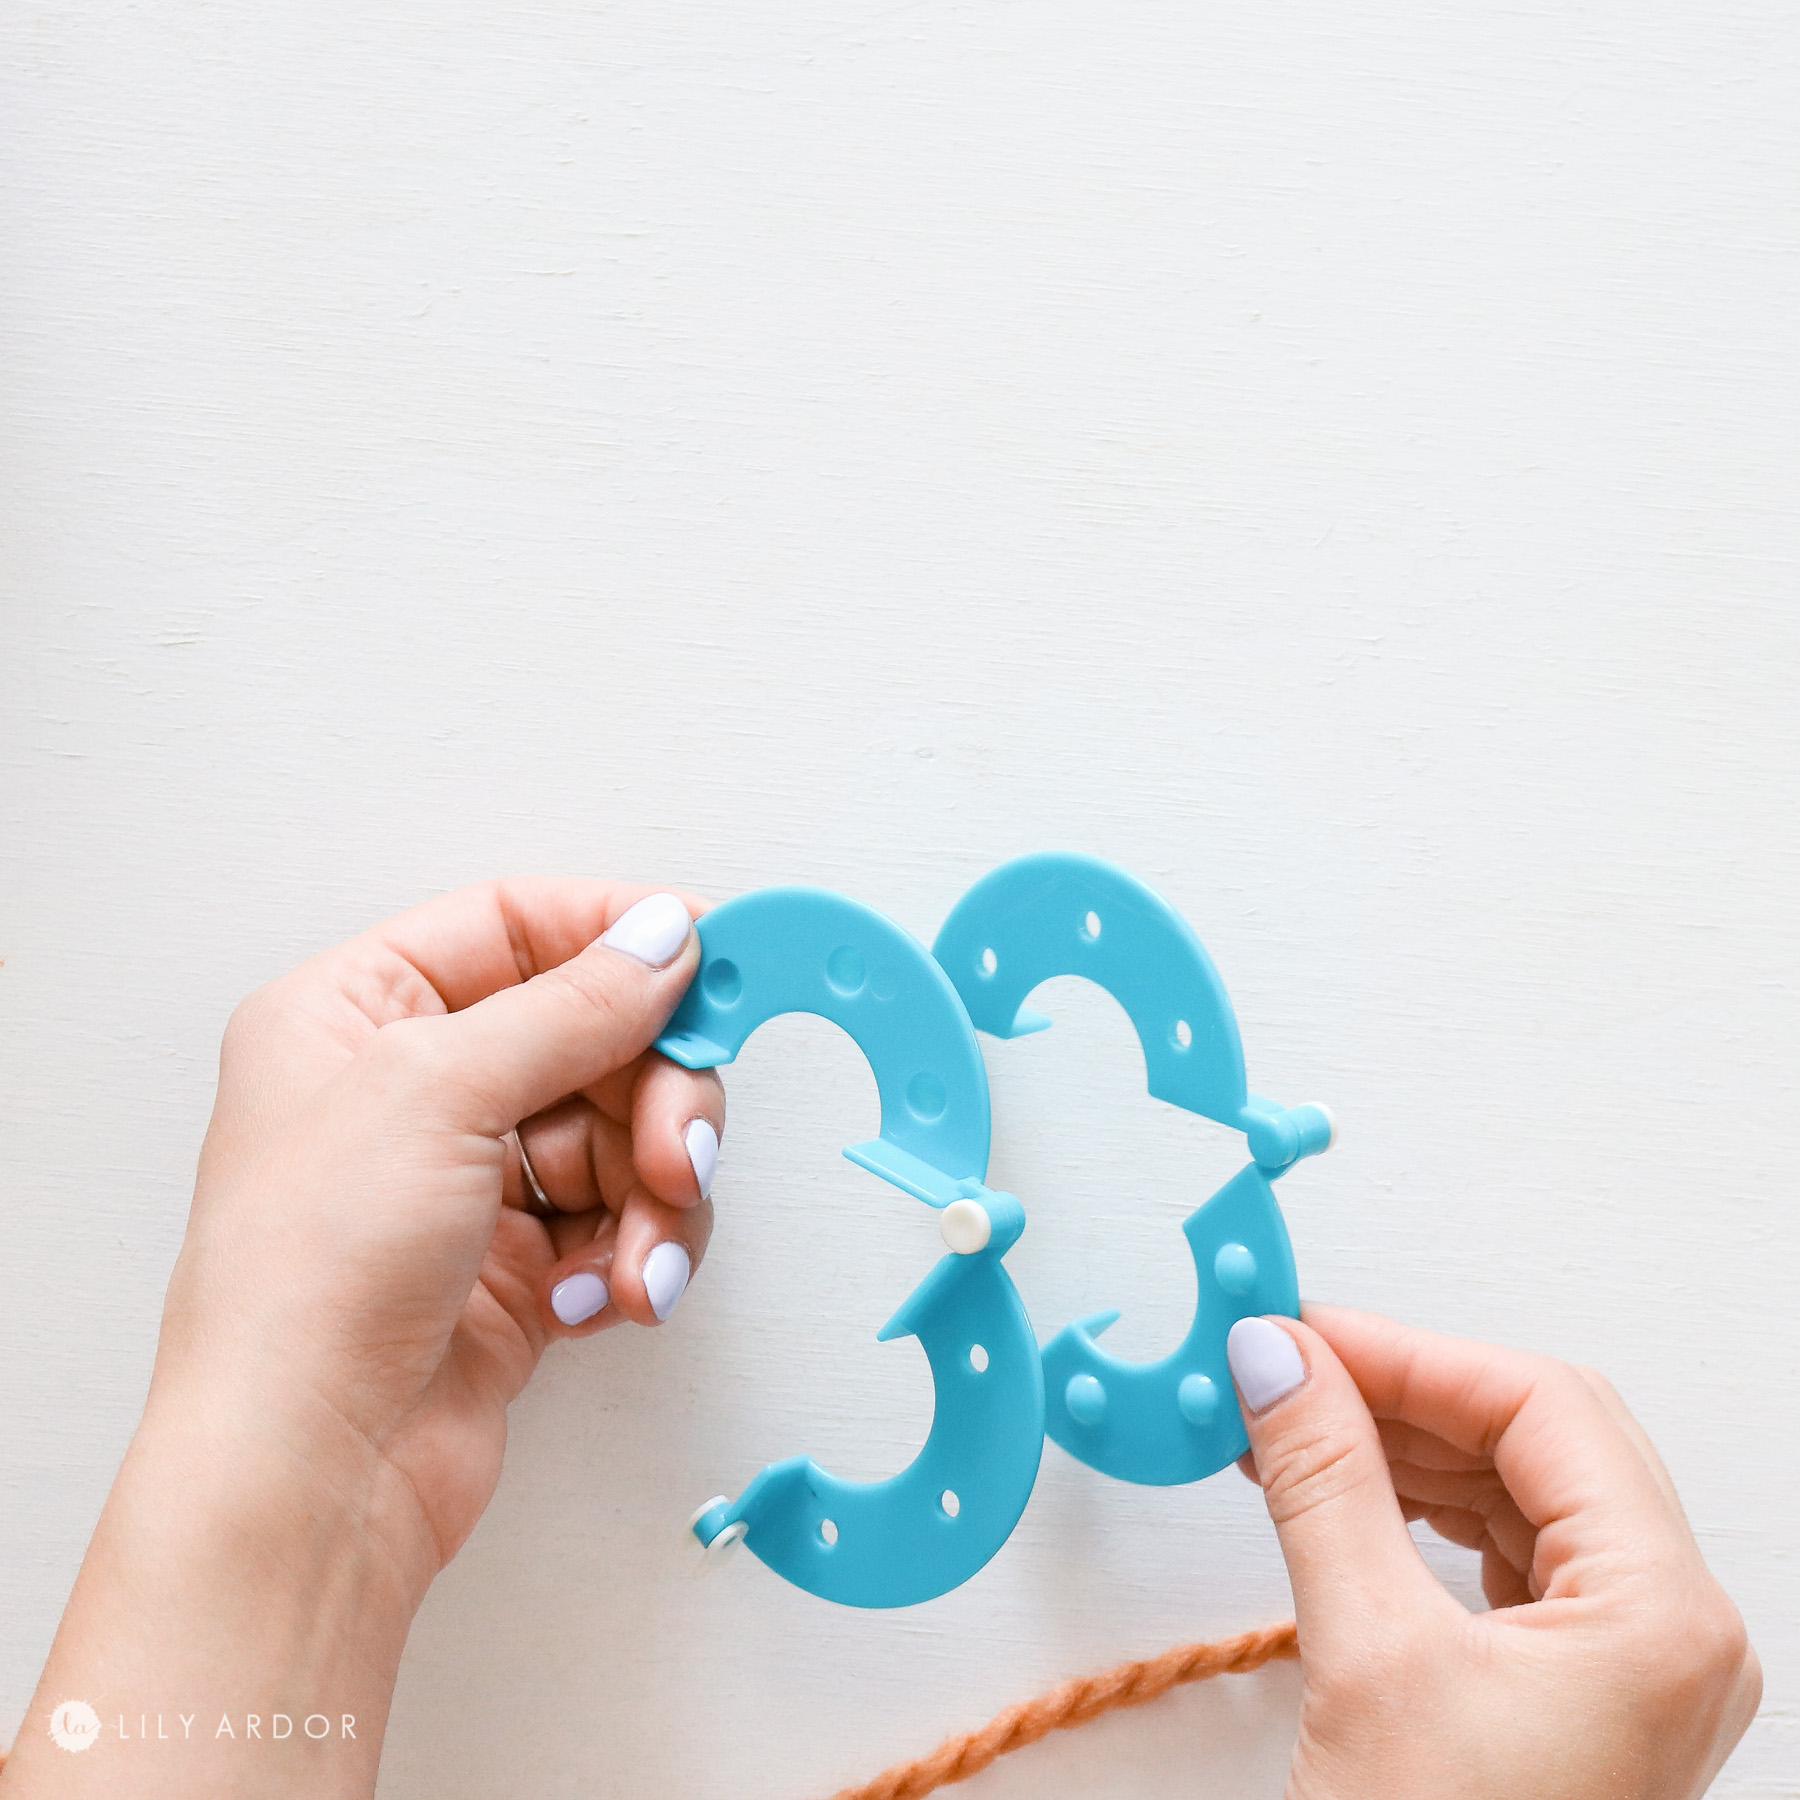
Like this! ( photo below )
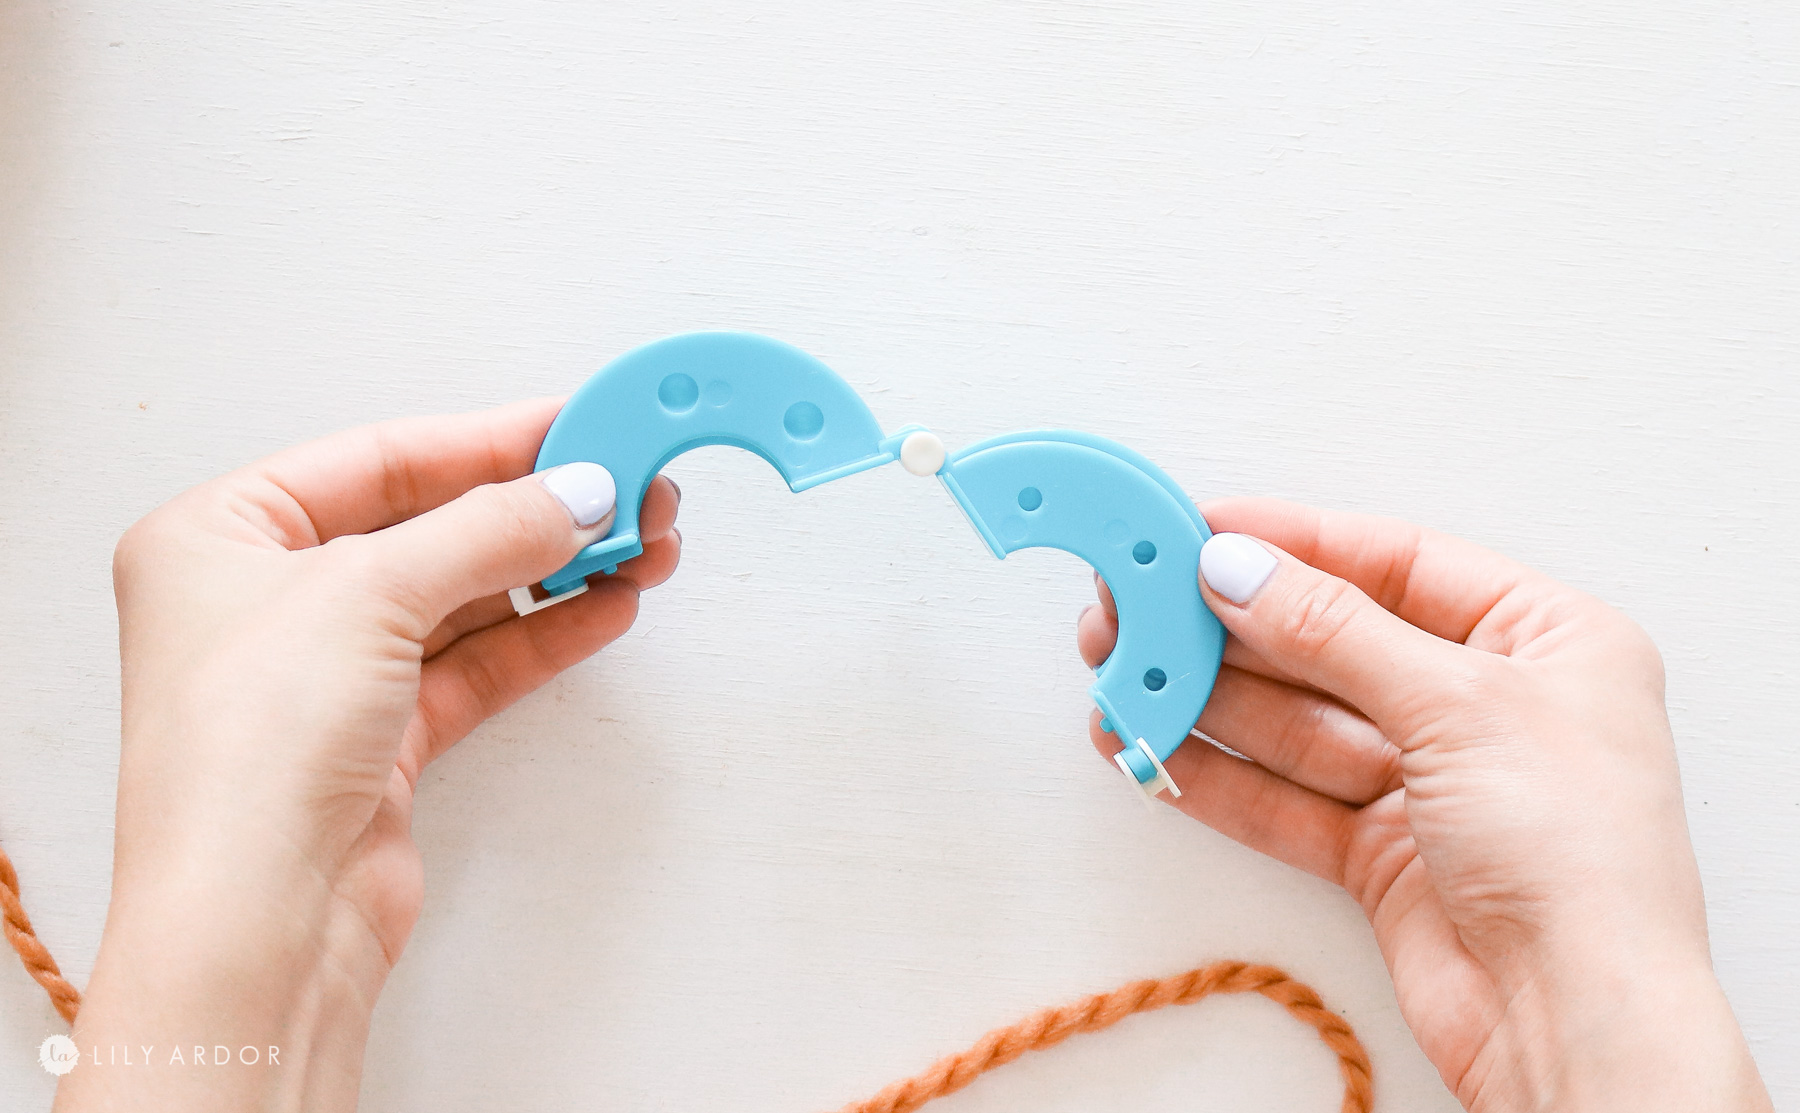
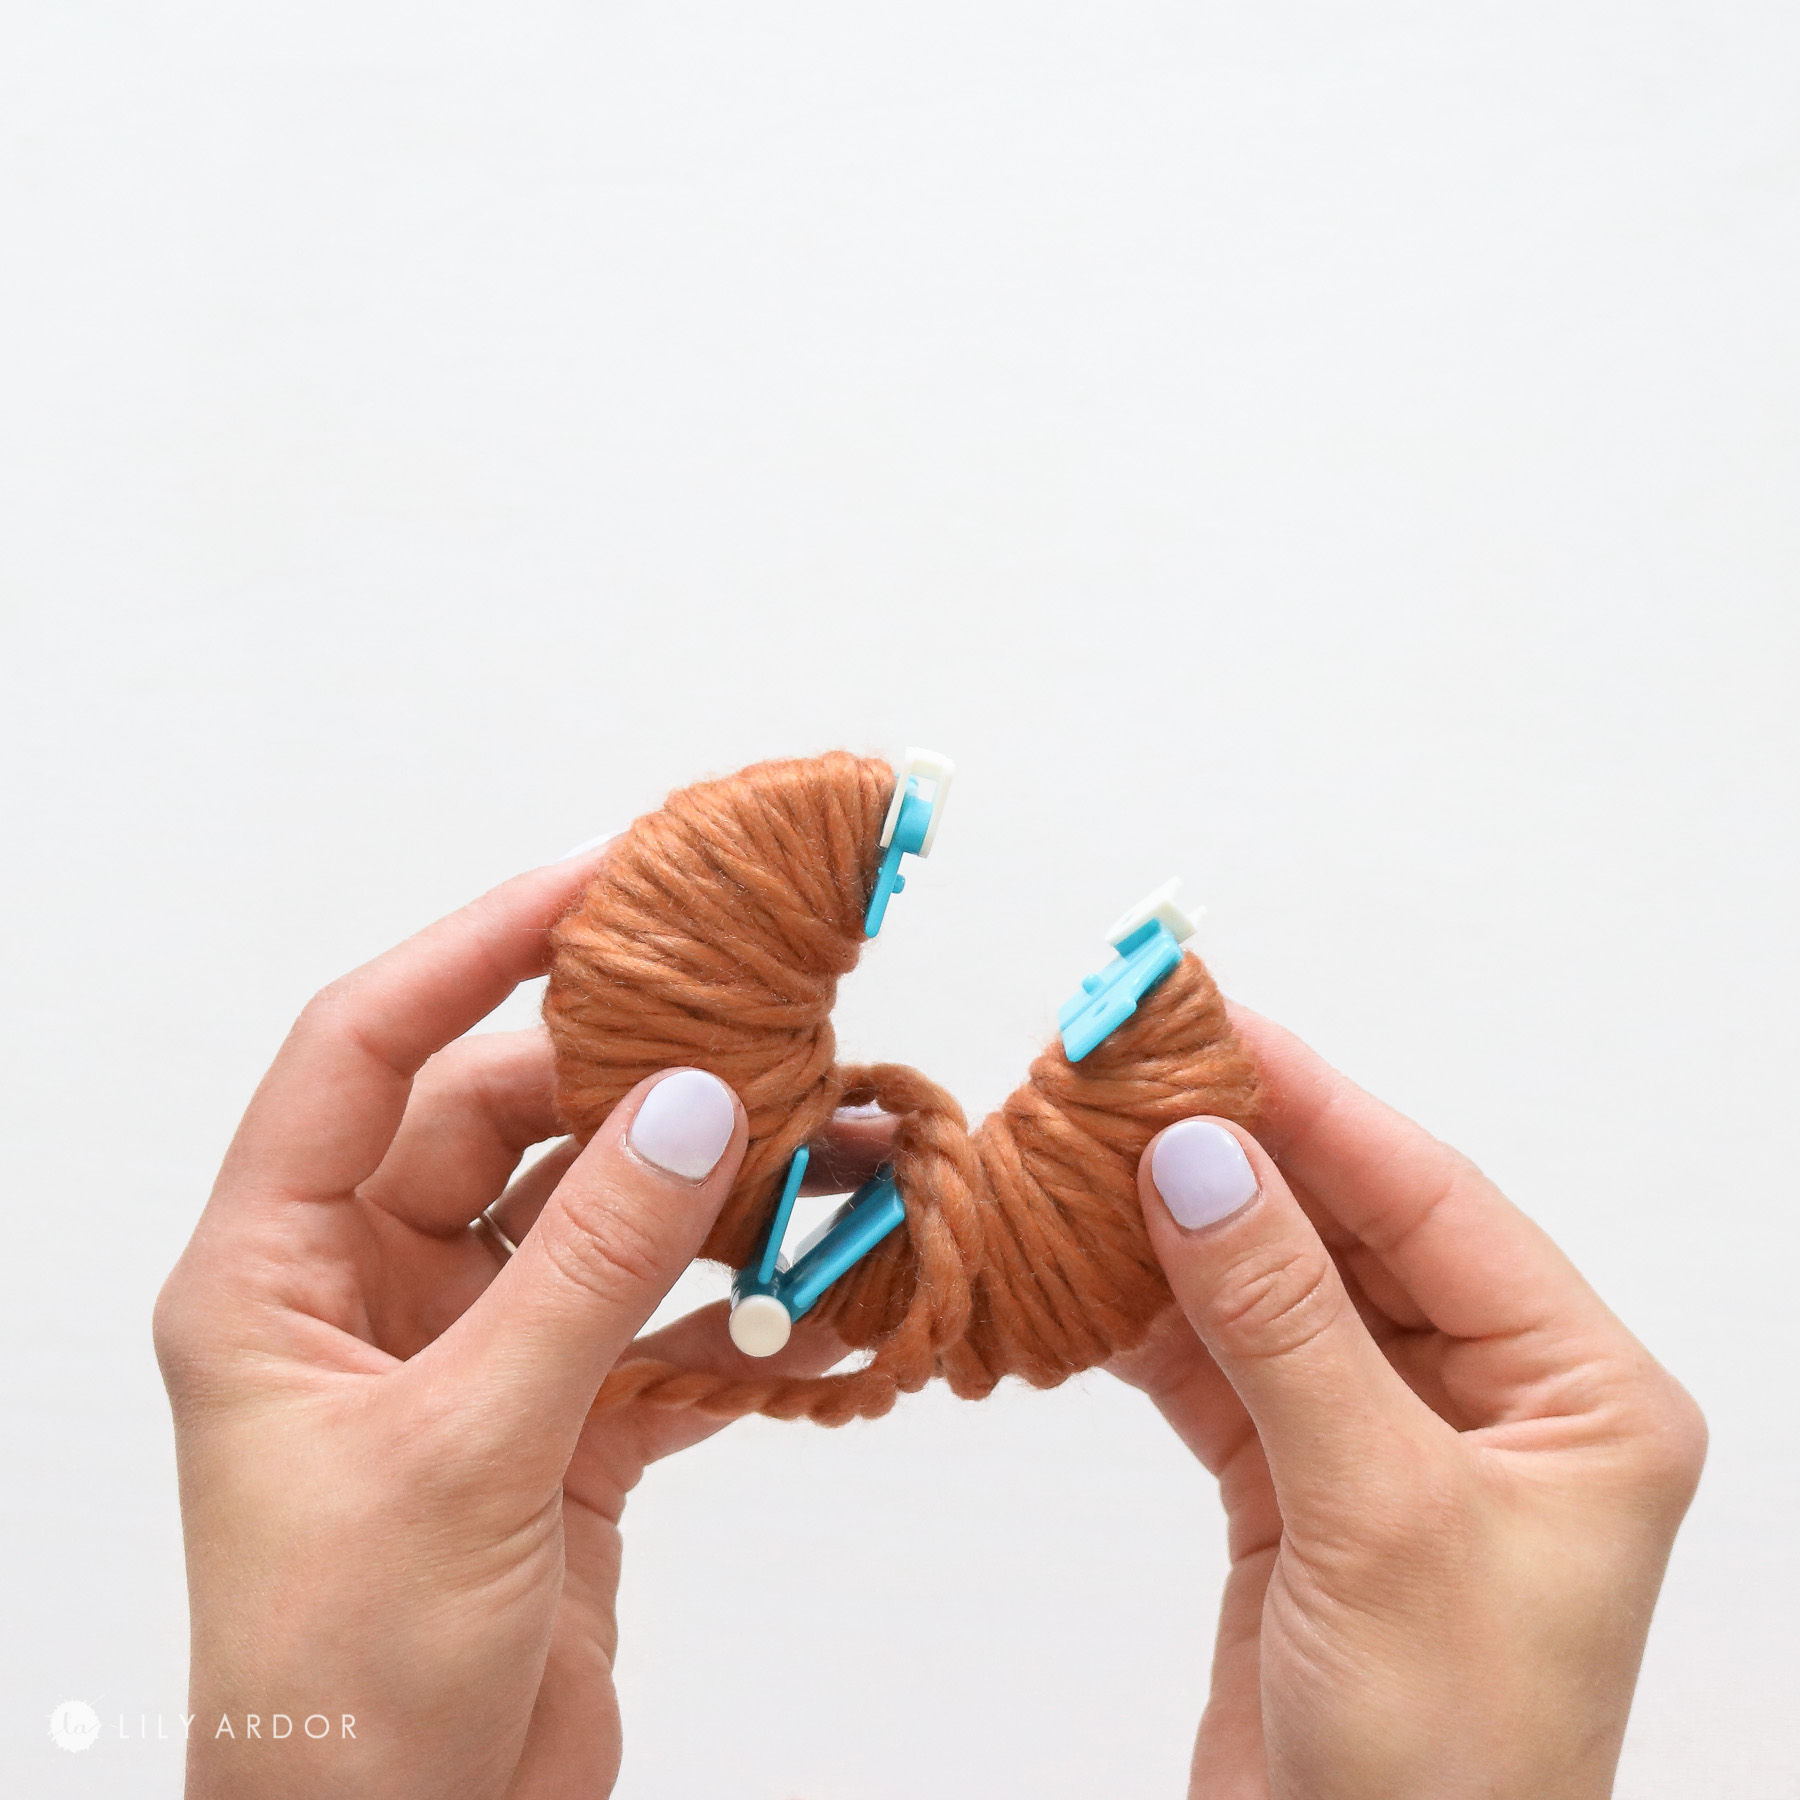
Step 2: Building up your pom pom!
Next while holding both plastics together start by wrapping your yarn around both sides. Keep wrapping until the curve on the inside is completely straight ( photo below for reference)
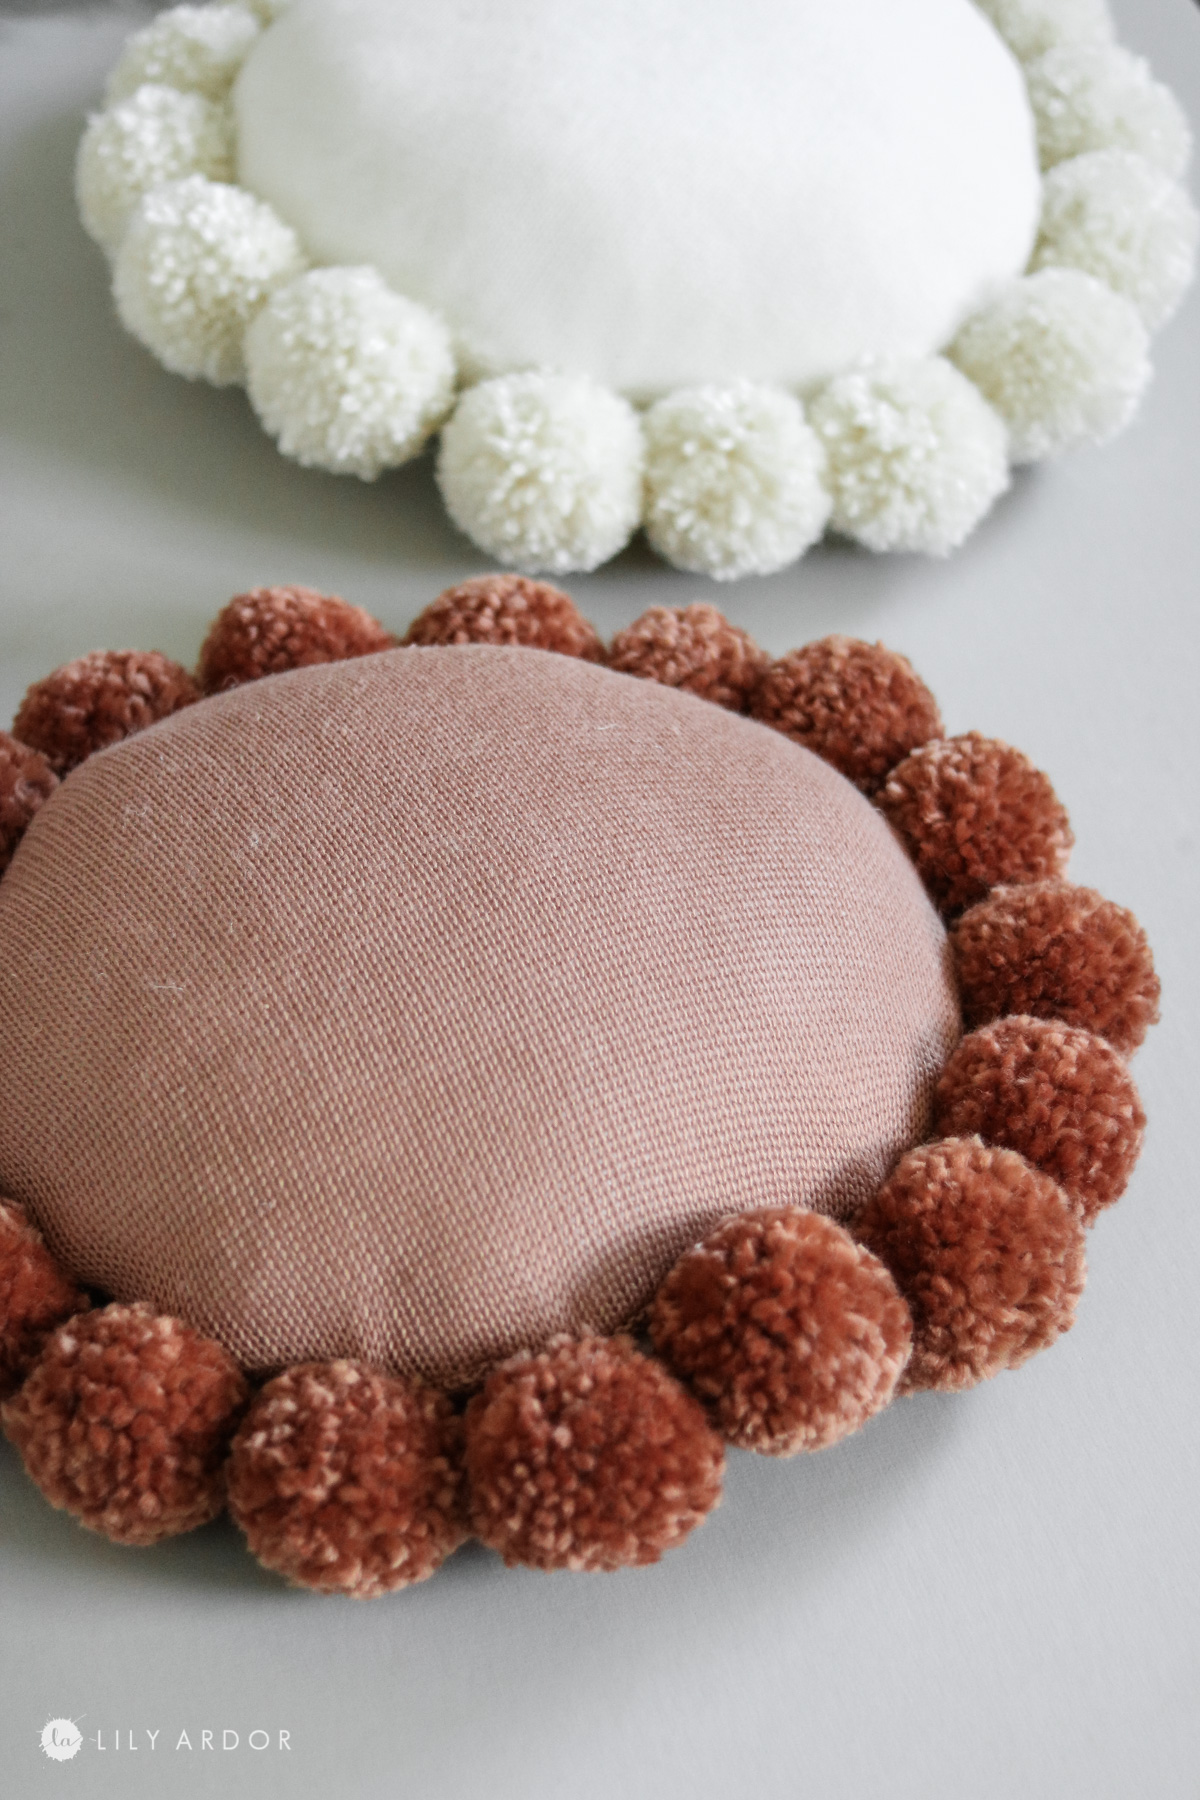
Honestly if it’s one thing I can say it I didn’t account for that much yarn to be used to create one pom pom. I used about 3-4 skeins of yarn per each pillow. Each pillow has 17 pom poms. I will say the thicker yarn is a lot quicker to work with.
Here’s how the inner curve should look. ( photo below) 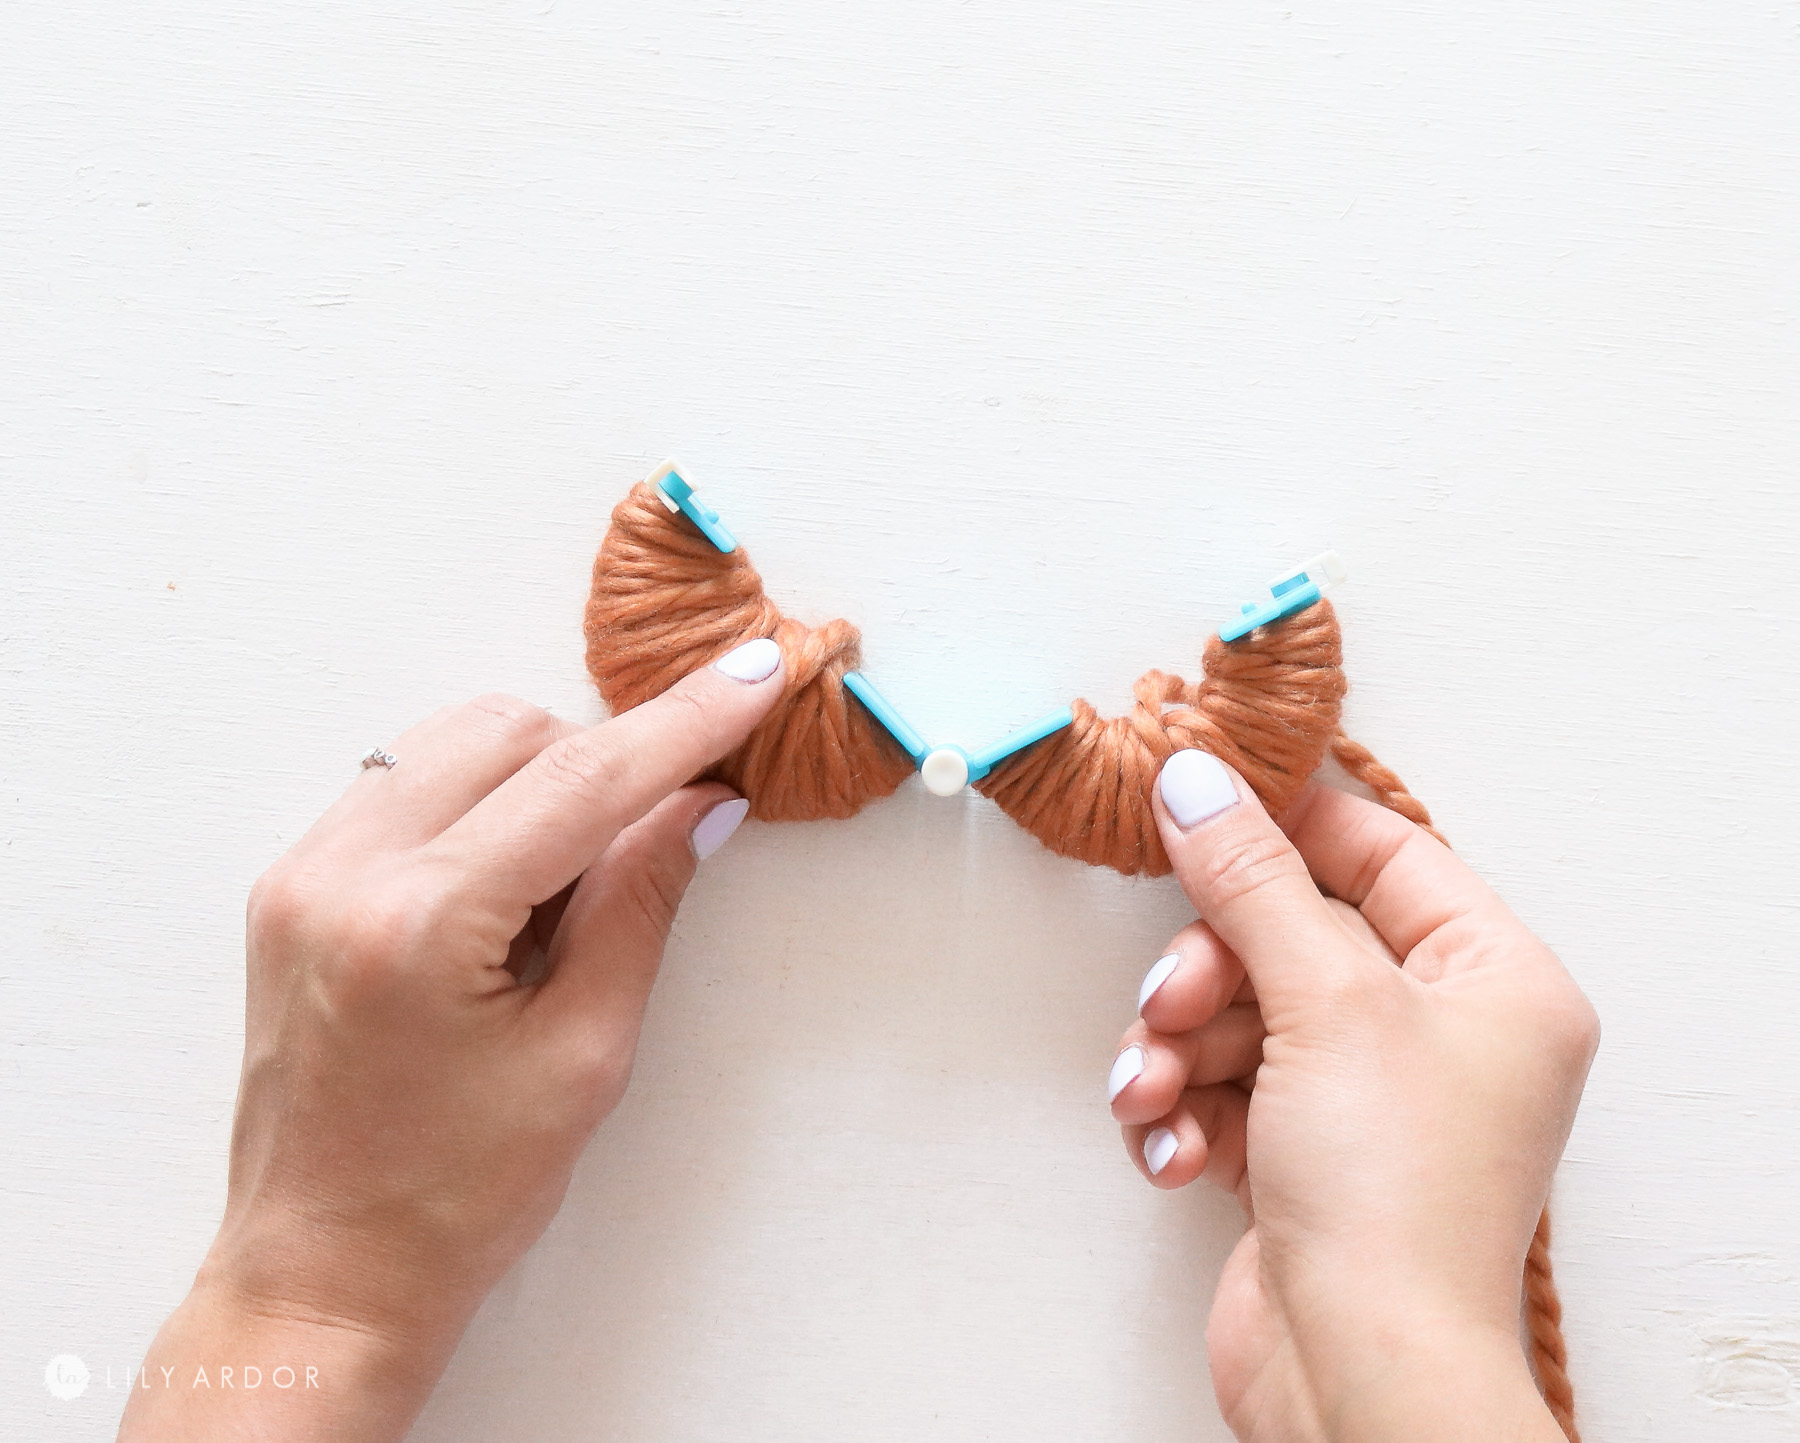
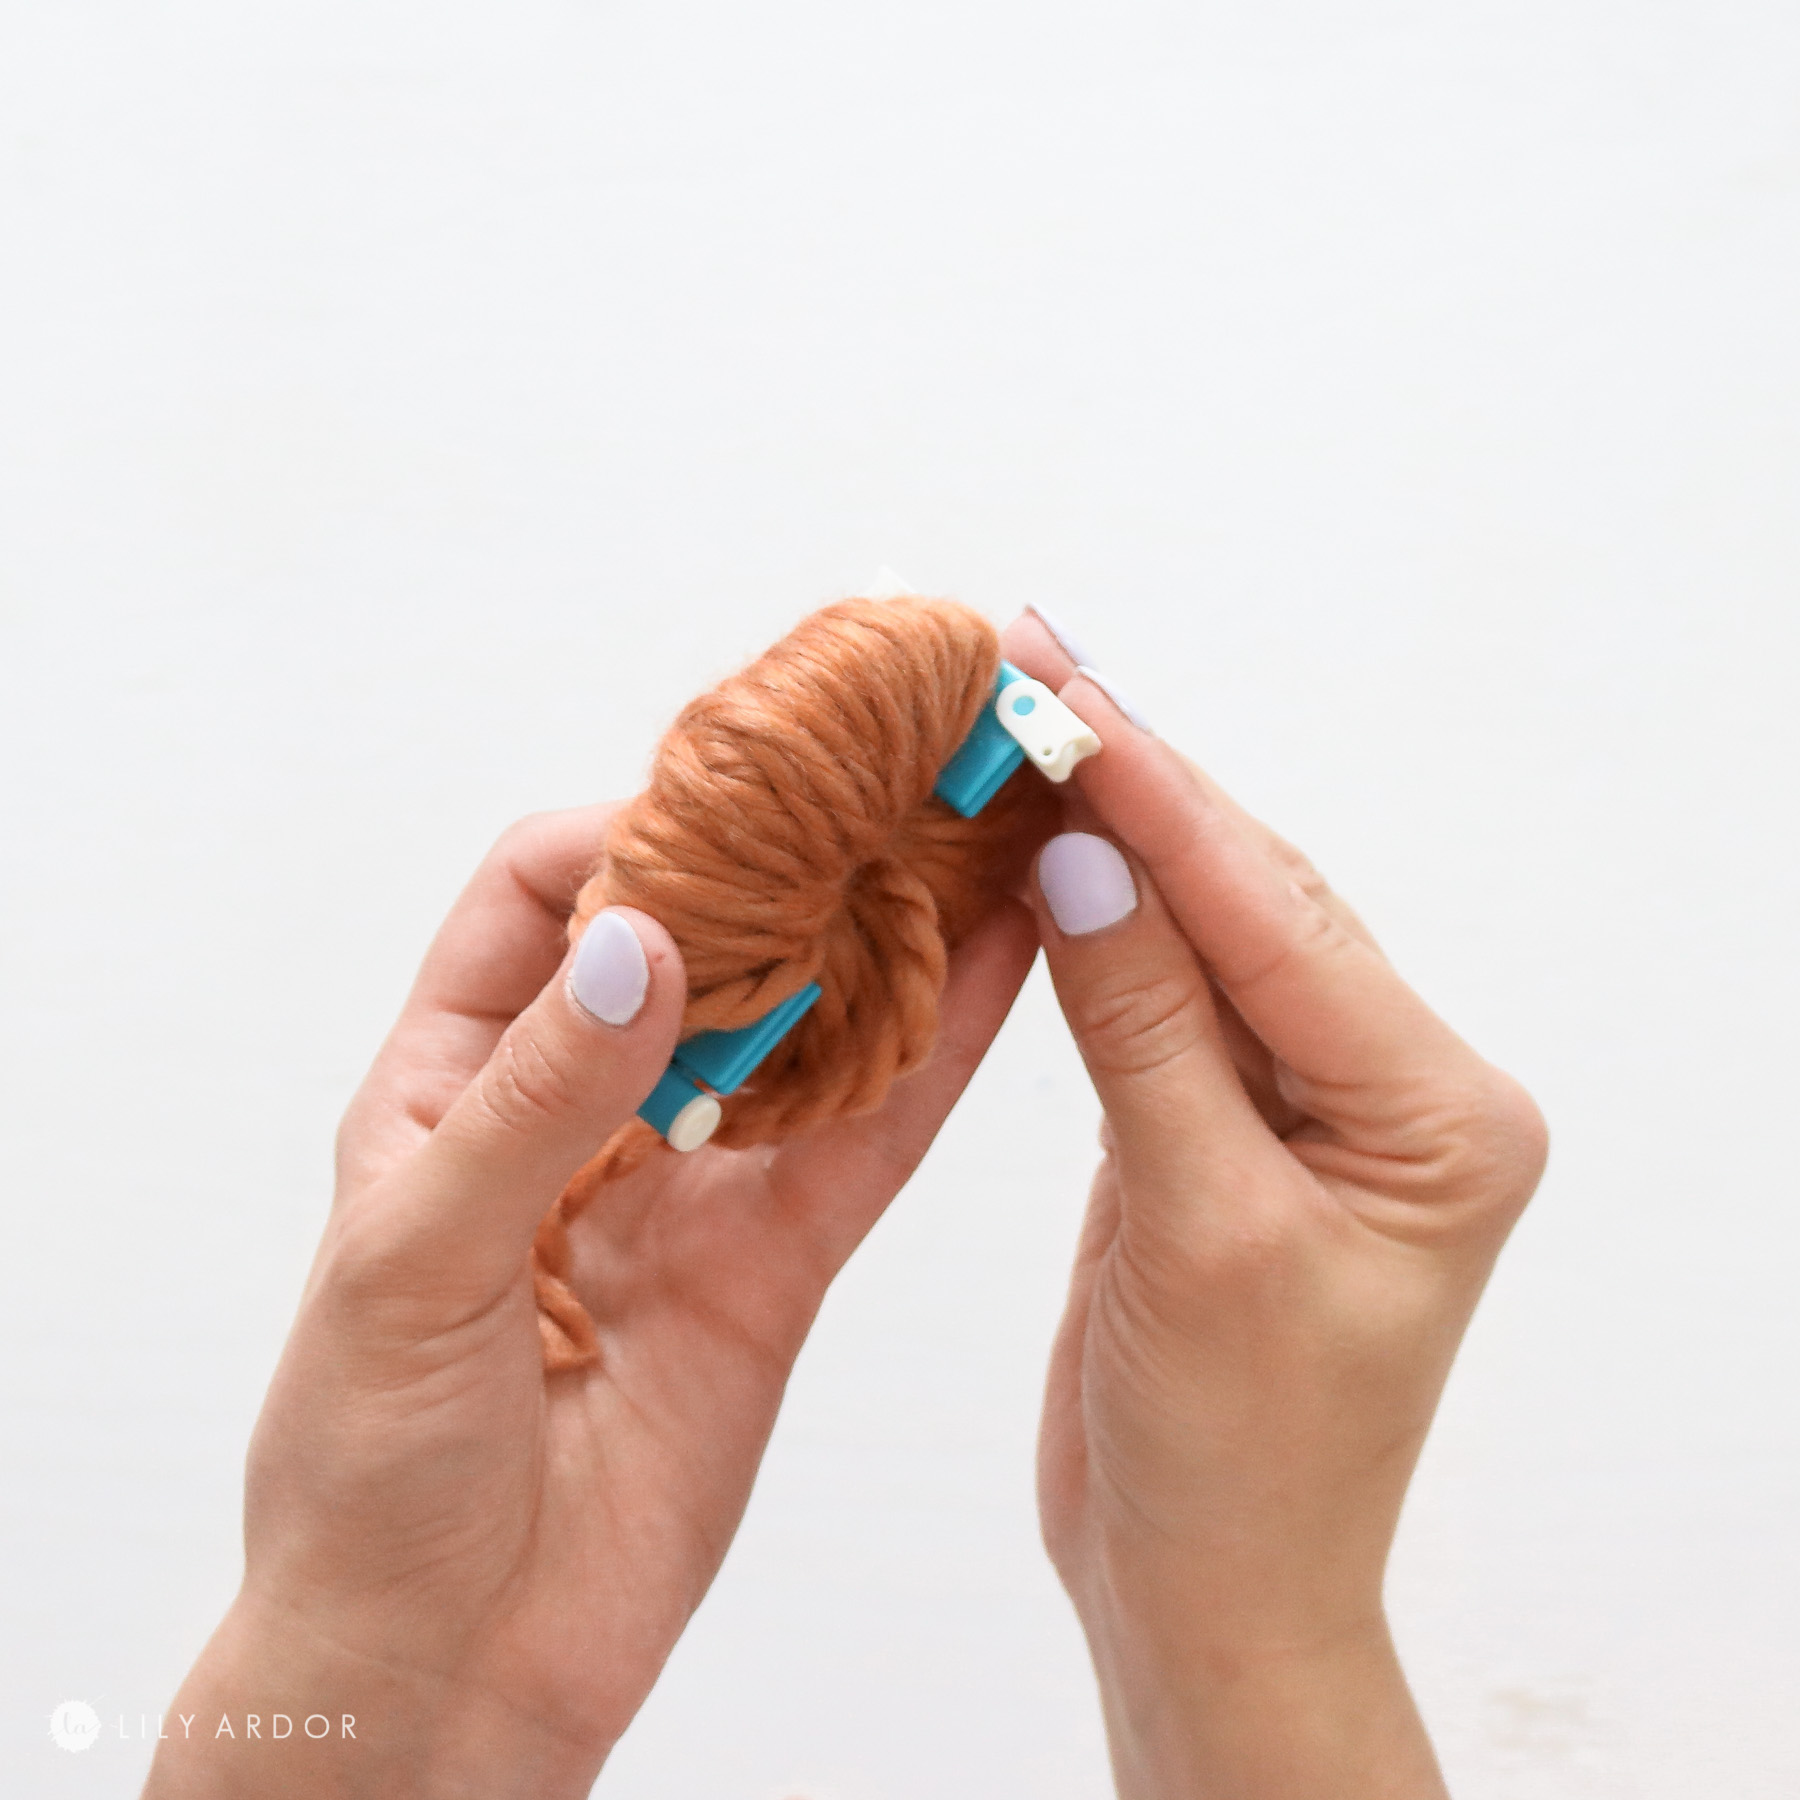
Step 3: Locking it in!
Okay now close your half circles and lock it in with the little plastic clip.
Here’s where you lock in the plastic clip. ( photo below)
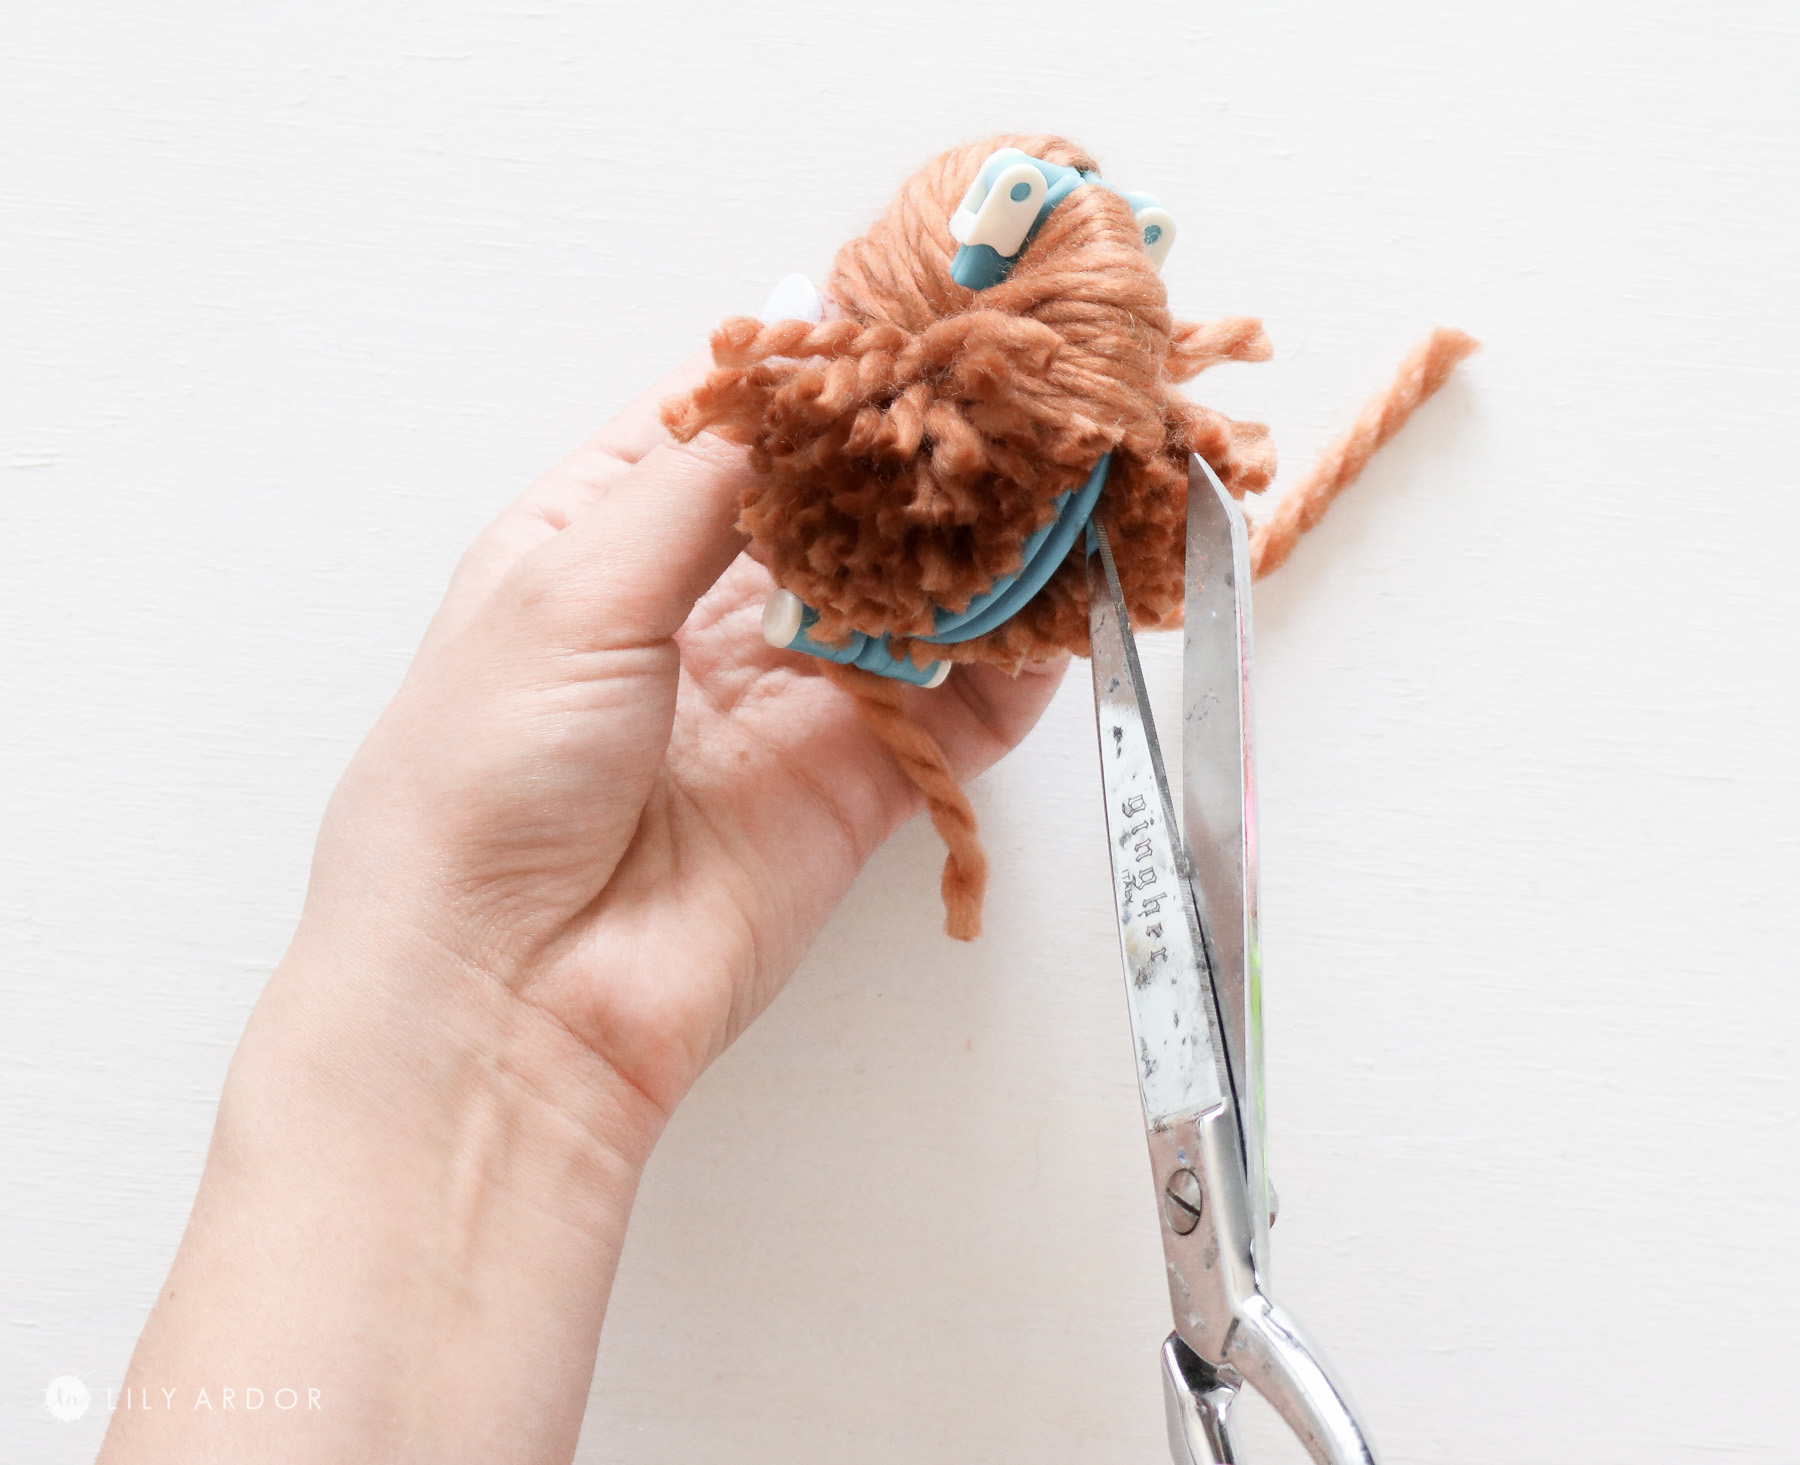
Step 4: Trimming and Shaping the pom pom!
Now stick your scissors in the gap between the two plastic pieces and cut all the yarn making your way around the circle. DON’T open your lock just yet.
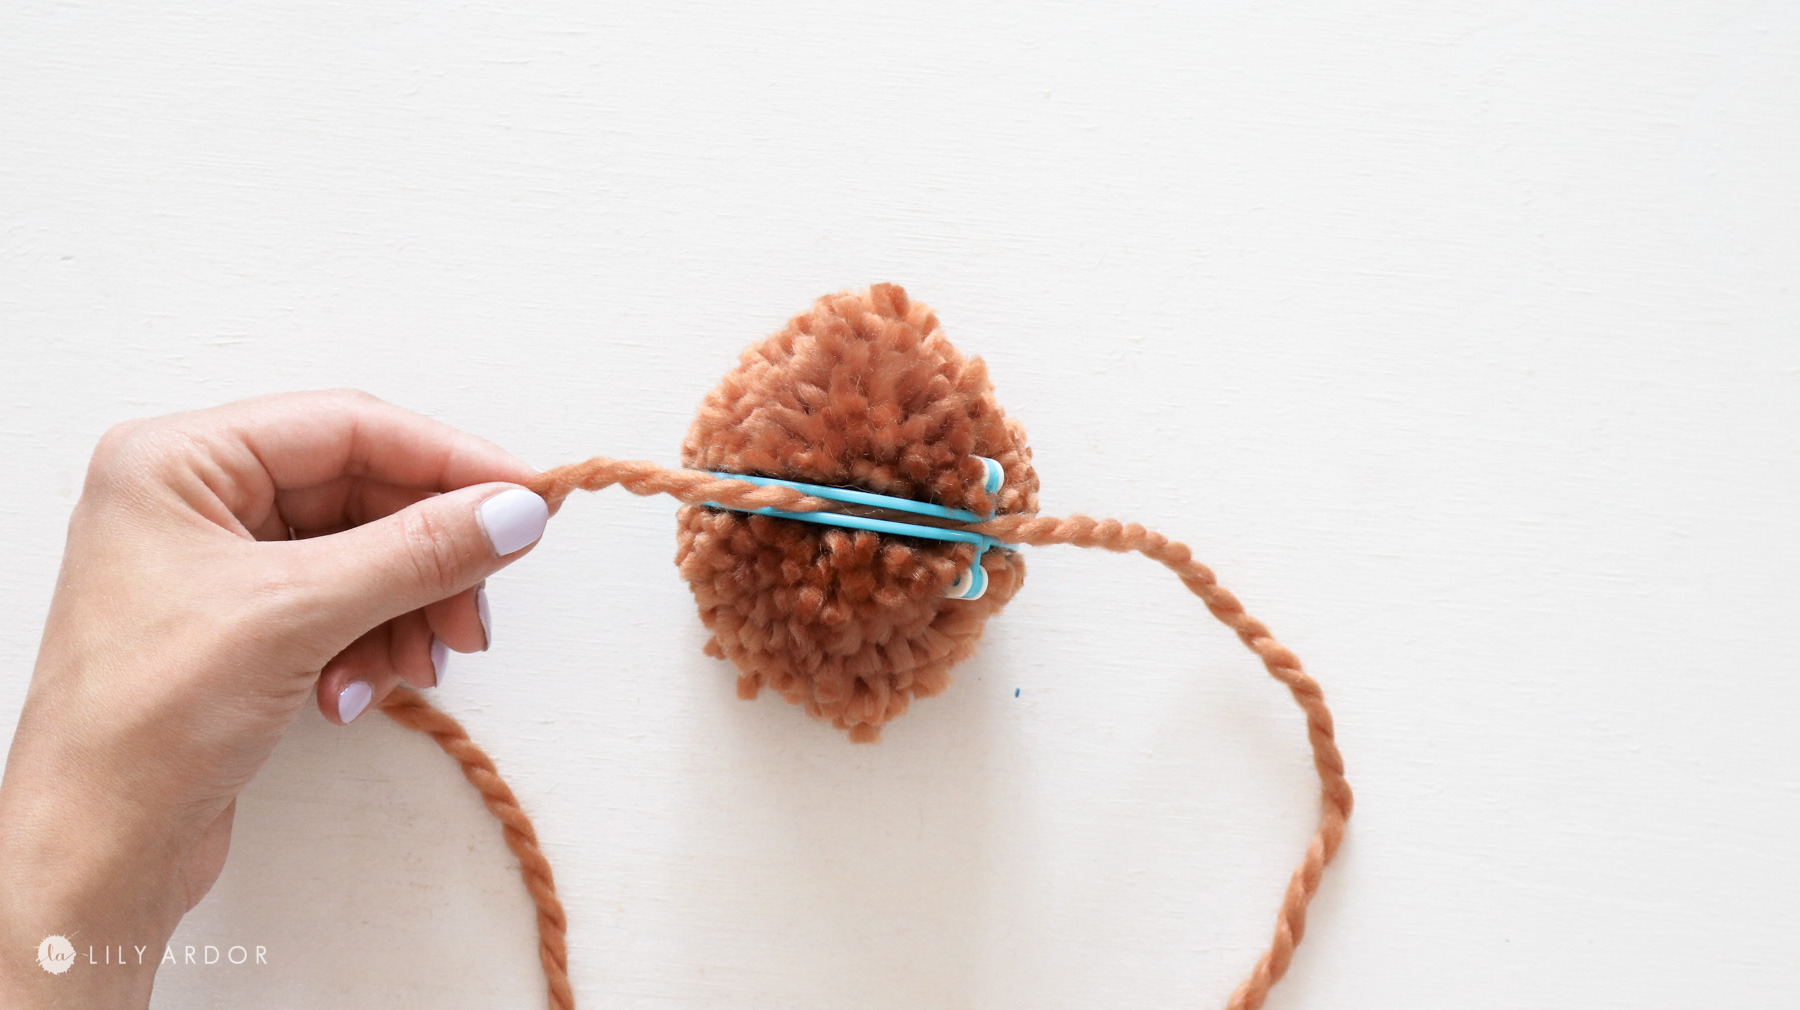
Step 5: Securing the fluffiness!
Now to secure your pom pom cut a piece of yarn that’s about 15 inches long. Stick it in between the two plastics and tie 2-3 knots. You can now remove the white plastic locks and both sides of the plastic. 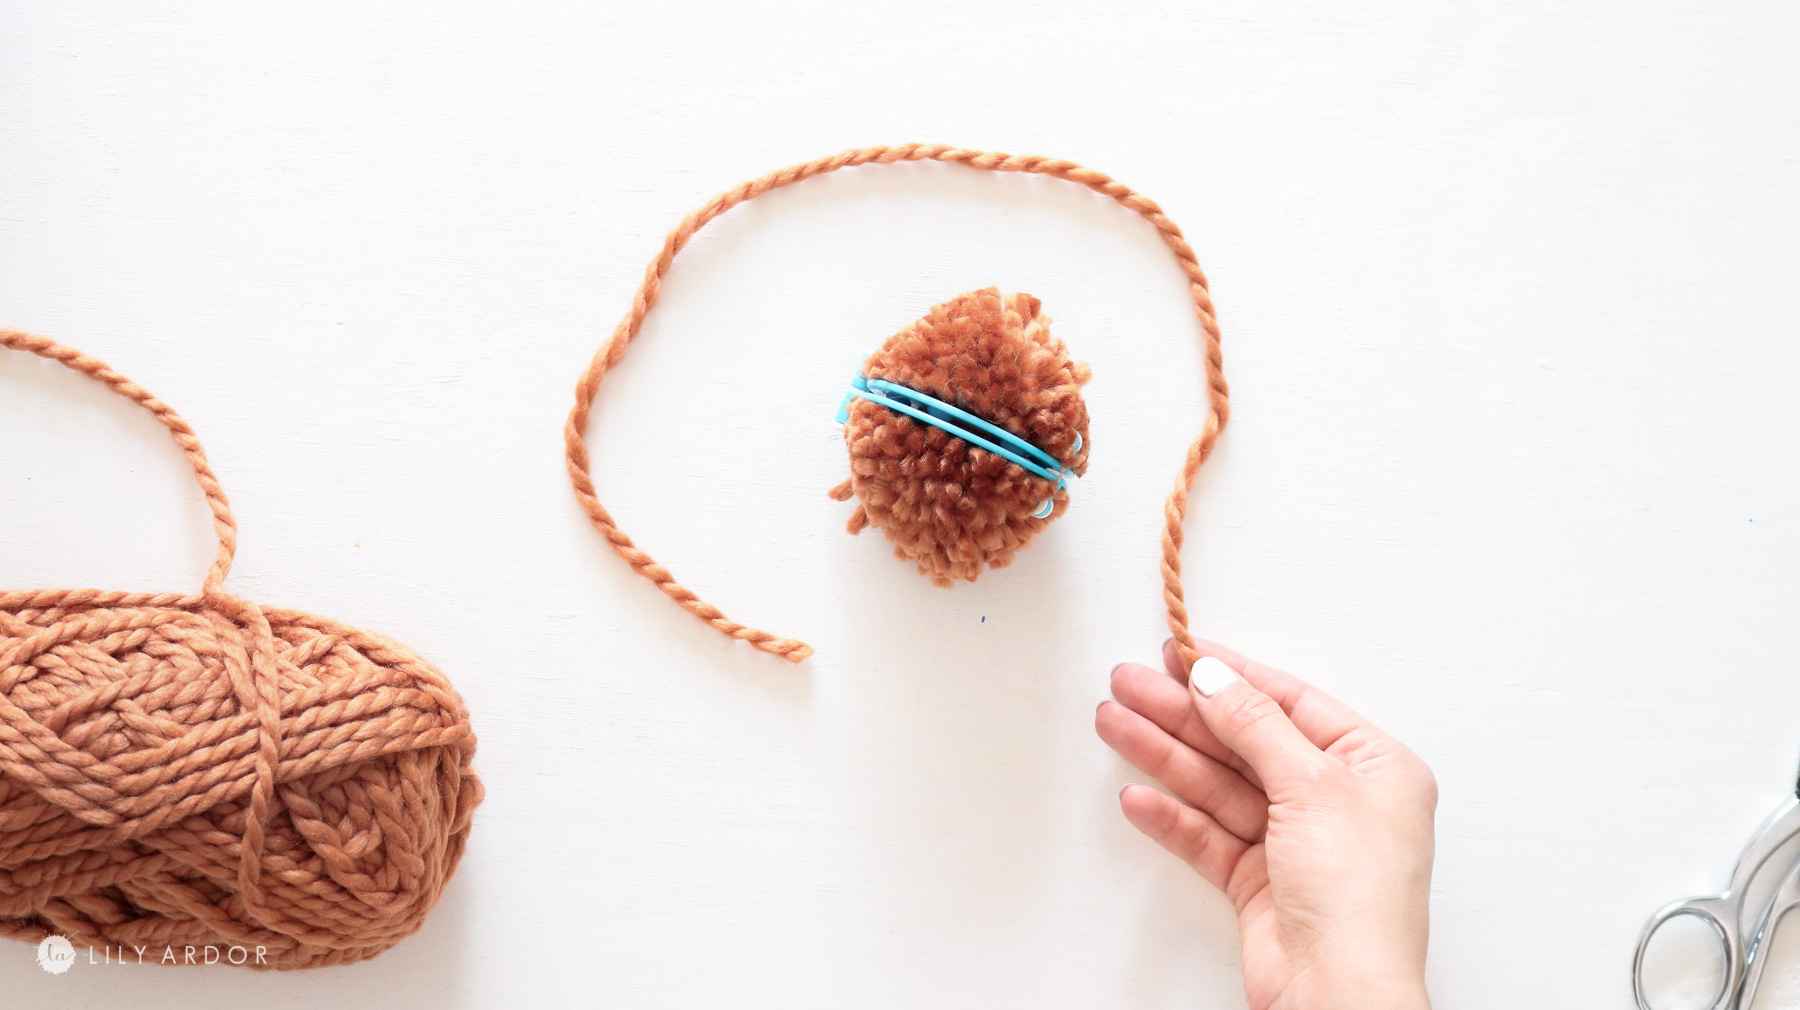
While holding the two tails you have left from the 15″ inch piece of yarn you used to secure it trim the pom pom with some scissors. Make sure you don’t cut the tails off as you’ll use them to attach the pom pom to the pillow.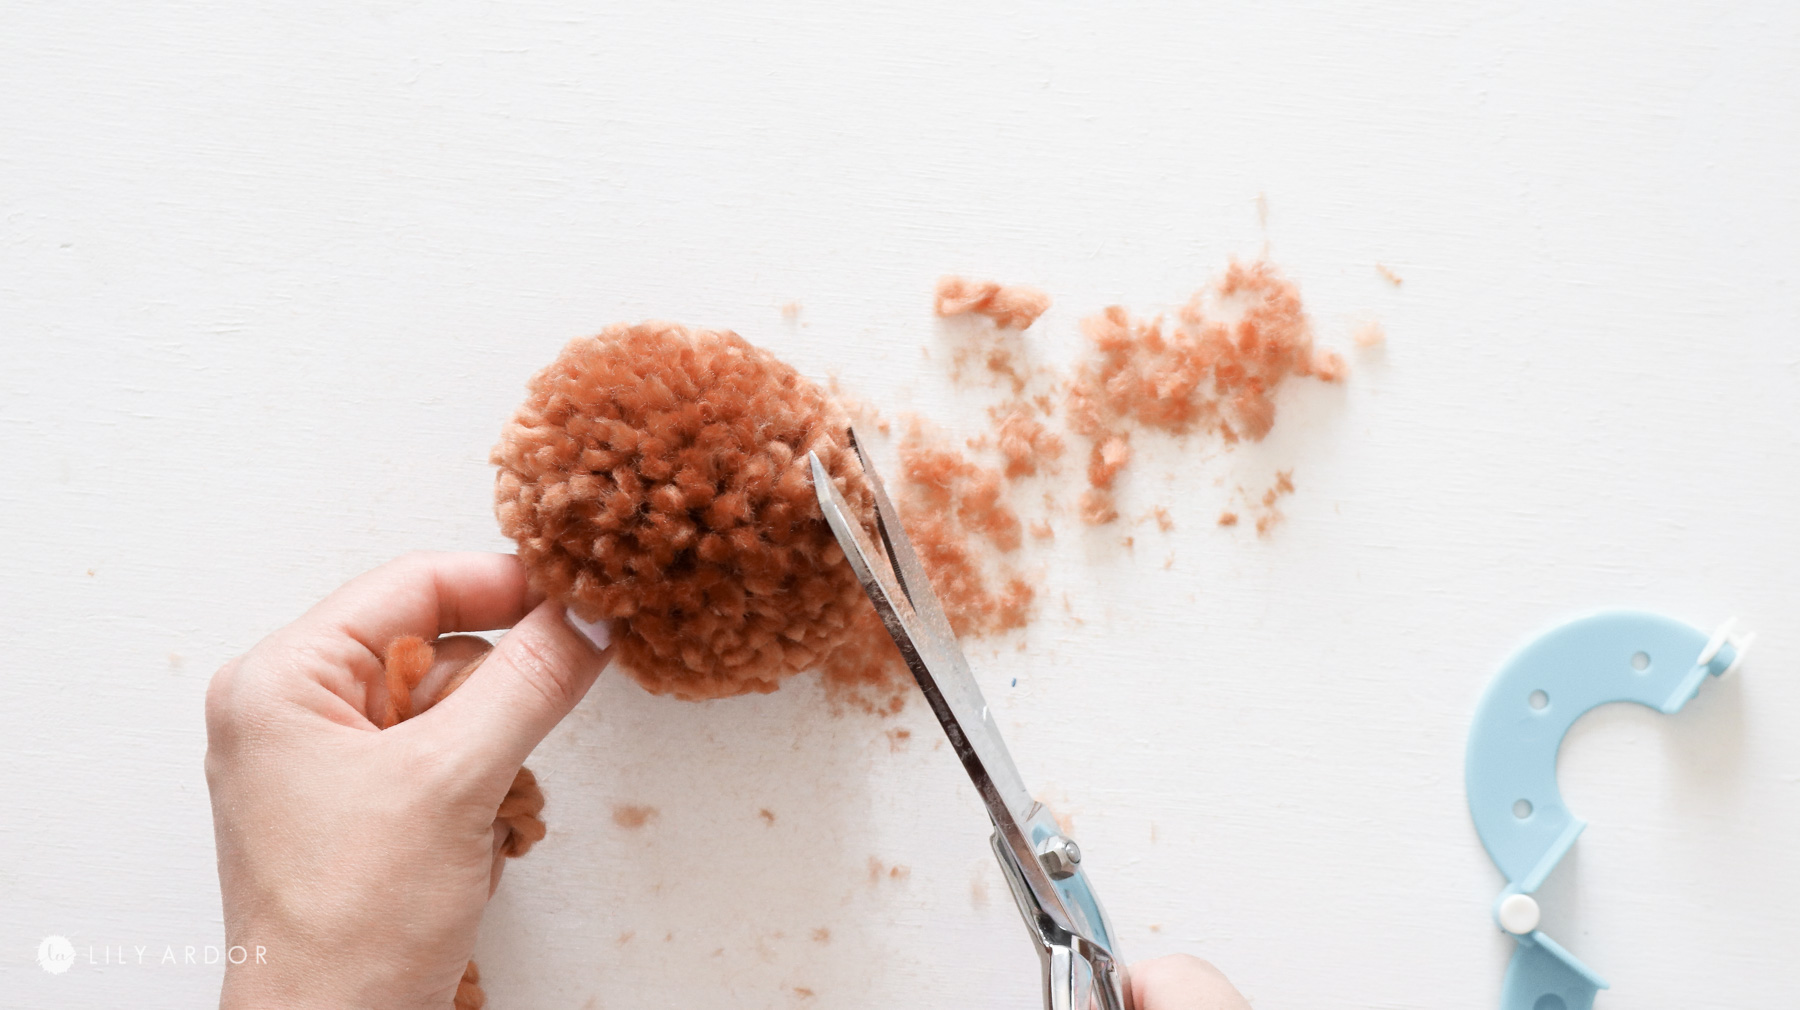
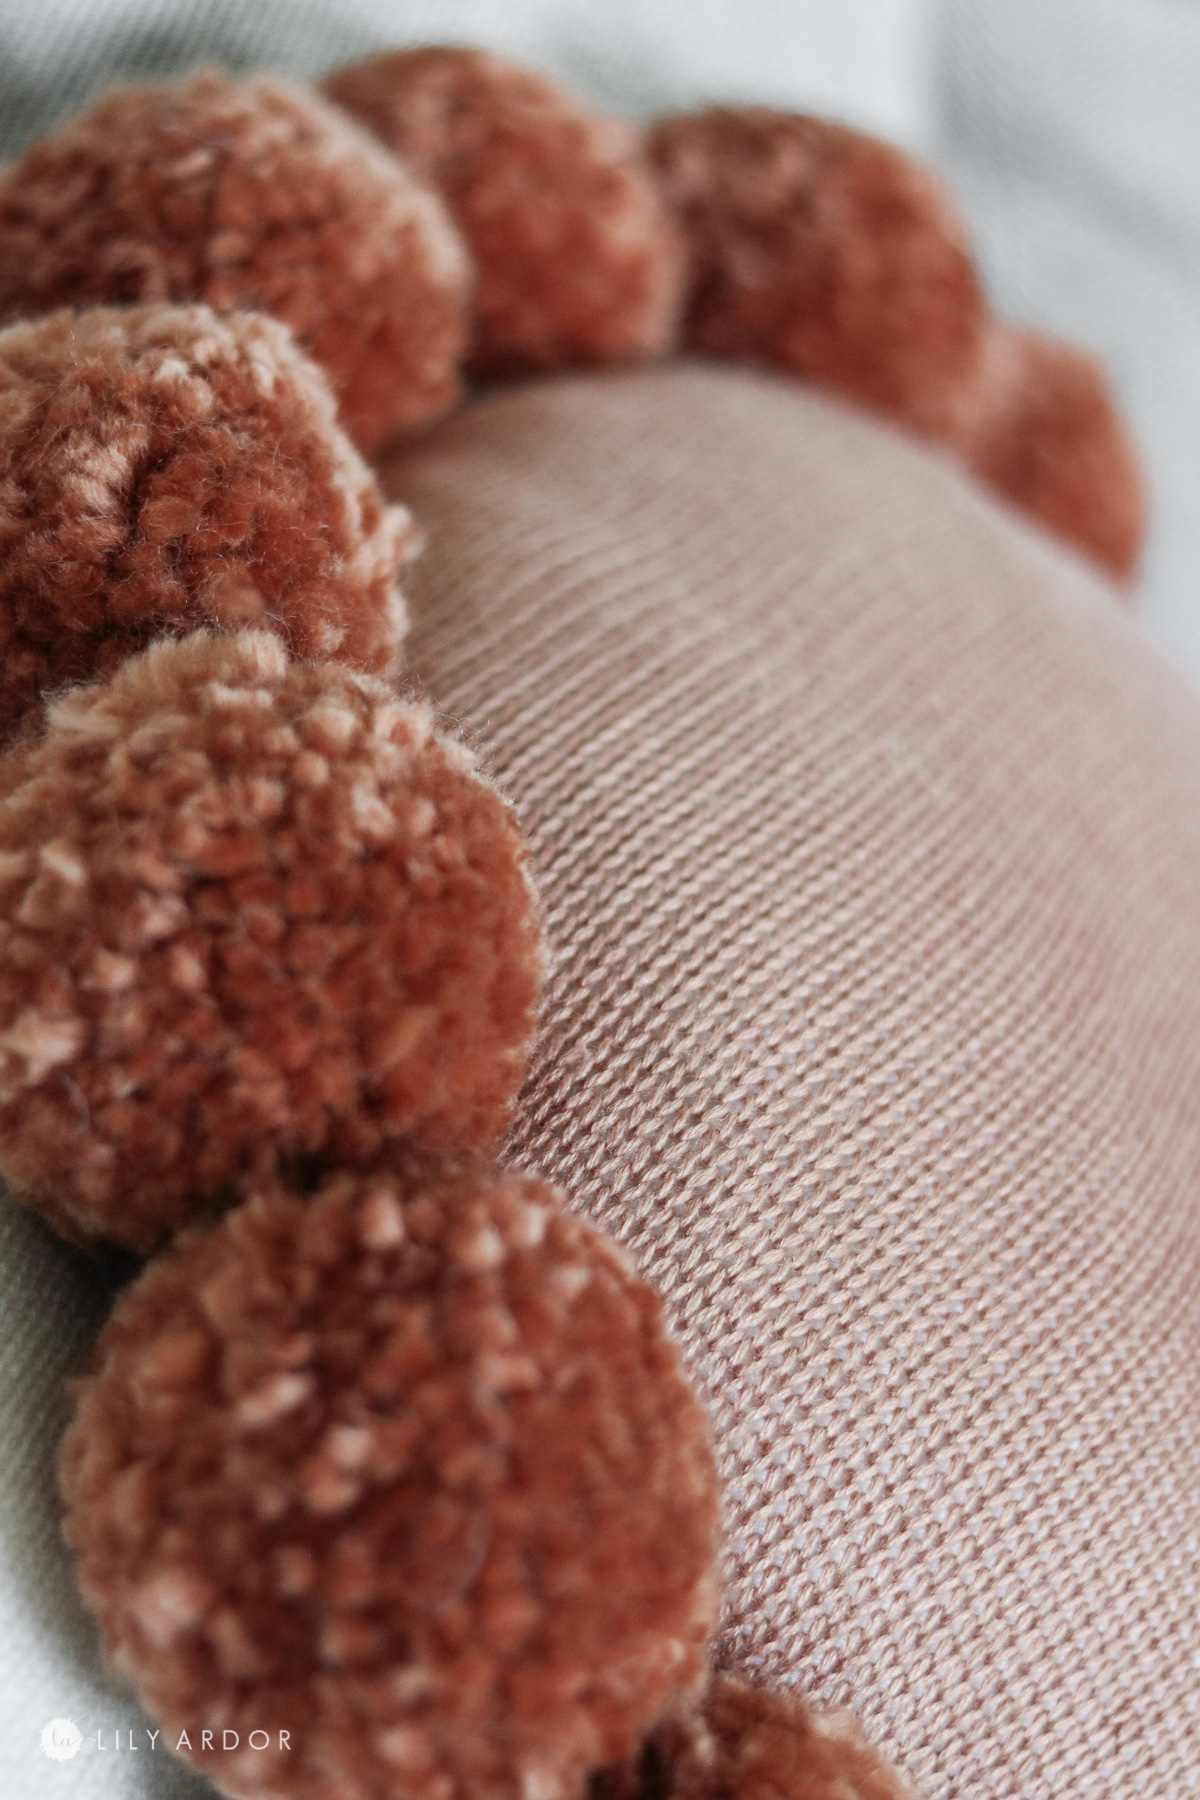
THAT’S IT!! I love how full the pom pom turn out with this kit! I could never get them to look that good with my homemade kit. I should mentioned that using thicker or fluffier yarn definitely helps. I loved working with this thick burnt umber yarn vs the regular white yarn I got.
OTHER HOME DECOR DIYS YOU’LL LOVE :
- HOW TO PAINT YOUR COUCH TO LOOK AND FEEL LIKE LEATHER!
- TRANSFORM OLD DOILIES INTO WALL ART
- ENTRYWAY BENCH USING 2X4’S
- DIY AFRICAN MUDCLOTH THROW PILLOWS
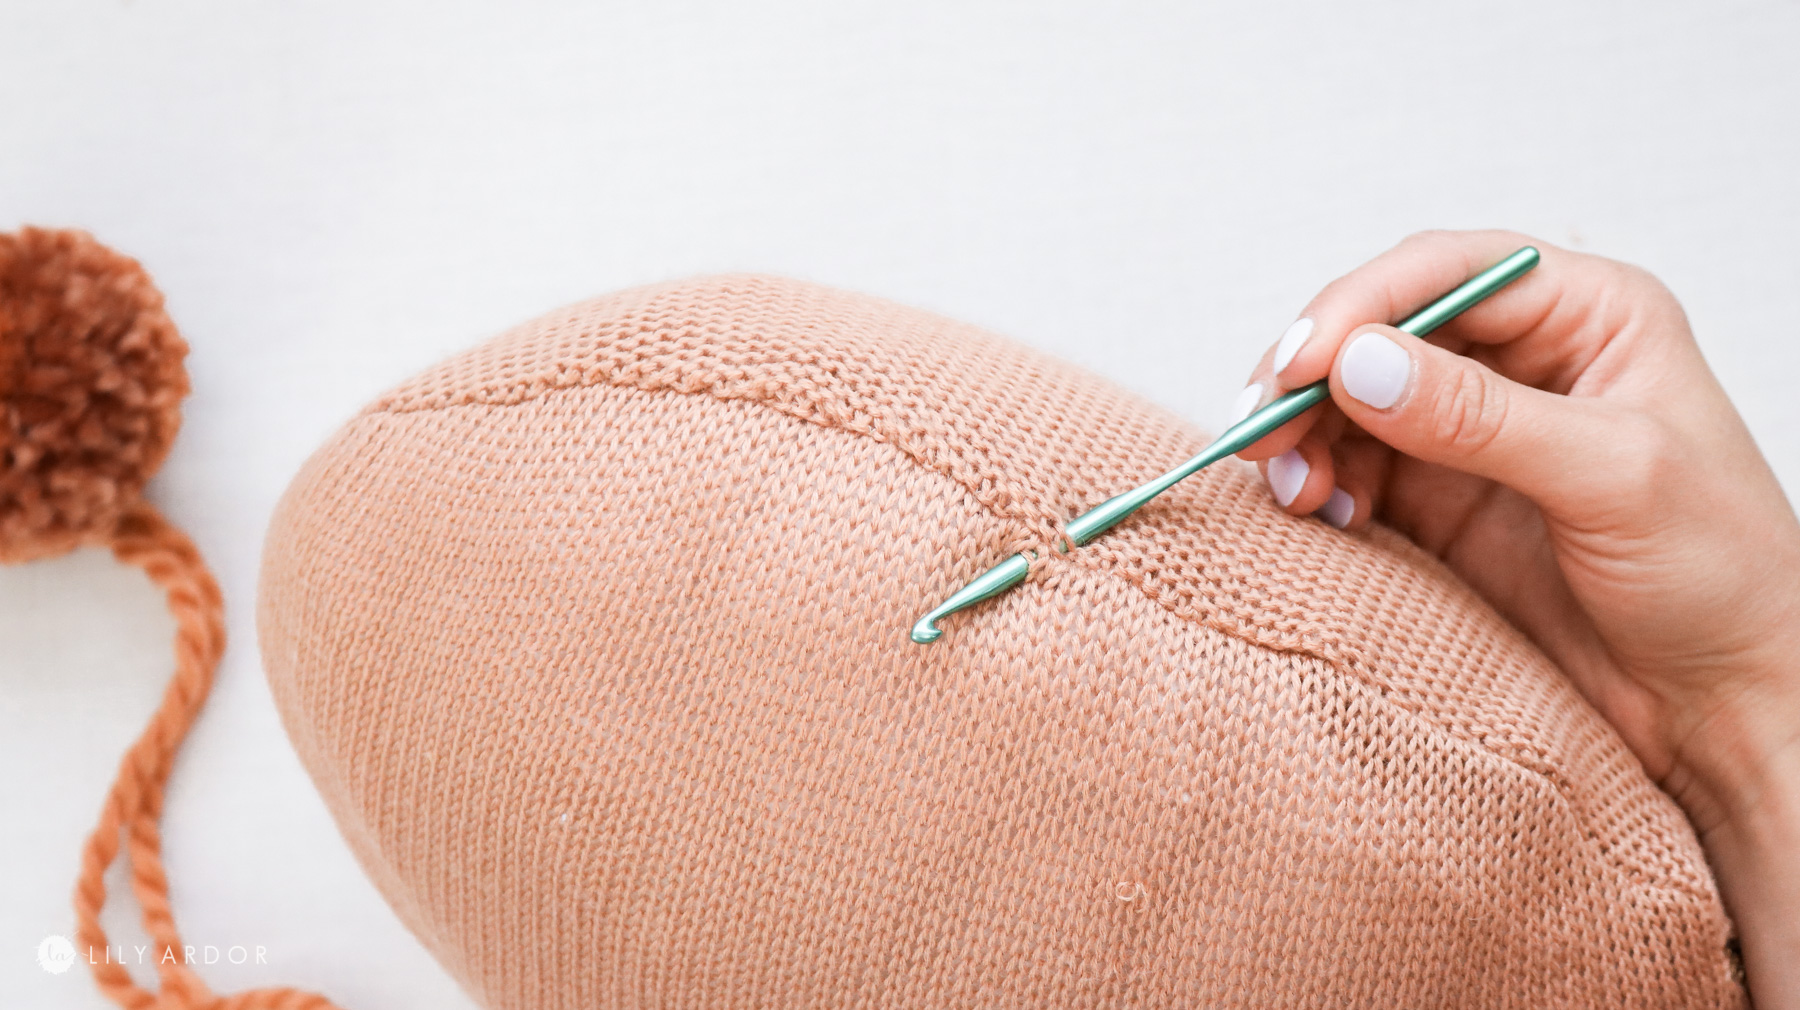
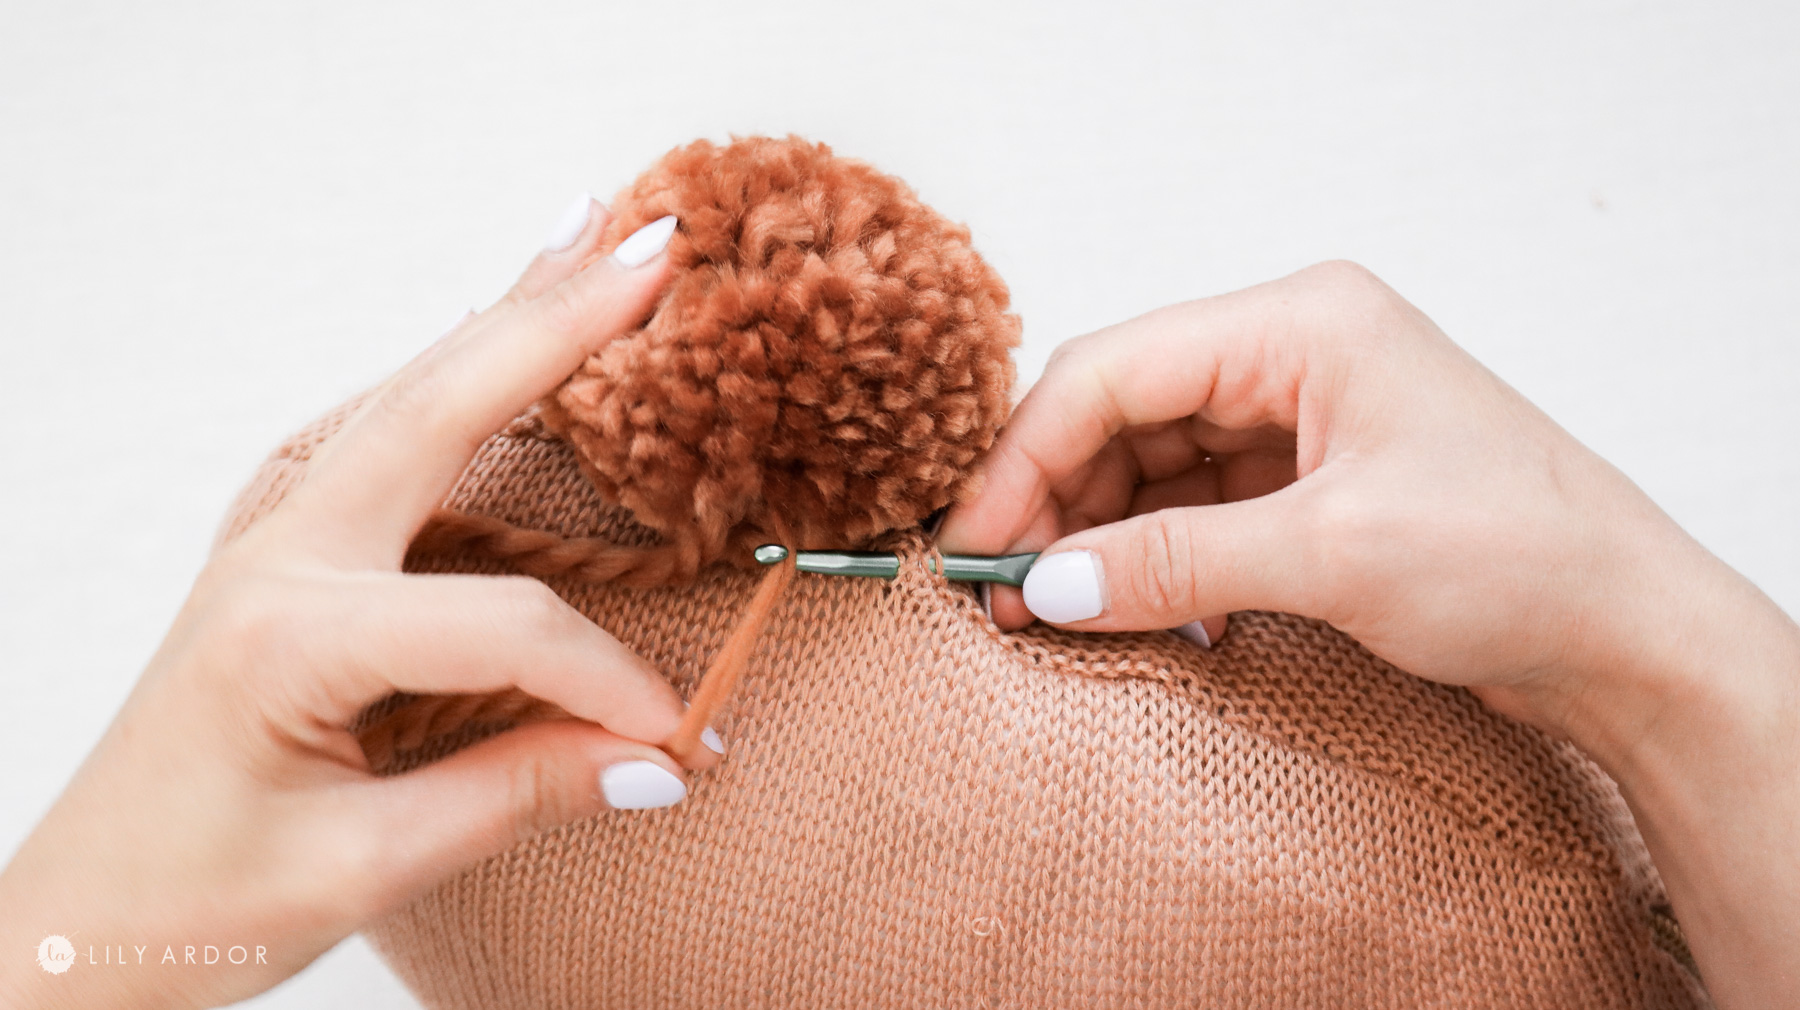
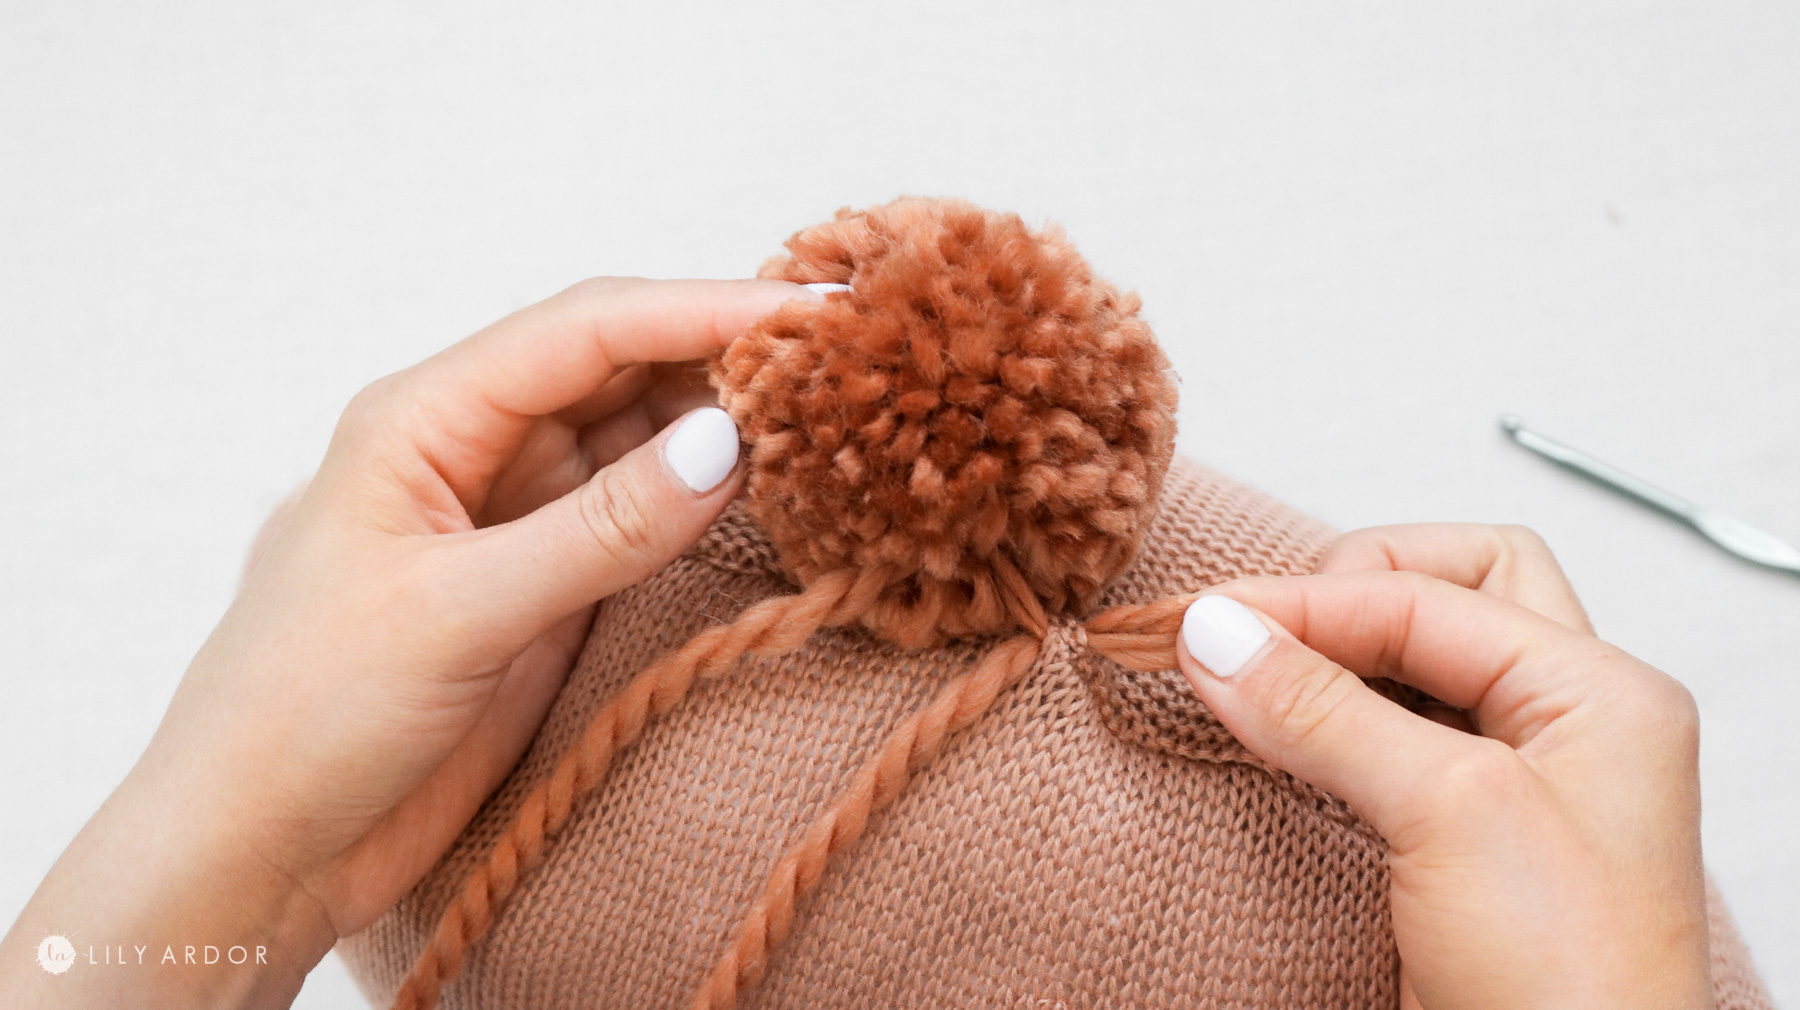
Attaching your pom pom to the round throw pillow!
This is super easy. You’ll need a crochet hook and your pom poms. Start by sticking your crochet hook through the edge of your pillow and grab one of the tails from the pom pom. Pull it through and tie both tails together attaching the pom pom to the pillow. Then simply cut off the tails and voila! If you installed a zipper you can attach the pom poms slightly to the front of the pillow instead of right on the seam. I did this and it wasn’t even noticeable that they were slightly off.

Quick video!
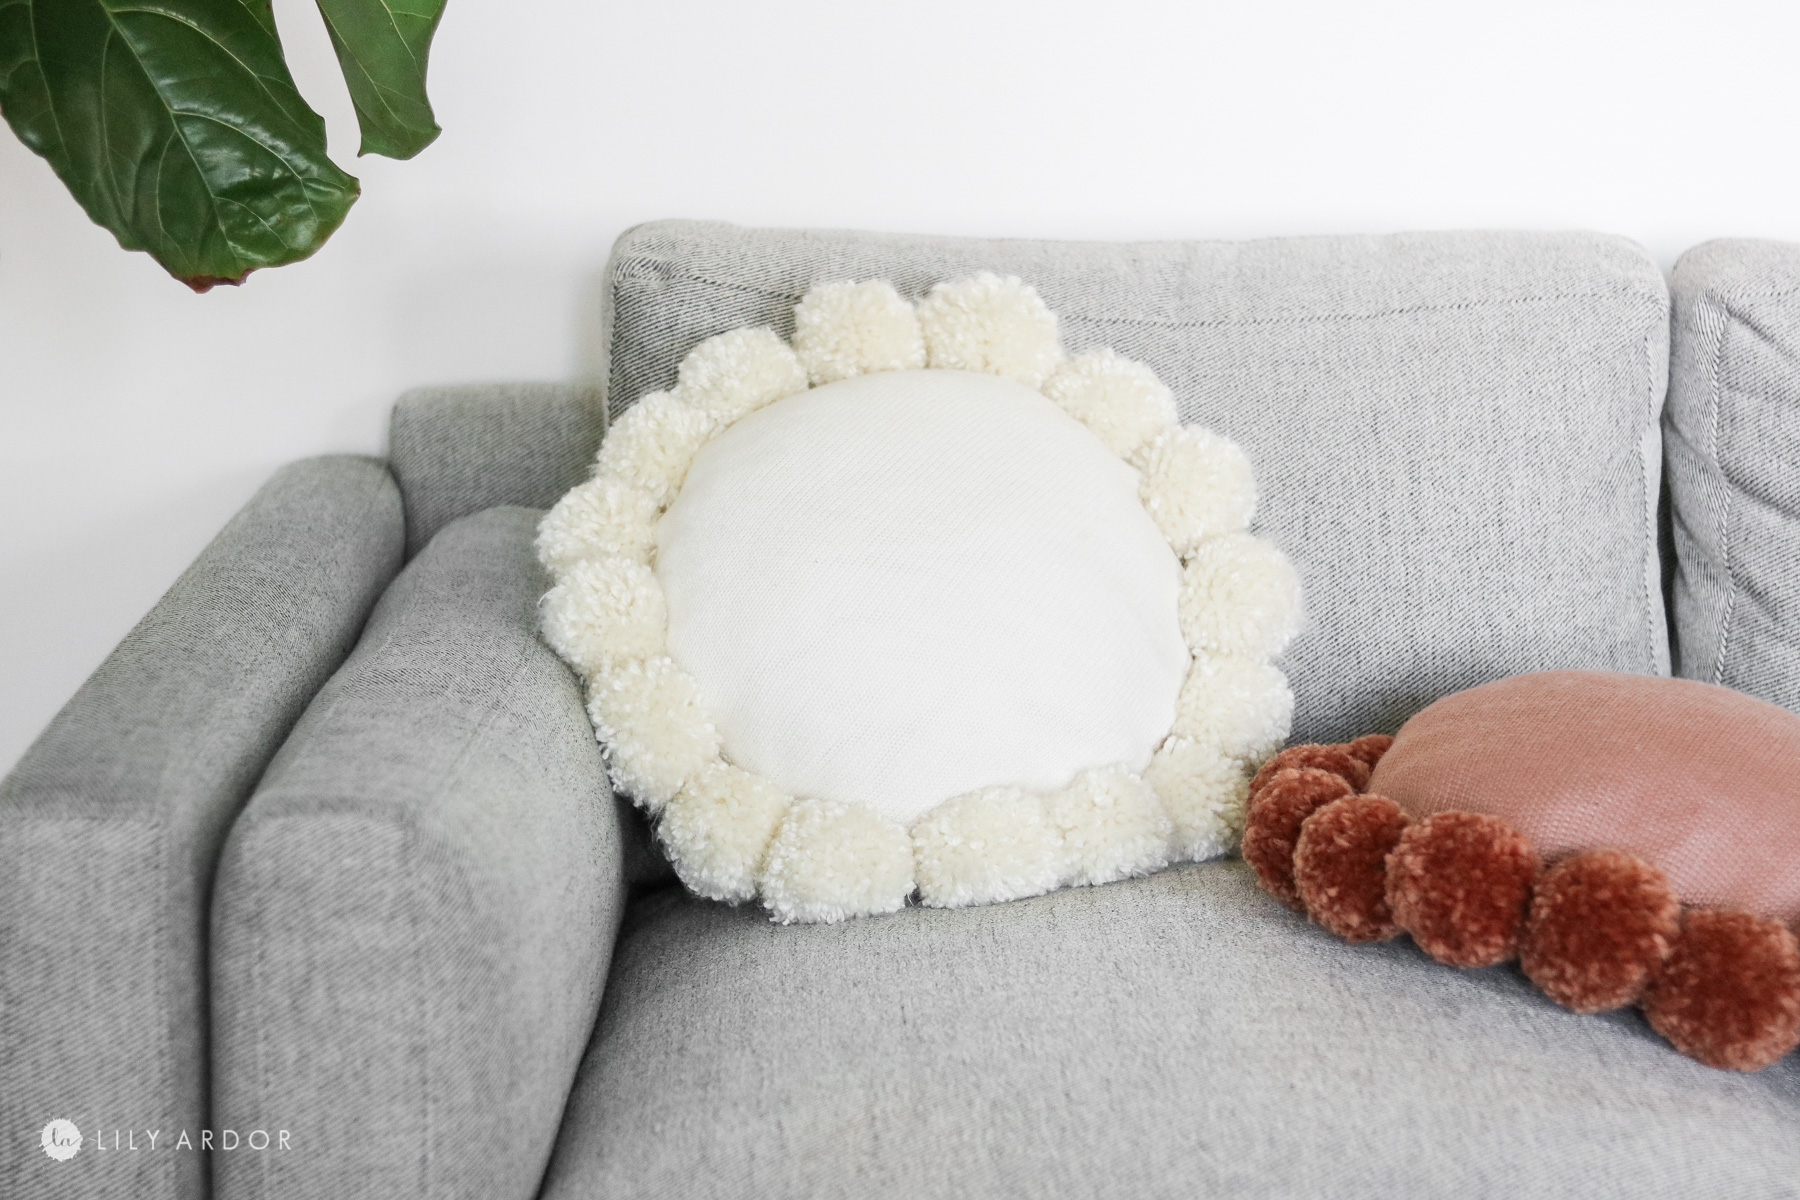
That’s all for this round throw pillow! These round throw pillows turned out way cuter than I expected!
HOME DECOR DIYS YOU’LL LOVE
- NEED A COUNTERTOP REFRESH? TRY THIS DIY MARBLE COUNTERTOP UNDER $50
- OLD PLANTERS INTO FAUX POTTERY
- GRAB SOME PLACEMATS FOR THIS DIY PLANTER HACK!
- AIRCLAY IN 5 MINUTES FROM INGREDIENTS YOU HAVE AT HOME!
- TRANSFORM AN OLD TV TRAY TABLE INTO A TEPEE!
These poms poms are the cutest! I still can’t believe were that easy to make. Each pom pom takes between 3-5 minutes to make.
This umber color is my favorite! I’ve been wanting to add more warn colors into my home decor. This pillow is the first of many more to come 😍.


Okay that’s all for today!
Thank you so much for tuning in! I hope you’re inspired to make your own thrifted round throw pillow!
I’ll see you next time.
xo,
Lily
I really love the colors they look so expensive I just was getting rid Of Sweaters I still have them I didn’t tell them out yet so I’m going to make them there really pretty thank you
These are precious. Pom Poms are so much fun to make, and the kids can help with that. Now to find some old sweaters. Do you think my husband will miss his old sweaters?
Thank you Ellen. LOL I don’t think Tony would notice his old sweater missing. Would probably be a great way to recycle 😀
Thank you very much for sharing, I learned a lot from your article. Very cool. Thanks. nimabi