Today I’ll be sharing another old planter makeover!
This was actually a DIY I did a few weeks back but, didn’t get around to sharing it until now.
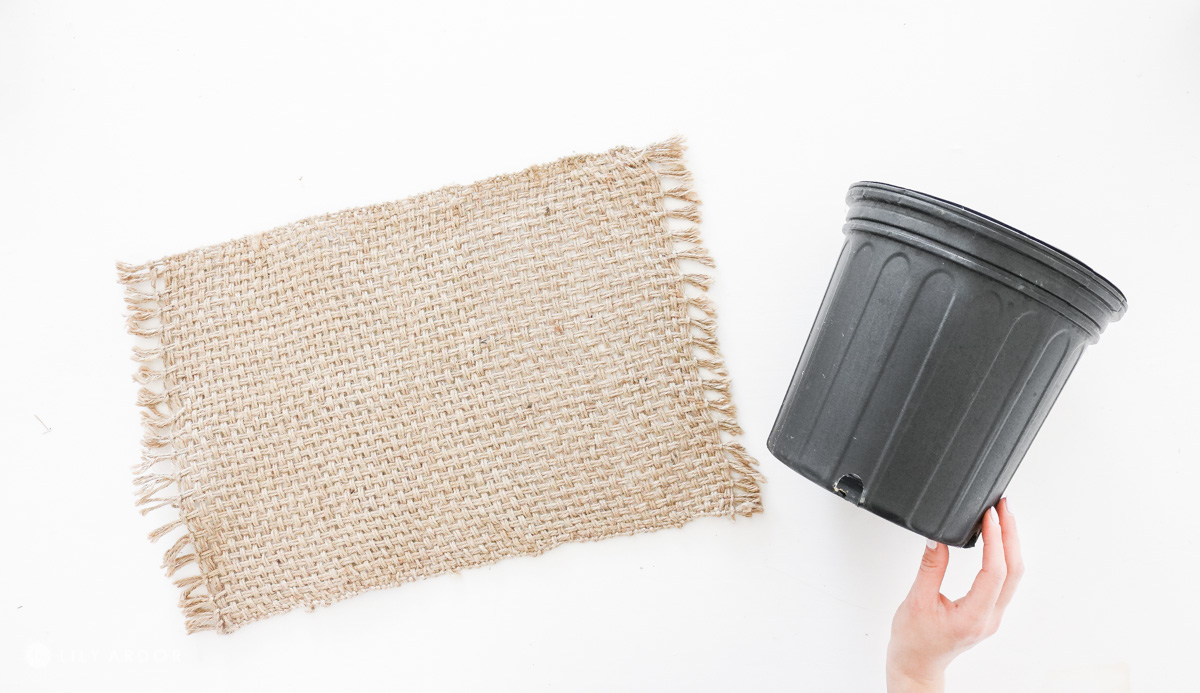
A few weeks ago when I was at peir 1 imports I came across this burlap place mat! Immediately I thought it would be so cool to transform an old planter with it!
TIME NEEDED:
About 30 minutes.
TOTAL COST:
This cost me around $5 to make. 🙂
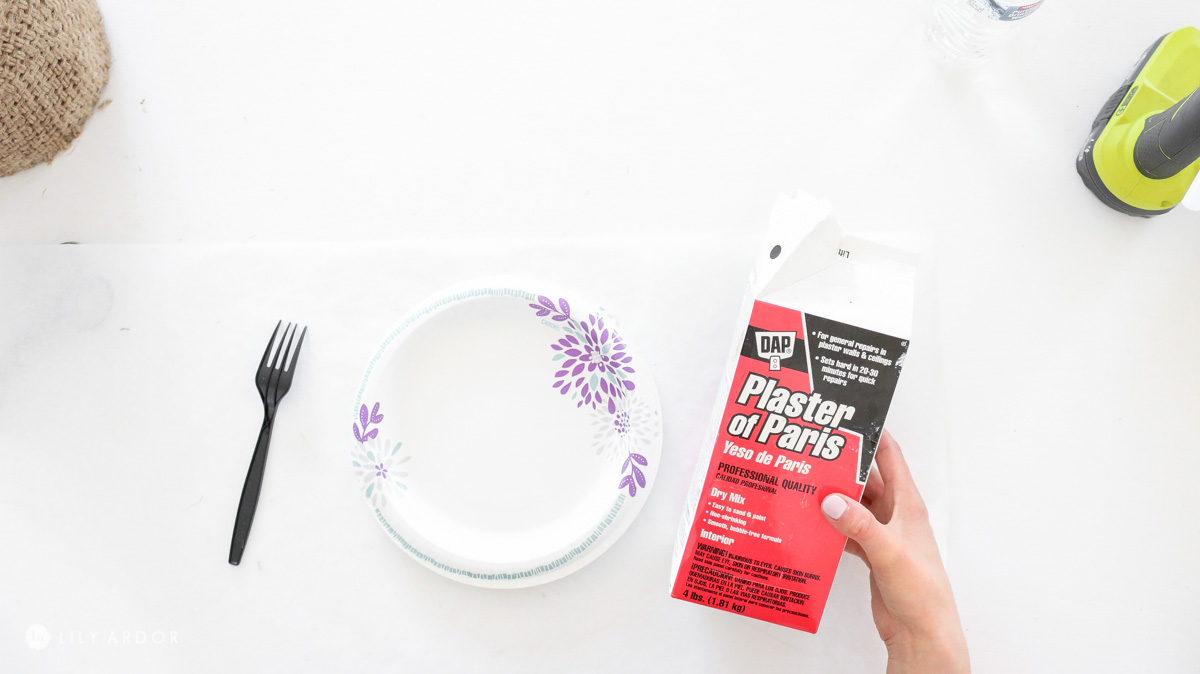
Supplies:
- old planter or plastic pot
- burlap fabric ( I used a placemat- I found something similar on amazon here – https://amzn.to/3dUFGv0 )
- hotglue ( Here’s the gluegun I used. )
- optional – plaster of paris ( you can get some on amazon here – https://amzn.to/2UIpHbZ )
- brush
- paper towel
- ultiliy knife
DIY OLD PLANTER TRANSFORMATION!
To transform my old plastic pot I was really inspired by the woven pottery I’ve seen on anthropologie. My idea was to apply a layer of plaster over the burlap to give it a woven pottery look.
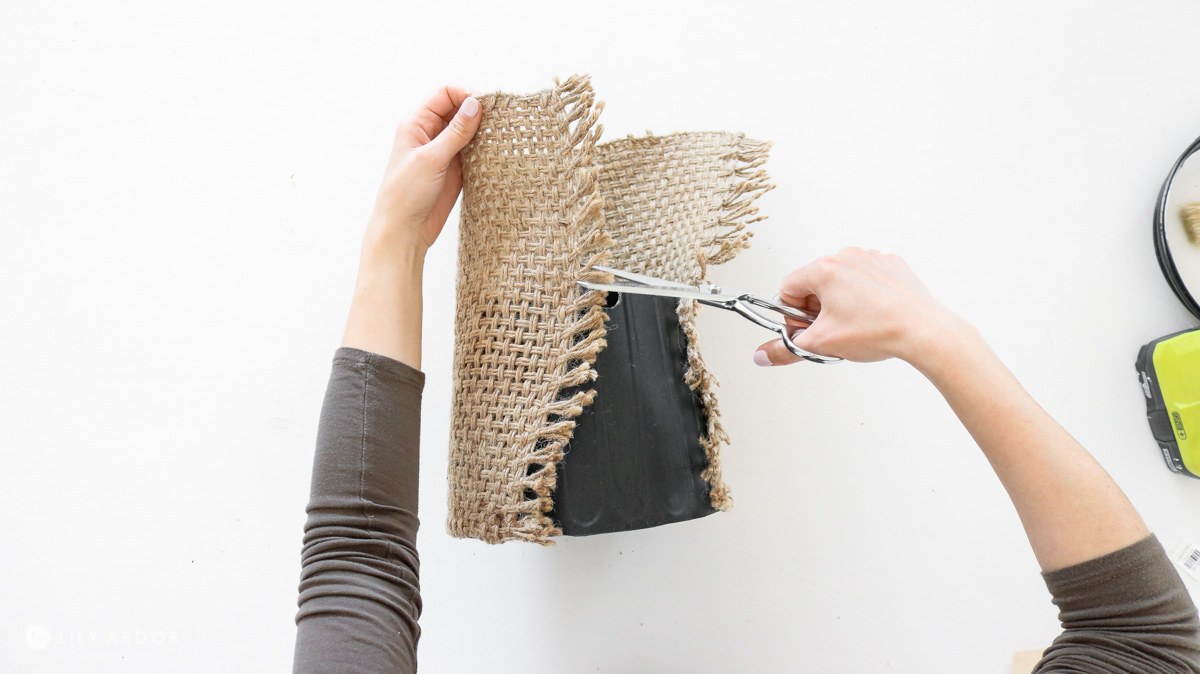
I started off by cutting the top inch of the pot off for a cleaner look. I used an exacto knife for this however you can probably cut it easier with a utility knife. This is totally optional. In fact this actually made the planter pretty flimsy but, I knew that the layer of plaster I would apply later would sturdy it up so I didn’t mind. 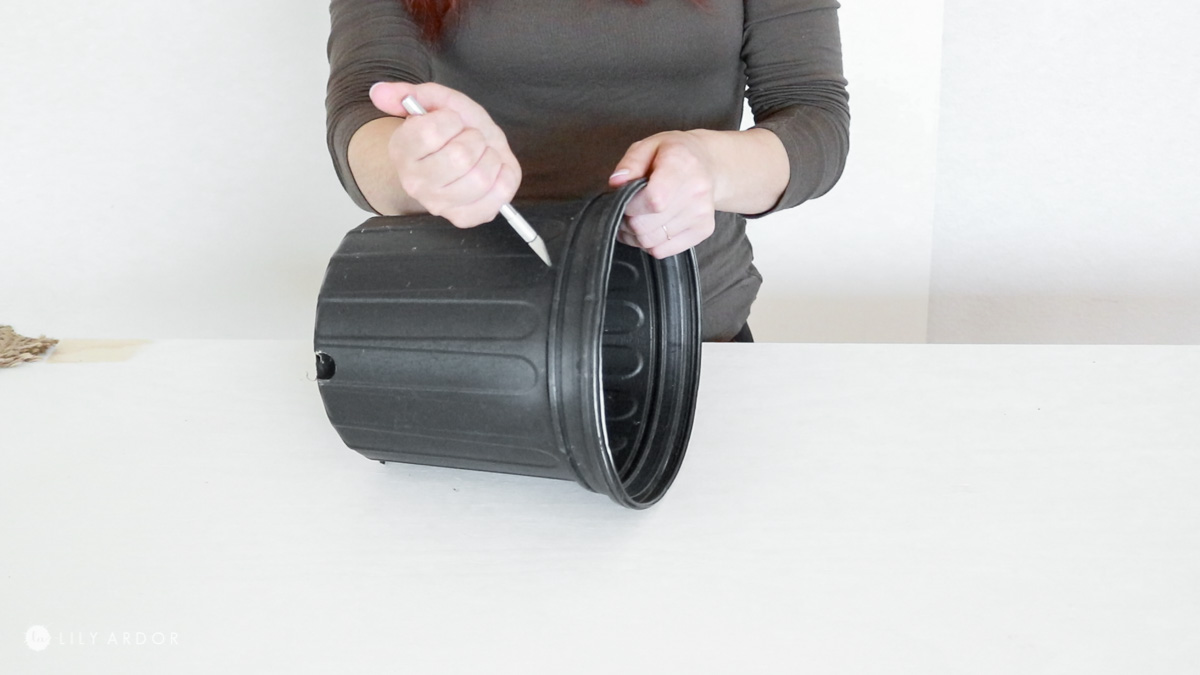
Because I kind of knew that the plaster would adhere the burlap to the plastic pot I lightly secured the burlap with some hotglue. If you plan on leaving just the burlap I would recommend gluing it more securely. Maybe even some silicone would be a great glue option and waterproof.
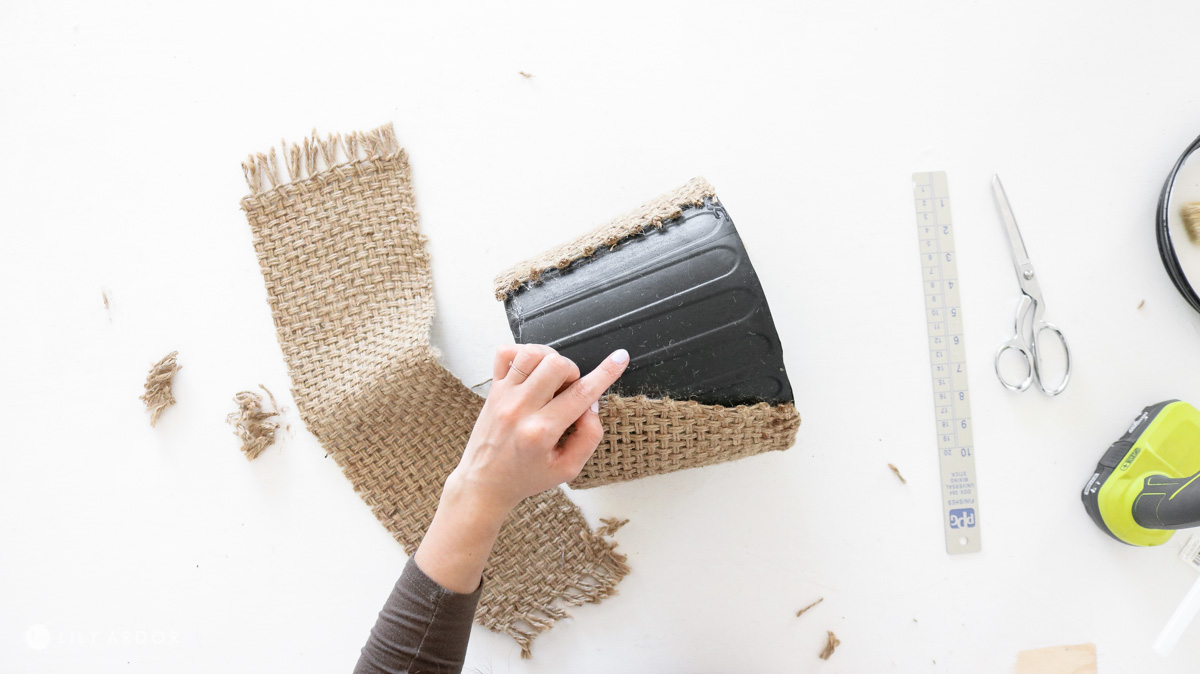
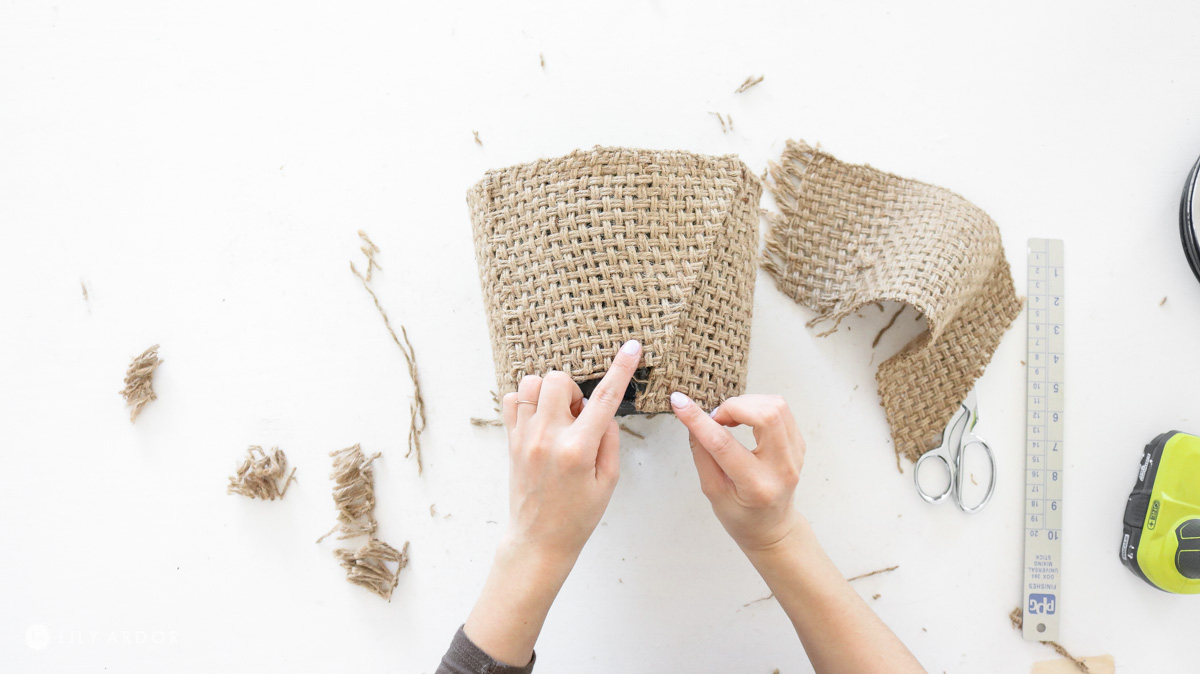
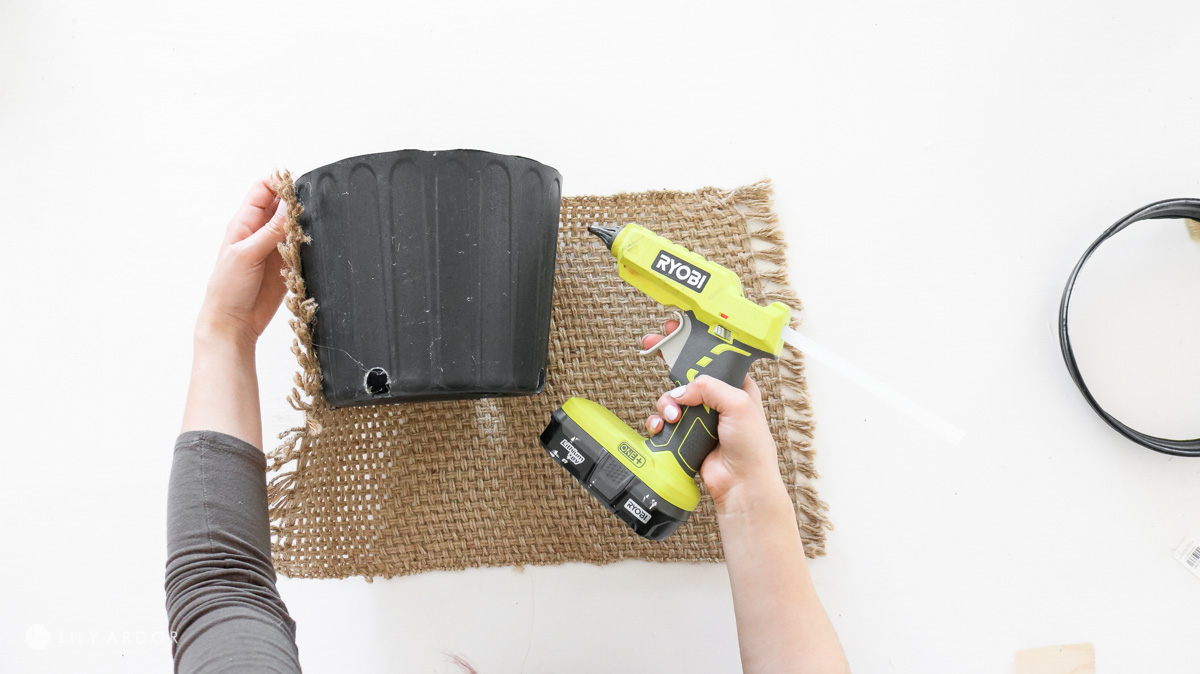 This was the last placemat in the clearance section so I had to do some patchwork to cover the pot all the way.
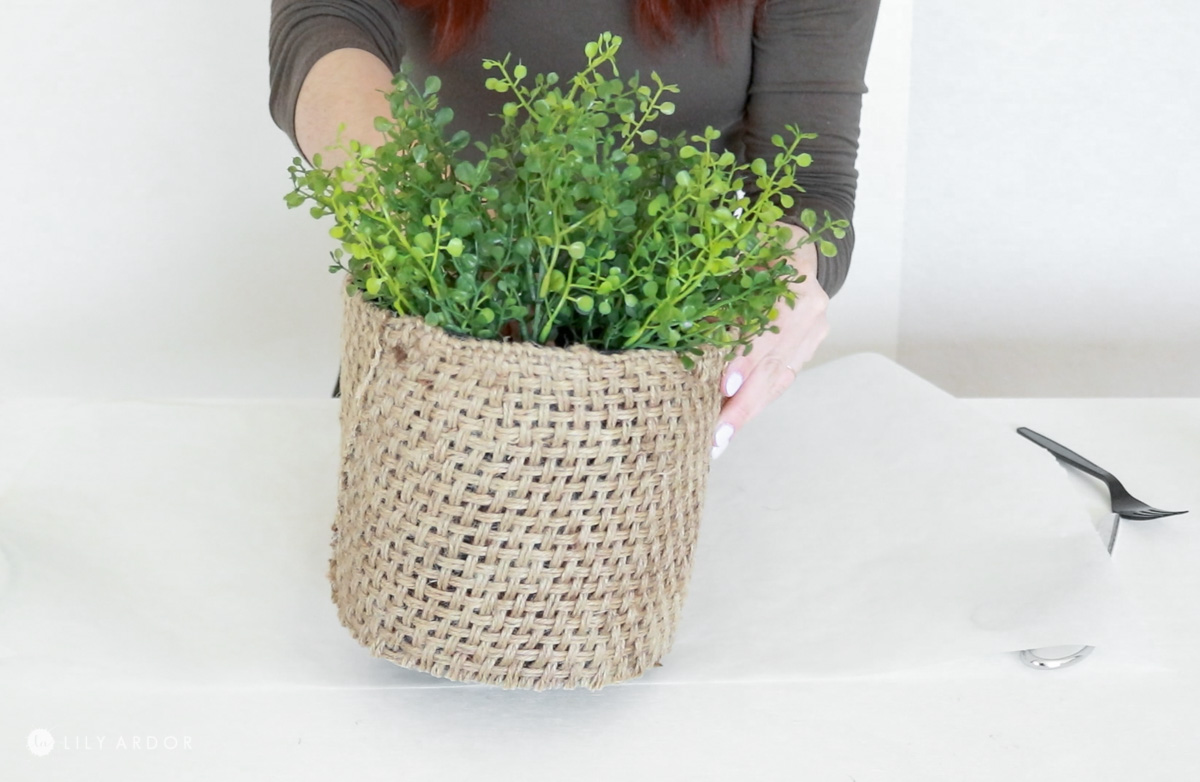
It actually turned out pretty neat. Even though there was a bit of patchwork.
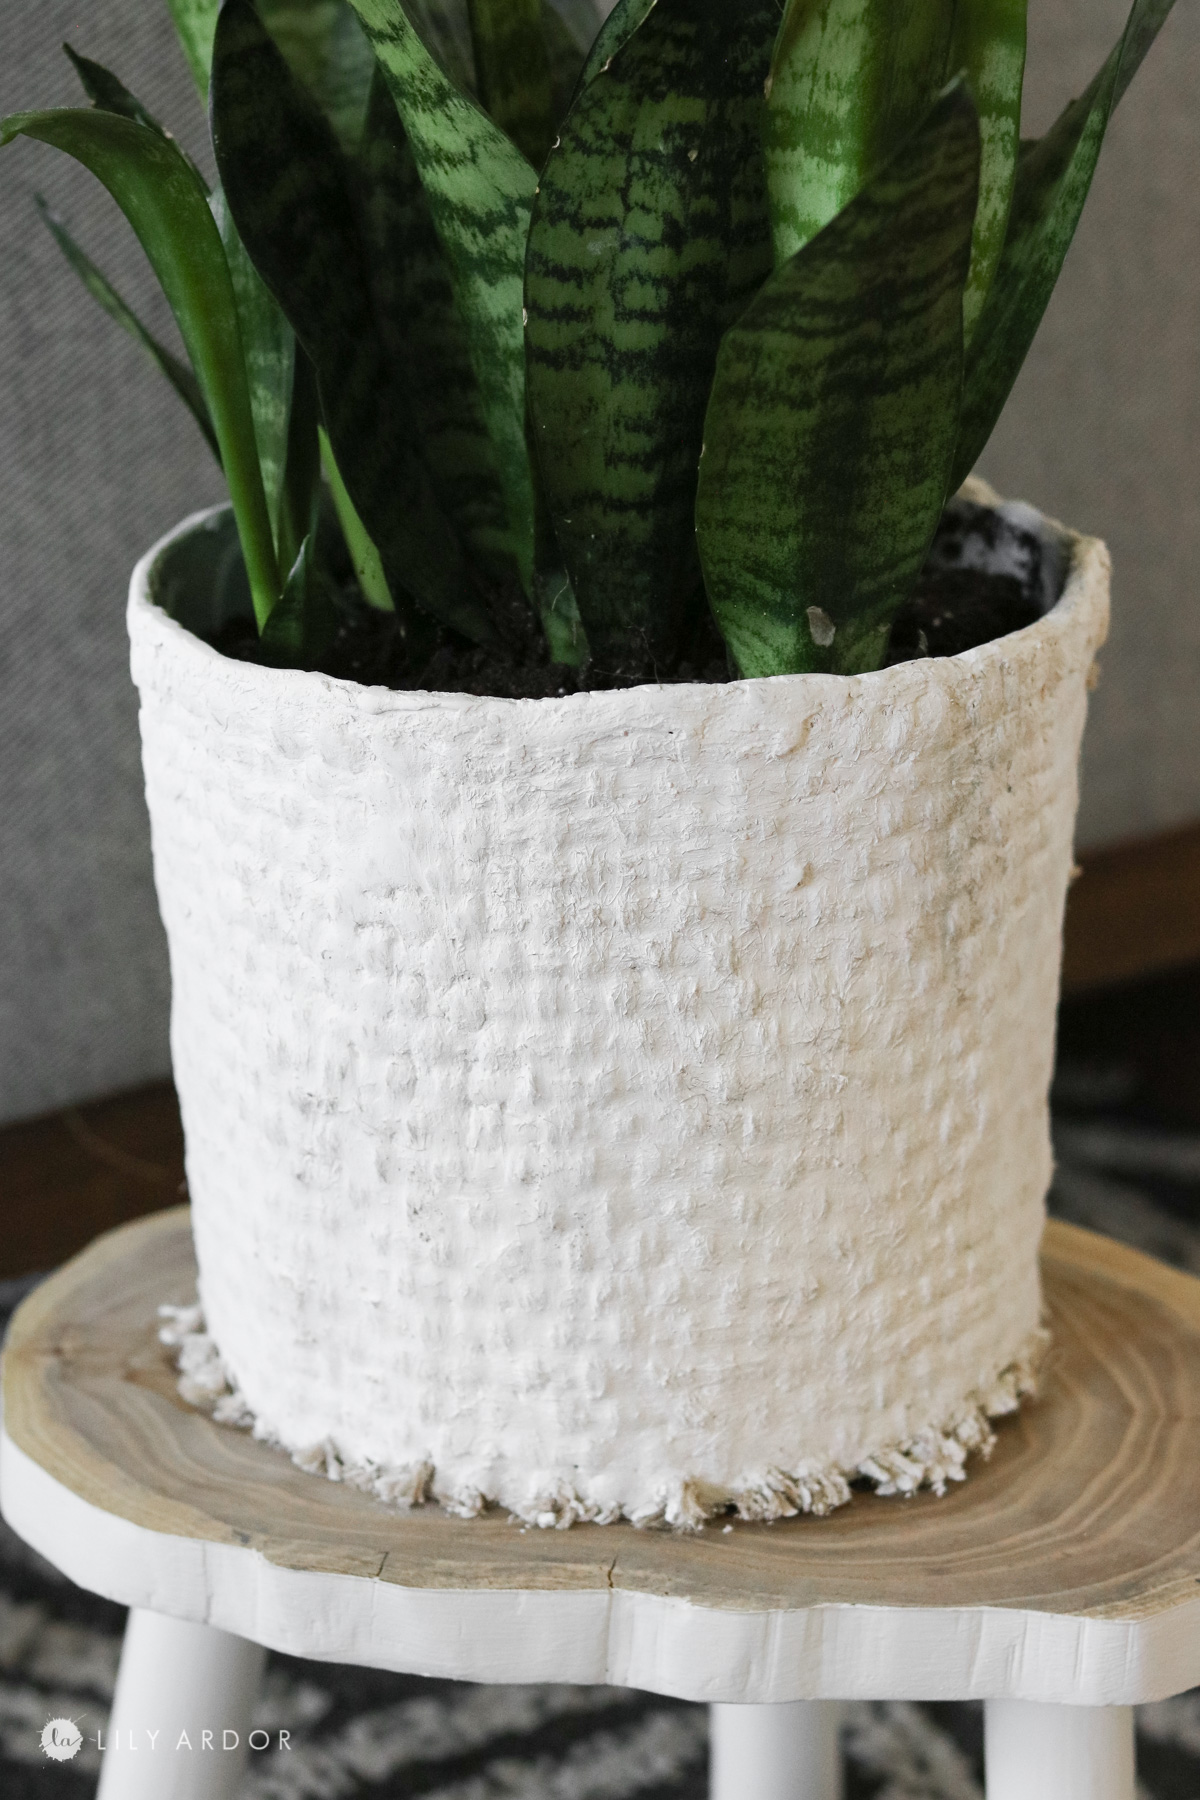
Okay honestly I really loved the burlap planter on its own but, because I was going for a light and airy look I still decided to apply a coat of plaster over it.
OTHER DIY’S YOU’LL LOVE:
How to Apply Plaster Over burlap!
To apply the plaster I mixed a tiny bit of the powder with some cold water. The consistency should be like semi thick paint.
A few things you should know when working with plaster :
- ALWAYS USE DISPOSABLE PLATES and SPOONS!
- Plaster takes about 7 minutes to set. You’ll need to work in small batches.
- When working with plaster always use cold water. This way it won’t set as fast.
- Never wash the powder or mixed plaster down a drain / toilet etc. It will clog it.
I also used an old brush that I threw away later. You can totally rub the plaster onto the burlap with your hands. I actually feel like this works a little bit better than the brush method and reveals the texture of the burlap. If your plaster mixture is too thick the fabric won’t be revealed as much. I learned that making the mixture paint like consistency works best.
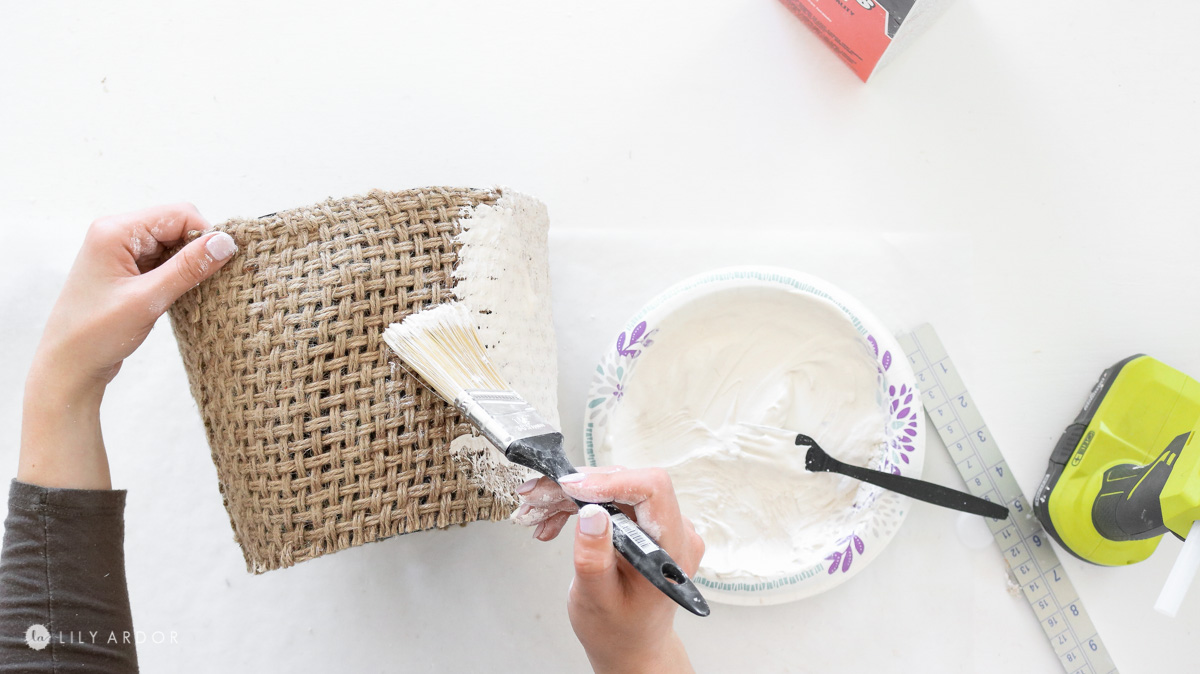
If you’re using a brush you’ll need to apply a small section than, before the plaster starts to set take a wet paper towel and wipe the plaster off to reveal the texture of the fabric.

Conclusion! What I’d do different!
There’s a few things I wish I did different. Once I transformed the old plastic pot I noticed it didn’t have as much texture as I would of liked. It almost wasn’t visible in areas. I was thinking maybe using just white paint might of worked better to apply over the fabric but, than it probably wouldn’t keep the fuzzies from the fabric down as much as the plaster would. In conclusion I would adhere the burlap to the pot a lot better to start off with. More hotglue or even silicone and then apply some really runny plaster over it. You can always do a few layers if needed.
That’s it! Here’s how it looks! 🙂
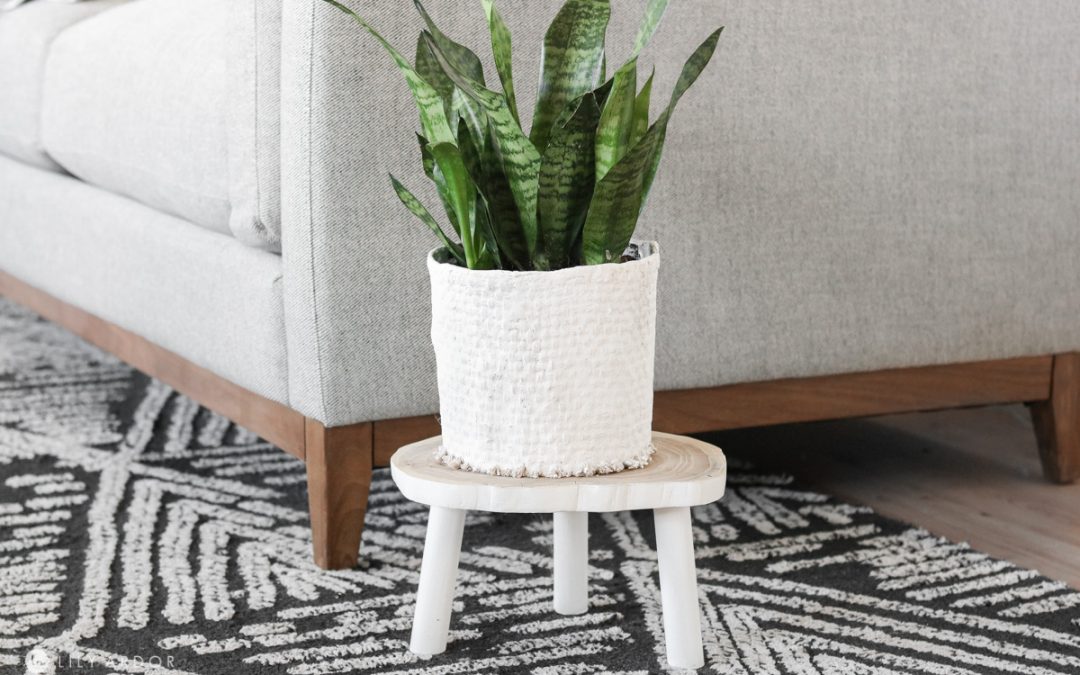
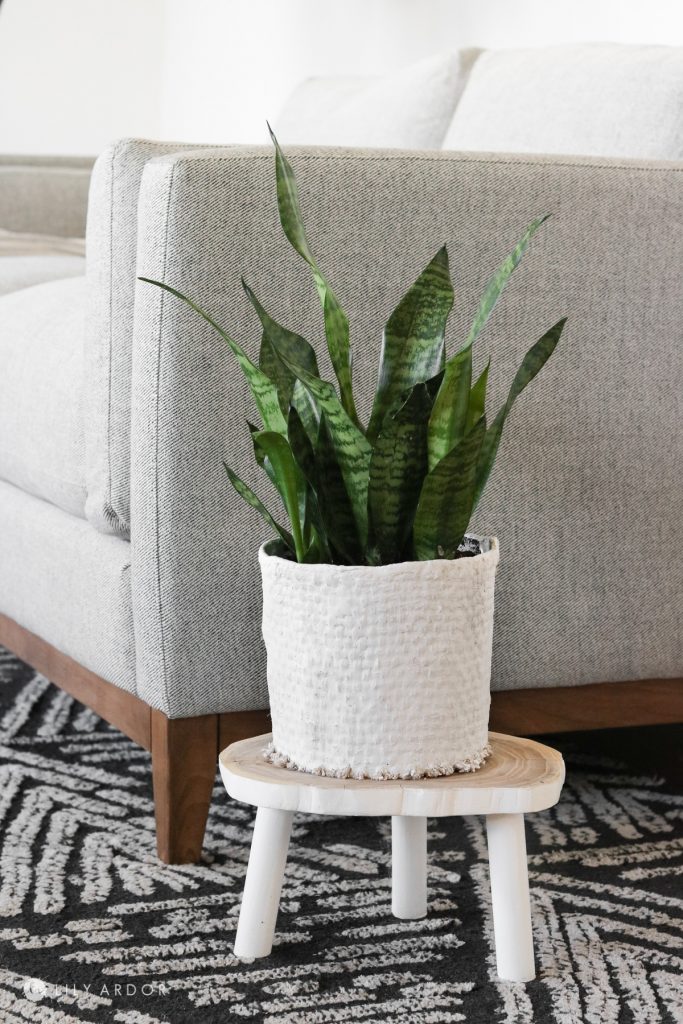
I love how it looks against my gray couch! Eventhough I love the look of burlap I do think this white look matches my living room more.
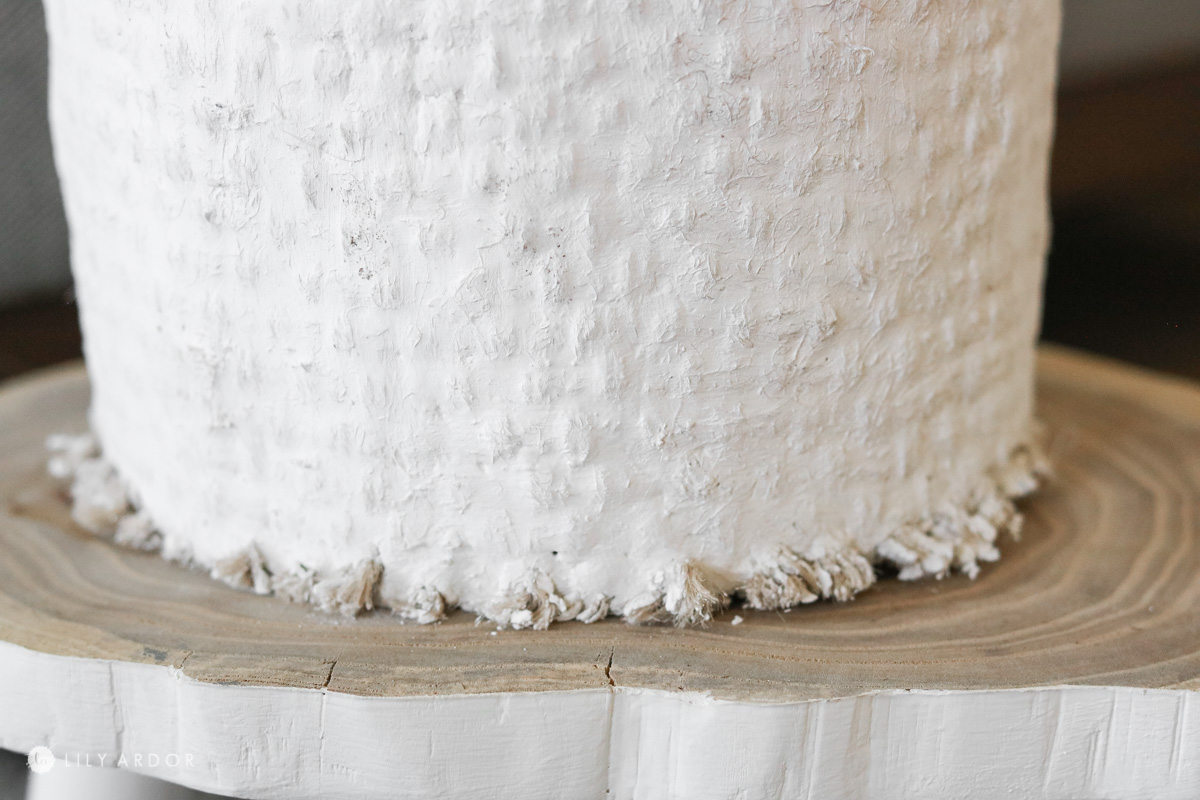
Here’s a little close up. I left the burlap a little frayed at the bottom to give it some character!
That’s all for this old planter transformation! Hopefully it inspires you to makeover your old planters 🙂 !
I hope your week is going well. Happy Crafting and happy spring! Stay safe.
I’ll see you next time!
xo,
Lily-
OTHER DIY’S YOU’LL LOVE:
- PLASTER + GOLDLEAF VASE
- DIY CONCRETE PLANTER HEADS
- TIN CAN HERB GARDEN
- UGLY PLANTER HACK – USING A DRY GRASS PLACEMAT!
- MAKE A GIANT REALISTIC LOOKING CACTUS PLANT !