Have you ever wanted to transform your living space with unique and personal decor pieces? I certainly have! This is an older DIY that I’ve already shared on youtube years ago and somehow forgot to share it on the blog. Better late then never right!
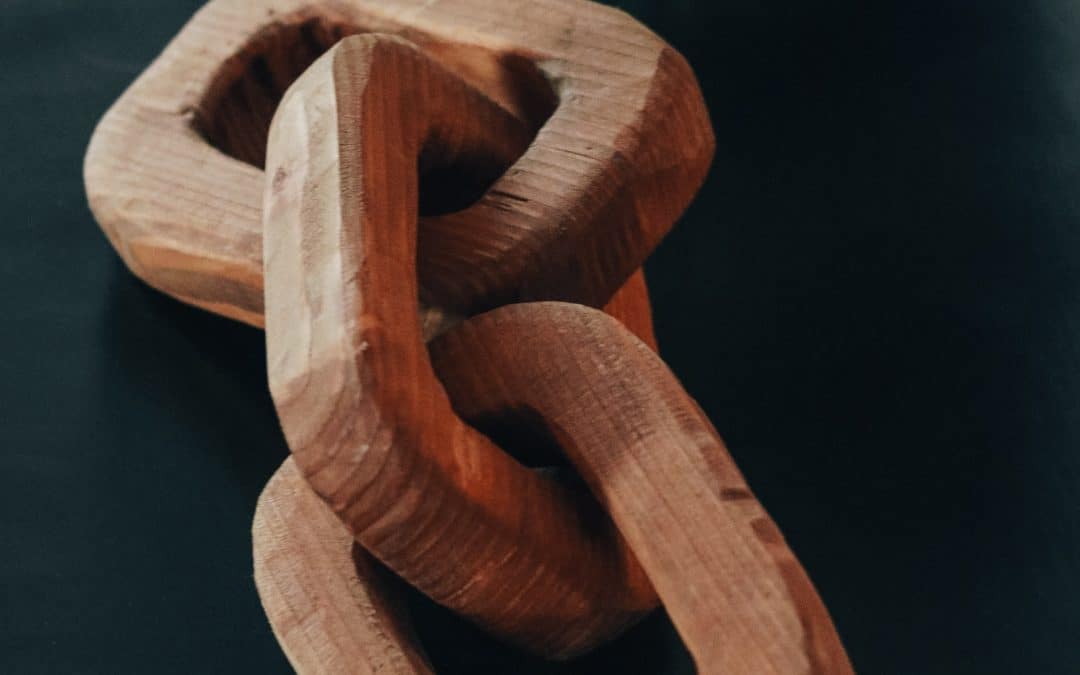
There’s an indescribable joy in creating items that add a personal touch to your home. Today we’ll explore the world of DIY, particularly the creation of wooden chain links. These links aren’t just ordinary; they’re a wonderful addition to your table decor, adding a touch of modern charm.
Exploring Wood Chain Links: A Personal Perspective
If you’re like me and enjoy making your home uniquely yours, this is a perfect DIY project for you. In this video tutorial, I’ll guide you through the process of crafting these stylish wooden chain links, which can enhance your table decor.
You can watch the video above or scroll down for photo instructions.
Your Essential Supplies:
- Gorilla Wood Glue
- Varathane Wood Stain – Honey
- Minwax Wood Stain – Gold Oak
- 2×6 Wood
- Rubber Bands
Must-Have Tools:
- Miter Saw
- Orbital Jigsaw
- Grinder or Sander
- Drill with a Big Drill Bit
- Clamp
Bringing Your Wood Chain Links to Life
Step 1: Creating a Stencil To kick off this creative journey, fold an 8×10 piece of paper, first in half and then in half again. I’ll admit, my first attempts weren’t perfect, but that’s part of the DIY adventure! Unfold the paper to reveal a perfect link shape stencil. Place it on your wood and trace the design with a sharpie.
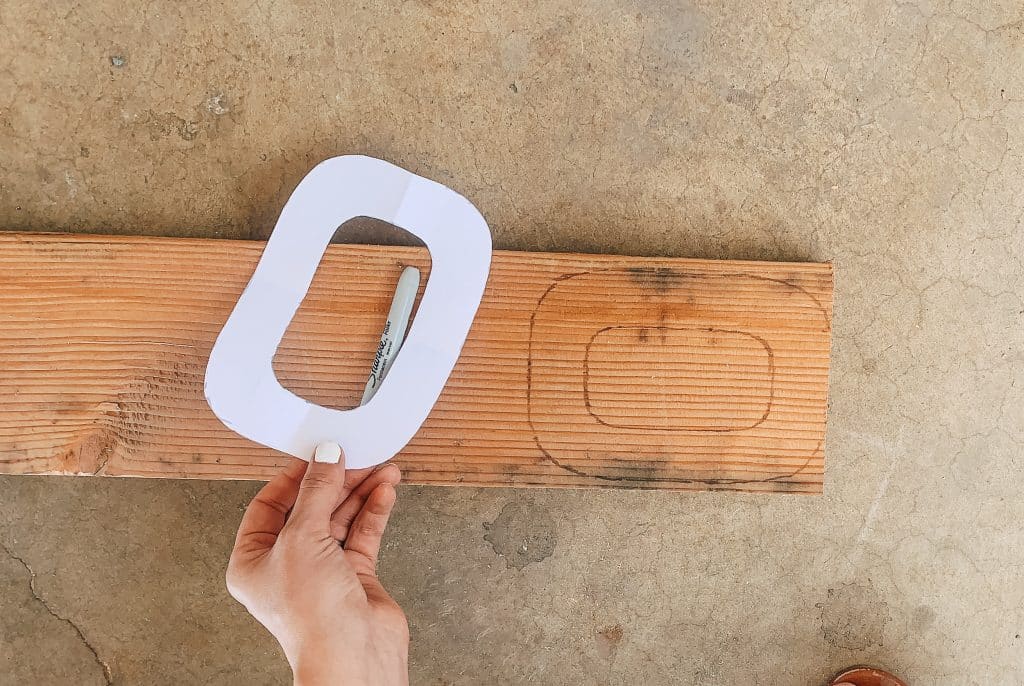
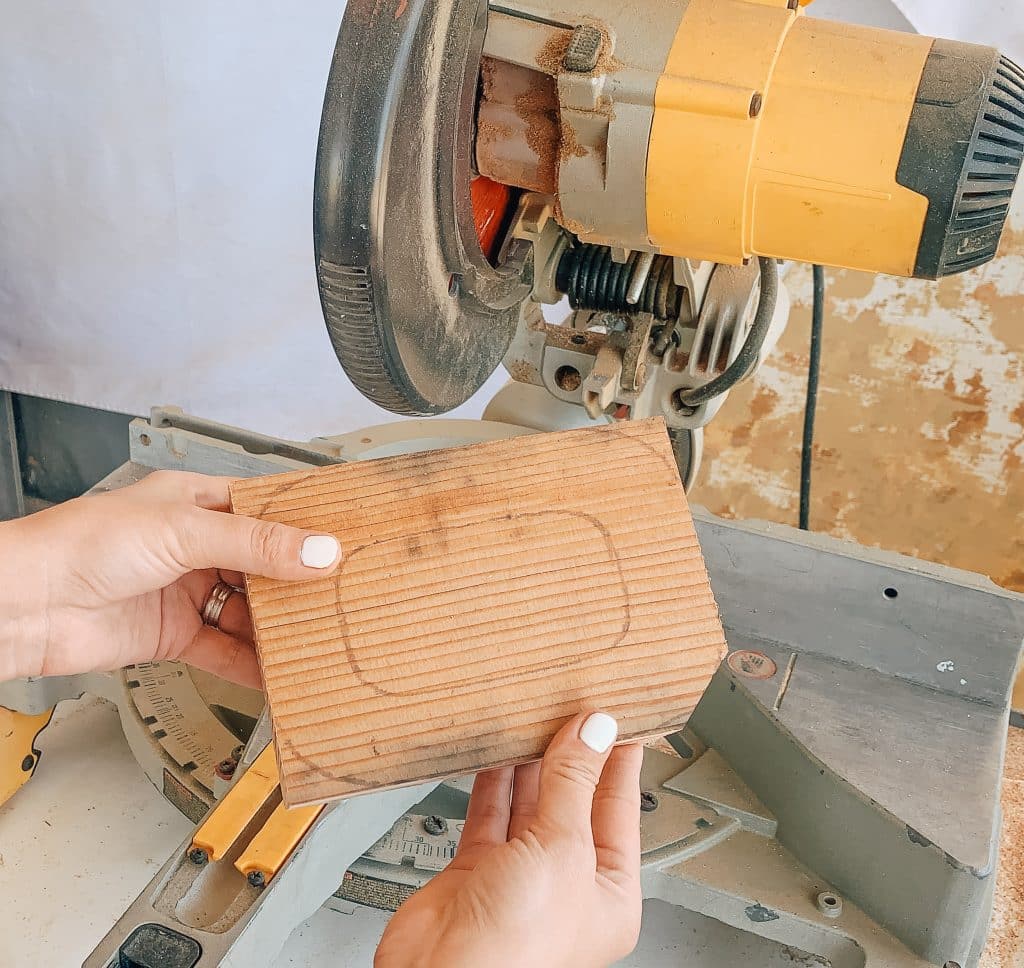
Step 2: Shaping the Wood Using a miter saw, cut your 2×6 wood to size. You might need to make slight adjustments to match your stencil, as I did. Rounding off the corners will give your links that polished look.
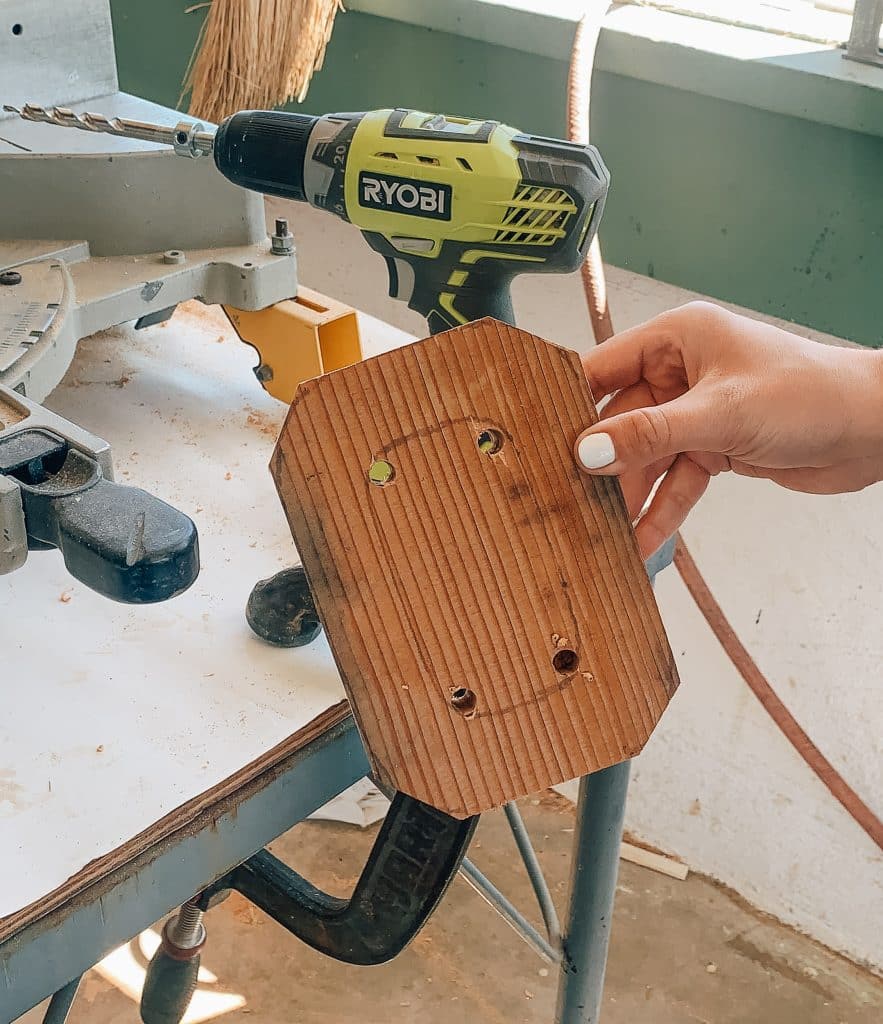
Step 3: Drilling and Cutting With the link clamped to the table, use your drill to create four holes in each of the inner corners, staying as close to your sketch lines as possible. Then, it’s time to bring out the orbital jigsaw. This part can be a bit like connecting the dots, so take your time, clamp firmly.

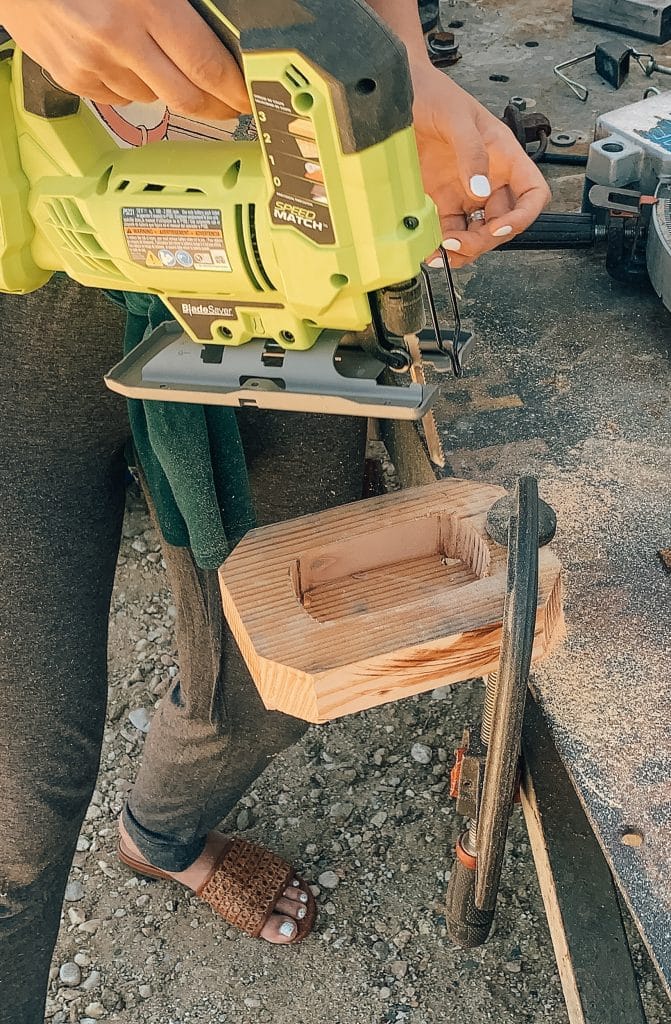
Step 4: Rounding off the edges! To make my chain links smooth, I used a cone-tipped sanding bit and a flat sanding disc to meticulously sand all edges, inside and out. Safety first: don’t forget those gloves and safety glasses! If this sounds confusing please use the video for reference. I go way more in depth in my video.
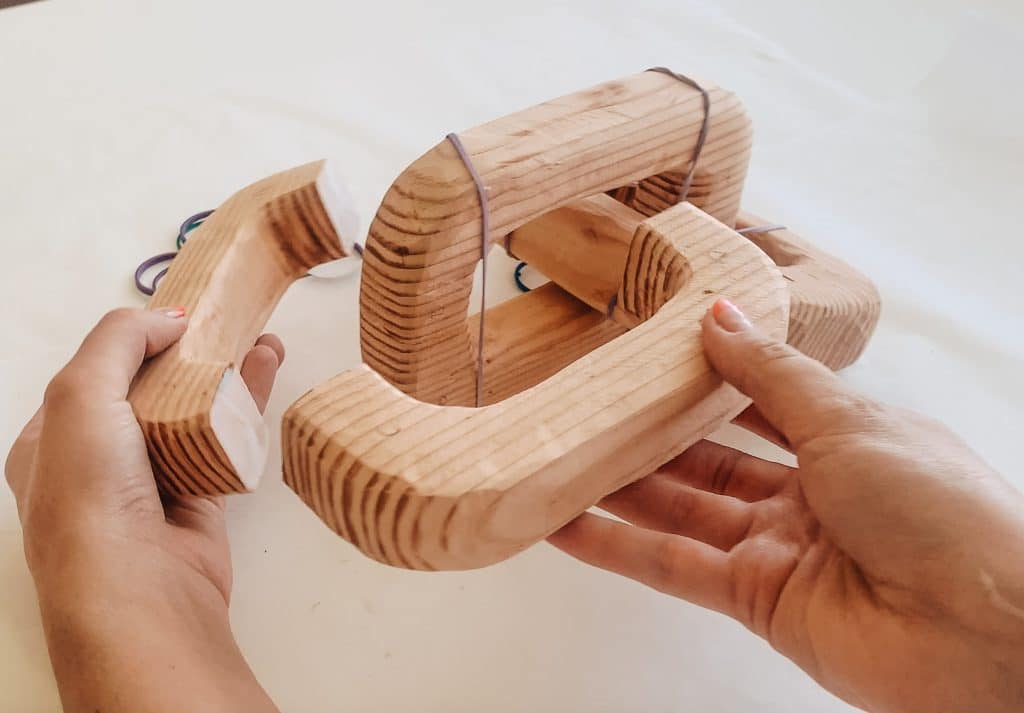
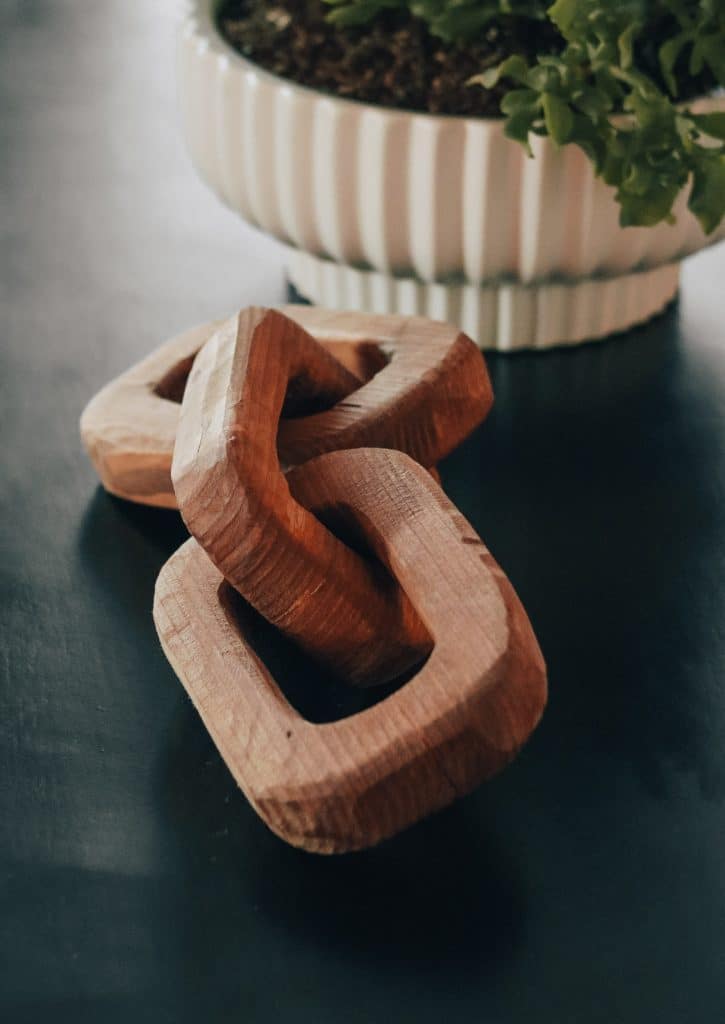
Step 5: Linking It All Together ! This is the best part! To connect you links you’ll need to use the miter saw to cut them all in half. Remember to mark the top and bottom on both sides with matching letters. This will help you put everything back together. Apply Gorilla Glue to each end, and secure rubber bands while making sure the links are connected while drying. I let them dry for about two hours before removing the rubber bands. Don’t worry about the cuts showing. They’re practically invisible. I kid you not I’ve had a few folks try and find the seems and they were surprised how clean it looks once done and glued back together.
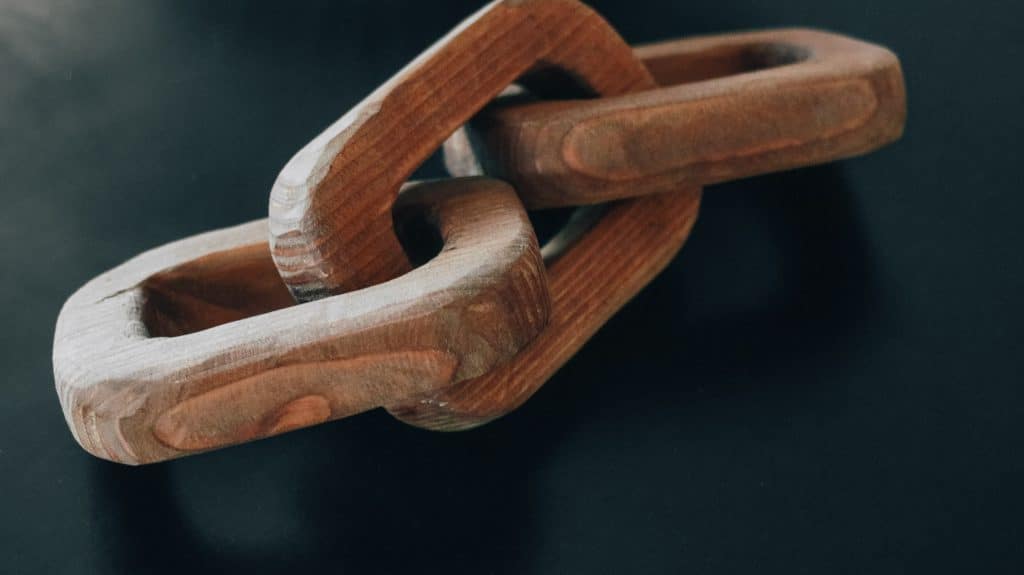
Step 6: Staining for the Final Flourish The finishing touch involves adding character to your wood chain links. Slip on your disposable gloves, gently rub a small amount of both Varathane Wood Stain – Honey and Minwax Wood Stain – Gold Oak onto the wood until it’s beautifully covered. I share more about the wood stains in my video.
Tips and Tricks for the Perfect DIY Wood Chain Link
- Cut your wood along the grain to keep seams inconspicuous. It’s like your little secret!
- For a rustic look, try using a grinder instead of a sander.
- Make staining a breeze by using a paper towel as your painting tool.
Personalizing Your Table Decor
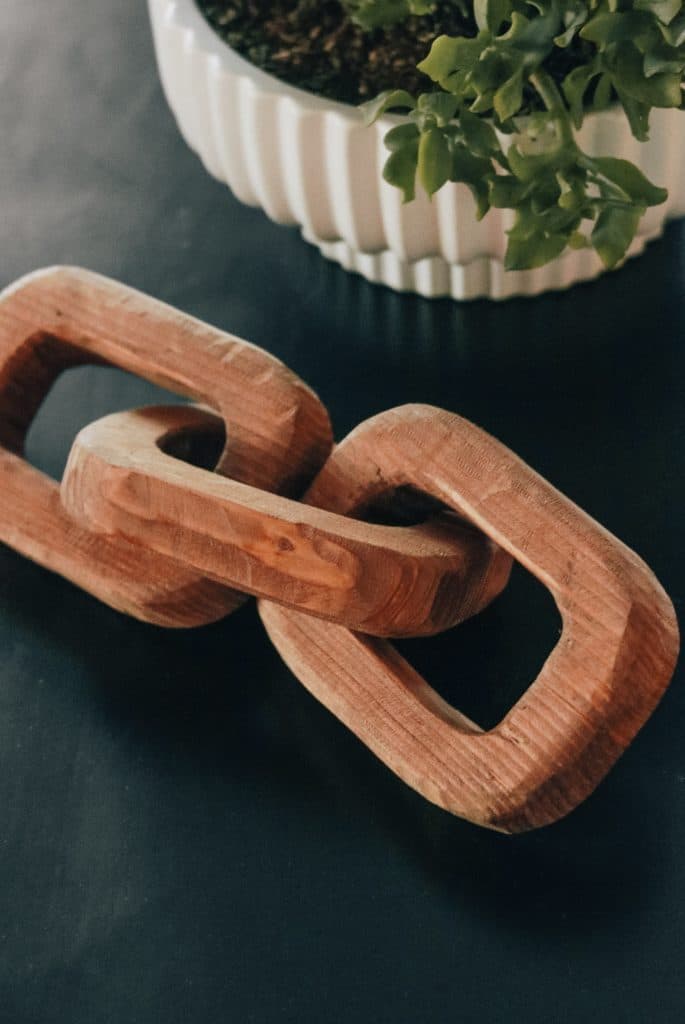
These wood chain links aren’t just for DIY enthusiasts; they’re for anyone who wants to add a personal touch to their living space. I’ve found that these links look fantastic on my coffee table, and they’ve also graced my bookshelves. The possibilities are endless when it comes to styling your wood chain links. Get creative, let your style shine, and watch your decor come to life.
Finding Tools on a Budget: My Journey
If you’re new to the world of DIY wood decor, it’s understandable if you’re starting with a limited set of tools. I’ve been there too! Tony and I have built our collection of power tools bit by bit, often on a budget. Here’s how you can find tools without breaking the bank:
- Explore Facebook Marketplace
- Check out Craigslist
- Keep an eye out for yard sales
Building your tool collection can be an exciting adventure. Remember, you’re crafting your unique decor, and the journey is just as fulfilling as the destination.
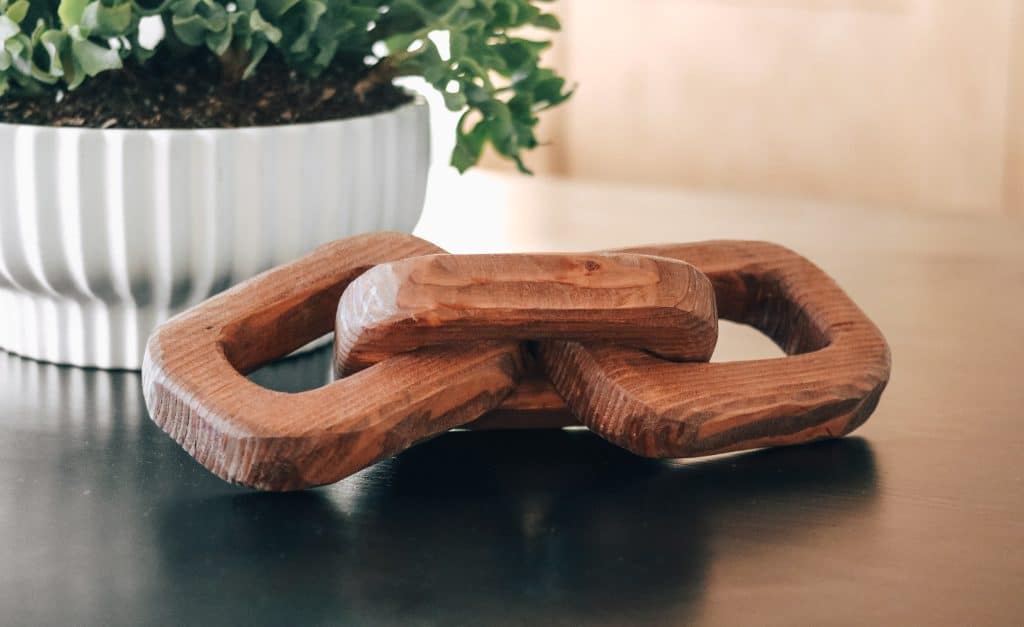

Creating your own wood chain links for table decor is a gratifying DIY project that adds a personalized touch to your home. These links are not just decor pieces; they’re a reflection of your creativity and style. So, gather your supplies, follow the steps, and embark on your journey to elevate your living space with modern coffee table decor.
SIMILAR DIYS YOU MIGHT LIKE
I typically don’t read blog articles, but I must admit that this particular post has piqued my interest. Your writing style is truly impressive and has left me pleasantly surprised. Thank you for sharing such a well-written post. By the way I am a Senior Researcher at Clickmen™ Social, a Social Media Marketing (SMM) Platform providing services throughout European Union, United States & Canada.