Hi Everyone, I hope you are enjoying some warmer weather. I had this bench on my to-do list for the past 2 weeks and didn’t get around to it until today because Tony finally had some free time to help.
I love wood projects but only when he’s around because it’s so much faster and easier!
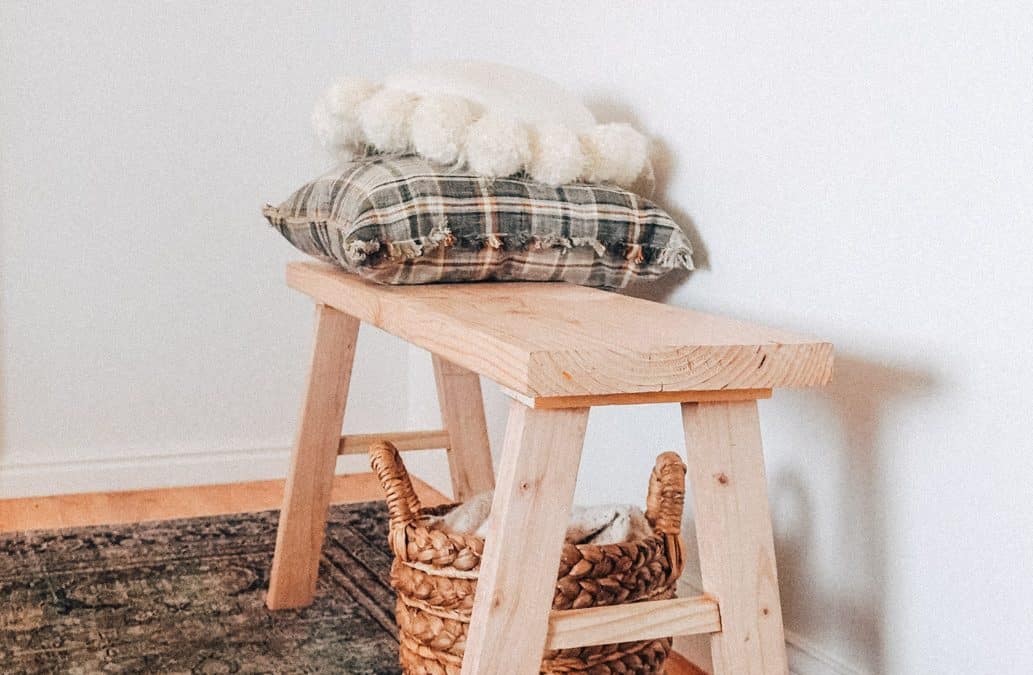
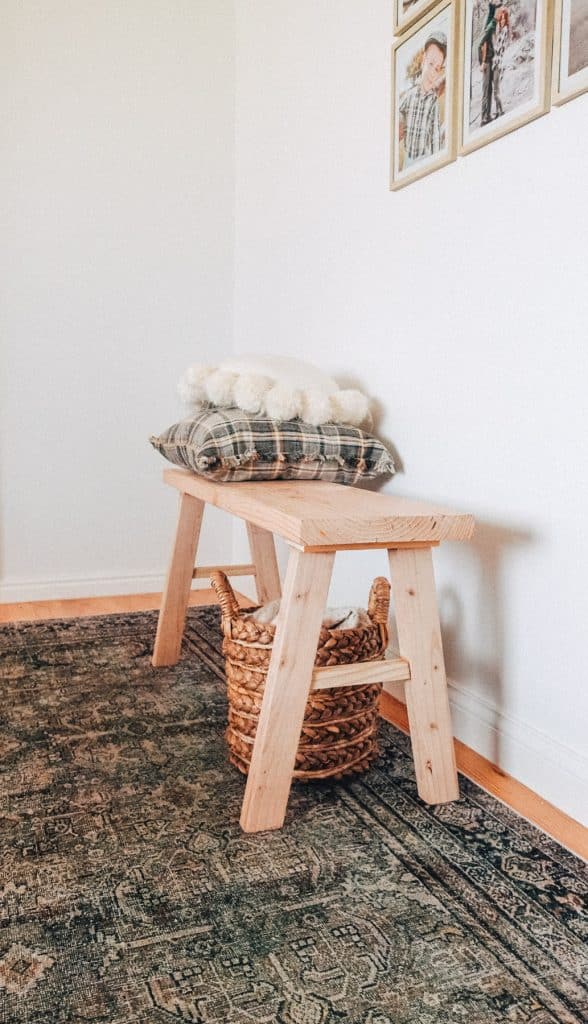
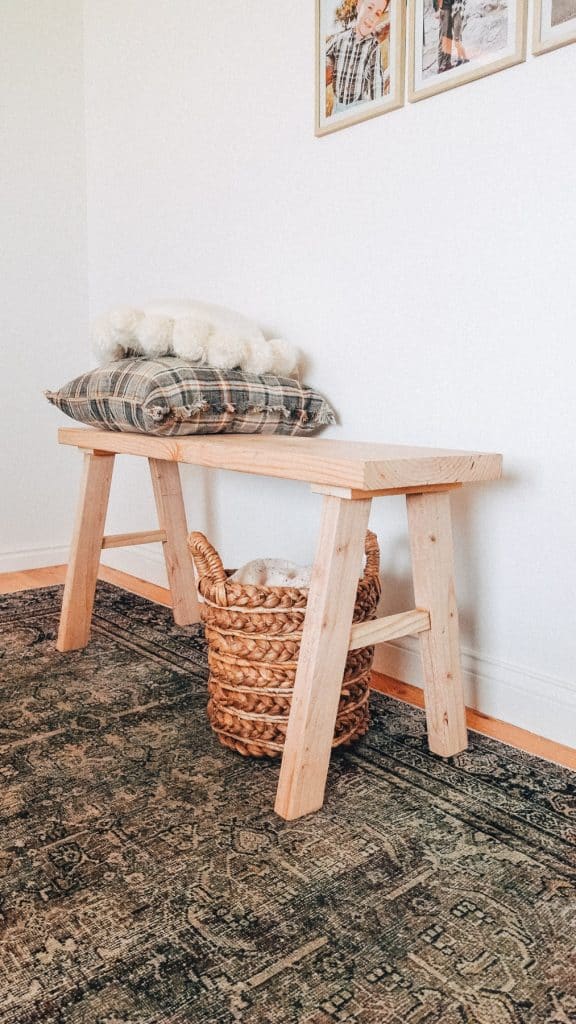
I plan on keeping this bench at the end of our bed for extra pillows at night. I will still be distressing the bench and staining in and I’m hoping to share that next so stay tuned.
Time Needed:
About 3 hours! WAY EASIER THEN IT LOOKS!
Supplies:
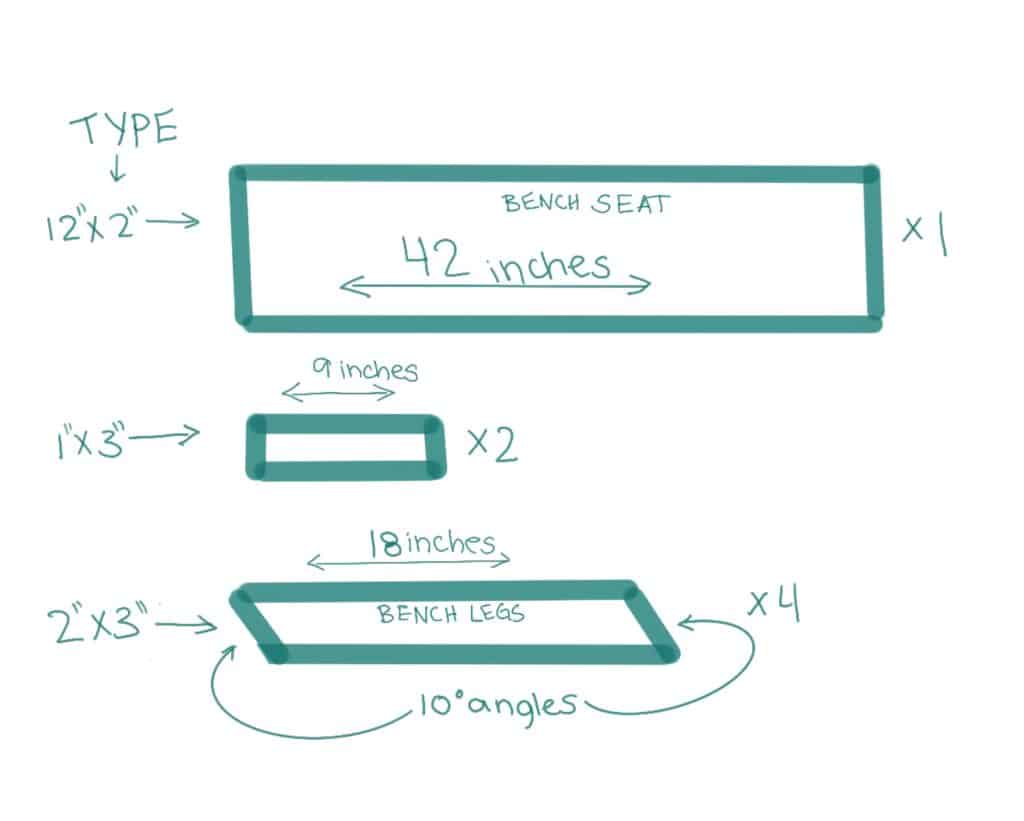
- One 12″x 2″ x 8′
- One 2″x3″ x 8′
- One 1″x3″ x 8′
- gorilla wood glue
- screws
- 1.5″ thickness wooden dowel
tools:
- drill
- countersink drill bit
- miter saw or circular saw ( if using a circular saw you’ll need a square tool which helps mark correct angles for cutting )
I sketched the plans below for Tony to follow when cutting the pieces for the bench. Hope you find them helpful. Let me know in the comments if you have any questions.
WHAT TOOLS CAN I USE TO CUT THE WOOD??!
The cool thing about this bench is you don’t need fancy tools! In fact you can get it done with a drill and a circular saw.
Keep in mind a square tool will come in handy when marking to get those angled cuts with a circular saw. I’m linking the square tool we have below. If you’re confused about using one it’s super easy. I took some photos below for you.
First line up the edge of the tool with the edge of your wood.

notice the top of the tool is flush with the wood.
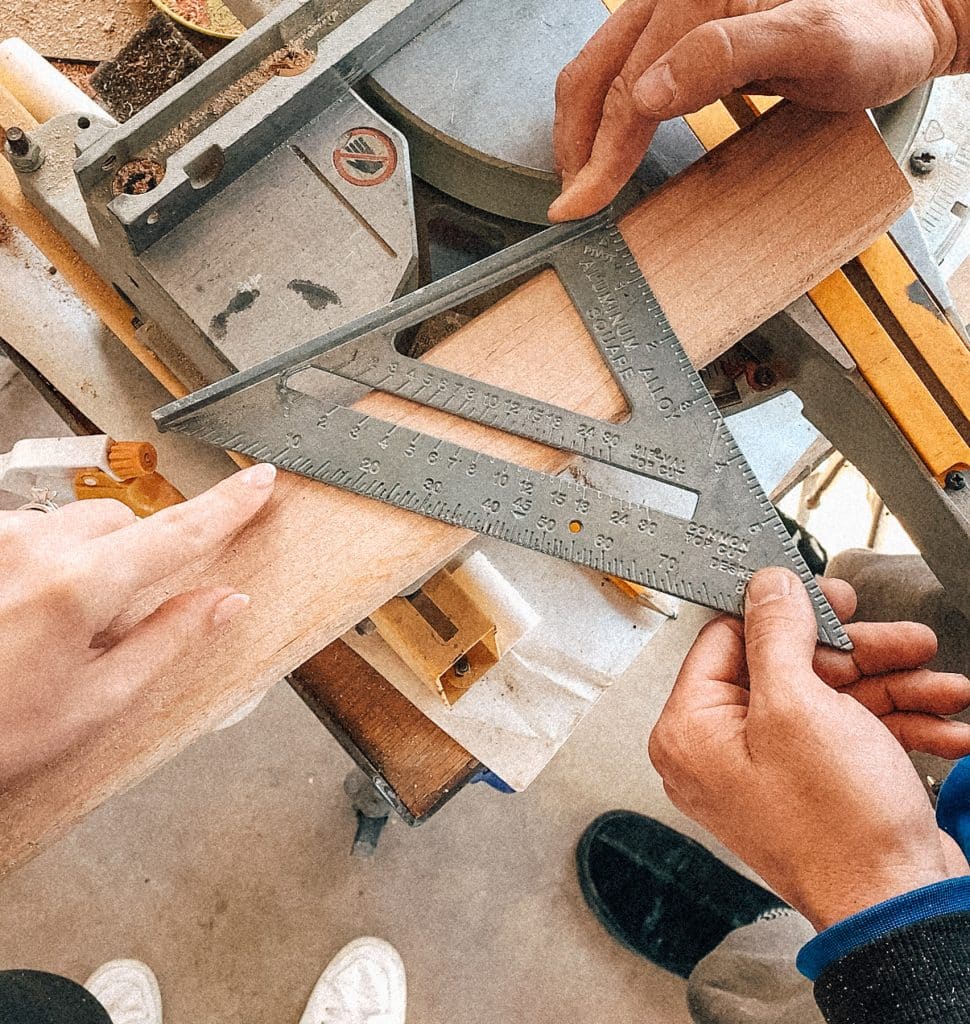
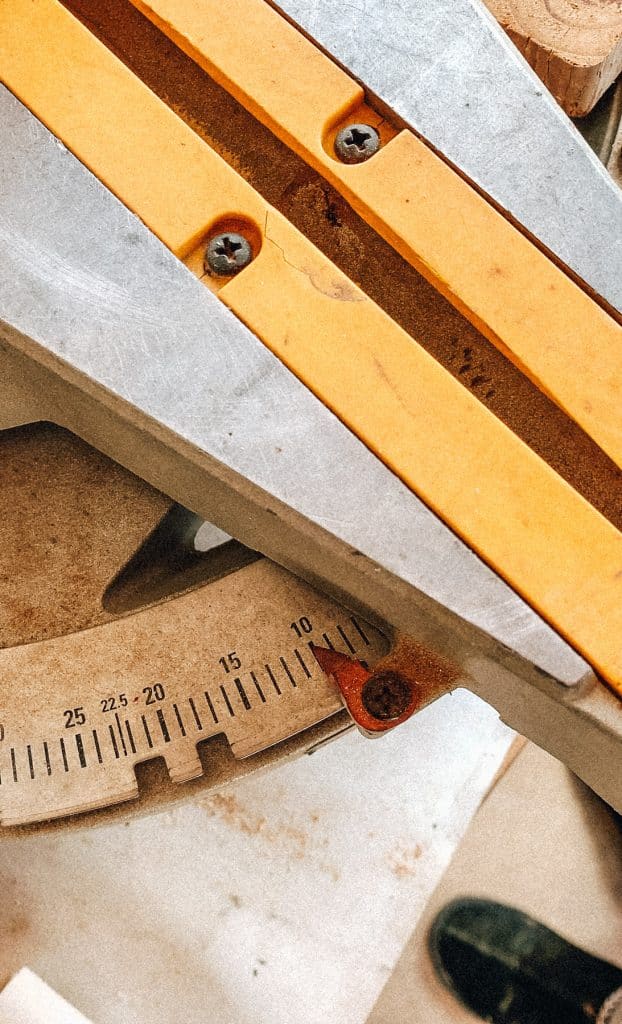
Now while holding the right corner of the tool start moving up the left end of the tool up until you reach the degree you want the cut at. In our case we needed a 10 degree angle.
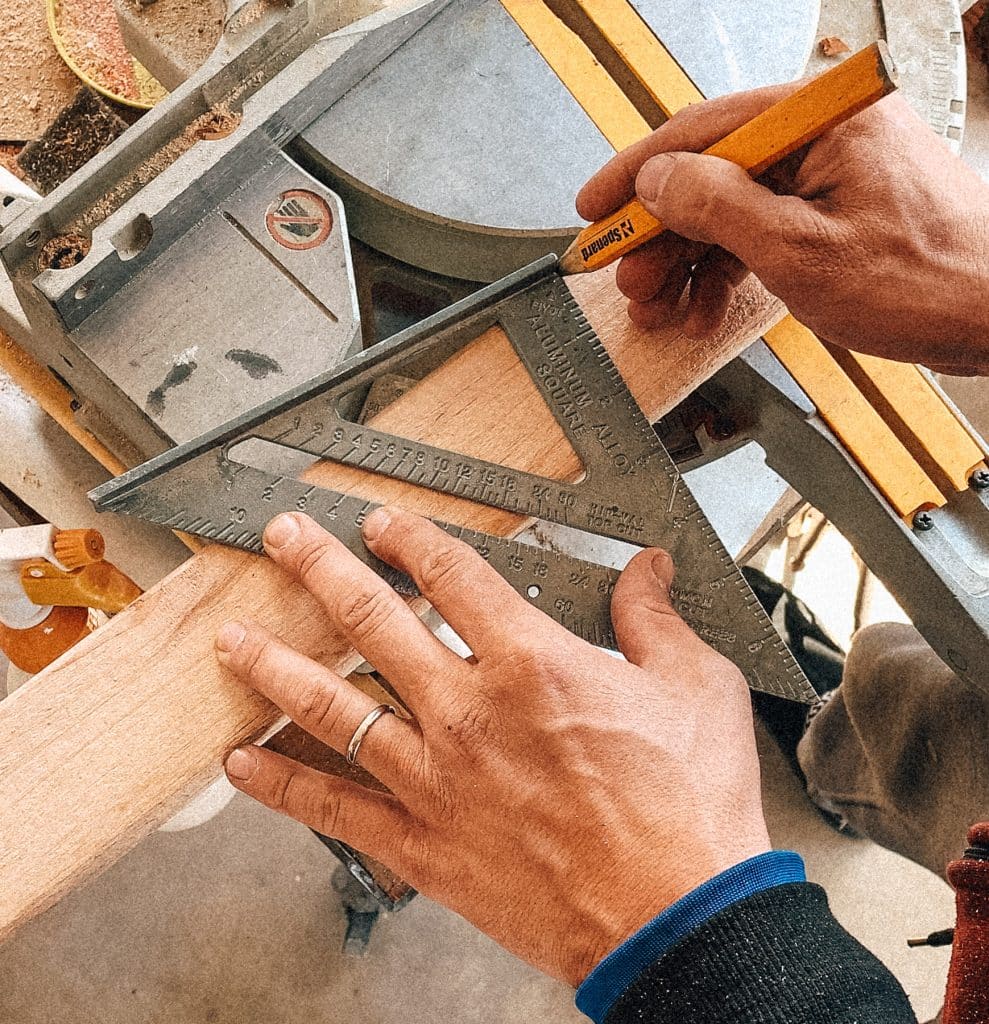
Hold it in position while you mark your angle. AND that’s it! That’s where you need to cut to get that 10 degree angle on that end! Isn’t that easy!
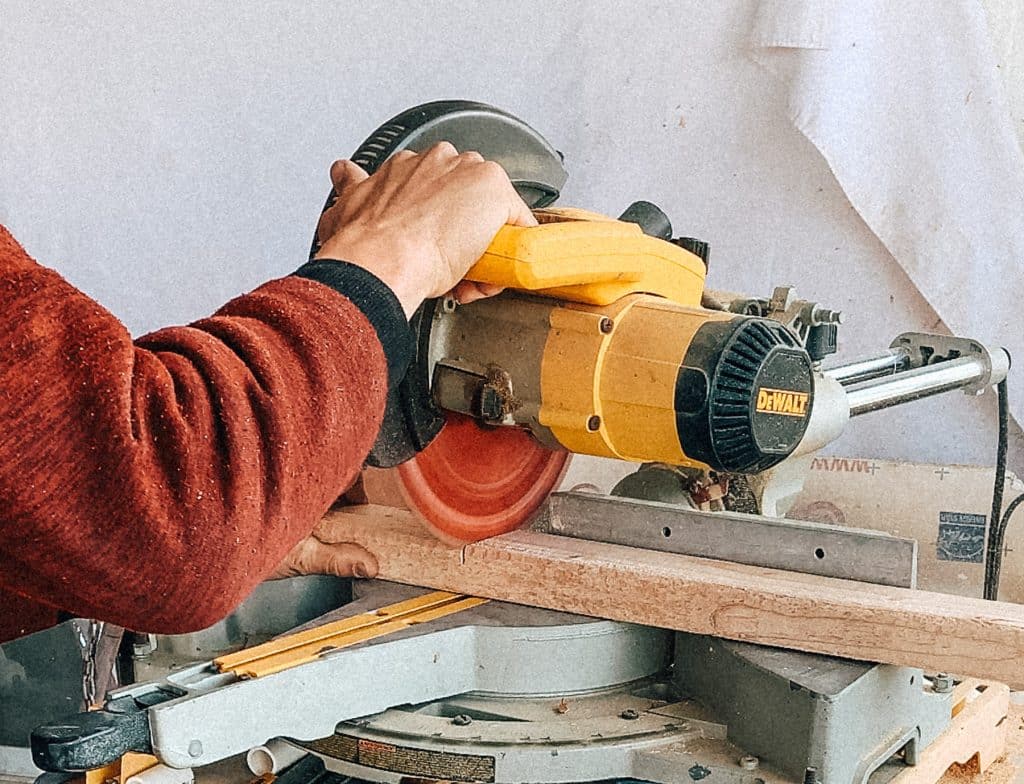
How we cut all our pieces!
If you have a miter saw the adjustable table on the bottom makes this so easy! That’s how we ended up cutting all our pieces.
Making the Bench!
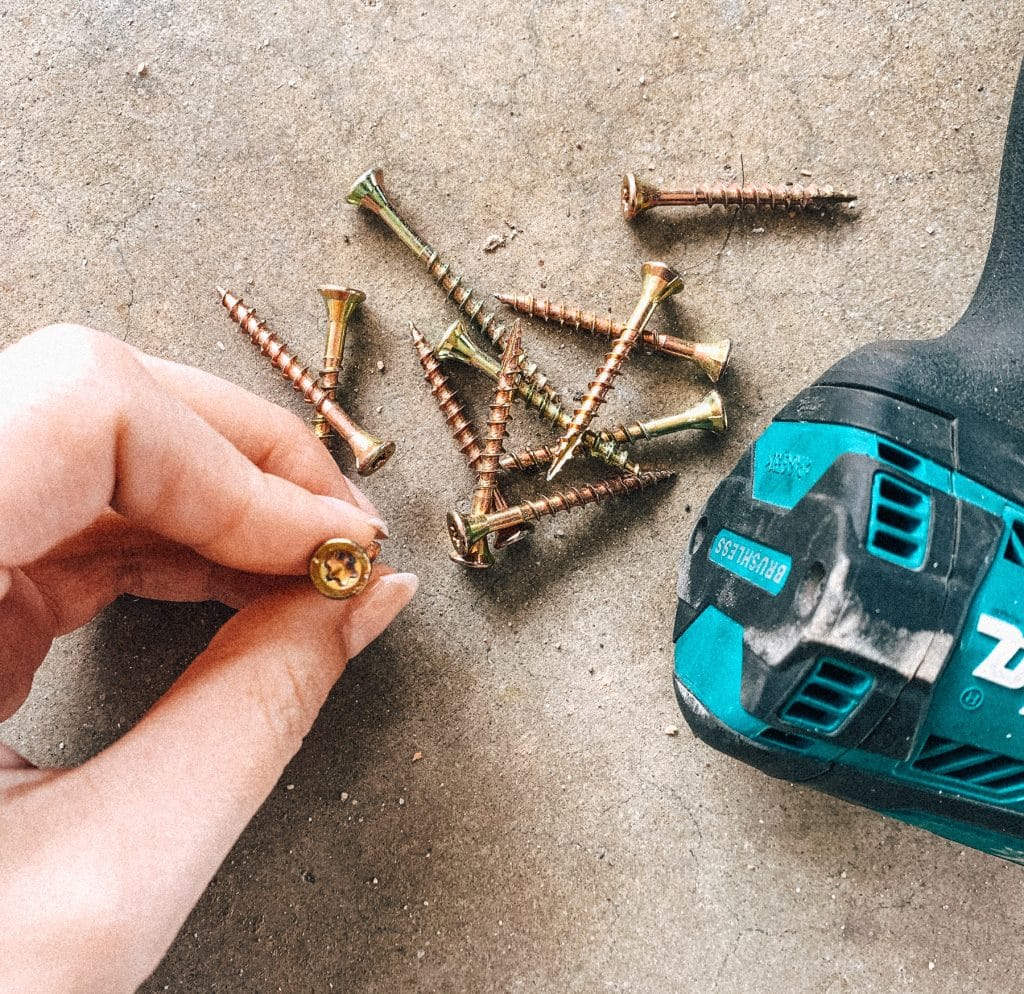
To assemble the bench we used these torx construction screws with a star tip. They are very durable. We’ve made a few furniture pieces with them and honestly I can’t complain they’ve held up so well. These were 1 1/2 inches in length.
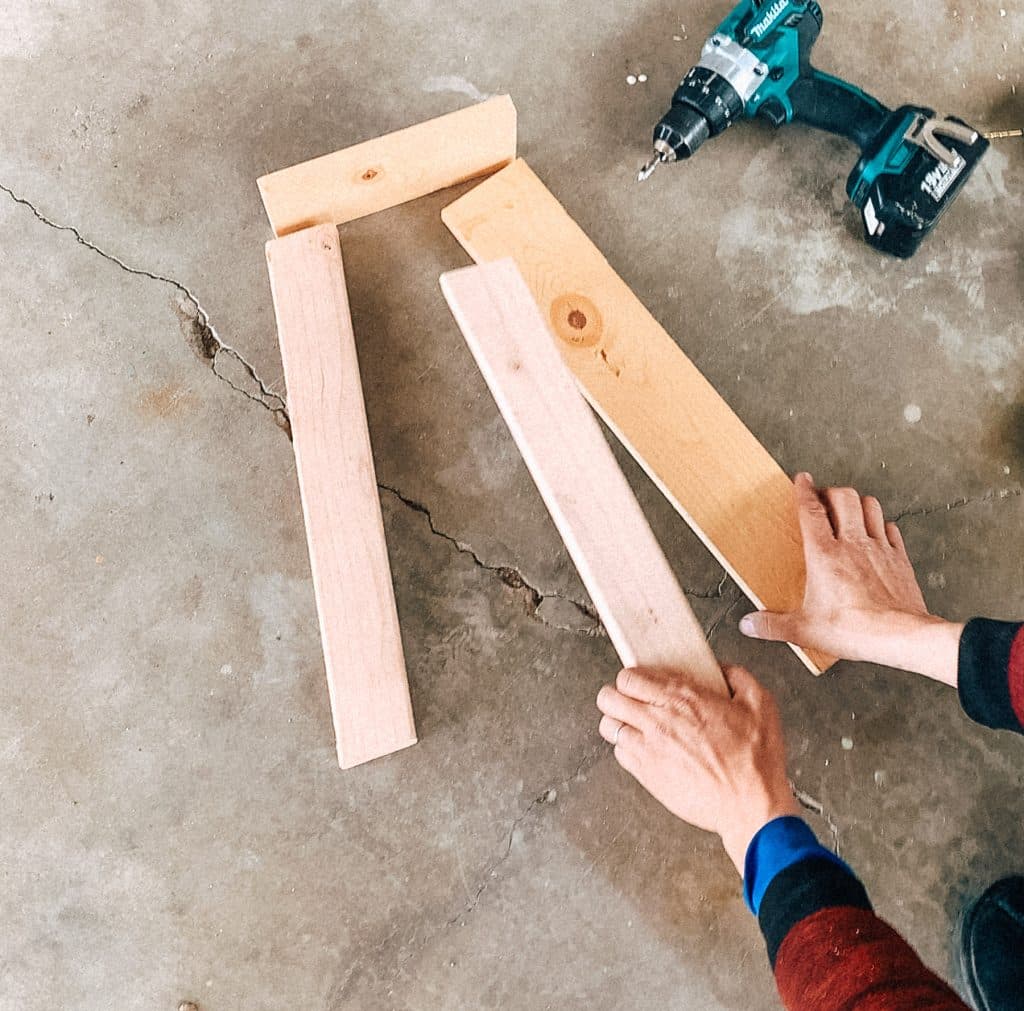
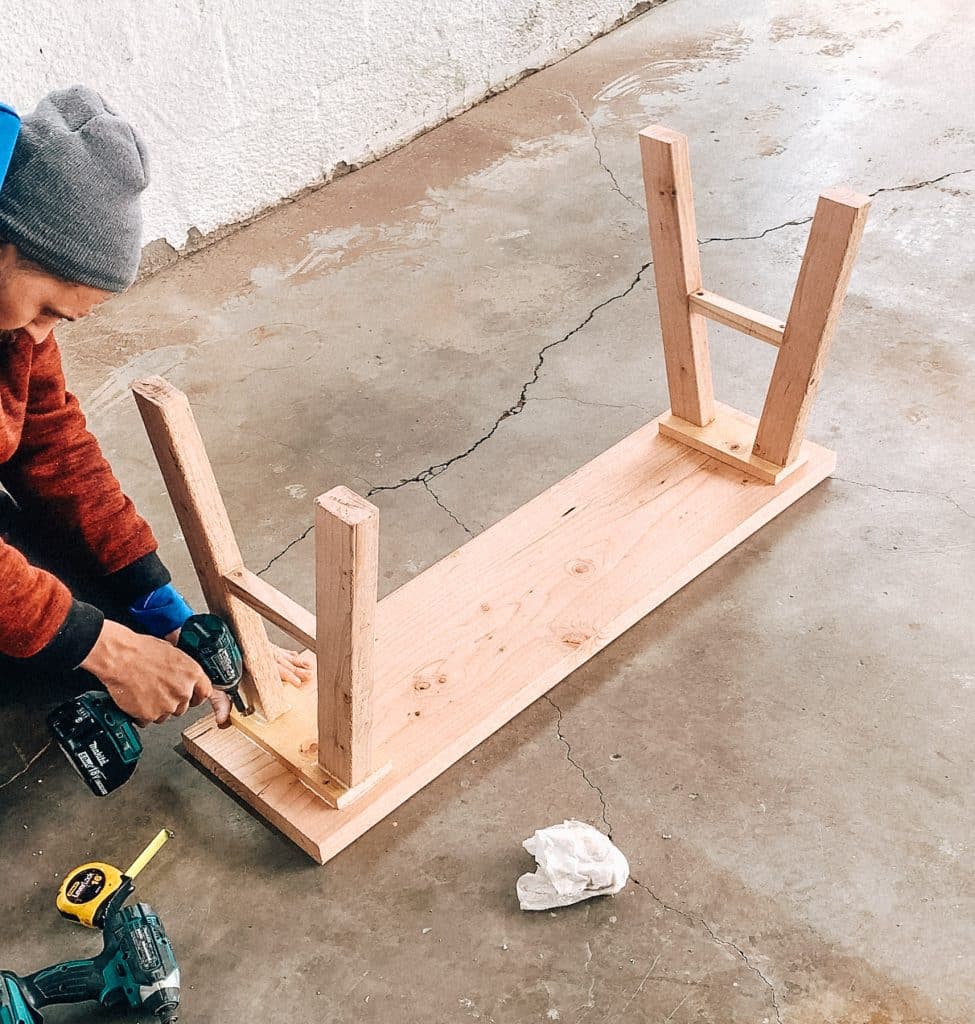
Assembling the legs!
We first started by assembling the legs.
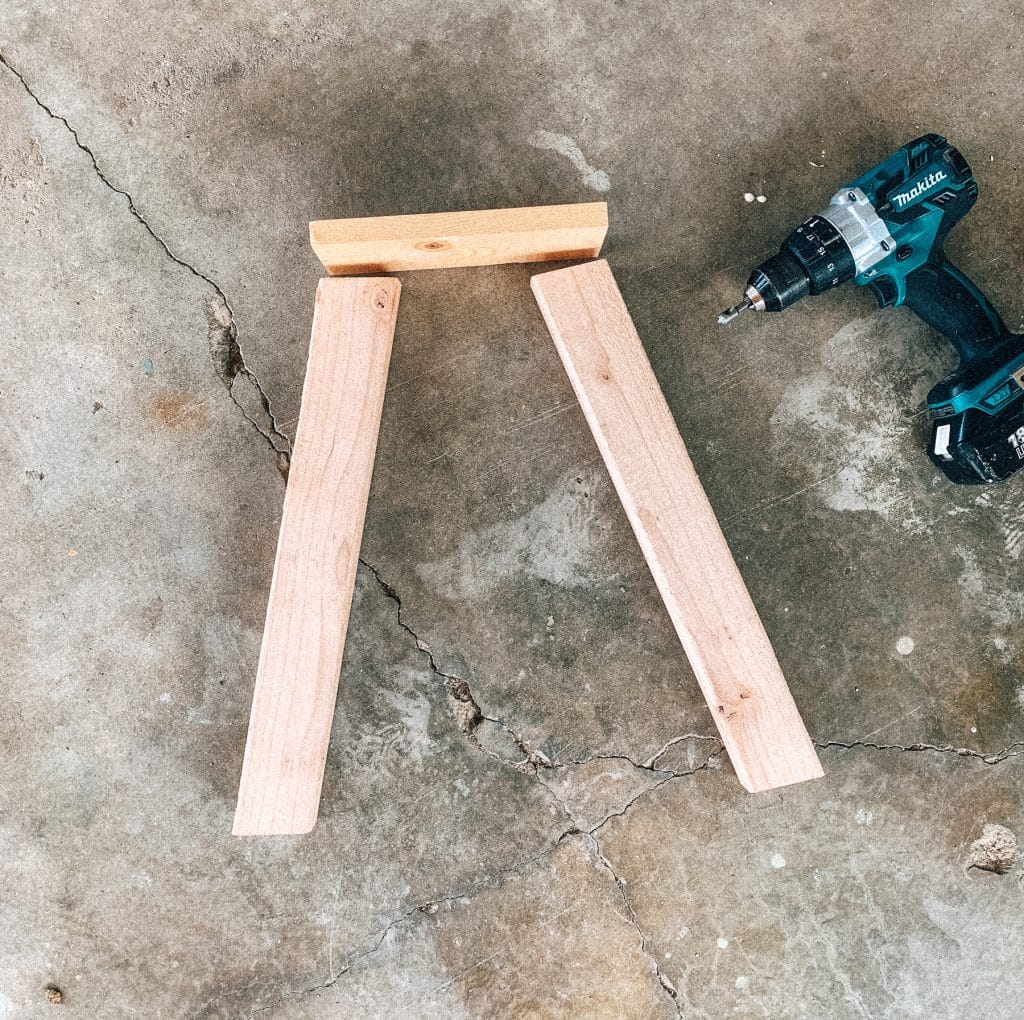
what all the leg pieces looked like before attaching
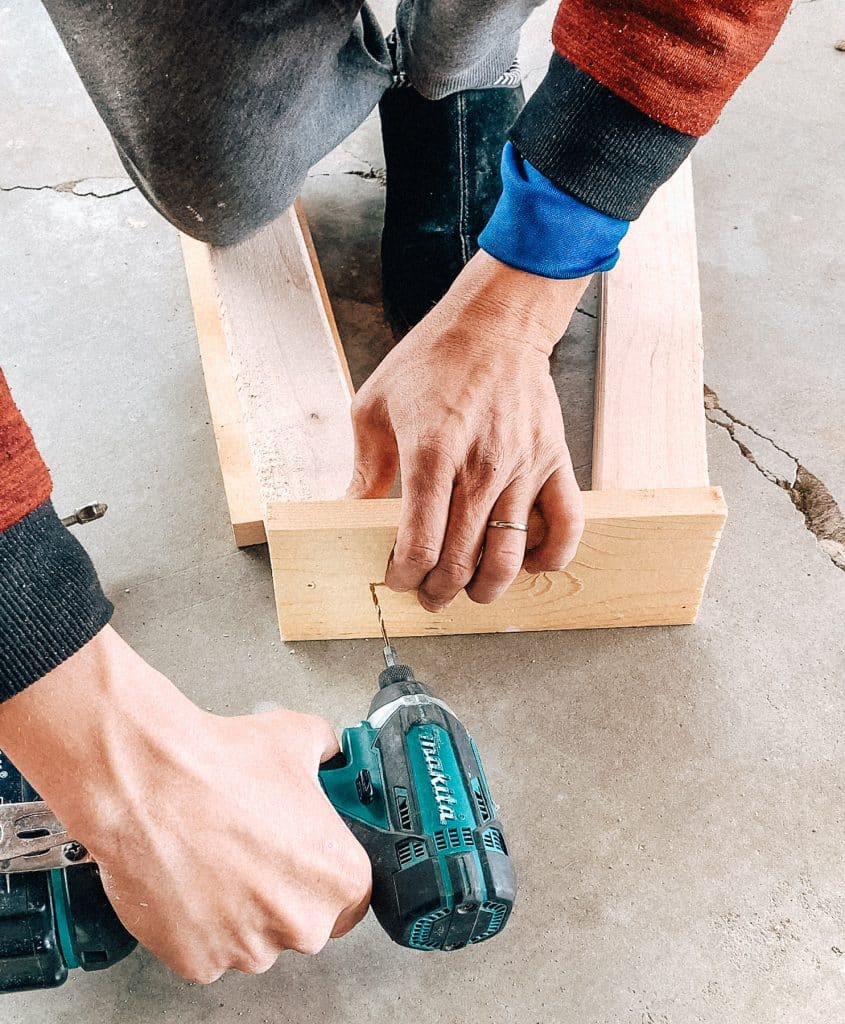
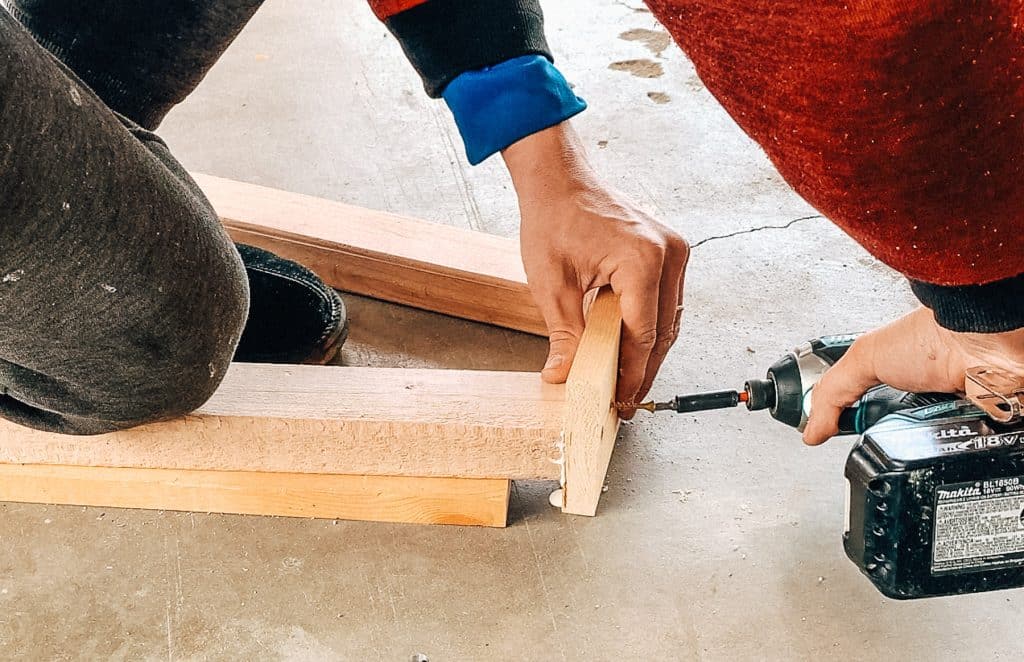
It can get a bit tricky trying to secure the pieces together we found it worked best if we propped the leg part up with a 1×3 while drilling and securing.
Tony then pre-drilled two holes and also used the countersink drill bit so the screws sit flush once attached.
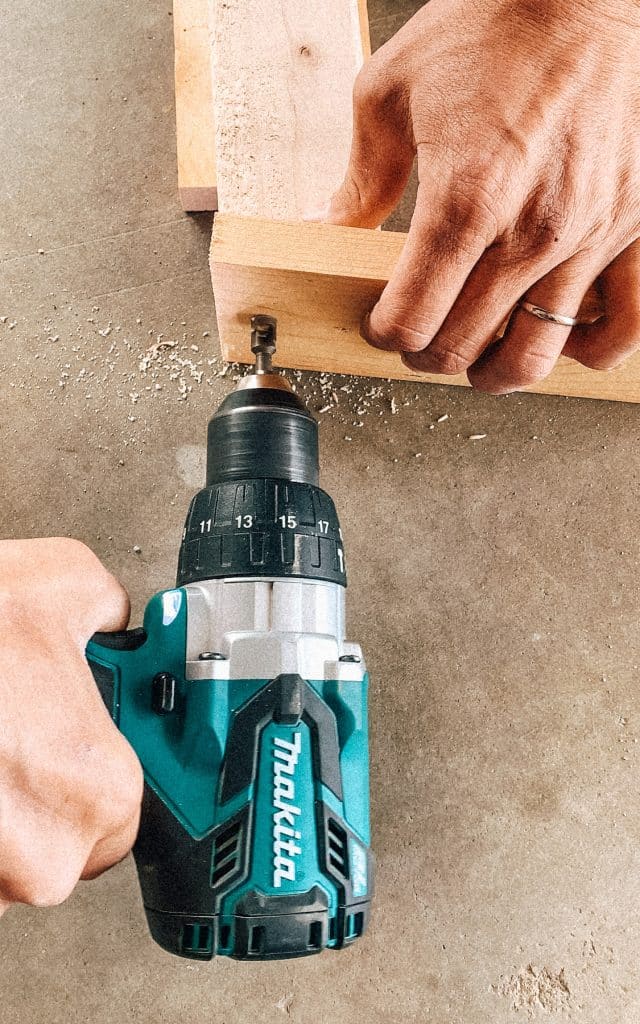
making the hole countersink
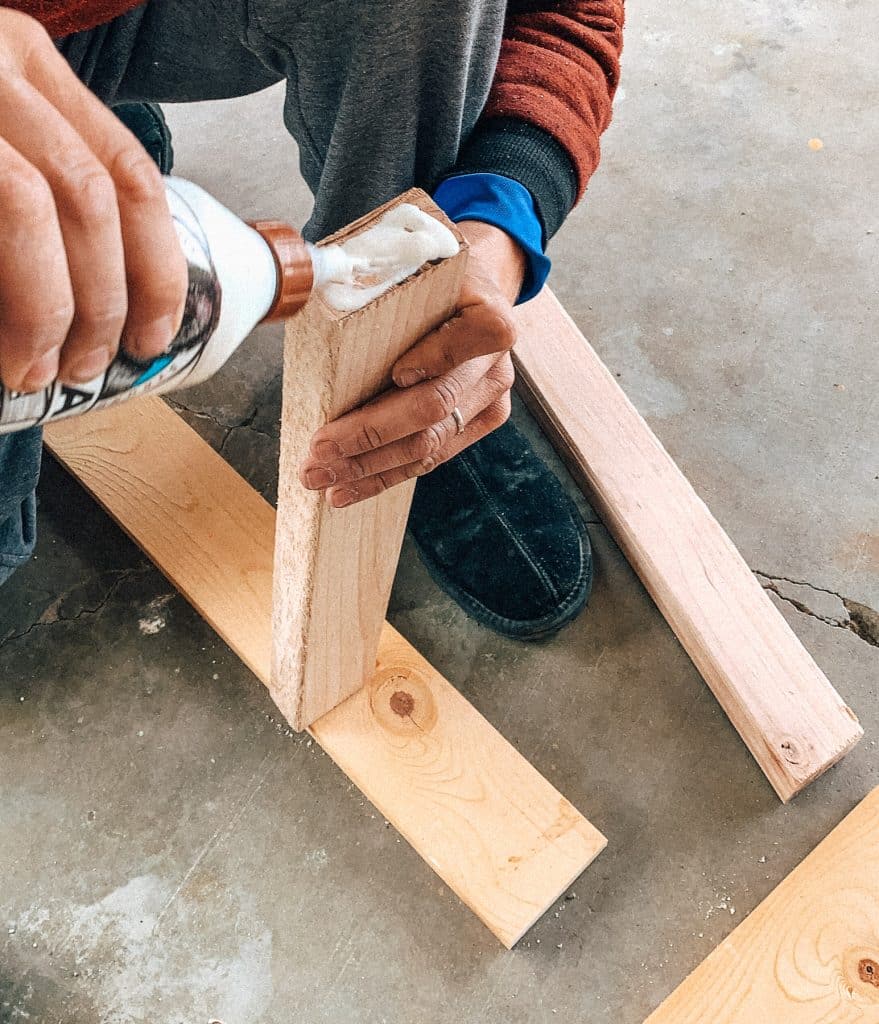
He than added gobs of glue to the top of the legs before securing it with screws where he had pre-drilled holes.
adding screws to secure the leg to the base
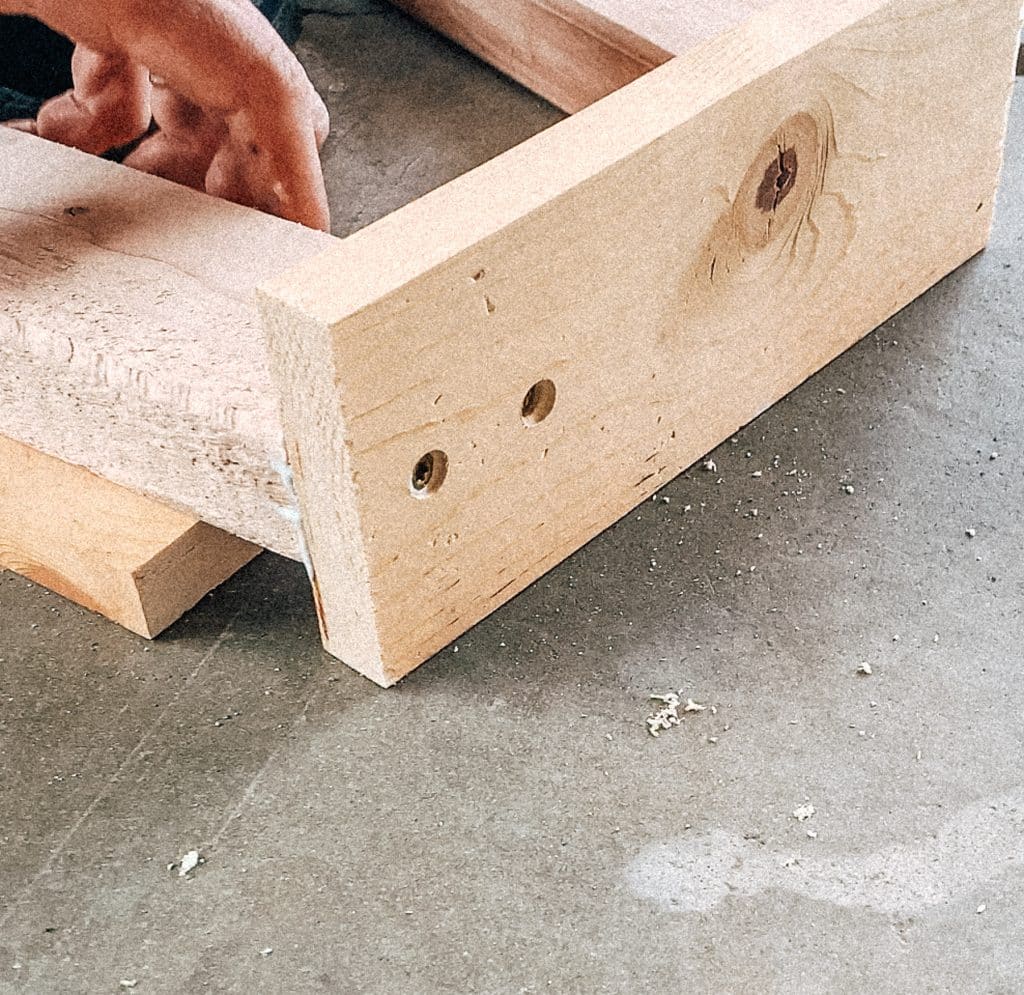
how flush the screws look once installed.
Adding A Center Beam to the legs!
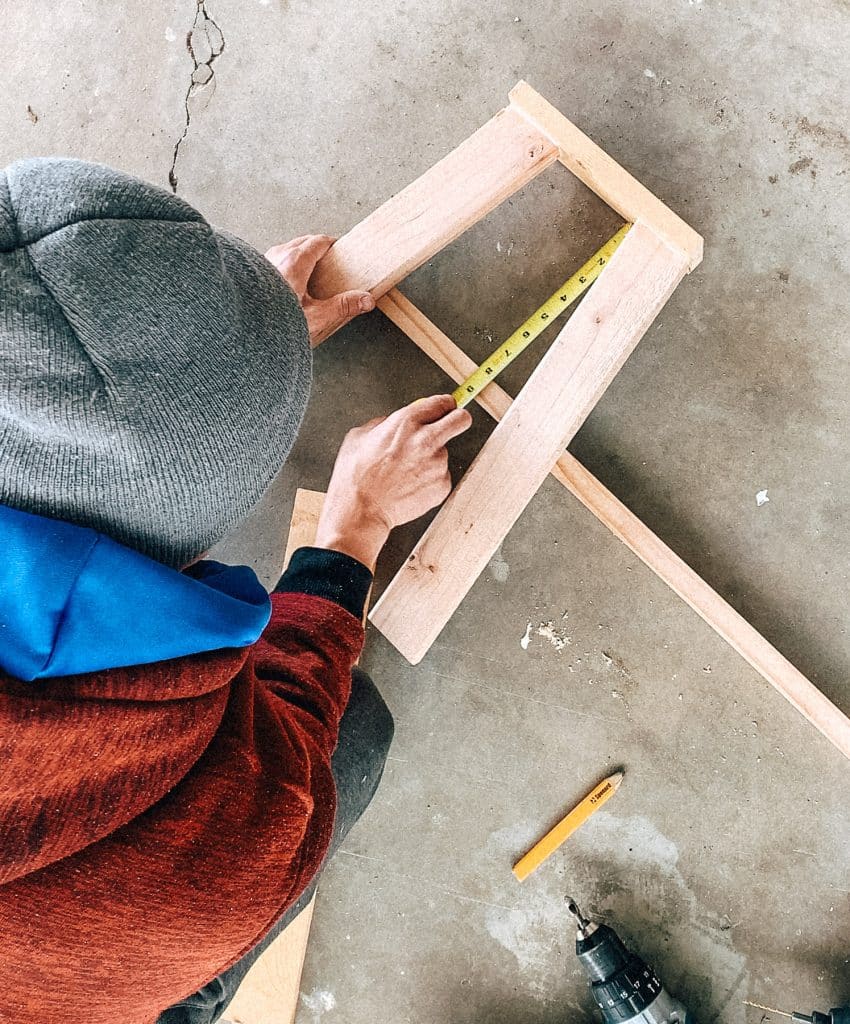
Next Tony lay the wooden dowel under the legs and measured how far down we wanted it. We positioned it 8 inches down and he marked the dowel on both sides with pencil to reveal where cuts need to be made. Tony then used the miter saw to cut the dowel to size.
We then slipped the dowels between the legs and while the legs were upside down Tony pre-drilled some holes for screws at an angle.
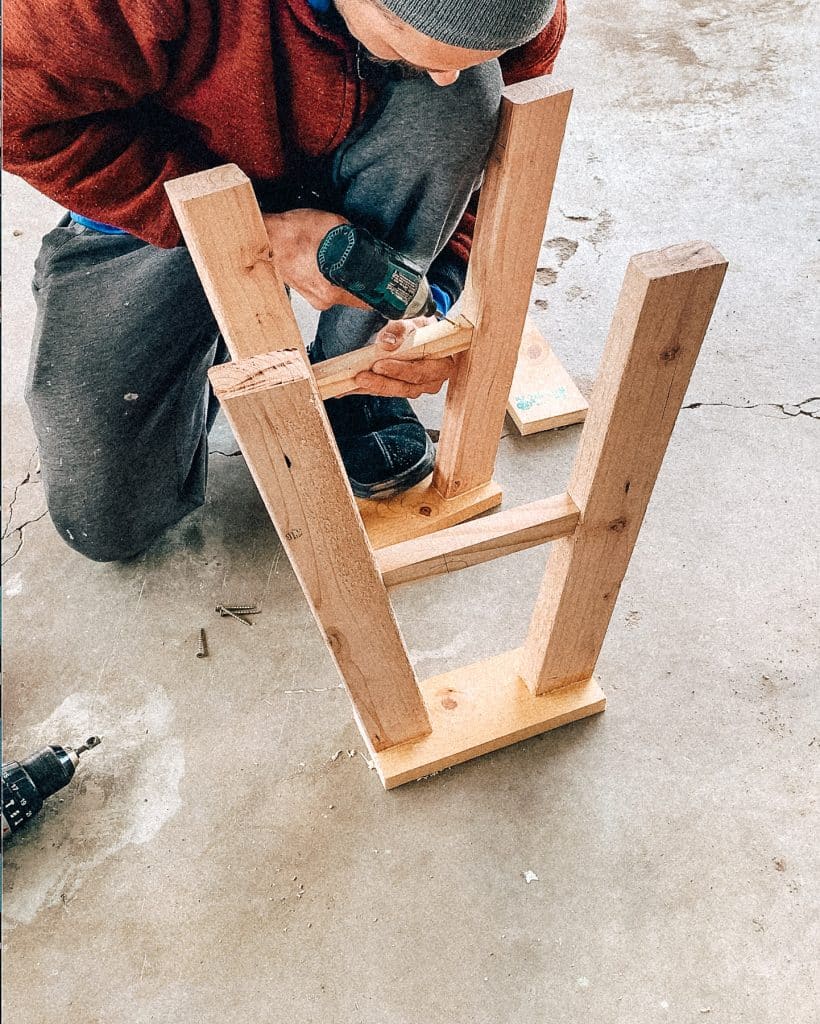

he removed the dowel and used the countersink drill bit in the same spots as well
Then Tony applied some wood glue before securing the dowel to the legs with screws.
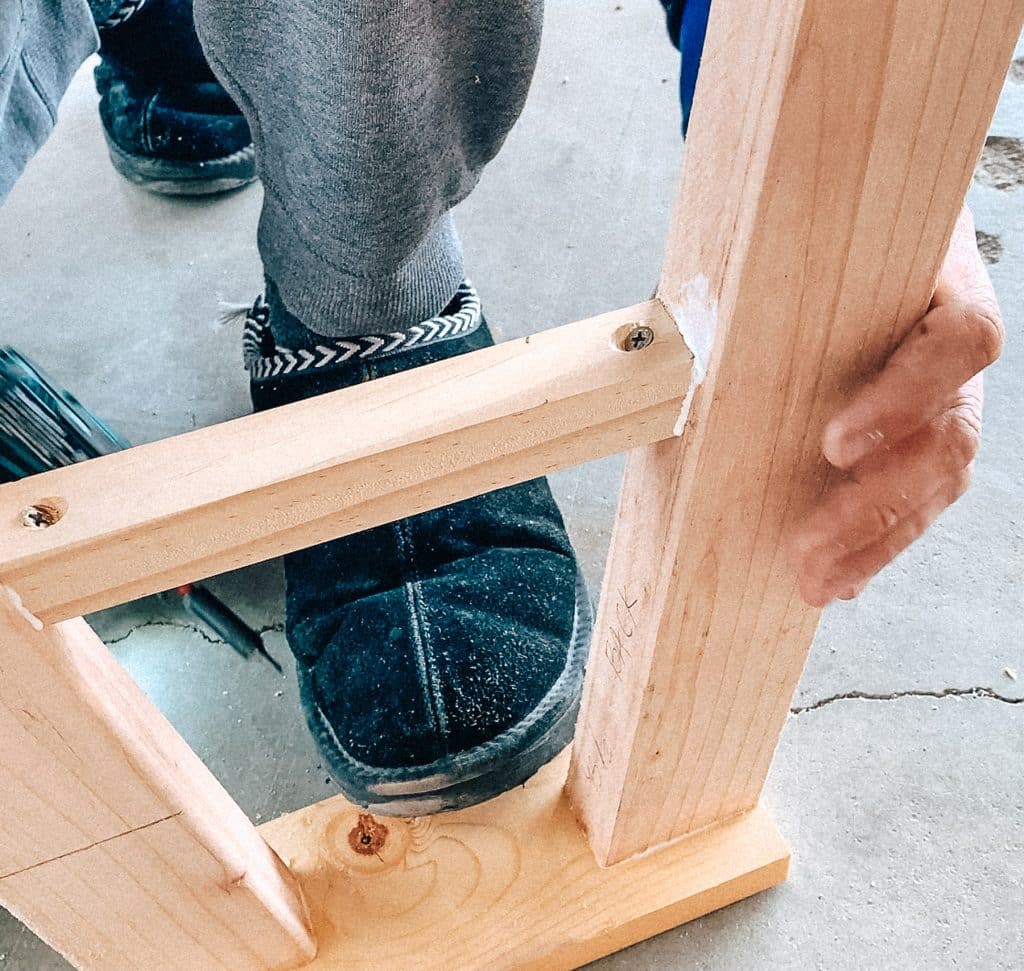
Attaching the legs to the bench!
Now that the legs were done we flipped the wood face down and marked how far we wanted the legs away from the edges of the bench. Tony then also pre-drilled and used a ton of wood glue before securing with screws.
![]()

We added 4 screws to secure the leg base to the bench top. Don’t forget to use the glue. That’s where most of the durability will come from.

Here’s a video of this DIY bench incase some of the photos didn’t make sense.
Final Product!
I love how it turned it and can’t wait to distress it! I think the legs will definitely look a bit thinner once I’m done with it. I still haven’t decided on a stain color but I’m thinking something lighter and not too dark.

That’s all for today! I hope you enjoyed this simple bench tutorial! NOW you know how to make a simple bench! Grab some wood and have fun making your own! You can change up the wood thickness and make it even more chic! HAVE FUN WITH IT!
I’ll see you all next time!
hugs,
Lily
I do not even understand how I ended up here, but I assumed this publish used to be great