Here’s how we made our own live edge mirror from scratch! Best of all it only cost us about $38! Pretty AMAZING RIGHT 😍?!
WOW! These last two weeks have been so exciting and very eventful to say the least.
We slowly started our bathroom remodel last year sometime in November. Not going to lie I’m sssso over it 😩😅 !
Today I’ll be sharing how we made this stunning live edge mirror from a wood slab. Surprisingly this was a pretty easy DIY.
Total Cost:
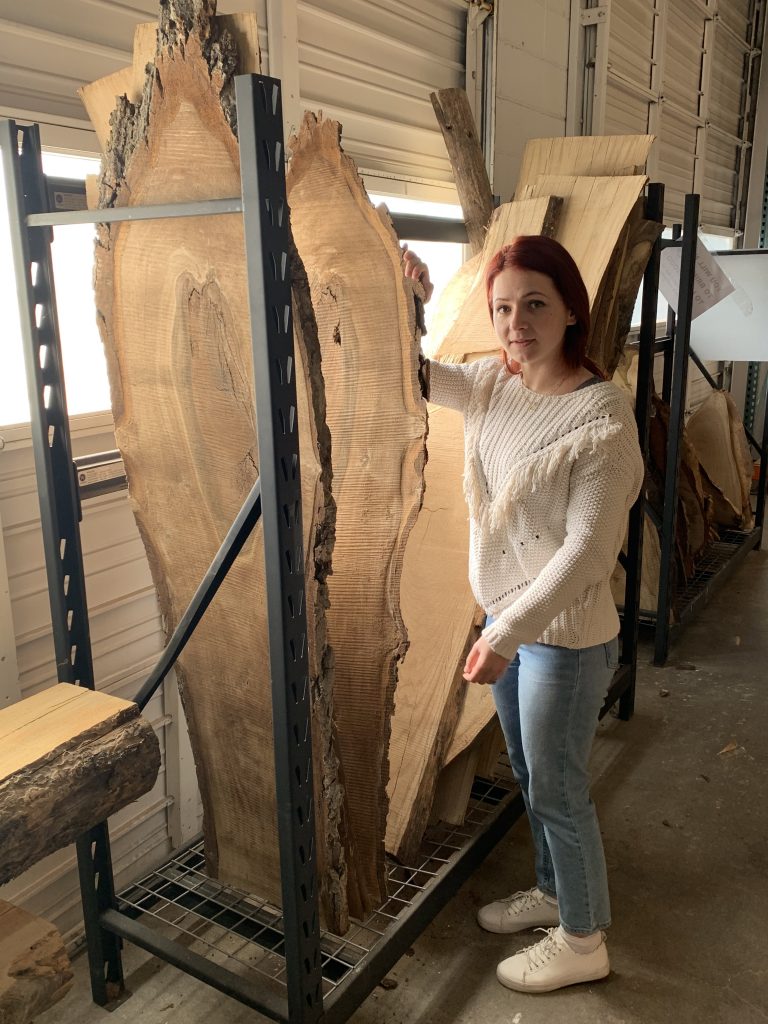
Target sells a very similar live edge mirror for about $180 and I was pretty close to buying it. The only reason I ever considered paying that much for a mirror is because I couldn’t find supplies to make it for much cheaper. All the wood slabs I found were around $100 to start off with. That’s insane!! I was thinking shoot investing around $150 in supplies plus labor ?? Not really worth it right? Then I found a little local pawn shop that sells wood slabs for super cheap! After a successful trip to the pawn shop we found two wood slabs for a total of $25. WOW! What a steal! Ok than for the mirror we headed over to restore a recycling appliance store . This is where we found our mirror for only $12. This was pretty much all we needed to get started.
Time Needed:
This project took us about 2 days to complete. We could have easily completed it in 1 day however their were a few hiccups I’ll cover later. In total I would say this took up between 4-5 hours to make. It’s super easy!
Supplies:
- wood slab ( I’m pretty sure ours was oak – not 100% sure though )
- wood glue
- leather straps
- silicone
- screws
- clamp
Tools:
- circular saw
- drill
- kreg jig ( I got mine at home depot a long time ago for around $7 from what I remember)
- sander
Our #1 Mistake While Making This Live Edge Mirror
If it’s one thing I want to emphasize on is the condition of your wood! This was our #1 mistake. Our wood wasn’t necessarily in bad condition however it was warped and bowing in some areas. We just needed to be more careful when choosing which areas of the wood to actually use for the mirror frame. If your pieces are bowed or warped your live edge frame will not fit flush to the mirror. Seems like common sense right LOL 😆 Not sure how we didn’t think of this before cutting all out the pieces!
One of the pieces were so warped. We even went as far as trying to straighten it. Eventually we gave up the idea and realized we had just enough to cut another piece to replace the warped one. 😬
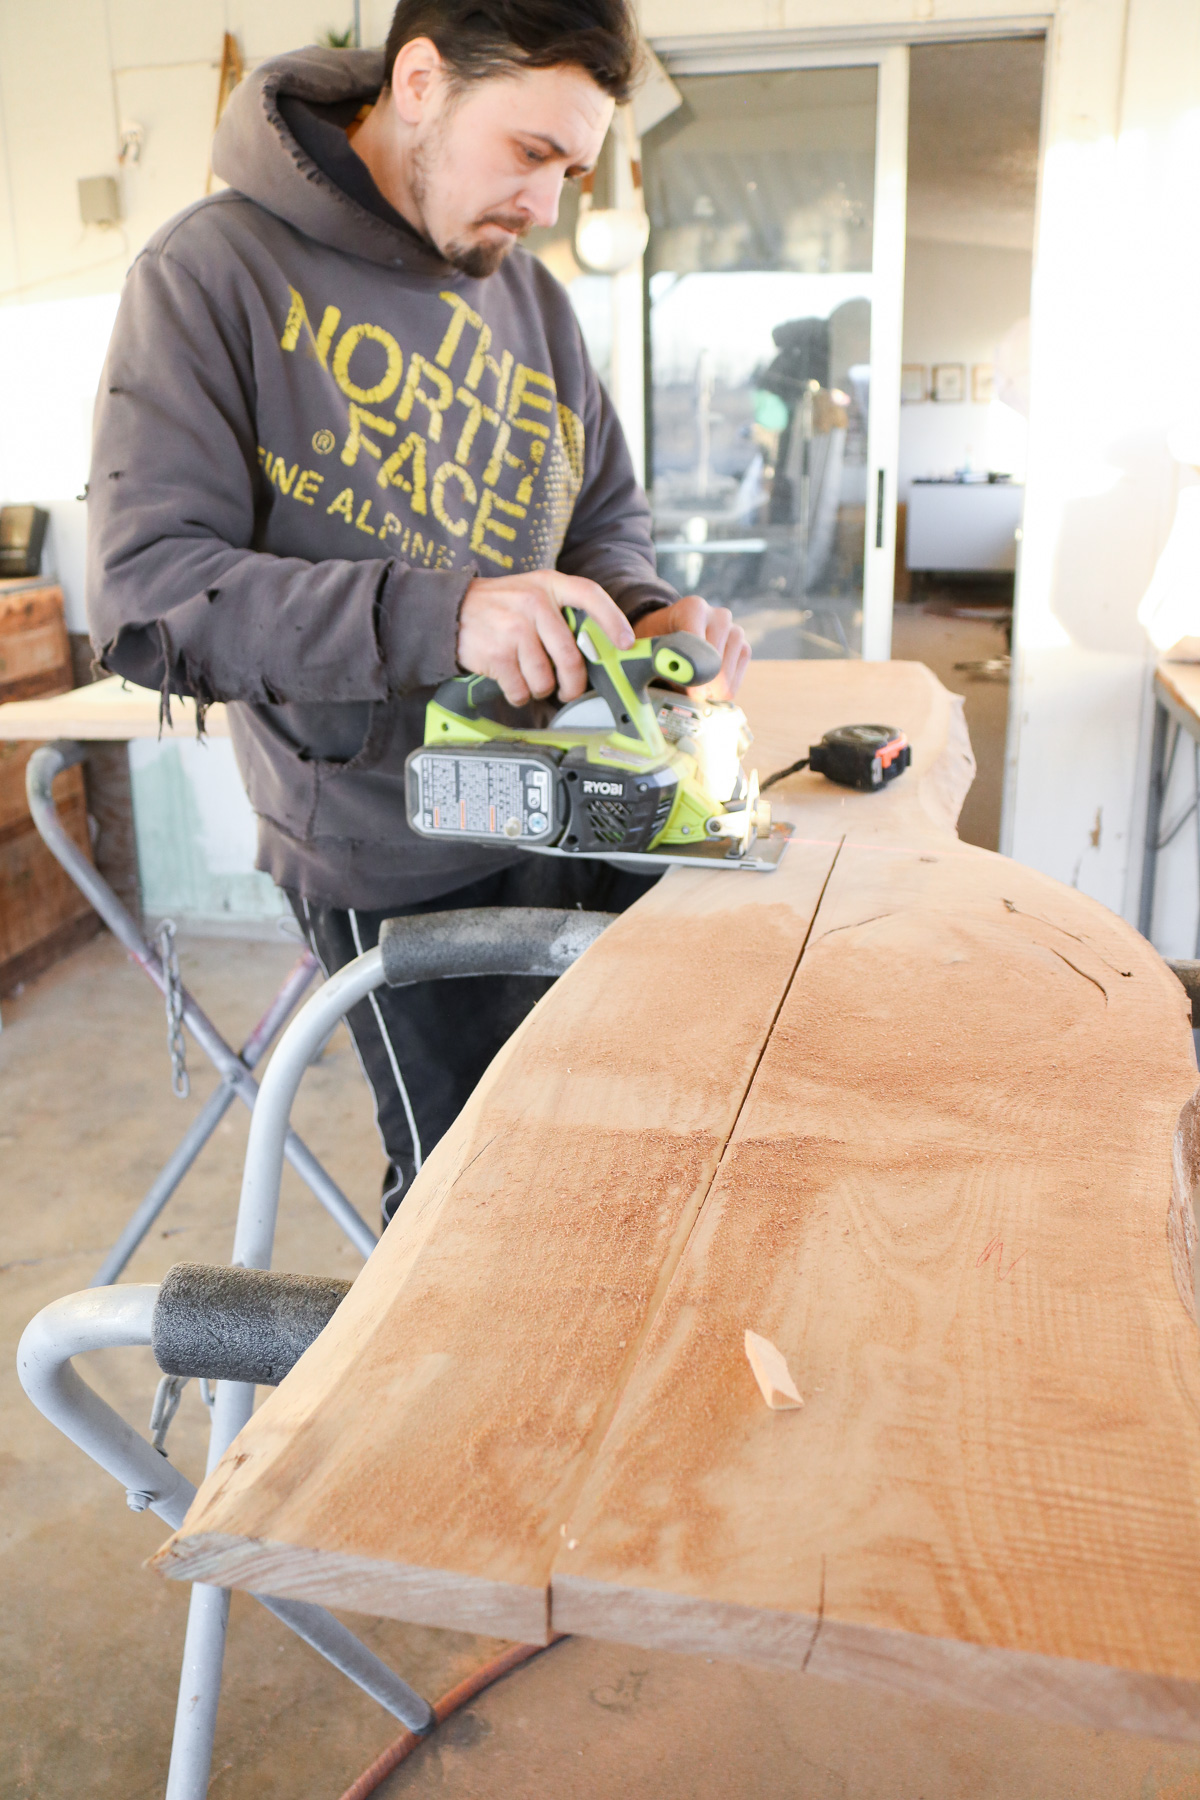
CUTTING OUT THE WOOD FOR OUR LIVE EDGE MIRROR
First off I measured and marked a total of 4 pieces to create the live edge frame. I decided to do both sides of the frame live edge and keep the top and bottom of the frame clean cut with no live edge. I made sure that once the pieces were put together they overlapped the mirror at least one inch all around this is how you’ll attach the mirror to the back. Tony used a circular saw to cut all the pieces out.
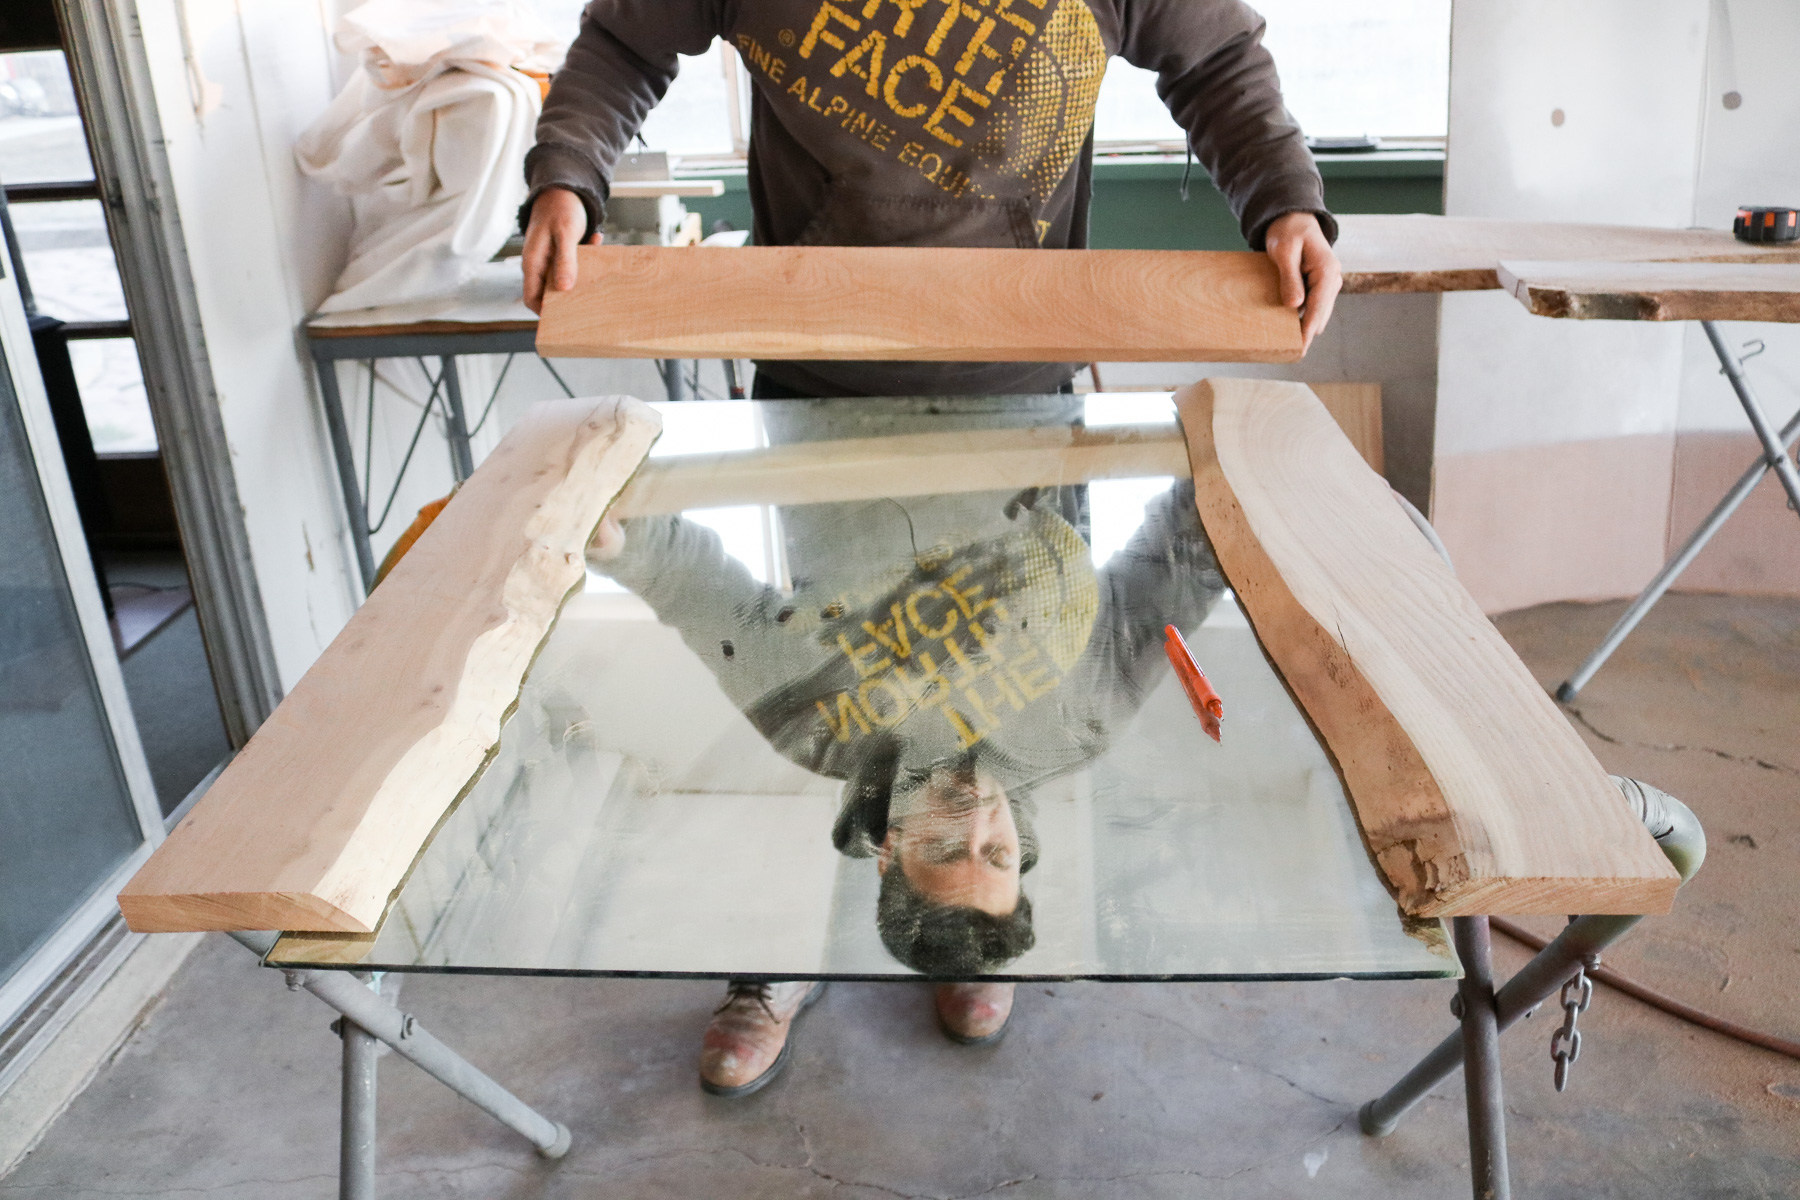
Here’s what the frame looked like. We had the mirror close by to make sure all the pieces fit nicely. Make sure you’re frame is a bit smaller. This is how you’ll attach the mirror to it. If you’re wondering how we accurately got an even width on the live edge pieces, we just kind of eye balled it 😆😉! Overall the width of each wood piece was around 5 inches we just kind of kept this in mind while cutting the live edge pieces. This did result in some adjusting later but, it’s exactly what we were expecting.
I sanded down all the pieces and we were ready to secure all the pieces to create the frame.
Before securing our frame we noticed slanted gaps between the pieces of wood. To fix this Tony light sanded the edges so we would get a flush fit.
SECURING ALL THE PIECES FOR THE LIVE EDGE FRAME
We used a kreg jig to help us secure all the pieces together. If you’re not familiar with a kreg jig it’s a really simple tool that helps you pre-drill slanted holes at an angel to hide the screw that’ll go in the wood. I purchased my kreg jig at homedepot last year. They have a few different options I just got the cheapest one.
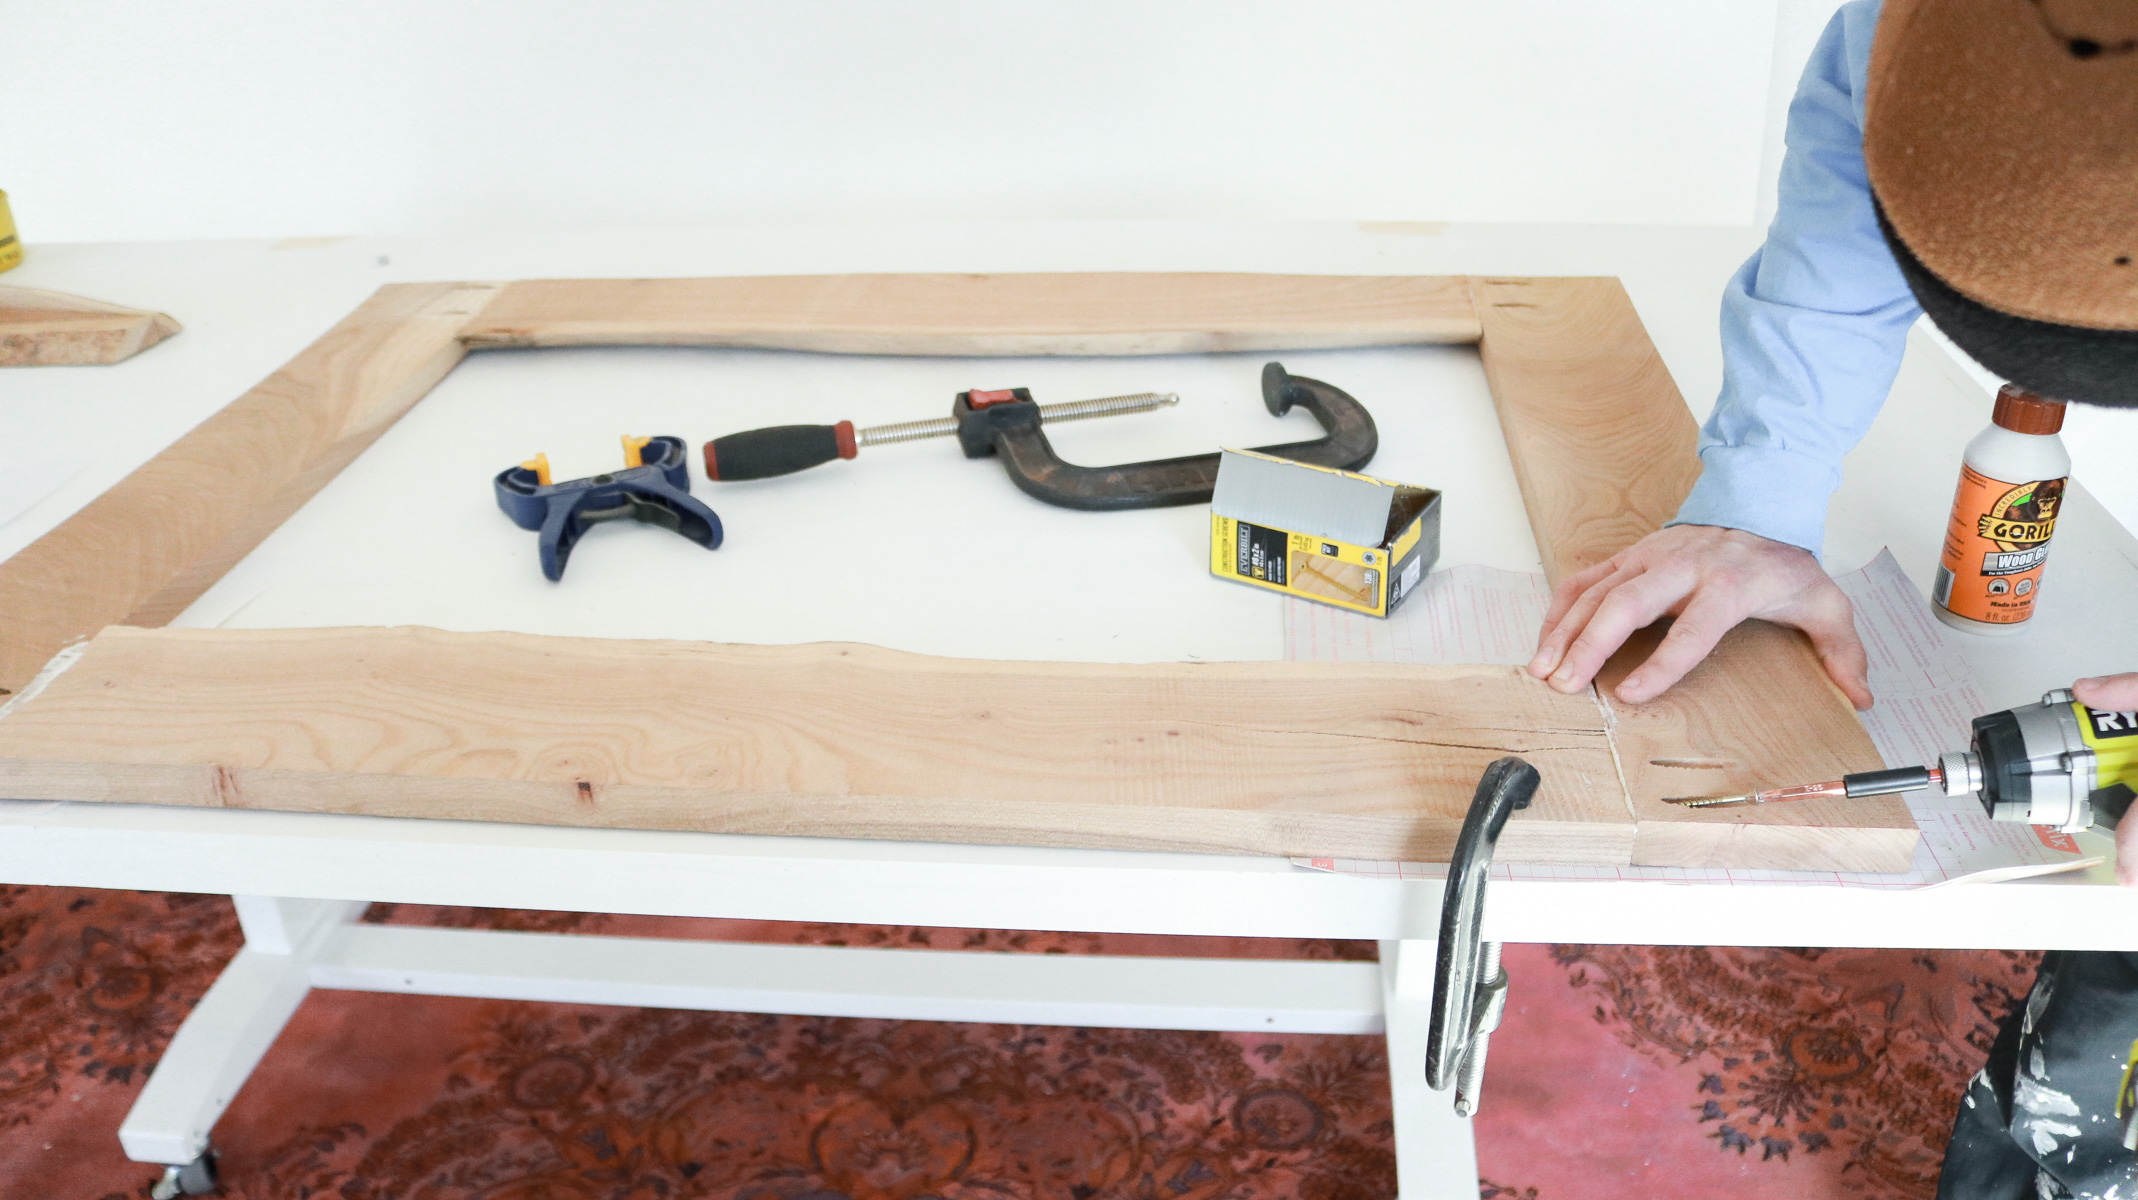
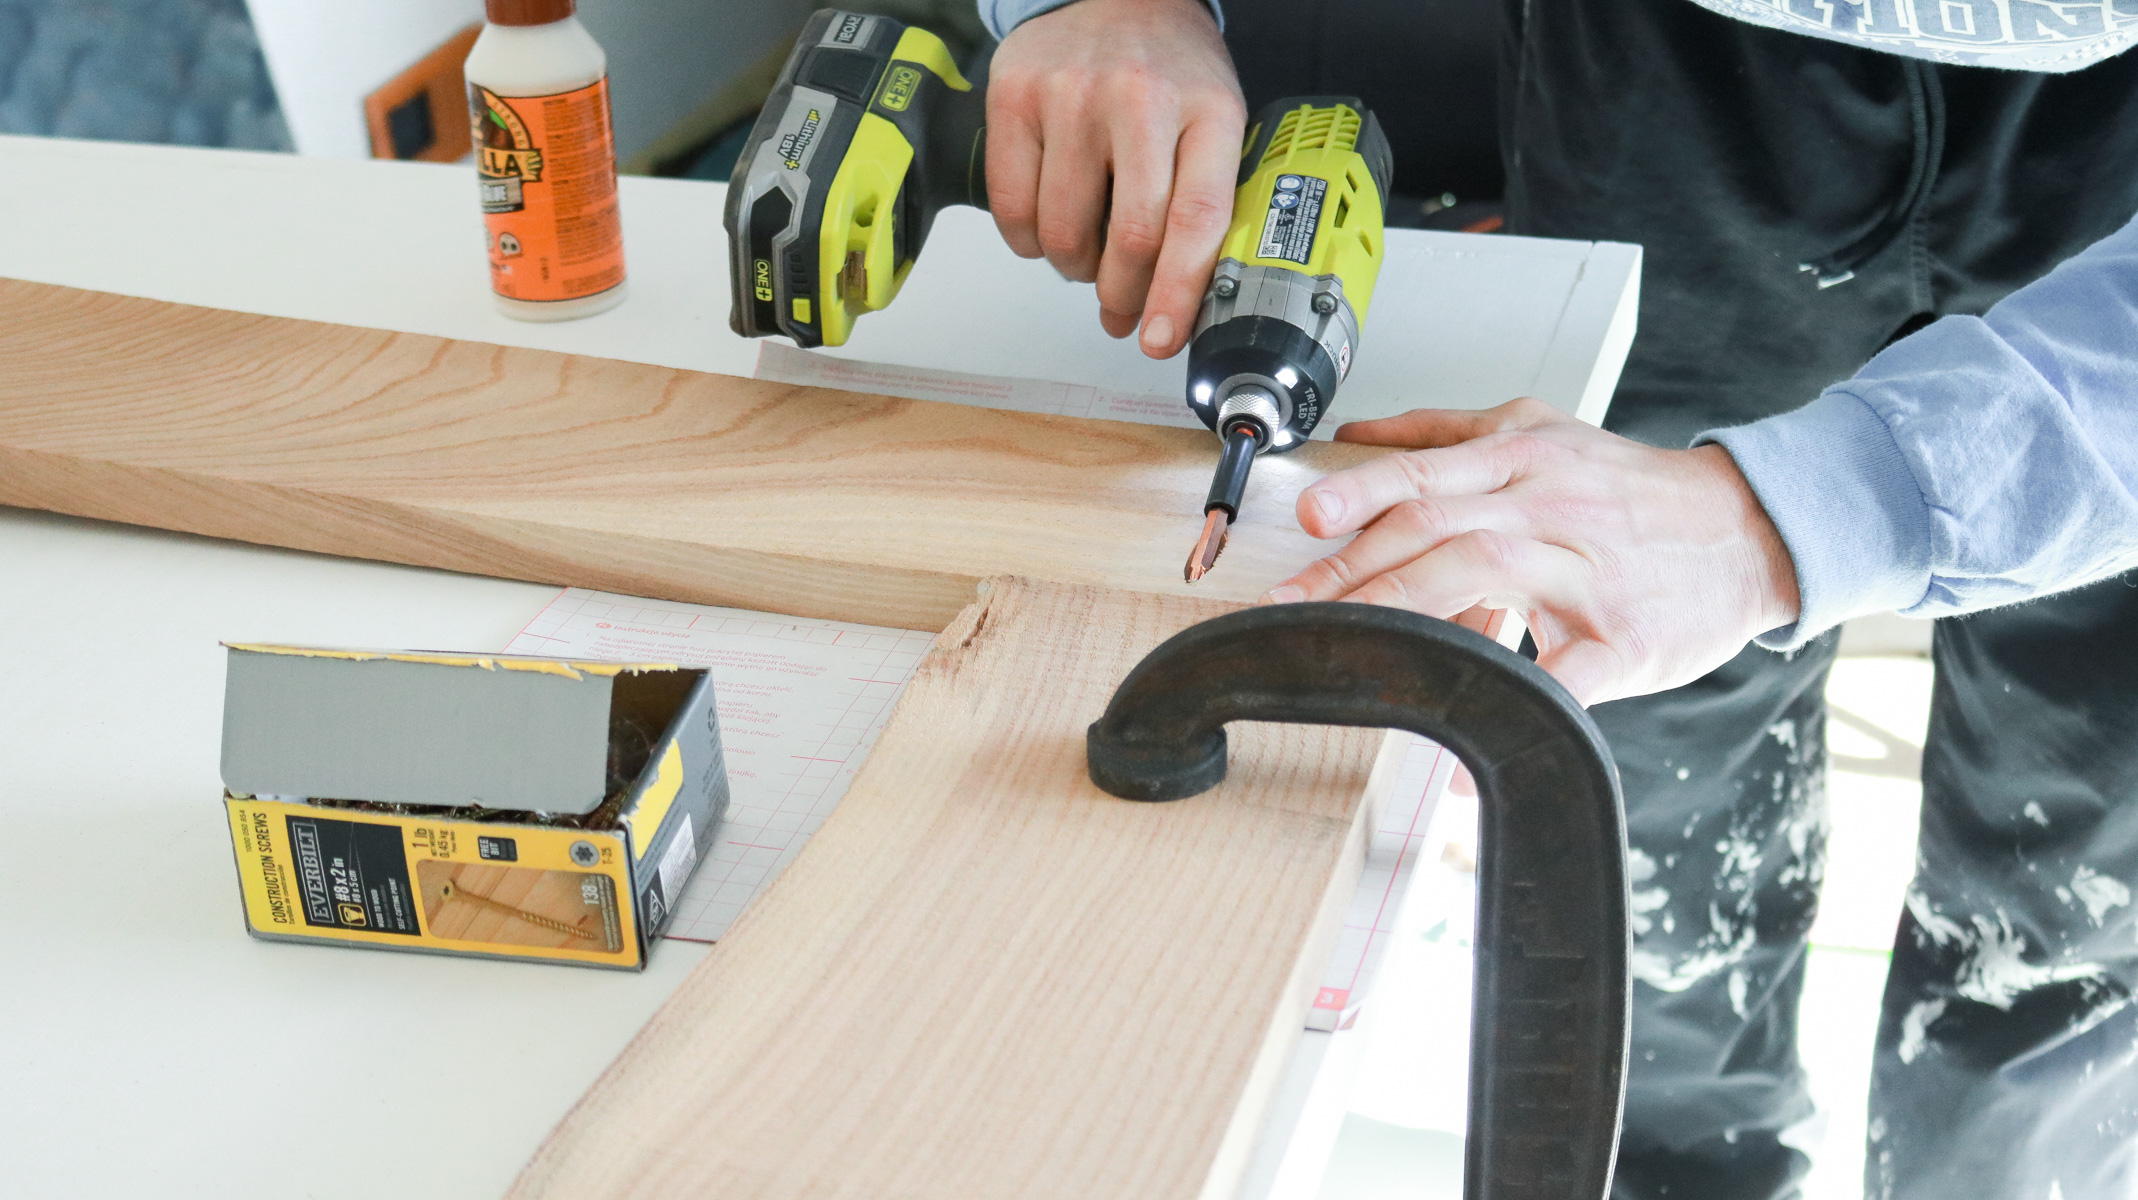
After making some holes on the back side of the wood pieces we added some wood glue to the seams and secured all the pieces together with screws. Yep it was that easy! If you’re freaking out about using a kreg jig keep reading! I was pretty overwhelmed by the idea of it before I tried it too!
WHY YOU SHOULDN’T BE SCARED TO USE THE KREG JIG!
So the first thoughts that came to mind when I first used the kreg jig was the thought of drilling a hole wrong and the drill bit that came in the kit was giant.
HERE’S WHAT YOU NEED TO REMEMBER! A FEW BASICS!
You can always practice on scrap wood before actually drilling a hole where you need it. This is what I always do. If you’re worried about getting the depth of your slant correct the drill bit comes with a little stopper on it. You can easily adjust it with an alan ranch. Keep in mind you will need a clamp to secure the kreg dig in place before drilling. If you’re concerned about the size of the drill bit that comes in the kit don’t be. Once you drill the hole it looks a lot thinner because of the slant.
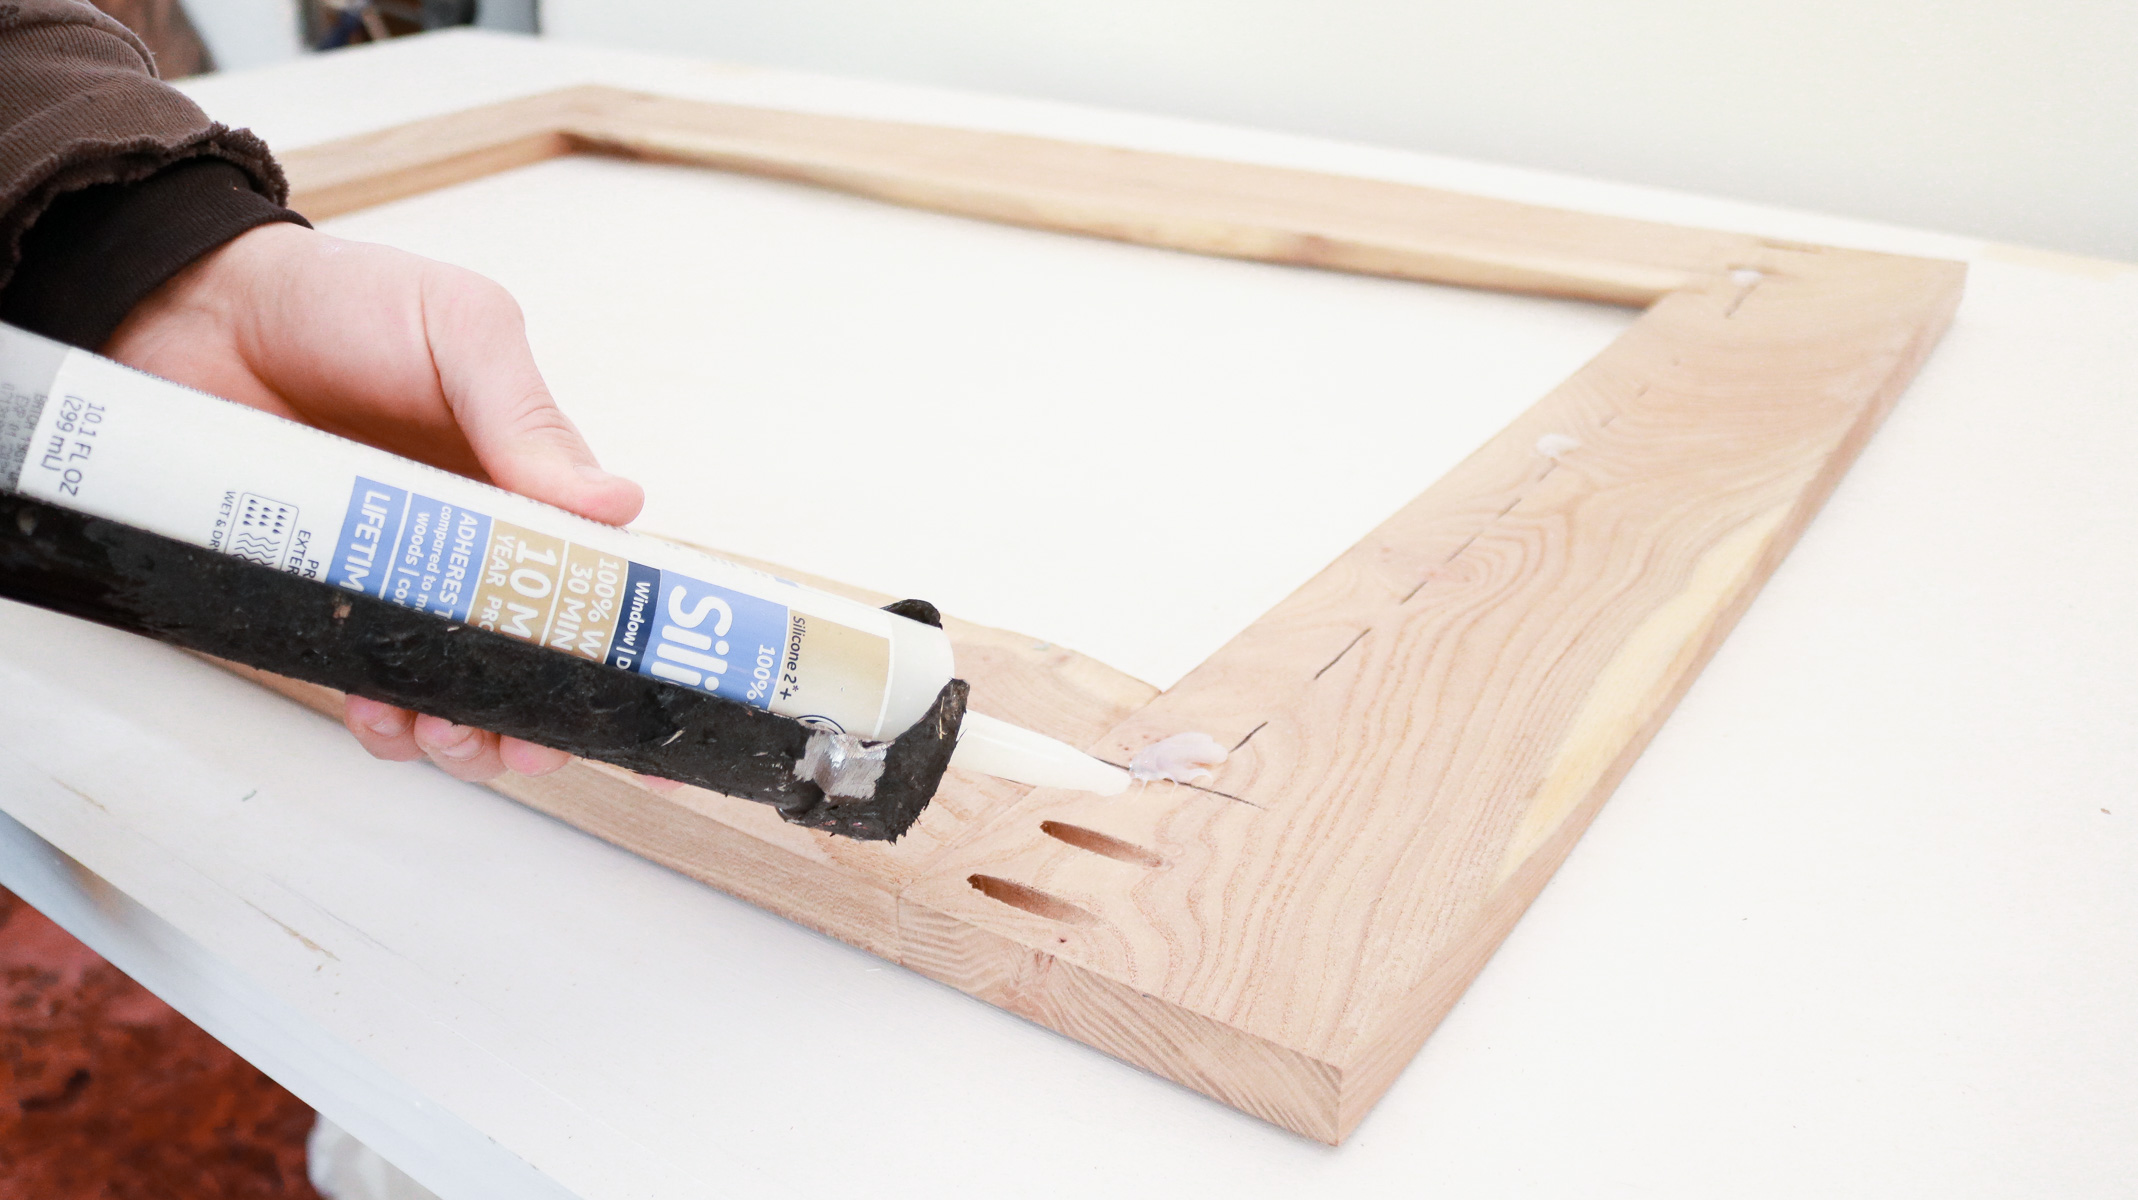
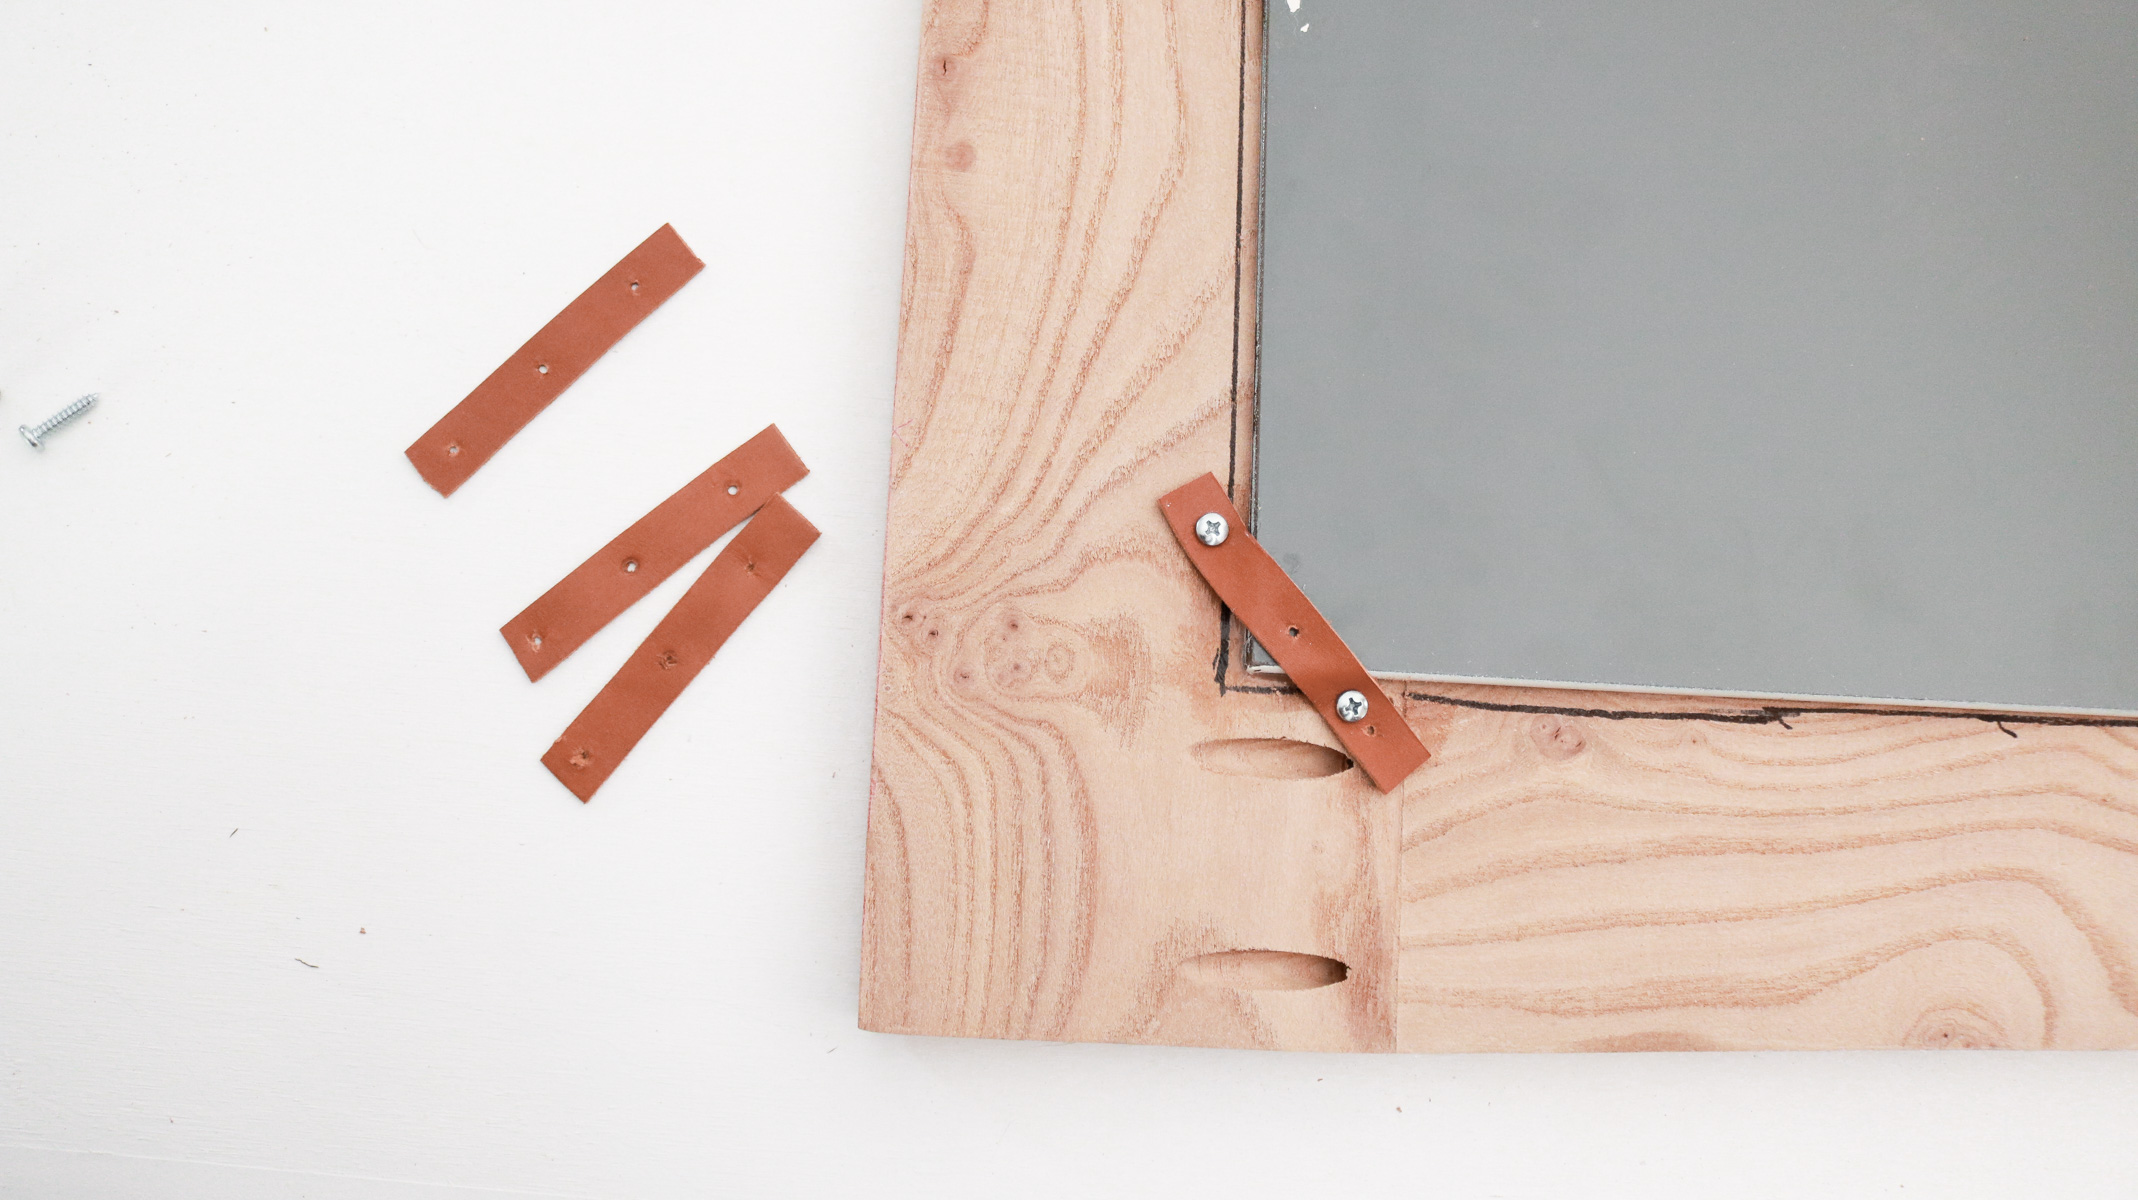
ATTACHING THE MIRROR TO THE LIVE EDGE FRAME!
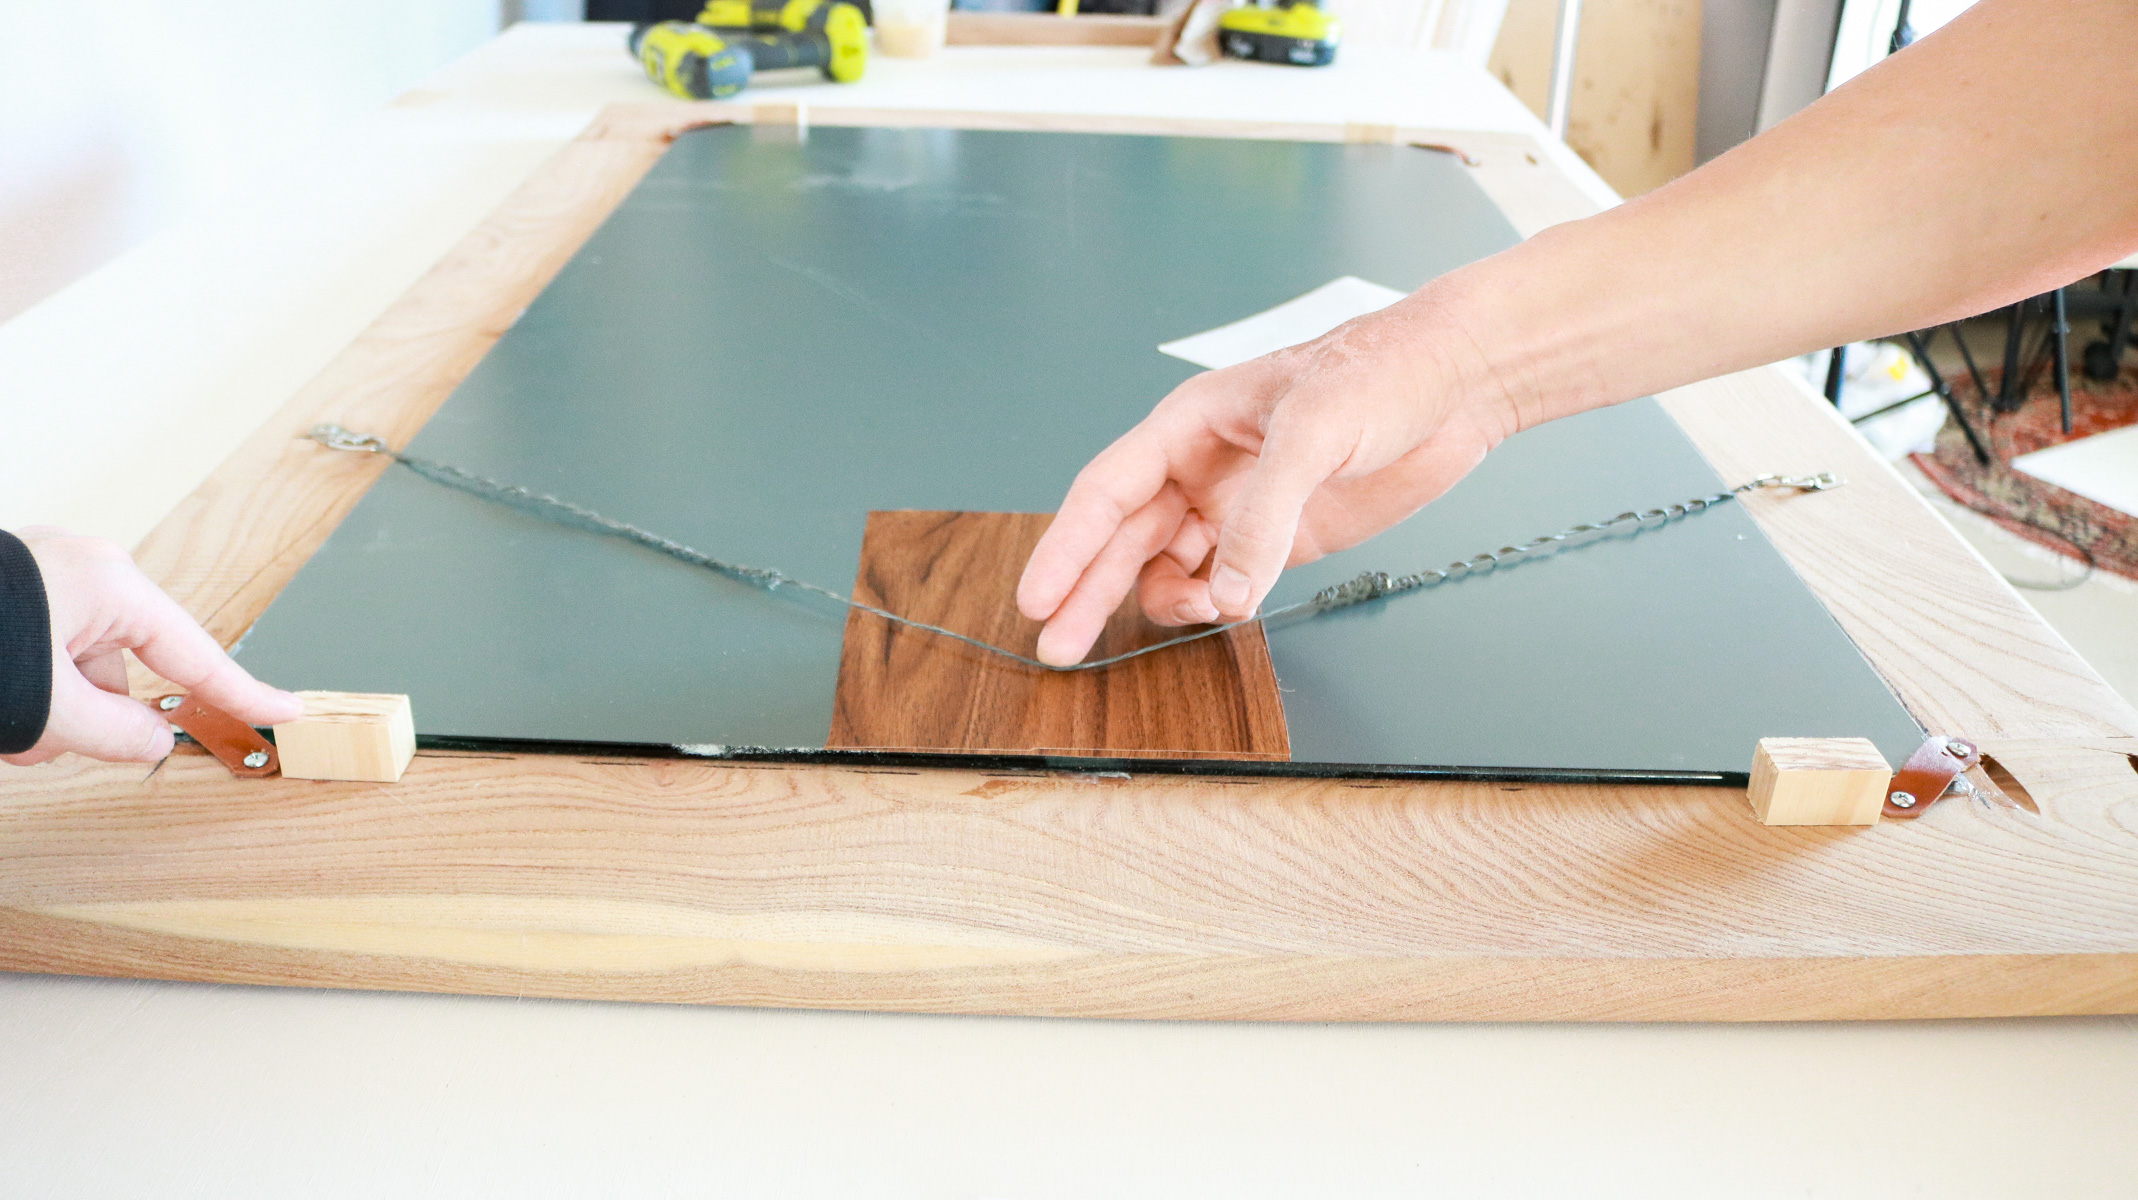
Okay now all that was left to do was attach the mirror to the frame we built. If you plan on staining the wood you will need to do this before attaching the mirror. I used some furniture wax and applied it to the wood just to add a bit more contrast in the wood grain. To attach the mirror we flipped the frame face down and applied a few small beads of silicone. A little goes a long way. Make sure it’s not to close to the edge of the frame because, you don’t want it to seep out once the mirror it attached. Next we lay the mirror over the silicone and secured all 4 edges of the mirror with some leather straps and screws. We made the leather straps from an old belt we had. That’s it! We let the silicone set overnight.
FINISHING TOUCHES THAT CAN MAKE OR BREAK YOUR MIRROR!
So most mirrors sold at stores have the back of the mirror completely covered and flush with the frame. This is usually for the safety of the mirror itself. We actually thought about this and it could be done by grinding down a drop in area for the mirror so it’s flush with the wood. This would result in A LOT more work and I talked Tony out of it because I figured we could easily do a few tweaks that are easier. Because the back of your mirror needs to be kept safe and you should avoid scratching it as much as possible. Tony applied some contact paper to top area. This helped keep us from scratching it while hanging it up. We also added some wood blocks to all 4 sides. This helps keep the mirror away from any screws sticking out of the wall.
Our Extreme Bathroom Makeover Video
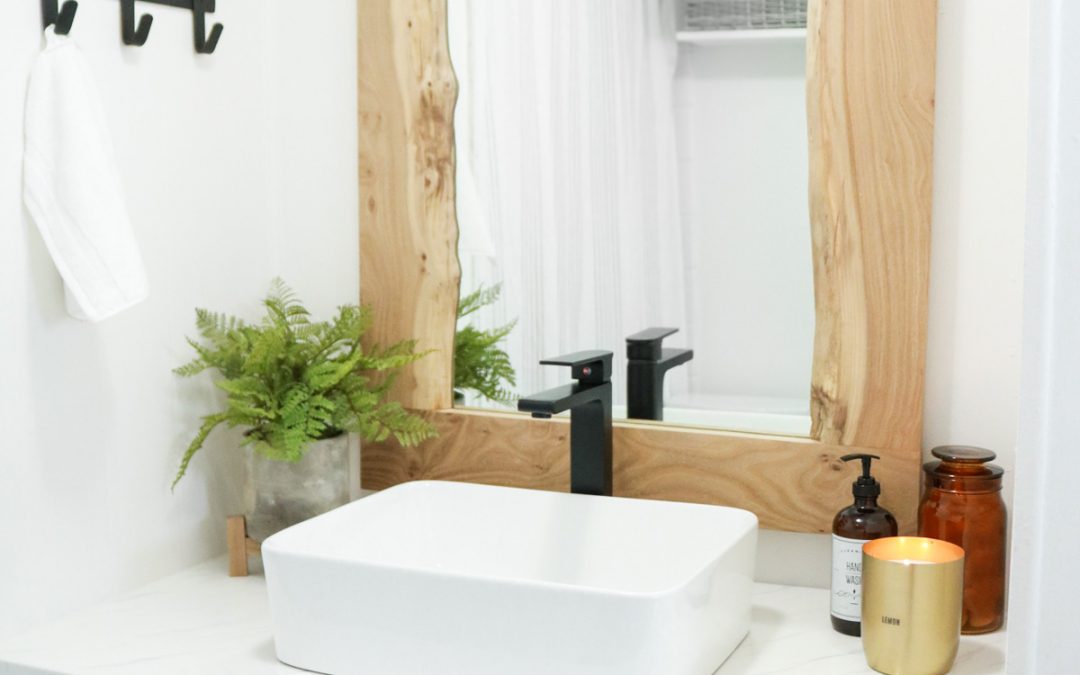
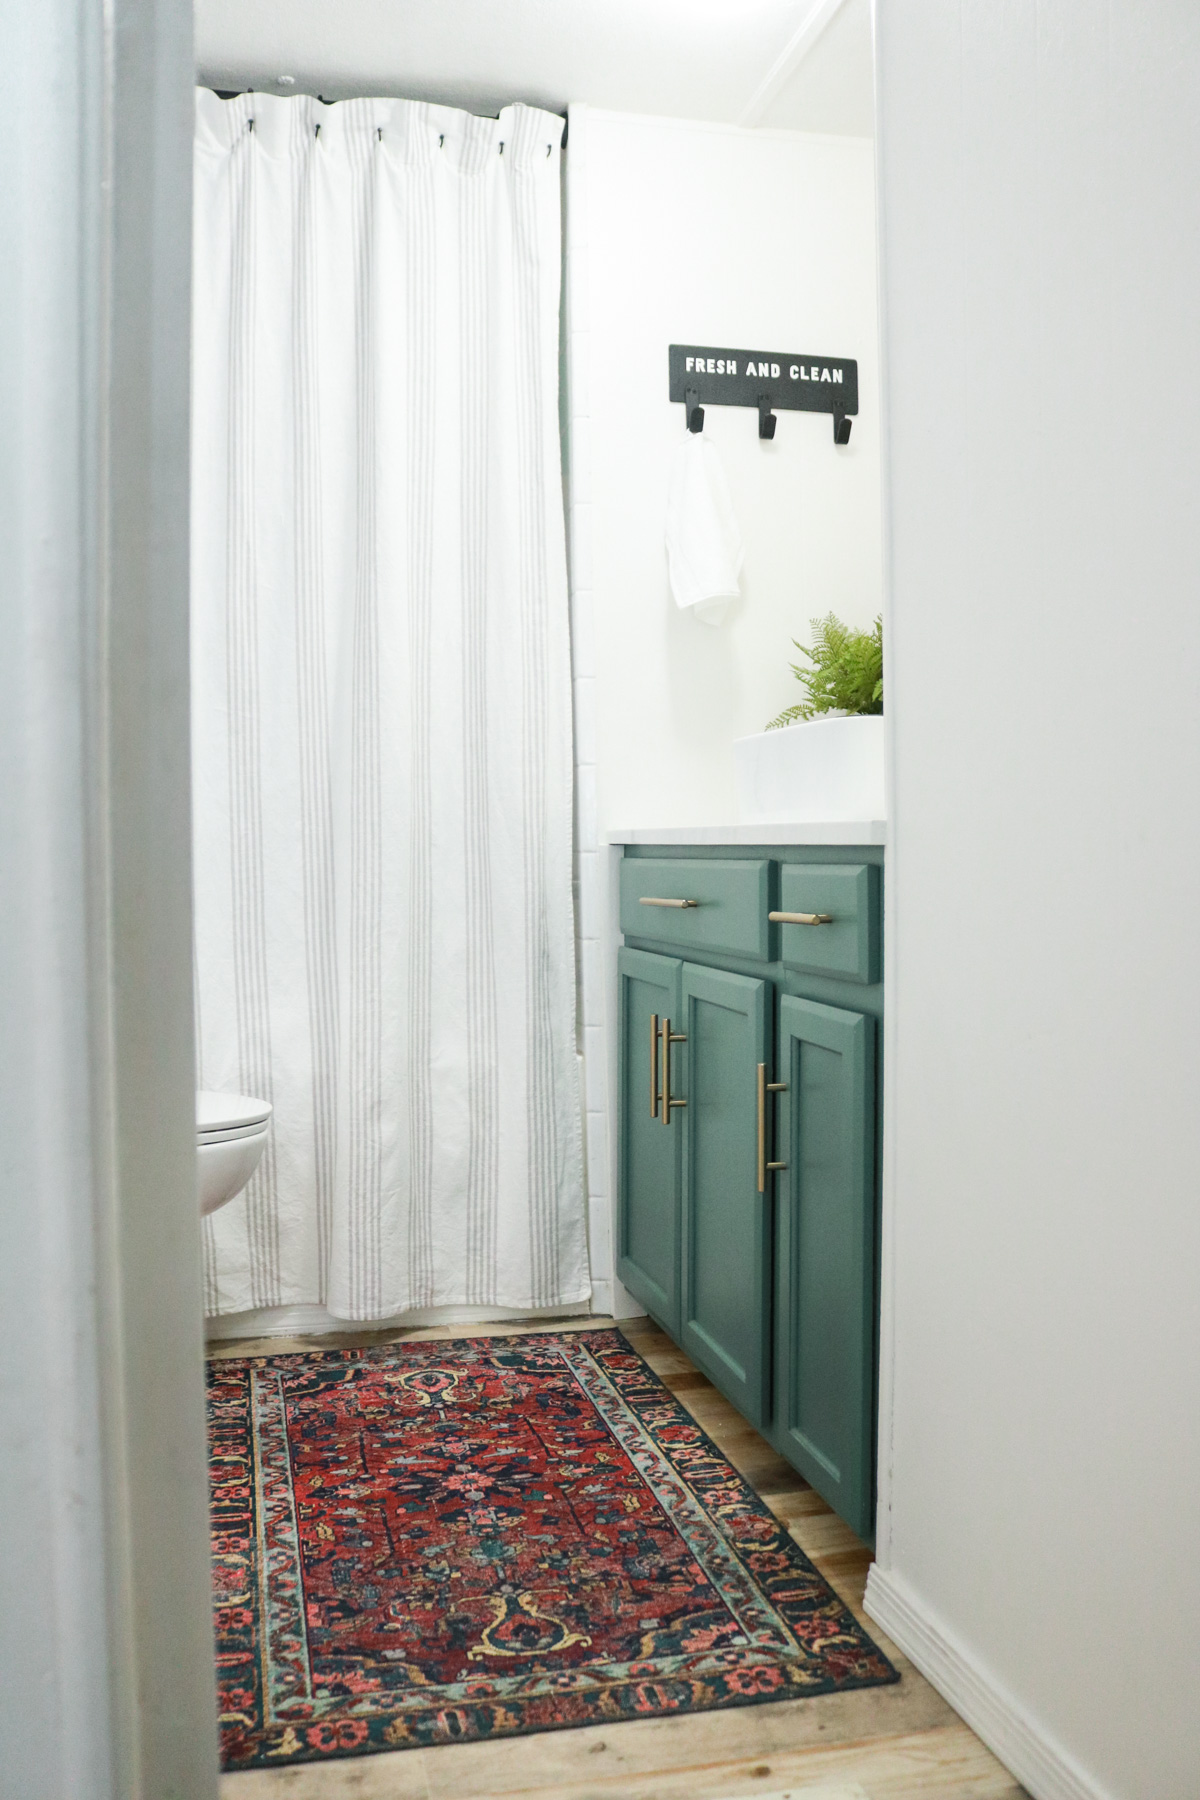
That’s it! Here’s how it looks in our bathroom! I still can’t believe it cost us under $40 to make! That’s amazing!
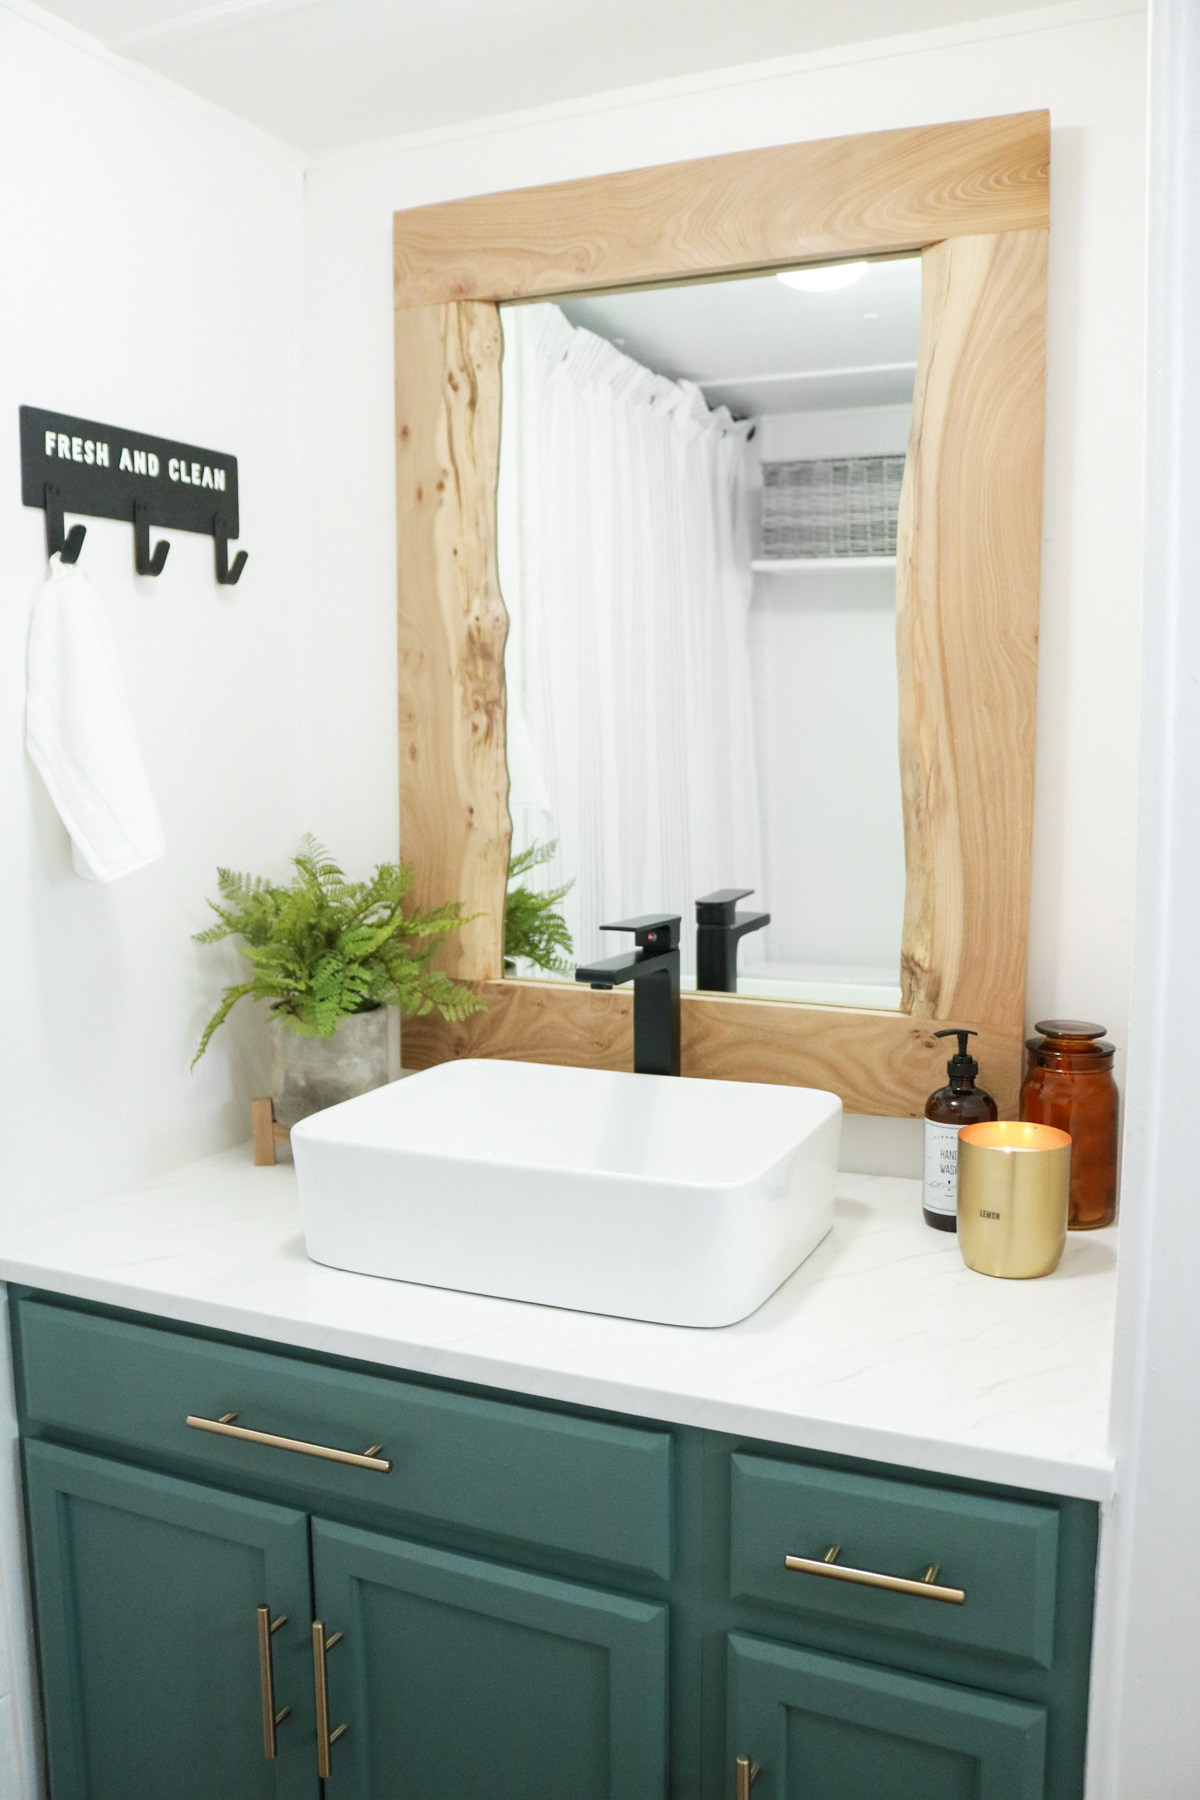

I’m in love with our new Bathroom 😀
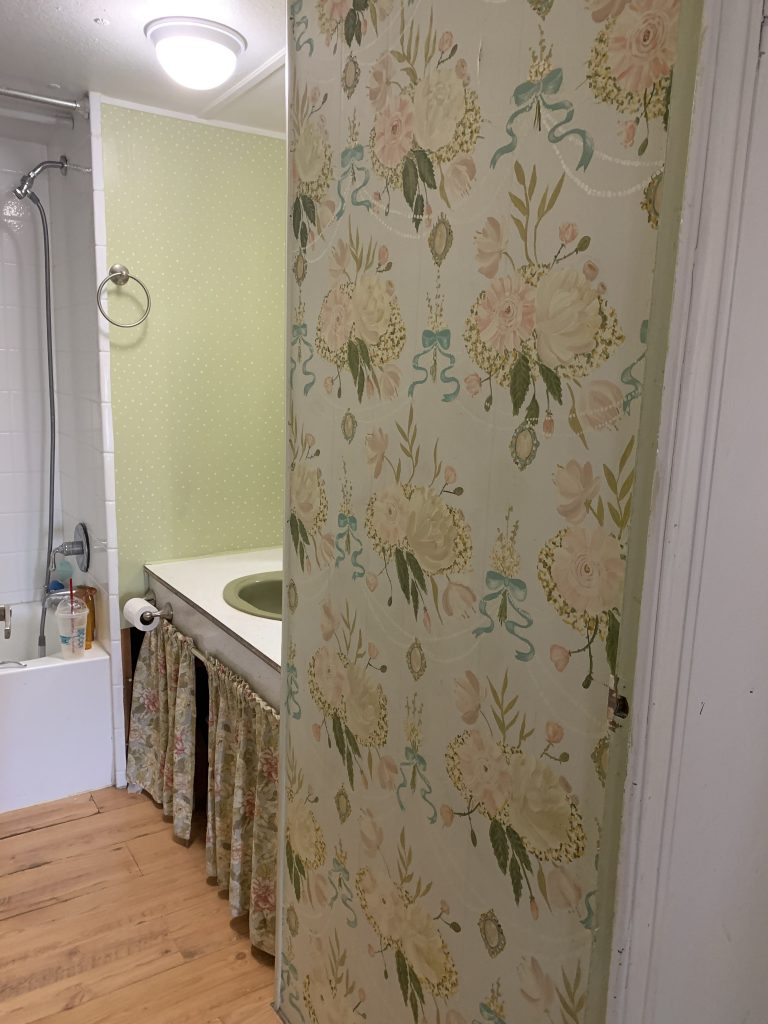
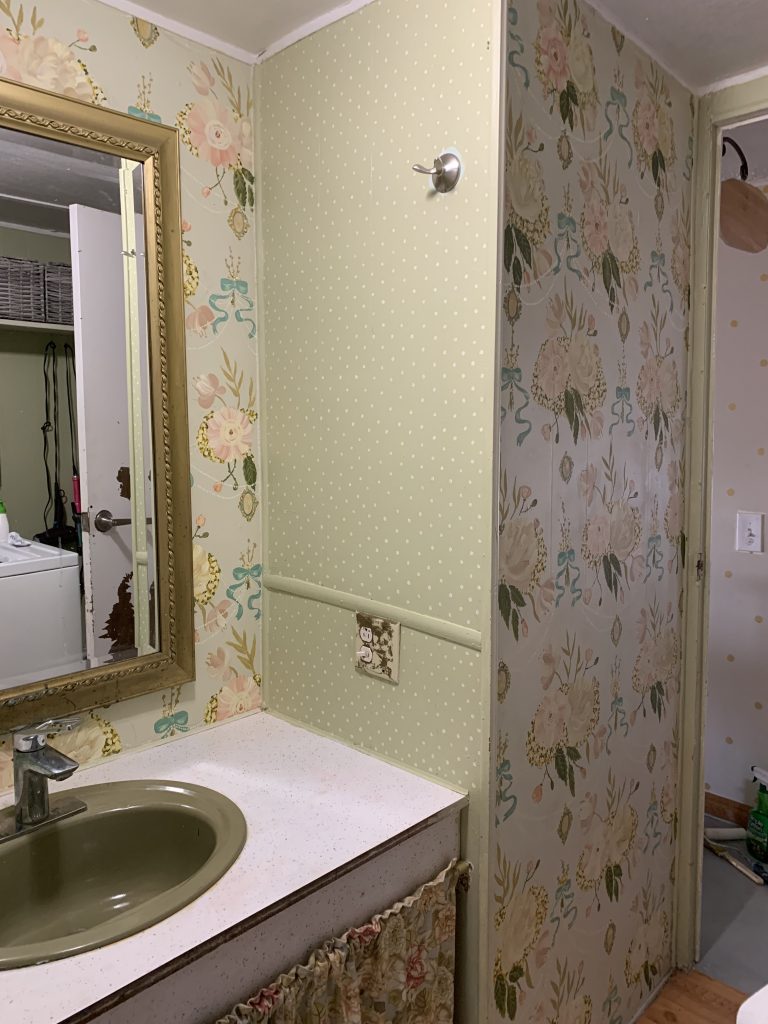
Here’s how our bathroom looked like before. YUK!! What a green icky mess! YEP that’s a green sink you see. It was there when we moved into the house and I made it even worse by painting the walls green with flowers. So glad that’s in the past. 😀
I hope this DIY live edge mirror inspired you to make your own.
Best Wishes,
Lily
This is amazing, I have been looking for just the right bathroom mirror solution and this might be it, I see live edge slabs listed on Craigslist regularly. Also any excuse to buy a new hardware, I’ve never heard of a Kreg jig before but now I need one! Your new bathroom is gorgeous, you have such a good eye for design and color. Did you make the lovely plant stand and planter?
You’ll love the kreg jig. It’s so convenient they even sell slanted wood pieces the go into the hole to fill it. Thank you so much I’m so happy to hear you loved it! Yes we made the plant stand too. The planter I had 🙂