Today I’m sharing DIY craft shrinky dinks for kids crafts!
Hi folks! Happy spring!
Before starting this project I actually didn’t know they make shrinky dinks. Originally I’ve seen these made from recycled plastic containers. When I finally decided to make these cute keychains I couldn’t find a plastic container in sight.
I made a quick trip to hobby lobby I learned they sell what’s called shrinky dinks. Actual plastic made to shrink. How cool right?
How do Shrinky’s Work?
You simply color on it then cut out the shape and bake it to shrink. You can also shrink it with a heat gun. If you want to add it to your key chain use a hole punch to make a hole before you shrink it.
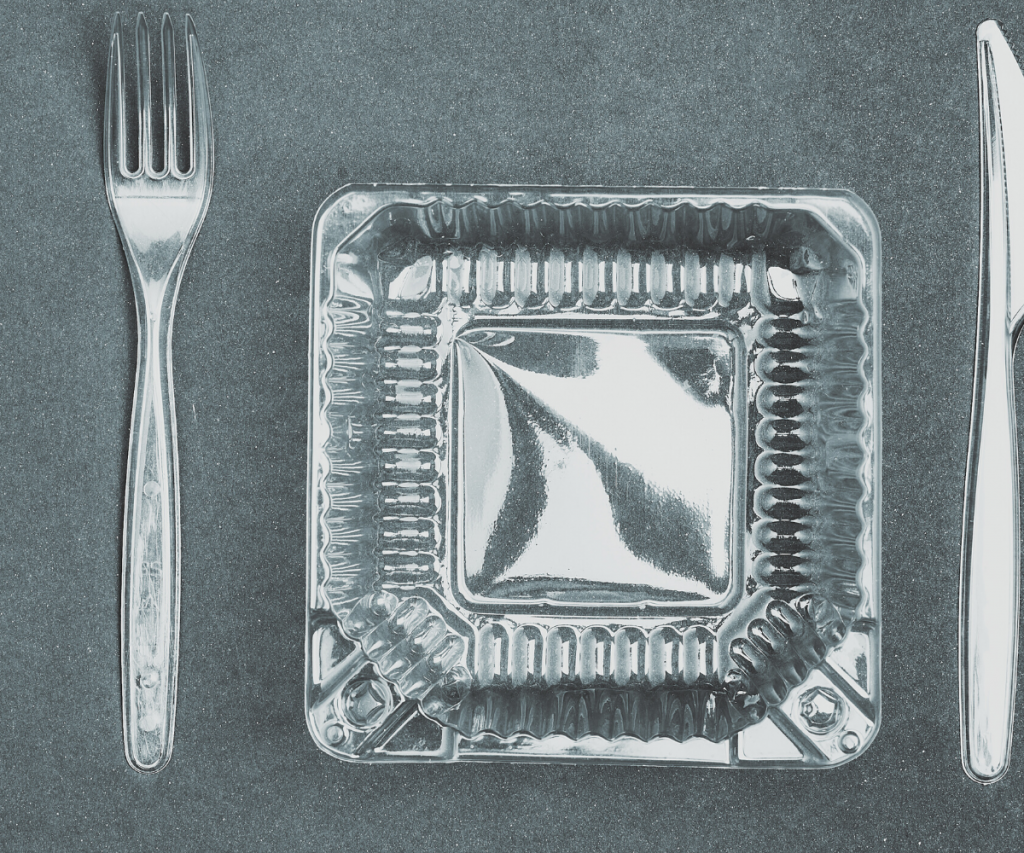
If you have plastic containers you can totally give it a go with that. I sometimes get them when we go out to eat. They’re the plastic to-go boxes or sometimes blueberry boxes are clear plastic too. ( photo below – an example of a clear plastic container )
OTHER DIY’S YOU’LL LOVE :
- CREATING ART WITH RESIN FOR BEGINNERS!
- PRESSED FLOWER CANDLE CRAFT
- DIY CONCRETE+CANDLE
- DIY FUN PEONY WREATH
- DINOSAUR EGGS DIY
Time needed:
15-20 minutes. The time really depends on how long it takes you to color your keychain. It bakes in the oven pretty quick.
Supplies Needed:
- hole punch
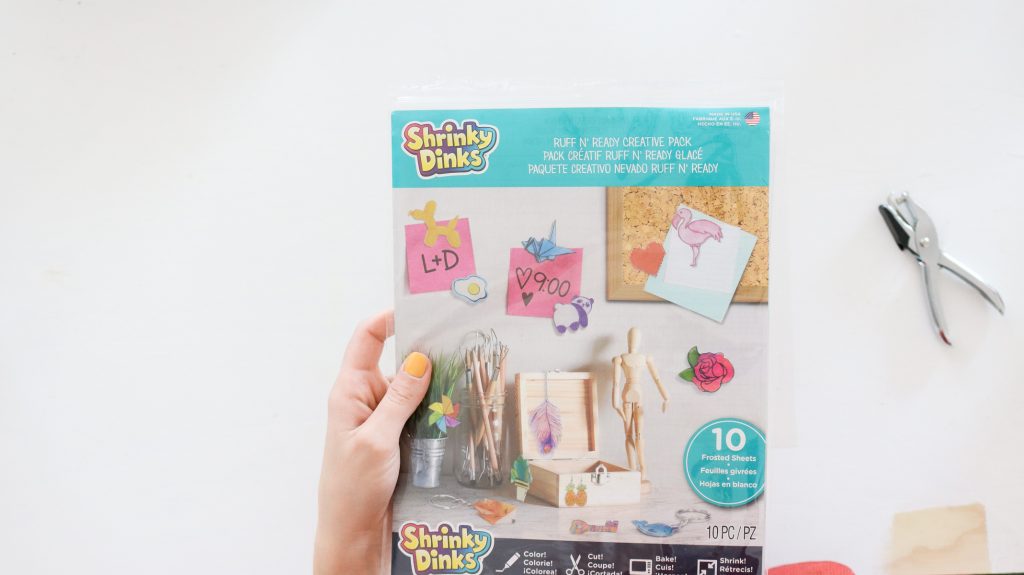
- shrinky dink sheets (Here’s the one I used – https://amzn.to/2QVgRp5 ) ( Or recycled plastic containers, for example plastic clear to-go boxes or blueberry containers)
- Permanent markers ( Amazon sells a set of 36 here – https://amzn.to/2WYxxj7 ) (Also found these awesome oil markers – https://amzn.to/3aB5J8z – Although I haven’t bought these yet I’ve heard a lot of good about them and can’t wait to try them.)
- rubbing alcohol ( optional if you want to get a watercolor effect)
- brush
- acrylic paint could be used to color too. ( Amazon sells a set of 18 here – https://amzn.to/2R1vsiE )
Their is a few different ways you can make these. We experimented with a few different mediums and techniques. In general I think it’s just a super fun kids craft. They also sell this shrinky paper as a printable photo paper option. If you want to print something memorable to gift to someone. That would be super cute. I went with the clear sheets so we could have fun coloring on them.
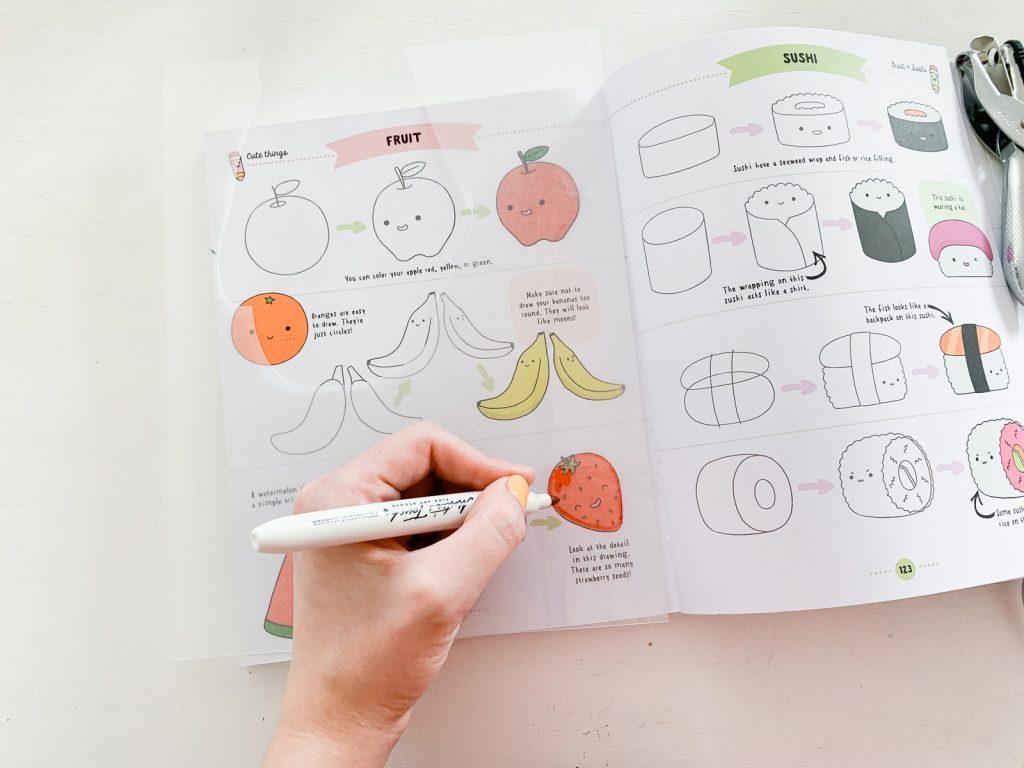
The nice thing about these clear sheets is you can lay them over any sketch or art piece and trace. You can start with tracing the overall shape and add your own unique touch as you go. These sheets have one side that’s shiny and the other that’s more matte. We used the shiny side to color on. I’m honestly not sure if that’s the right side now that I think about it.
Permanent markers work great for this. I think you can also use oil based markers.
If you’re looking for video DIYs you can Check out my youtube channel here!
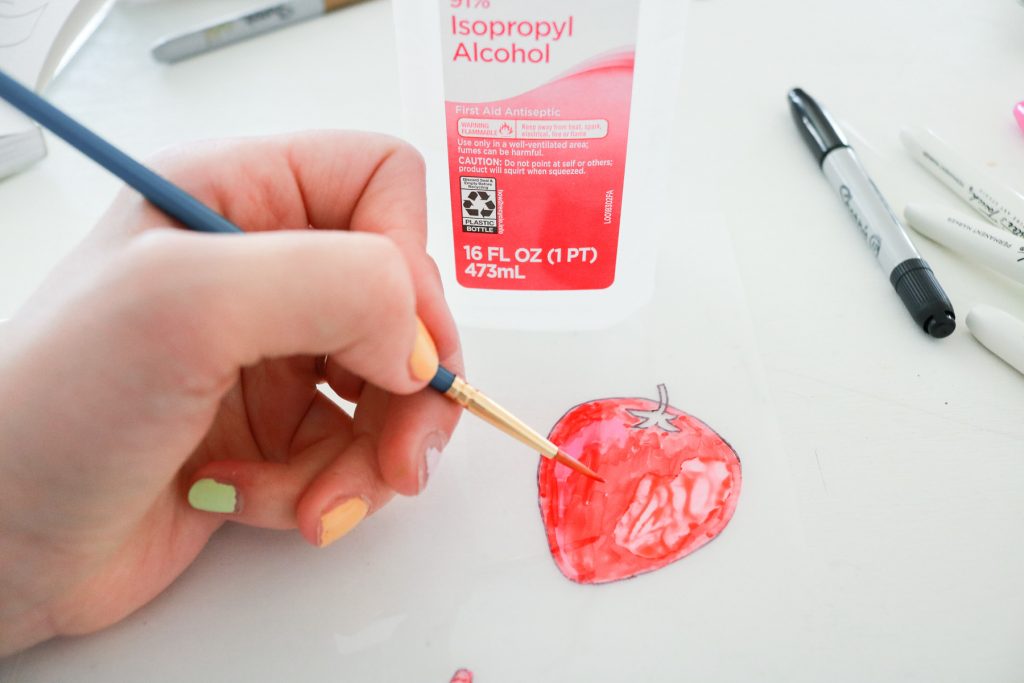
Water Color Effect! How to smooth out permanent marker.
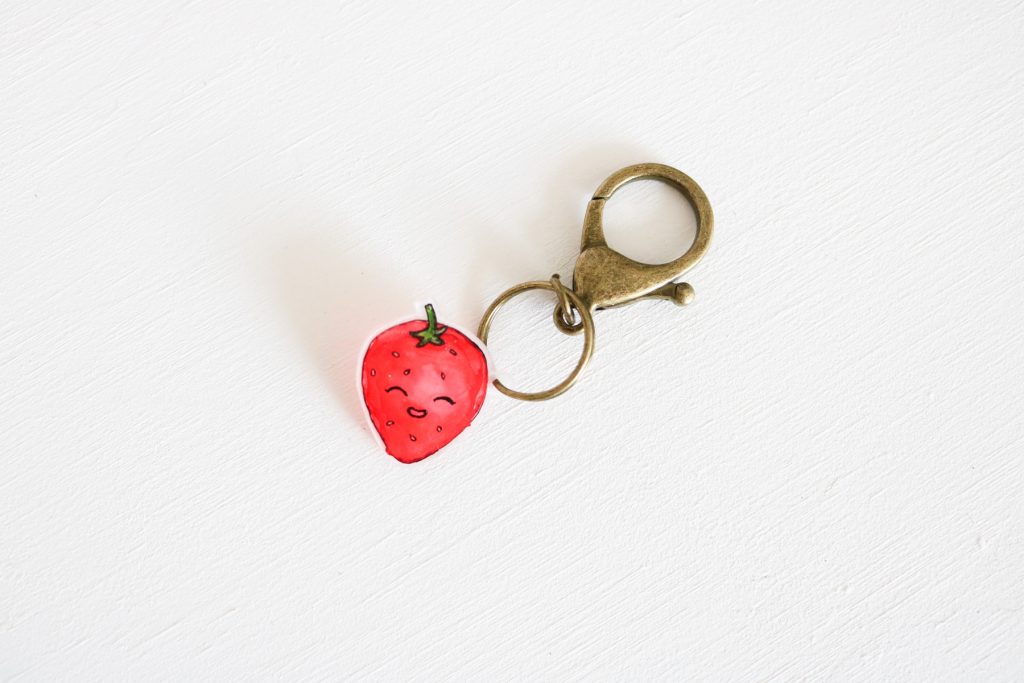
I noticed it was kind of hard to get a smooth look with the permanent marker. To help blend it I dipped a paintbrush in rubbing alcohol and went over my strawberry to blend the color. Than gently blow some air on it until the rubbing alcohol dries to give it a watercolor effect.
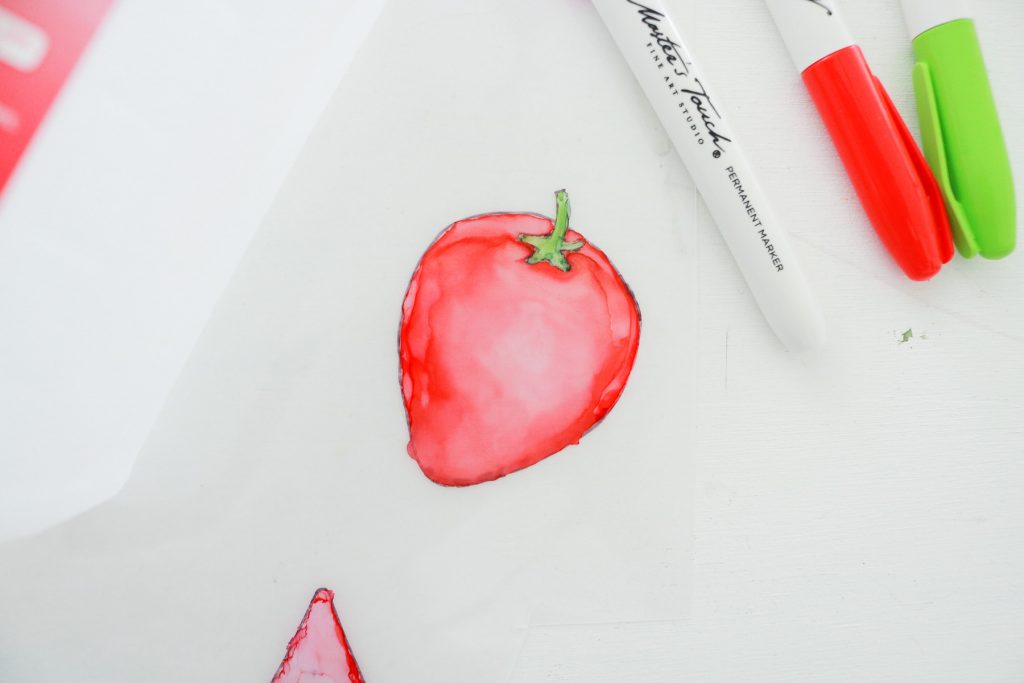
Here’s how it’ll look after it’s dry.
Kids Craft Shrinky!
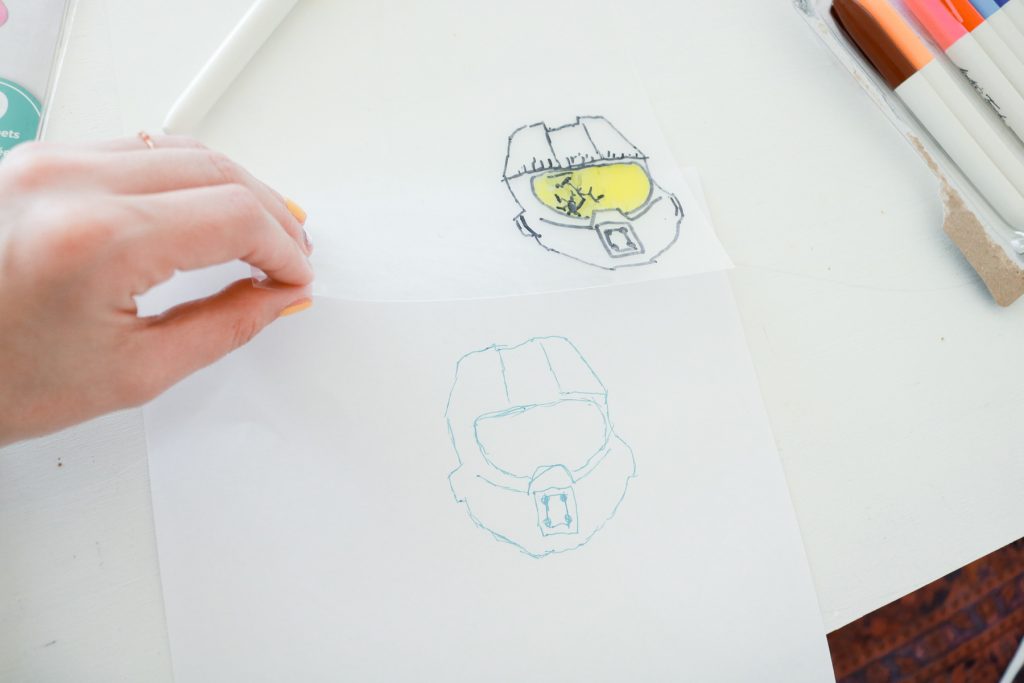
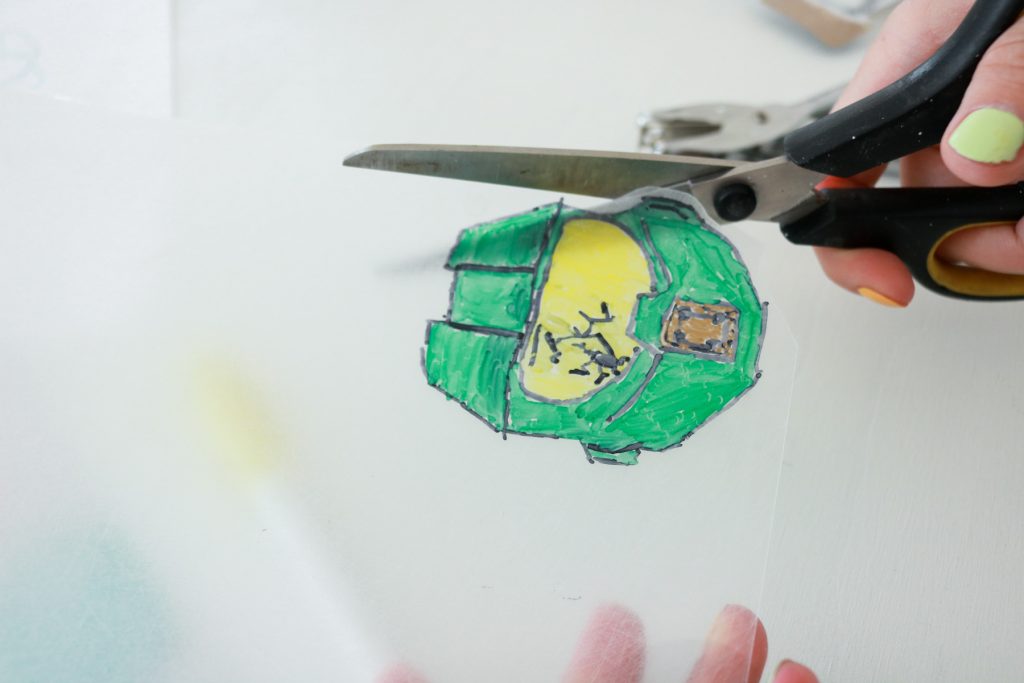
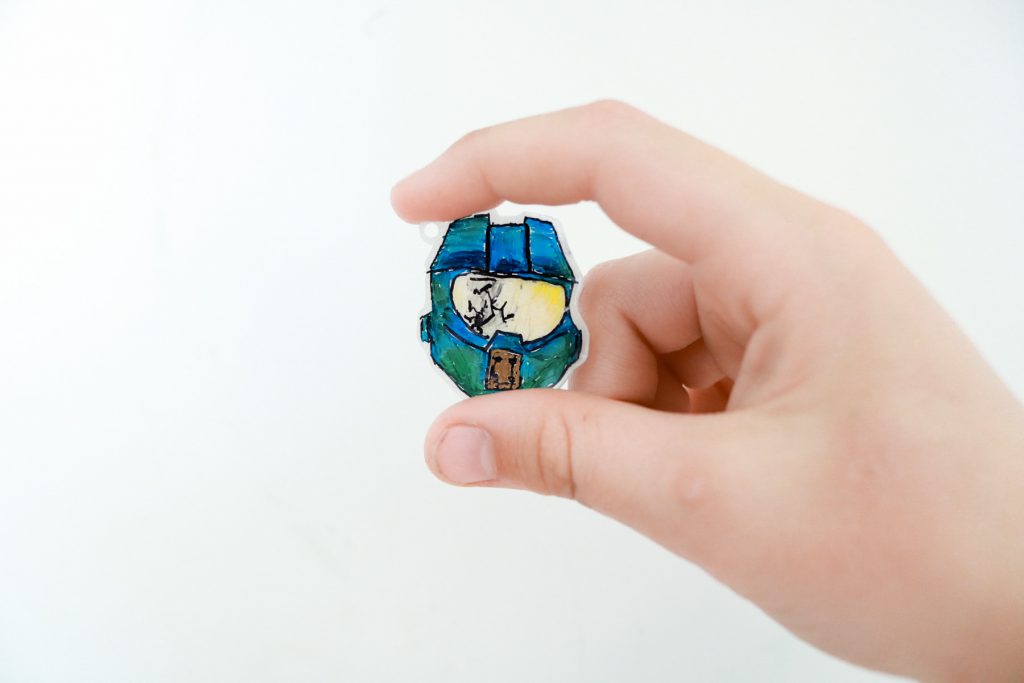
Oleg chose to trace a halo helmet that he drew on paper. These DIY craft shrinky dinks were so much fun to make!
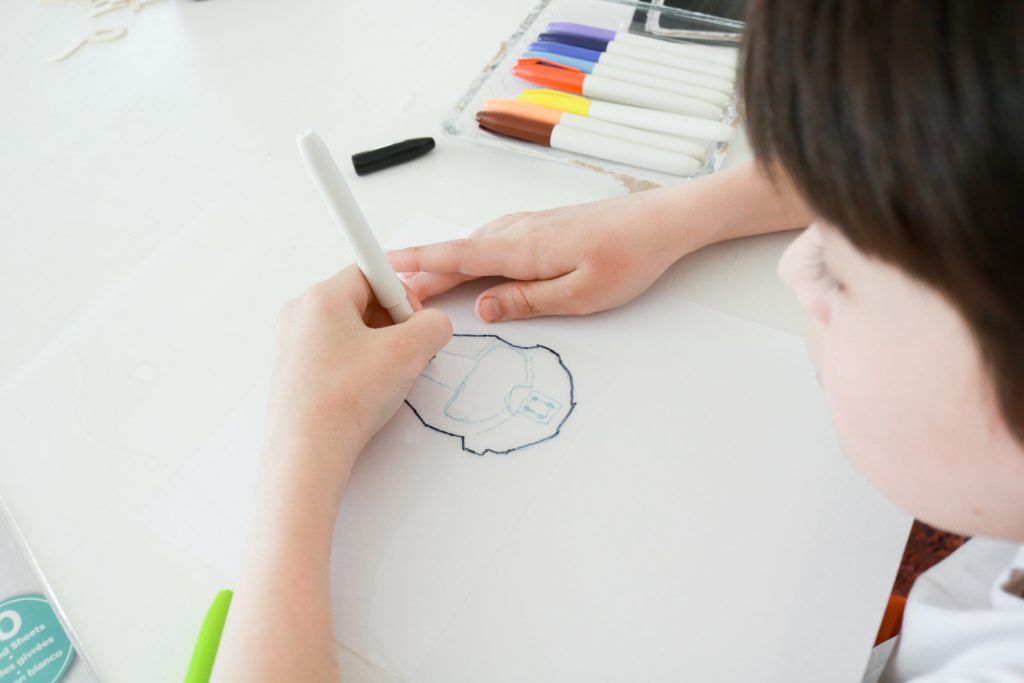
He actually came up with the idea of tracing stuff. LOL I saw him doing it and I was like AHHHA that’s how it’s done. LOL 😅
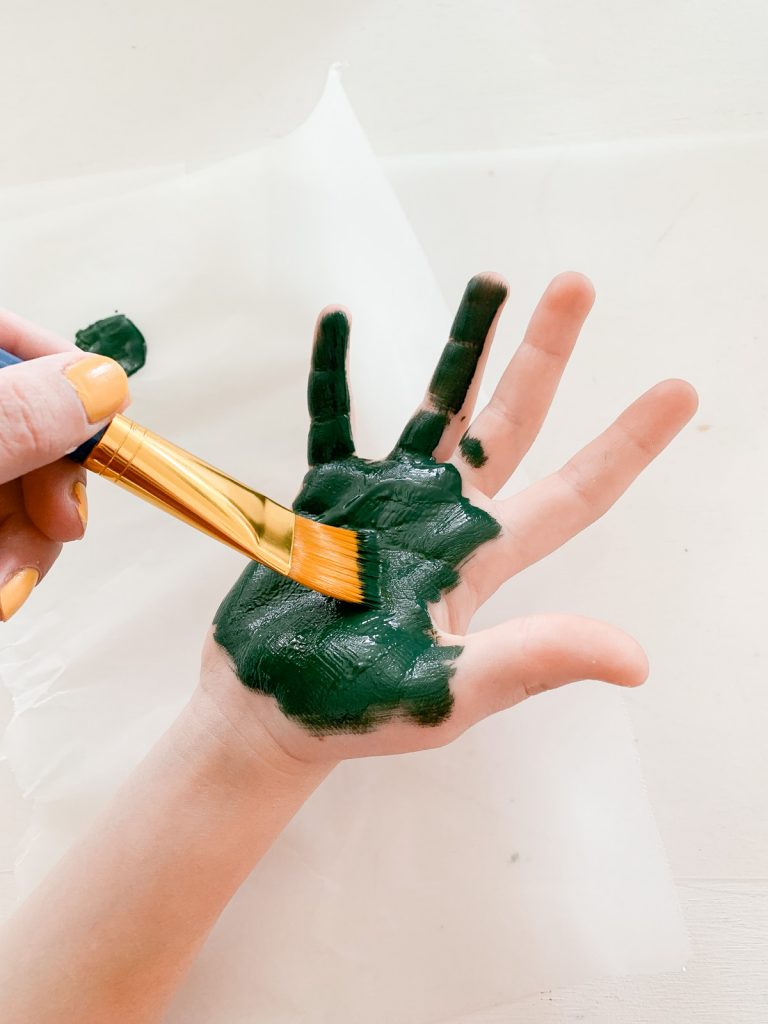
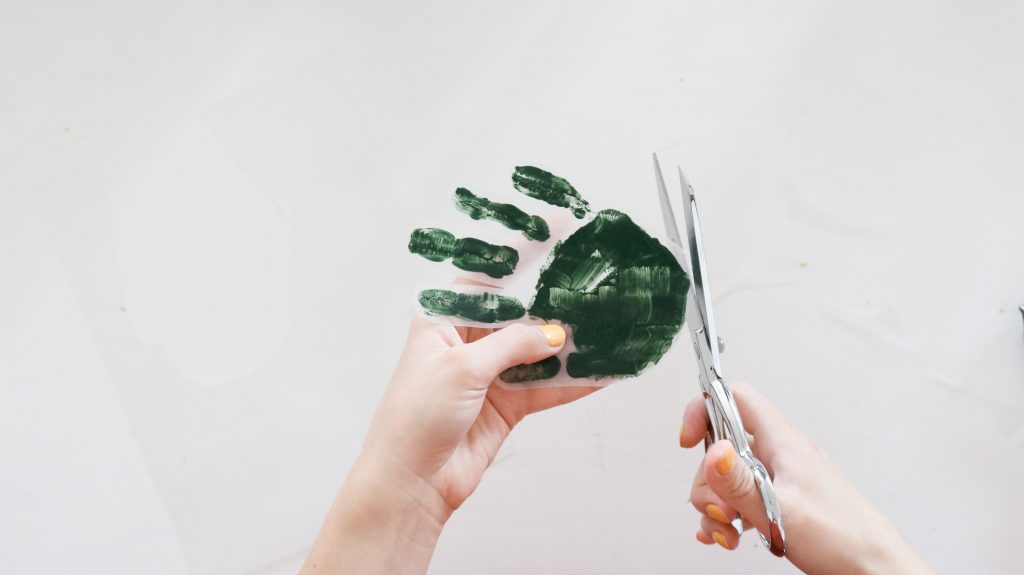
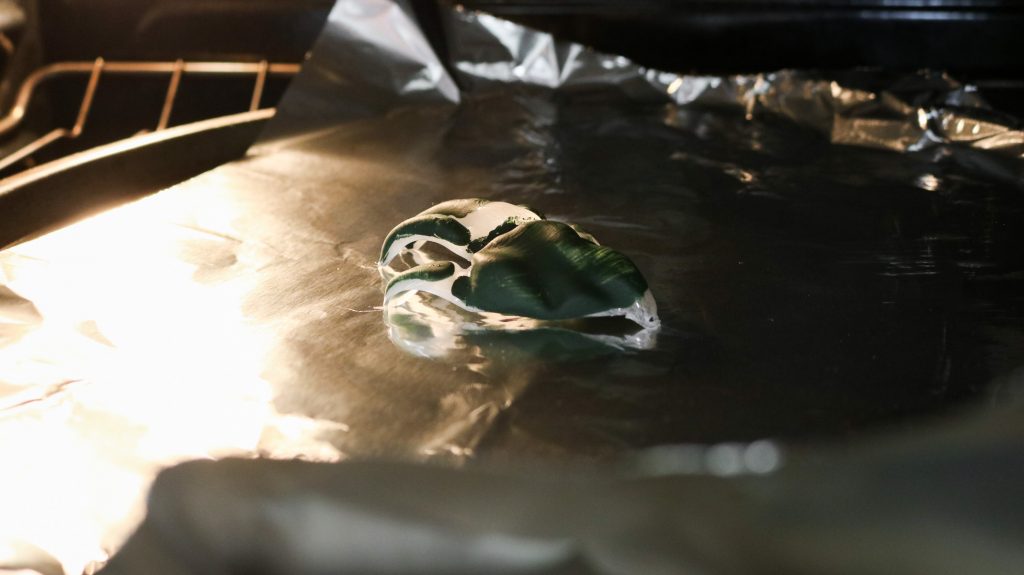
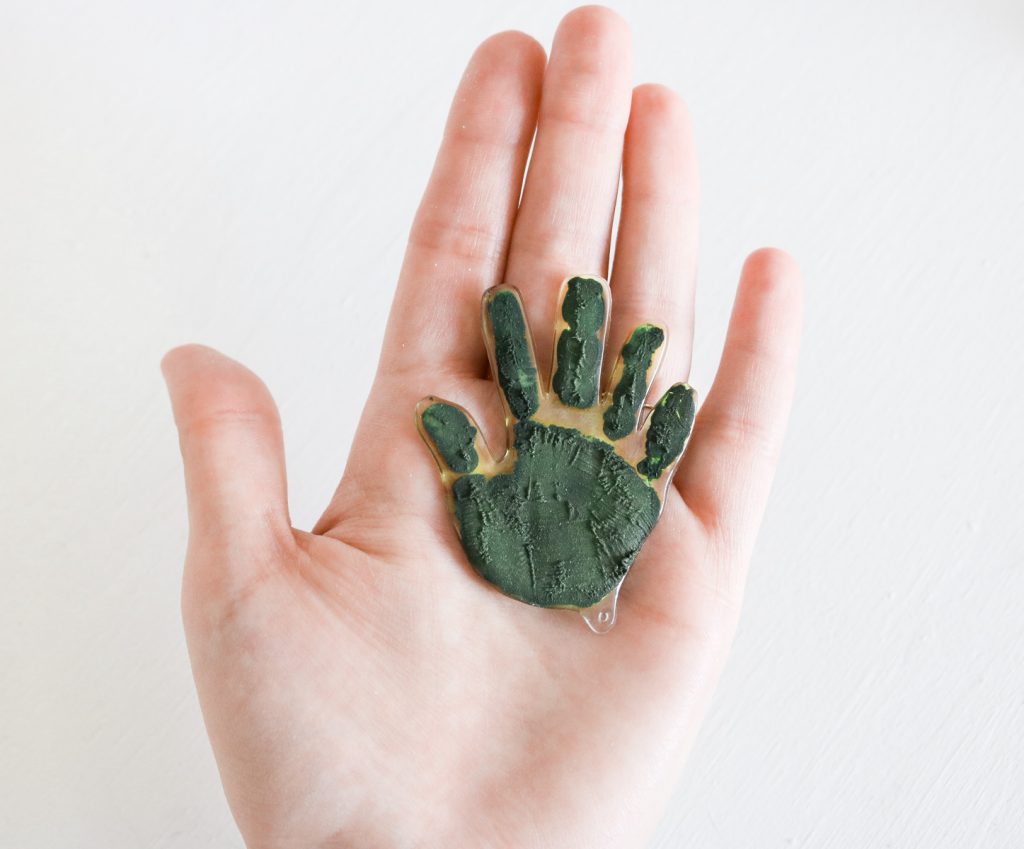
Hand print Shrinky with Paint!
We also tried applying acrylic paint on his hand and then stamping it onto the paper. I let it dry than cut it out and baked it.
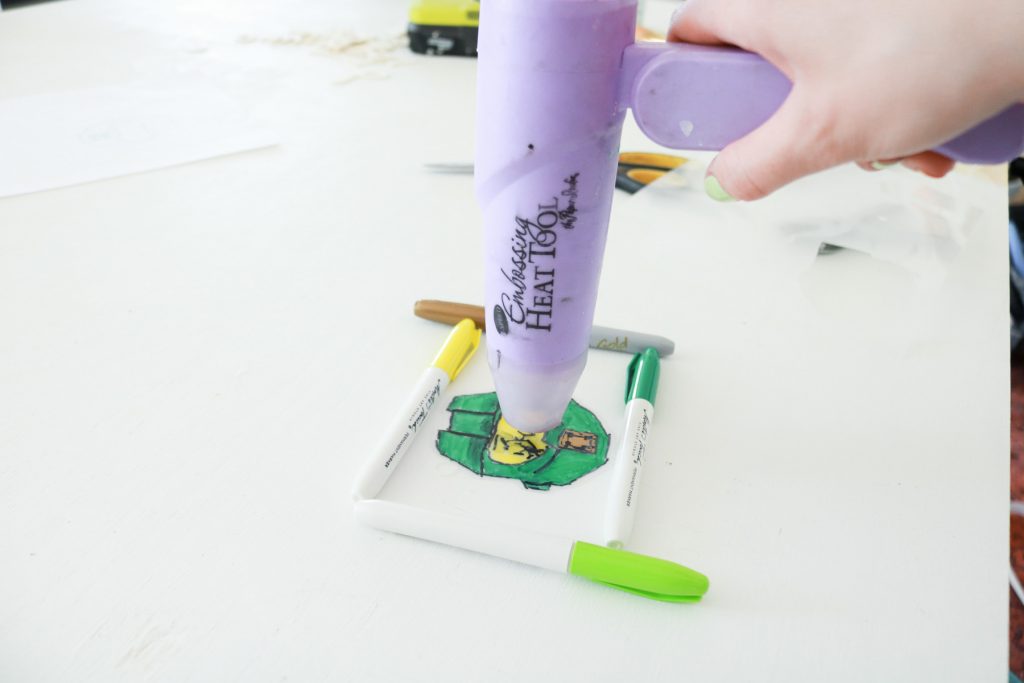
How to Shrink it?
If you have a heat gun you can use that. Just turn it on high and hold it on your project. It’ll shrink pretty quick. It kind of curls up and flattens out once it done.
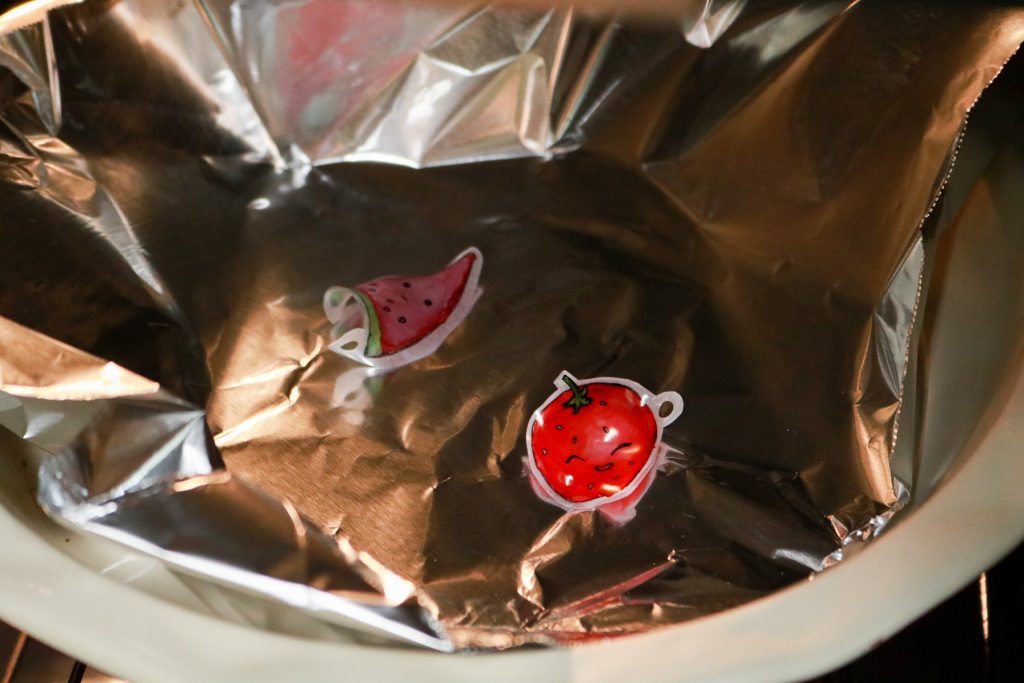
If you choose to bake it in the oven. Here’s how I did it. I lined my pan with some aluminum foil and set the shrinky on top than I preheated my oven to 425 F and baked it until it shrunk. Keep a watchful eye it shrinks pretty quick. If you wait to long the plastic starts to melt a little. It takes about 2-5 minutes depending on the size of your shrinky.
Here’s a few photos showing them in the process of shrinking.
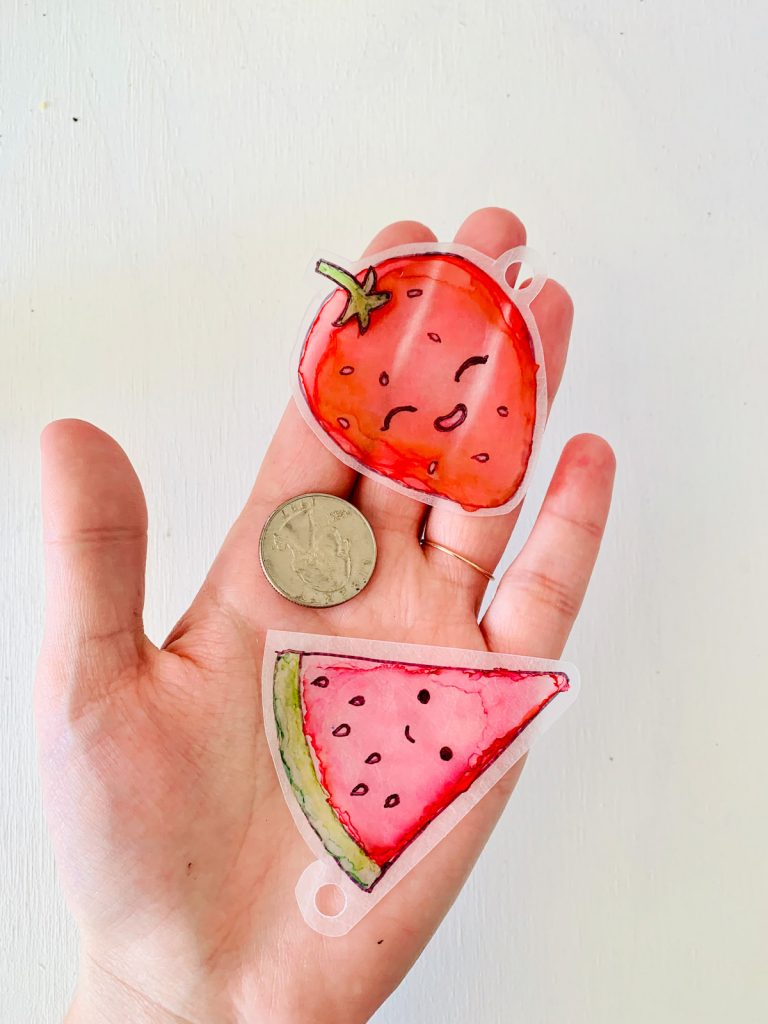
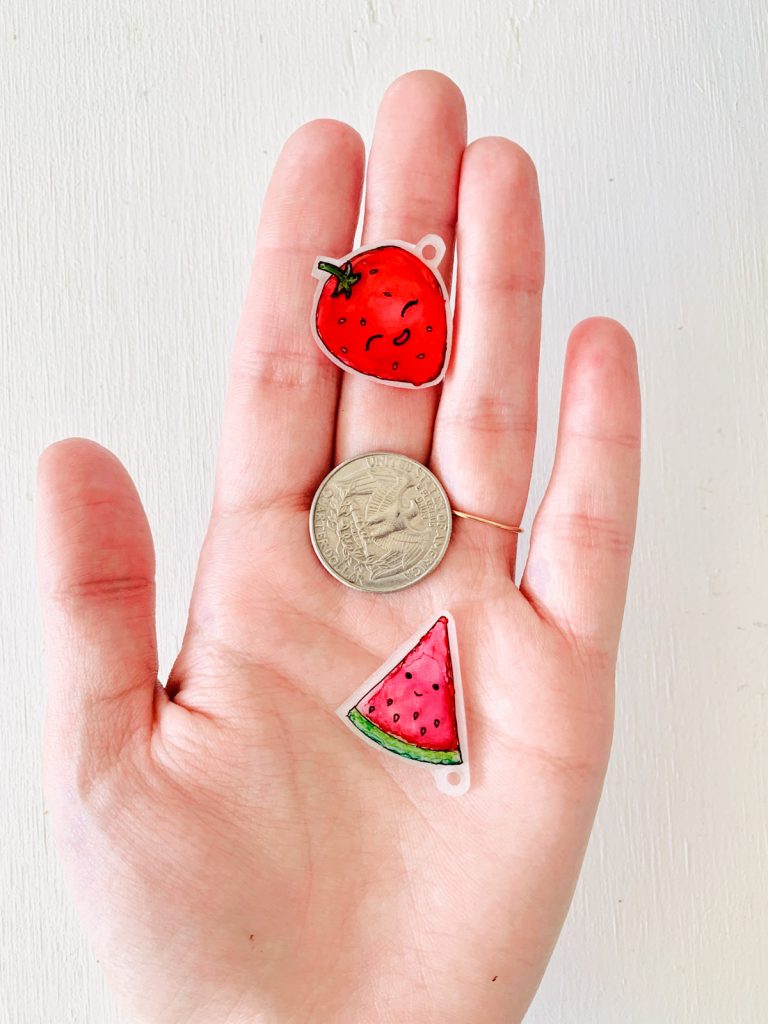
Here’s how they look before and after! I took a photo next to a quarter just to show you how much they shrink. Aren’t they the cutest. I can’t believe they shrink that much.
Here’s how the hand print looks. As you can see the acrylic paint definitely shrinks and deepens in color. I’m also thinking you can flip it upside down to help eliminate so much texture. I did notice the hand print shrinky had a harder time flattening out after it shrunk. Not sure if I did something wrong.
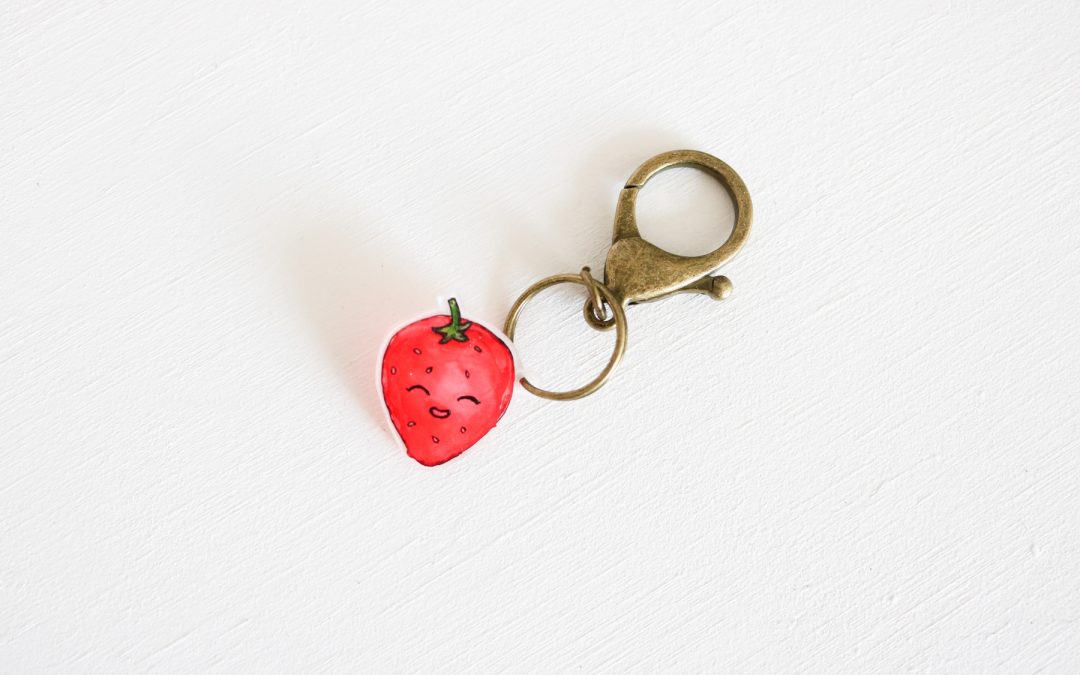
And you can add these cute little things to your keychain.
Here’s how Olegs helmet came out.
That’s it! I hope you have fun crafting with your kiddos! Thanks for stopping by.
Go make some DIY Craft Shrinky Dinks!
Best,
Lily
OTHER DIY’S YOU’LL LOVE :
- CREATING ART WITH RESIN FOR BEGINNERS!
- PRESSED FLOWER CANDLE CRAFT
- DIY CONCRETE+CANDLE
- DIY FUN PEONY WREATH
- DINISOUR EGGS DIY
These “shrinky dinks” are great! Pinned to do with the kids this week!
YAY! I’m so happy to hear you loved this! 🙂