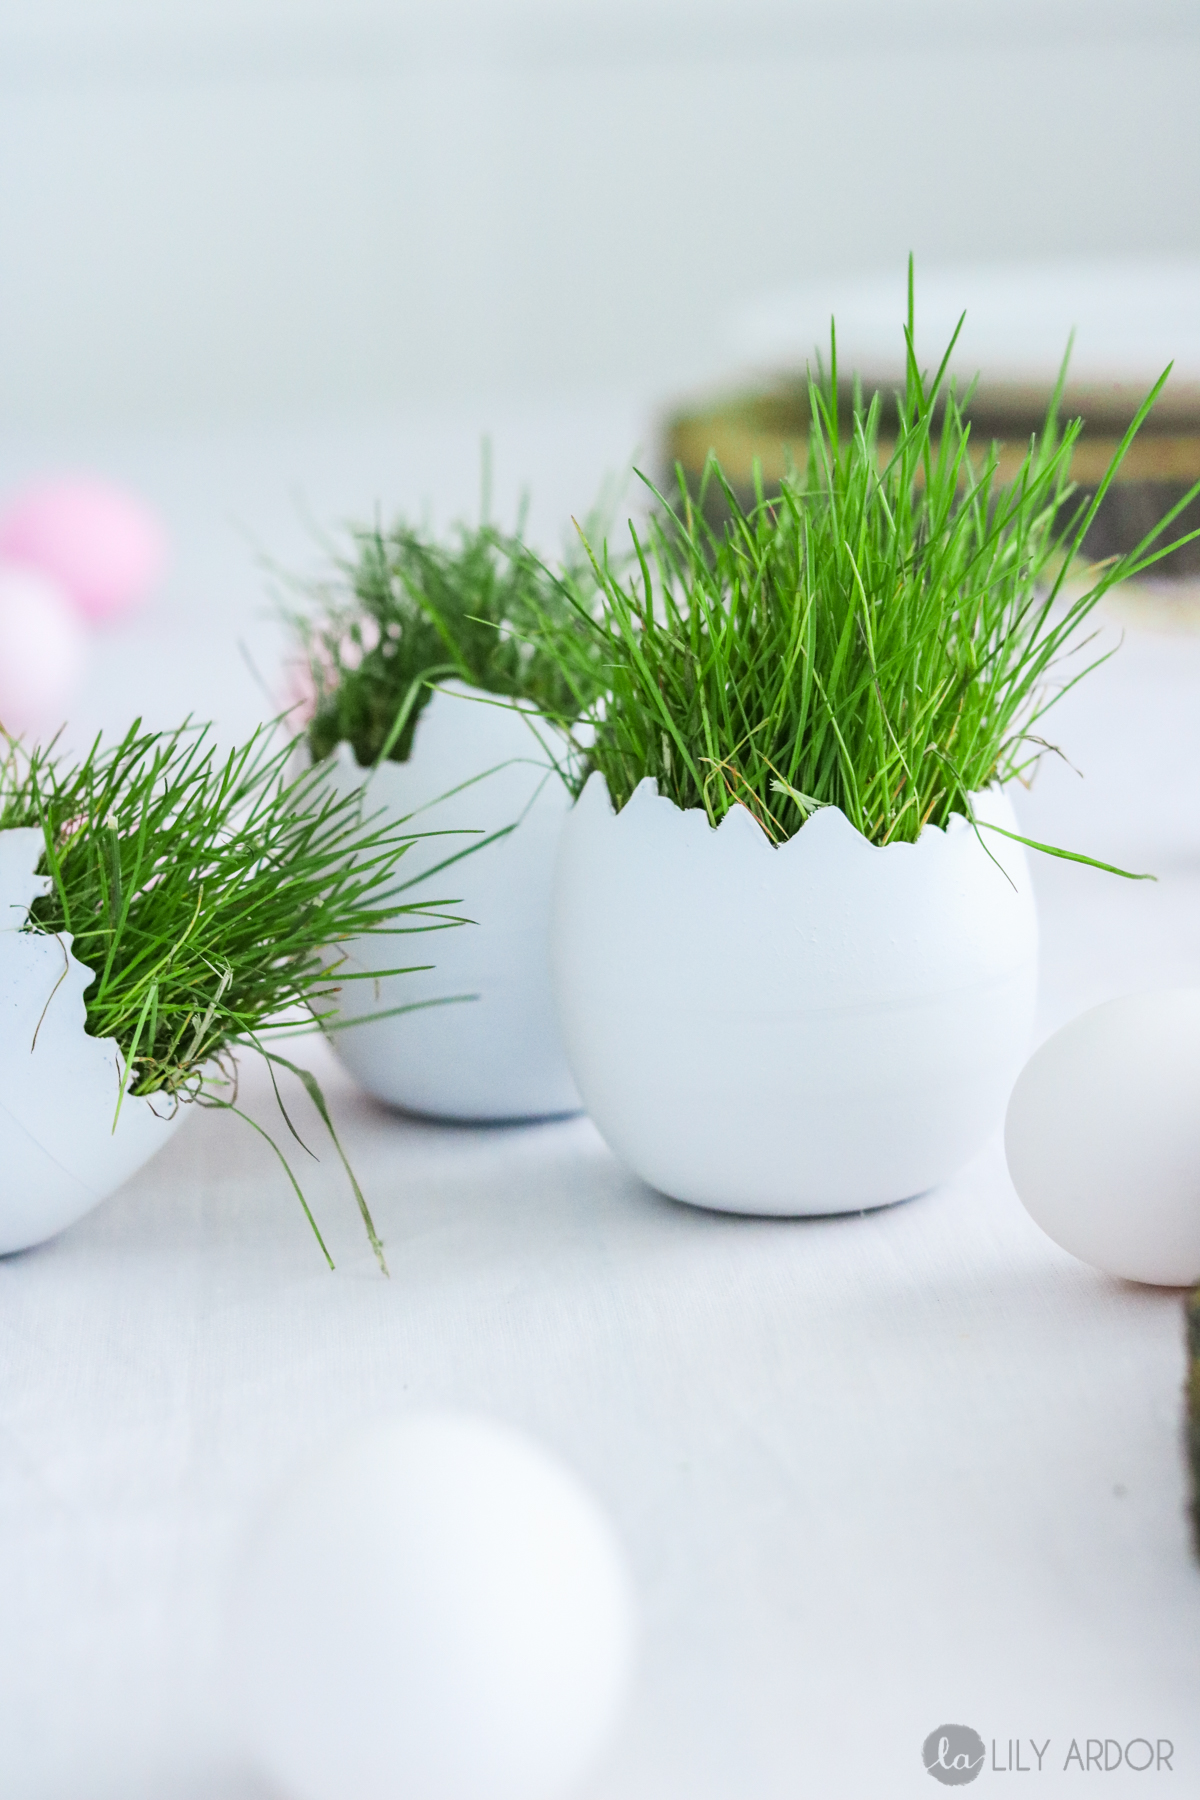
Cracked Eggs Tutorial
I had big plans for this centerpiece. In fact they were so big I had to down scale. HAHA Originally I was thinking to make a set of giant cracked eggs to display on the table with greens growing out of them. Sadly giant eggs are a bit hard to find. Walmart had some but, they had a weird shape to them and it was like $9 for only three of them. I would need a lot more then that to make the look complete.
You know I even went as far as thinking to make some giant eggs out of paper mache. I went out and bought balloons and was set to go but, after thinking it through a bit more I kind of lost all motivation to do paper mache because it’s such a long and ugly process. I figured most of you probably wouldn’t have time to mess around with a whopping bowl of glue and a pile of paper. The more I thought of it the more I realized getting a smooth eggshell surface was virtually impossible. Plus the drying time kills it for me. To much work for something so simple!!
Then on a trip to the dollar store I had and epiphany and figured why not save money and downsize my idea. Use smaller eggs with the same idea and that is how these centerpiece came to light! 😀 😀
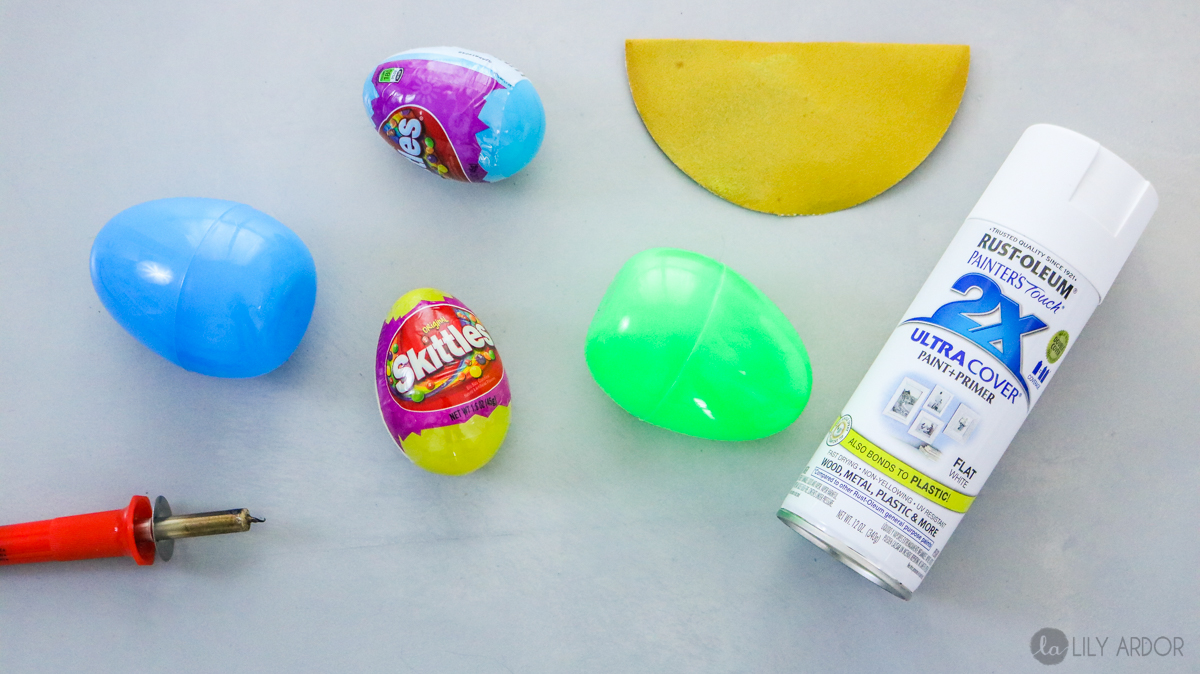
What you’ll need
- Dual sander and sand paper
- White spray paint
- Primer
- Big plastic Dollar store Eggs
- Hotglue
- Permanent marker
- hotknife
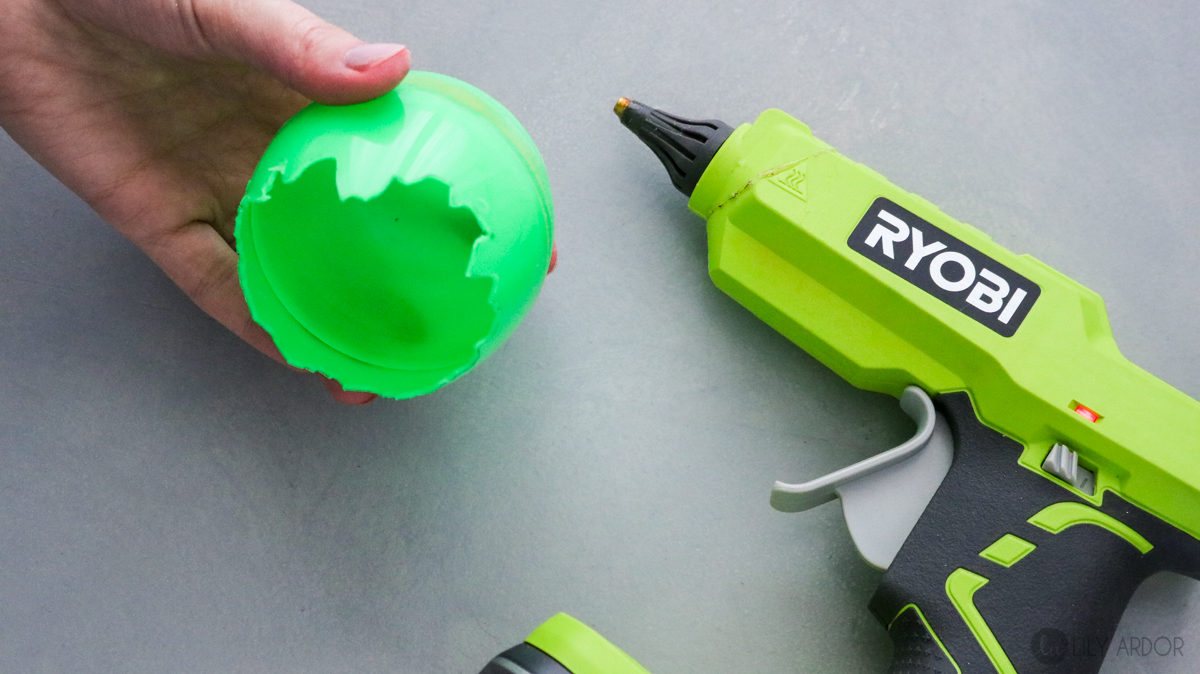
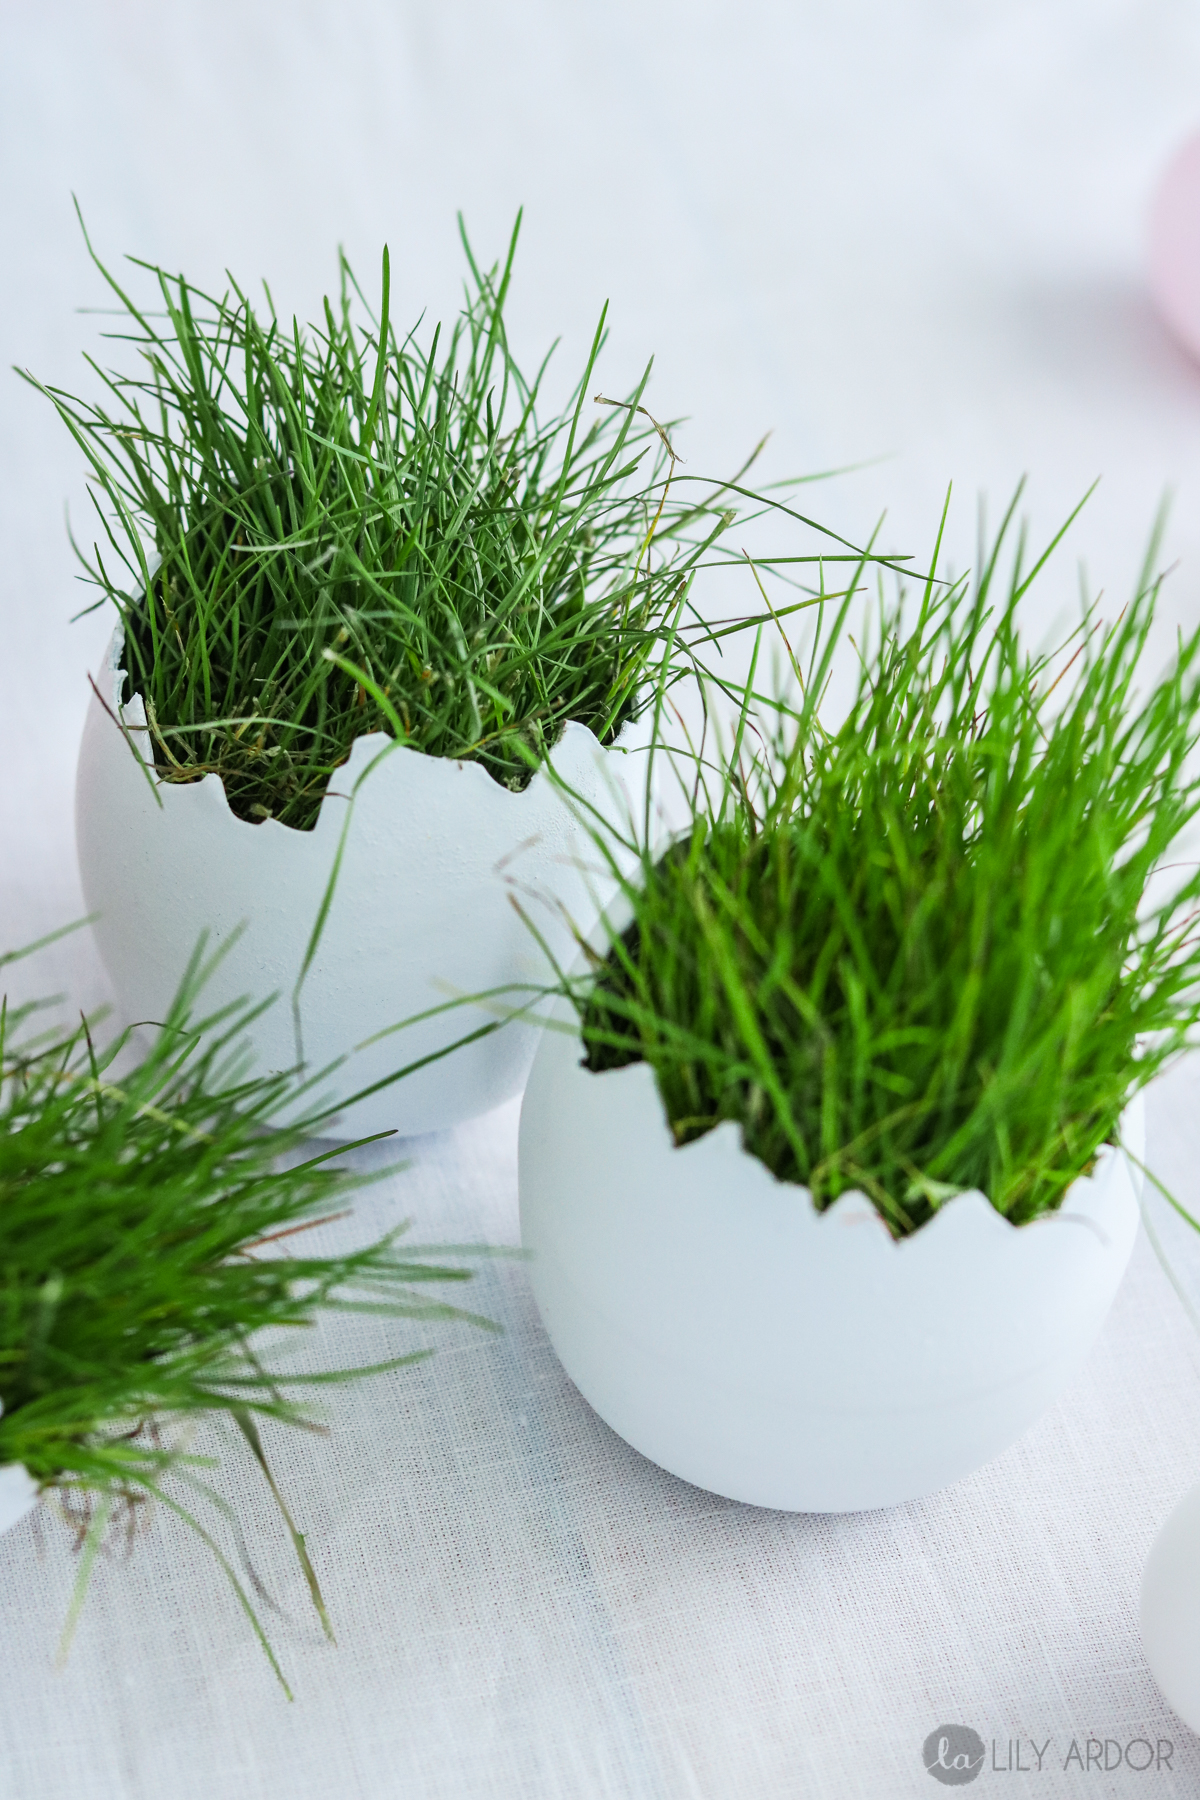
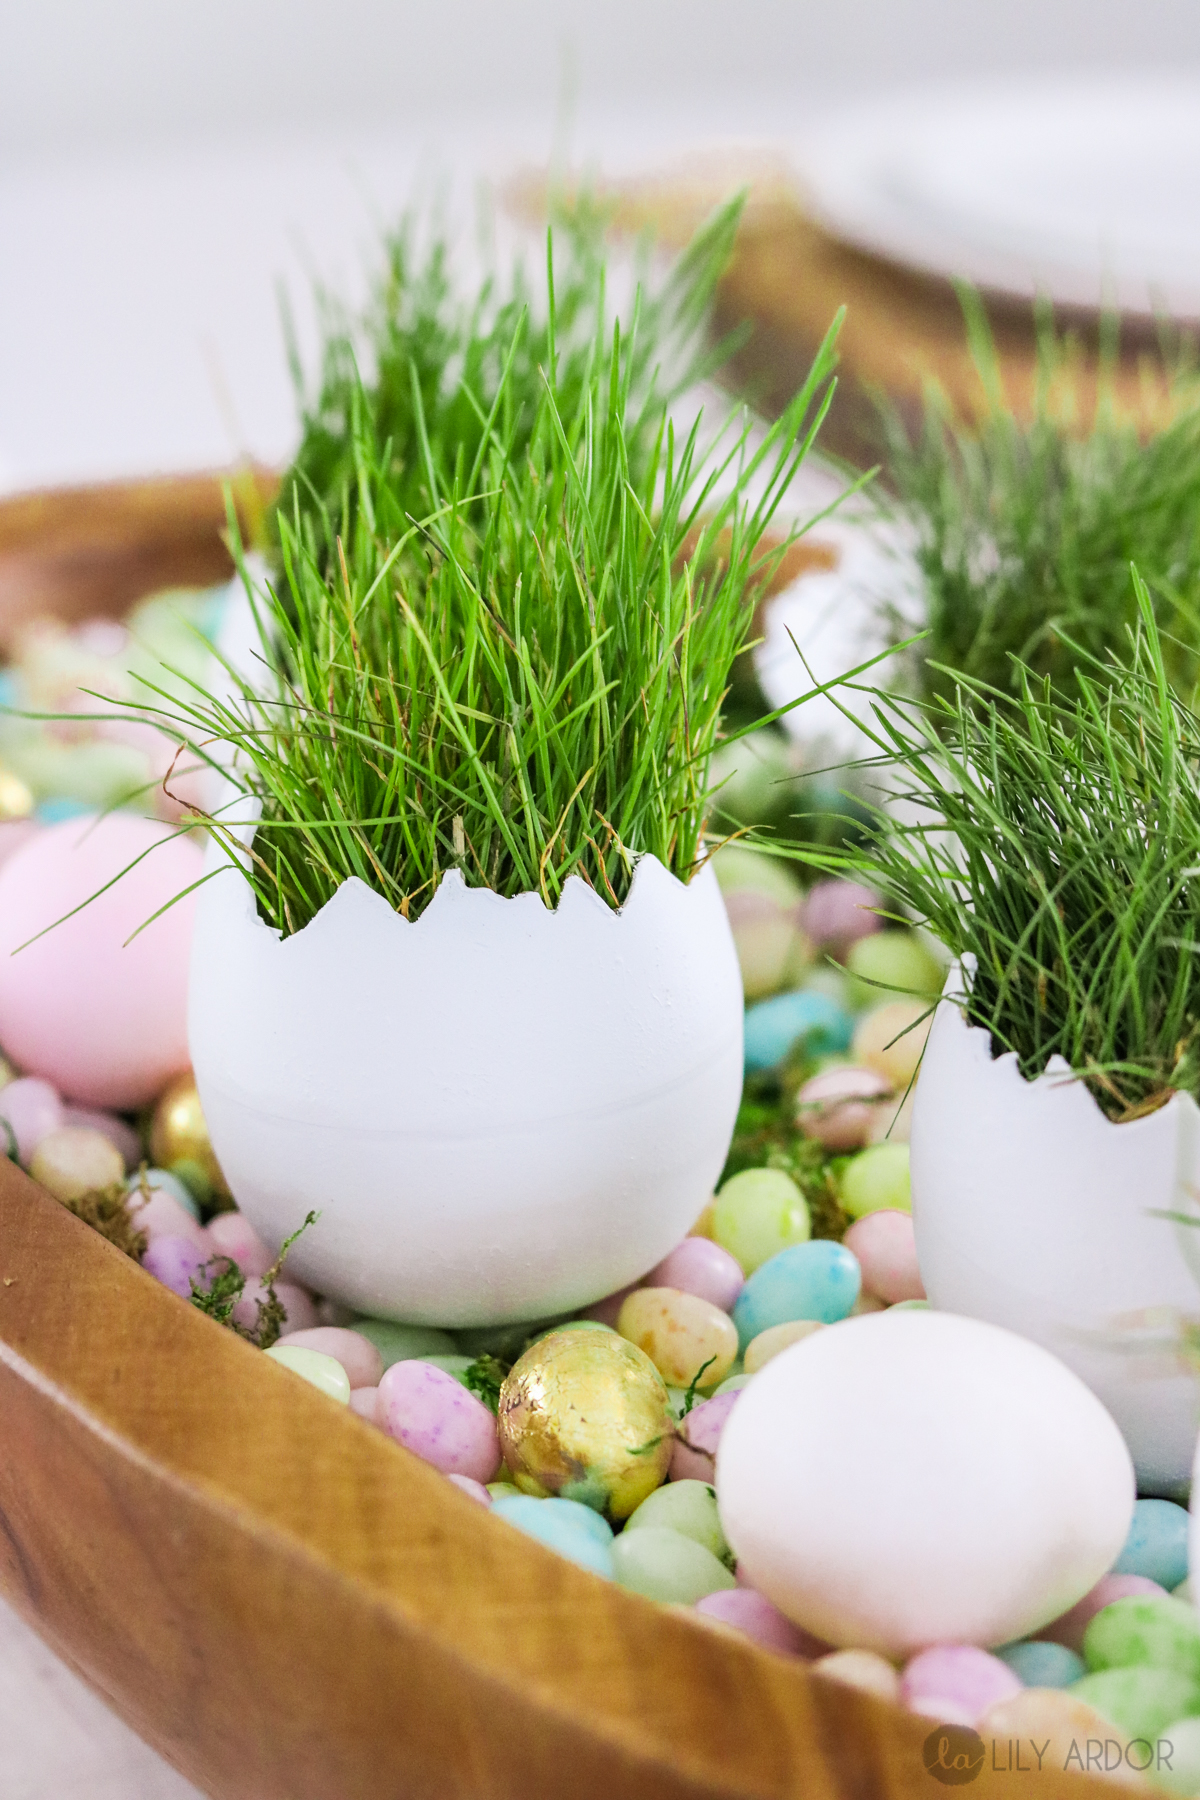
To begin use a marker to draw a zigzag line across the top half of your egg. Then use your hot knife to the shape out. Following that use your hotglue to glue the inside of your egg opening. I glued all the way around. By the way. I love my ryobi glue gun. It glues so much stronger the the cheap glue guns.
Tricky Plastic Eggs
For the sanding part it gets a bit tricky. So the reason I sanded them in the first place is because I wanted to eliminate the line where the egg opens up. First I tried sanding by hand with just sand paper and that kind of took forever. I like to get things done quick!! HAHA If you don’t have a dual sander you can always do it by hand. Keep in mind plastic isn’t exactly sandable but, the dual sander was a perfect fit. We tried using a smaller sander that spins a lot faster and it melted the plastic instead of sanding it. Hopefully some of these pointers will help you find a way to sand them easier. At one point I even thought of maybe somehow dipping the eggs in plaster of paris but, that would just give this project more work so I crossed that off my list. HAHA Feel free to try it though. 
Even after sanding the whole egg down and make the cease line blend in as much as I could it was still visible. So I used this primer I had around before applying the paint. It helped a little. You can skip this step if you don’t really care about the line being a bit visible. 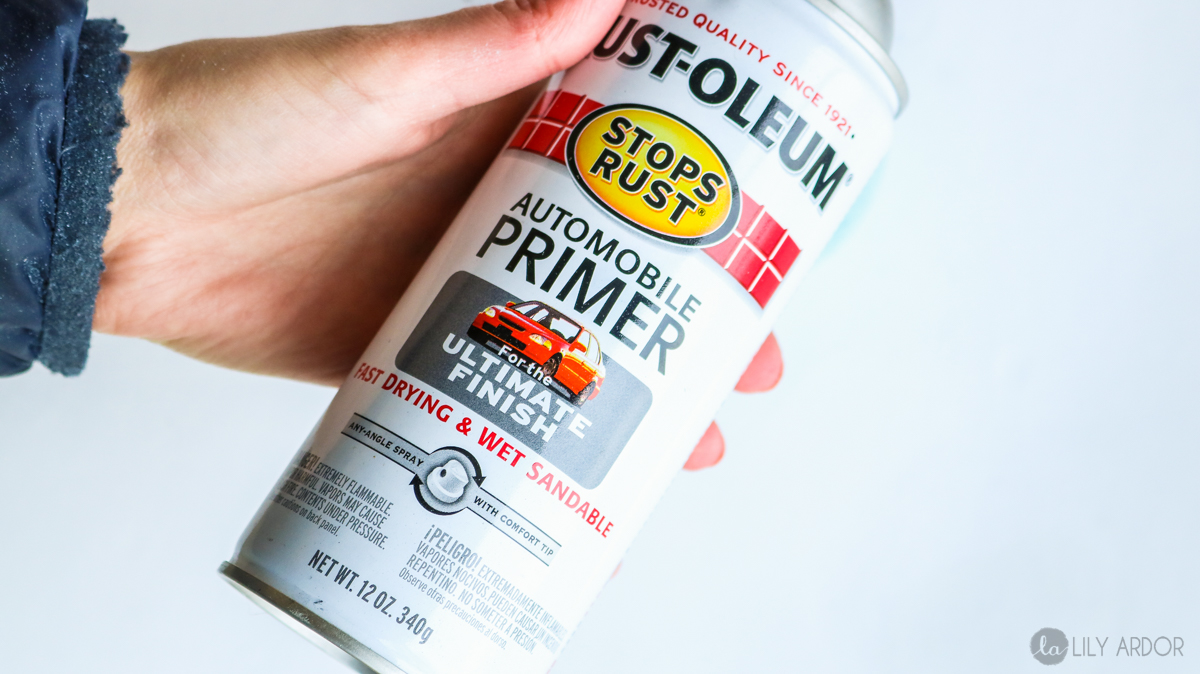
Following that I apply two coats of this rustoleum spray paint. Although this stuff says it adheres well to plastic I found that easily come off on the spots I didn’t sand on the eggs. So make sure and sand the whole egg.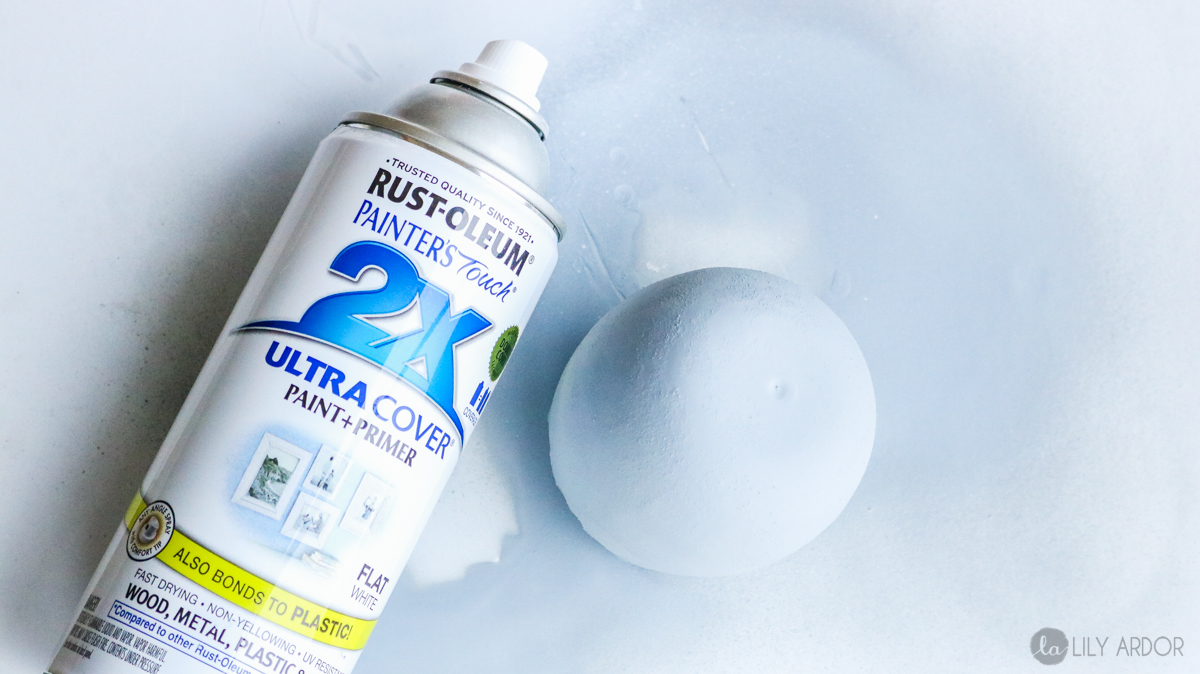
And that’s it. For the greens I really really wanted some wheat grass. Unfortunately after about 5 phone calls and two different grocery stores I finally gave up looking. They were all out of stock and needed to be pre-ordered. I didn’t have time to pre-order seeing as I was borrowing props for this table from Pottery Barn boise and needed to return them the same week.
So I used my good ol GRASS from our lovely front yard.. HAHA Yep cut it out smack dab out of the center. LOL NO I wouldn’t do that! My husband would be furious! Although I can’t say he’s to happy about our lawns zigzagged edges! HAHA I be honest…, It looks close enough to wheat grass for me PLUS it was FREE! So you can’t be that! 😉
Here’s the video tutorial –
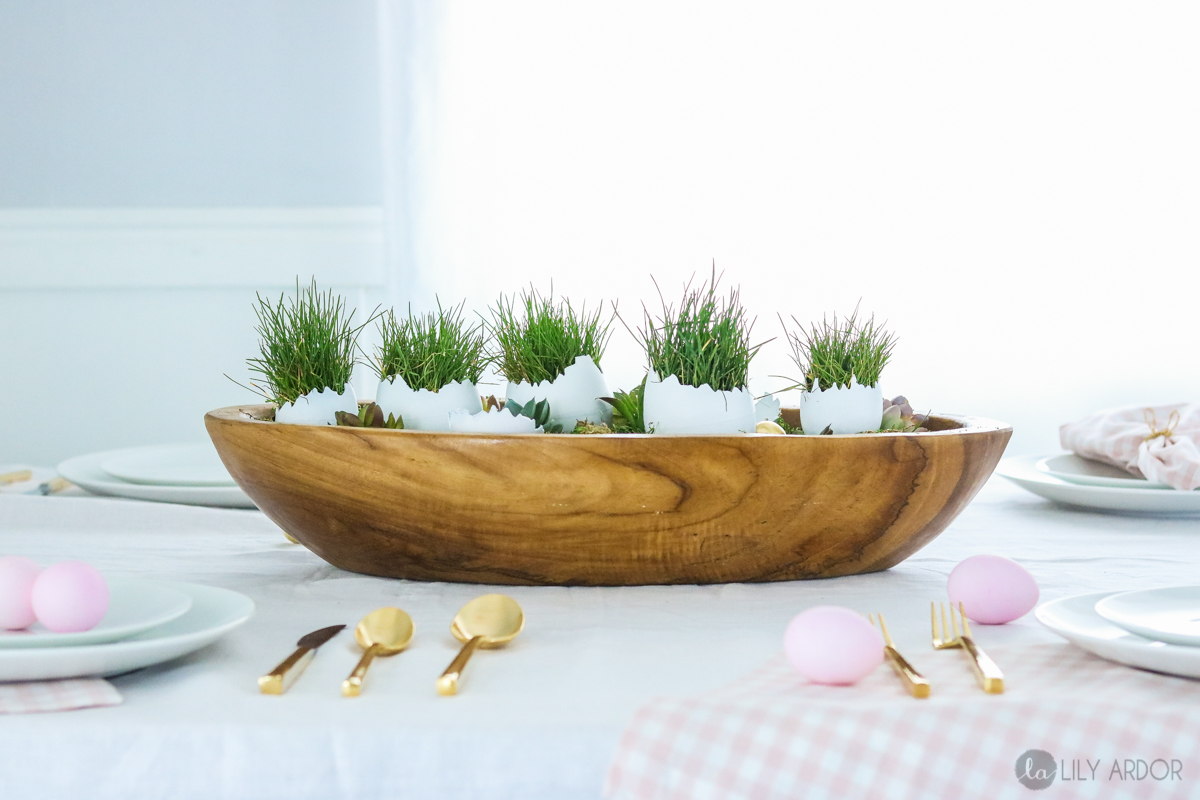
3 Ways to Display
To spice things up I’ll show you 3 ways to display these beautiful cracked eggs in your centerpiece.
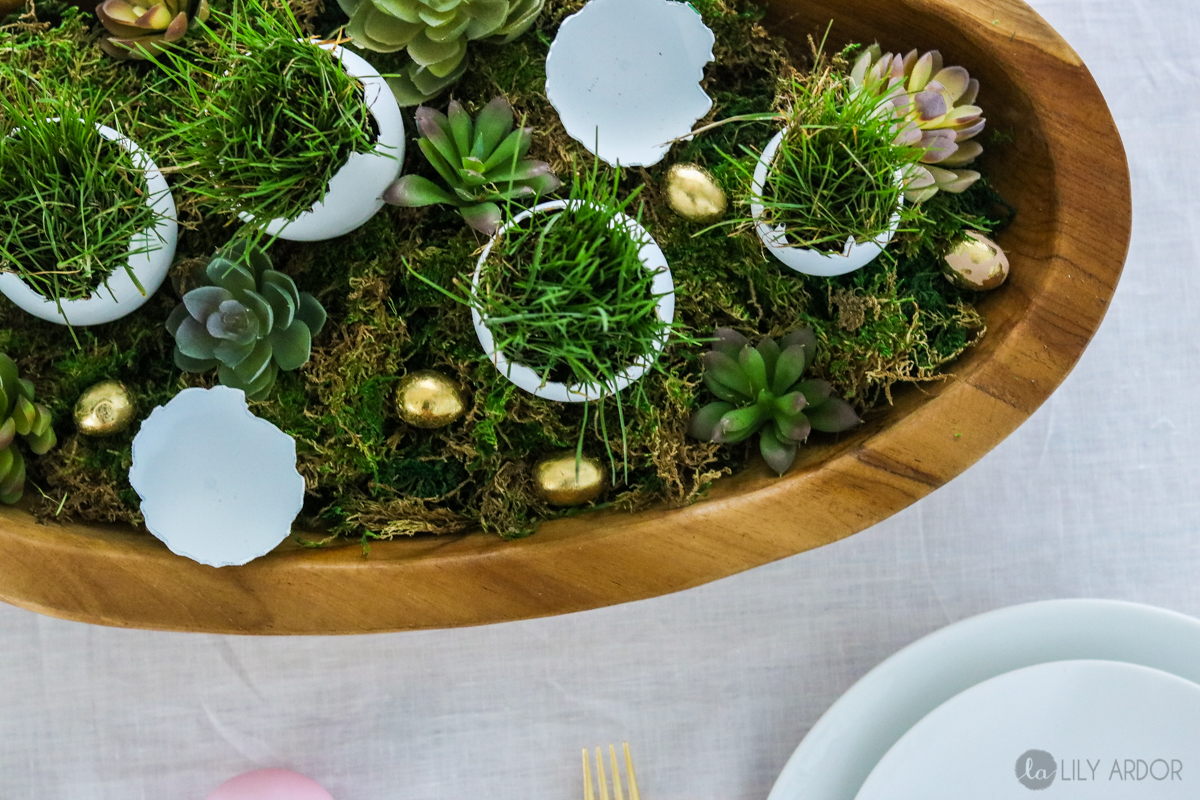
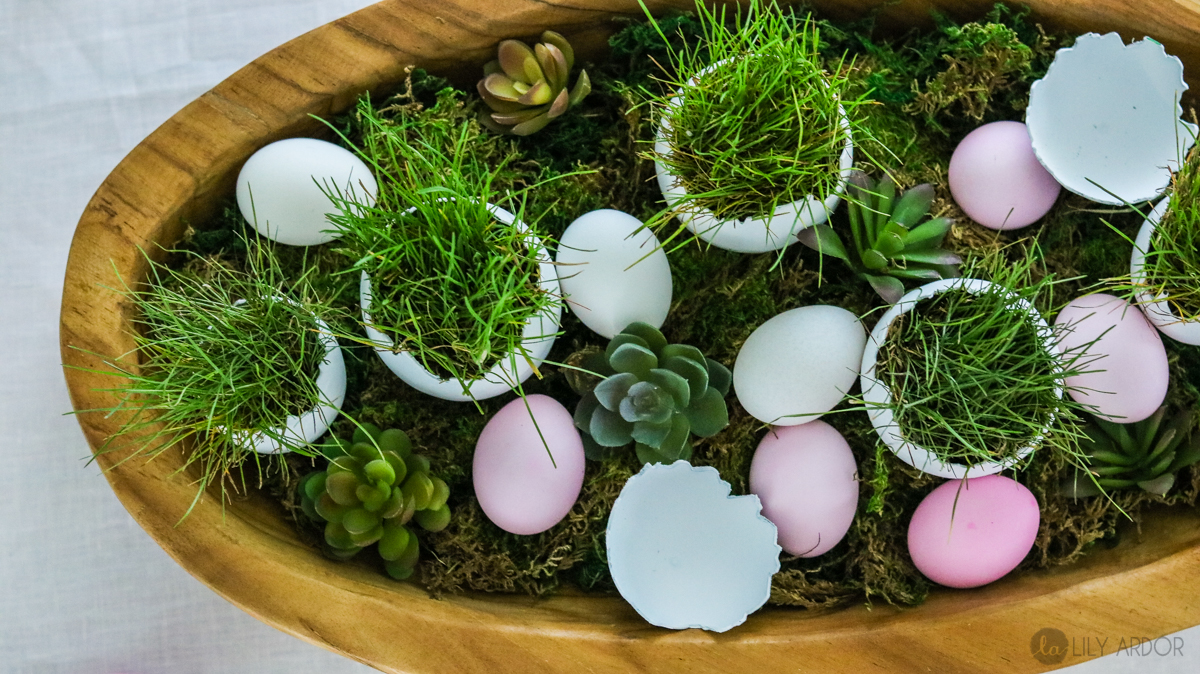
#1 Simple Easter Terrarium Centerpiece
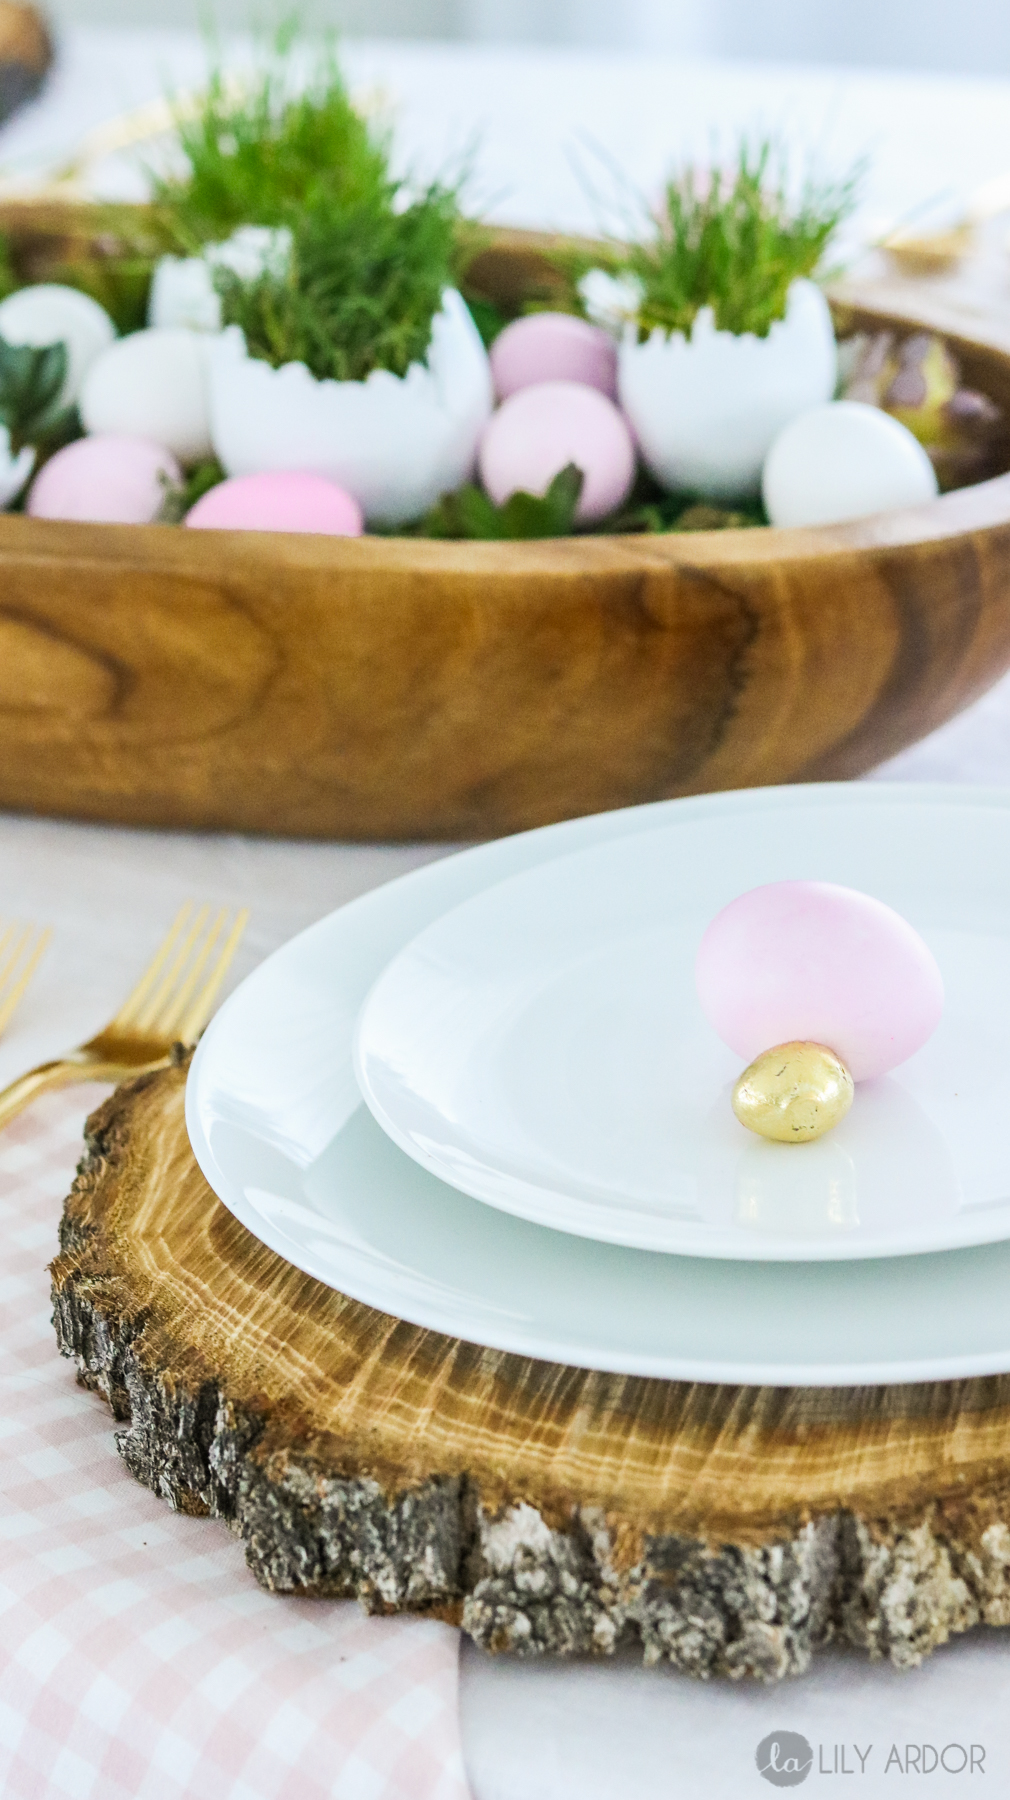
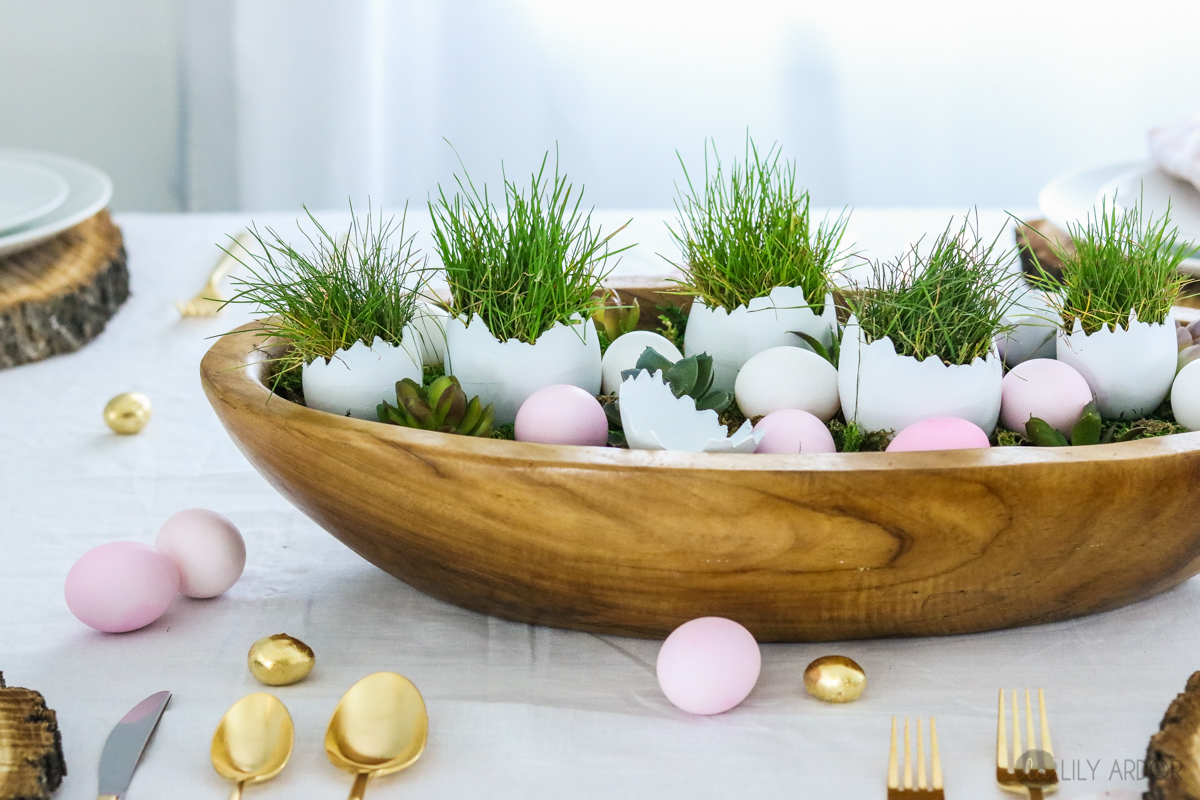
I got this wood bowl at Pottery Barn and added a layer of moss that I purchased at the dollar store. Following that I added some succulents I had around and some mini gold eggs. This is the simplest of all three looks unless of course you want to just have your eggs stand on your table. This reminds of those terrariums but without the glass lid. 😀 😀 PS. Those of you wondering if the succulents are real… they’re not. I purchased them at michaels last year and the mini eggs I made out of clay for 99 cents. You can find the tutorial here.
#2 Pop of color Centerpiece
So the reason I came up with 3 ways to display these is because I had a hard time making up my mind on one. The plan was to pick one and go with it but, I ended up loving them all!! 😀 😀 For this centerpiece I simply added some ombre pink eggs inside the bowel to add more contrast and make it a bit more festive. 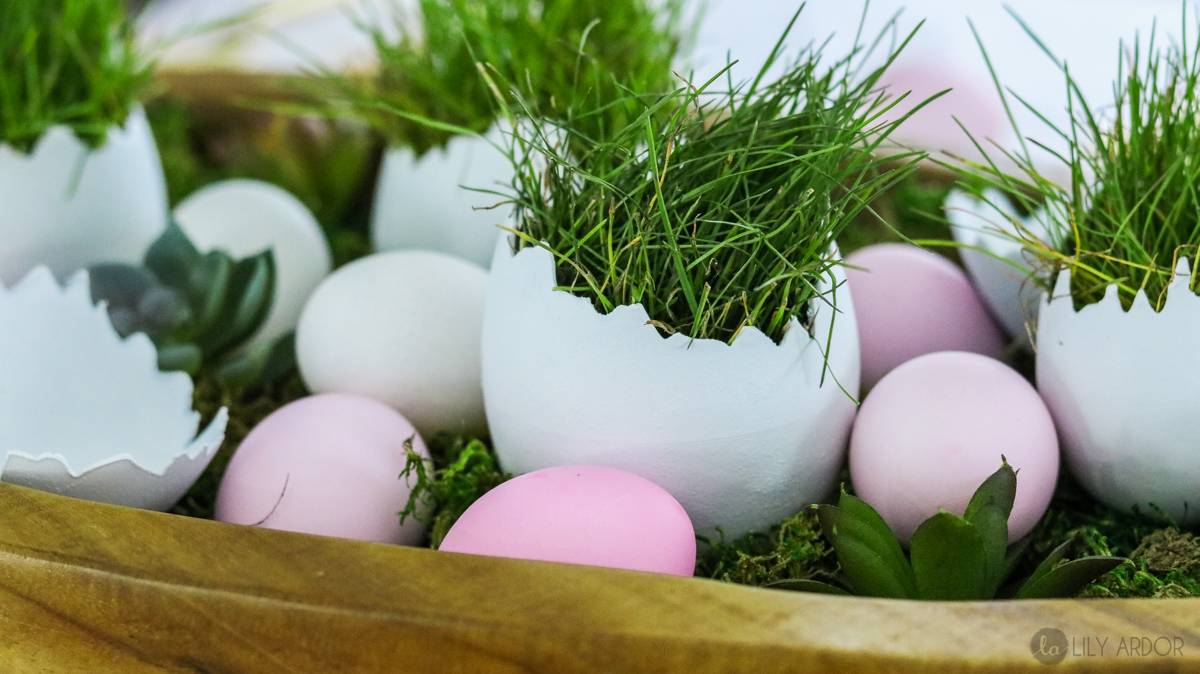
It definitely looks more Easter like then the one above. To me for some reason the first one (above: simple Easter terrarium) came off as more of a coffee table centerpiece rather then one for a dinning table. What do you think? I think ombre pink eggs helped a bunch.

This mini gold eggs are ssso cute! They match everything. I’m so glad I took the time out to make them!
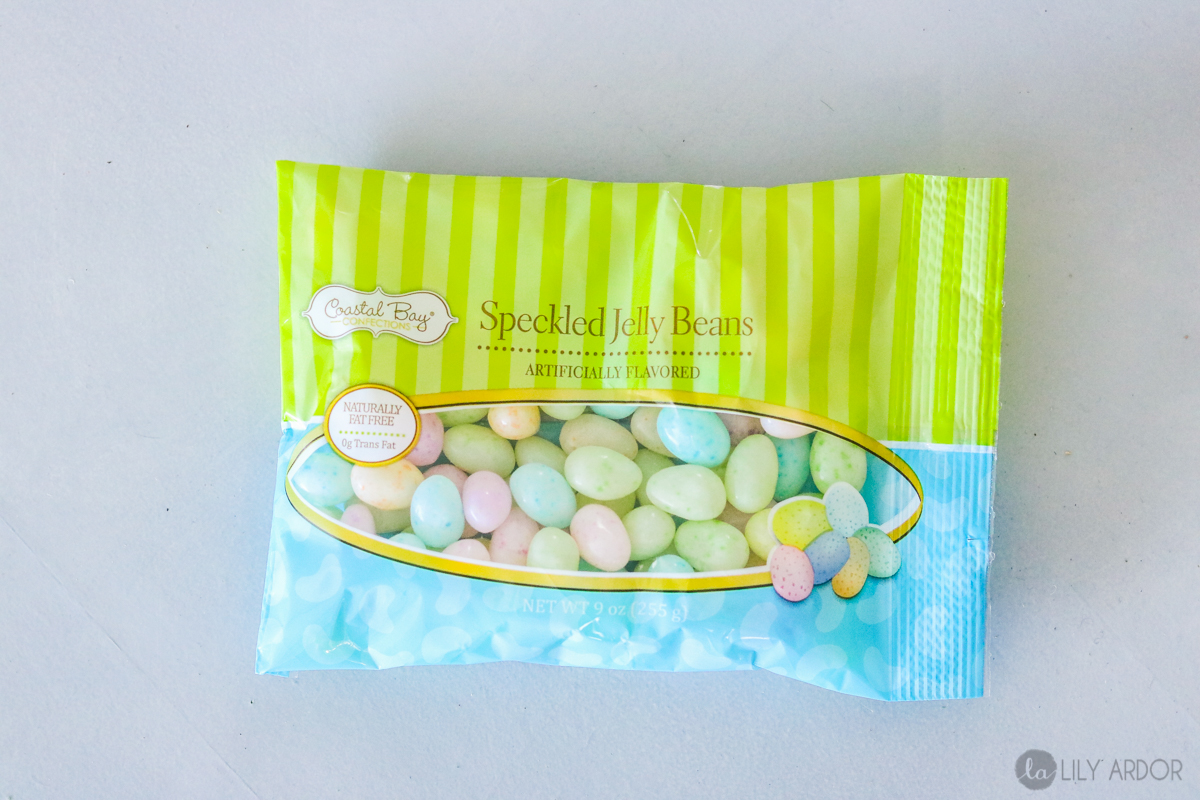
#3 Pastel Bowl
I think out of the three this one is my favorite! If definitely has that Easter vibe and the color combo couldn’t have been better!!
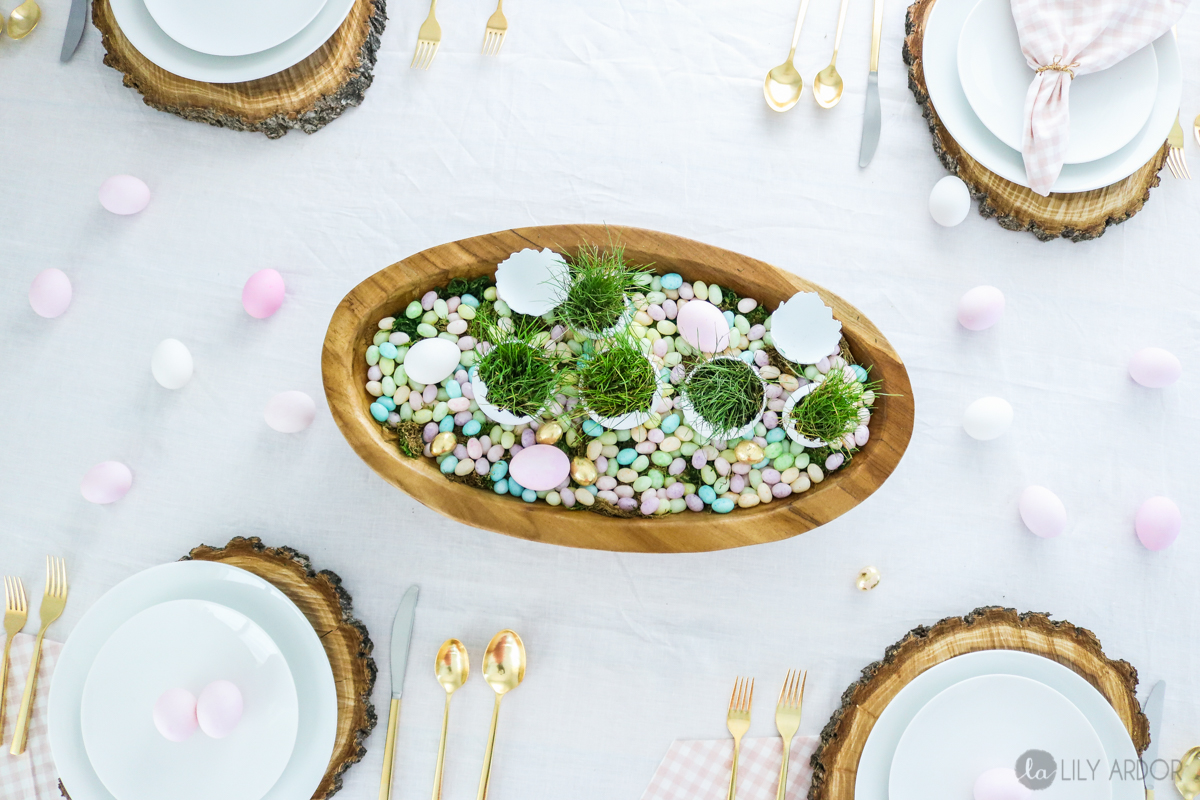
Yes I had to make another run to the dollar store to buy these jelly beans but, it was totally worth it. I ended up buying 6 packs and only used 4.
As you can see the line on the eggs is slightly visible but for a $1 I’m totally fine with it! HAHA plus it looks so cute I don’t ‘mind. 😀
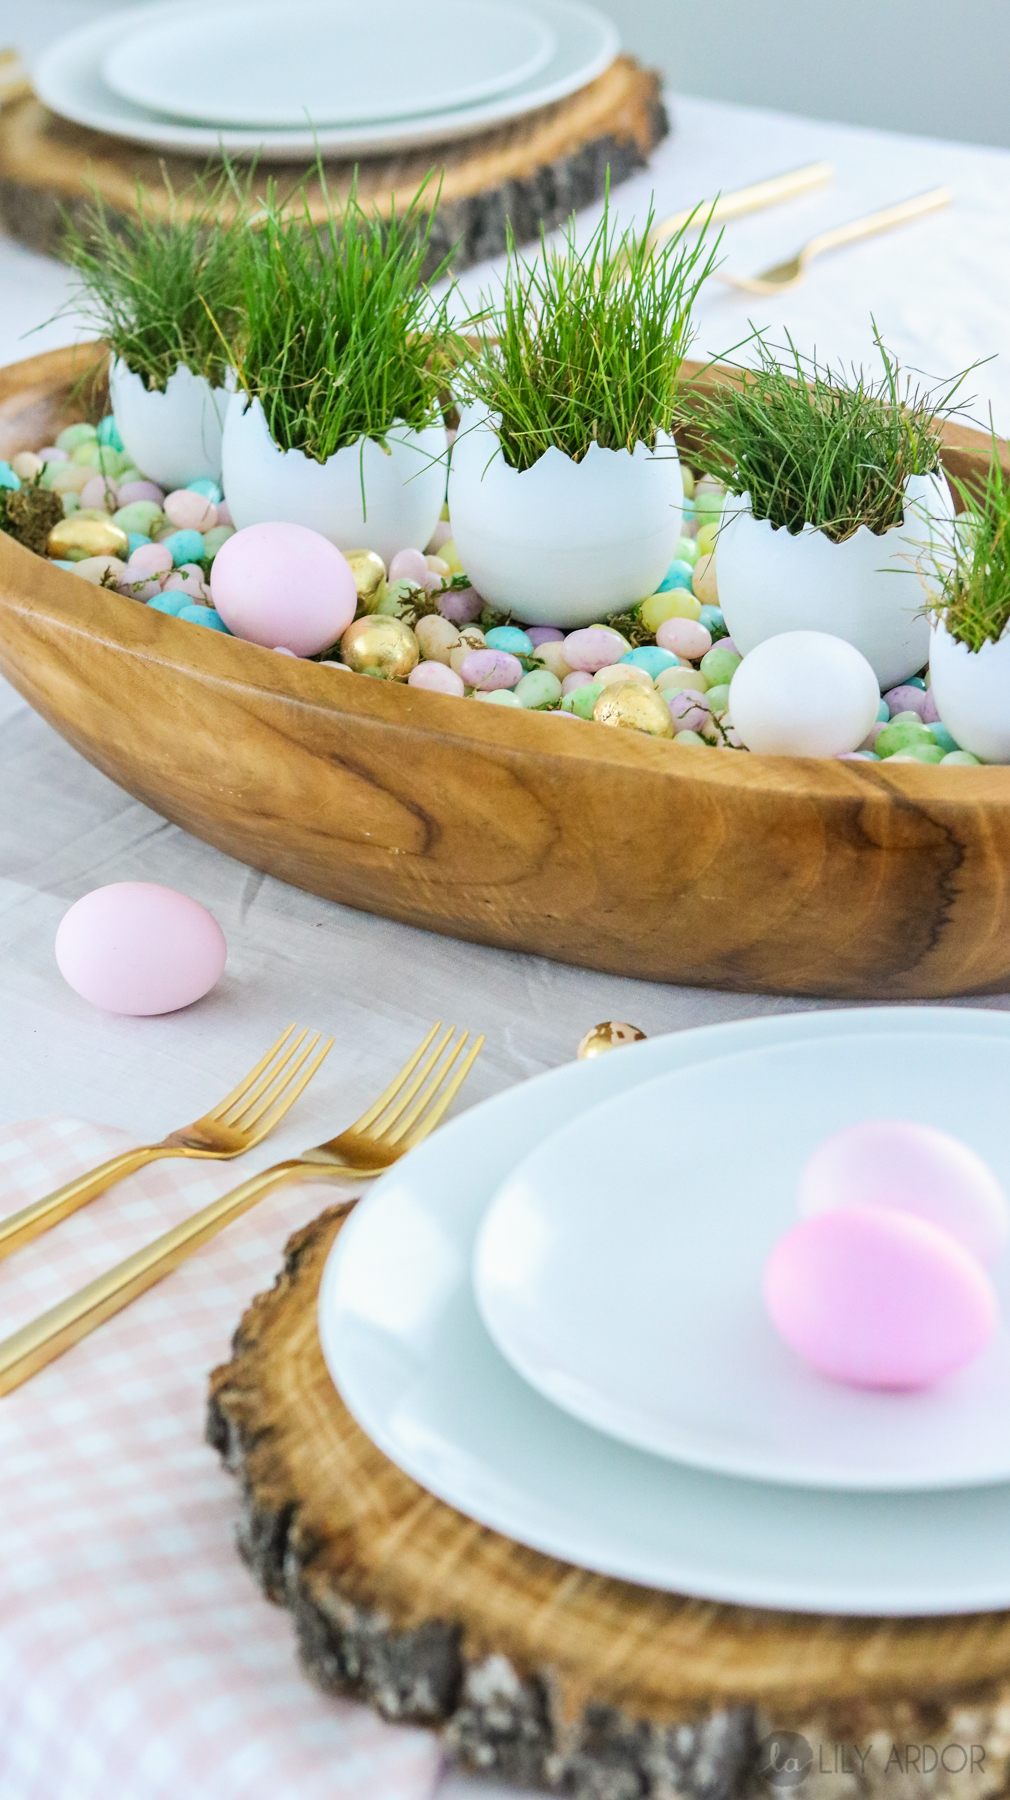
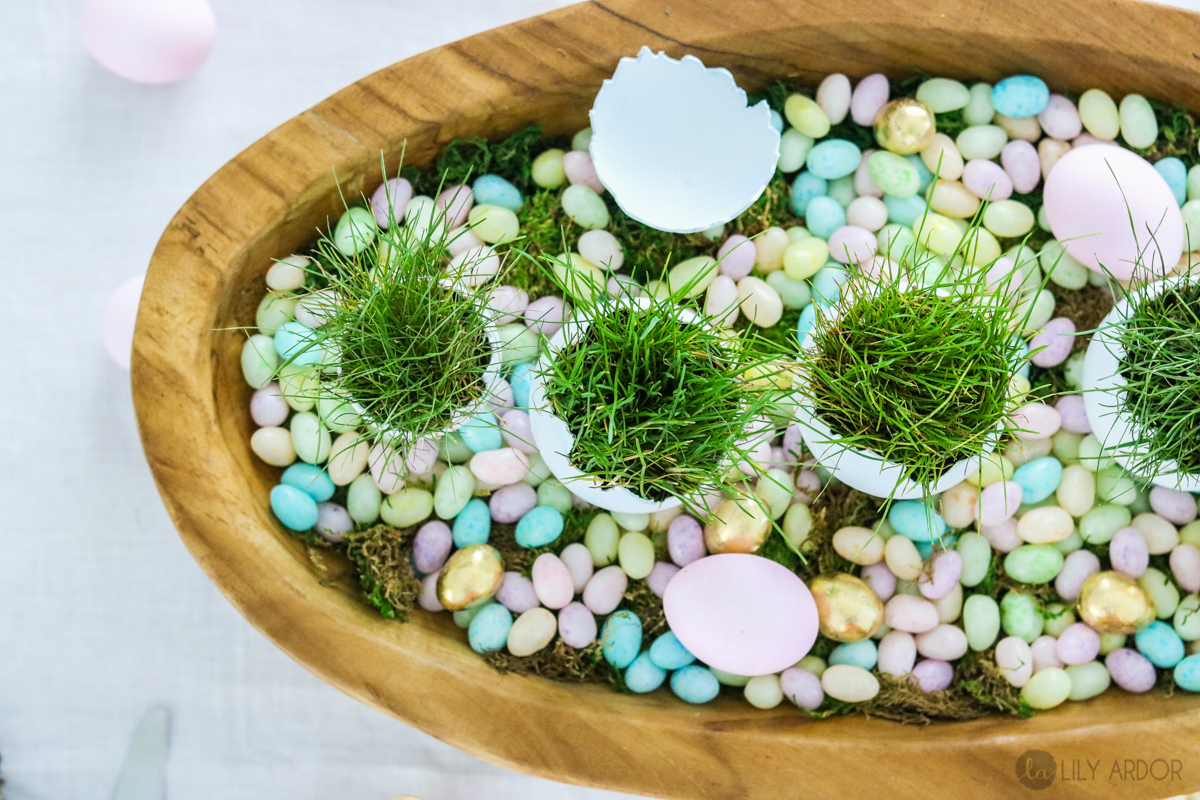
By the way. I just poured my jelly beans over the moss if your wondering. Nothing special! 😀 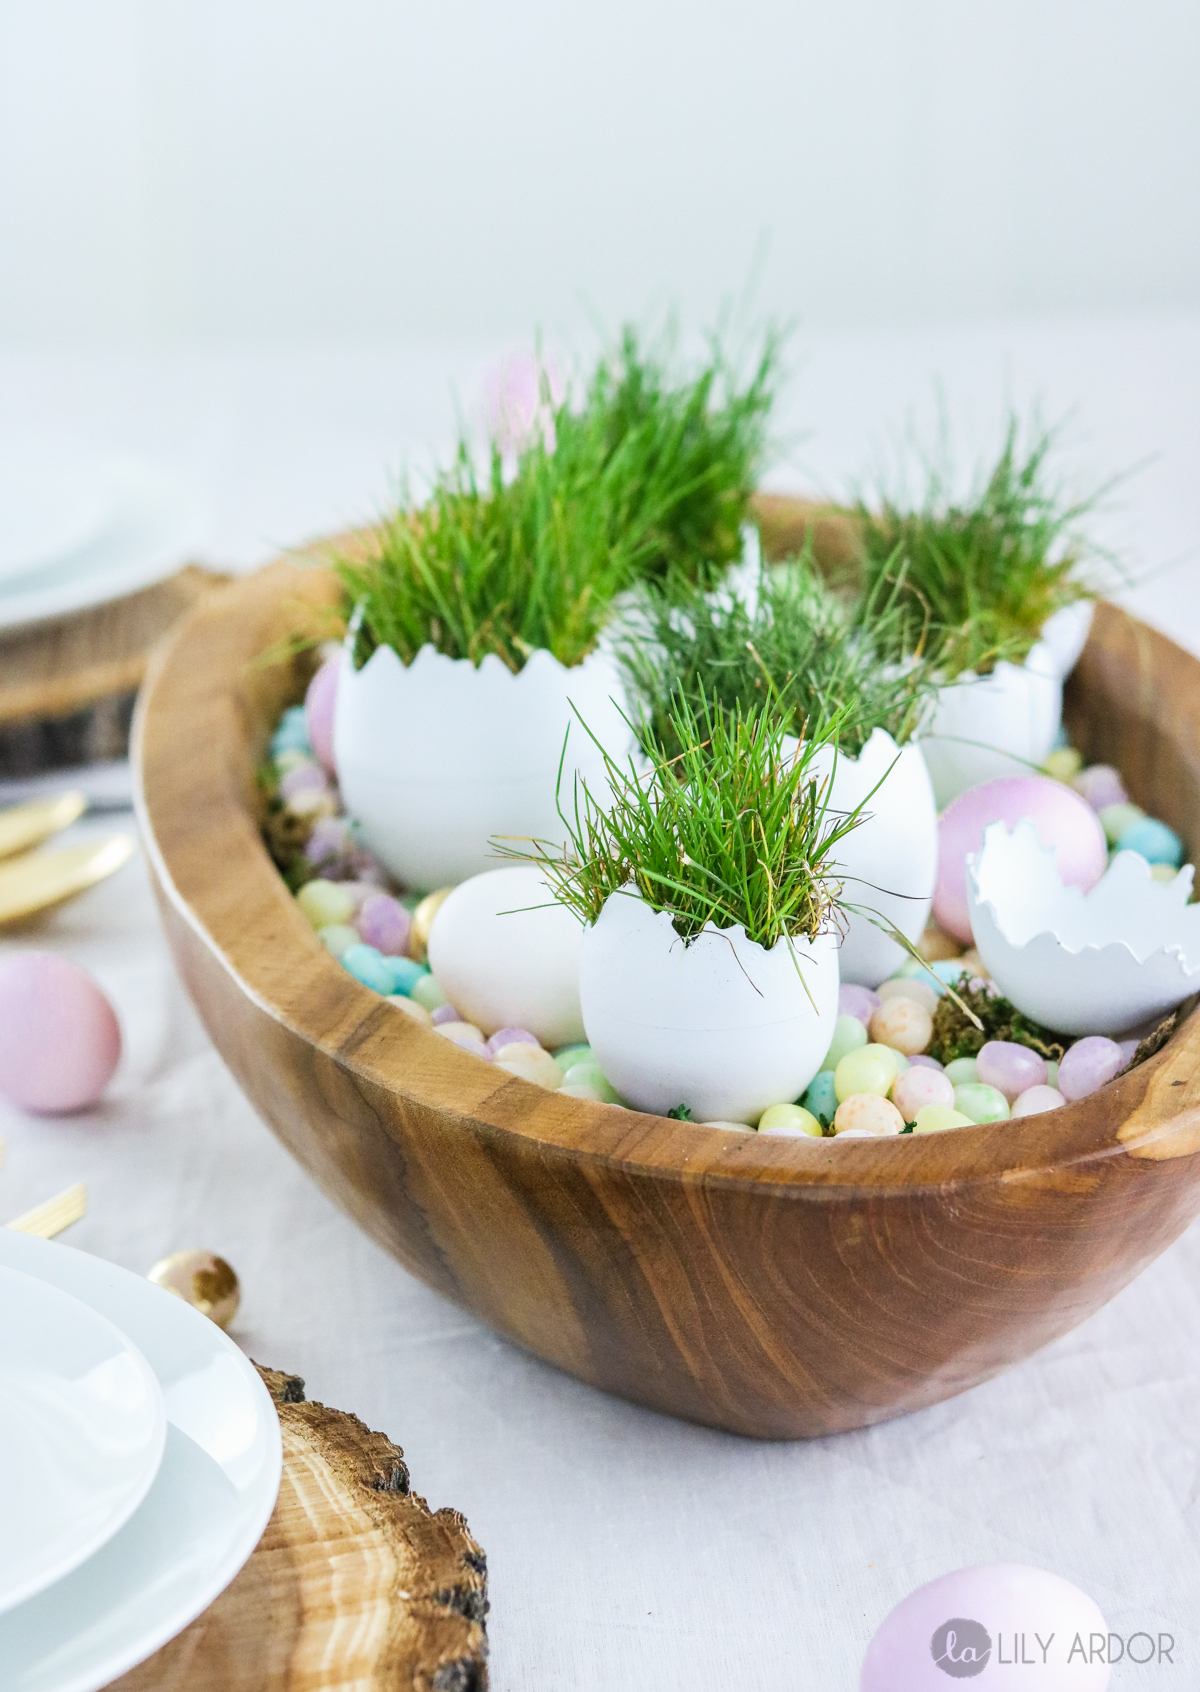
That’s it for this centerpiece. I hope this will give you some ideas to create your own whimsical Easter terrarium inspired centerpiece. WOW that’s was a mouthfull! HAHA Enjoy! HAPPY EASTER! I’ll see you next time!
Here are some more ideas for your Easter table!