How to Hem a Dress Like a Pro
I can’t tell you how excited I am about this tutorial. Here’s why I’m so excited! If you follow the instructions and learn how to hem a dress you can use this same method to hem a t-shirt, tunic, blouse etc. Pretty much anything that looks kind of like a dress. 😊
STOP and READ Before working on a Formal Dress!
Although formal alterations usually require a very similar method of hemming I figured it would be a good idea to talk about this subject in a little more detail since this can make or break your wedding/prom dress. There are a few things you’ll need to watch out for.
During prom season my little alterations shop was packed full of prom dresses. It was the busiest time of the year for me. You wanna guess what was the most common alteration on those dresses. YEP It was dress hems! Here’s where it gets tricky. There are so many things you need to take into consideration when hemming a formal dress. It’s not the same as hemming a regular dress or shirt. I’m going to point out three most important factors. If any of these apply to you. I would be very cautious. Even though the method I will be showing you is pretty standard and will work on most dresses, clothing comes in such a wide range of styles I think it would be a good idea to know what to look out for.
- Formal dresses are a lot fuller than a plain dress which makes it a lot harder to hem. (this method will still work it will just take longer.. READ #3 before starting though)
- If there are beads on the bottom of your dress and if cut wrong it can make all the beads fall off the dress. There is a specific way to cut when working with beaded dresses.
- Some fabrics are super tricky. I’ll try and explain this as accurately as possible. For example: I would have a customer come in with a prom dress and we would do a fitting. We would pin how much we wanted the dress off the floor then the customer removed the dress and I marked the length. I couldn’t lay the dress out and cut where I marked like I’ll be showing you in this method because, the fabric would swim all over the place. Meaning I would mark 4 inches from the bottom in one spot than if I picked the dress up and lay it back down again and measured where I marked the 4 icnhes it wouldn’t be 4 inches. It would be way off. Believe it or not this happened quite often. The reason this happens is because the grain of the fabric was sewn a specific way to make the dress lay prettier. In this case it would be impossible to hem your dress because it would turn into a guessing game and every time you would lay it back down to check the marking it would be off. The method I would use to hem these types of dresses is not the method I’ll be showing you today.. If you notice your fabric is doing that then I would avoid using this method. ( Let me know if you want a full tutorial on how to hem a formal dress)
- Don’t be scared to work with lace. It’s no different than working with regular fabric.
Okay now that we got that out of the way we can start!
Before we jump into this tutorial. If you want to learn more about sewing this is a 5 part series where I teach you the most basic clothing alterations coming from a professional seamstress. Here’s what else goes in this series.
- How to hem a dress
- How to hem sleeves
- How to hem pants
- How to fix ripped jeans
- How to cut jeans into shorts
Here’s the quick 7 minute video to teach you all five
ABOUT THIS DRESS HEM!
If you’ve been following me on Instagram you probably remember a few weeks ago when I made a trip to town just to buy clothing that doesn’t fit so I could do this series of sewing tutorials. As a seamstress I have plenty of clothing that needs fixing. I guess it’s just one of those things… You always find something to fix if you know how to. LOL😂. With all my clothing to-dos I had piled up I didn’t have a dress I could hem. Ok honestly it was the weirdest shopping experience. I don’t think I ever went shopping to find a dress that didn’t fit. LOL😅 After visiting my local Uptown cheapskate consignment store and failing to find something I headed over to Forever 21 and came across this cute little summer dress. If you’ve never heard of consignment clothing stores you should look into them. They sell lightly used high end clothing. My favorite place to shop for clothing. Ok so, I love the floral and color on the dress however, the length just made me look sssso short! Plus my legs look kind of stubby😏 like this because the length cuts off at the widest part of my calf. I figured if I shortened it than it would be perfect! Maybe a a little above the knee to make my legs look a little longer.
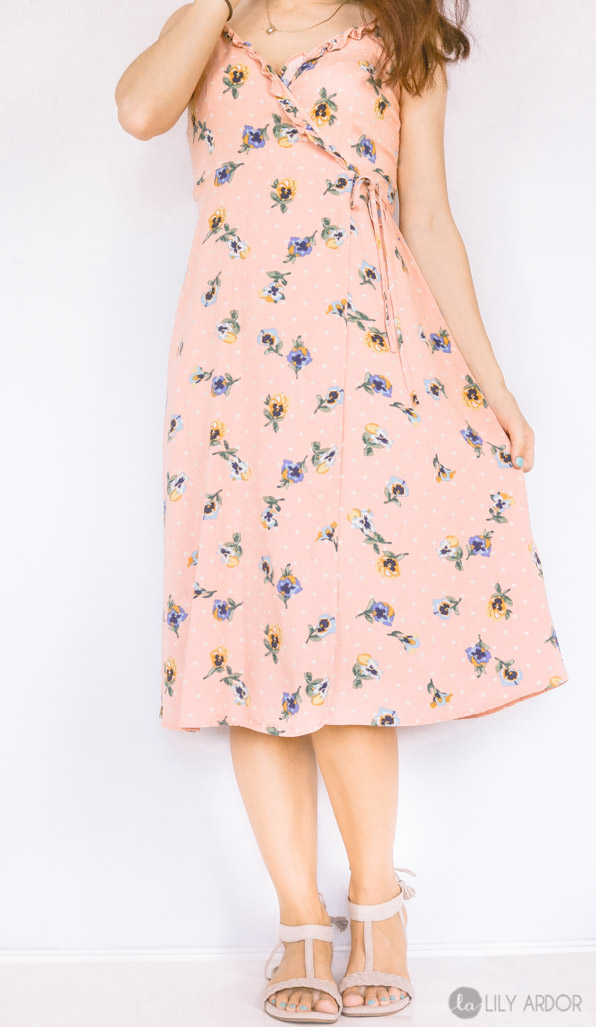
Like this.

Step 1 – Fitting your dress!
To begin your fitting your regular pins to secure how short you want your dress. Wear the shoes you’ll be wearing with your dress most. If you’re doing a maxi dress do not do the fitting without shoes. A QUICK TIP: Before doing any clothing alteration to get the most accurate tailored fit pre-wash and iron the clothing! (unwashed clothing may shrink after washing and be shorter then intended)
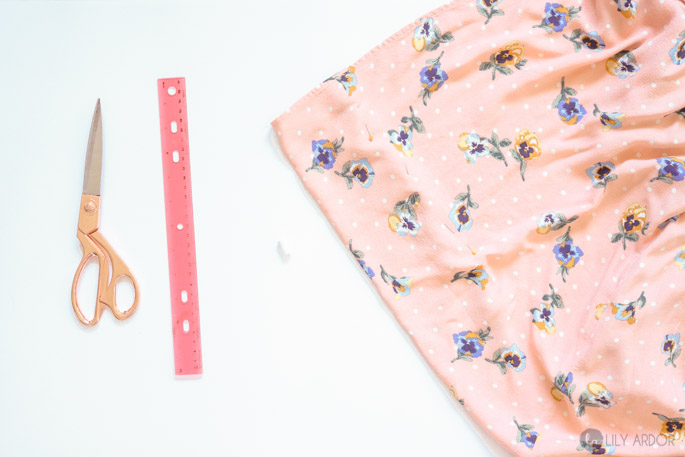
What you’ll Need
- ruler
- scissors
- chalk
- thread
- sewing machine (nothing fancy just a straight stitcher)
- pins
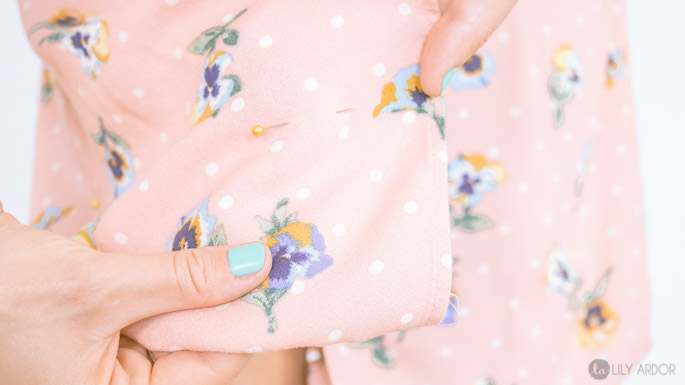
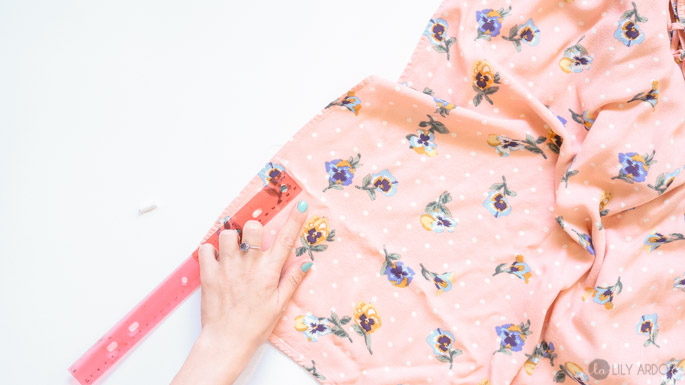
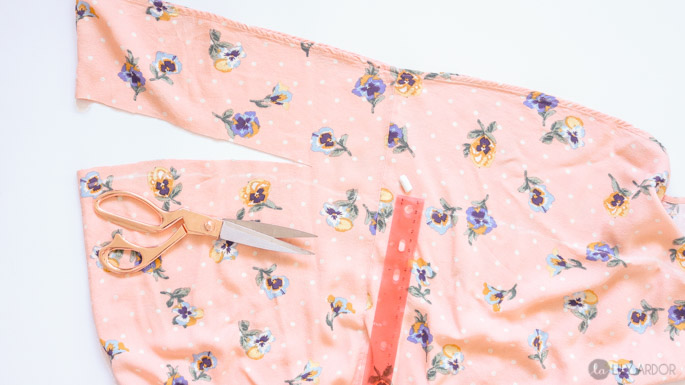
Step 2 – Marking your length!
Following that remove your dress lay it down and mark your length with chalk.
Measure how much needs to get cut off and mark the same amount all around the bottom of your dress. For instance my dress needed 4 inches off the bottom so I went around marking 4 inches from the bottom.
This is what your markings should look like. (photo below)
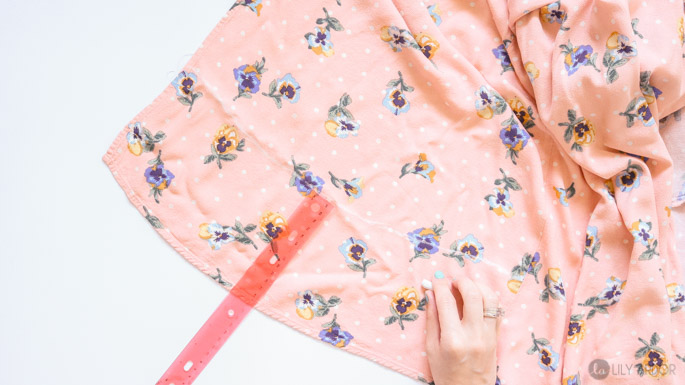
Step 3 – Cutting into your Dress!
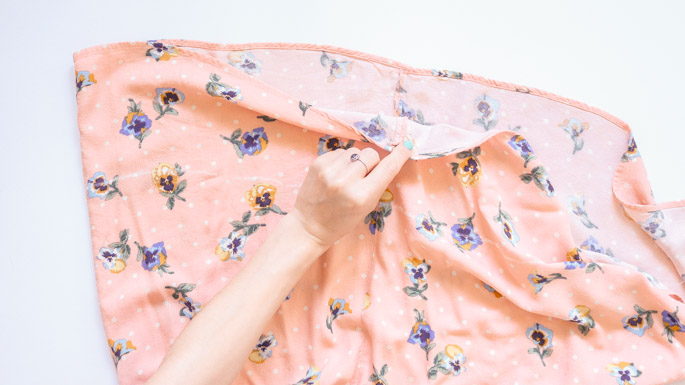
Before you starting chopping away at your dress you need to lay it down properly on a flat surface. Make sure you have plenty of room to work with. If you’re dress flares our a lot, use the floor. To begin laying it out correctly start by lining up both side seams on your dress like shown in the photo below.
Okay now make sure both seams at the bottom of your dress are as even as possible before cutting in. Eliminate any bubbles and crumpled fabric. If it’s crumpled make sure and iron it out before cutting.
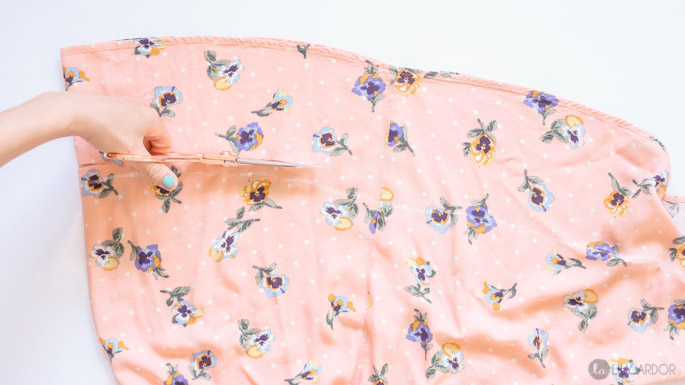
Since my hem was about 1/4 of an inch on the bottom to match the original hem I left a seam allowance of about 3/4 of an inch. You can do this by just eyeballing it or actually go around with your ruler and mark your seam allowance.
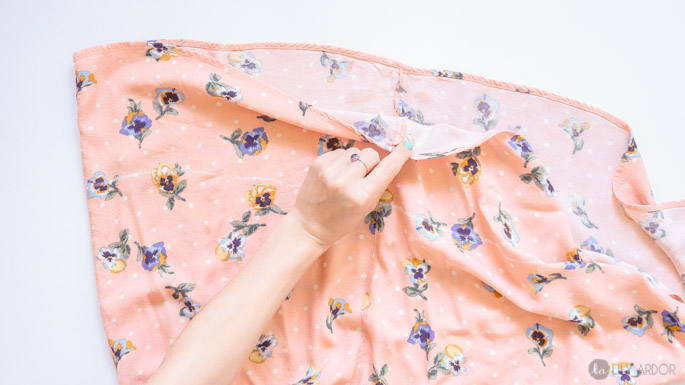
Step 4 – Finishing touches!
Now to finish off your dress hem fold the bottom of your dress in twice making sure not to fold over the white line you marked because that is your length and give it a straight stitch. I fold in about 1/4 of an inch twice and give it a stitch. And that it 😁 A rule of thumb to keep in mind while doing any clothing alterations is to keep your hem looking as close to the original as possible. So if your original dress hem isn’t 1/4″ but 1″ you would try and match it if you can. And that’s it you can use this method to hem, blouses, t-shirts tunics and more.

I hope this tutorial taught you something helpful. Feel free to ask questions in the comments below! 😀
If you want to learn more about sewing this is a 5 part series where I teach you the most basic clothing alterations coming from a professional seamstress. Here’s what else goes in this series.
- How to hem a dress
- How to hem sleeves
- How to hem pants
- How to fix ripped jeans
- How to cut jeans into shorts
Enjoyed so much. I want to follow all 5 steps.
I’m glad to hear that JoAnn 🙂
Solving problem with very fine fabric with loose weave that seems to go on bias when doing 1/4 inch hem? One shop said they sewed before cutting but wouldn’t share how…
I need to hem my bridesmaid dress. So you have a tutorial on that? 🙂 Thank you!
Sorry at the moment this is the only tutorial I have to hem a dress. Do you know what fabric it is? The technique doesn’t change much for hemming. You would just need to do the fitting correctly depending on the fabric. Some fabrics stretch weird not allowing you to accurately cut or hem ( usually fabrics that are sheer like chiffon ) In this case if the dresses are floor length I would have the girls stand on a solid surface with the shoes they’ll be wearing and measure and mark the same height from the floor all around while they’re standing. do this instead of laying the dress out on the table and marking the amount that needs to be cut. The will give you an accurate fitting and even bottom. Again this really depends on the fabric. If it’s a simple fabric then the sides seems just need to be lined up just like in this dress and hemmed. Hope this is helpful.
My two dresses that need to be cut off and hemmed are chiffon and they are lined, of course. I didn’t see a solution for those kinds. I have a Husvarna machine! I only have 3 weeks to get two dresses cut off and hemmed! Thank you for any help you can give me!