
Okay so this is way last minute. It’s 4 days before Christmas and we finally got around to putting up our Christmas tree. I was starting to think we weren’t going to have one this year. I’m so happy to say I’m finally done writing the (clothing fixes) book and had some time to make last minute DIY wood ornaments. This was not a planned DIY at all in fact after going to the store to shop for ornaments I realized they didn’t have what I wanted. So, I decided to buy wooden objects and giant beads and put them together for ornaments.
The last couple of years our tree has been red and white. I loved it for the longest time however I’ve been drooling over the nordic trees on pinterest. In fact I’ve planned on buying all white ornaments for a few years now and just never got around to it. This is the first year I told myself that’s it! Enough with the red and white. I really wanted something different!

I love an all White Christmas Tree
Originally I had only planned on making the tree white and accents of wood. After going to hobby lobby I was totally taken away by their sale and ended up buying a whole pile of ornaments. 🙈 Totally returning more than half. I ended up arranging them on the tree and was like WWWOWW who ever knew too much ornaments could look so ugly! HAHA 😬 Hubby even wished me luck on fixing the tree situation after seeing it! YES it was that bad! LOL I ended up leaving some gold ornaments because they were toooo cute!
Today I’ll be sharing the 4 styles of wood ornaments I made. They are all really easy to make and super kid friendly. I was done with a pile of ornaments in about 3 hours. These will last for years and I can’t wait to reuse them again
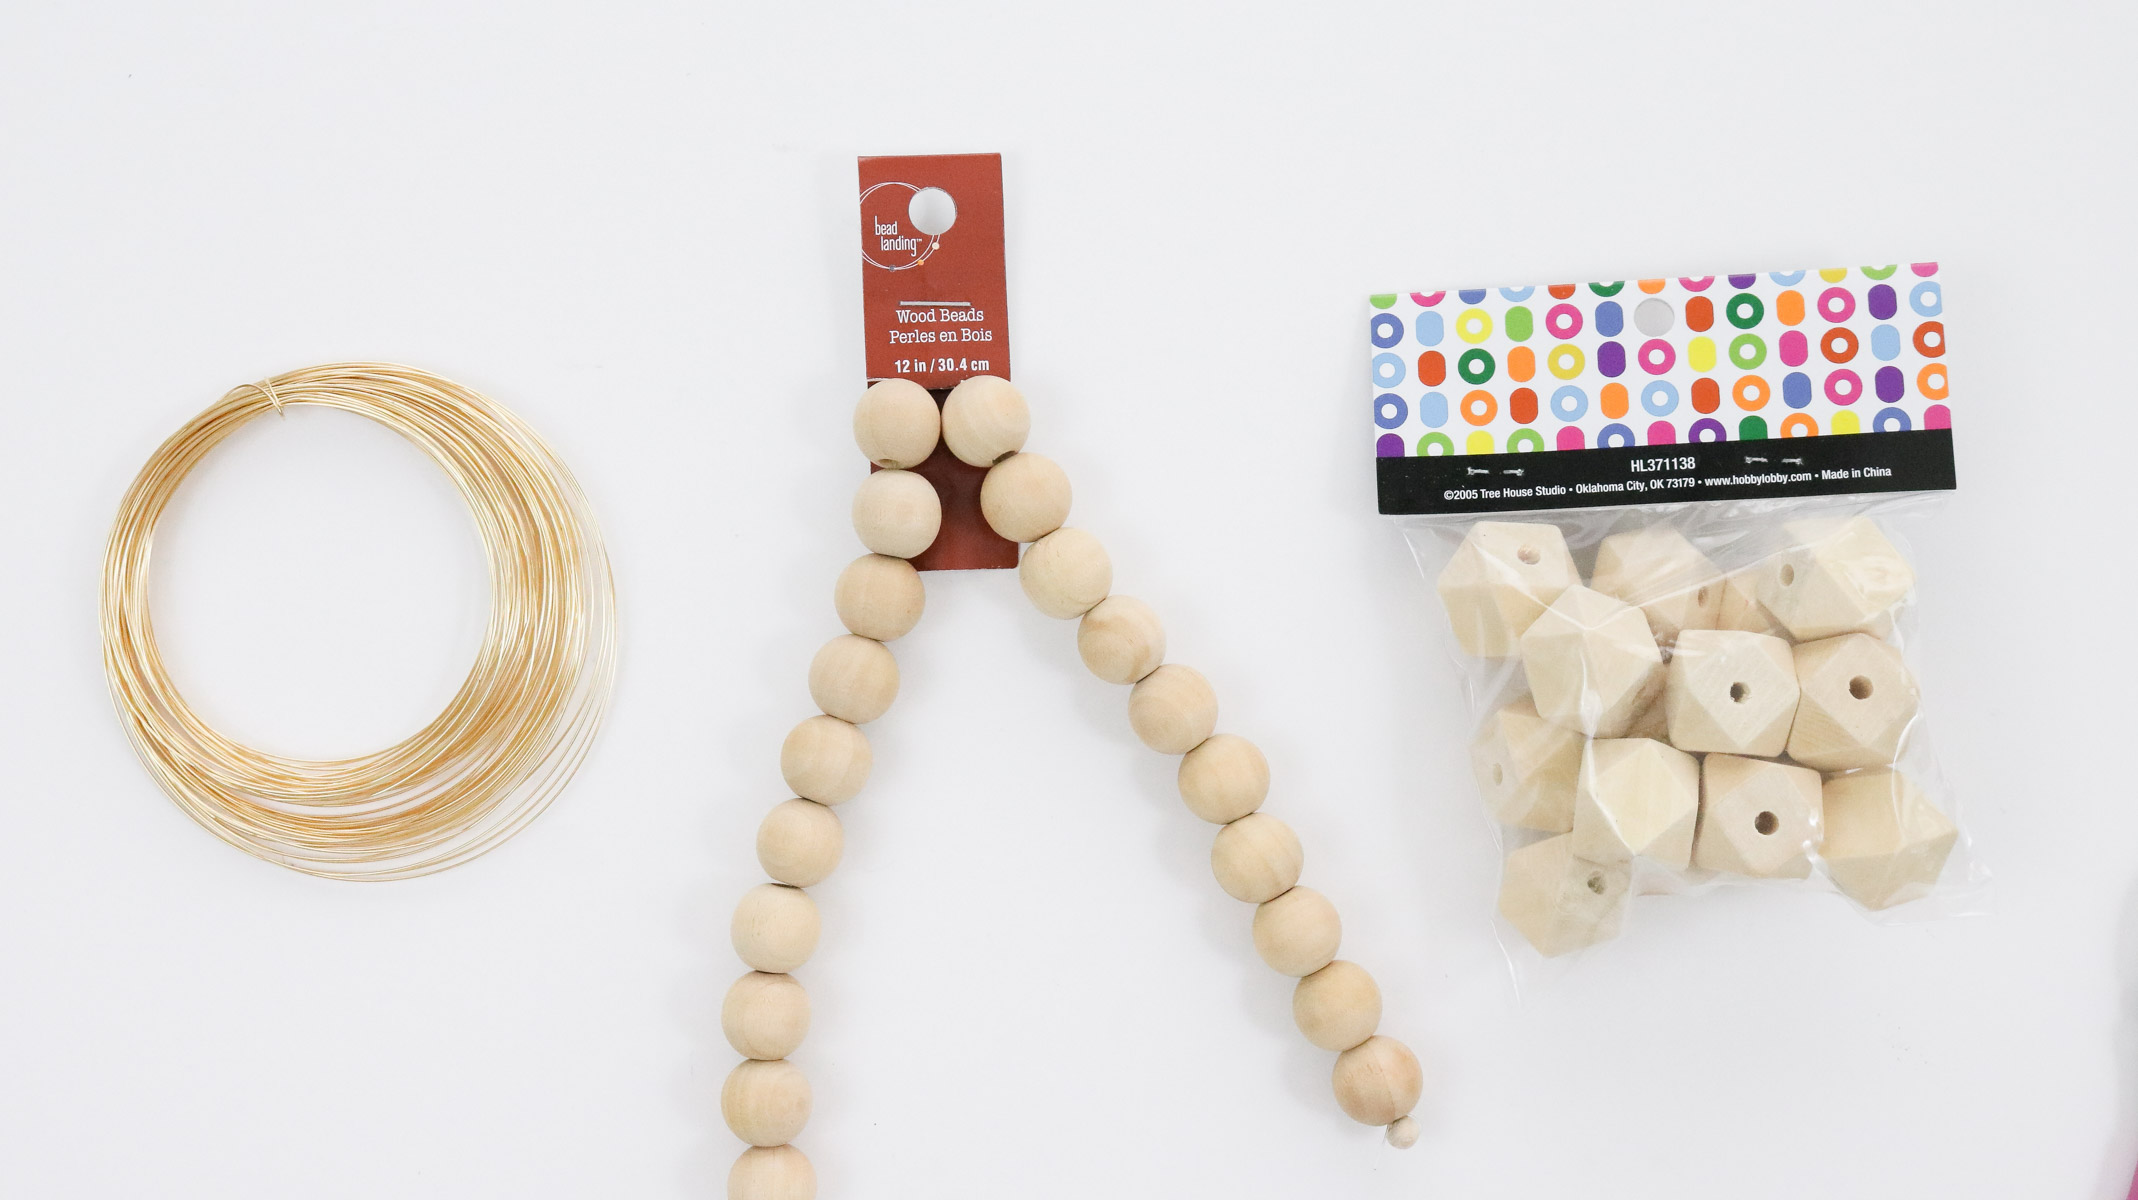
SUPPLIES:
- wood beads ( looking to make a bunch for your tree – amazon sells a set of 700 pieces here for a great deal – https://amzn.to/3blkFHZ )
- wire ( Here’s some wire similar to the one I used – https://amzn.to/2y1CZY8 )
- tassels ( amazon sells similar ones to what I used here – https://amzn.to/2QJLrlp )
( ps. if you’re not familiar with my youtube channel you can check it out here )
#1 Wood Beaded Wreath Ornament
Every one of these DIY wood ornaments require some fine wire. You can get it in the jewelry section of any craft store or sometimes in the wreath making section. For these wreath ornaments you’ll need some beads that aren’t too big. Cut a piece of wire and string the beads onto the wire. I did some round beads and some diamond shaped beads.
Once you’re done beading them on make sure you have at least 2 inches of wire left on both sides and twist the wire together.

Then create a hook at the top to hang with and that’s it. 
Omg I love how elegant yet sophisticated this one looks!

#2 Wood Earring Ornament
I’m calling this one an earring ornament because, that’s what they kinda looks like. 🙂 I got some tassels from the ribbon section at hobby lobby. They’re pretty tiny and worked perfect for this.
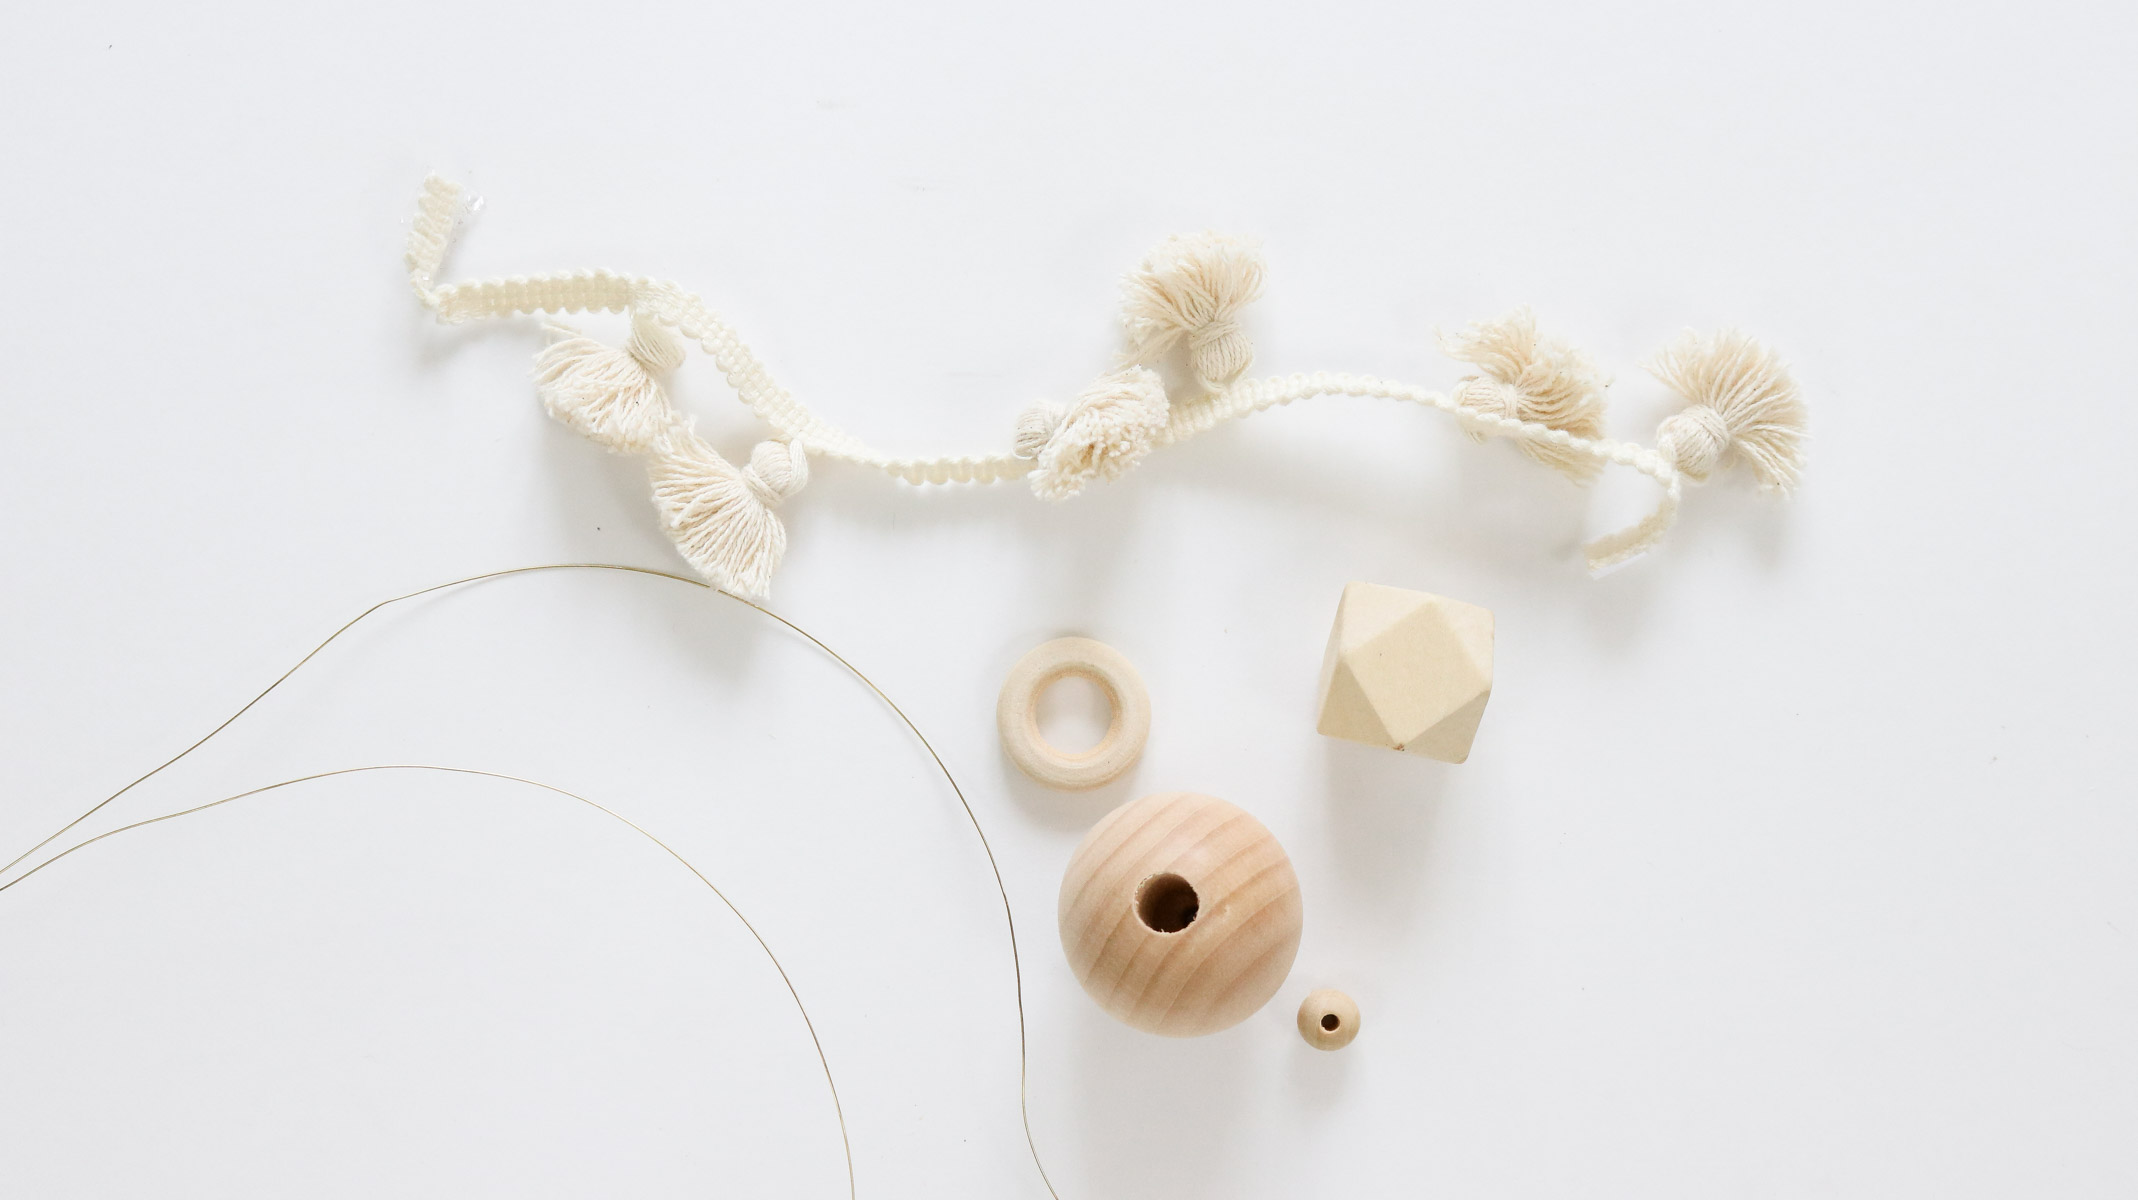
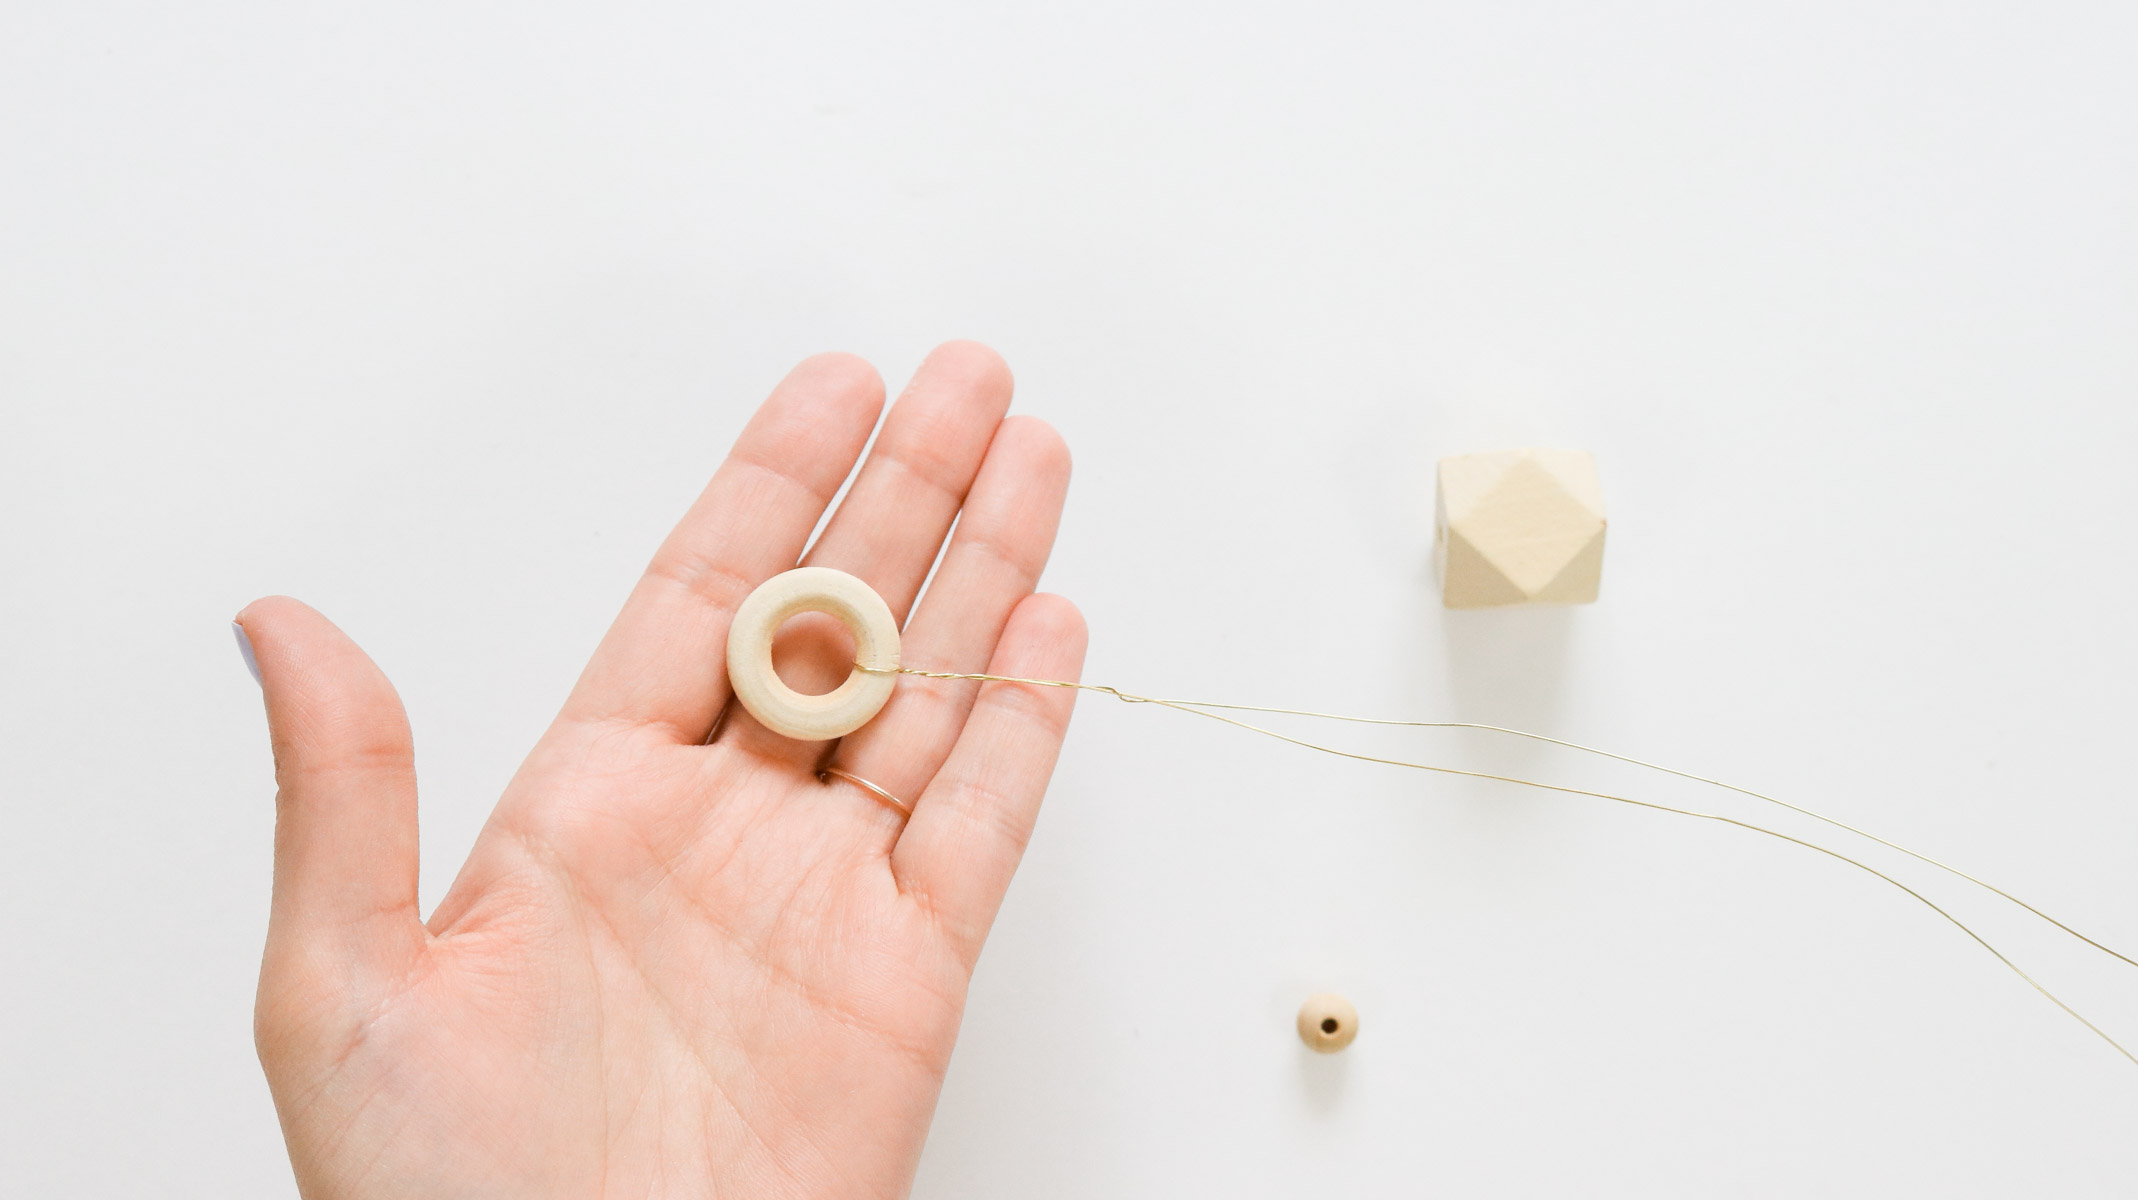
To make this DIY wood ornament I started by cutting about a 14″ piece of wire and wrapped it around the wood hoop. Make sure to tighten it. Than start by beading on the diamond shaped wooden bead and the huge round one.

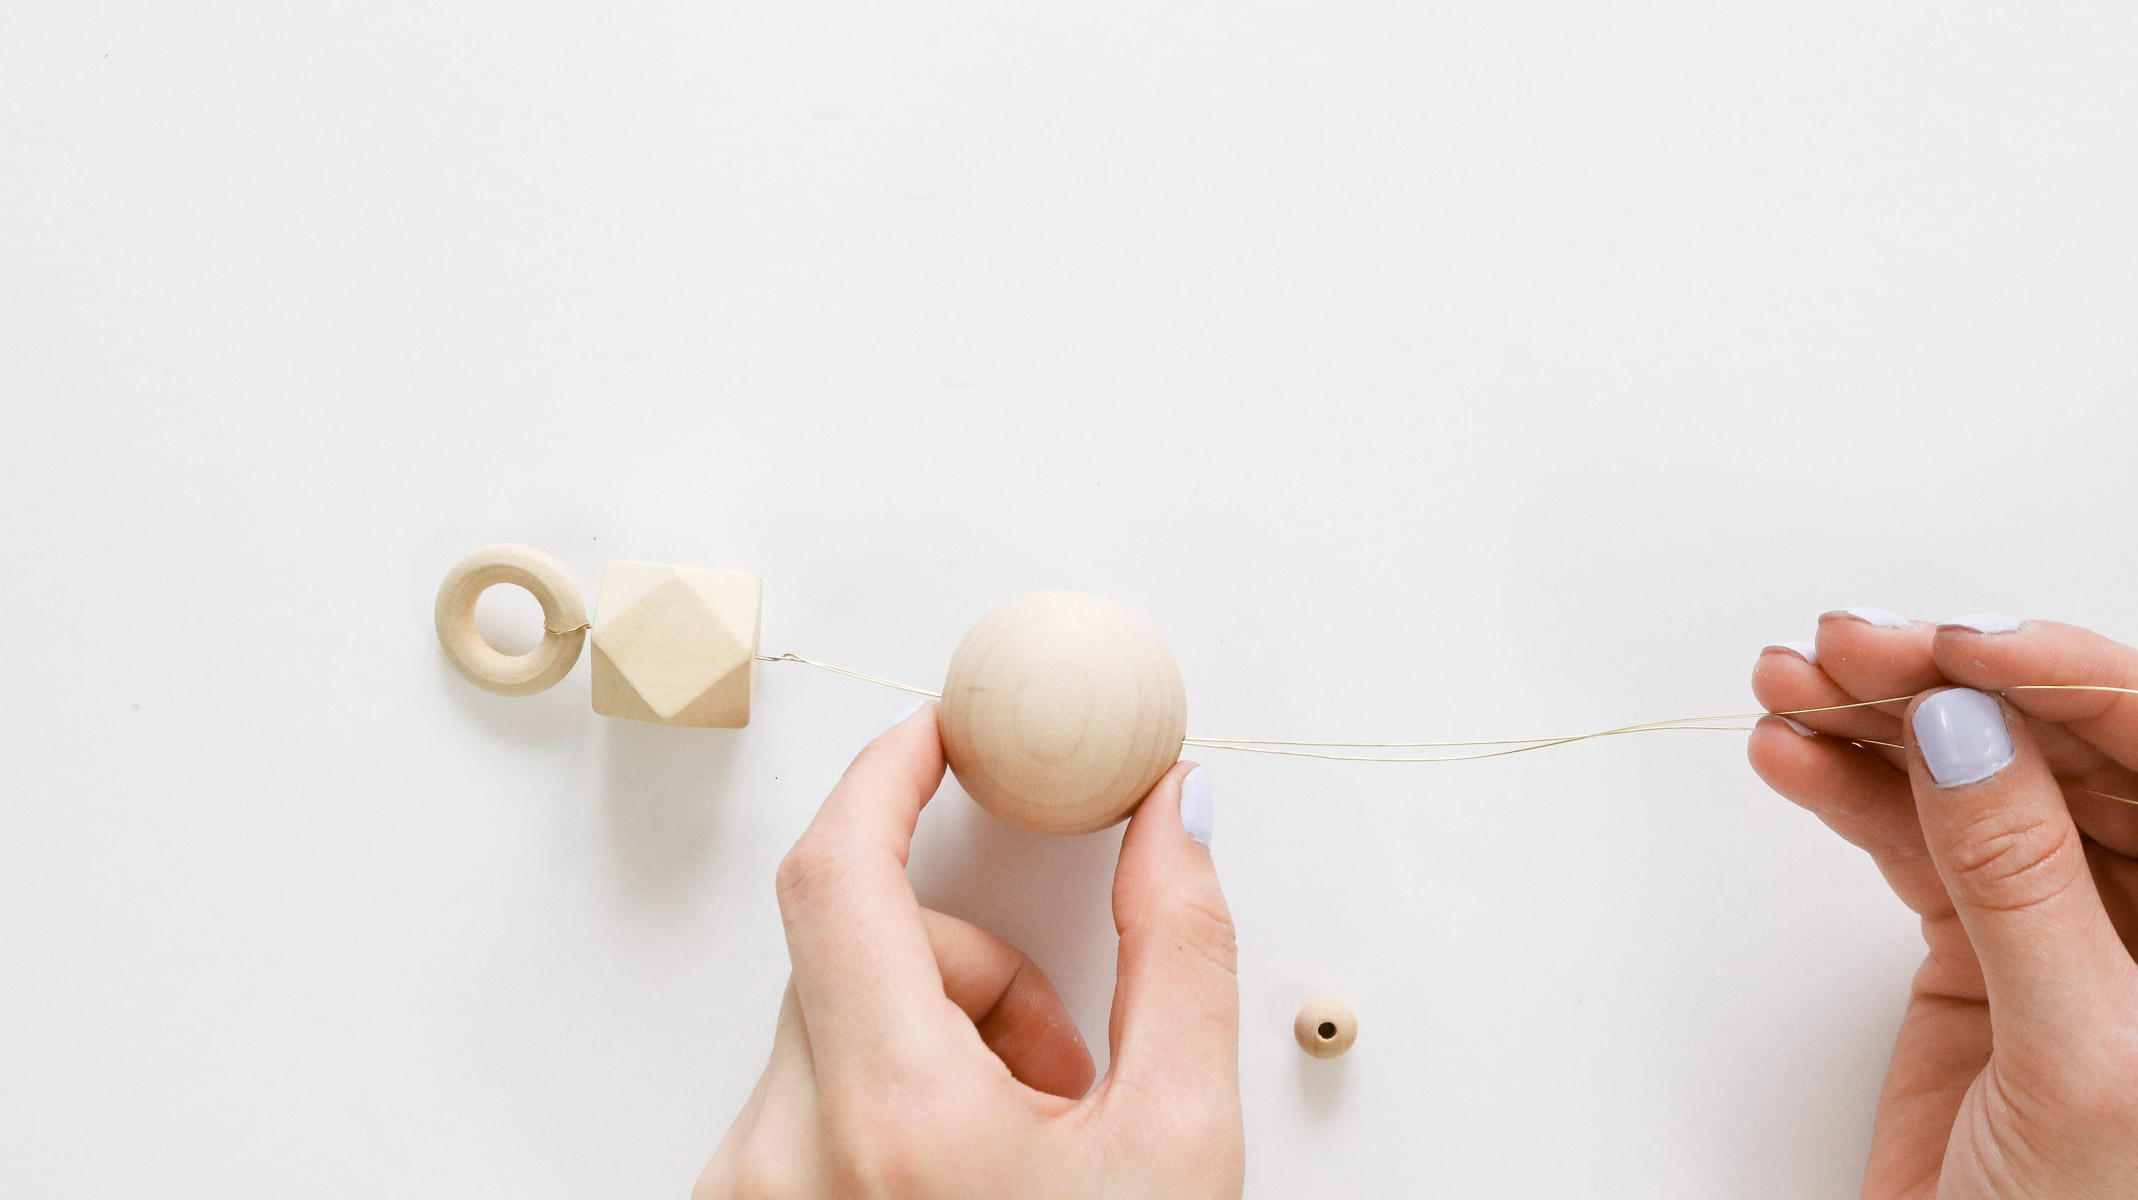
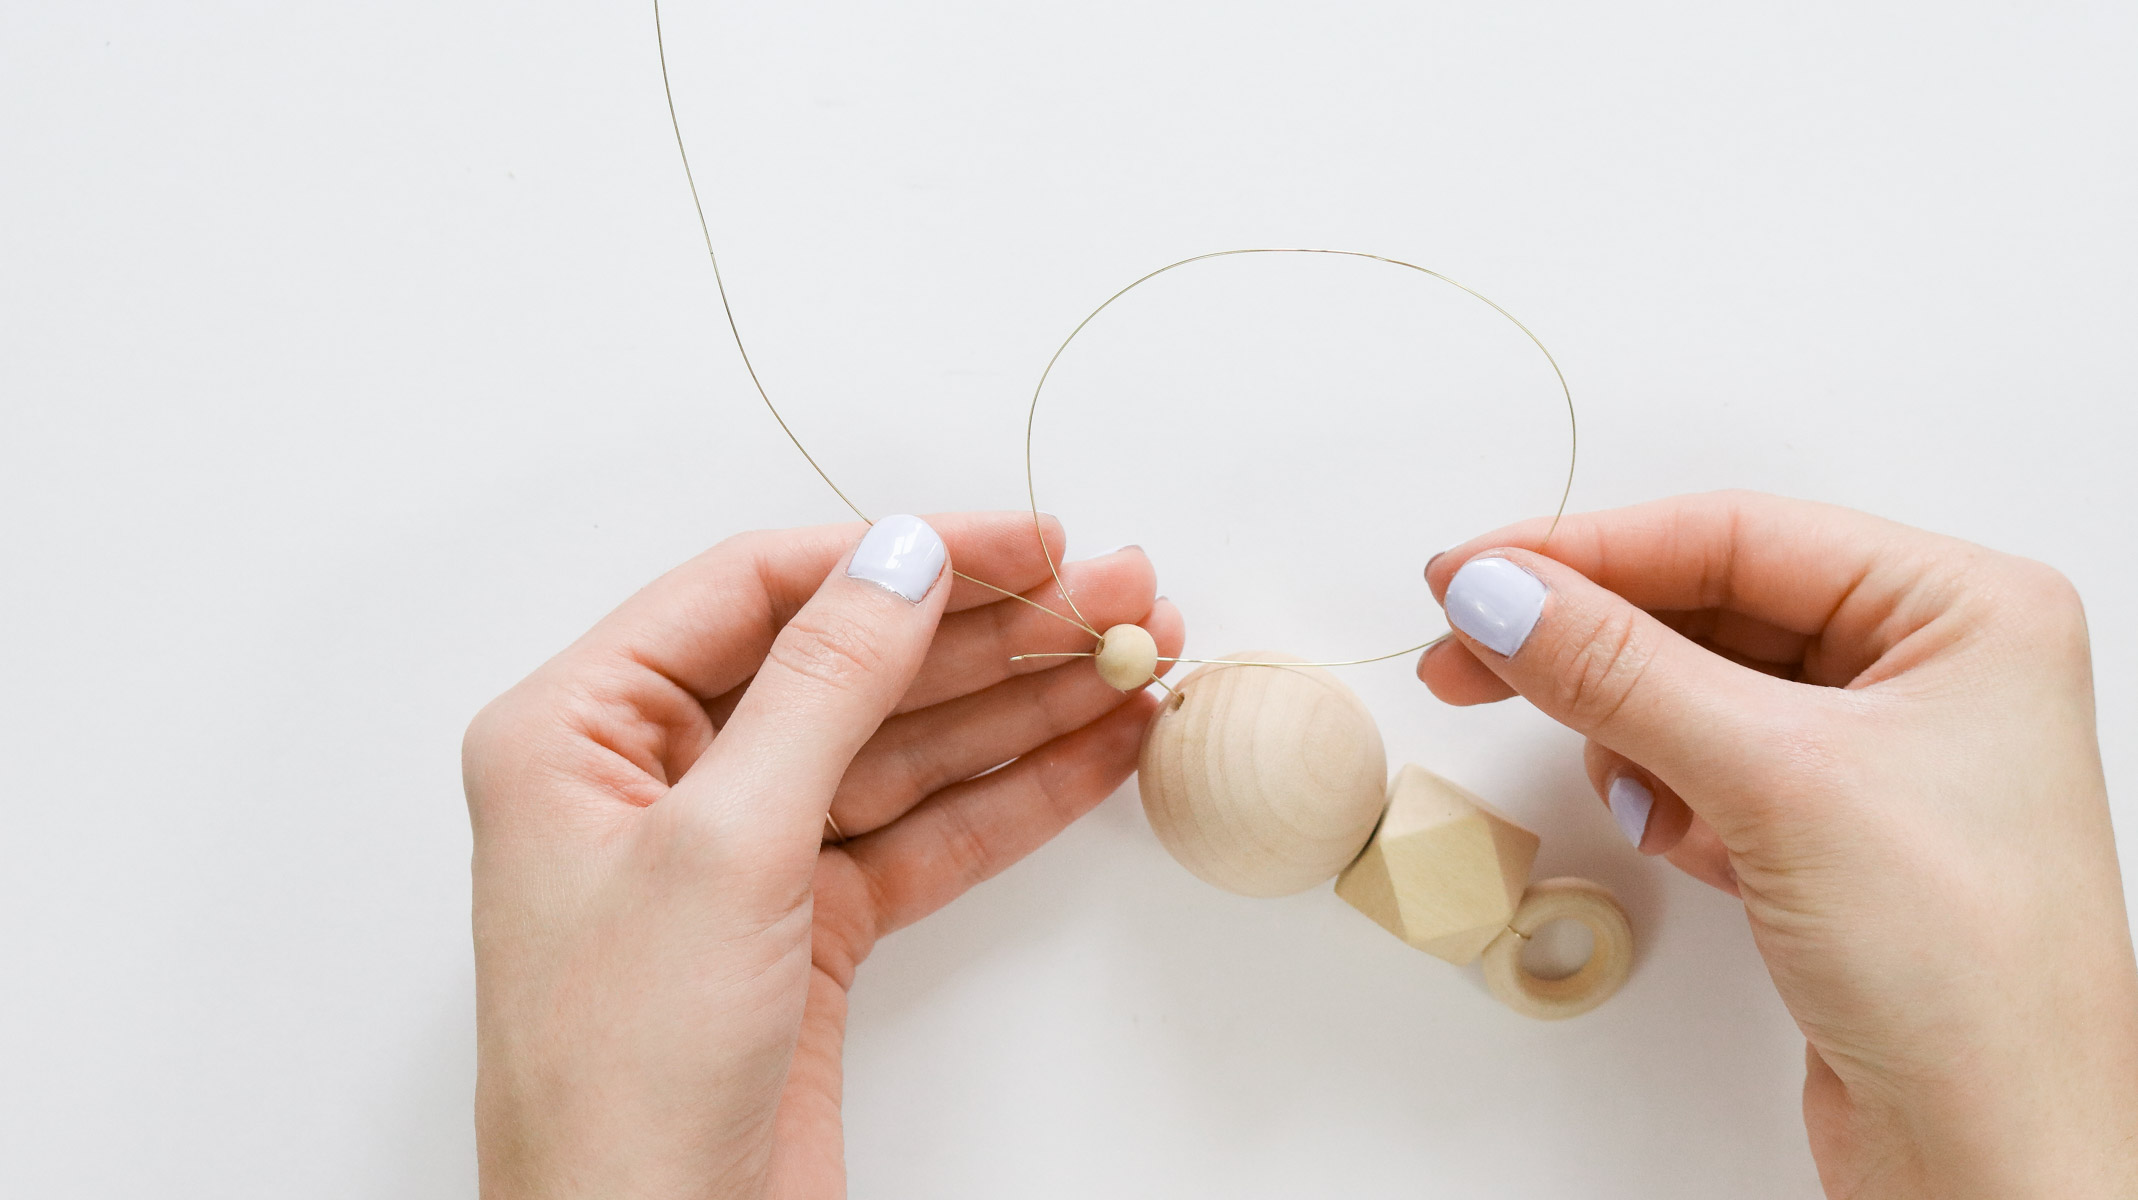
To secure it all in place slide on a small wooden bead and wrap the same wire around and through the small bead again. Kind of like a loop. Pull tight on the wires and it should secure the last bead in place and eliminate it from sliding around. 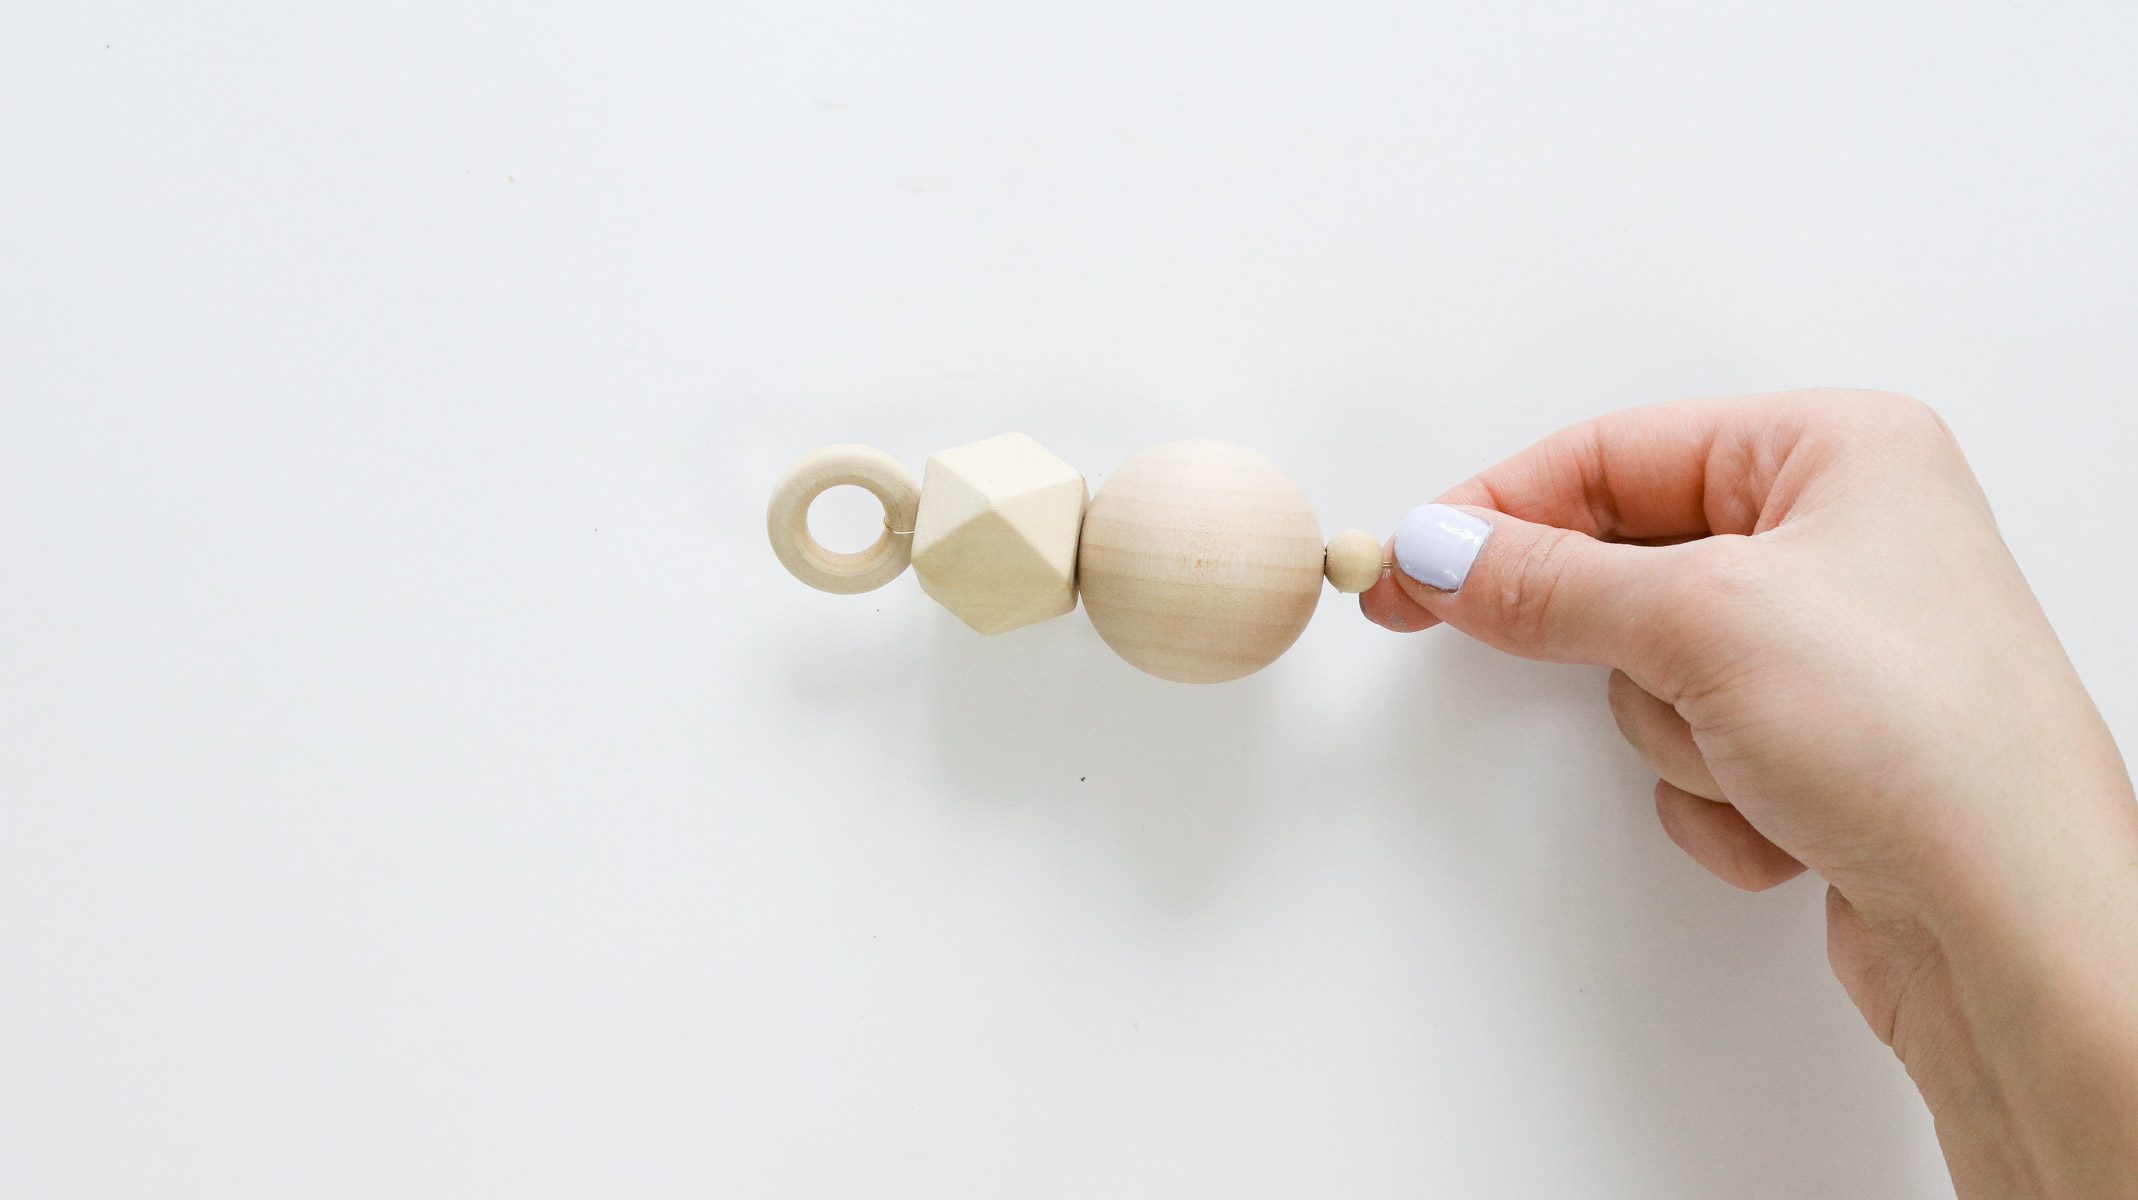
Here’s what it should look like when feeding the same wire into the small bead at the end.
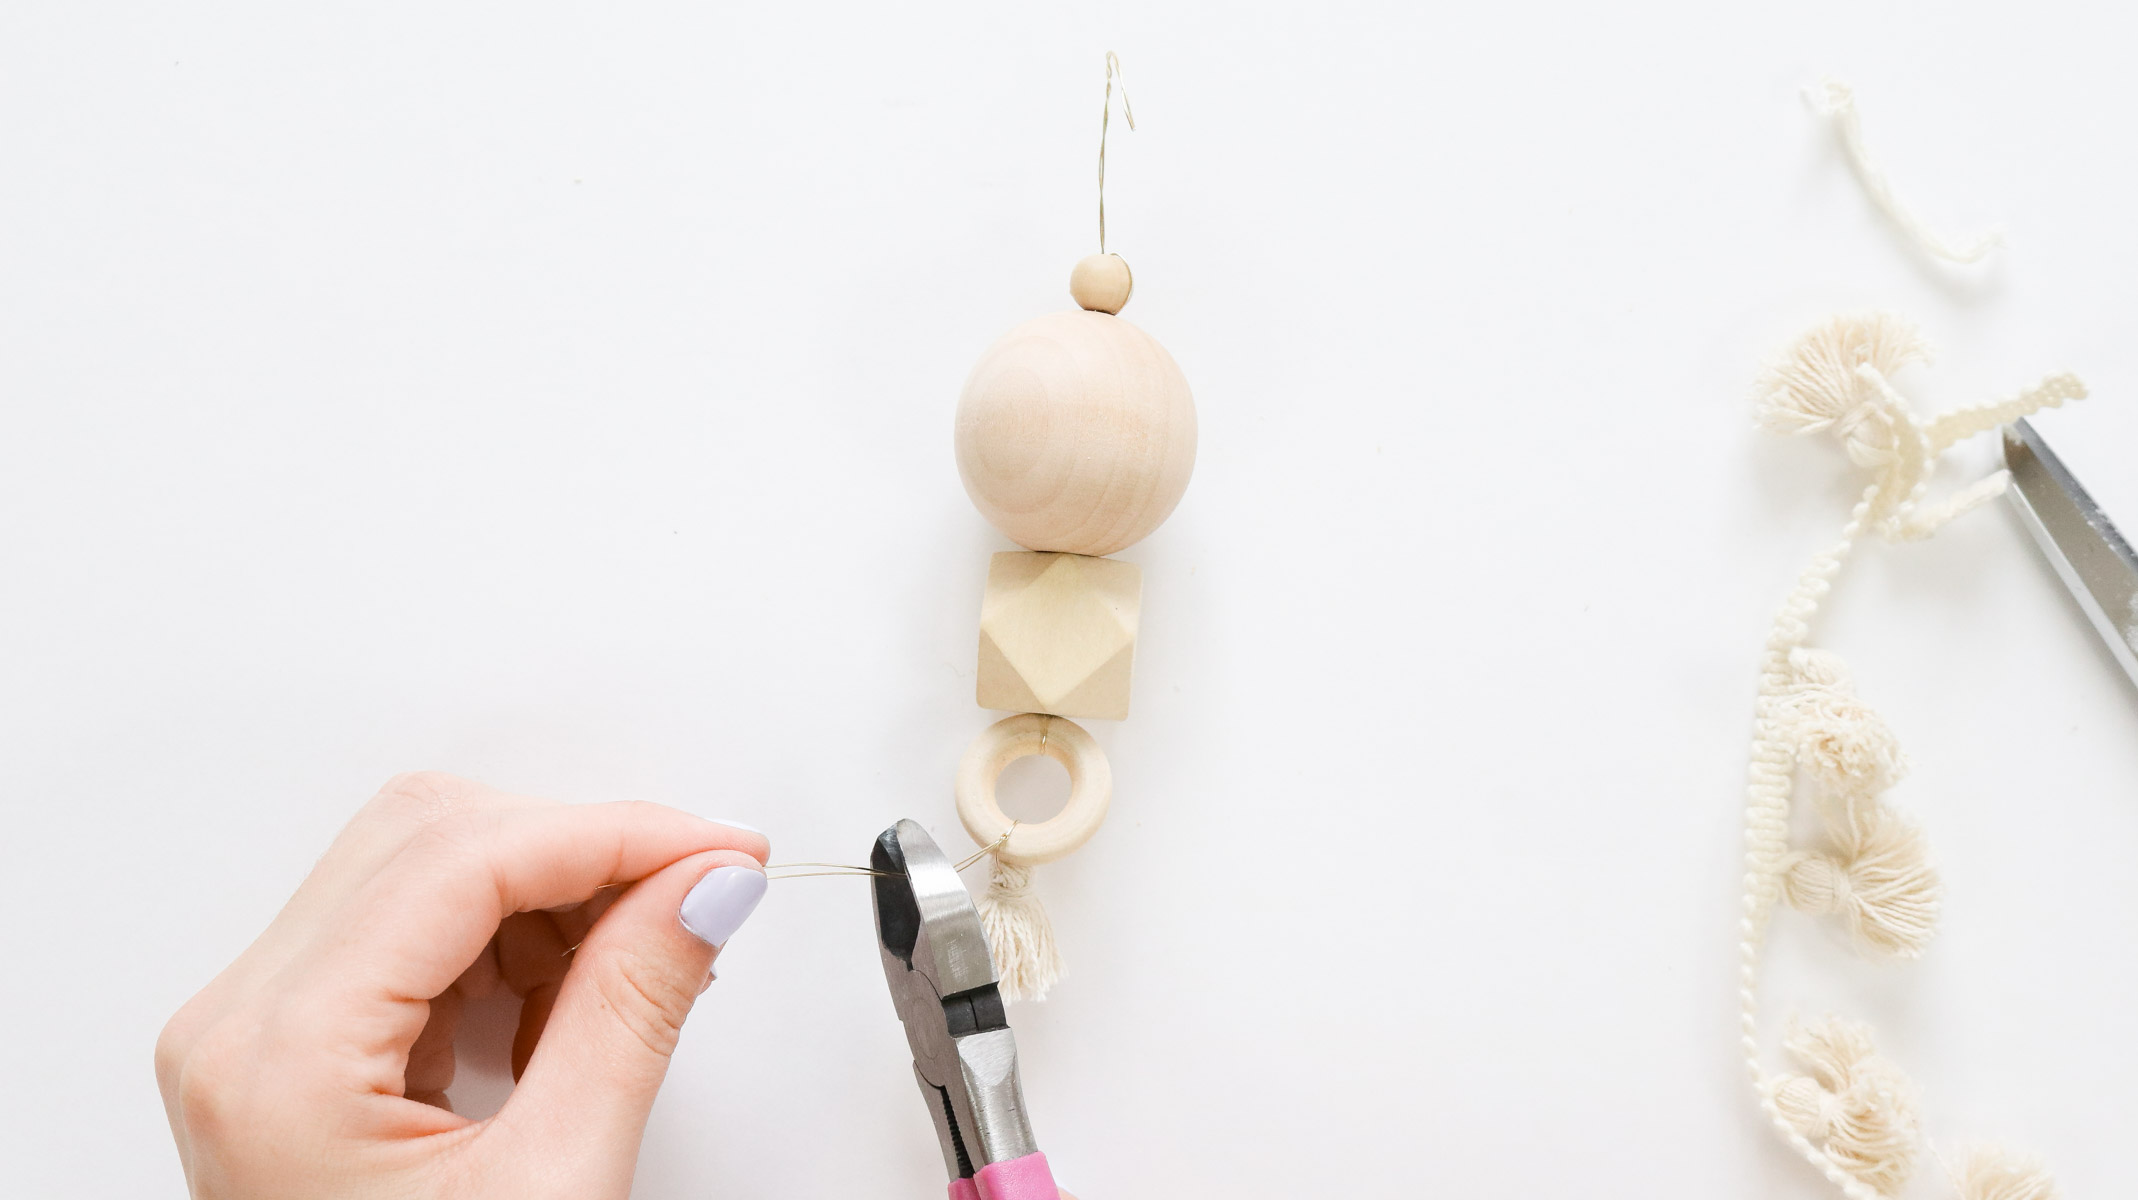
Then cut off any excess wire and create a hook at the end.
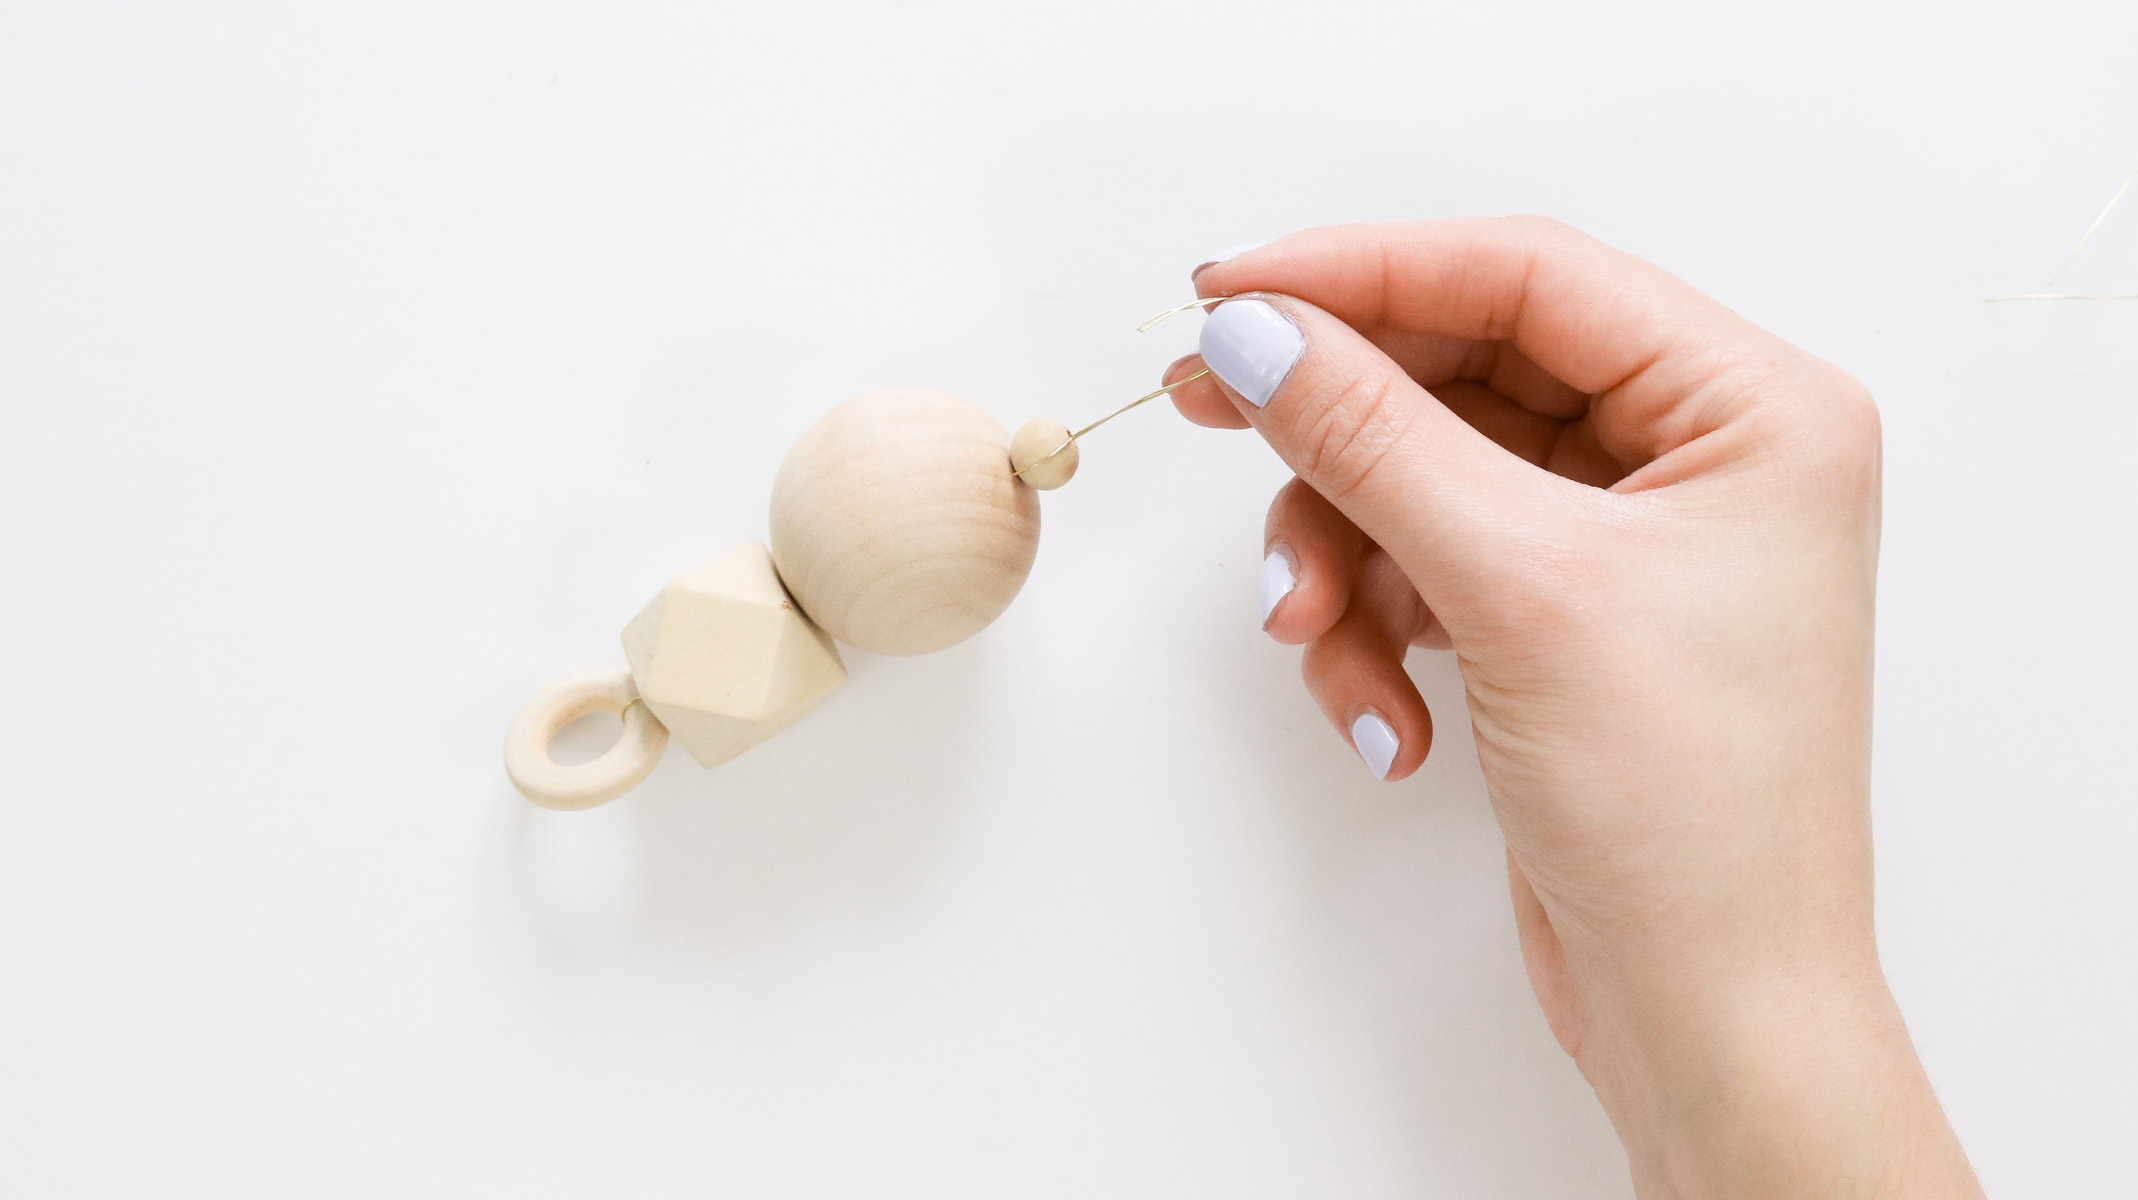
If you choose to add a tassel like I did feed some wire through the top of the tassel. Than wrap the wire around the bottom of the wooden hoop and cut off any excess wire before sticking a tiny tale of wire into the tassel.

This one is sso fun! You can change it up however you’d like as long as you secure the top ornament.

#3 Round Wood Ornaments
If you find some giant round wood balls you can add a tiny eye hook to it like I did. It’s so easy to make and they look super cute. I got my wood balls at hobby lobby. I think they were 4 for $3.99. The eye hooks came for the jewelry making section at hobby lobby. ( ps. LOL mentioning hobby lobby A LOT. Wish I could say this was sponsored. I’m just a very loyal customer 😬)
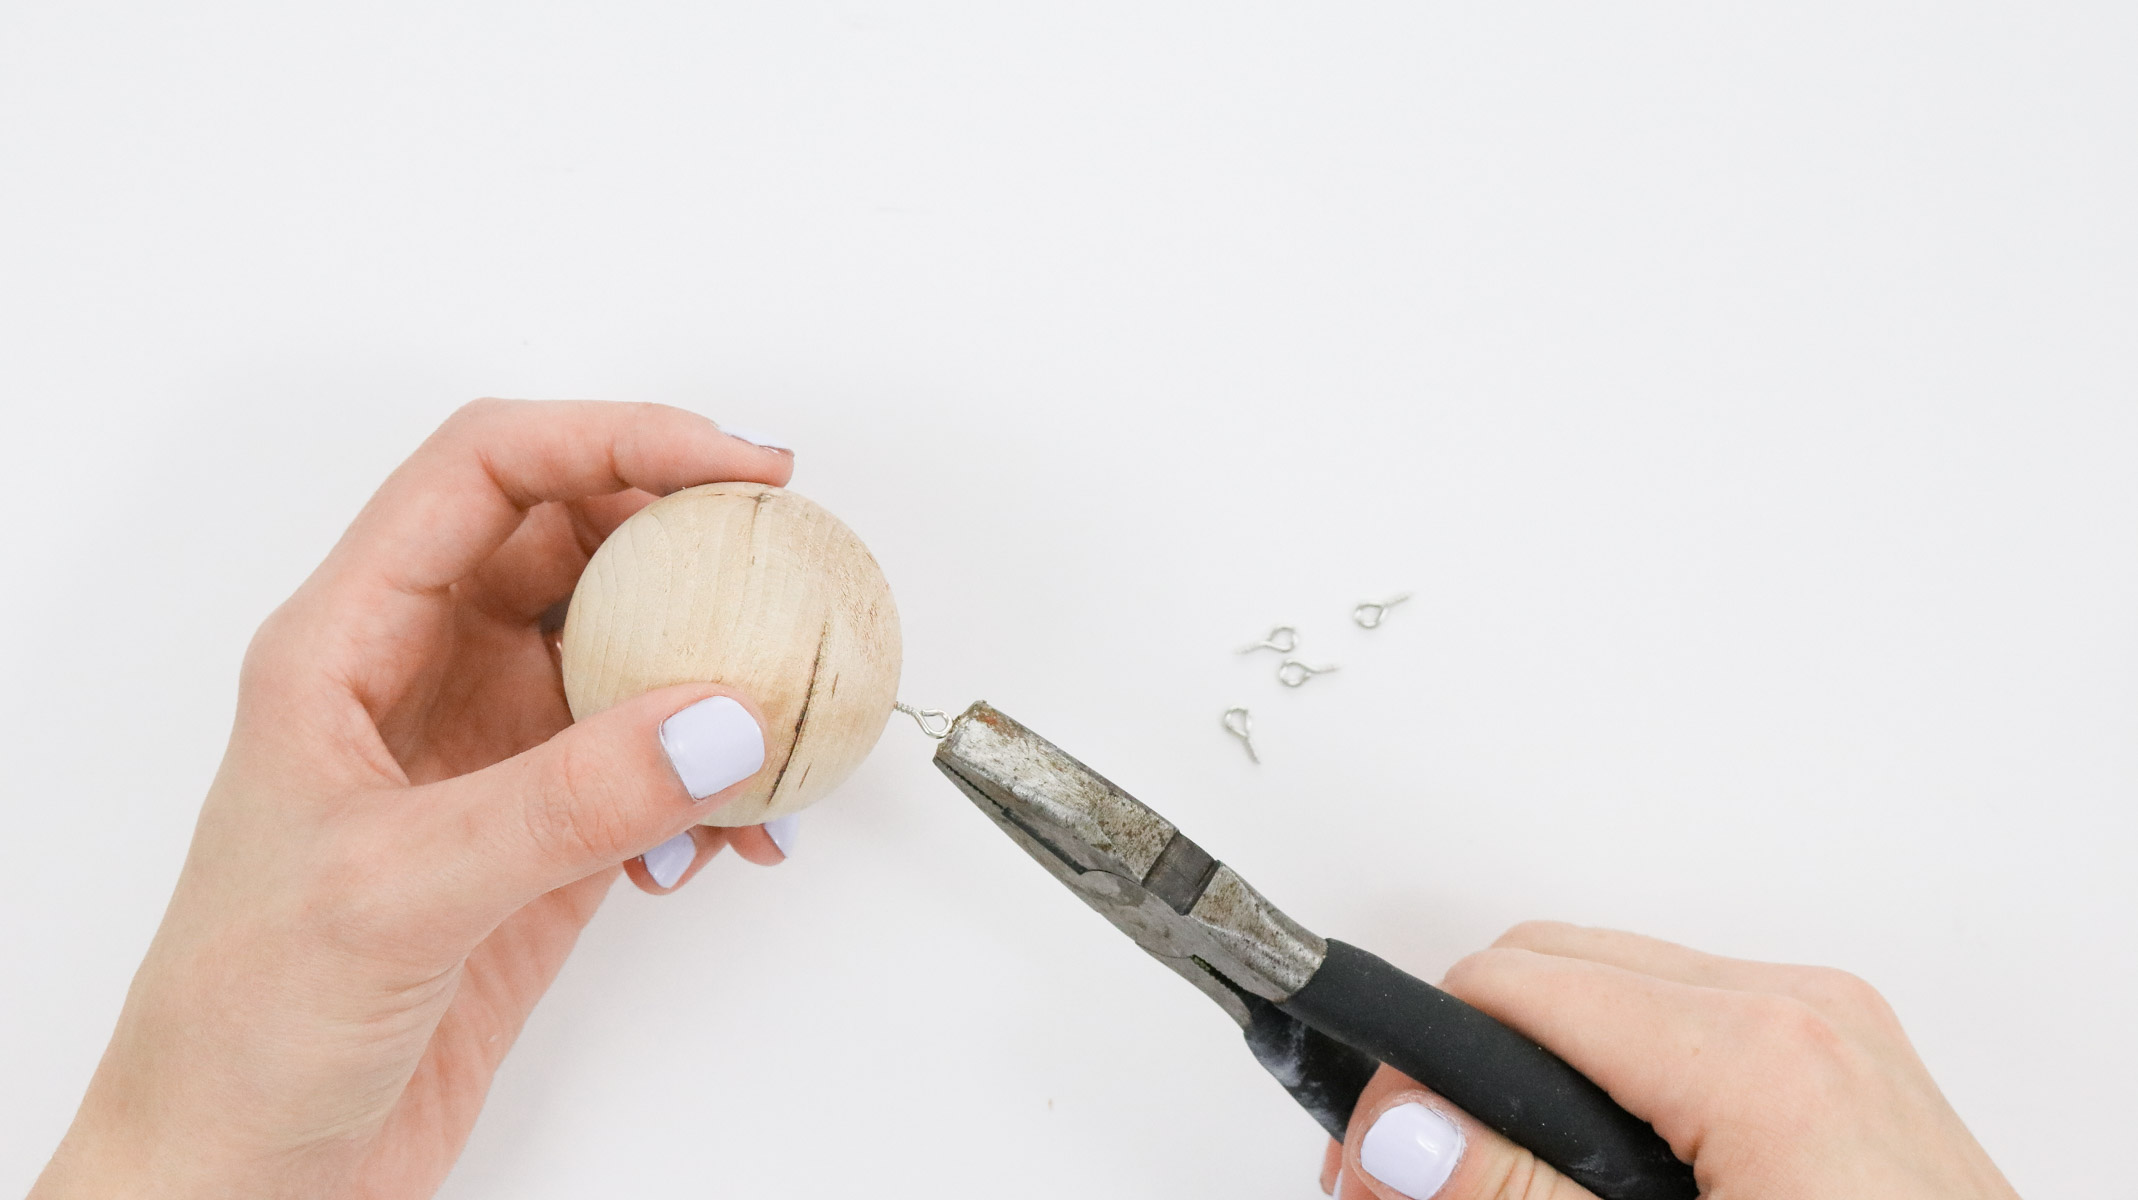
I love the simplicity of these ornaments! Wish they made even bigger wood balls.

#4 Wood Label Ornaments!
Okay I think I had the most fun making these DIY wood ornaments. I choose to go with balsa wood for these. It’s a super soft wood and can literally be cut with scissors. The balsa wood usually comes in a few different thickness widths and lengths. I choose the size as close as I’d need for the label. All I had to do was cut the length for each label. I also got a bag of wood letters at hobby lobby. To start I lay out the letters. Than I used a piece of card board (can never find a ruler when I need one) and sharp object to mark where I needed to cut it. Then I simply used some scissors to cut the wood to size.
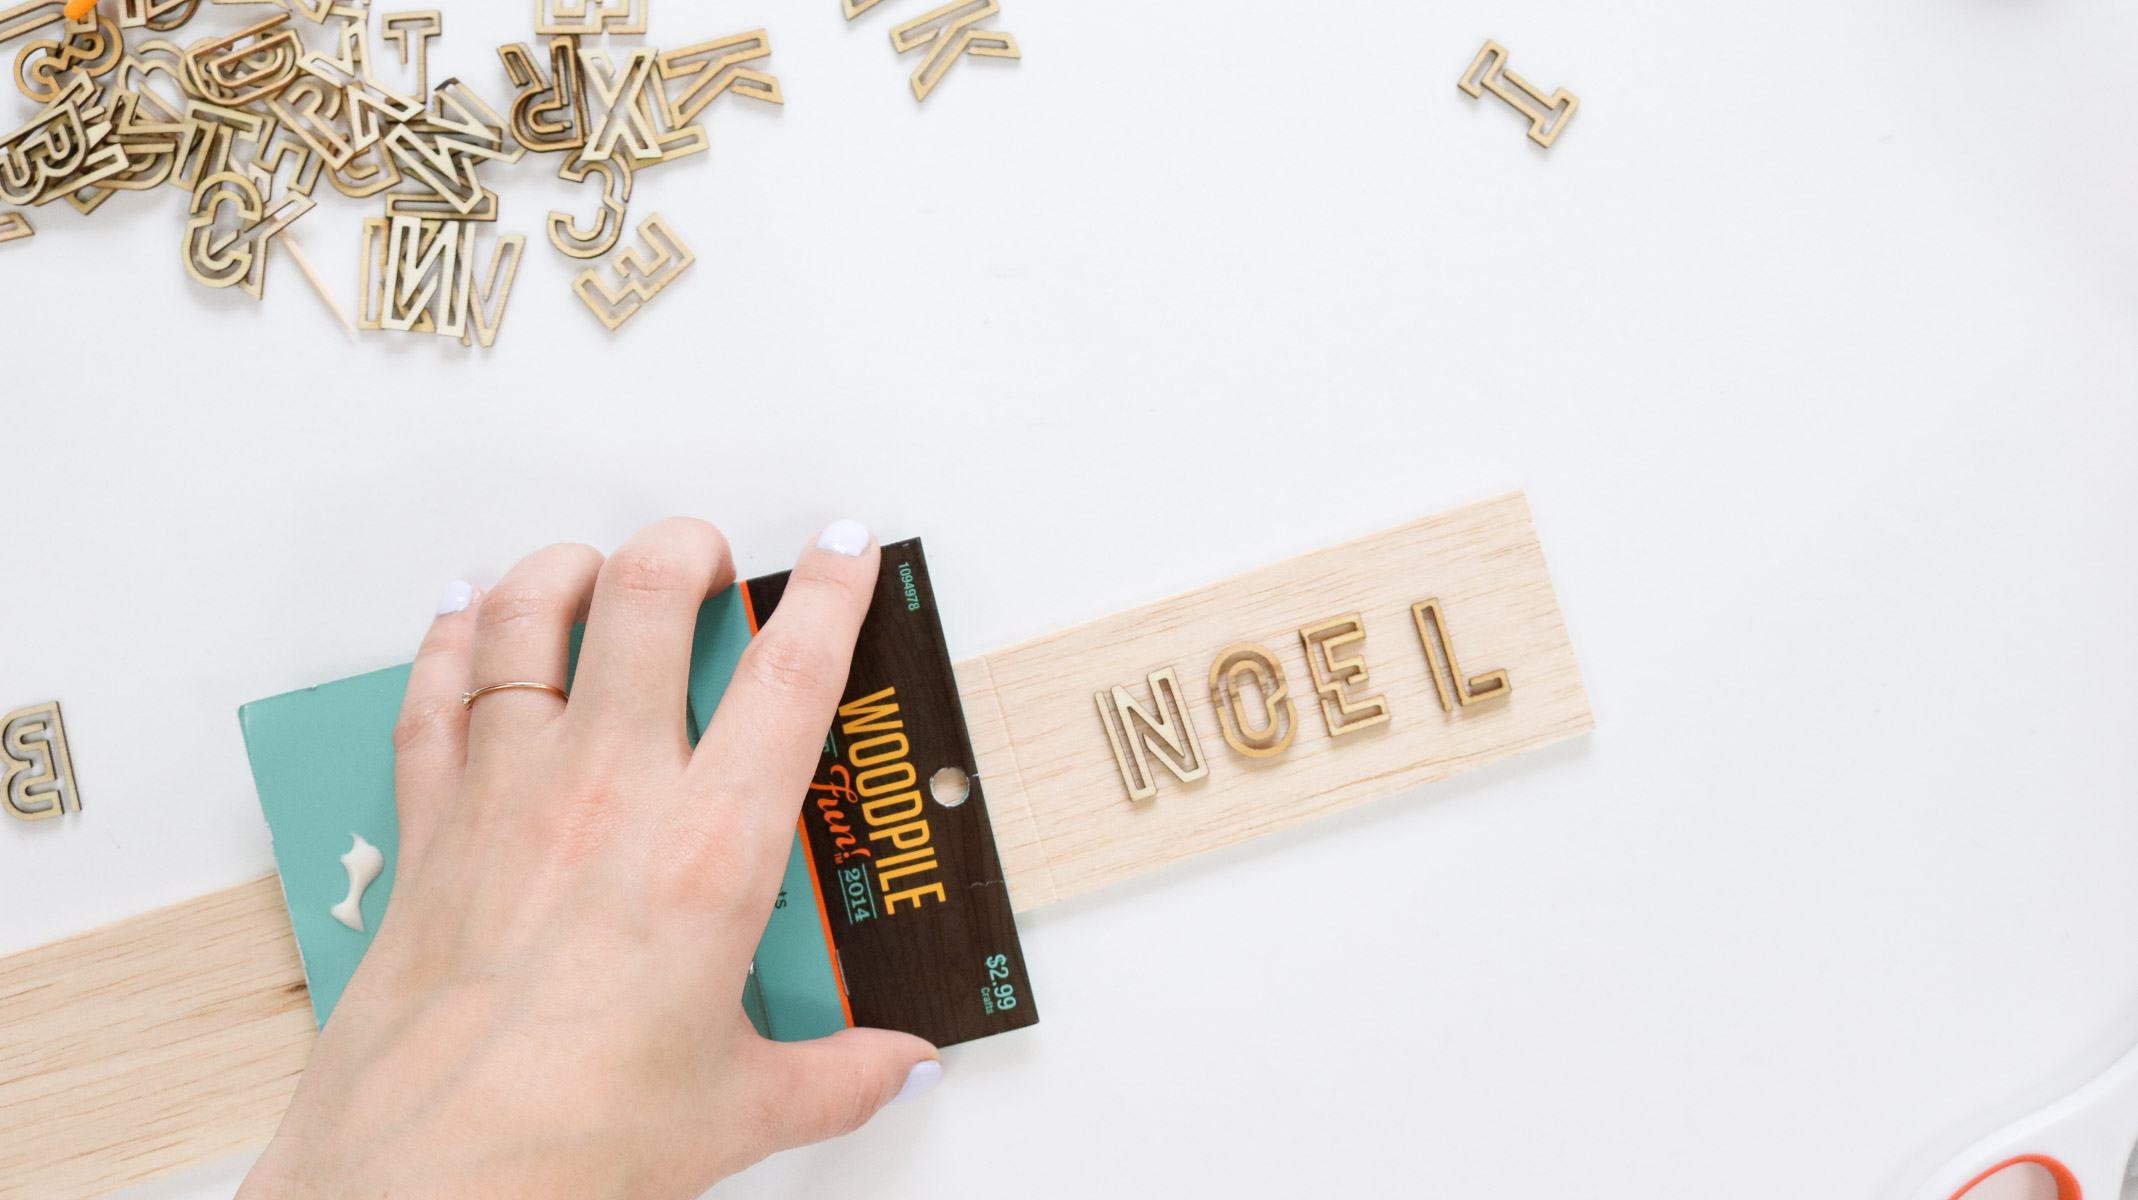
To attach my letters I used some gorilla wood glue. A drop goes a long way. I actually applied a tiny but with a paint brush to the back of each letter to attach. Than I punched holes on both sides of the label to insert wire and that’s it.
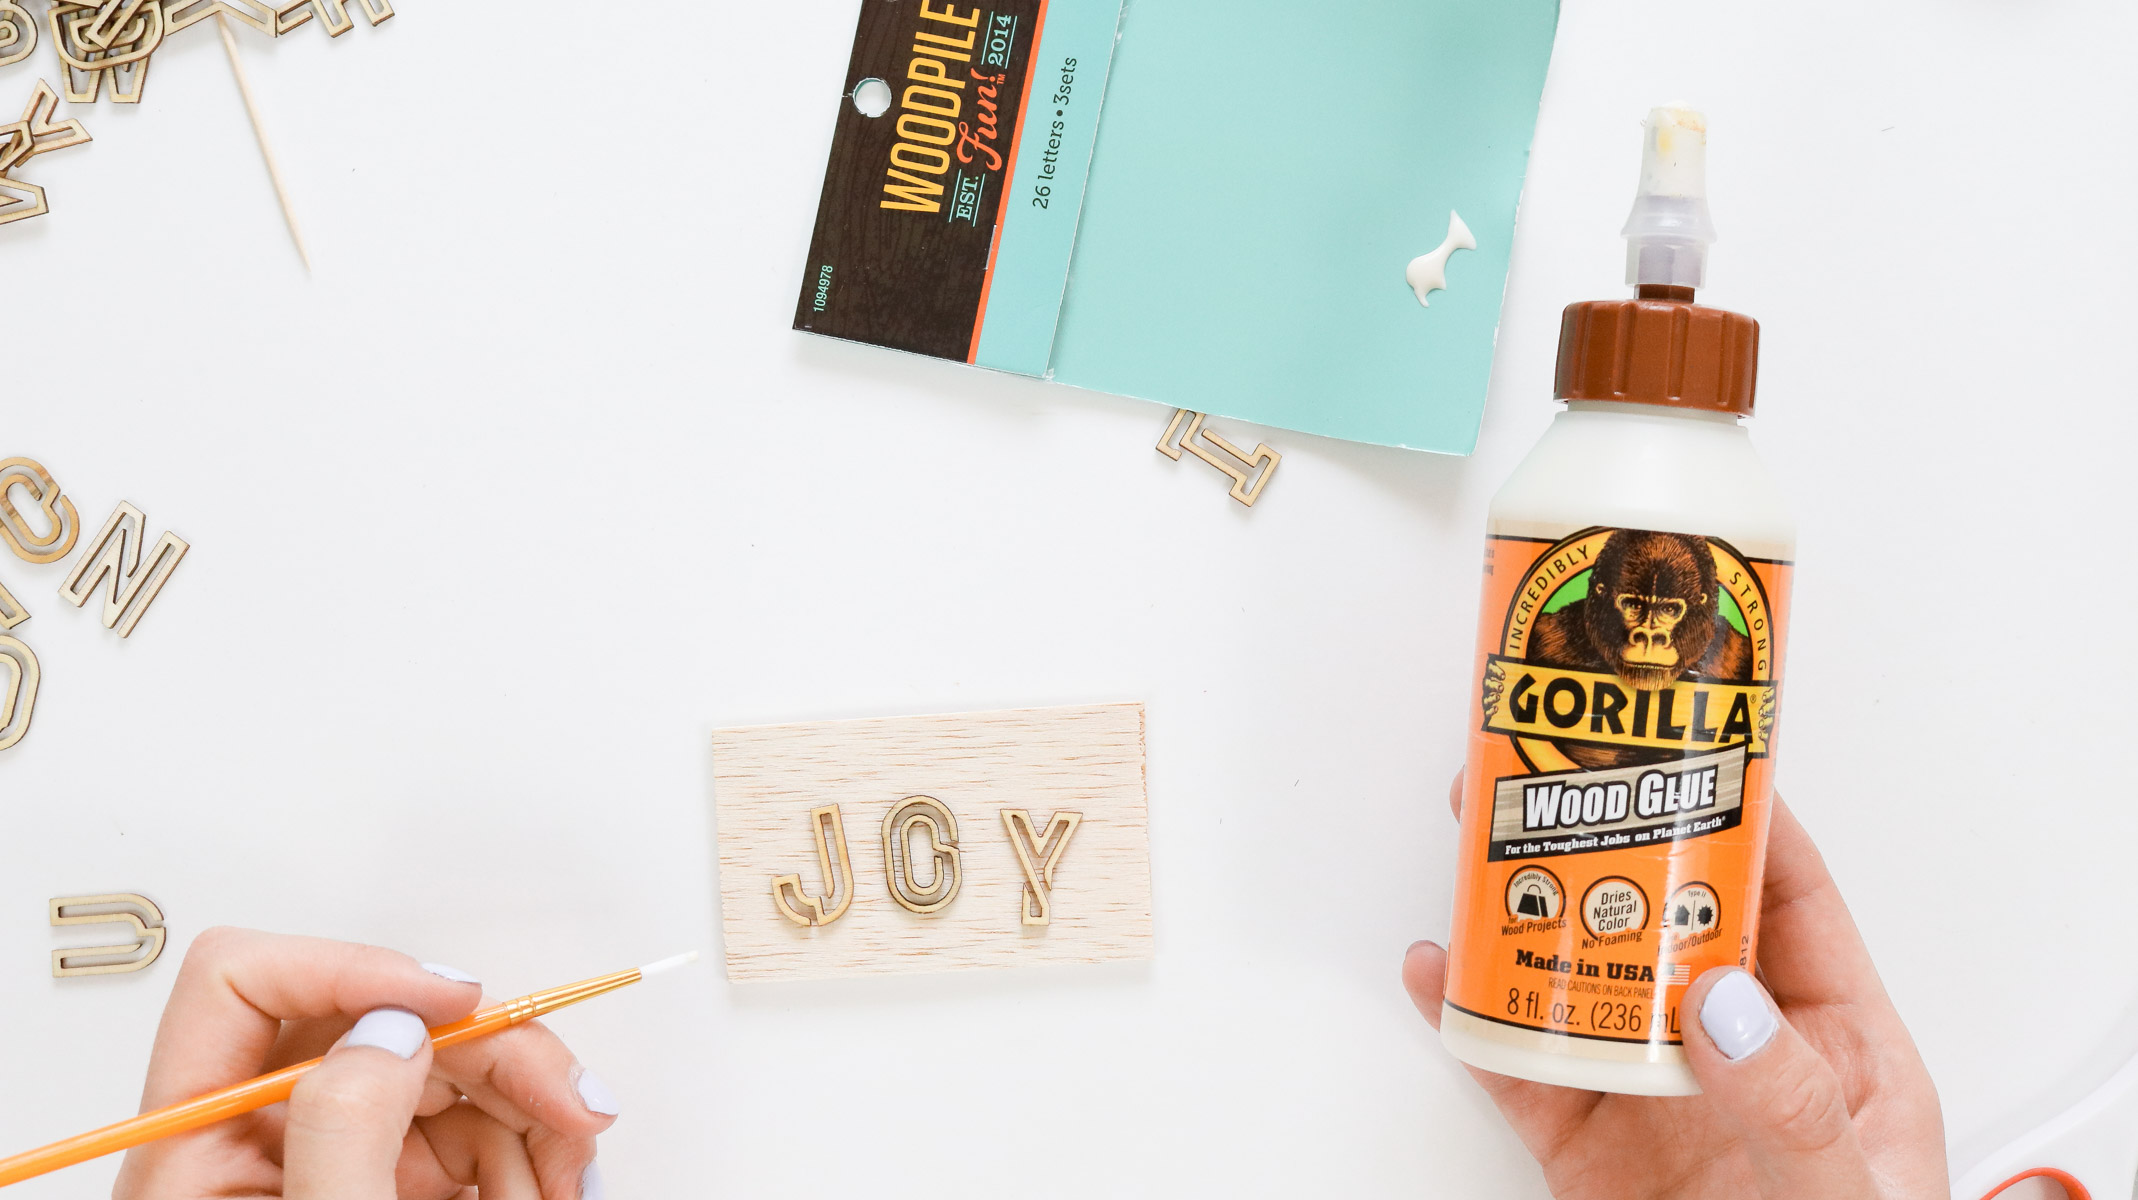
I got a total of about 10 ornaments from one piece of balsa wood and one pack of wood letters. Here’s my favorite!

OTHER’S CHRISTMAS DIYS YOU’LL LOVE :
- MAKE SUPER COOL GIANT ORNAMENTS FROM OLD CAR TIRES
- DON’T GET RID OF THOSE OLD ORNAMENTS! HERE’S HOW TO TRANSFORM THEM!
- CHUNKY KNIT PLANTER DIY
- MAKE A GIANT CHUNKY KNIT BLANKET IN 3 EASY STEPS!!
Our DIY Christmas Tree
Here’s a quick snippet of the whole Christmas tree and me faking to put on an ornament😬. LOL!!
 I also made some garland with wood bead and stars. If you missed it I made these stars last year from baking soda air clay. They’re so easy to make and last years unlike salt dough. You can get the air clay recipe here – https://www.lilyardor.com/star-garland/ . It only takes about 5 minutes to make.

OOH and for the snow I used snow flurries instead of spraying on snow. I hate how the spray on snow looks. It gives a more frosty look rather than snowed on. The snow flurries definitely give a realistic snow effect however be cautious if you have kiddos this stuff is messy and I’d be worried about them tryna eat it.

I got this wrapping paper at walmart and I’m in LOVE!! Since I totally forgot to buy ribbon I actually cut some fabric strips from muslin that I had and tied them around the presents to decorate. We also added a pine sprig under the knot to complete it. 😀

That’s all for our DIY Christmas Tree this year. Huge pointers to my hubby for wrapping the gifts so nicely! He does better than me 😬! I’m super happy with how these DIY wood ornaments turned out. I’ll see you all next time. Merry Christmas to you and your family! Bye.
Love it !! We dont have room for a tree yet . But possibly next year . i love a more traditional look . Let my girls paint with some gold , bronze and silver 😍
I understand. This year we had to rearrange half our living room to fit in a tree. Love a mix of metallics! That’ll look lovely!
Beautiful! So going to do the DIY wood signs….! Thanks for the idea.
Thank you Maggie 🙂 Happy to hear you liked them