HOW THIS TABLE COST ME UNDER $60
This project has been quite an interesting journey. Originally I wanted a live edge dining table, but unfortunately those live wood slabs cost an arm and a leg. After digging deeper into the DIY process of a live edge table I found out that we would need to piece the table out of two slabs instead of one. Book-matching is what they call that. It seemed simple enough but for the price of two we were looking upwards of $400. I was determined to make it happen but, after a short conversation with my better half 🙁 it was official that a live edge table simply wasn’t in our budget. Besides we could probably get a new table for that price on amazon minus the labor.
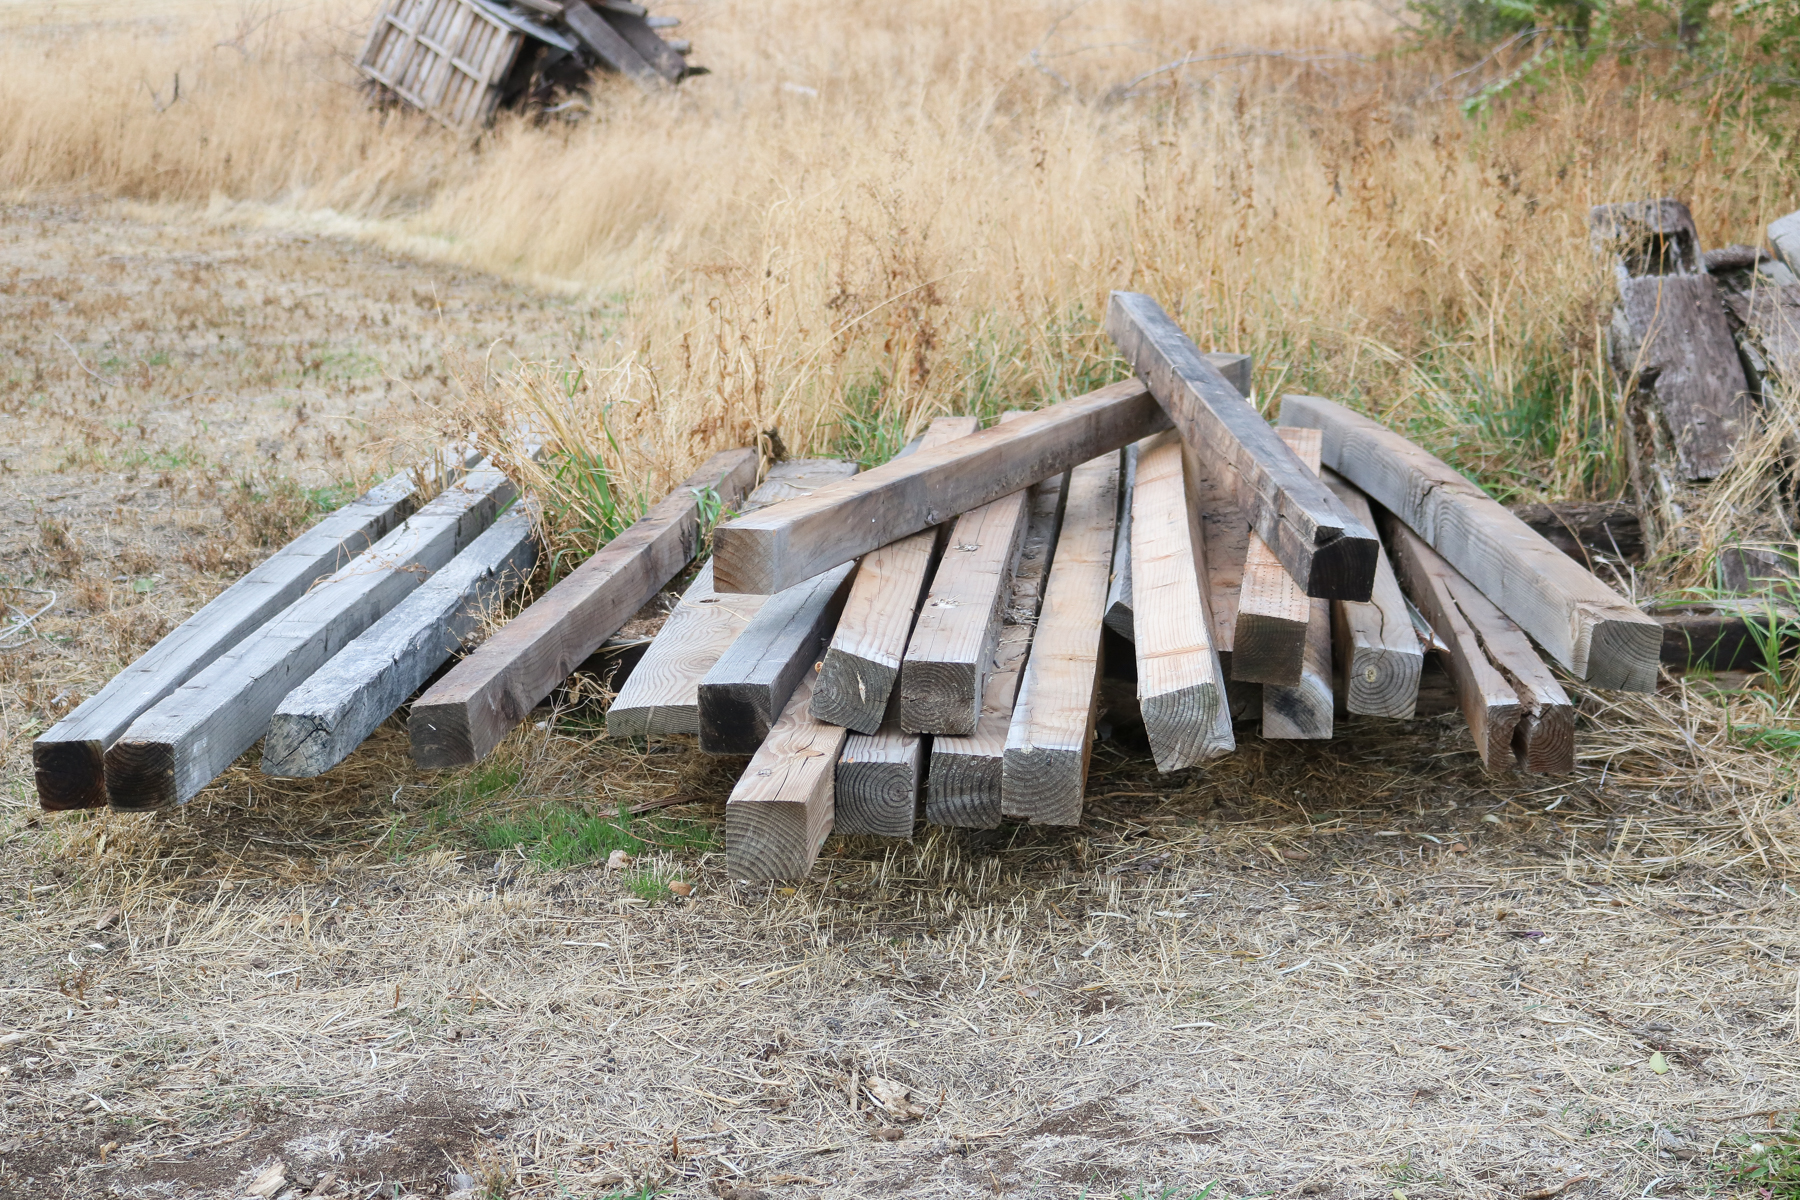
Trash to Treasure…
After much deliberation and a few long walks around our yard I came across this unsightly pile of wood. So, I called up my better half with this bright idea!! Or at least it seemed like a bright idea at the time. He tried convincing me that this wood was way out of shape. Call me stubborn!! HEHE 😀 !! I insisted it would work!! A few days later these 4×4’s ended up in the garage and after I pieced the puzzle together they looked somewhat Ok. GOOD enough to get him to help me built the table!! YEY!!!
I kid you not… I literally pieced the puzzle together. It took me about an hour to get each bent board to match the next!!
We started welding the base for the table that same day. Oh and yes we found some angle iron around the yard as well that worked just fine. This table would of practically been FREE if it wasn’t for my husband. After building the table top he decided to invest into some nice metal tubing for the legs. Honestly I was ready to recycle the angle iron we had but, after much thought I knew he was right! The angle iron wasn’t bulky enough and the table would have probably ended up looking too flimsy. In the end the only thing we payed for was the 24 ft metal tubing and the lacquer for the wood. That’s it!! Totaling at about $57. I gotta say for a table like this you can’t beat that price!!
What You’ll Need
- Thirteen 4×4 wood boards
- 19 ft of Angle Iron
- Minwax Lacquer
- Brush
- 21ft of 1×3 metal tubing
- Spray paint (optional)
- Screws
This is what we used for our table. We had all of our tools which saved us a lot of money. You can customize yours however you’d like! 😀
Tools needed :
- Welder
- Electric Wood Planer ( will not need if your wood is in good condition)
- Sander (optional to do this by hand if you have good wood)
- Drill (drill bits + optional : Countersink drill bit)
- Skill Saw (we used this to cut our wood to size)
- Grinder
- Metal Saw
- Straps
Table Measurements :
66″ length x 48″ Width ( should seat 6 )
Height 31″
How we did it!!
(Don’t forget to watch the VIDEO! –> scroll down)
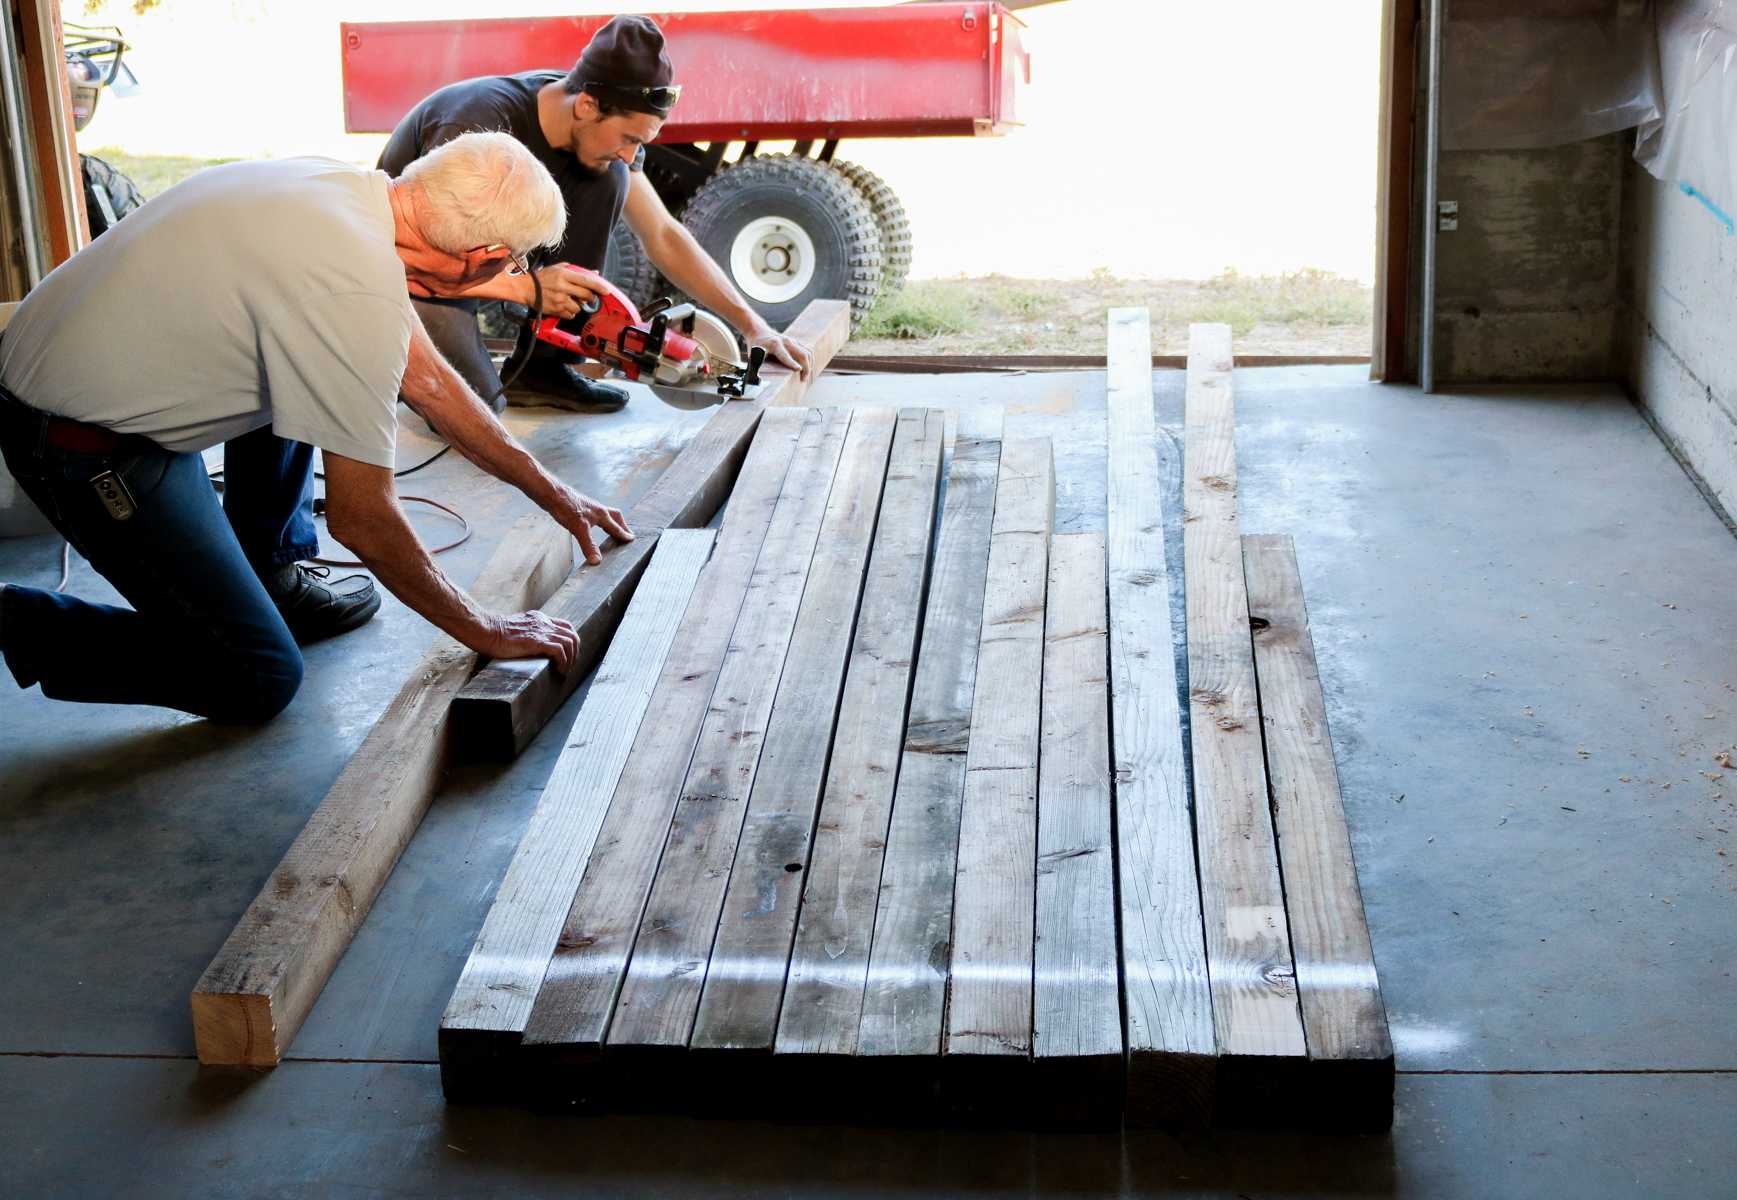
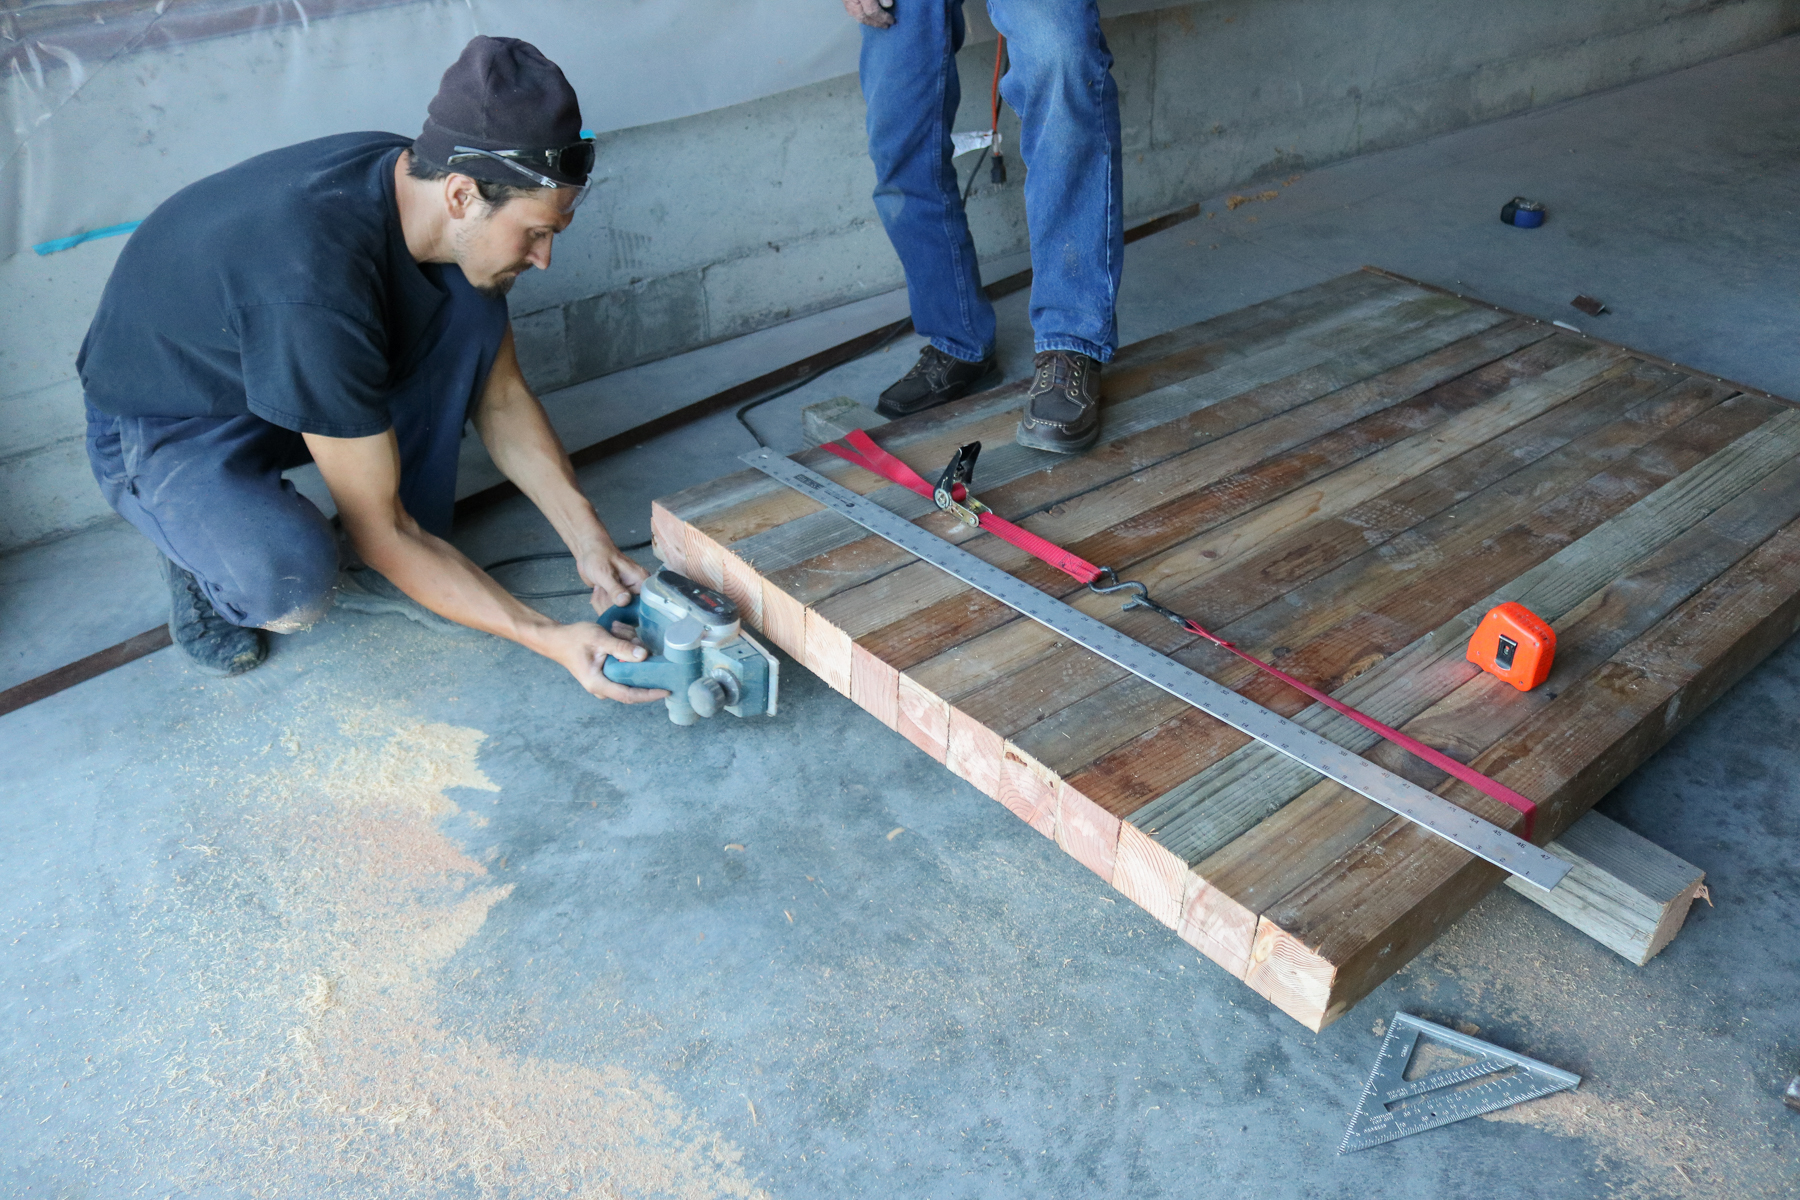
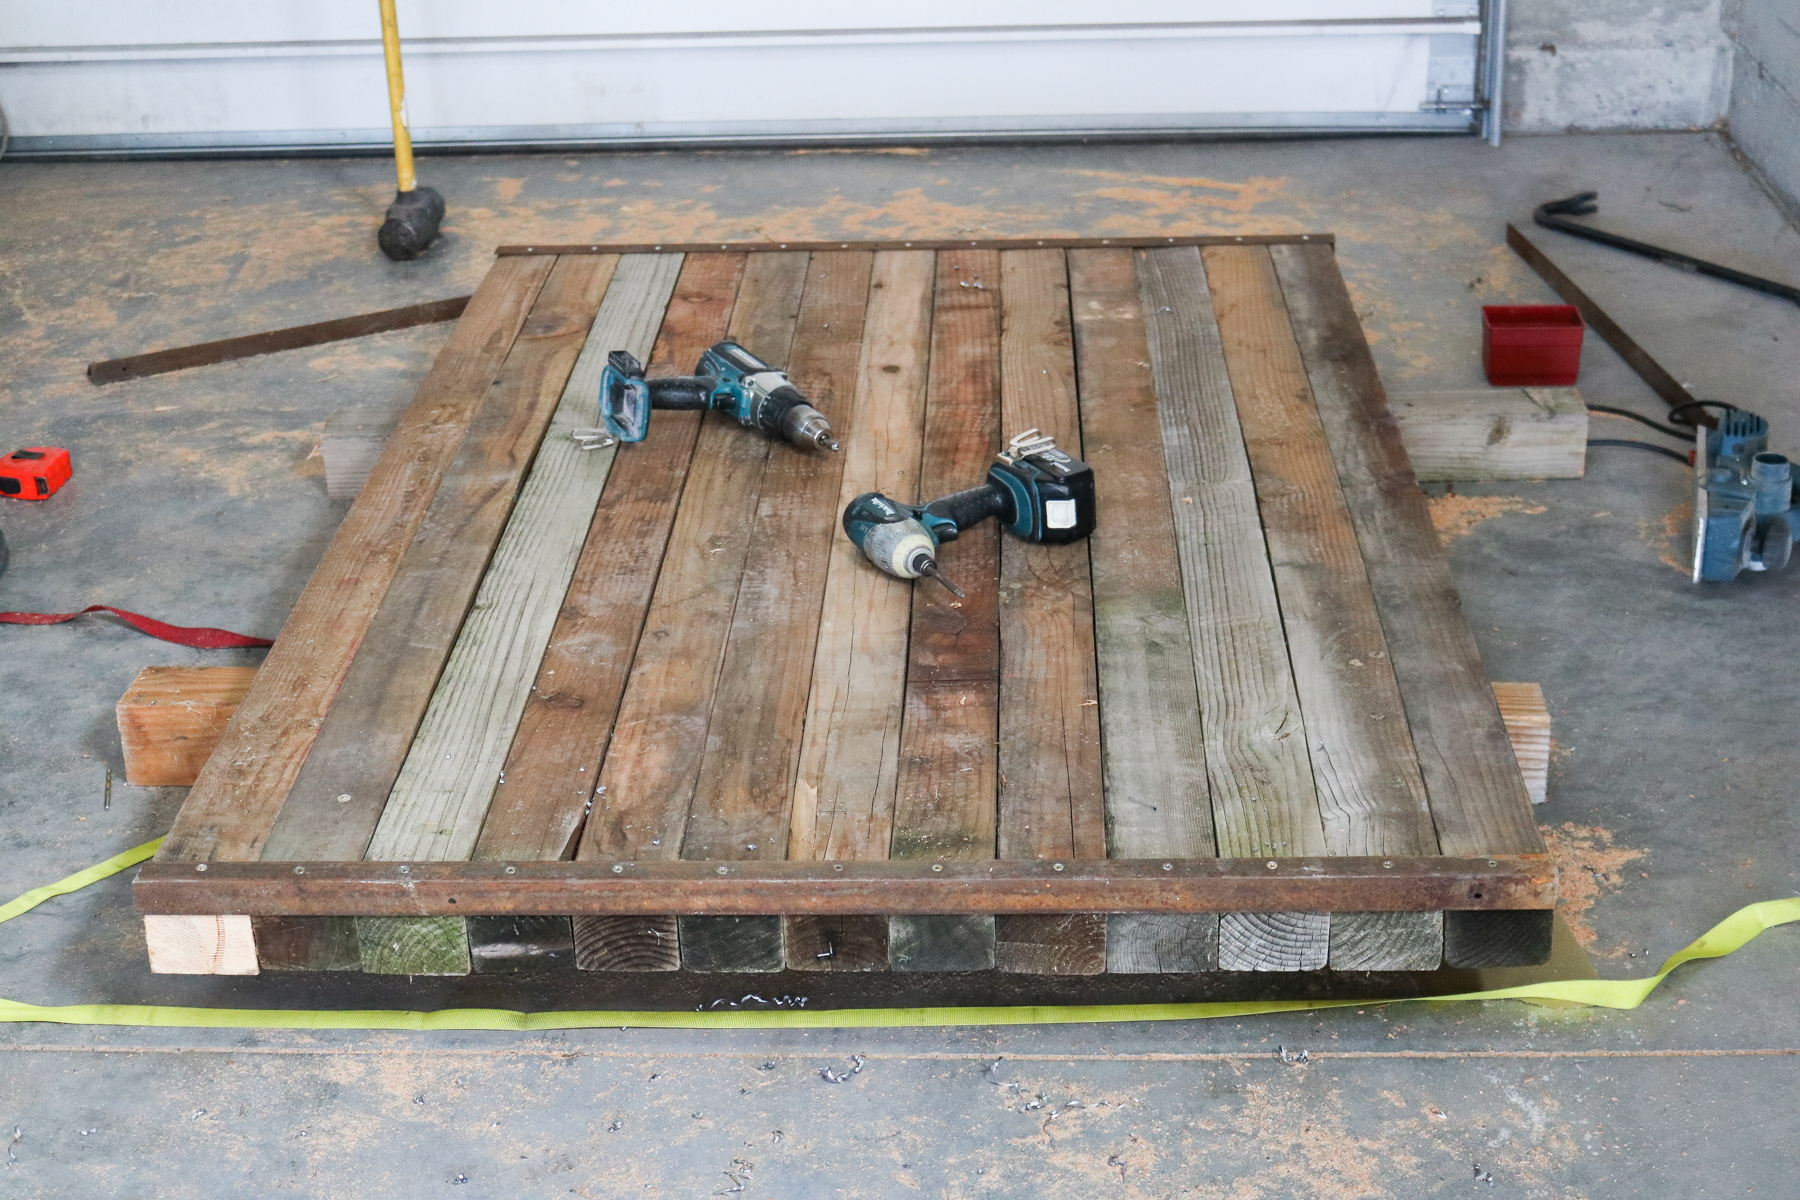
We started off by cutting all the wood down to size. Can you see how warped the boards were? No the table isn’t bend at all!! We got it pretty straightened out with the metal angle iron and some straps. (sorry some of these photos SUCK. I did the best I could with what mother nature gave me 😀 )
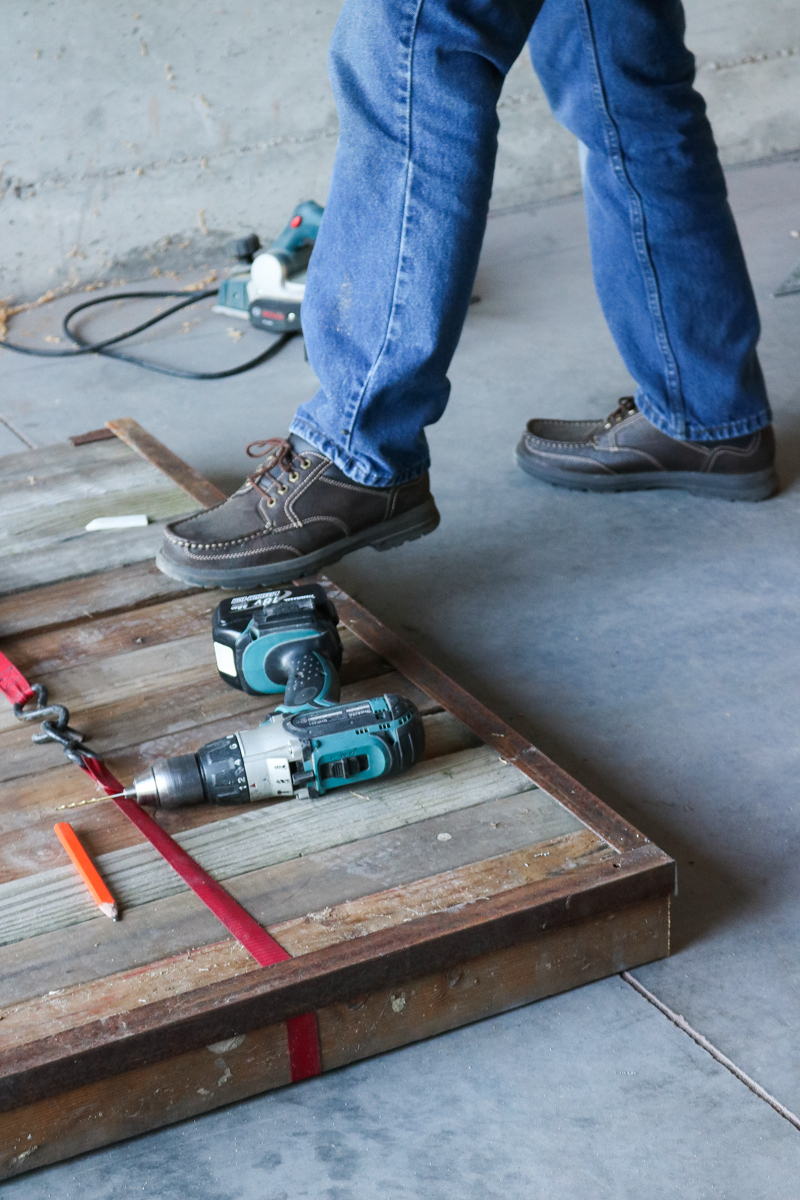
Here they are strapping the wood together! 😀
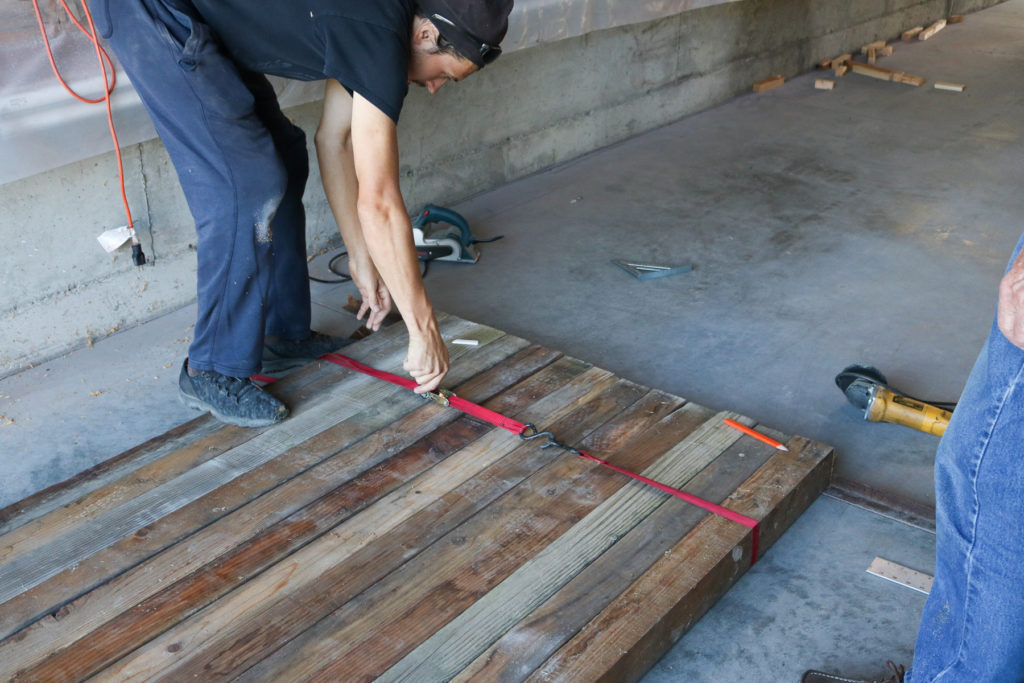
And of course getting that angle iron on.
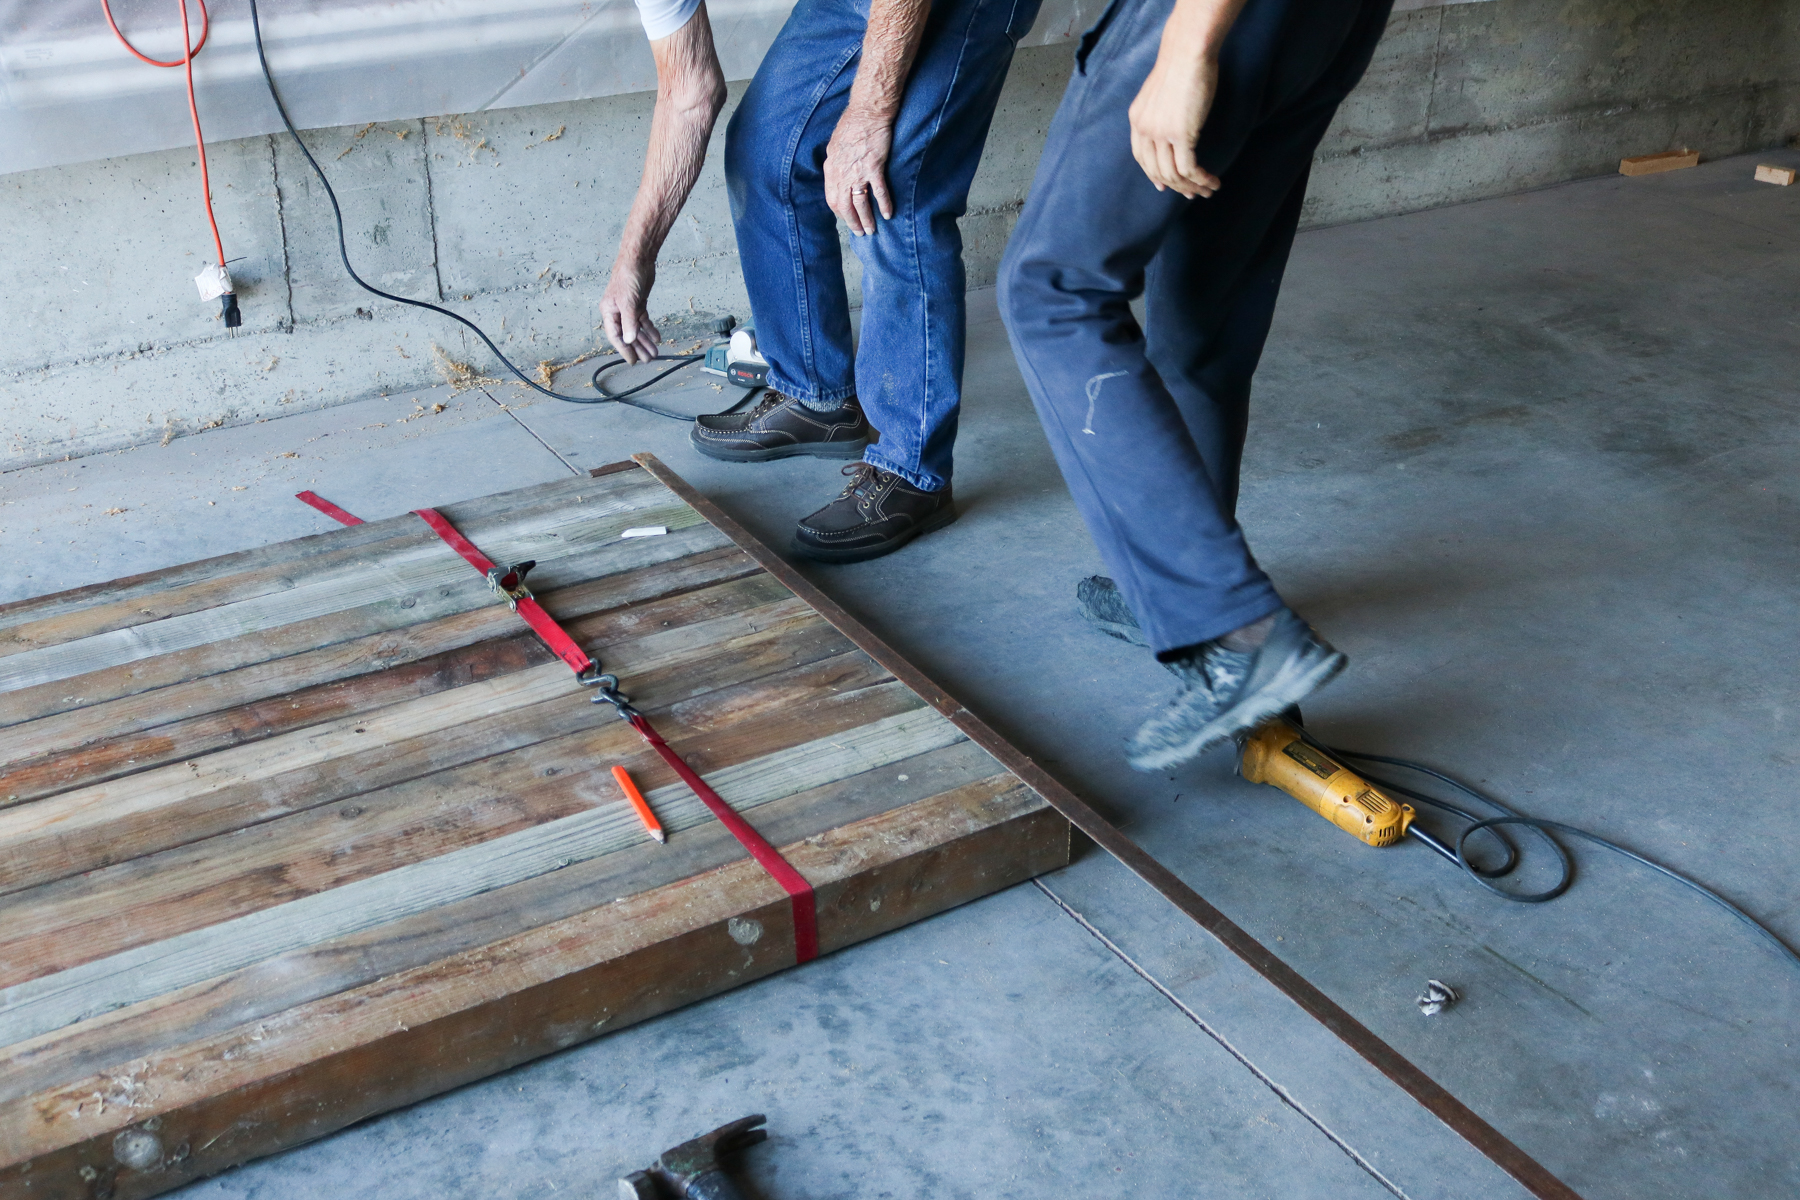
He then marked where he should pre-drill each hole for the wood and used a regular drill to make holes.
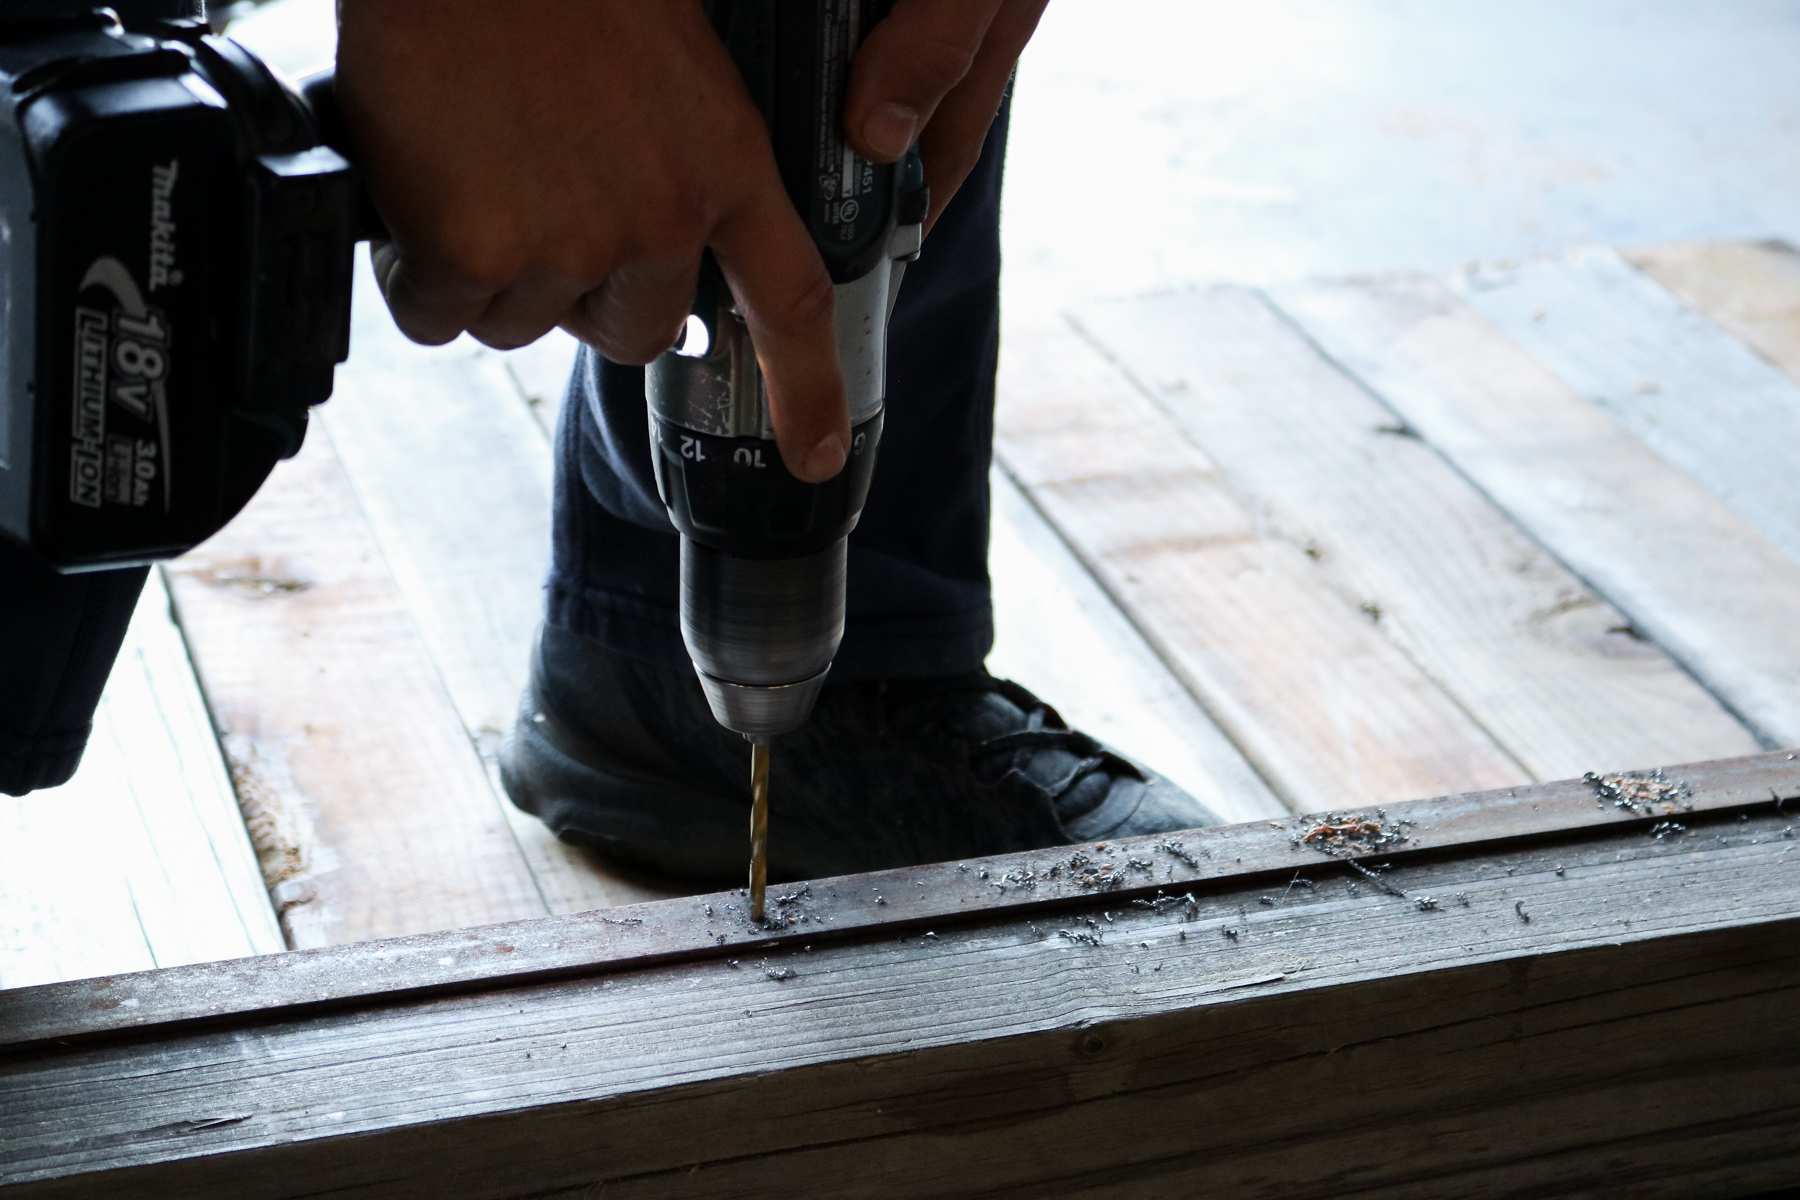
The next step was securing the wood to the angle iron.
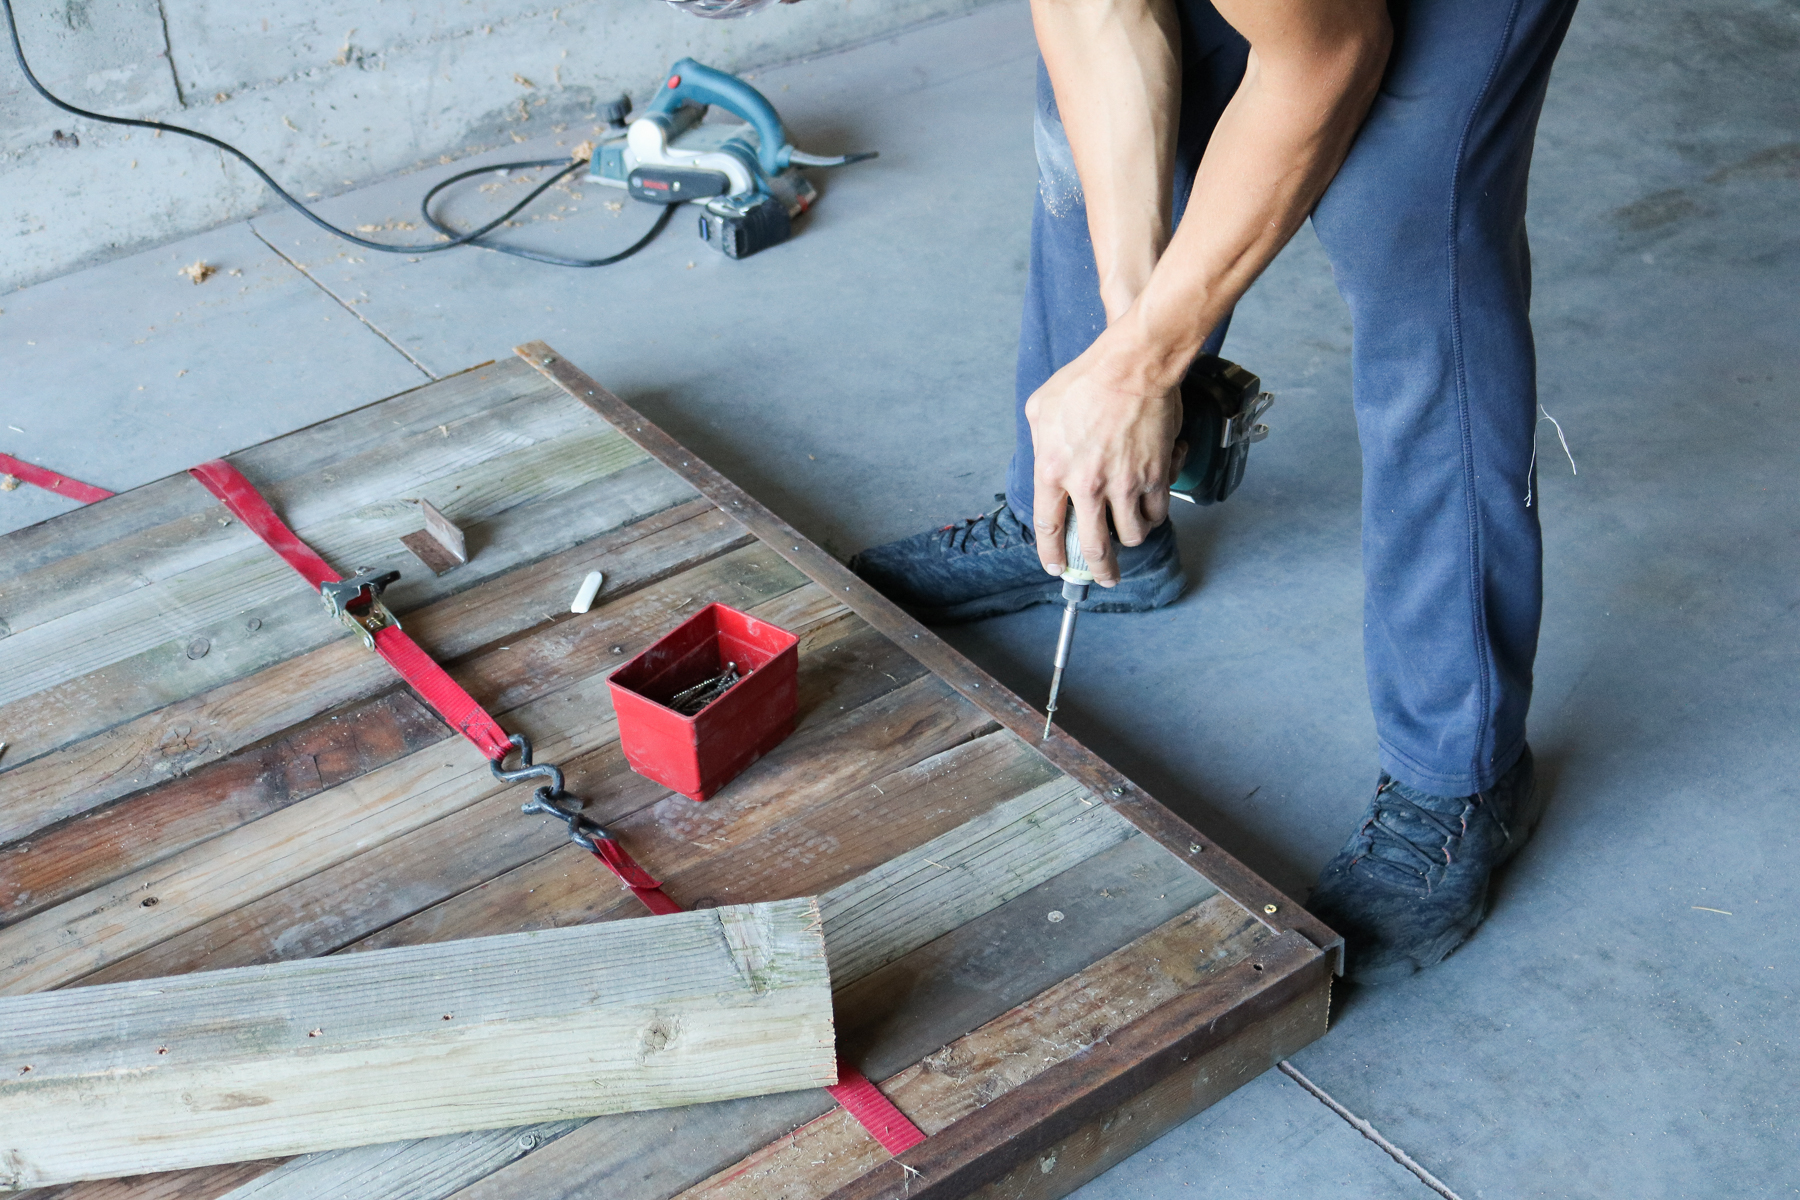
He also used a counter sink drill bit to get the screws flush with the surface. 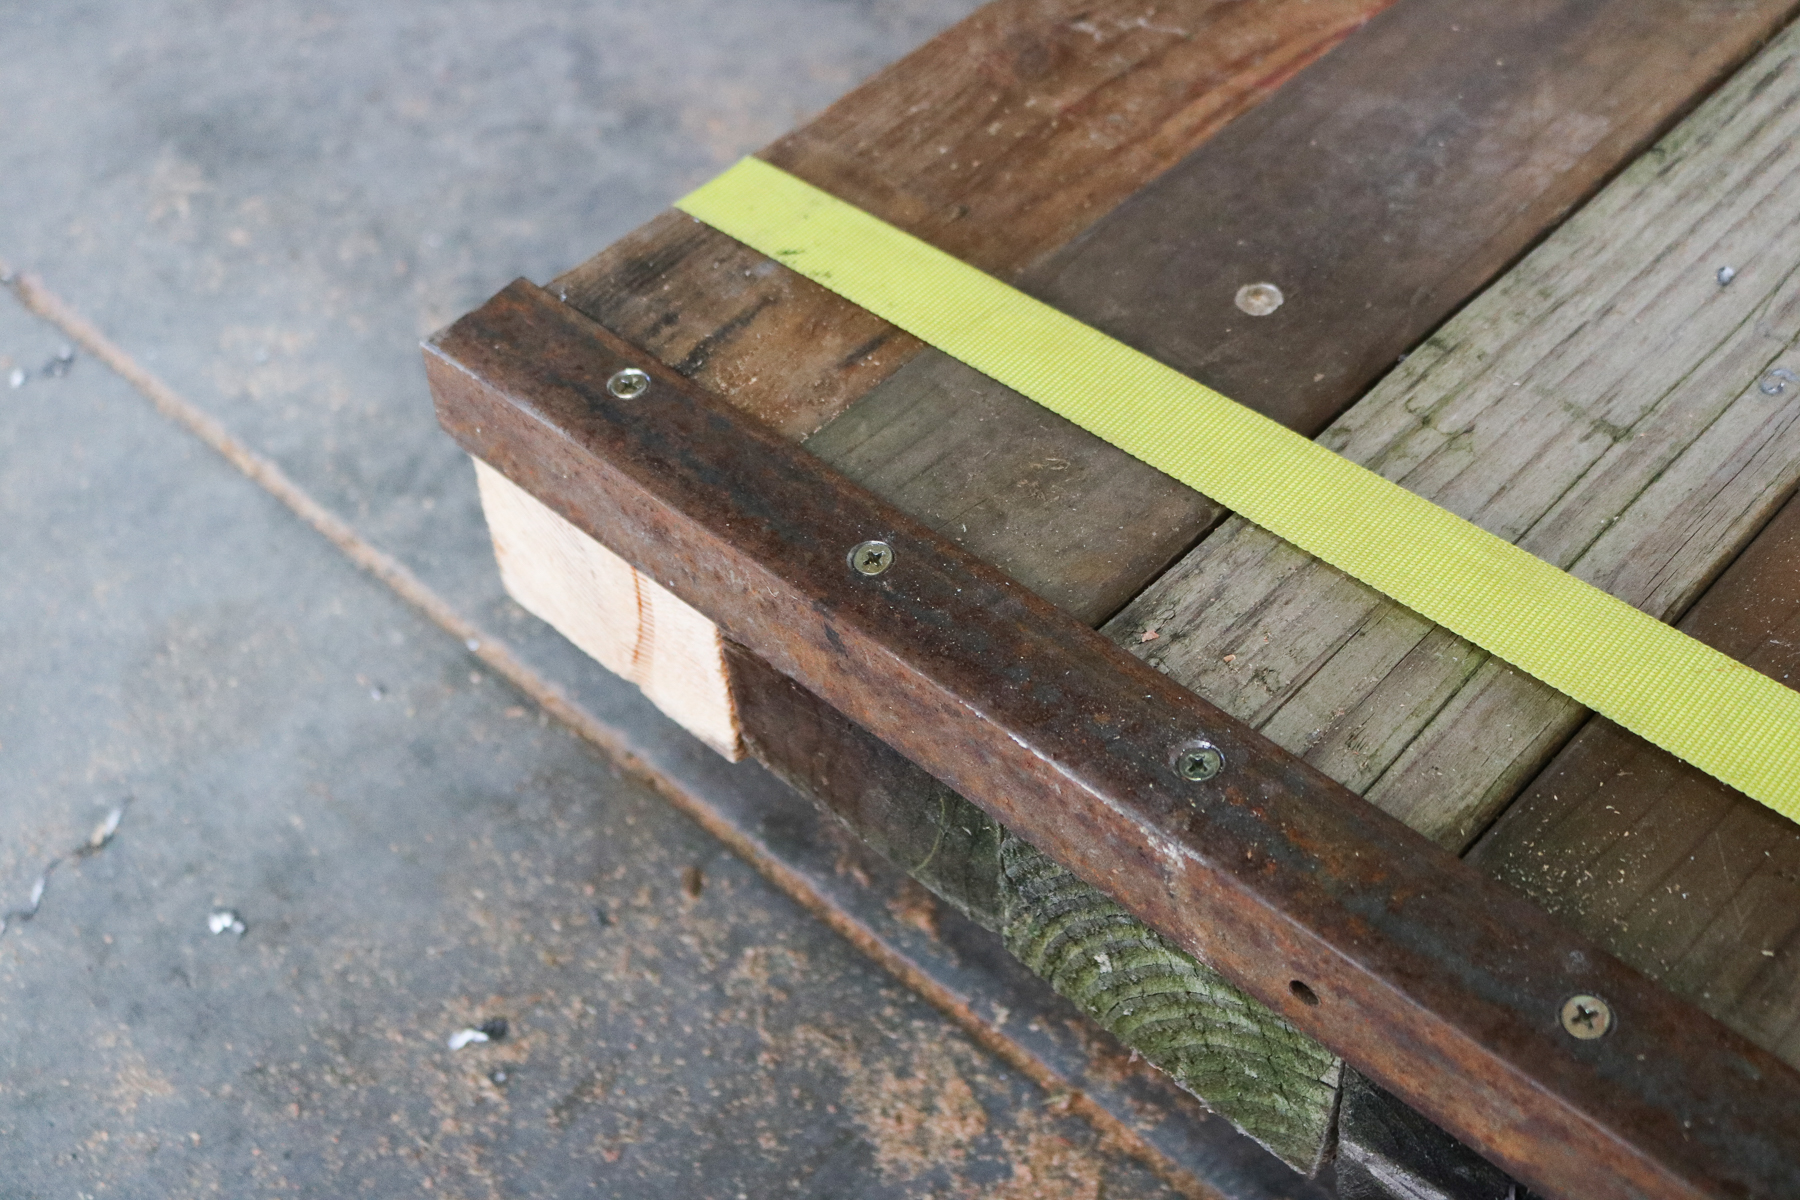
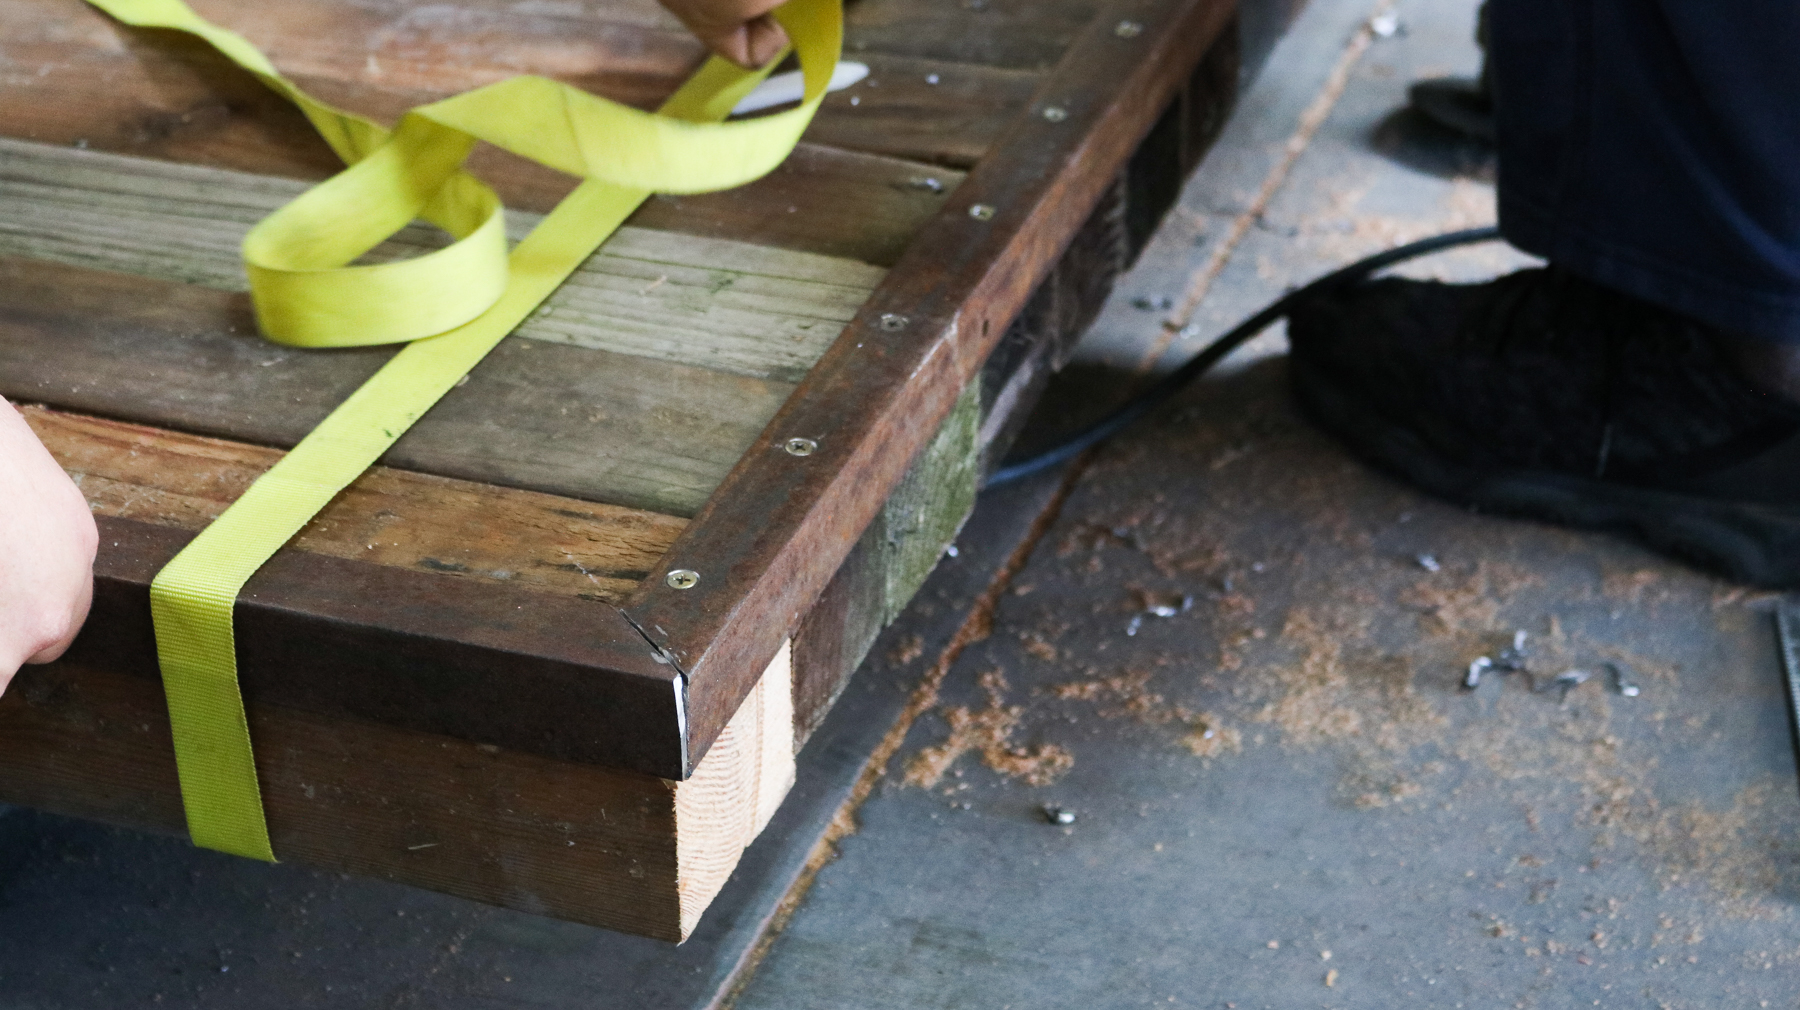
We used our electric hand planer to straighten out the edges. Just to give you guys a heads up make sure and do this to both sides before attaching your metal. We totally forgot to do it to one side and since the wood was so out of shape sanding it down didn’t do much.
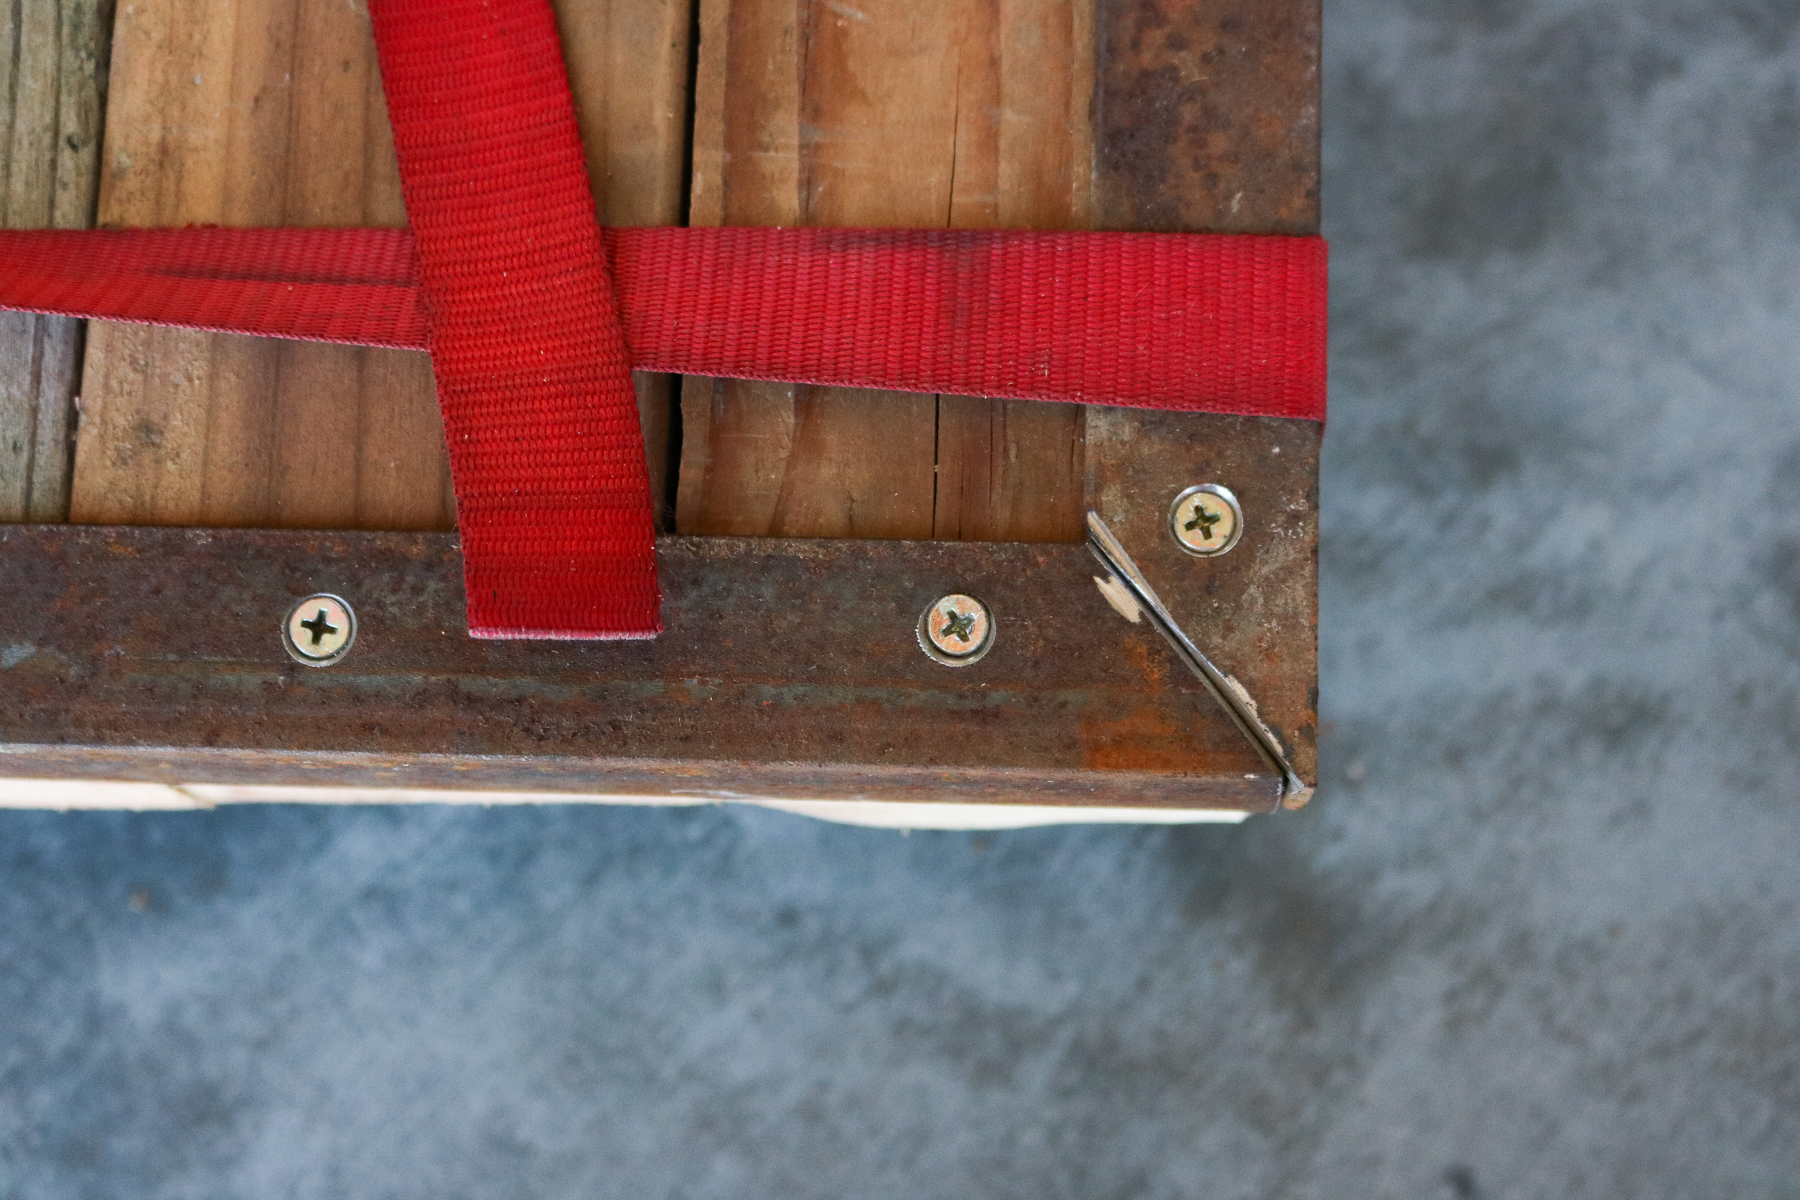
Following that we moved the strap to the other side of the table top and did the same with the angle iron. Once we removed the straps the wood held it’s shape!! YEYY!!
Make it work!!
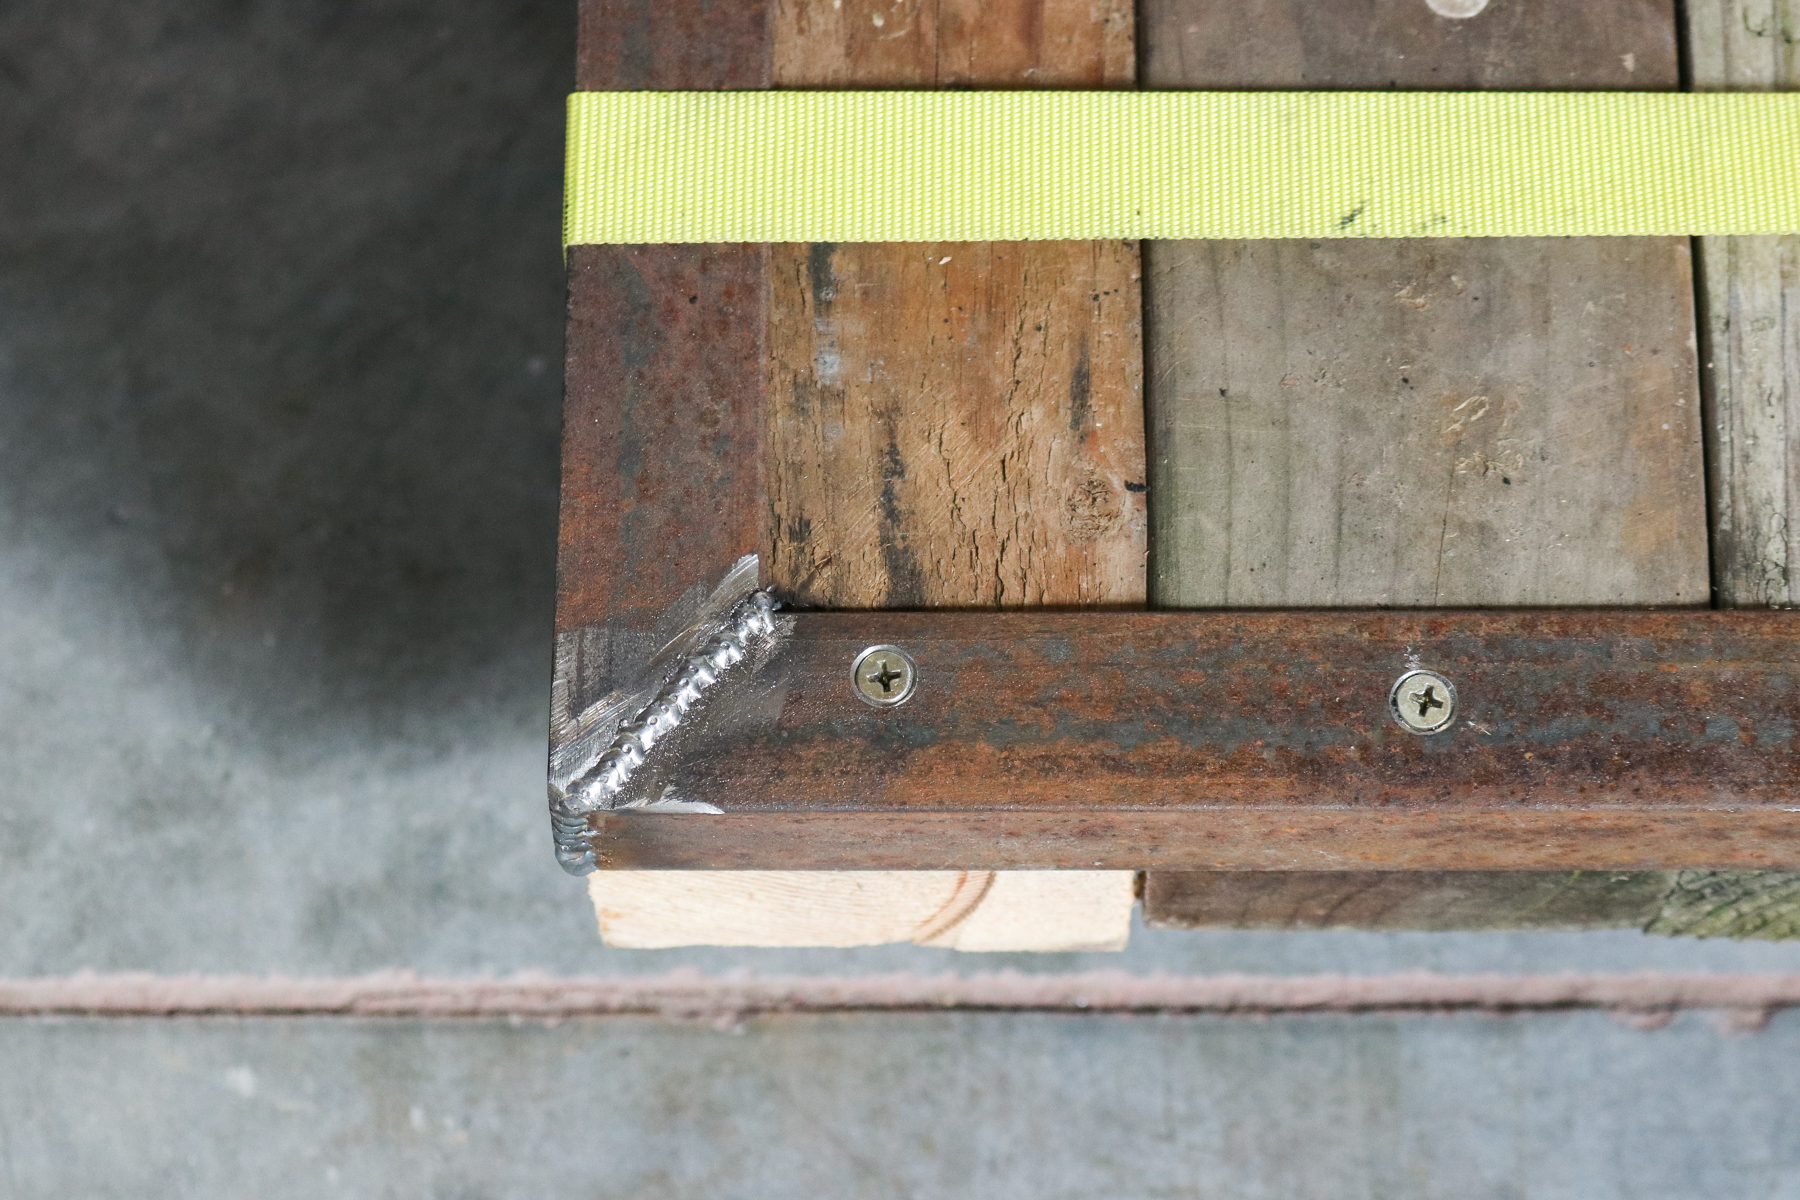
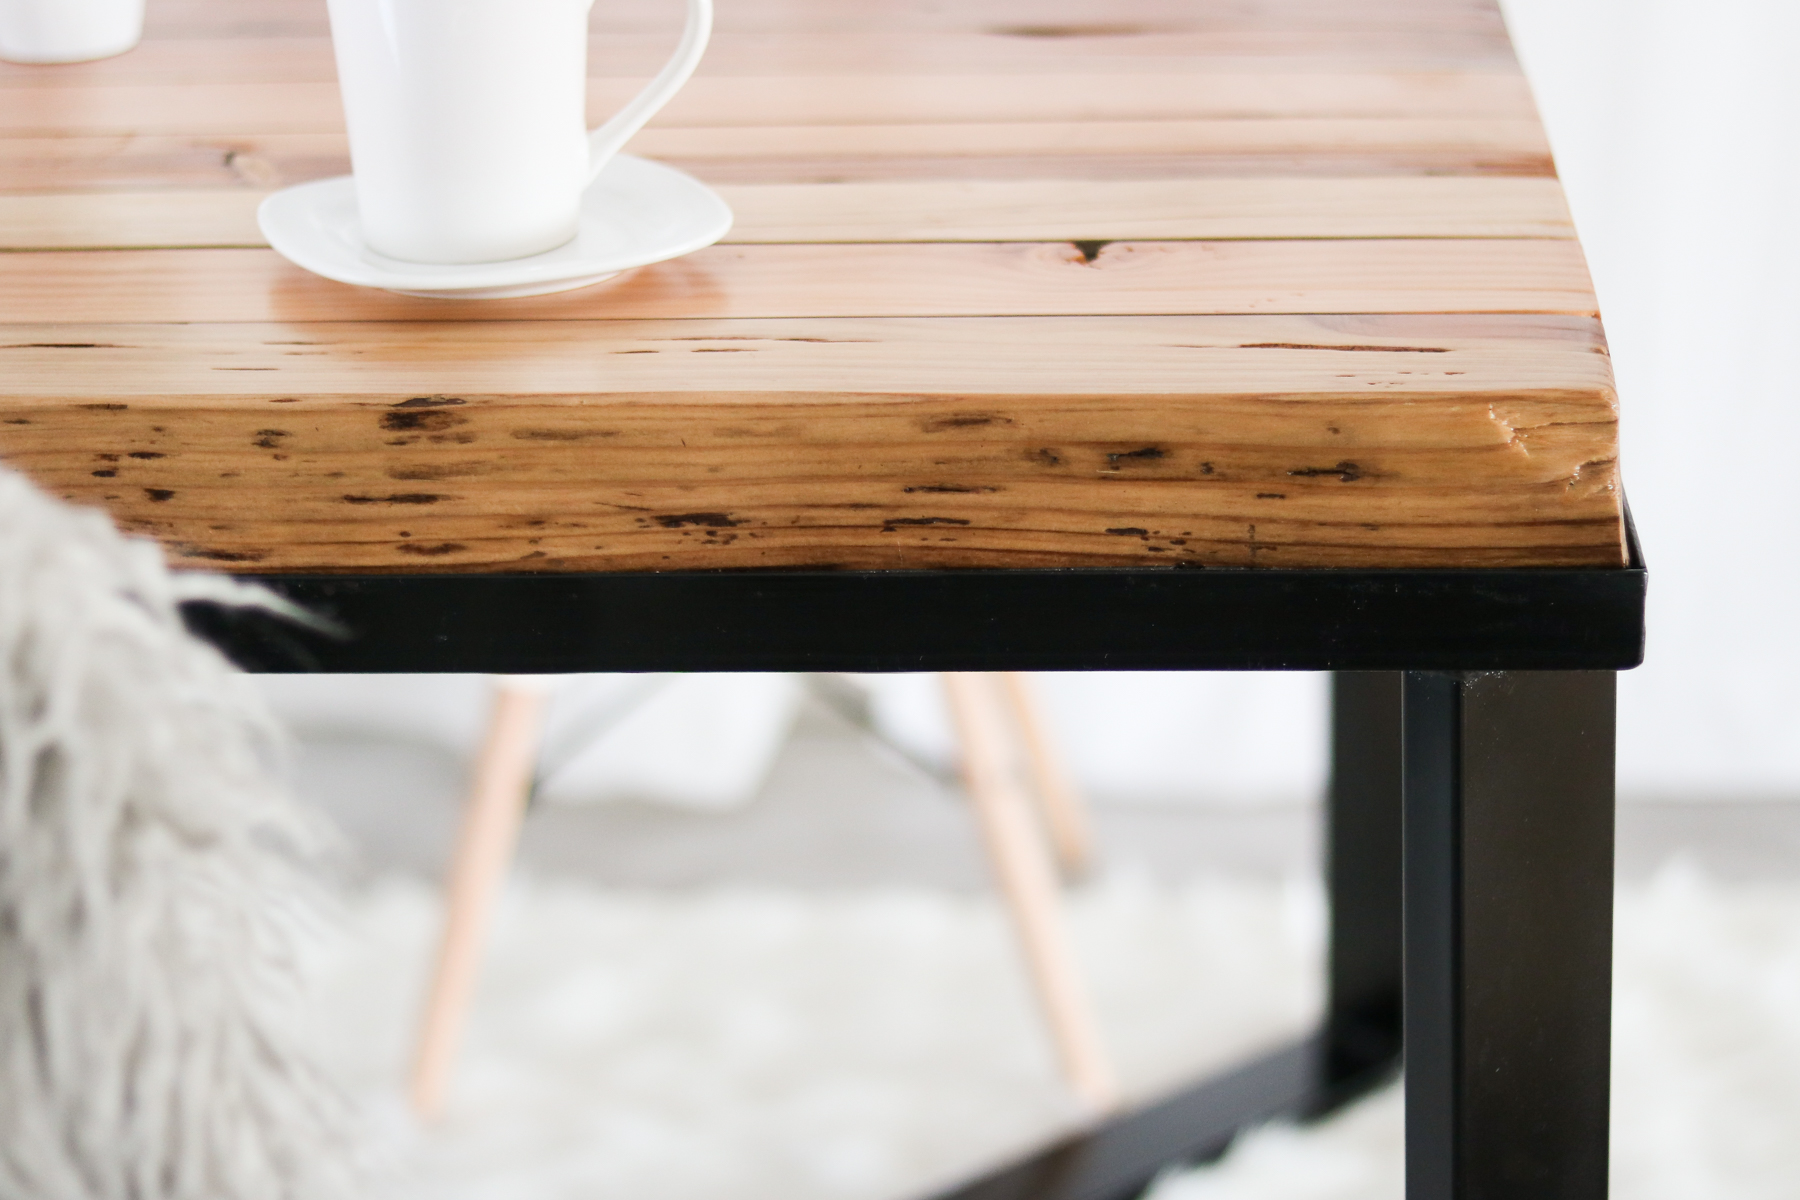
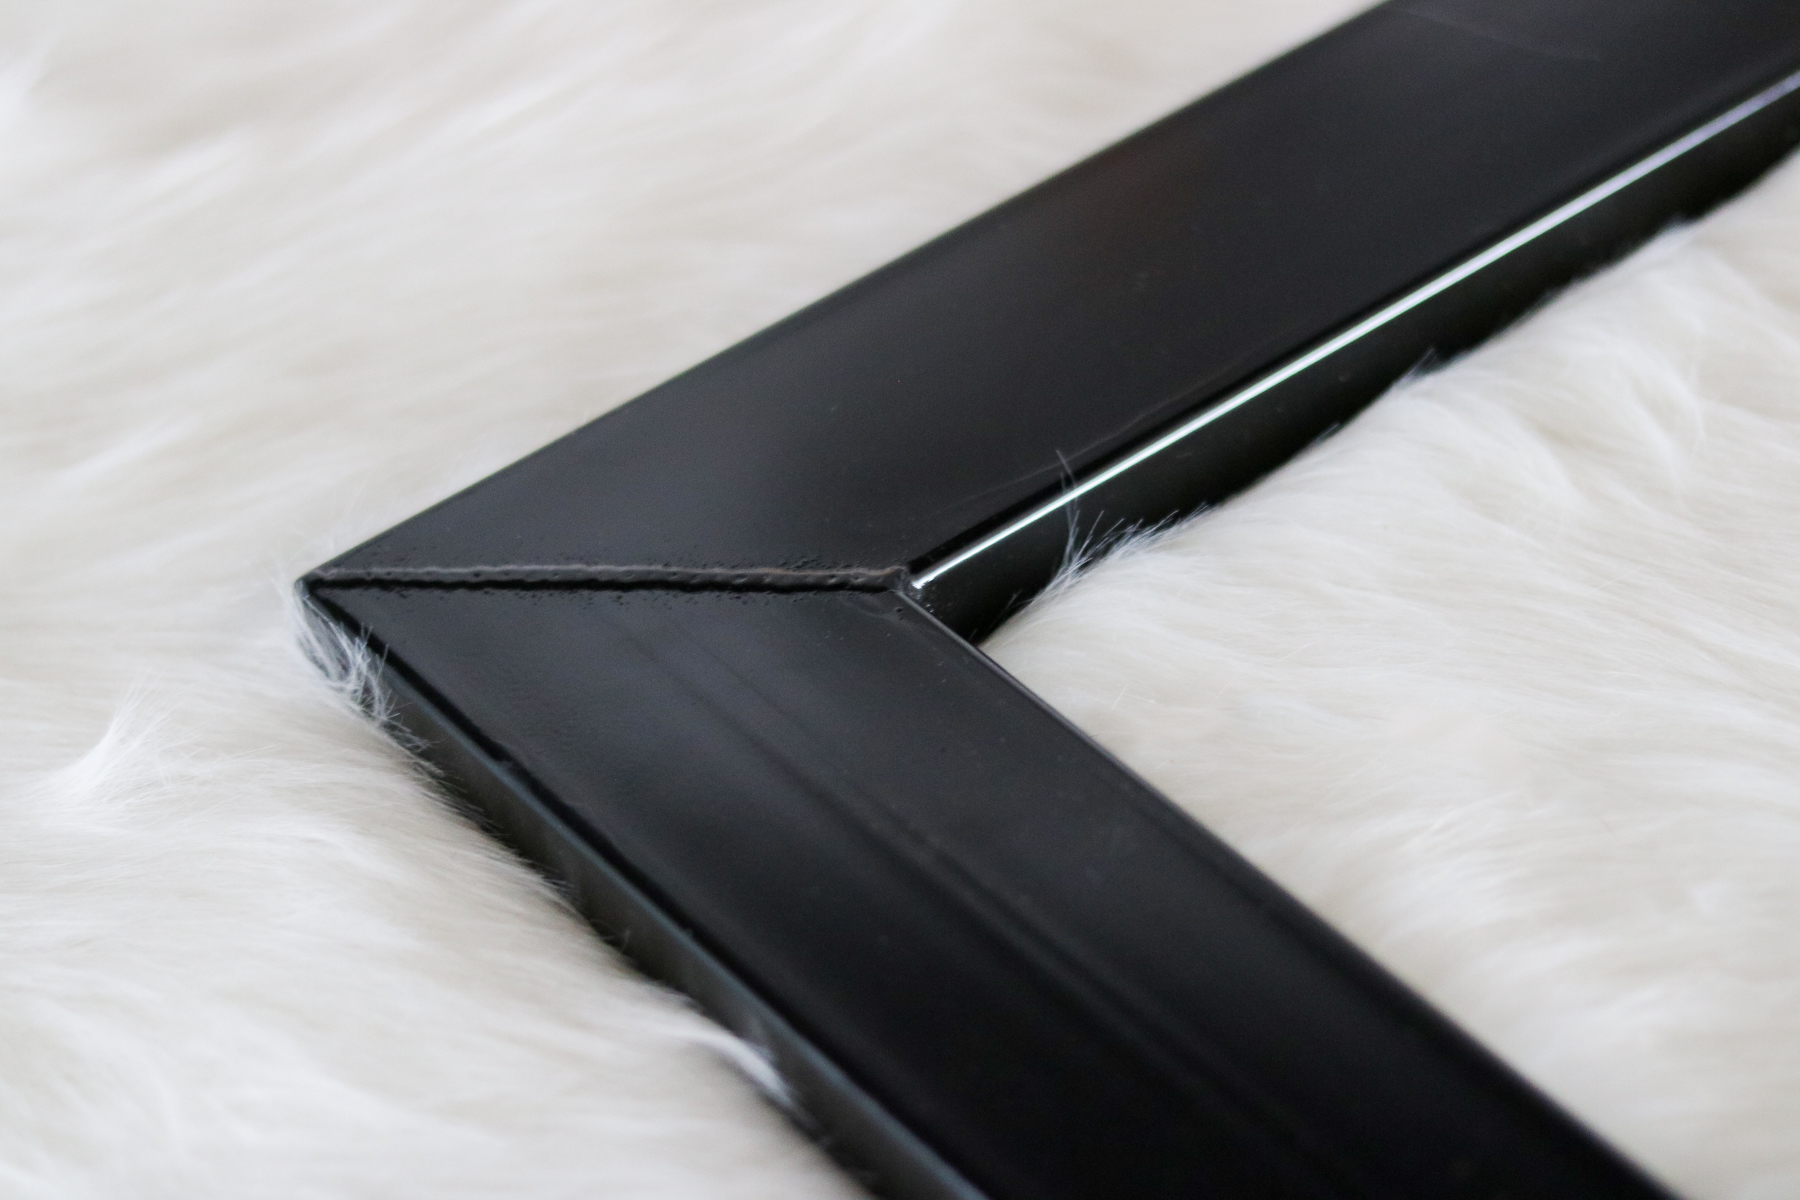
Okay so we’re not pros at 45 degree angles…This probably isn’t the correct way to do this but it seemed to be the easiest. If you look at the photo above on the corner of the table top you’ll see that we simply lay the angle iron overlapping one another. To get our 45 degree angle we simply used our grinder and cut an approximate 45 from the top. When done it looked like the photo below.. BAM !! 45!! No rulers needed. HAHA! Hope the video will make more sense of this!
Here’s another close up of the 45 angle.
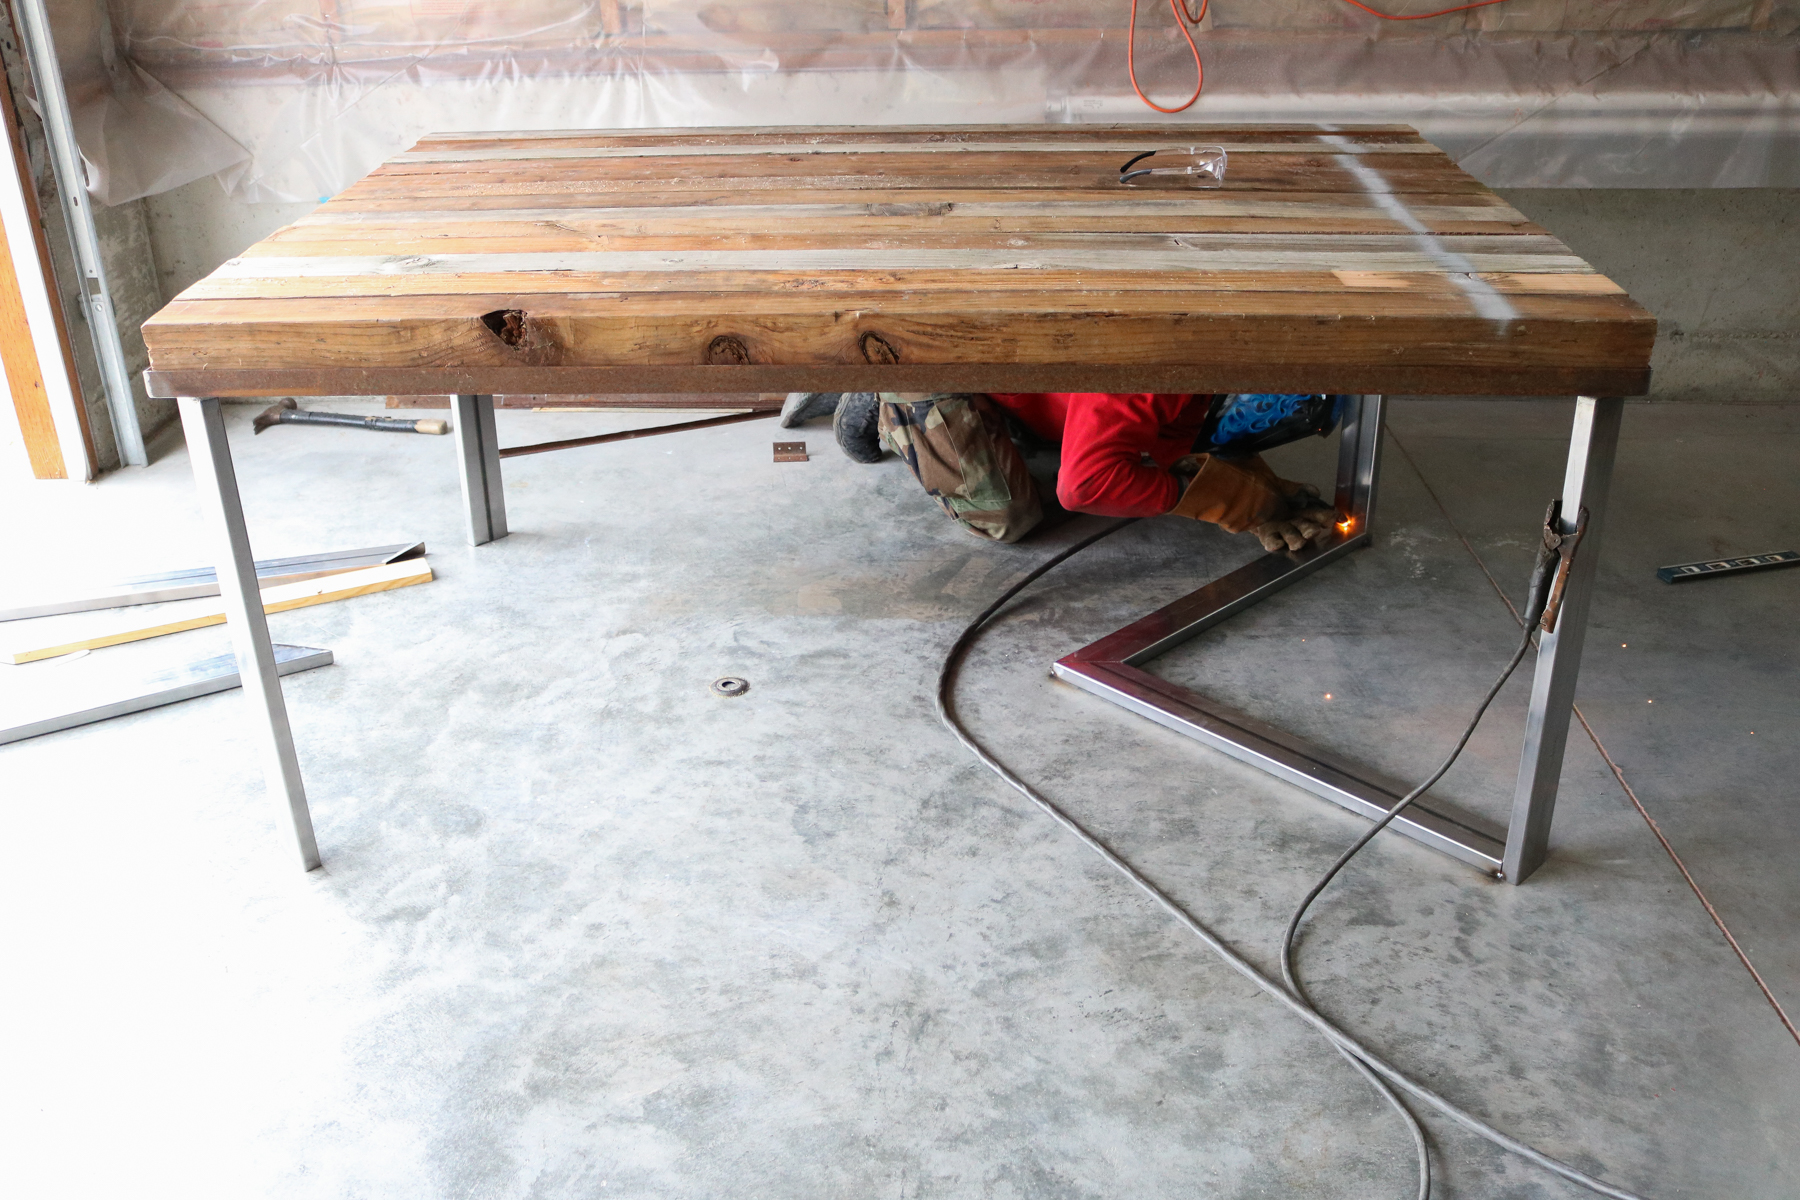
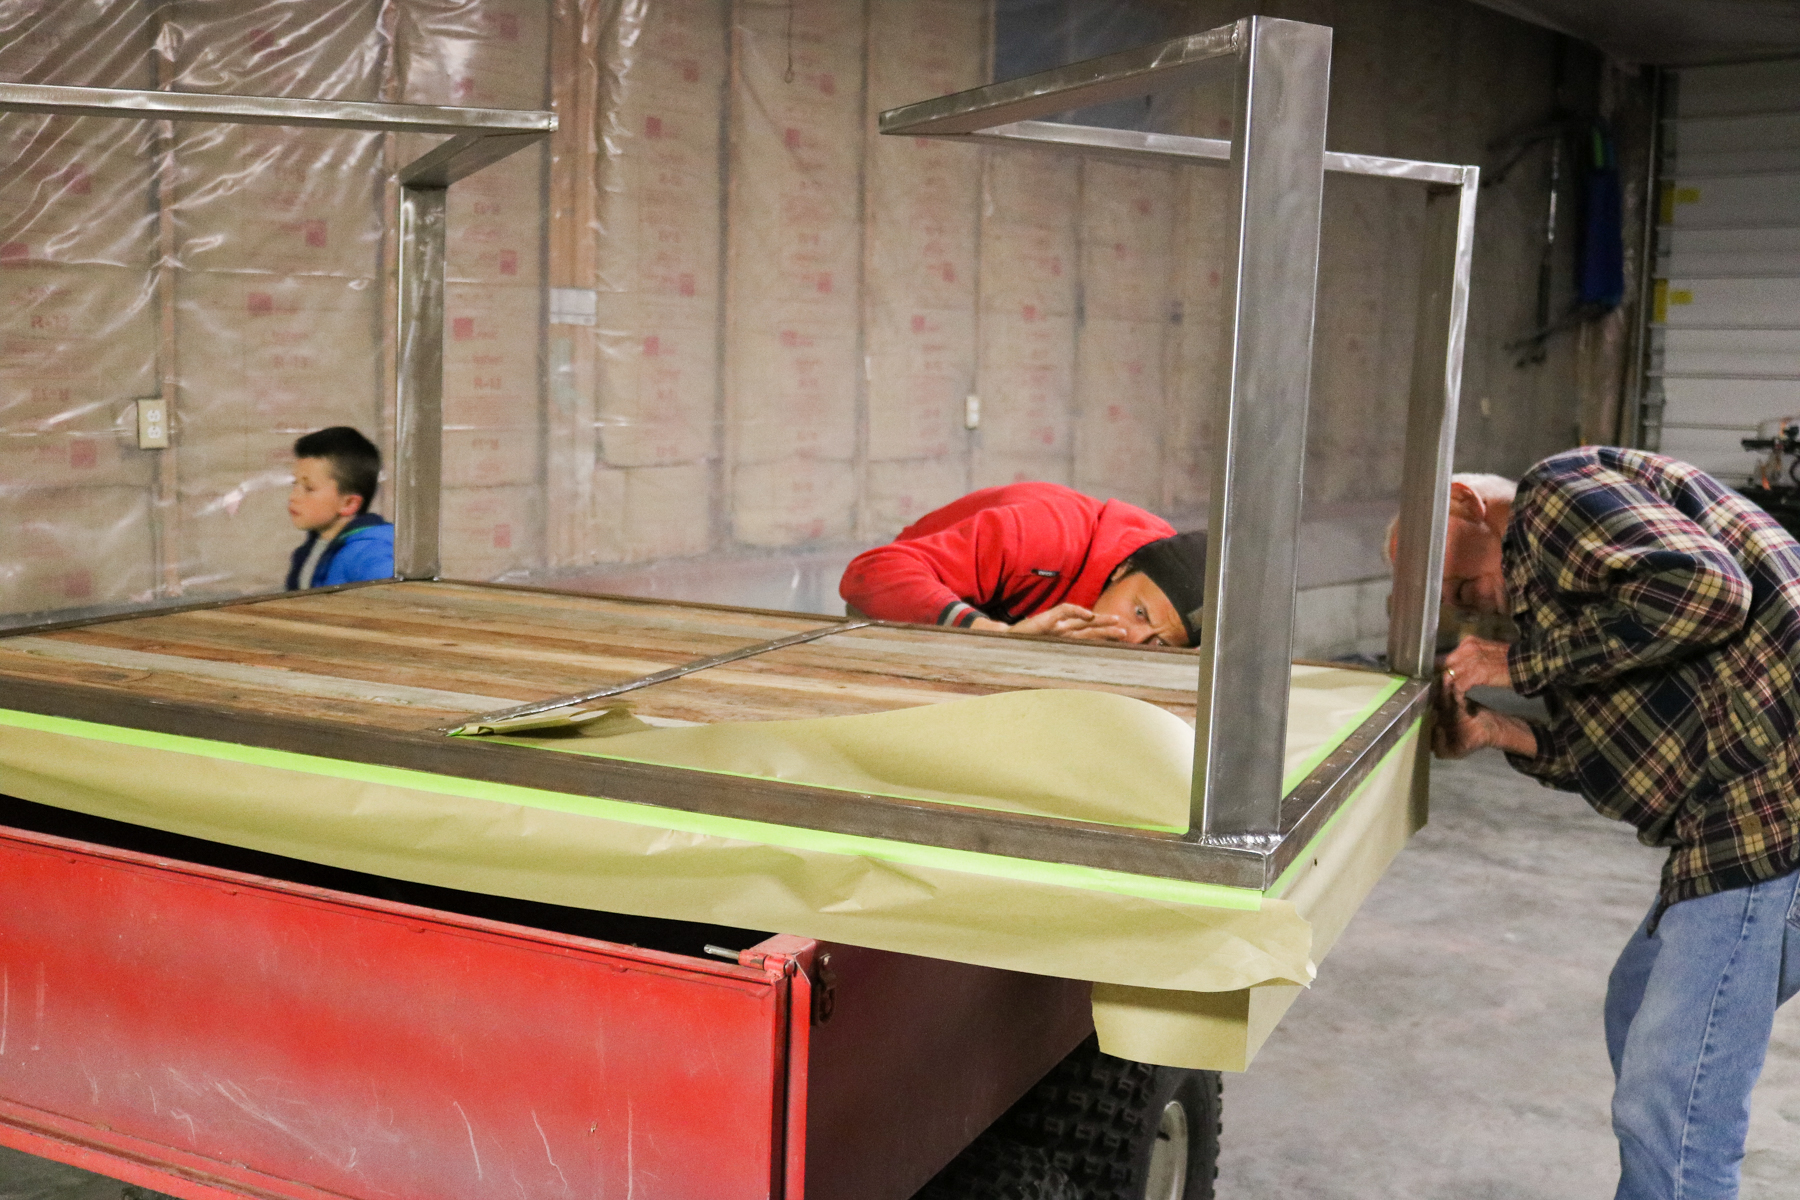
Let the Welding begin
And then the art of welding began!! I had no idea my talented hubby could weld so pretty. Simply Perfection!! I know it looks easy but it isn’t. I tried AND I SUCK!! It’s so stinking hard to get a straight line without gaps or crazy bubbles!! So YEY for talented hubby!! (thanks Hunny)
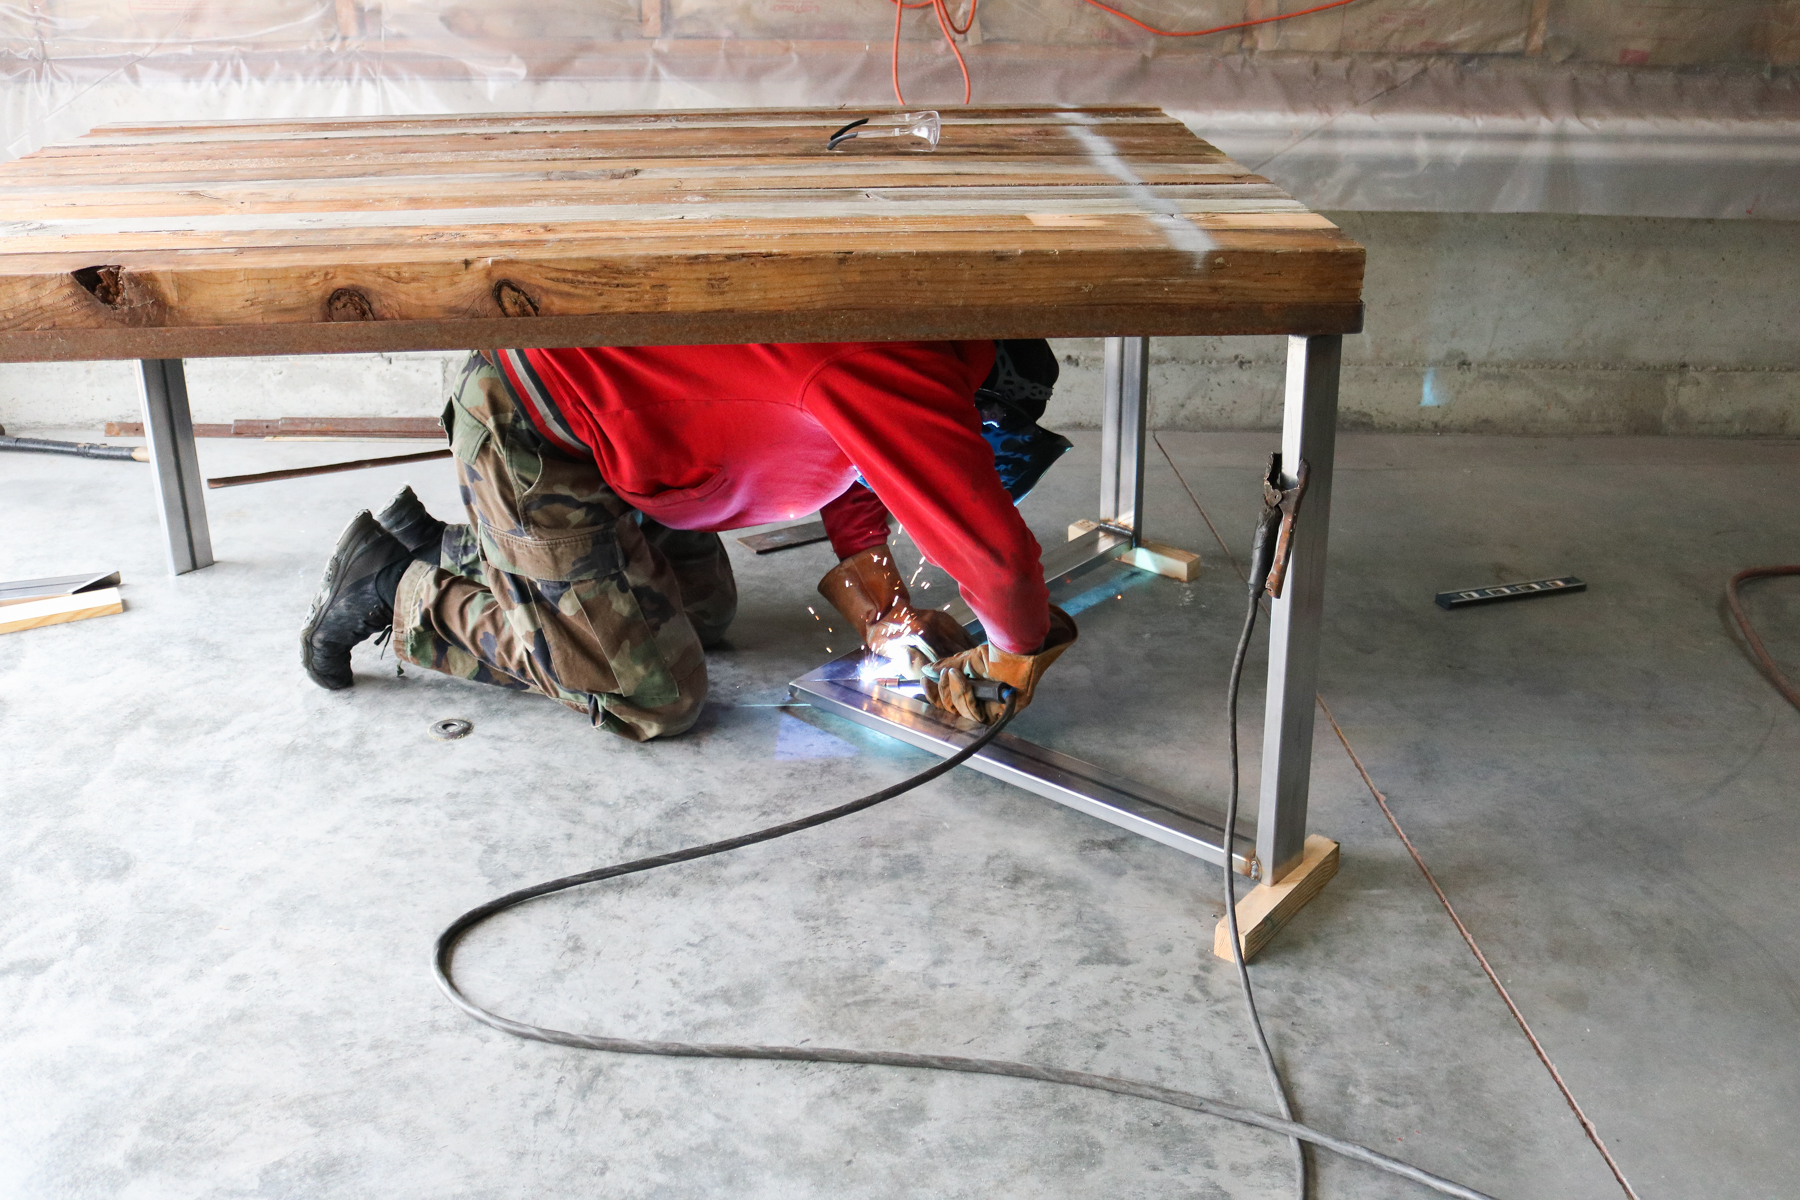
We then cut our metal legs to size and lay them onto the bottom of the table. Following that we angled them inward since we wanted to make V shapes. There wasn’t any specific way we angled them just as long as they looked straight. (watch the video for reference)

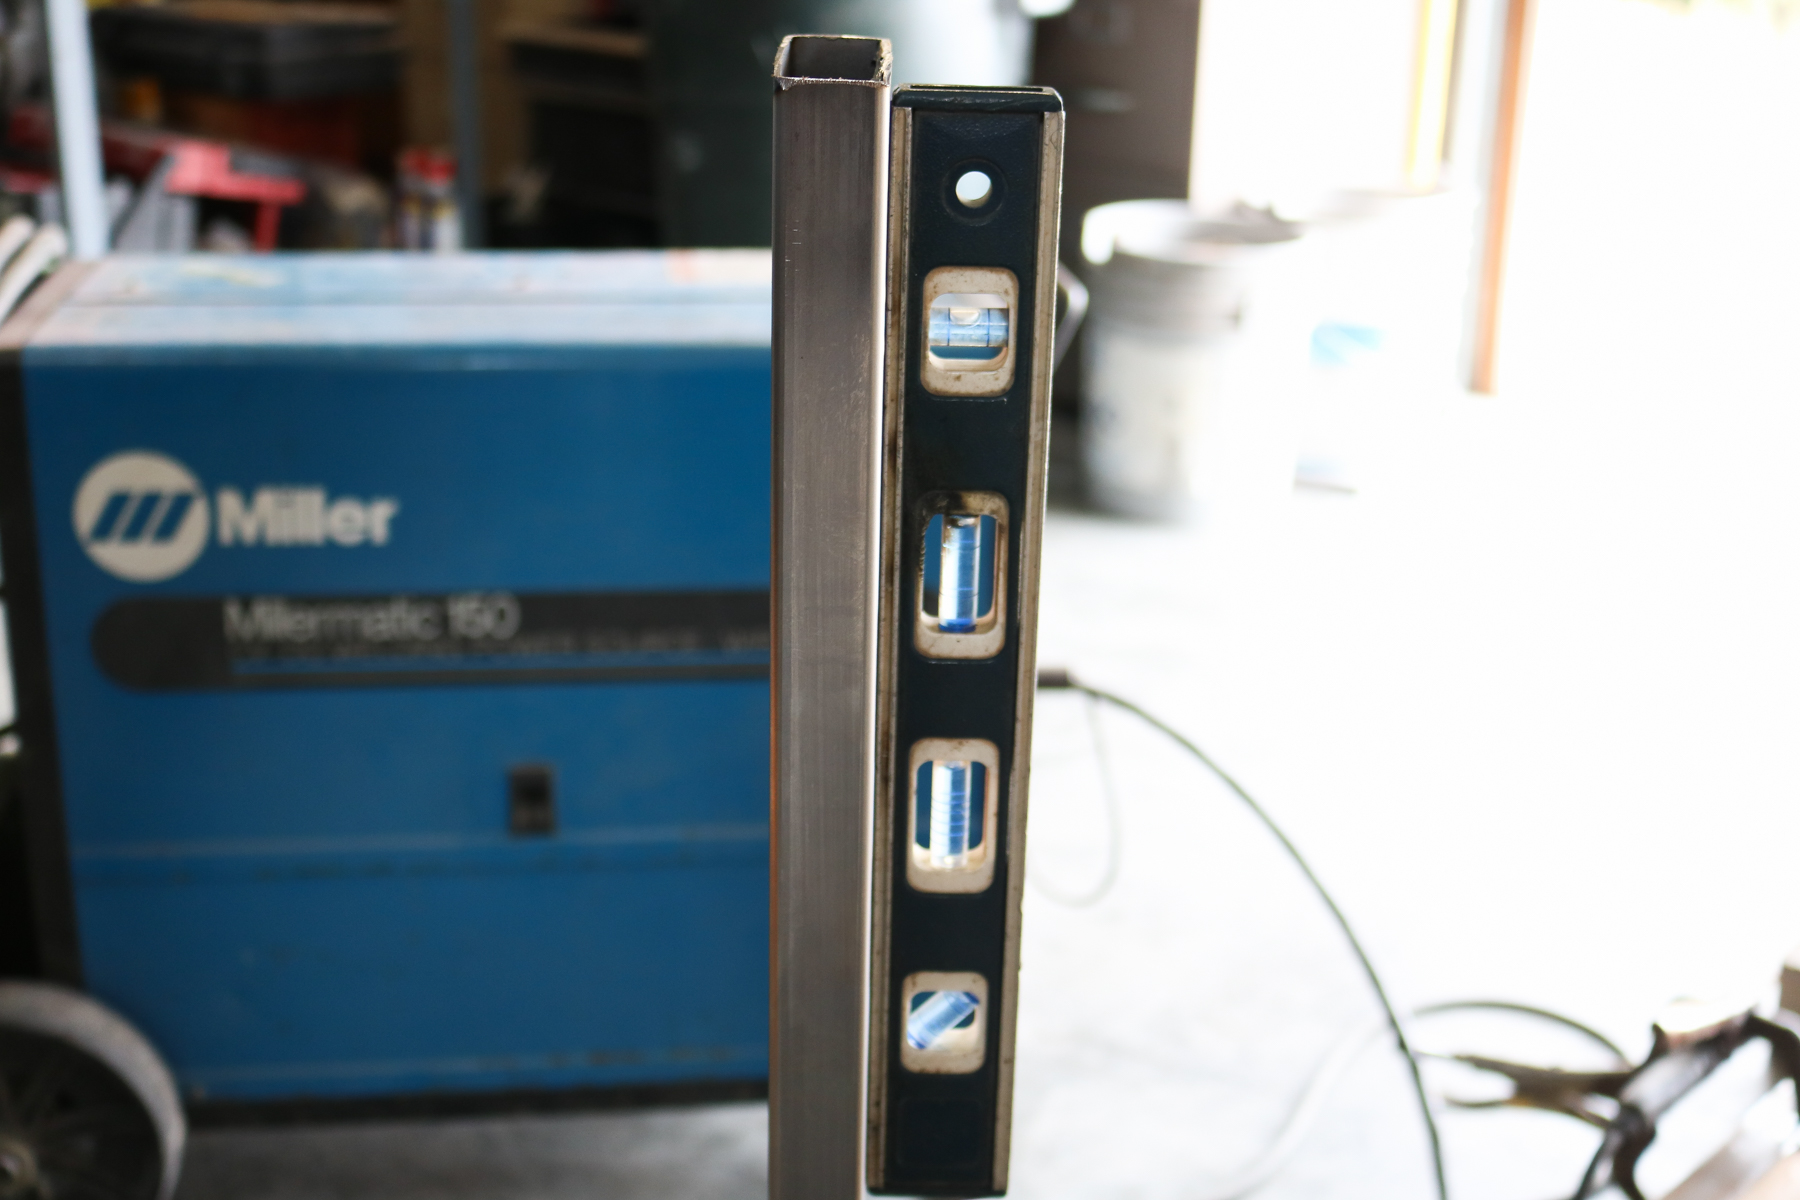
To be extra careful we used a level that magnetically attached to the metal legs to show us how straight we needed to weld them. He went around and tacked each leg with two welds just to see if anything would shift, and guess what they all shifted. So, we bend them back into place. Which was super easy. I think this is much better then welding the whole leg into place only to find out it shifted while welding. The tacks definitely help hold it in place while welding. 😀
Another 45 degree Hack (or not)
OKAY!! In all honestly this was my idea!! HAHA! I wanted to practice the V on wood before cutting into the $40 metal. Believe it or not it didn’t help much. I’ll try to explain in as much detail as possible why it didn’t’ work.
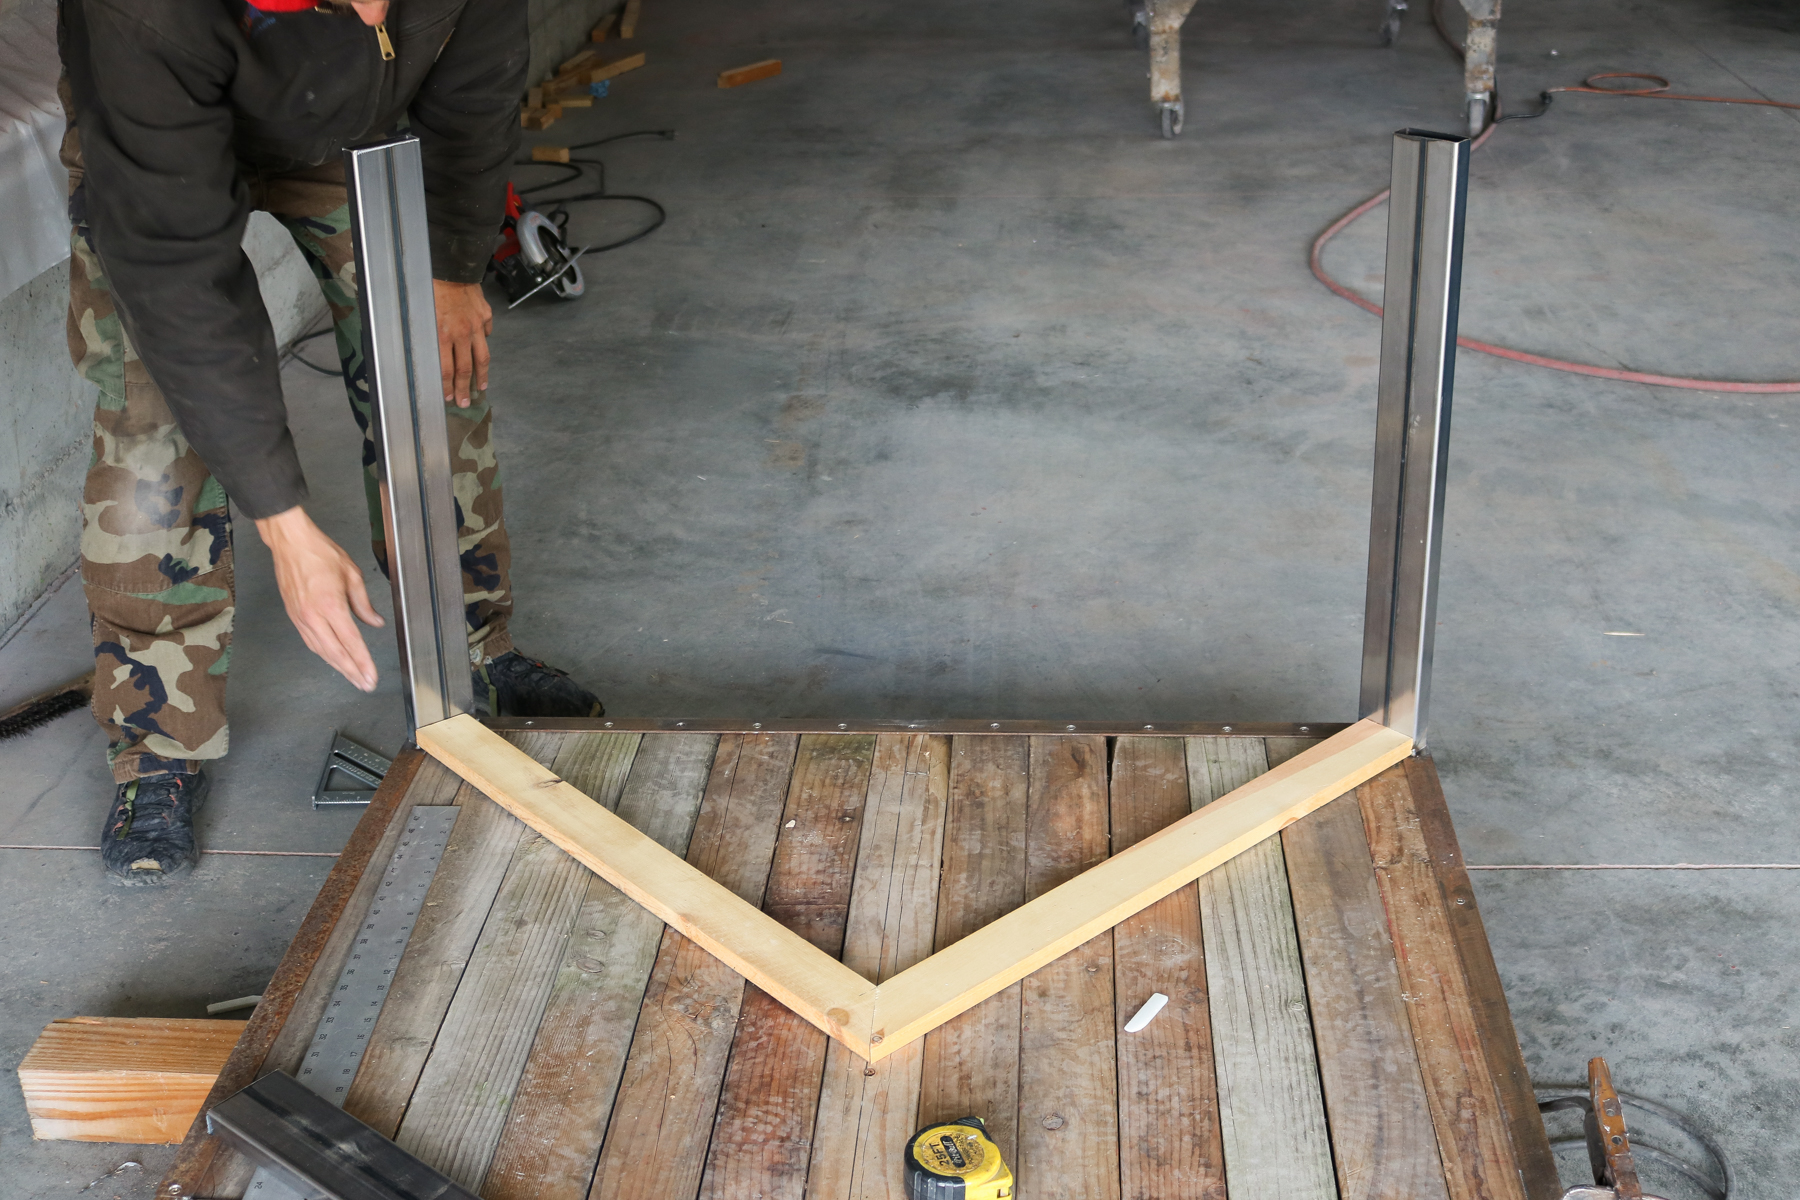
Getting our V on
Before starting we marked the center of the table. If you look close you can see a white line going down the center. Here’s why it didn’t work. We used our miter saw that had a built in 45″ angle cut to cut our wood. Once we cut the wood and lay it down it seemed ok. Following that we cut the metal the same way and lay it out. Keep in mind the wood wasn’t as wide as the metal and therefore it lay different. Also I’m sure the fact that we angled the legs in like that had something to do with it as well.
With all that said. Cutting a 45″ angle wasn’t a problem with the metal. The problem was a 45″ degree angle wasn’t needed. Each side need a custom angle in order for the V to be perfectly centered.
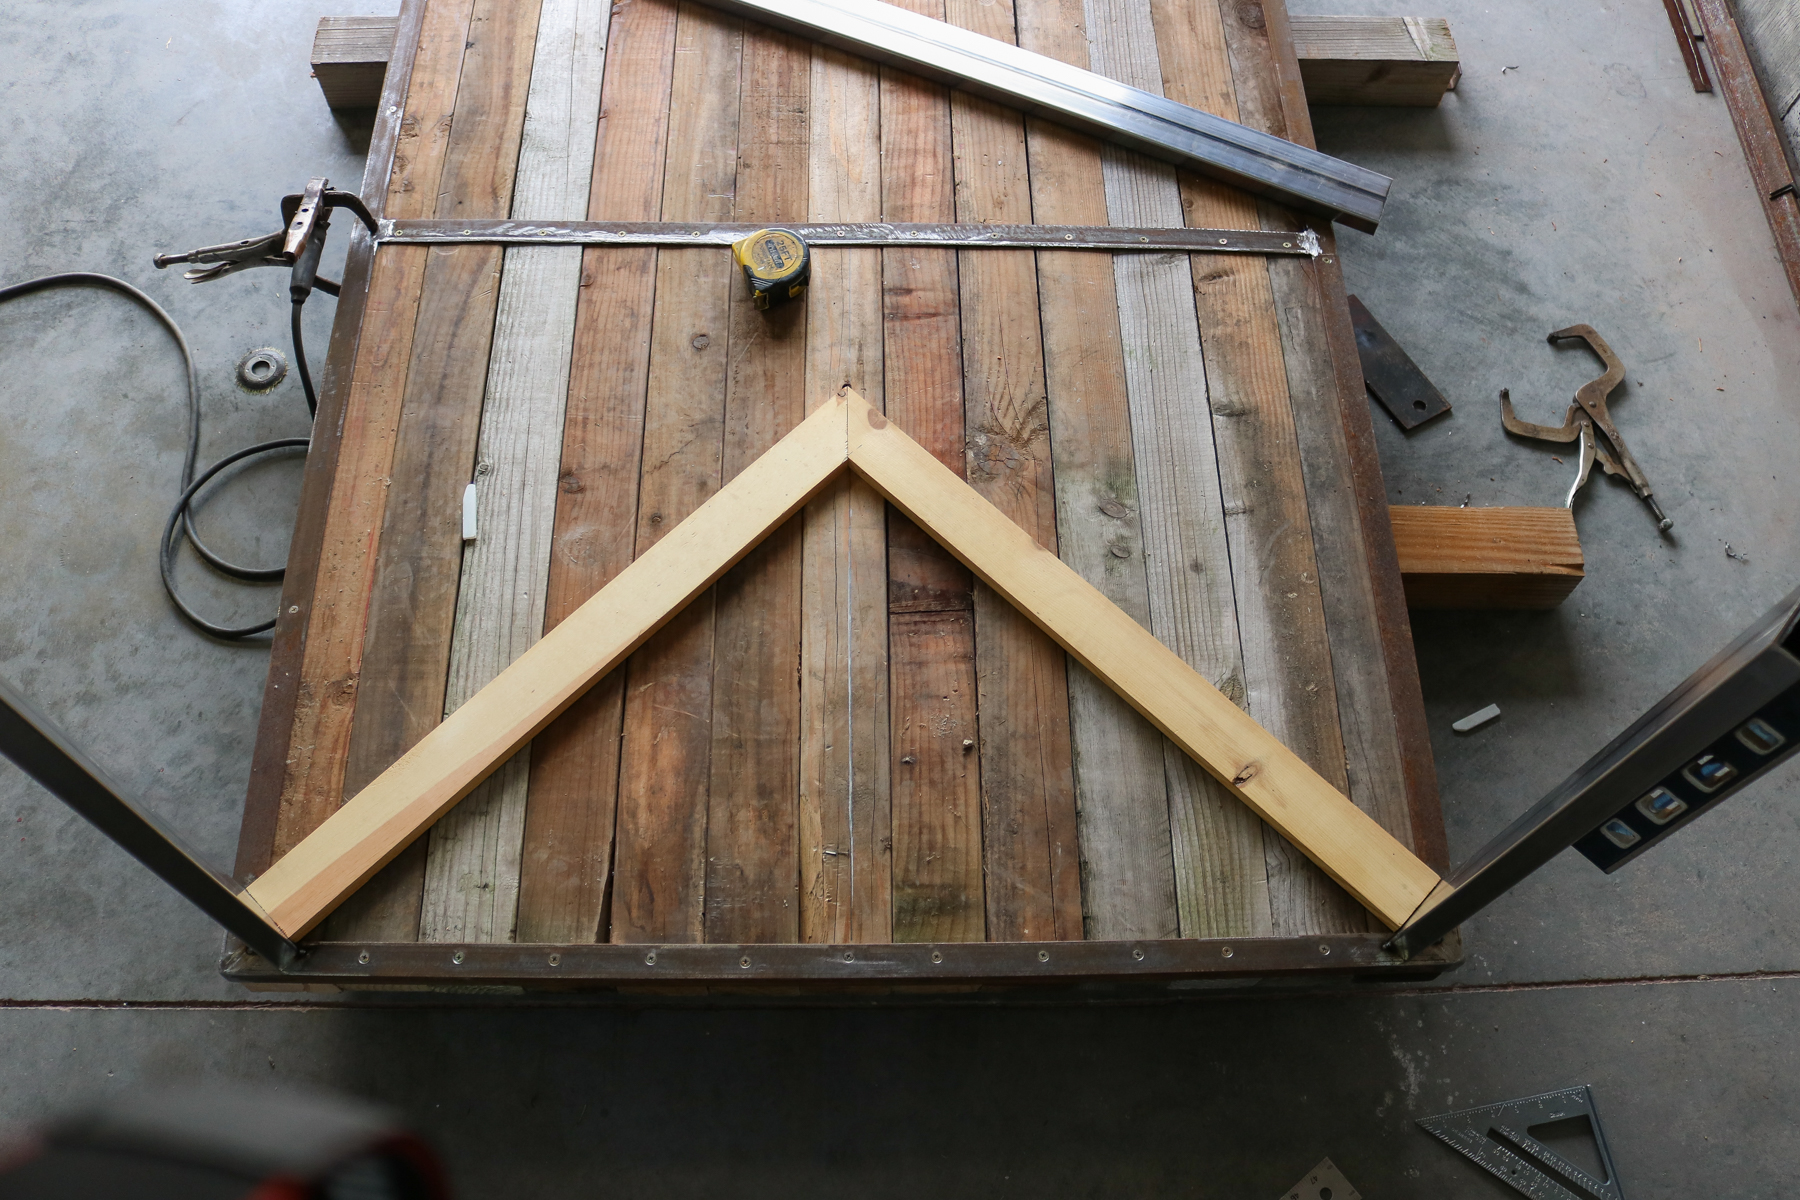
Here’s where we marked the wood pieces on the metal and cut each piece of metal accordingly. Man I wish I had a picture of how it looked after we cut the metal. HAHA!! I think we got to carried away trying to fix the problem. The metal V was close but not perfect!! So my husband tweaked it a bit to get it to work. I guess you could use this method if your paranoid non-professional like me. HAHA! (PS: He did the second V his own way using the same method as he did with the angle iron. –> Stalk on top of each other and slice through. It worked like charm! 😀 )

Here’s some more pretty welds for ya’ll to see!! These are the legs attached to the table top.

Fixing Shifting Welds
And the welding continues. If your wondering what that line across the top is. We spray painted a line to make sure we don’t misplace the wood pieces while in the process of building!! I wouldn’t want to spend another whole hour trying to piece the puzzle together now would I !! 😀 😀
Find the difference between these two pictures?! (above and below) HAHA!! Believe it or not things really shift while welding!! As he was welding the V into place we noticed that the V kept shifting and stuck upwards!! So to fix the problem he put little wood boards on the corners and slightly pushed down on the V while welding! Problem fixed!
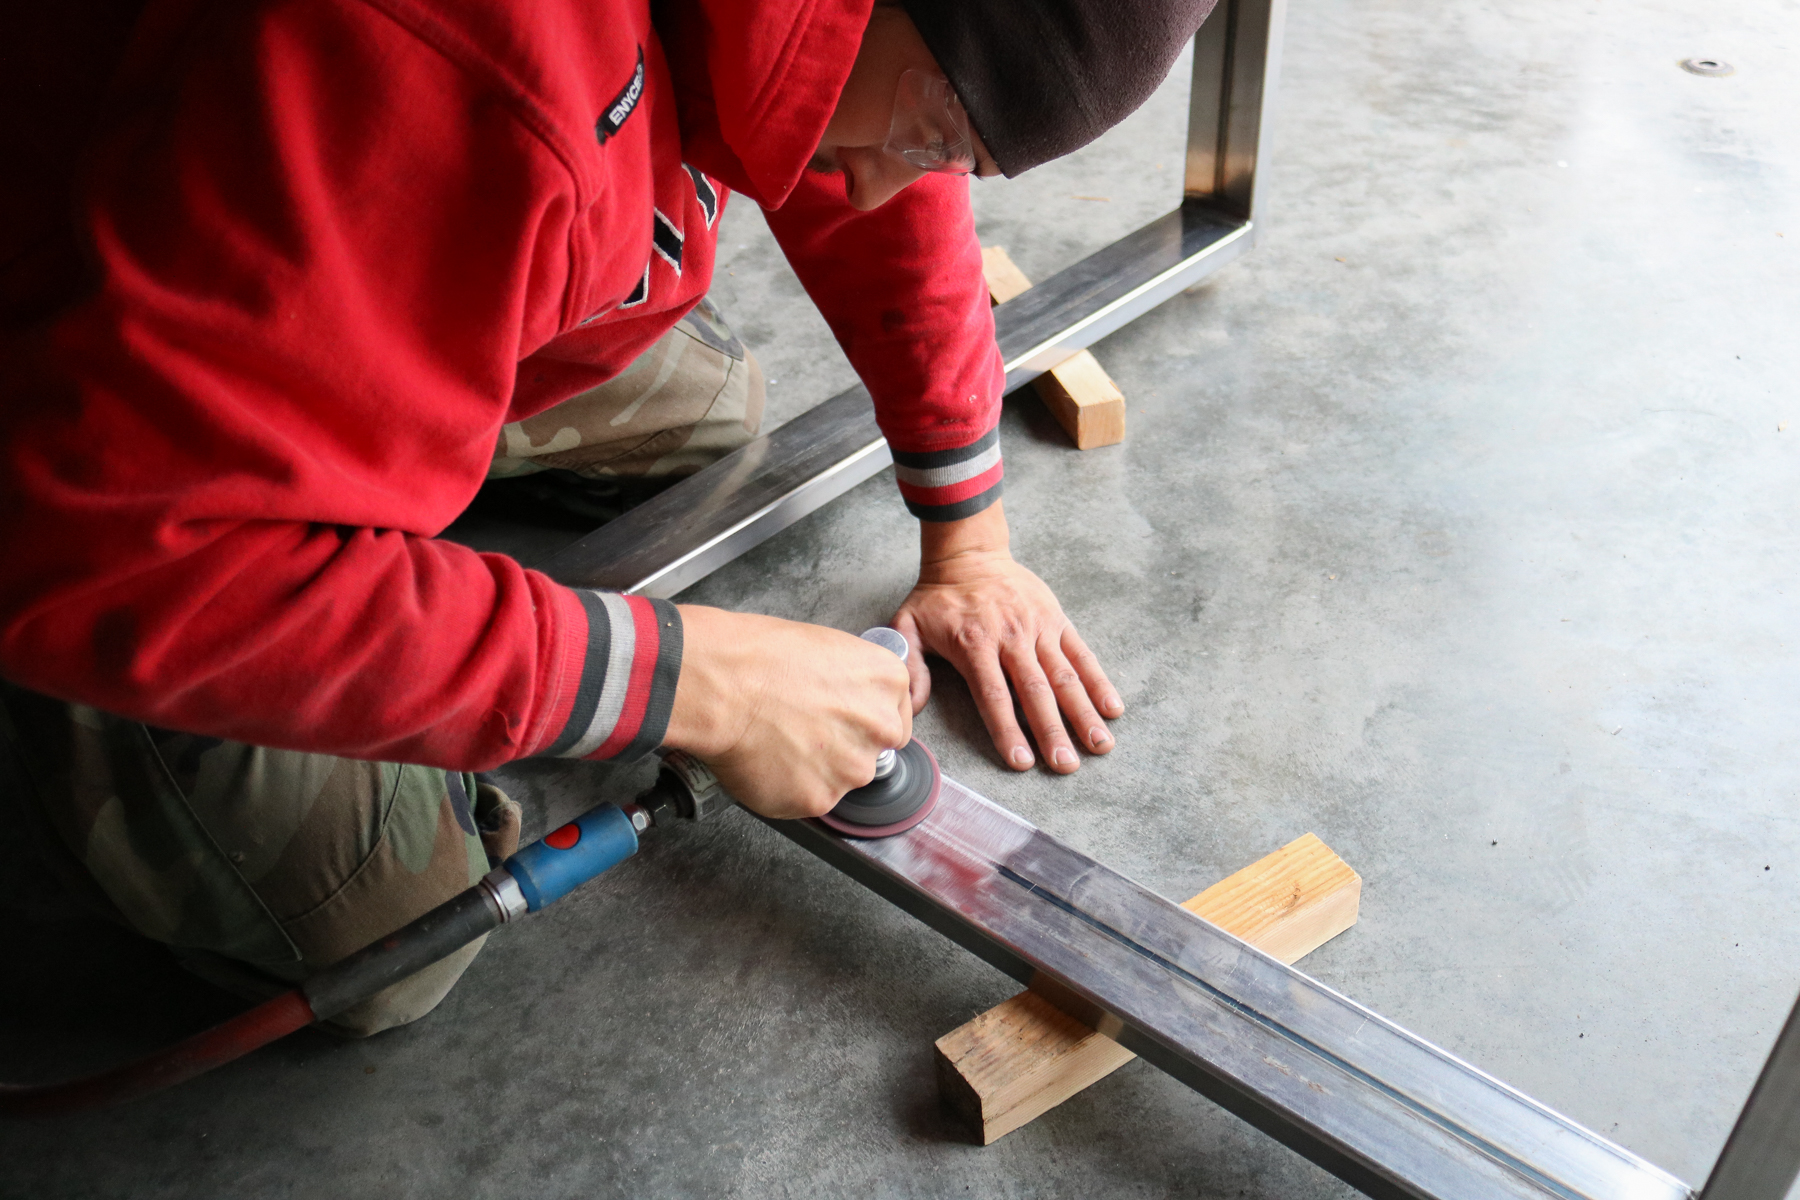
To finish off the metal he sanded down all the rough lines.. This was way to much work for no reason!! We were debating on leaving the legs silver or spray painting them black.. ?!! First we were going to go with the silver (raw metal) but, then I decided to spray paint them because I didn’t want them to eventually rust. I think if you were to spray paint them you could just wipe down the metal and spray paint.. Or to be on the safe side give it a light sand.
Finishing touches
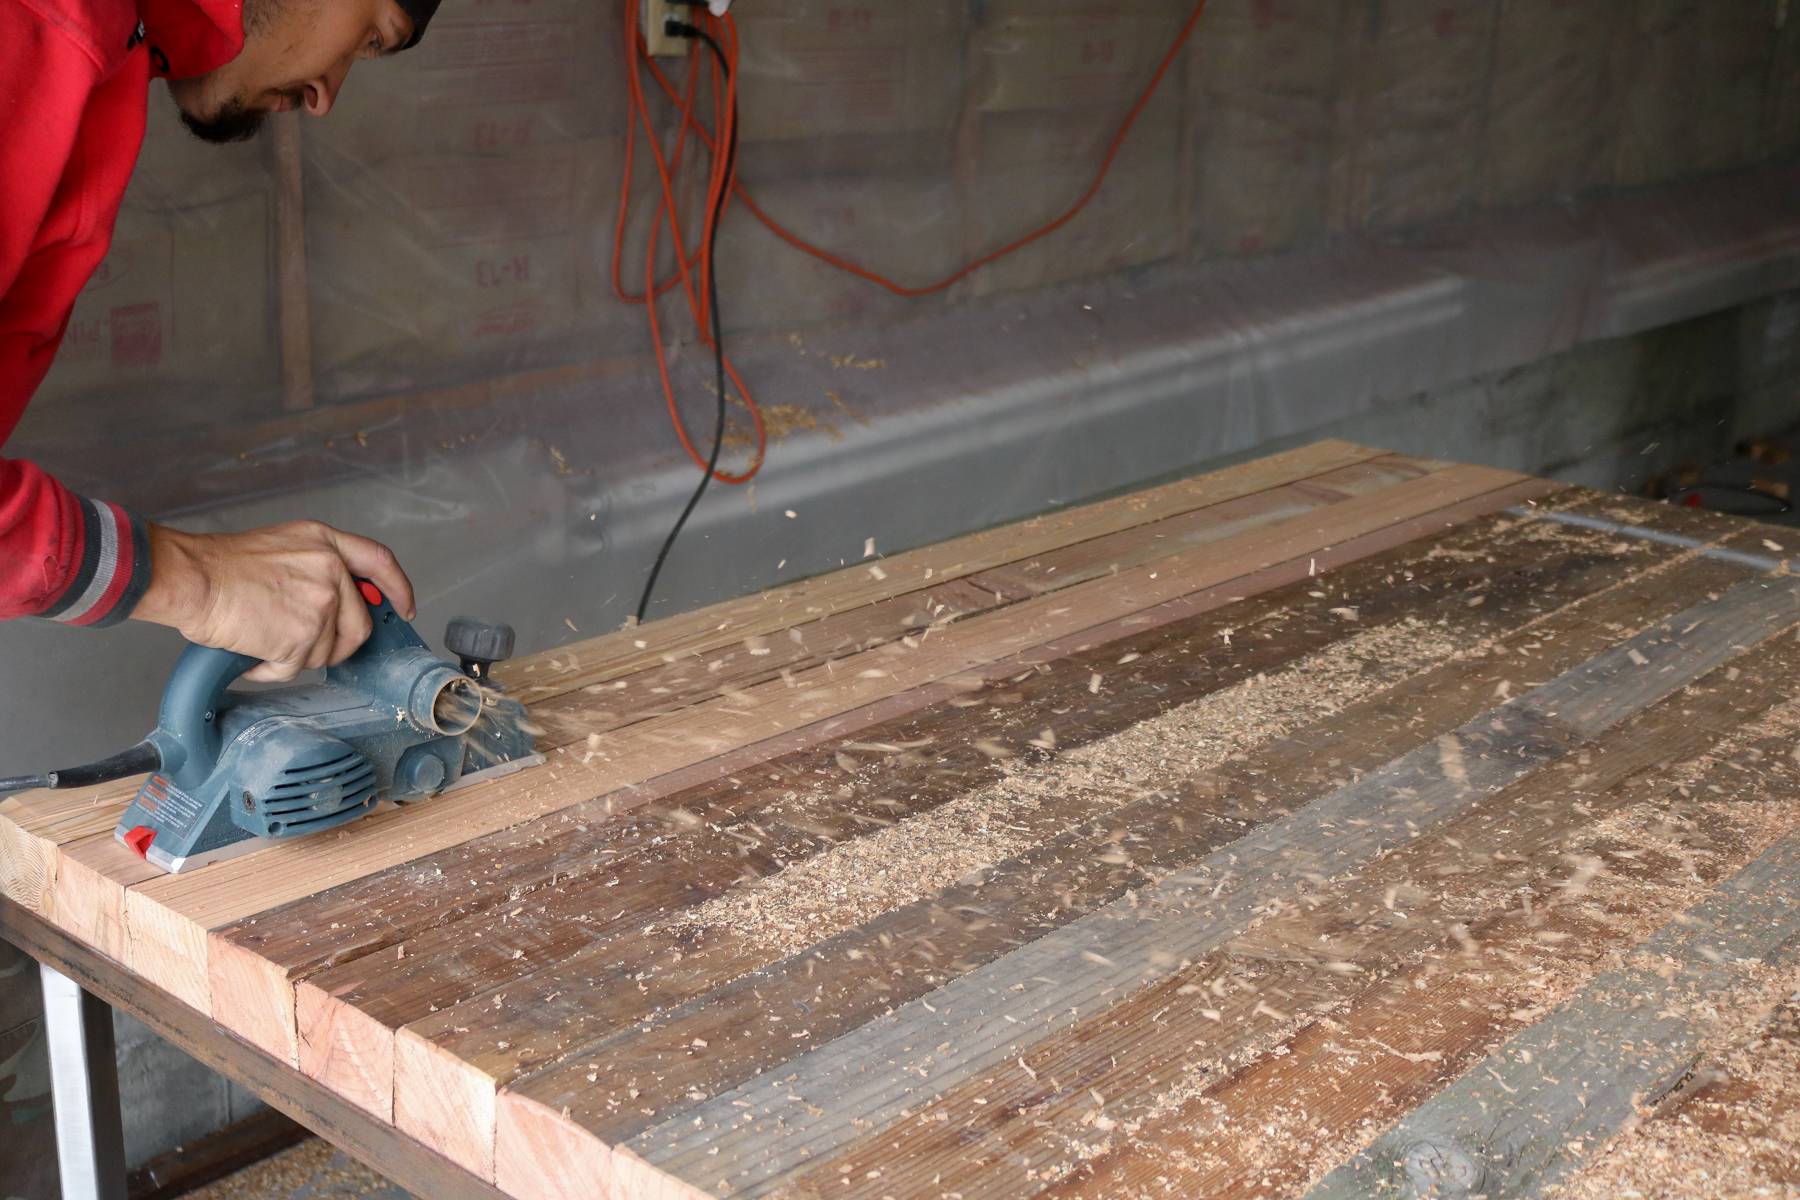
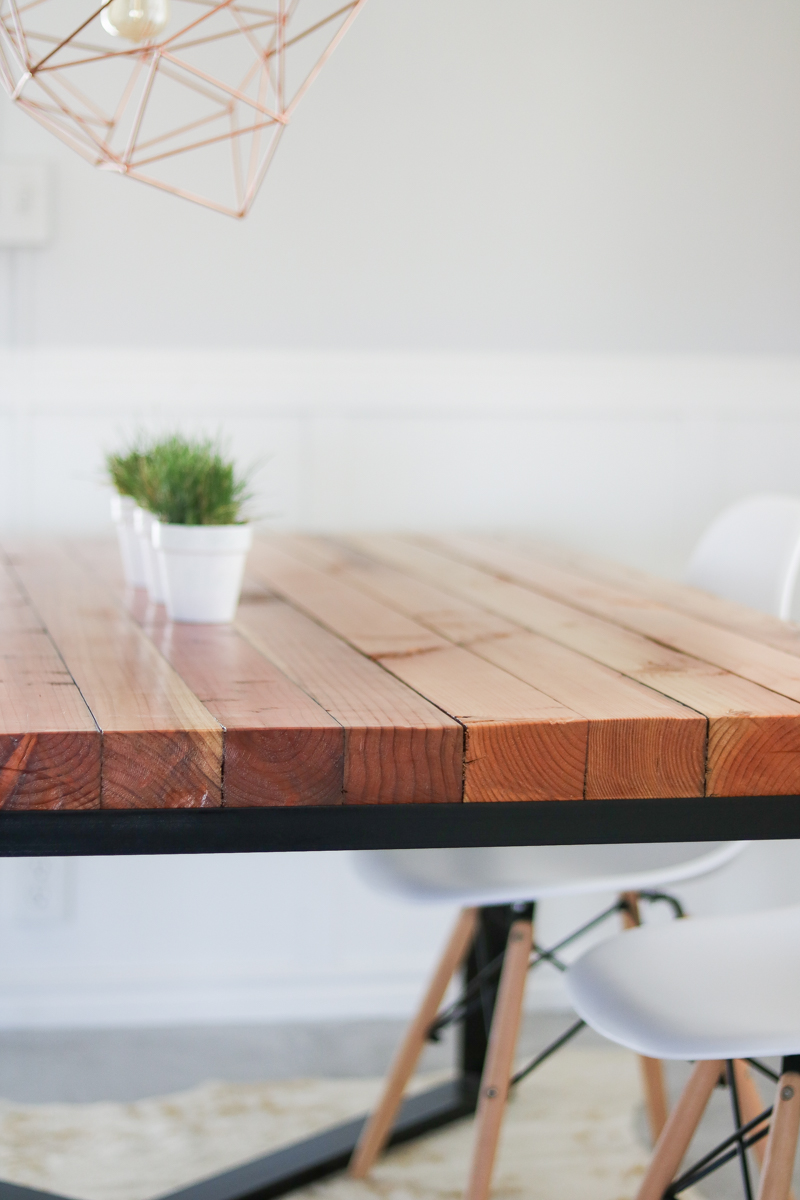
This electric wood planer sure came in handy. I don’t know what we would do without it!! We literally took off a good 3/4 of an inch off the top of the table to remove all the ugly wood.
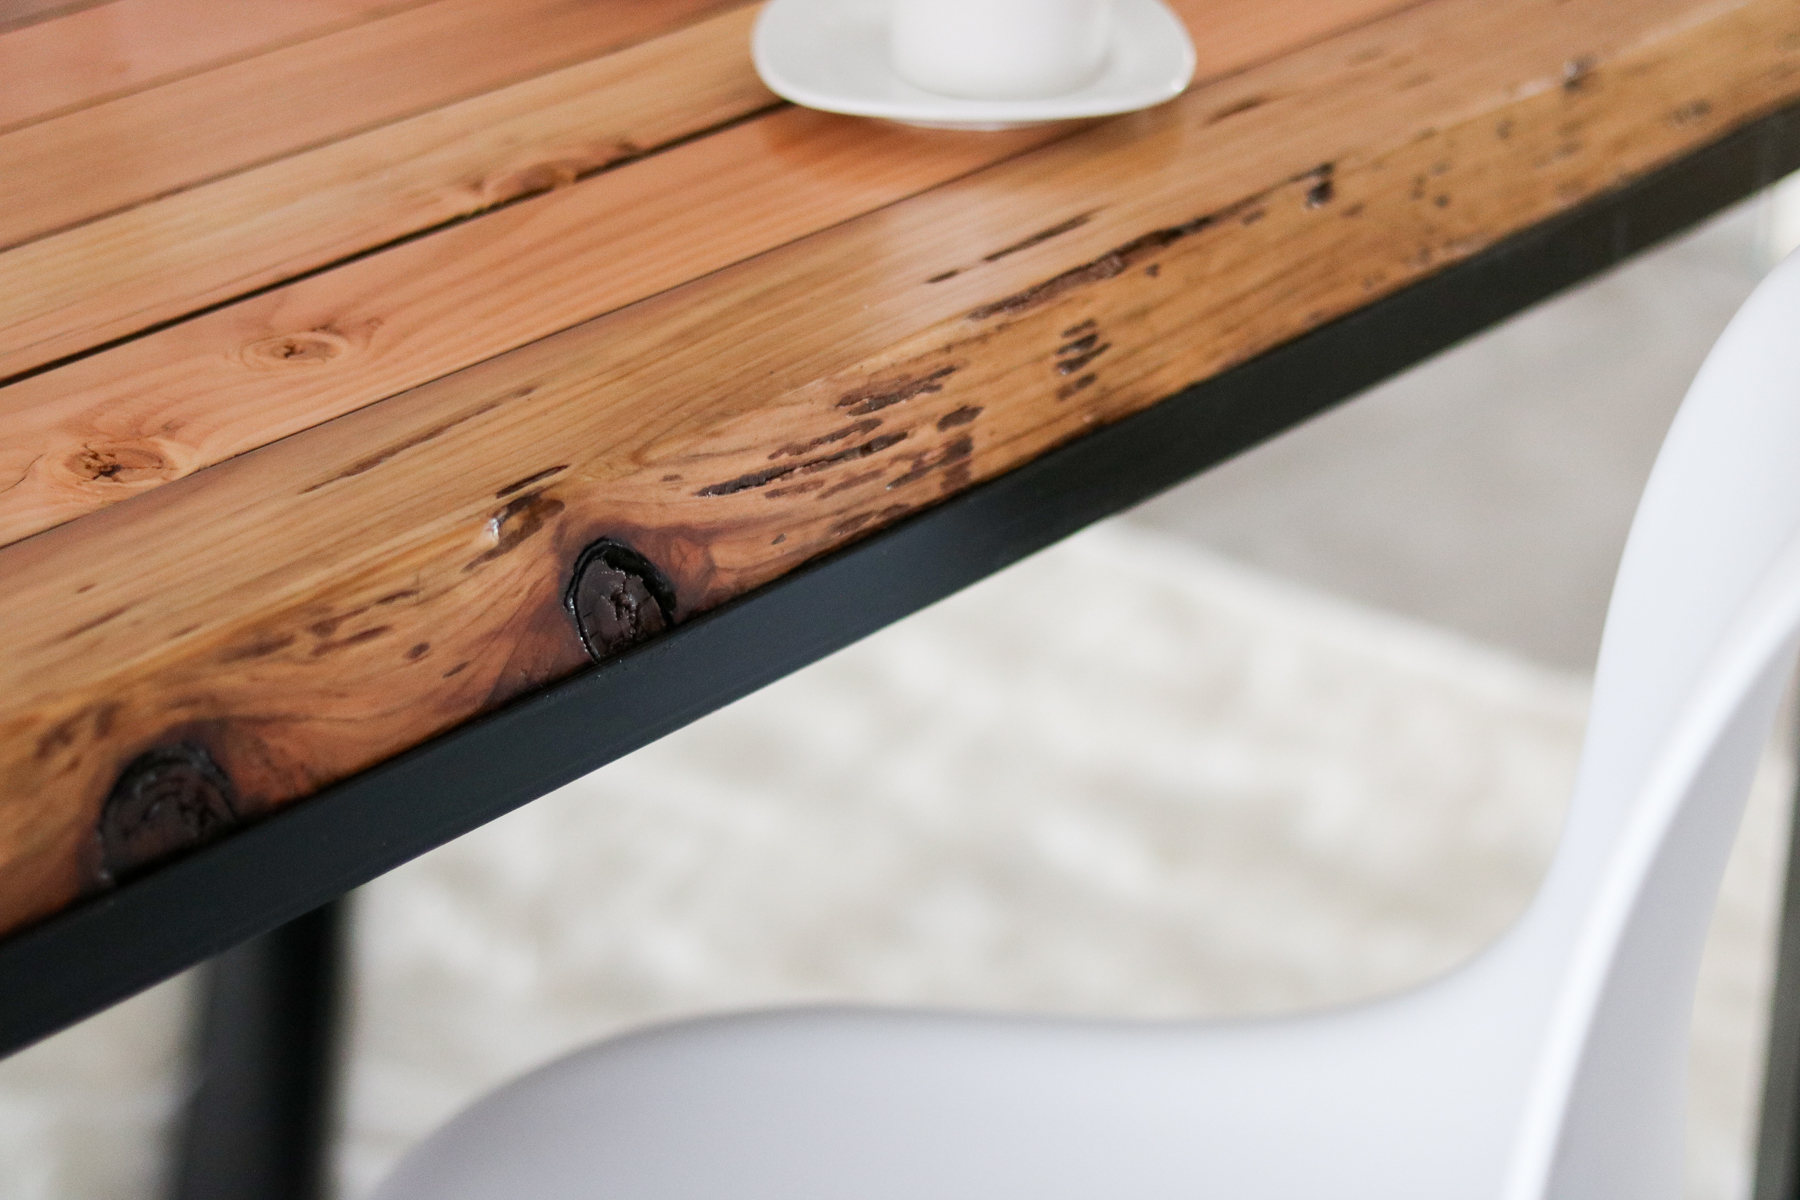
And finally the boys masked it and spray painted it black with Rustoleum spray paint. To finish off our top we used lacquer. I didn’t use a wood stain because I wanted it as light as possible. I wish I could of left the top without a protective finish because honestly the color changed from pale to a super contrasted wood grain. It is slowly growing on me though!! 😀
Protecting Your Wood the Correct Way!!
Over the years I’ve acquired a few tips and tricks under my sleeve when it comes to protecting wood furniture. I’ve used a lot of water based polyurethane, oil based polyurethane, Lacquer and Wax. I’ll break down my experience with each one but, just so you know out of all of these I would have to say my favorite is Lacquer. Here’s why!!
-
Lacquer: Goes on clear and stays clear. Plus it is super durable. ( Good to use on light or dark furniture : may crack overtime. Honestly this doesn’t bother me at all. I found a few tiny cracks on my computer desk after 3 years of use and the protection still holds up even with the tiny cracks. )
- Oil Based Polyurethane : Has a yellow tint and once dry turns super yellow… My kitchen floor was ruined with it. I literally used it over white paint and my whole floor looks nasty yellow. To make matters worse within one year my whole floor turned even worse yellowing in spots. That said, it is durable but, it stinks longer then lacquer in my opinion. (note: don’t use on white or light colored furniture)
- Water Based Polyurethane : Okay!!… OH BOY!! Where do I begin the oil based makes me pretty upset but this.. 🙁 MMMMMNN!!! Don’t waste your money. Maybe I haven’t come across a good one. HAHA!! In my experience this stuff goes on like glue and dries with white spots on a dark surface.. Ruined my stairs with this!! LOL. ( note: Don’t use on dark surfaces!! )
- Wax: Honesty I don’t know how this is even meant for furniture. I used the Johnson’s brand from home depot a few years ago. It’s meant to go on chalk paint and you need to re-wax your furniture every 3 weeks or so depending on the usage. I painted our dining table white and applied wax for protection. A dining table probably isn’t the best choice to use wax on because I gotta tell you it was all in stains within about 3 weeks with only 3 people in the house. I gave up re-waxing it after about 3 rounds!! To much of a hassle and i don’t see the protection anyways. Maybe if your furniture is used super lightly this would be okay. (good to use on dark or light furniture)
My Improved Protection Method
I’m not a big fan of shiny things so I wanted to protect my table with satin finish lacquer, however satin is not 100% waterproof. It will hold up just not as good as a gloss finish. So for this table we did 3 coats of gloss lacquer. Then we let it cure for 2 days, gave it a light sand and finished it off with 1 coat of satin lacquer. If that doesn’t make sense we have a satin finish table with 3 heavy coats of gloss under.. 😀 I’ll let you guys know how it holds up! 😀 WOW HAHA that was a lot of finishes!! I think that’s it!! Let’s see how the finished table looks!! 😀 😀 😀 (no more I promise)
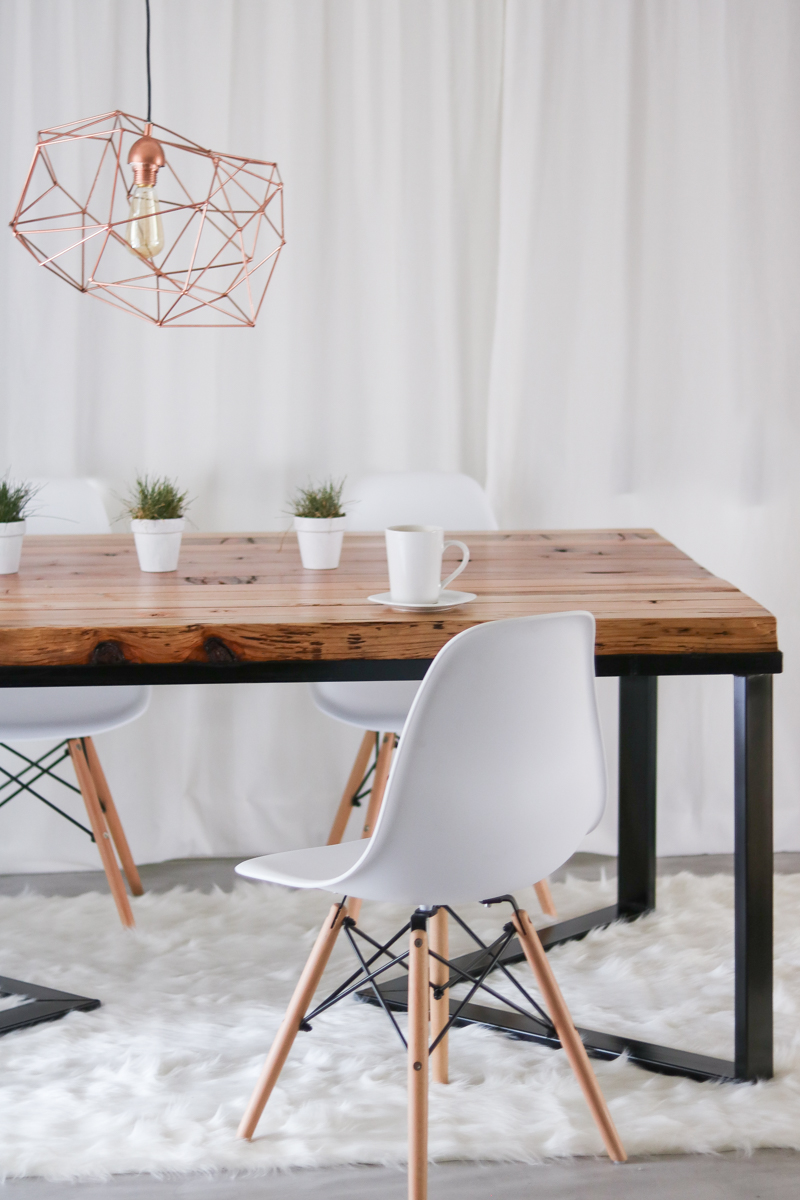
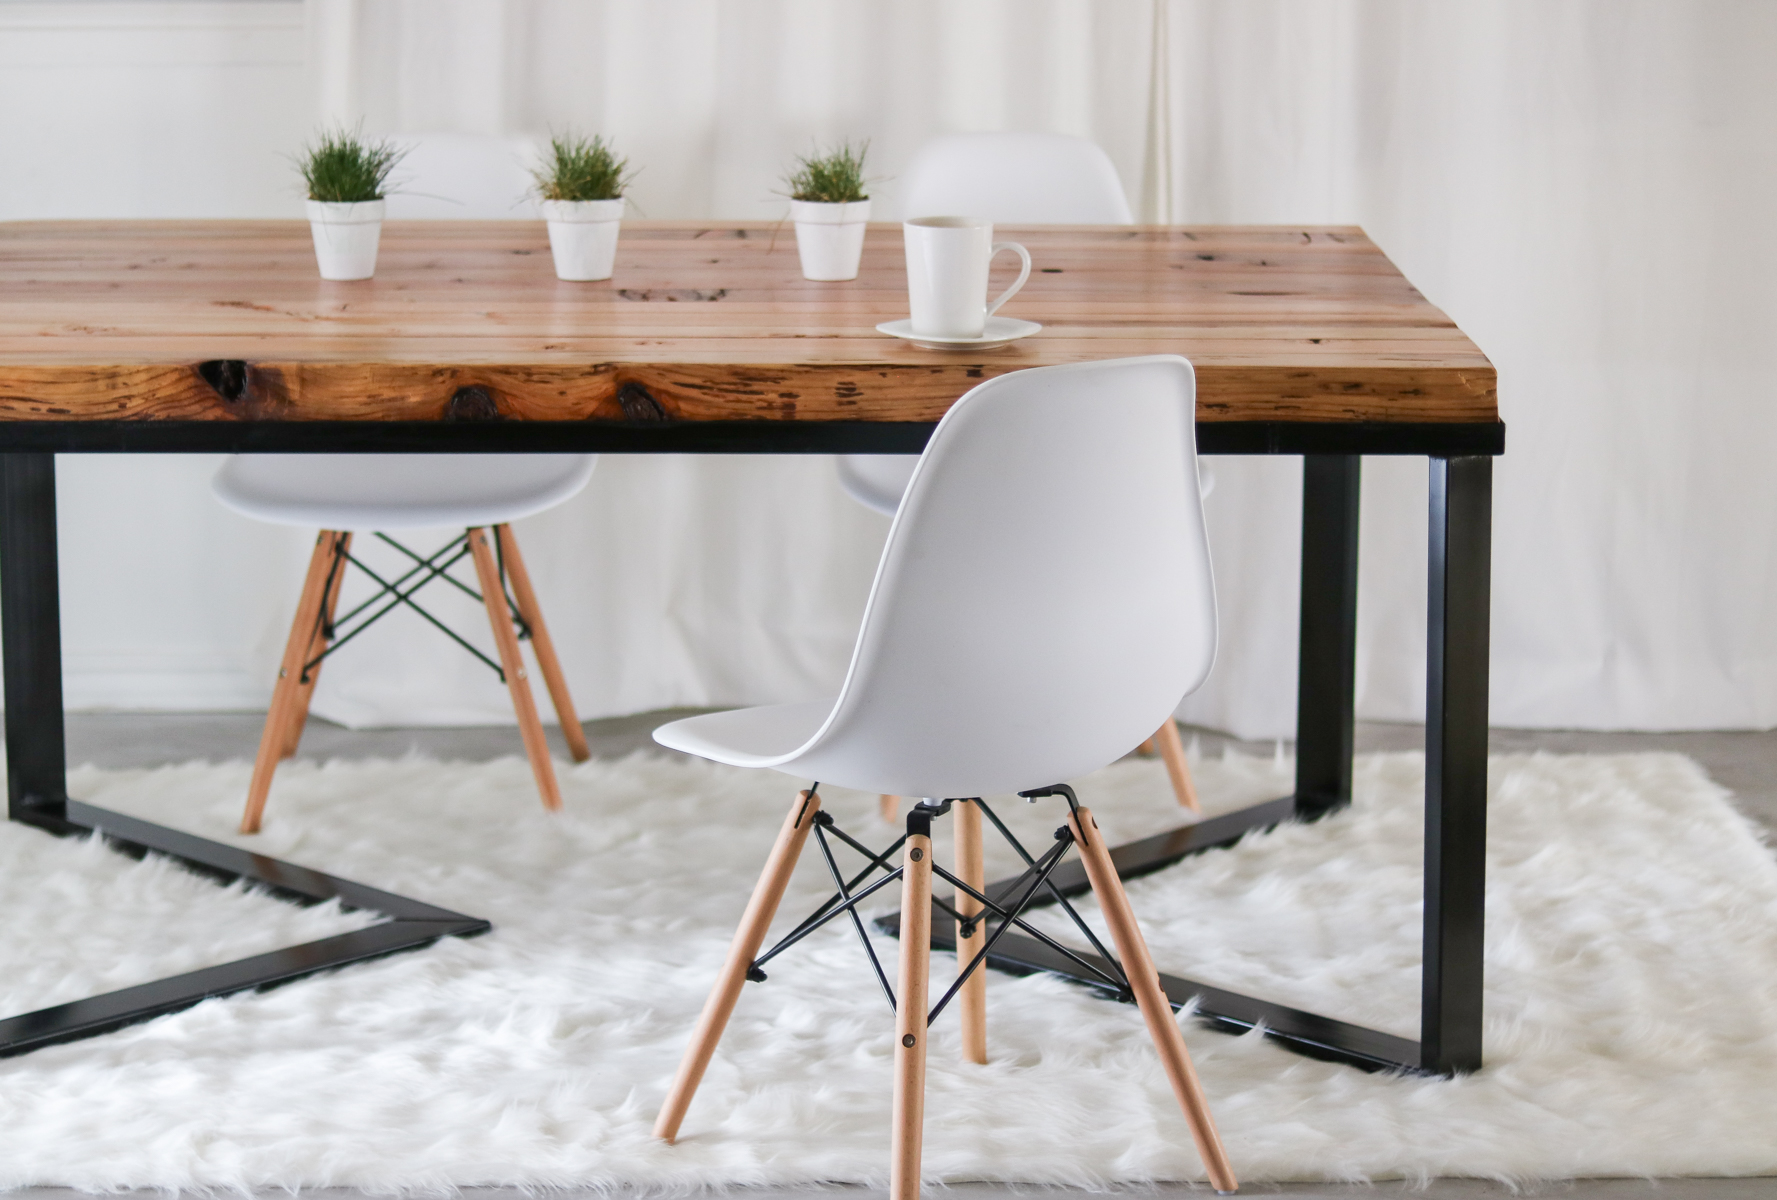
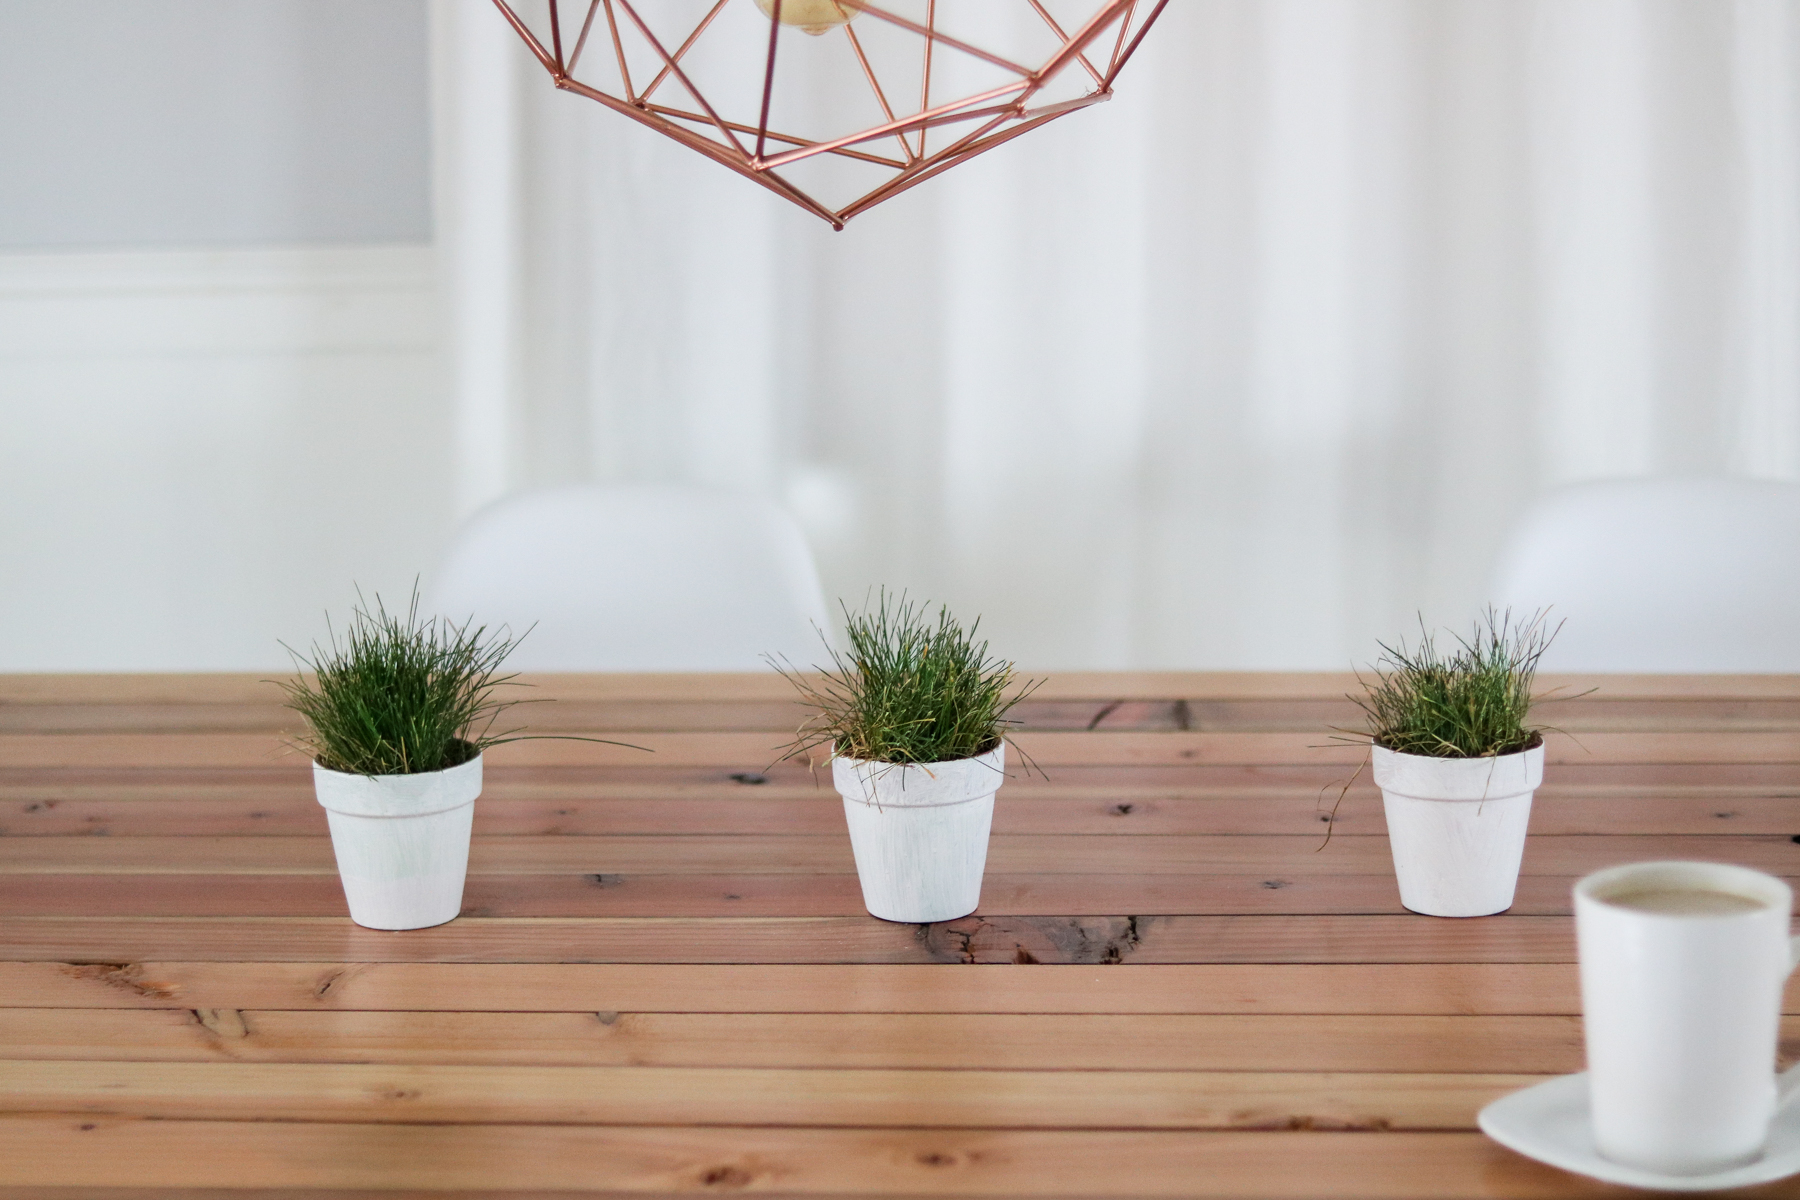
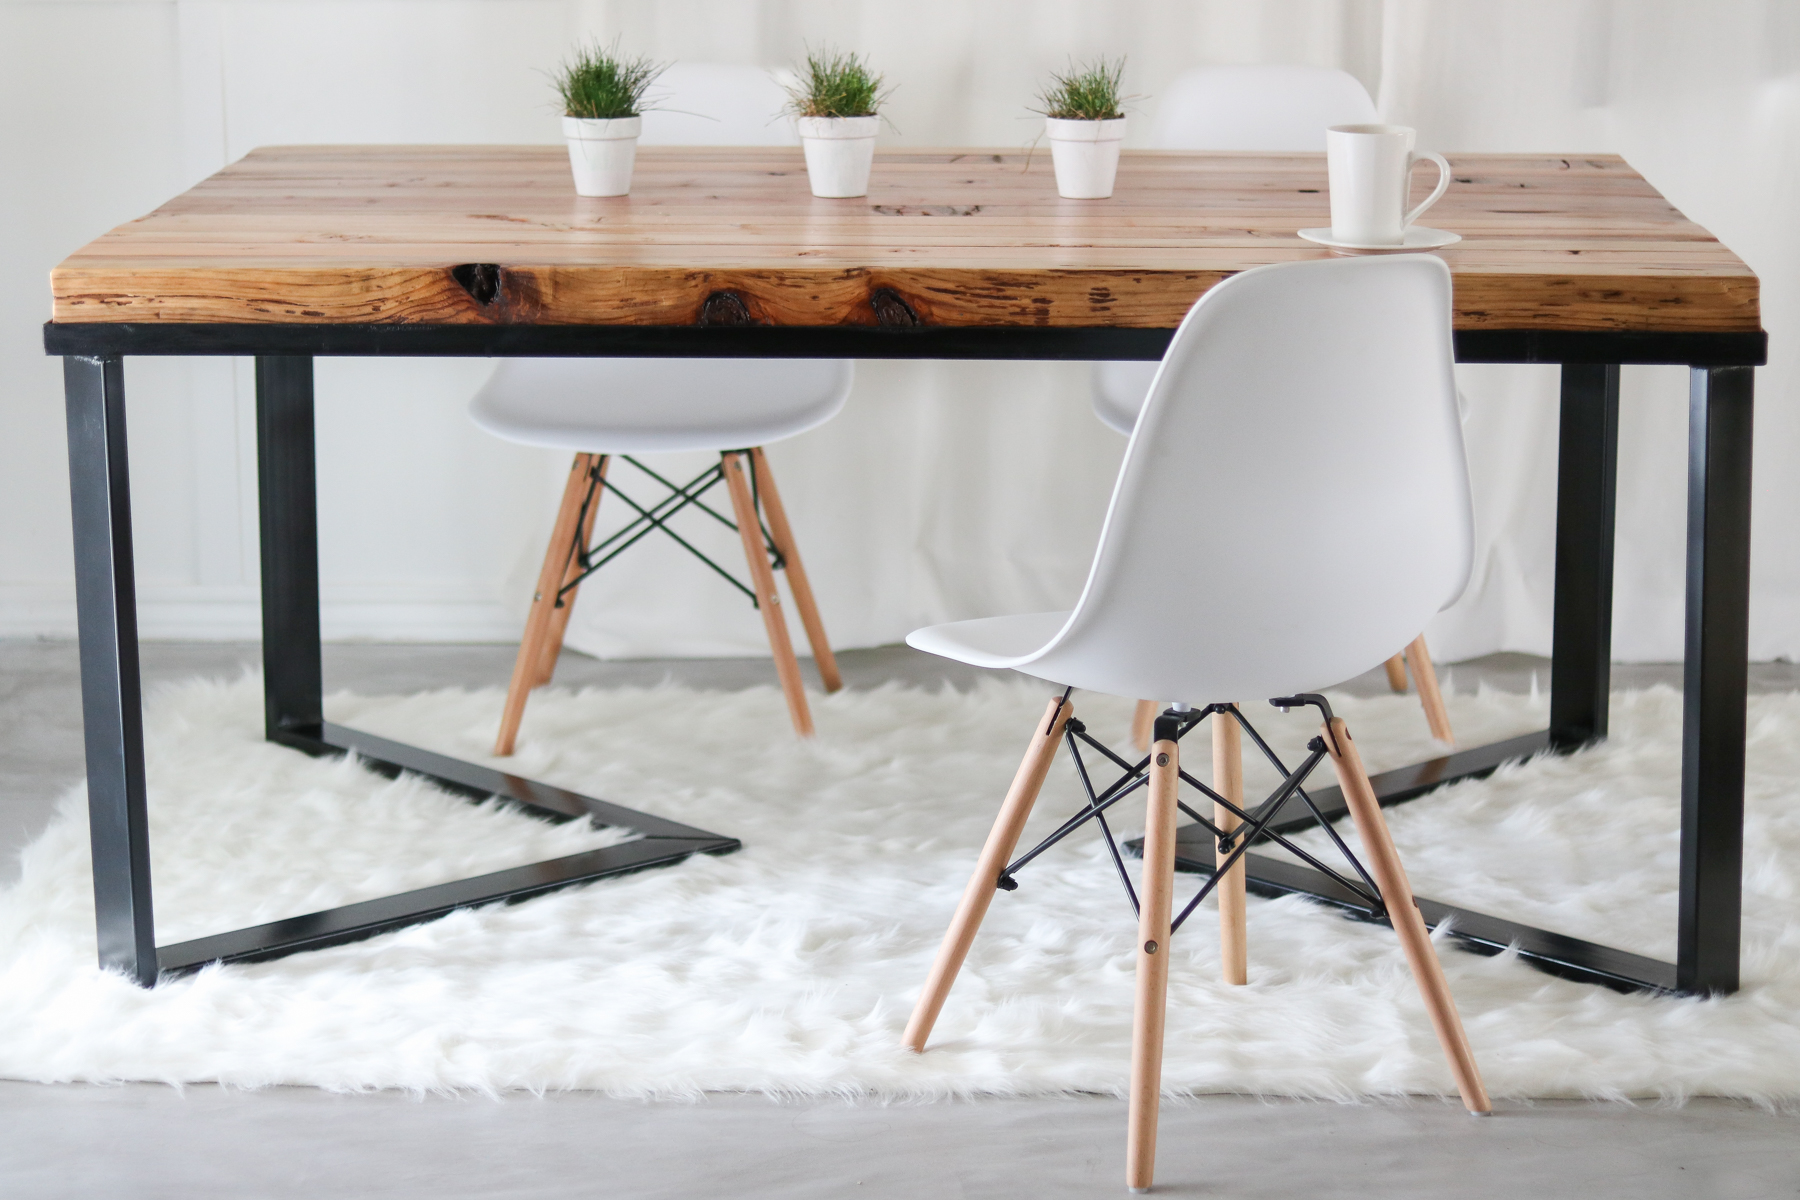
I love rustic wood. This wood grain turned out so beautiful. ( you can see how I made that geometrical pendant light here . )
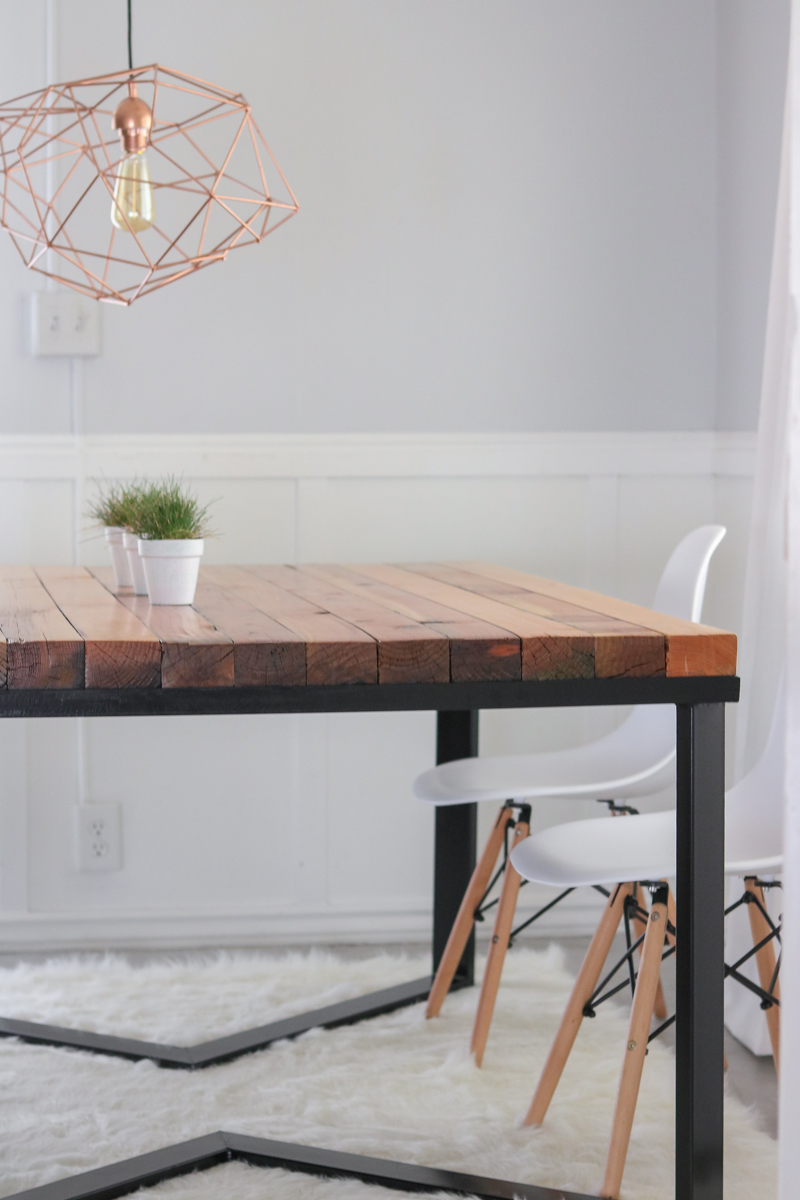
I’ve always wanted a very light and airy dining room!! I think I finally got one 😀 ! To be honest I was super indecisive about painting the legs black. If you follow me on Instagram you probably already know because you helped me pick 😀 ! I was worried the black would take away from the light and airy feel but, I think it looks rather well!! 😀 😀 What do you think? Should I go back to silver? HAHA!! (hope my hubby ain’t reading this right now)
WE have since made a new dining table. I share all the DIY details here.
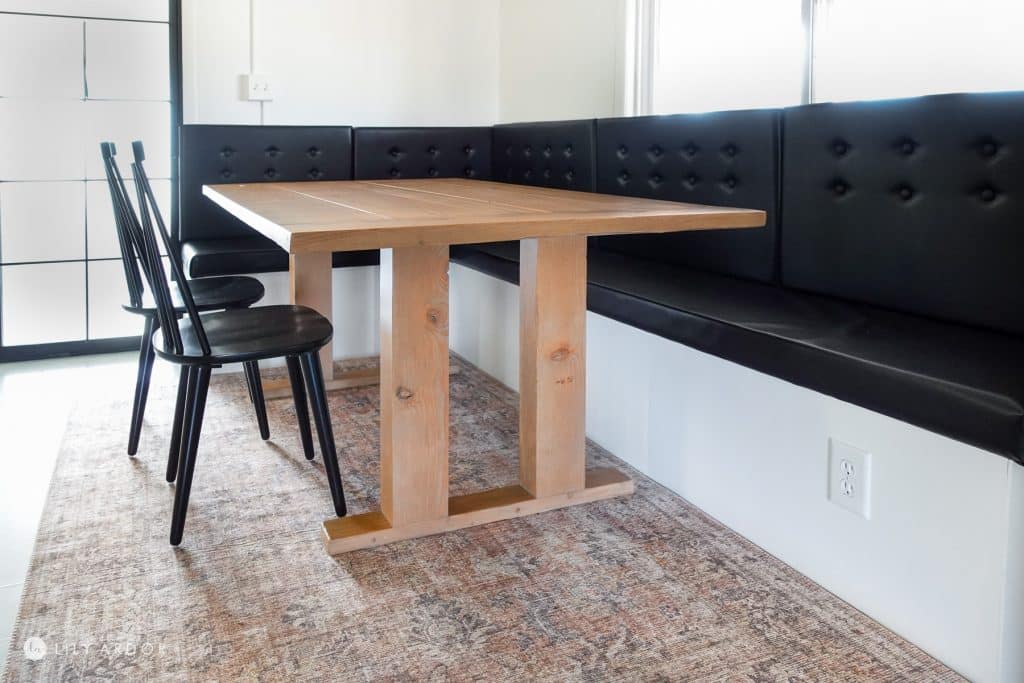
DIY dining table
It has few chips and cracks but that what makes it unqiue. 😀 I kinda like it.
Reality..
Awe look at those cute little centerpieces. I AM LAUGHING looking at this photo right now because, I was to frustrated to go to town for and centerpiece and instead used grass from our front yard!! YEP!! my hubby yelled at me!! 😀 😀 OOPS!! Don’t worry I didn’t get a chunk out of the middle of the yard I got it off the edges! 😀 HAHA! (now you know my secret.. shhh don’t tell anyone) 😀 😀 😀
And as if these post isn’t already a mile long…,You wanna know why I was so frustrated? !! You see that beautiful pastel gray floor? (photo below) Let’s just say I spend a good four hours masking it off with heavy duty paper and painting over it to match the photo-shoot!! DEDICATION!! HAHA! My floor is hideous under there!! YELLOW to be exact. It was a lot of work but totally worth it because, now I want to re-paint my yellow floor for real!! 😀 😀

Here’s a close up on some pretty welds!! 😀 DANG!! He’s good I tell ya!!
Did I get all the angles yet? I should prob stop.. Can you tell I’m a little obsessed with it!! HAHA
Oky Doky than I hope you love it as much I do!! 😀 Let me know what you think? Thanks for joining me on this LONG adventurous post!! I hope you tag along for more!! I promise I won’t bore you! 😀
Last but not least here’s that video I was talking about!! ENJOY!!
To give you a better idea of the products we used here are some links.
Magnifique réalisation, très inspirante ,j’ai trouvé votre article en cherchant comment refaire un plateau de table .J’ai une table ikea en pin que j’ai acquis il y a de nombreuses années et elle ne correspond plus à notre vie actuelle je la voudrais plus large ,je suis donc partie à garder les pieds en les peignant en noir et le projet de refaire le plateau en bois de recup et je tombe sur votre merveille et cela me conforte encore plus dans cette envie …merci de ce bo partage
I am so glad you liked it. I was in the same situation. Our previous table didn’t fit our needs. This table was a lot of work but totally worth it. I’m so glad you came across this post. Let me know how your table turns out! I look forward hearing from you.
I have been reading out many of your stories and i can state clever stuff. I will definitely bookmark your site.
Whats Going down i’m new to this, I stumbled upon this I’ve discovered It positively helpful and it has helped me out loads. I am hoping to give a contribution
Thank you for all your work on this site. Gloria enjoys carrying out investigation and it’s really easy to understand why. All of us hear all about the lively mode you convey vital things through this website and cause response from others about this point then our own child is without a doubt learning a lot. Enjoy the remaining portion of the new year. You’re the one carrying out a powerful job.
I think other site proprietors should take this website as an model, very clean and great user genial style and design, let alone the content. You’re an expert in this topic!
Thank you
Great design, would this work as an outdoor table? If so what kind of wood would I use and any extra steps?
Yeh I don’t see why not. Honestly though I would make something easier like the all wood dinning table we made recently. It was way faster to make – https://www.lilyardor.com/diy-farmhouse-dining-table/
I have been absent for a while, but now I remember why I used to love this web site. Thank you, I will try and check back more often. How frequently you update your web site?
New DIYS Every friday
Heya i am for the first time here. I came across this board and I find It really useful
I’ve been surfing online more than 3 hours today, but I never discovered any attention-grabbing article like yours. It¡¦s pretty worth enough for me. In my view, if all web owners and bloggers made good content material as you did, the internet can be much more useful than ever before.
whoah this weblog is excellent i like reading your posts. Keep up the great paintings! You know, a lot of people are looking around for this information, you can aid them greatly.
You are a very clever person!
AWE thank you 🙂
Hello.This post was extremely interesting, particularly because I was looking for thoughts on this topic last Thursday.
Hi !
Could you please give me the metal tubing exact dimensions ?
Thank you very much
Sure I’m sorry it took so long. This time of year is ssso busy for me. Length of the table is 66 1/4″ on the tubing, width is 44 1/4″ , height is 26 1/8″ and each v cut is 30.5″
I love it! Looks amazing, wanting to get my partner to do something similar.. just a quick question.
Is it easy to clean? we have little kids and i am imagining food going between the gaps in the wood?
Thank you Sam. yes it’ll a little hard to keep up with. I do wish I sealed the gaps with epoxy. If I ever get a chance I’ll do that.
Keep up the good work! Thanks.
Thank you 😀
Read your post. I have a question I was hoping you might be able to help with. Is a kitchen remodel worth it if you are selling your house? My dad is remodeling his kitchen but I think he’s spending too much on counter tops. Any help you could provide is greatly appreciated!
Hi! I absolutely love this! Do you know what type of wood you used??
Thank you! 😀 I believe it was timber ? Not sure though.
Hello
So nice !
Did you paint it to get that color before applying lacquer ?
No we just applied the Lacquer. 🙂 It makes the wood grain pop.
Hello, I’m so in love with this idea, but I have a question , can you tell me which kind of wood is ?
Thank You!
I believe it’s timber but i’m not sure. They’re just the wood posts sold at homedepot.
Do you think these style of legs would hold up the weight if they were made of wood? Love the style just do not weld. Thanks!
Hi Sandra, unfortunately I don’t think wood legs like this would hold up. Did you look into maybe purchasing similar ones. I haven’t been able to find the exact ones but, They have cute ones on amazon too — https://amzn.to/3aLgLY3 I remember finding super nice ones on etsy as well.
We found our metal tubing at a local shop called pacific steel. length 65″inches , width 44″ wide, height 29.5″ inches
Thank you. They do if I place the chairs further apart.
Can you please tell me where the chairs are from? Do you like them? Are they comfortable? Thank you!!
I got them on amazon. A set of 4 for around $100. They are actually really comfy. We enjoyed them for a long time. We got new chair now but we loved those white ones more. Here’s a link to the exact ones I had – https://amzn.to/40wQ1WP
Mayhoekage, Jasmine Skii, Sarah Lee Only Fans Leaks( https://UrbanCrocSpot.org/ )
Hot 4 Lexi, Lexi 2 Legit, Brittanya Razavi ONLY FANS LEAKS ( https://picturesporno.com )
I haven?¦t checked in here for some time as I thought it was getting boring, but the last few posts are good quality so I guess I will add you back to my daily bloglist. You deserve it my friend 🙂