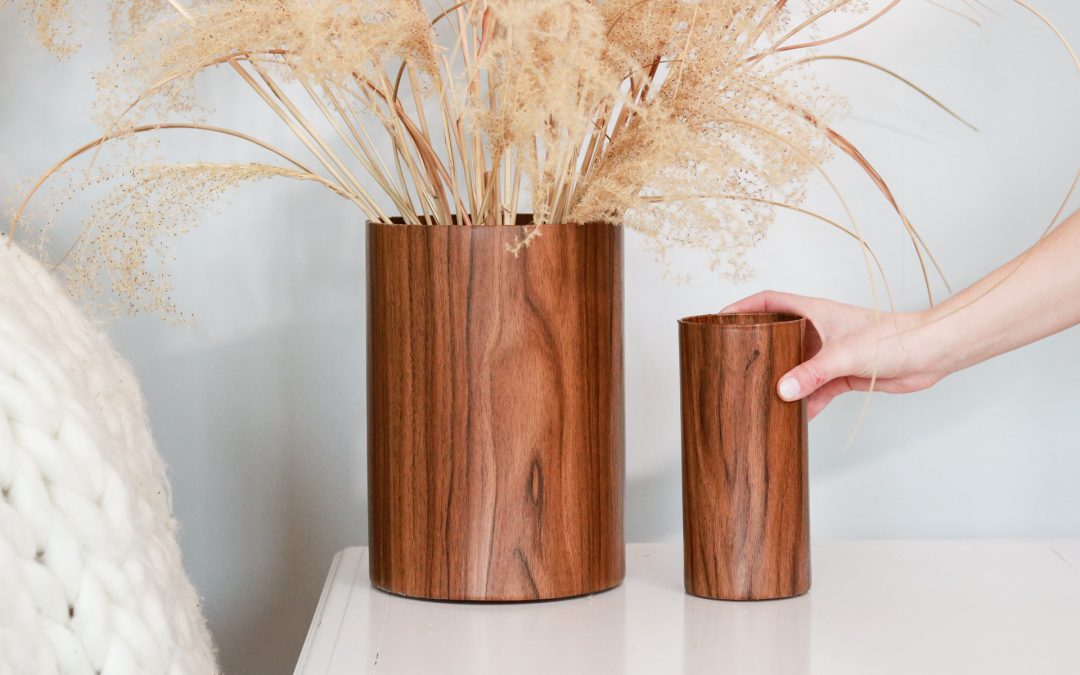
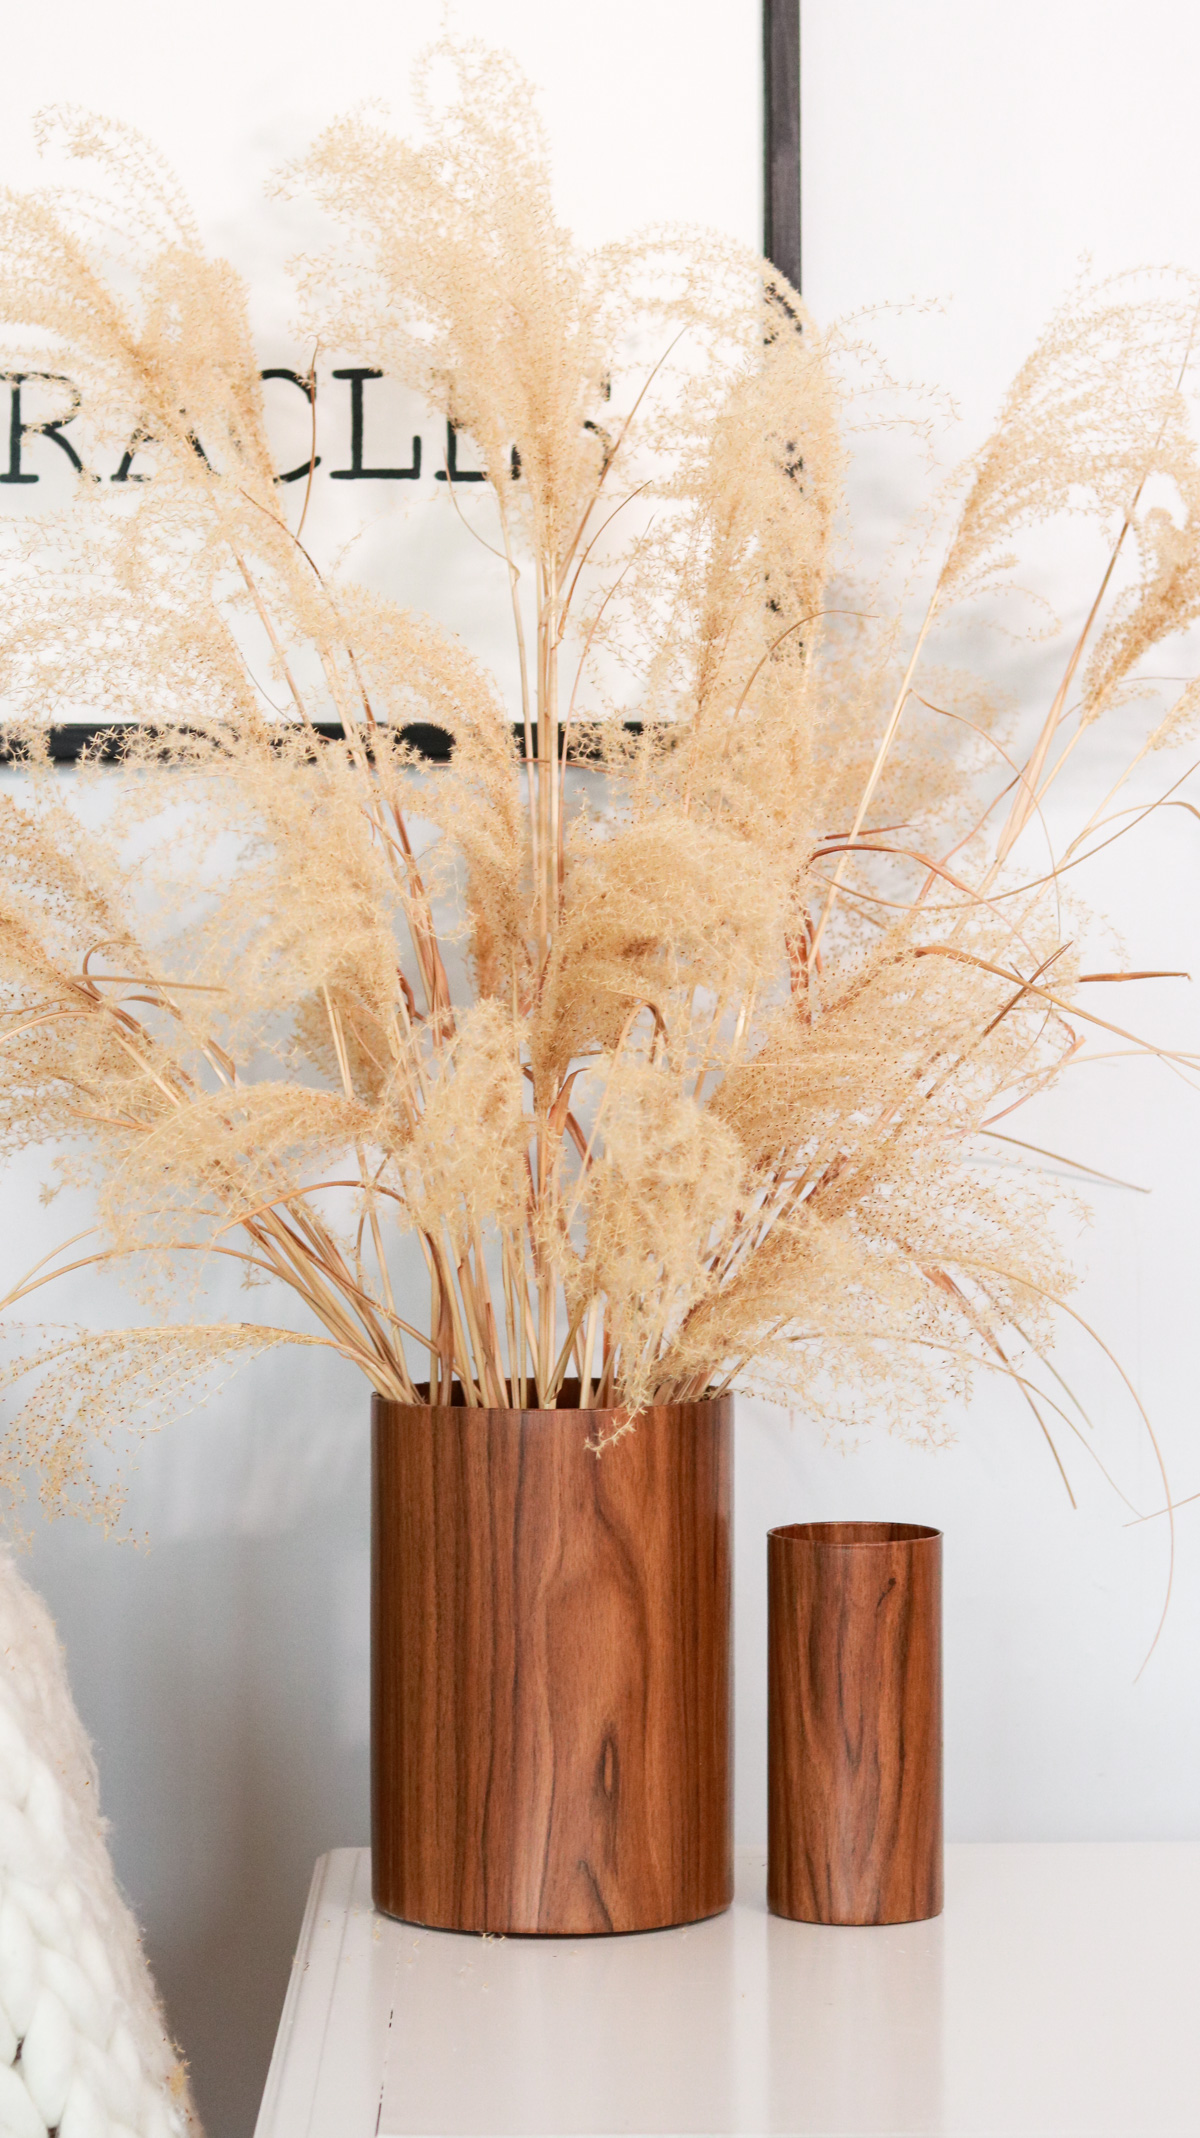
Happy Friday! I hope your week was as exciting as mine was. This week we decided to challenge ourselves with some thrift flips 🙂 by doing a glass vase to wood upcycle! No magic needed. LOL!
Among the many plans we had this year one of them was to create more DIYs together as a couple. If you’re not familiar with my youtube channel ( check it out here ) You’ll probably notice I’m usually the only one in the videos however our plan for this year is to have both me and my hubby the videos.
I guess you can call this a Who DIYs it Better Challenge because my Tony was super excited to join me for this.
We both picked glass vases from the thift store and our ideas were far from similar.
This wood vase idea was Tony’s. He wanted the end result to look like the glass vases are made of wood.
Time Needed:
About 10 -15 minutes. This is super easy to do. Depending on the size of you vase it might take a little longer to smooth out bubbles.
Total Cost: $10
He purchased the wood contact paper on amazon it was only about $7. I’ll add a link for you here if you want the same one.
Supplies:
- scissors
- wood contact paper ( I got mine on amazon – https://amzn.to/3bhTYEZ )
- glass vase ( must be straight up and down )
- utility knife
This article contains affiliate links*

DIY Wood Vase
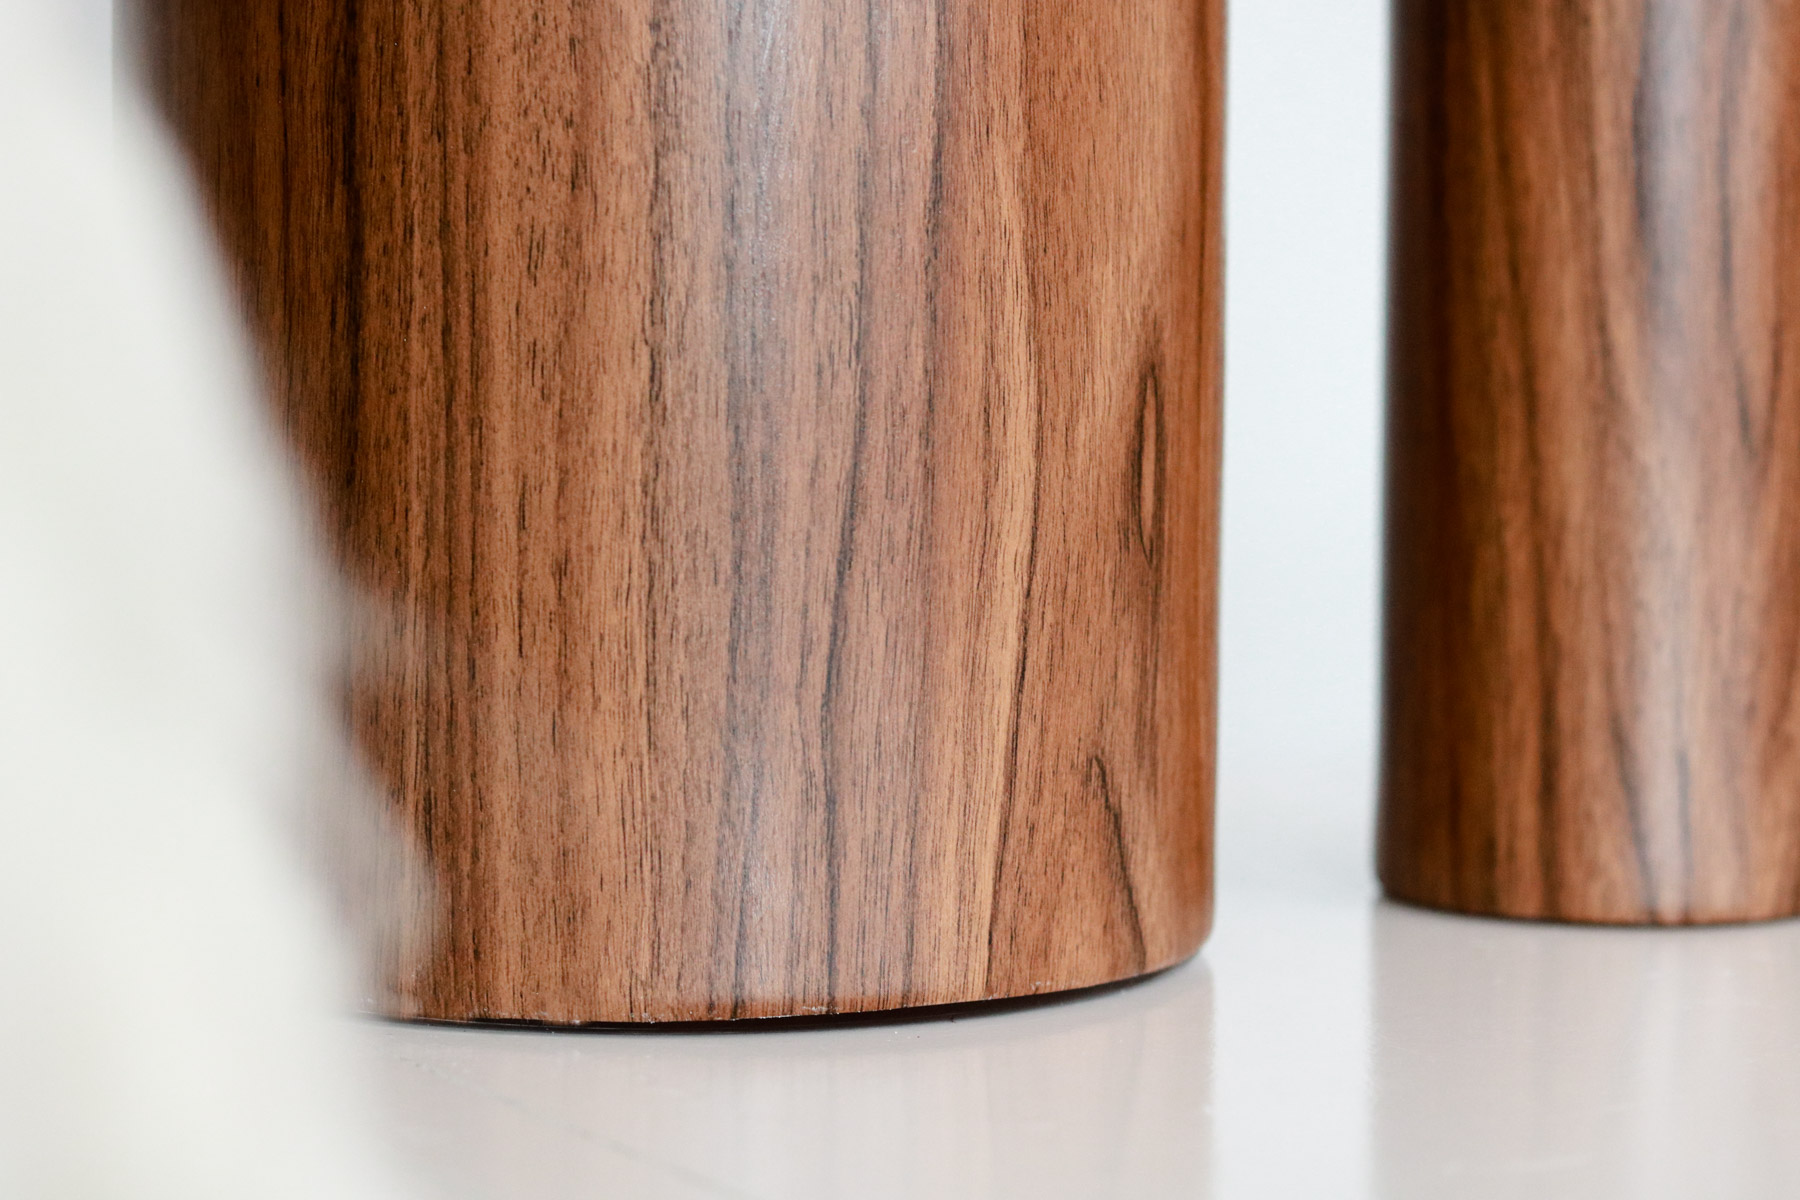
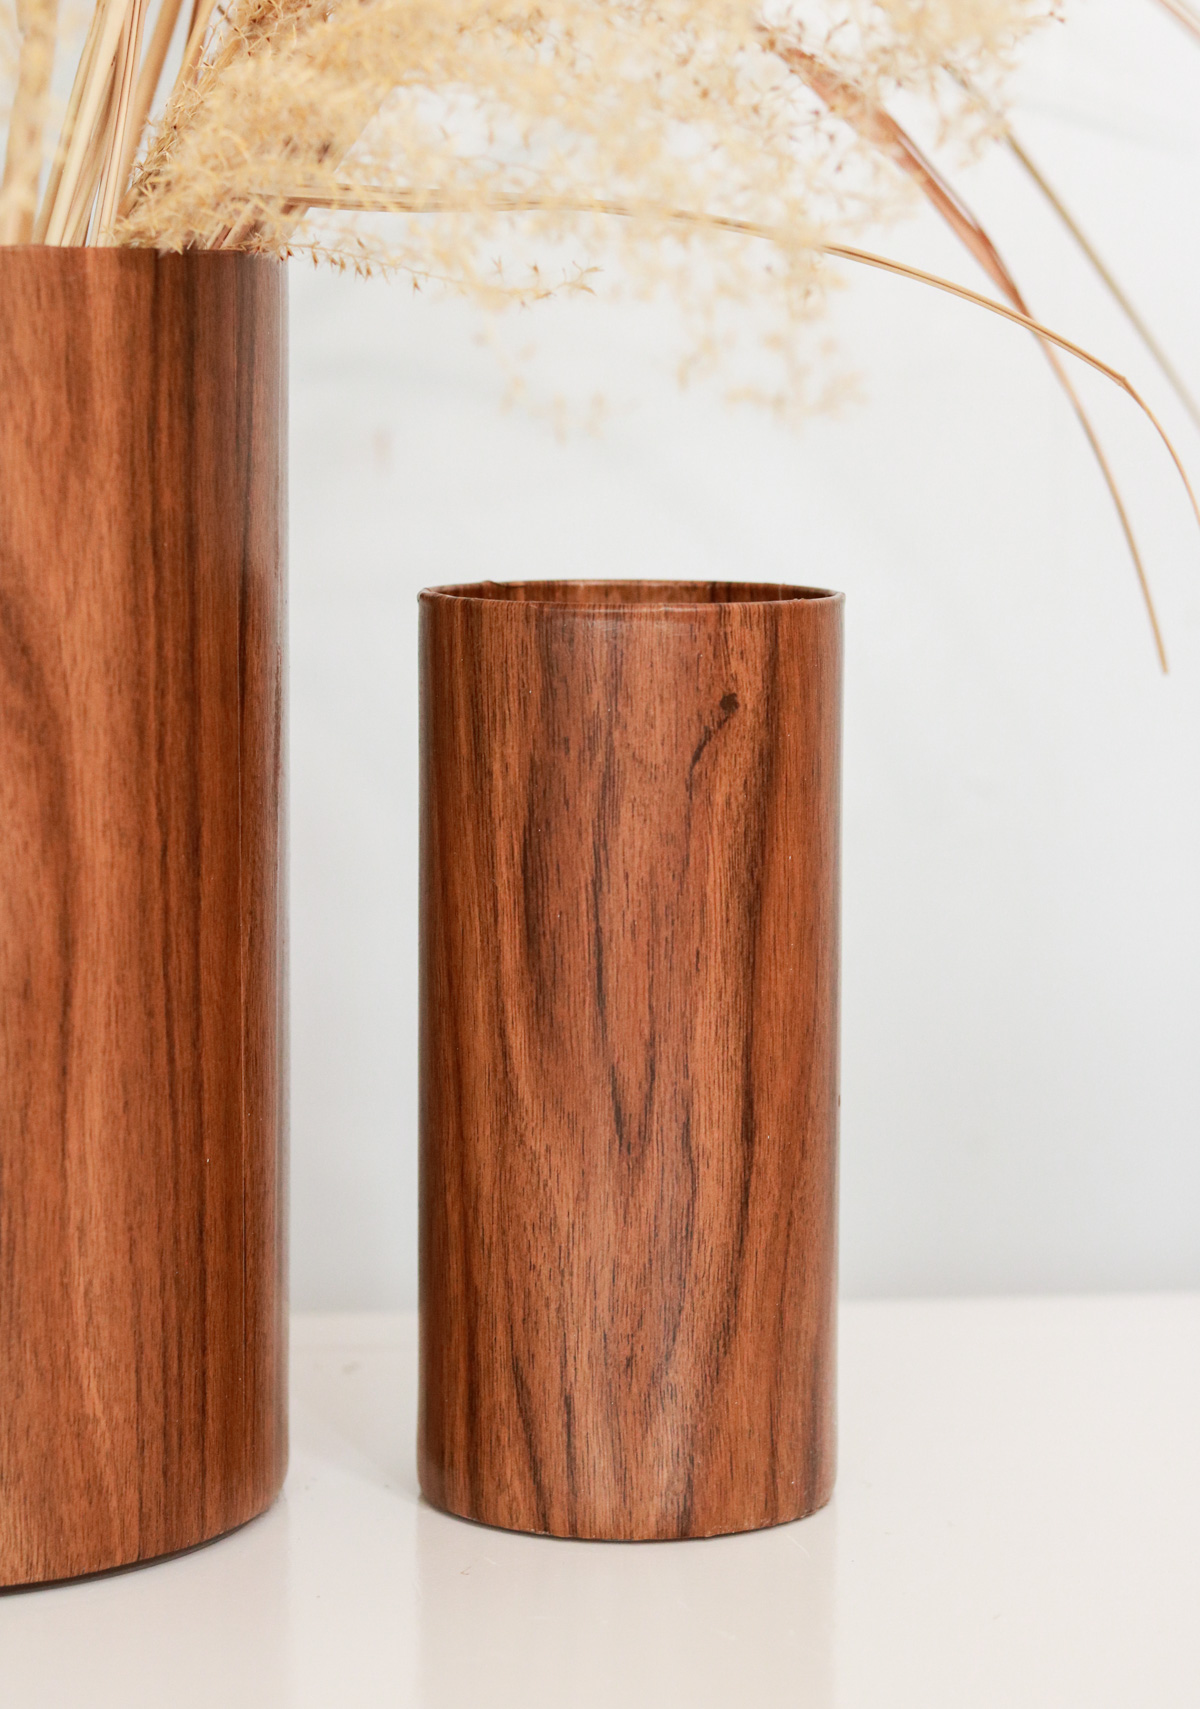
We purchased this wood contact paper from amazon. I love the way the grain looks on it!! So realistic!
You’ll simply need to apply the contact paper onto the vase. YEP! It’s as easy as that! If you’re not familiar with contact paper it’s like a giant sticker. Toni cut contact paper a bit taller than the vase it’s so he could fold it in at the top.

Removing Bubbles
If you have any bubbles gently remove the contact paper on one end and reapply it while smoothing it out slowly working your way around. He shows this in the video. Make sure you cut the contact paper a bit taller than the vase so it could folded into the vase at the top. This will cover the glass on the inside as well. He simply cut slits at the top and folded each slit in. The thinner your slits and the neater it’ll look once you fold it in. For us about 1/2 thickness worked best. 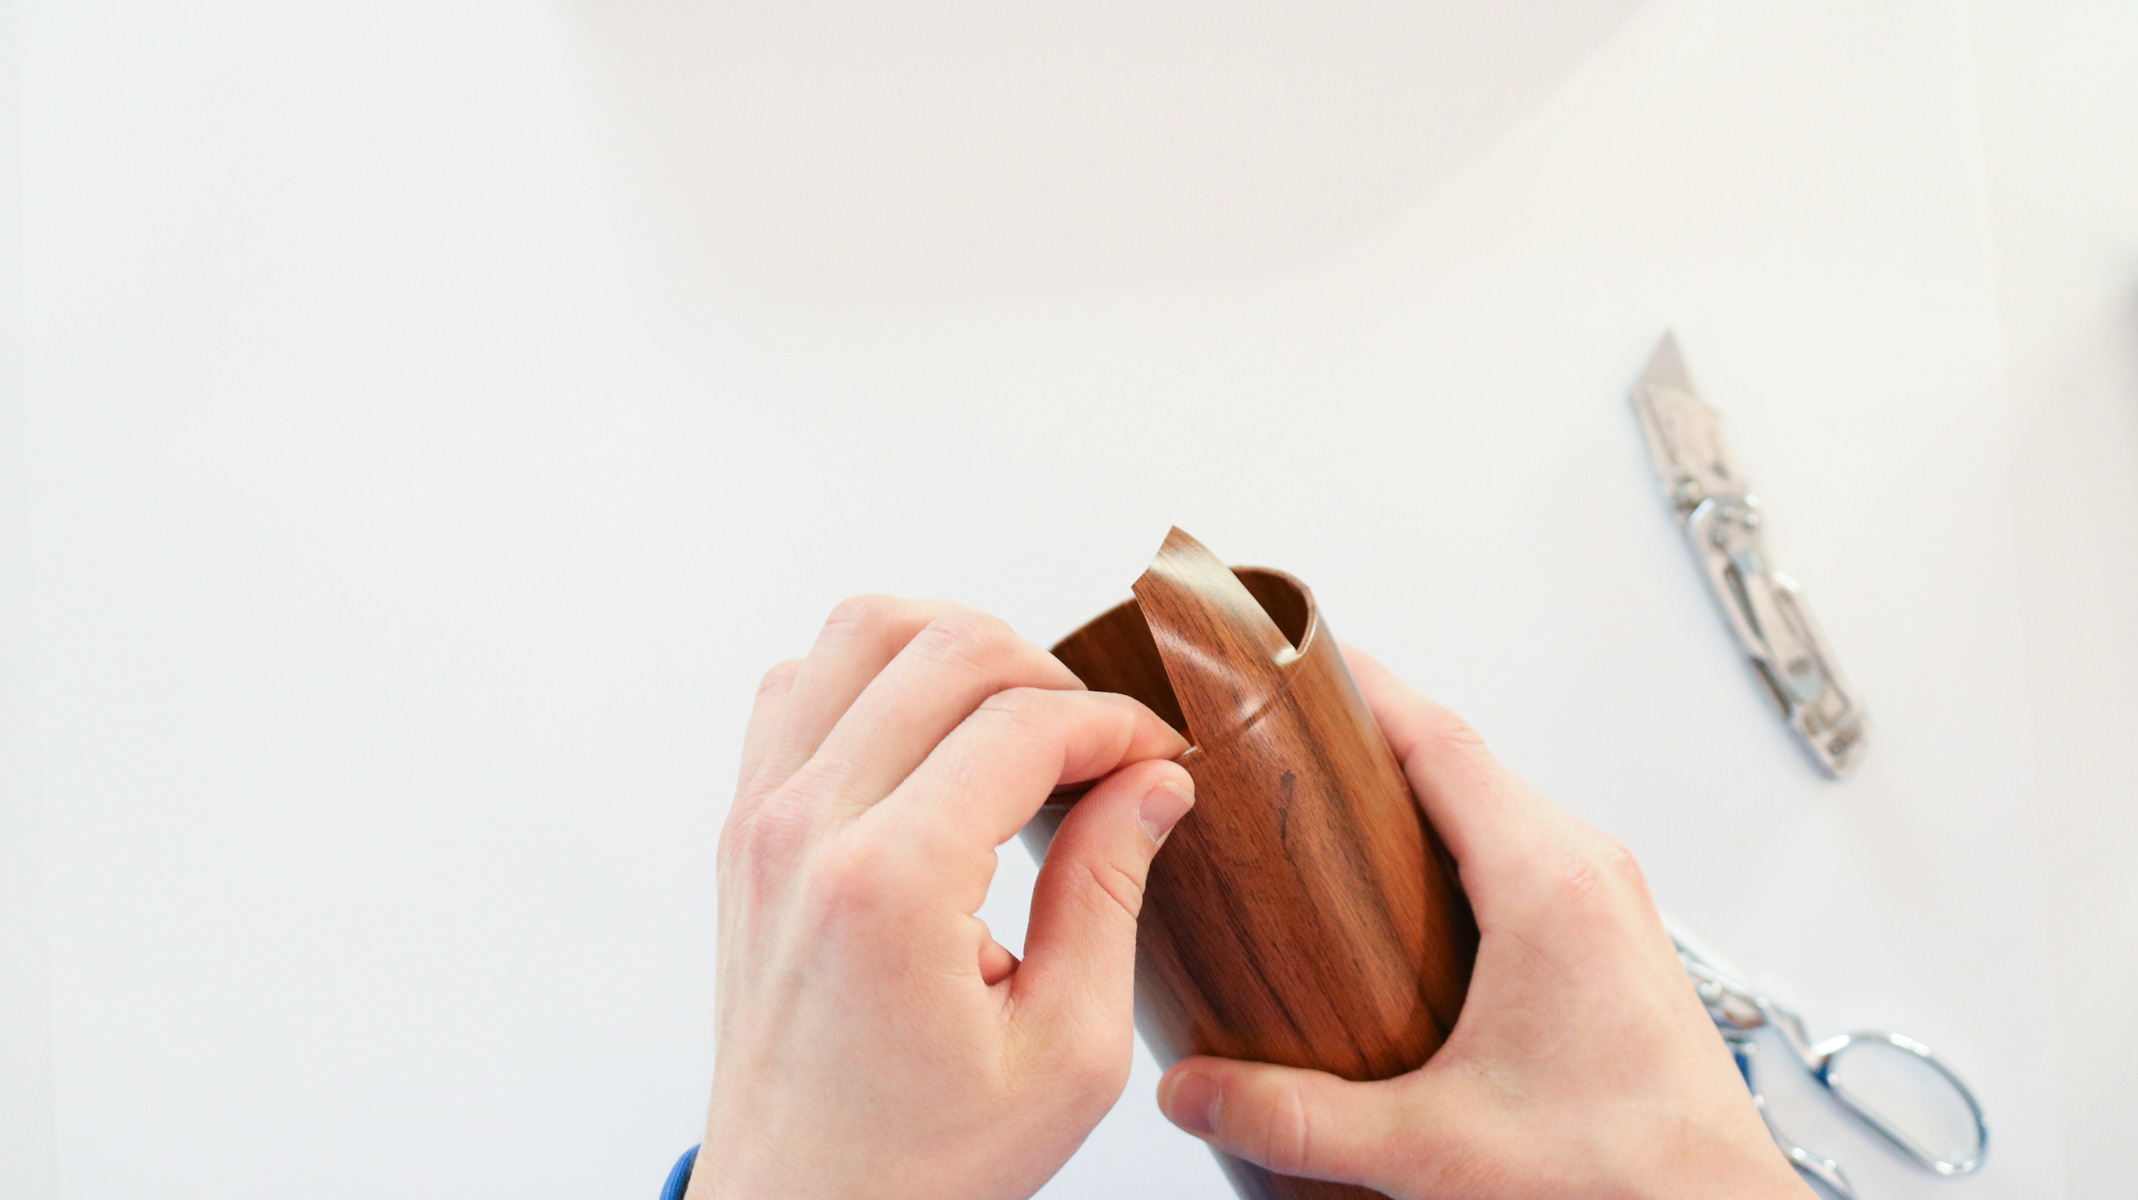
OTHER HOME DECOR HACKS YOU’LL LOVE :
- STRUGGLING WITH STORAGE? GRAB SOME CARDBOARD BOXES TO MAKE THIS
- HAVE UGLY PLASTIC POTS? TRANSFORM THEM IN MINUTES
- NEVER THROW AWAY DOILIES AGAIN – HERE’S HOW TO MAKE ART!
- TRANSFORM PLACE MATS INTO CUTE HOME DECOR
Here’s the video version! 😀 ( ps. if you’re looking for the beaded vase DIY it’s starts at 4:15 in the video)
I also applied a coat of matte mod podge because I didn’t like the sheen on it.
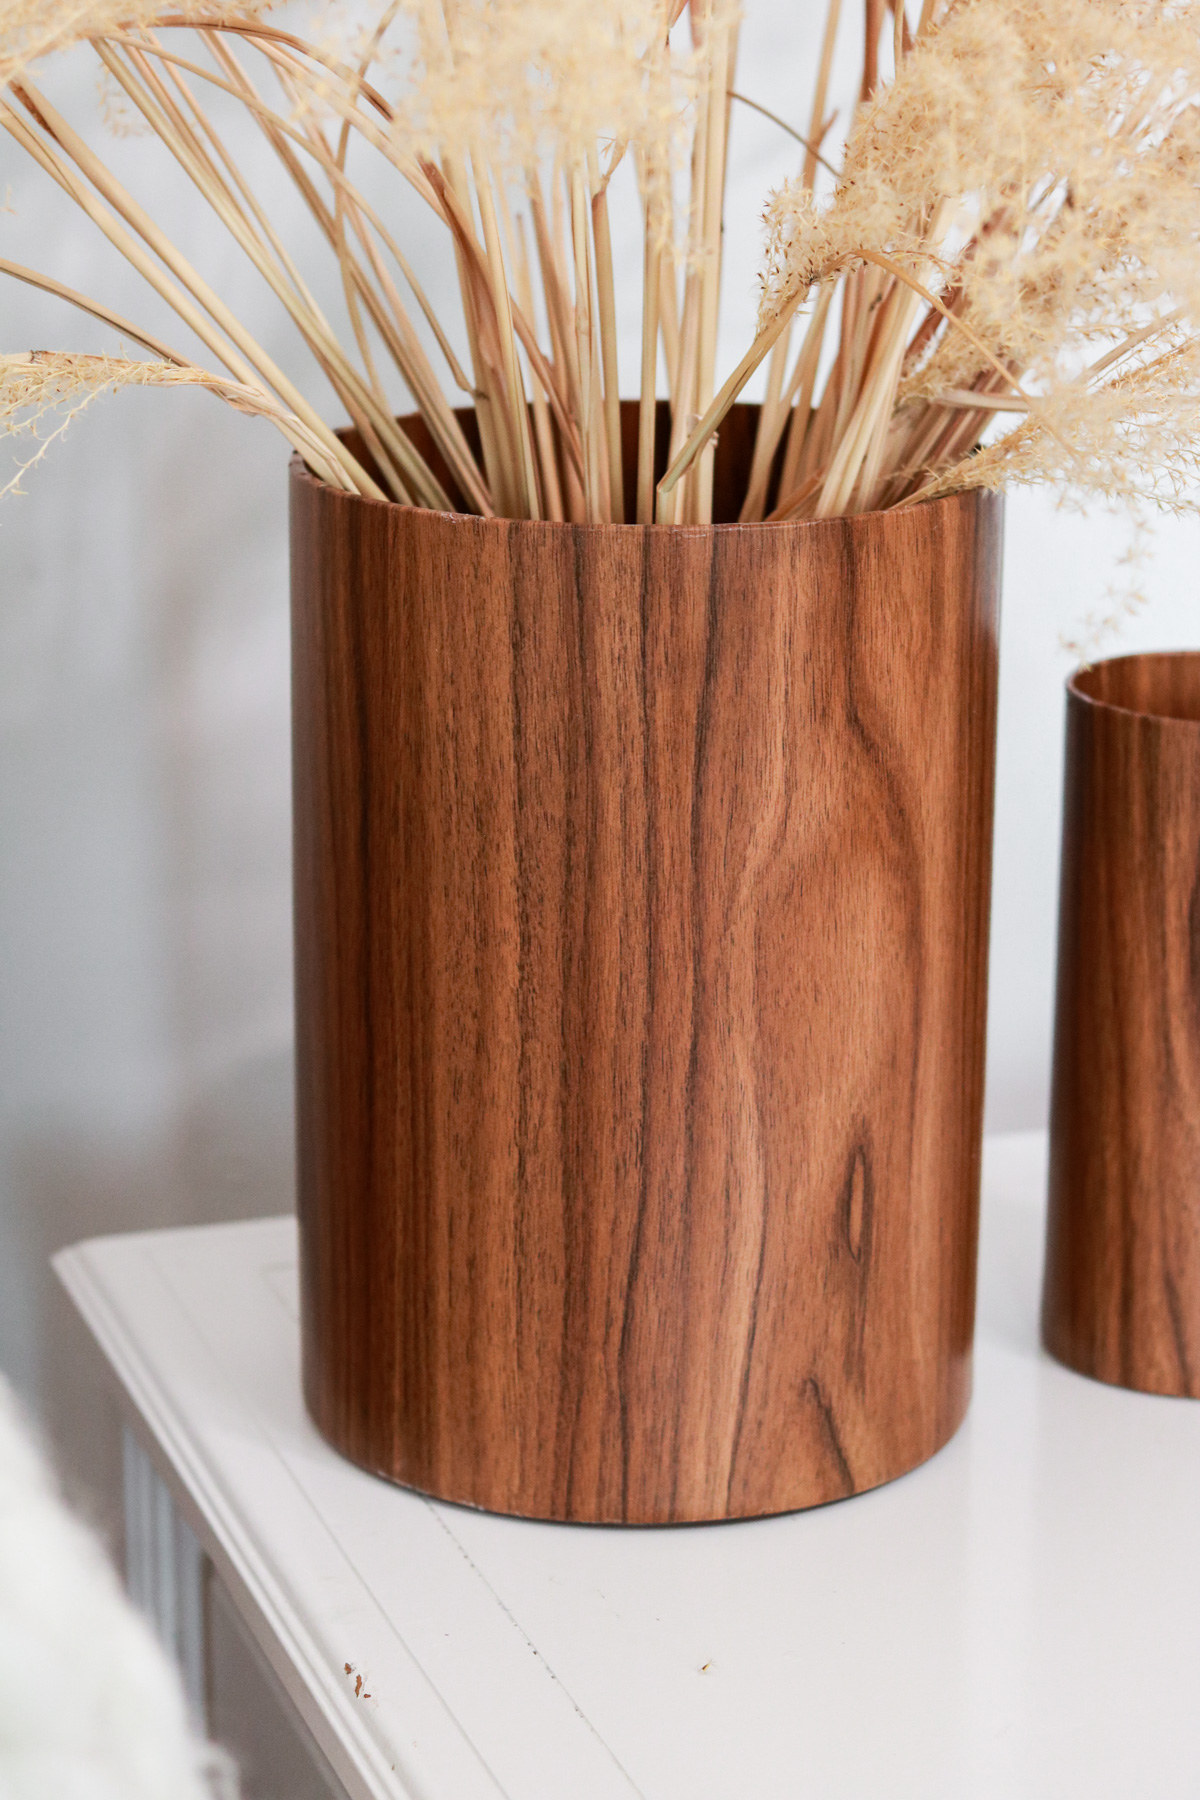
So So in love with how this turned out!! Can’t believe this was his idea. Talk about hidden talents!
Can we just talk about this pampas grass! How stinkin cute! Right!
Here’s a close up on the smaller one. 🙂 I tried to take different angles of the wood grain just to show you how it catches the light and almost looks a different hue. Not sure if you noticed 🙂 .
That’s all! I hope this inspires you to make your own wood vase.
I thought I should mention this just in case. We tried this on a rounded vase which was a total fail. LOL! We thought maybe heating it with a heat gun would stretch it. What were we thinking right?
Till next time,
I love this look. I am going to try this project and spruce up some of my plain glass vases
So happy to hear you loved it Jennifer! 😀
Awesome!
Your blog is amazing i’m gonna spend my whole day browsing here while doing DIY”s!!
AWWE YAY! I’m so happy to hear this girl! Happy Crafting 🙂
Amazing idea!! Thanks for sharing.👍
Glad you liked it. Thank you
I did it! Super easy and I love them! Thanks for sharing!