If you’re looking for a waterproof finish with a subtle matte look on your wood or painted furniture. This is the DIY for you!
Today I’m sharing my favorite method of sealing furniture so it’s 100% waterproof. Meaning you won’t get any water rings if you accidentally forget to use a coaster. I’ve used this technique on at least 5 of my wood projects and it’s held up so well. I’m talking years and years and still no cracking or bubbling and zero watermark stains etc. It’s super durable and only requires two products!
supplies:
- paint brush
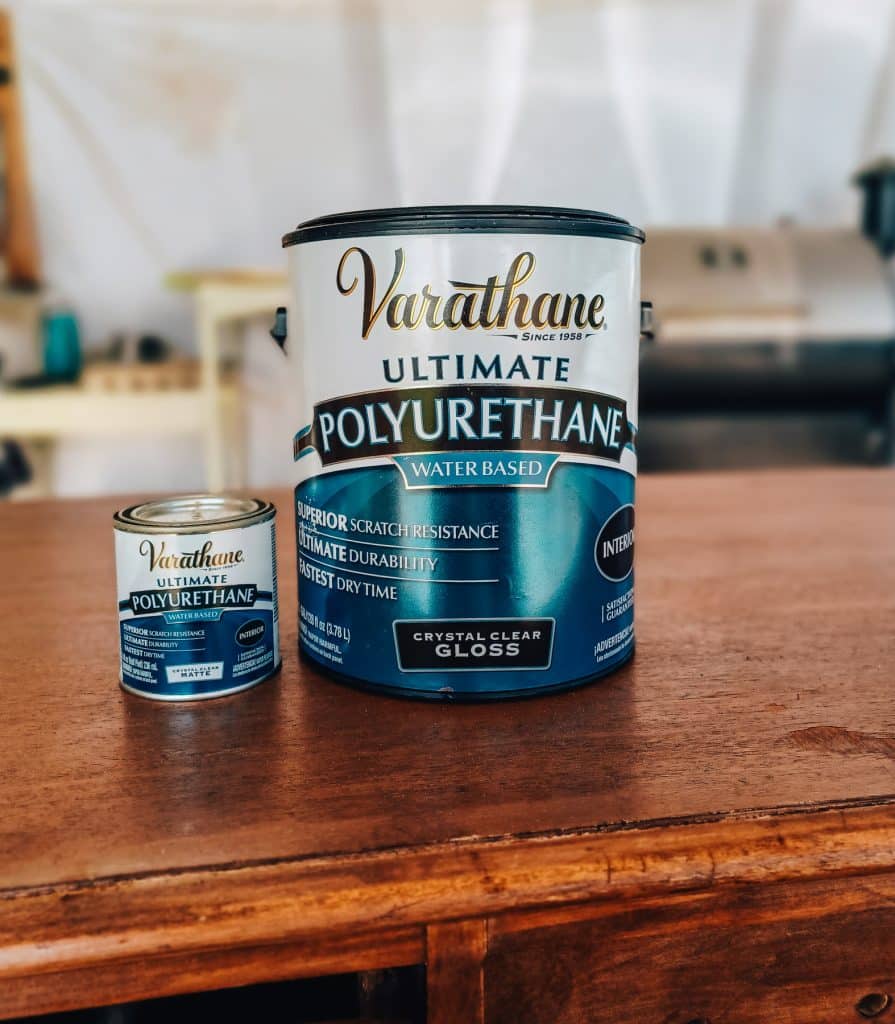
- Polyurethane gloss finish ( water based )
- Polyurethane matte finish ( water based )
- stick for stirring
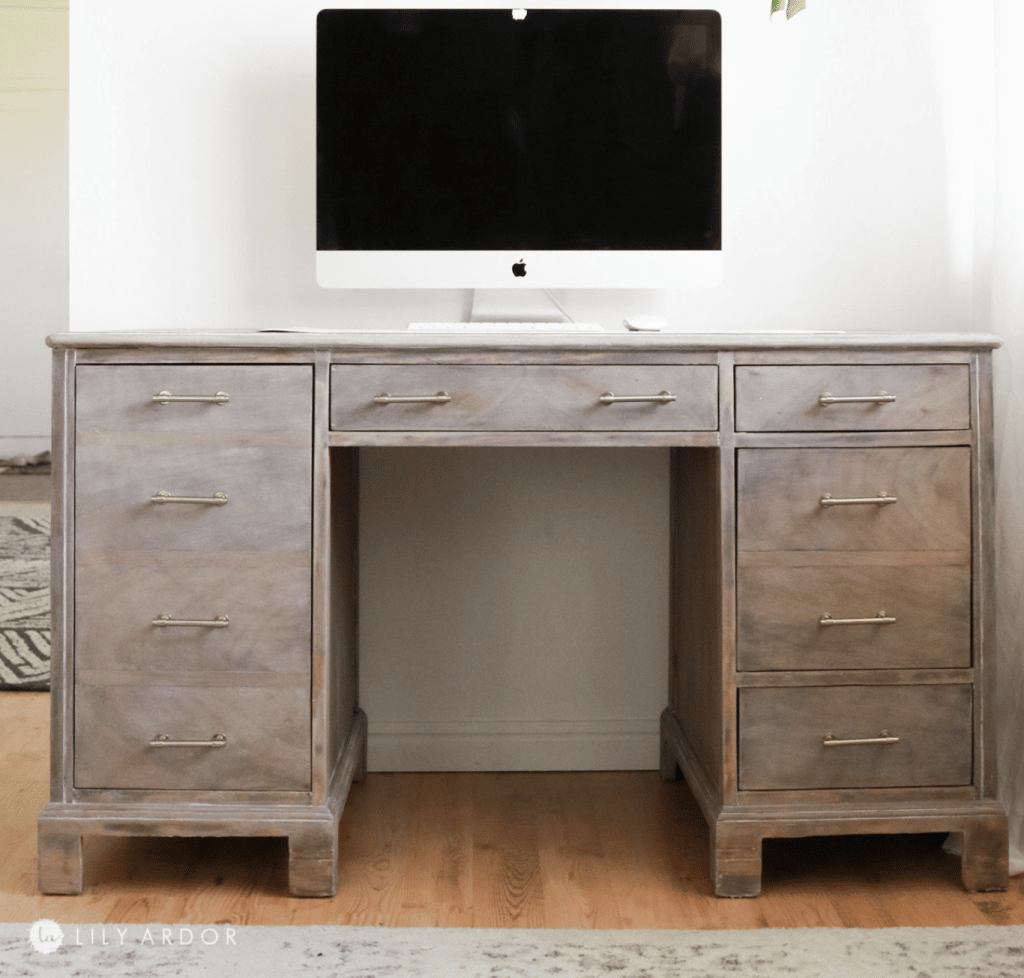
THE DESK THAT NEEDED SEALING!
The project I’m working on today was this desk( photo below). Last year I shared a long process of me stripping layers and layers of paint off of it and bleaching the wood which I shared here. Even though I was worried the bleach smell would never go away because I didn’t neutralize it correctly it in fact did eventually evaporate and we ended up using the heck out of the desk. In the end I came up with a very light rustic washed wood color. I loved the color but, because I ended up moving it into my sons room and it was to be his desk this color of wood seemed a bit to gentle for the theme of his room.
My choice of sealer back then was wax. Most of it had worn off by now and needed resealing anyway. Any wax finish wears off over time and needs to be resealed about every 3-6months. So I figured instead of resealing with wax I would give it a few coats of new stain and reseal it to be waterproof this time.
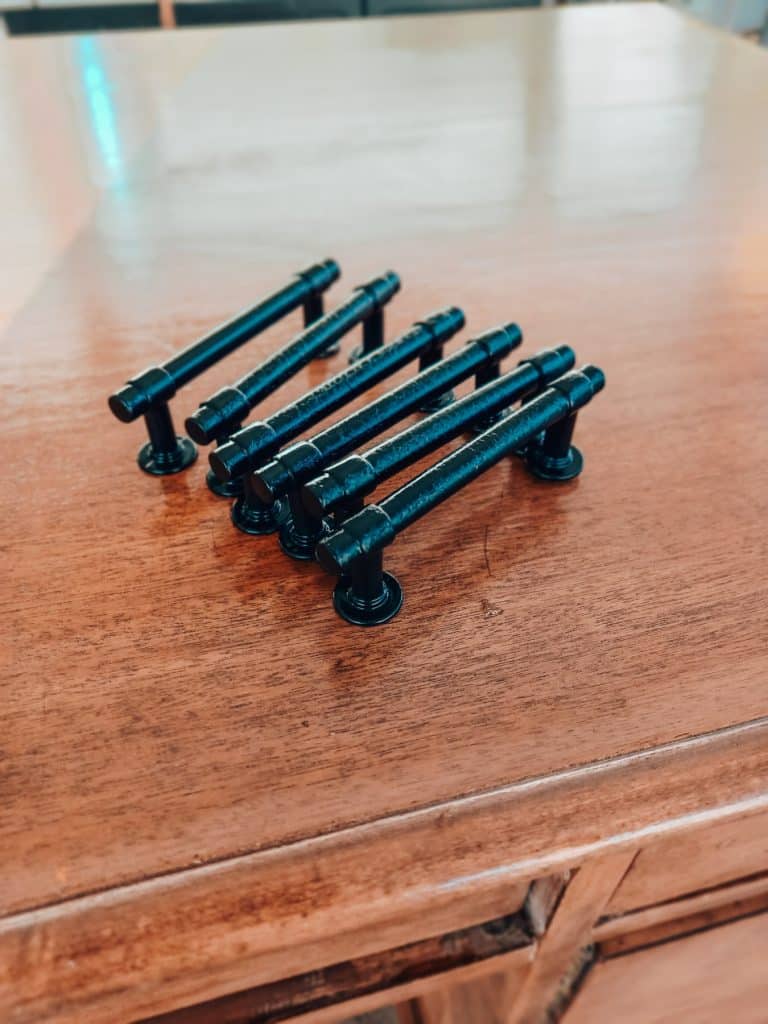
The hardware was definitely too fancy too. Tony gave the hardware a quick spritz of black spray paint to match the look I was going for.
Here’s a link for the hardware. I got it on amazon.
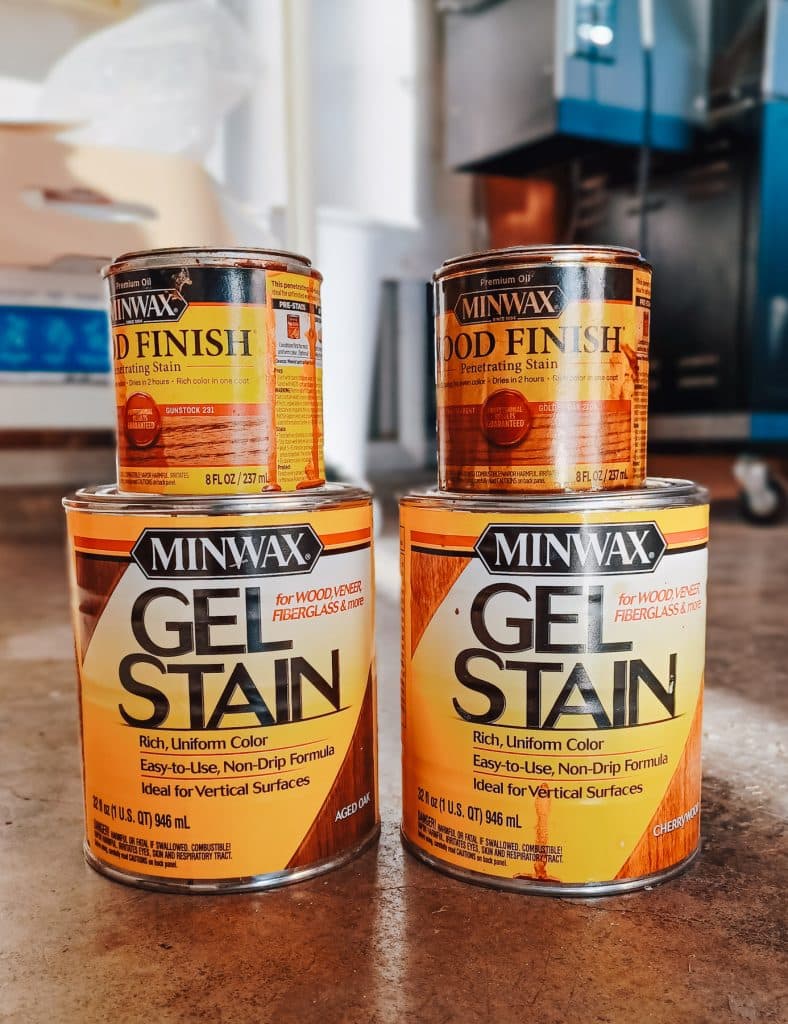
DID you know you can mix your own custom wood stain color?!
To stain the desk I mixed a combination of 1 part aged oak gel stain, 1 part cherry gel stain, 1/4 part of gunstock, and 1/4 part of golden oak. Experimenting with custom colors of wood stain is my favorite. As long as they’re all the same base you can combine the colors with no issues. At least in my experience I’ve never had an issue. If for instance one is waterbased and the other is oil based you would have a problem. They wouldn’t mix.
After applying the stain onto my desk I letting it dry overnight. I was ready to seal the next day.
100% Waterproof Wood Sealer
Here’s the method I use to seal all my wood projects.
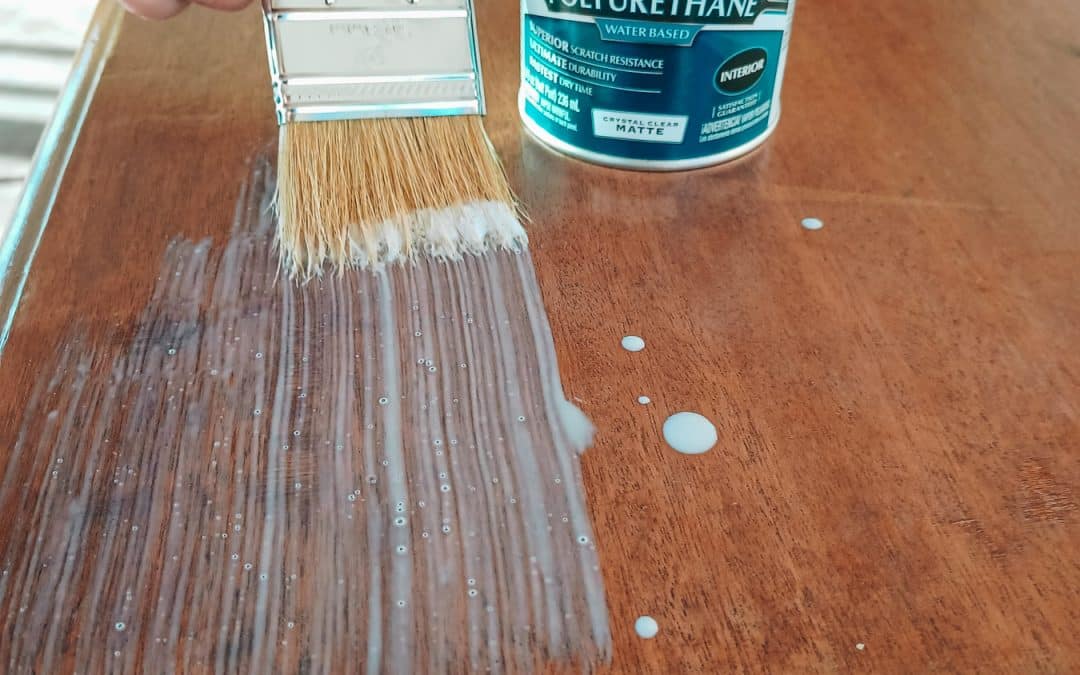
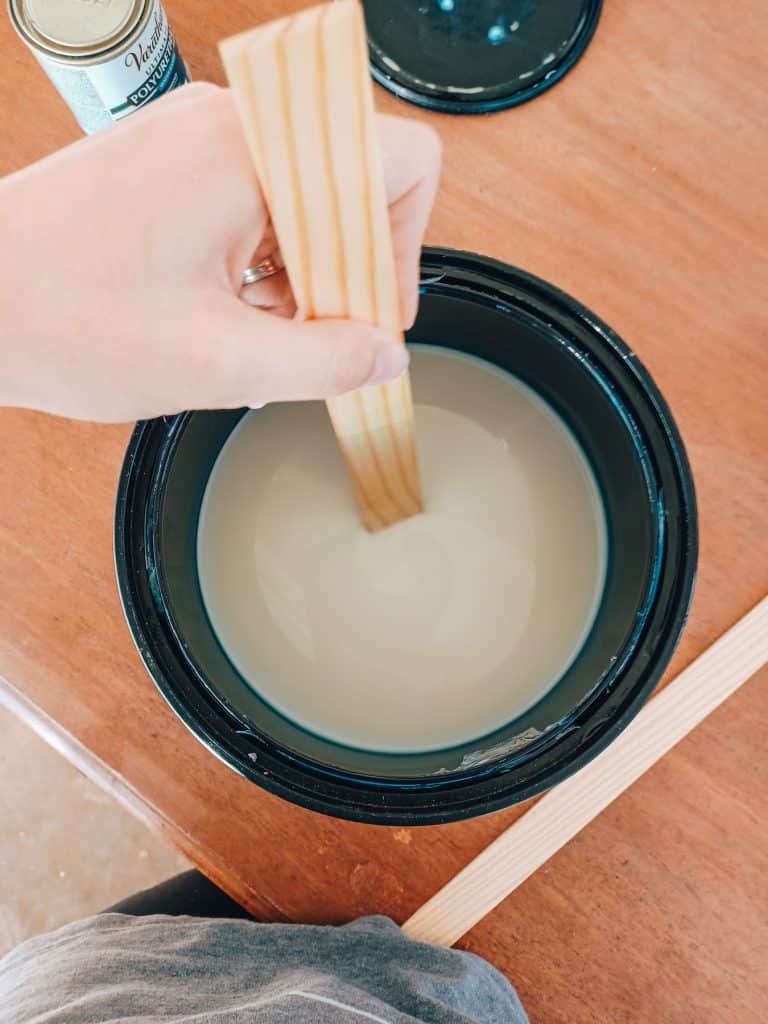
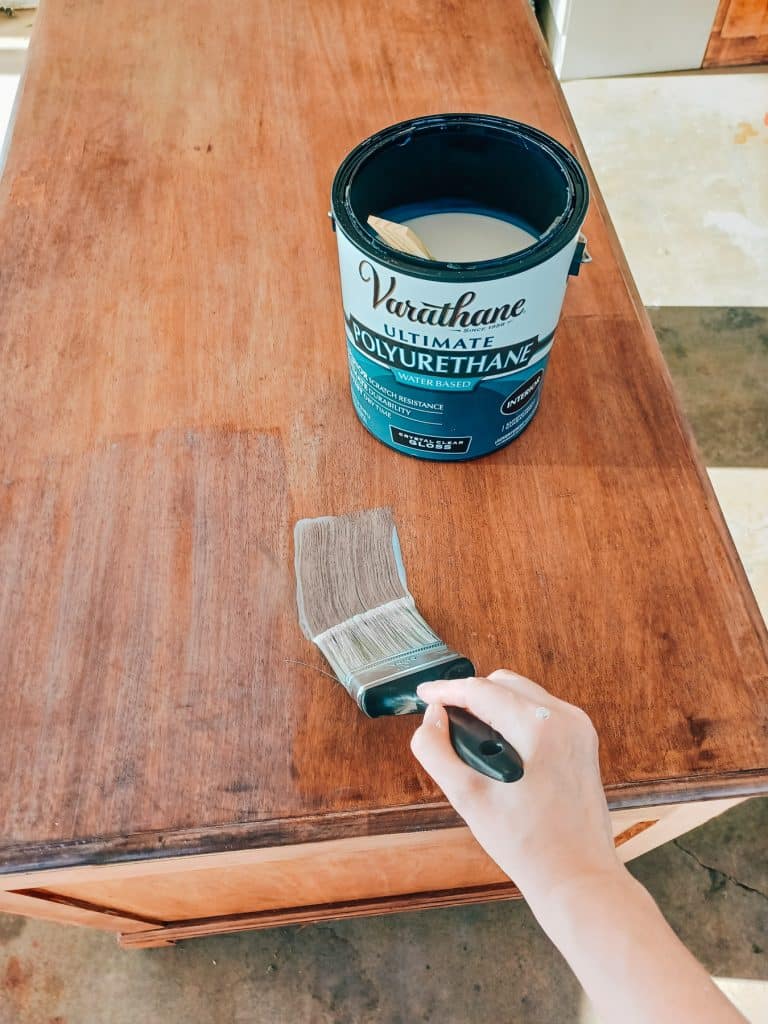
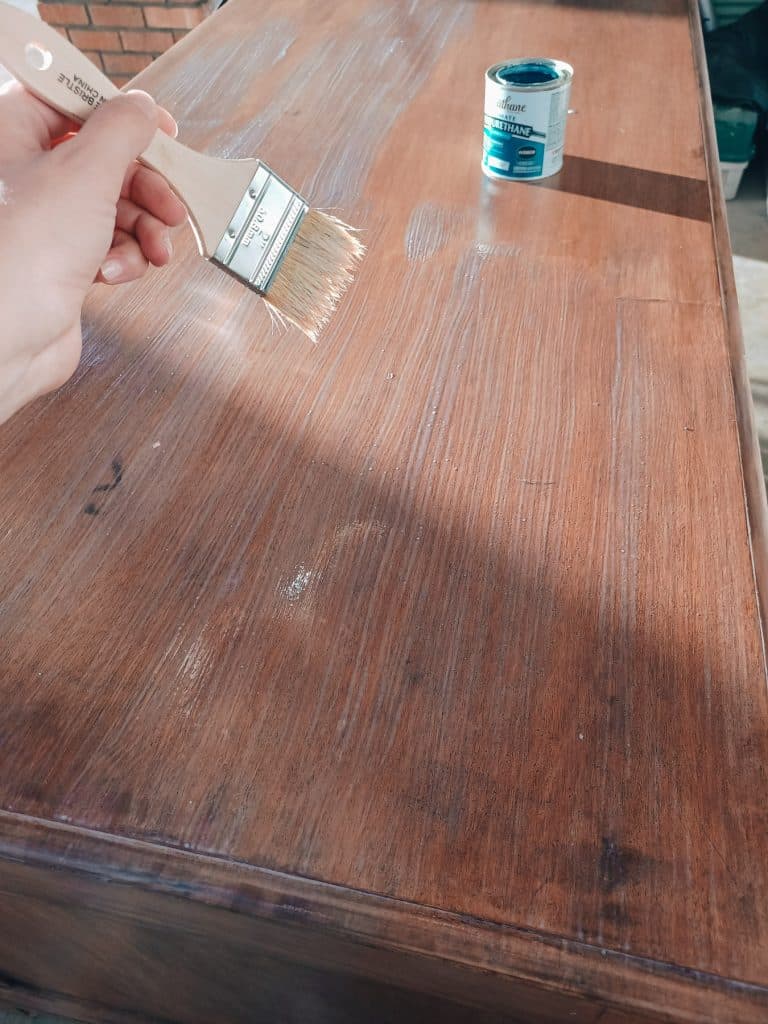
Start by stirring your gloss finish polyurethane. Never mix as it creates more bubbles in the sealer.
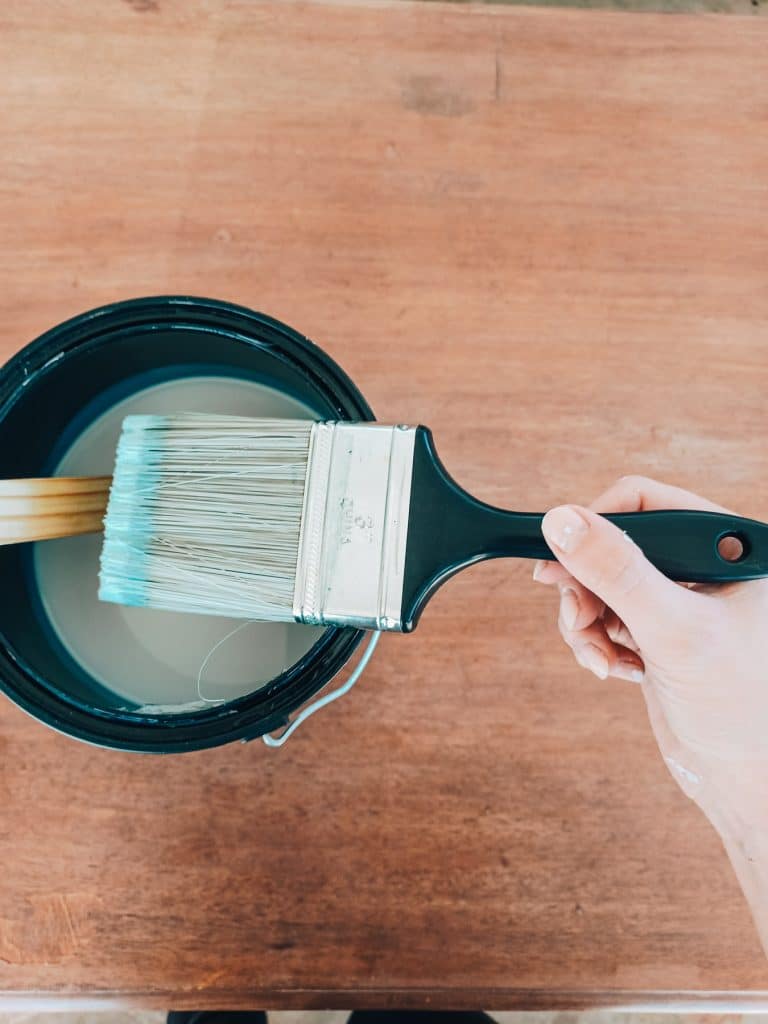
Picking the perfect brush!! WHY IS IT IMPORTANT!
I usually just a cheap brush from homedepot or you can use one that’s higher end. In general a brush with medium hardness bristles is perfect for application. Believe it or not I used to think I needed the softest bristles I could find for the job but, it actually ends up creating way more bubbles in the finish. It’s almost like the medium bristles apply the polycrylic perfect without allowing extra air to get in while brushing. Just keep in mind it’s always best to used a brush that is brand new. If you used it for anything else before the clear finish will eat away at it while your using the brush most likely leaving specks of paint on your finish! Been there done that! Learned the hard way.
If you look close the photo below shows a bit of green on the tip of my brush. That’s because I used it to paint my dresser and even though I washed it what seemed like really good the polyurethane still brought up the color to the top. I got slightly a greenish tinted finish because of this but it wasn’t noticeable at all so I decided to keep using the brush because I didn’t have anything else on hand.
Step 1:Sealing With A Gloss Finish First!
Keep in mind even though this will give you a waterproof finish this isn’t intended for outdoor use. Or at least I haven’t tested it outdoors. All the furniture I’ve tried this sealing method on have been used indoors. This is intended for high traffic areas with little kiddos which might get a ton of water spills etc.
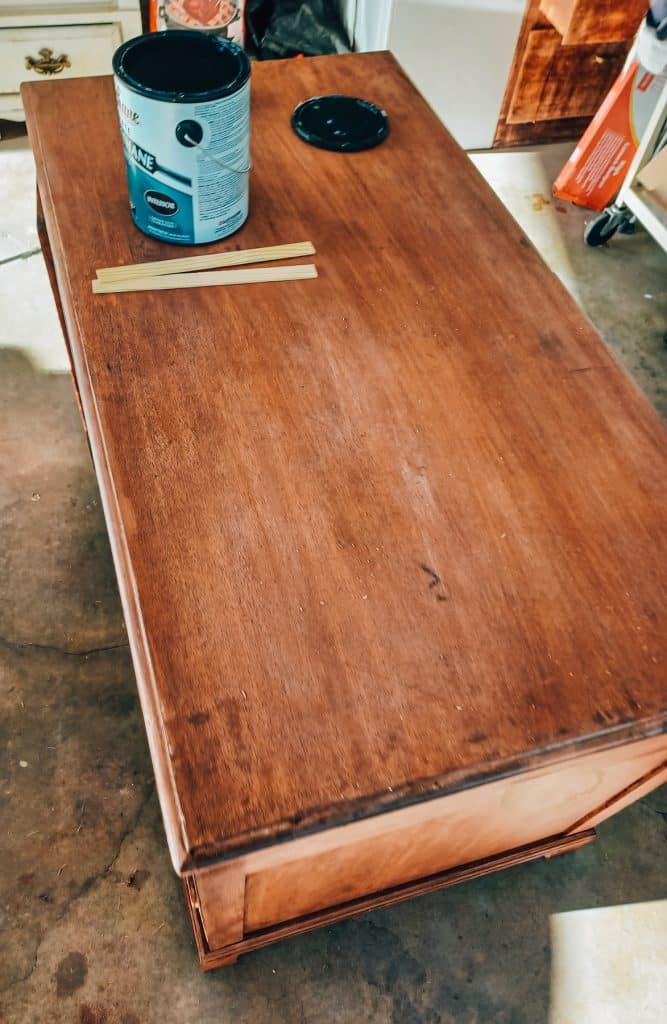
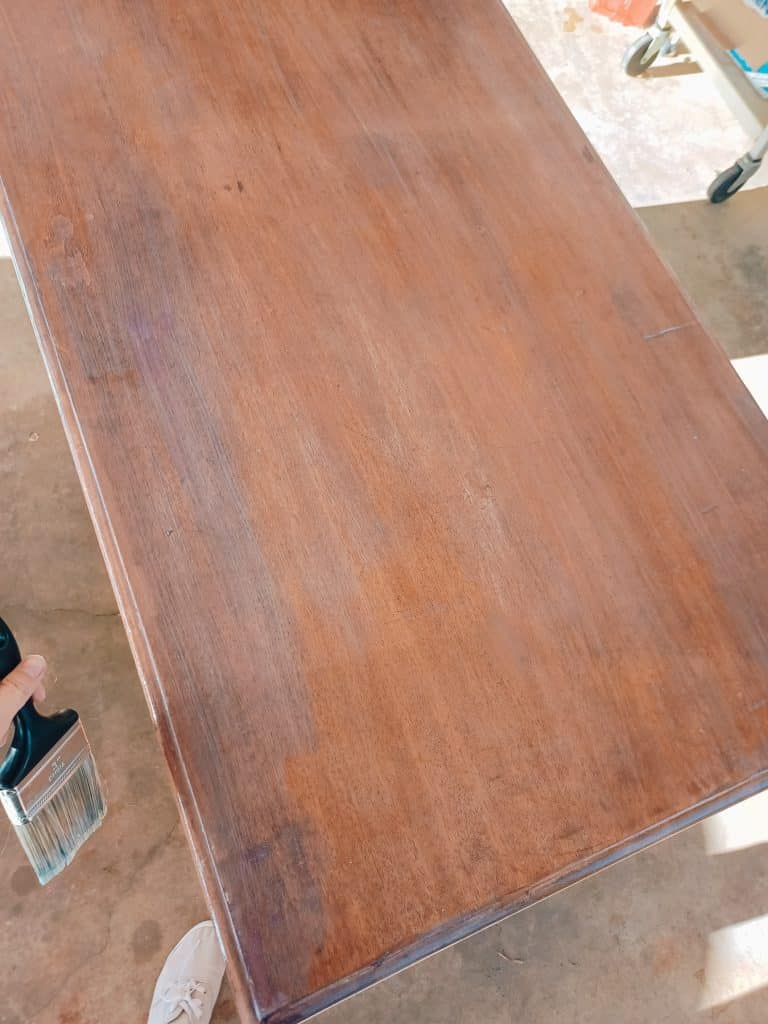
The application process is really simple. Don’t overthink the tiny bubbles. They actually settle in really nice once it starts to dry. Avoid over brushing when applying the polyurethane to keep the bubbles at bay. I try to do long brush strokes only going over the same areas 3 times at most. Don’t rush, take your time. Start on one side of your top and work your want to the other side.
It will look pretty milky while wet and don’t let this freak you out. It dries completely clear. Photo below shows areas that are dry and some areas that are still milky because they’re wet.
HOW MANY COATS DO YOU NEED?!
I like to do two coats of clear gloss polyurethane finish on the top of my tables. You can do three if you’d like but in my experience two is more then enough.
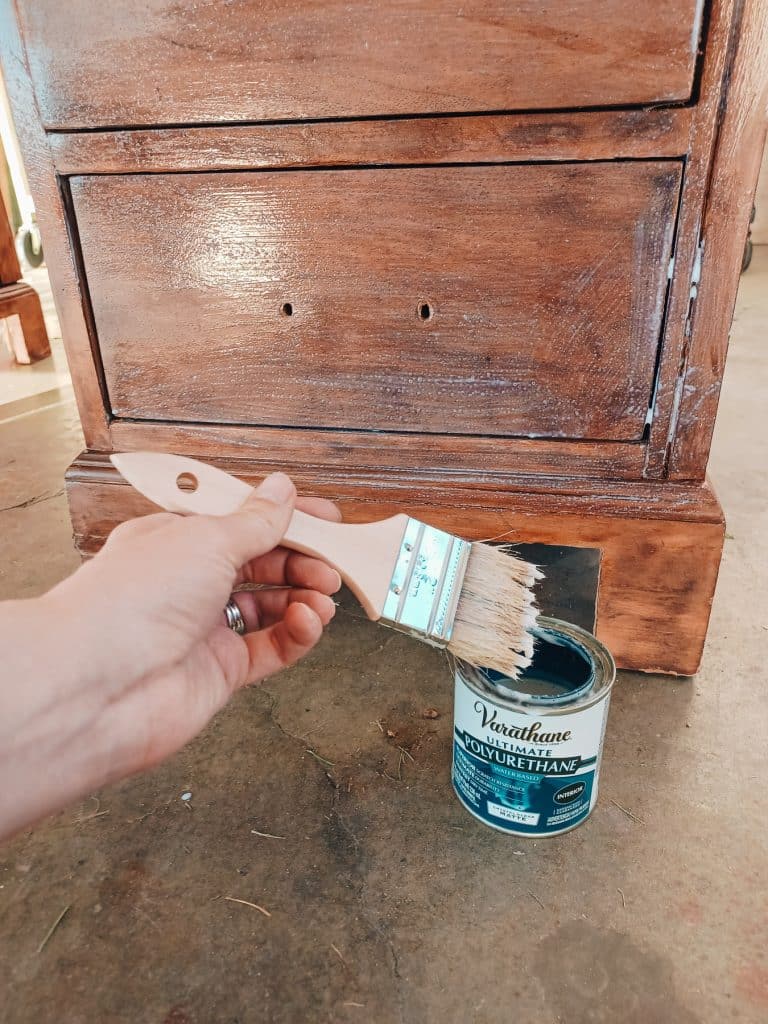
TIP OF THE DAY: I DO NOT SEAL THE SIDES OF MY DRESSERS OR TABLES WITH GLOSS FINISH. I USUALLY ONLY DO TWO COATS OF GLOSS ON THE TABLE TOP. AREAS THAT ARE LIGHTLY USED I ONLY SEAL WITH A MATTE FINISH. THIS HELPS SAVE ME SOME PRODUCT AND GIVES ME DURABILITY WHERE I NEED IT.
Step 2: Final coat of Matte finish!
Photo below shows clearly how shiny the gloss finish looks once dry. Notice how all the bubbles are gone and it looks smooth. Now we’re ready to apply the matte finish. If you admire a glossy finish you can simply apply the two coats of gloss over your whole project and call it a day. Yep it’s that easy! But because I love a matte finish on my furniture I like to go over the gloss with a matte finish.
You will only need one coat of matte. Unless you want it extra durable you can do two.
HOW LONG SHOULD IT DRY BETWEEN COATS!?
So I usually wait about 30 minutes to an hour between coats. On a warmer day it dries a lot quicker. In general if it’s not looking milky then it should be ready for the next coat. Also It’s a good idea to give it a light sand with a scotch pad before applying your next clear finish like matte.
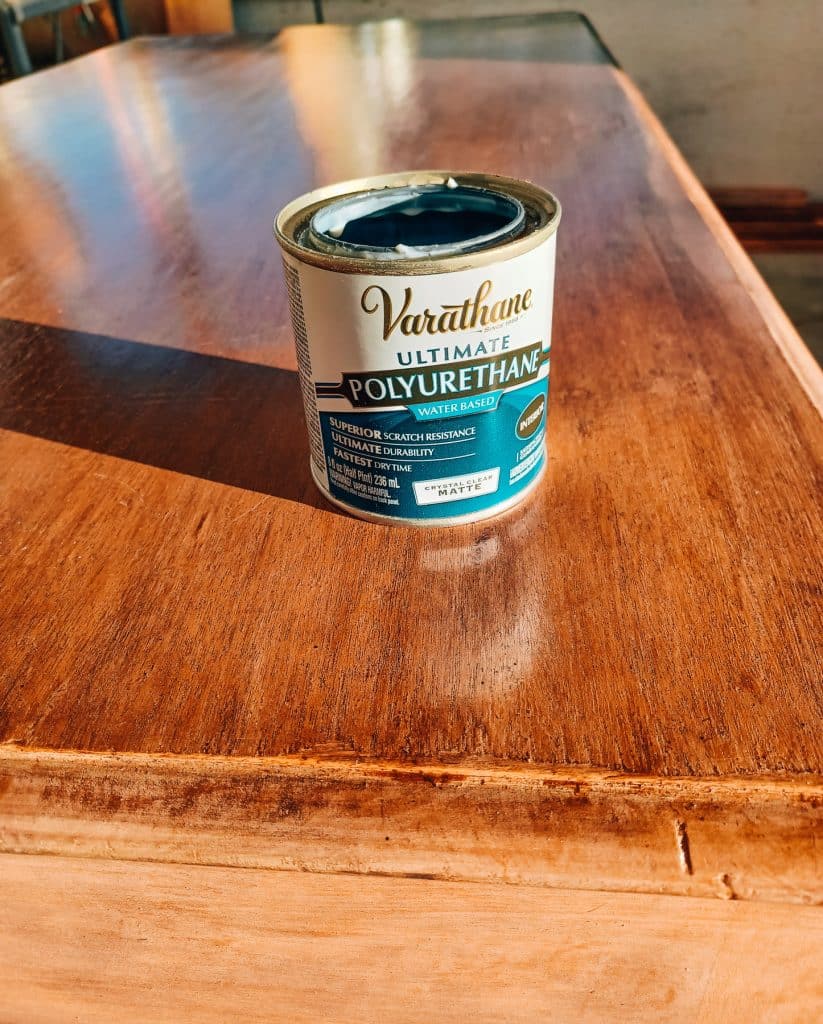
example of dried gloss finish.
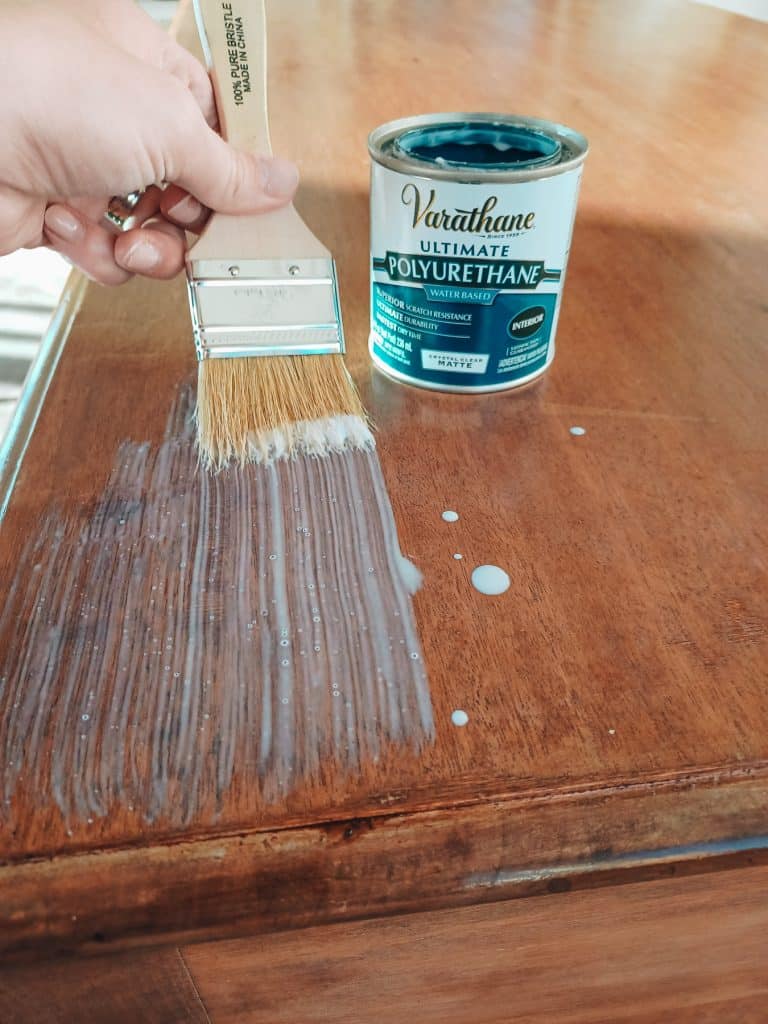
You’ll notice the matte is even more milky then the gloss finish. This is because it has more powder in it to keep it from being shiny. This next brush I used was even cheaper then the previous creating even more bubbles because it’s too soft but I knew most of them would settle in.
WHAT’S THE BEST CLEAR FINISH ON THE MARKET!
By the way In my experience minwax makes a much better quality matte clear finish. I haven’t had the best luck with varathane matte finish. Varathane makes amazing gloss finish there matte on the other hand sometimes ends up leaving milky markings and scratches off easy. I’m not sure if the product was just expired. Just wanted to share this. Hope it helps. To be on the safe side I would stick to minwax. Their products never fail me. ( Ps. Neither one of these companies are sponsoring this DIY. I truly enjoy using there products )
This technique works the same with most gloss and matte finish products. If there’s another brand you love. I would give it a try.
Here’s an example showing how the matte is drying on the gloss. ( photo below) You can see how much less sheen it has compared to the gloss.

Another quick photo showing how bad the brush stroke look before dries. They settle down so nicely once it dries. It almost looks like I spray painted the finish on.
And the rest of the desk I just went over real quick with one coat of matte finish.
That’s it! So EASY to do! I hope you find this as helpful as I have over the years! Don’t know what I would do if I didn’t accidentally try this one day while messing around with finishes!
Let me know if you try this waterproof wood sealer! Keep in mind when I say waterproof I don’t mean your furniture will be able to swim underwater, or be in the rain. I mention that to put emphases on the fact that you won’t need to worry about using coasters or a spill that happens and you don’t notice right away. This is a high traffic finish for any furniture project you have going on!
I’ll see you all next time
Here’s the products I used linked below –
xx,
Lily
Thank you SO much!
Hubs and I had an electrical fire in the attic..everything moved to storage including my beautiful mahogany bedroom suite. I’m frustrated because my dresser came home (me not here) with a long scratch on the top. The only thing I would recommend is trying a old-fashioned scotchbrite! The stainless one..3to a pkg..not the copper ones…baby smooth finish💖
Subscribing!!
Awe I’m sorry to hear that! That’s terrible! I hope you can fix it.