Hi everyone! I hope you are doing well.
Today I’ll be sharing how I restored my desk. A project I planned would only take me about a week to do ended up taking me 2 weeks plus to complete. You probably already know just from me saying that that this wasn’t any easy project!
Because this is my first time restoring furniture there was a ton of trial an error. I hope to share in as much detail as possible 🙂 . Honestly I find it easier to just paint furniture and that’s what I usually do but, because this desk had so many layers of paint I decided it would be good to strip all the paint and bring it back to it’s former glory since it’s a solid wood piece.
this post may include affiliate links. Please read my disclosure policy for more info
Total Cost:
- supplies for stripping and staining : about $55
- Hardware: $27 fro 10 ( I got mine on amazon for a steal deal)
Time Needed:
A TON! LOL I’m not going to lie this felt like it took forever (2 weeks) . Maybe it’s because I had too many errors and tried so many different products. All I know is It definitely wouldn’t take me 2 weeks to do it again because, now I know what works and what doesn’t.
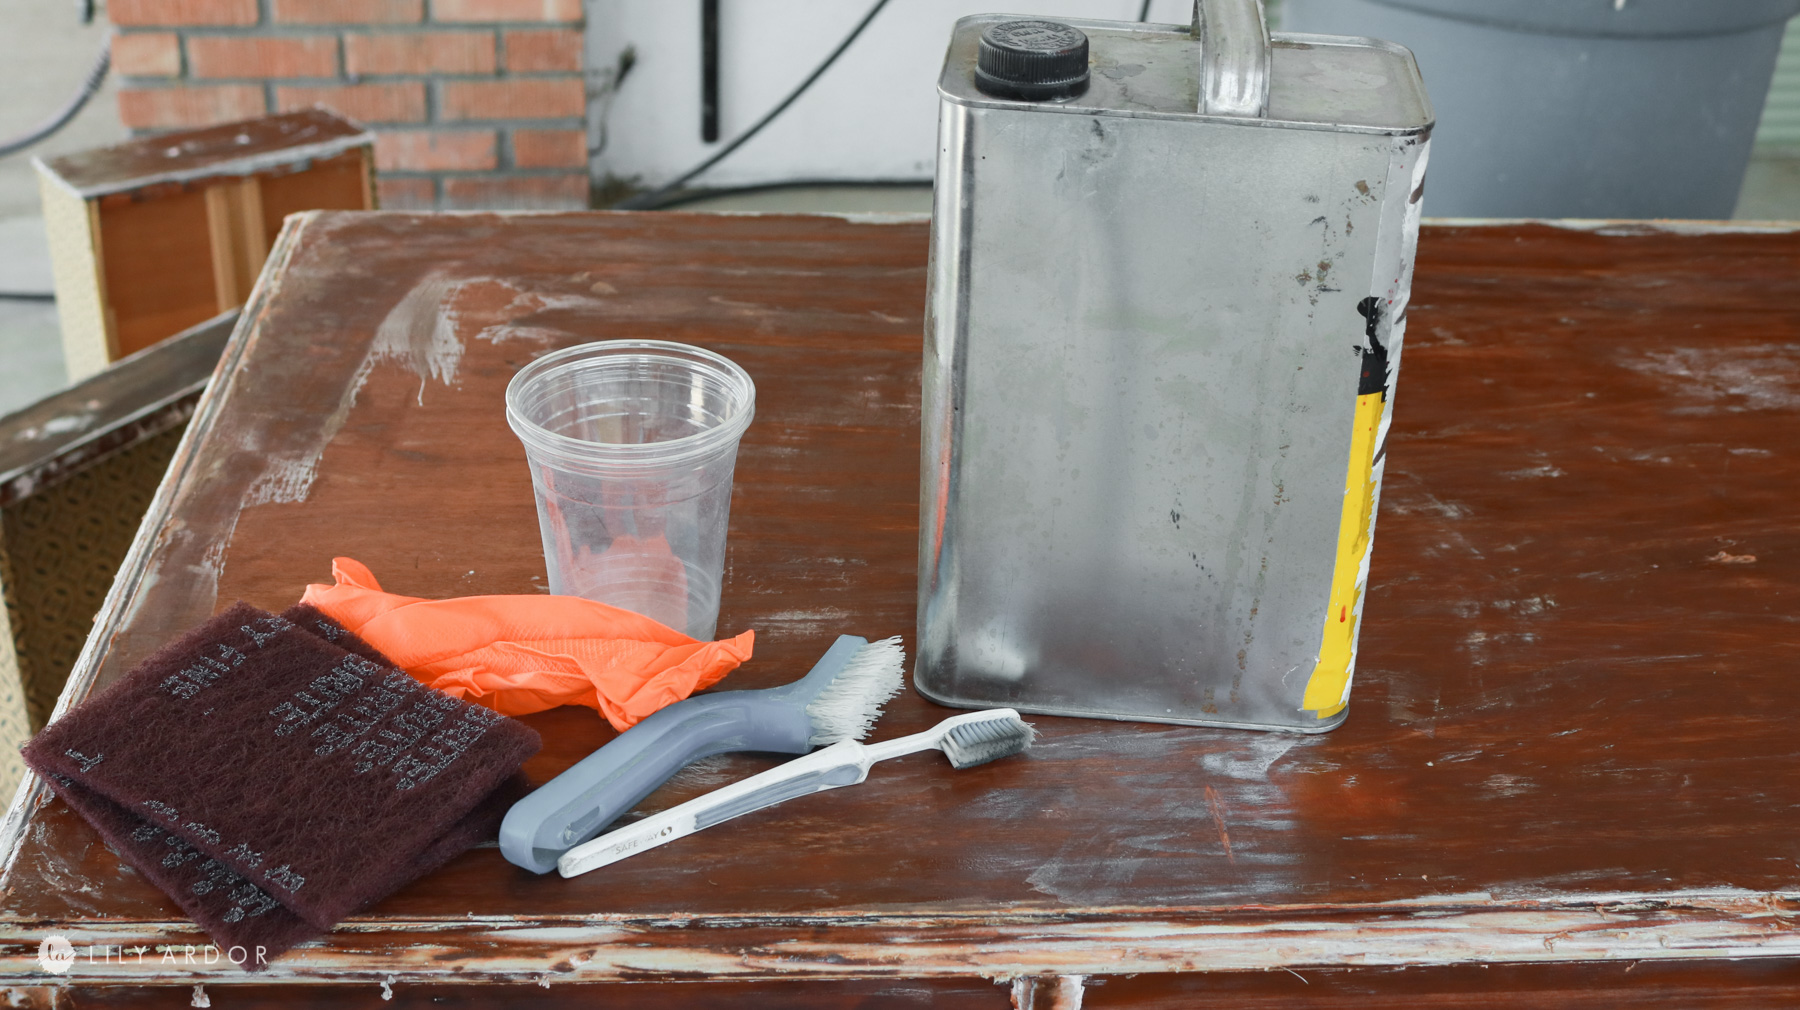
Supplies: Here’s what I used
- citri strip ( you can get the one I used here – https://amzn.to/3fJcirs )
- fruitwood minwax stain
- gold oak minwax stain
- gunstock stain
- Microfiber towels
- Minwax highlighting wax
- Johnsons furniture wax
- Thick Paper towels
- Lacquer thinner
- Metal Paint Scraper
- Hardware ( I got my bronze handles here )
optional: if you choose to bleach your wood you’ll need wood bleach. ( Note: I’ve never tried this. Please be sure to do some research . )
Tools :
- Ryobi Jig saw ( this is what we used to cut the legs at the bottom )
Okay let’s do this.
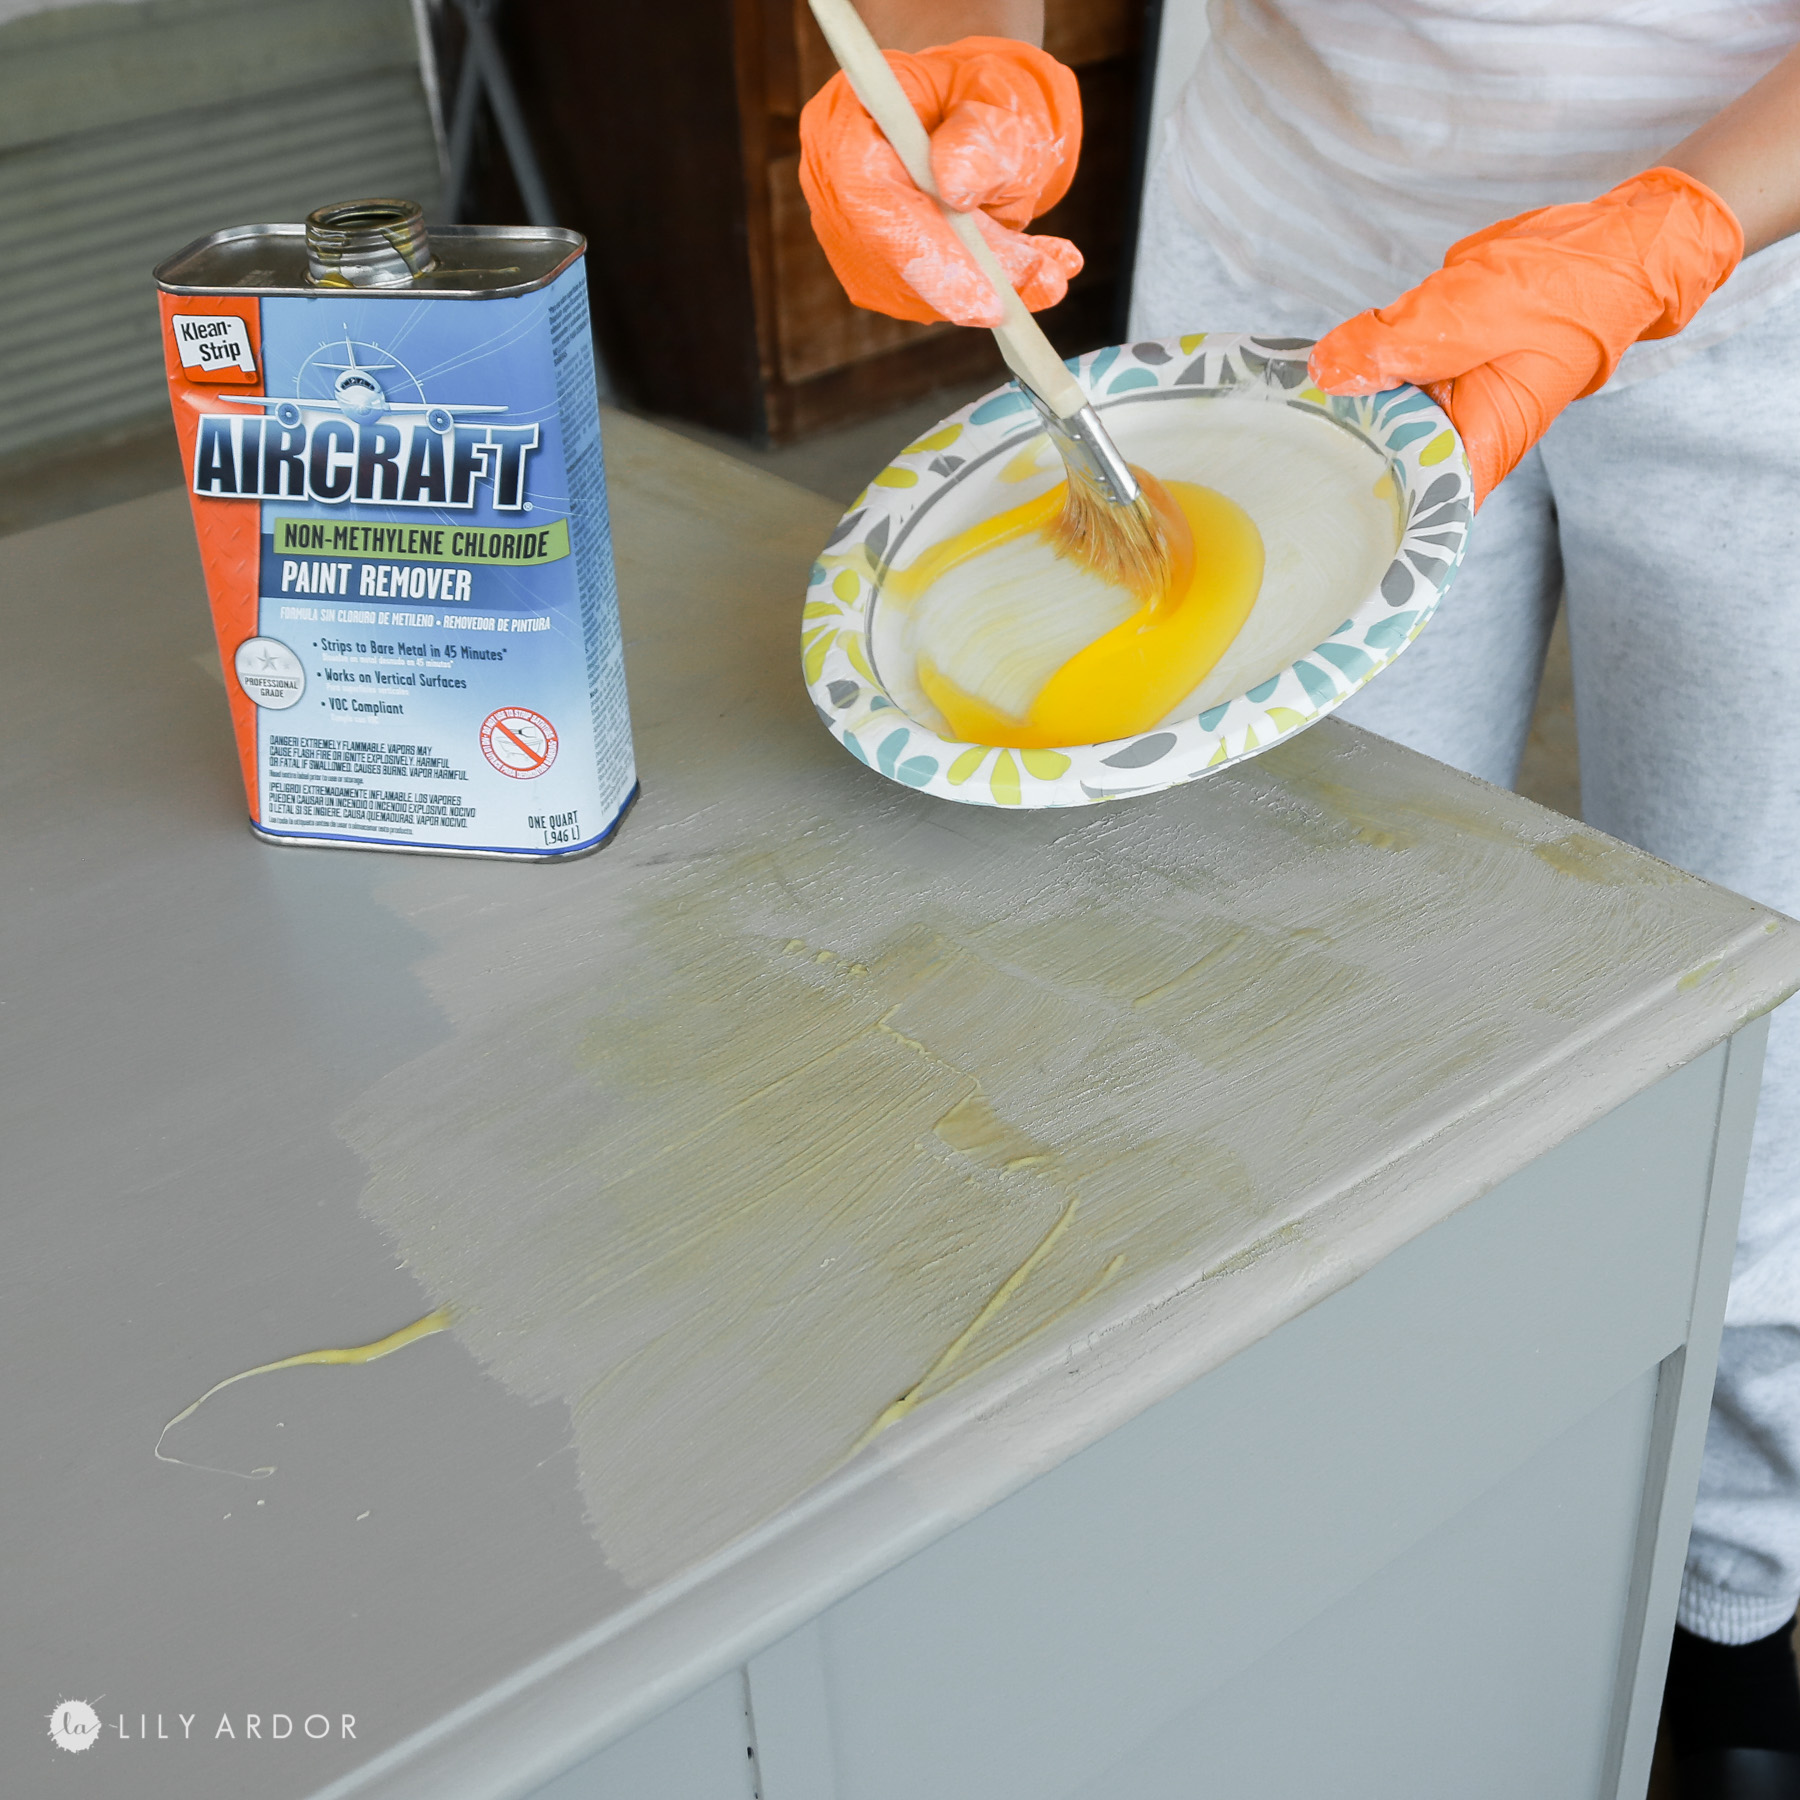
WHAT’S THE BEST PAINT STRIPPER AND WHAT TO AVOID!
Okay we’re talking 5 plus layers of paint. I actually didn’t realize there was that much paint until I started stripping the paint. With primer there was around 5-6 layers. Before I even started this project I had planned on trying to find a product that would remove all 5 layers in one swipe! LOL High demands I tell ya! Honestly I just didn’t feel like scraping a layer at a time.
Are airplane strippers any good for furniture restoration?
The first product I tried was an airplane stripper. If you’re asking why on earth I would go for a product like this it’s because I assumed it was probably the strongest stuff on the market. Tony has also used it before and said it worked great to take paint off cars. For latex paint stripping it ended up being the worst of all of the products I tried. While wet after about 2 minutes after being applied It would scrape away about 2 layers of paint but, once dry it gave the paint a layer of rust and wouldn’t budge at all. I feel like it didn’t stay wet long enough to penetrate through all the layers.
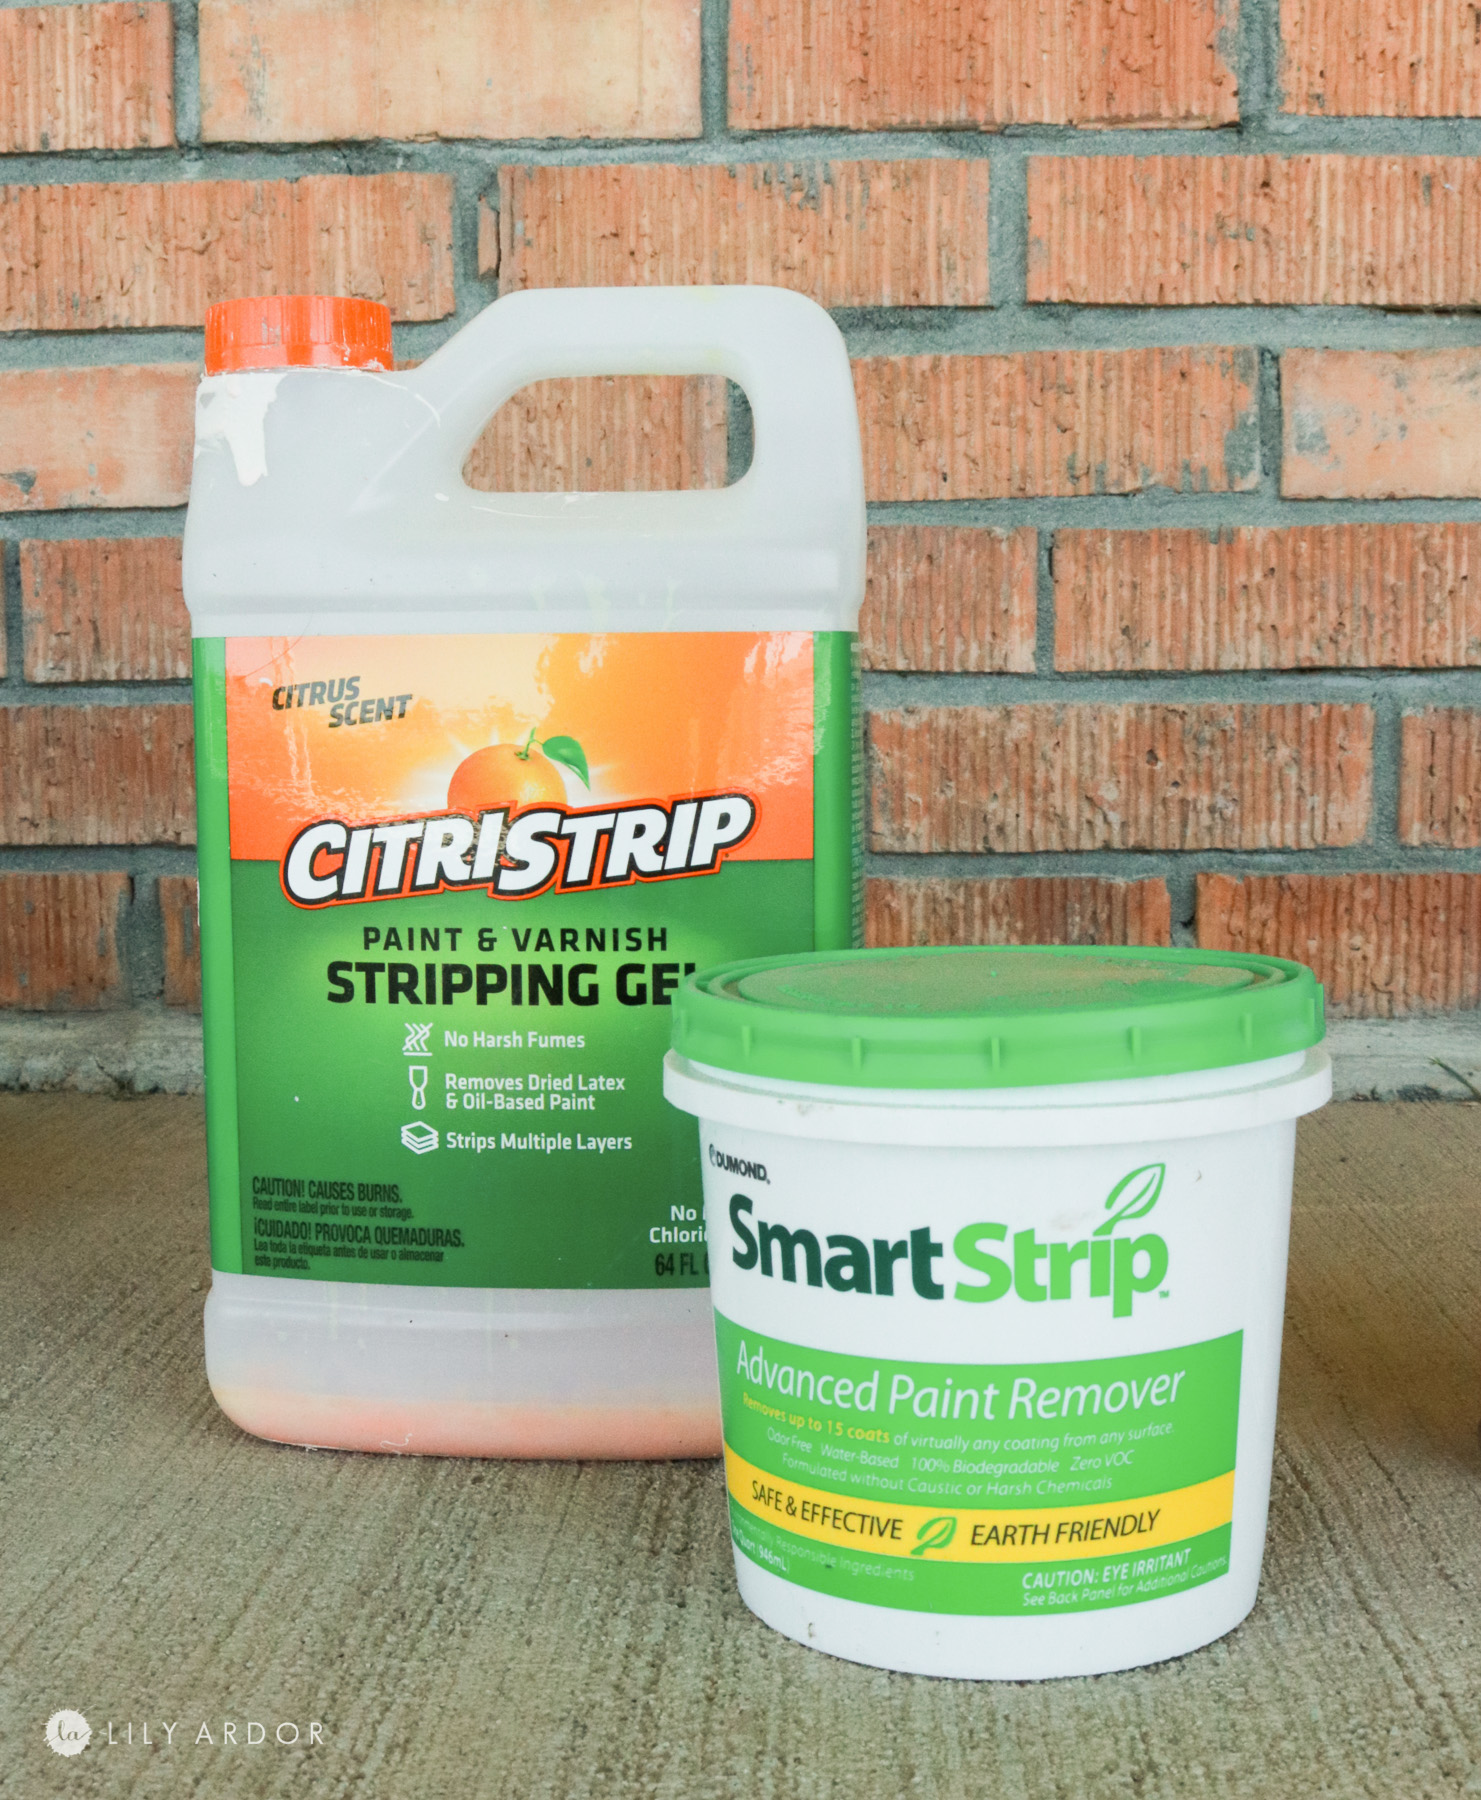
SmartStrip Vs Citristrip ?? Which is Better?
Okay both of these are great products but, If I had to pick between the two I would definitely say citristrip. I just feel like it’s much better at doing the job and I loved that it kept working it’s magic even after it looked like it was dry. Once the smart strip was dry I feel like it didn’t do much and you would need to keep reapplying it to keep removing layers.
BEFORE AND WHY I WENT WITH PAINT STRIPPING
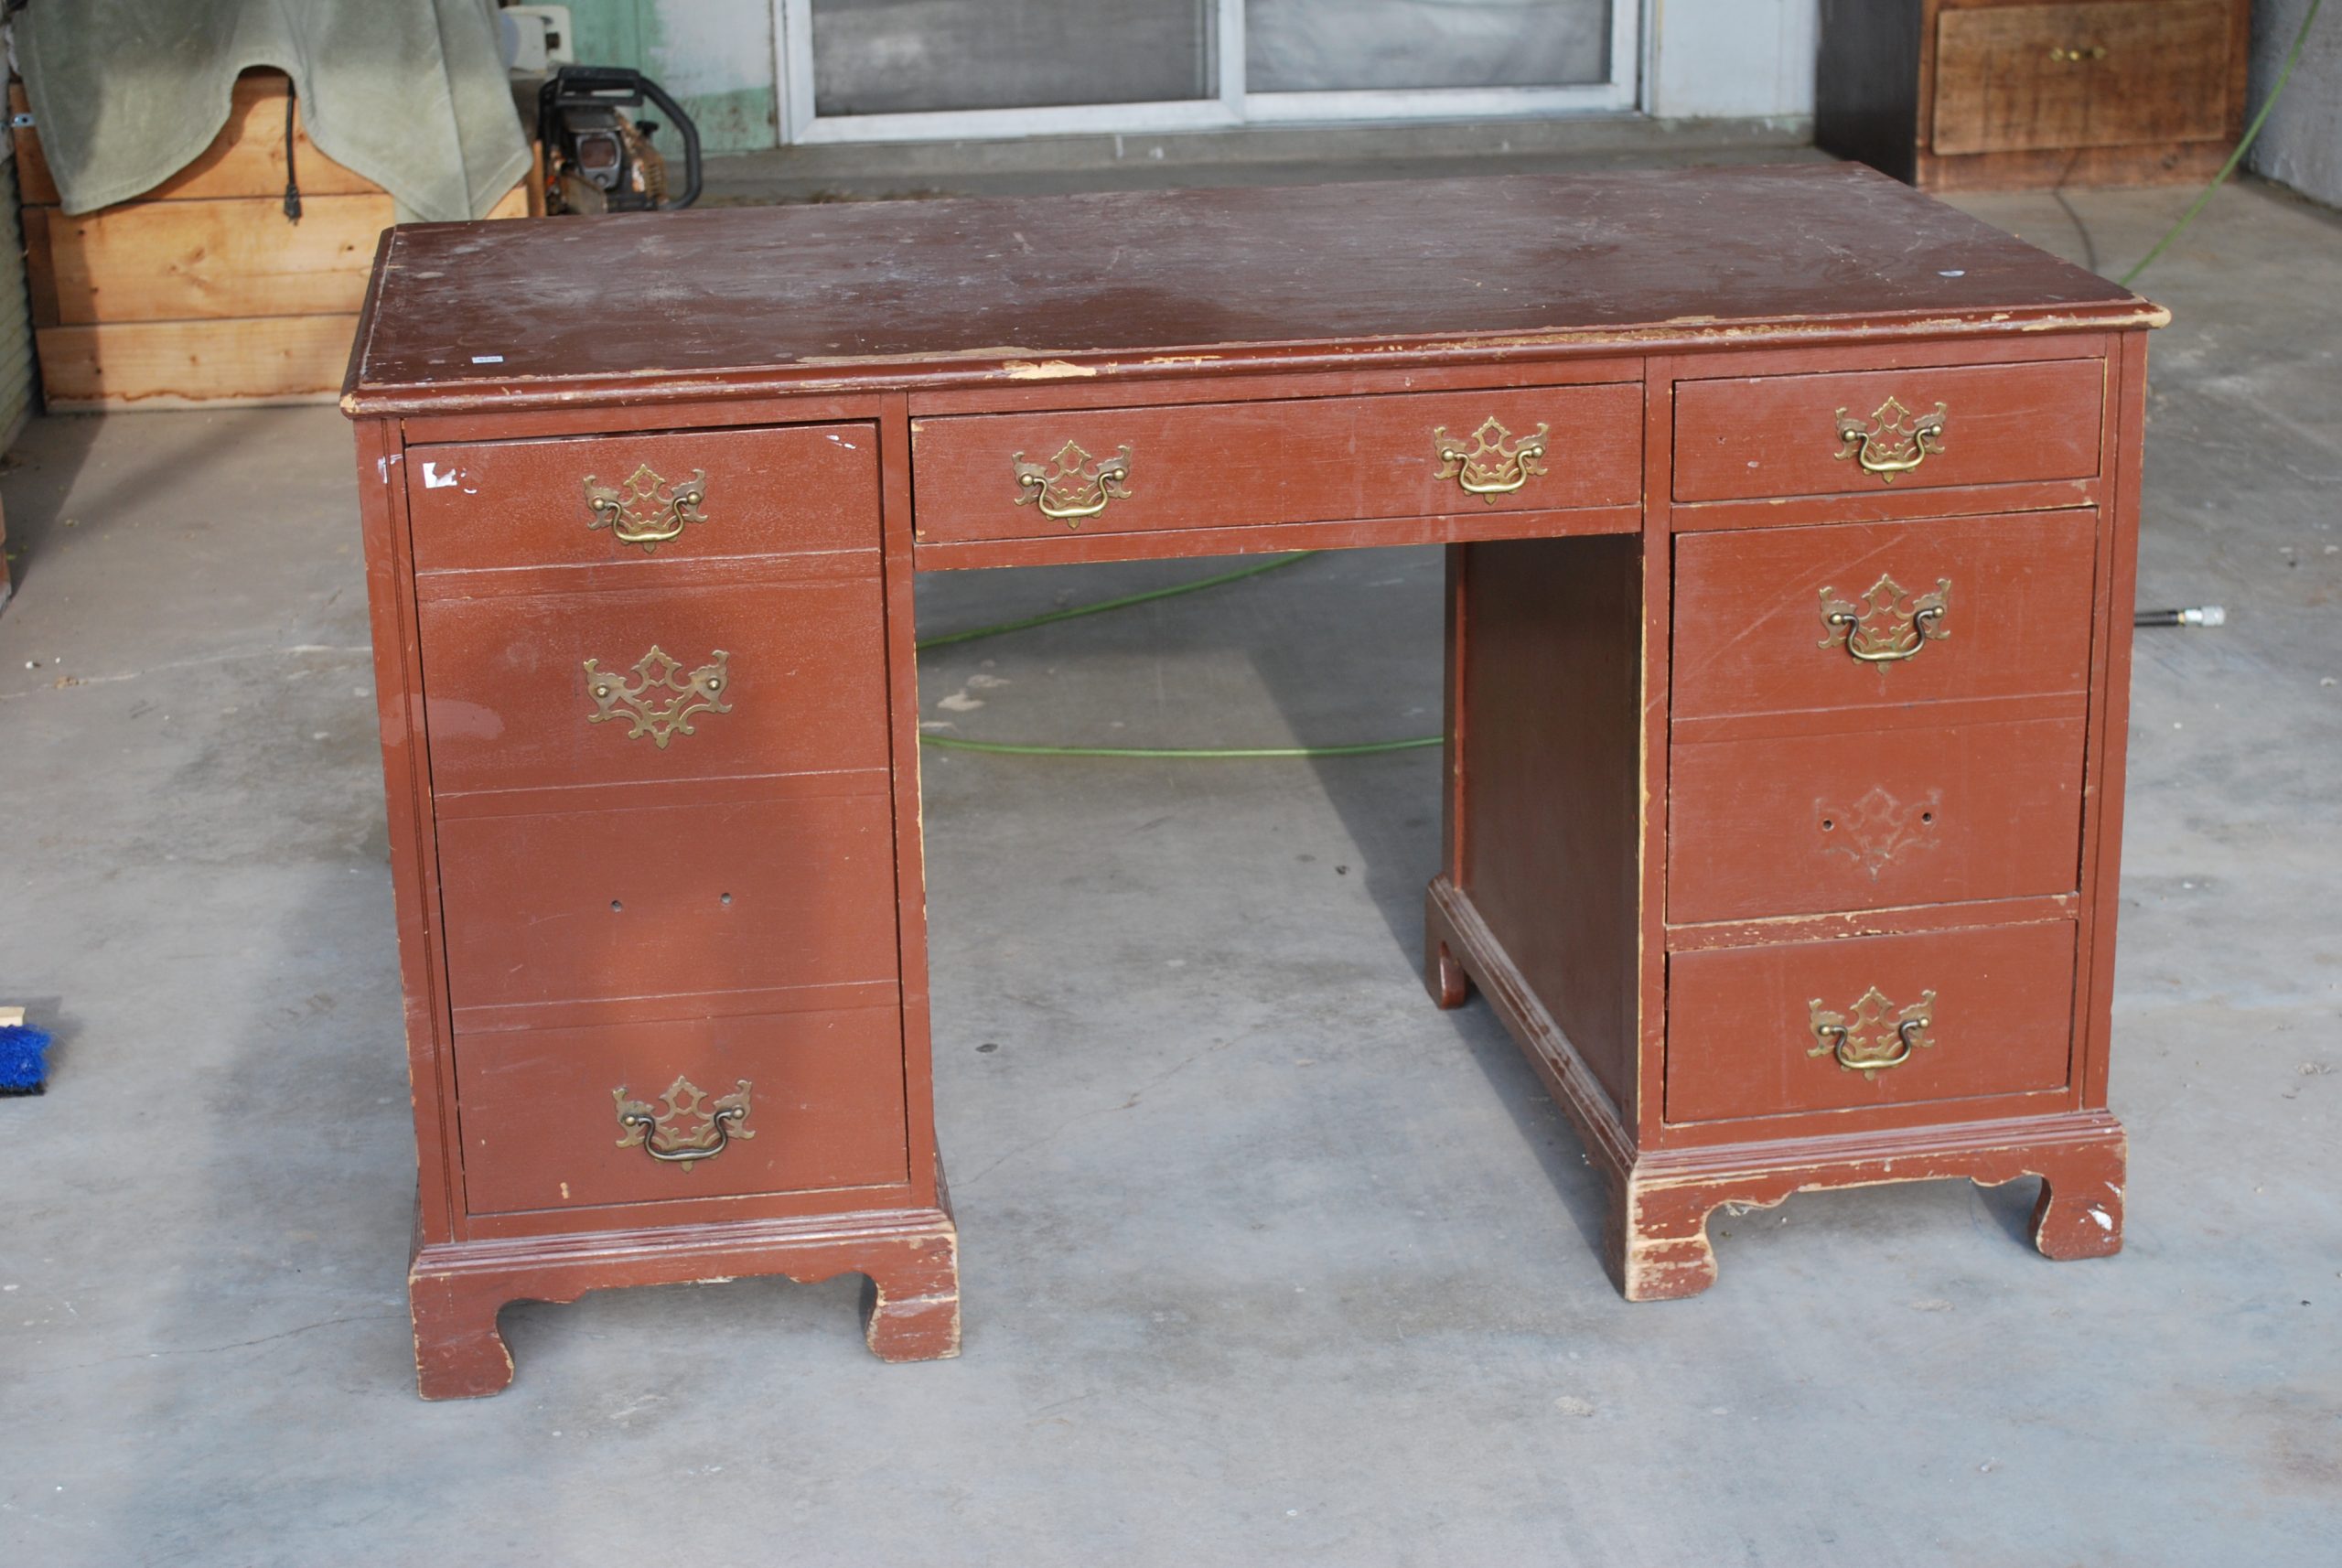
Here’s what the desk looked like when I just purchased it about 5-6 years ago. Someone had already painted it brown so I figured because there’s already paint on it might as well just paint it. I first painted it a mint green! Don’t ask why LOL not sure what I was thinking. It looked cute for about 2 months and I was over it. About a month ago I decided to paint it gray. I took it outside and gave it a coat of primer and paint. It ended up looking nothing like I wanted. The lighting was so different outside vs inside and the gray hue wasn’t at all what I wanted. This wasn’t even the worst part. After about 3 days the paint literally started rubbing off. CRAZY RIGHT! I think what caused this was, I didn’t have white latex paint to lighten the gray and kept using primer to lighten the paint. Probably just a bad chemical reaction. This is when I realized the only way to save this desk was to strip all the paint and start from scratch.
STEP 1: PAINT STRIPPING!
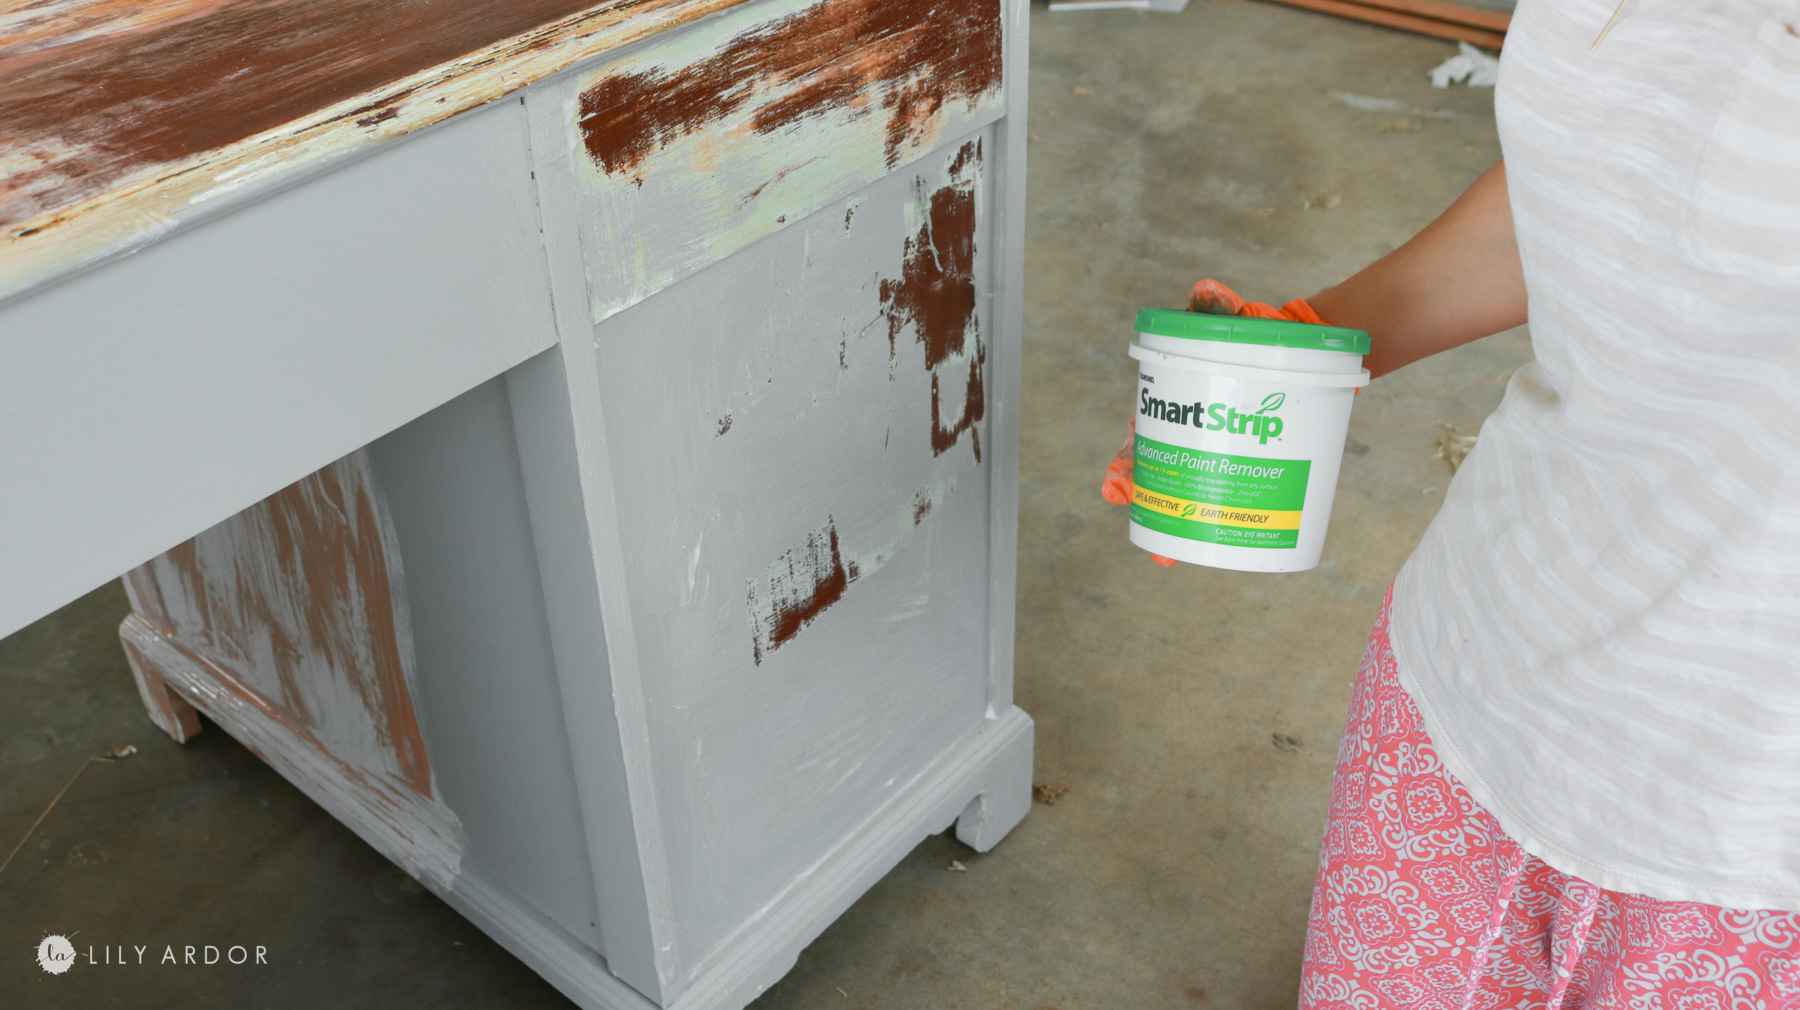
Smart strip – Applied onto the desk panel and started scraping after 1 hour wait time.
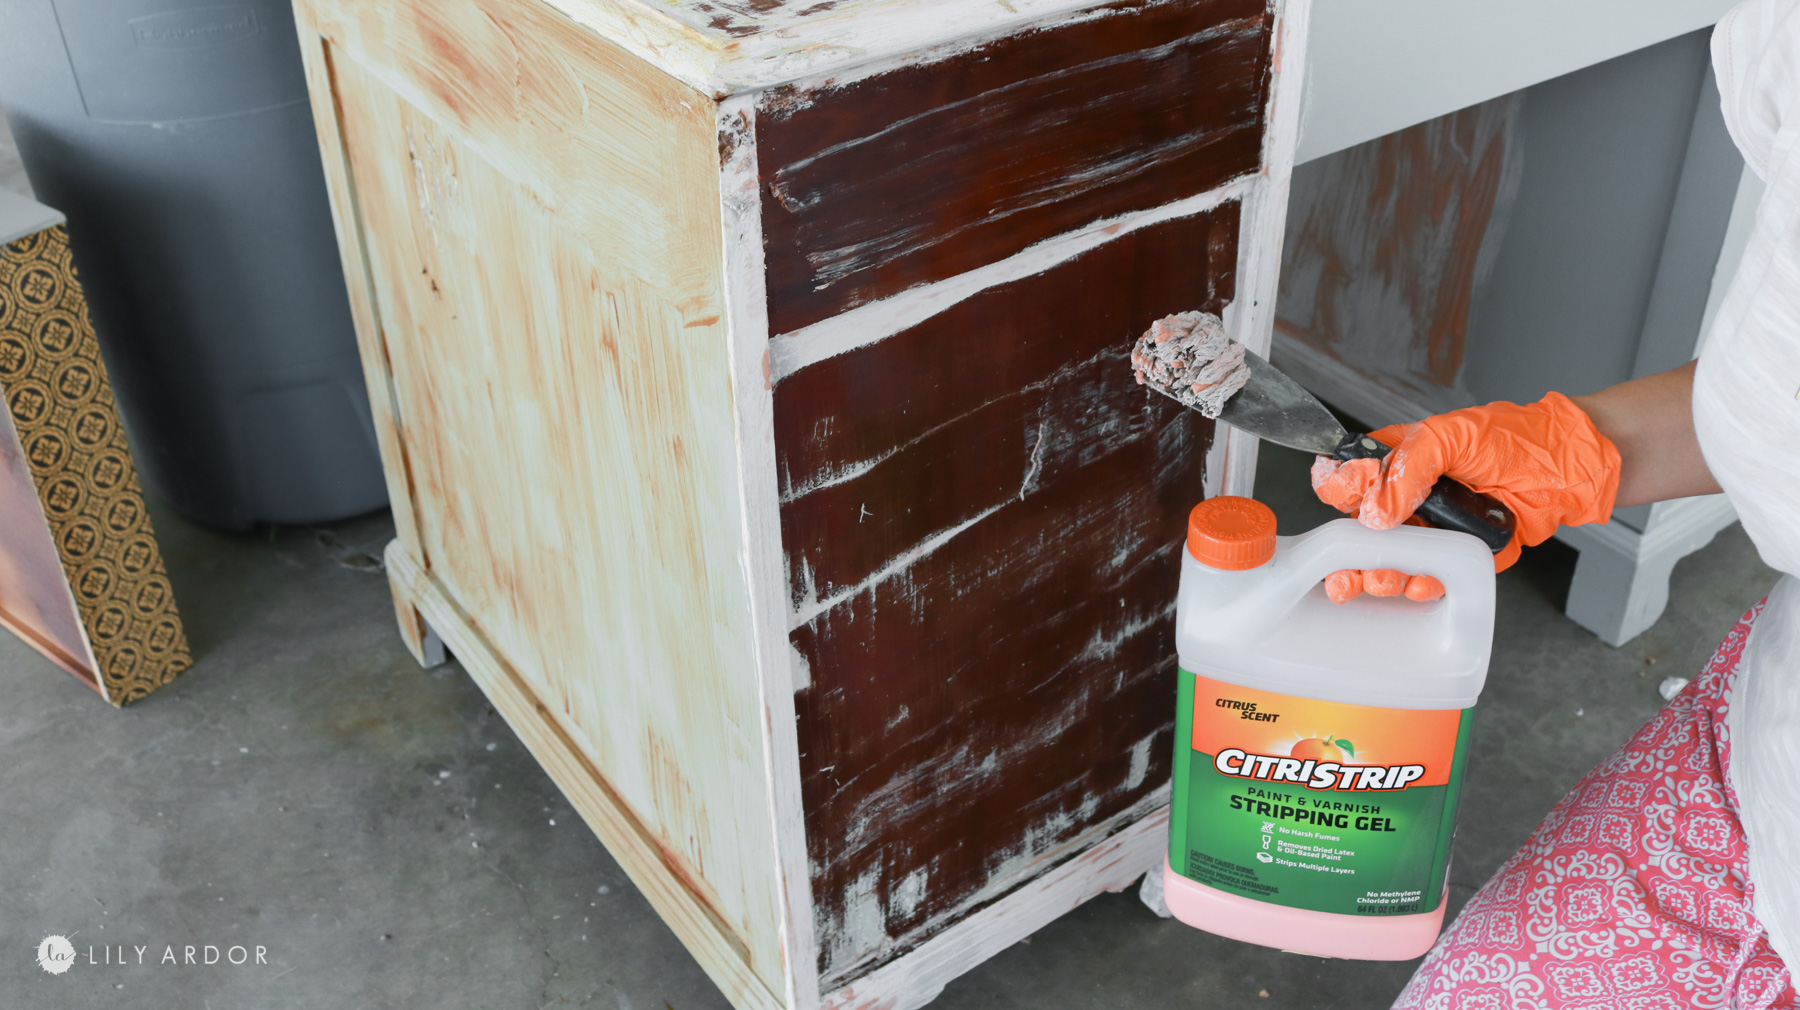
Citri strip – Applied to another panel and scraped after an hour wait.
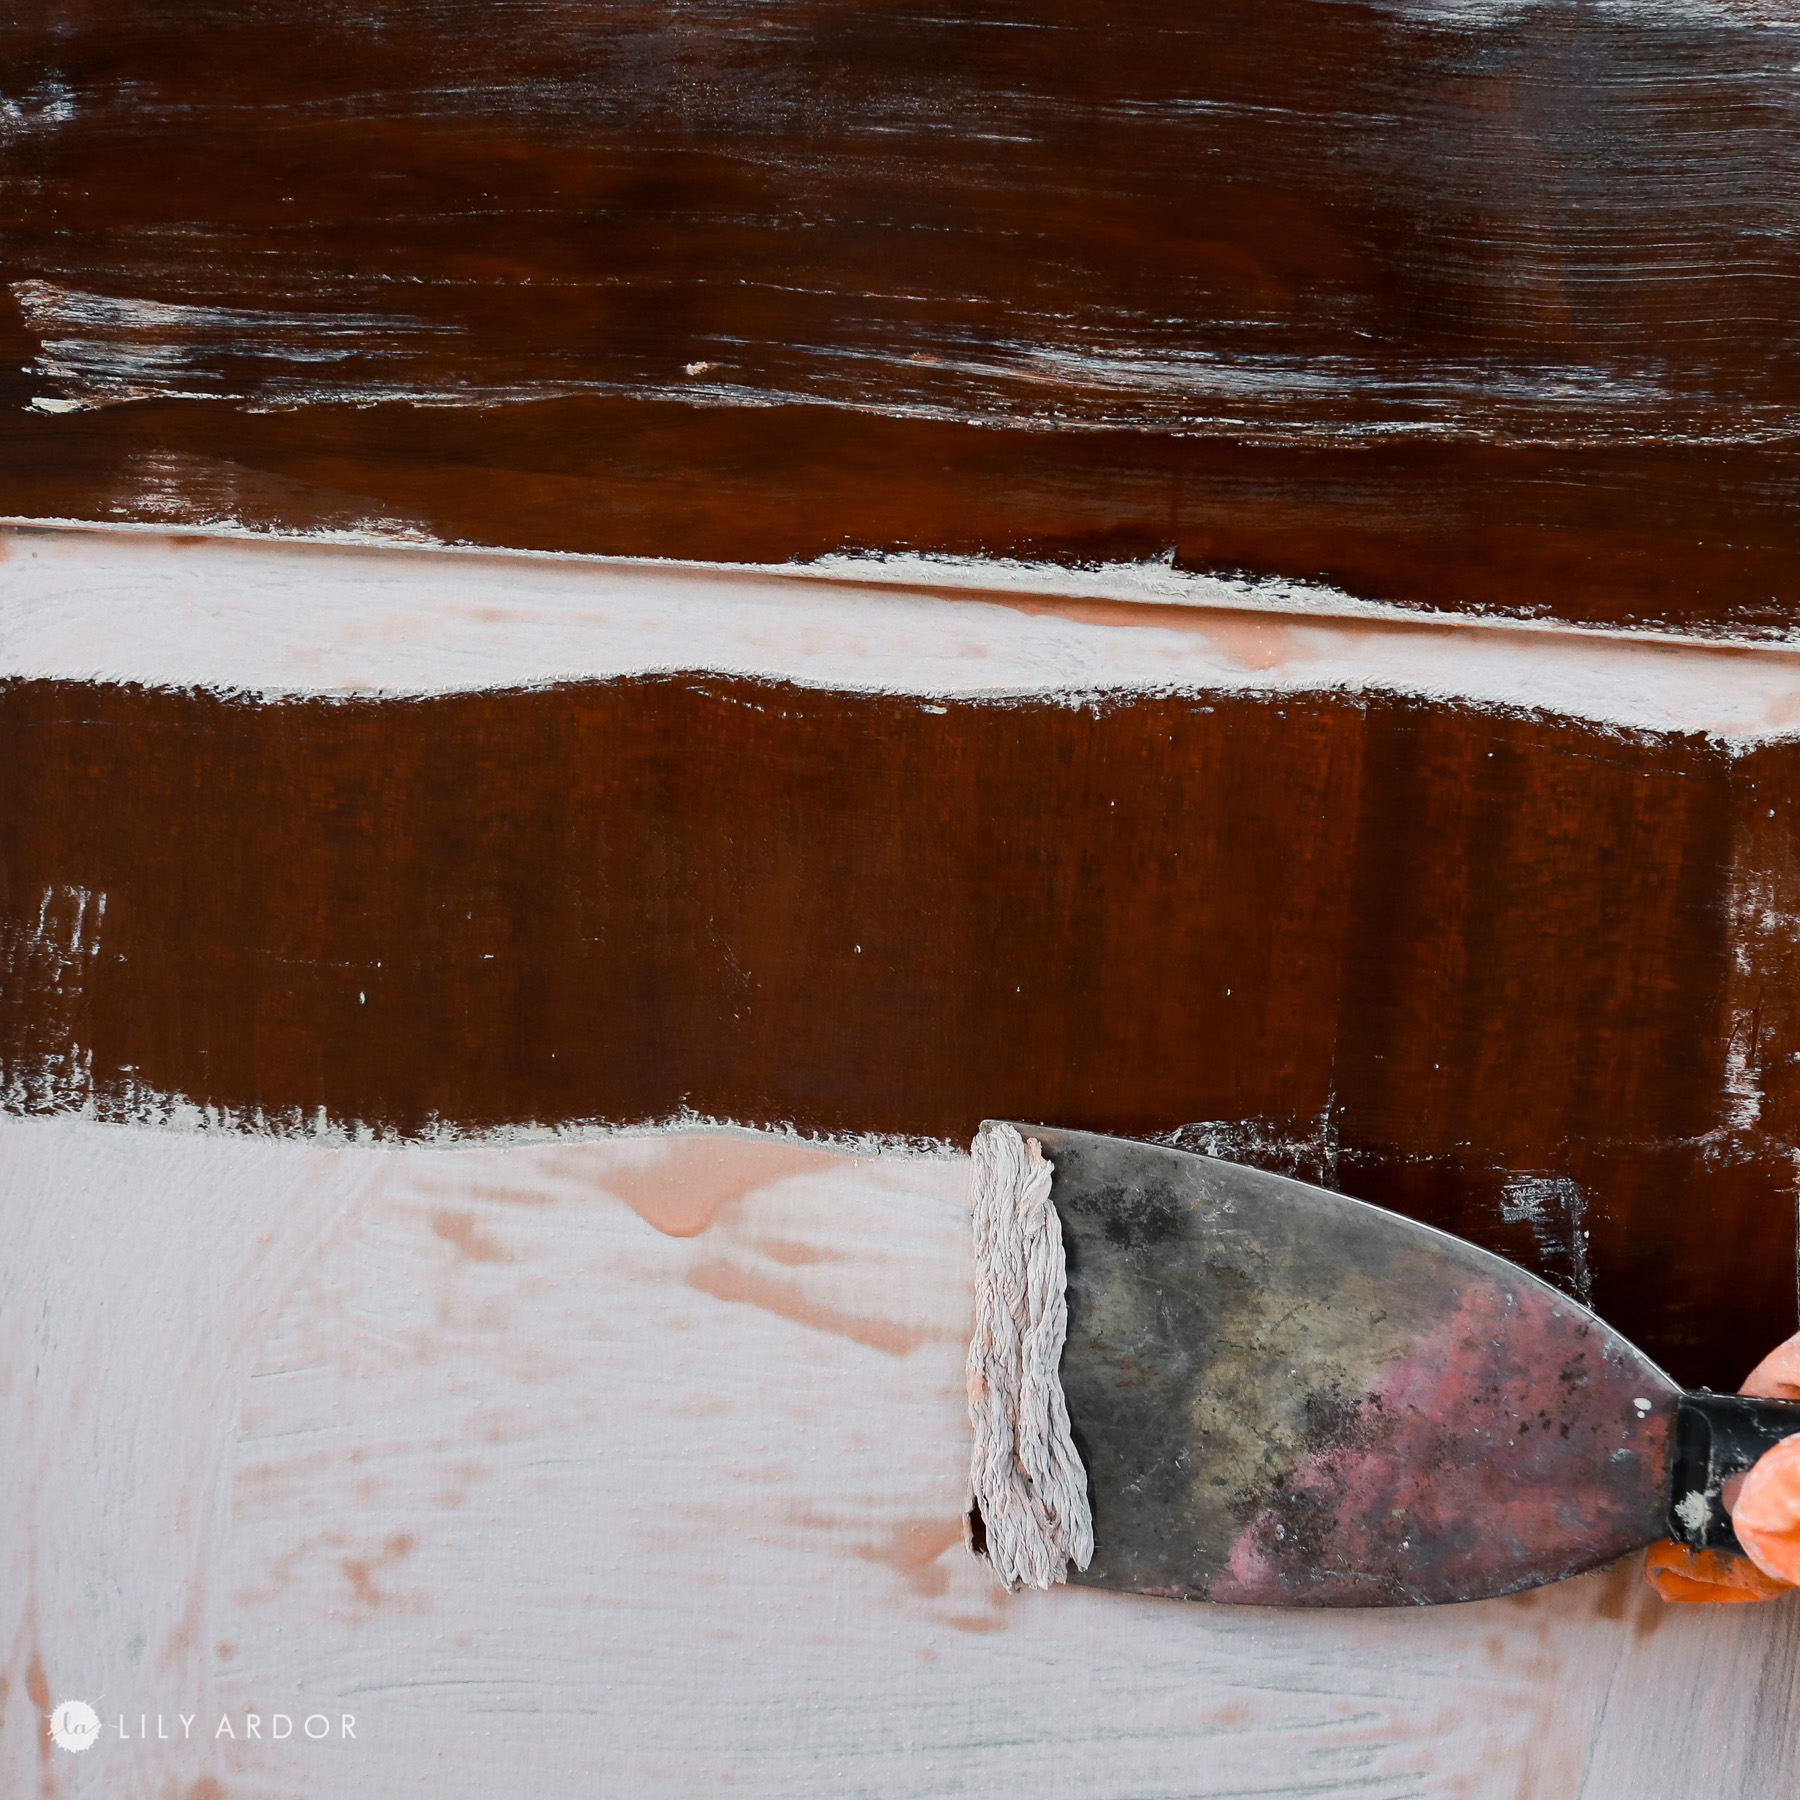
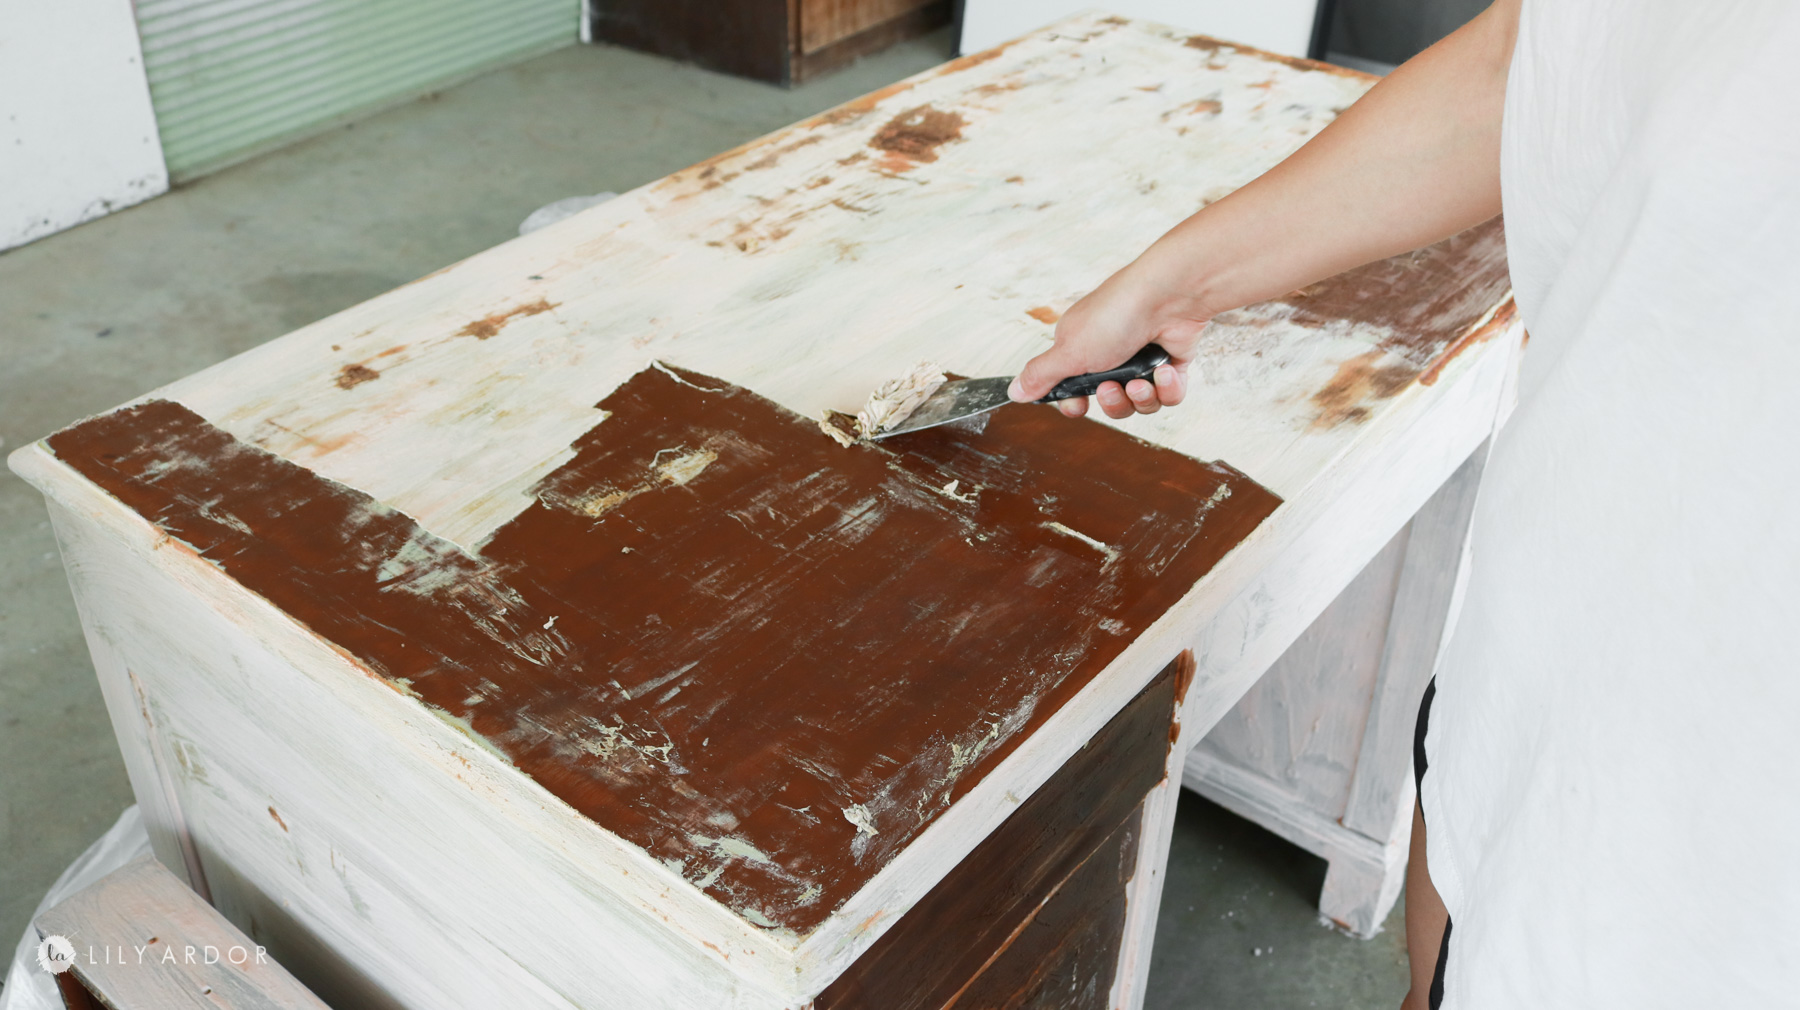
After testing multiple products I settled on citri strip. I found the best way to get the paint off was to let it set for 24 hours. I applied a thick layer of citristrip over the whole desk and cover it with some plastic I had. It was about 100 degrees outside so I’m sure the heat helped a bit too. The next day I used a metal scrapper to remove all the paint. I was still left with a sticky paint residue because of all the layers. So I applied another layer of citristrip and left it for another hour before scraping it off. You can see more in the video- https://youtu.be/P10nK-AUX-8. I feel like the extra layer helped clear up the desk quite a bit.
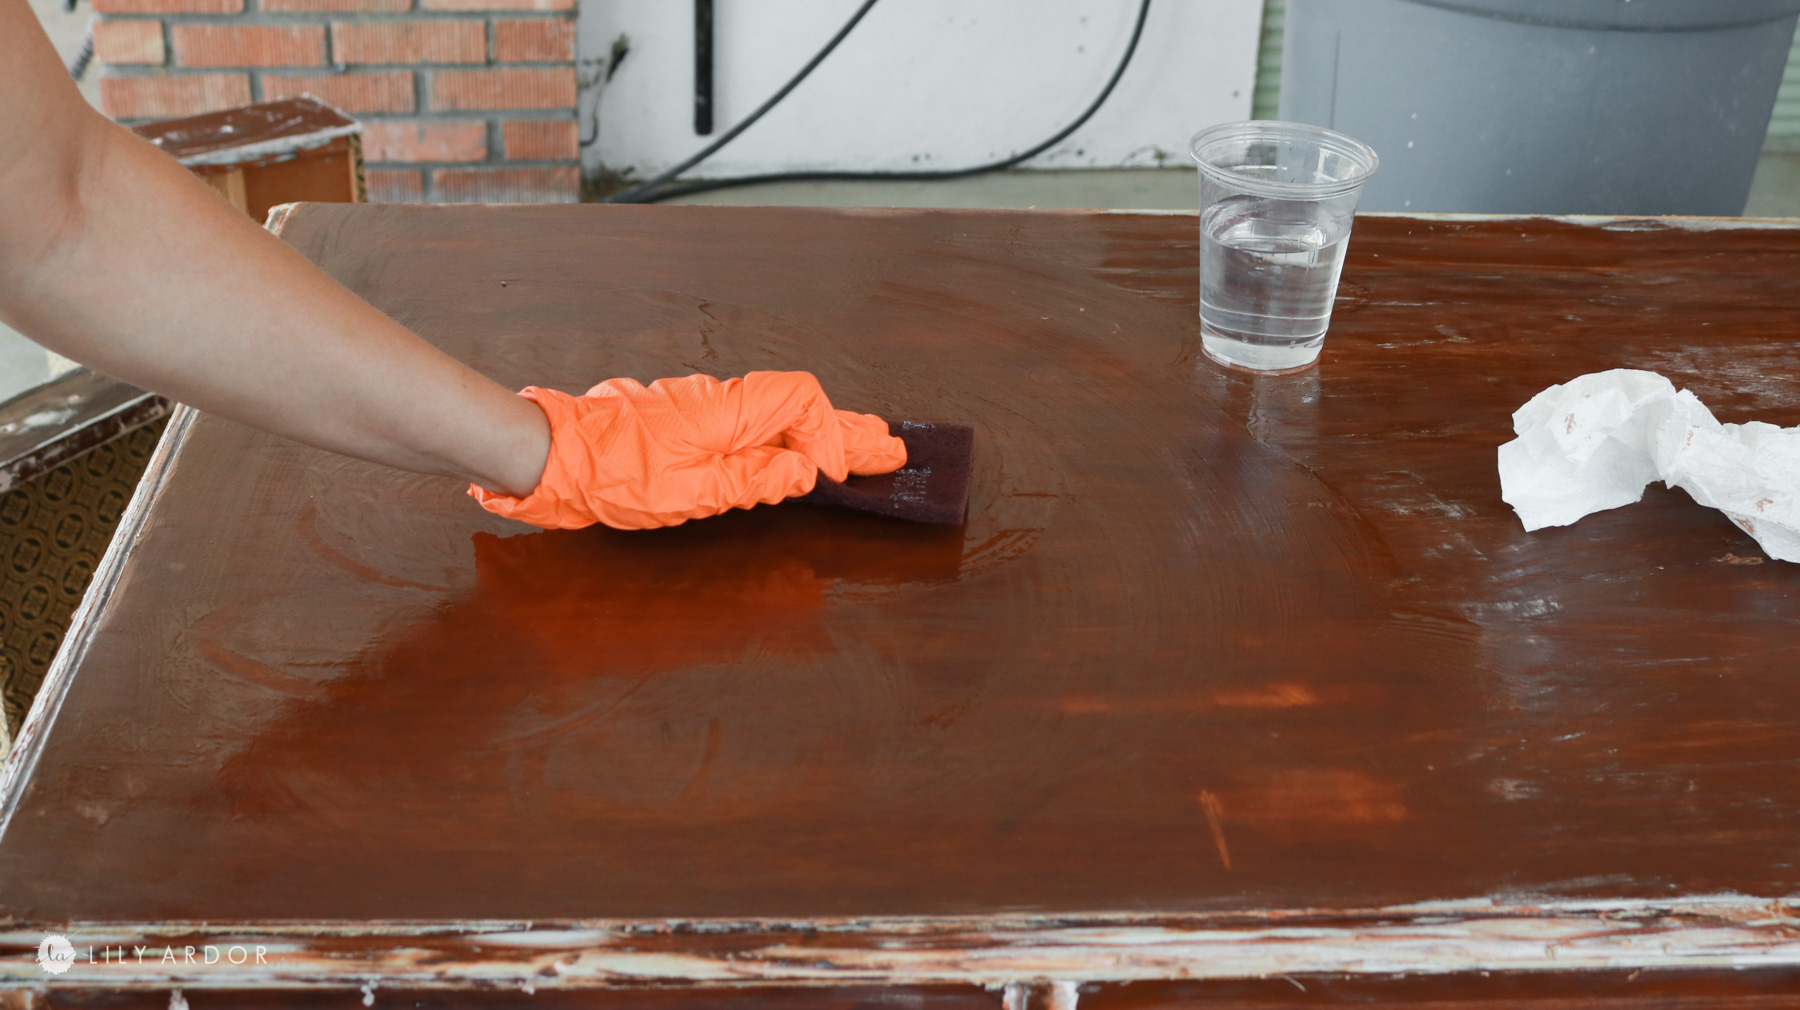
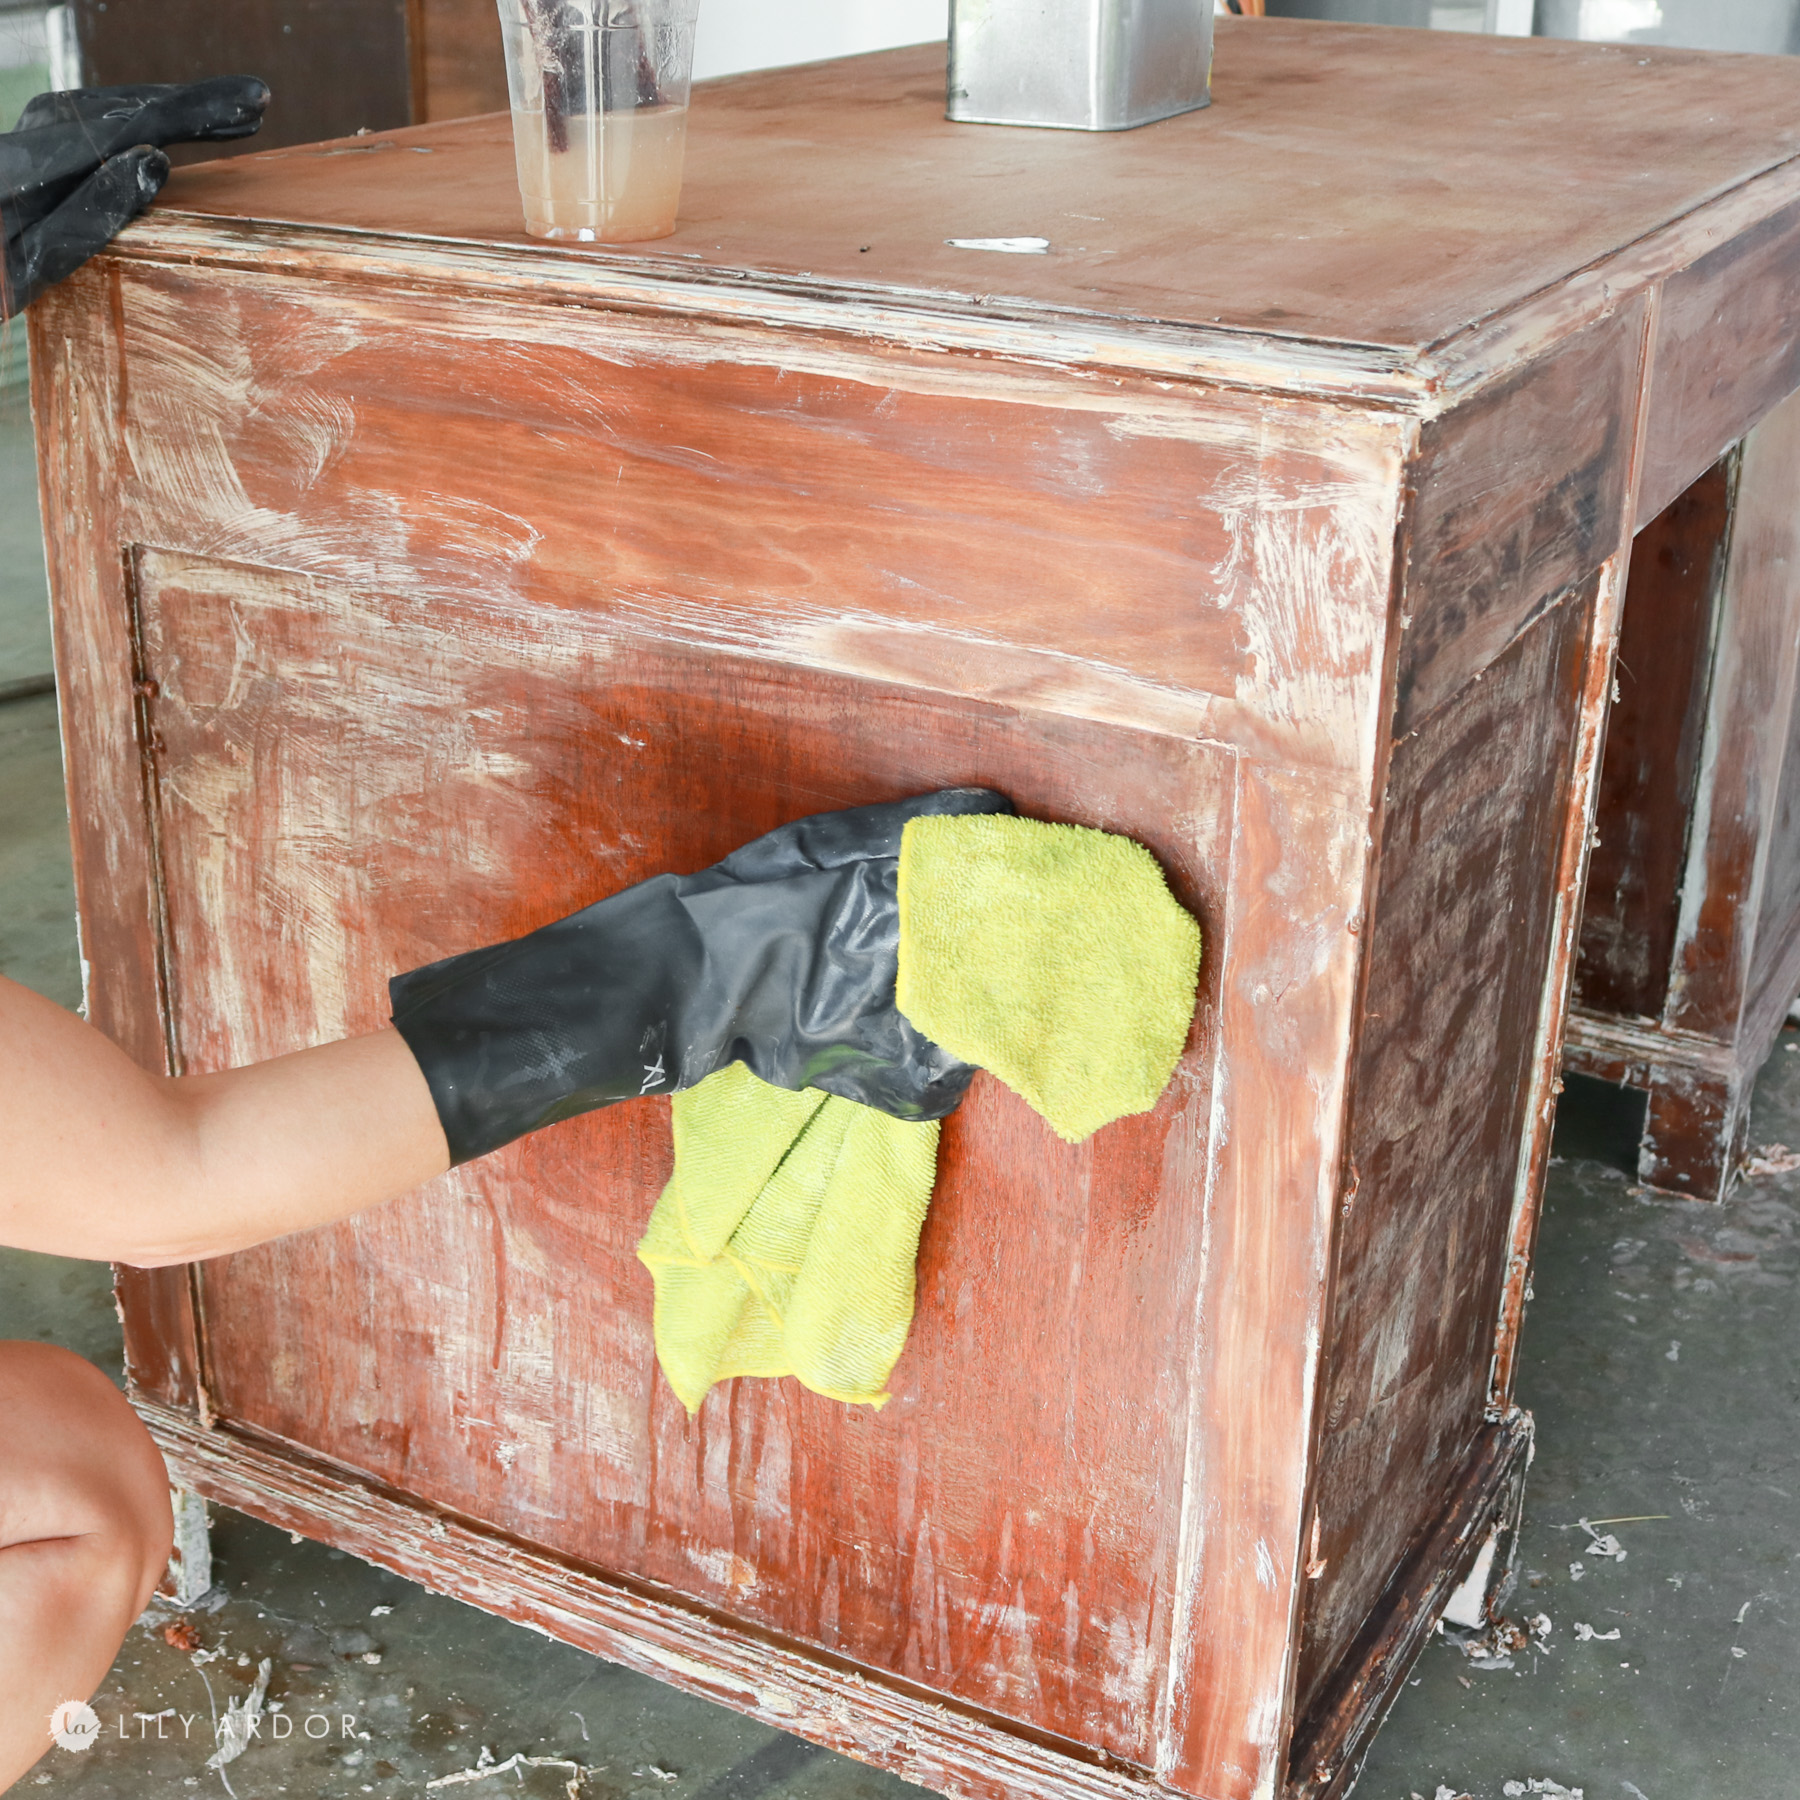
STEP 2: Cleaning the PAINT STRIPPER!
YUK! This was probably the worst! It was so hard to remove the sticky mess. I tried doing it with paper towel but, it wasn’t really working that well so I opted out for microfiber towels. Eventually the best way I found to do it was to pour lacquer thinner onto it or dip a scoring pad into the thinner and rub the desk with the scoring pad. This would lift up the gunk and I would wipe it off with a moist microfiber towel. Just a heads up! You’ll be throwing those towels away. I couldn’t get them cleaned with anything and ended up tossing out 3 old microfiber towels. I was totally ok with that at this point. LOL Just glad I figured out a way to clean the desk.
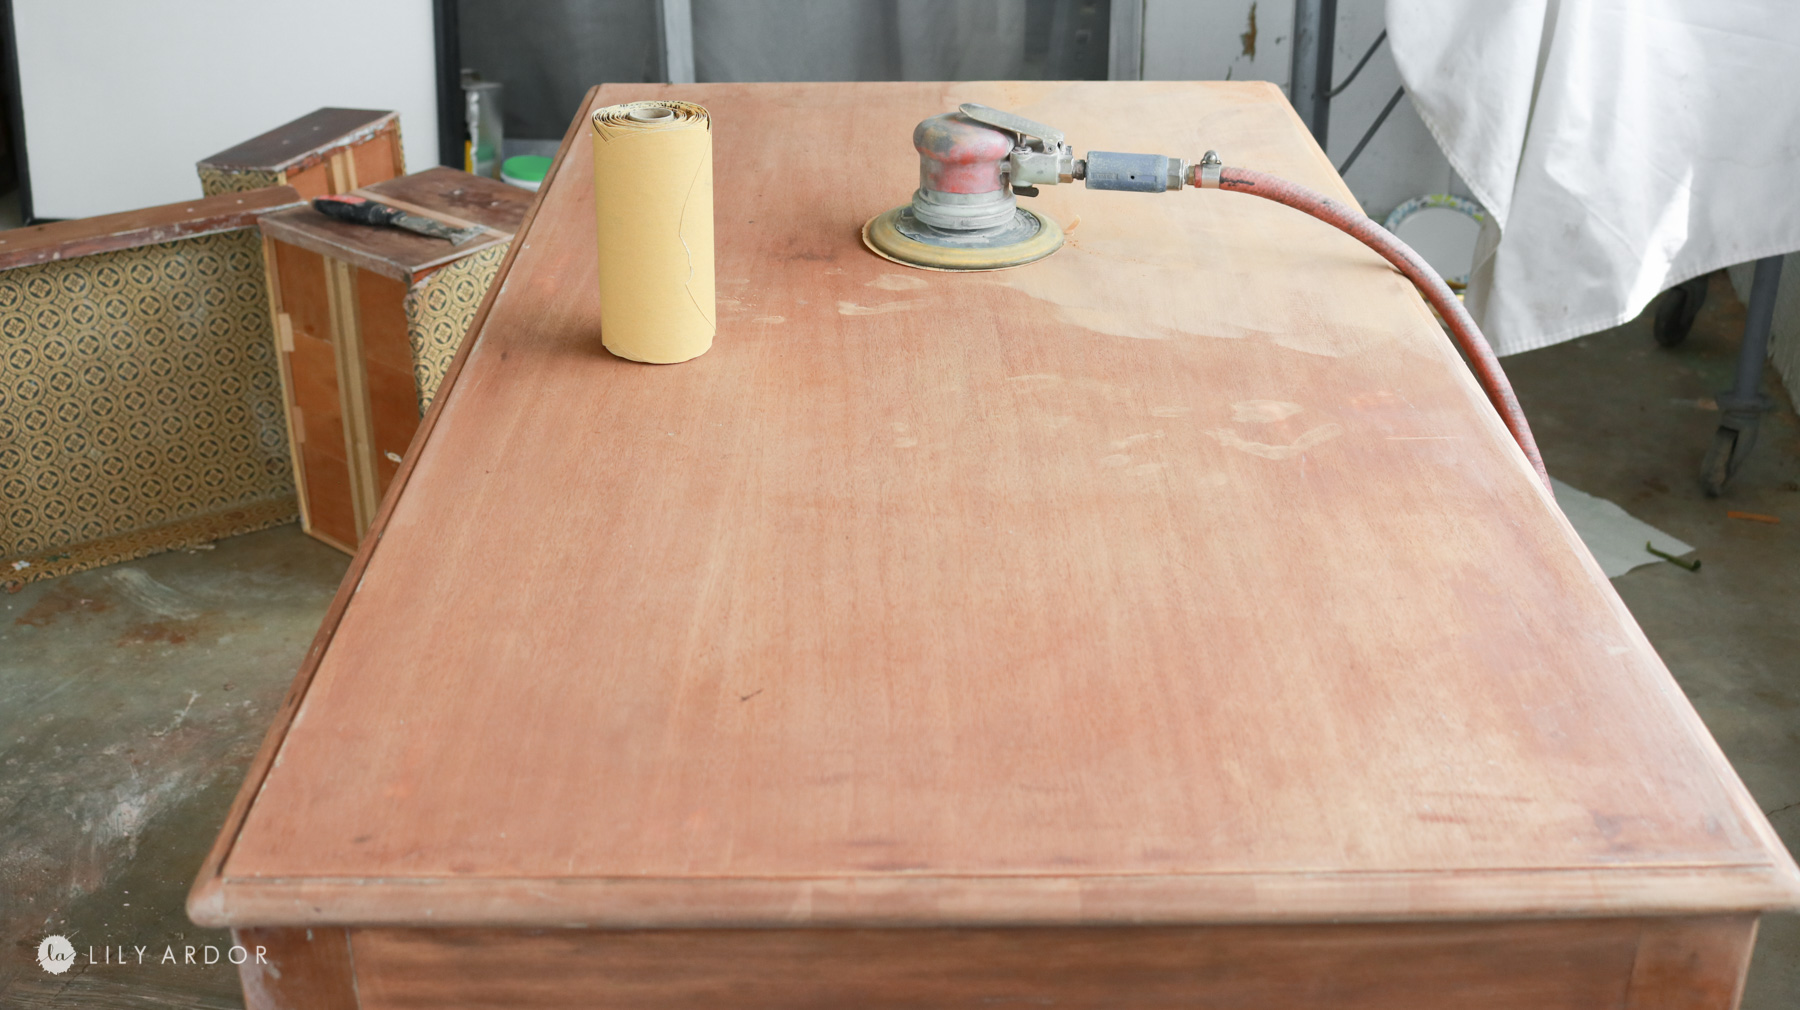
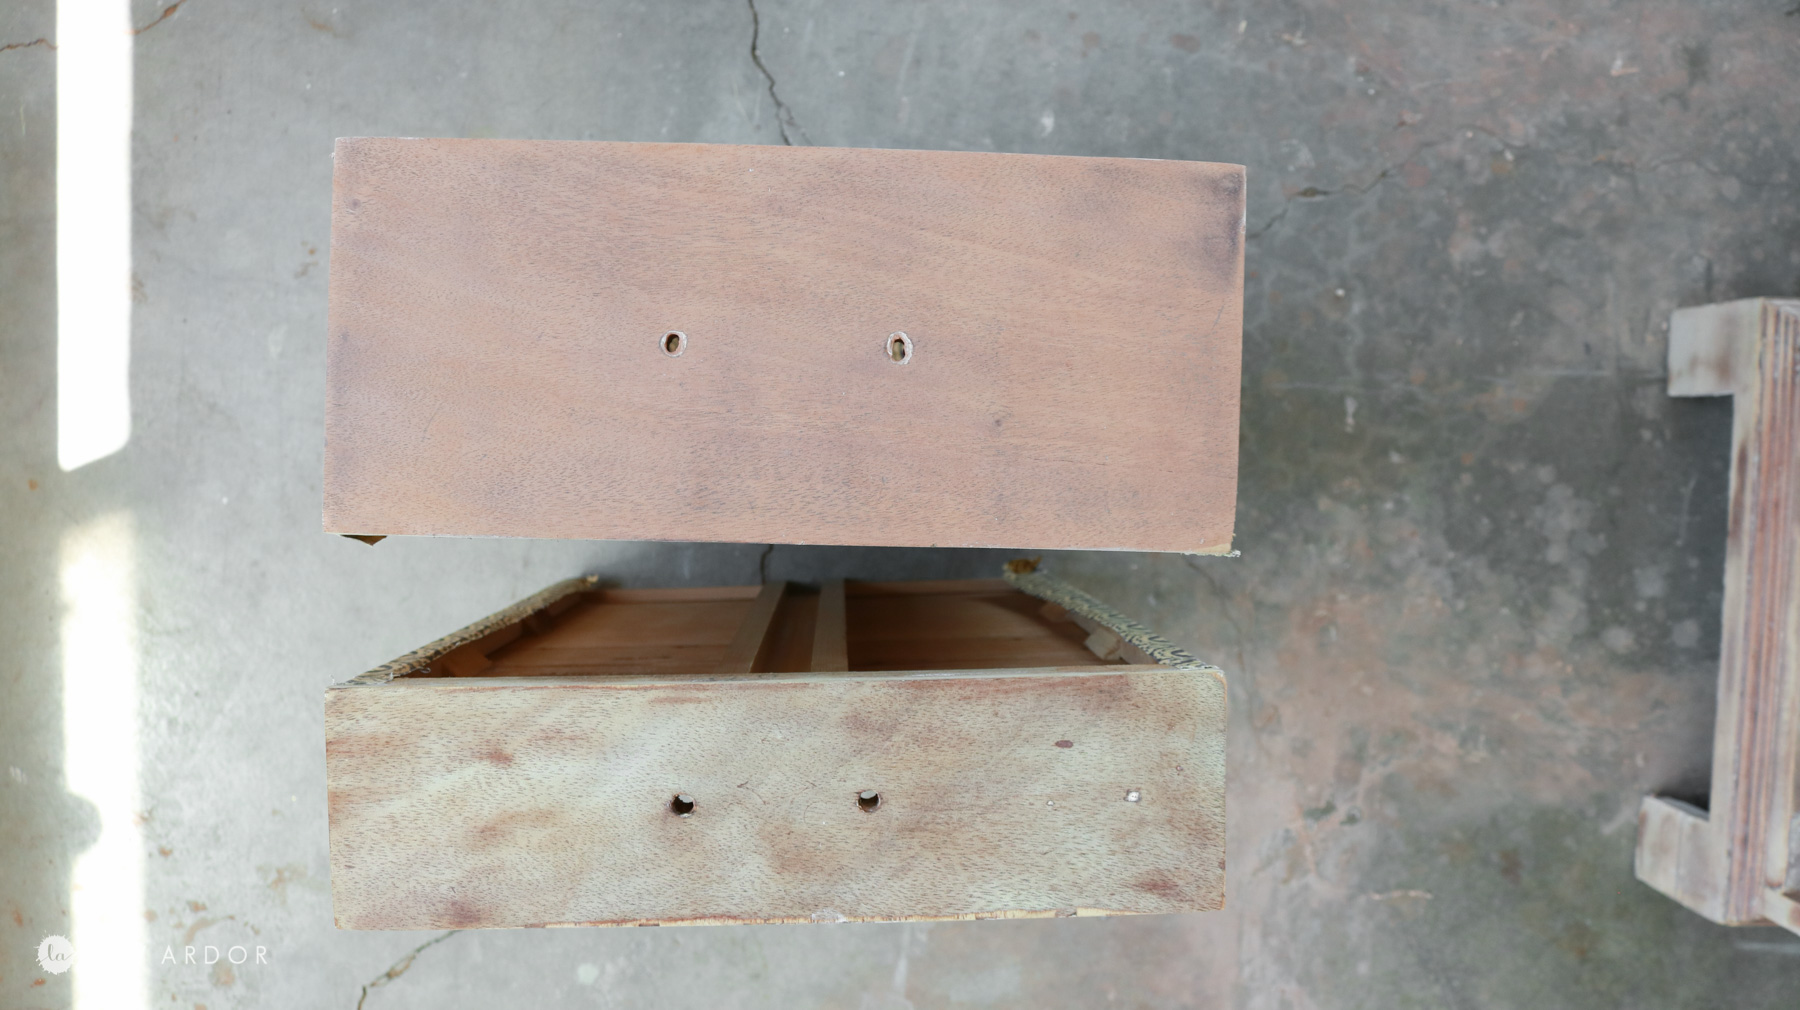
STEP 3: SANDING!
I used my dual sander to sand the desk overall and sanded by hand in all the corners. I hate sanding and feel like this took forever. Also it didn’t help that it was 100F outside. Sanding in heat like that isn’t the best feeling in the world! 🙁
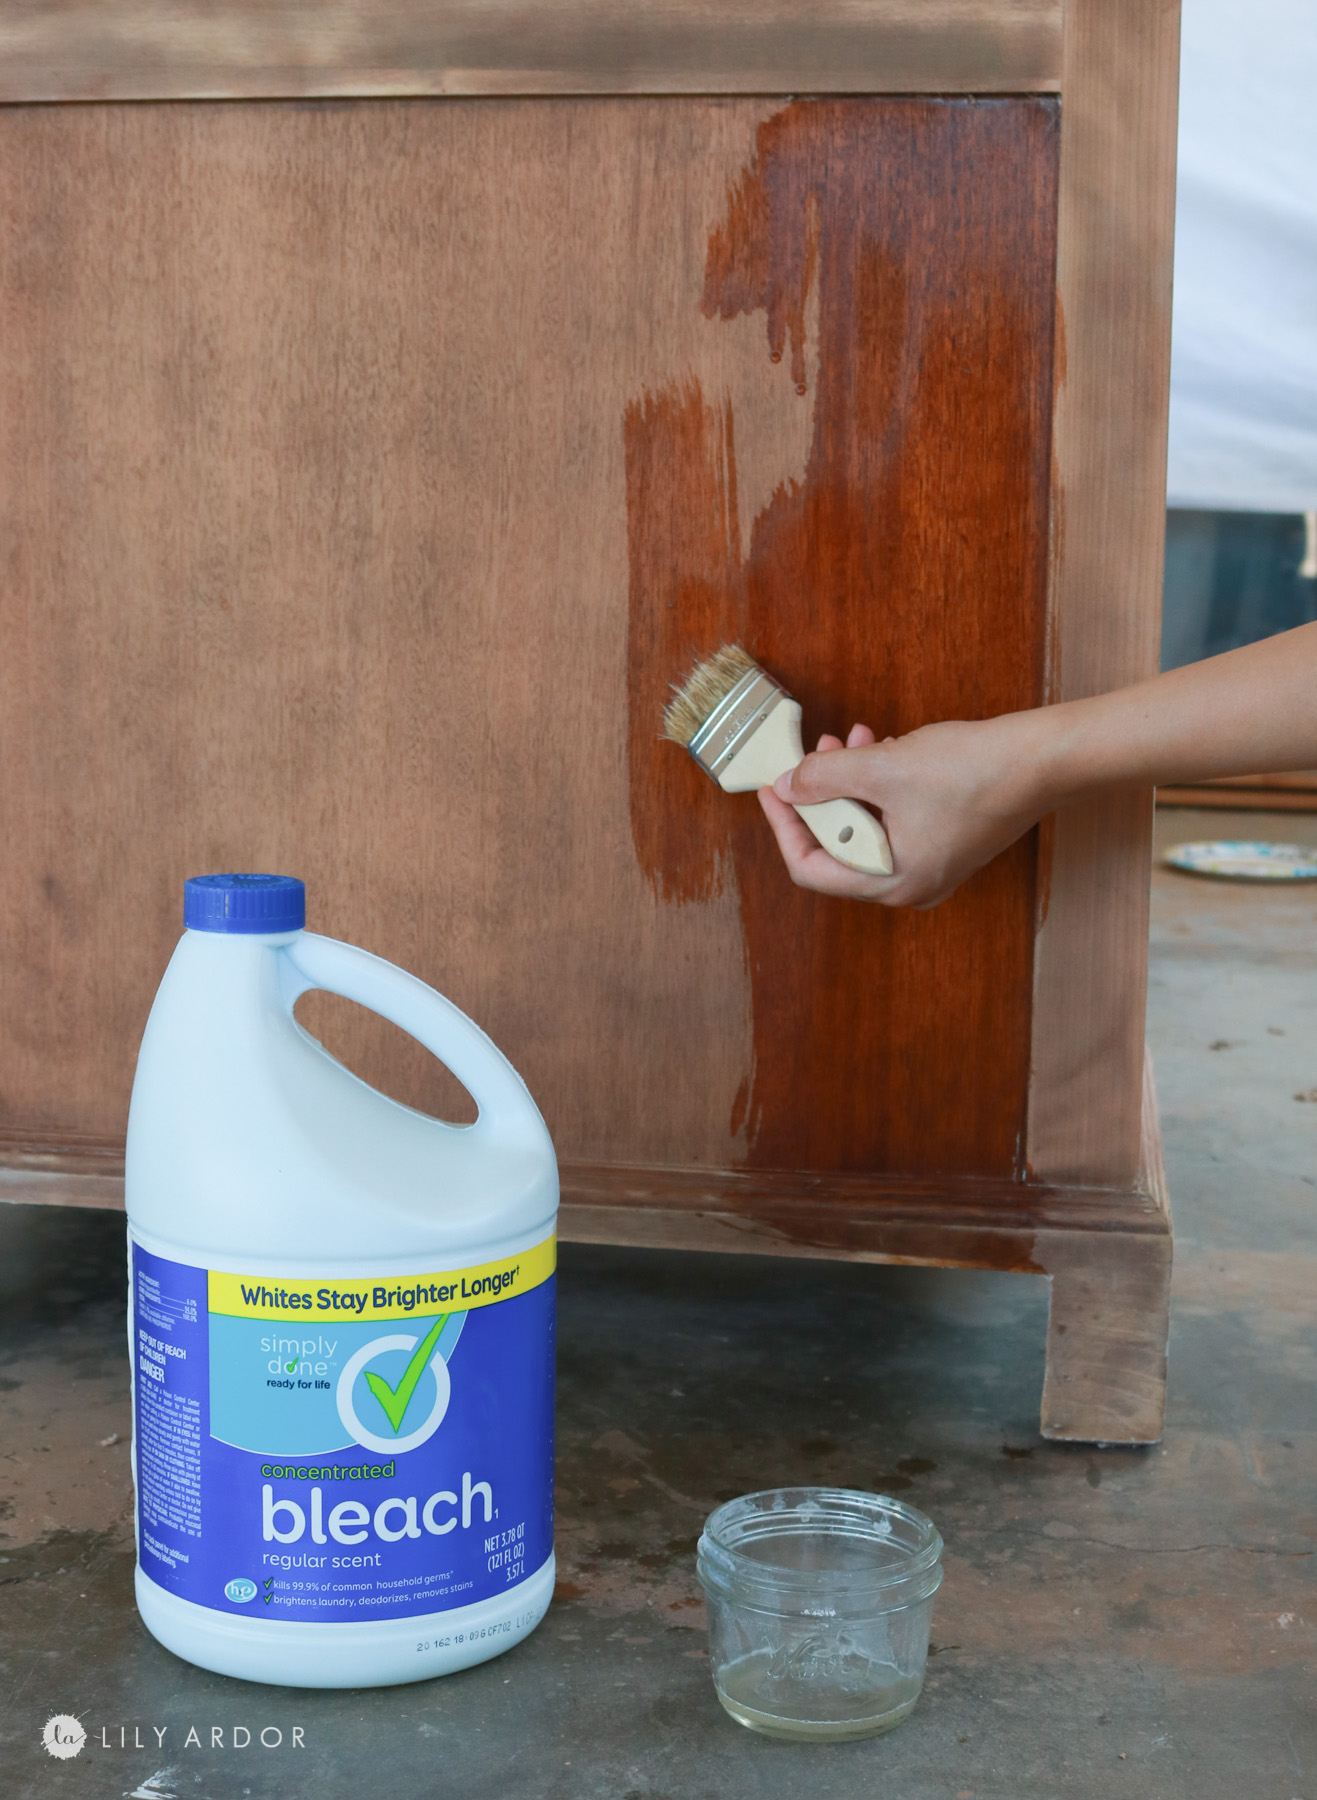
STEP 4: BLEACHING YOUR WOOD+ USING THE RIGHT PRODUCTS!
For this next step I decided because I’m not able to sand it enough to remove the stain I would bleach the wood. I found an article online and followed the instructions. I definitely regretted doing this! Not because the wood didn’t look good. In fact I loved how the bleach made it look. It smelled horrendous! I eventually found out how dangerous it is to use the wrong bleach on your wood project.
Top shelf: Before Bleach —- Bottom shelf: After Bleach
CAUTION READ THIS! DANGERS OF WOOD BLEACHING!
There are products made specifically to bleach wood. DO NOT USE HOUSEHOLD BLEACH TO BLEACH WOOD LIKE I DID! I followed a DIY I found online without doing much research. I did my research after completing the project. 🙁 After the desk was in my office and I realized how bad it smelled. I was googling how to kill the smell and found out that bleach never evaporates it actually stays active even when dry. In order to neutralize bleach you need to wash it with water thoroughly or apply hydrogen peroxide over dry bleach ( household bleach ) I did neither of these steps so I immediately took my desk outside and applied a few coats of hydrogen peroxide. My desk has been outside for about 5 days now. It’s doesn’t have a bleach smell at all. I can’t wait to get it back inside the house and set it up.
UPDATE: The desk has been outside for over a month now. I applied hydrogen peroxide over it to neutralize the bleach multiple times and it hasn’t helped. It seems to help for a bit but the smell comes back. I’m assuming this is because I have a wax finish on it. Not sure, but I’m thinking I would have to refinish it to get rid of the smell. Probably remove the stain and soap it up and hose it down then reapply the finishes. Even than I’m concerned the bleach smell won’t go away. This DIY was a flop because of the bleach. 😅 glad I got to try this so you don’t make the same mistake.
The two biggest things that freak me out about using household bleach is that if you inhale too much bleach it can be deadly yes even if it’s dry on your desk and if you use ammonia based products on bleach it creates a very toxic chemical. Please keep these in mind.
If you’re using bleach that’s made for wood please do research and follow the manufactures instructions.
I would also recommend watching the full video on this makeover. I go way more in depth about everything – https://youtu.be/P10nK-AUX-8.
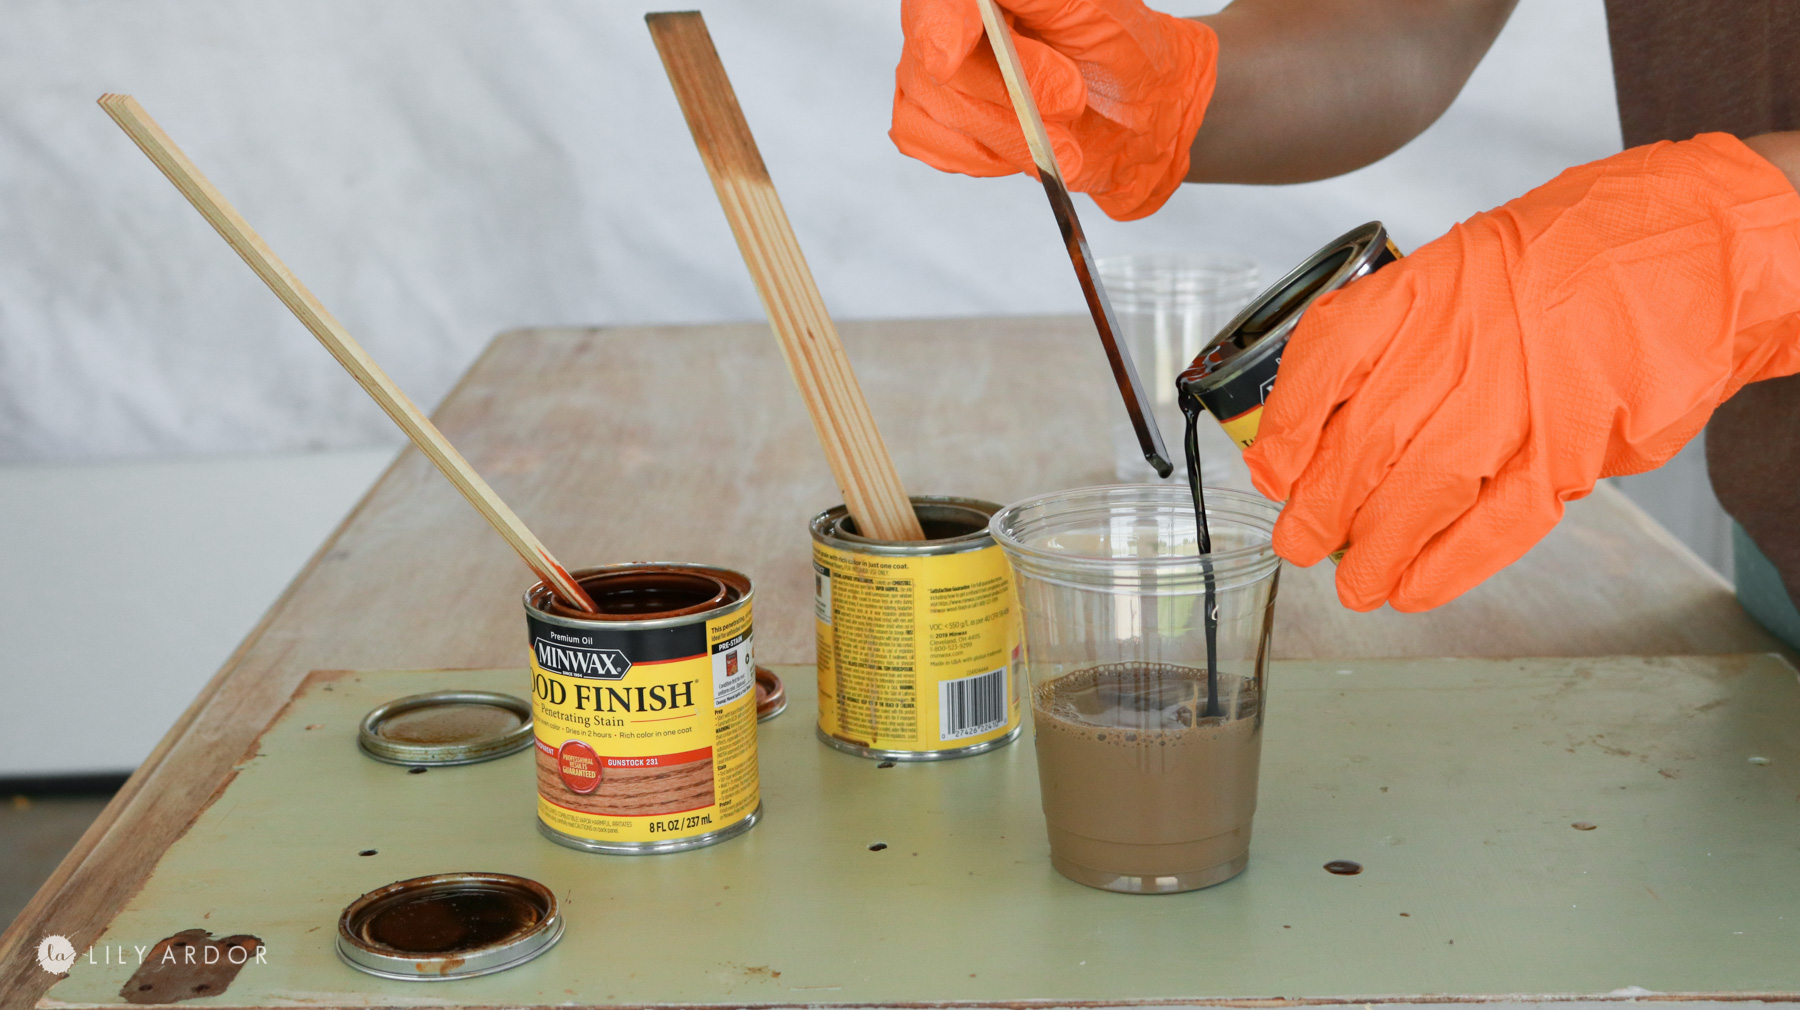
STEP 5: Staining the Wood!
For the first time ever I decided to try mixing my stains to get the exact color I wanted. I love this idea! It works perfect and let’s you customize so easily! To stain my desk I used mostly fruitwood stain in the minwax brand and added a bit of english chestnut and gunstock in the same brand and stain type. This gave me a beautiful stain color. I applied the stain with a paper towel and wiped any leftover stain off right away.
Step 6: Finishing off and Waxing your wood!
Because I wanted to keep the wood matte I decided to use a wax. I also wanted to see if a white wax would make it look any better. I’ll be honest I wasn’t happy at all with the desk at this point. It looked so blotchy. It’s almost like the desk was built using 3 different types of wood. I found a white wax at lowes and gave it a try.
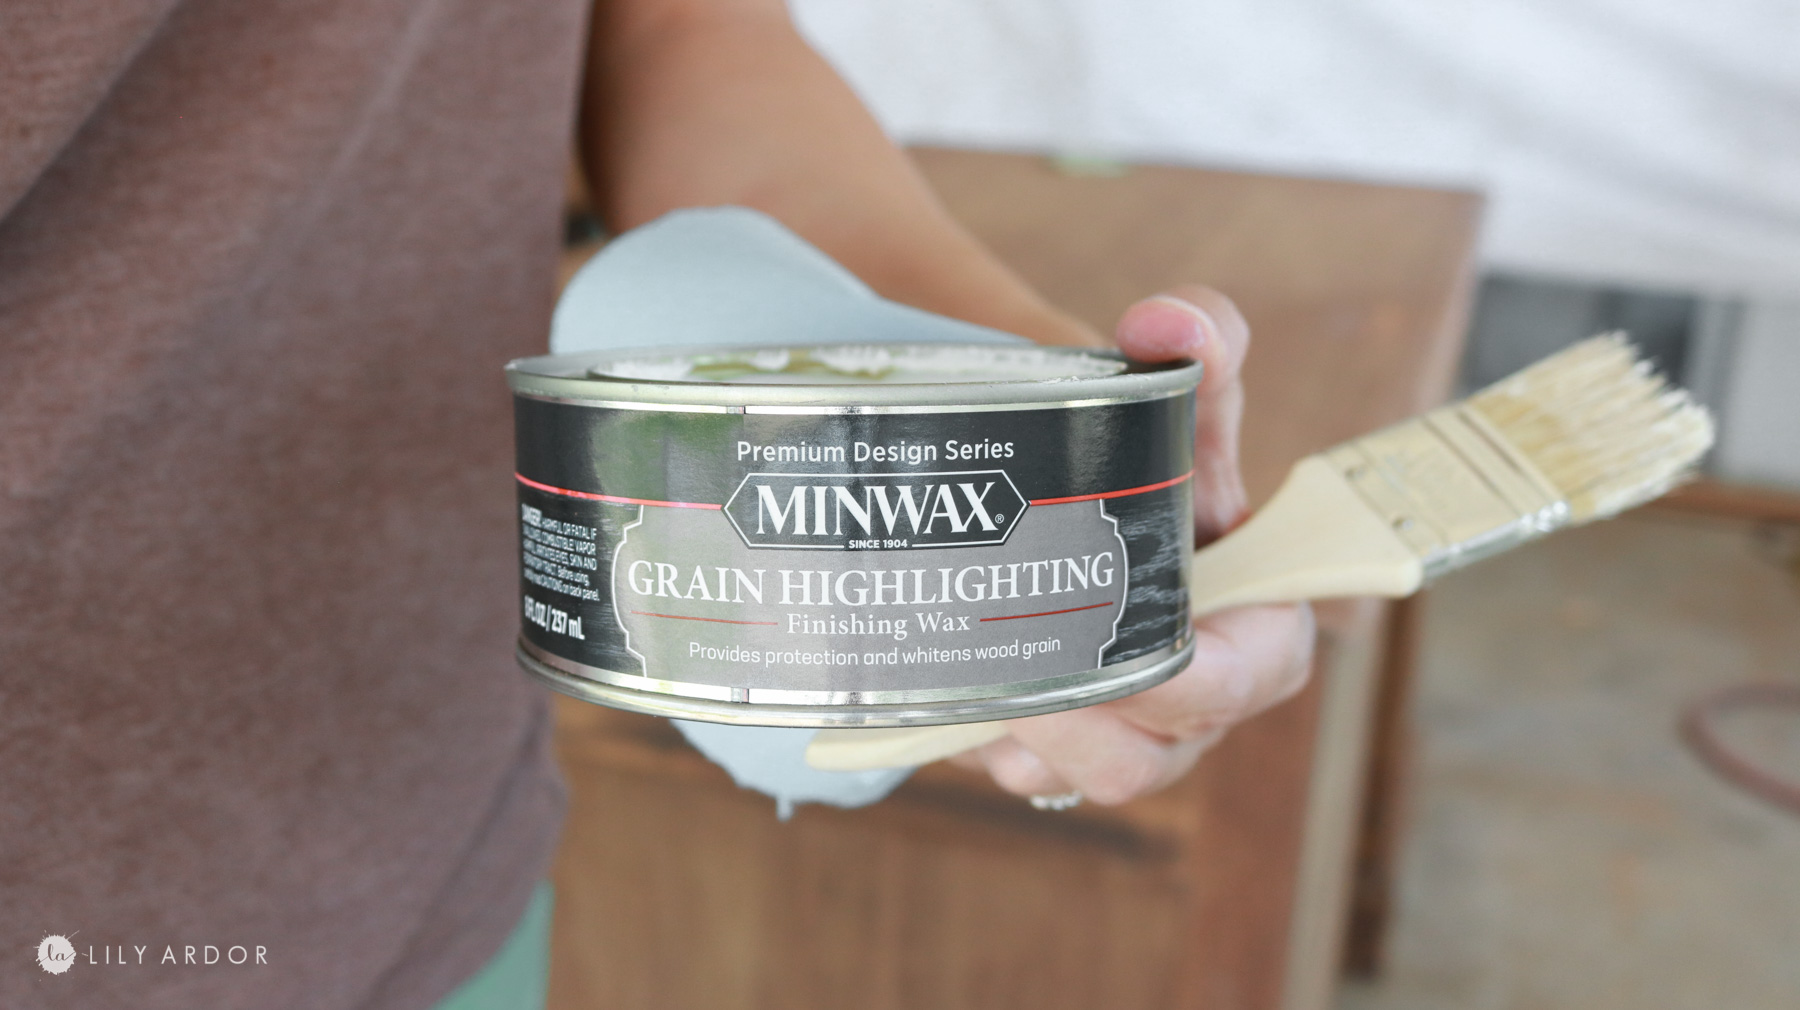
white wax
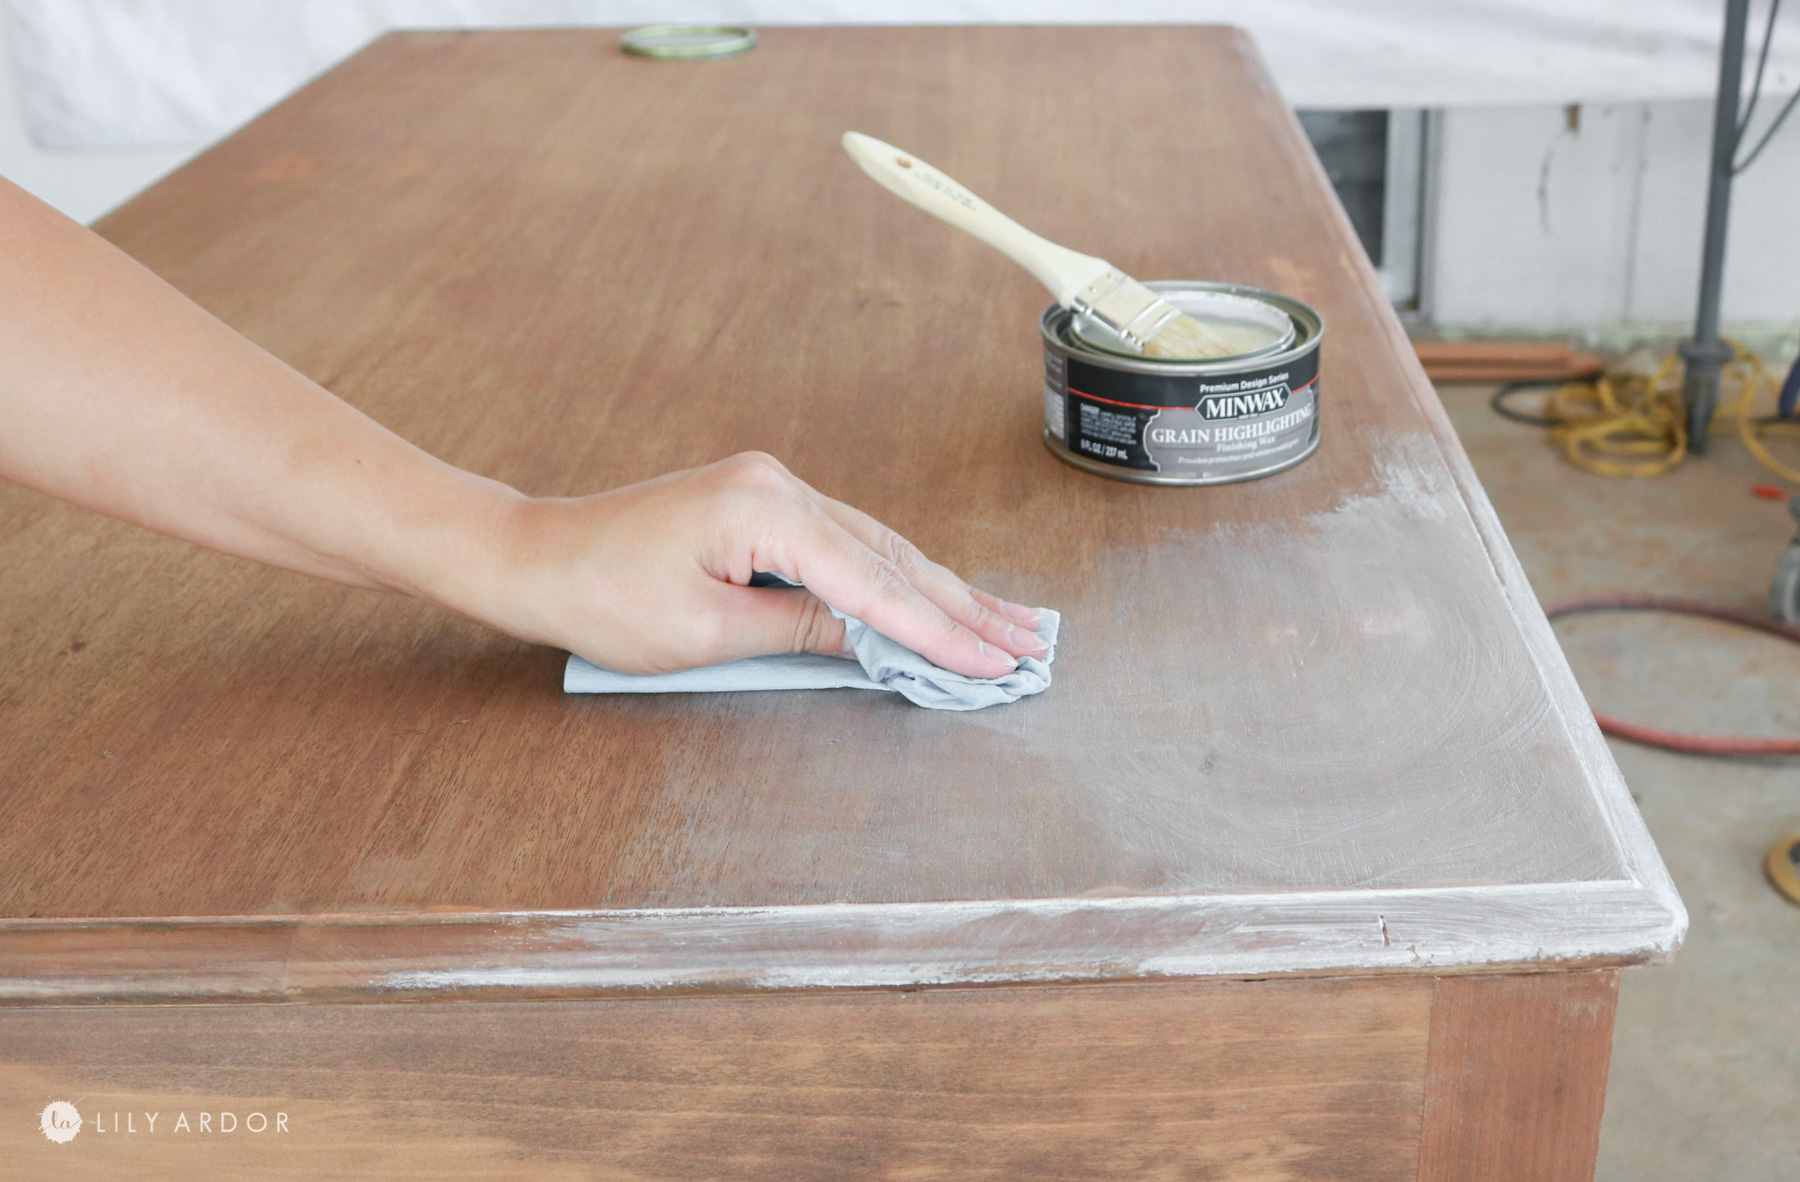
I was totally blown away! This white wax was so easy to use and brought the whole look together! I than applied a few coats of clear wax letting each layer set about 30 minutes in between coats. To apply the wax I used a paper towel dipped it into the wax rubbed it onto the desk with the wood grain and let it sit for about 20 min. Then I came in with a clean paper towel and rubbed over it in circular motions. This will buff it if you want a shiner look. I did one coat of white and two coats of clear on the table top for extra protection.
PROS AND CONS OF WAX finishing!
Pros:
- Gives your furniture a satin/matte look.
- Easy to apply
- Doesn’t stink as much as other finishes.
- Comes in different colors
Cons:
- Will need to be reapplied every 3-6 months depending on use of furniture
- Not recommended for high traffic areas ( I tried it on a white dining table, worst idea ever. It stained way to easy)
- Not 100% waterproof ( could be with multiple layers for a period of time until wears off )
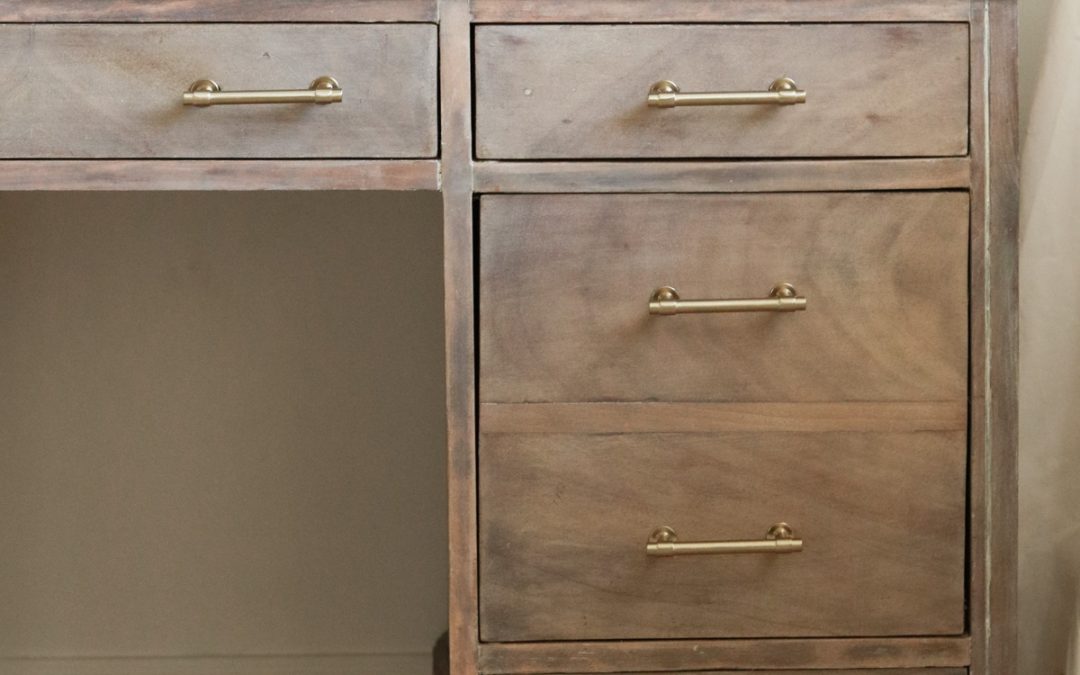
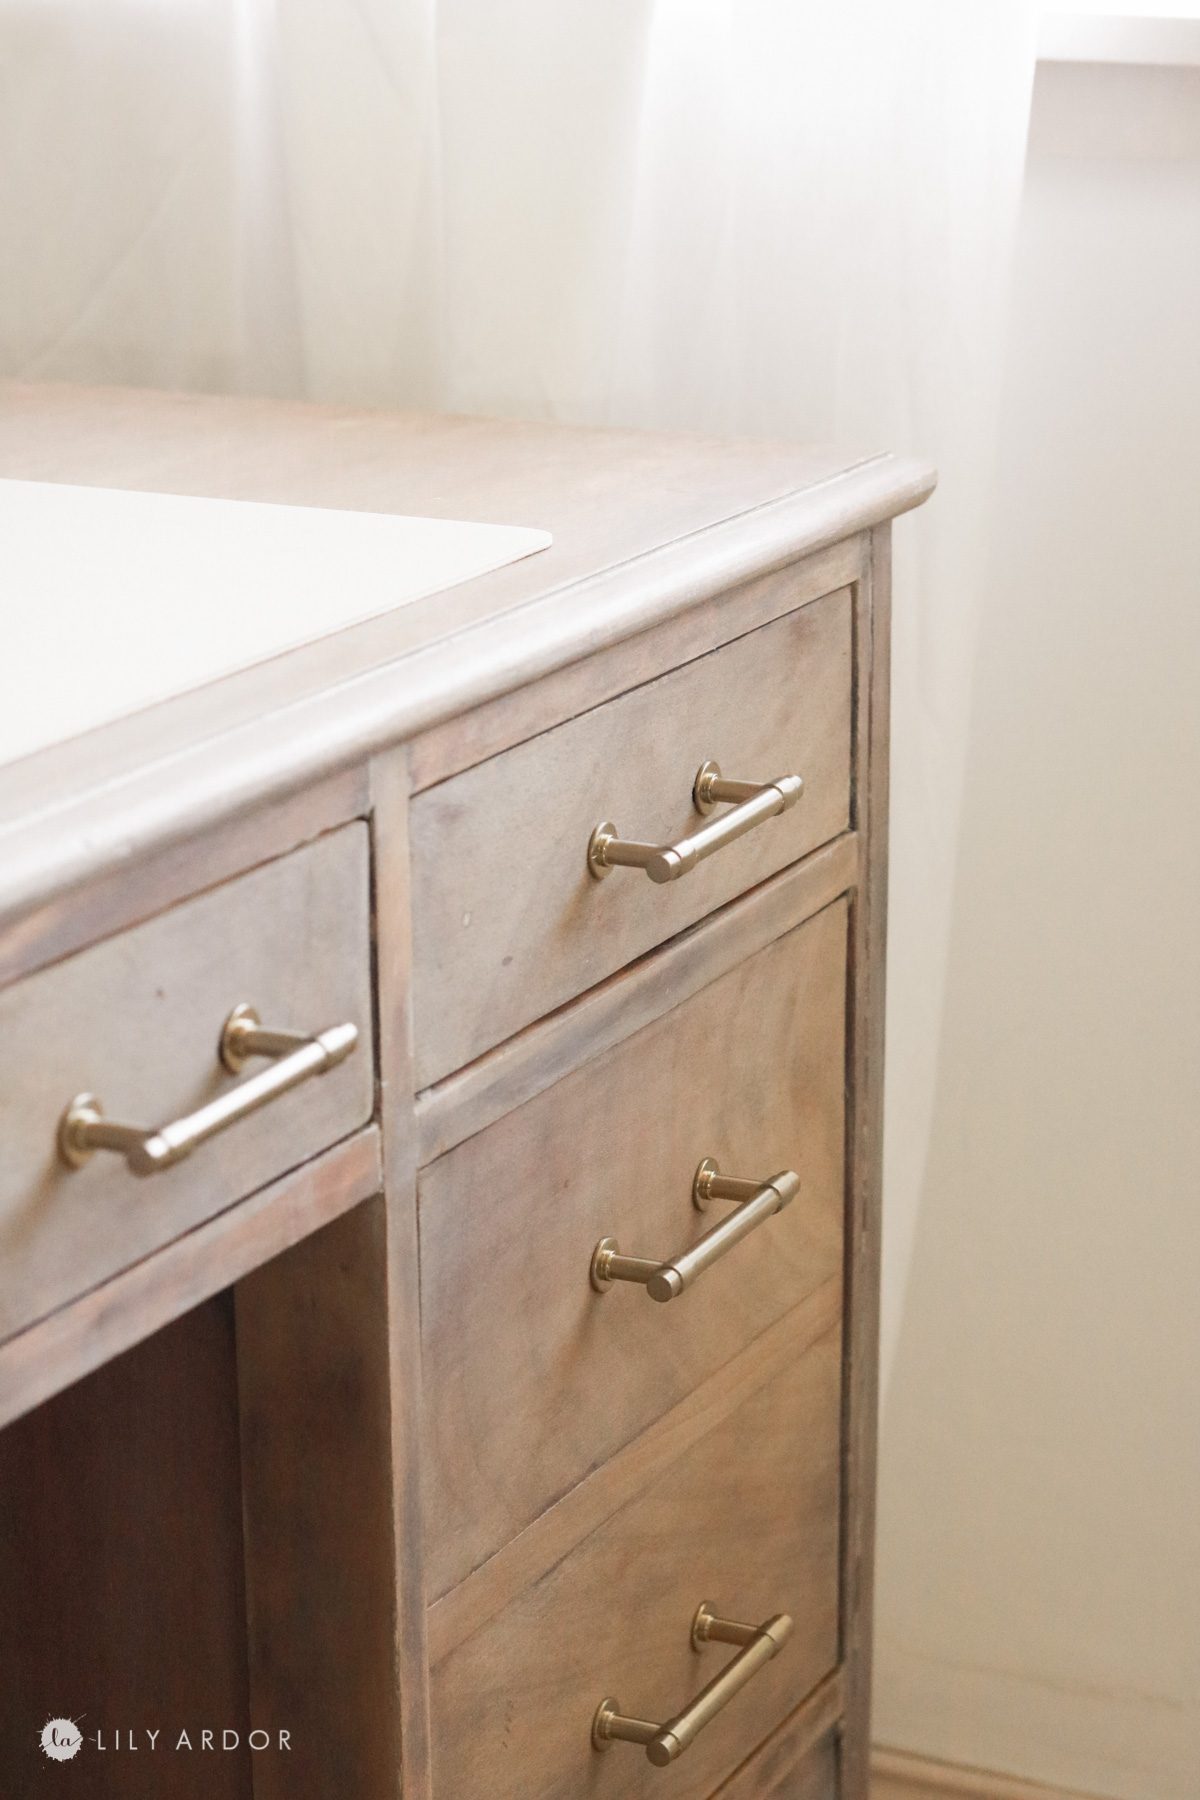
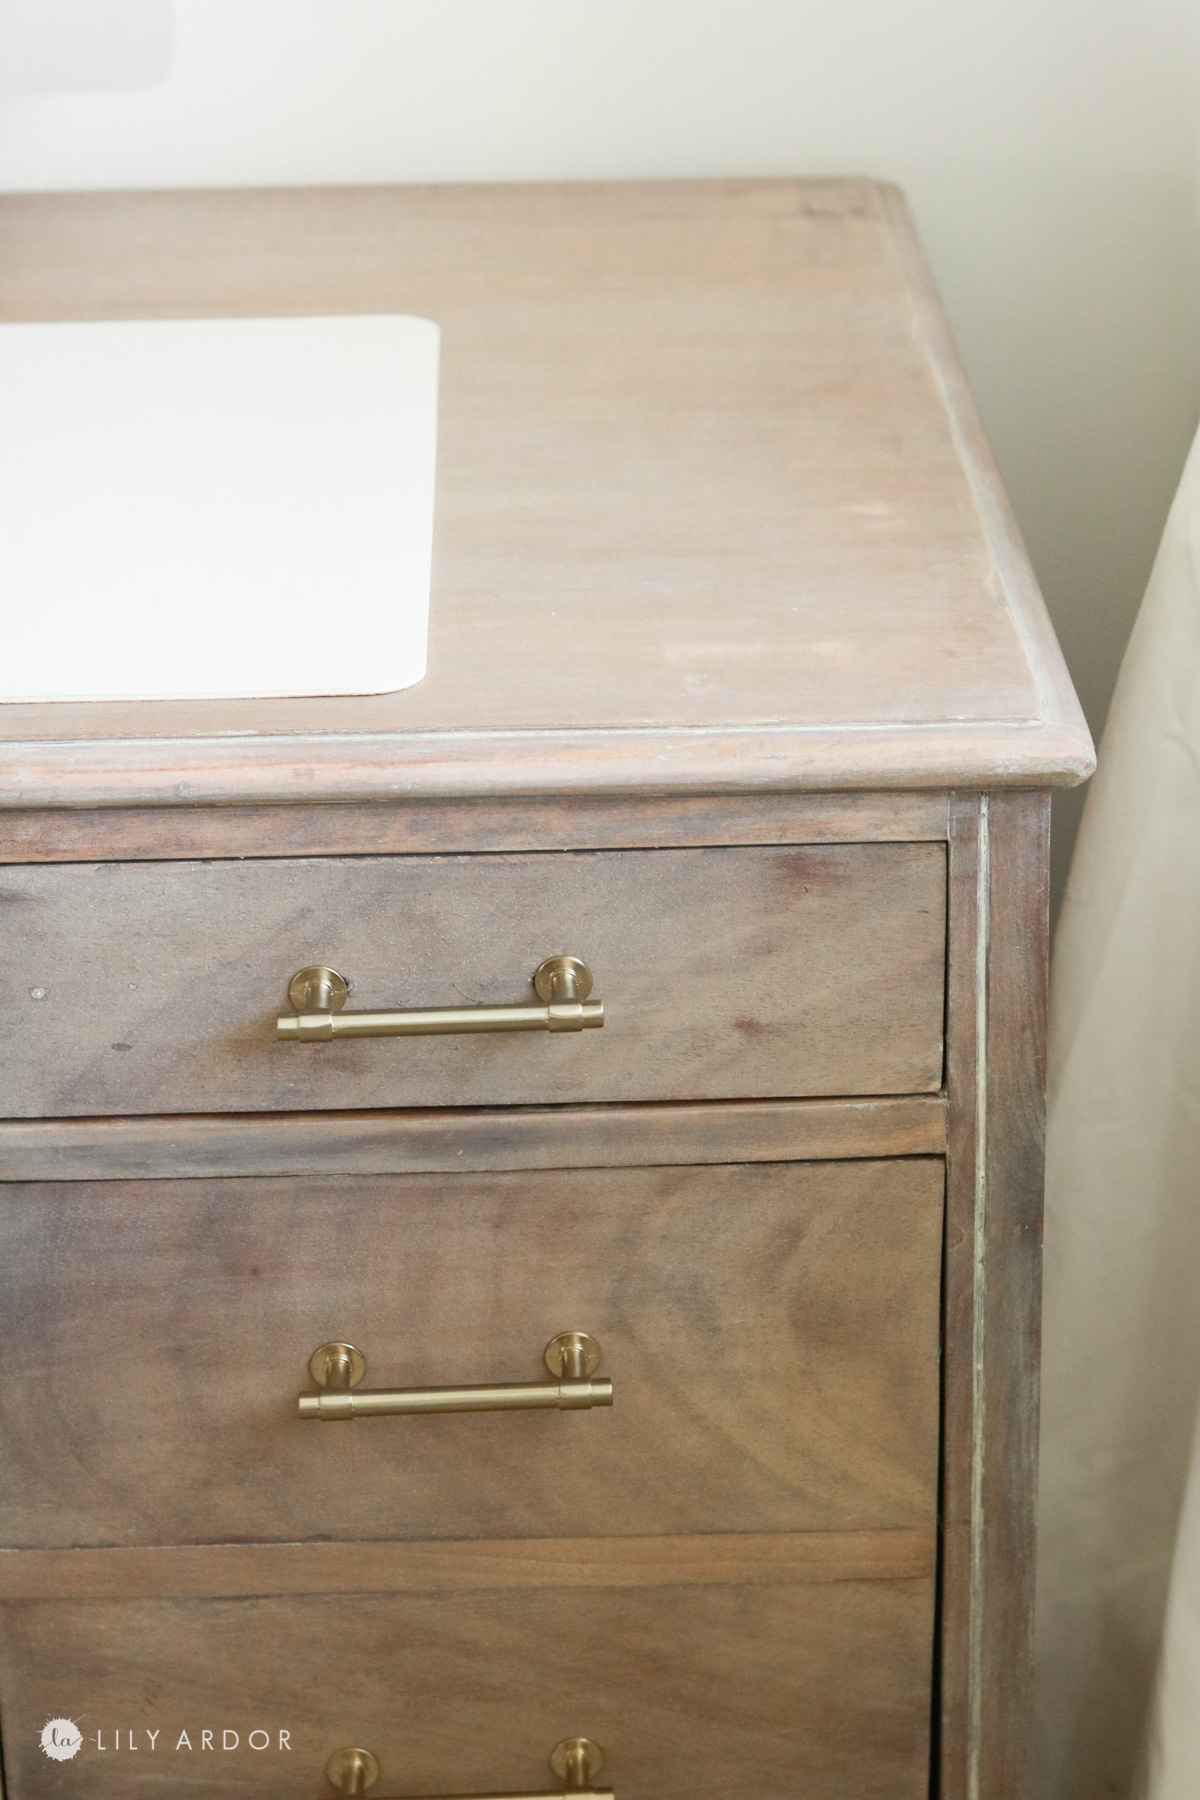
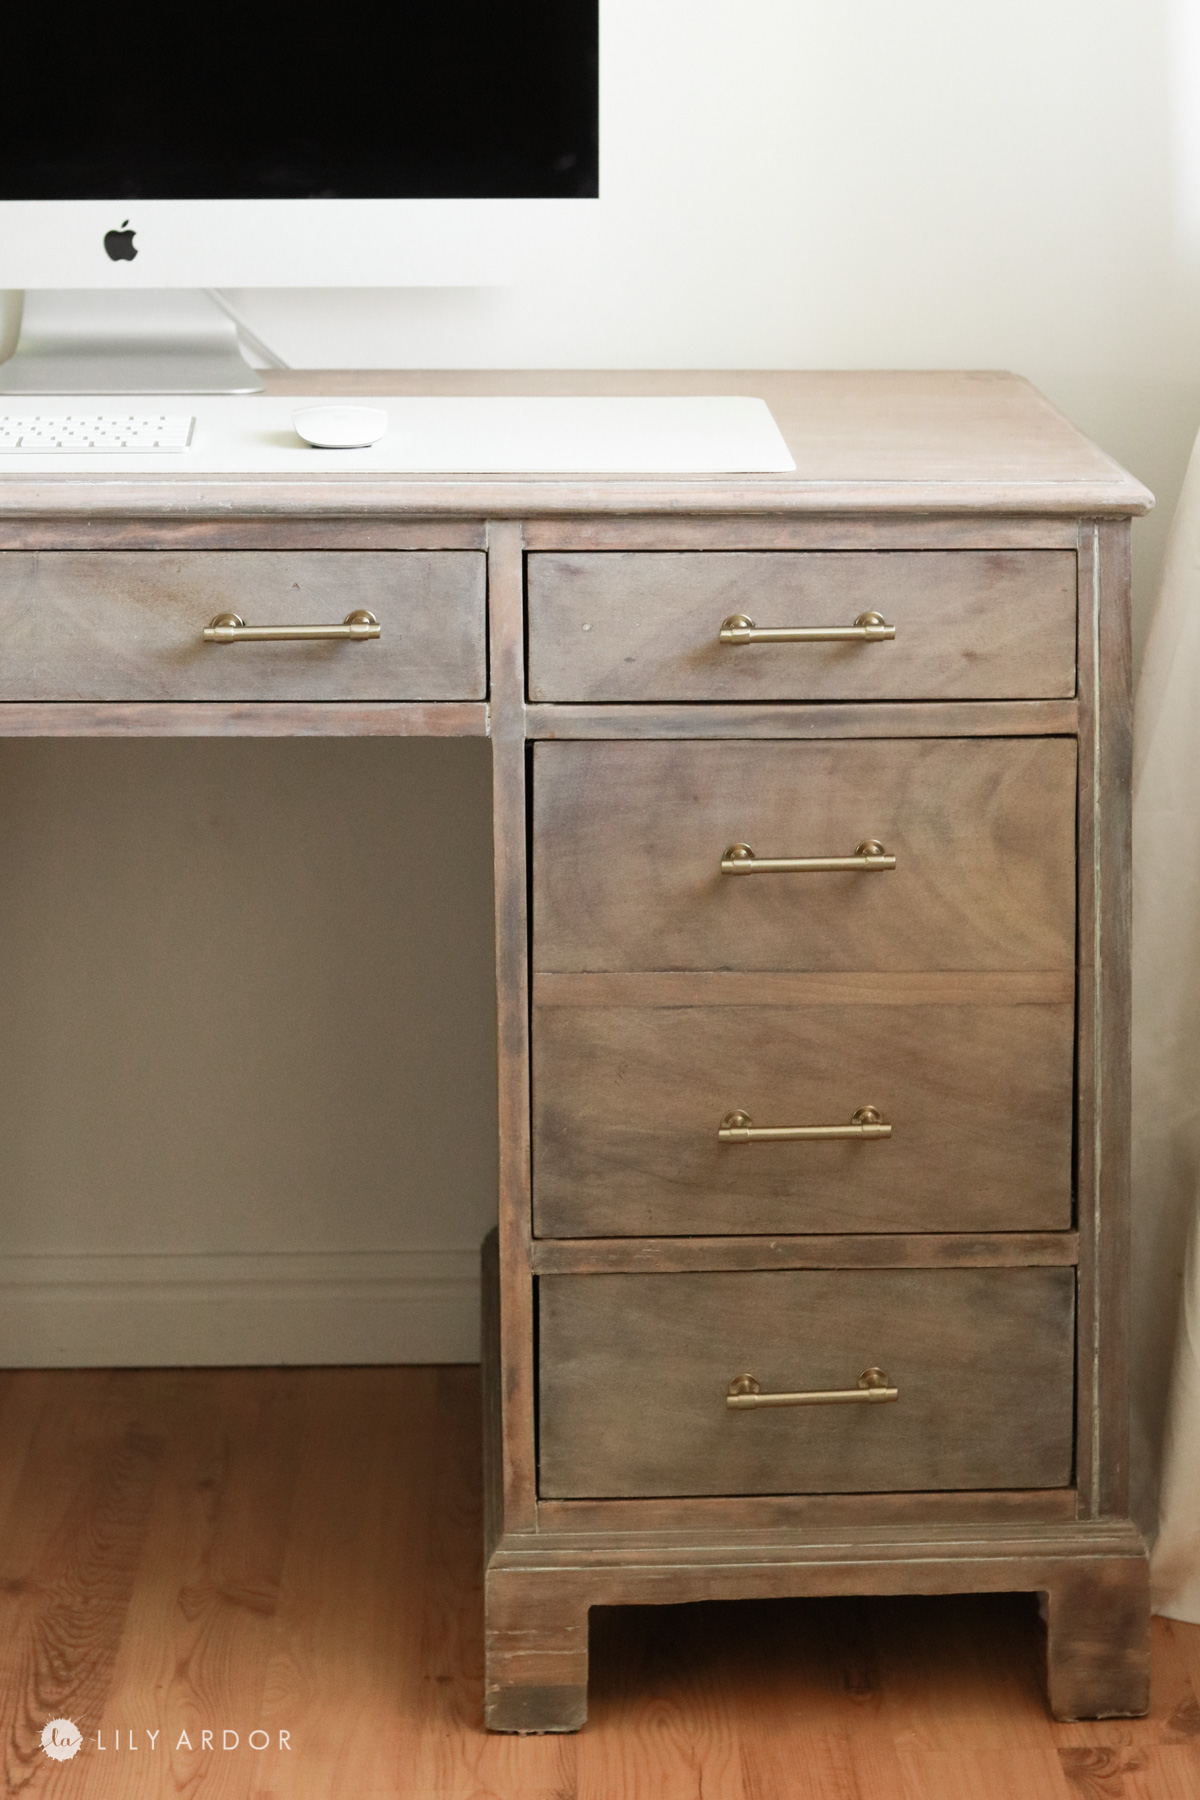
That’s it! All that was left was to install the hardware. I got my hardware on amazon. Probably one of my favorite finds on amazon to date! I love how chick they look and they were a steal deal. About half the price from what I would pay at a local hardware store.
Here’s an in depth video showing the process.
Loving how the desk turned out! I’m so glad I completed it. Can’t say how many times I wanted to quit and write it off as a fail! It turned out way better than I expected!
Oh my gosh totally just noticed my plant needs water. What better way to find out. LOL! Ooops I’m not a good plant mama😂

This aged look looks so much like pottery barn furniture to me. 🙂
I also purchased a new rug to match it can’t wait to set it all up in my office!
Thank you for tuning in. I hope you found this article helpful. LOL I sure did. Definitely learned a ton from this project and I’m excited to bring this knowledge to some good use with future projects. I’ll see you all next time.
Best Wishes,
Lily