
Ok round 2. If you’ve missed my first desk it turned out to be a flop. Even though the end result was gorgeous the smell is horrendous. It’s been outside for over a month now and still smells like bleach. While doing this desk things went so much smoother and it only took me three days to refinish this desk instead of 2 weeks like the previous desk.
Time Needed:
1-3 days depending on the size of your furniture piece. Its actually really easy. The step that took the longest was sanding it down after removing all the varnish. I’m not really strong in the arms so I had to take a ton of breaks. If you could get your hubby to do this step 😬 it’ll definitely speed up the process.
Total Cost:
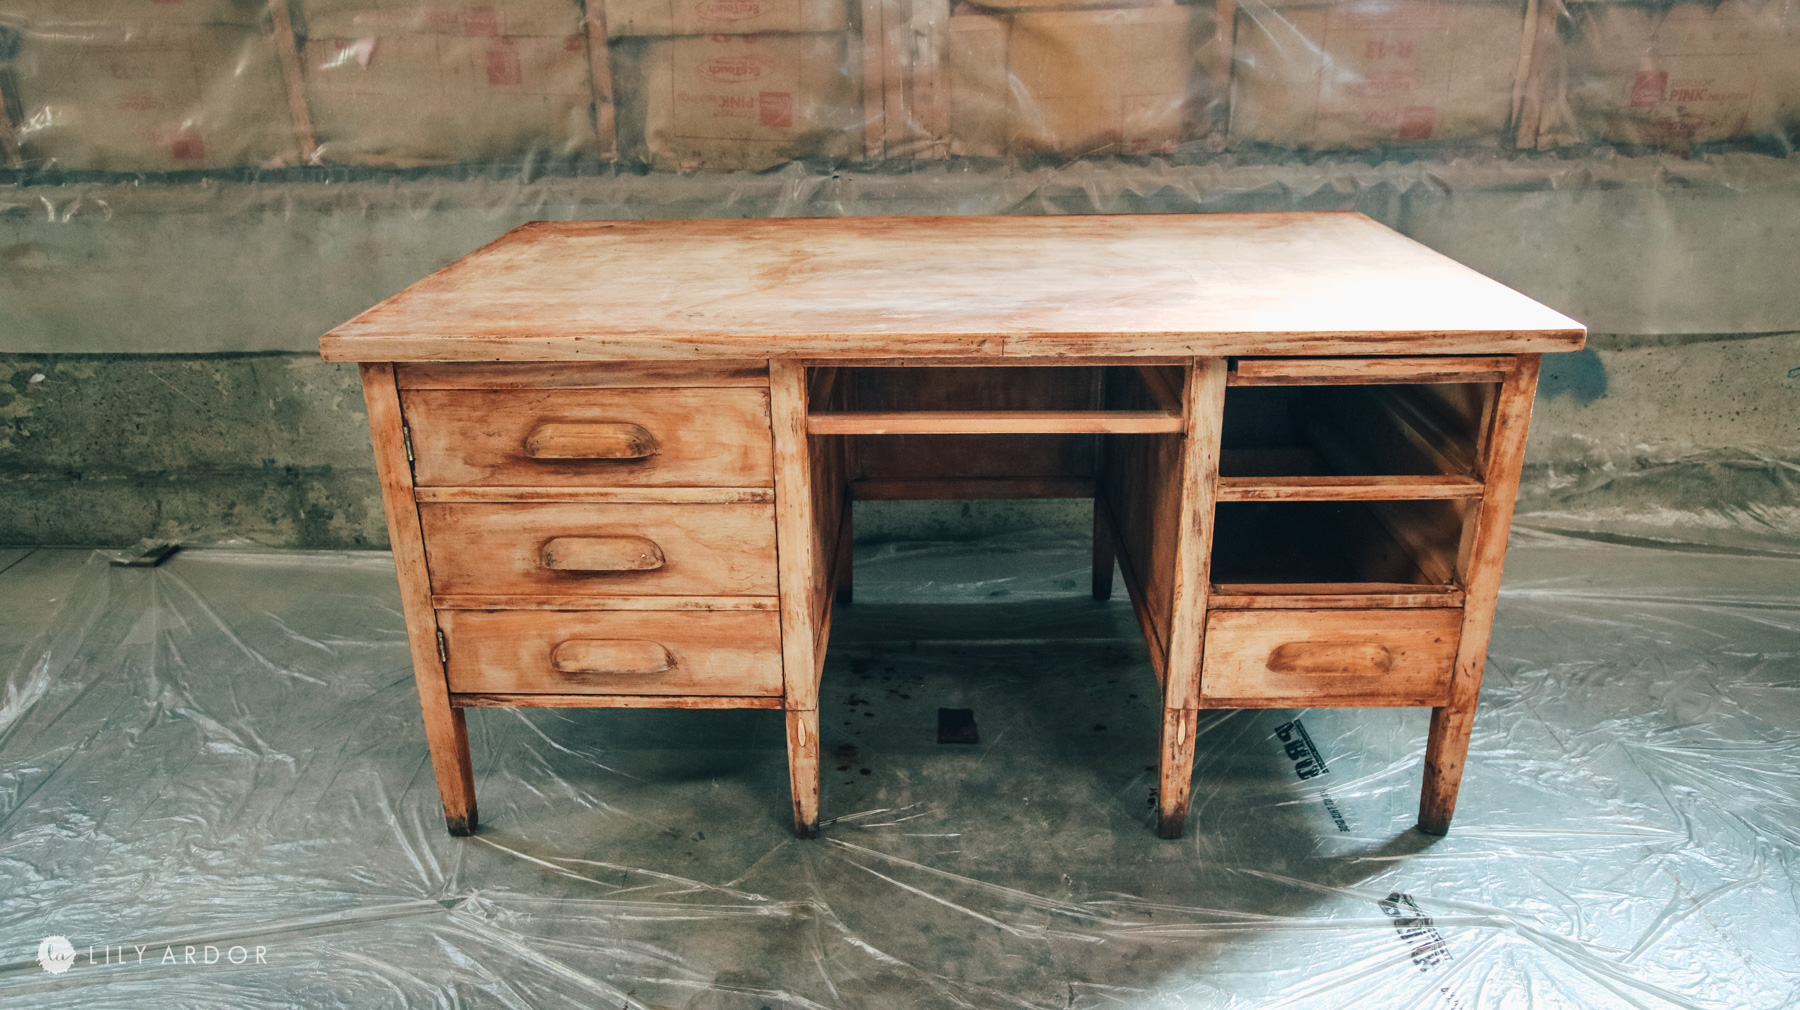
I still can’t believe this desk only cost us $78 to complete. WOW! We actually got it on facebook marketplace for $20. What a steal! Here’s what the desk look liked when we bought it ( photo below) It wasn’t in the worst shape ever but it’s was pretty rough all around. The previous owner also cut off all 4 legs in the middle. Good news is he saved them so we ended up reattaching them. LOL! Probably not in the most professional way but we made it work. I talk about it in the video – https://youtu.be/NBVUw9YAZPI . 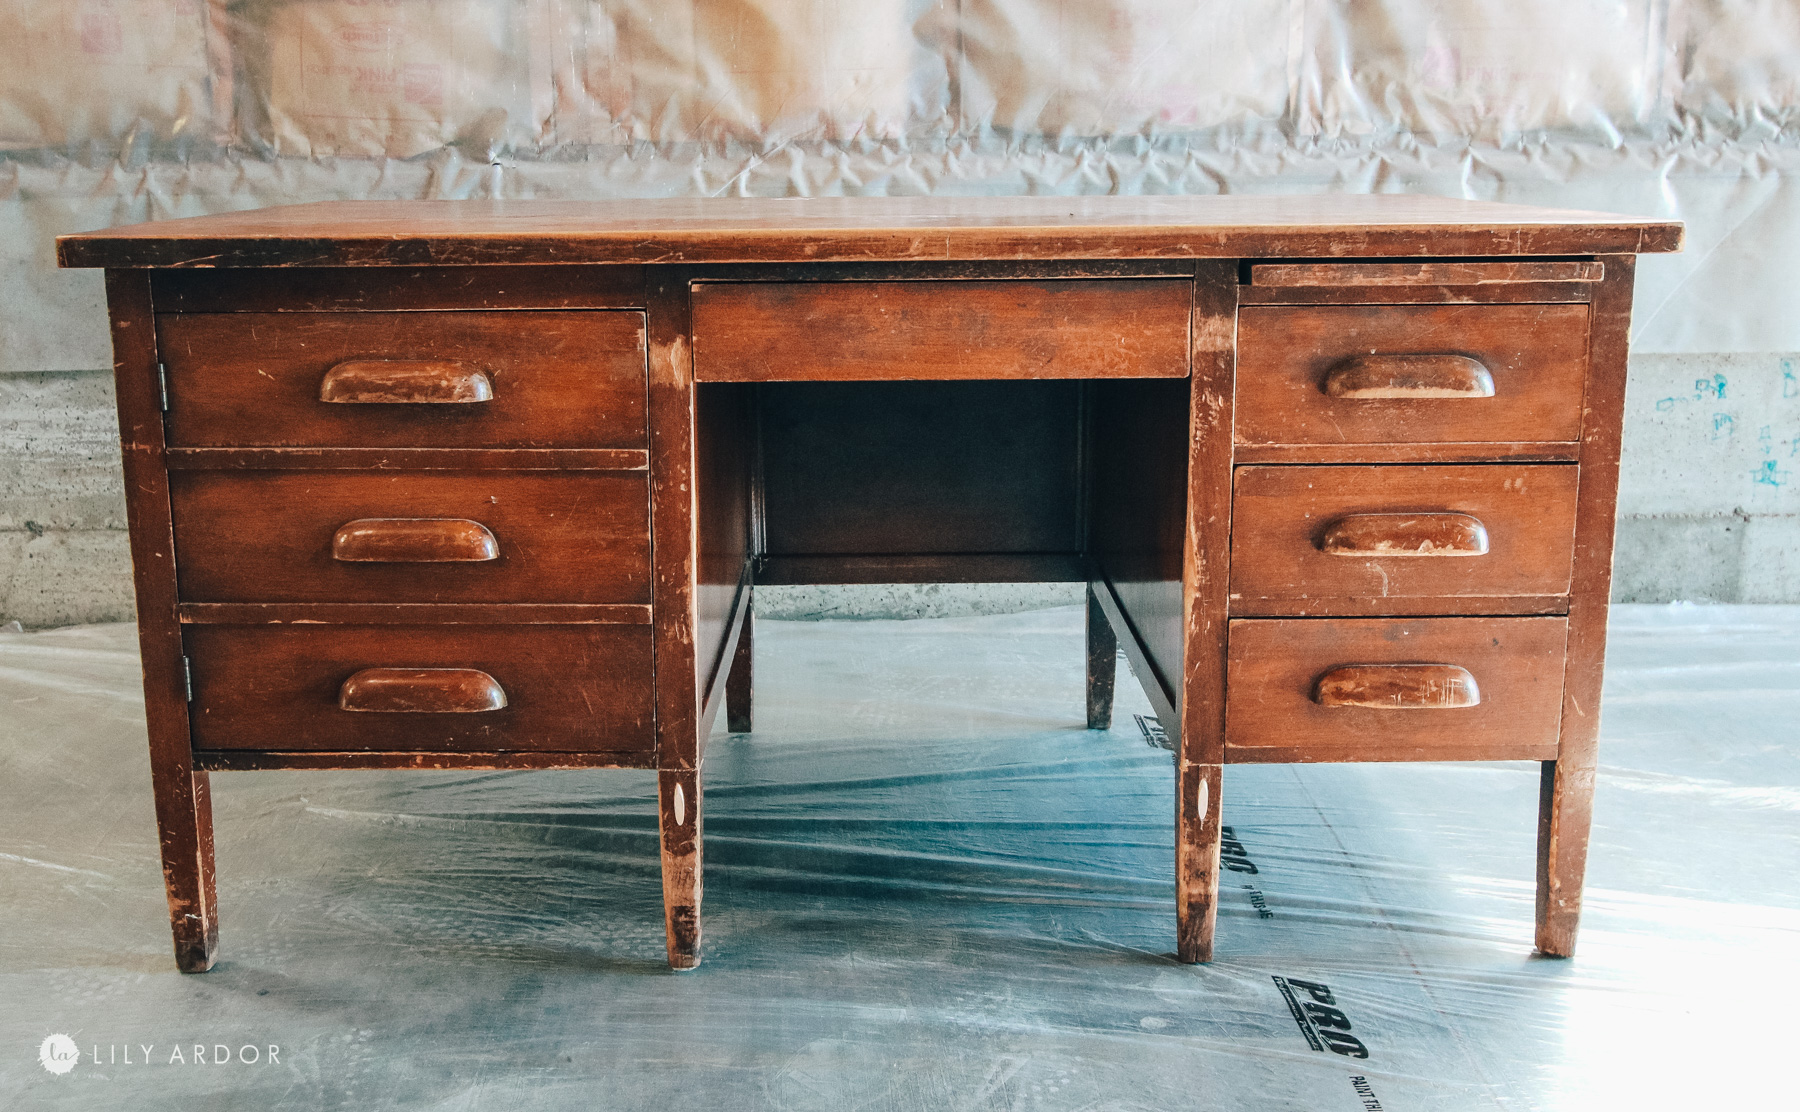
*this article contains affiliate links. visit my disclosure policy for more info
Supplies:
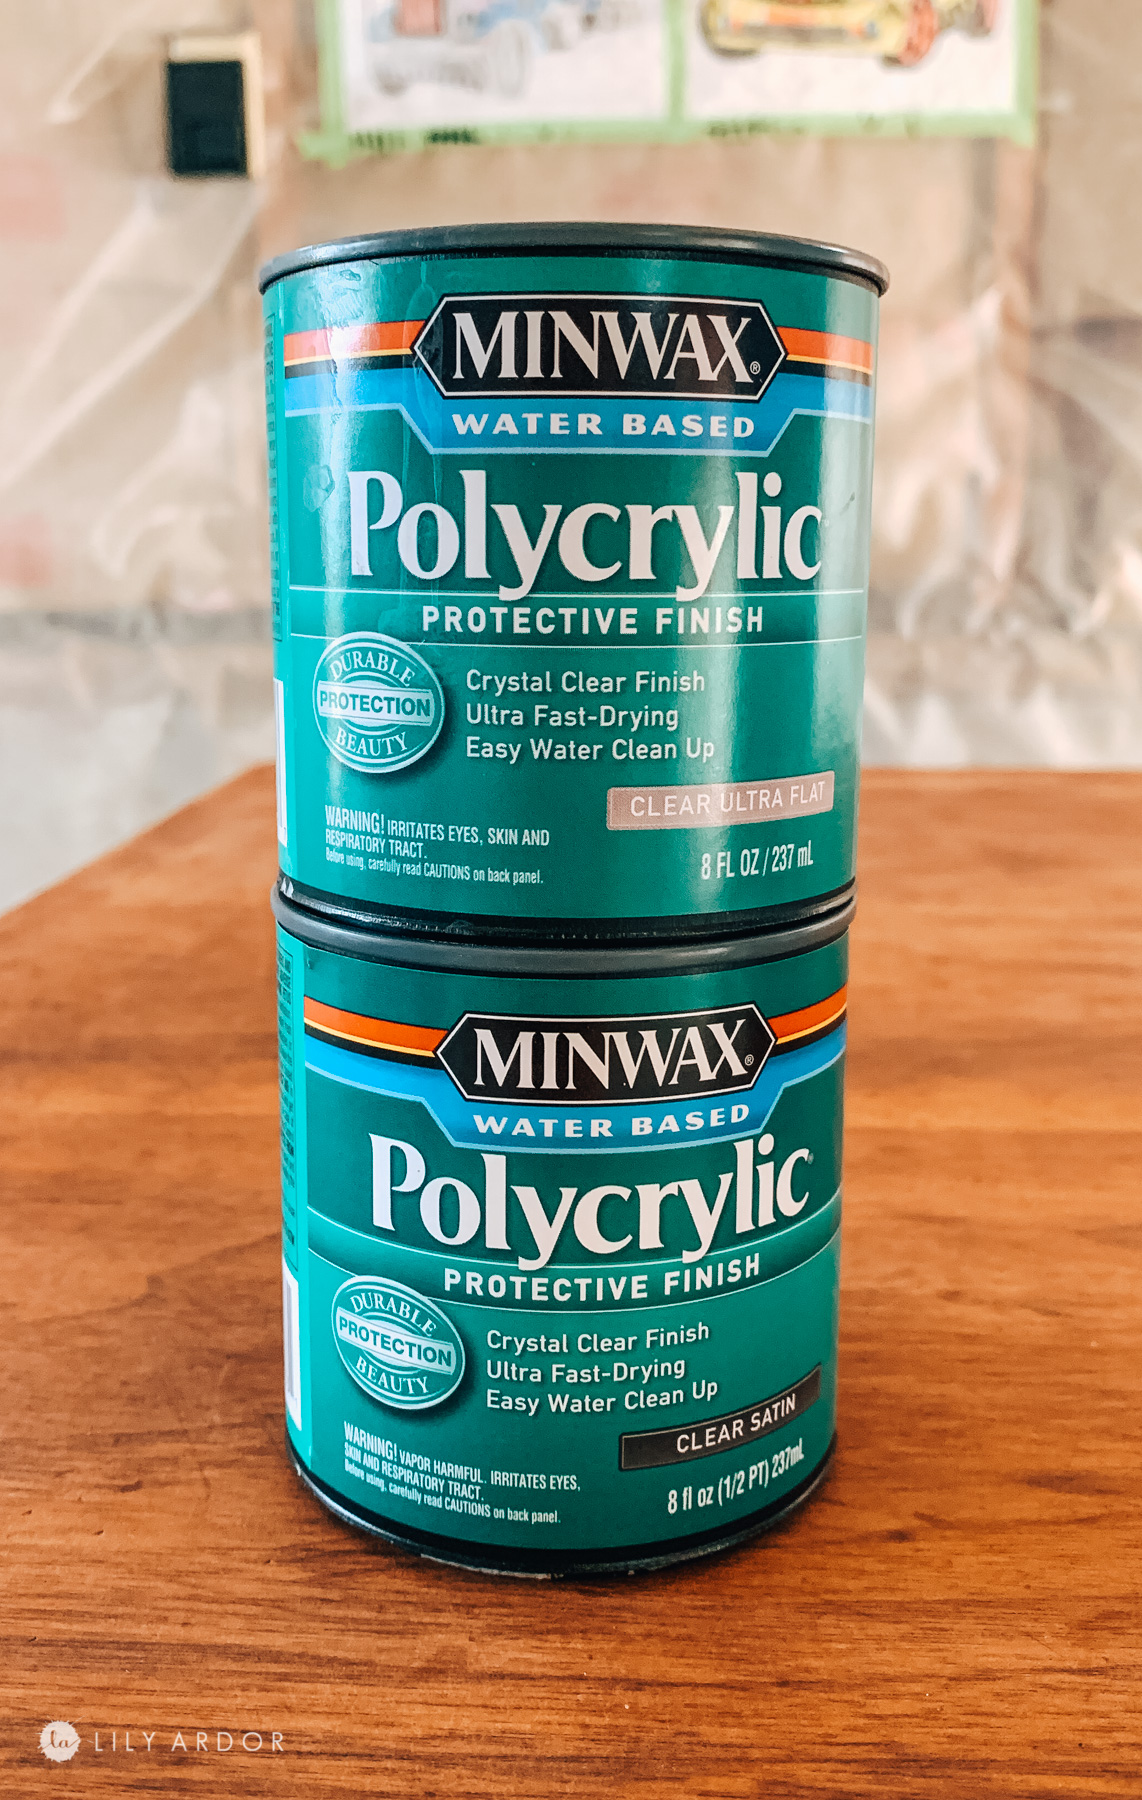
- Stain
- Satin polycrylic ( for the top ) – https://amzn.to/35Xx8SR
- Matte polycrylic ( for the rest of the desk) – https://amzn.to/2En2EhG
- 120 grit sand paper
- paper towels
- lacquer thinner
- sanding sponge
- Stripper
- metal spreader
- scoring pad
Tools needed:
- dual sander
Let’s do this! DIY Desk refinish!
There’s only 5 simple steps you need to follow to give your desk a complete makeover. Some steps take longer then others but, to be completely honest I was expecting this to take forever. The only step I’m going to complain about is the sanding because I absolutely hate it. If you love sanding this will be a walk in the park 😆.
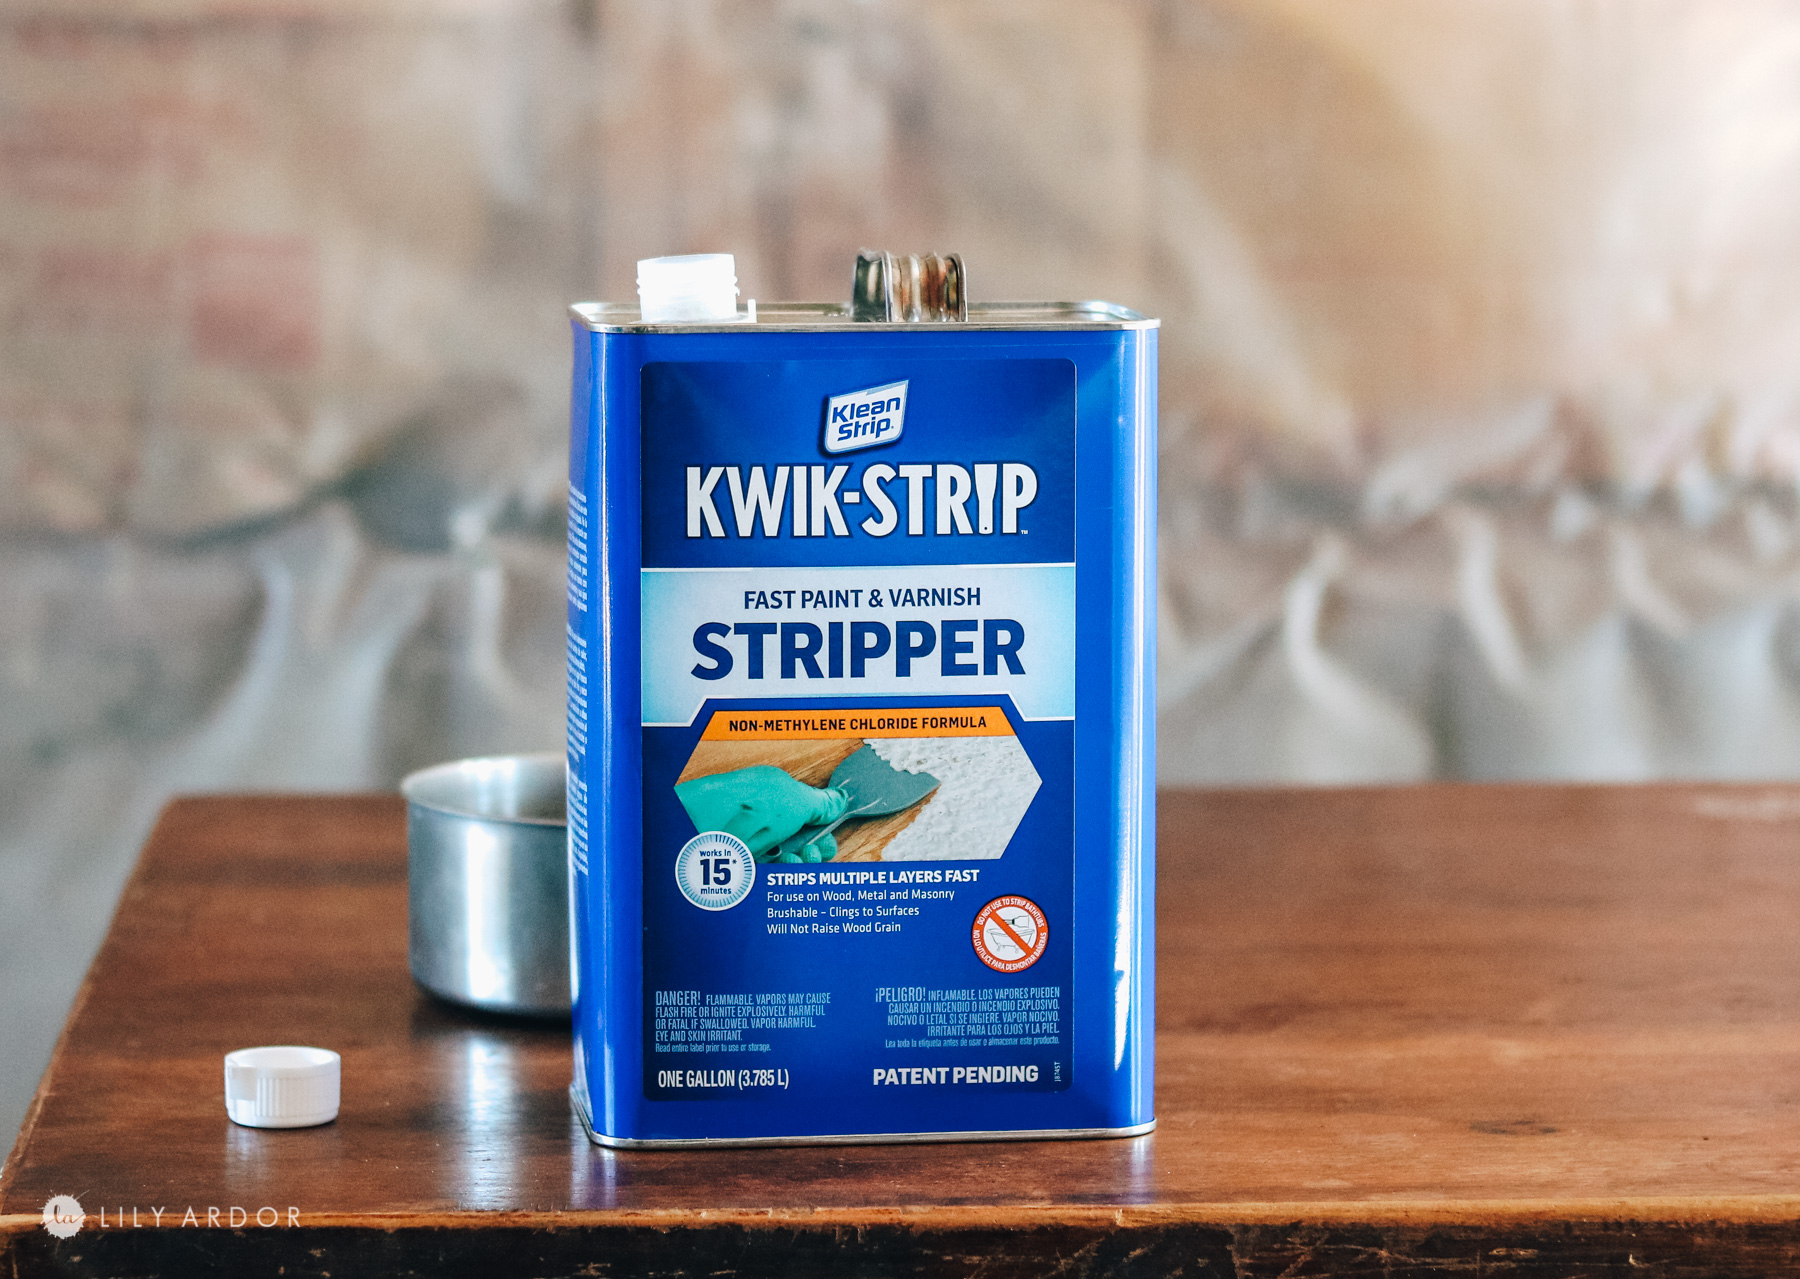
Even though I used citri strip and loved it for my last desk I decided to go with a different furniture stripper this time. The KWIK-STRIP. This one sold me because it said it works in 15 minutes. Citri strip takes a little longer. Don’t get me wrong I love both products I just think citri strip is made to remove paint and this Kwik strip is made to remove lighter finishes like a simple clear coat with stain. It works in about 15 minutes and you simply scrape it off just like you would citri strip. The reason I think citri strip is perfect for removing paint is because it stays moist for what seems like forever allowing the stripper to penetrate through the layers of paint. Kwik strip seems to set a little quicker but, works faster. In my opinion i think it’s perfect for lighter finishes. I got my kwik strip at lowes for over $40. I ended up using up only about 1/4 of the bottle. So I’ll still get a few more projects out of it.
Amazon also sells a spray on version (below). I haven’t try this one yet but, I’m betting it’ll save some time instead of having to brush it on. I would think it’s probably made for lighter projects and I probably wouldn’t use this on furniture pieces that have paint or heavy finishes.
Step 1 : stripping the desk!
The stripper actually works as advertised. It only took about 15 minutes and in some areas even less to lift all the varnish off the wood. The consistency of the kwik strip is clear and gel like. It’s really easy to work with and in my opinion easier to clean up vs citri strip. I did notice you need to apply an even thick coat. Some areas that didn’t get enough of the project didn’t strip away as well. By strip away I mean they still came off it just didn’t slide off like the rest of the varnish.

While I was applying the stripper I decided to go over area’s I thought didn’t have enough and realized it had already softened the varnish and I could easily move it around with my brush. THAT’S PRETTY COOL! Pretty surprised at how well it worked.

Step 2: Removing the stripper!
Okay so we tried a few different tools for this and the one that worked best isn’t even made for the job. Instead of using the standard metal scraper that’s recommend to scrape away all the gunk Tony had some steel metal spreaders he uses to bondo cars sometimes and those were night and day compared to the scraper. The thickness of the metal is a lot thinner on the metal spreader’s allowing us to get a close swipe against the bumpy desk surface. We did two coats of stripper.
I found the metal spreaders we used on amazon – here
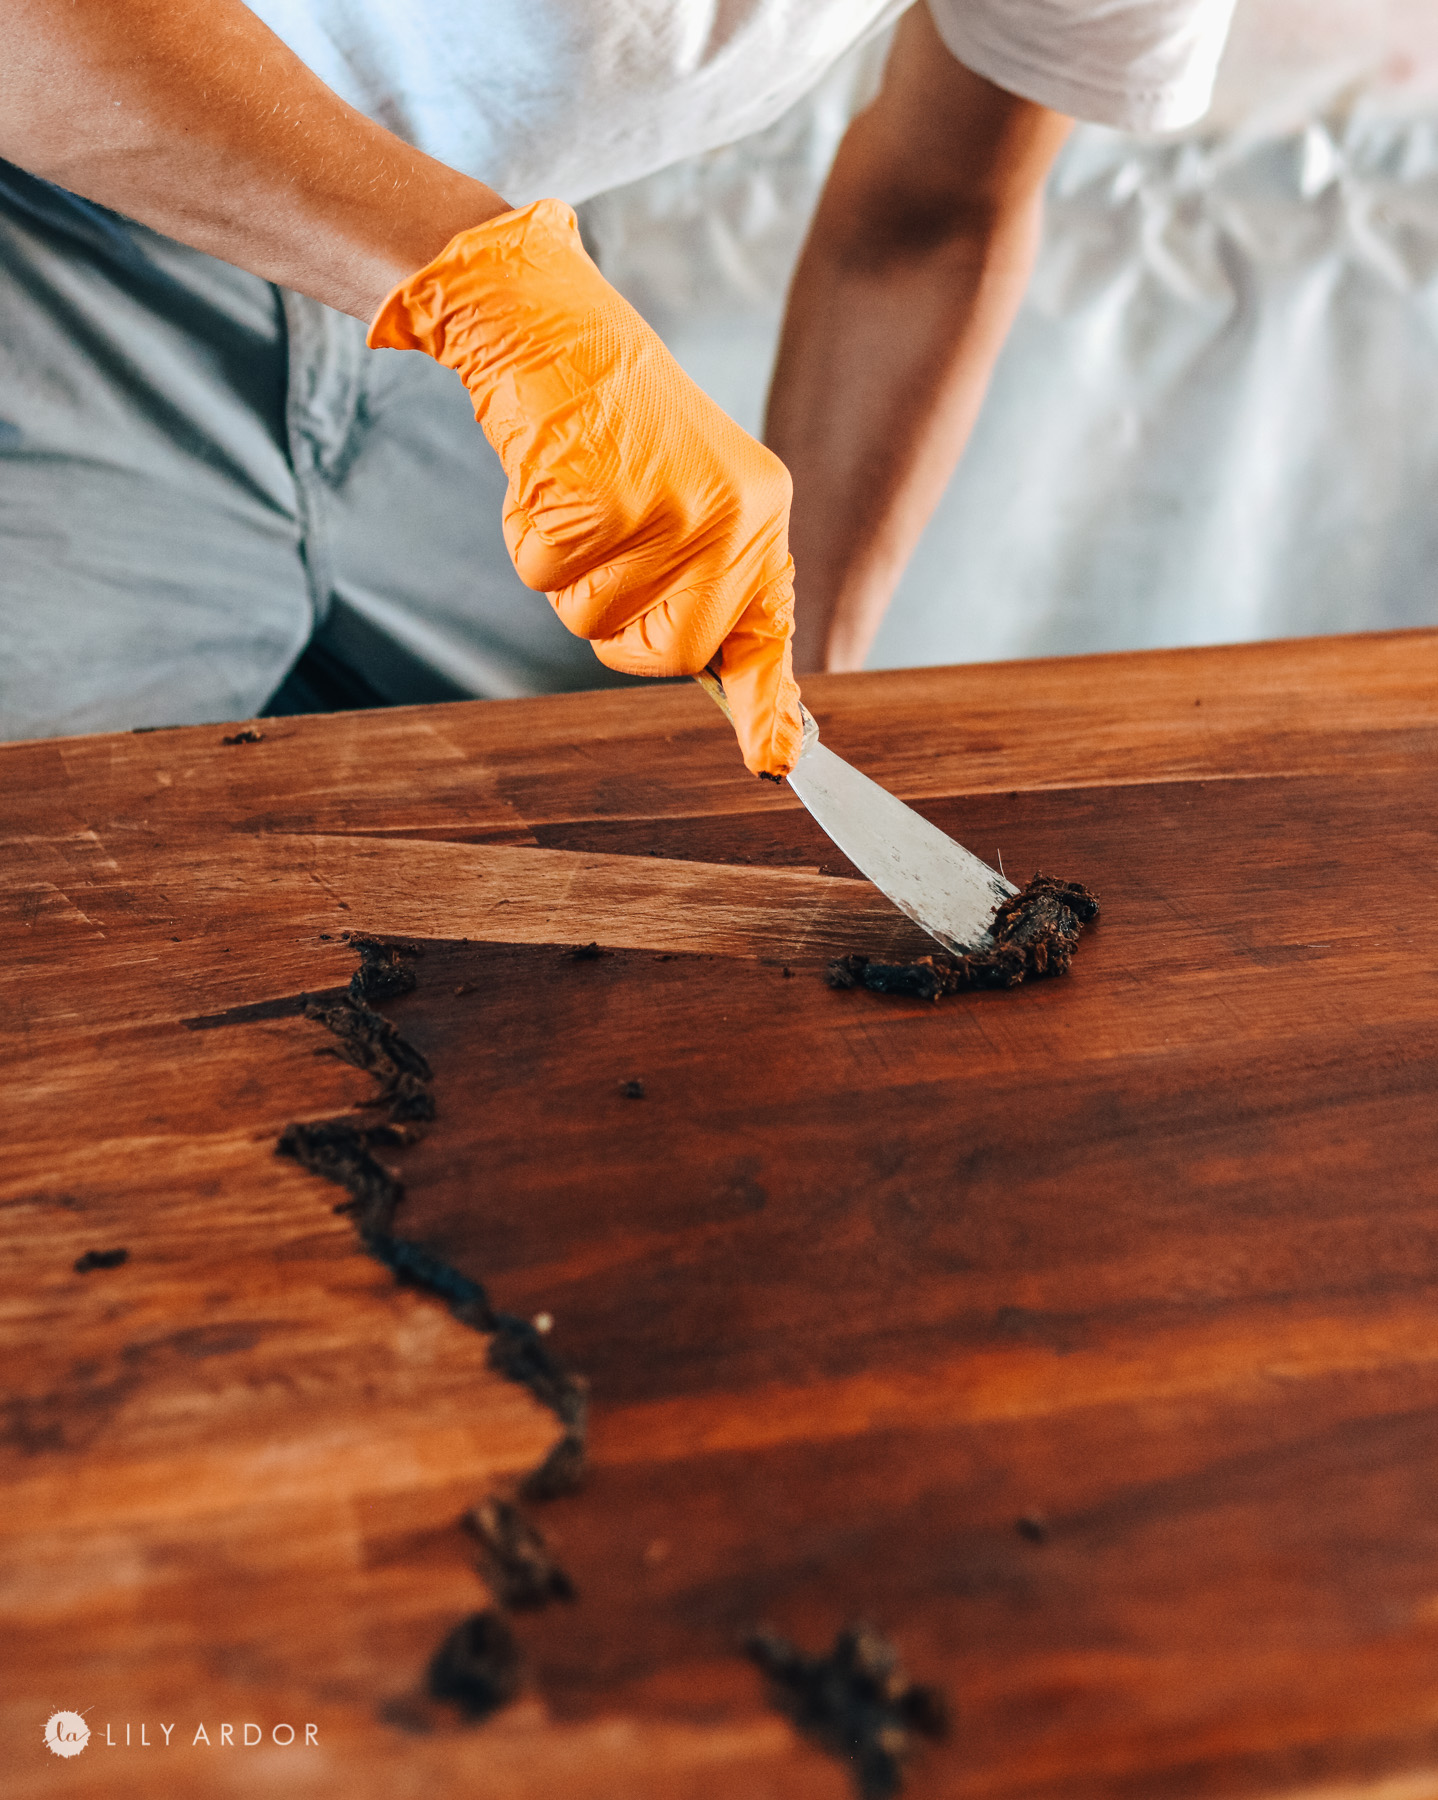
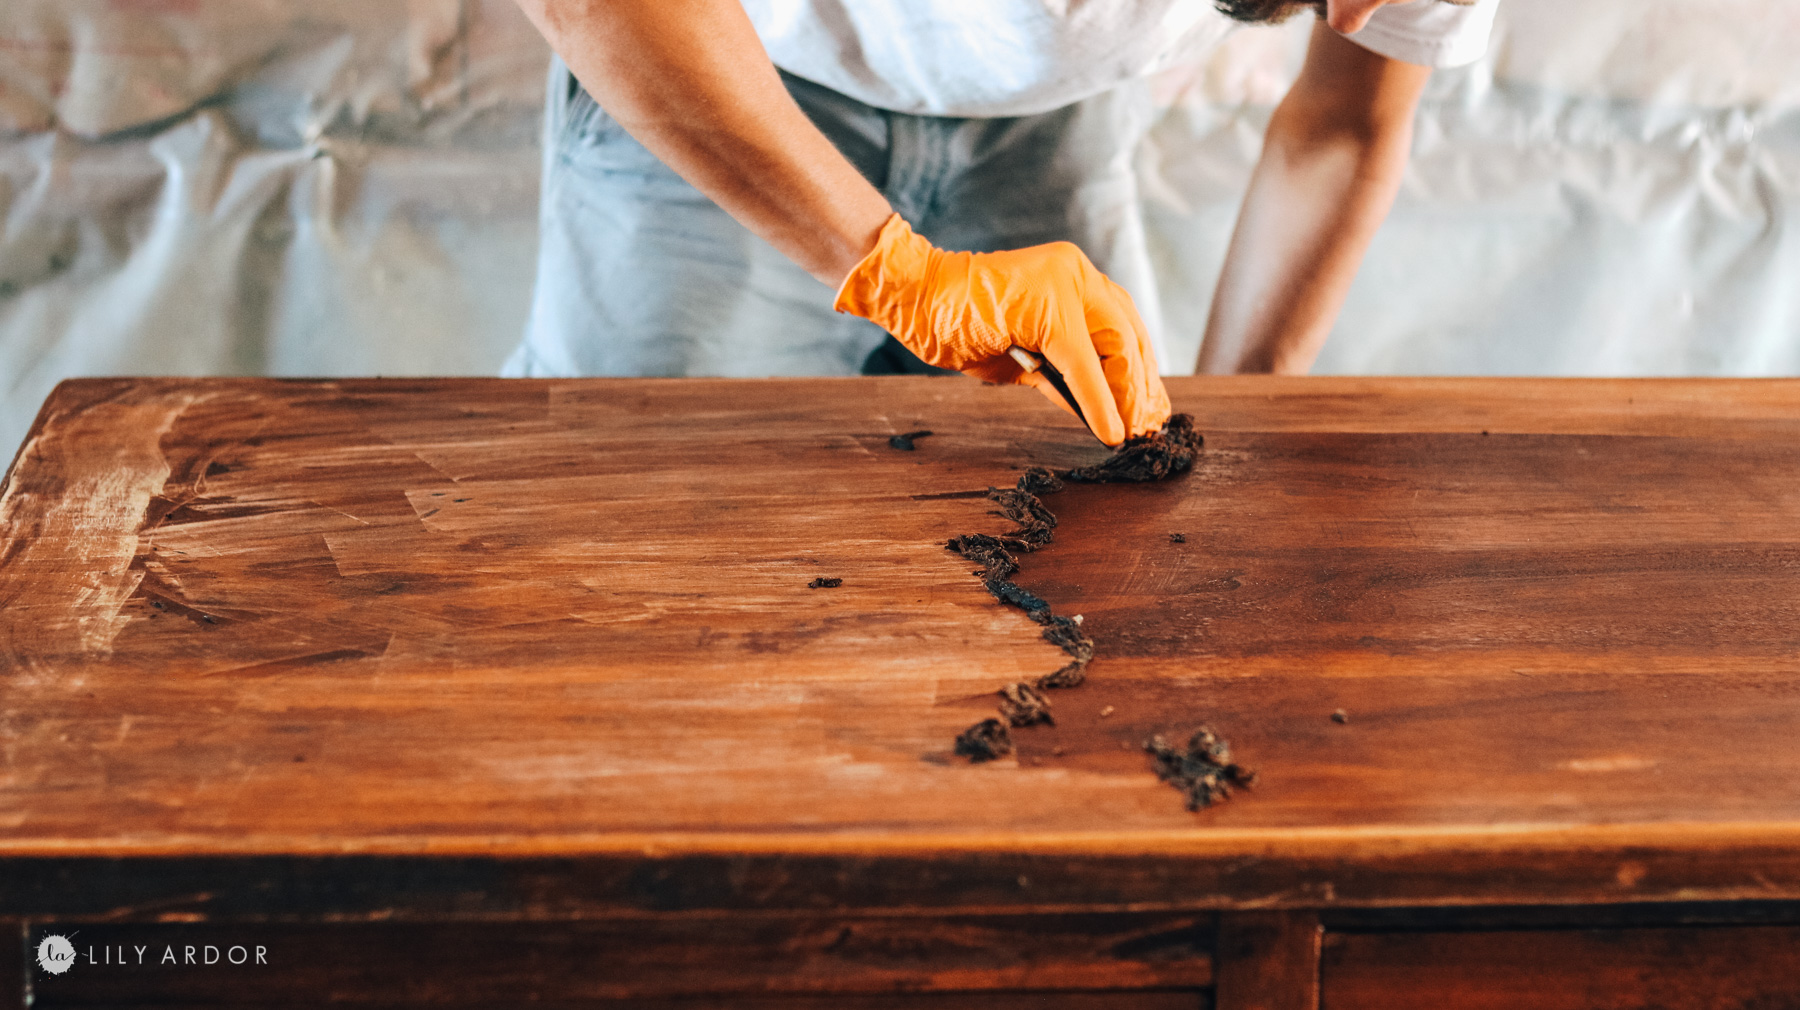
Step 3 : Cleaning the desk surface!
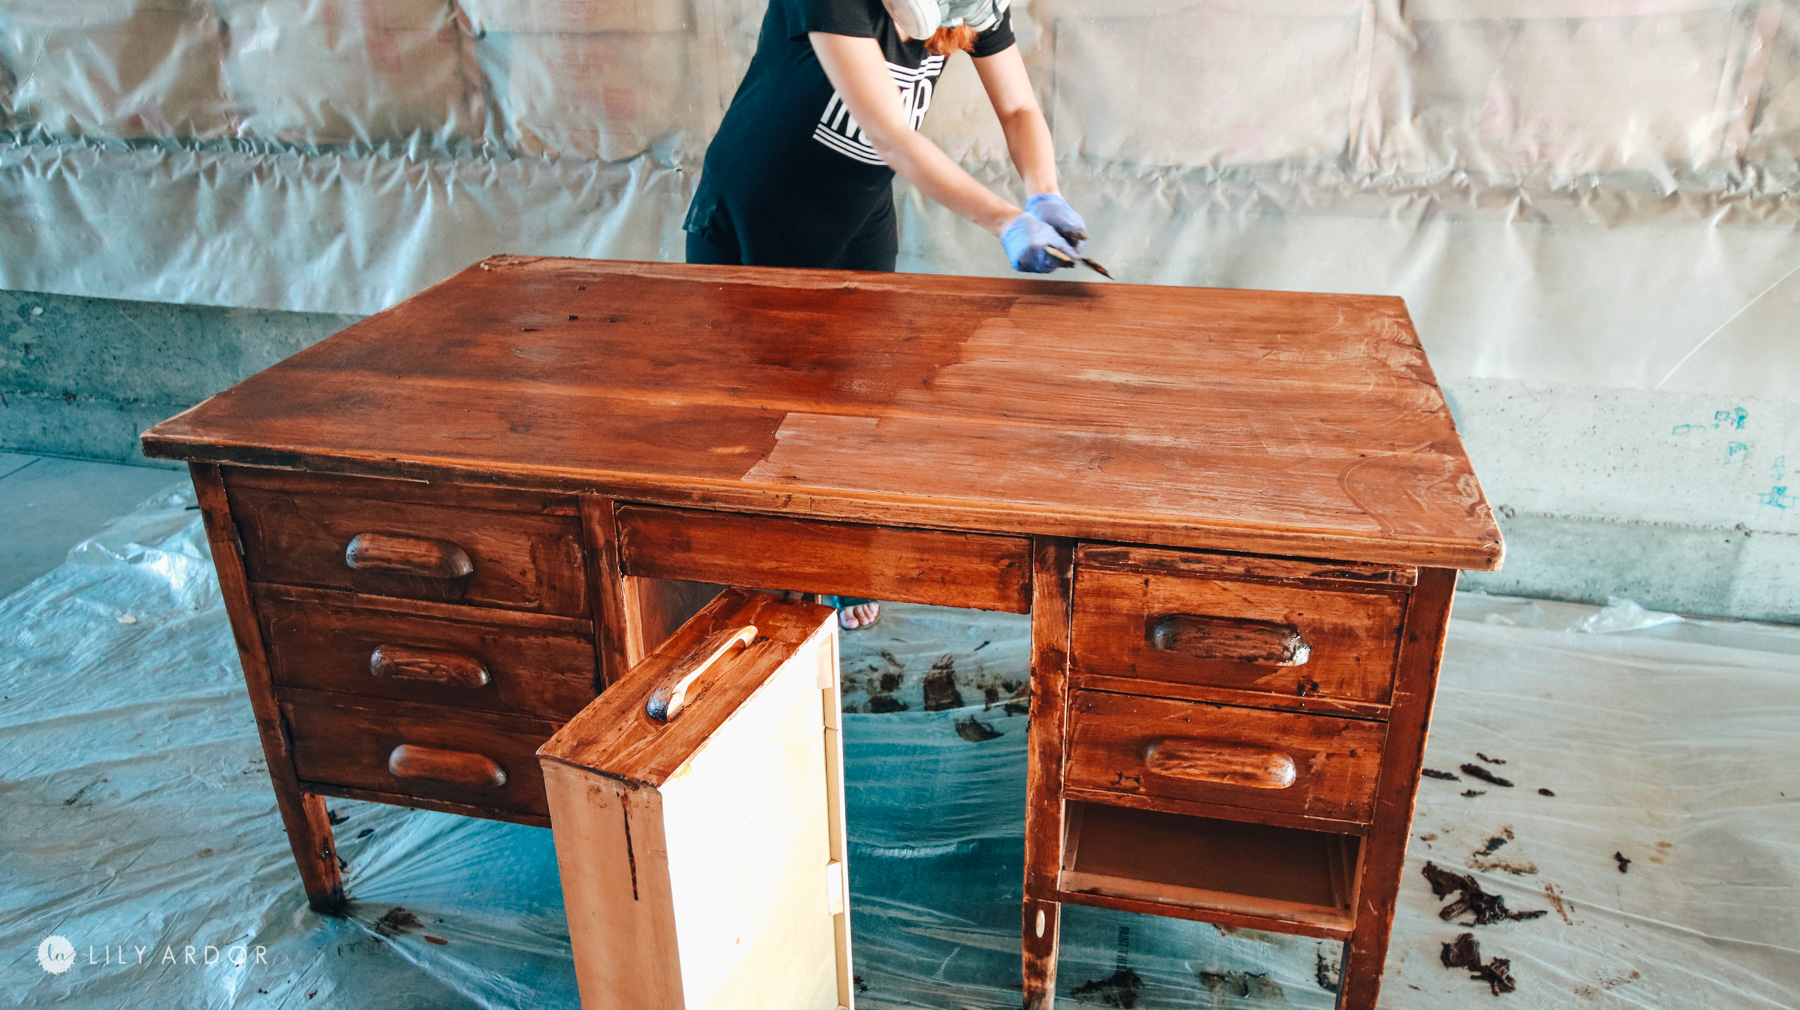
I tried a few products to help me clean the desk’s surface and came across an amazing find. Because I had denatured alcohol left from an older project I decided to use it first. Once I ran out I used some of Tony’s lacquer thinner and was blown away by the results.
The denatured alcholol did a great job at removing the gunk however it wasn’t as great as the laquer thinner. The lacuqer thinner in addition to removing the gunk also bleached the stain color from the wood! AWEEEESOMMMENESSS! RIGHT!

The steps to removing the gunk are real simple. You spray on or pour on the lacquer thinner and using a scoring pad to break up all the grime in that area. Than use a paper towel and wipe it off before it dries. I worked in about 2 foot areas until the whole desk was clean. Photo below shows how much the lacquer thinner lightened the stain on the desk. Again if this is confusing I share in more detail in the video- https://youtu.be/NBVUw9YAZPI
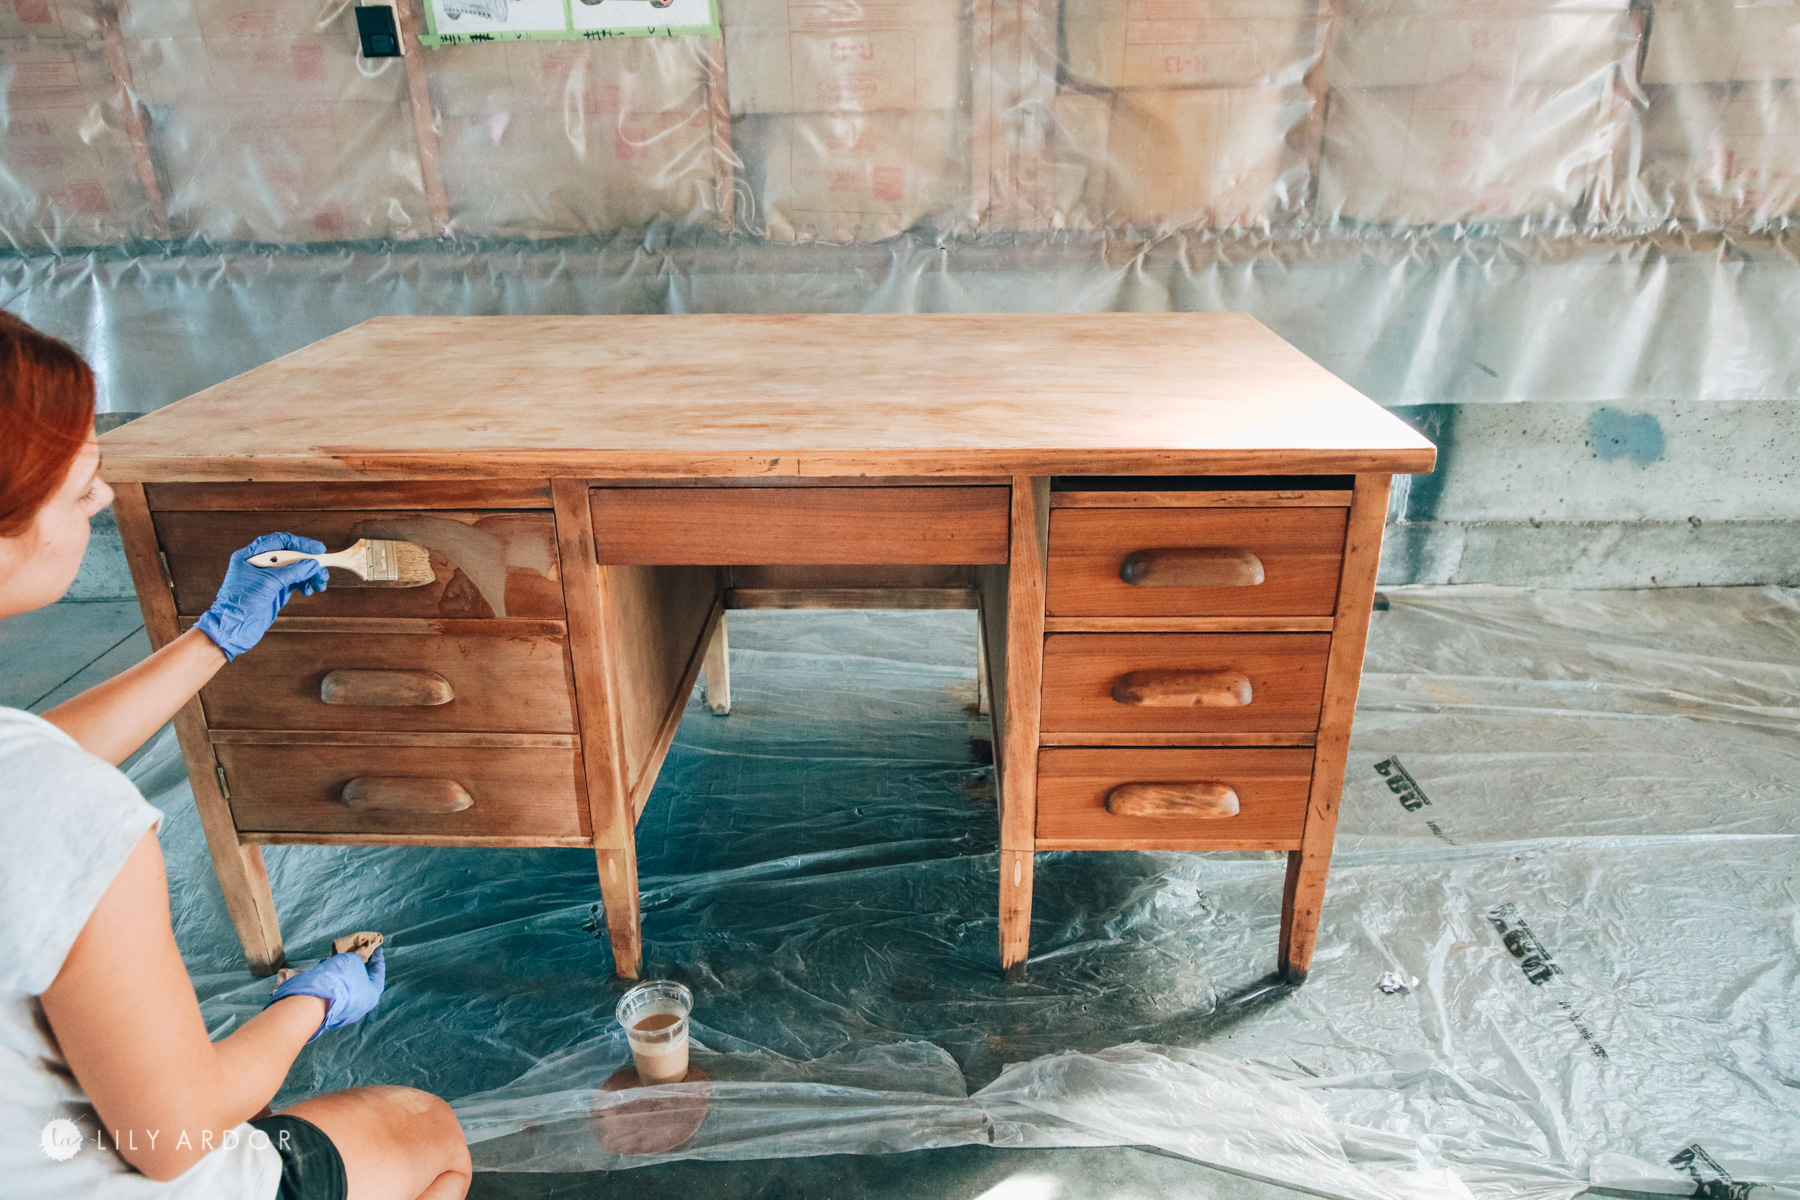
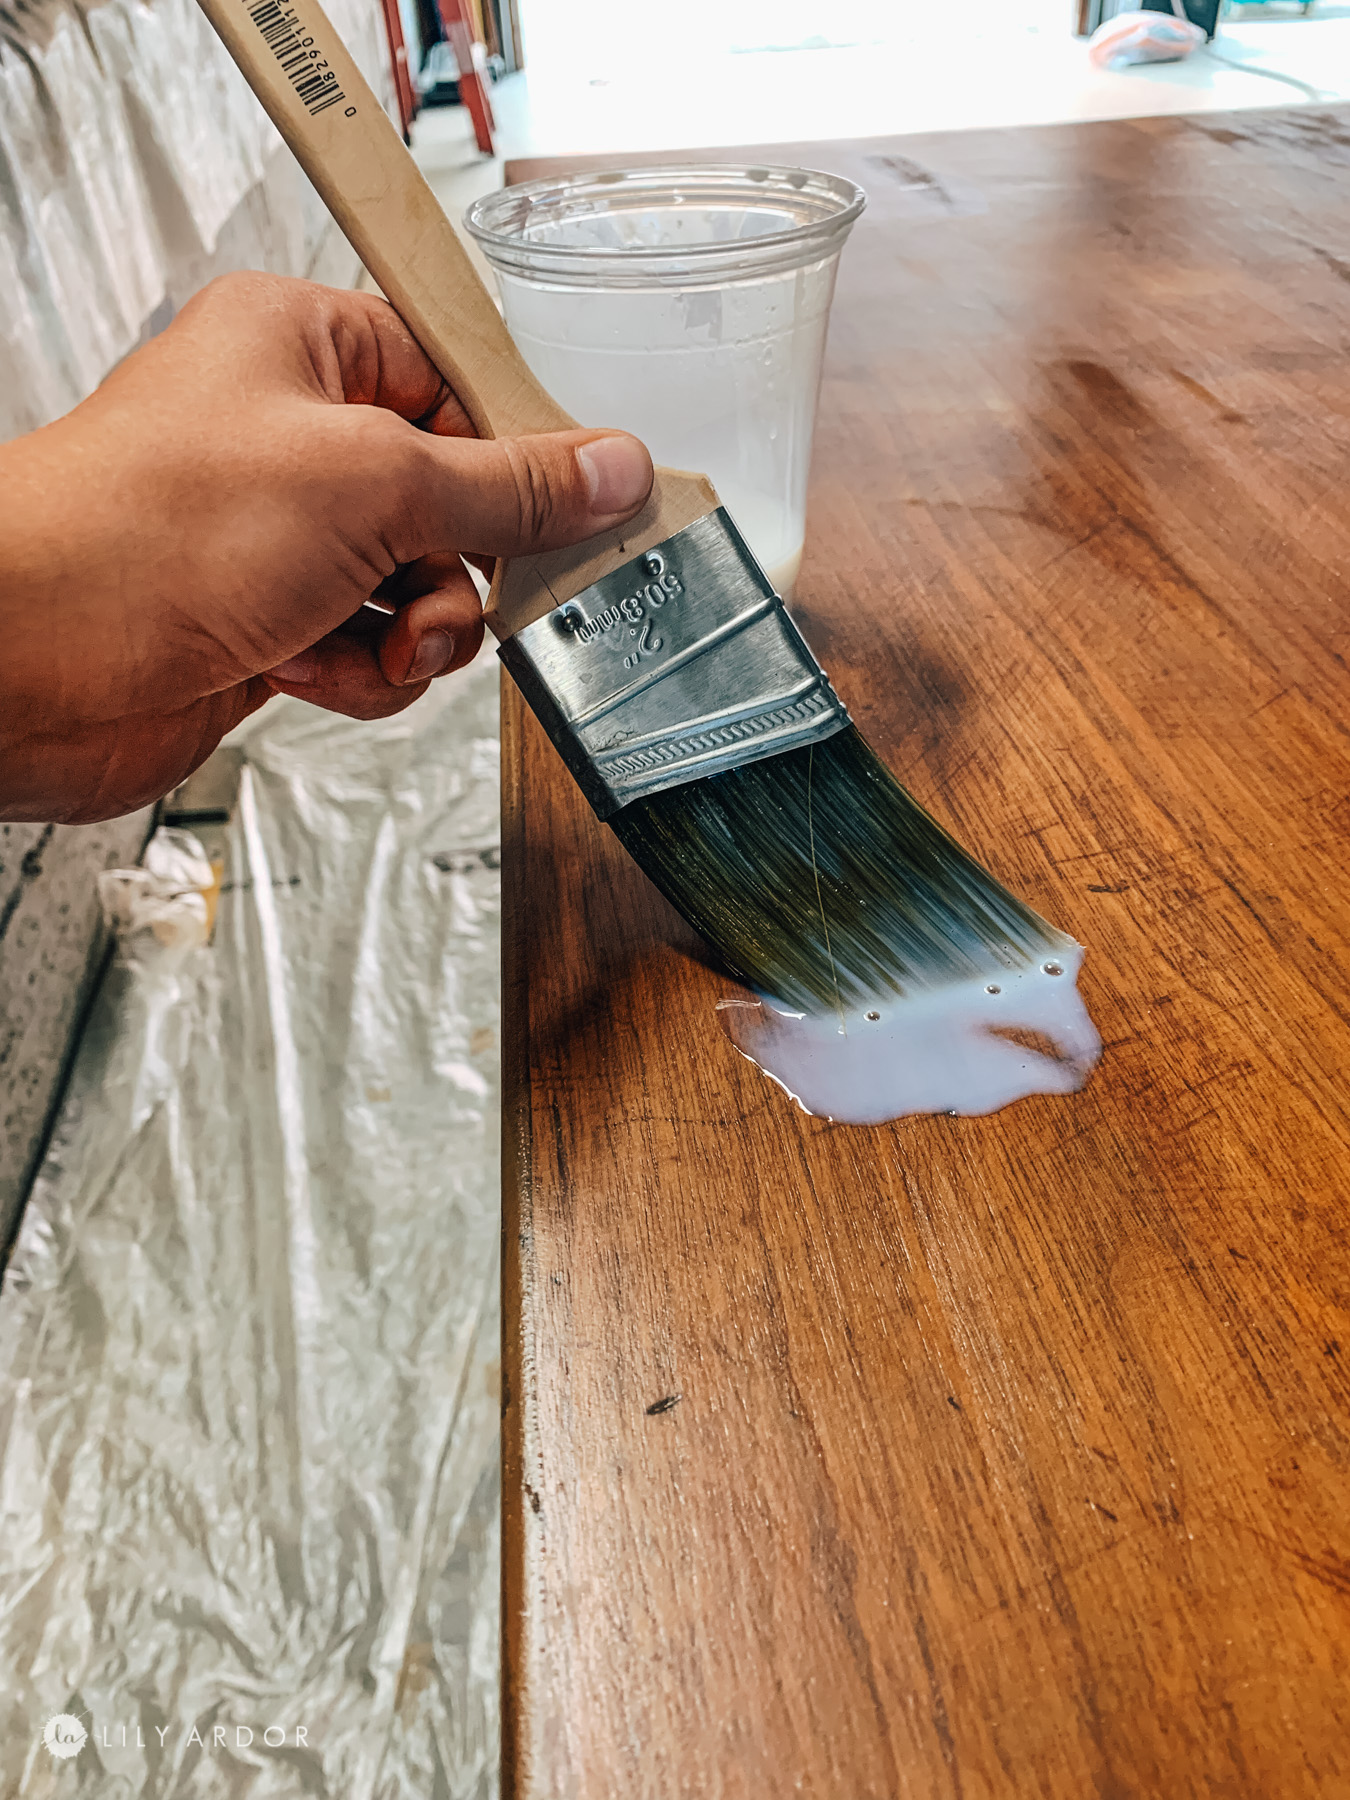
Step 4: Staining the desk!
I chose to combine a few colors for my stain. I’ve been doing this for a while now and absolutely love it. I always use the minwax brand and make sure both stains are oil based. The colors I combined was silvered gray and fruitwood. It was mostly fruitwood and I toned the the orangey hues with the gray. I’m not really sure it helped much it. If you look close at the photo you can see the stain is pretty cool toned yet the desk looks very saturated. I’m not sure what wood the desk is so I’m assuming that might have something to do with it.
Step 5: Sealing the desk!
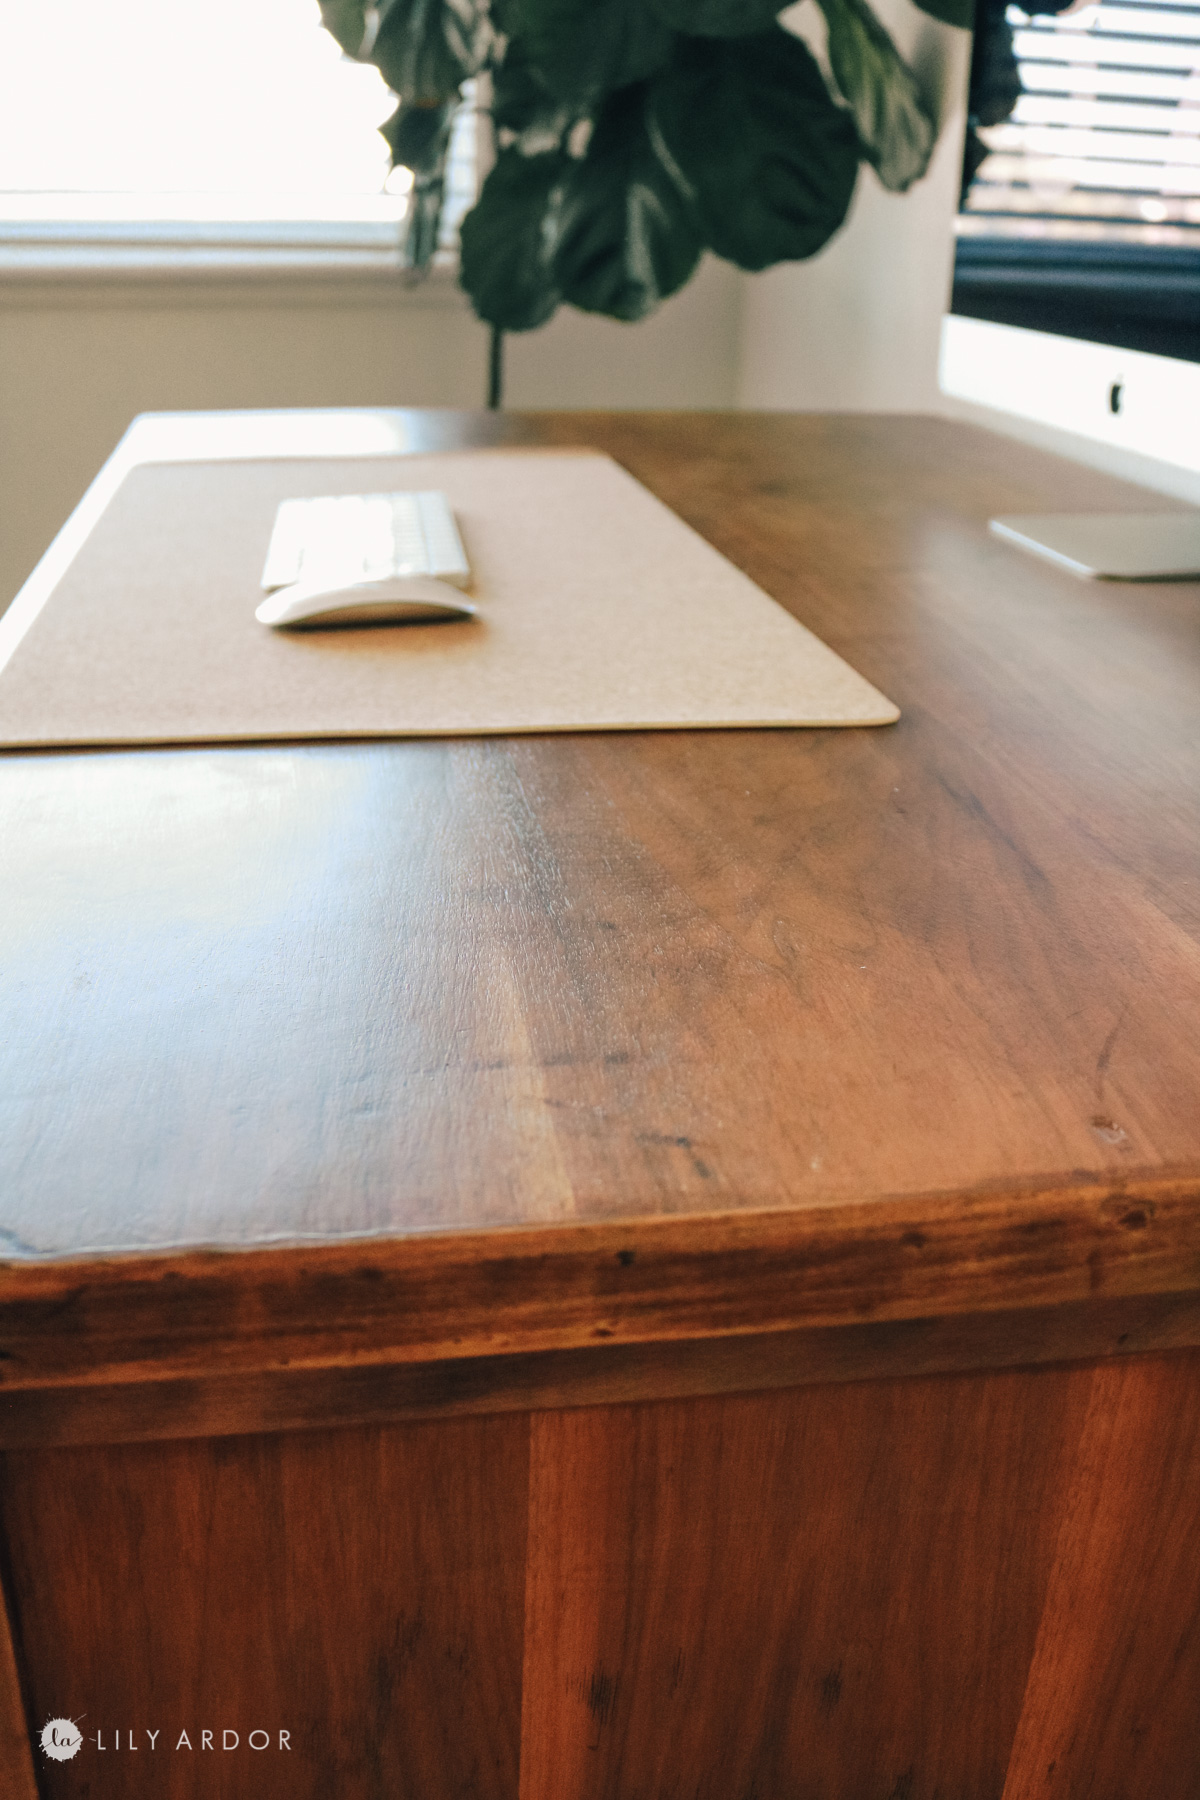
For my desk I decided to try something a little bit different. Since the top of the desk is the most used surface I sealed it with a satin finish. The rest of the desk was done in the ultra flat matte finish. CAN I JUST SAY! This is my new favorite sealer! IT’S AMAZING! The way it settles in once it dries literally looks as if you sprayed the finish on. I still can’t believe it looks so good! Do you see that finish? ( photo below)
Adding links for you! #notsponsored! I’ve been looking for a great finish for years! This one is definitely a keeper!
I can’t stress this enough. PLEASE use a new brush to apply your finish. I’ve ruined a handful of projects trying to stick to budget. It’s not worth it. The old paint pieces from your brush fall off into the clear finish and you’ll end up having to pick them out. It’s a sucky process! If you’re on a budget and have an ace hardware near buy they have great brushes. Actually better deals than home depot and lowes from what I’ve found. Average good brush that’s made for stains and finishes is about $9-10 at home depot + lowes and I got this one in the photo for about $7 at ace hardware. They had cheaper ones too.
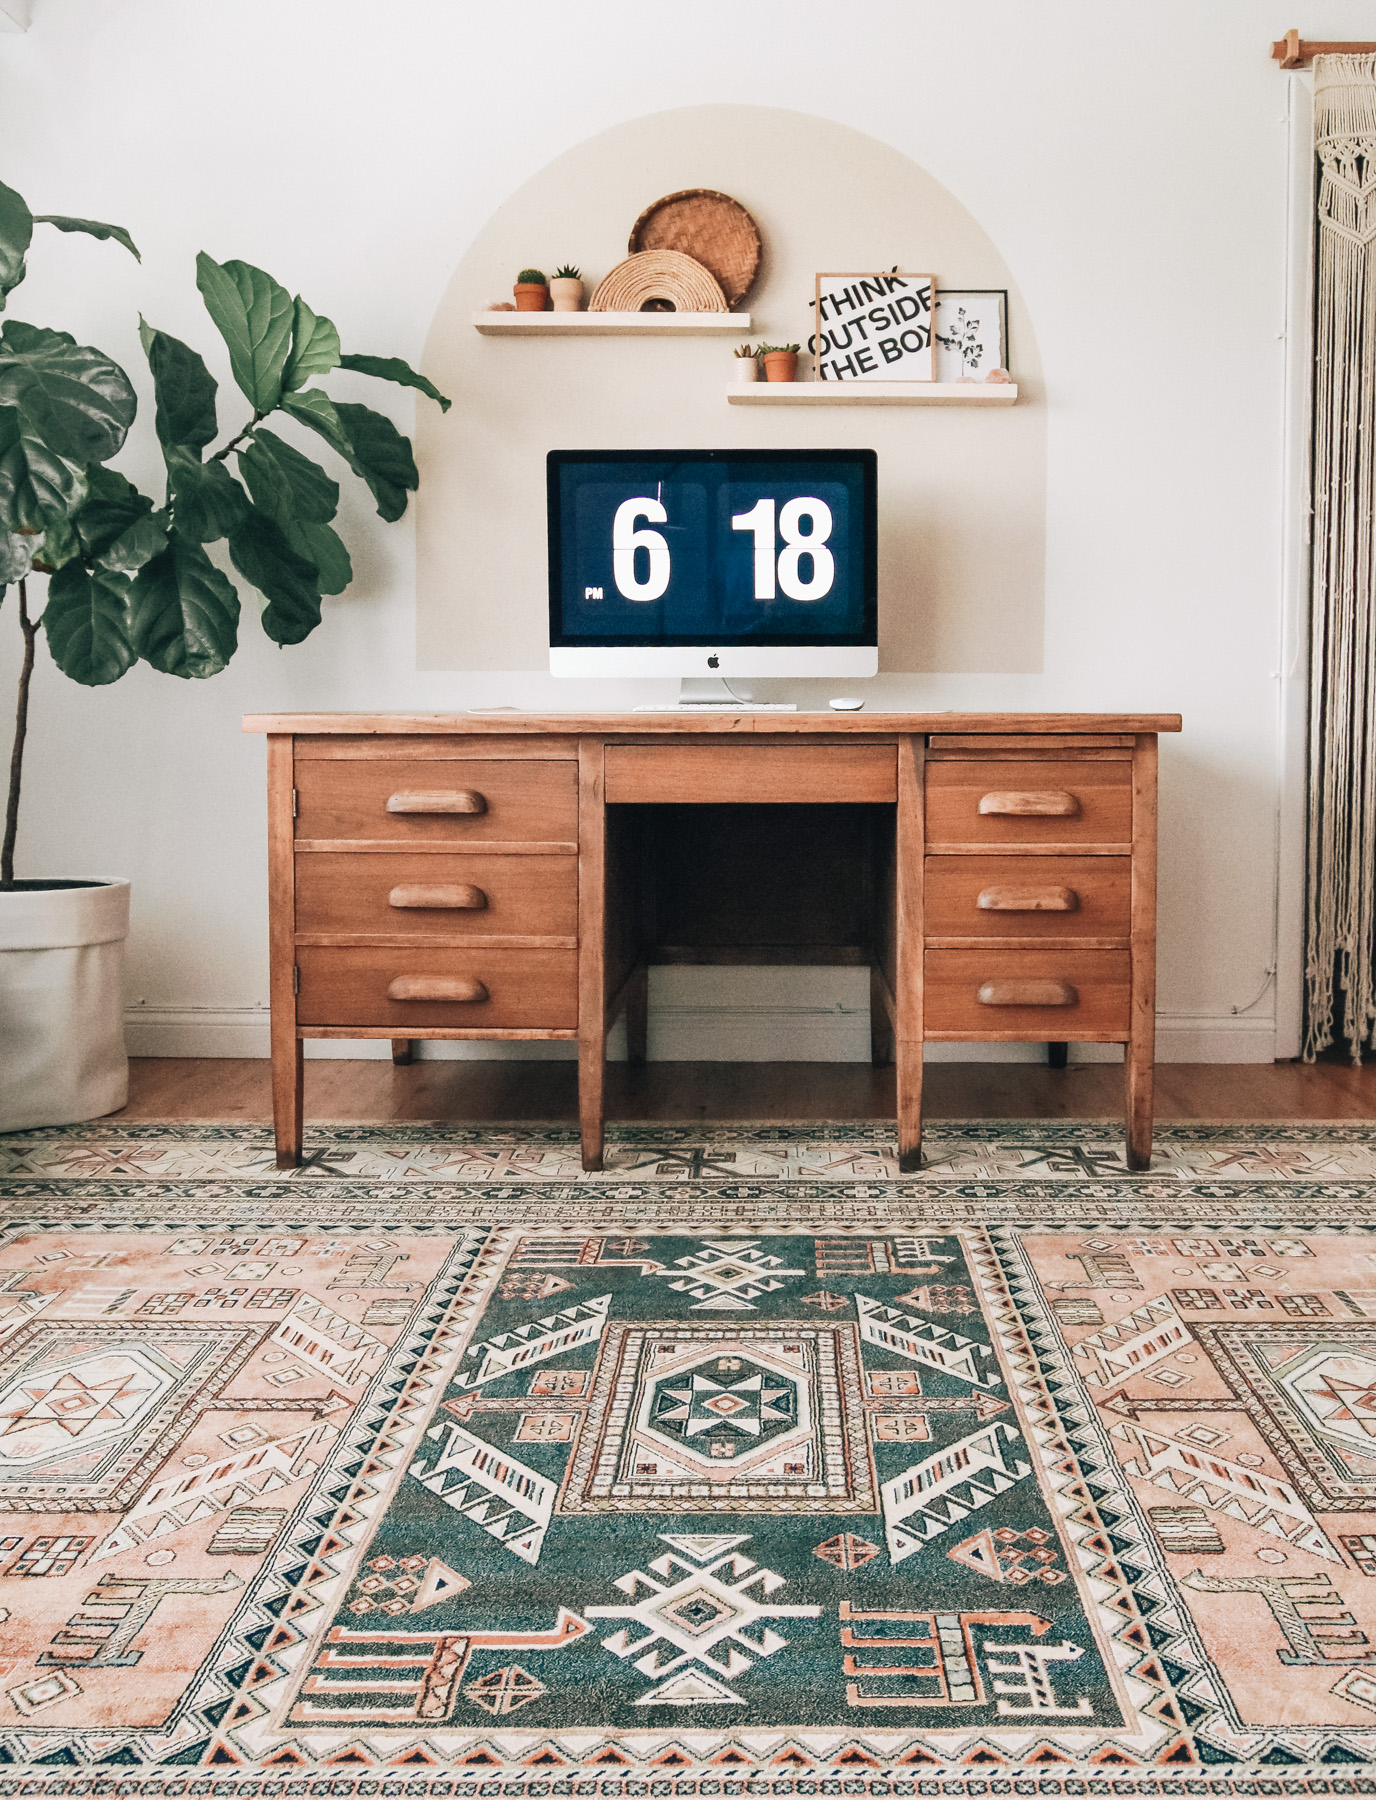
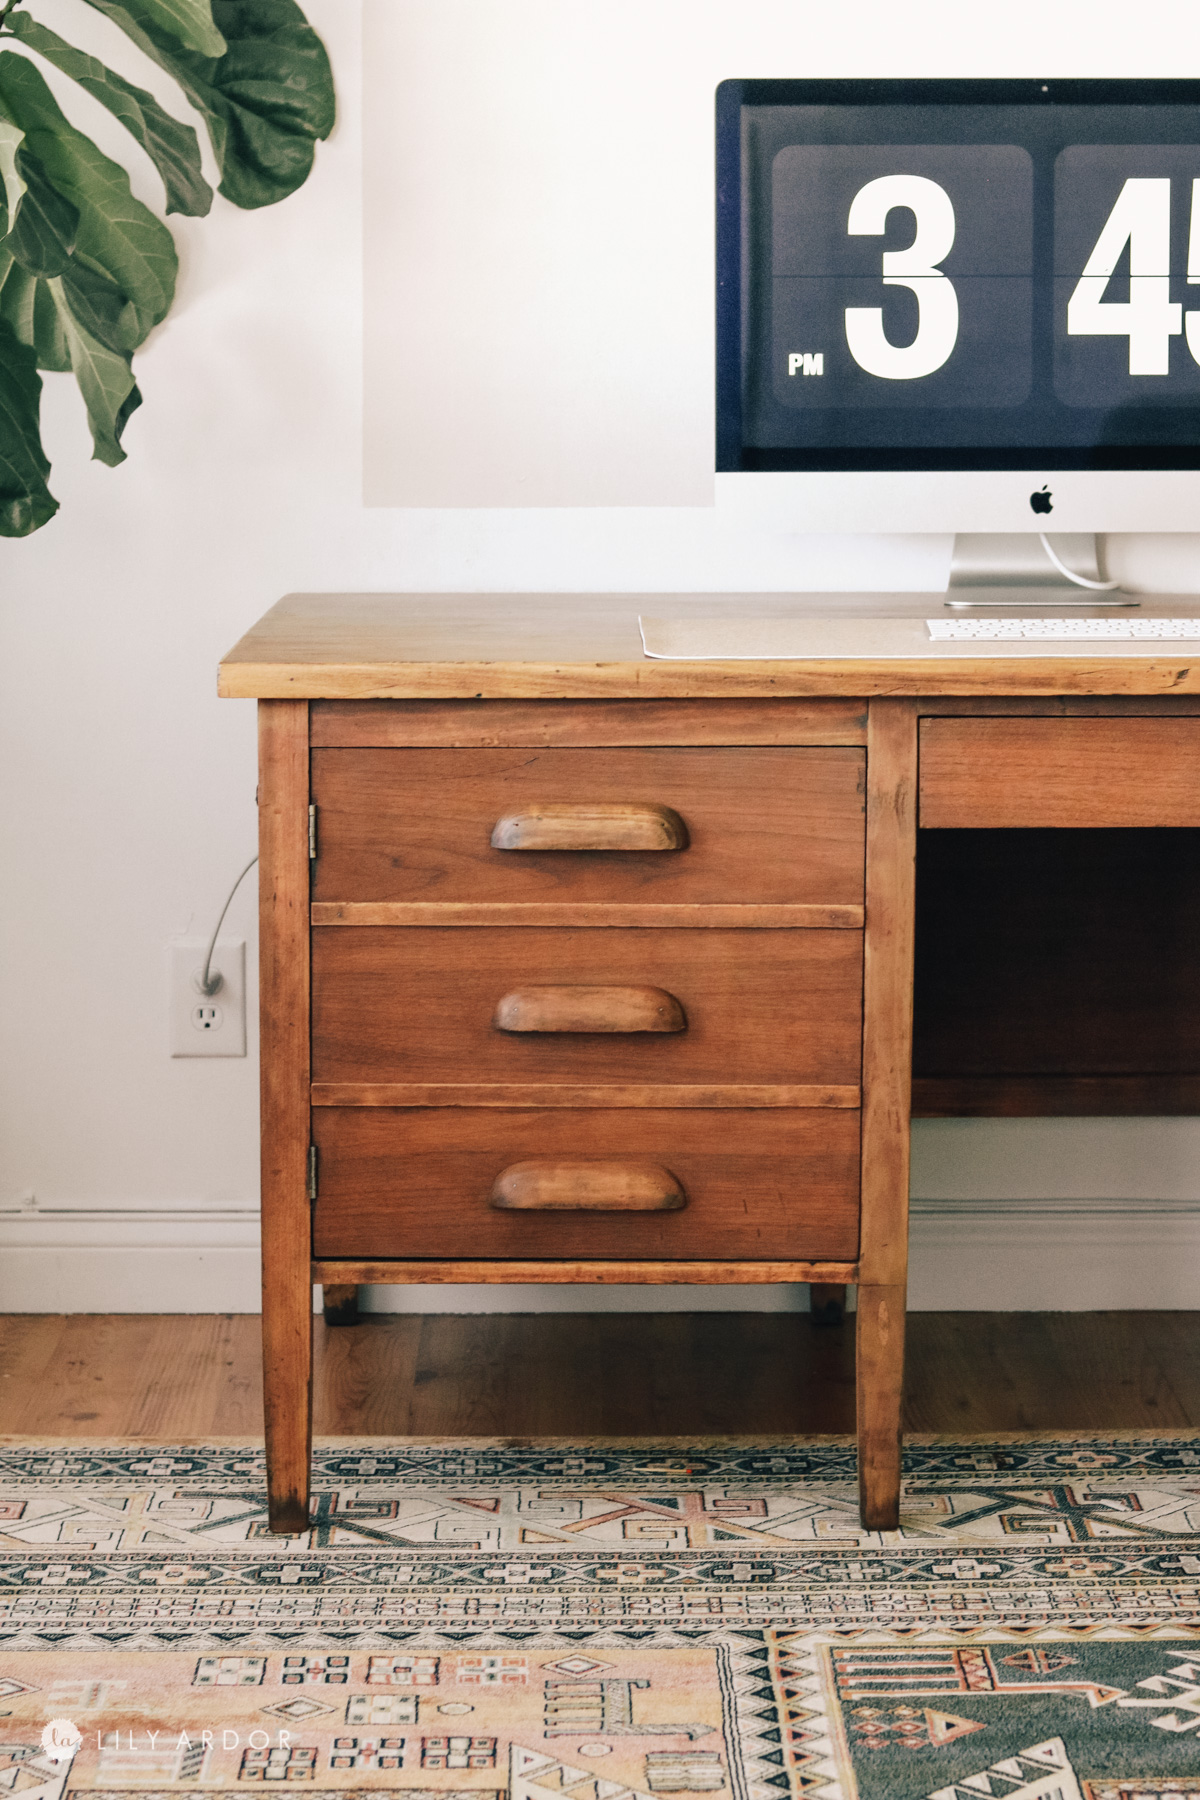
That’s it! Here’s how the desk looks all complete! 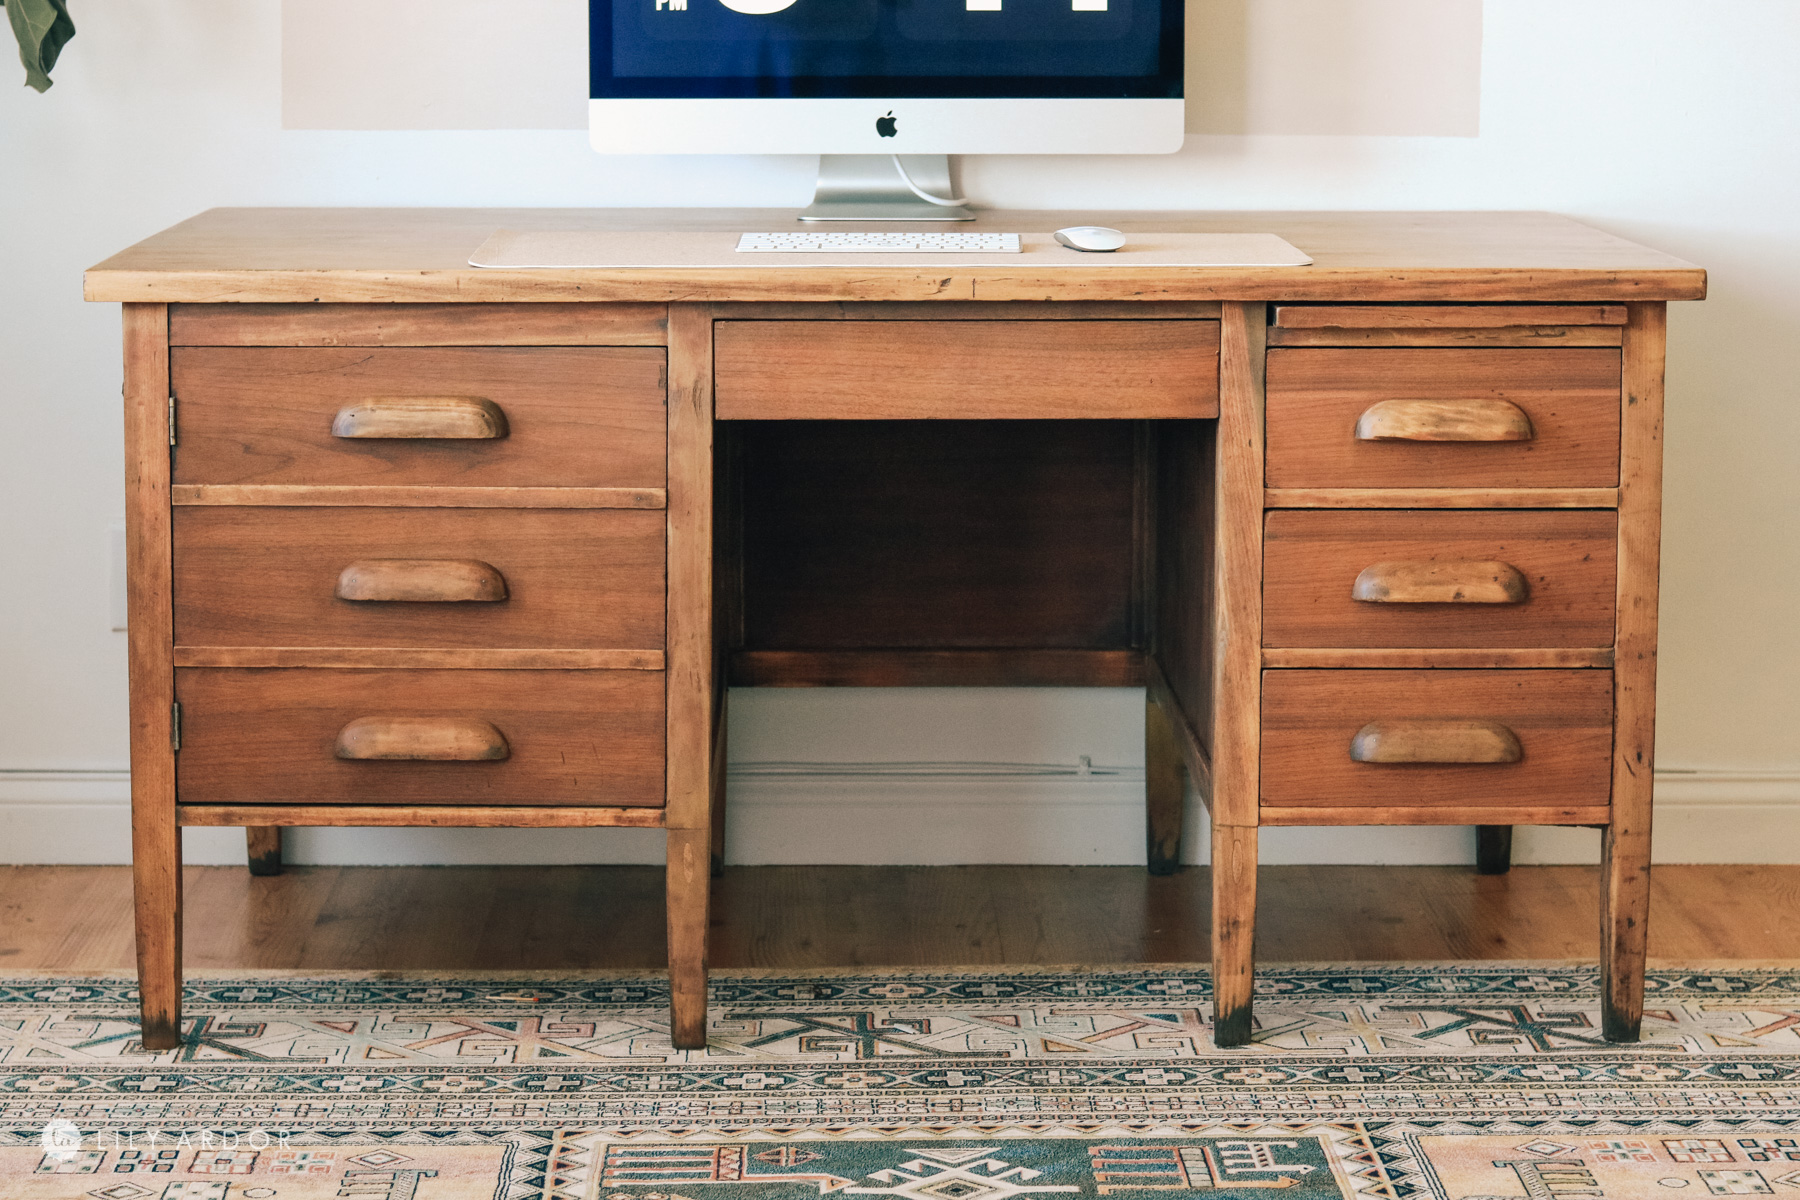
It looks so good in my new office! I can’t get enough. It’s such a rewarding feeling to have a complete and functional office to work out of.

Okay this rug is one of my favorite purchase to date. Our floor color is so weird and it’s so hard to pick the correct rug color. I feel like this rug go perfectly and because it has the perfect blend between warm and cold hues it would probably match almost any floor color.

I got the rug on allmodern.com . It was a bit over my budget but, I’m glad I invested in it. I should mention it’s a really thin rug. To thin to really vacuum if you have a super strong suction vacuum. It sweeps really easy though.
The other option I was looking at was this darker rust tribal rug ( photo below + amazon link under) Honestly I’m not sure why the photo shows red. If you look at customers photos it come off as a dark rust color! SUPER beautiful!

Other rugs I had added to my wish list on amazon:
For about 4 years now I’ve been wanting to make a macrame curtain for this doorway. The doorway leads into my craft room storage which isn’t always ship shape. Who am I kidding…when is it ever LOL 😅 . Anywho I love a hard project but macrame just seams like a tough project to tackle especially that big. When I saw this curtain on amazon I knew I have to get it! BEST OF ALL it was only $40 when I got it! What a steal I couldn’t even find cording for that price.
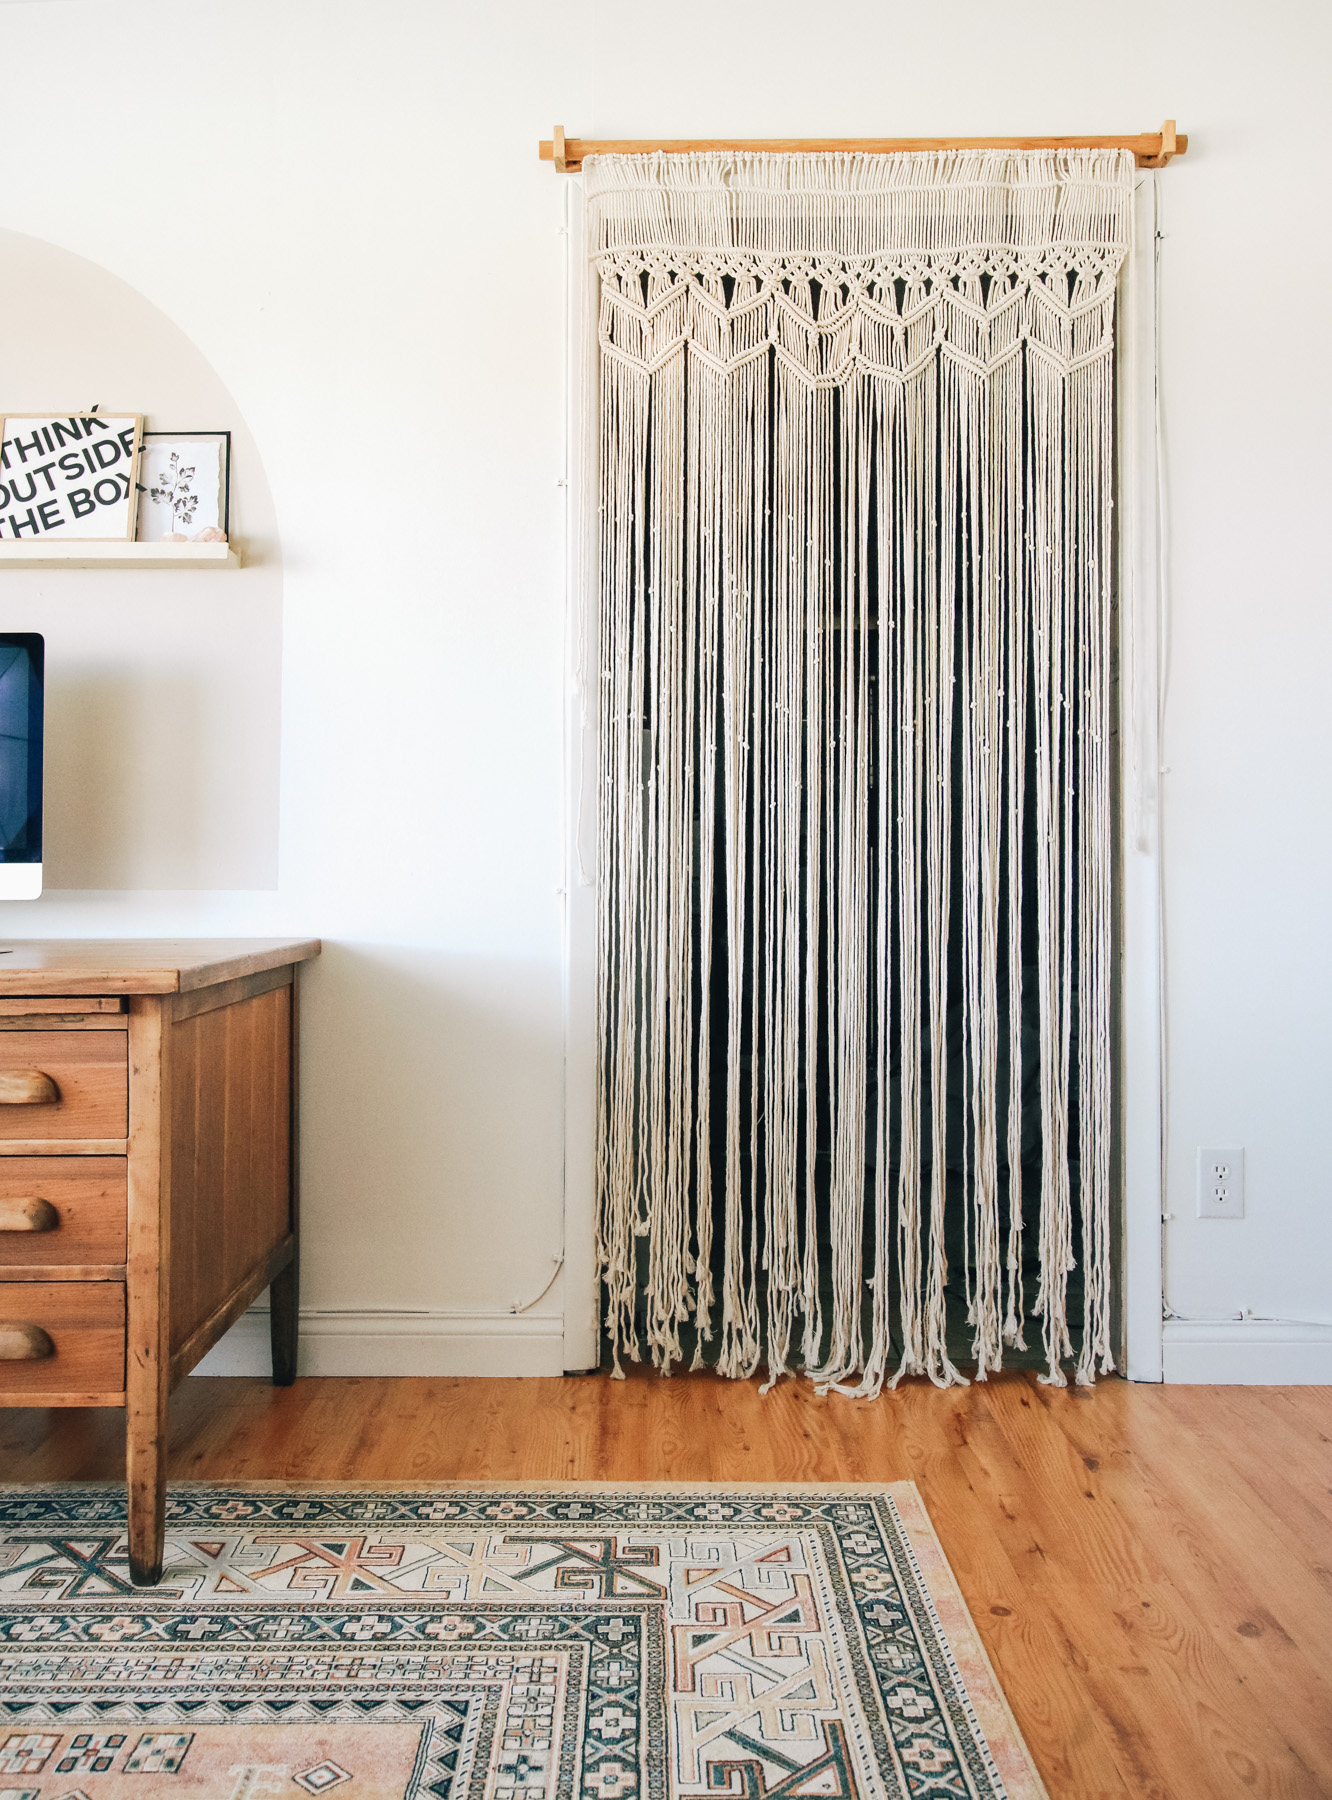
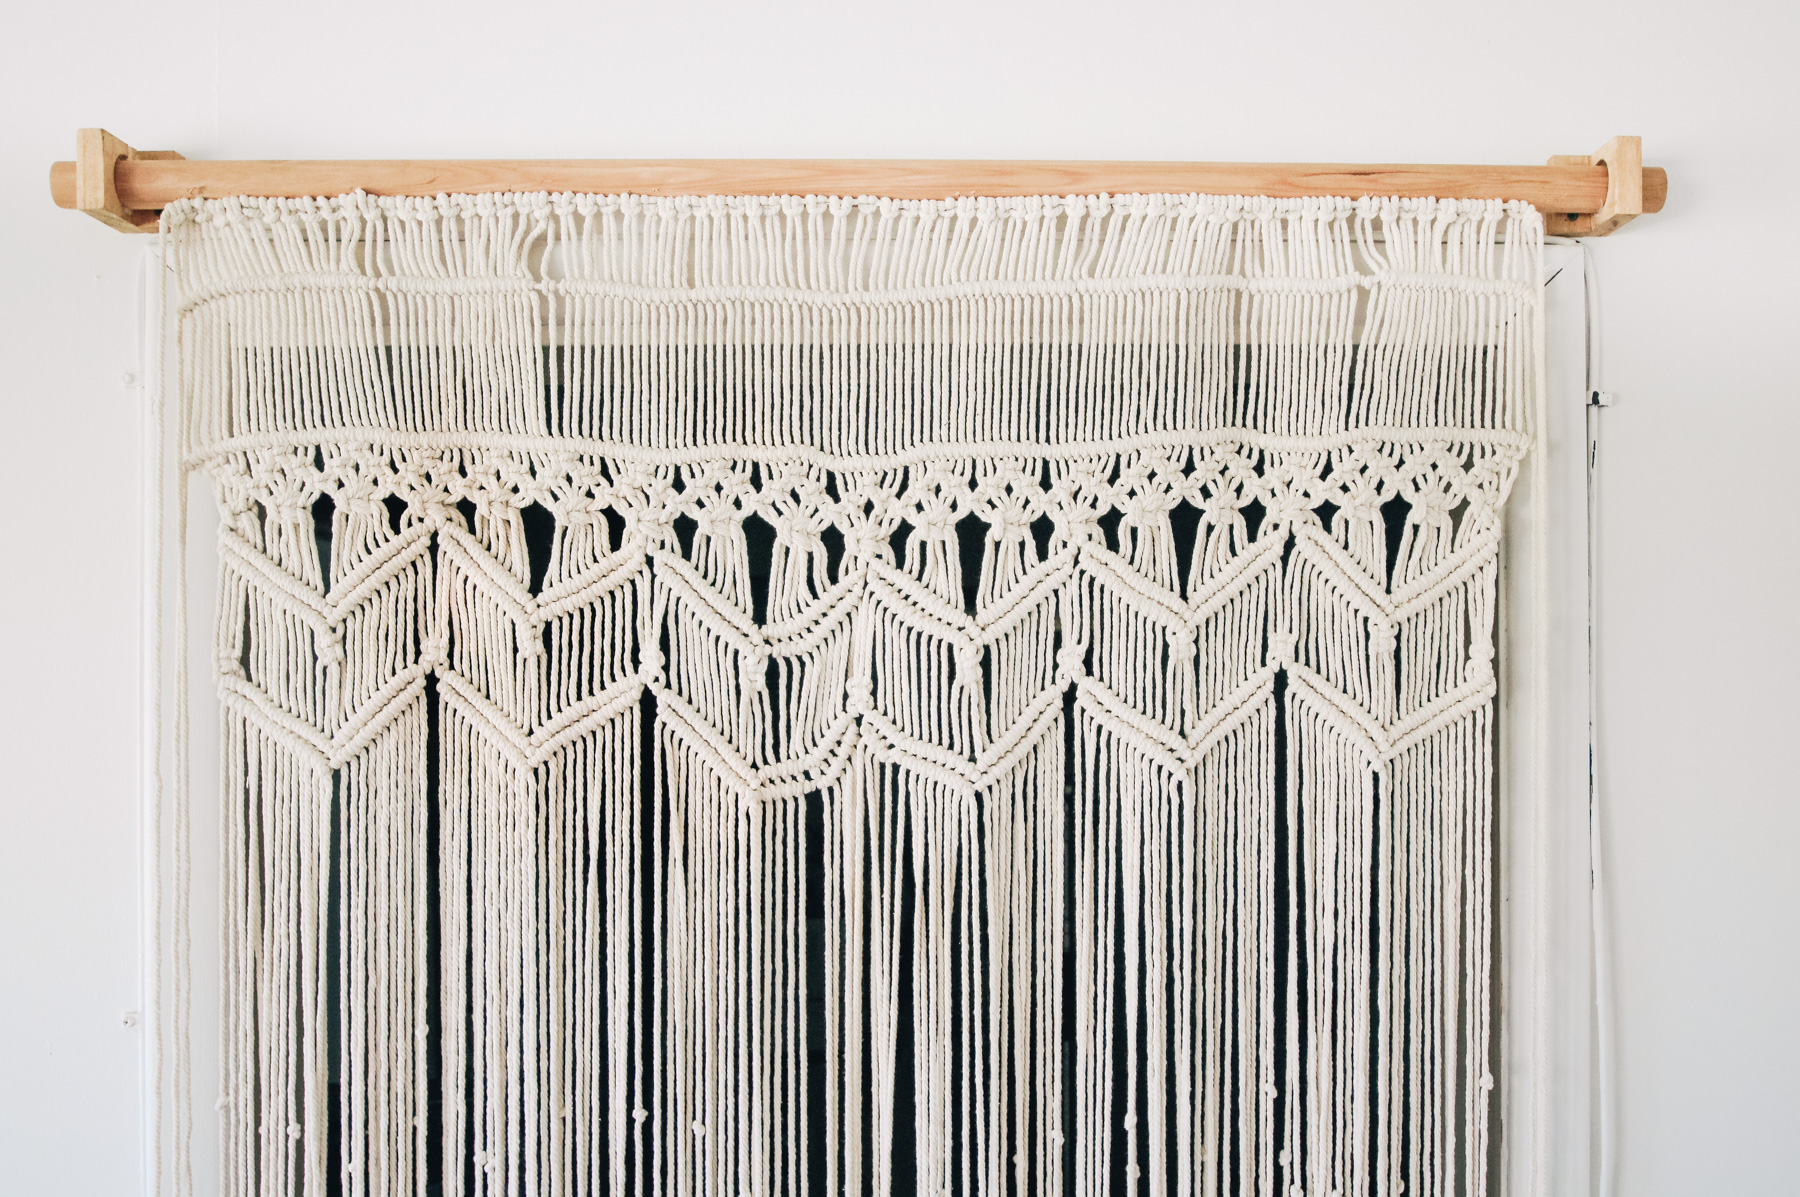
Adding a link for you 🙂 in case you want to get one.
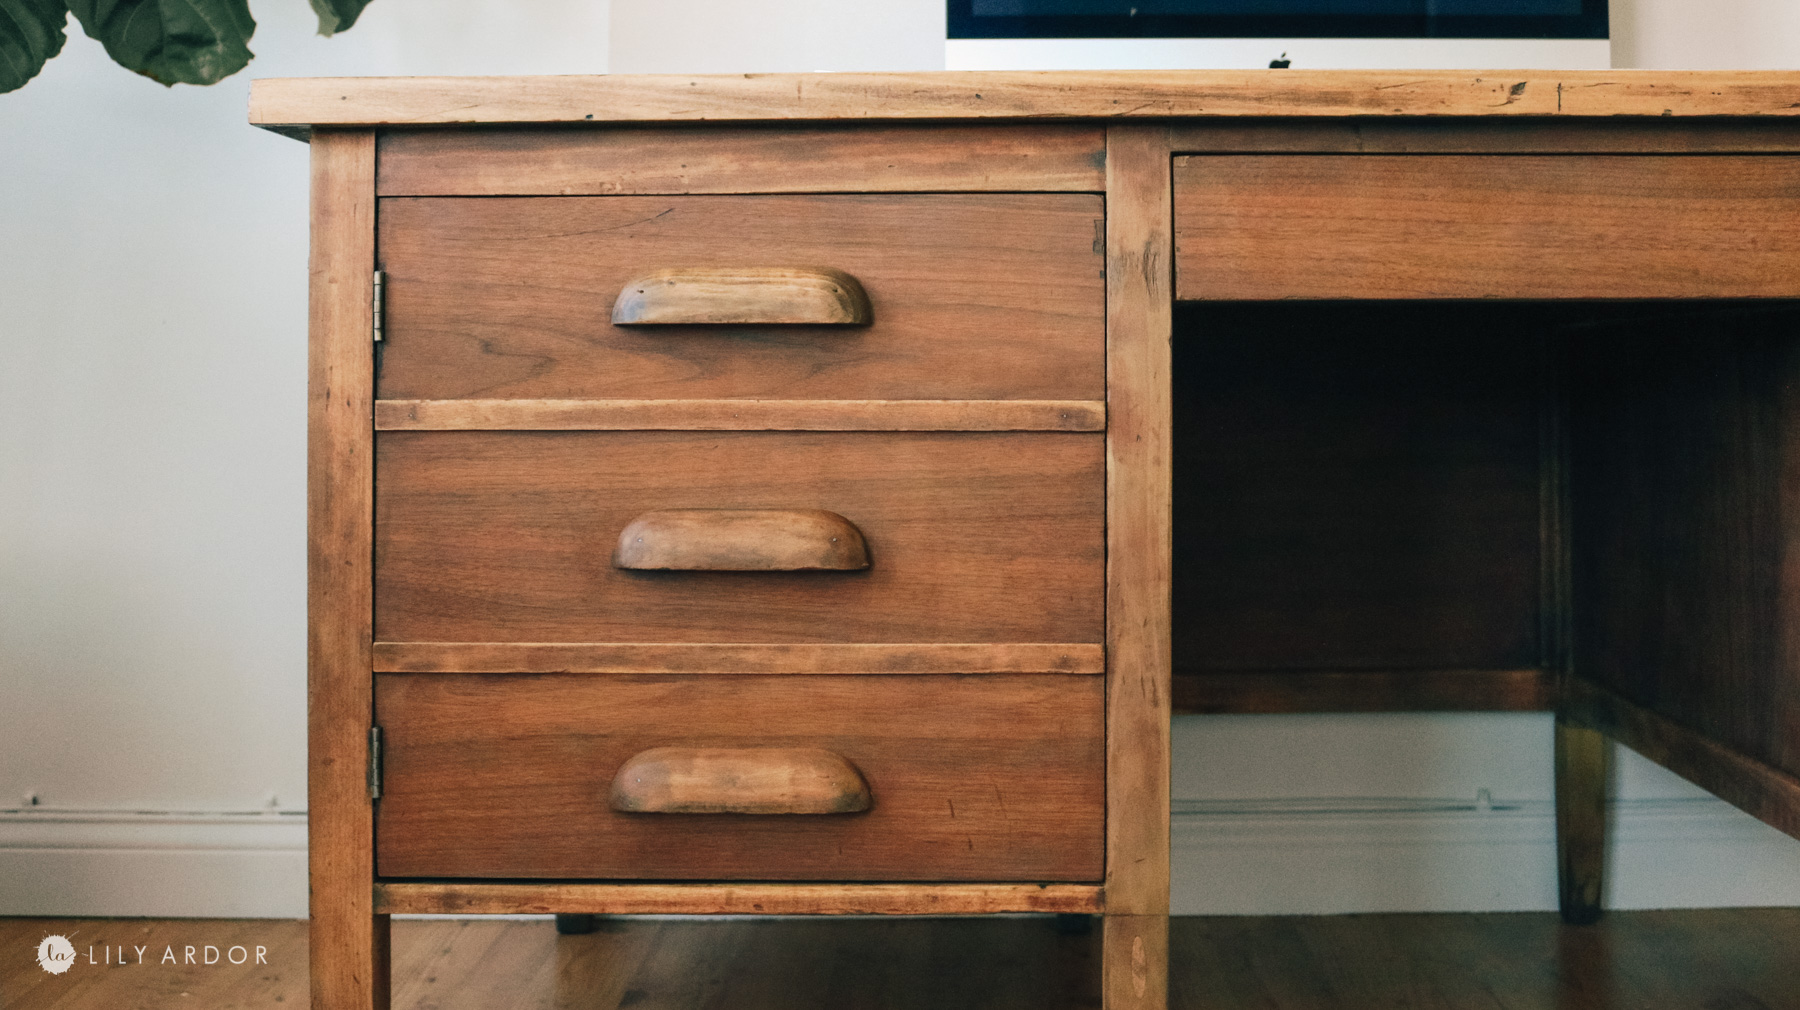
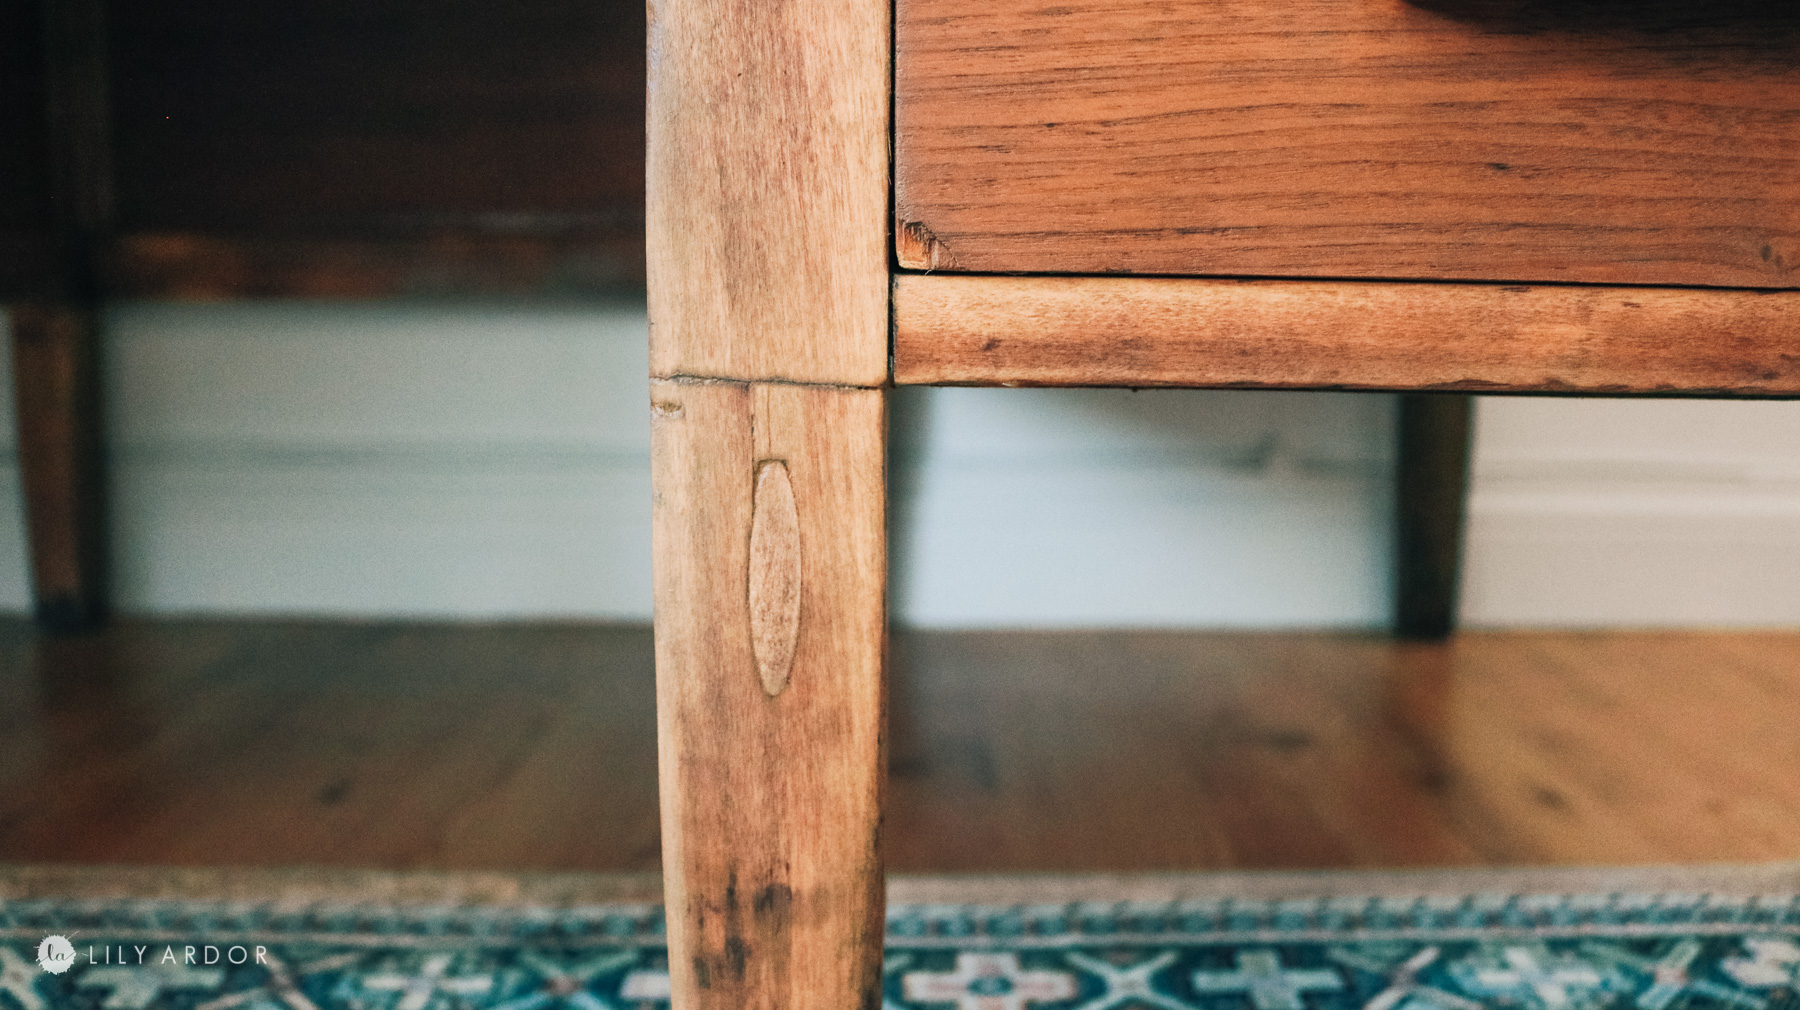
I was a little worried it would look a bit beat up after refinishing it but, it actually ended up giving the desk more character.
So I’ve been considering painting the arch a bit darker like a light clay color. I feel like like it’s a bit hard to see it in photo. I know I was go for a very light faded look but, it almost blends too much.. What do you think?
Here’s a close up on one of the reattached legs. We used kreg jig and pocket hole plug to re-assemble it. You can see how we did it here – https://youtu.be/NBVUw9YAZPI
I made some cute decor to go on my little shelves above the desk. I’m hoping to get some DIY blog posts in about them soon. I’ve been focusing on getting more videos up on youtube lately and haven’t been able to post as much on the blog but, good news is I have these DIYs up on youtube. It’s all in one video with the desk . https://youtu.be/NBVUw9YAZPI

That’s it for today! I hope this inspires you to refinish a piece of furniture. I had so much trail and error before I got to the easy 5 step process that worked for me and I’m so glad I could share it with it.
Have a great week and stay crafty 😀
signing off,
Lily 😬
Thank you very much for sharing, I learned a lot from your article. Very cool. Thanks. nimabi