Hi everyone, happy spring!
For today’s DIY you’ll want to grab some recycled boxes to make the cutest concrete egg holders!
Time needed:
This project takes about 30 minutes of hands on work plus some time to allow the concrete to set. I would say in total with drying time about 4 hours. Because Rapid Set Cement All achieves structural strength in 1 hour, you’ll complete your projects sooner.
Supplies:
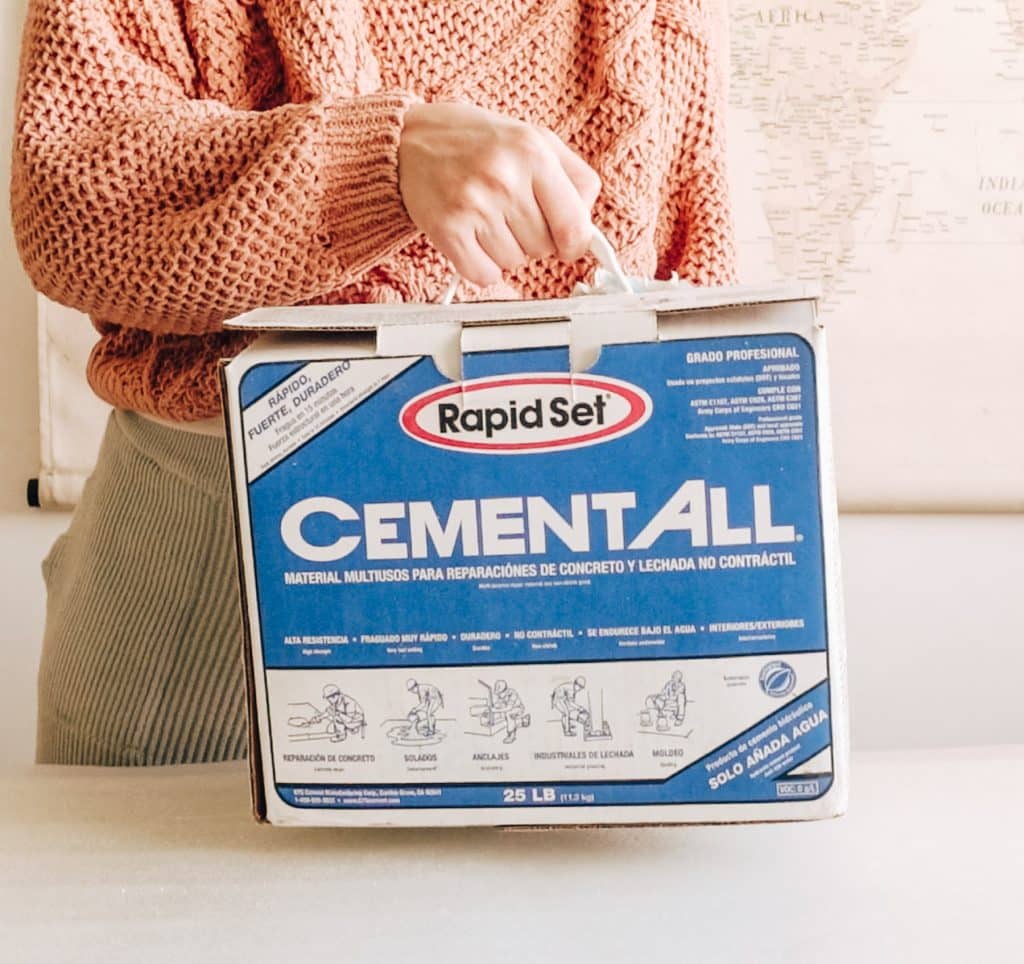
- Rapid Set Cement All
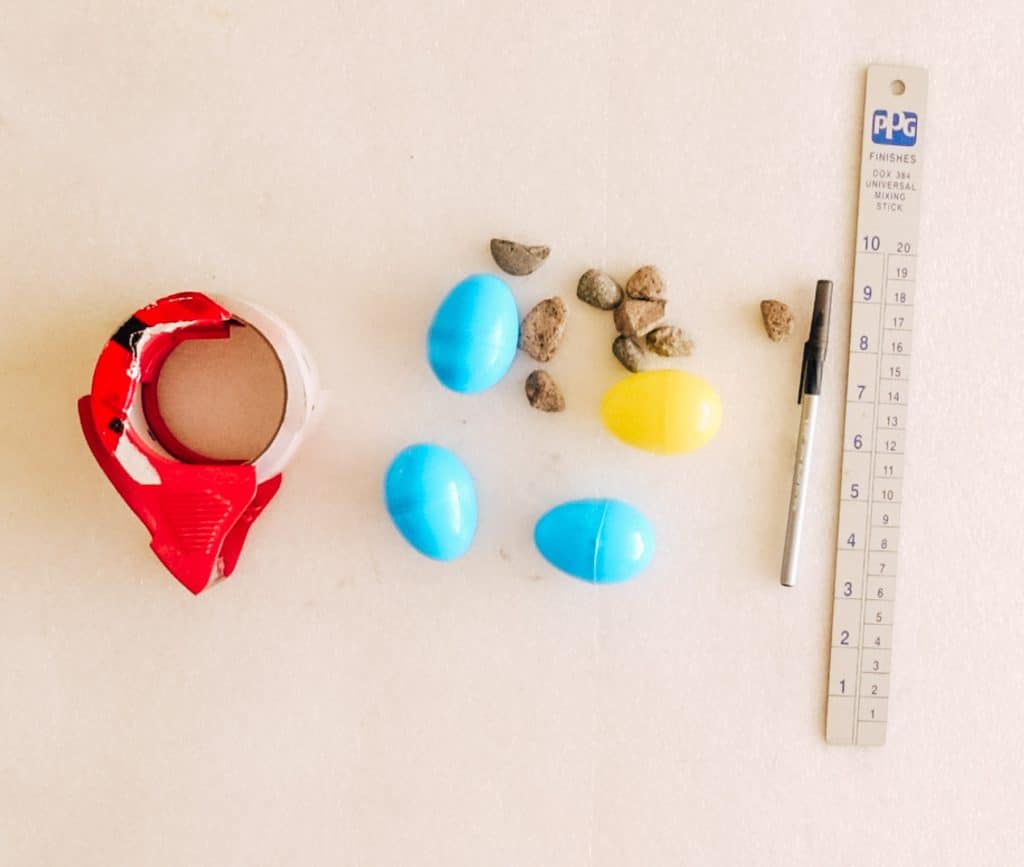
- Plastic eggs and small rocks
- Tape
- Recycled boxes
- Sander with 80 grit sand paper
- Pen and ruler
Optional : Terrazzo Effect
- Square tip paint brush
- 4 different acrylic paint colors
Let’s Make Some Cement Magic Happen!
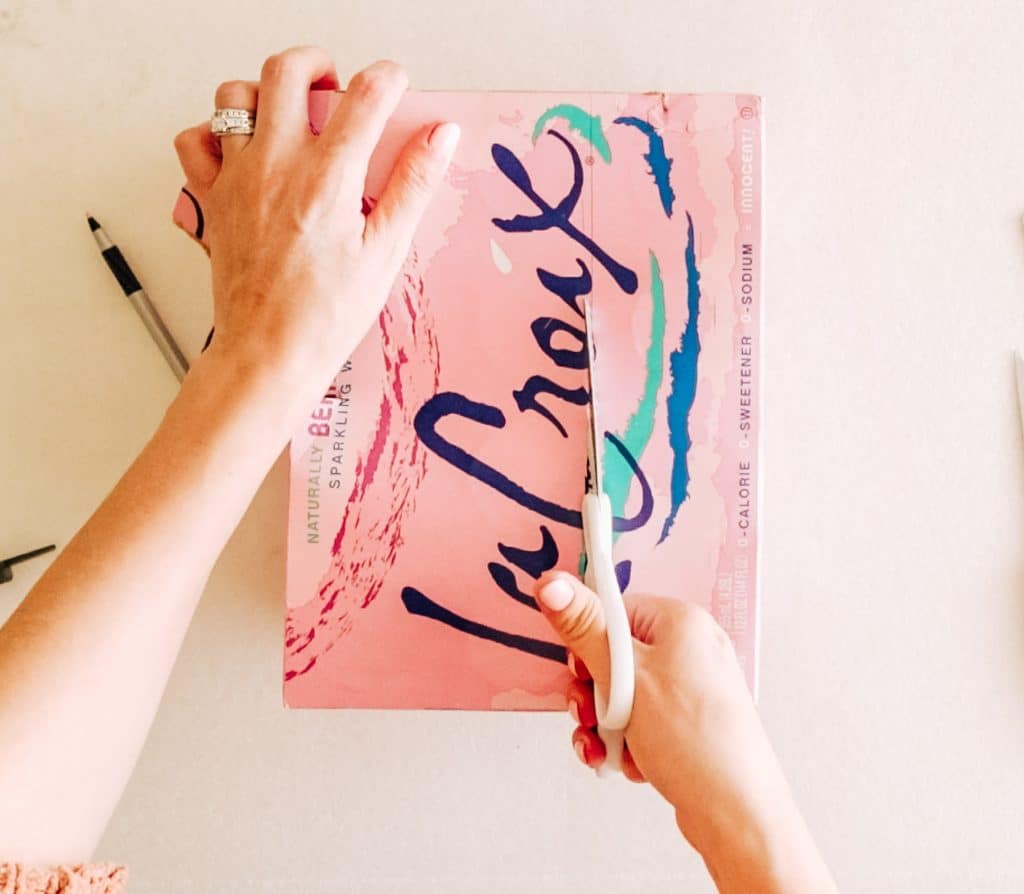
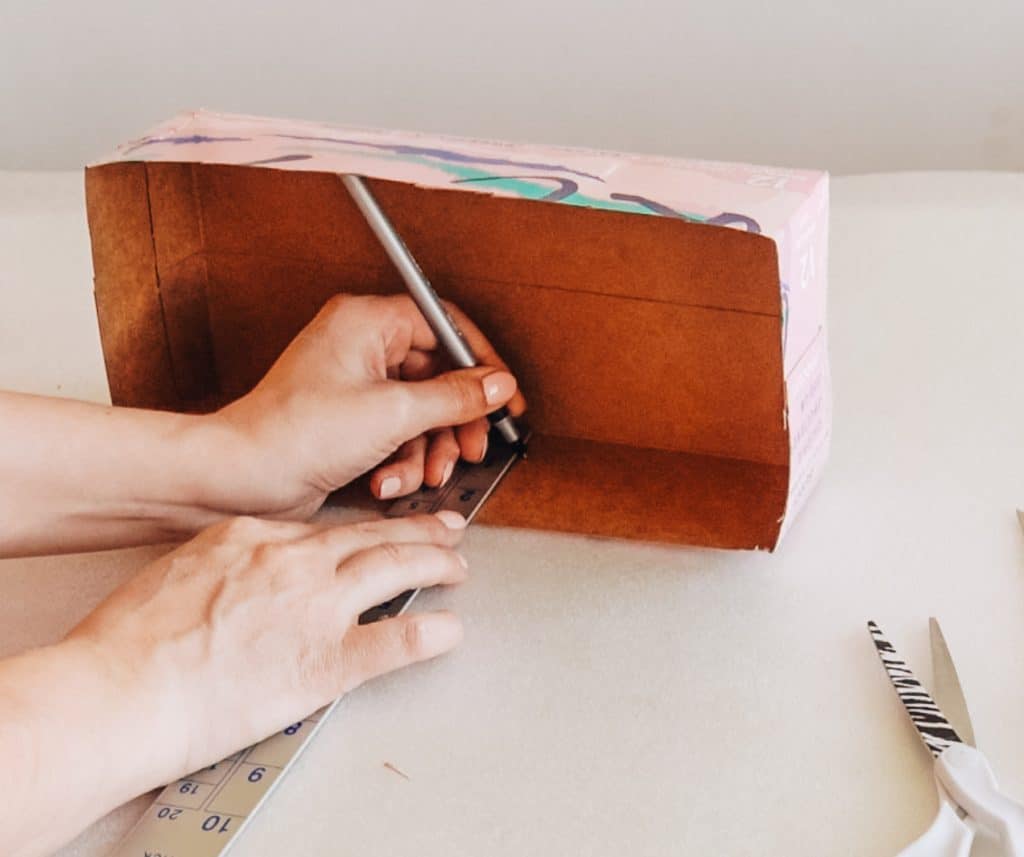
Step 1: Prepping the box!
In order to make sure the egg holder is an even thickness I marked my box before cutting it. This keeps the project neat. I wanted the thickness of my egg holders to be 3/4 of an inch. So I cut my box to the height of 2 3/4 of an inch. This is tall enough to later tape the eggs in place if needed.
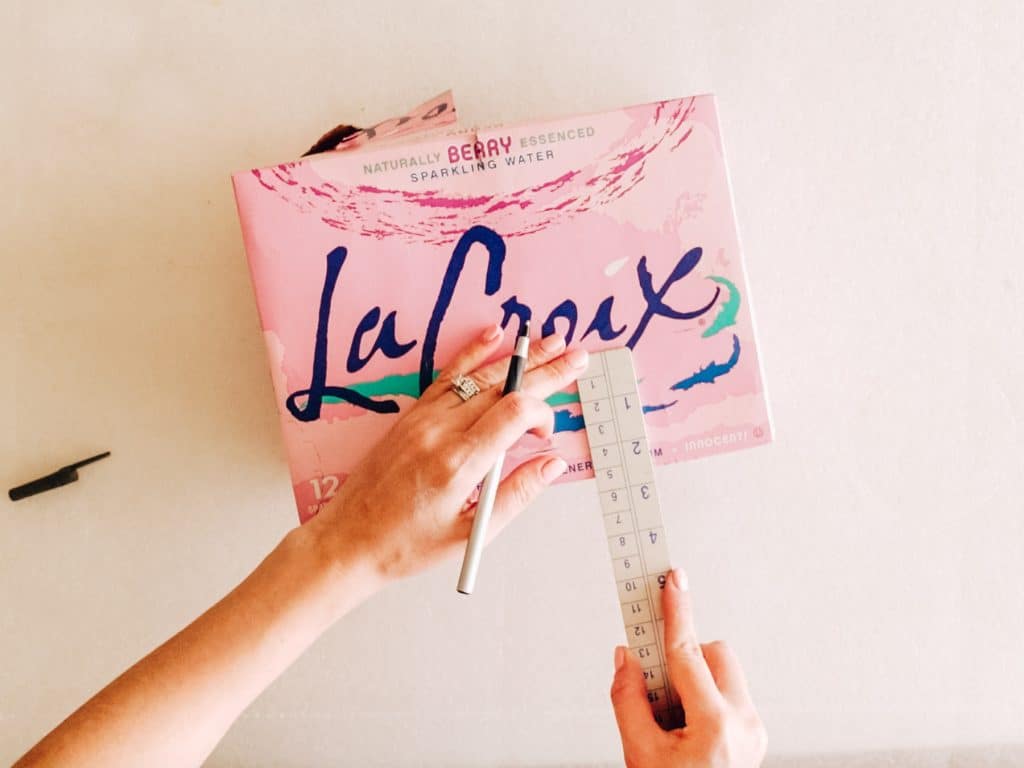
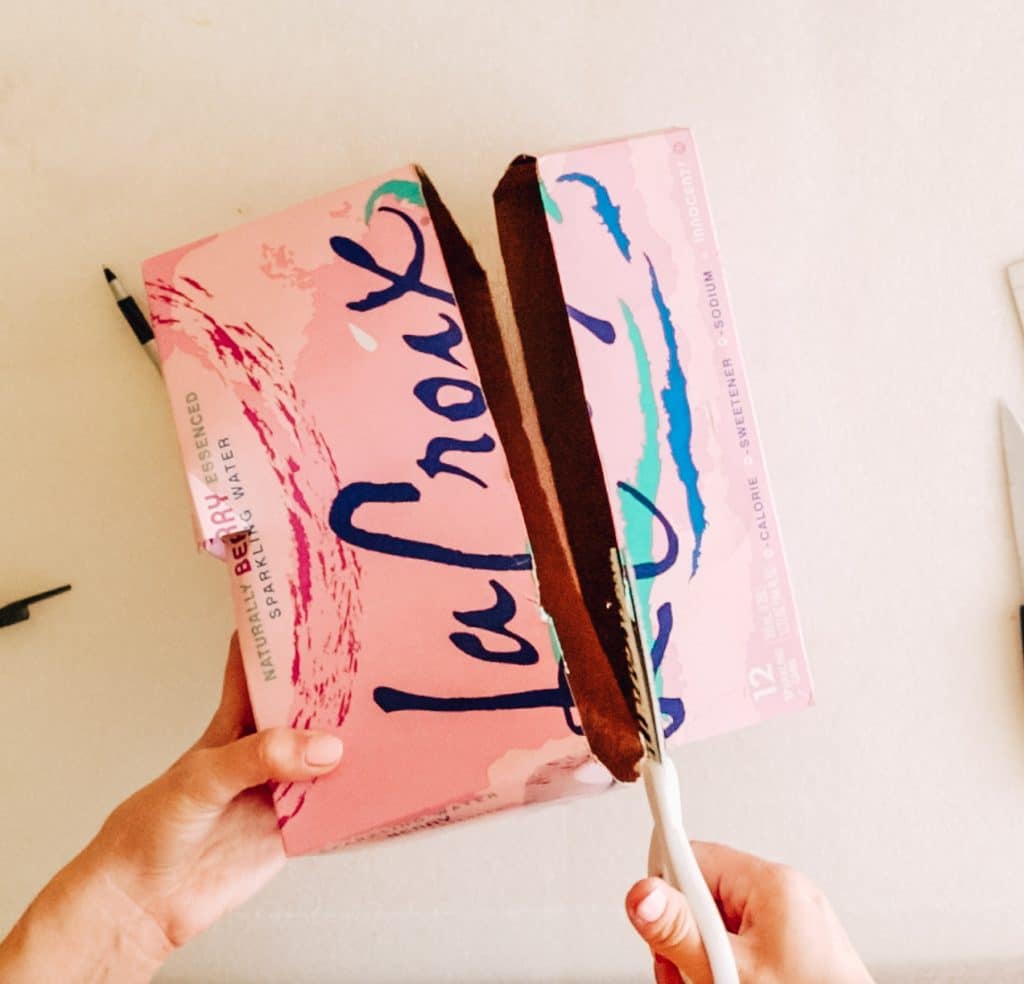
Next I flipped the box down and marked the inside at 3/4 of an inch from the bottom. These will be the guide lines when I pour the cement. There, now your mold is ready!
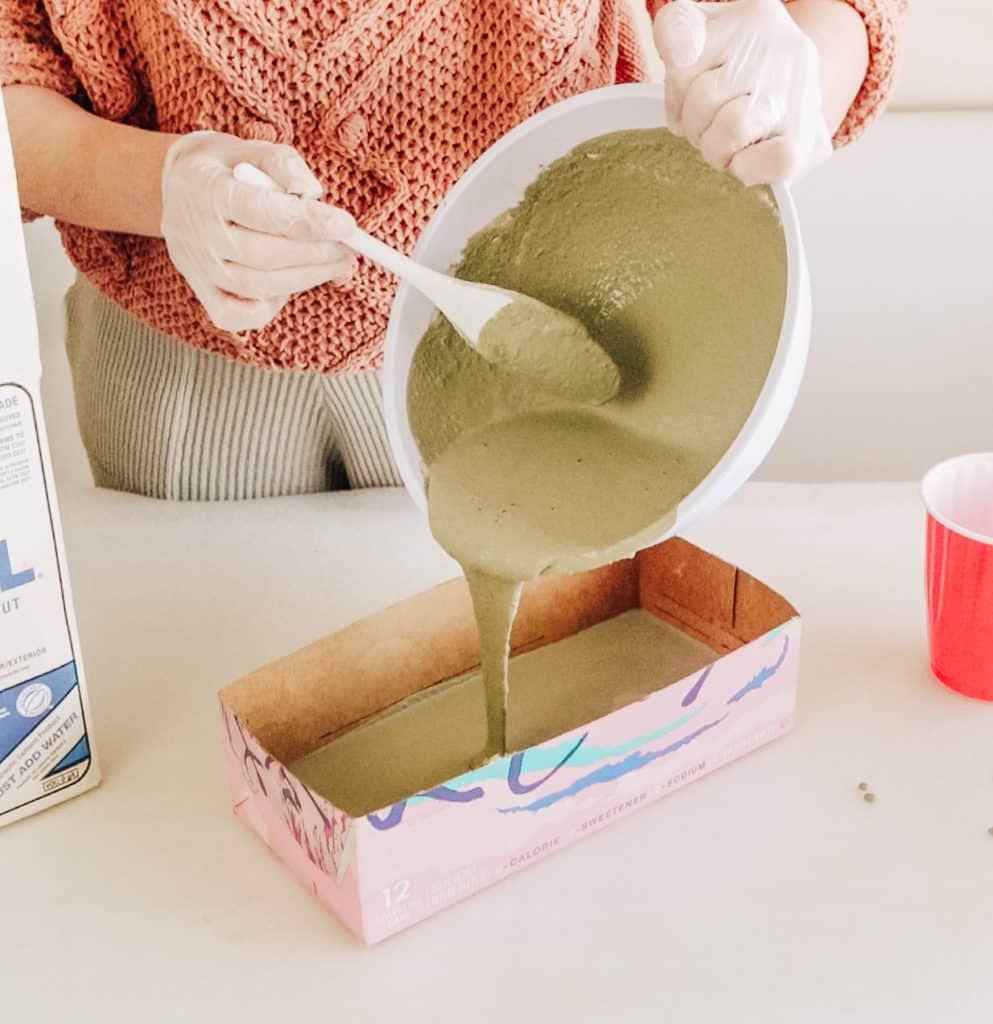
Step 2 : Pouring Cement All Into Your mold!
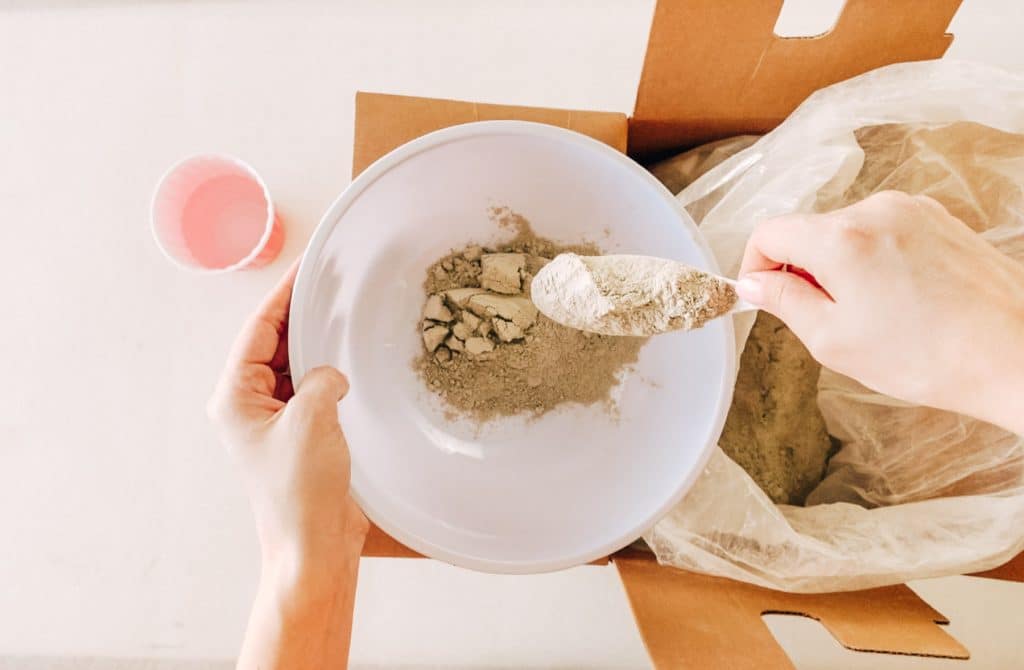
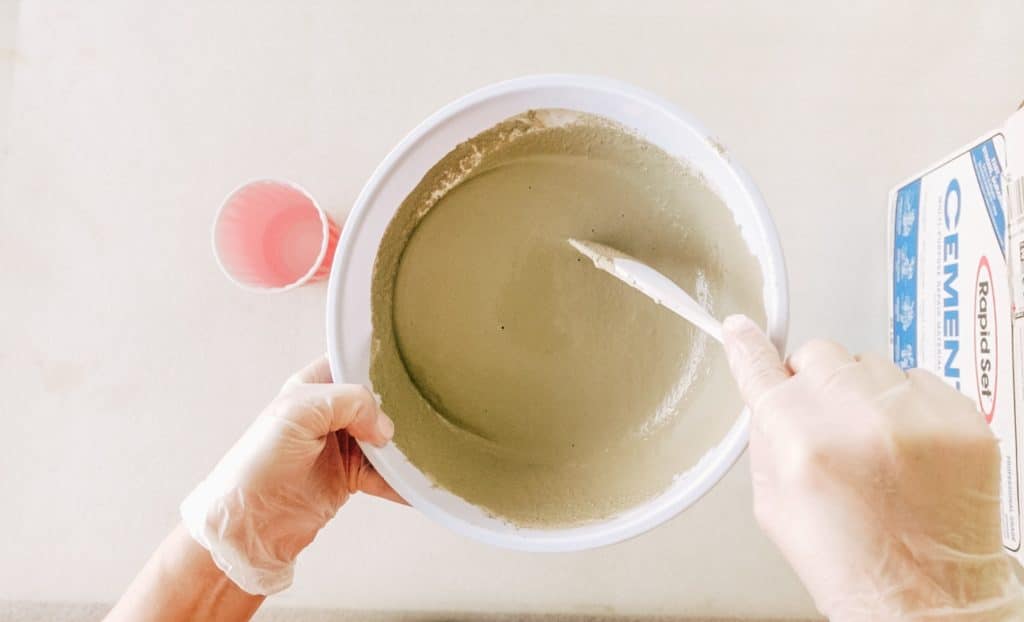
I love working with this cement mix. It’s so easy to use. Just put water in a bucket or bowl, add the Cement All, and mix. Keep in mind for this project the consistency of the cement mix is very important.You need to be able to easily pour it into your mold.
I poured the cement mixture into the mold making sure I don’t go over my marked lines. Make sure the surface you have your project sitting on is level. Lightly jiggle the box to ensure the mixture settles evenly in the box and to get rid of air bubbles.
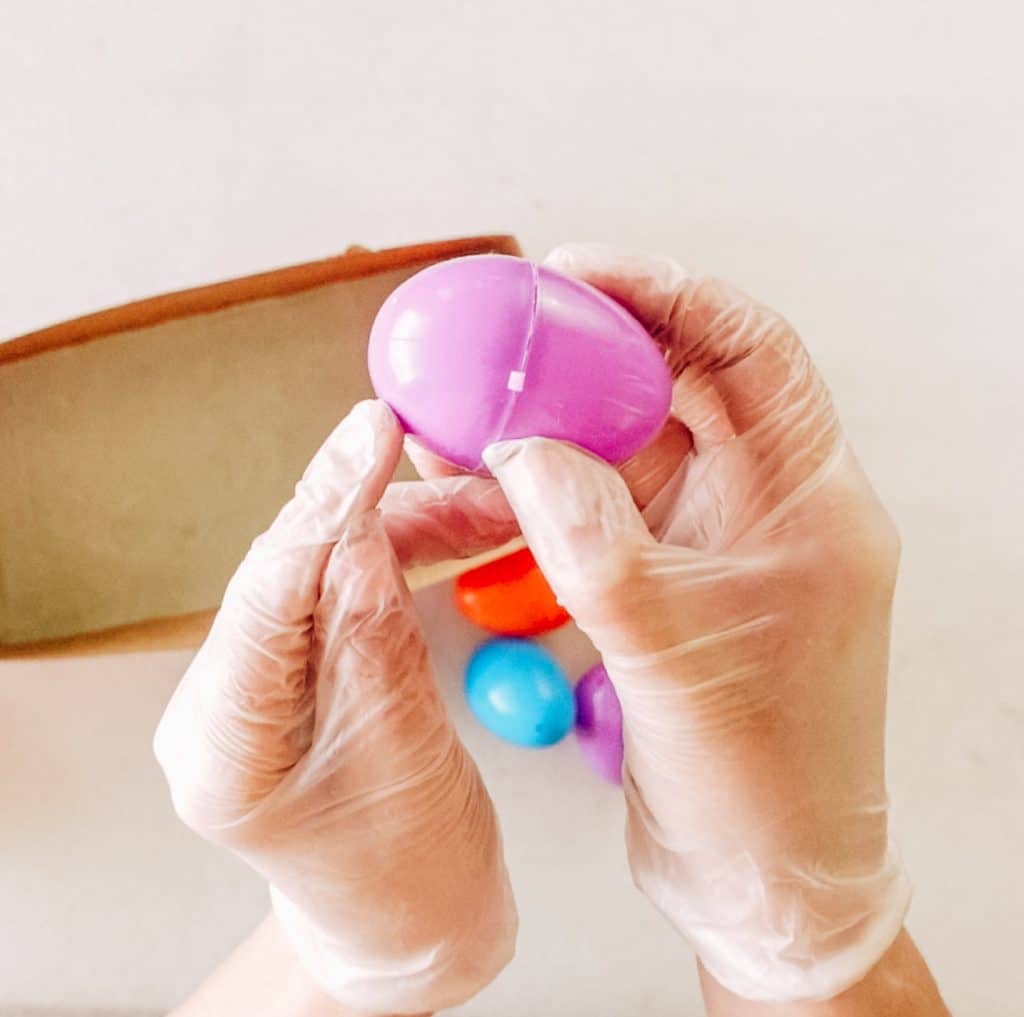
Step 3: Installing the Eggs!
For this next step it’s important to allow the cement mixture in your mold to settle for about 3-4 minutes. This will allow it to thicken just enough so that your eggs don’t sink in too much.
You only need the eggs to settle in about 1/4 of an inch. YEP! That’s it.

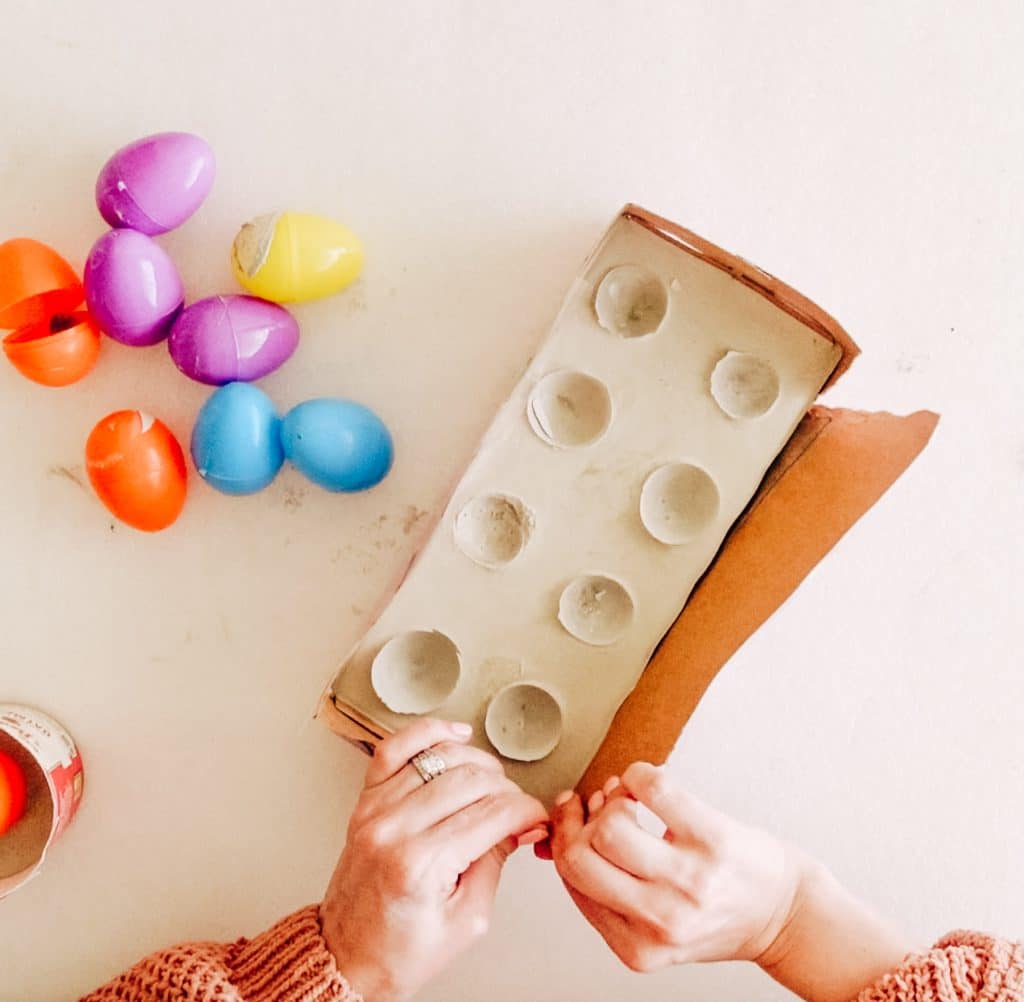
Once I added the eggs I noticed the box started bowing along the sides. I used some tape to keep the shape of the box intact while the cement sets. The eggs also tend to tilt to the side which is ok. They don’t have to be perfectly straight up. As long as the egg doesn’t tilt completely on it’s side you should be fine.
If you notice the eggs are tilting too much you can use the same tape you already applied to help hold them up straight. That’s what I did.
For larger projects, begin water curing using a spray bottle as soon as the surface starts to lose its moist sheen. Keep the exposed surface wet for a minimum of one hour.

Step 4: Sanding rough edges!
I left to town for about 3 hours and when I got home this baby was already dry! I couldn’t believe it! Because cardboard absorbs moister it will stick in some areas. The areas that were completely dry came off much easier. I wasn’t too worried about the areas where the cardboard stuck on because I knew I was going to sand it.
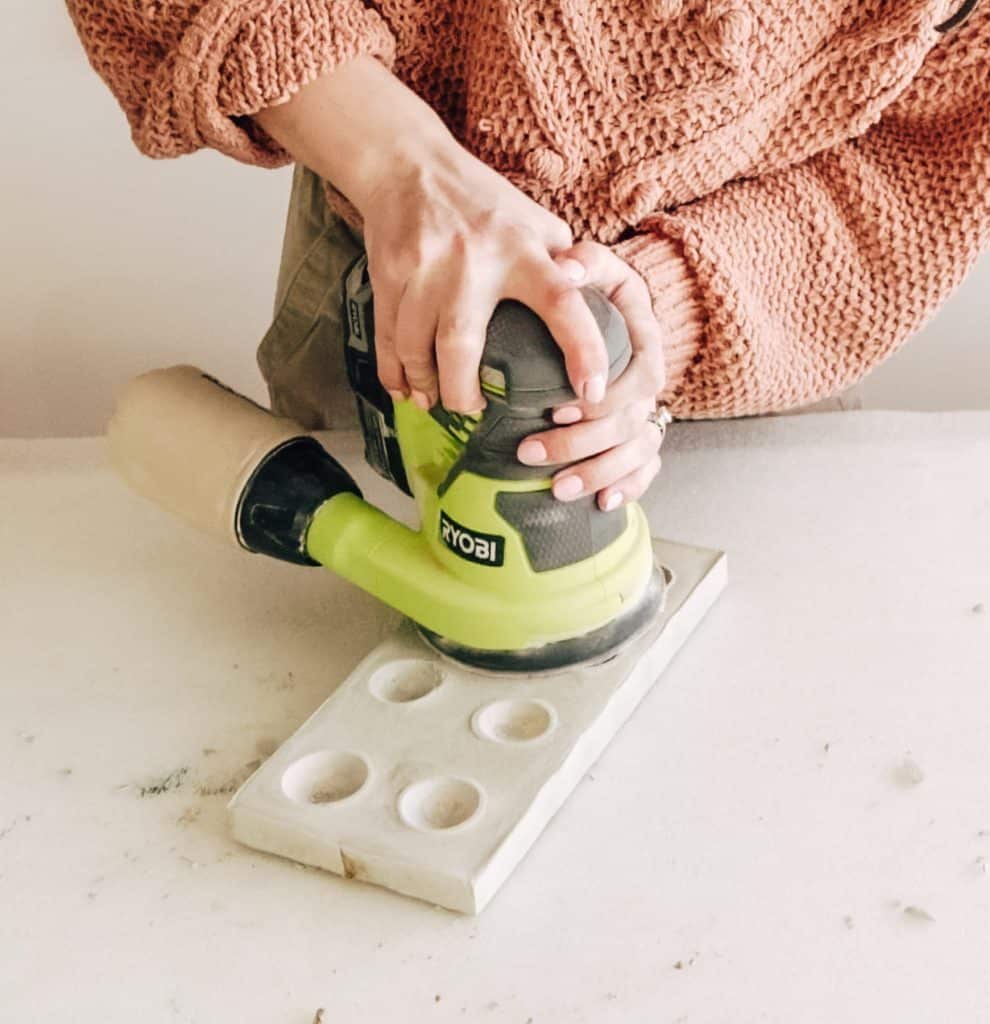
I gave all the sides a good rough sanding with my ryobi sander and some 60 grit sandpaper. If you’re thinking to do this by hand I have to say it would probably take a while unless you use rougher sandpaper maybe.
Let’s JAZZ this egg holder UP!
Here’s an affordable and quick + easy way to add terrazzo to almost anything!!
I really wanted to give it some color and after considering every way possible of implementing terrazzo I decided to paint it on since it would be the easiest. Plus this way I could control the colors I put on a lot more.
A square tip brush is a must for this. I works best if the brush are about medium density ( not too soft and not too rough ) .
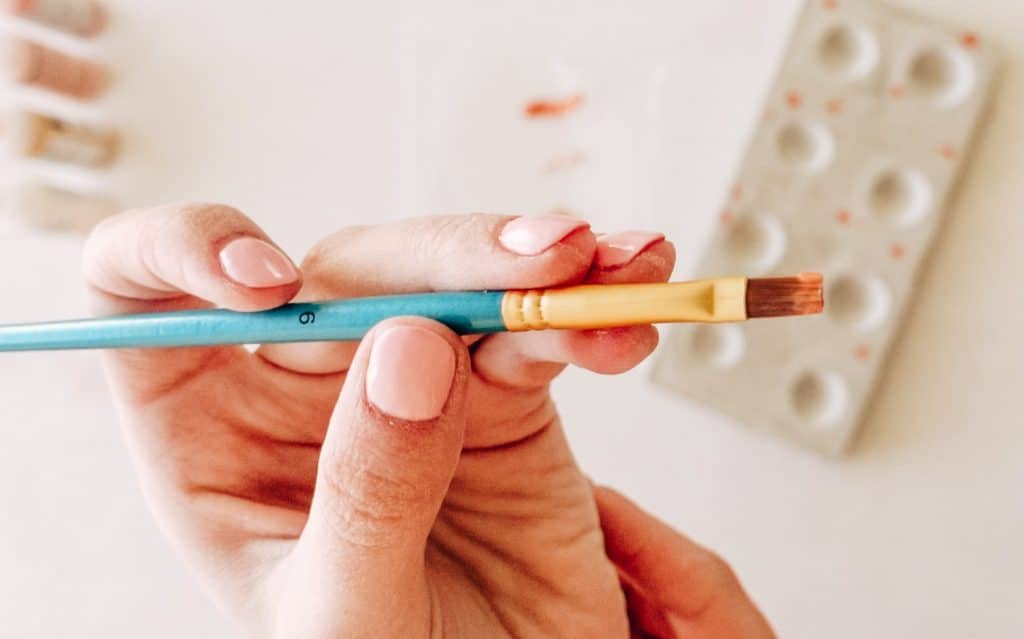
I chose 4 colors and started by adding specks in different colors. It’s best to think of it as applying each color in clusters of 3 that are far from even and don’t look alike.
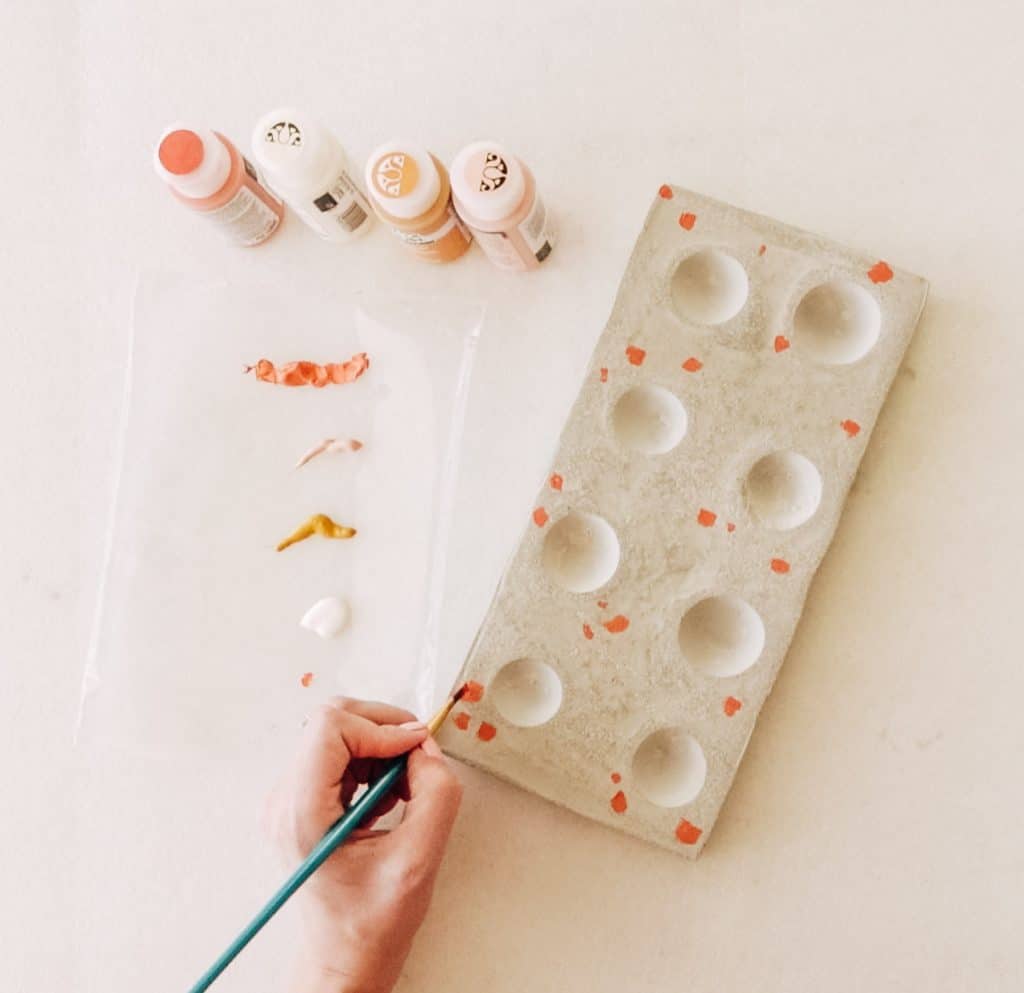
Once I would finish with a color I would move onto the next. When I felt like I had terrazzo enough evenly dispersed I added some really tiny specks to fill the space and a few huge specks to break the pattern up. That’s it! Super easy right?
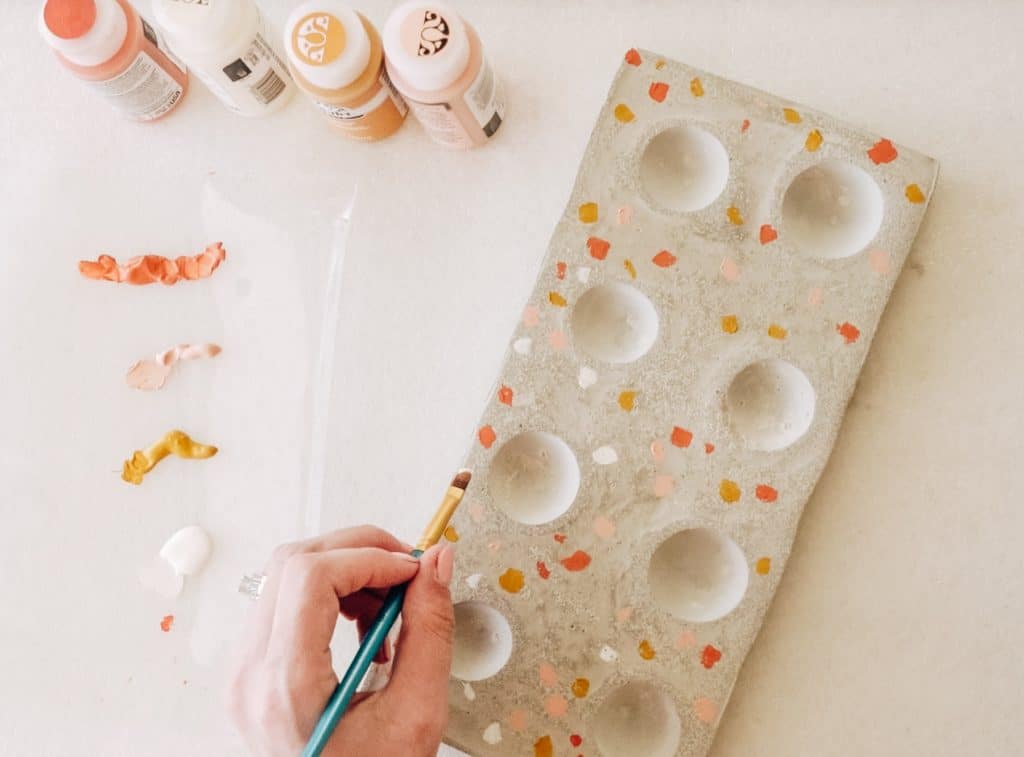
Don’t forget the sides.
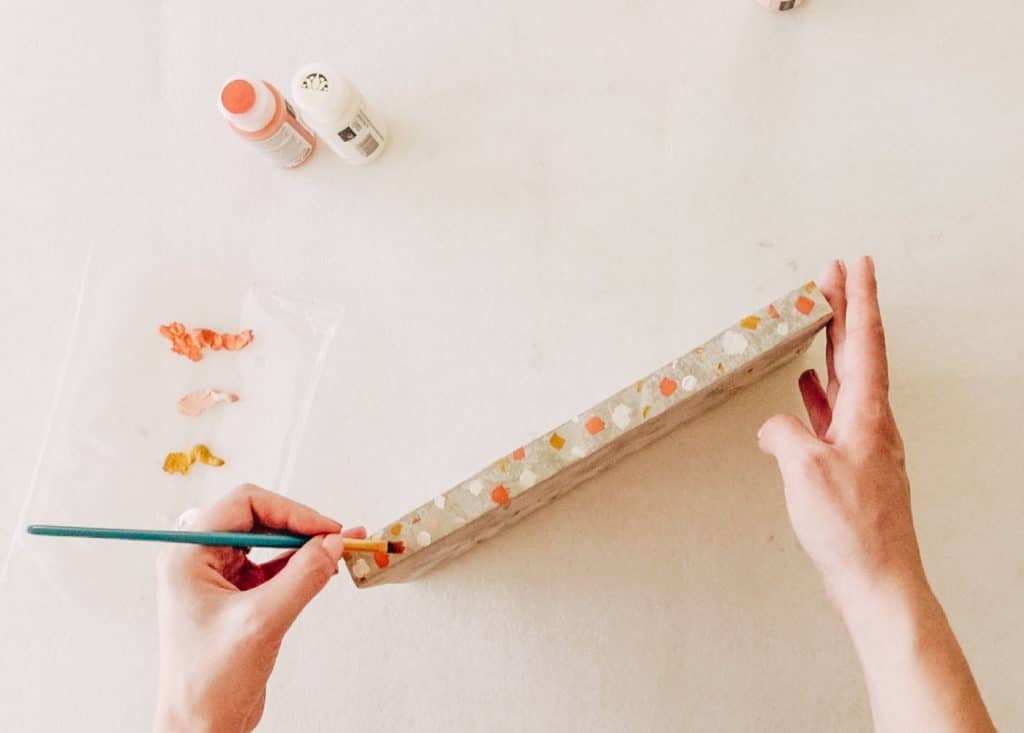
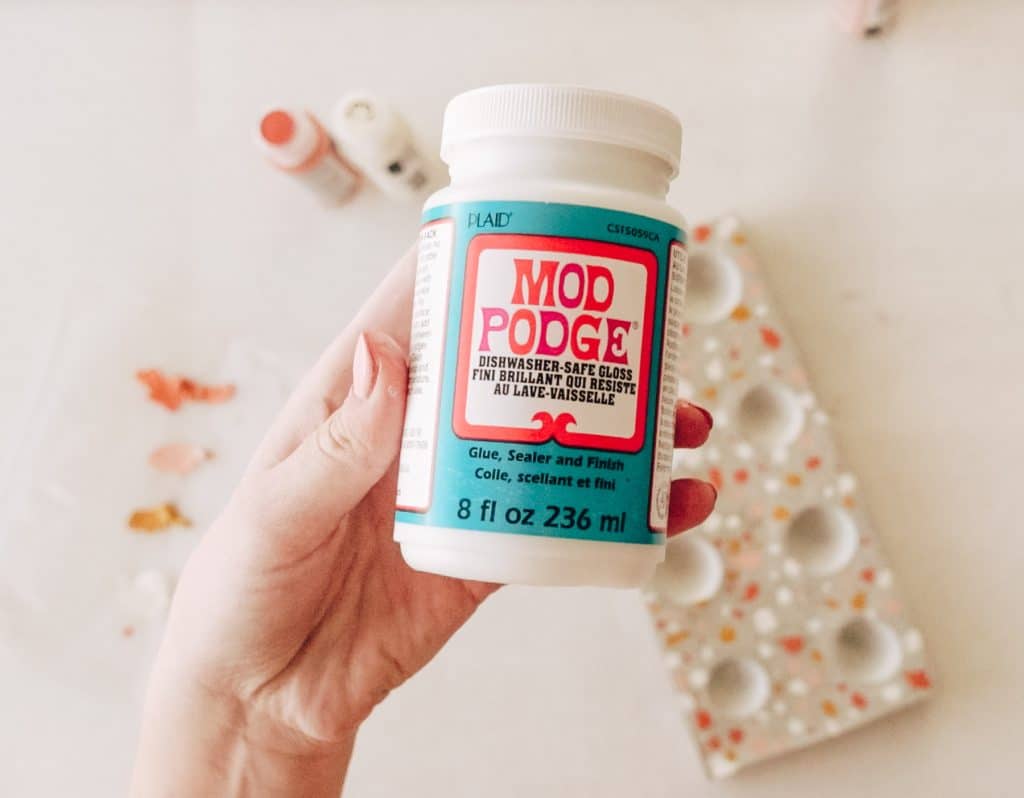
Now all that’s left is sealing it with food safe mod podge! I love this stuff!
Here’s a video of this DIY
DIY Concrete Terrazzo Egg Holder!
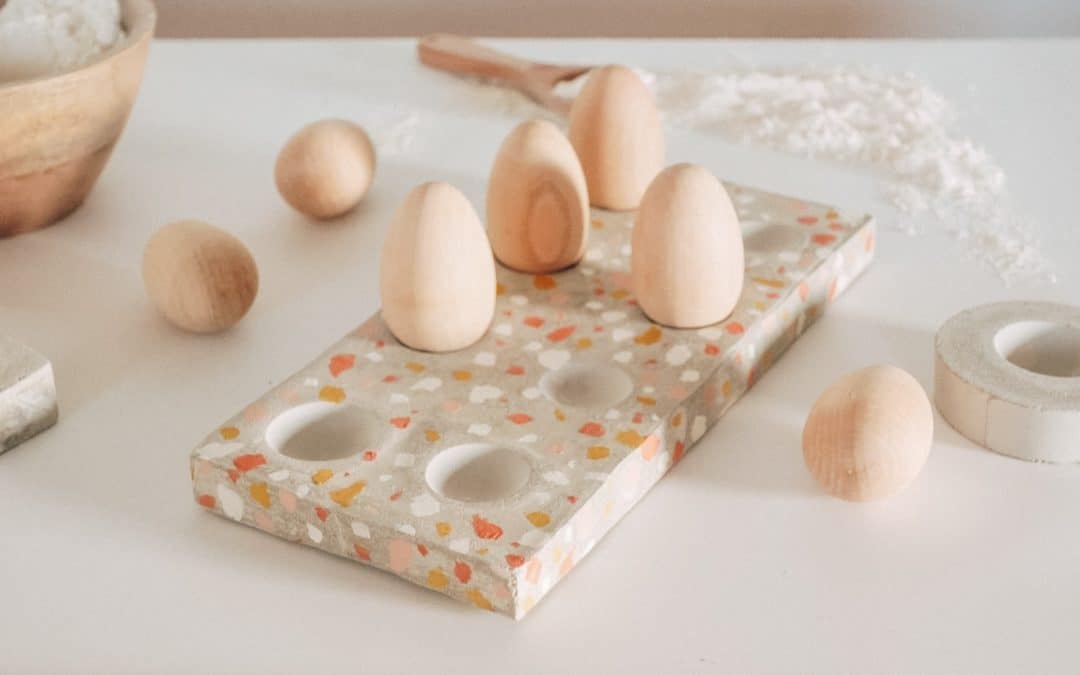
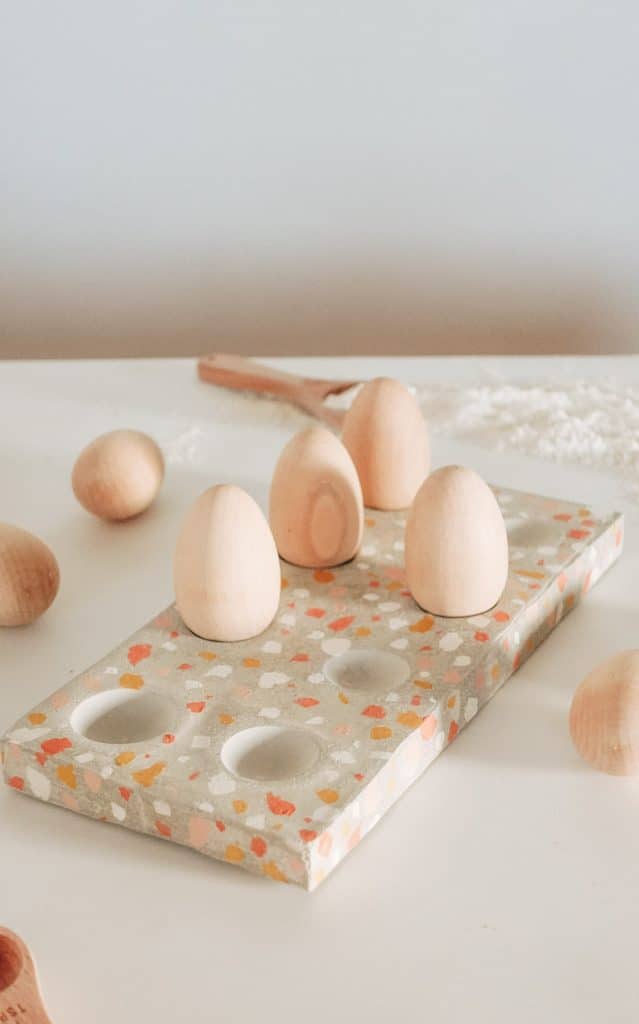
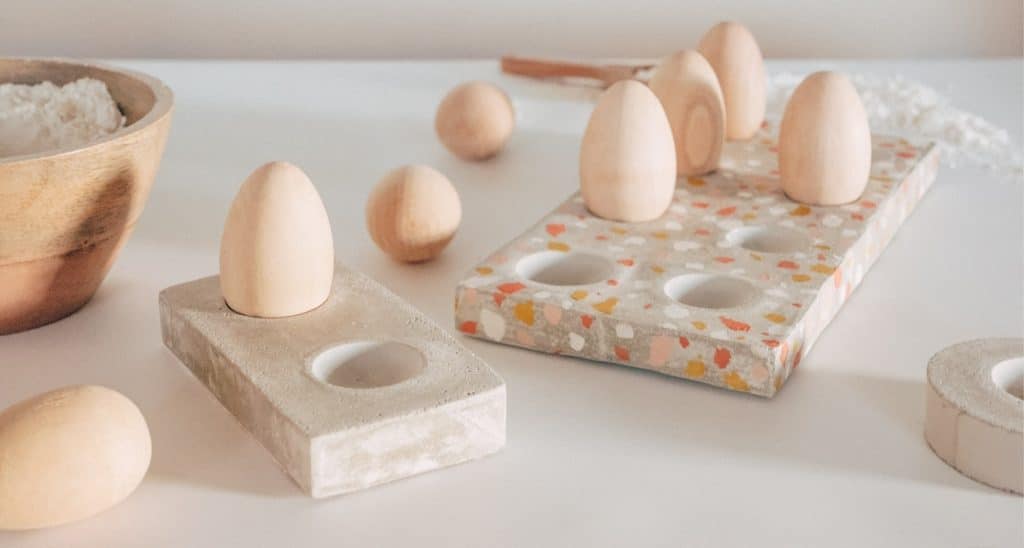
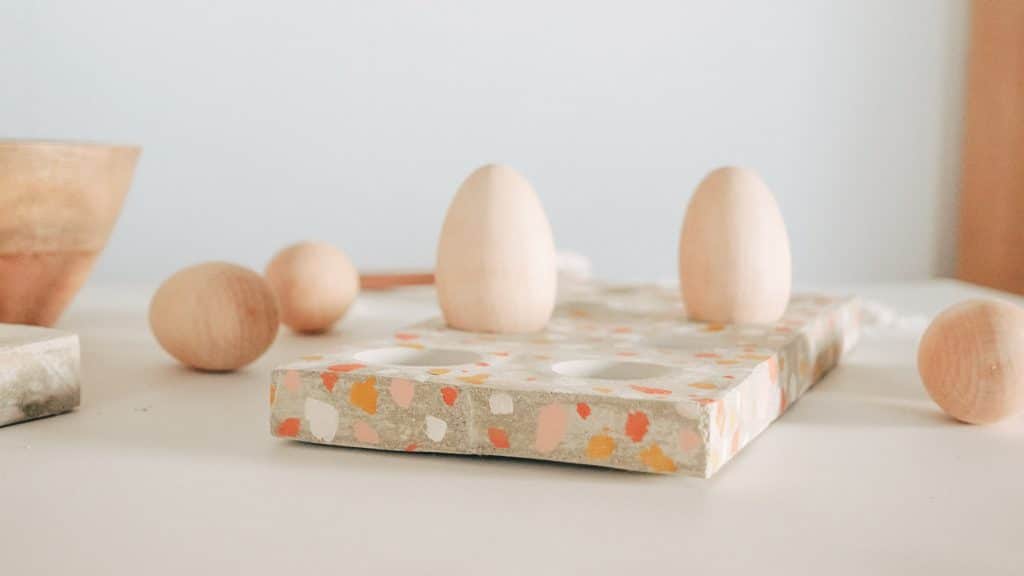
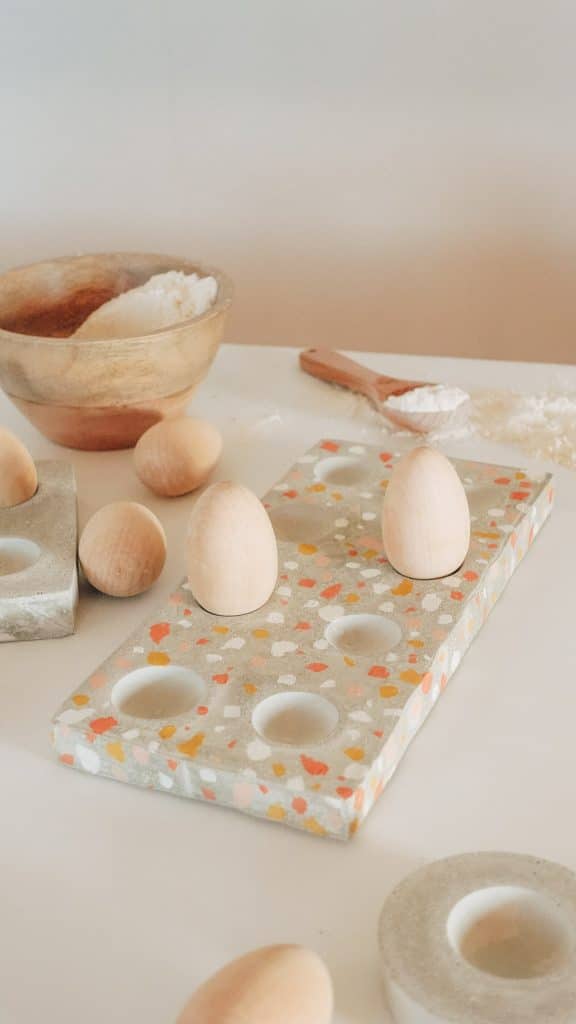
The final look!
Just look at those details! I love the pop of color the terrazzo gives it! Not gonna lie I was so nervous painting it!
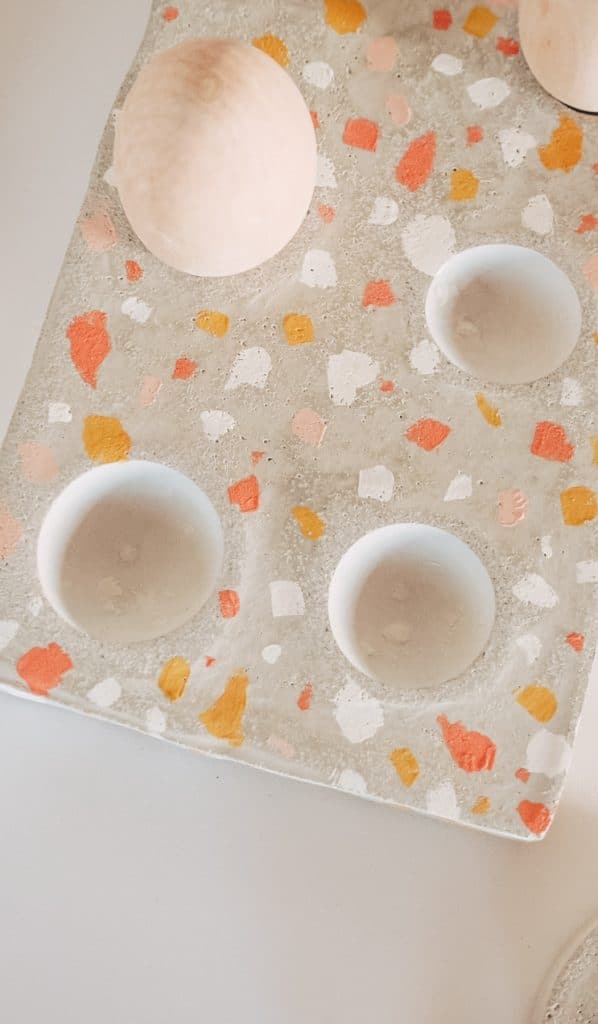
Honestly it’s hard to believe this is just cement! This egg holder has so much class and looks like something I would see in anthropologie!
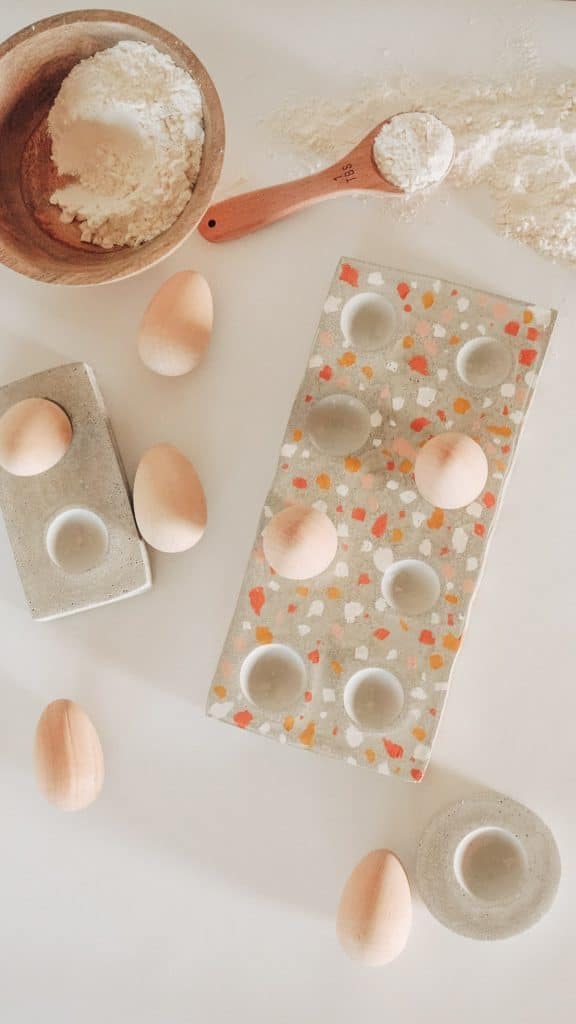
I actually ended up making a few smaller ones as well. The little rectangle egg holder was made from a recycled tea box.
Those edges look so neat!
That’s all for today’s project! I love how versatile Cement All is! I can’t wait to use it on all kinds of different DIY projects.
SHOP THE SUPPLIES BELOW –
I’ll see you next time!
XX, Lily