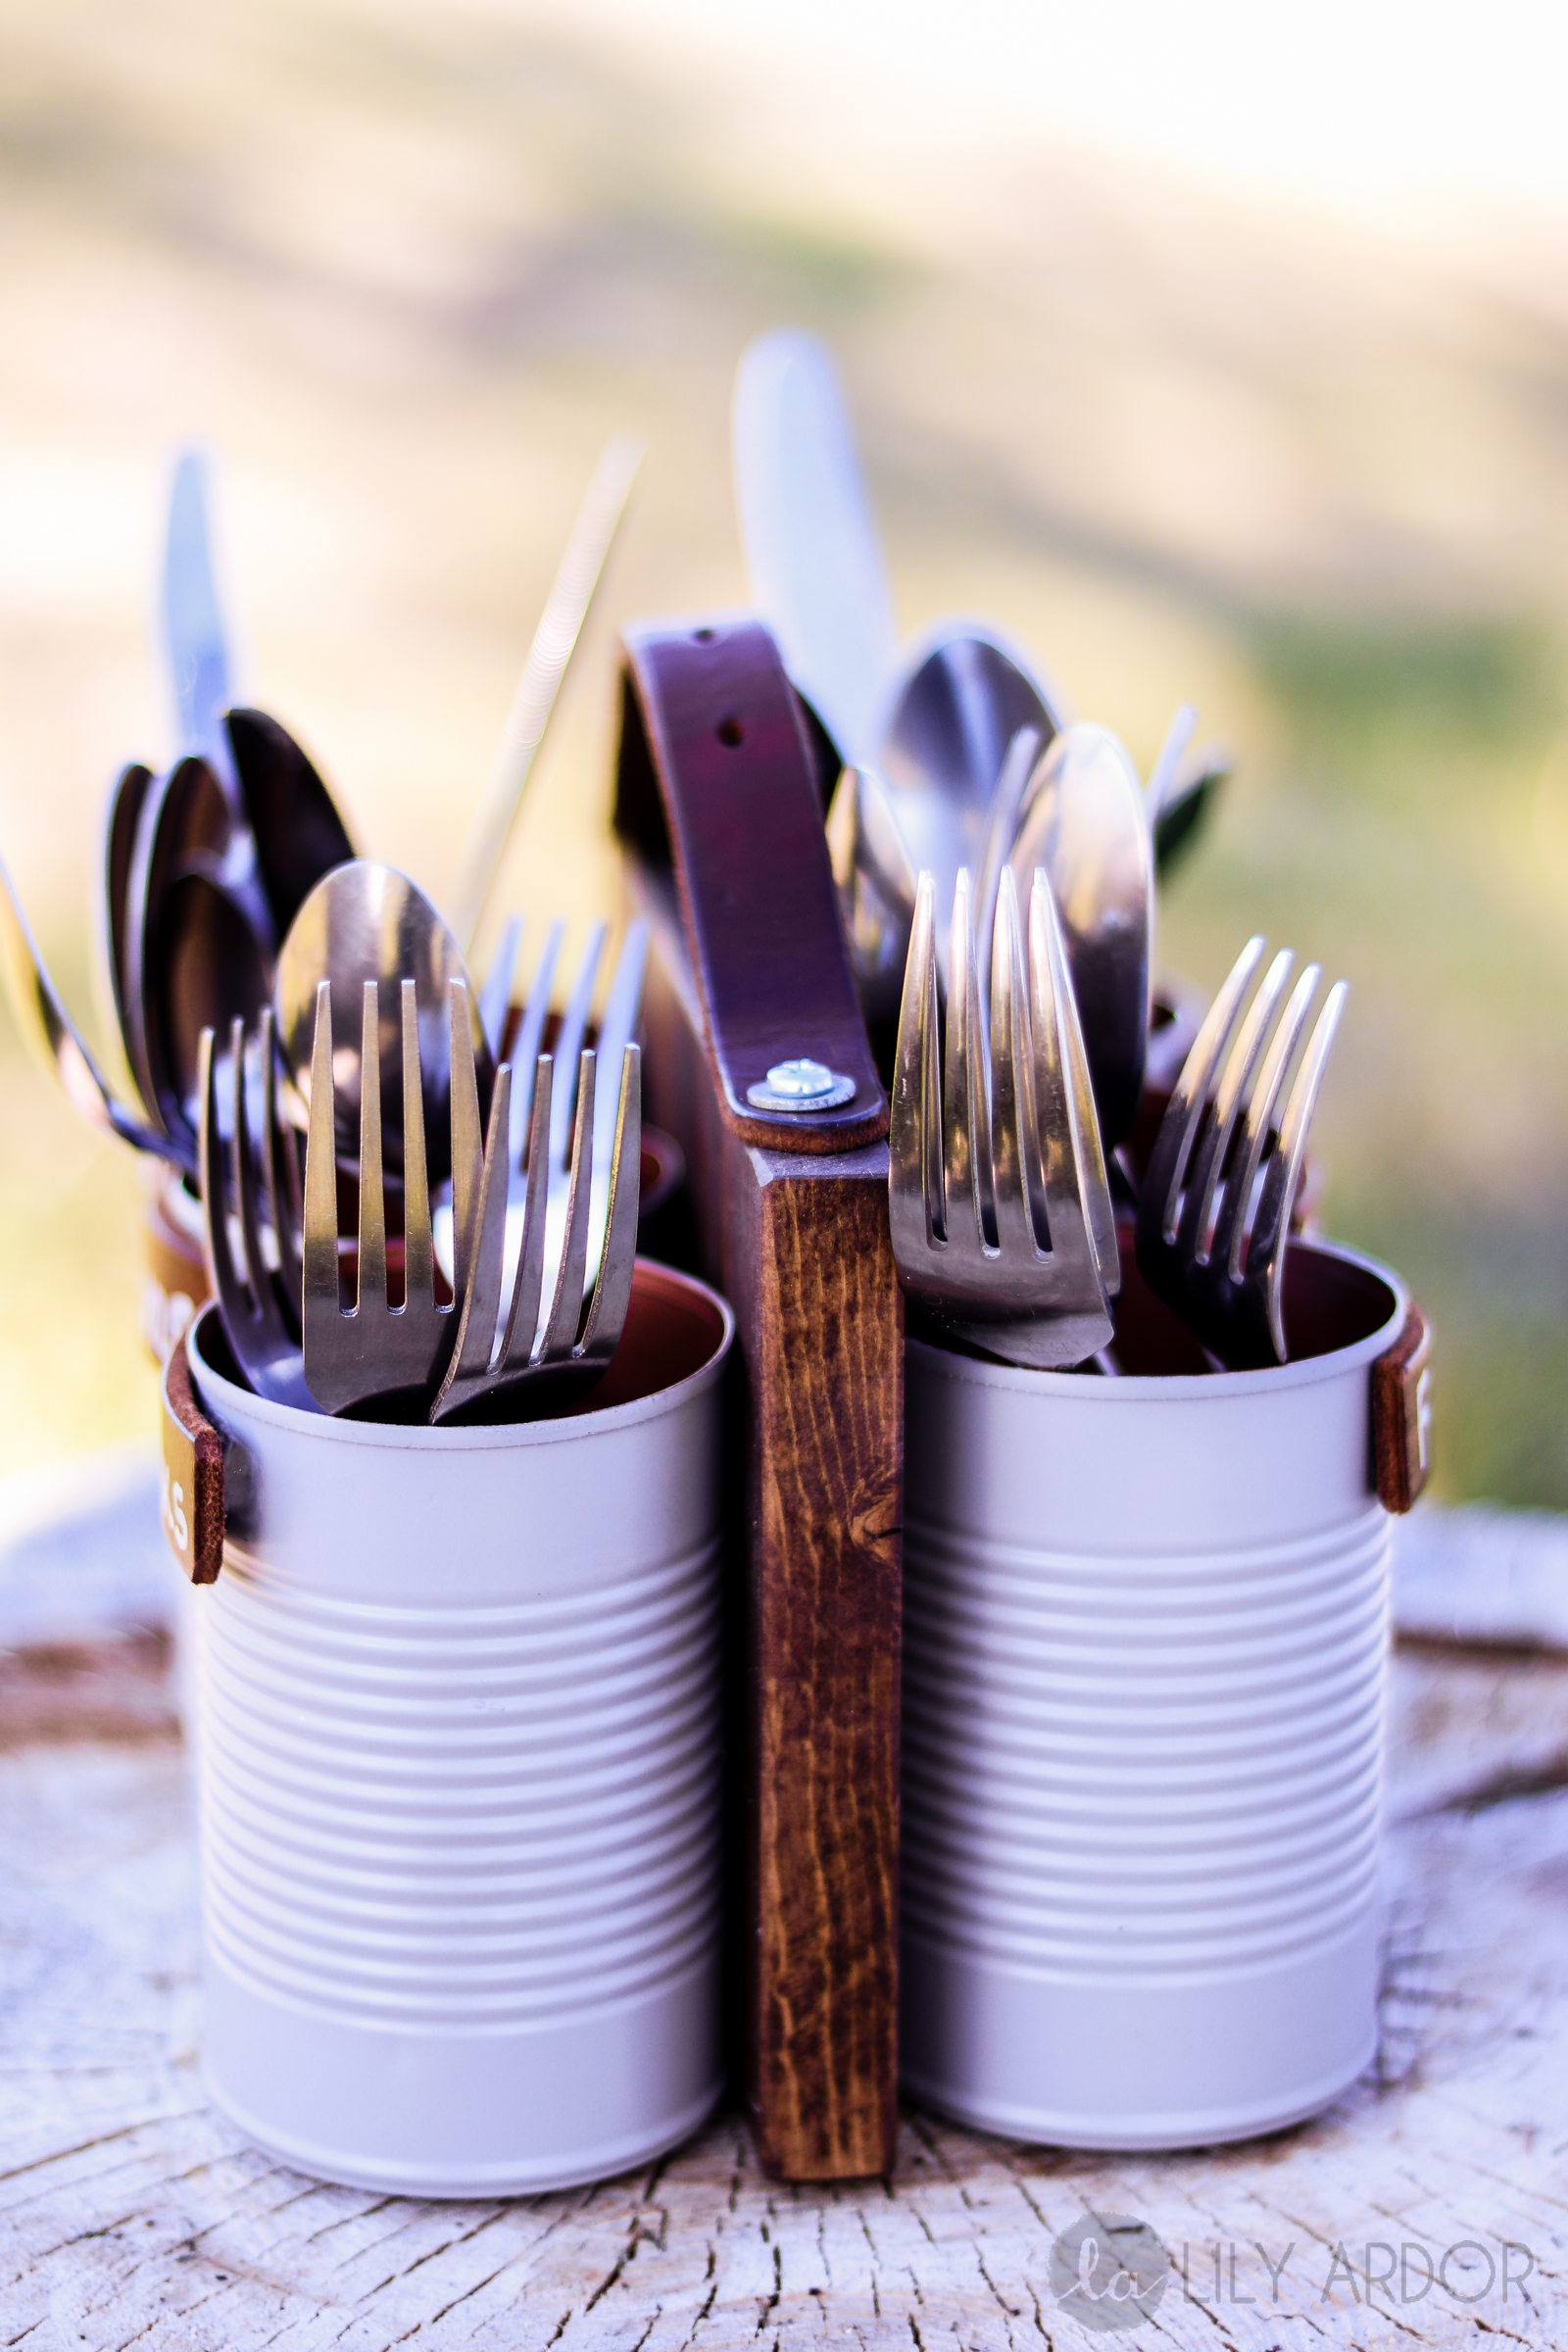
Useful on so many levels
I absolutely love silverware caddies. If you have a kitchen like mine with open shelving.., a silverware caddy is a must. I don’t like a cluttered kitchen but, I can’t say no to cute and useful decor. Three things I like about this silverware caddy. #1 It’s recycled materials (yippee) #2 It’s a fun family project (get your little ones involved my little guy loves spray painting 😀 ) #3 Last but not least it’s the perfect gift IDEA. Especially for MOMS.. What mom wouldn’t like an awesome silverware organizer..?? OH and the fact that you handmade it means that much more. So get your DIY rhythm going and lets do this… 😀
What you’ll need
- Wood ( measuring 9.5″ x 6″ , 3/4 thickness)
- stain
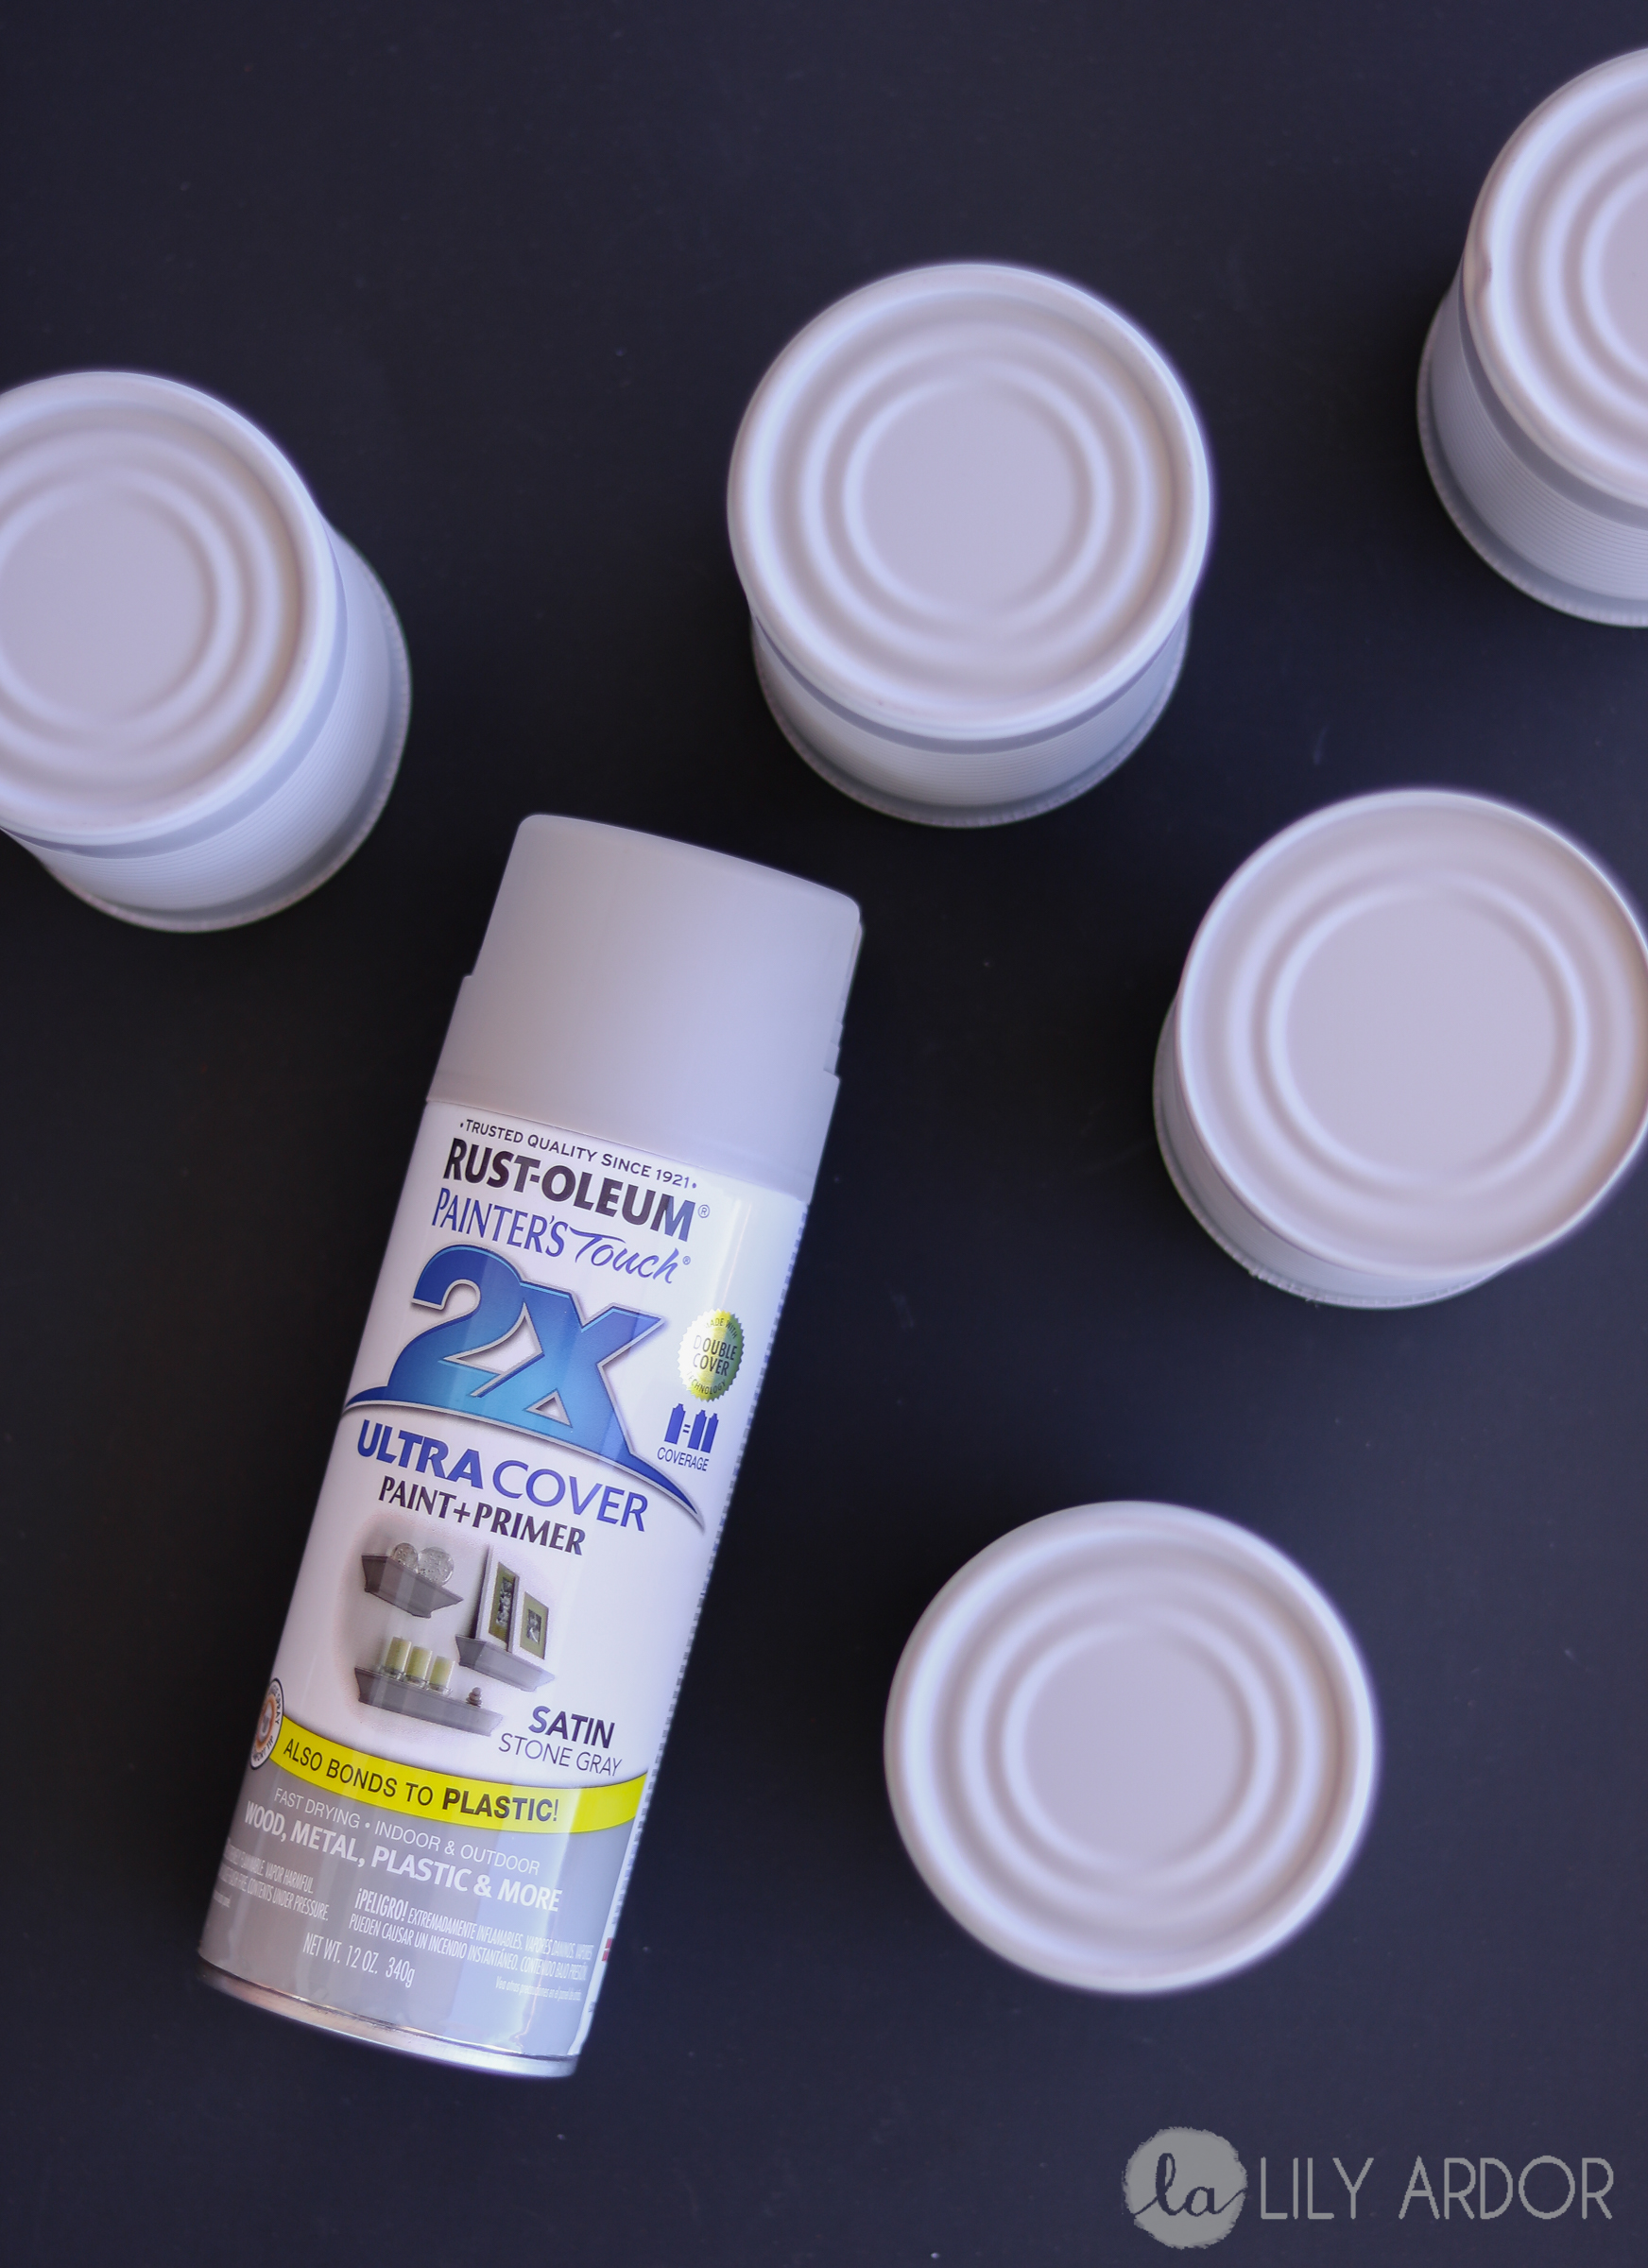
- spray paint (rustoleum brand)
- leather belt
- washers and two 3/4 inch screws
- six 1/2 inch screws
- clear coat
- scissors
- drill
- screw driver
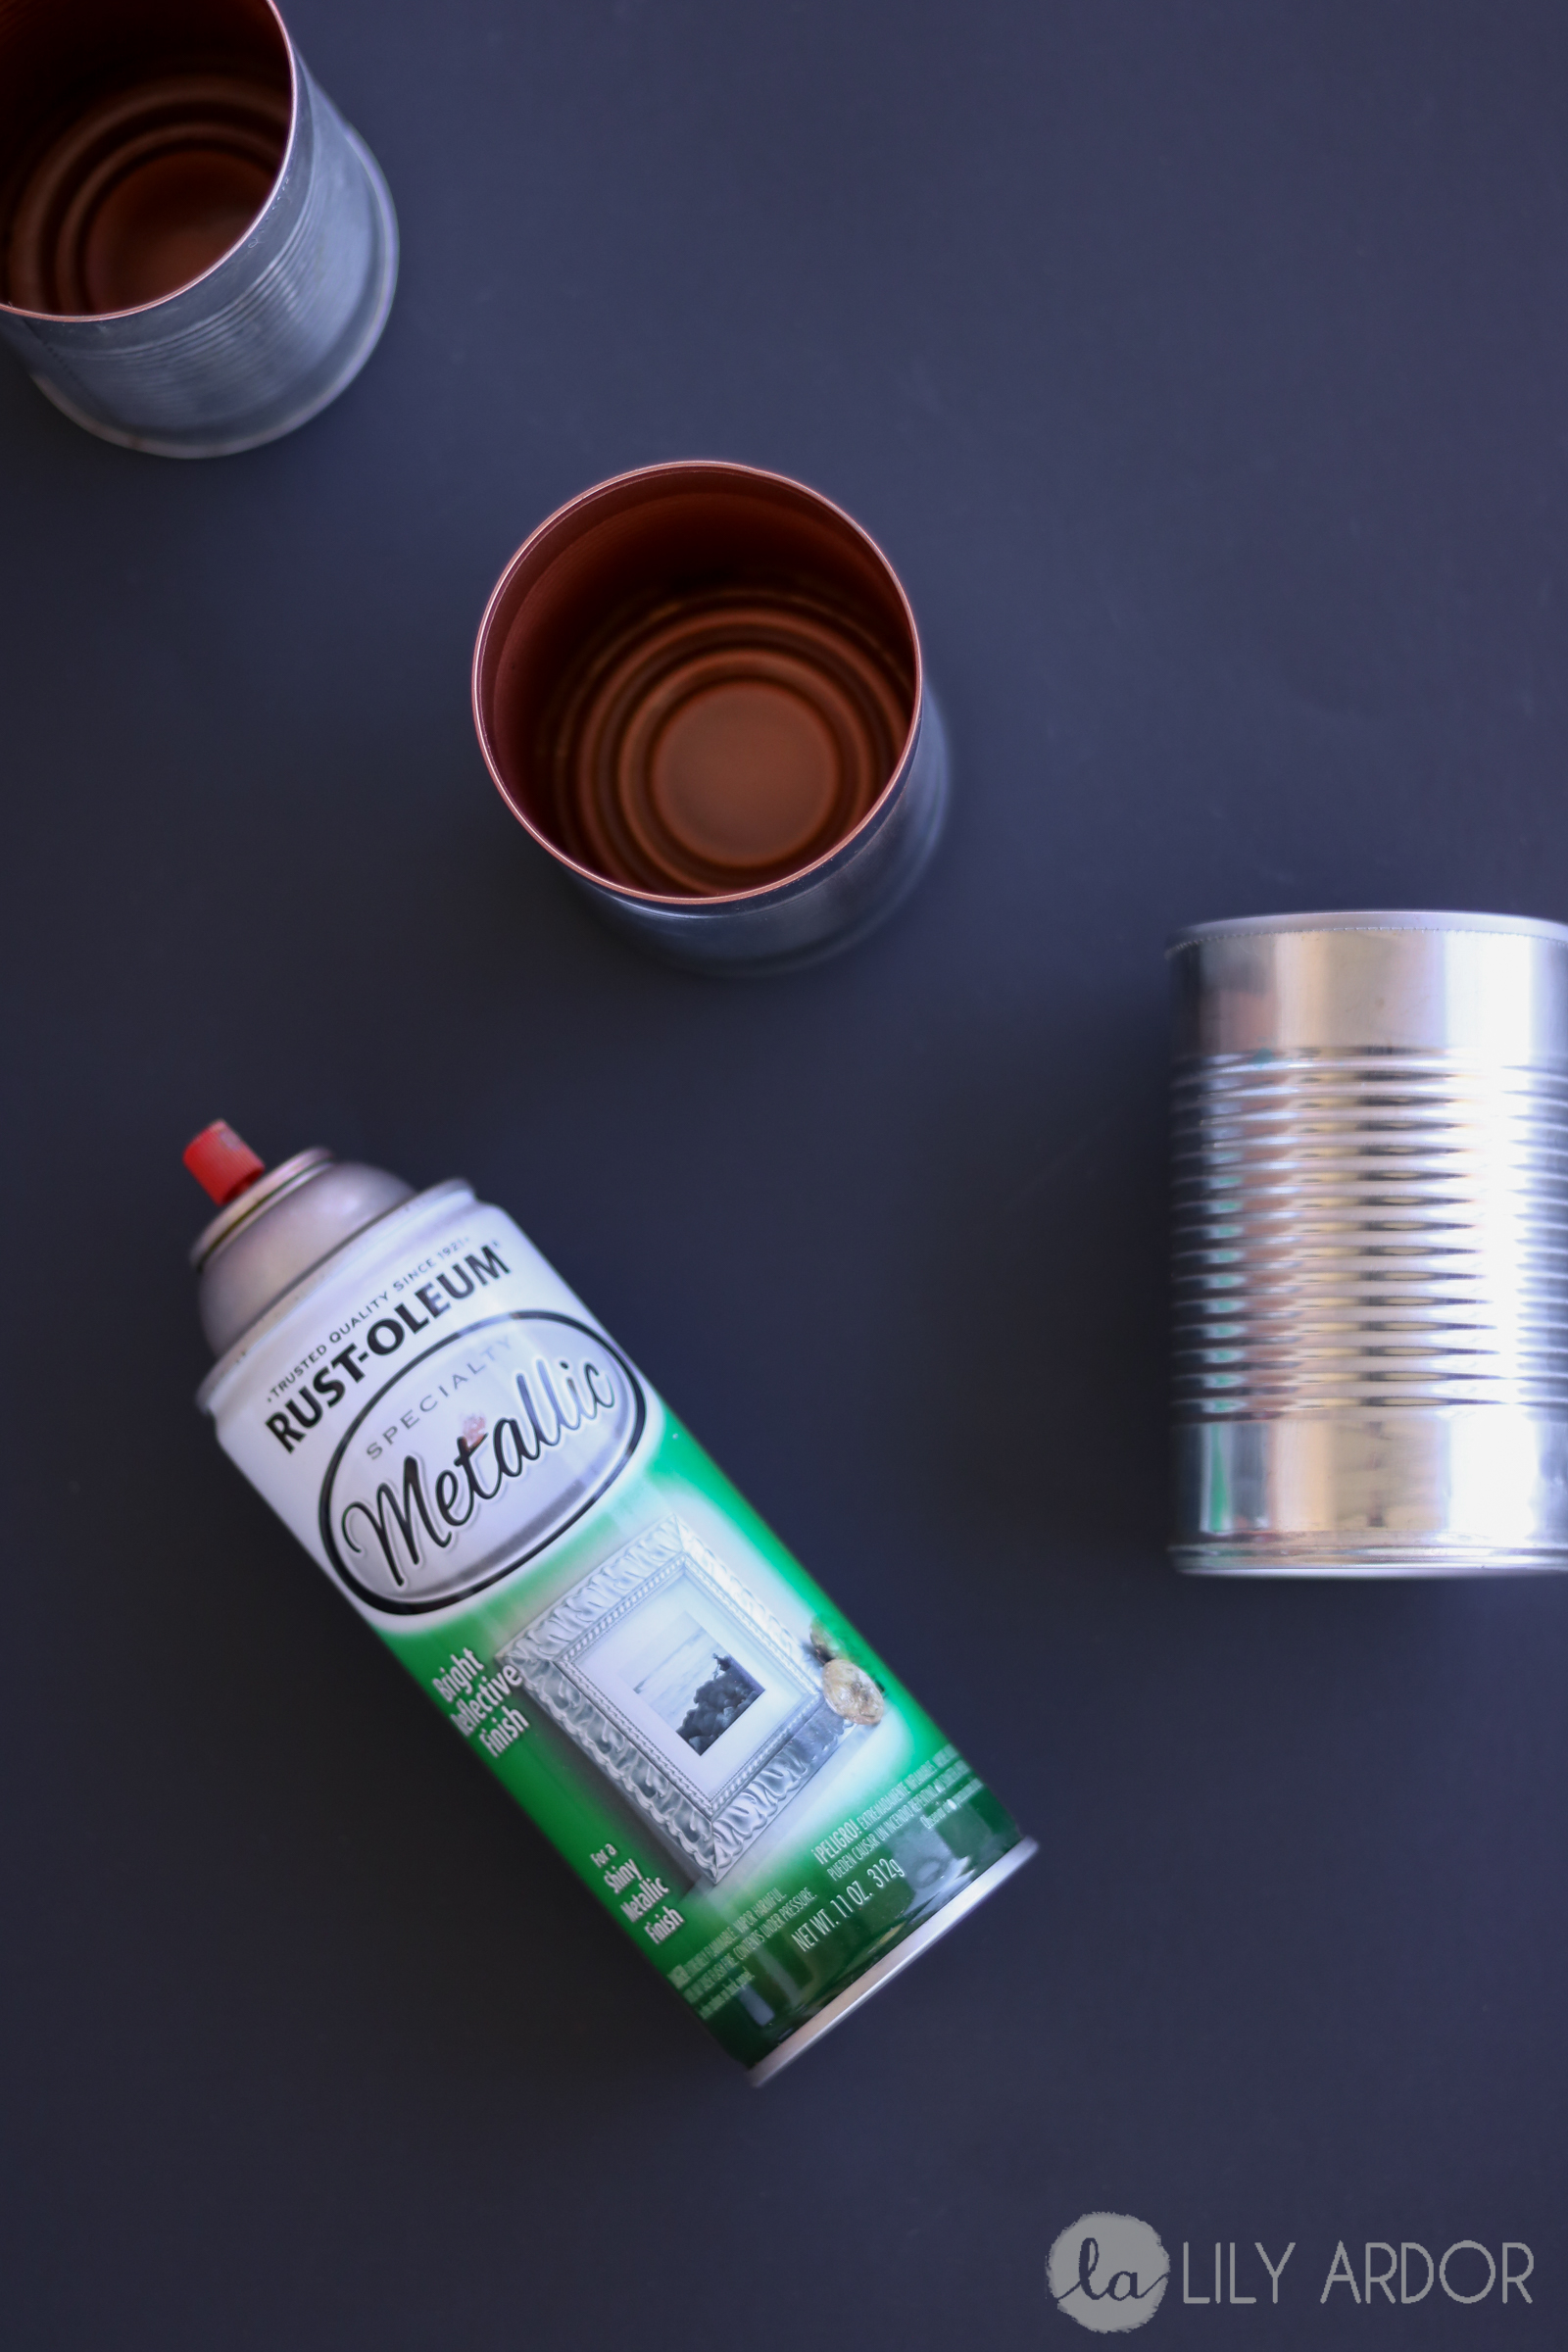
- 6 aluminum cans
- E6000 glue
Make sure all your cans are nice and clean. If you have glue residue left from the label that’s ok it won’t be showing. Your can must be dry for this step. Start by spray painting the insides of the cans. Let dry between coats and apply 2-3 coats in total. I picked to go with my favorite metallic copper spray paint. Preferably restoleum spray paint is best to keep rusting at bay.
I chose to stain my wood, but this is totally optional you can also spray paint the wood. The stain color I chose is ” special walnut” . Simply dip a napkin in while wearing gloves and rub into the wood. Let stain soak in for about 4 hours.
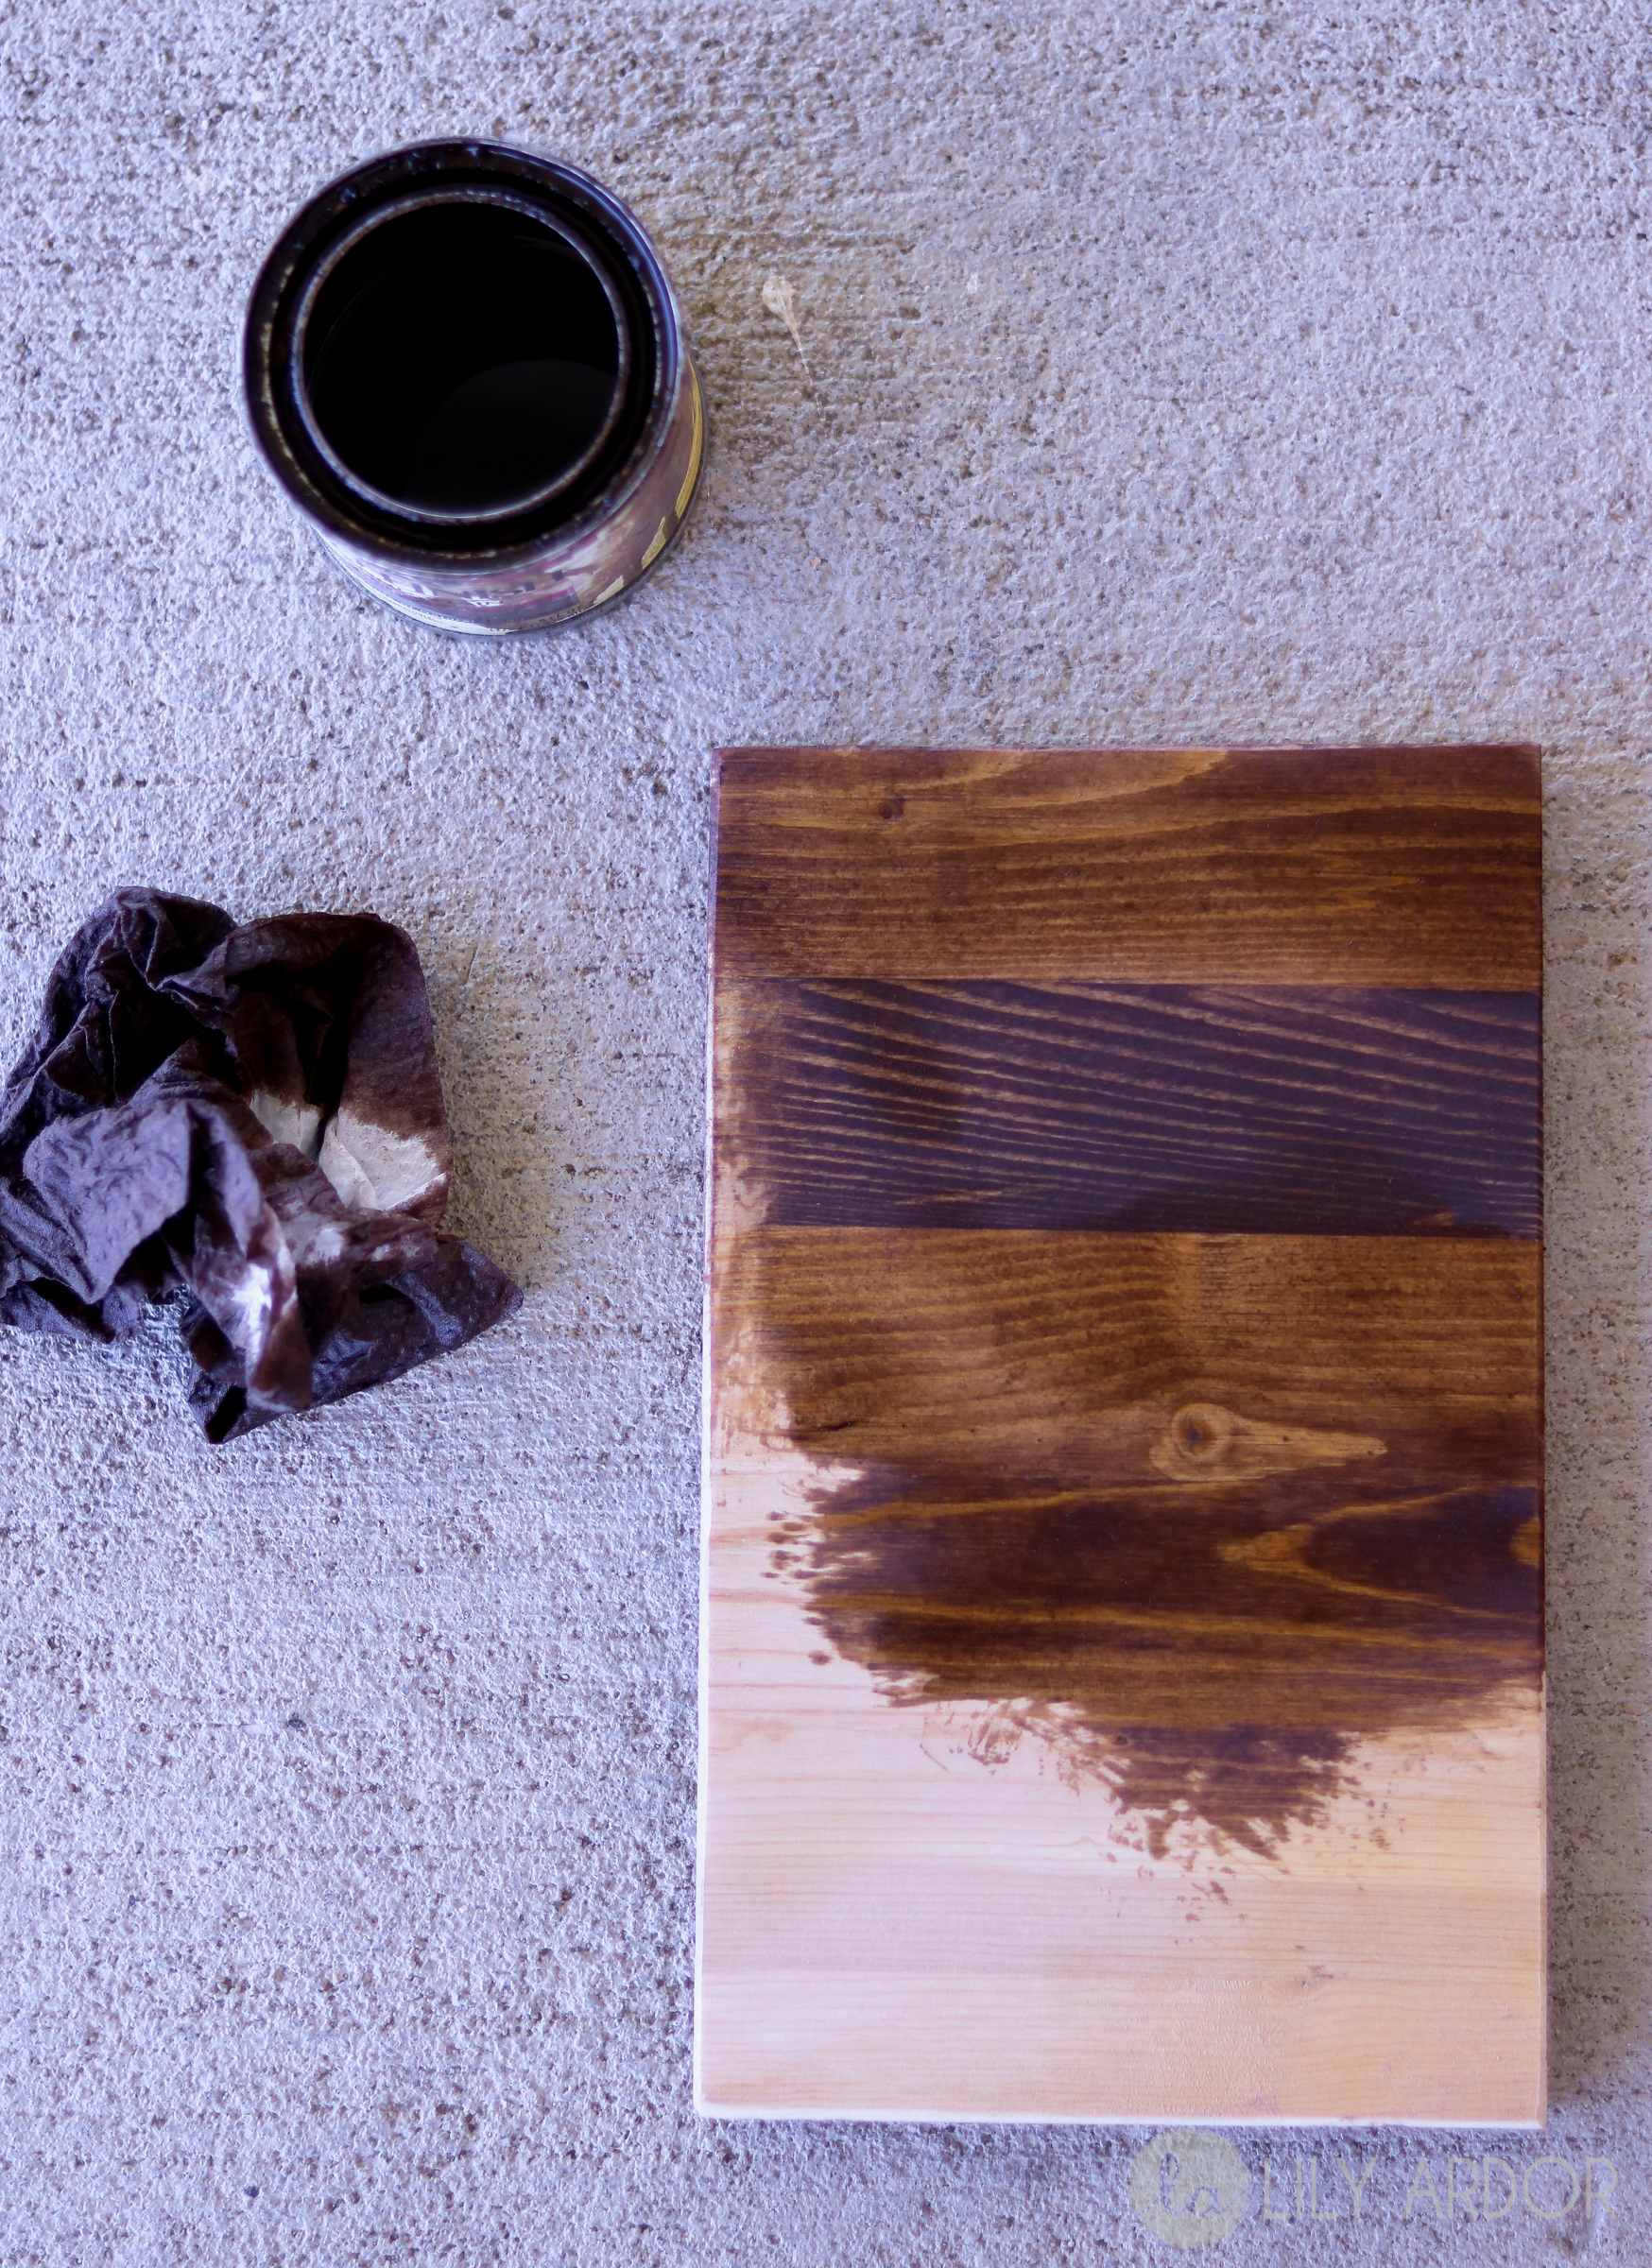
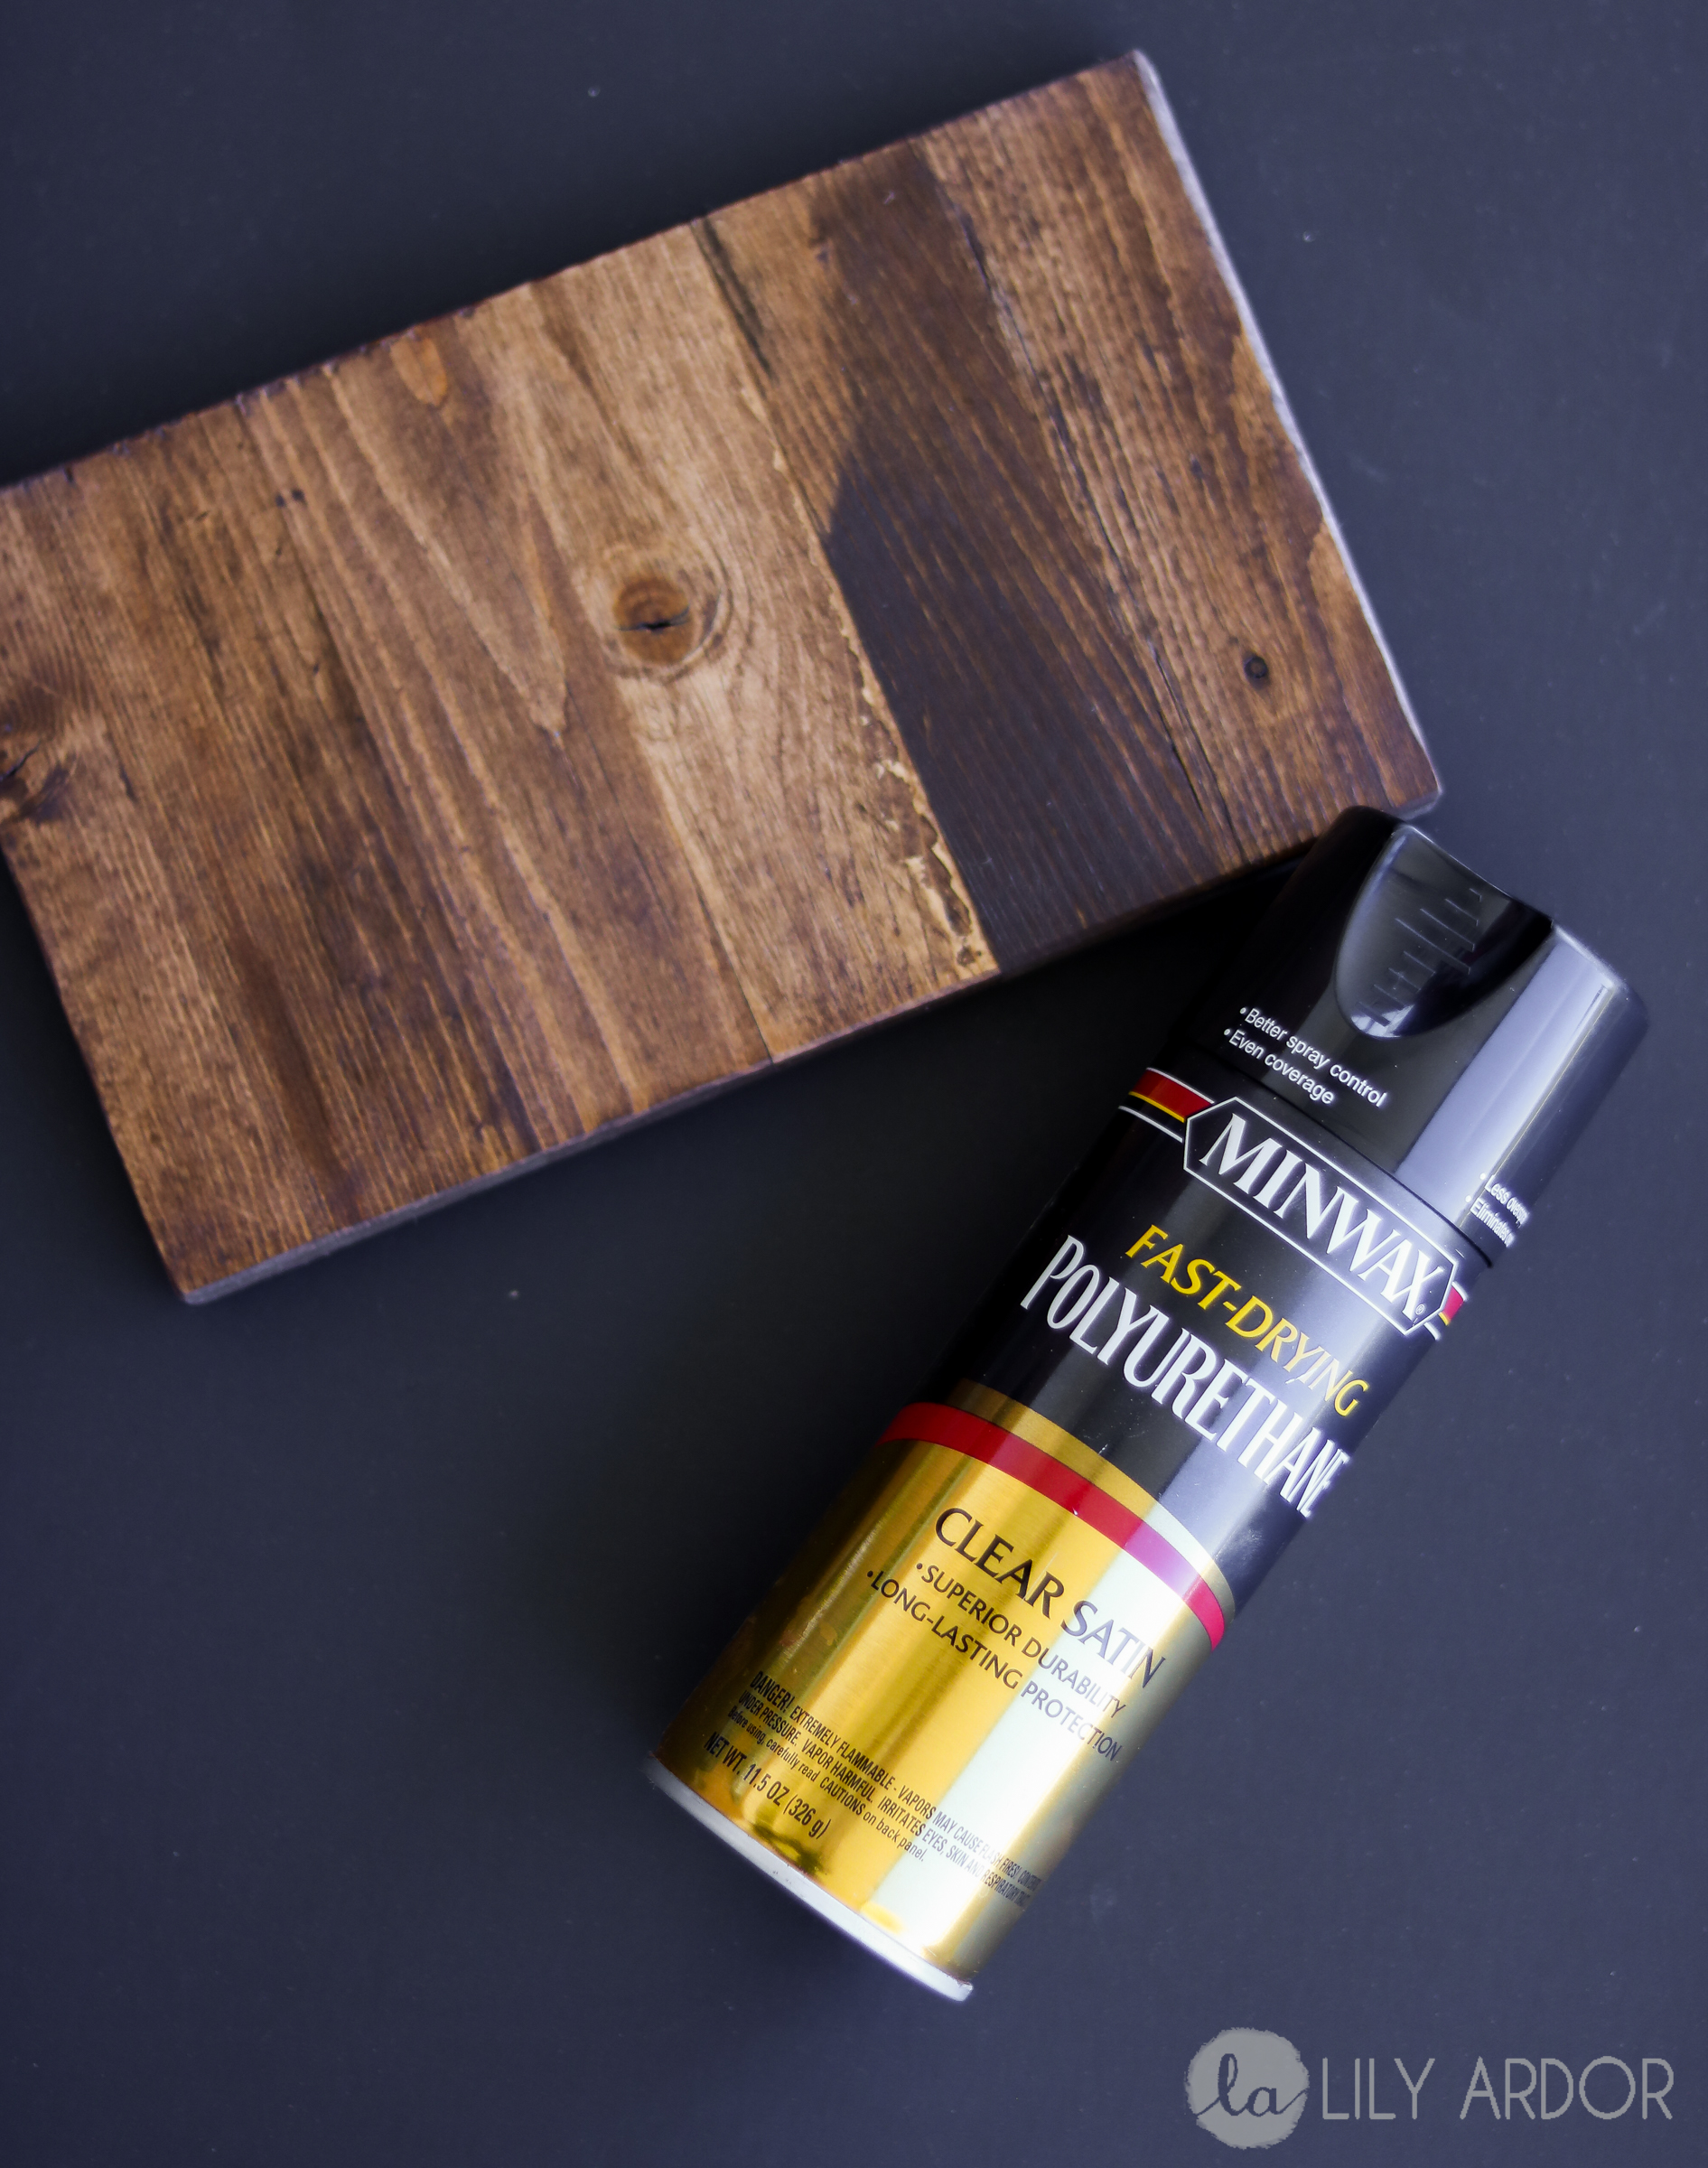
If your in a rush you can wipe off the stain with clean napkins as much as you can and follow along with the clear coat. I went with the min-wax polyurethane clear coat.
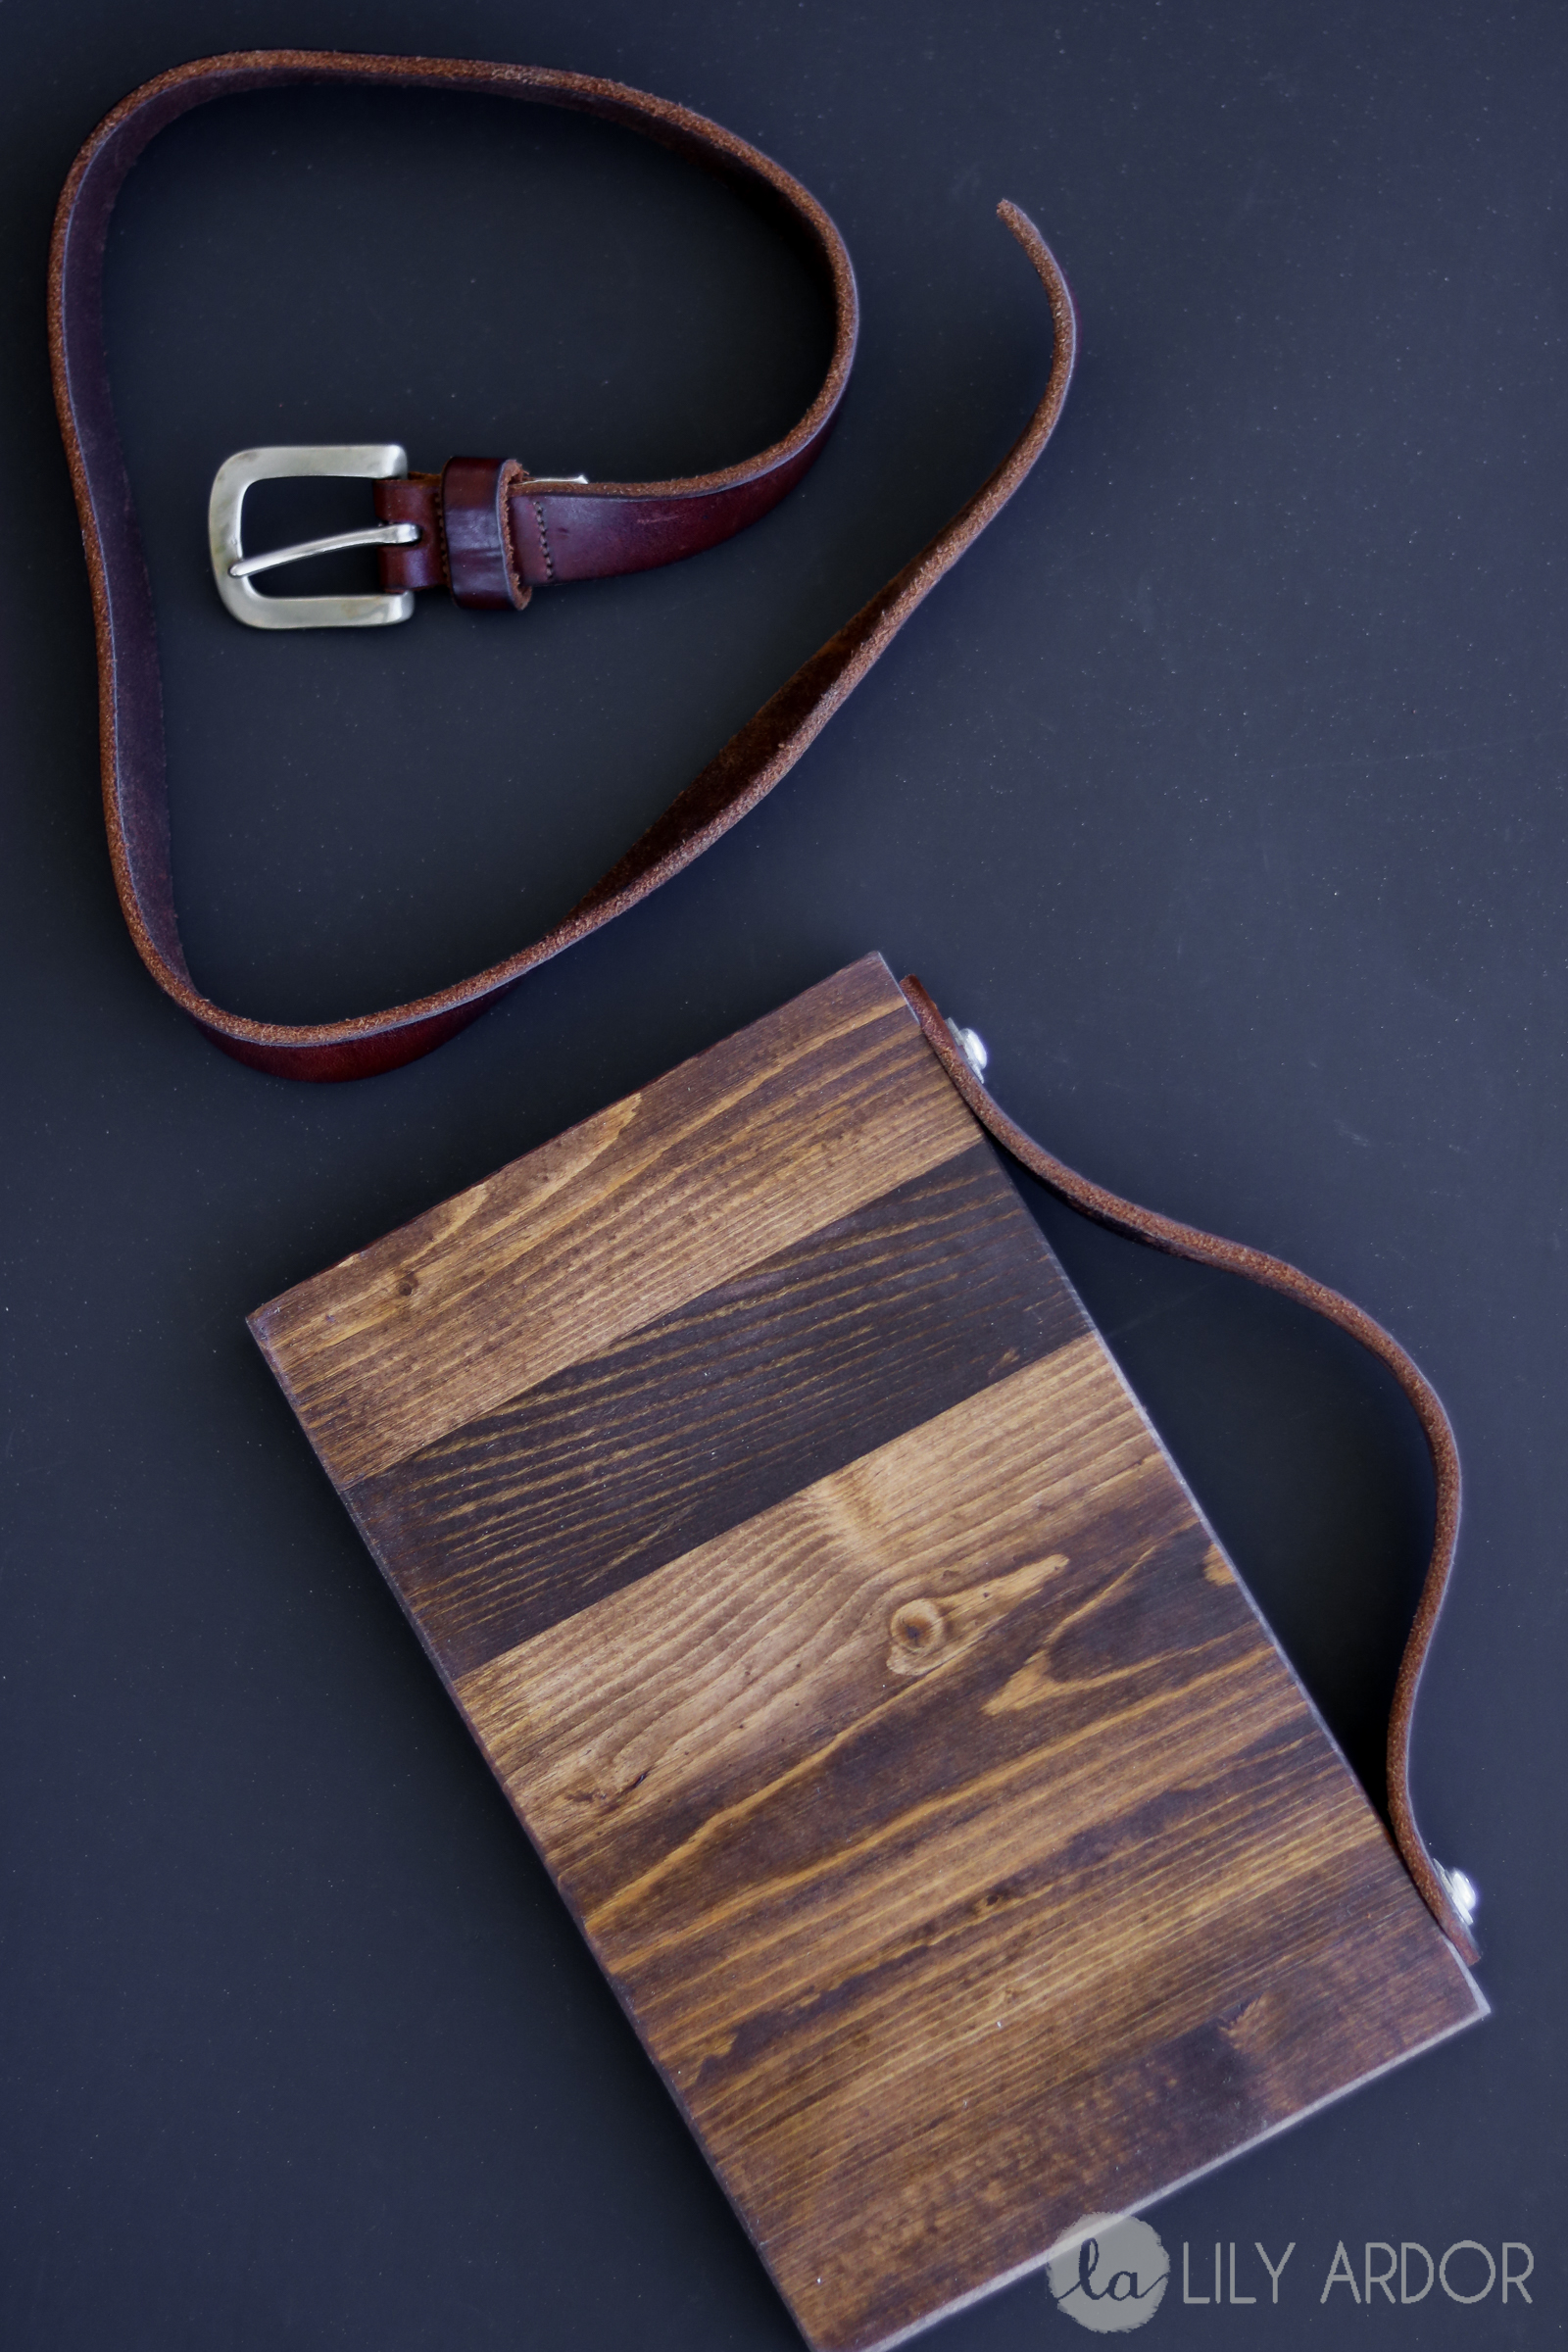
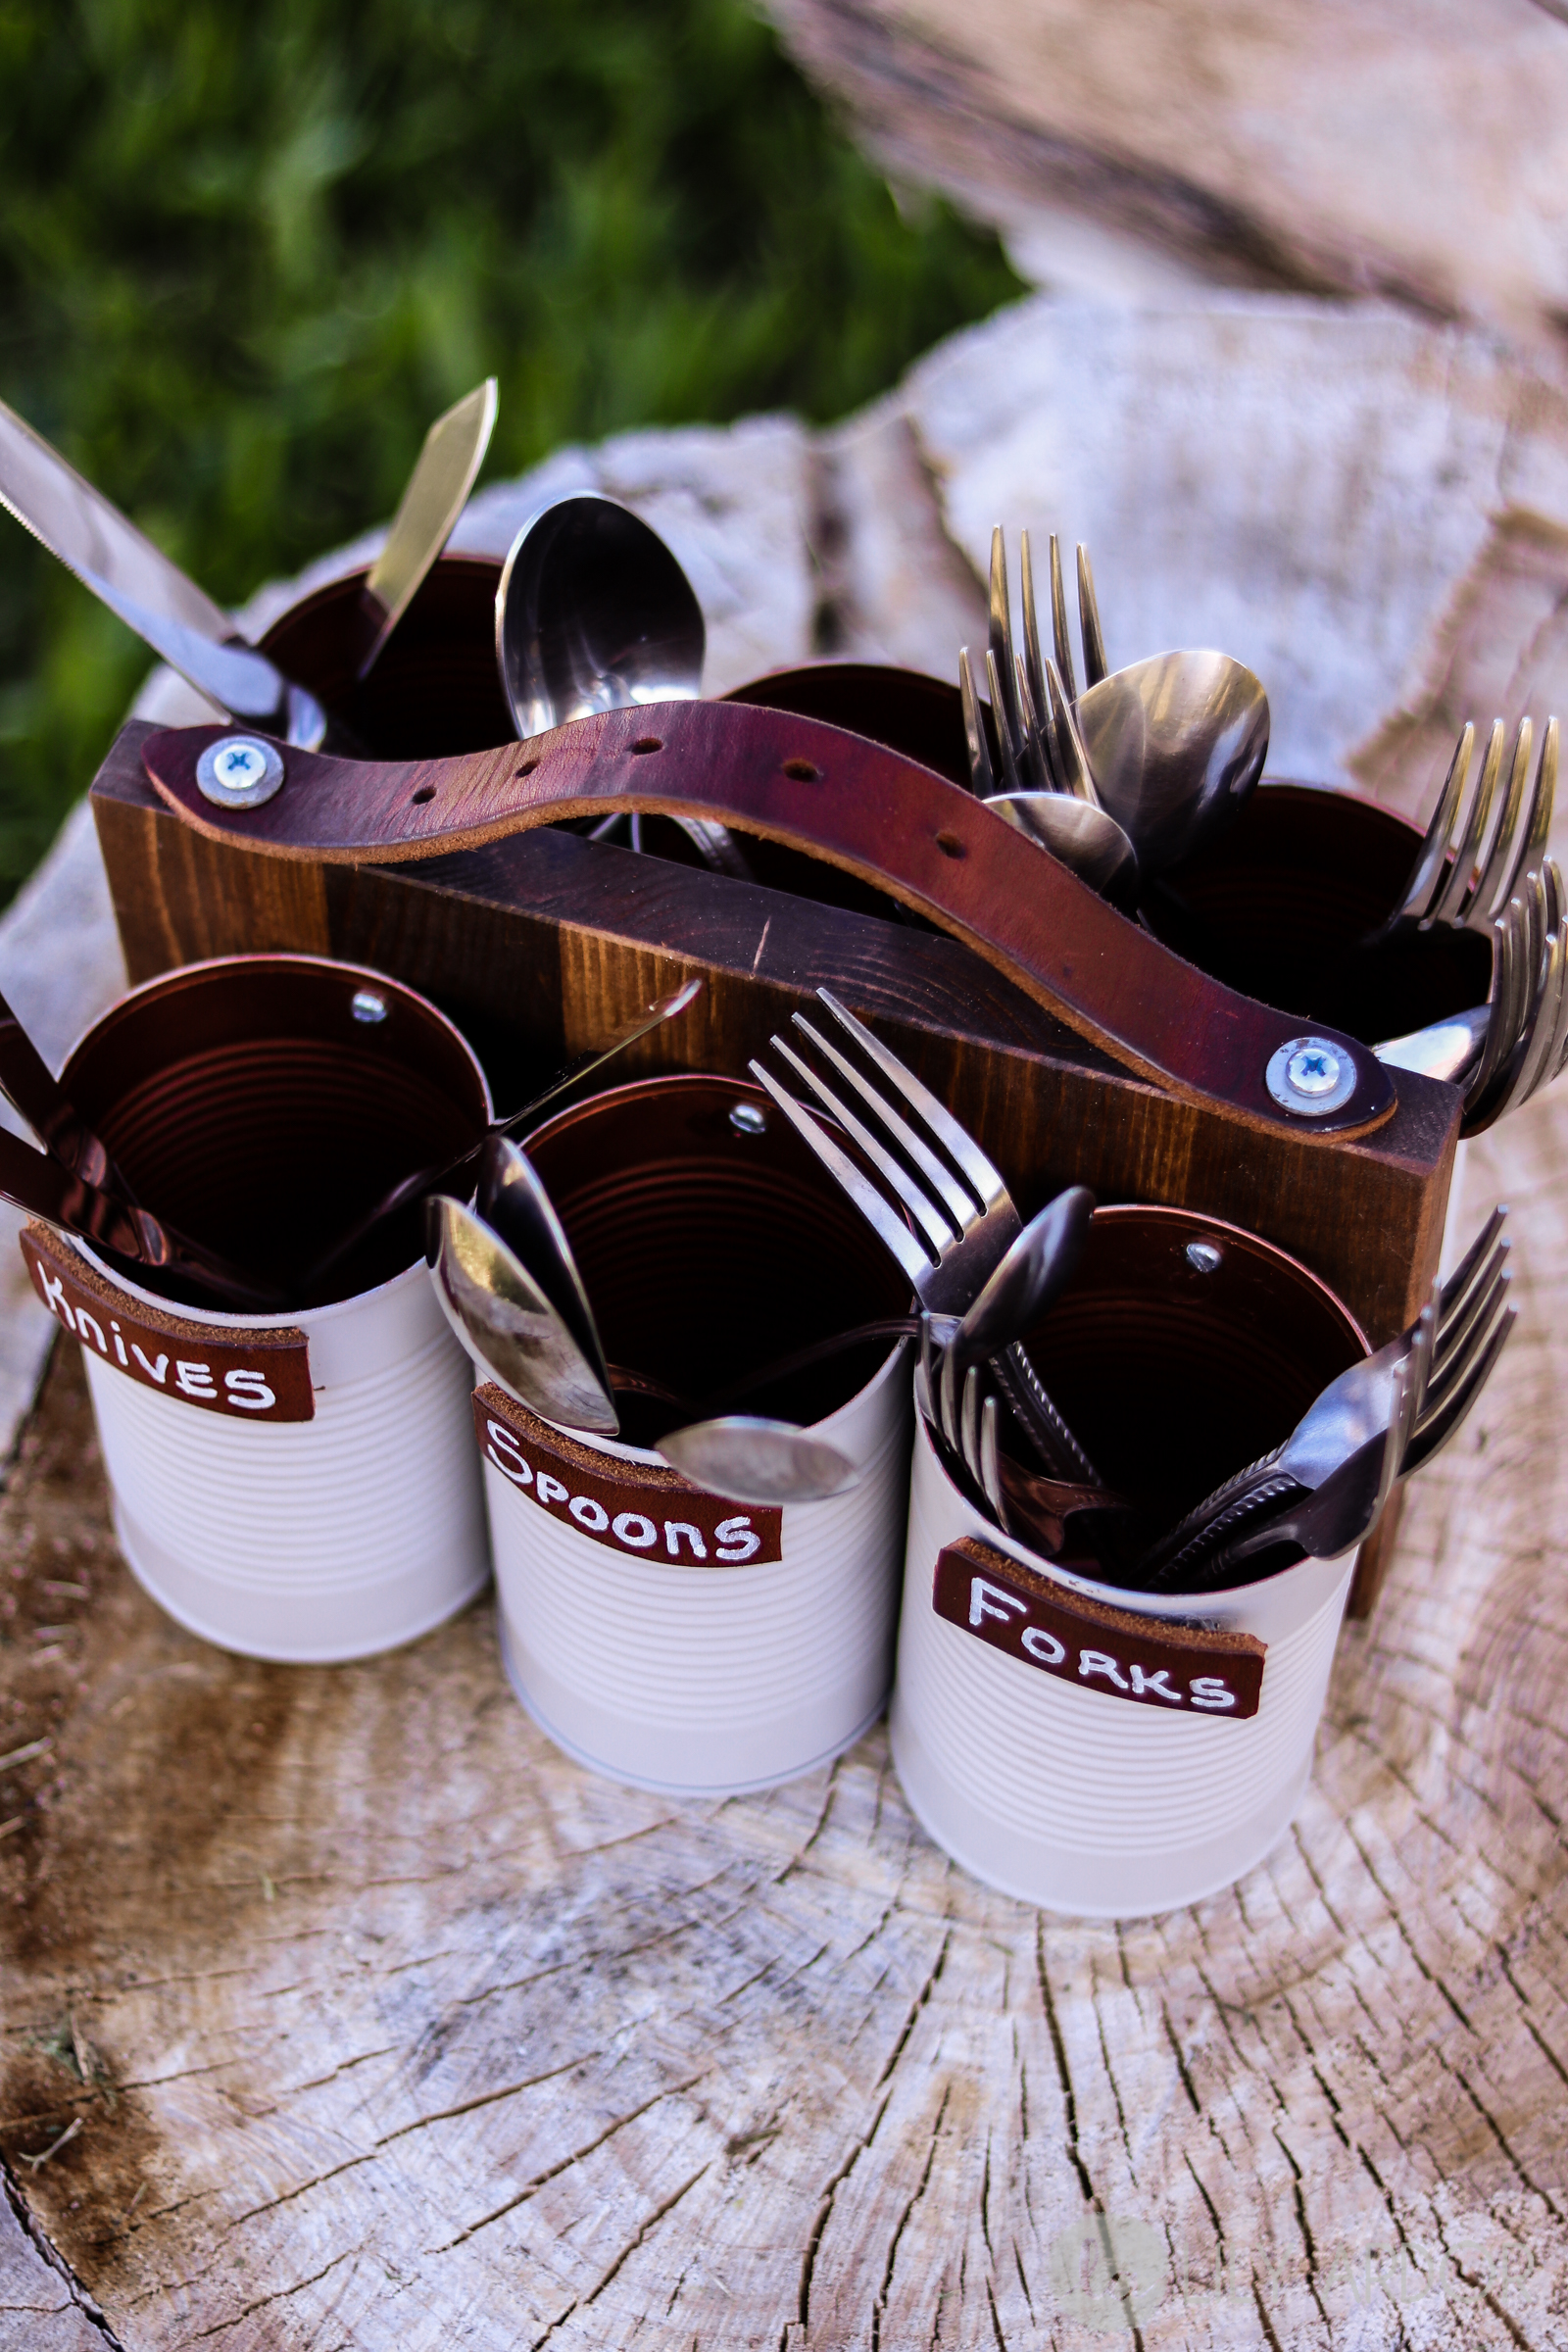
Handle
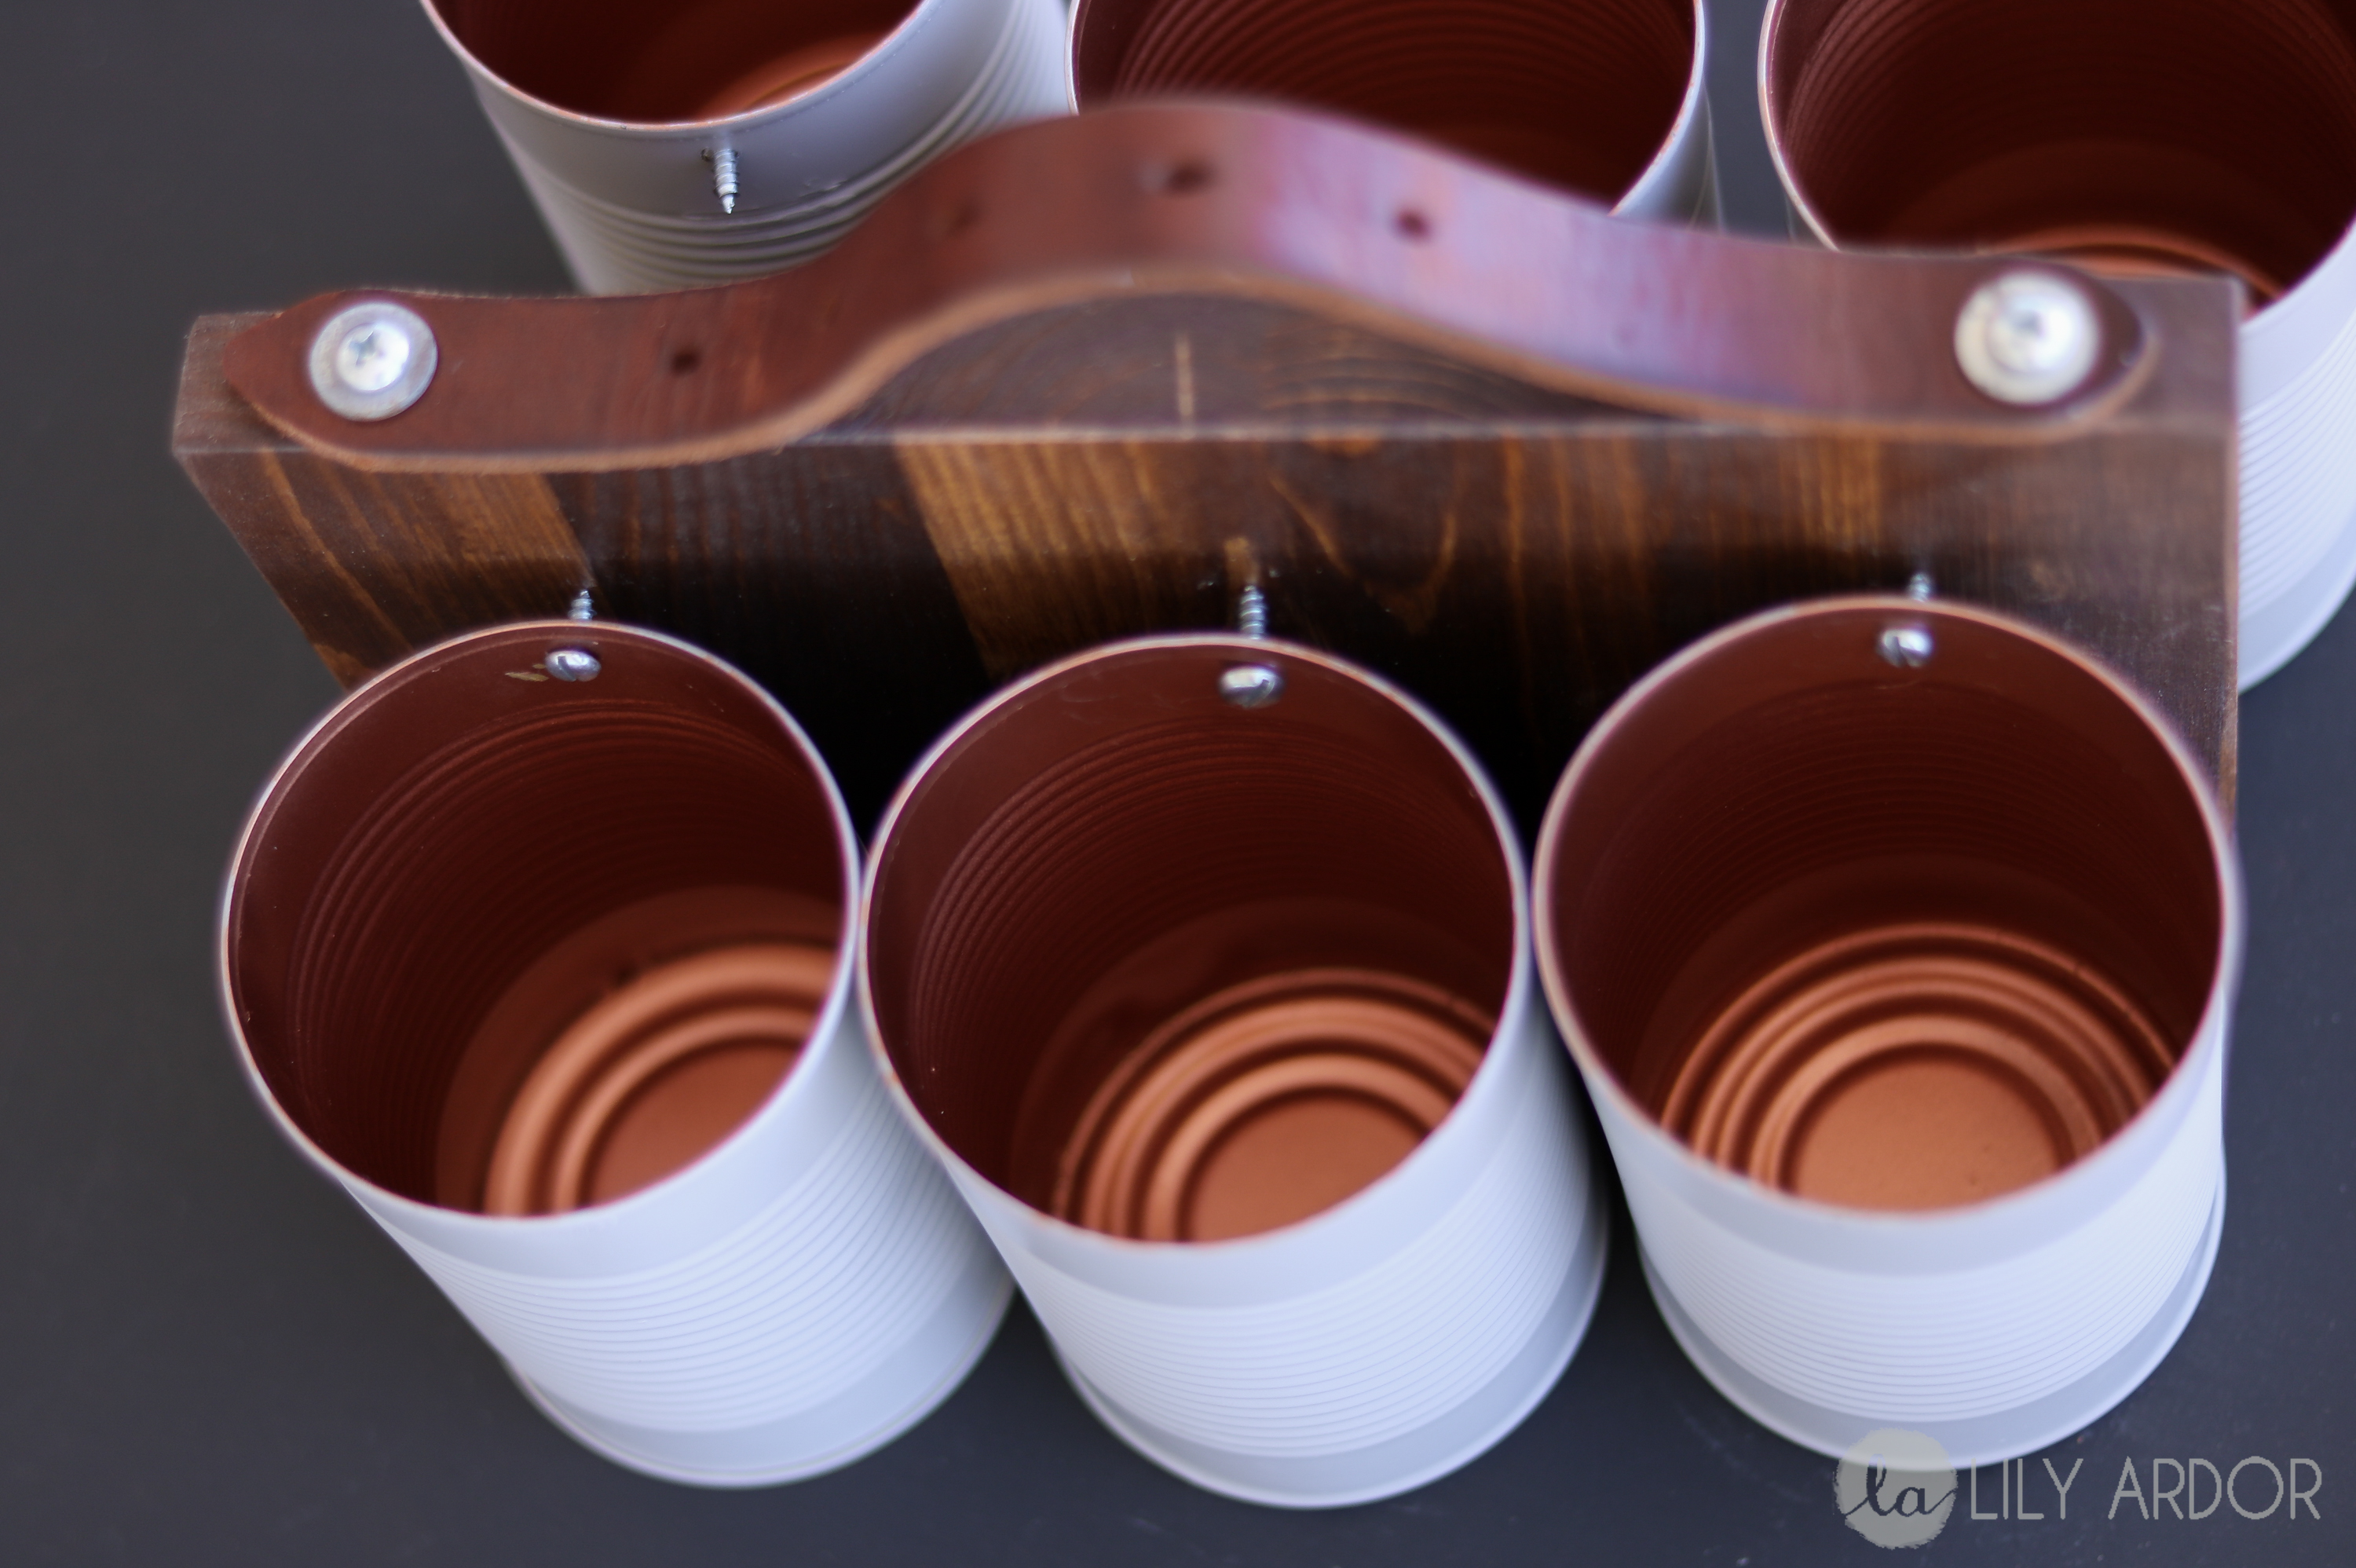
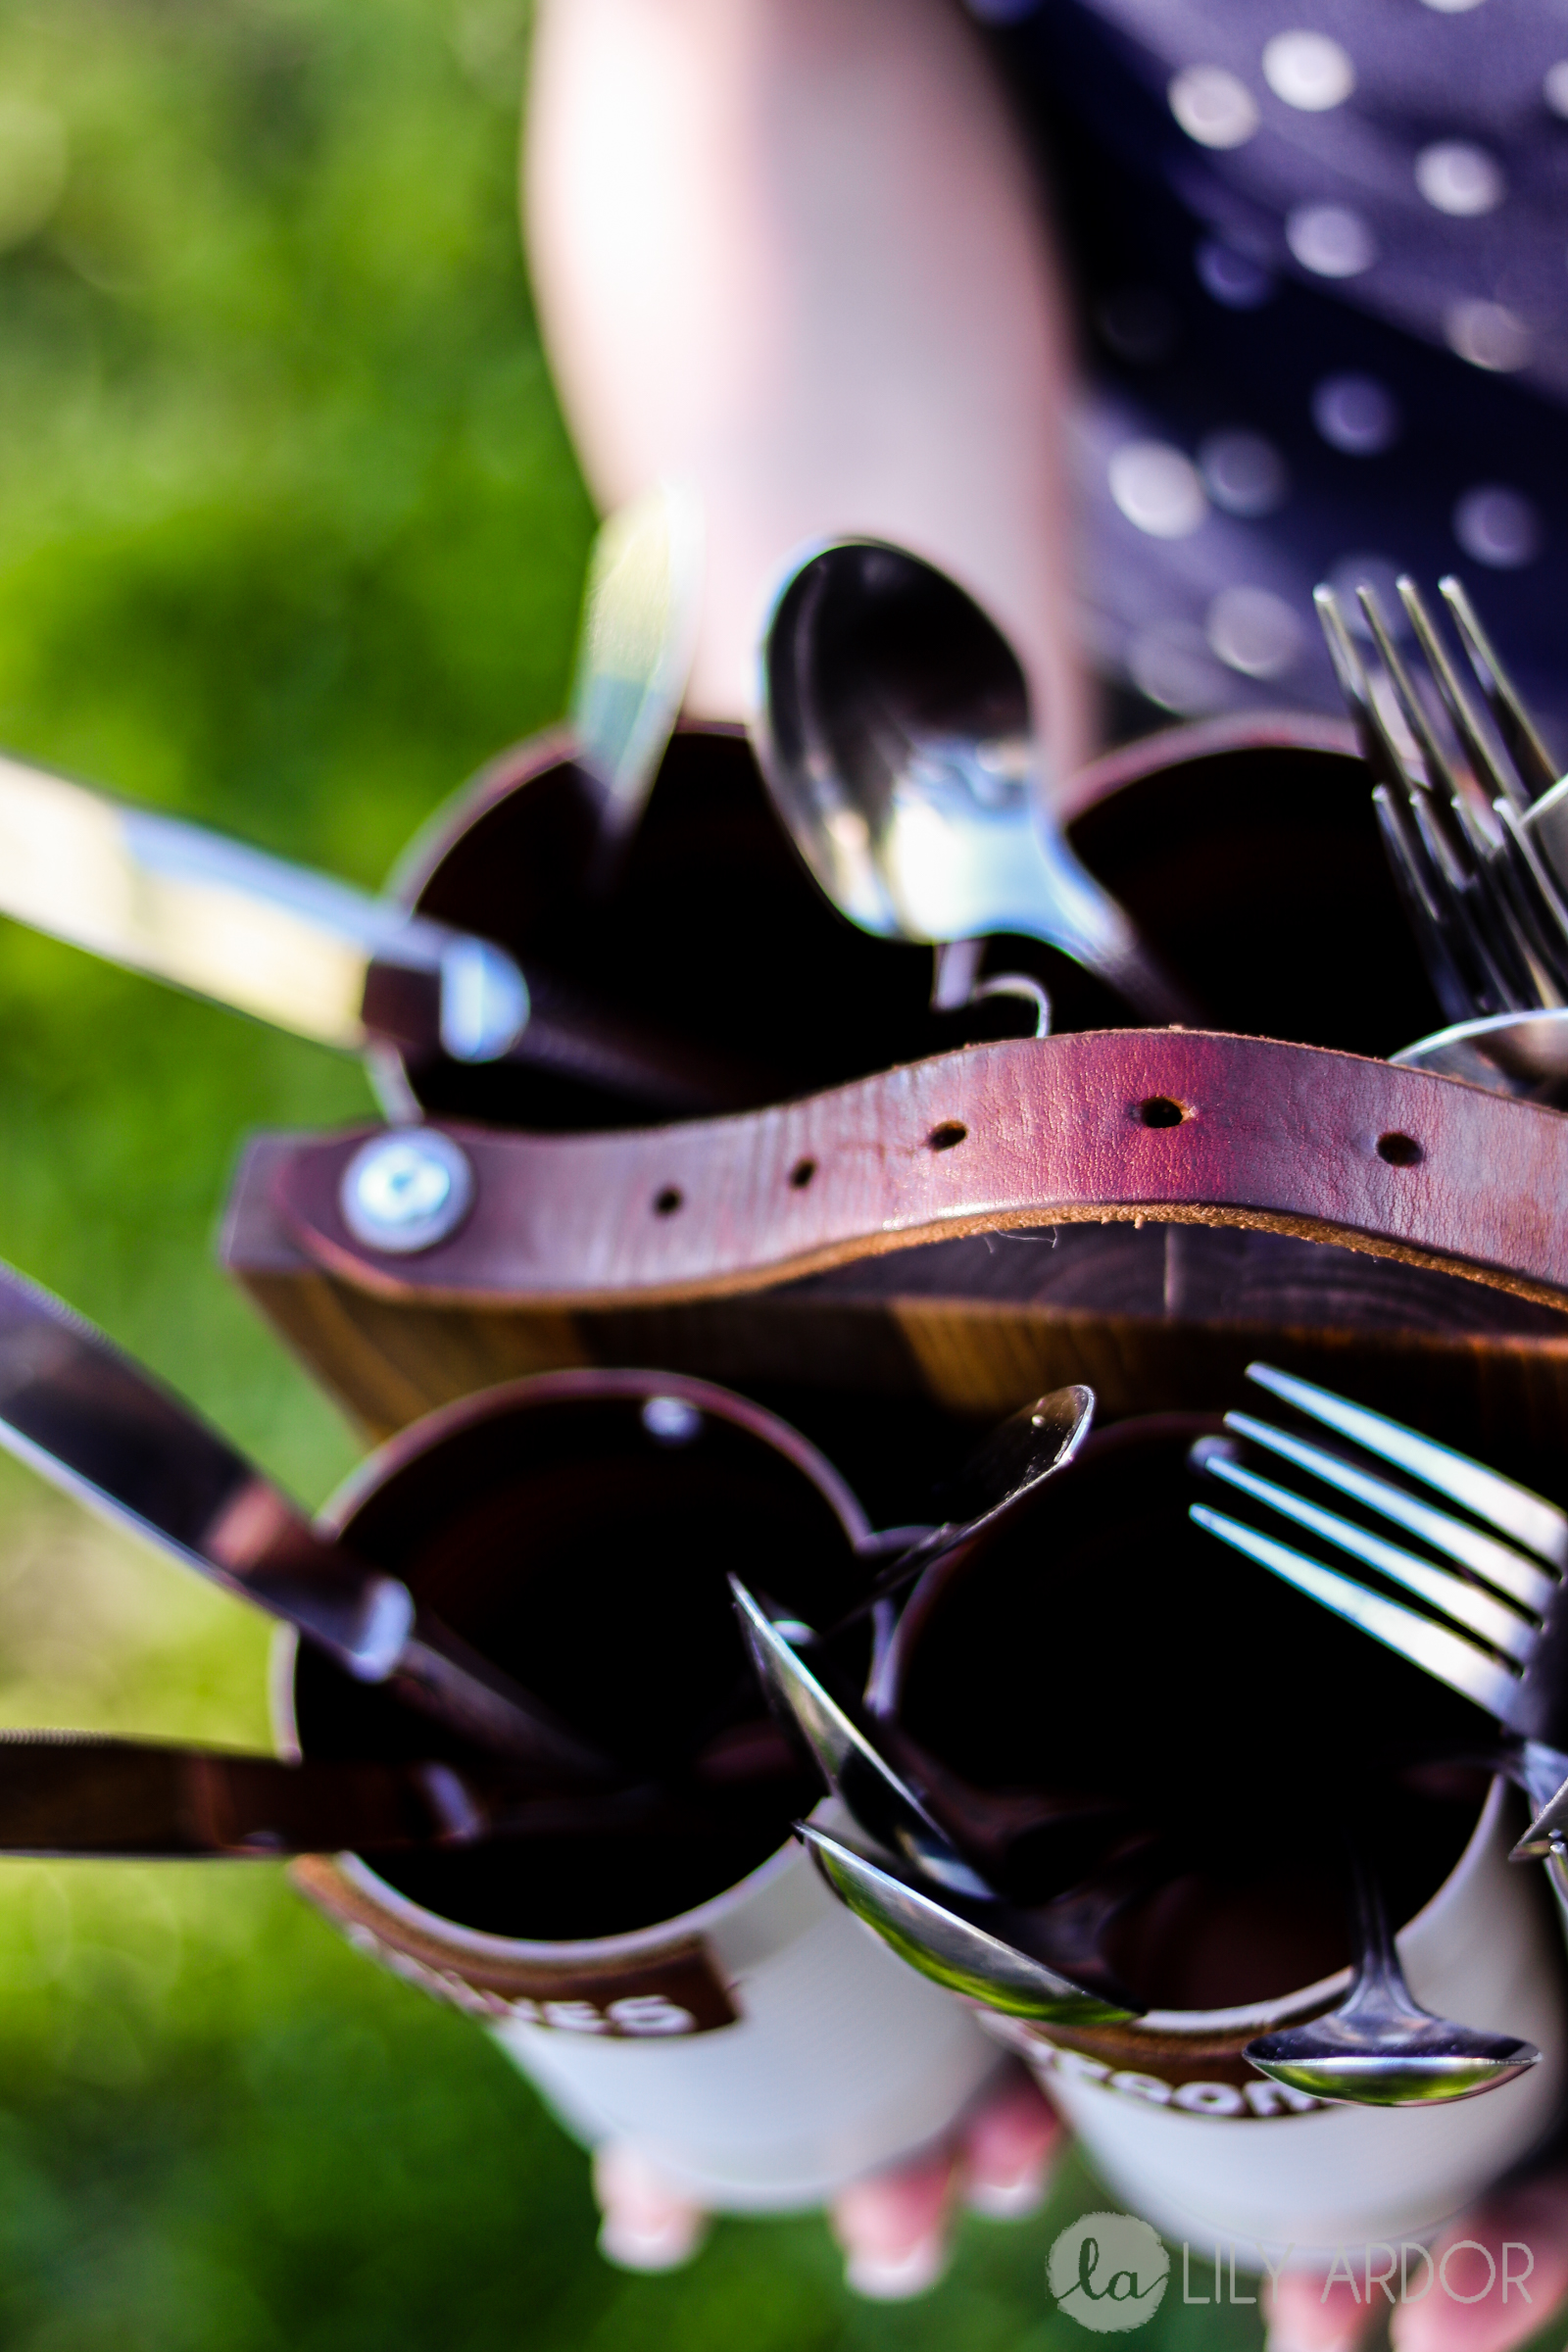
I purchased my belt at goodwill for $2. Which is a steal for a real leather belt. I measured the length needed for my strap and cut it. Then I pre-drilled holes and attached the strap with some screws and washers for better durability.
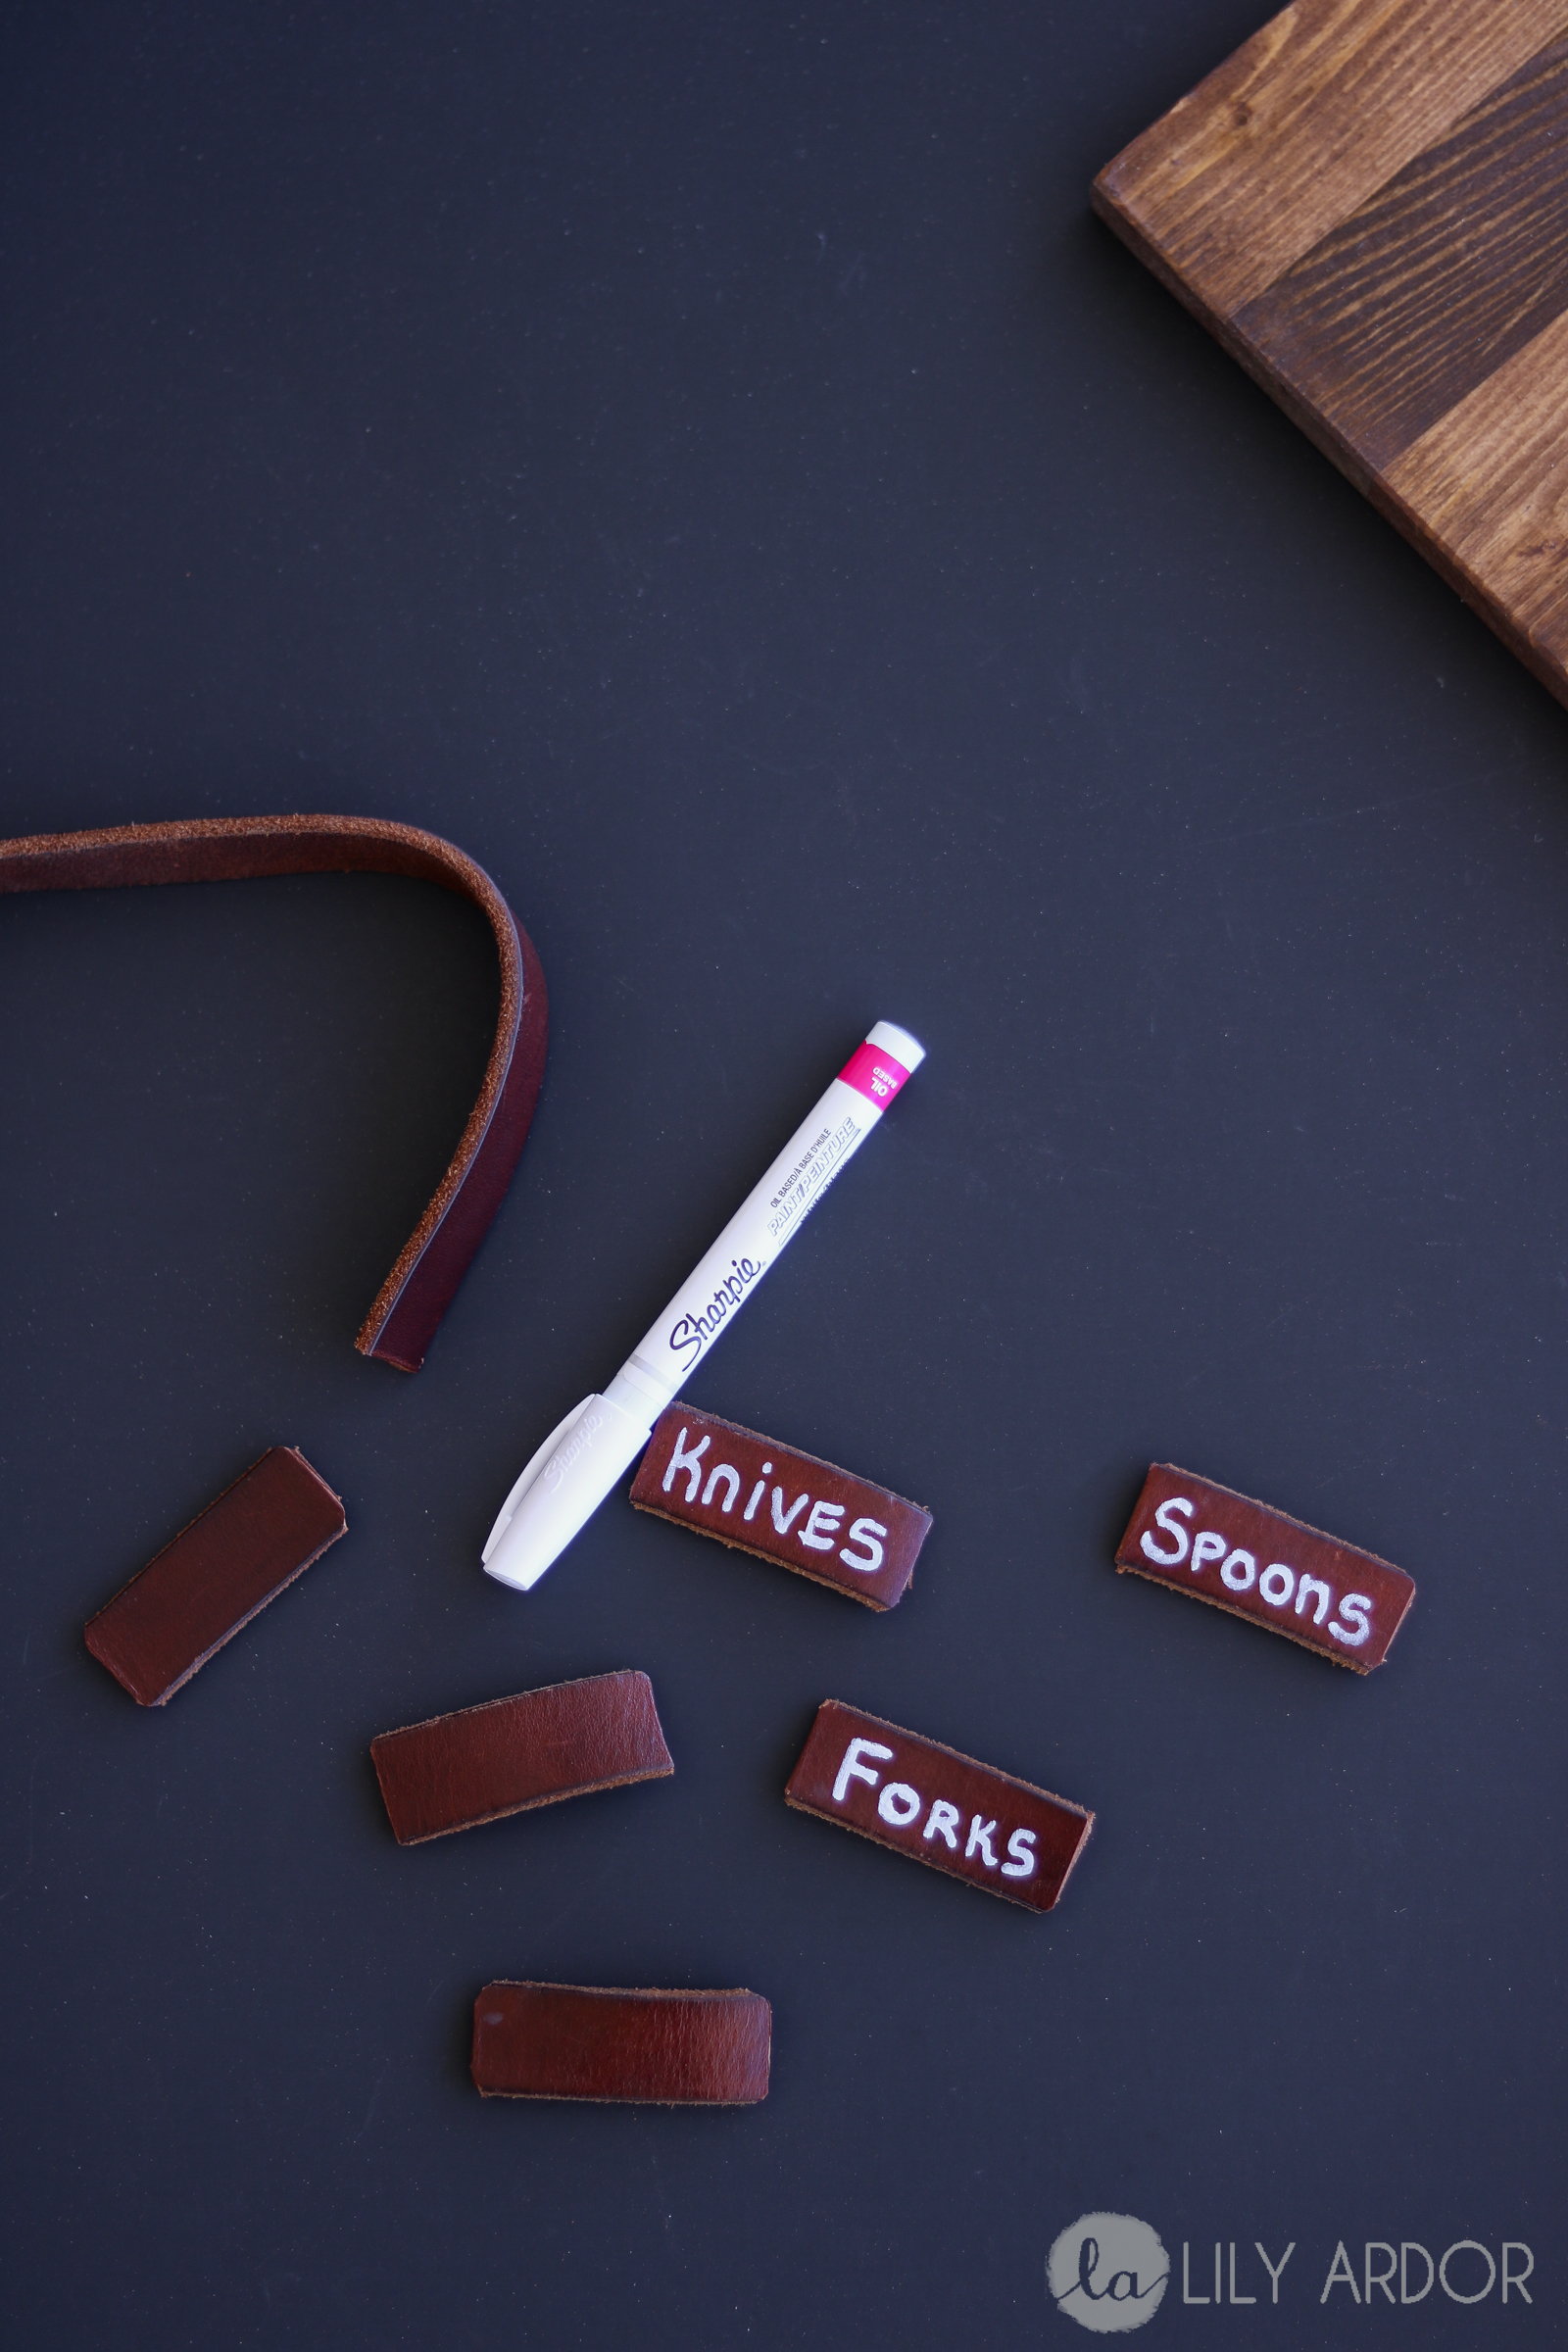
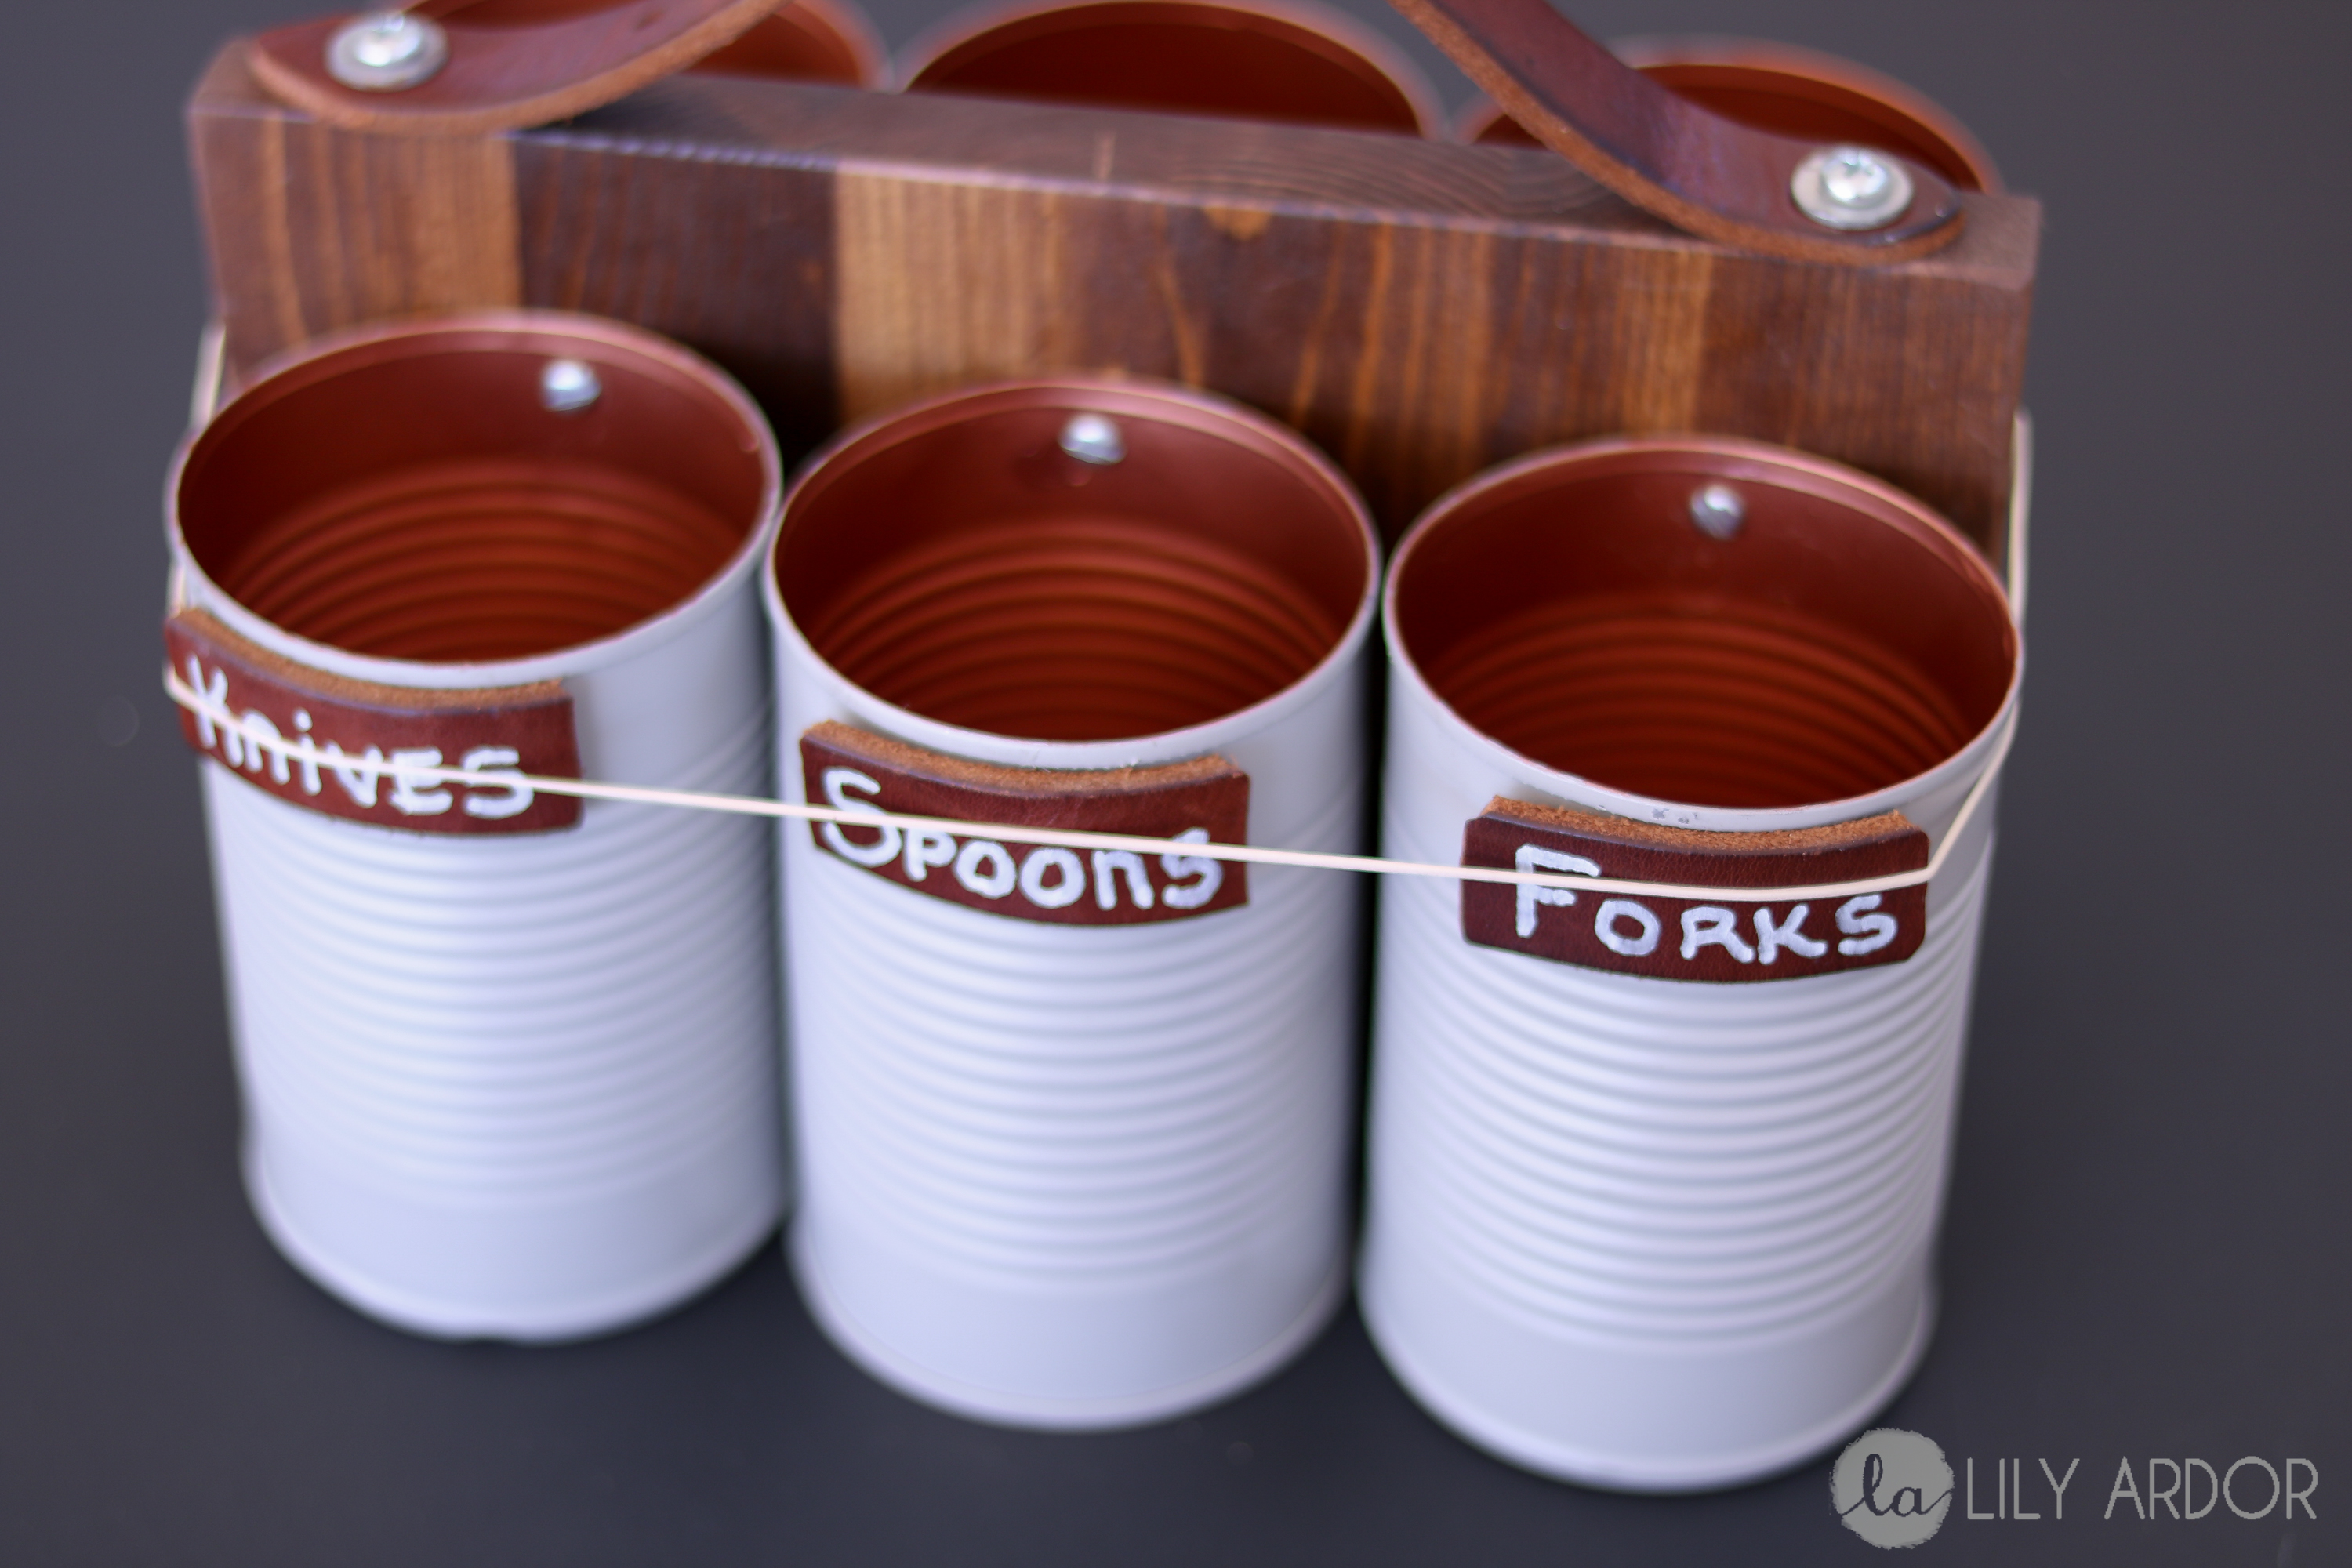
Labels
I used what was left of the belt to make labels. Each label measured 2 1/4 inches in length. Then I wrote the descriptions with my white oil based sharpie… (yes permanent marker)
Two tone
I flipped my cans over and spray painted the outer sides gray. Remember if your doing different colors inside and out you need to spray paint the outer sides while the cans are lying face down so you don’t get any over spray on the inside.
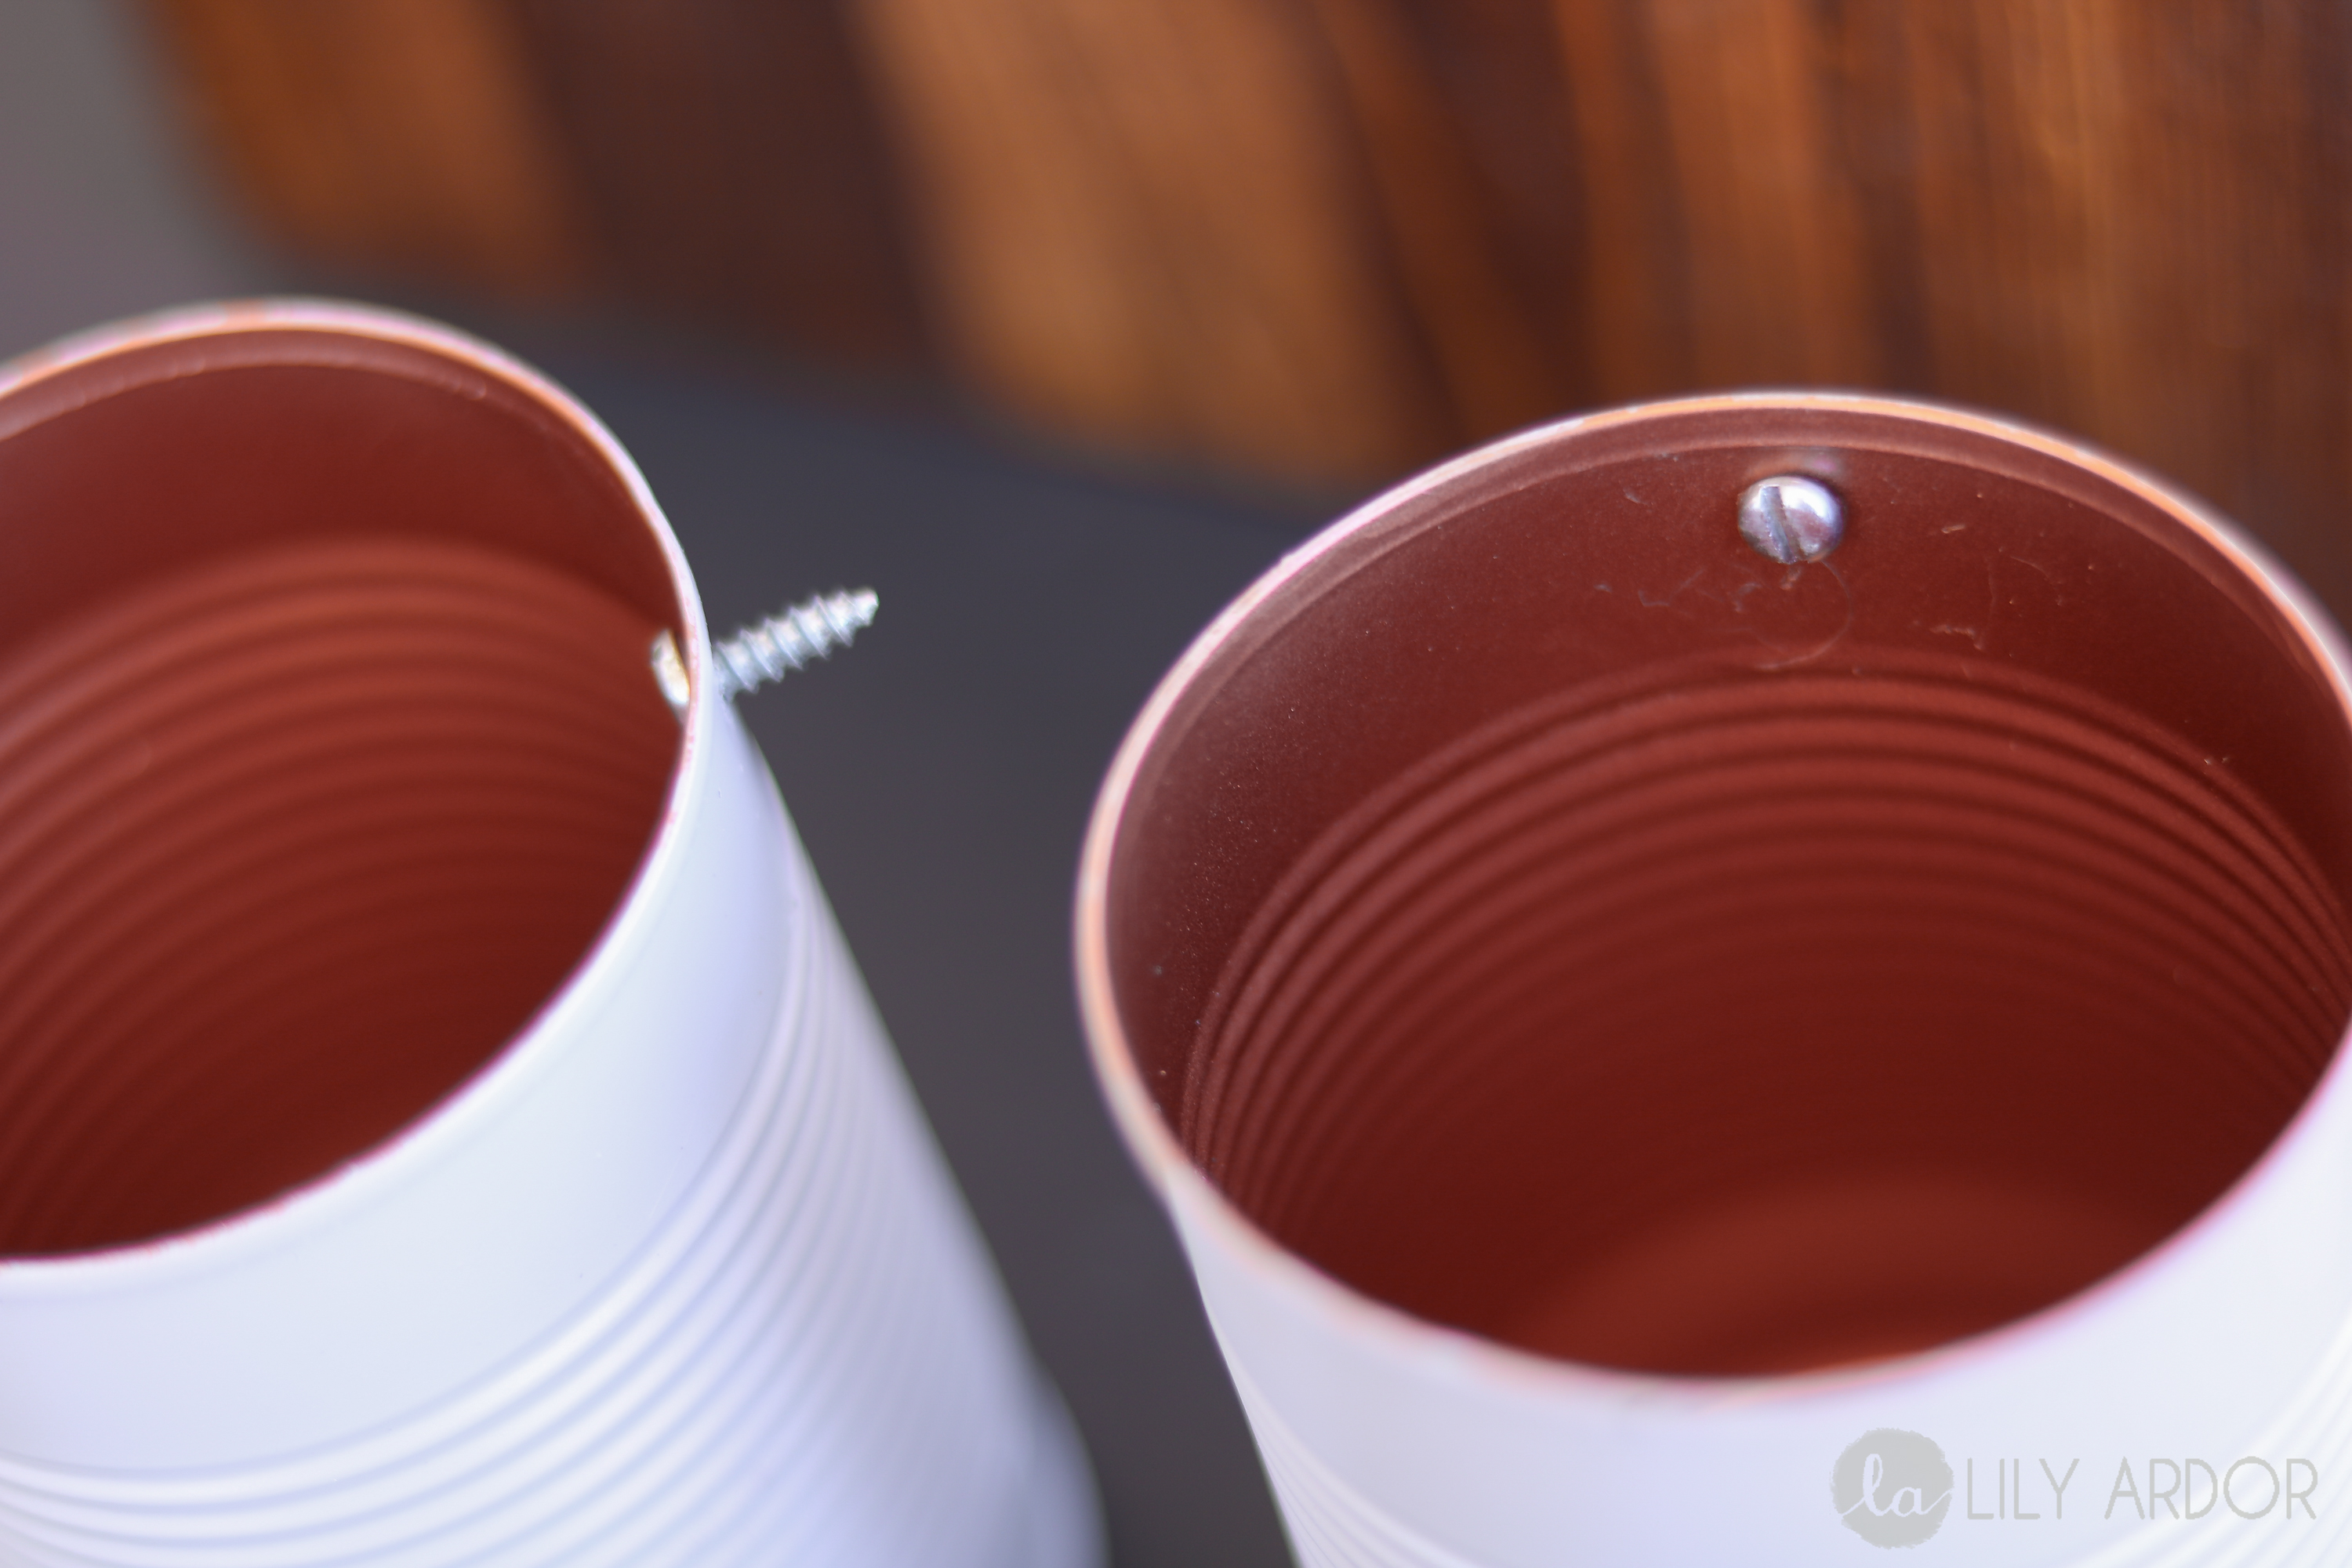
On the side that has glue residue pre-drill holes for your screws. Widen the whole just big enough for your screw to be able to turn in smoothly. 
Then screw the screws in.
Lay the cans out evenly and push gently onto each screw to mark the board where you will be pre-drilling for these screws. Once you’ve pre-drilled for your screws you can use your screw driver to secure the screws into place.
Use E6000 glue to secure the labels into place. ( you can also use hotglue.. but I find this to be more durable)

Then use a rubber band to secure them while drying.
What do you think? Do you like the colors? Which ones would you pick?

Durability Tested
I made one of these a few years back and I gotta tell you.. I am amazed at how durable this silverware caddy is. After two years of constant use still looking just as fab as the day I made it and no signs of rust whatsoever. Two thumbs up. 😀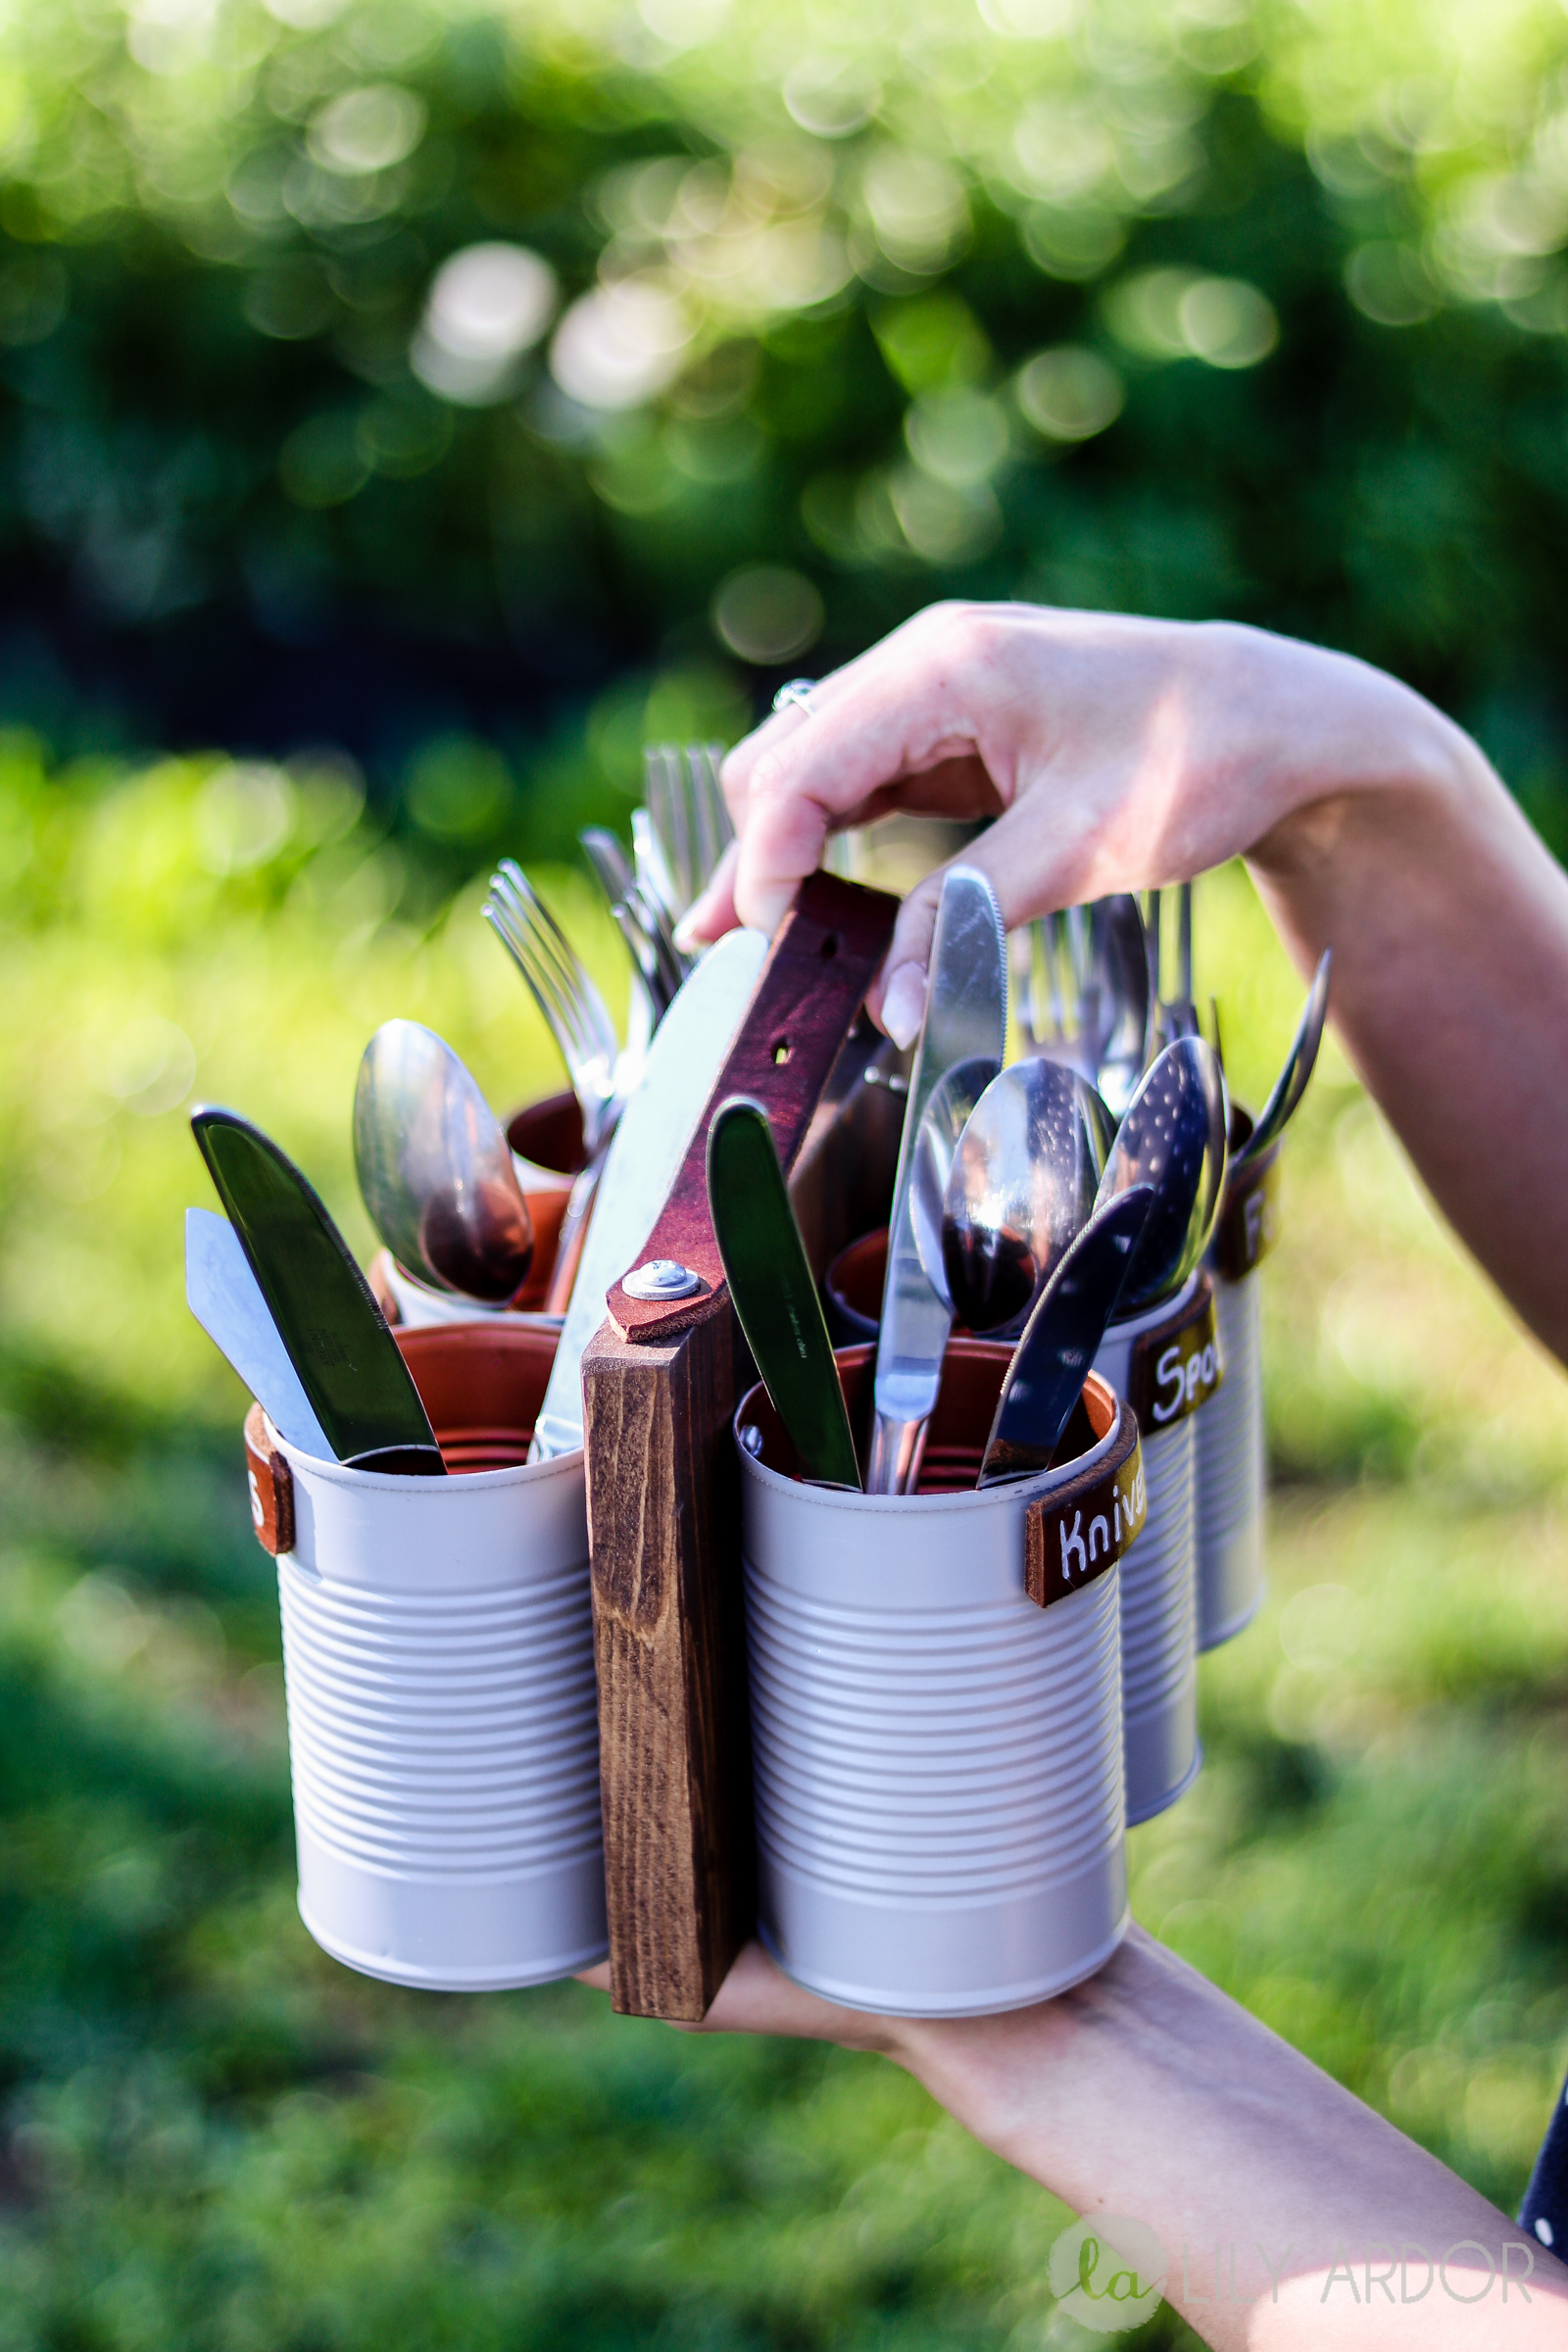
 Told you he likes spray-paint (his hands).. HEHE. 😀 My Crafting buddy. Best in the world. Doesn’t get any better then him and my awesome husband that did this cool photo-shoot.

As you can see we are finally getting warmer days. It’s our first official warm enough day to wear a t-shirt comfortably outdoors. This winter has been one of our longest.
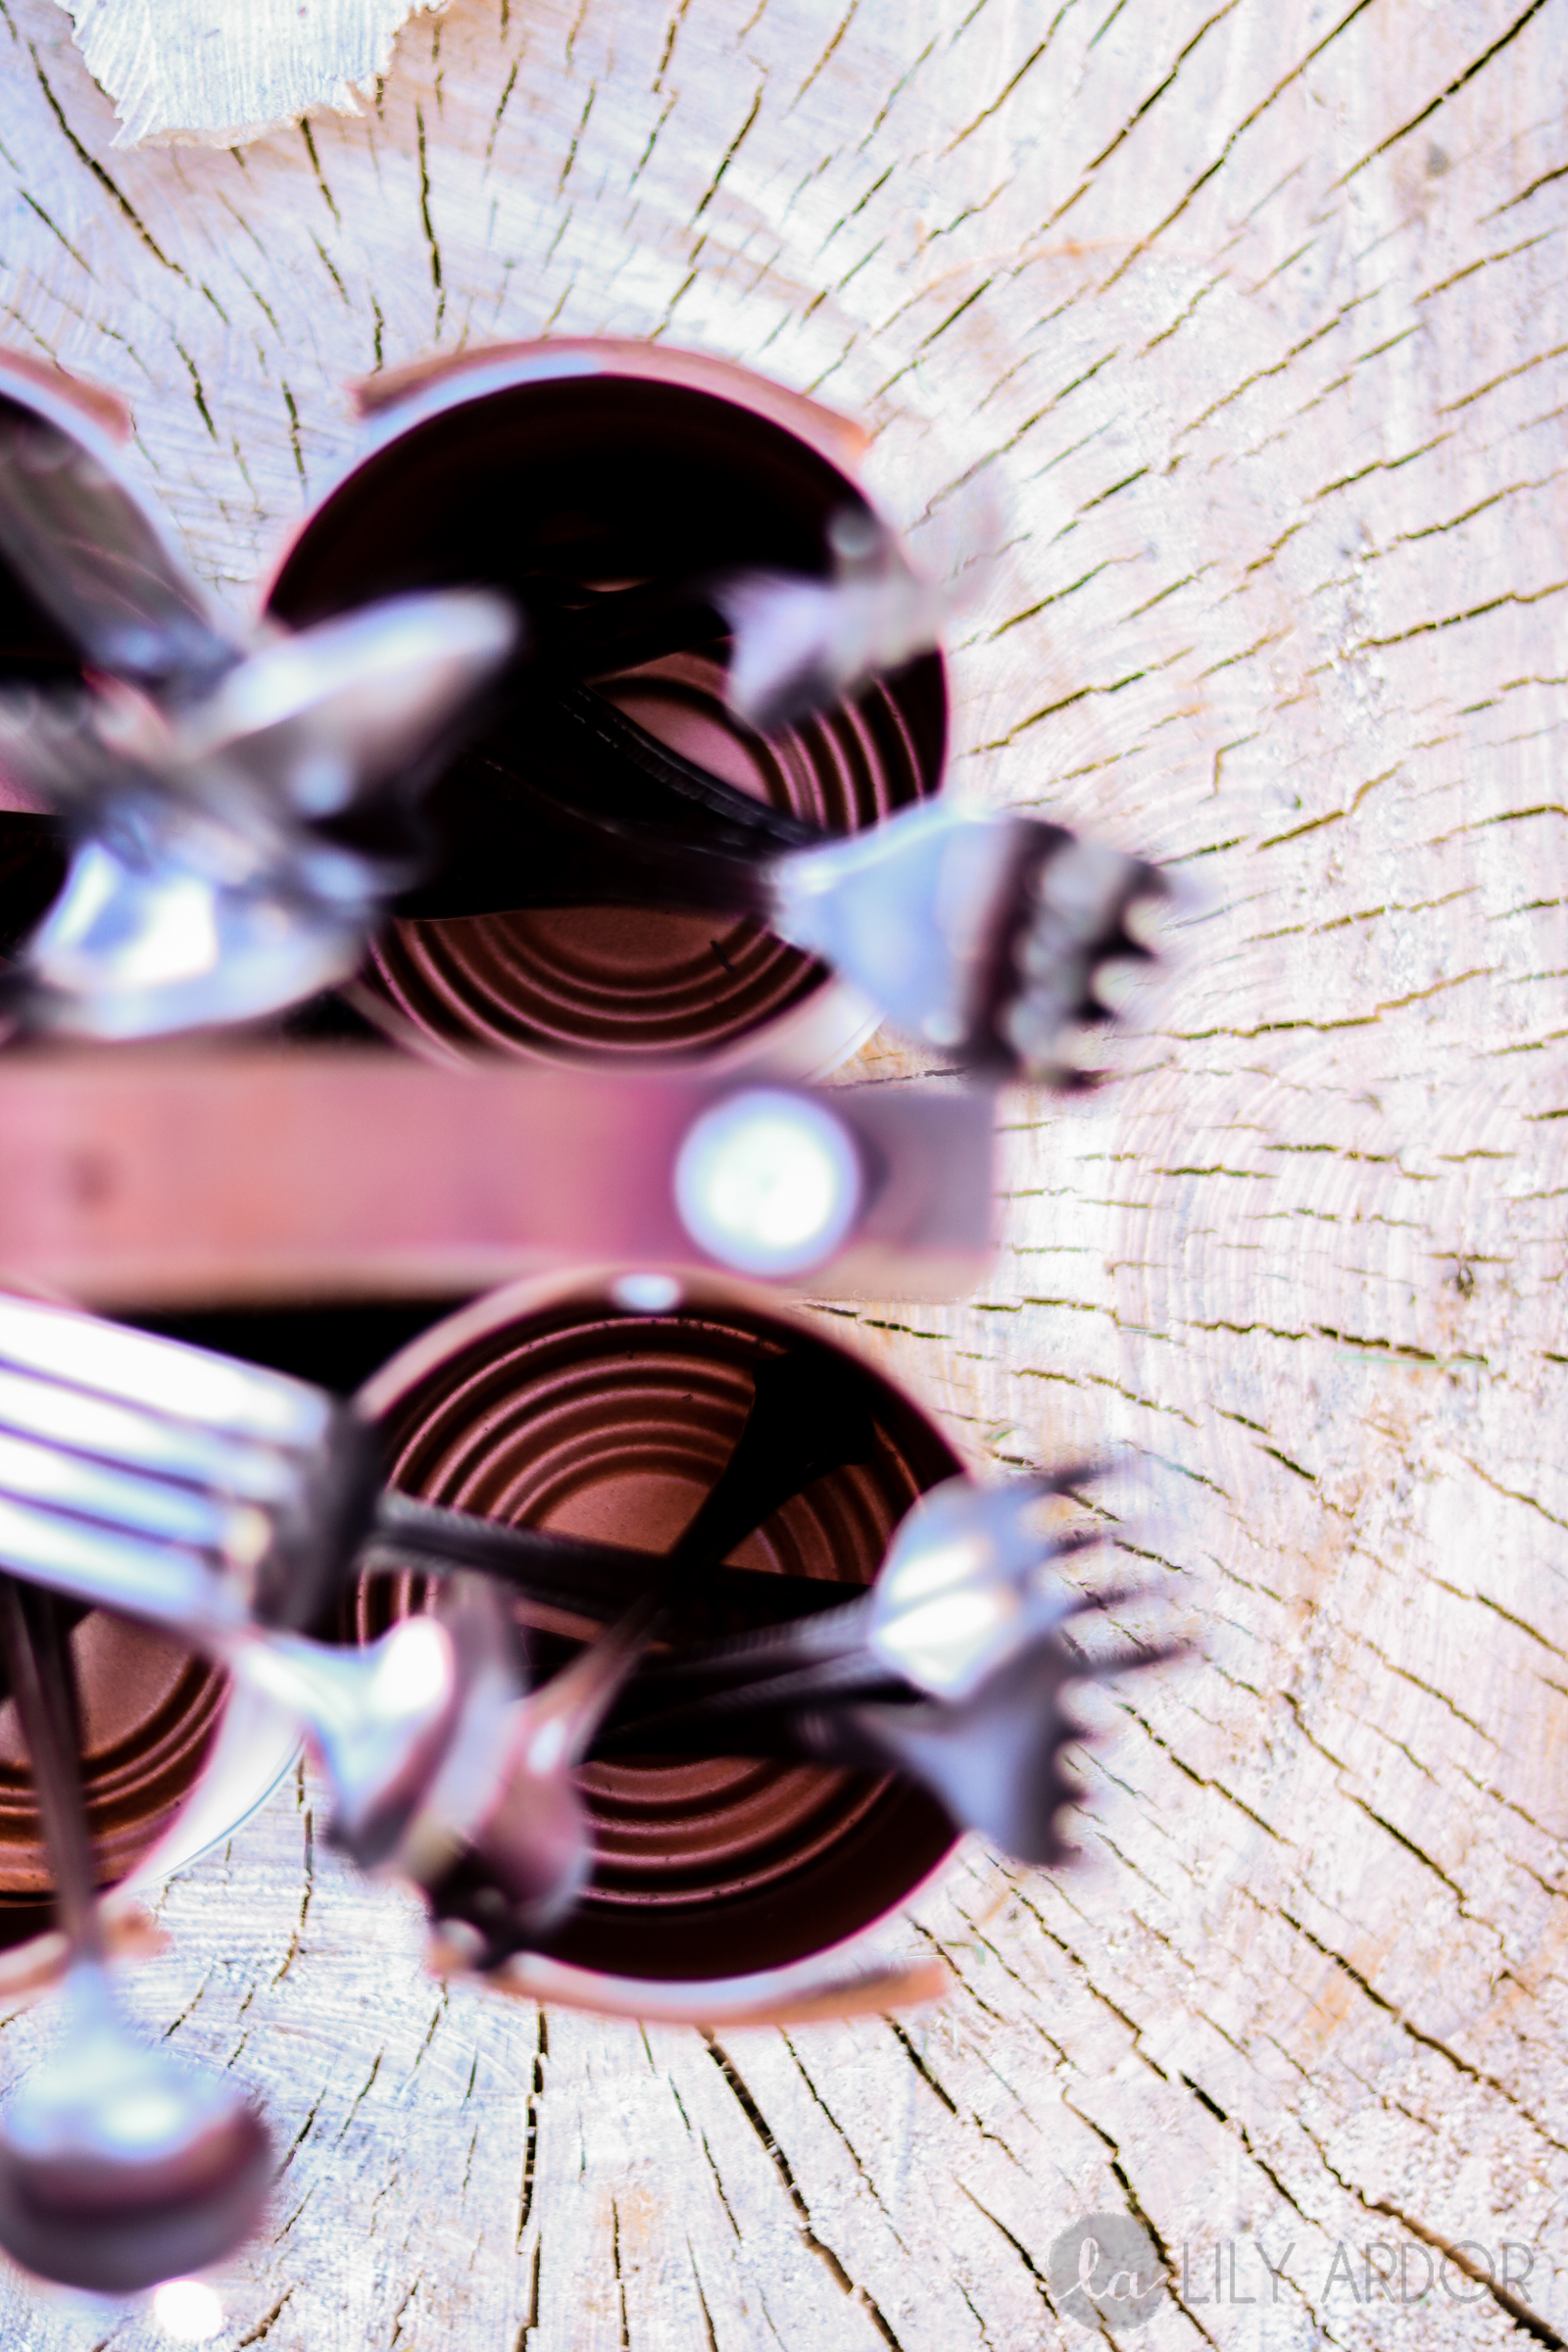
A side snippet 😀
And a sneak peak inside…
Well then.. That is all for today thanks for joining me I hope you liked it. Don’t forget to tag me on instagram if you make one of these cute DIY silverware caddies.. I am sure your mom will LOVE IT 😀 😀 😀
Here are a few of the products I used and some of my favs. 😀
I love your ideas! Want to make this caddie for myself! Just have to say that your son is adorable and it is great to have a “craft buddy”! I love crafting! Have a great summer! Will be looking forward to more crafts and crafting!
Teri
Awe thank you so much Teri. OOOH I can’t wait to see it. What colors were you thinking to do? My previous one was aqua. 😀 Yes it makes crafting so much more fun. 😀 You have a great summer as well. 😀 😀
THIS will work great for our cookouts, we’ve been looking for something to put our silverware in for outdoor use
Oh man girl!! I use this still to this day. It’s been years!! Definitely my favorite tin can recycle. It’s so easy to store in it. I think it’ll be perfect for cookouts.
Just made my own one with my wife! We love it!
That’s awesome!! So happy to hear that!
Love this! Turned out super cute!
Thank you Megan 🙂
Love this idea. Up cycling at it’s best and useful. Love your site, just found it and glad I did.
AWWE Thank you and Welcome! 😀
Ooh this would also make cute herb garden. Love it. Thanks
OOH yes Love that idea!
What a great tutorial! You did a wonderful job laying out the steps and the pix are terrific.
Just two quick things.
It’s sad to see someone as obviously intelligent as you are making simple grammar mistakes, so let me help you with that.
When you mean “you are”, what you do to get it right every time, is take the bottom part off the a, turning it into an apostrophe, then scoot it over up against U and you’re done. See what I did there? YOU’RE done😂! I crack me up.
Now doesn’t your eye get all twitchy when you’re reading something where the author doesn’t know this! YES! So does mine!
Thanks for a great tute!!
That’s a neat idea. Thanks!
I will have to try this.
I use my caddy for my craft supplies. Paintbrushes, scissors, wire cutters etc. I absolutely love it!
That’s awesome! It’s perfect for crafts supplies 🙂