
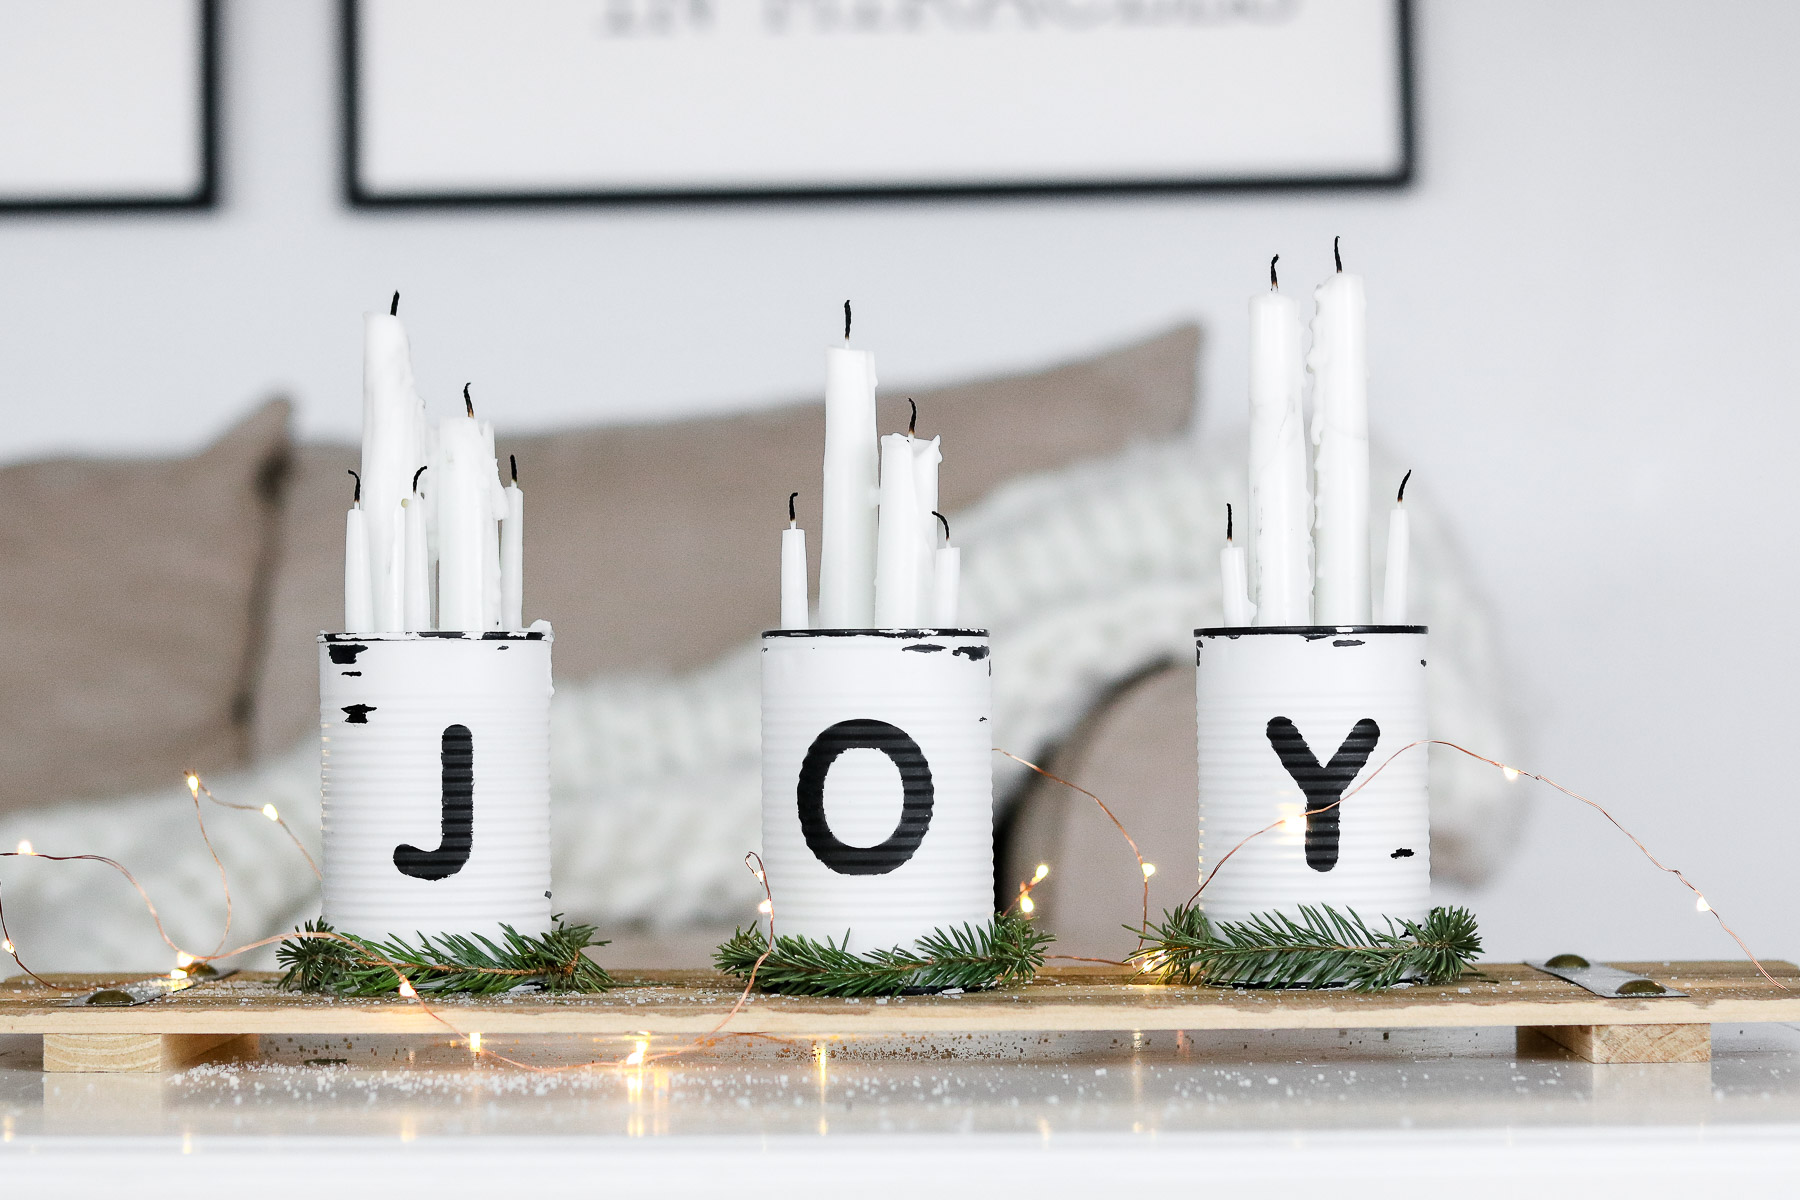
Enamelware Inspired Tin Can Centerpiece
Me and great time management are just not meant to be this Christmas. Seriously though, Christmas is literally days away and I still have so many DIYs planned. What was I thinking😲!! On a positive note If you need a last minute centerpiece this might be what you’re looking for. It was something I put together weeks ago but wasn’t able to edit the footage until now. Better late than never right?! 🙈
A while back I made a herb wall using tin cans. I had such a great response from you all I wanted to give tin cans a try again. My hubby and little guy love canned corn. They add butter, salt, and pepper and it actually taste good. Every once in a while we’ll have some and I save the tin cans.
Than I was at hobby lobby a few weeks ago and they have such a pretty selection of white enamel inspired decor. That’s where I got the idea to turn these tin cans into something similar. I was a bit worried about the ridges on the tin cans however I decide to give it a try anyway. Now that they’re done I actually think the ridges give the centerpiece character.
Quick Video Version
TIME NEEDED: About 40 minutes
It really depends on how quick you can dry your cans. Prep time is only about 7 minutes. It was raining here while I was making them so the drying time seemed like it took forever.
TOTAL COST: $14
This post contains affiliate links*
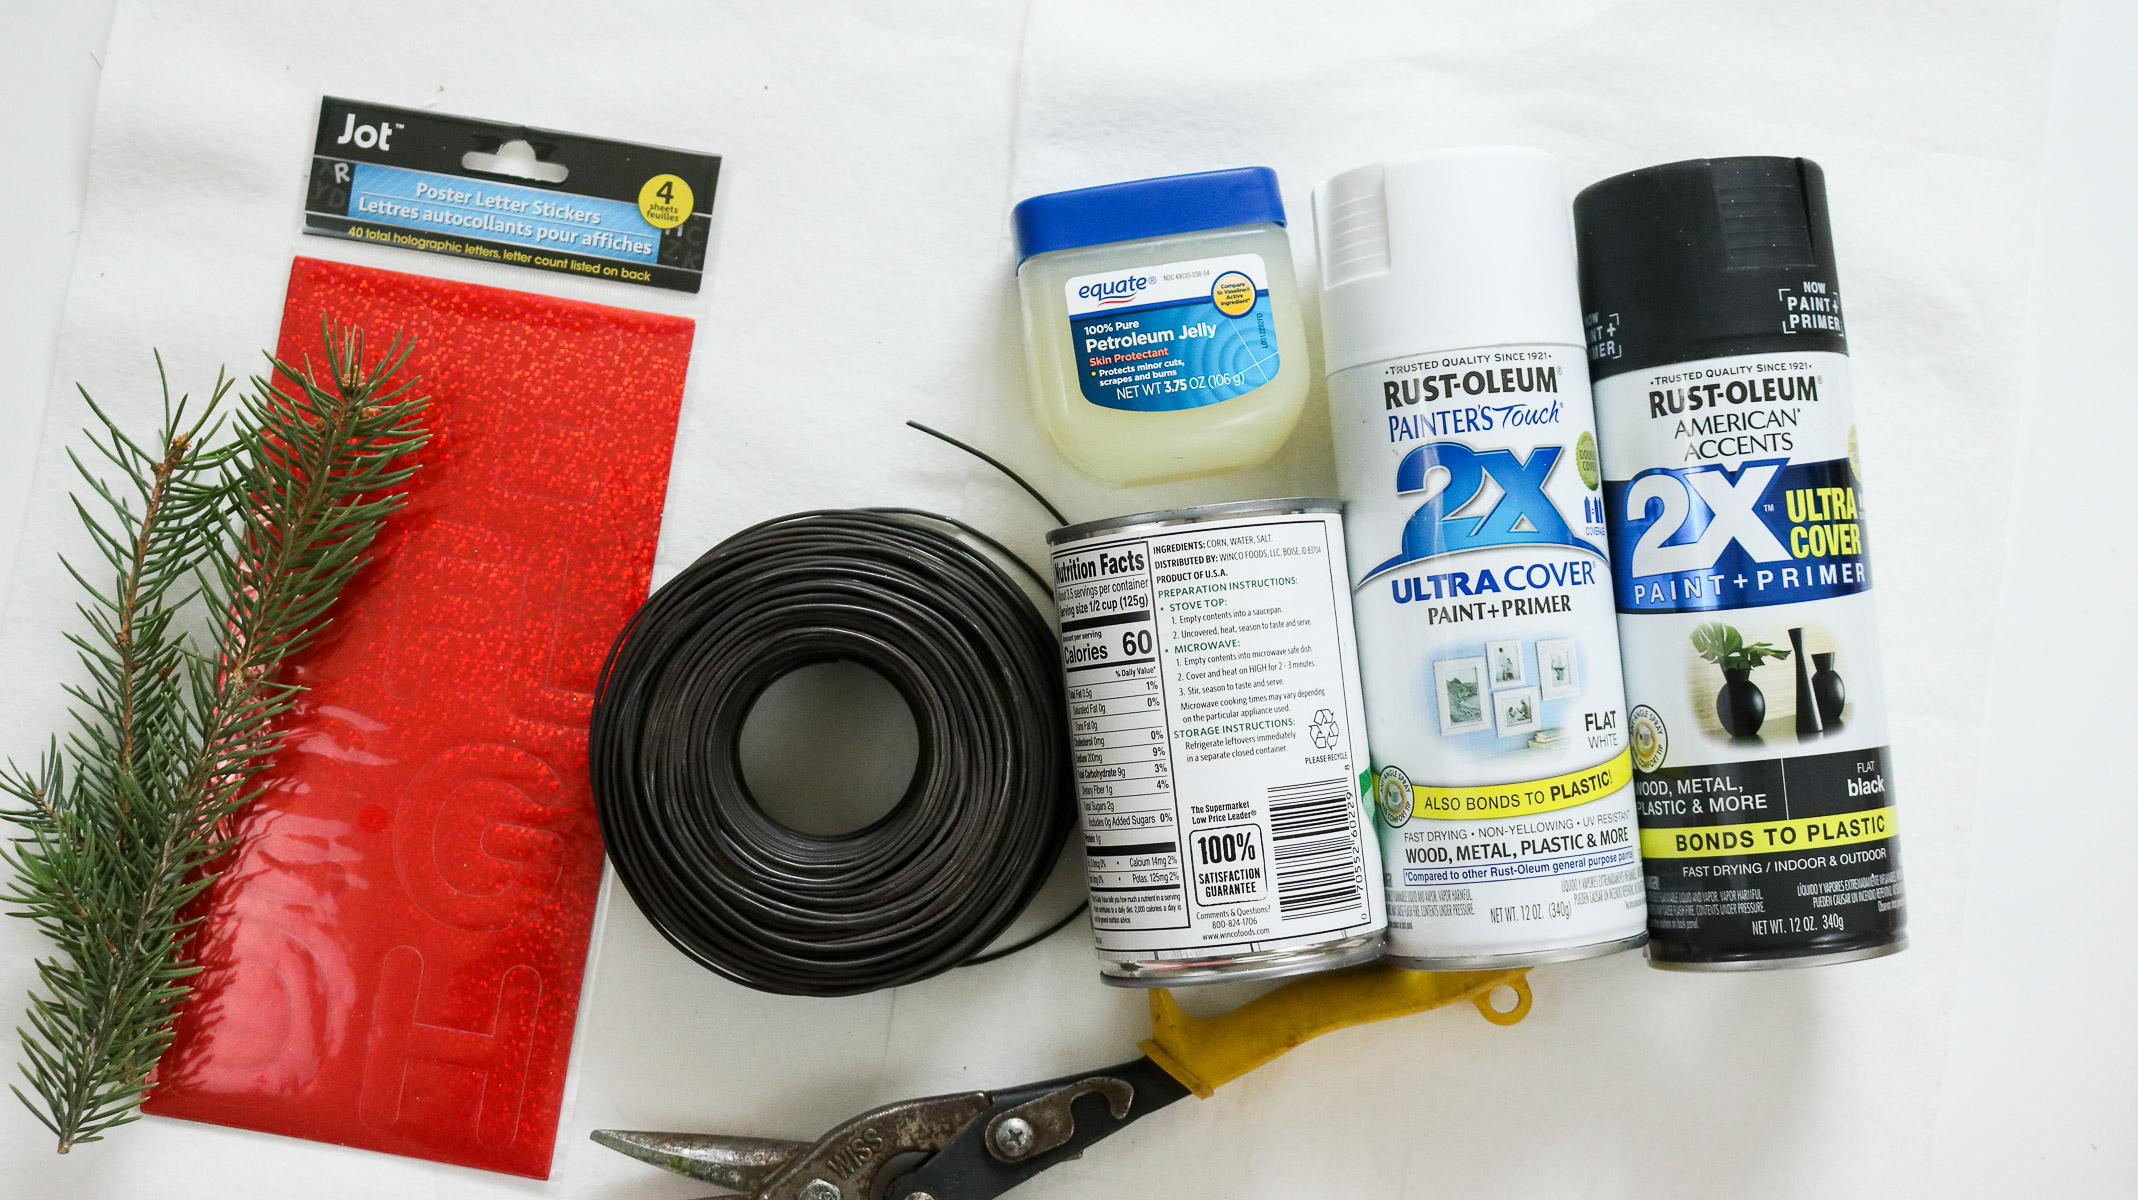
SUPPLY LIST:
- 3 tin cans
- white spray paint
- matte black spray paint
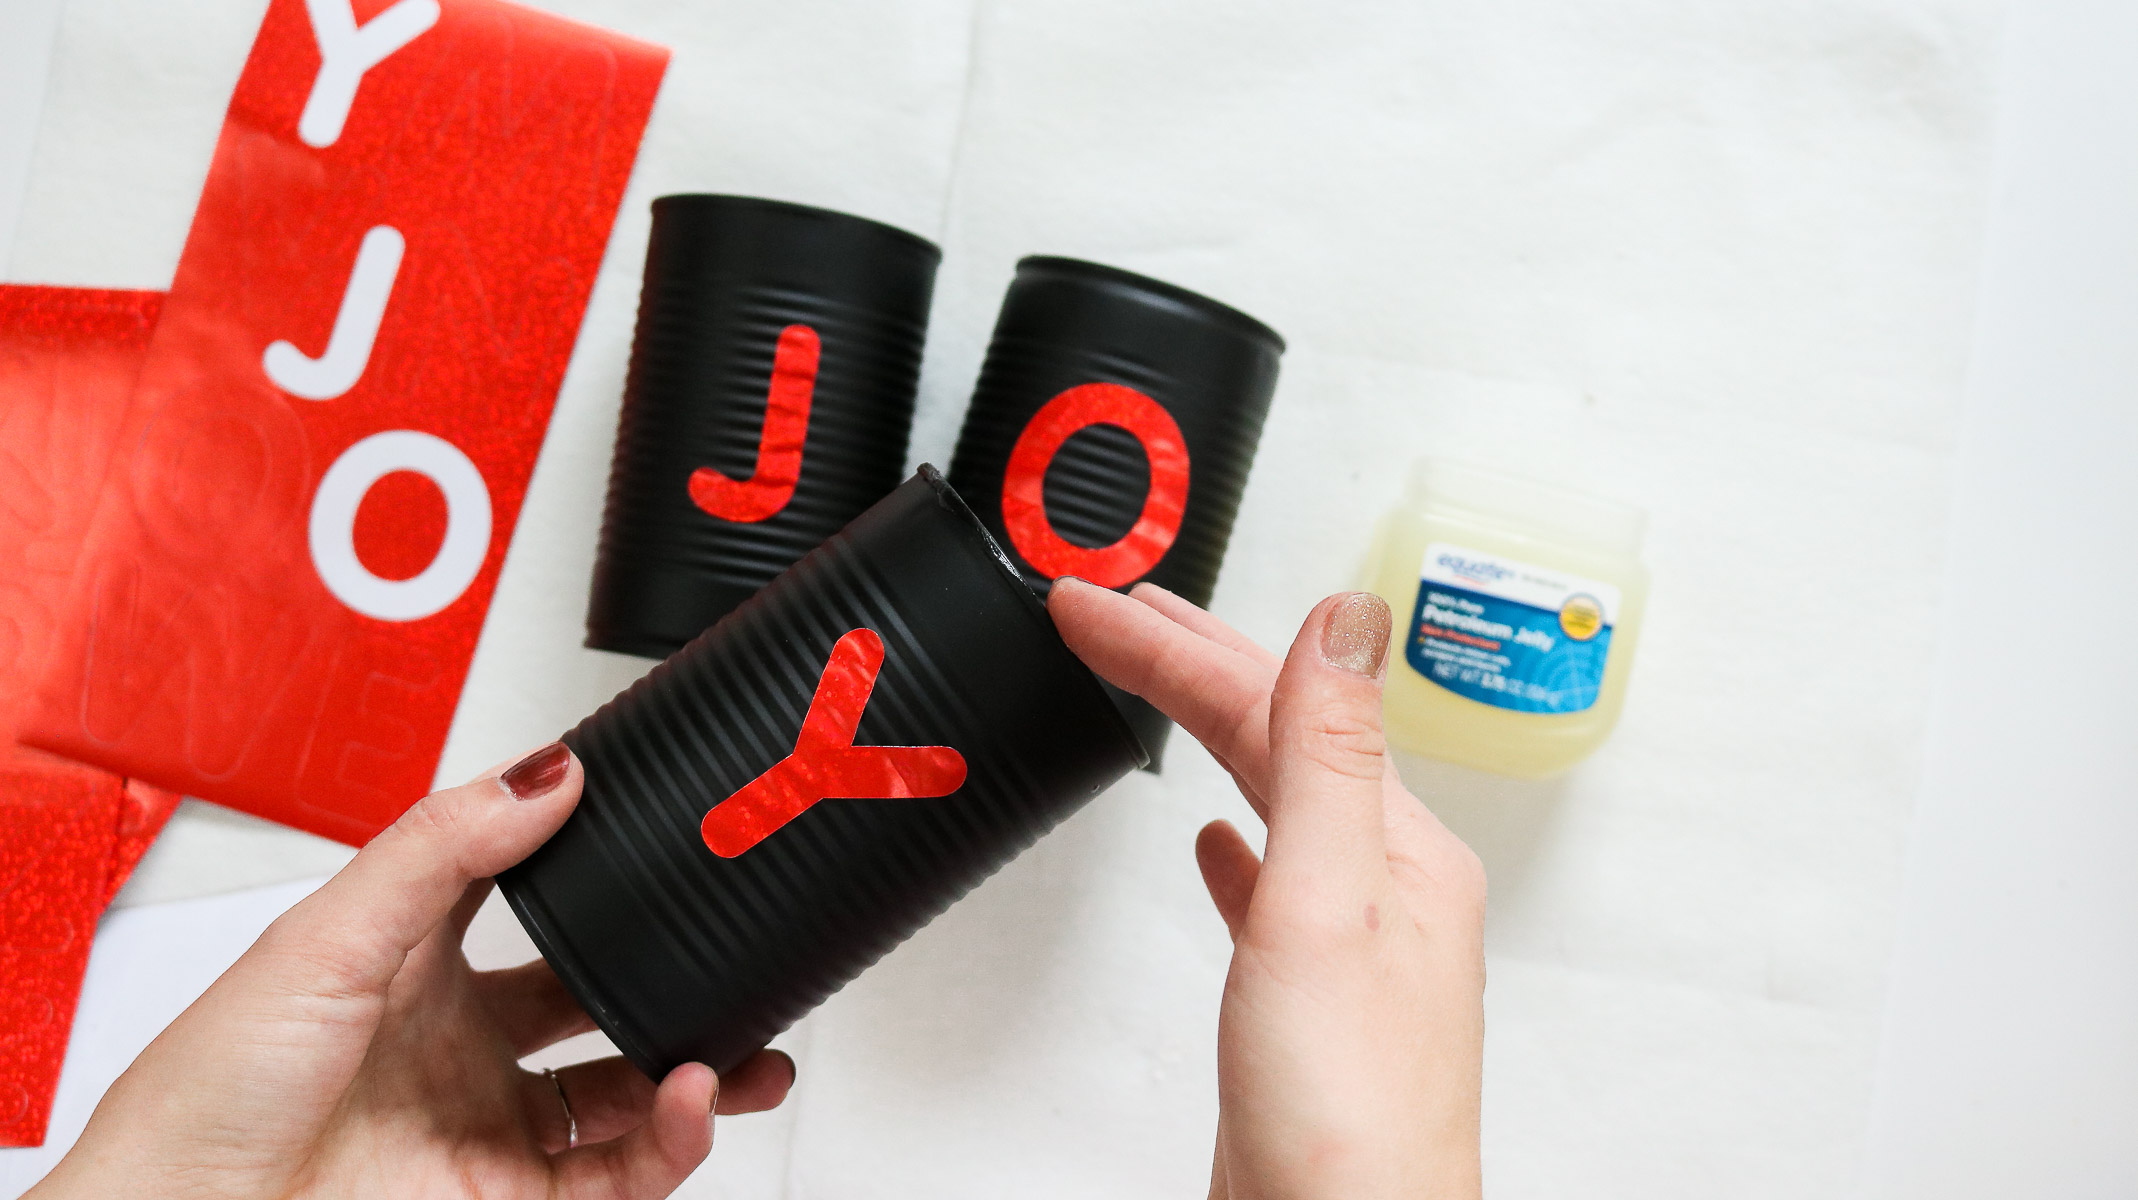
- alphabet stickers ( I got mine at the dollar store they were called poster stickers)
- petroleum jelly
(NOTE you will NOT need the wire as shown in the photo below.. More on that later)
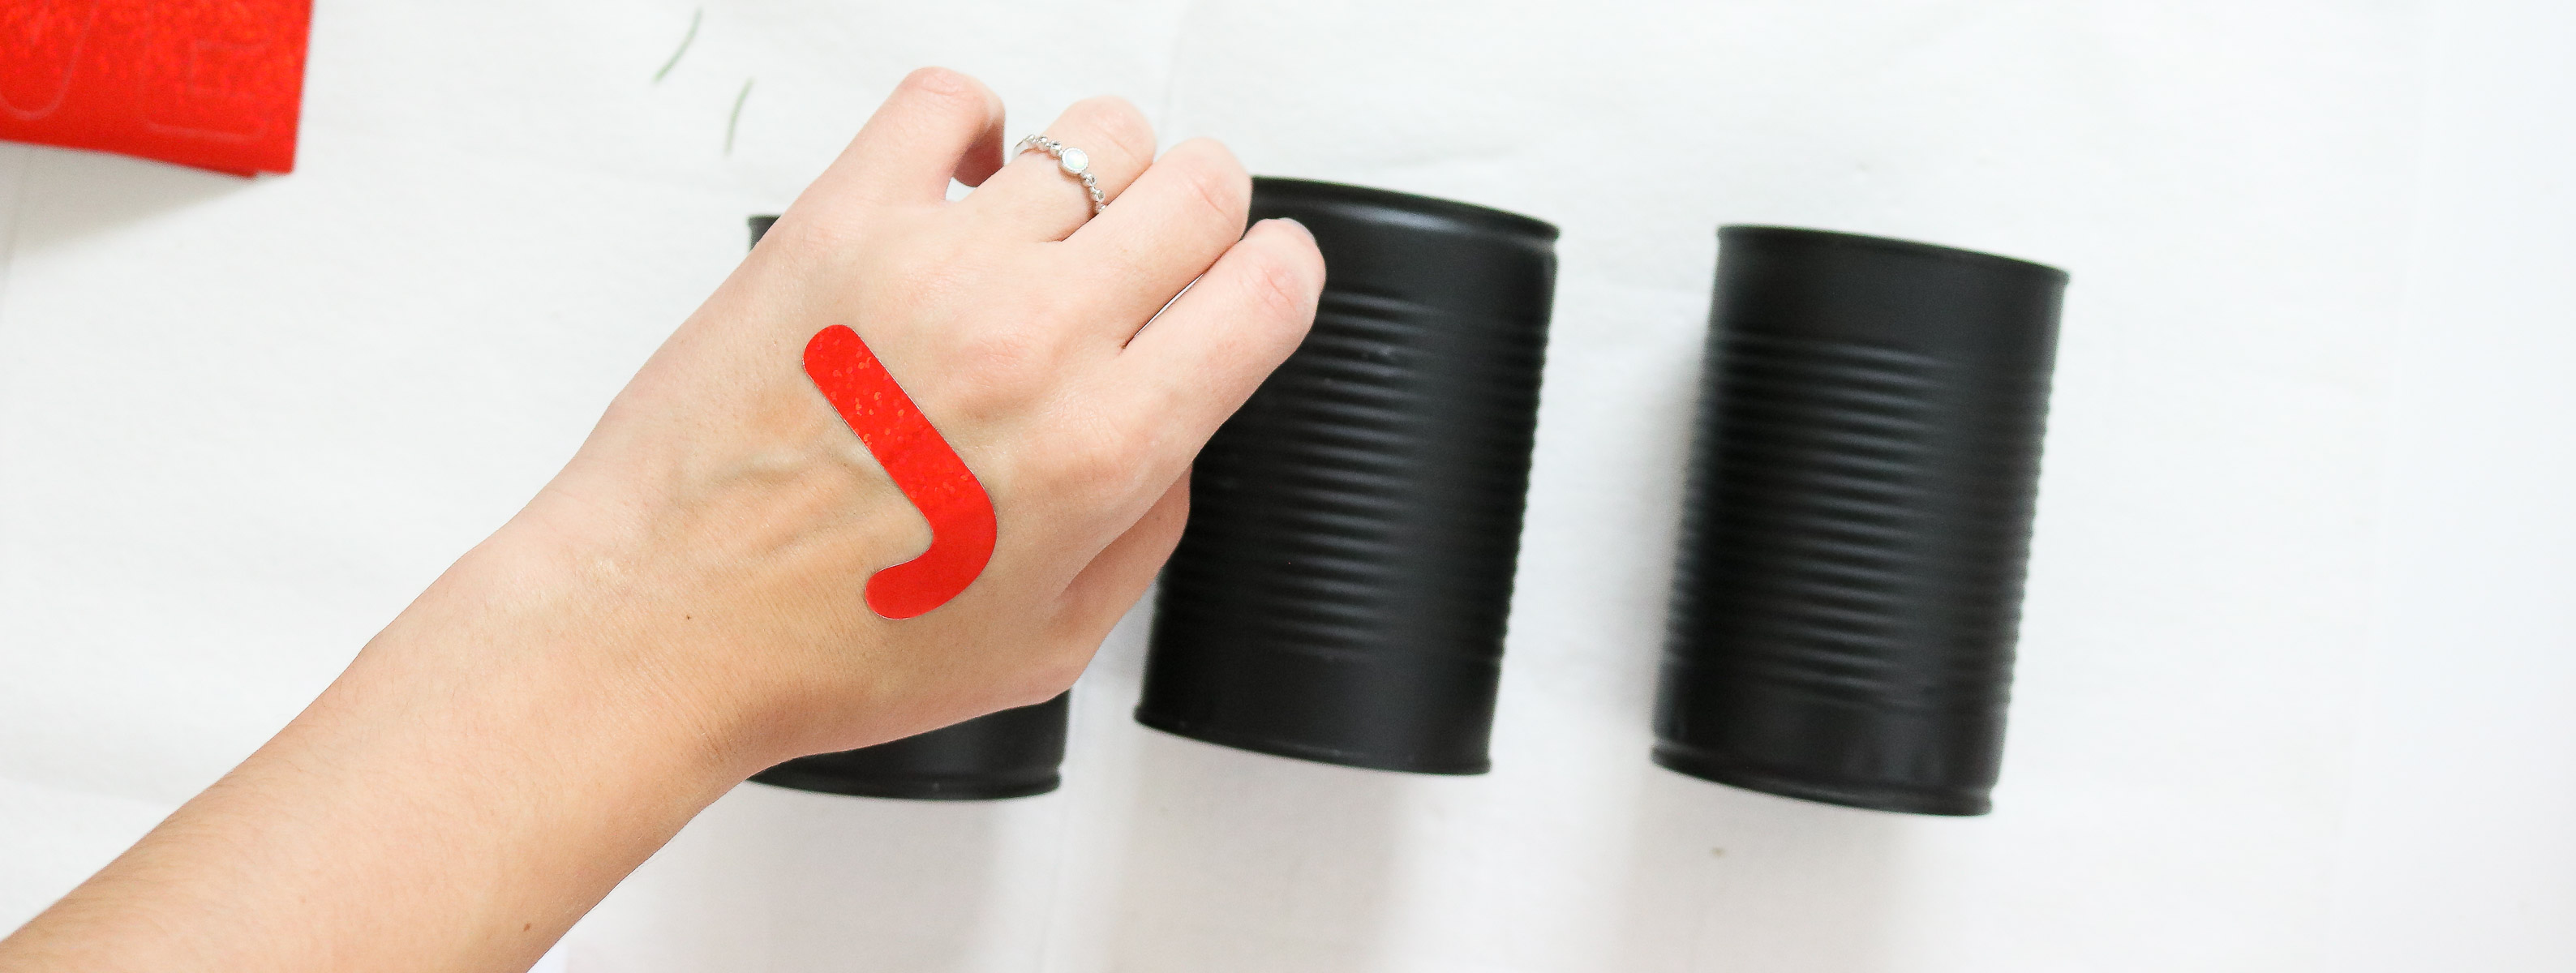
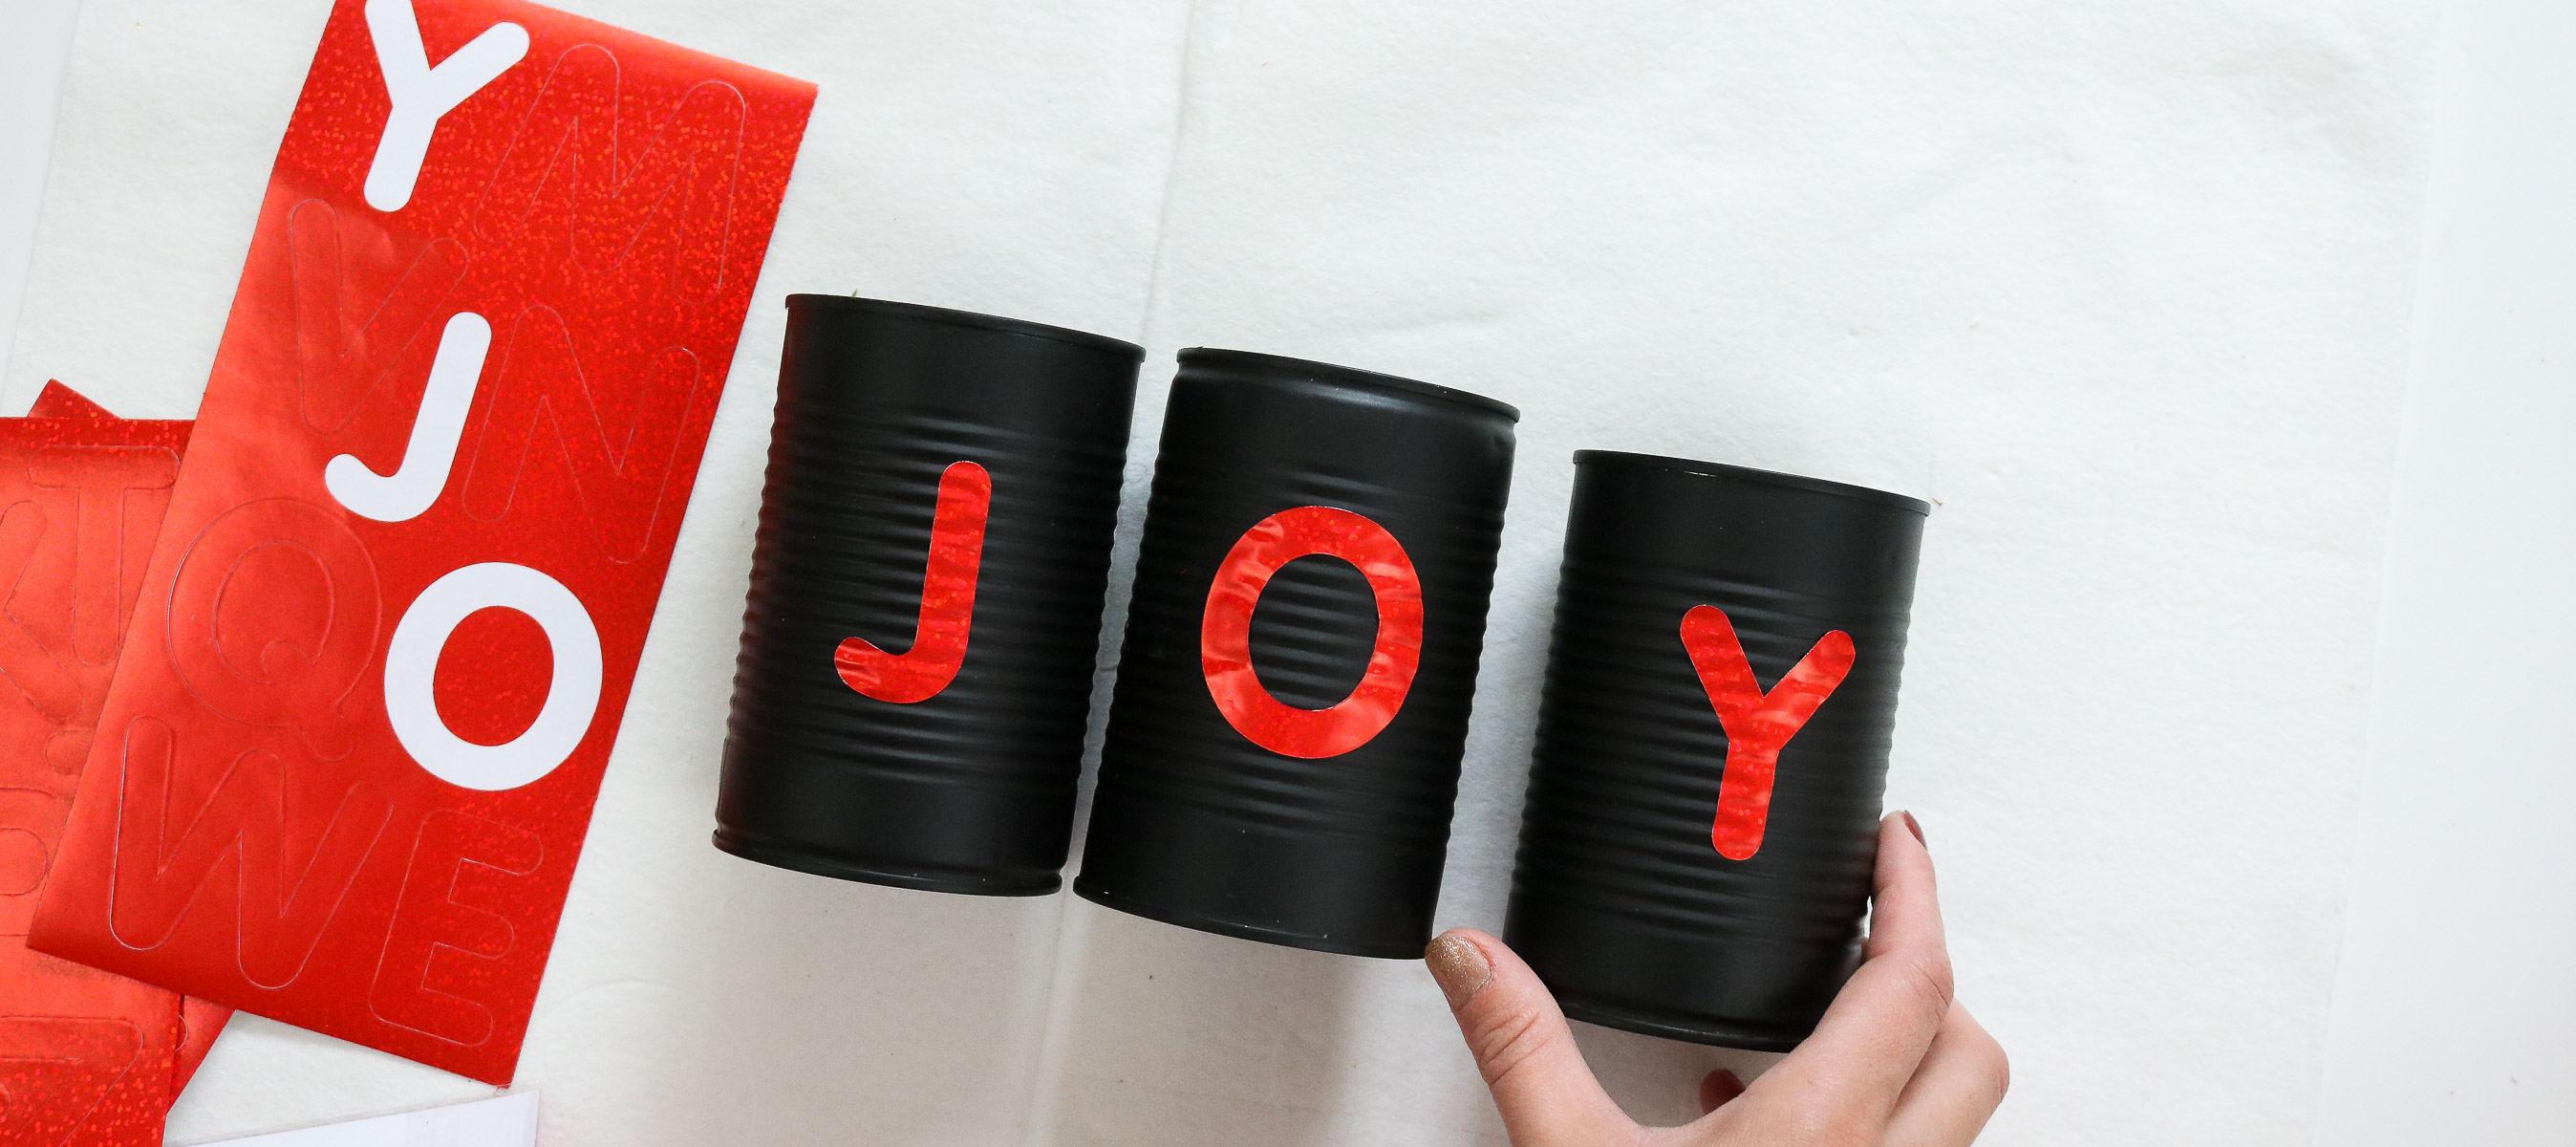
Step 1: Paint and Apply your letters!
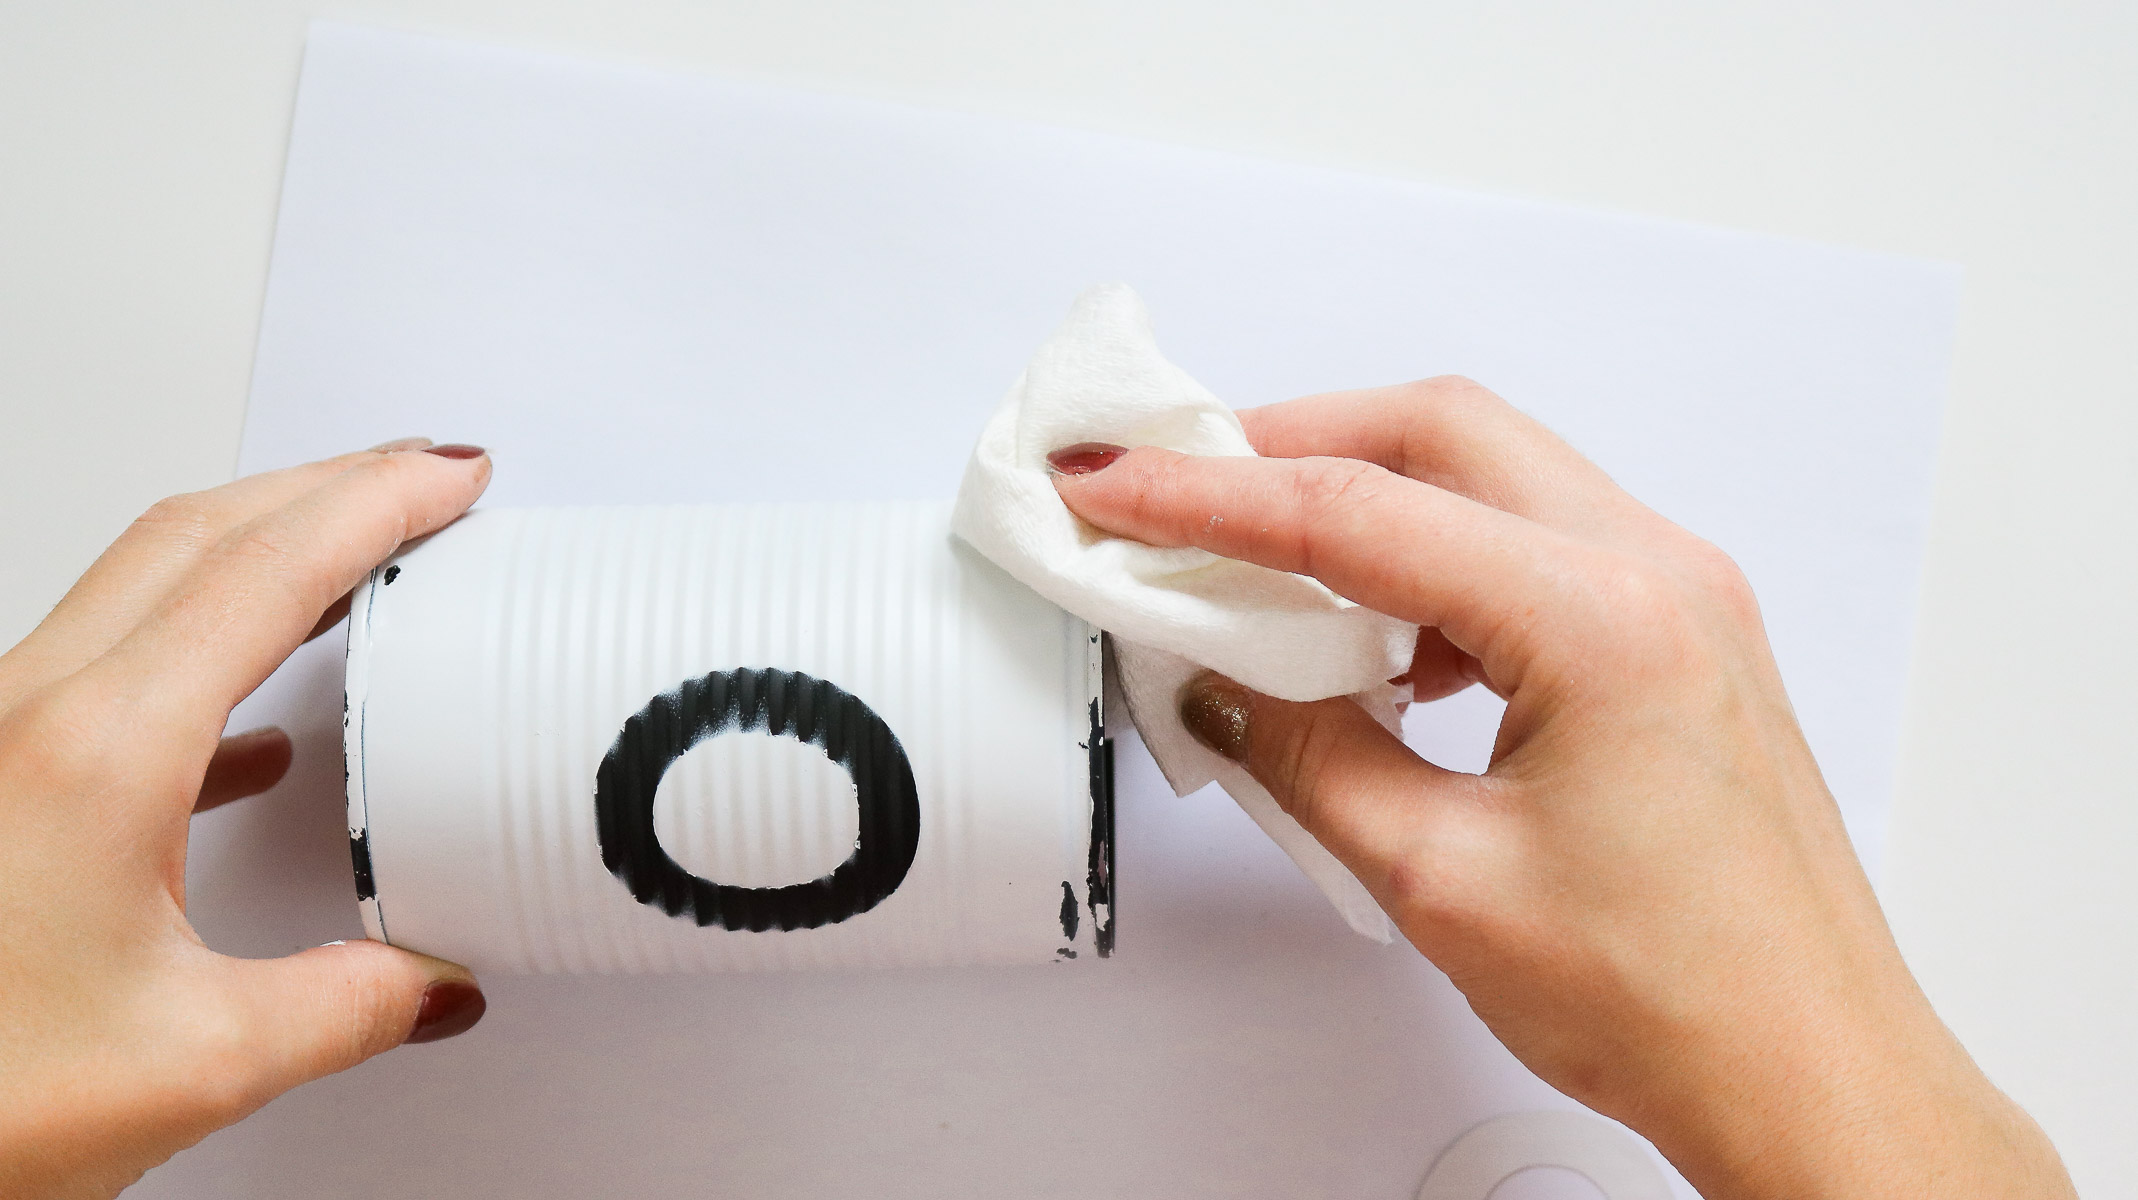
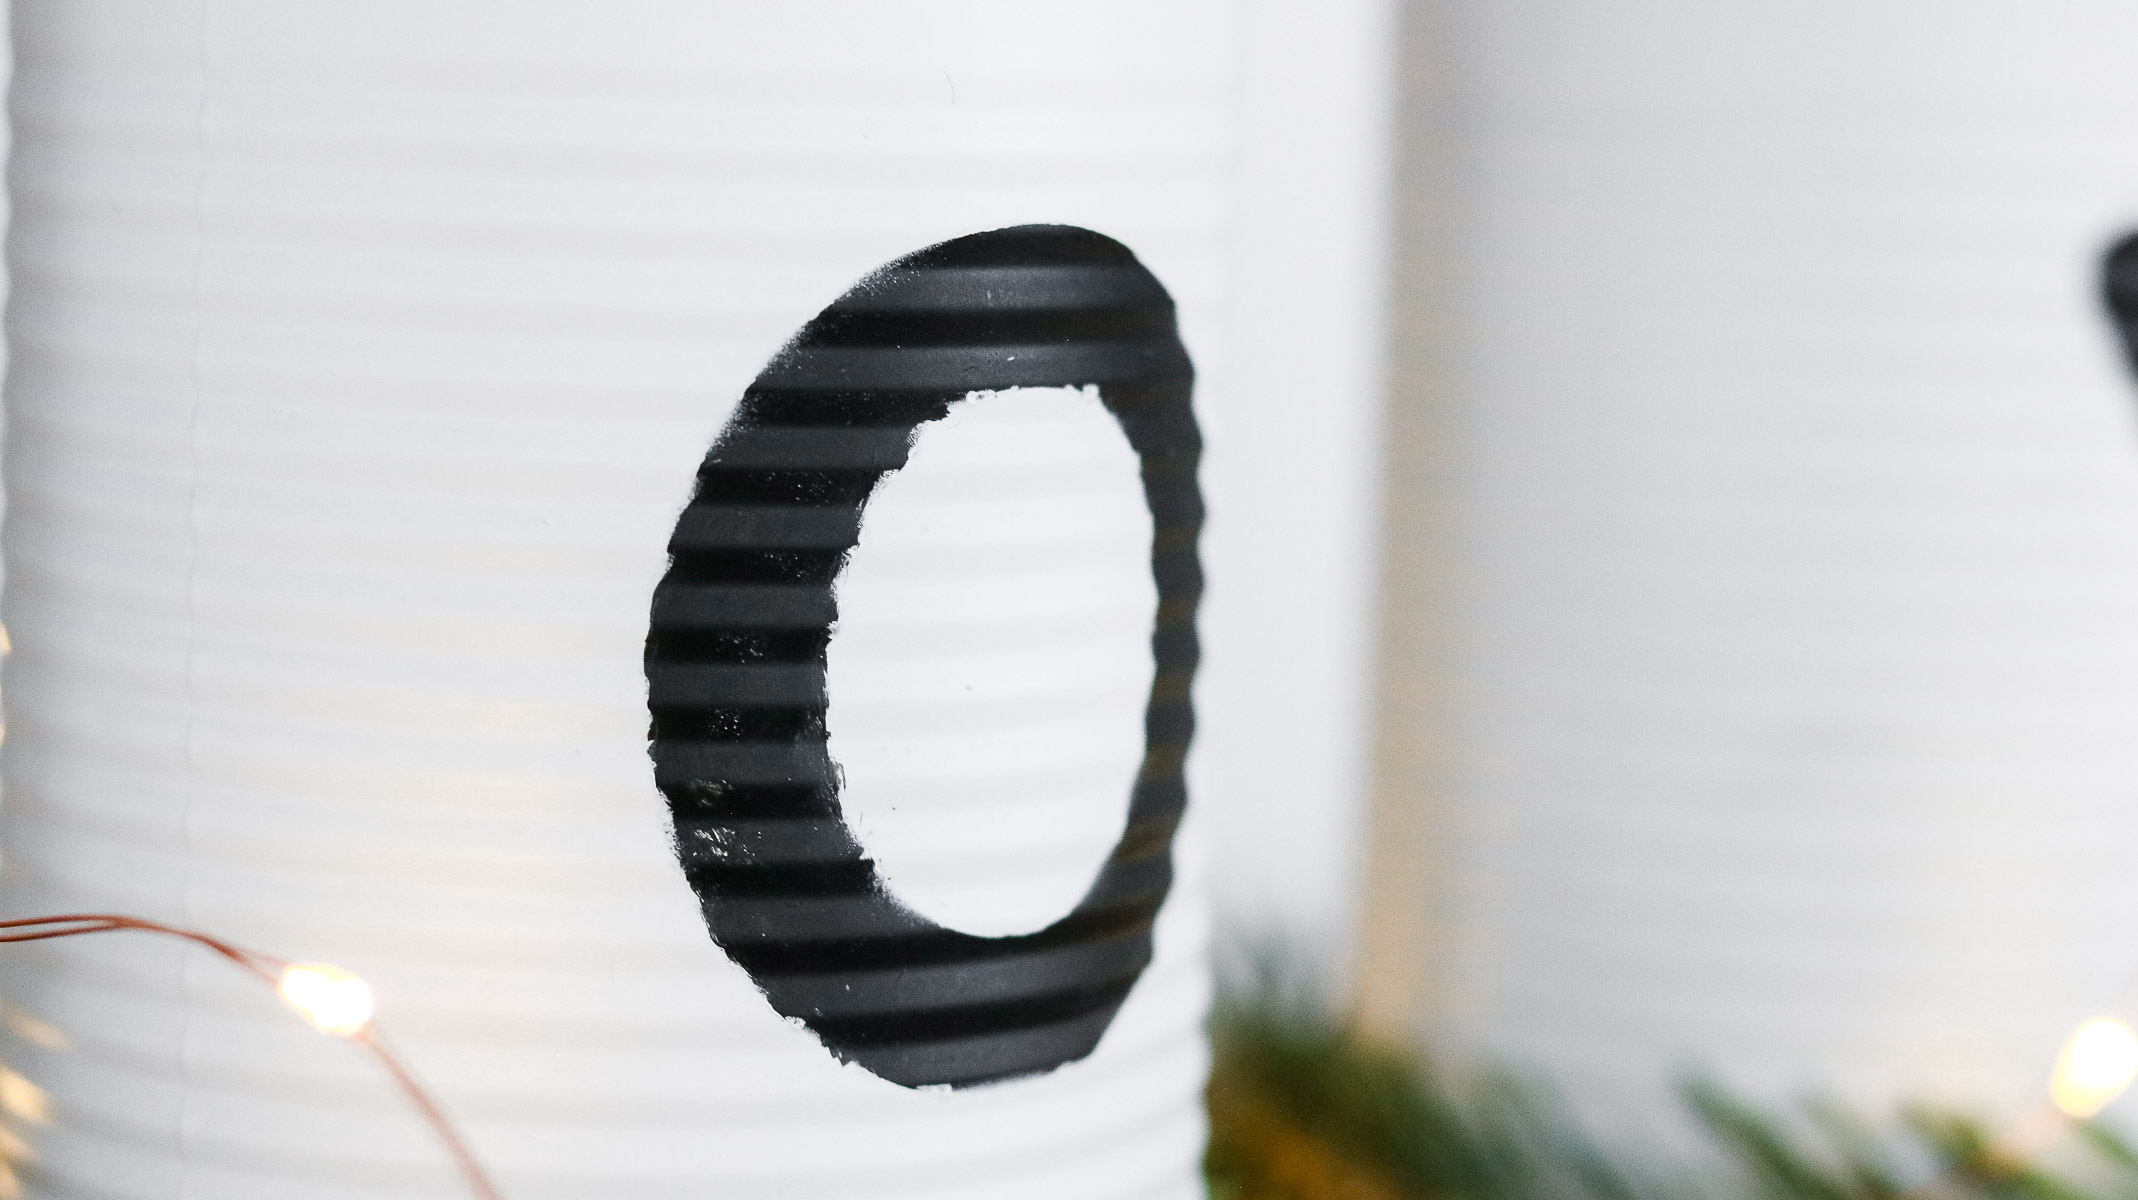
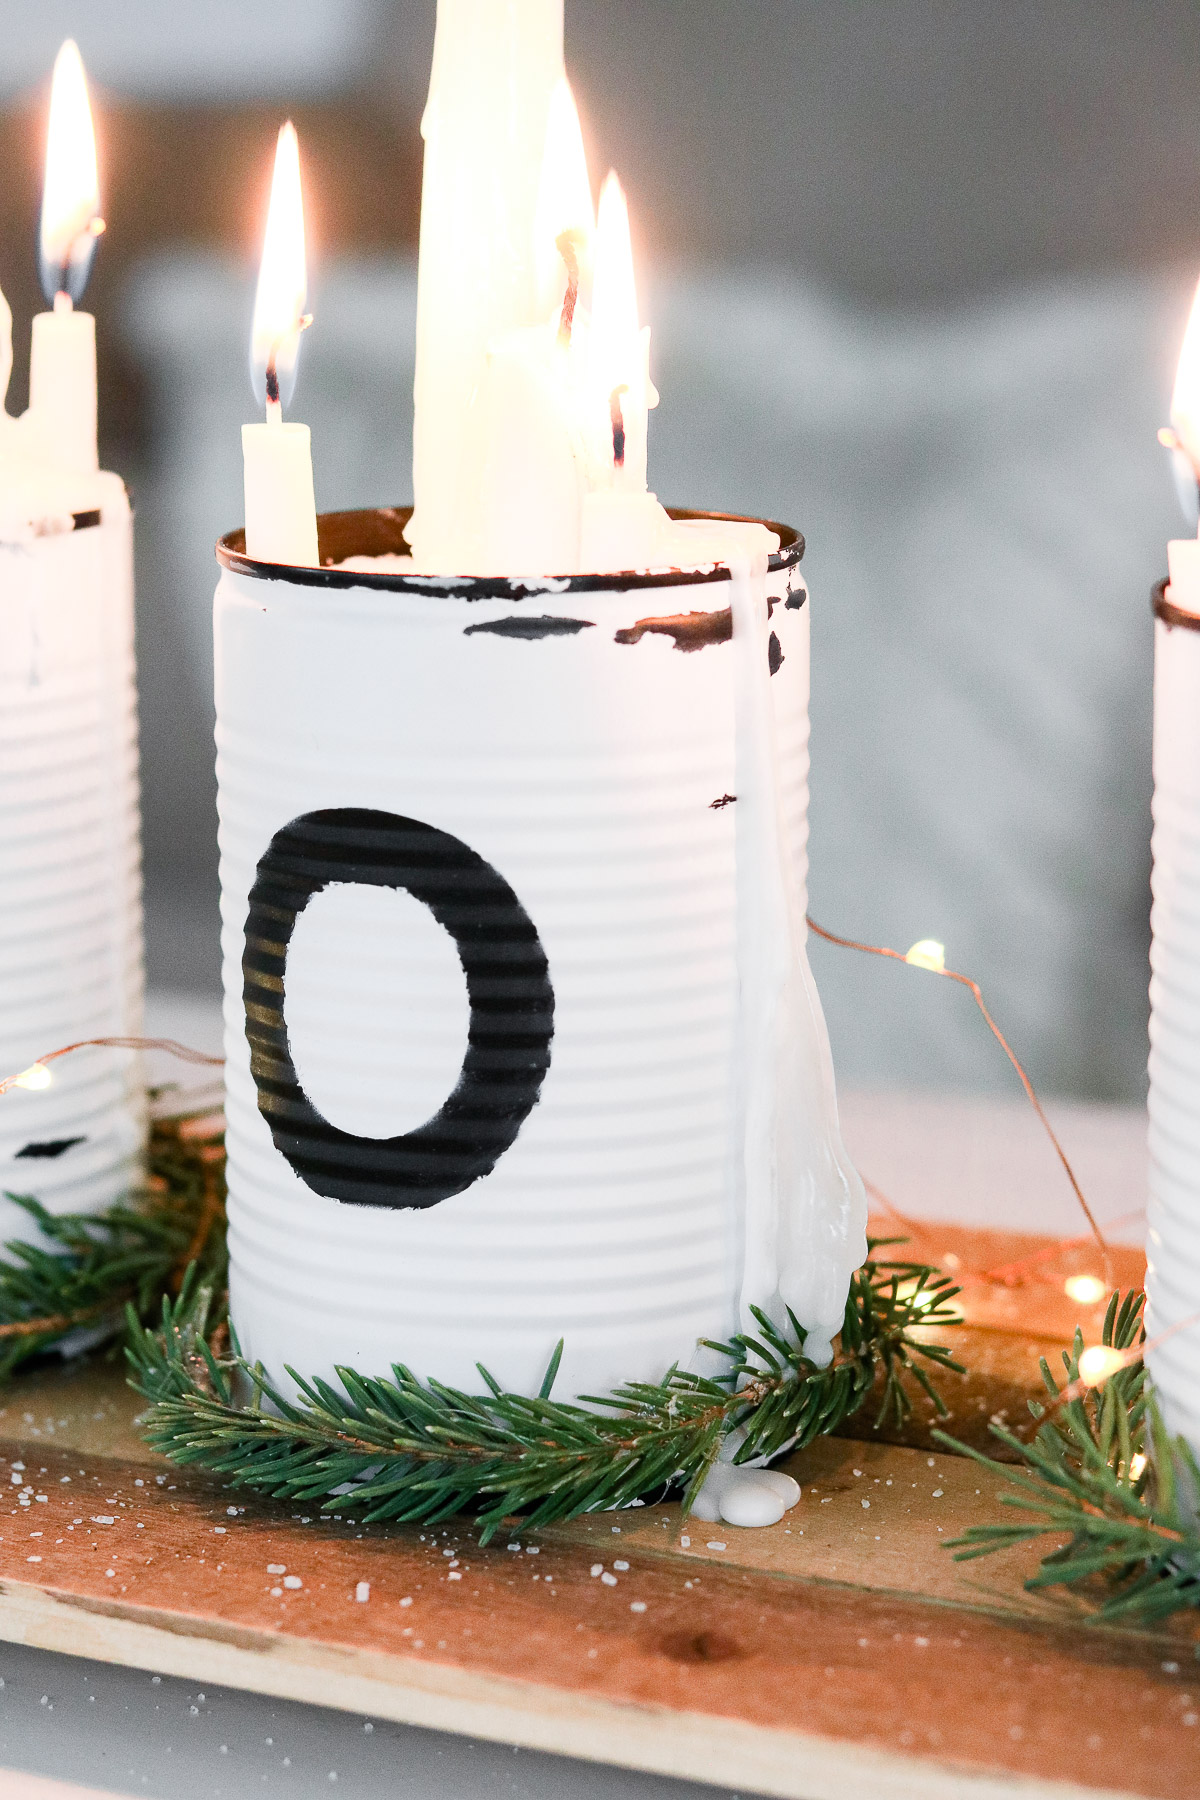
To begin spray paint your tin cans matte black. Sanding down your tin cans is optional. I didn’t sand mine and the black paint adhered to them really well. Let them dry completely than remove your stickers and apply them to your hand before applying them to your tin cans. This will ensure that your stickers aren’t to sticky so they don’t remove the black paint. Make sure your stickers are snug around the grooves of your tin can.
Step 2 : Apply your Jelly!
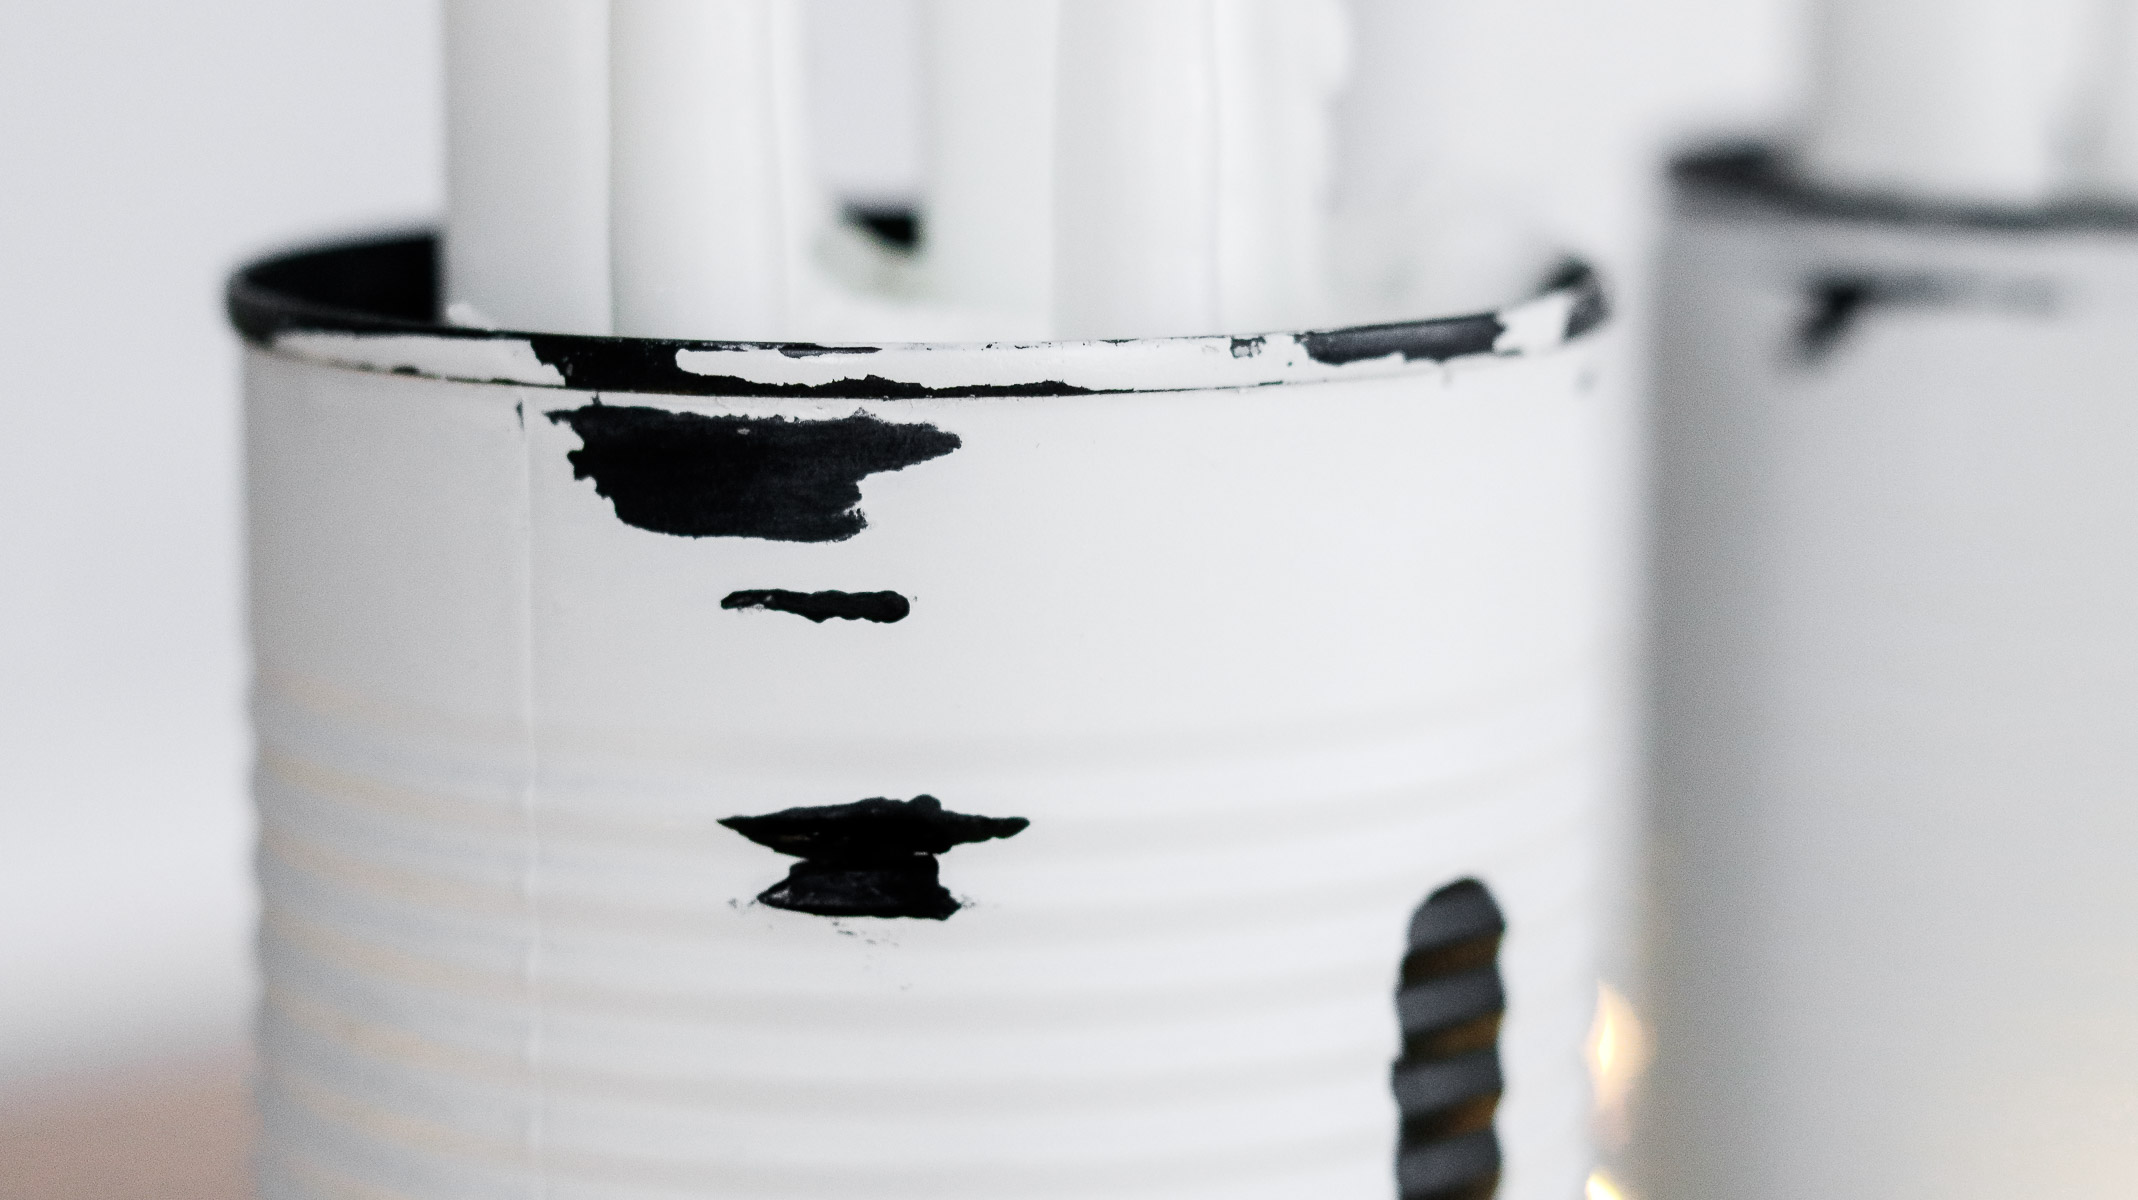
Apply a decent amount of petroleum jelly around the edges of your tin cans as well as a few spots in the middle. Avoid applying it anywhere near your letters.
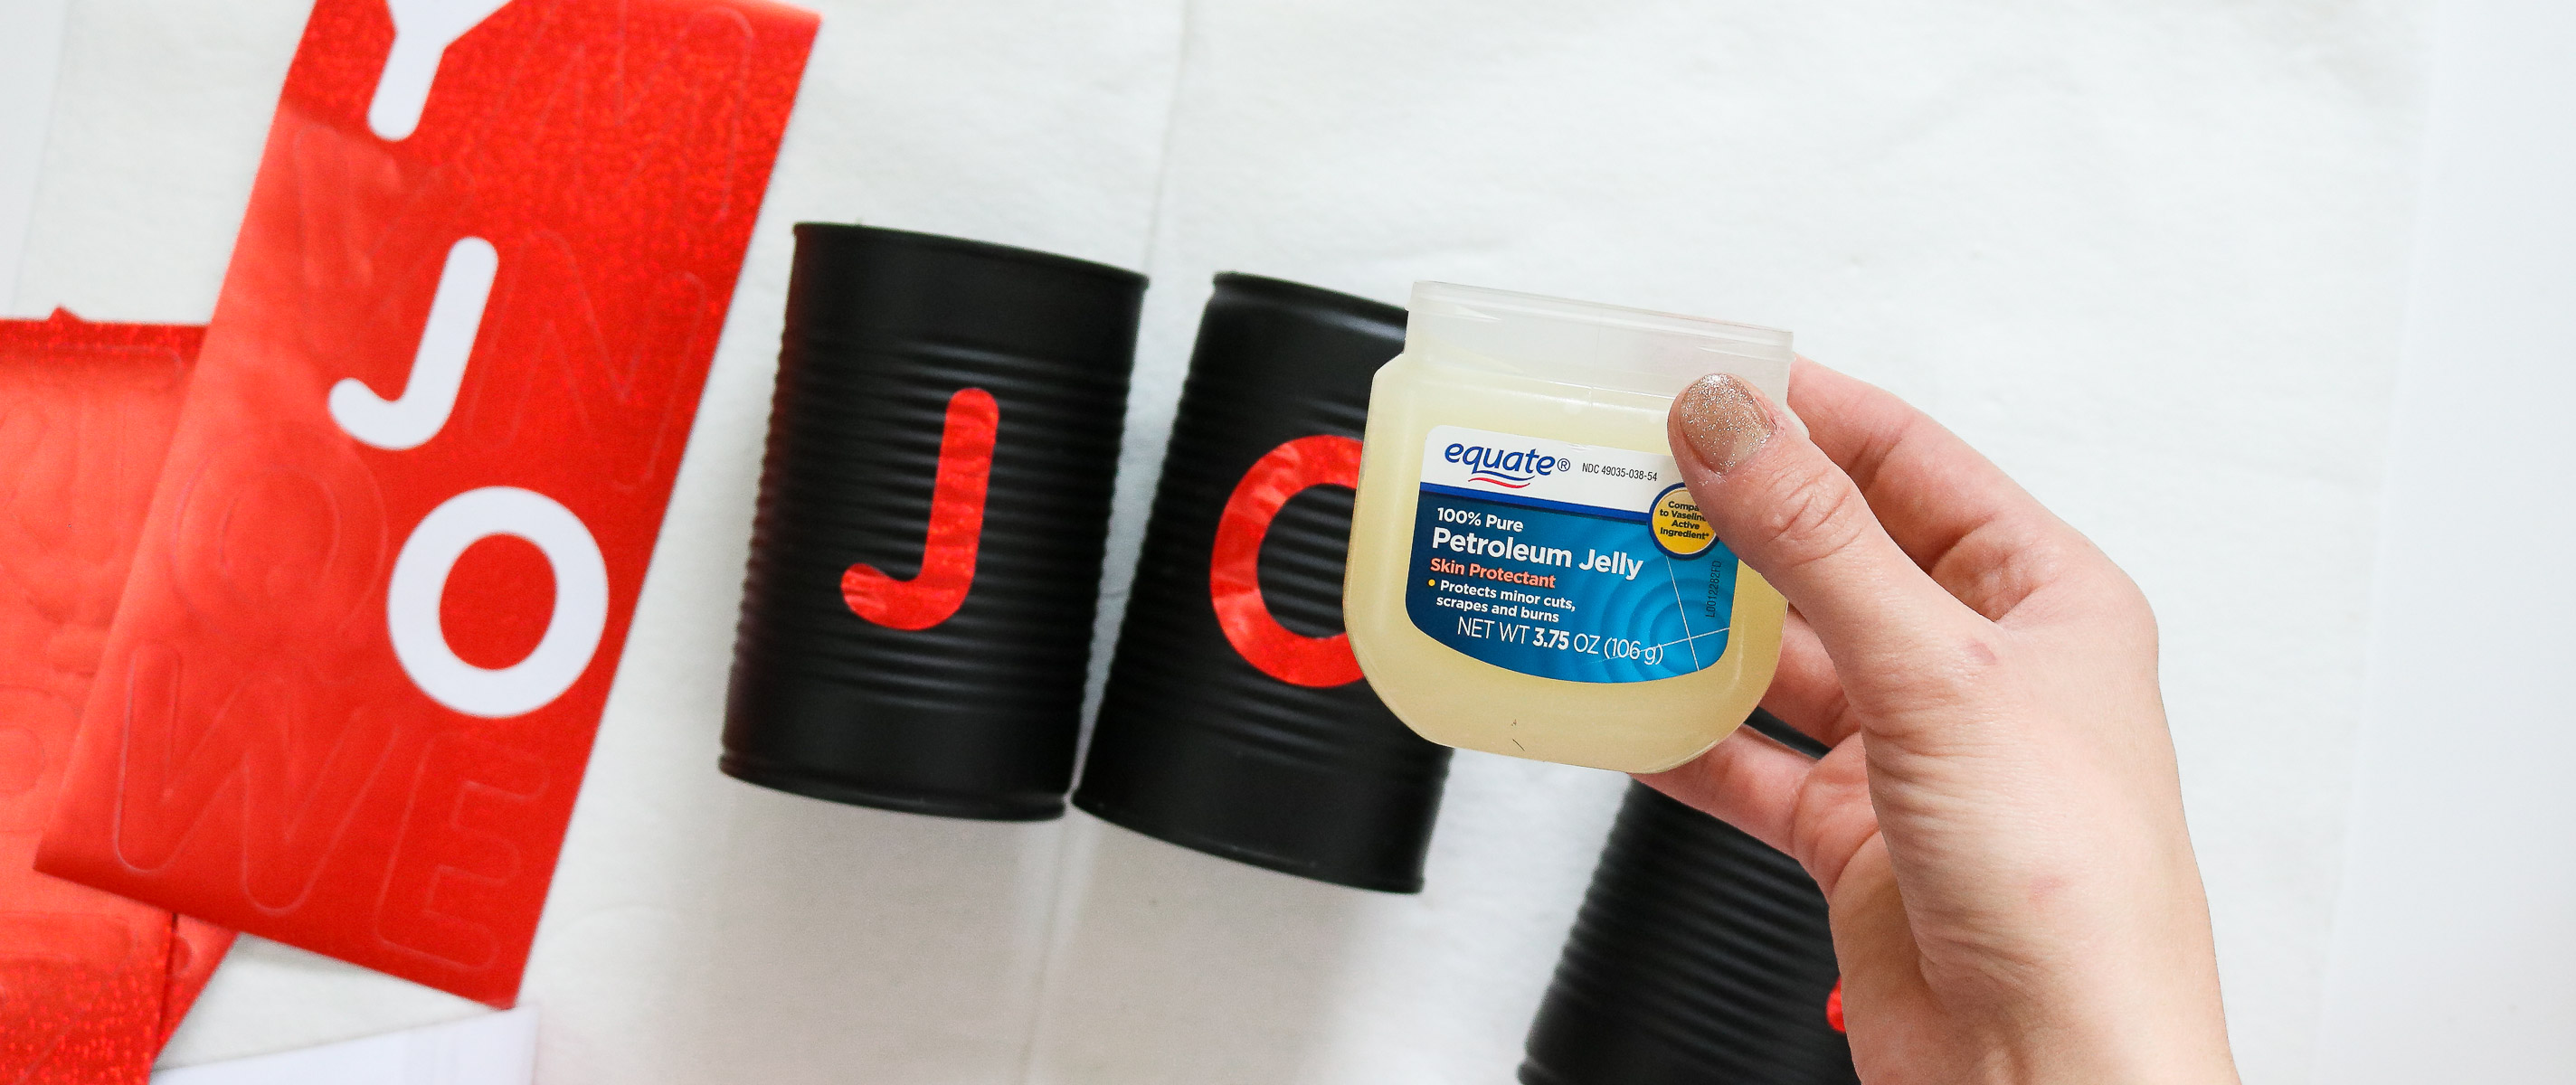
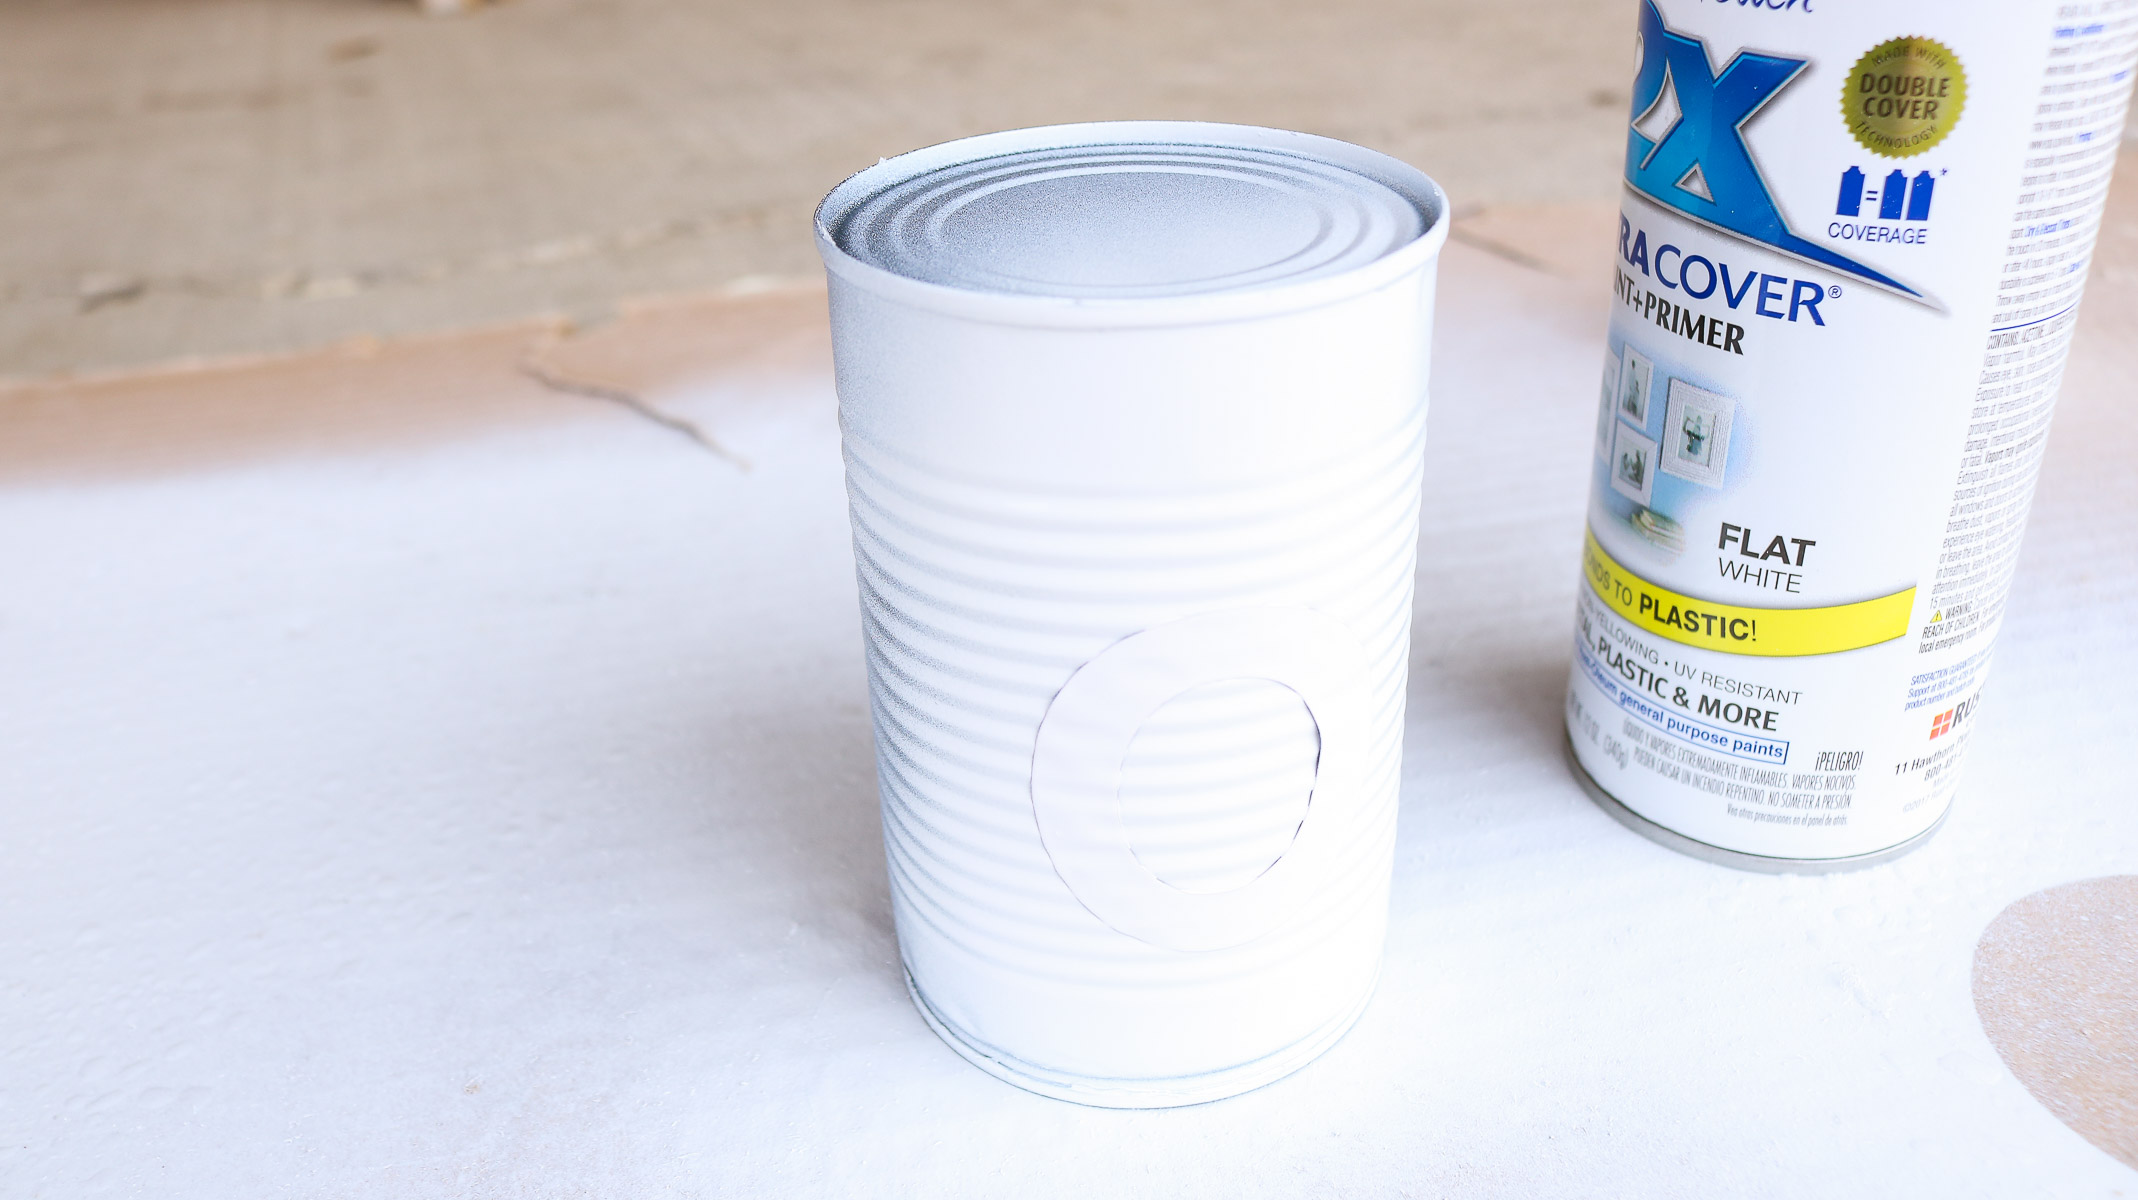
Step 3: Paint them white!
Before giving them a coat of white paint make sure your stickers are on securely again. Do not remove your petroleum jelly you should be applying white paint over it.
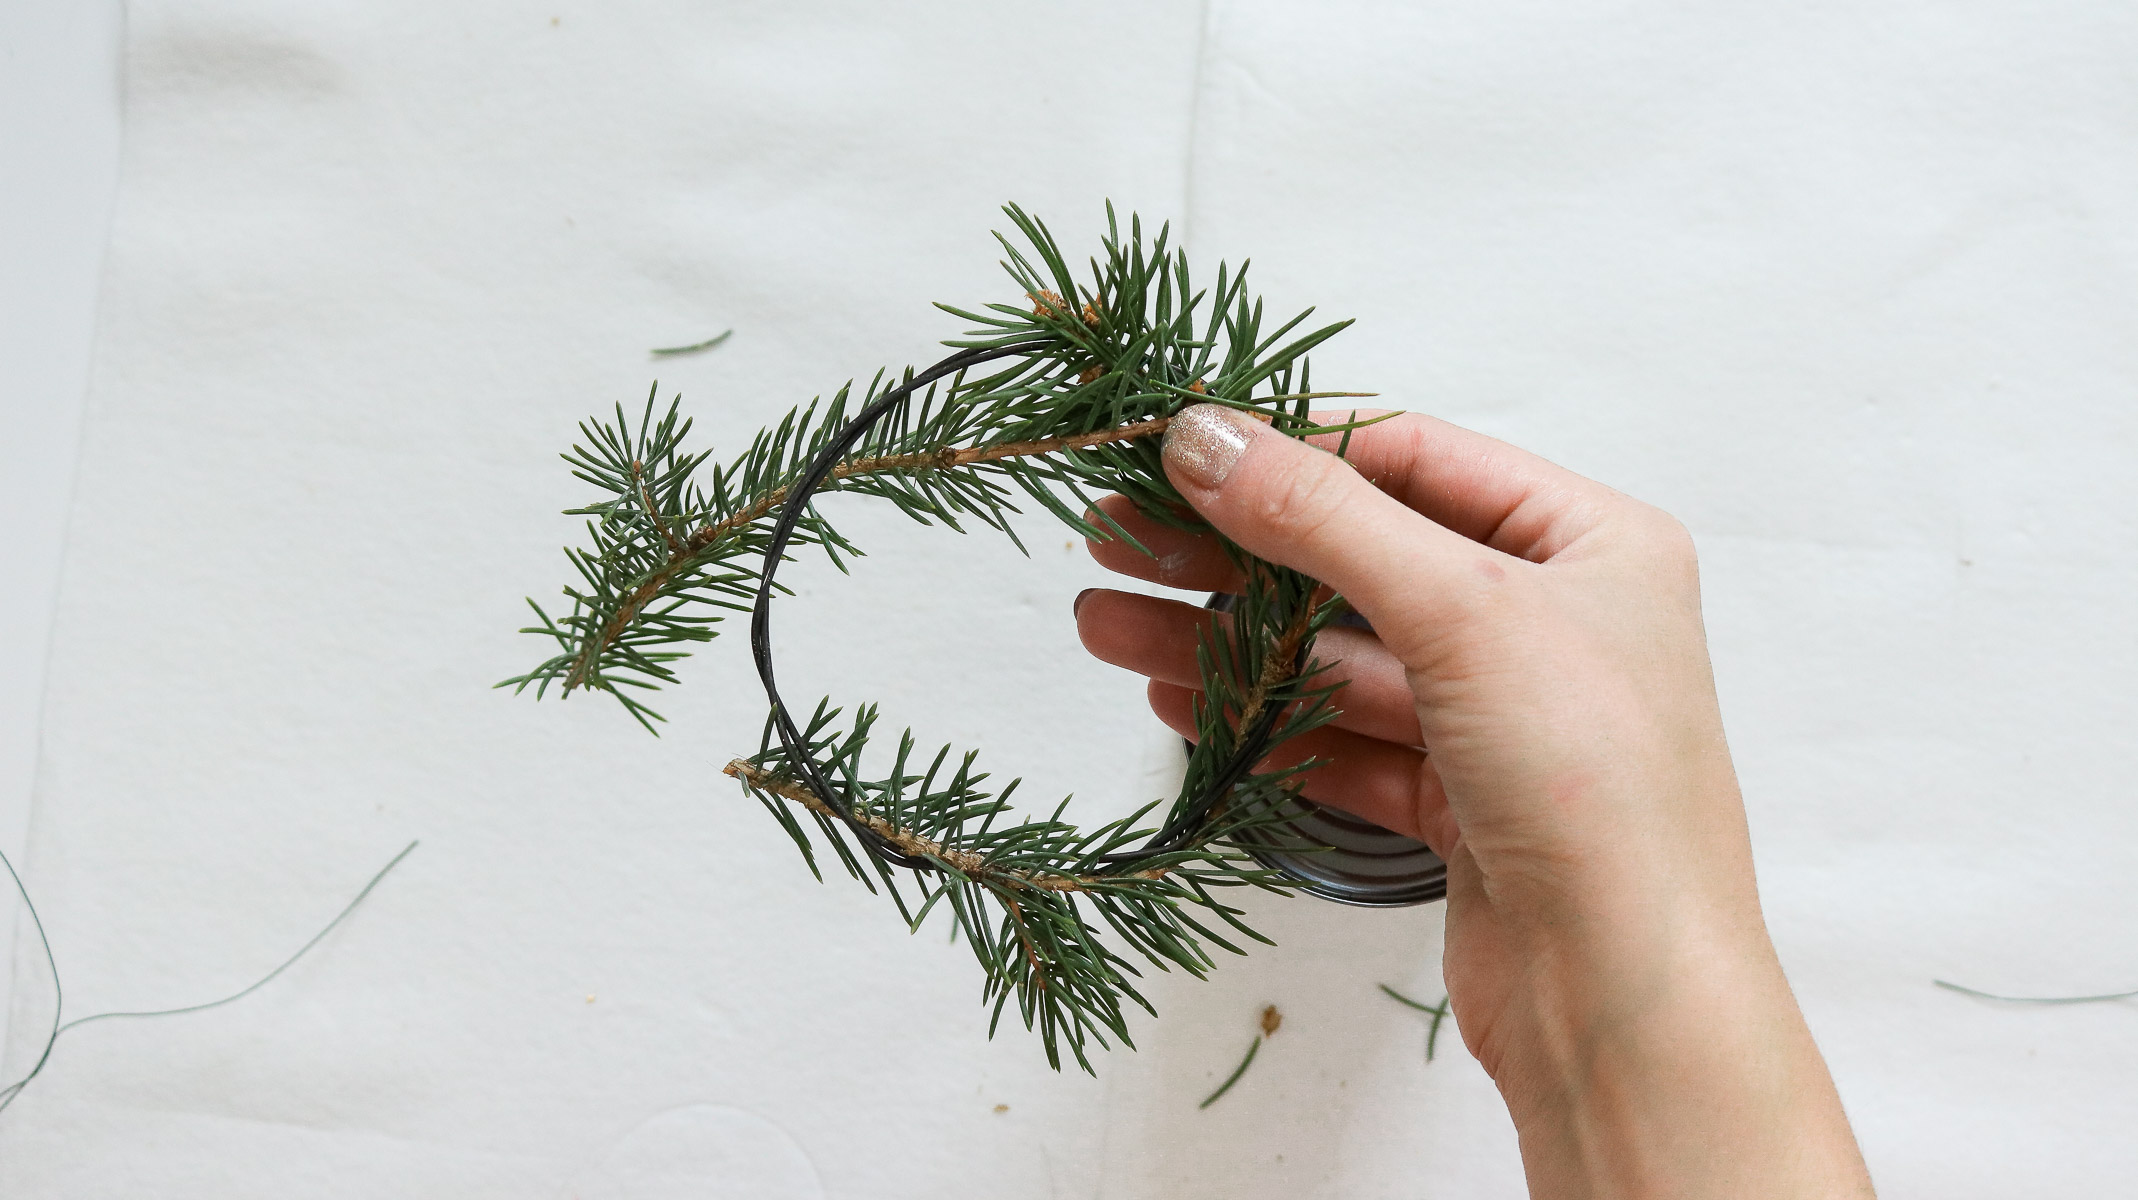
Step 4: Creating Little wreaths!
Okay so originally I was planning on wrapping pine around some wire but it turned out looking too bulky and not pretty at all. So I scratched the idea and simply glue the pine springs together on their own creating a delicate little wreath to go around the tin can. It looked a bit wobbly but once you pull it over the tin can it forms perfectly around it.


Step 5: Revealing your Enamel finish!
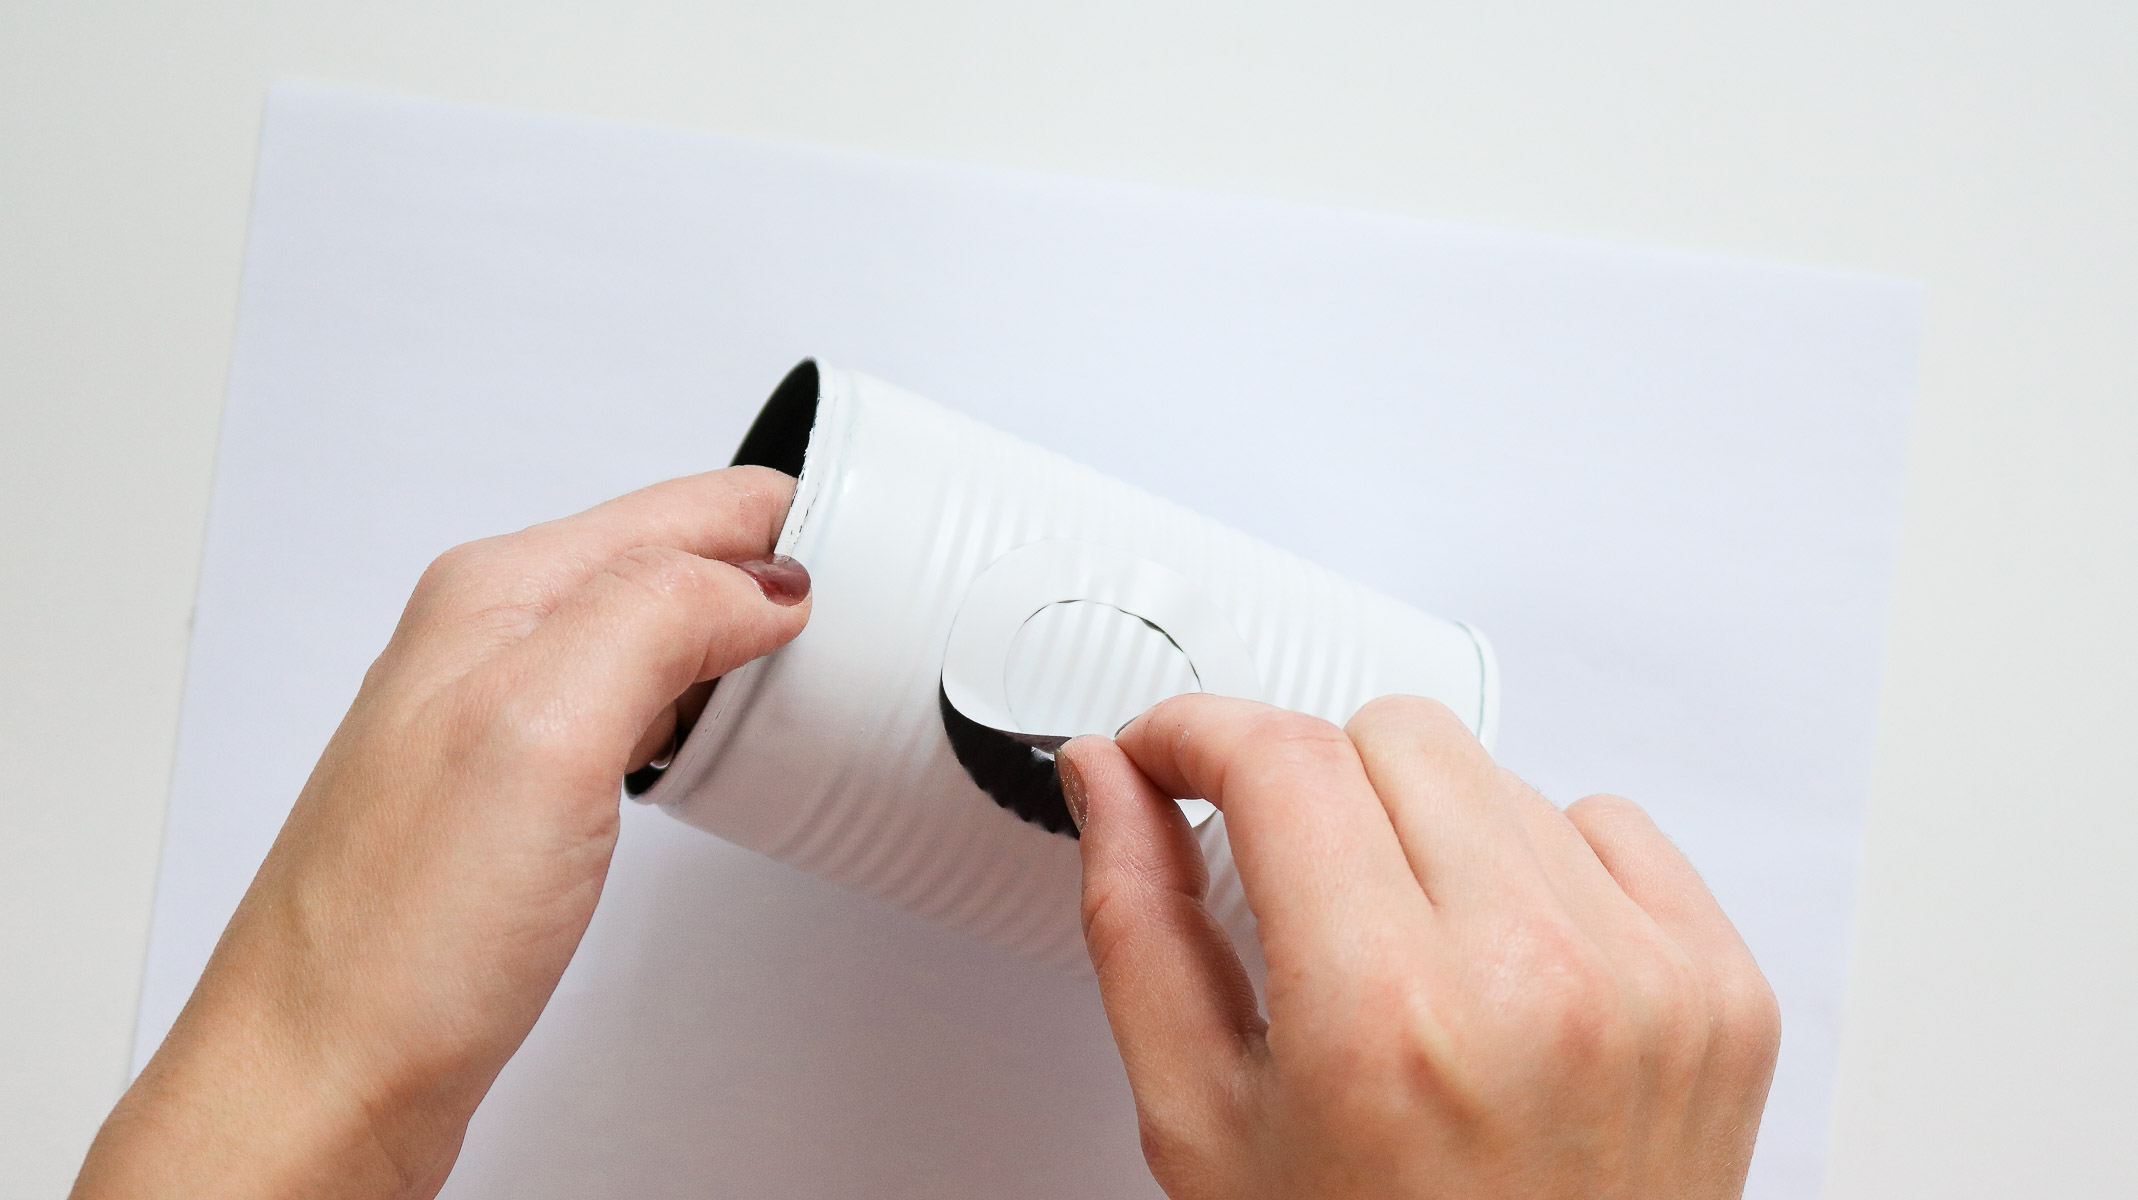
Okay once your paint has dried completely gently remove your stickers. If you got some white over-spray on the black use a paint brush and some black spray paint to touch it up. I just sprayed a bit of spray paint in a paper plate than dipped my paint brush and touched it up that way. Following that take a paper towel and start wiping the edges of your tin can. Your white paint should start coming right off where ever you applied the petroleum jelly. This should give it that rustic look and that’s it!
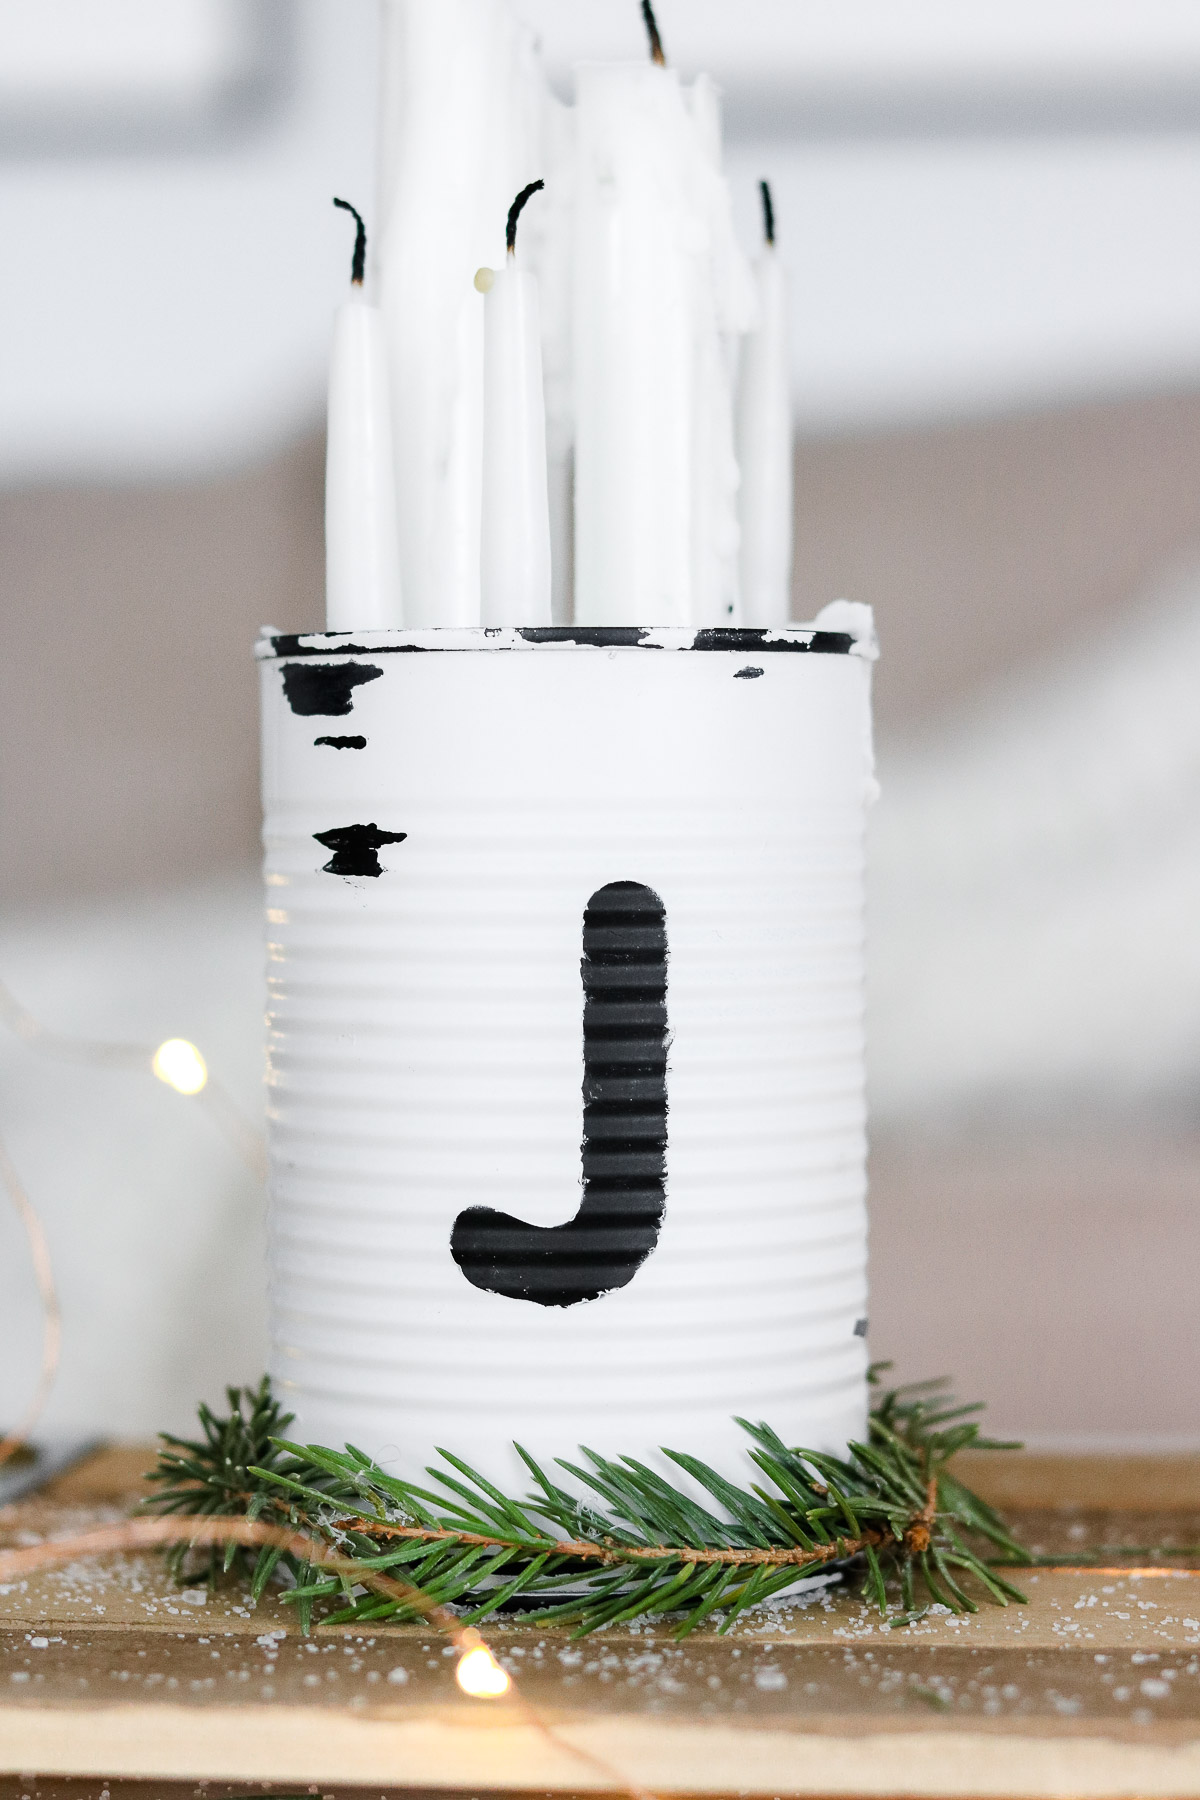
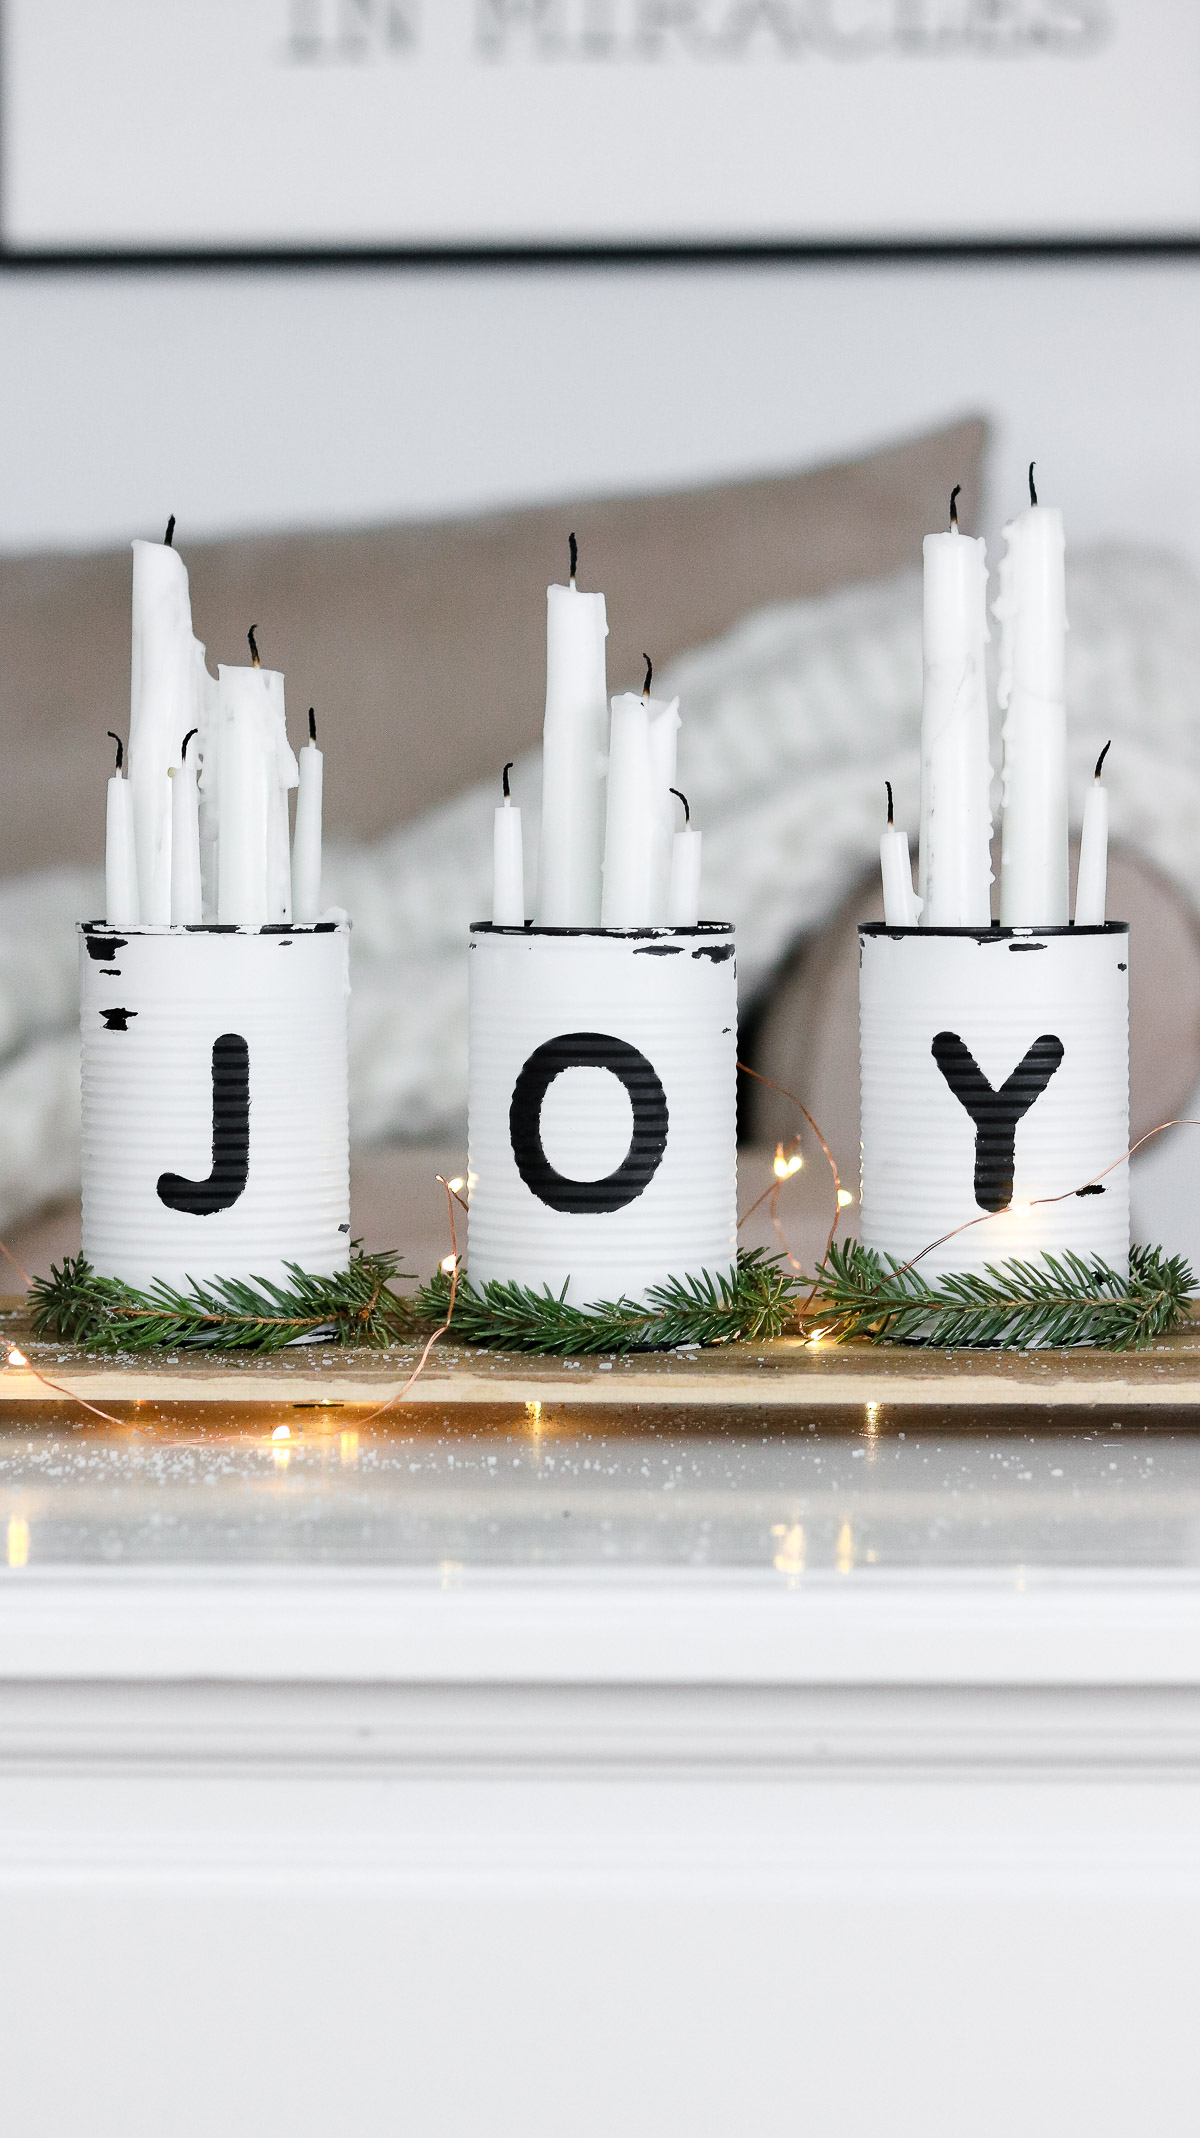
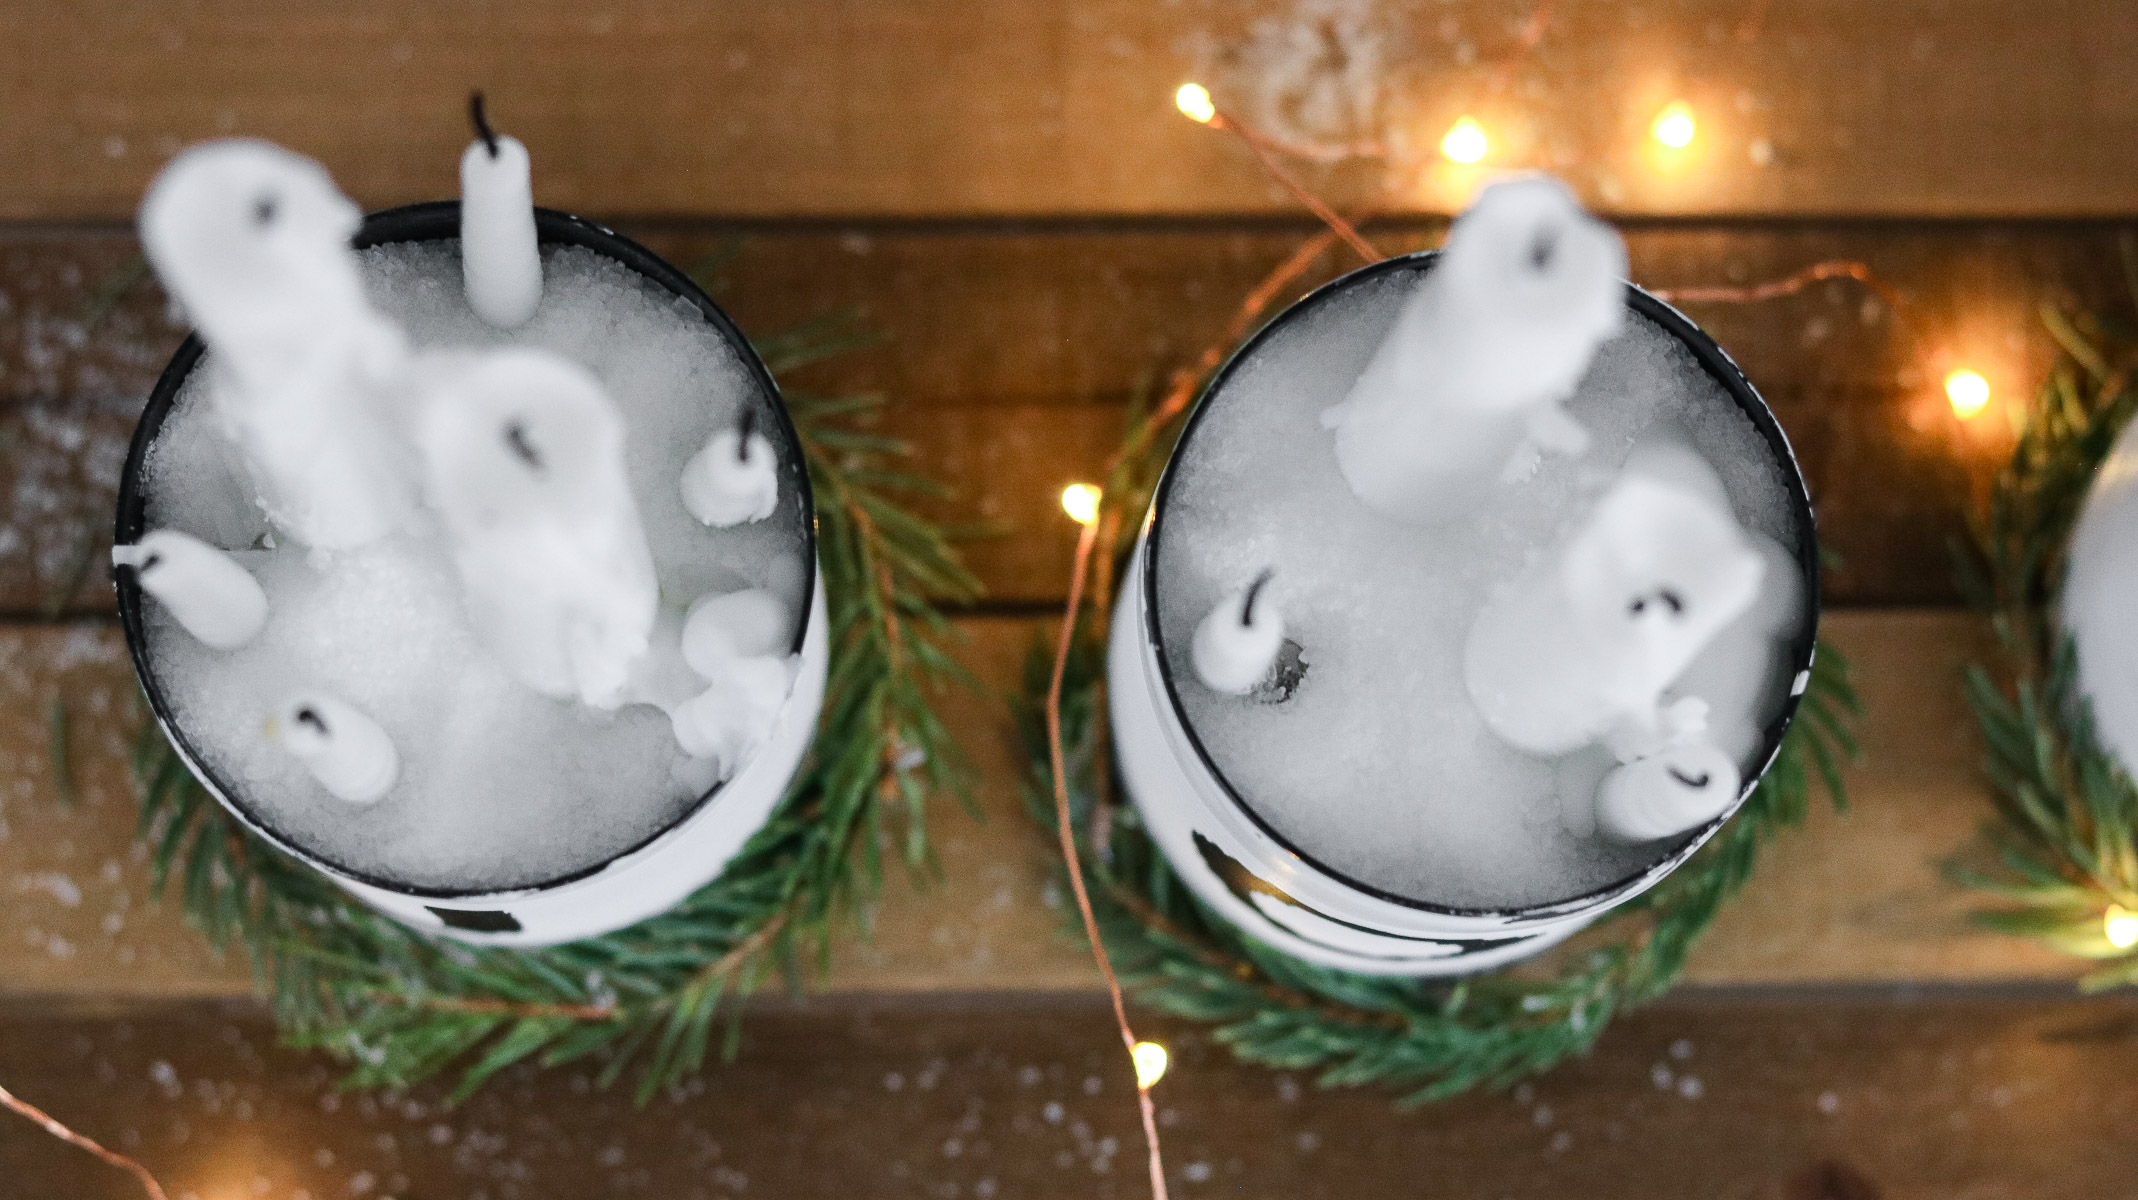
If you wish to display candles like I did. Lay your candles in the tin candles then pour Epsom salt over them and adjust them. 😀
I love the way the jelly created those rustic details! I can’t wait to try this trick on furniture!
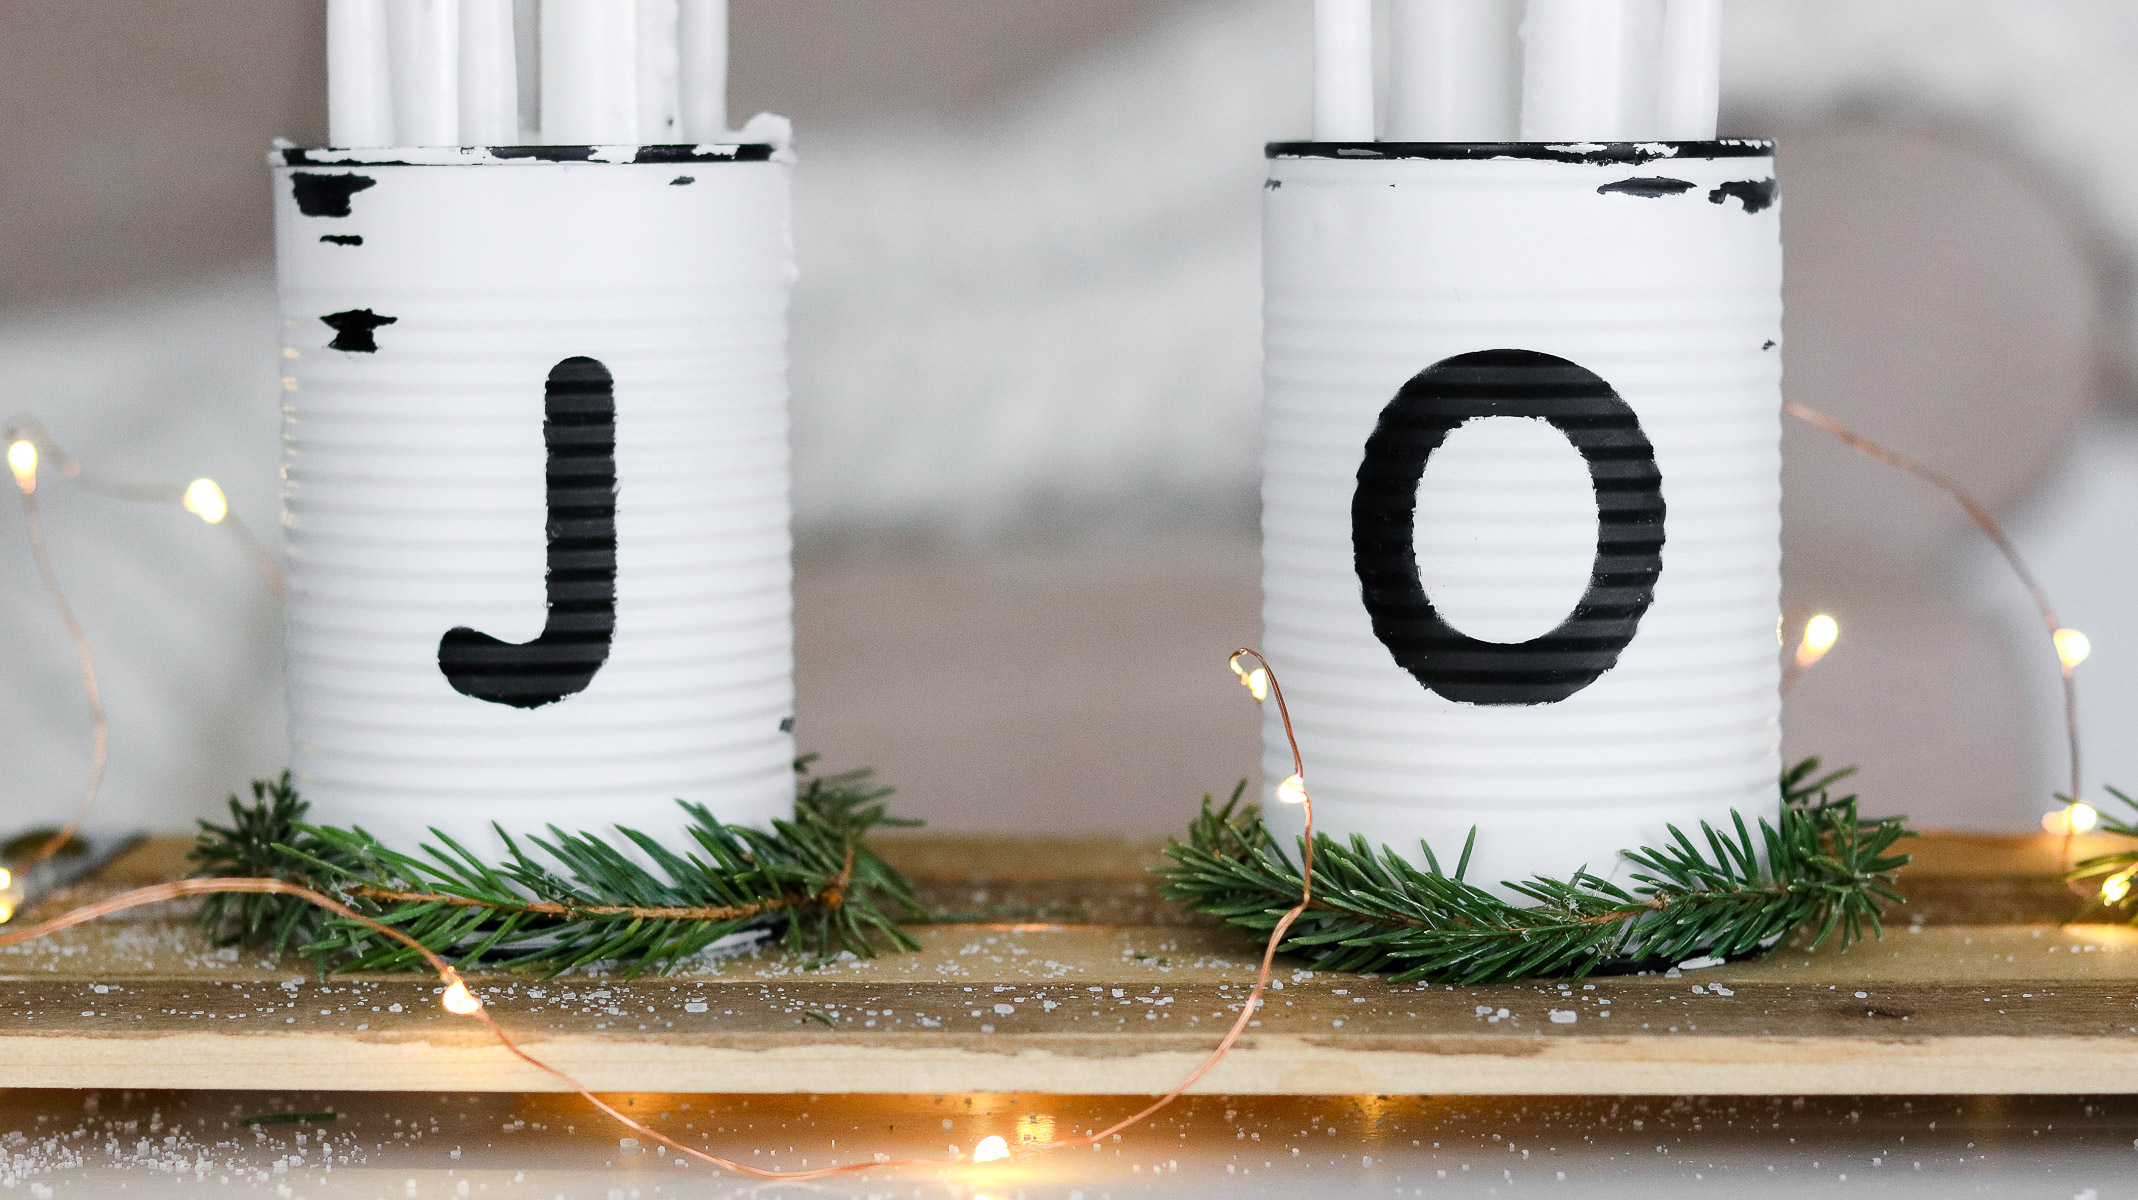
So if you look close my letters weren’t perfect but considering this DIY took really quick to complete I’m really happy with how they turned out! Plus I think it kinda of adds to the rustic charm . 😀
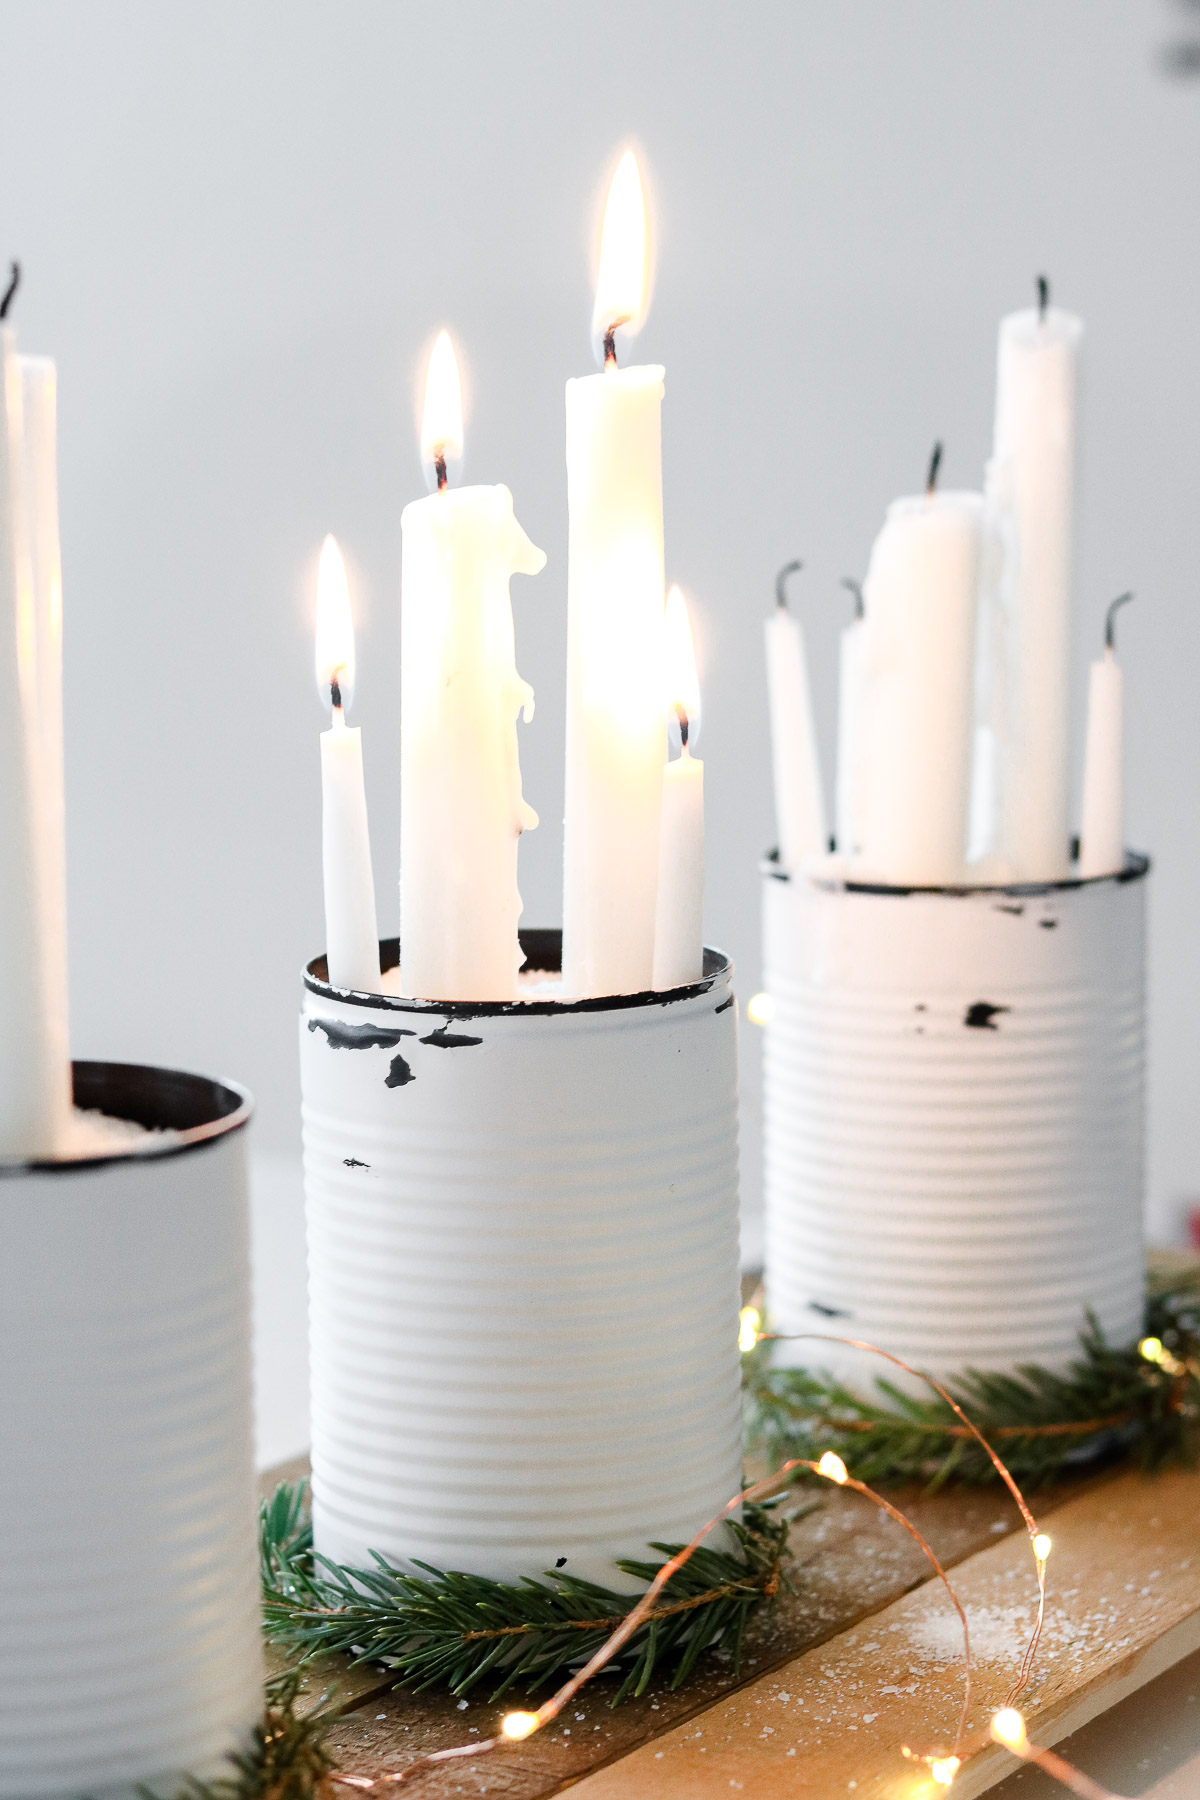
AWWE the wax is so pretty! Look how it melted! 😀 Dunno why but, I love melted wax dripping down candles 😀
That’s it for today! I hope you and your family have a very Merry Christmas and Happy New year! I couldn’t be more thankful for all your support , love and encouragement! I appreciate each and every one of you and can’t wait to share another year of DIY adventures with you! 😀
PS. If you love gold leaf than stay tuned for the next DIY! One more tin can DIY coming right up! 😀
Very cute and I like the ridges on the cans, adds charisma and character. What I like to call rustic or farmhouse chic. If you don’t have Epsom salt, sand or aquarium gravel will hold the candles in place and you can always pour regular table salt on top to get the “white snow” effect. Crushed shells, or crushed mother of pearl work too. Use what you have handy or can obtain quickly and inexpensively without a lot of fuss. Great last minute craft or gift idea too. ❤
Thank you Naomie, YAY! I’m glad you like the ridges. yes they are very farmhouse chic 😀 😀 OOOH I love the idea of using aquarium gravel and salt for the top. 😀 Thank you 😀
Woooo Hooooo these are amazing. Girl you are so blessed with talent. Thank you so much for sharing your amazing creativity with us all. Now I need to empty some cans. Wonderful gift idea. Thank you again. Looking forward to your next idea. Have a blessed Christmas 🎄
OH MY GOSH YOU are too sweet Tina. Thank you ssso much! Have a blessed Christmas as well. 😀 😀
LOVE LOVE LOVE this DIY idea!! I will be using it for sure on an old metal bin I have. Thanks for sharing your project.
AWWWE thank you! I am ssso happy to hear that! OOOH I wanted to do an old metal bin as our Christmas tree base. I LOVE THOSE!! What do you plan on using it for?
I absolutely love these and am going to try to make them! Fingers crossed! It sounds pretty easy and they look amazing!! Thanks for a great idea!
I’m so happy to hear you loved them! Happy Crafting 🙂
Where can I get the variety sizes of candles? Amazon doesn’t seem to have them.
I’m pretty sure I got these at hobby lobby I’ve also seen the at target in the party decor section.