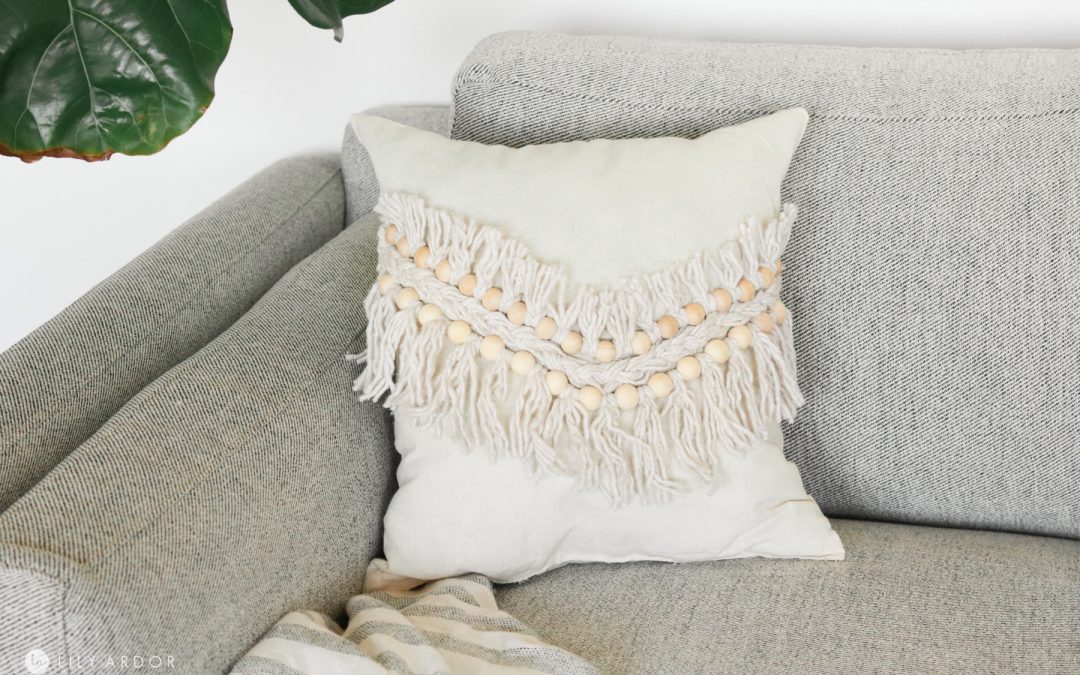
Hello everyone! This week I’m sharing a few dollar store DIYs. This dollar store mop transformation is something I’ve had on my mind for quite some time now. I was always fascinated by the amount of rope they could sell for a dollar and thought it would be a perfect rope/cord supply for a macrame DIY project.
total cost:
It cost me around $8 dollars to make. I should mention I ended up using wood beads from Joanns craft store and not the dollar store. It’s optional to use the beads. I know the dollar store sold some colored wood beads but because, I was going for a simple look I really wanted to use wood beads. They cost me around $3 after 40% off coupon. So it’s wasn’t to bad. For all my dollar store projects I try and keep it under $10.
This article contains affiliate links – visit my disclosure policy for more info.
Time needed:
This took me about 35 minutes to complete. Once you get the technique down it’s actually pretty easy and goes by quick.
Supplies:
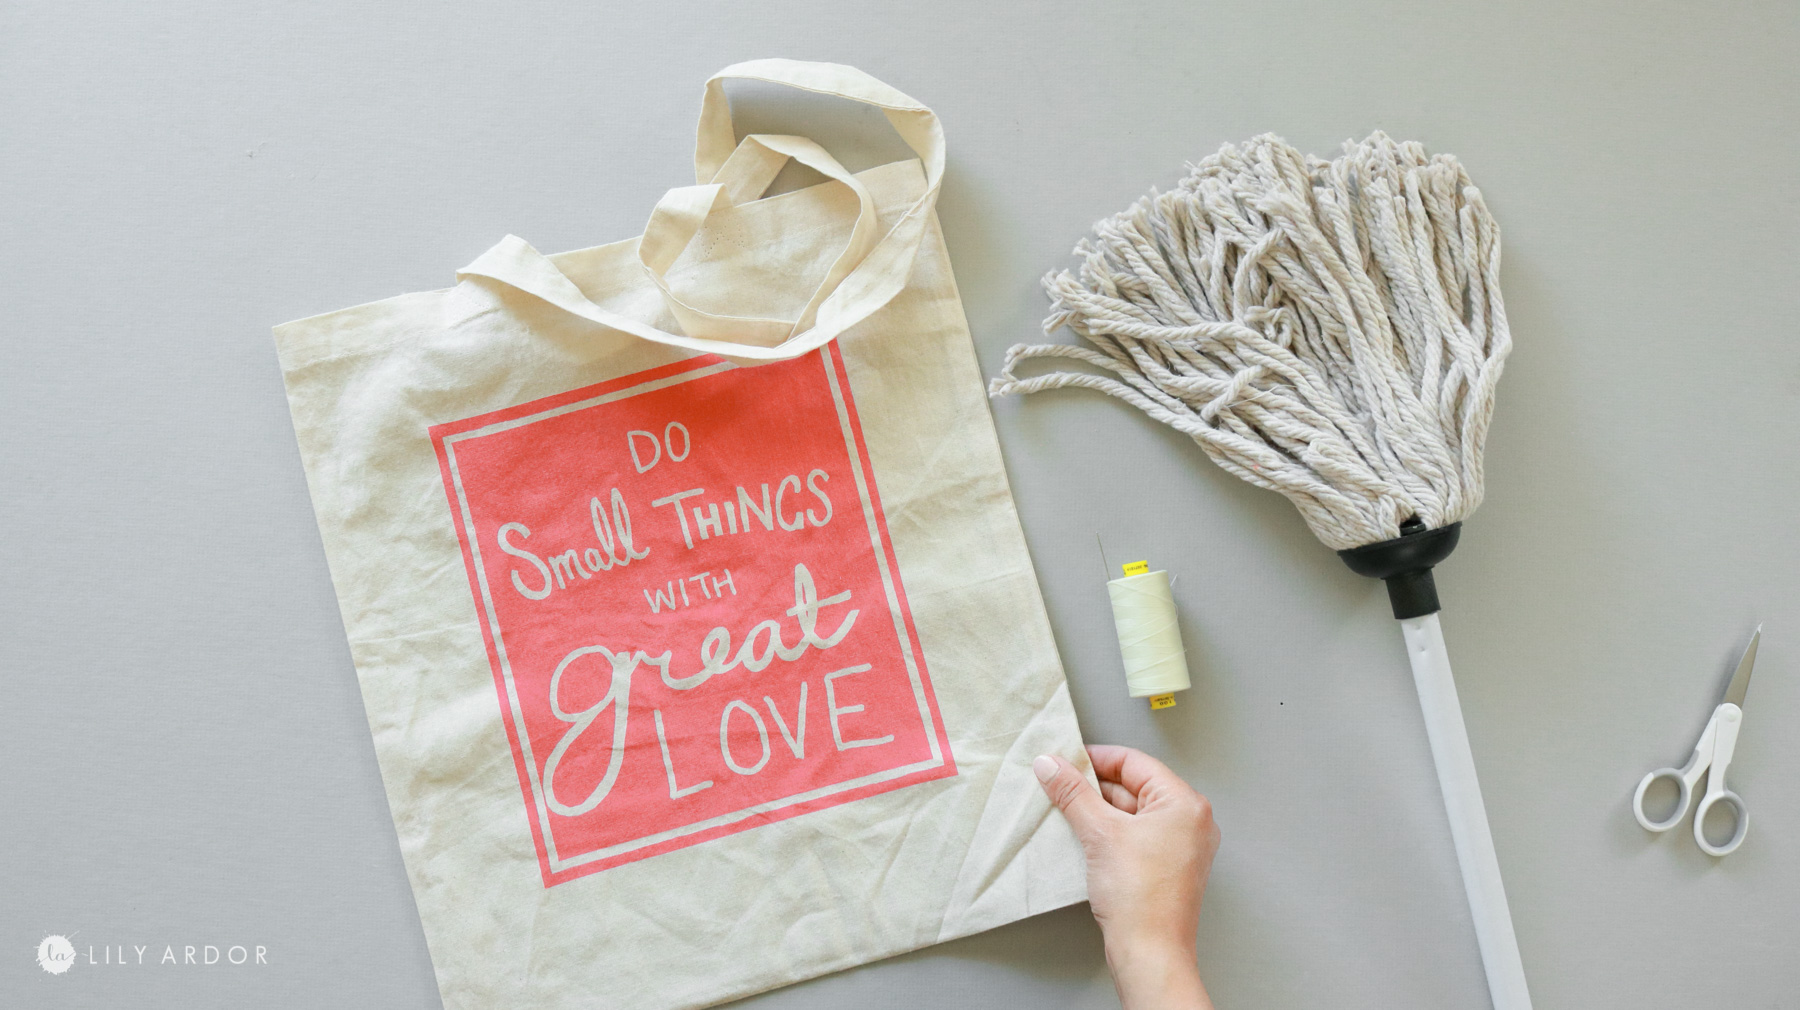
- $1 Dollar Store Canvas Tote
- $1 Dollar Store Mop ( caution: sheds like crazy. I would swap this out for real macrame cord if I was to make it again. Amazon sells some real nice cord here that’s affordable – https://amzn.to/2CFOgjf )
- Pillow stuffing
- needle and thread
- wood beads ( optional )
- tape ( I used electrical tape from the dollar store )
- scissors
- thin rope or yarn ( the mop rope won’t work for this- it tears easily )
Pros for this DIY pillow:
It’s super budget friendly and gives your decor lots of character if you’re looking into getting some bohemian vibes in your space.
Cones for this DIY pillow:
There’s a few things I learned from this project that definitely made me question whether I’ll ever be using a dollar store mop for anything anymore. You get what you pay for 🙈. This thing was shedding sssso much I had to wear a face covering as to not get it in my mouth because so much fuzz was just floating around EVERYWHERE! This brings me to say if I’m ever working on a macrame project I would rather invest into some decent cording or even buy yarn instead ( https://amzn.to/2CFOgjf ) . I know the dollar store actually has some cute colored yarn to pick from. I went with the mop in the first place because I loved the rustic color the rope had and thought it would match my macrame bohemian vibes more.
Okay let’s make this macrame pillow 🙂
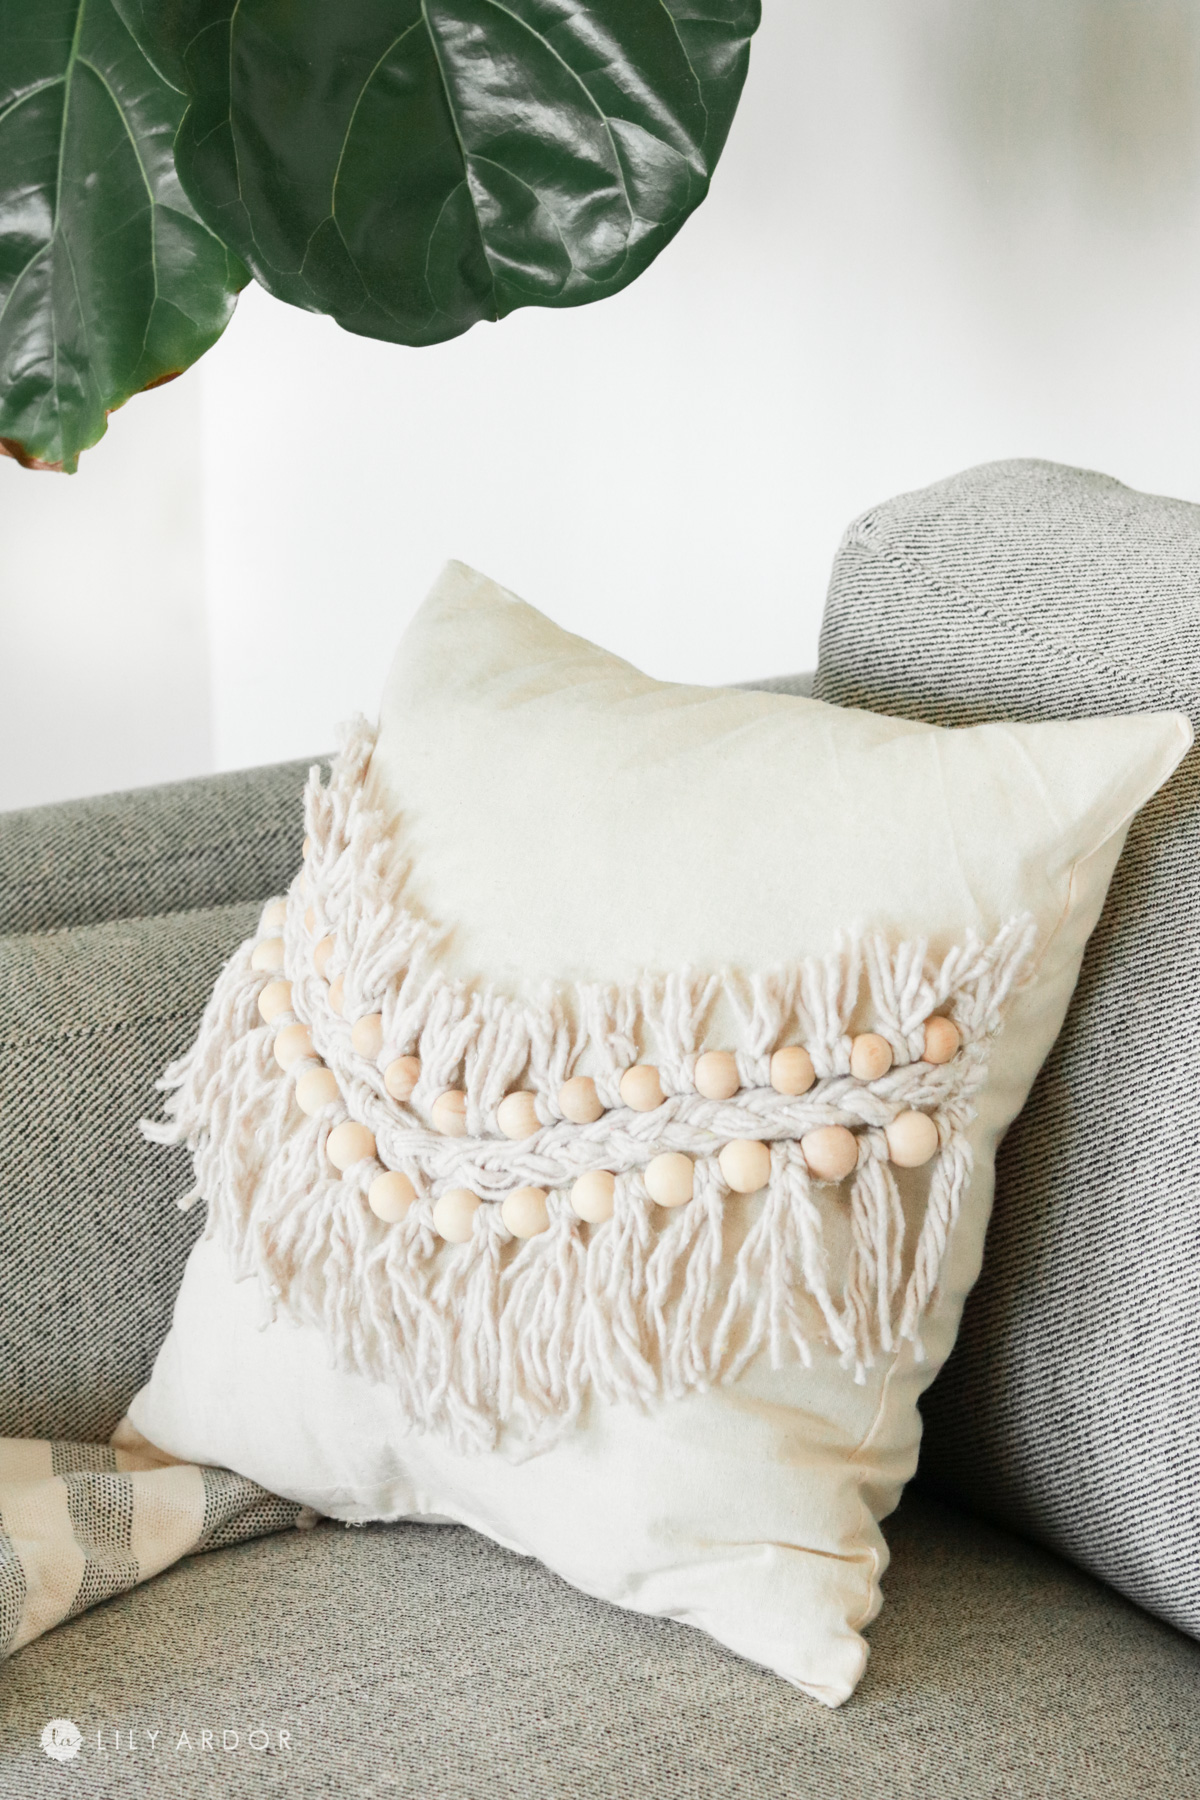
DIY braid
If you have some fabric left from another project you can use it for the pillow case. I actually came across this canvas tote at the dollar store and thought it would make the perfect pillow cover. So much easier than having to make one from scratch. I started off by cutting off the handles off the tote and taking apart the mop. If you move the rope out of the way you can see a plastic piece in the center of the mop. Simple pry this with something and it should pop right off. It comes off really easy.

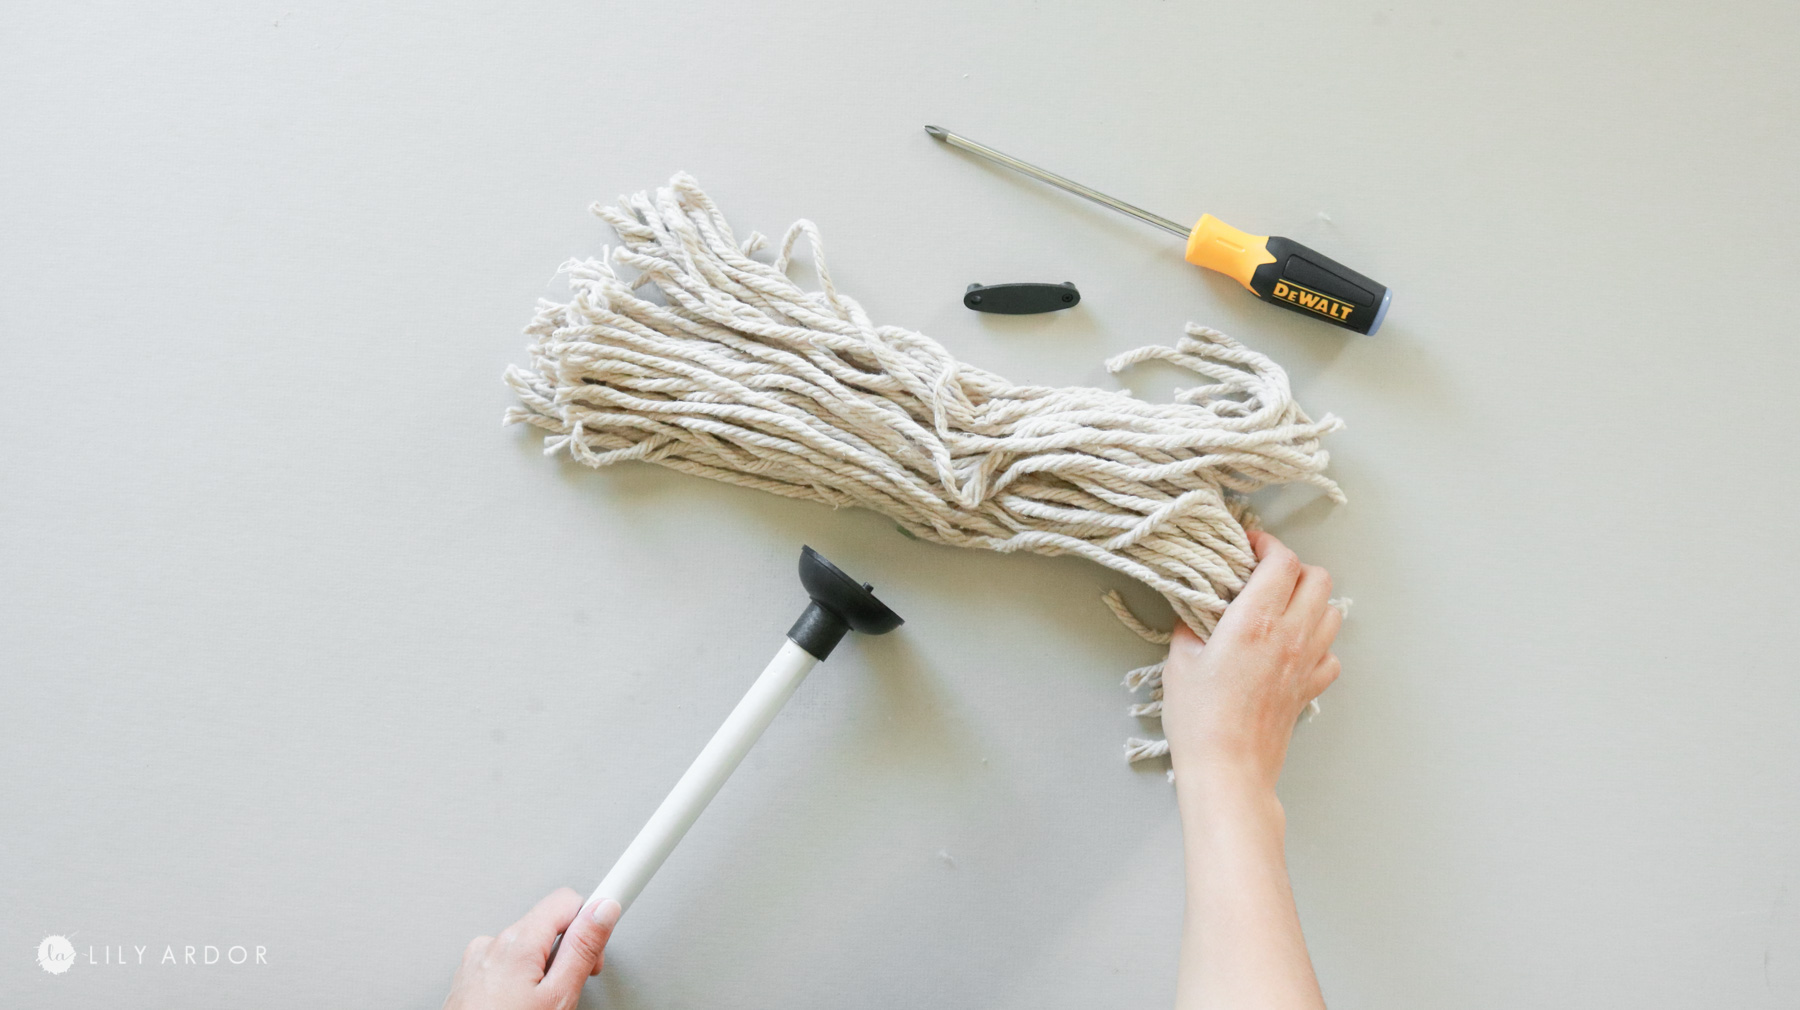
I was also thinking maybe I should of washed the mop to eliminate too much shedding but, after seeing how much it shed I’d be scared to wash it with any other clothes at all. Definitely would wash it on it’s own.
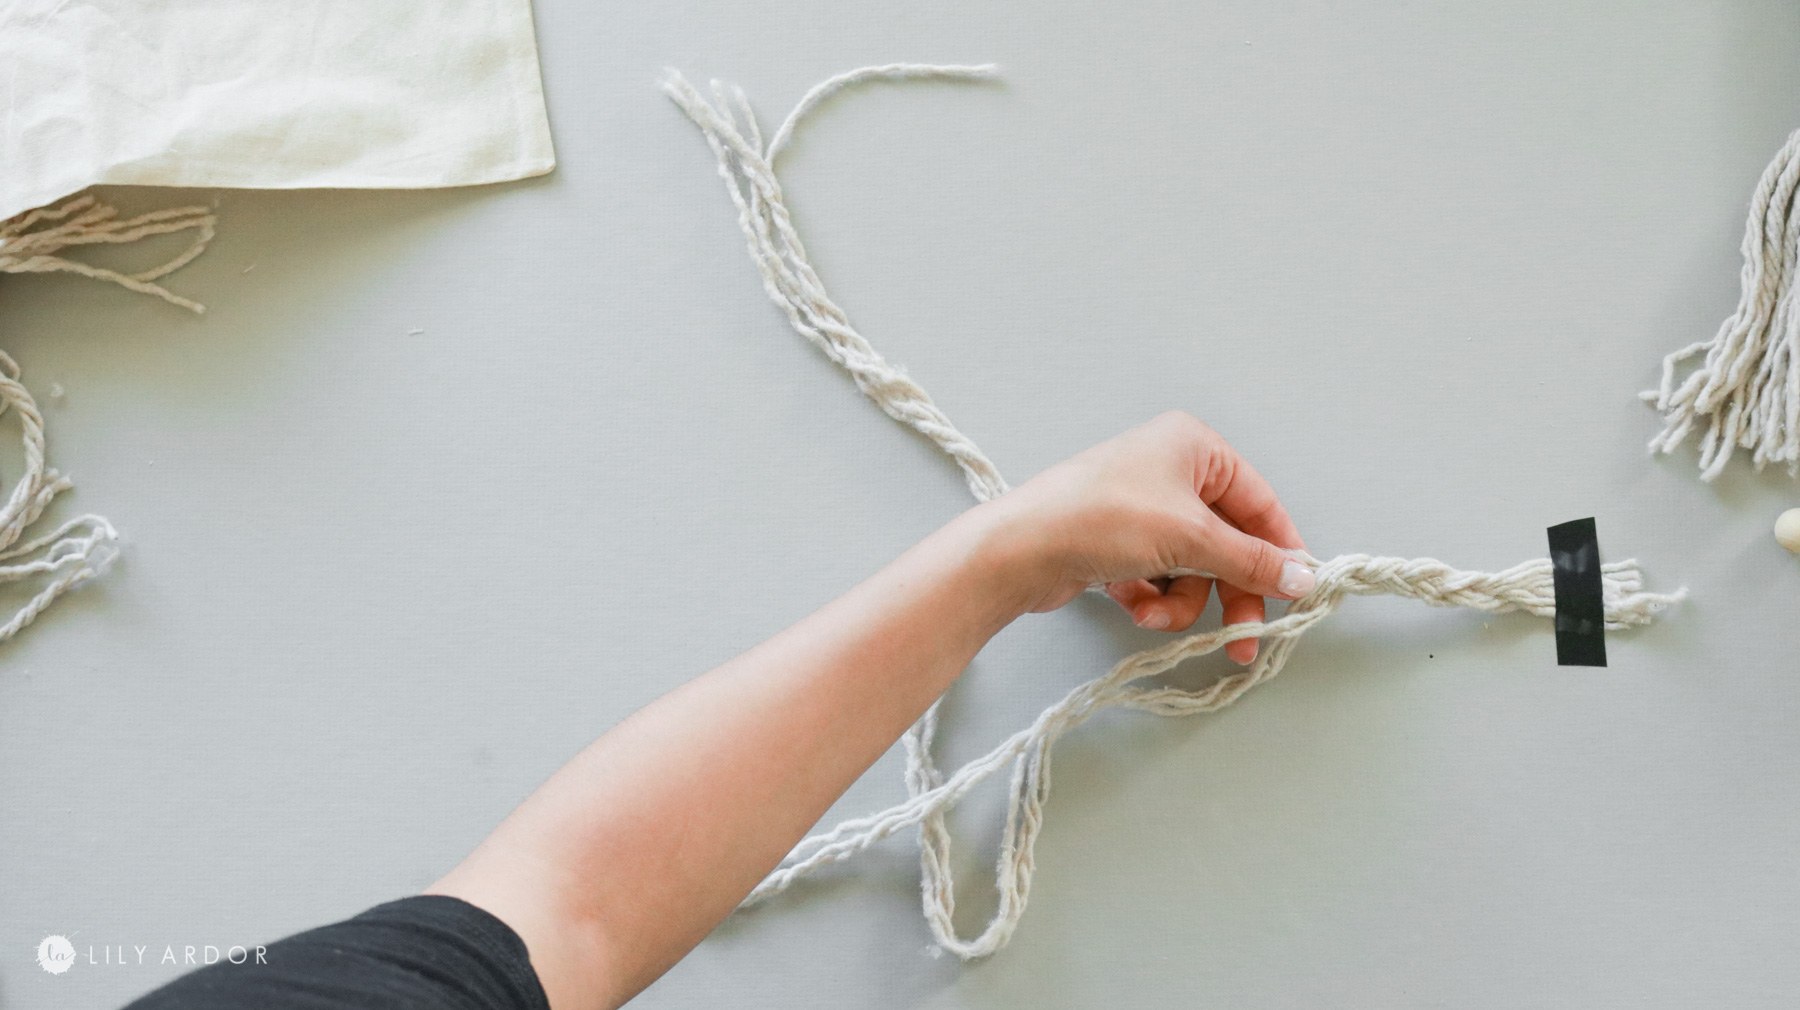
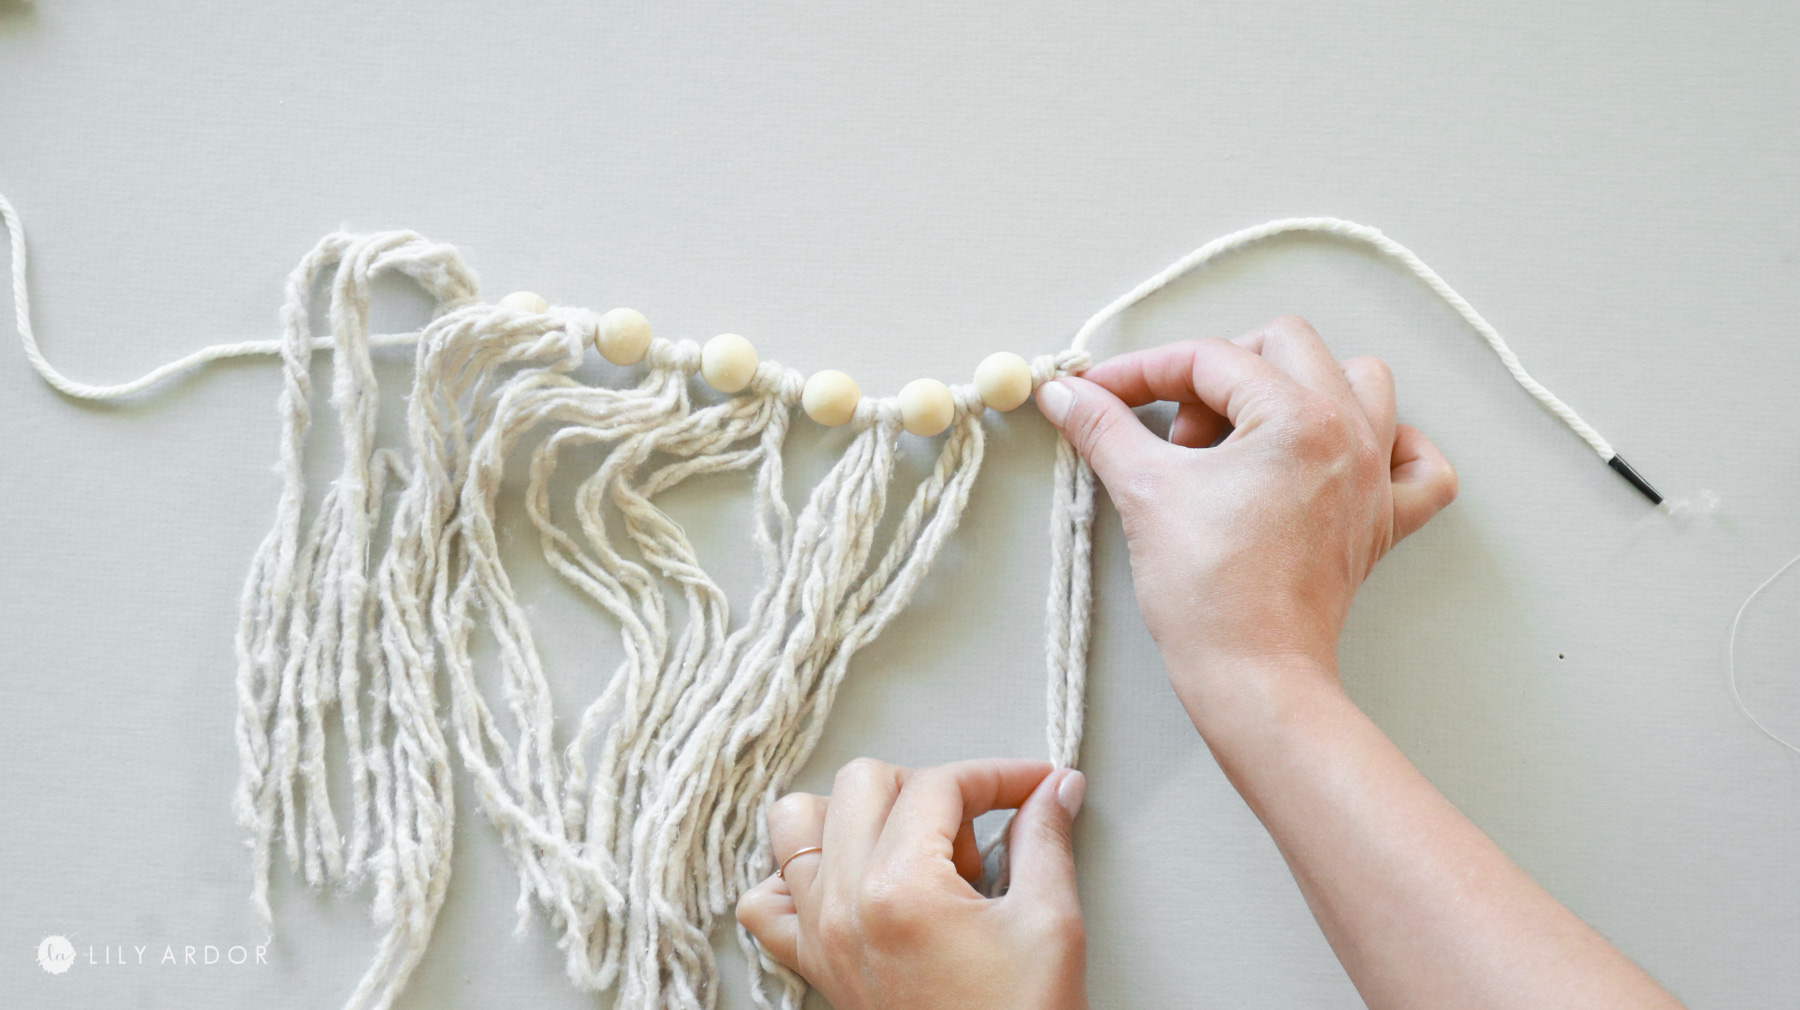
Next I took three strands from the mop and taped them at the top to my table with some tape. I loosened up the rope a little and made a braid.
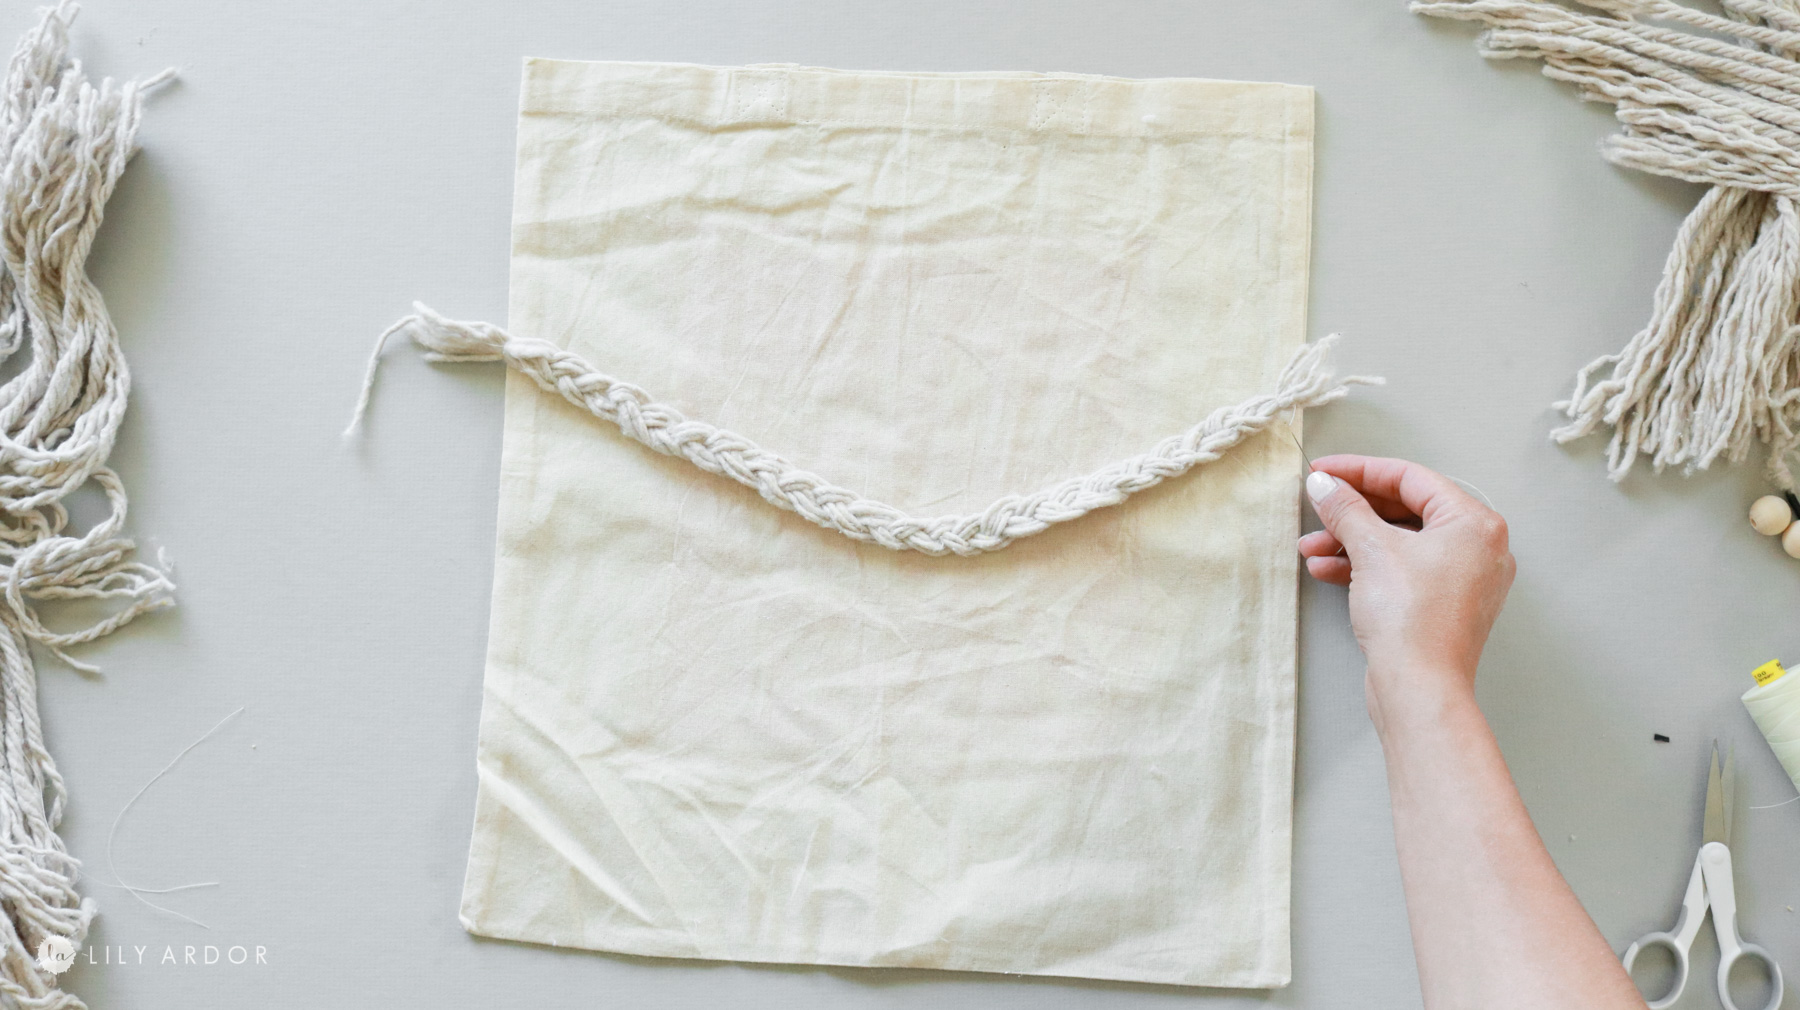
Now I was ready to attach the braid to my pillow. I lay it onto my pillow case in a V shaped and stitched it onto the pillow case with a needle and thread. In order to avoid sewing through both layers of fabric I inserted a piece of cardboard inside.
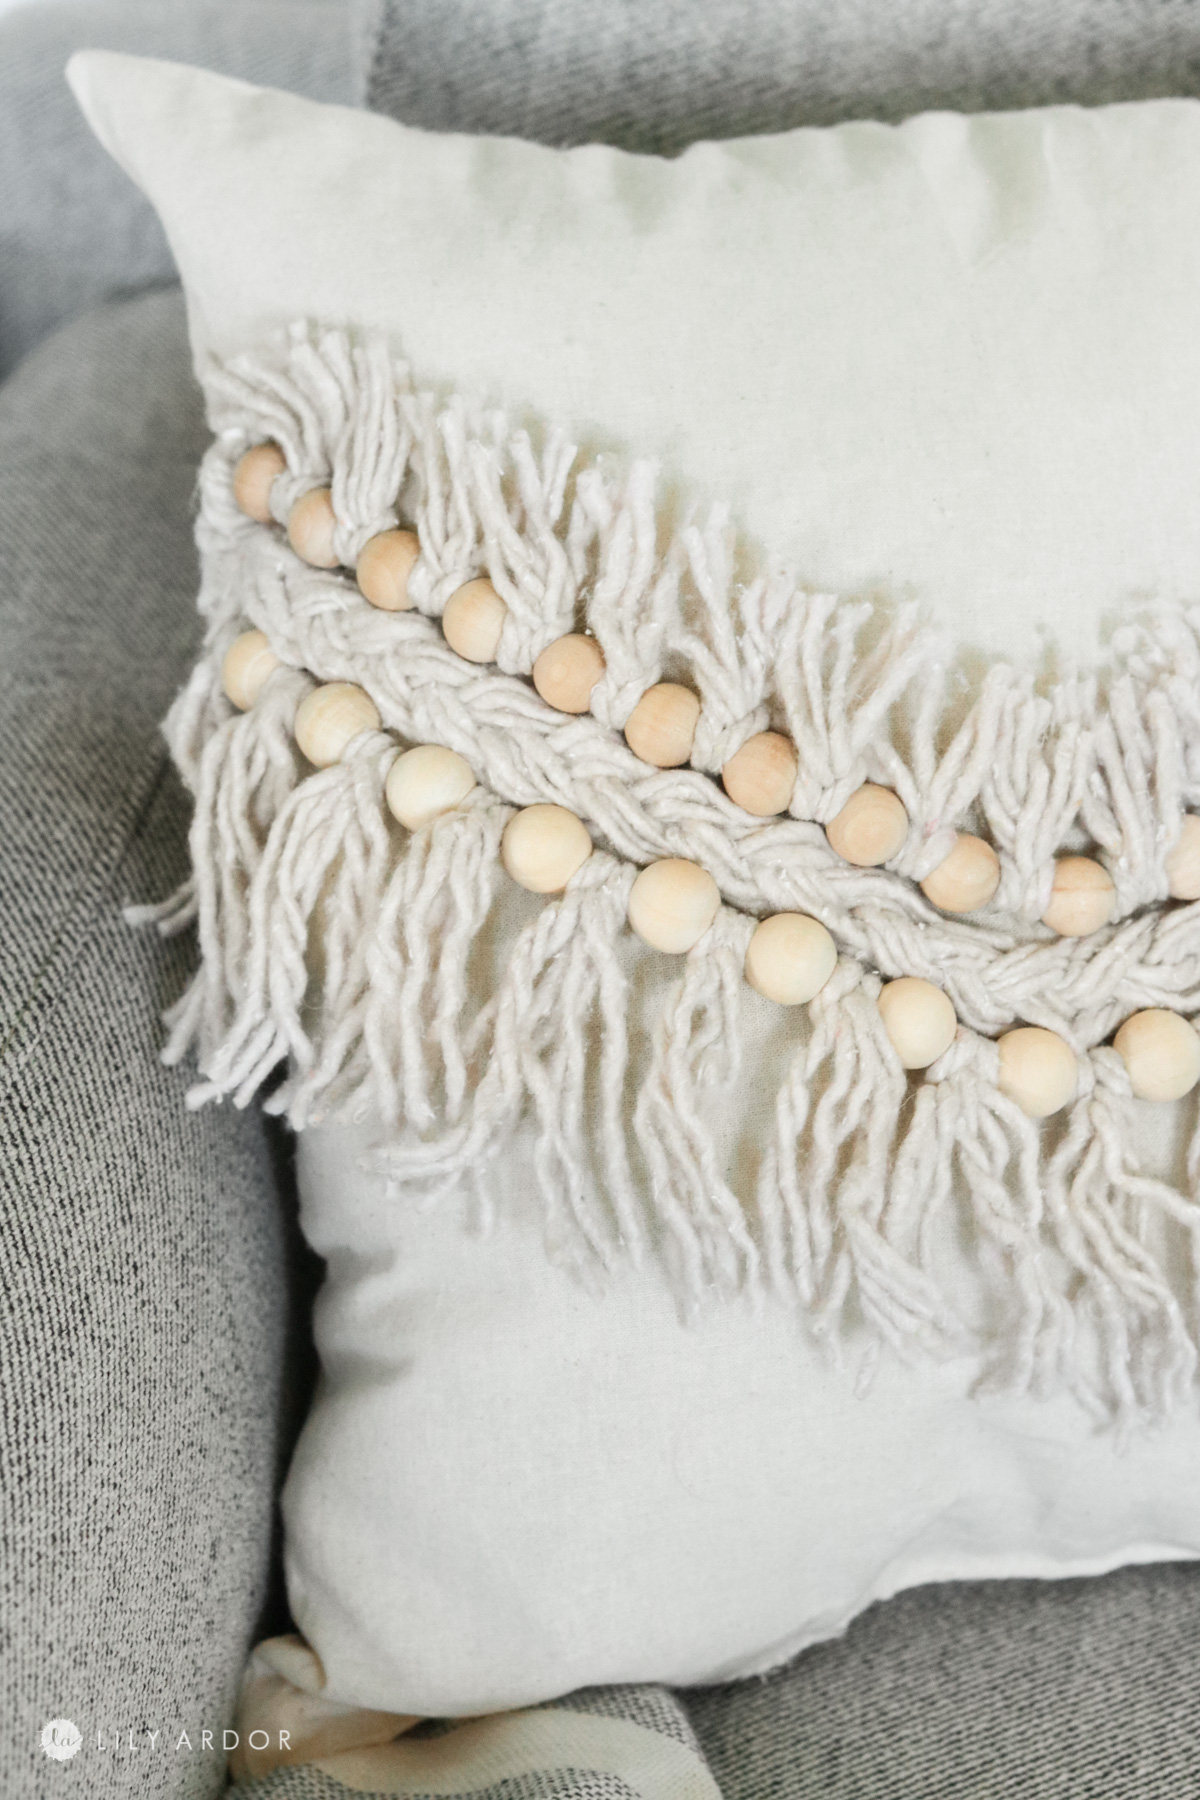
Making the Macrame Fringe for my pillow
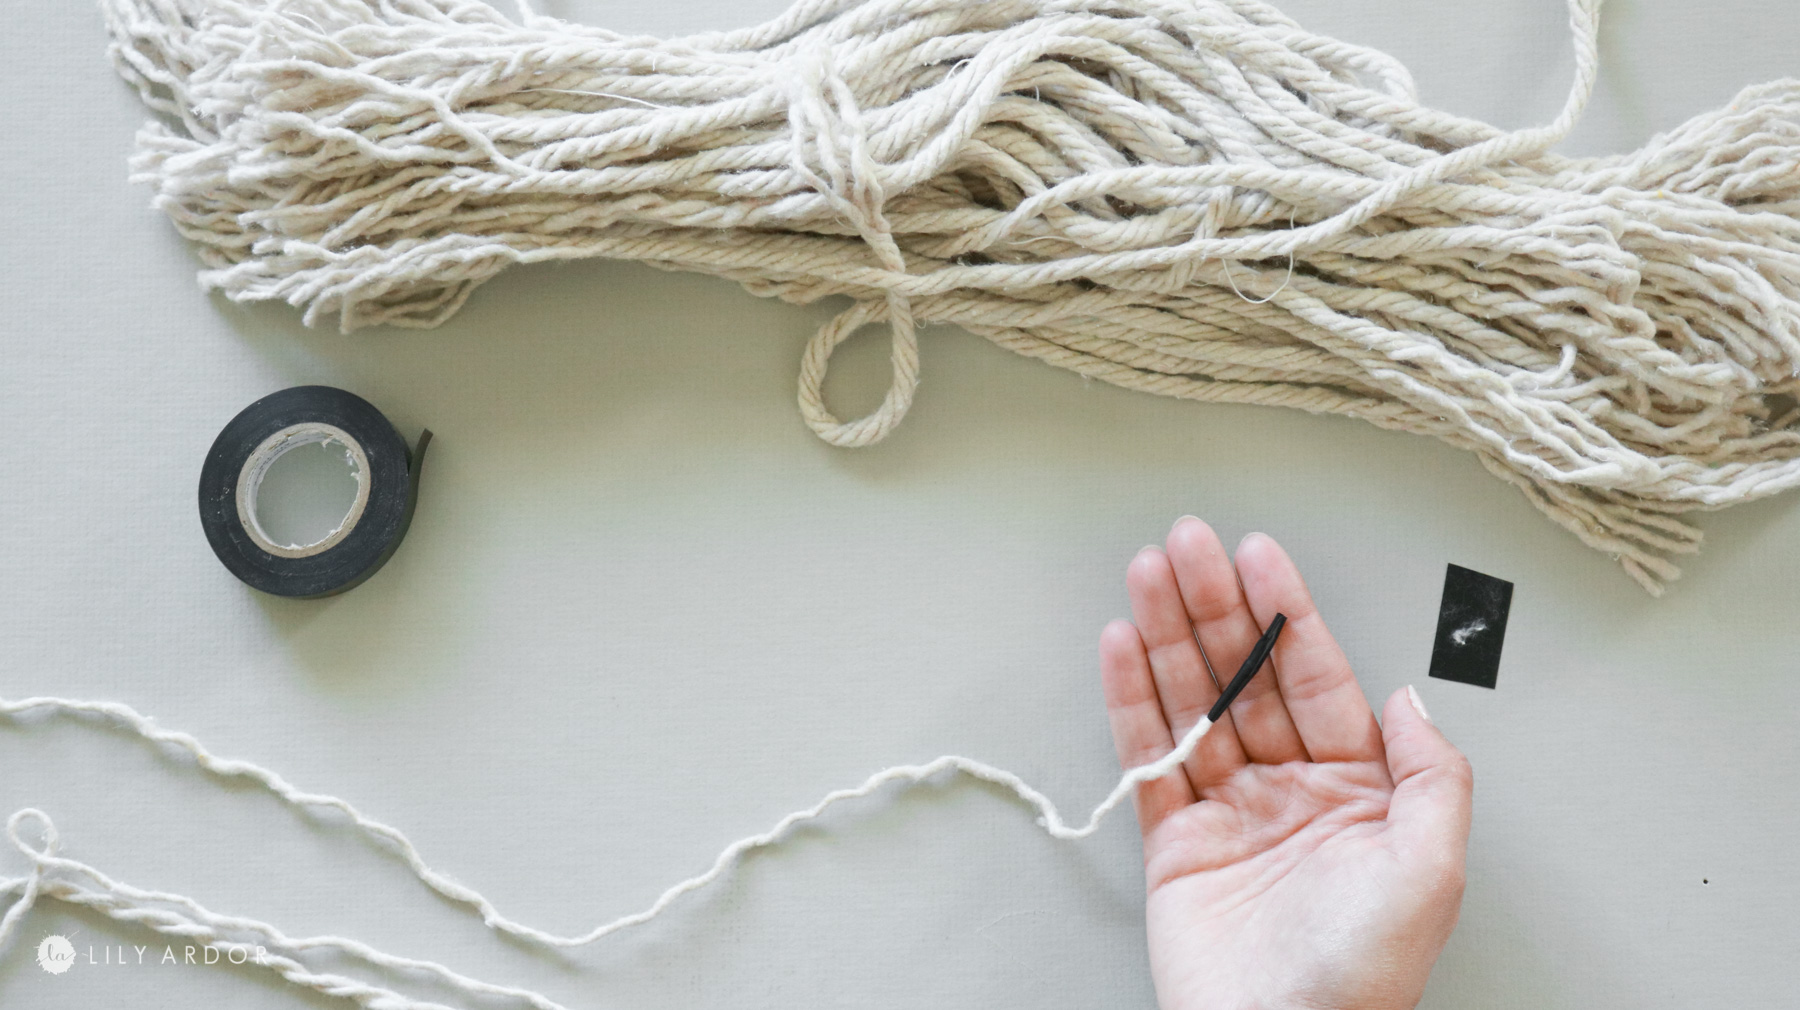
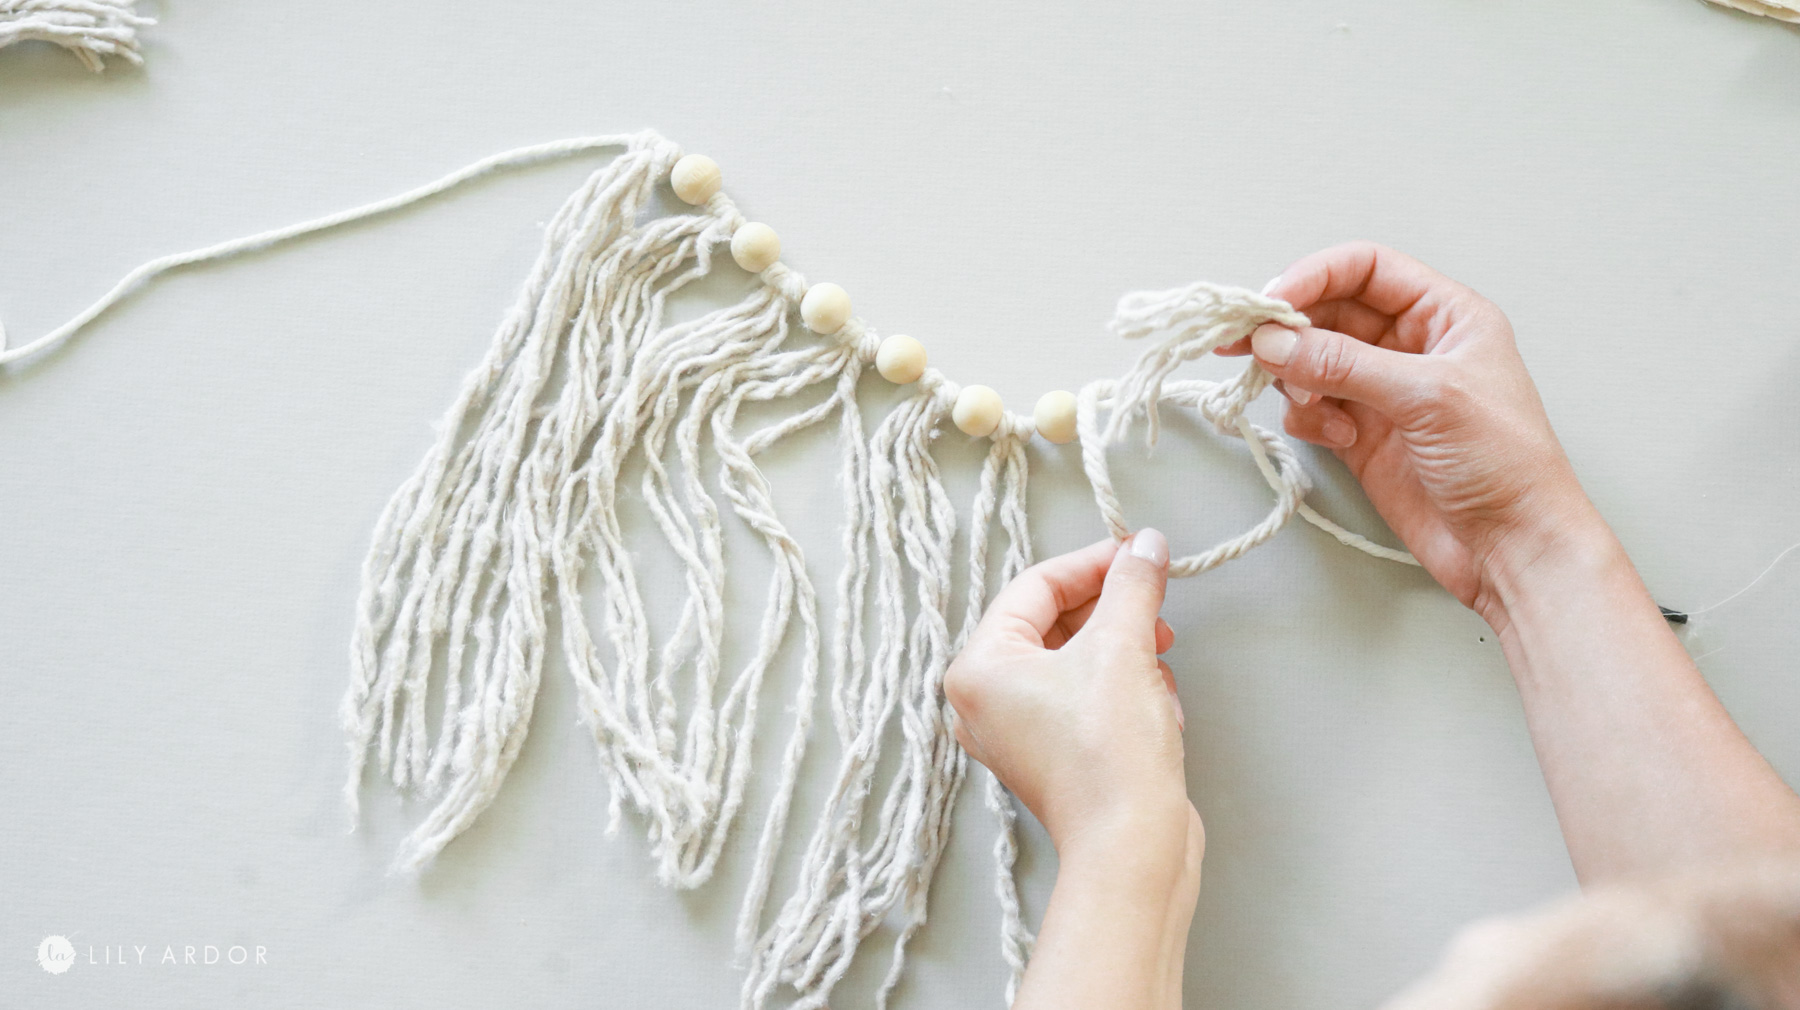
Okay to start off you’ll need a piece of thin rope ( thin enough to feed beads onto) . This will be layed out horizontally and you’ll build your fringe onto it. Start off by taping one end of the rope to eliminate it from fraying and it’ll allow you to easily put on the beads.
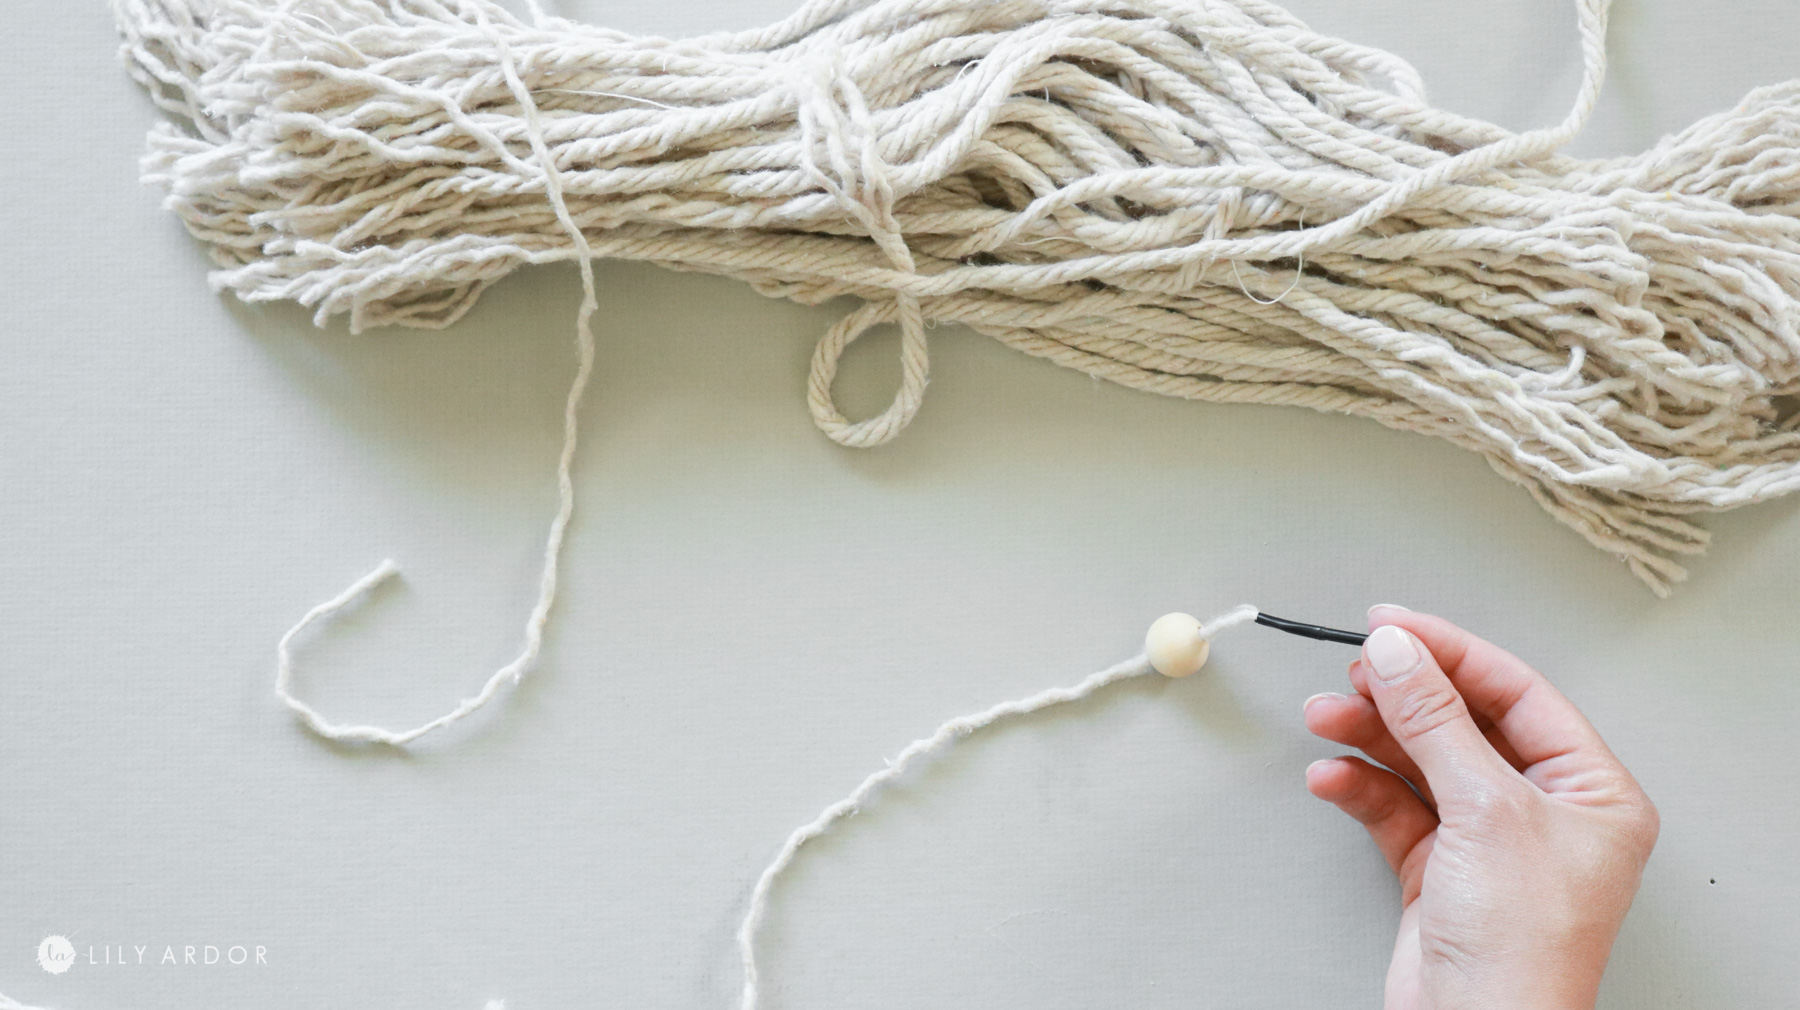
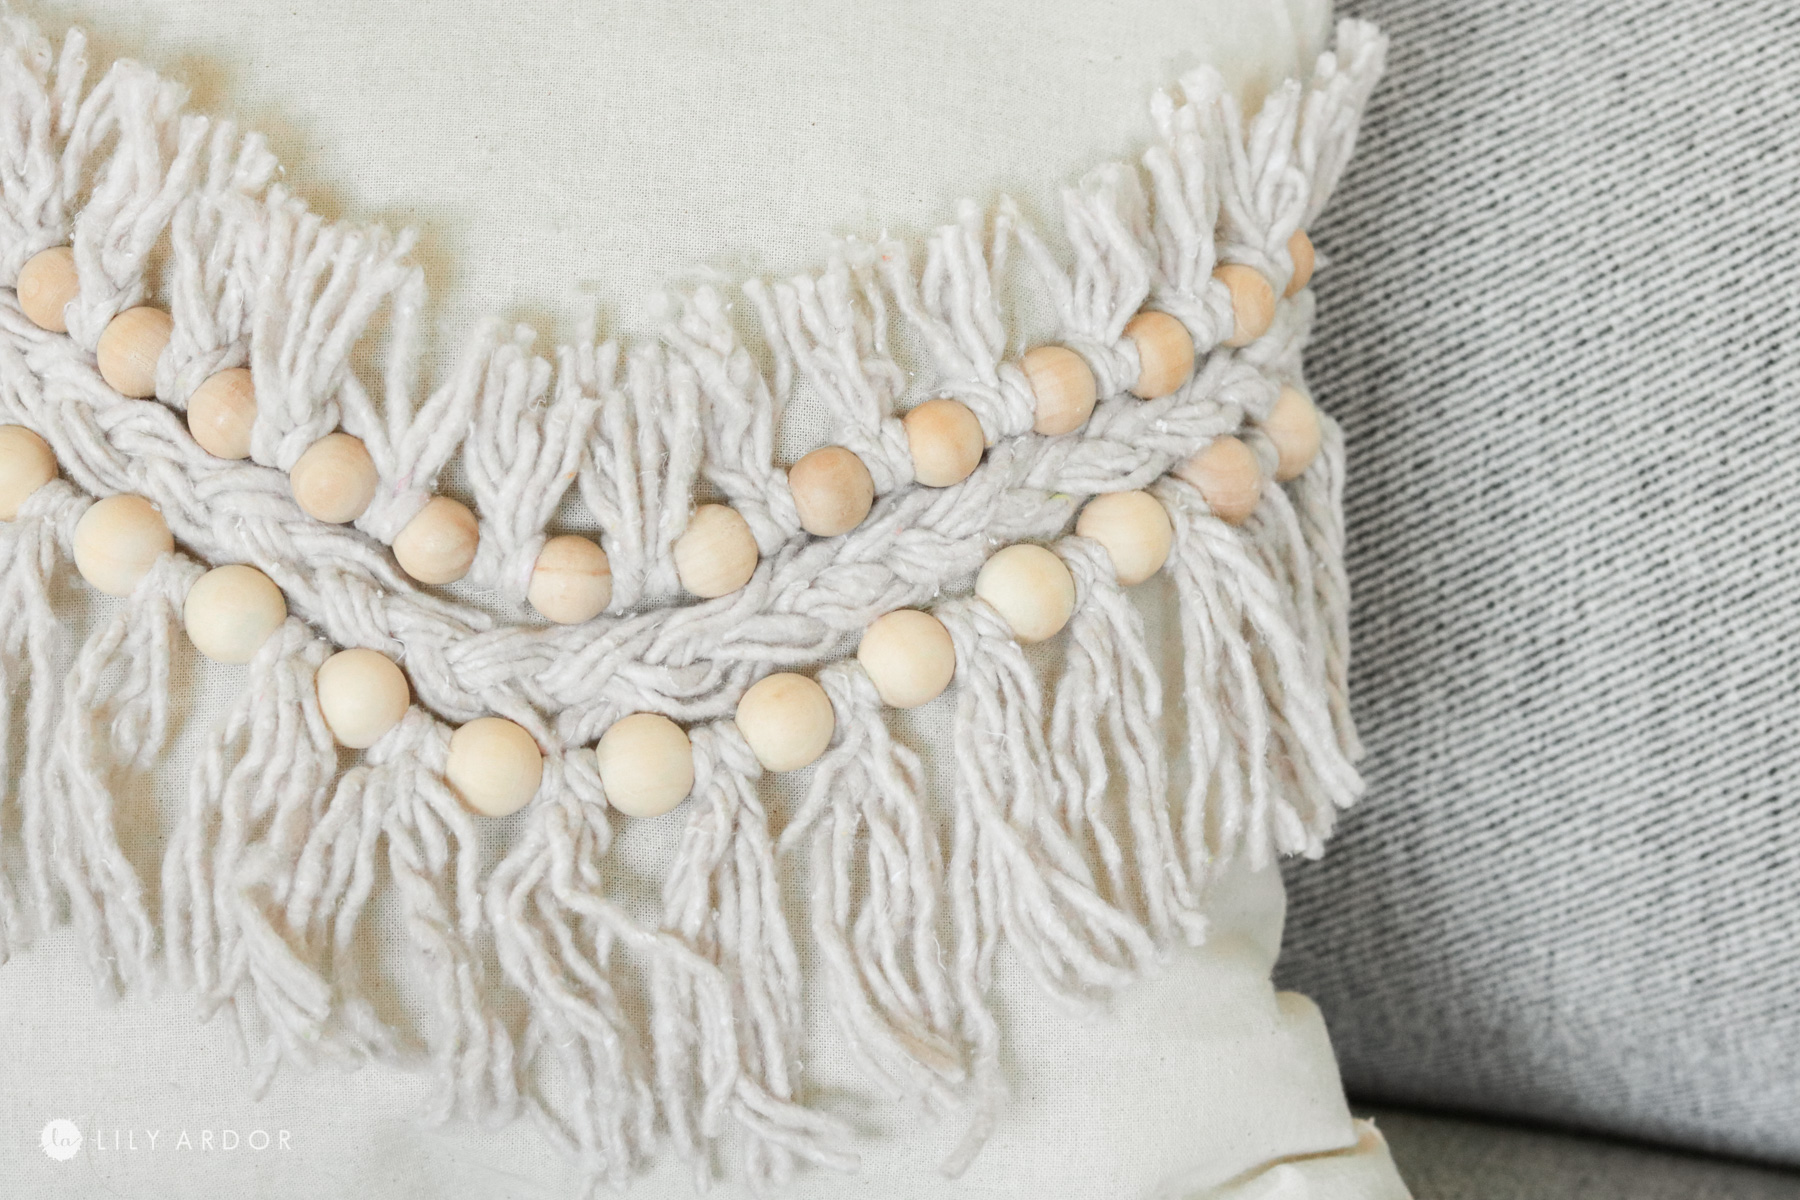
Next choose a pattern you’ll stick to. I alternated between one wood bead and one fringe.
Making the fringe is really easy. Think of it as creating knots along the length of your rope with beads in between.
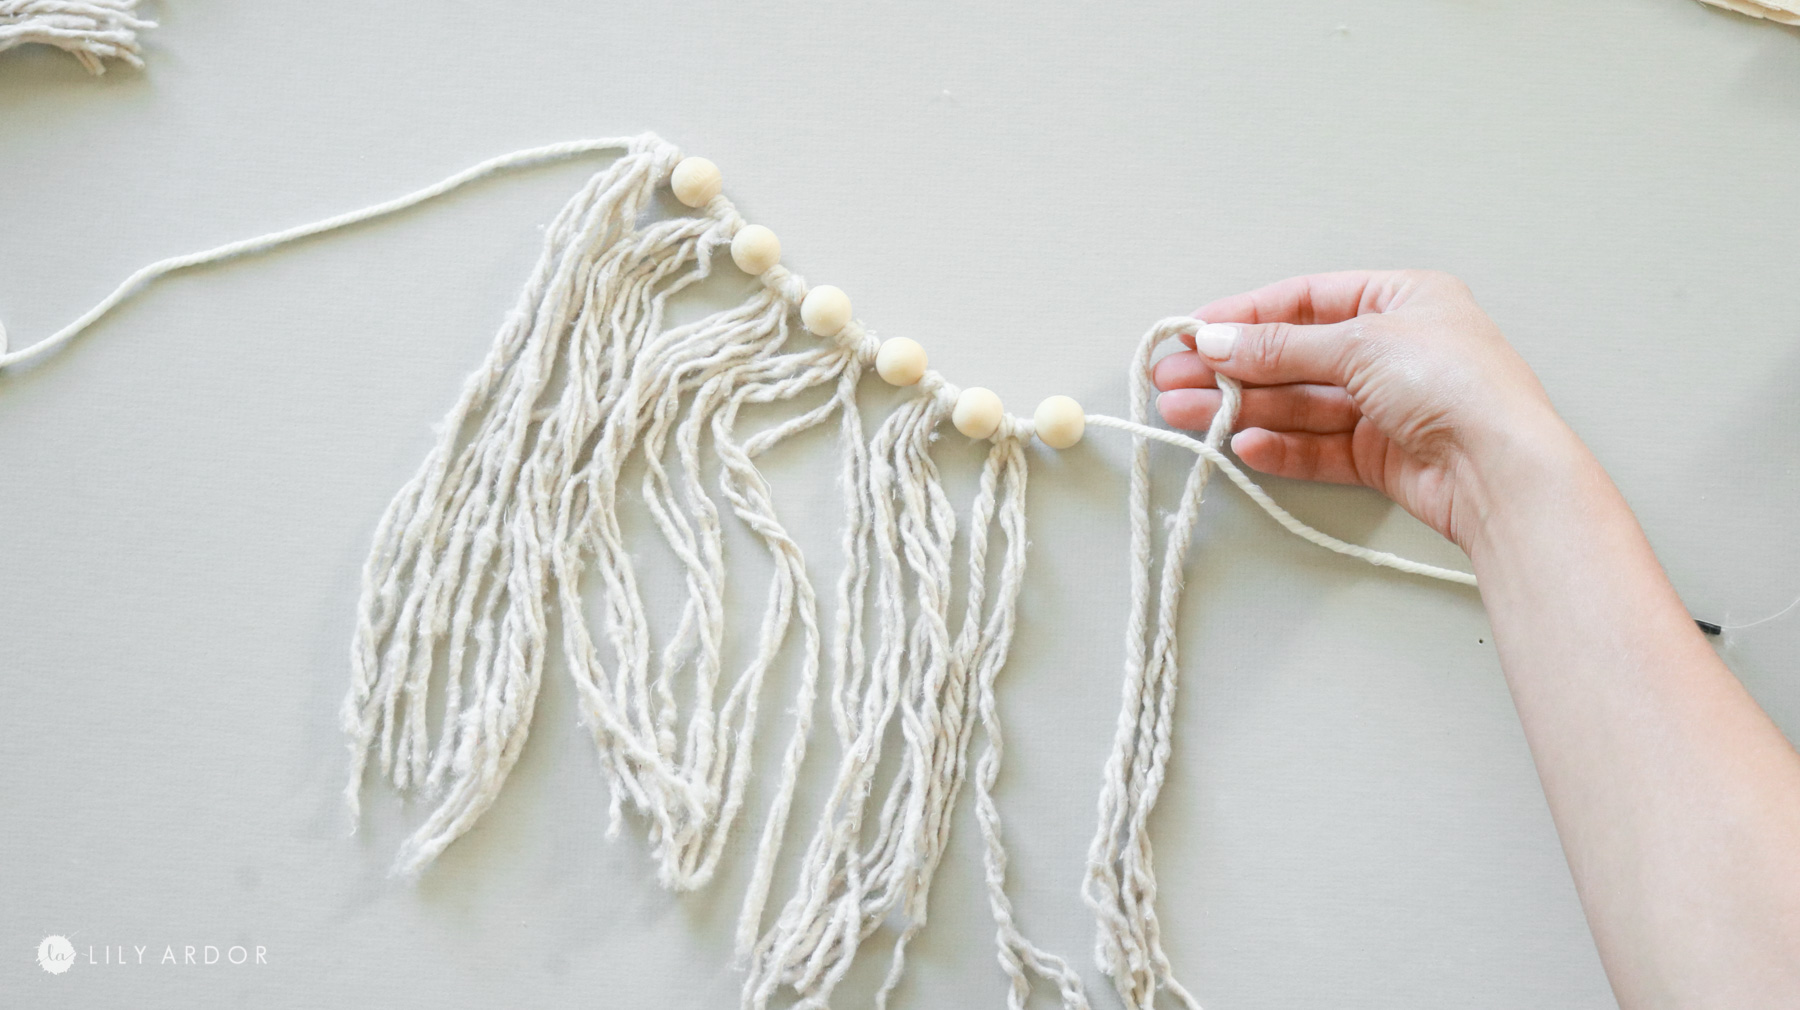
To make the fringe take one strand of rope off the mop and fold it in half. Lay it under you’re rope that’s laying horizontally making sure the loop at the top is sticking out about 1-2 inches over. Now grab the tails from you’re fringe and feed it through the loop. Pull down on the tails and hold up knot at the top to tighten. That’s it. Keep repeating your pattern until it’s long enough for your pillow.
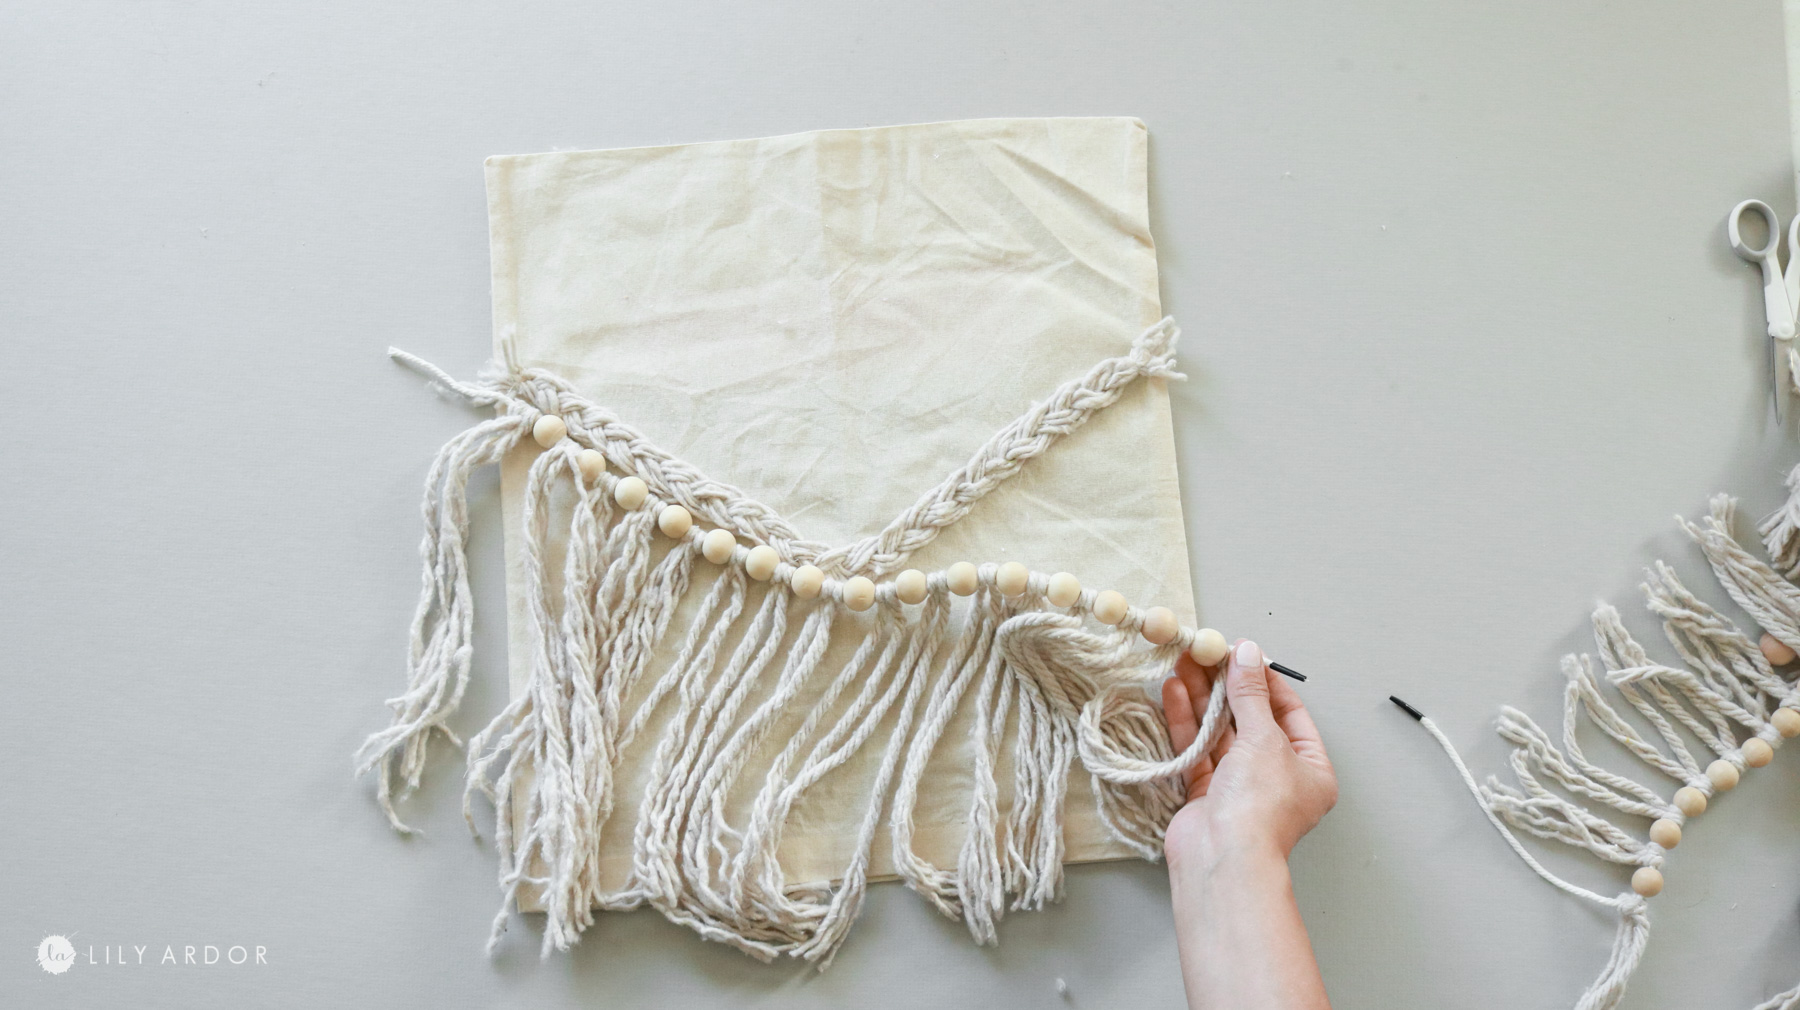
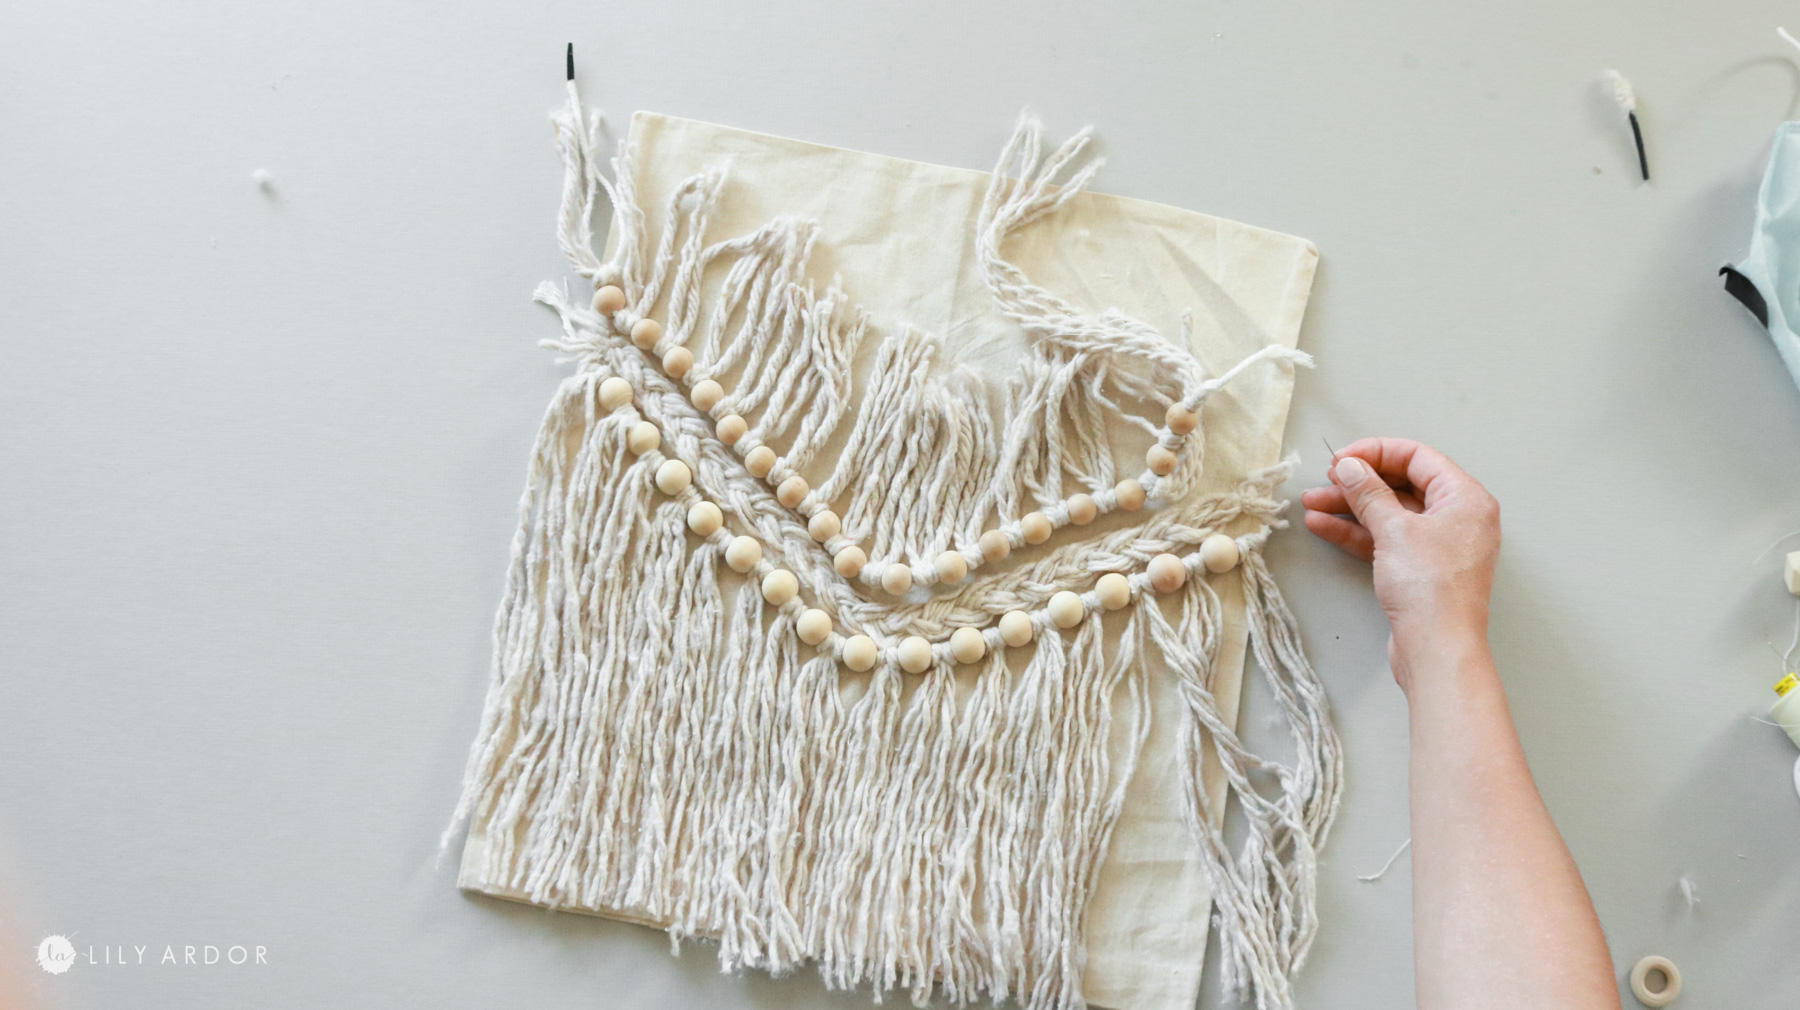
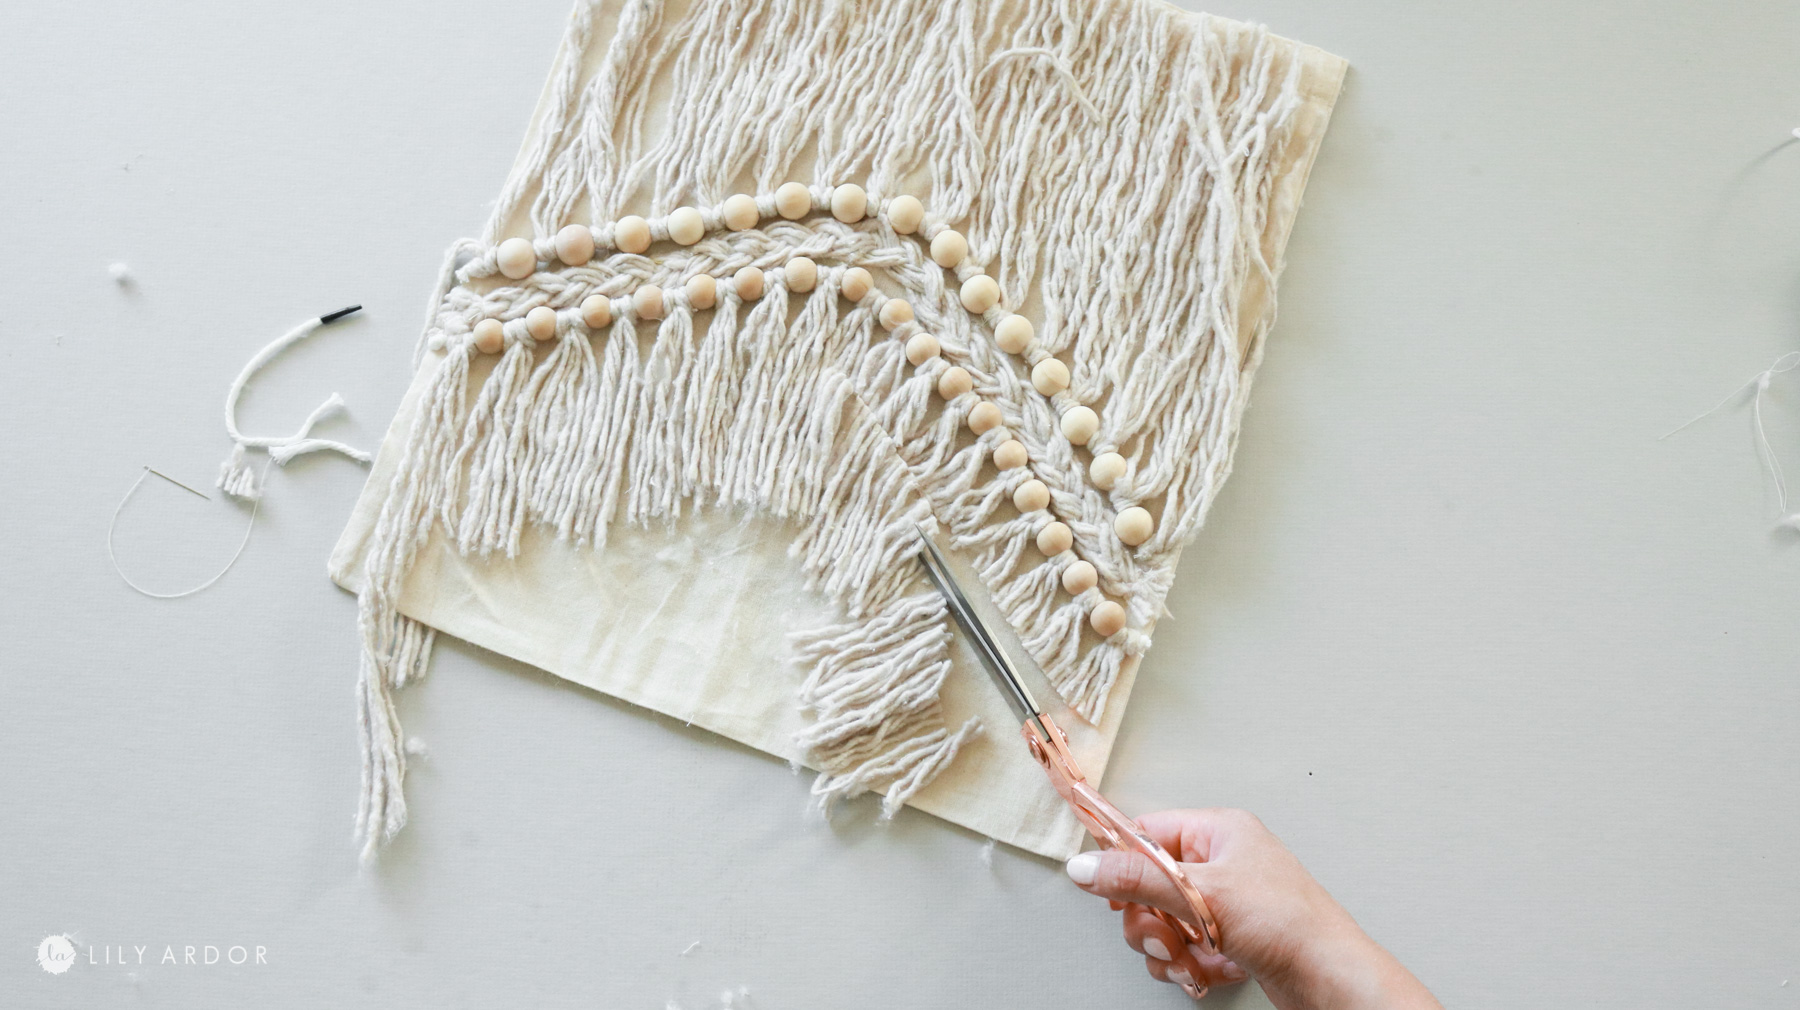
Securing your Fringe and trimming!
I made two pieces of fringe. One was attached above the braid and the other was below the braid. To attach them I made sure there was cardboard inside the pillow case and simply used a needle and thread to attach them. You can also trim it to your liking before stuffing the pillow case.
Completing the pillow
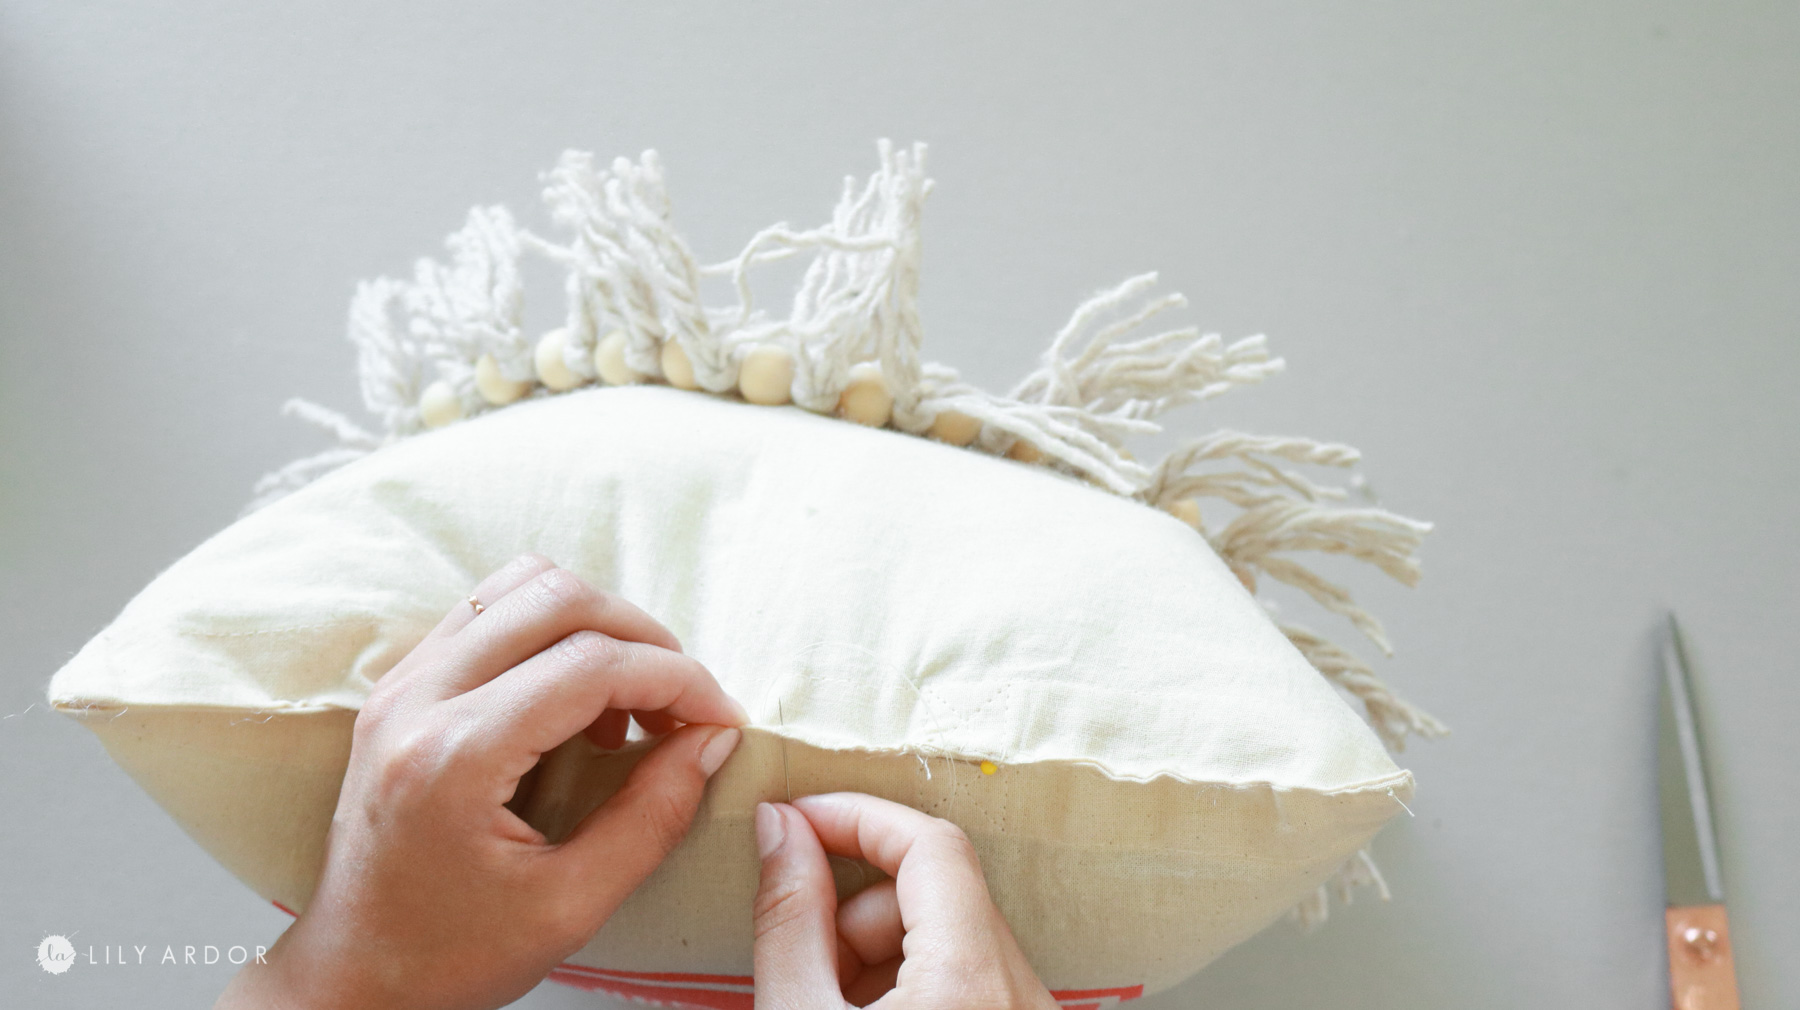
I stuffed the pillow with some pillow stuffing from an old pillow I was planning on donating and closed off the bottom seam with a needle and thread. That’s it!
Here’s a quick video sharing 3 dollar store DIYs one of which is this pillow.
Super easy! I love how cute it turned out! I can’t tell you how many times I almost gave up on this pillow the shedding form the mop had a lot to do with that. LOL 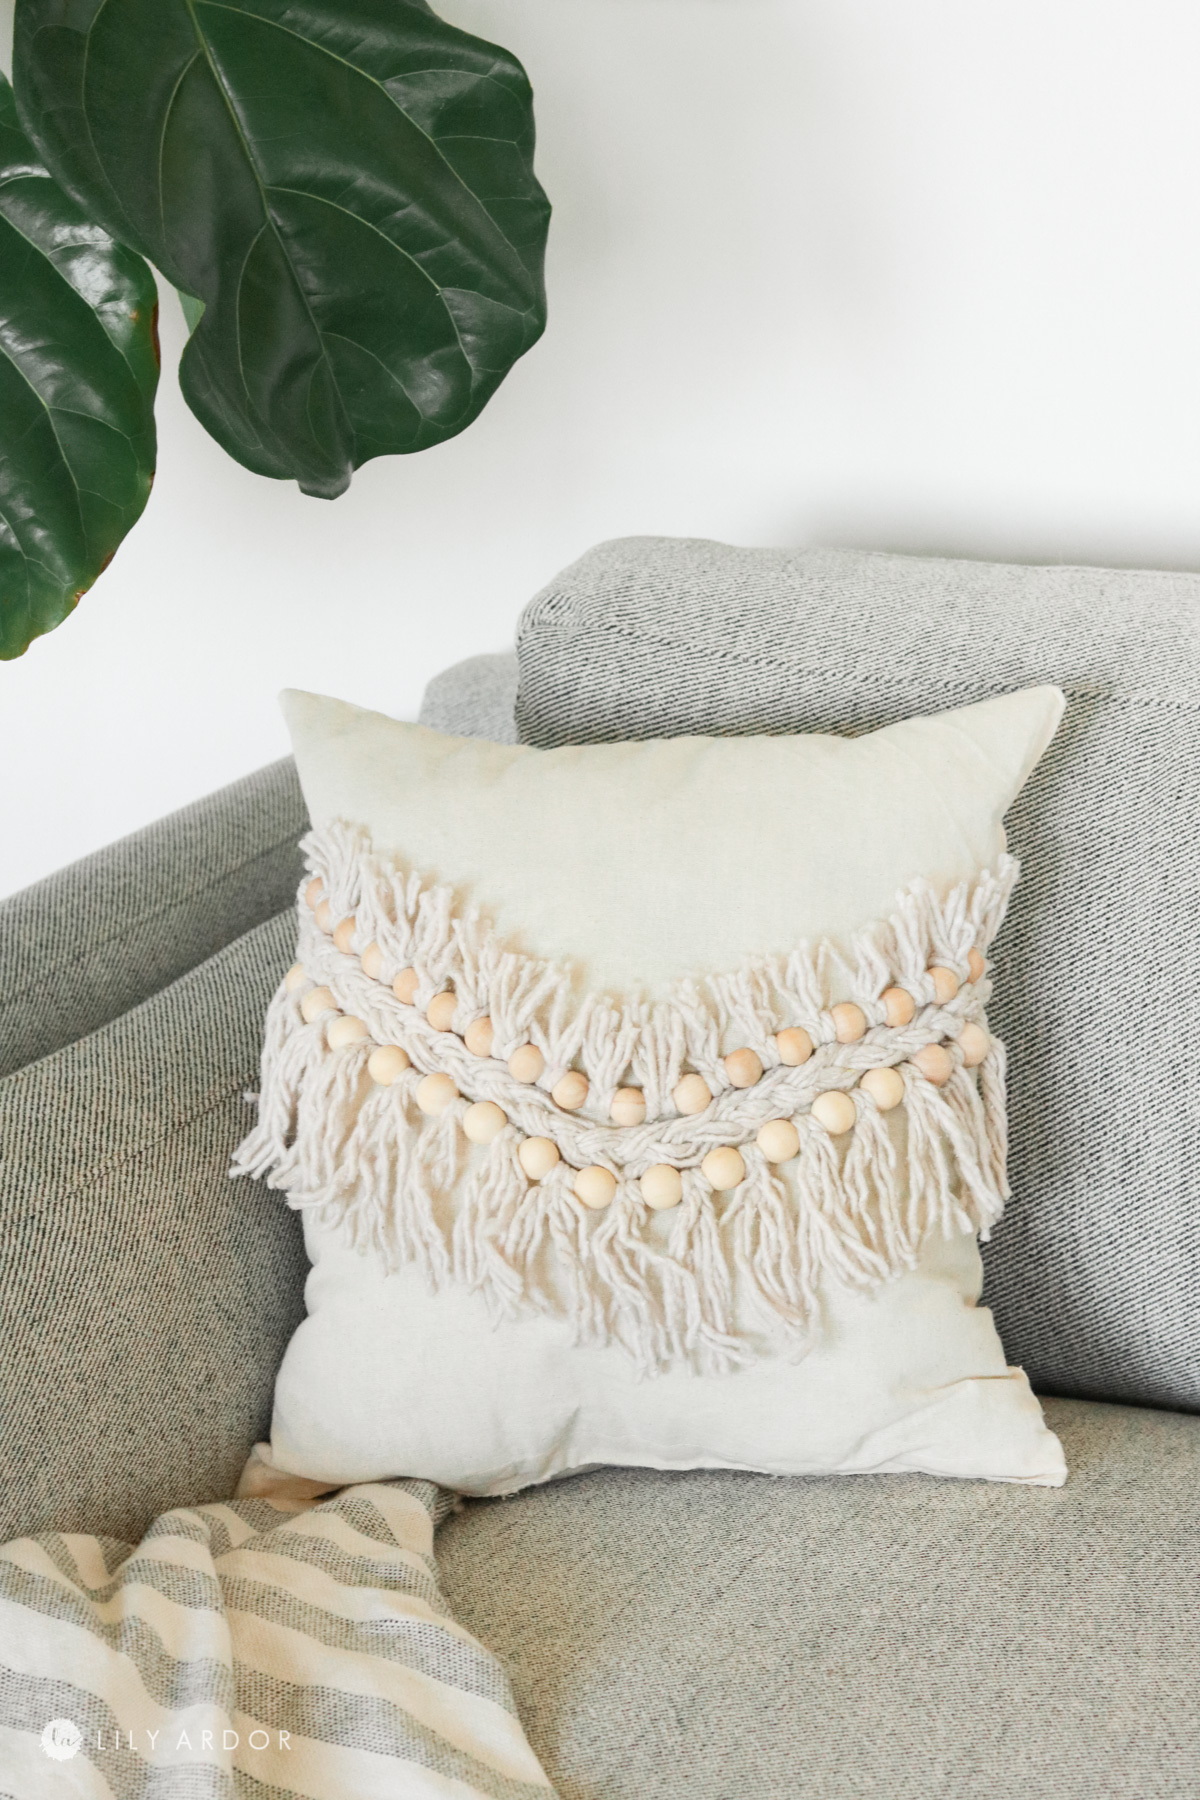
The beads are definitely my fave! They complete the pillow.
That’s it for today! I hope you are doing well and keeping busy with crafting! 🙂 Maybe this DIY pillow will give you some ideas.
I’ll see you next time
Best Wishes,
Lily
His is wonderful, Thank You So Much for Sharing. It’s adorable, Can’t wait to make my own, because of you I now can. Usually I just use Fabric Napkins. Or placemats, Fold and Stuff and Hot Glue Closed.
The End! Lol
Thank you Sandi! I’m so happy you like it and this inspired you.
Definitely going to make one of these. I use shop towels from my local hardware for pillows. Package of 12 for 12.00.
Thanks for the great idea!
Nice love that idea 🙂