Hi ya’ll! I hope your weekend went by smoothly.
This week I decided to give my task chair a makeover. It had been sitting in my living room for the past week and I was pretty close to returning it.
Eventually it dawned on me right before sending it back to try and make a seat cover because I loved the shape so much.
time needed:
I ended up spending about a total of 4 hours on it. To be honest had the hardest time slipping the back seat cover onto the chair. Apparently I didn’t account for the leather being grippy but, baby powder came to the rescue eventually.
Total cost:
This project could either cost a lot or be super budget friendly. Because I purchased a new chair my total cost was a bit pricey. Just the chair alone was around $150. Photo of the chair below 🙂 . Honestly the chair was beautiful the color however was a bit more then I was expecting. It was clashing with my desk so much and I realized I wanted something lighter in color instead of all those warm darker tones. You can also use a thrifted chair for this DIY. Supplies costs for me were around $35. If you choose to go with real leather that racks up the price real quick. I payed $24 for the leather which is a lot more than I would of liked. I was also thinking some recycled leather would work of faux leather as a cheaper option.

Supplies needed:
- sherpa fabric
- leather or faux leather
- tan cording
- leather needle if real leather used
- needle and thread
- scissors
tools needed:
- sewing machine
- heavy duty stapler
Let’s make this cover!
DIY Sherpa Seat Cover!
After examining the chair I realized the bottom already had staples so the bottom seat cushion was a breeze to make. I simply cut out an approximate shape and stretched and stapled the fabric onto it. I than trimmed all the extra fabric and that’s it.
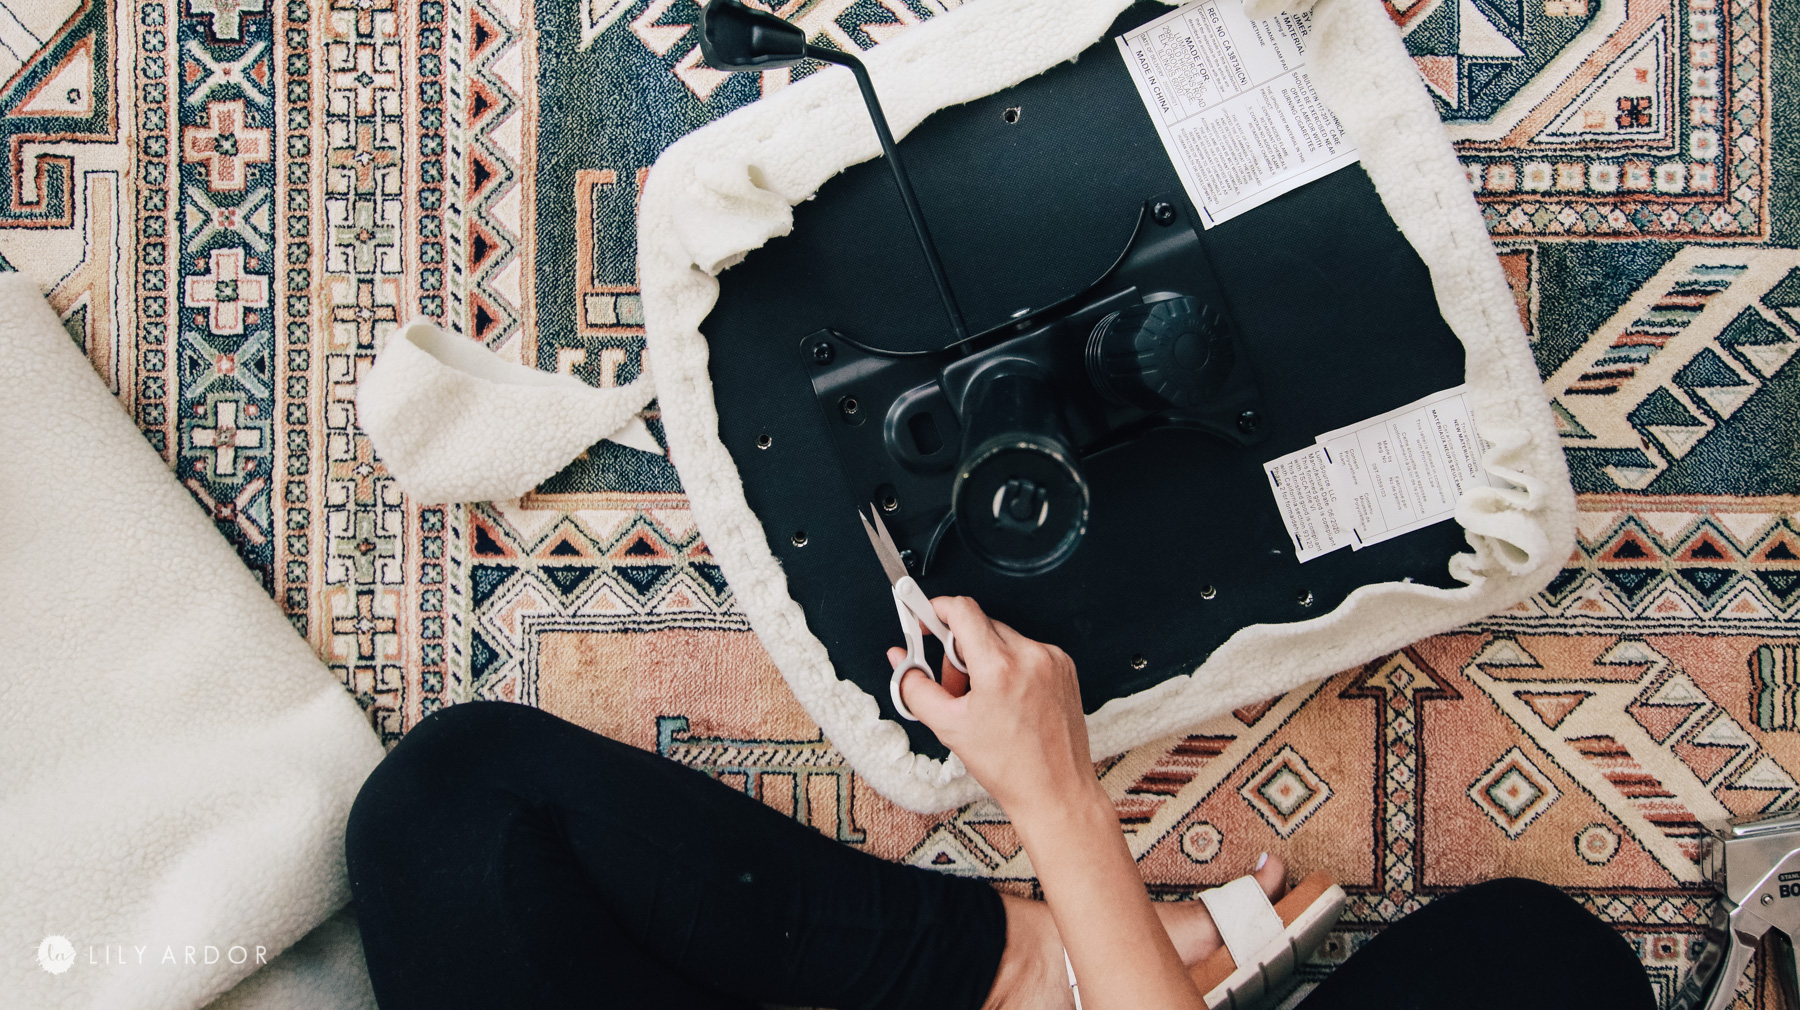
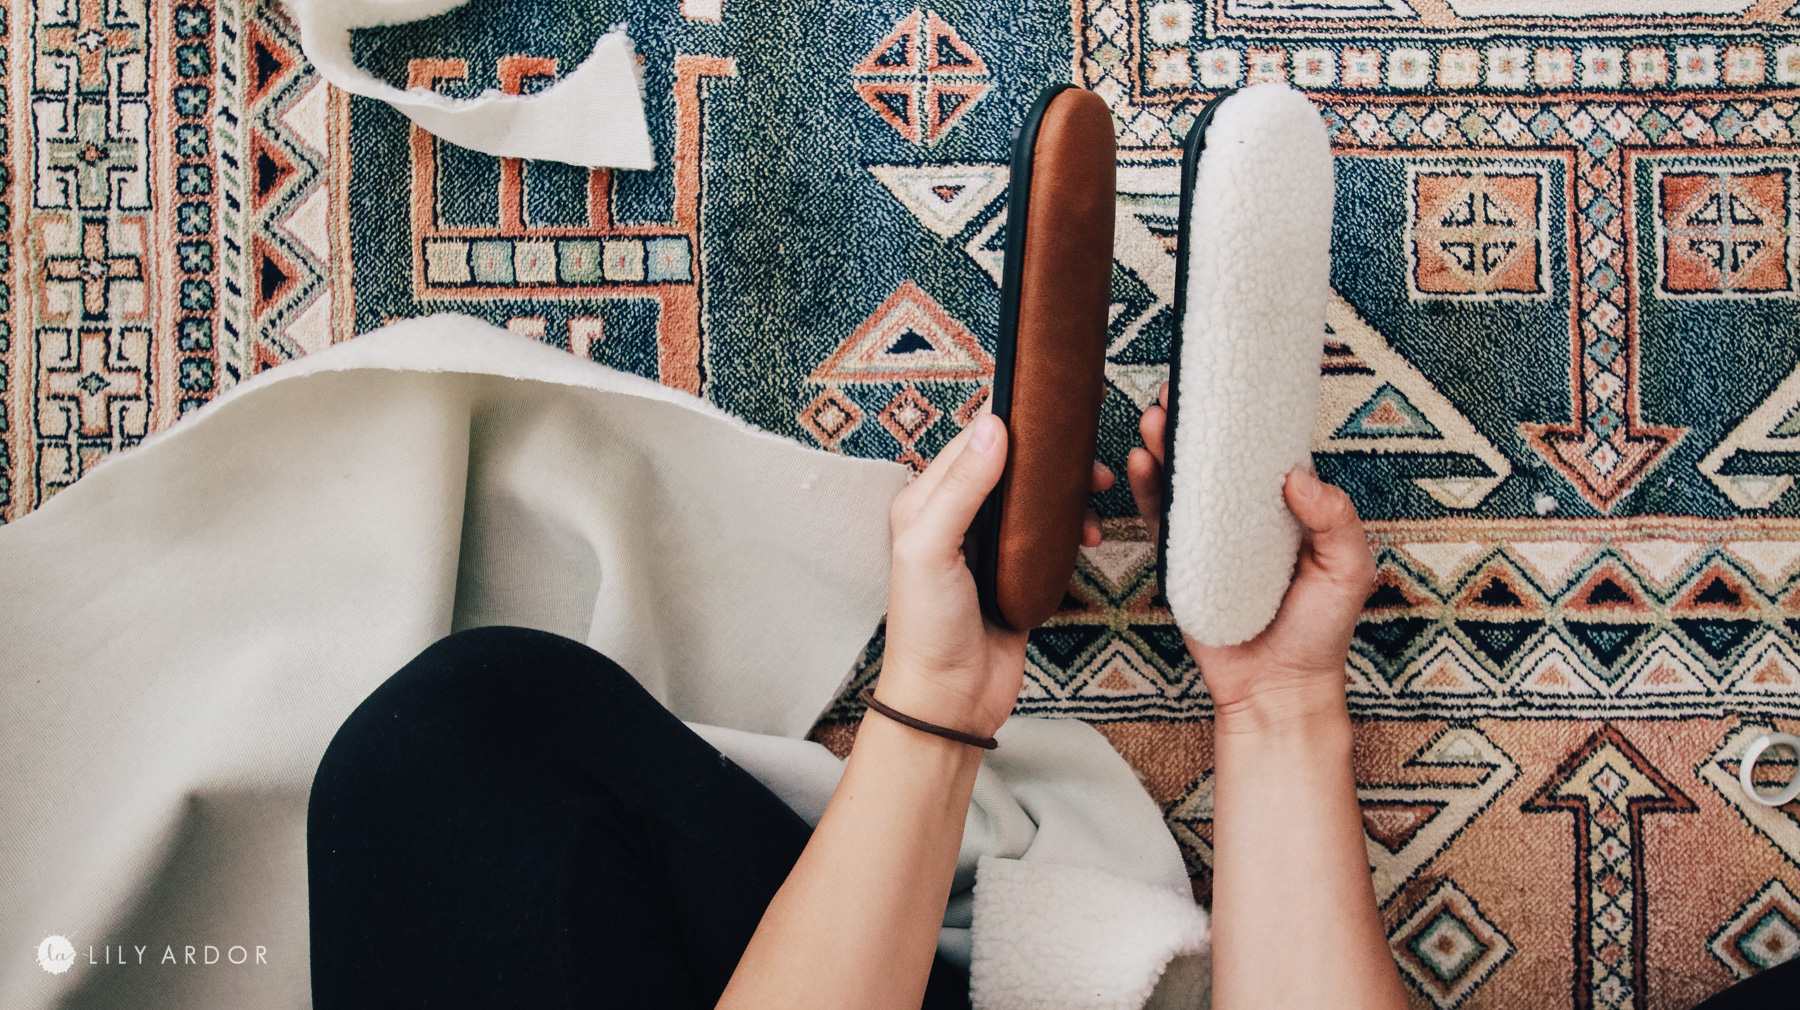
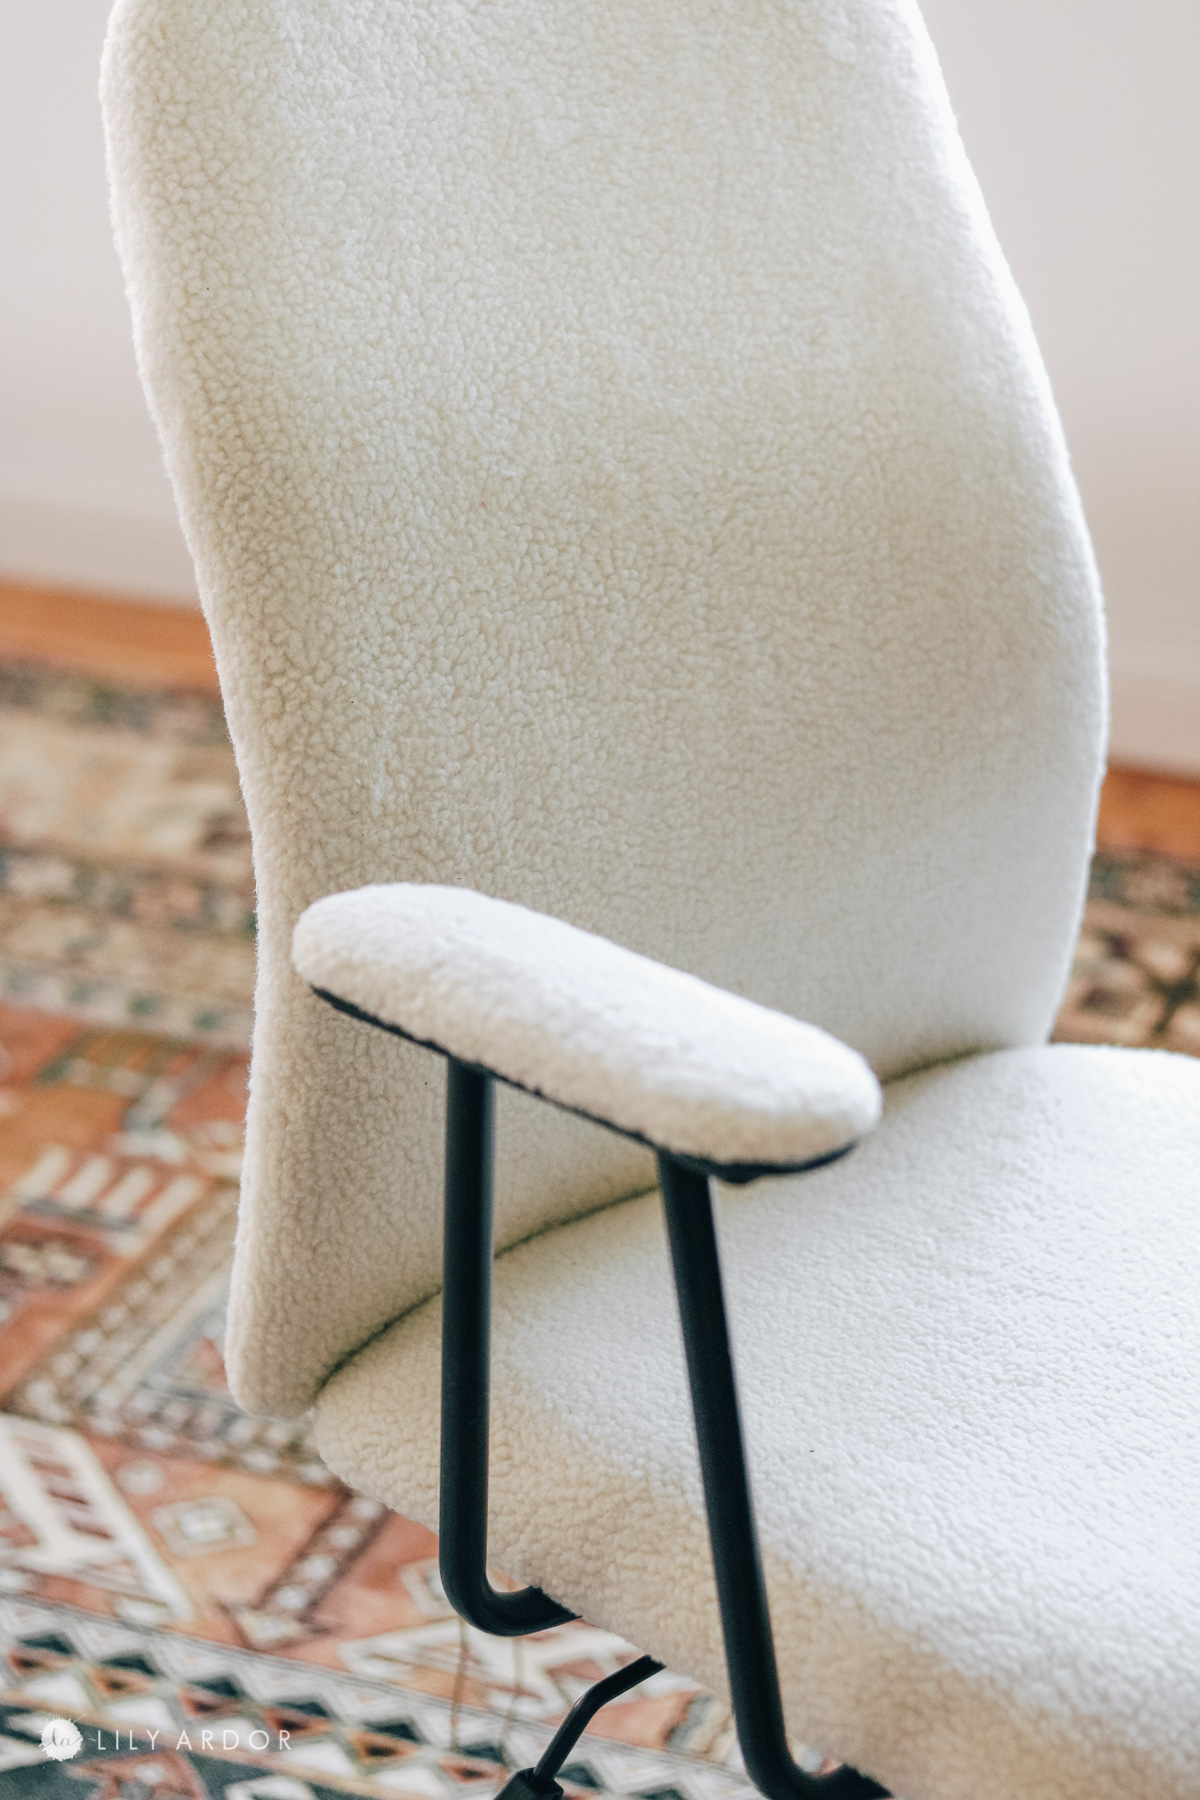
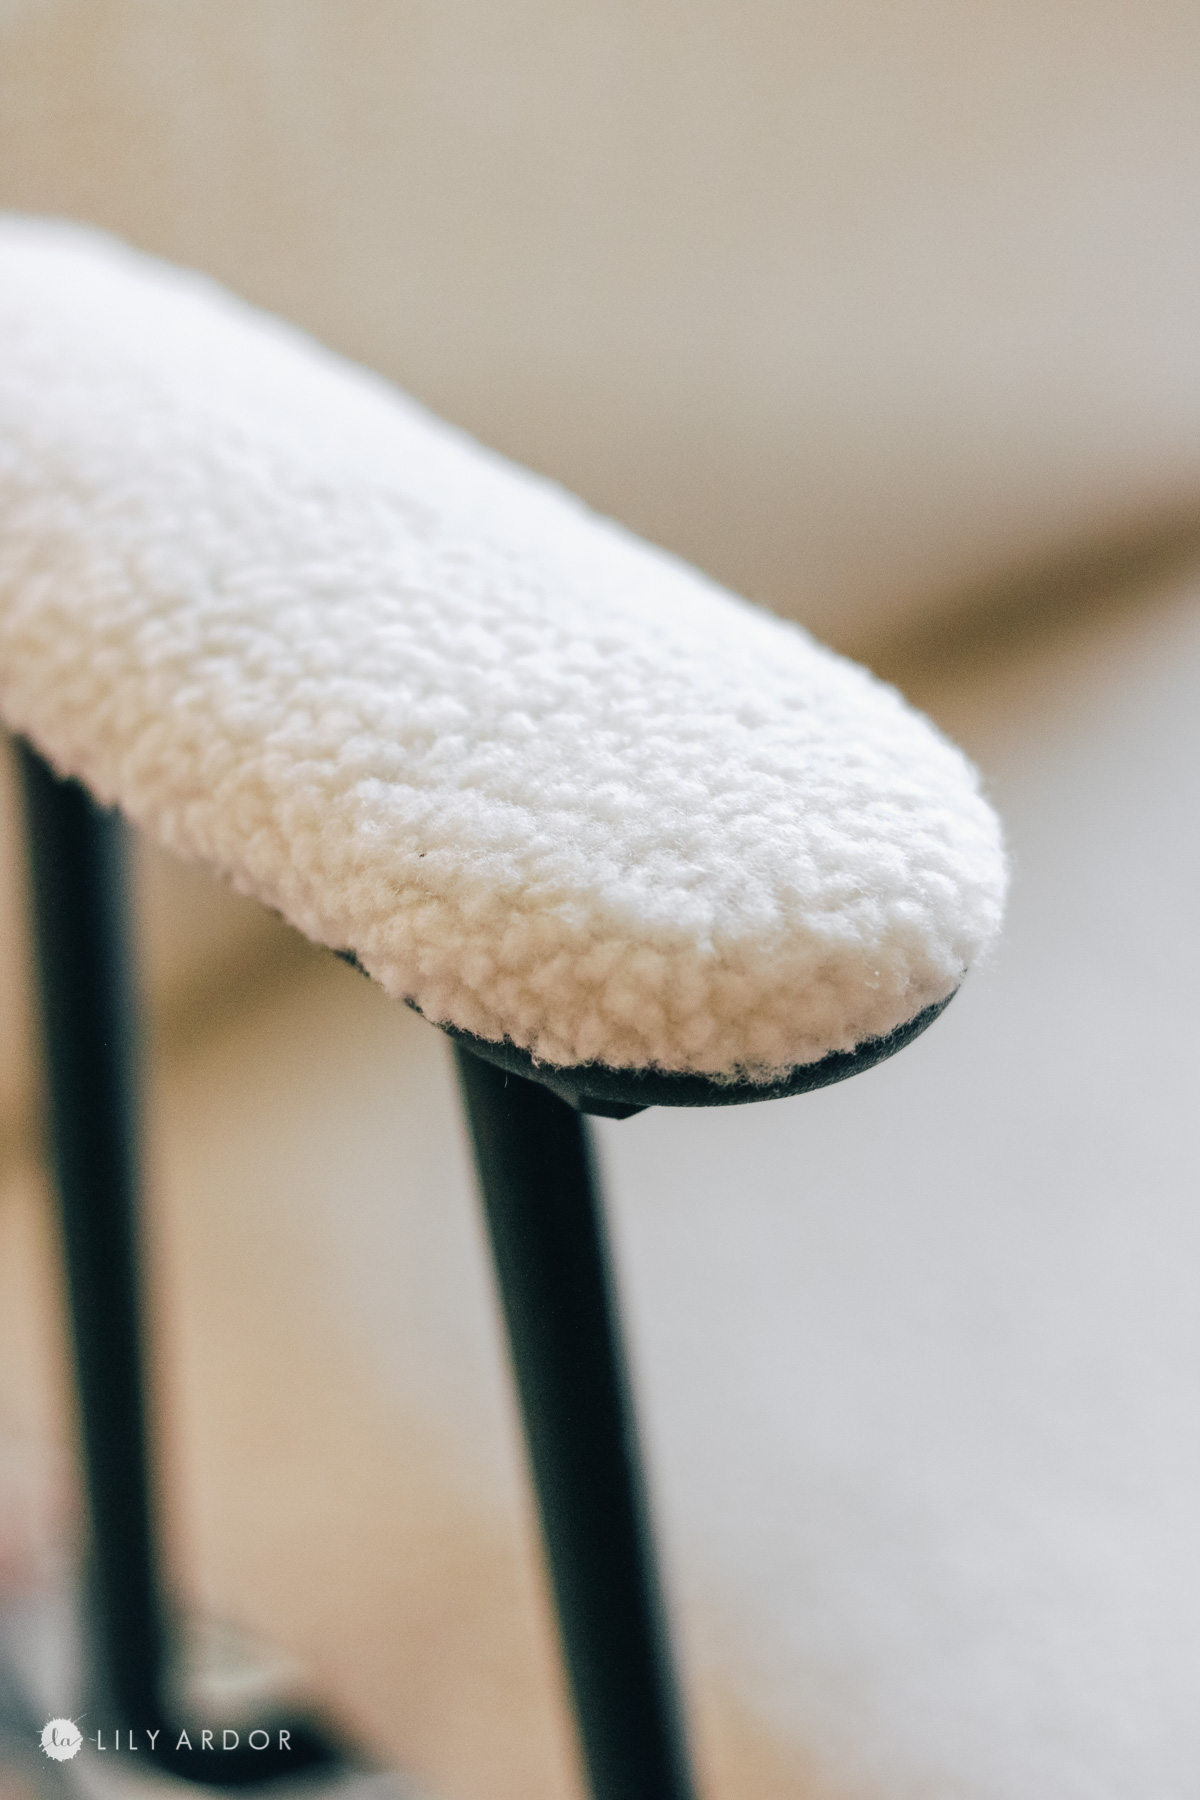
I did the same to my little arm rests. 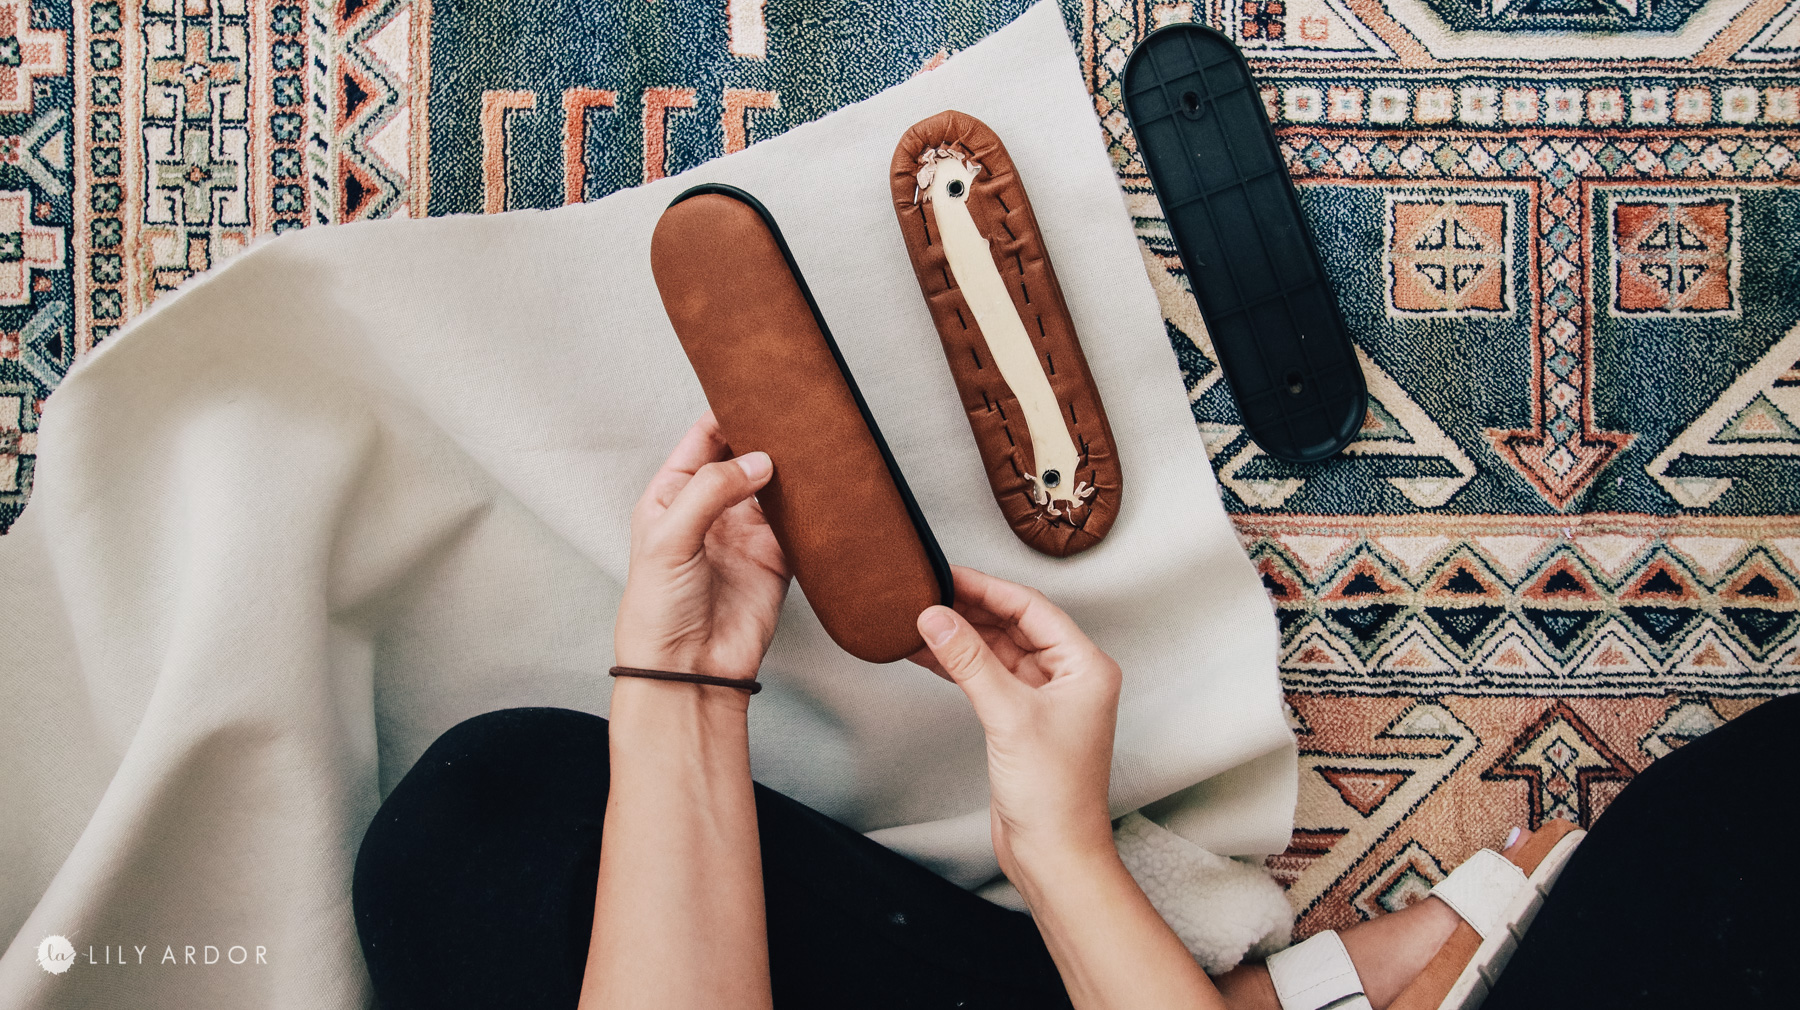
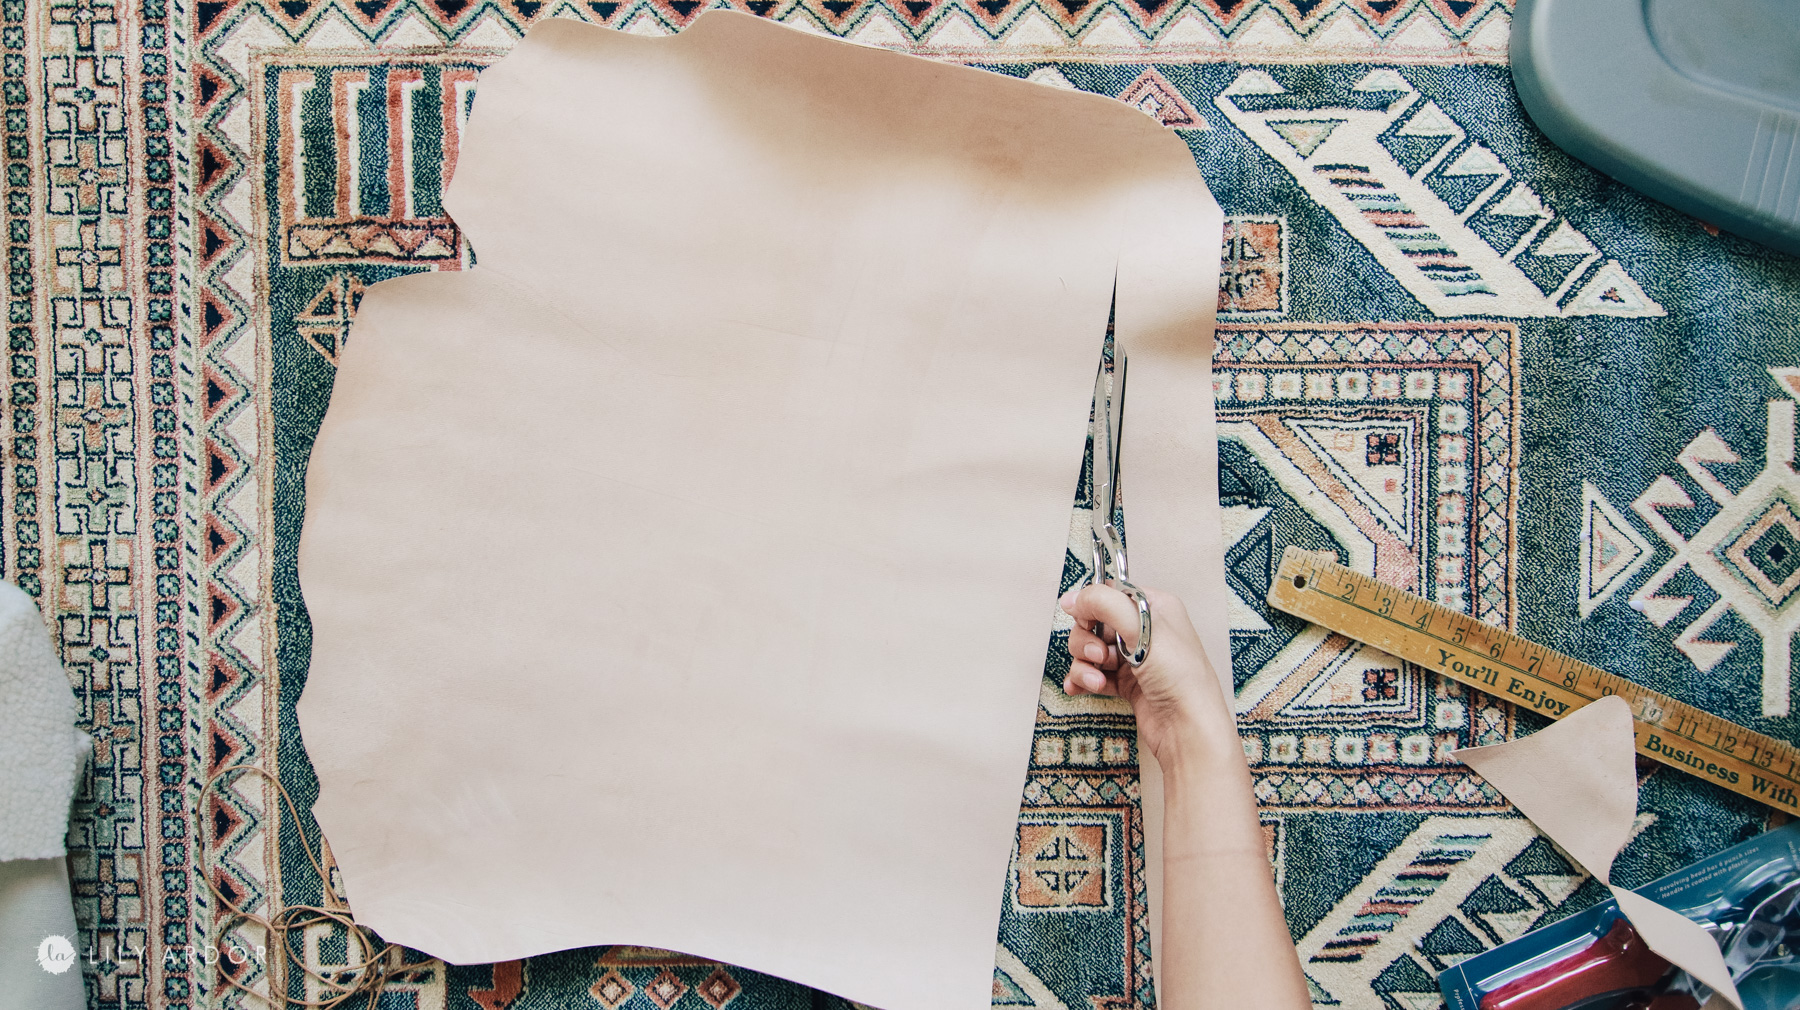
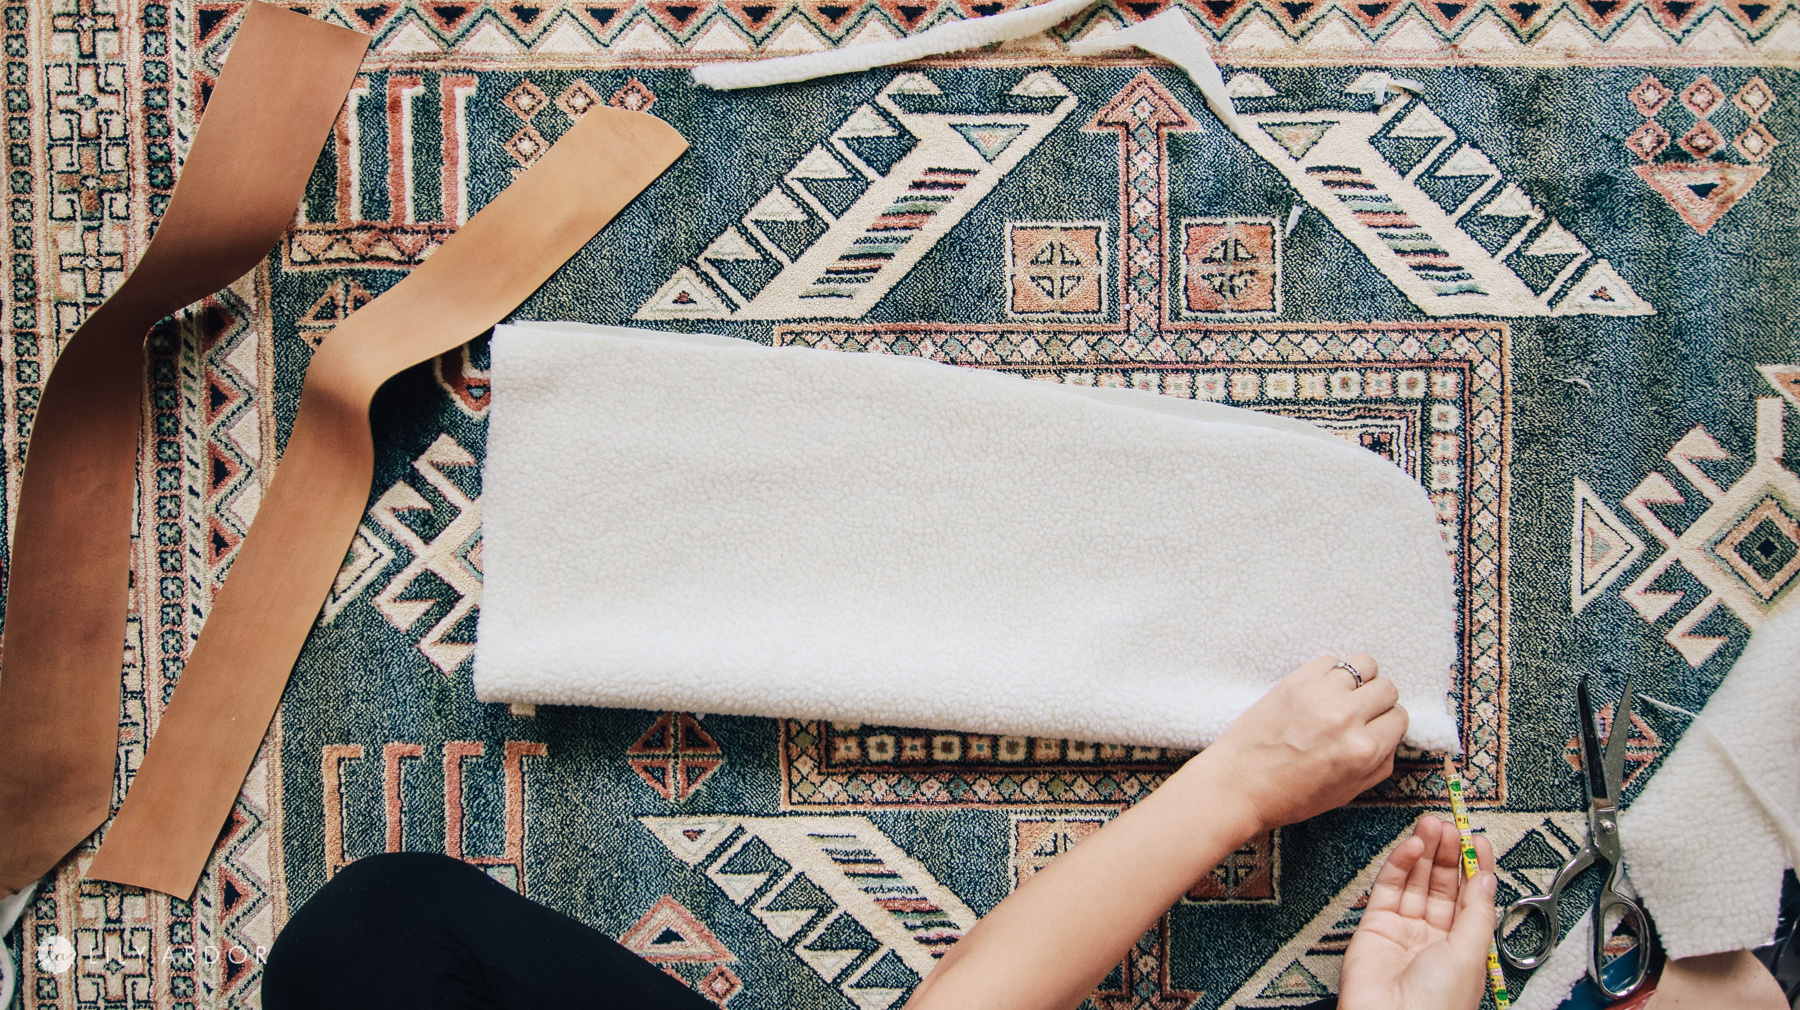
For the back of the seat I lay the seat over some fabric and traced the rough shape with a pencil. About 1.5 inches out. So it was a little bigger all around. Then I just cut it out.

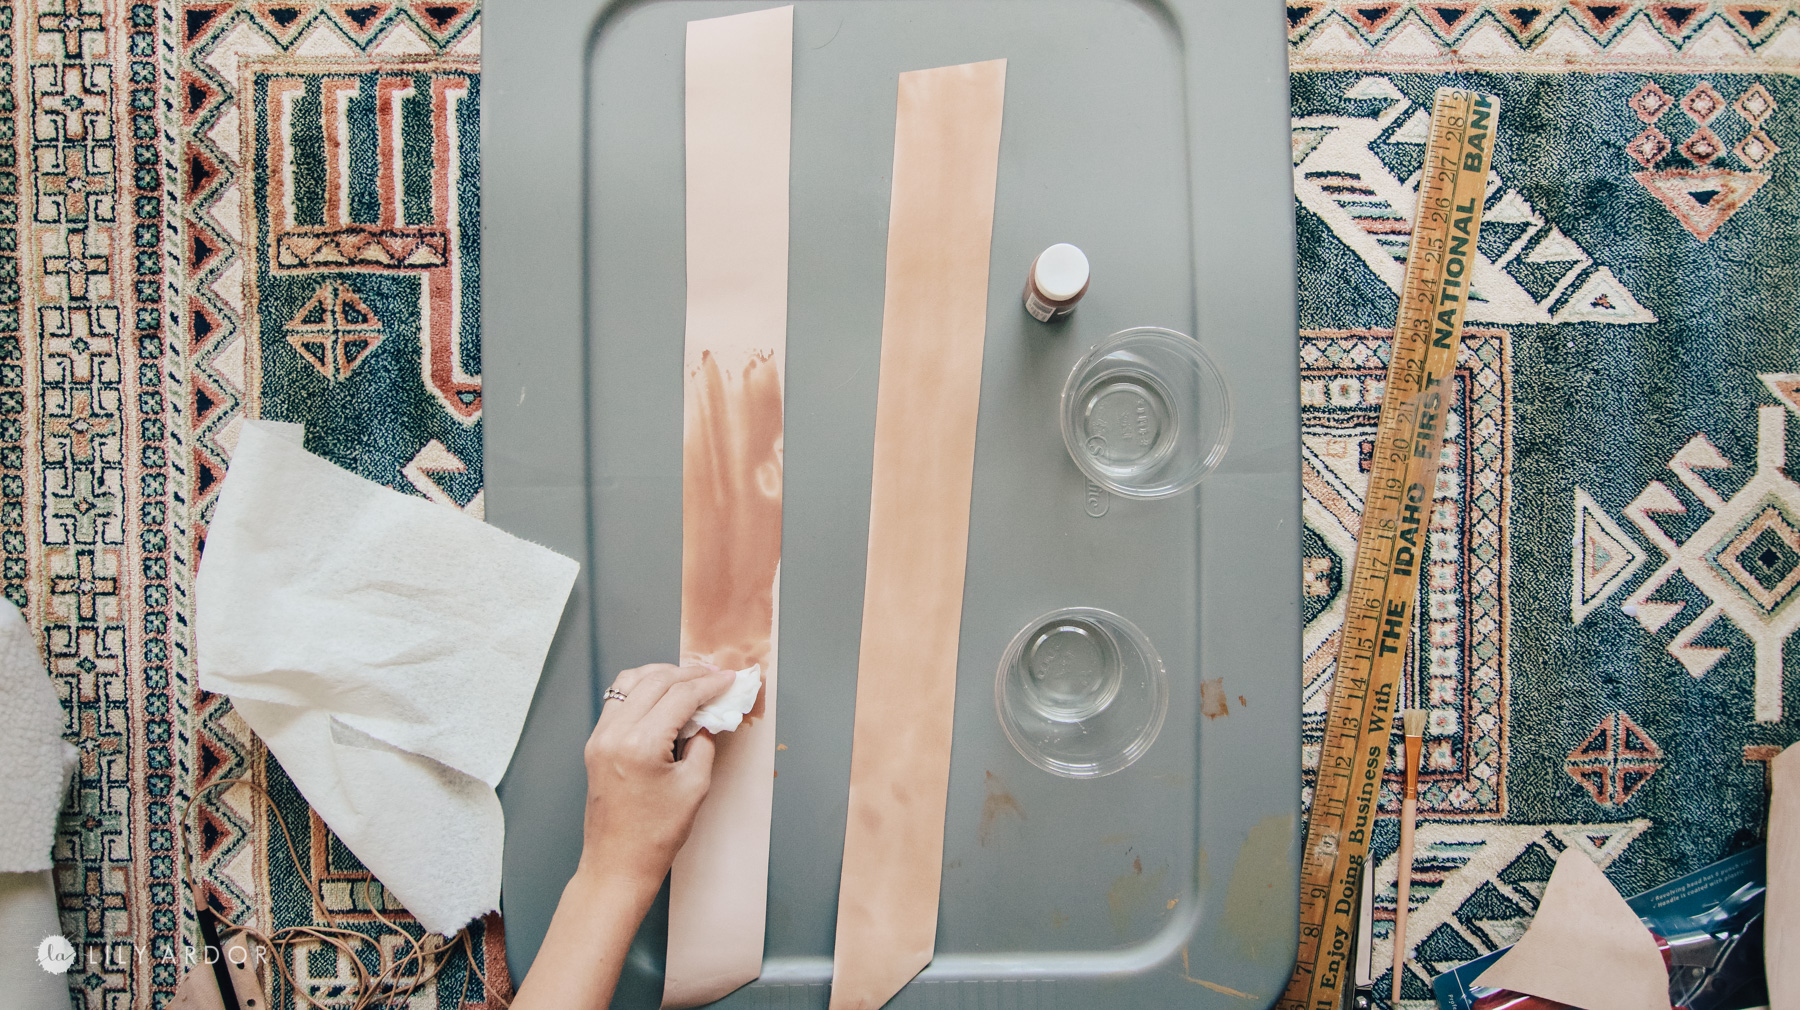
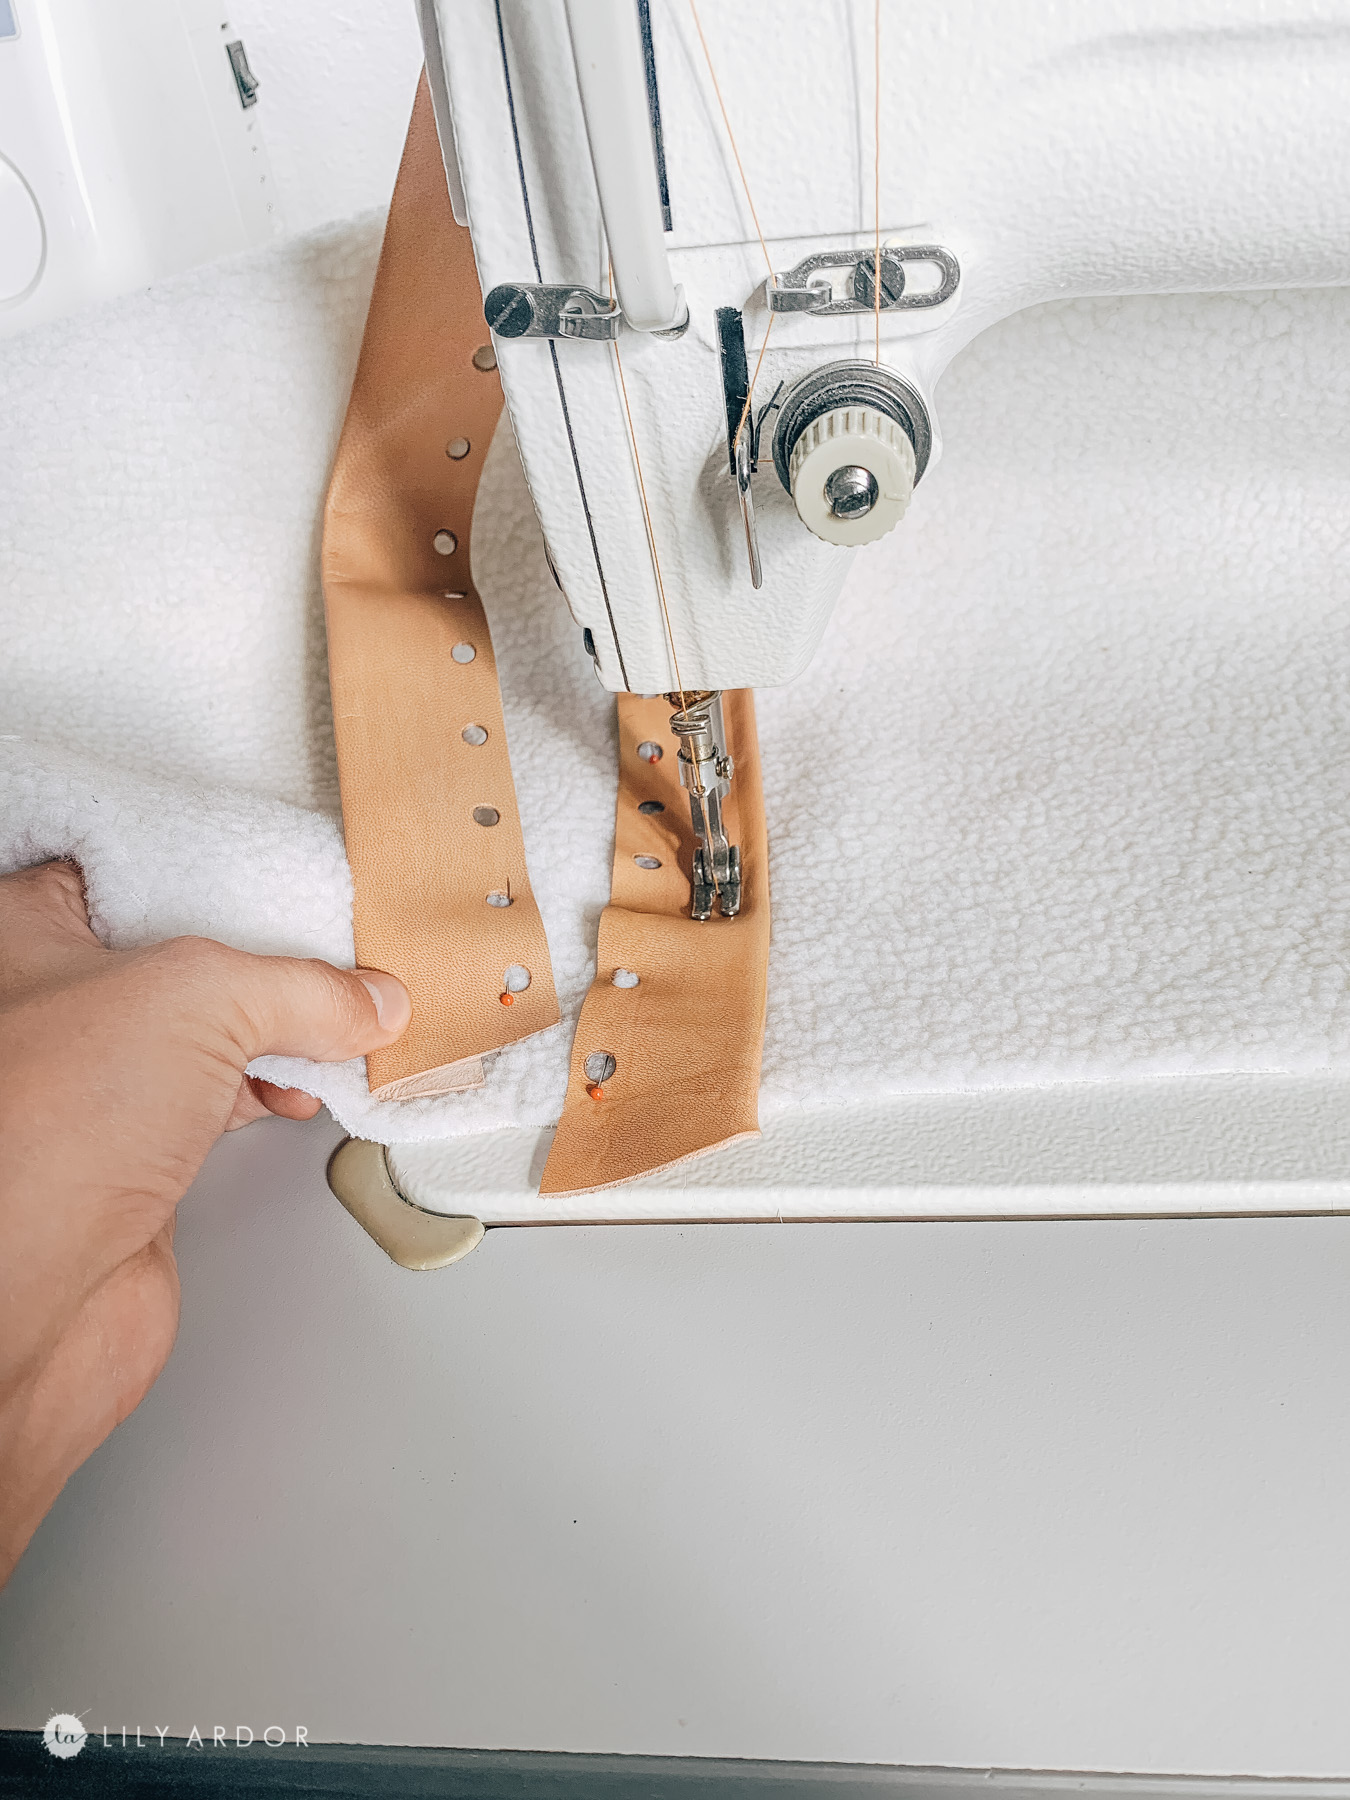
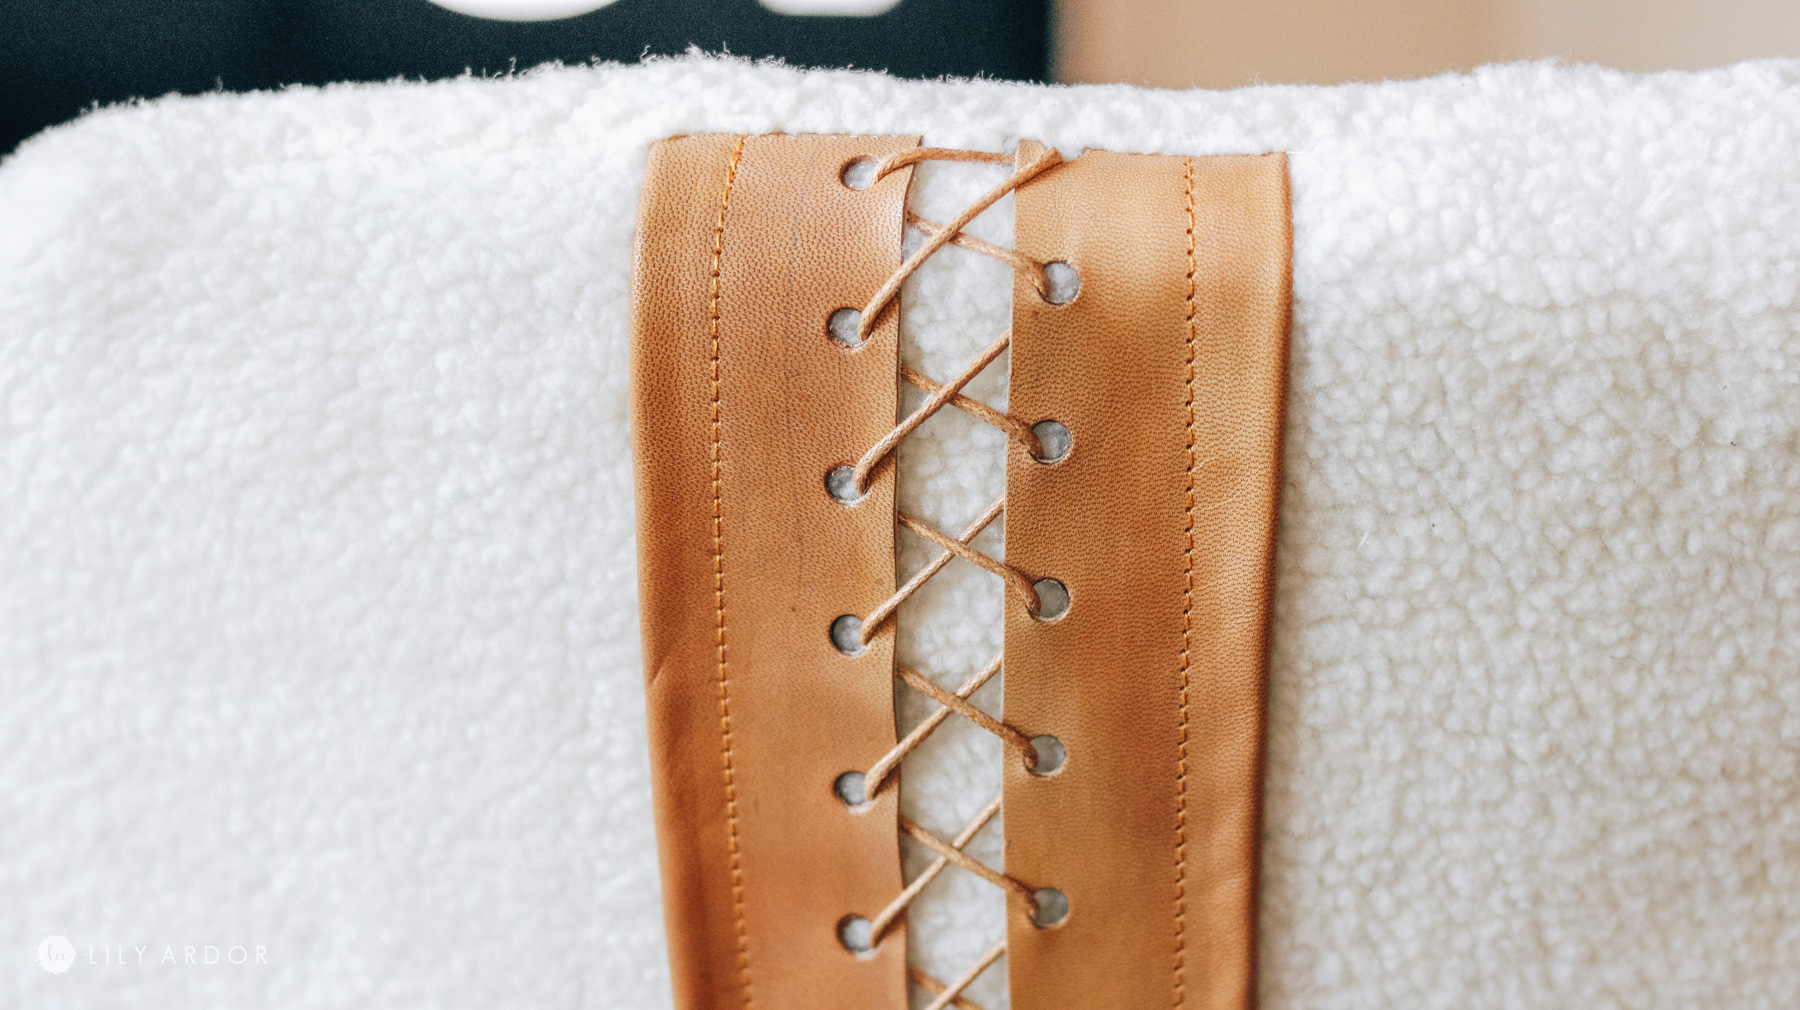
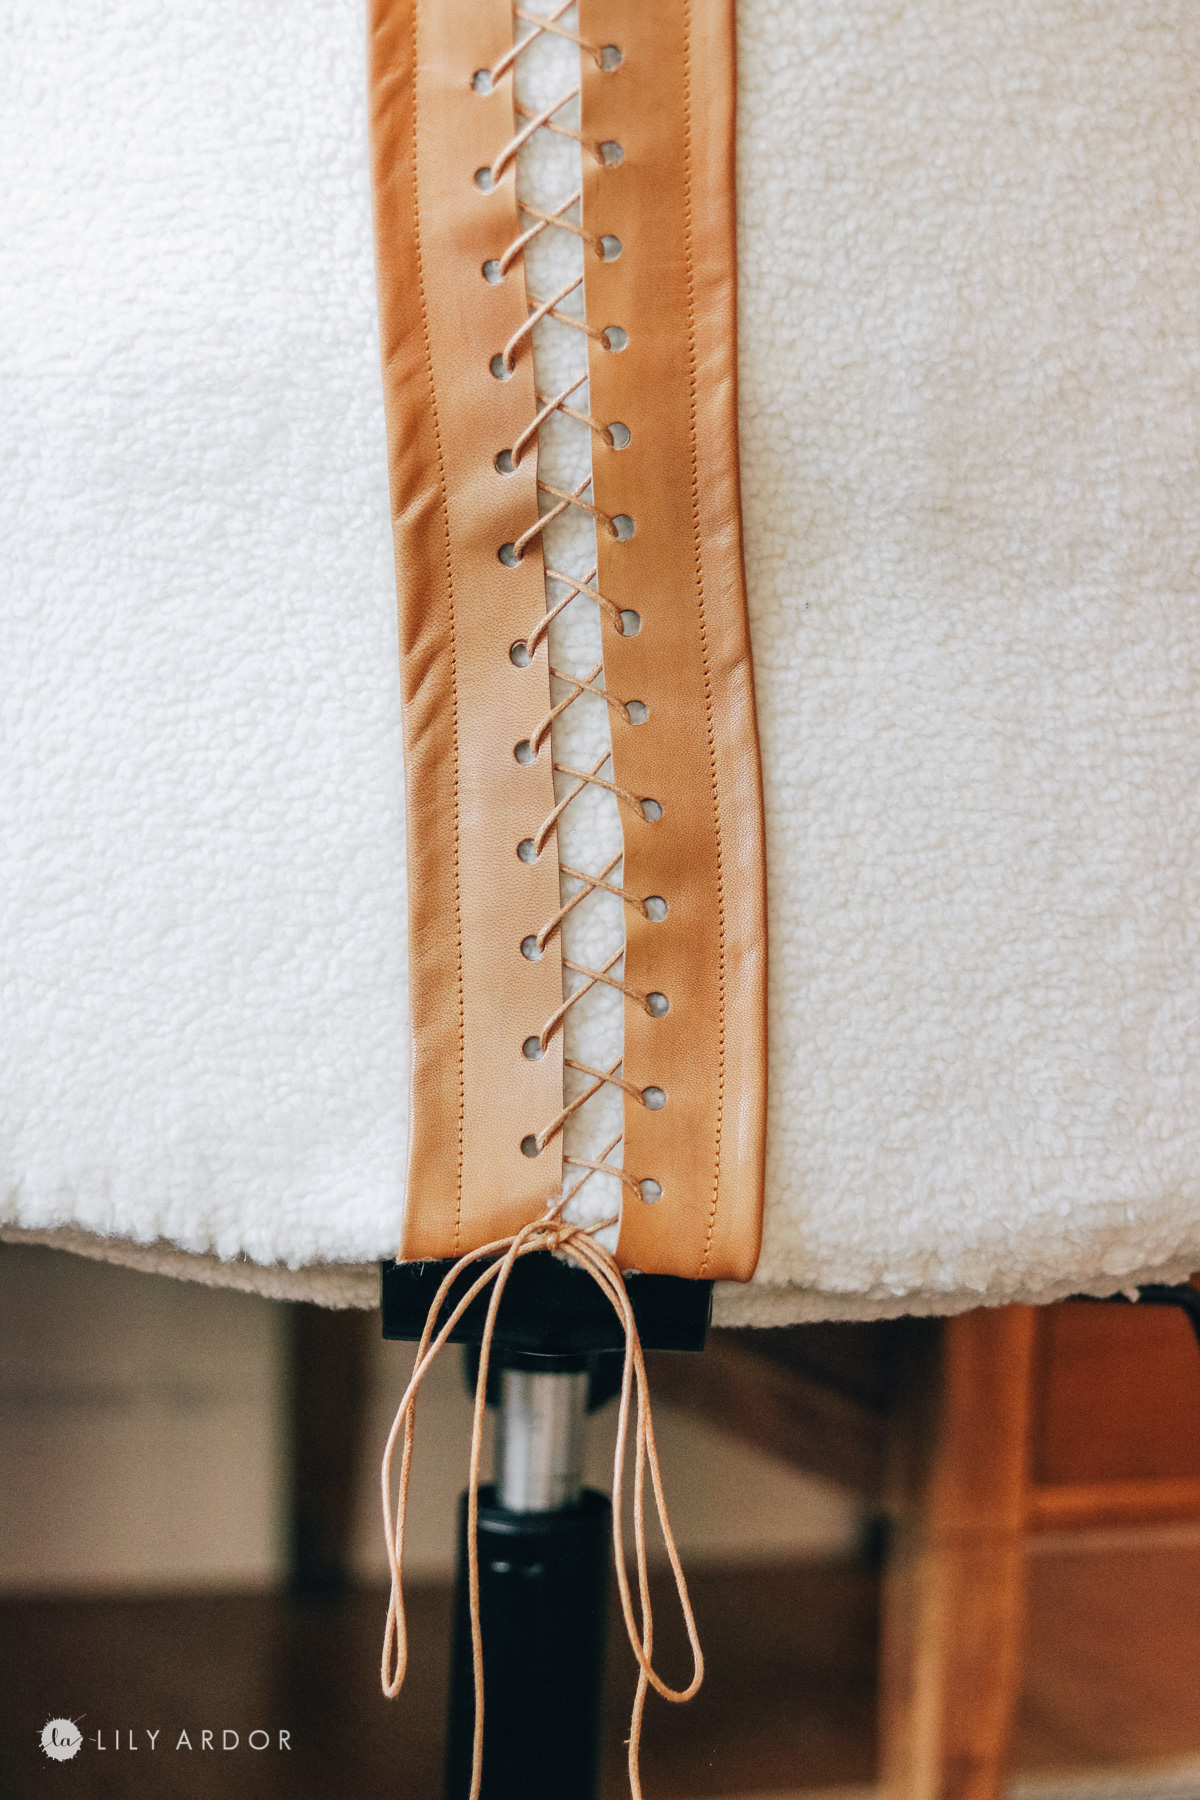
Because I wanted to add some cute detailing to the back I cut out two strips of leather measuring 2.5 inches in thickness.
I then stained the leather with some diluted craft paint. Did you know you could stain leather with regular acrylic paint?? I share more about this in the video here- https://youtu.be/N1qRoybH9UI
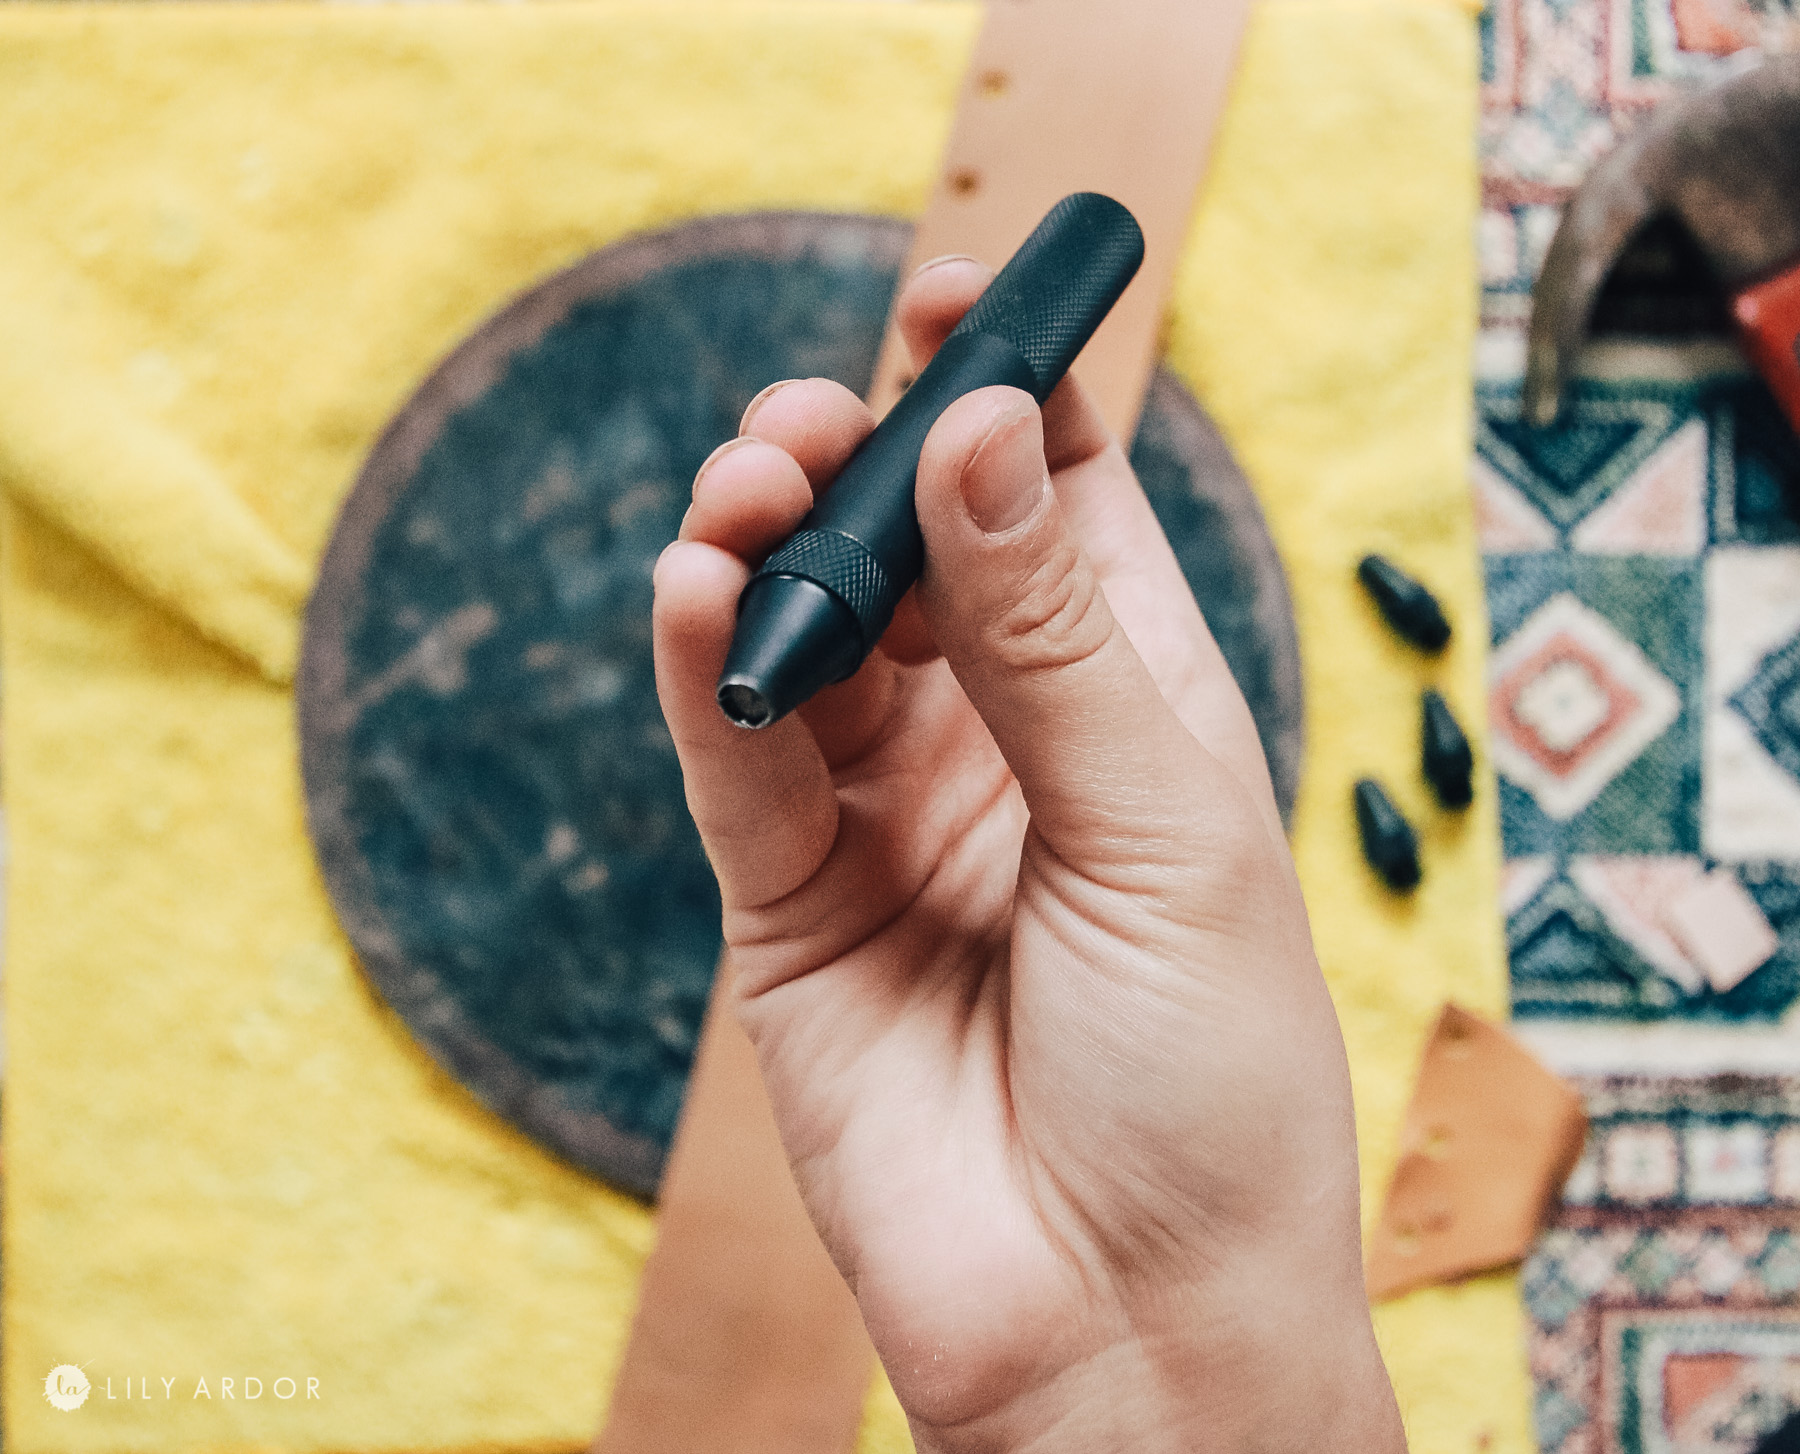
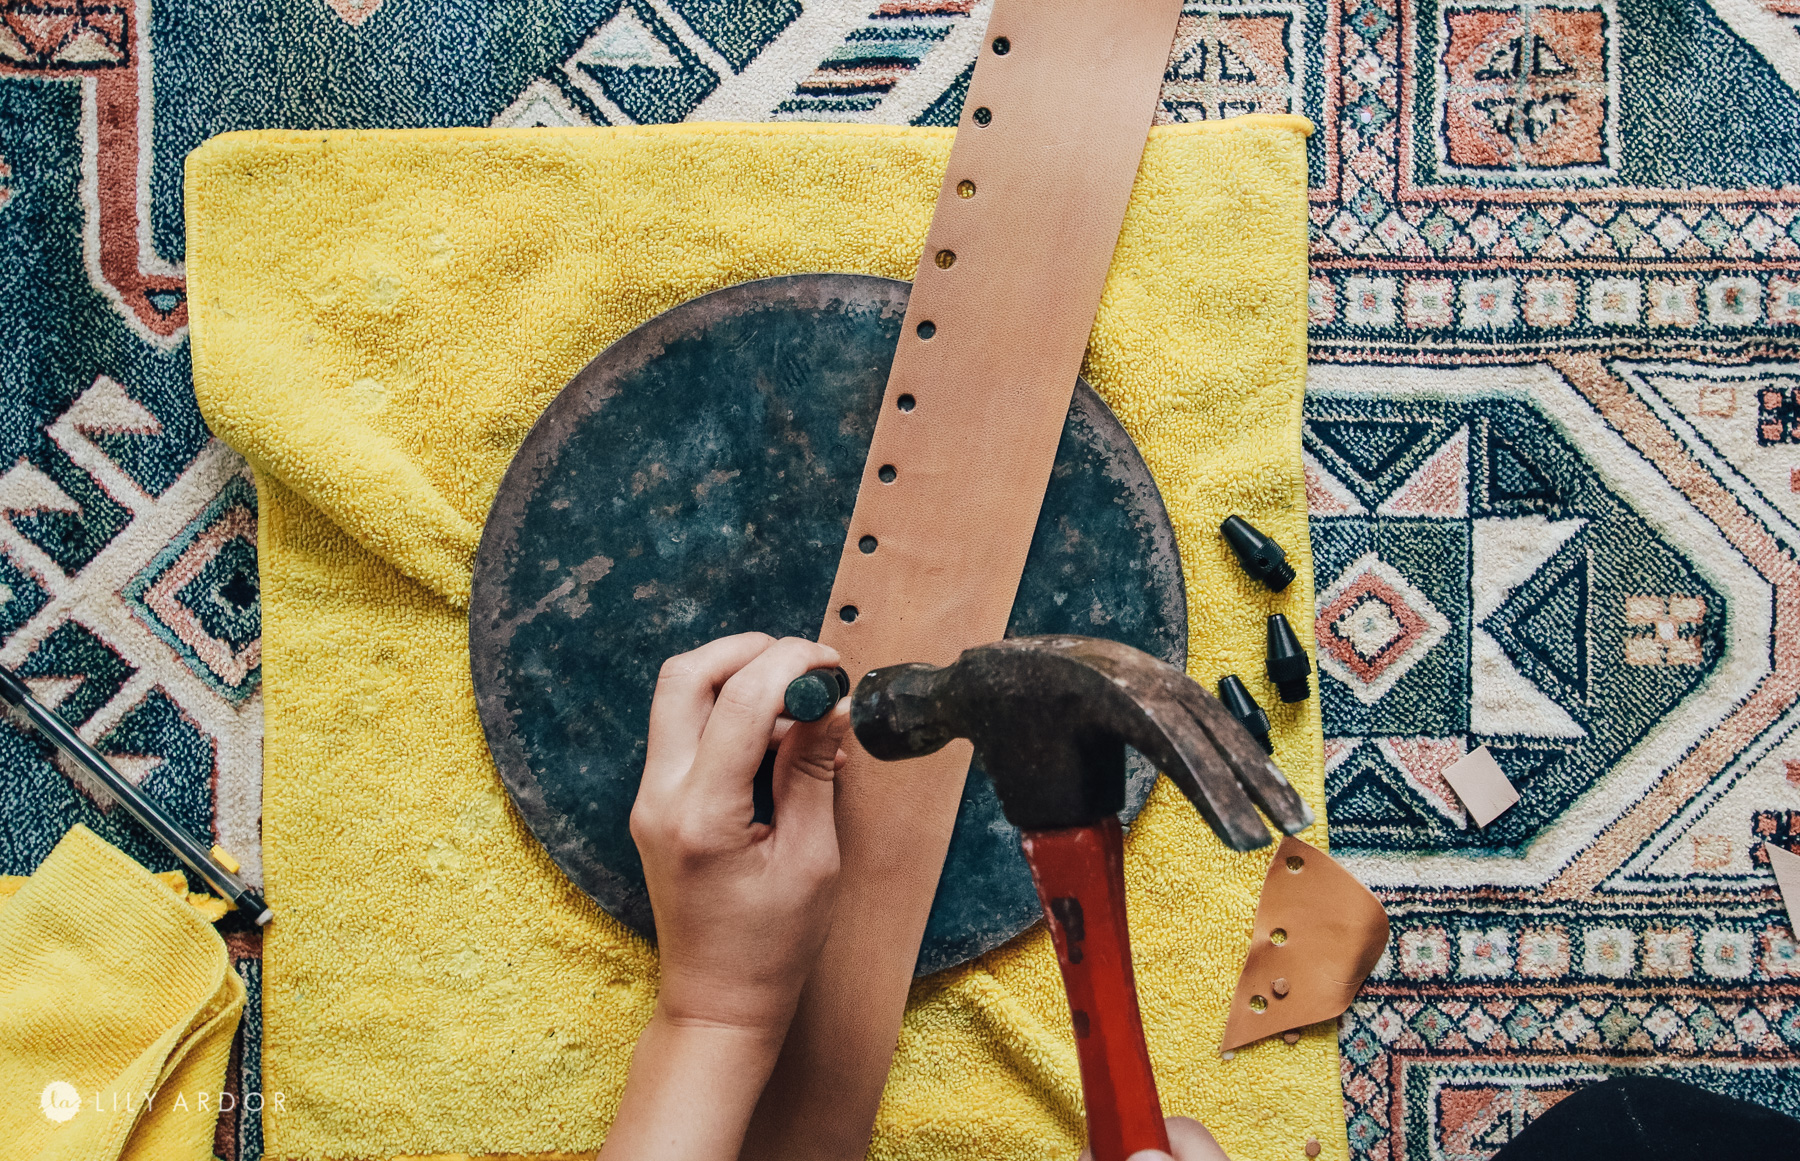
I than punched holes through the leather so I could lace through the cording later. They sell hole punch pliers or you can use this tool that helps you do it with a hammer. It’s so much easier on the hands and is usually sold in the leather section at craft stores.
I folded my back cover in half to find the center and marked it.
Than I sewed the leather strips onto the cover before stitching together the cover all together.
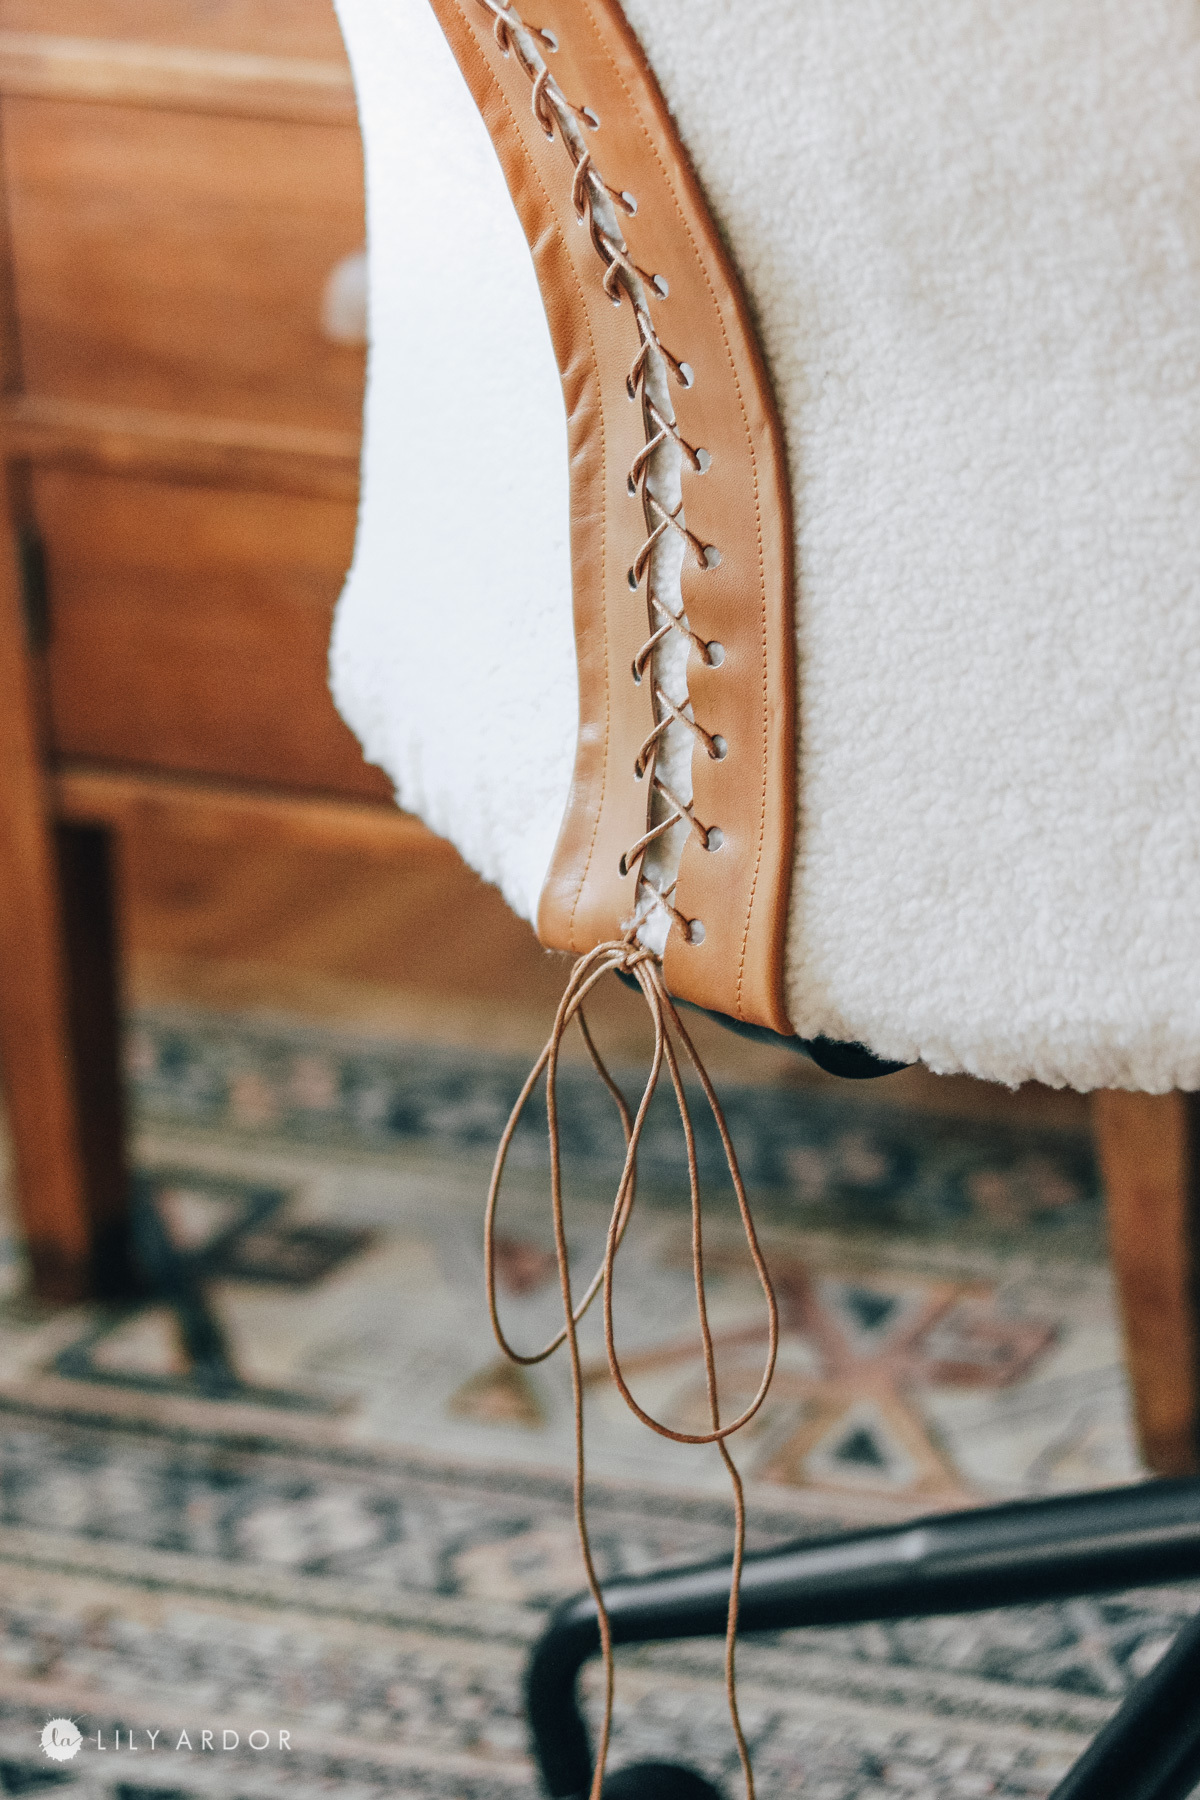
I slipped the cover onto the seat and laced up the leather detail with cording. 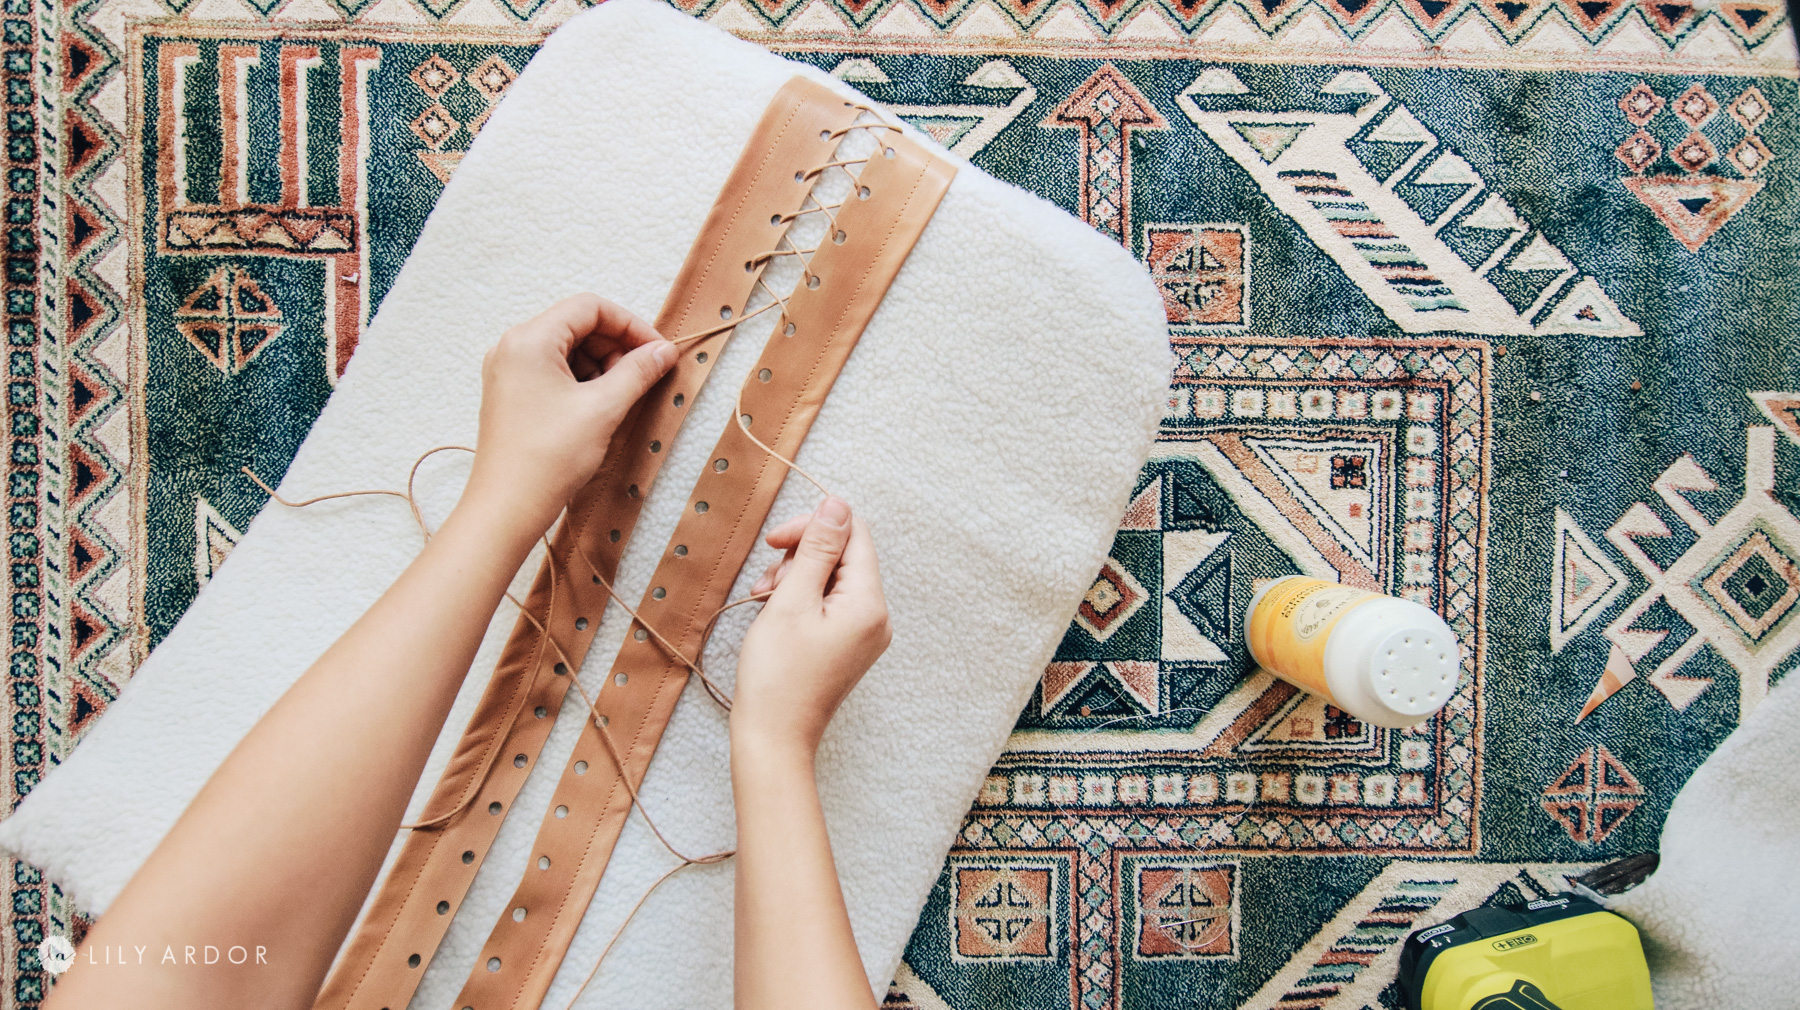
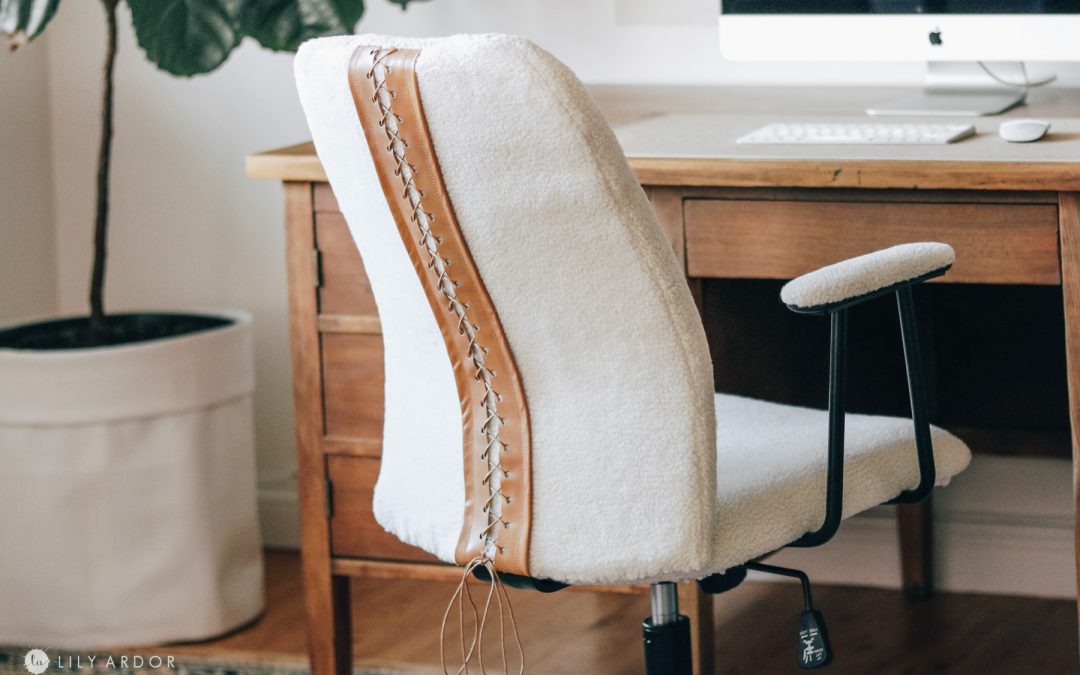
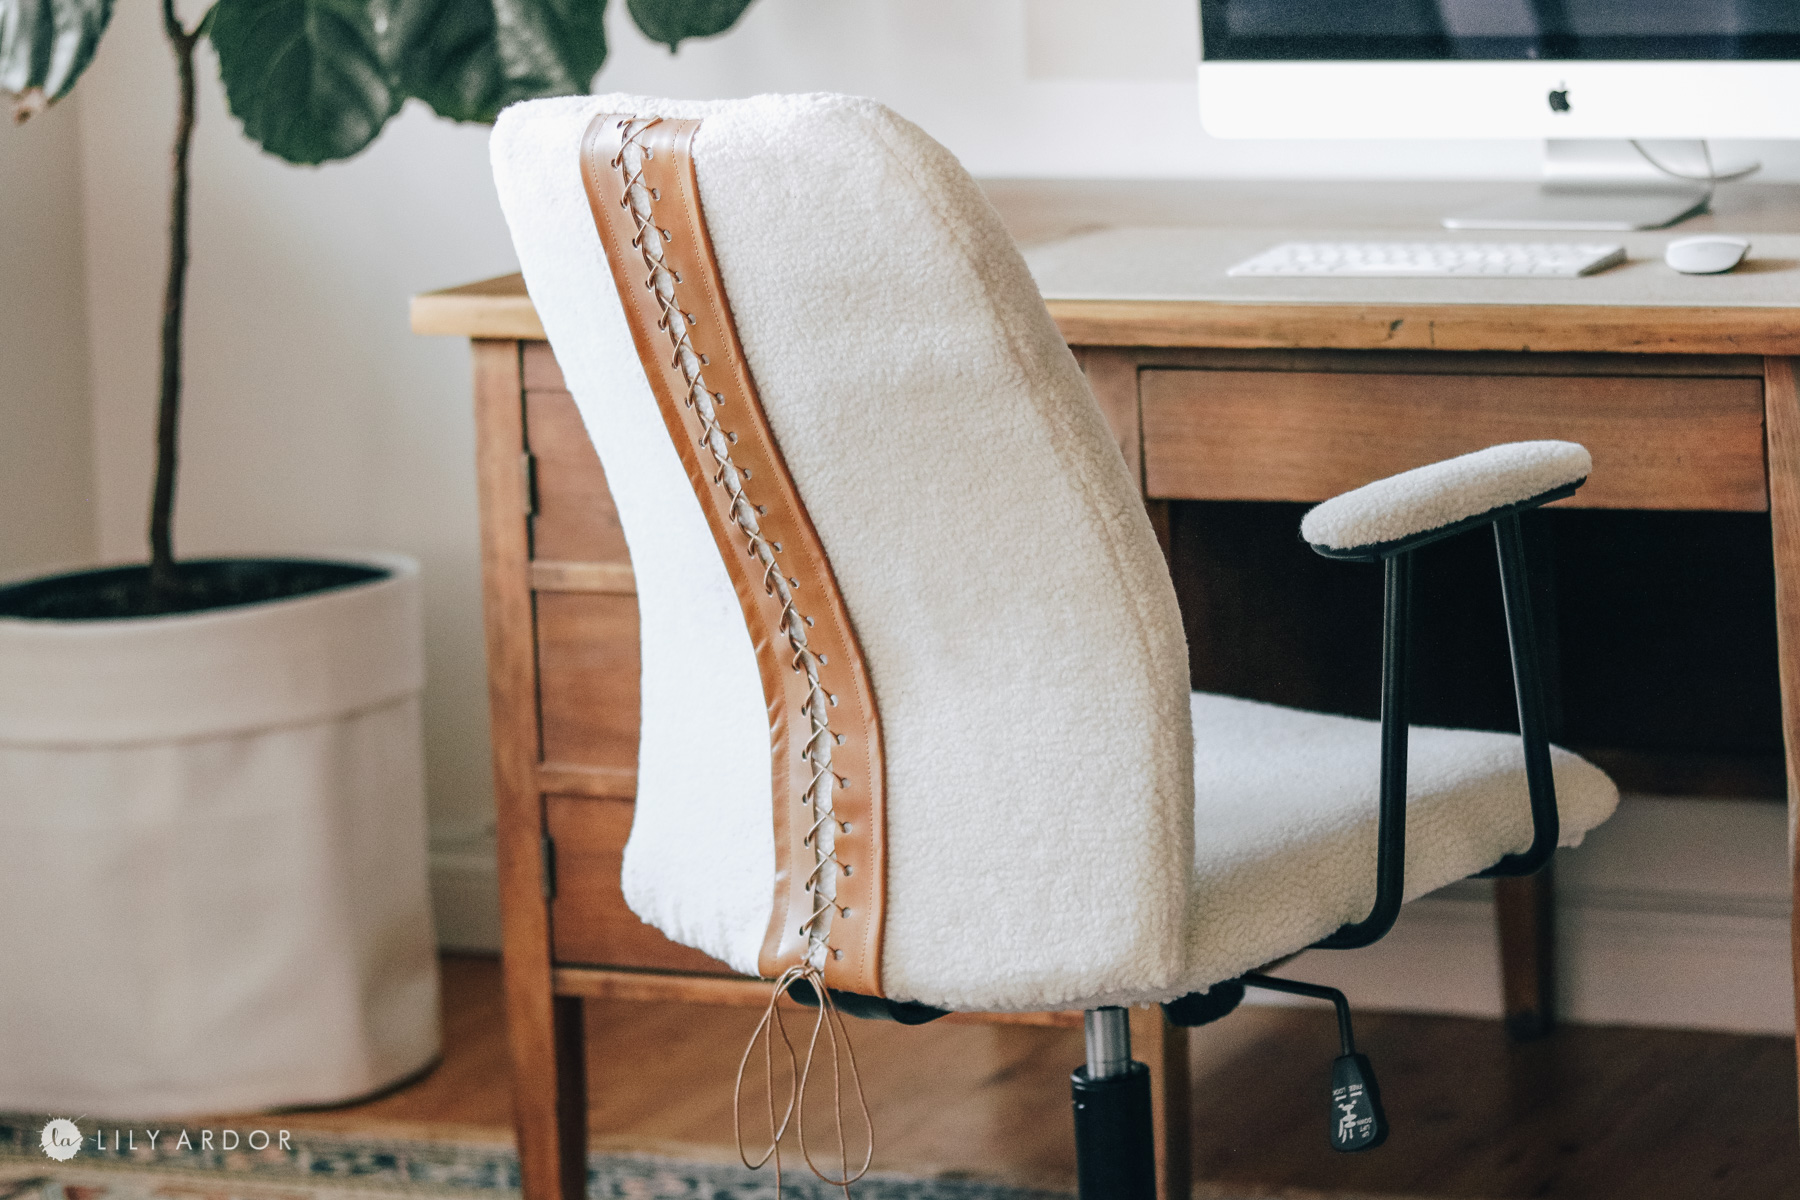
Here’s how the office chair looks now!! I couldn’t be happier! It so light + airy and the details on the back are so fun!
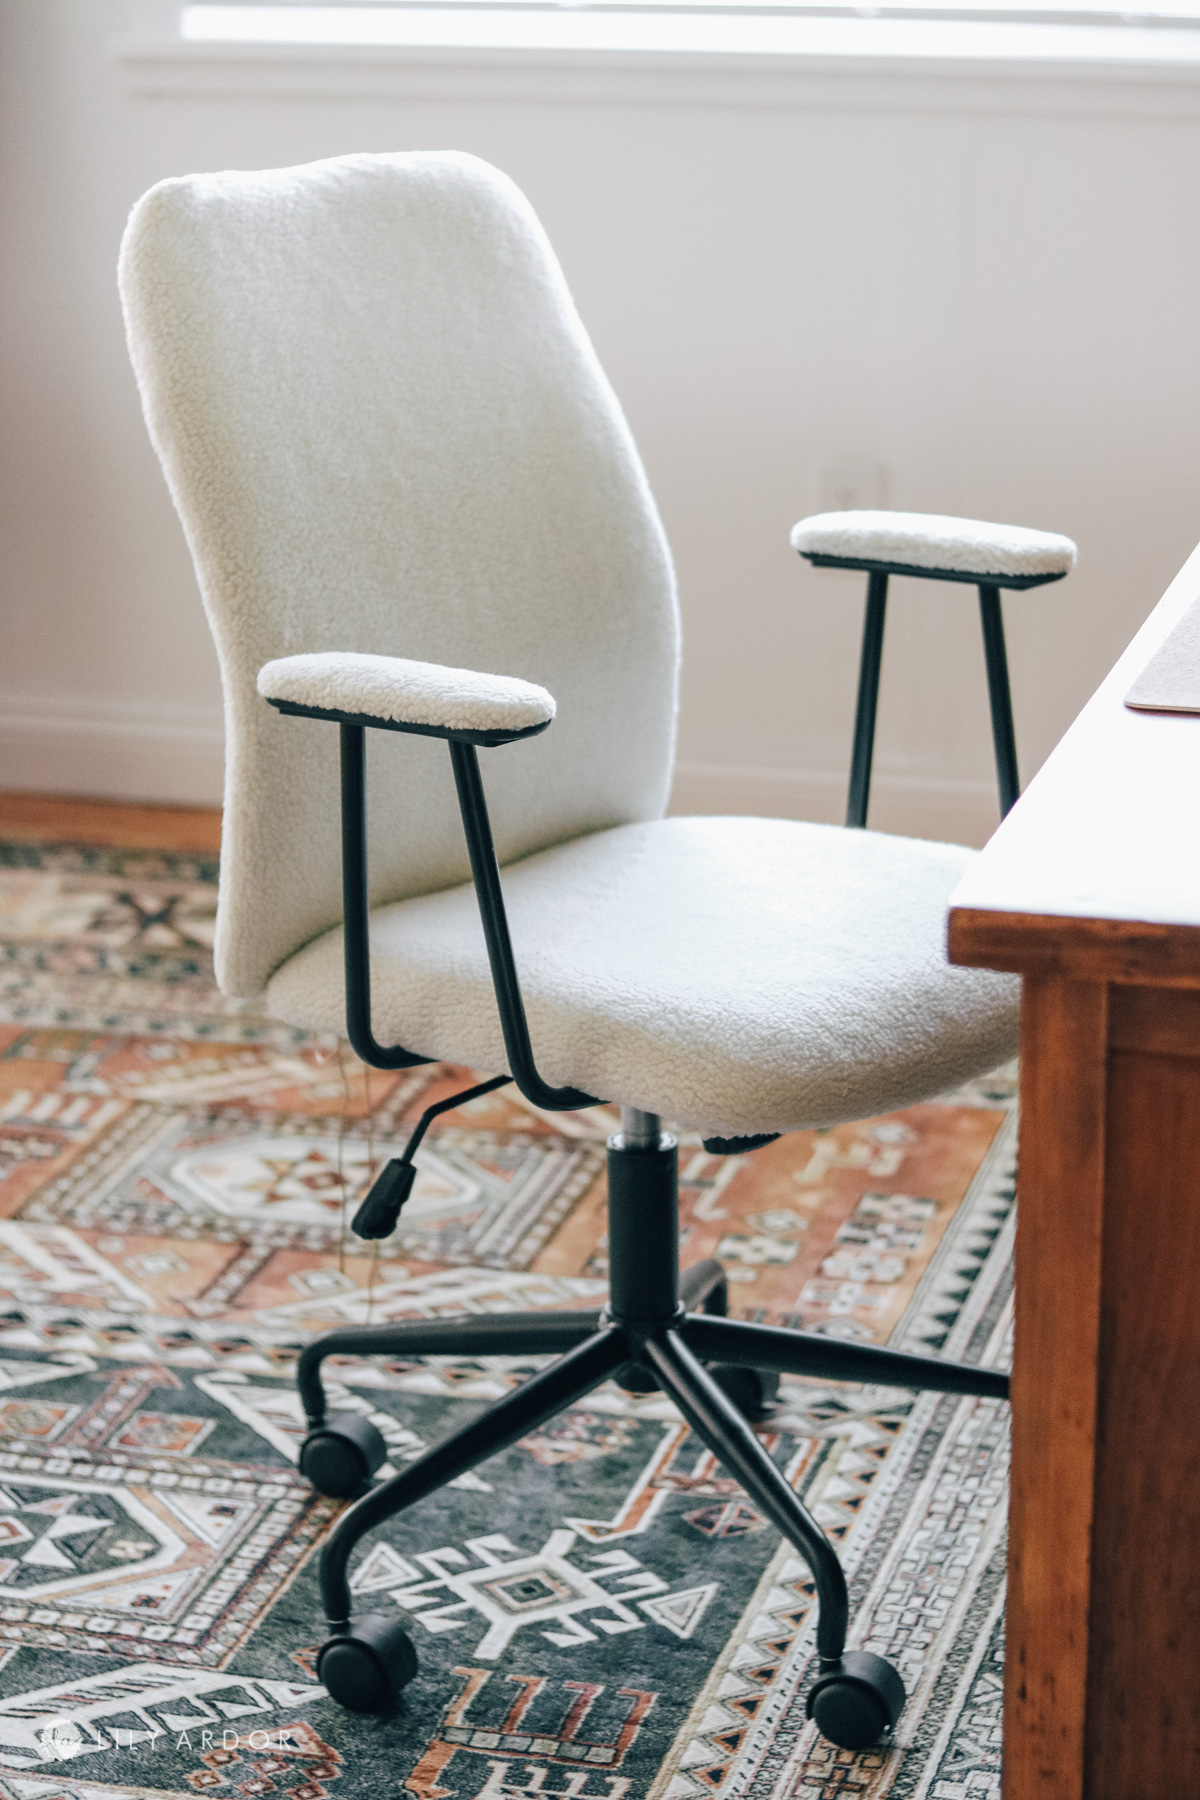
I’m so glad I decided to stain the leather. It would of definitely been too light for me taste with the original color.
It’s so soft.
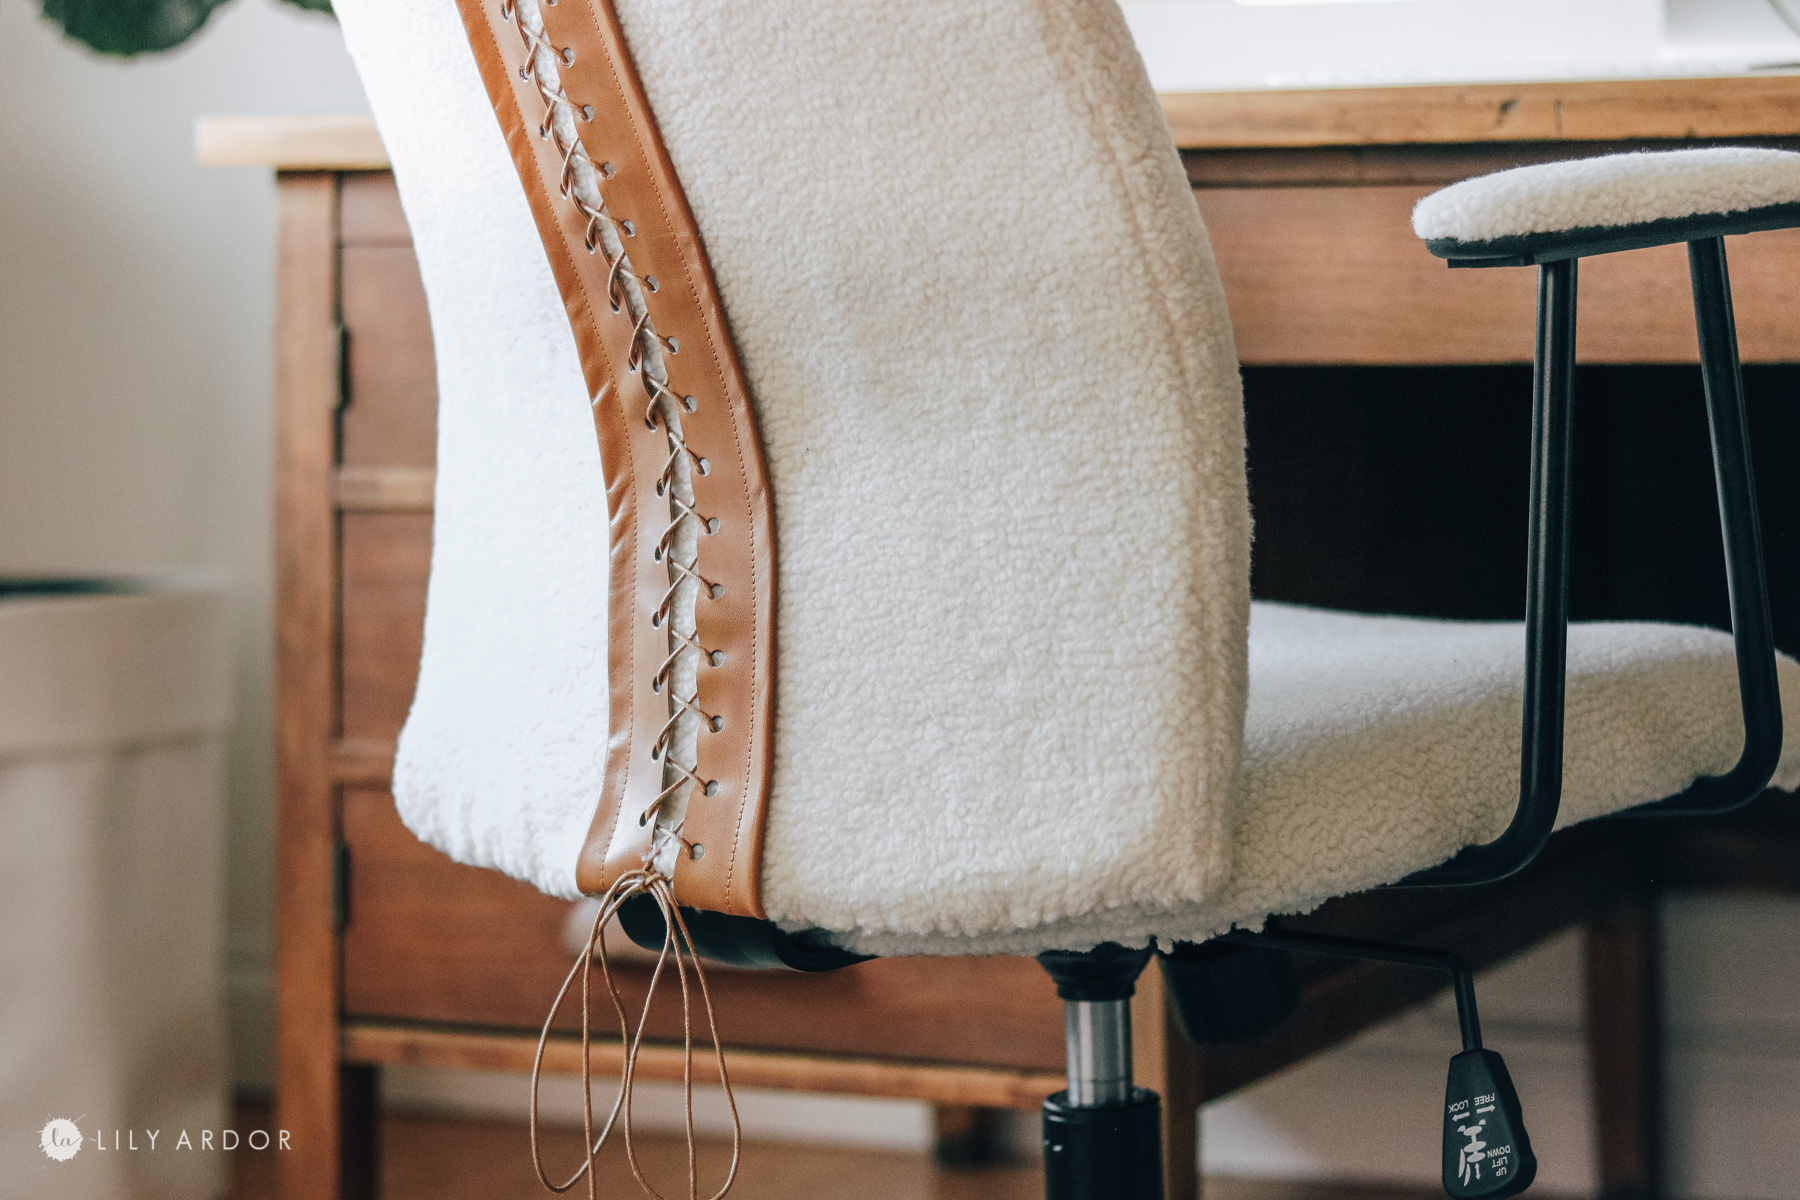
Love how this lace up detail ties into my office decor! LOL get it ties 😂😬
That’s it for today! I hope this inspires you to give your old chair new life!
Happy Crafting everyone I’ll see you next week!
xo,
Lily
Where was your chair originally from?
From what I remember I think I got it on wayfair.
Thank you very much for sharing, I learned a lot from your article. Very cool. Thanks. nimabi