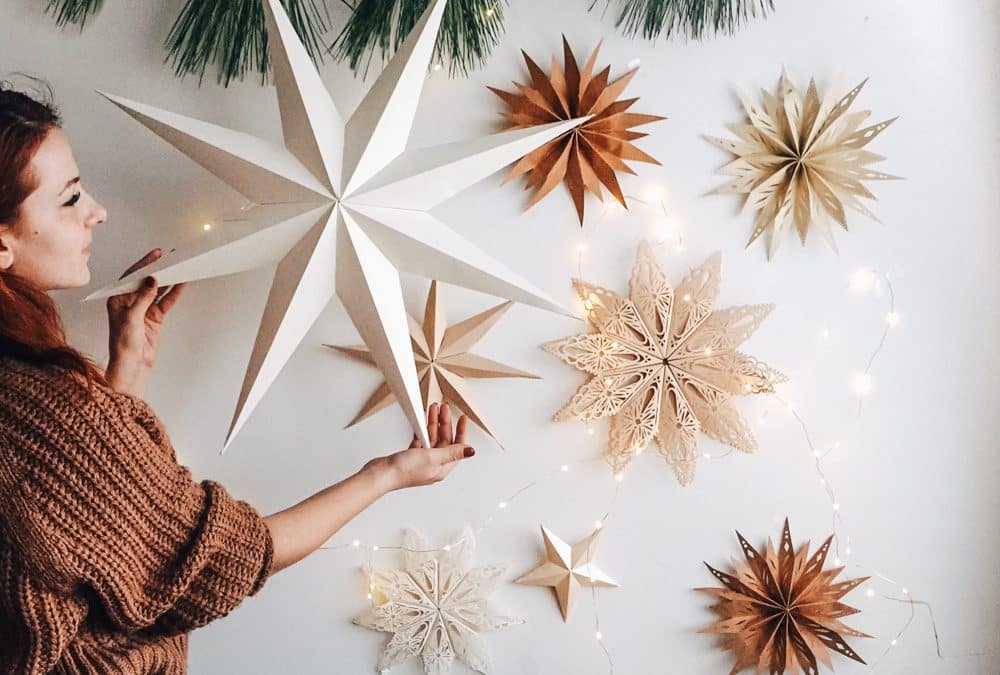
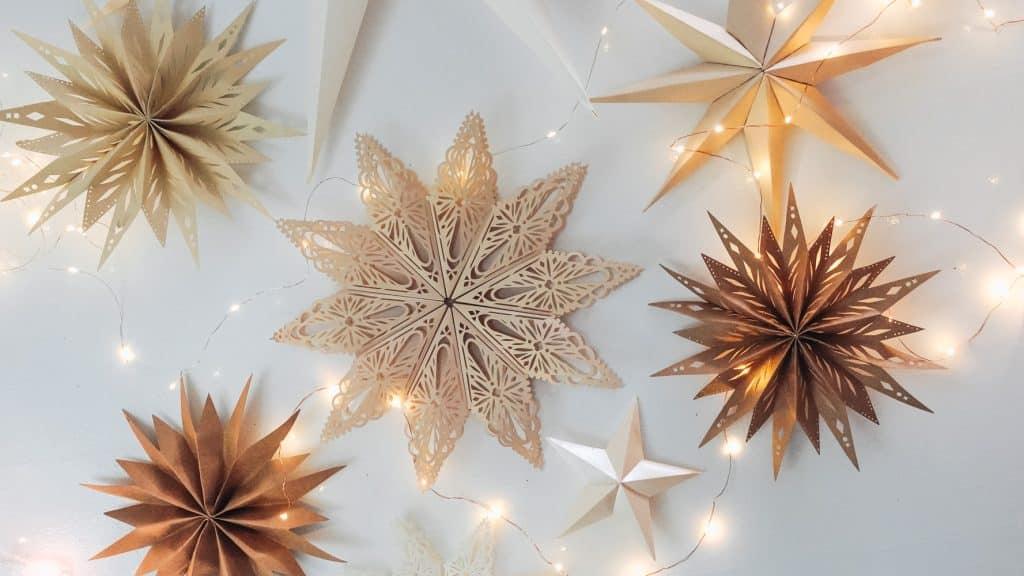
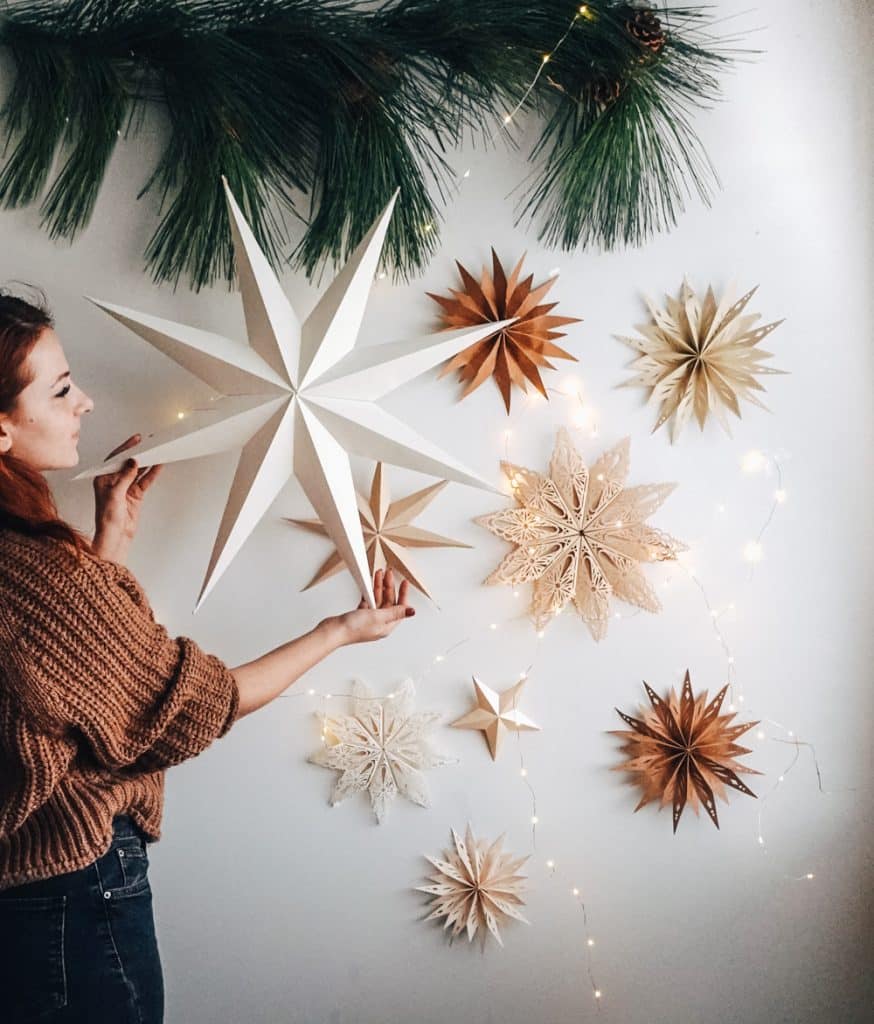
Hi everyone, today I’m sharing how i made these beautiful paper stars!
I’ve been seeing these everywhere! On pinterest on instagram. It’s almost Christmastime and time to decorate! Since these stars are such a big trend I decided to try and make some myself. I’ll be sharing 3 different way to make stars. All three will be shown how I made them using my cricut explore 3 machine and design space however, I’m hoping if you don’t have a cricut machine these will at least give you ideas on how you can make your own. If you’re going for a more simple look I think you can just cut them out by hand as well.
Also… Let me know if I should make some without a cricut machine. I’m not sure how many of you have one.
supplies:
The amount of cardstock will depend on how big you make your stars.
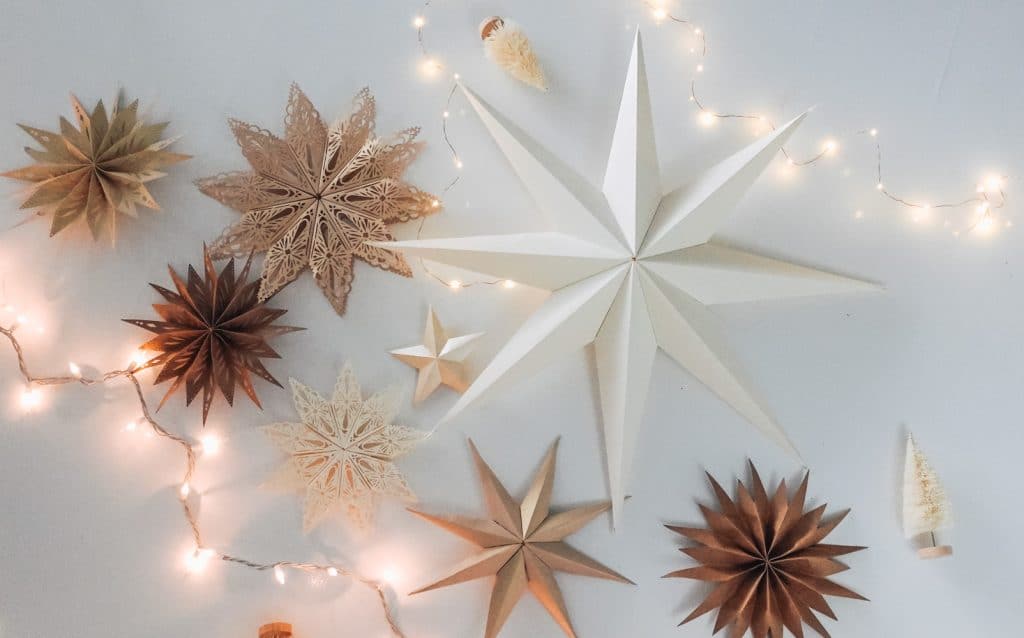
1: Starburst
- cardstock 12×12
- gold floral wire
- hotglue
2: Snowflake Star
- cardstock 12×12
- hotglue
3: 8 Point Star
- card stock
- hot
Paper Starburst DIY
If you missed the video above you can check it out here. I share how I made the SVG’s for each star and how I assembled them in the video.
This first star is the easiest of all three. I honestly think this one would be pretty easy to cut out and put together even if you didn’t have a special machine however it sure makes the process much faster with the cricut. Also I love that you can get such fine details with the machine.
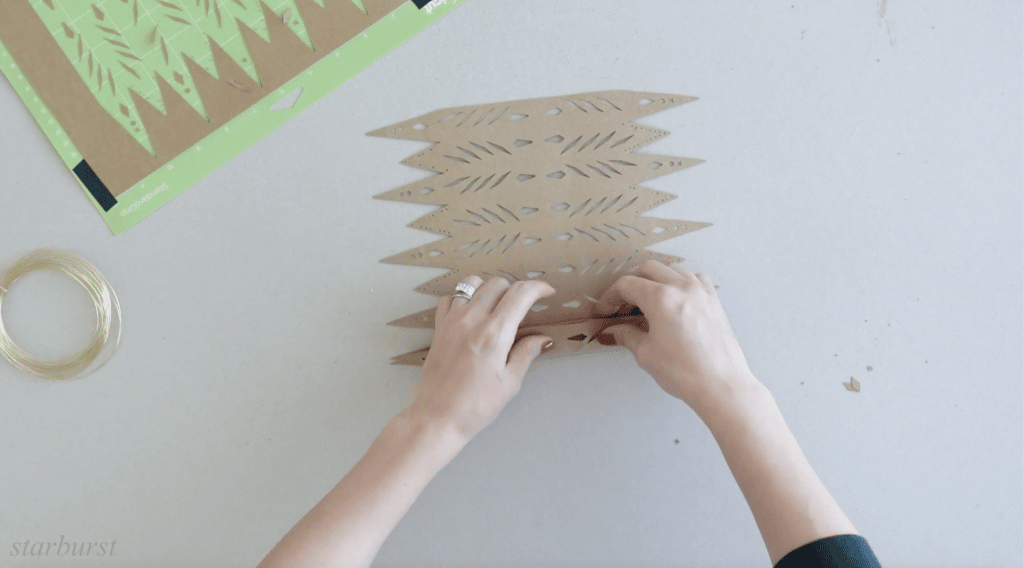
If you know how to make a paper fan then you’re good to go with this DIY.
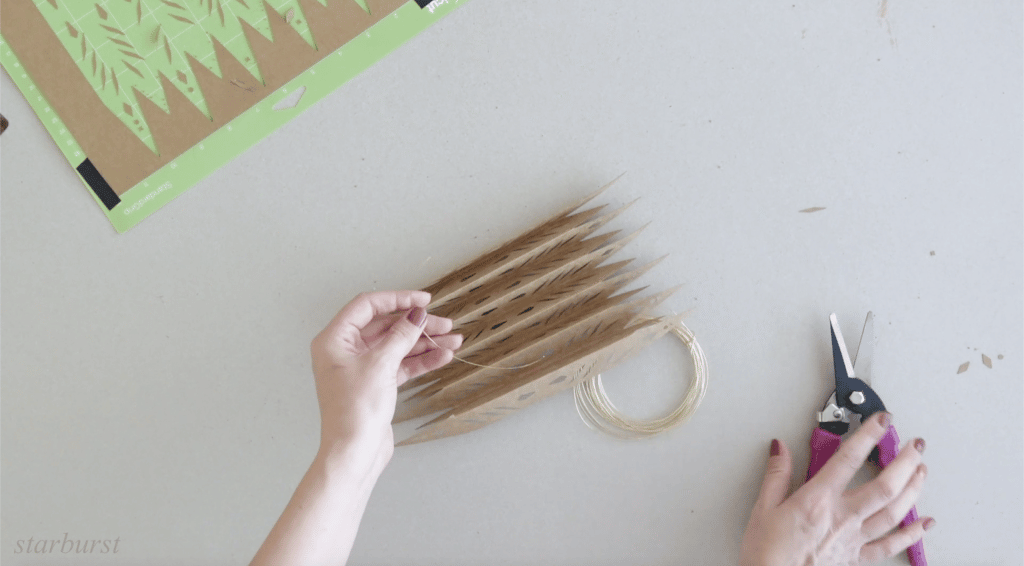
All you need to do is fold a paper fan and secure some floral wire in the center.
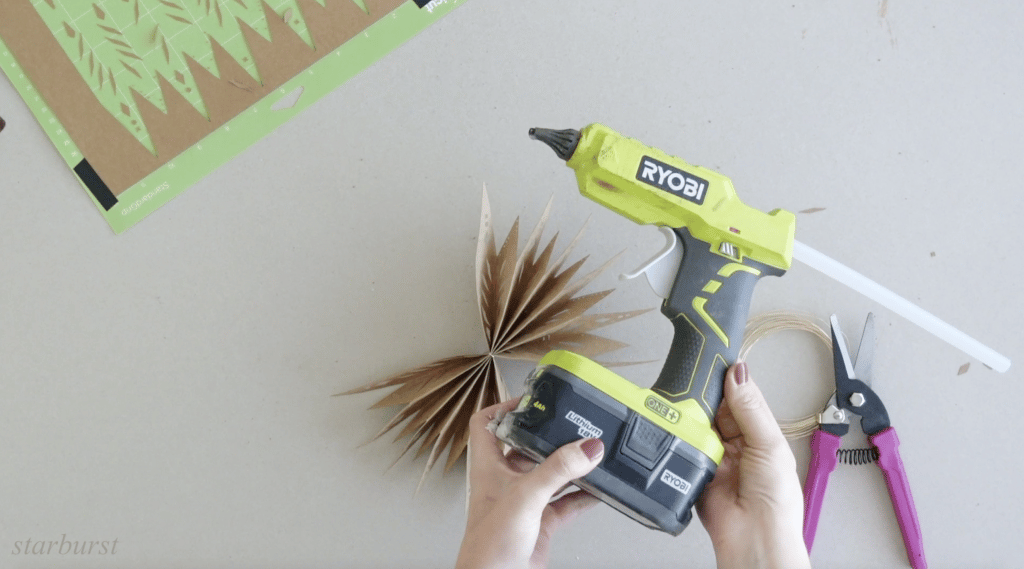
Then spread the starburst out and secure both ends together with hotglue on both sides.
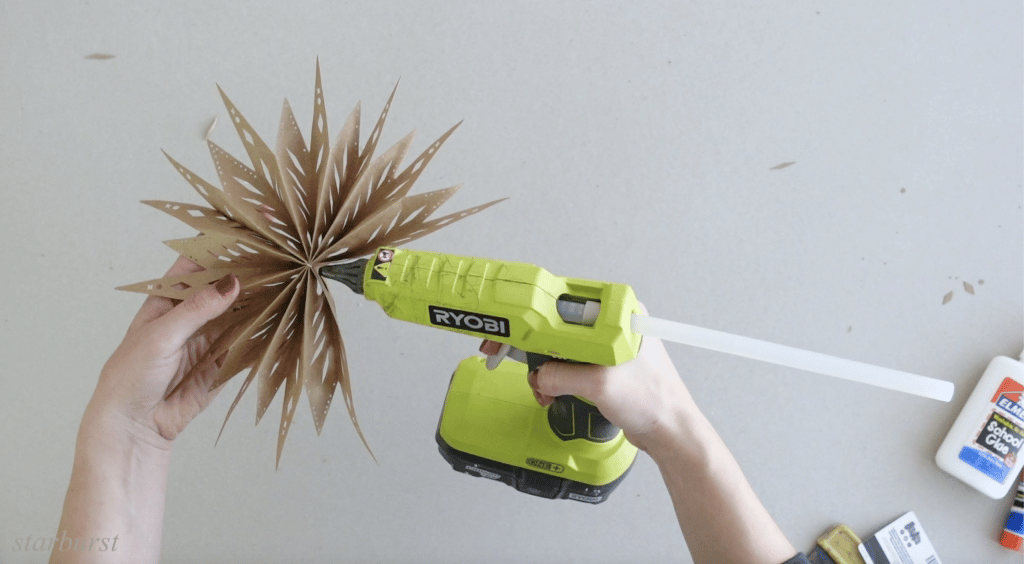
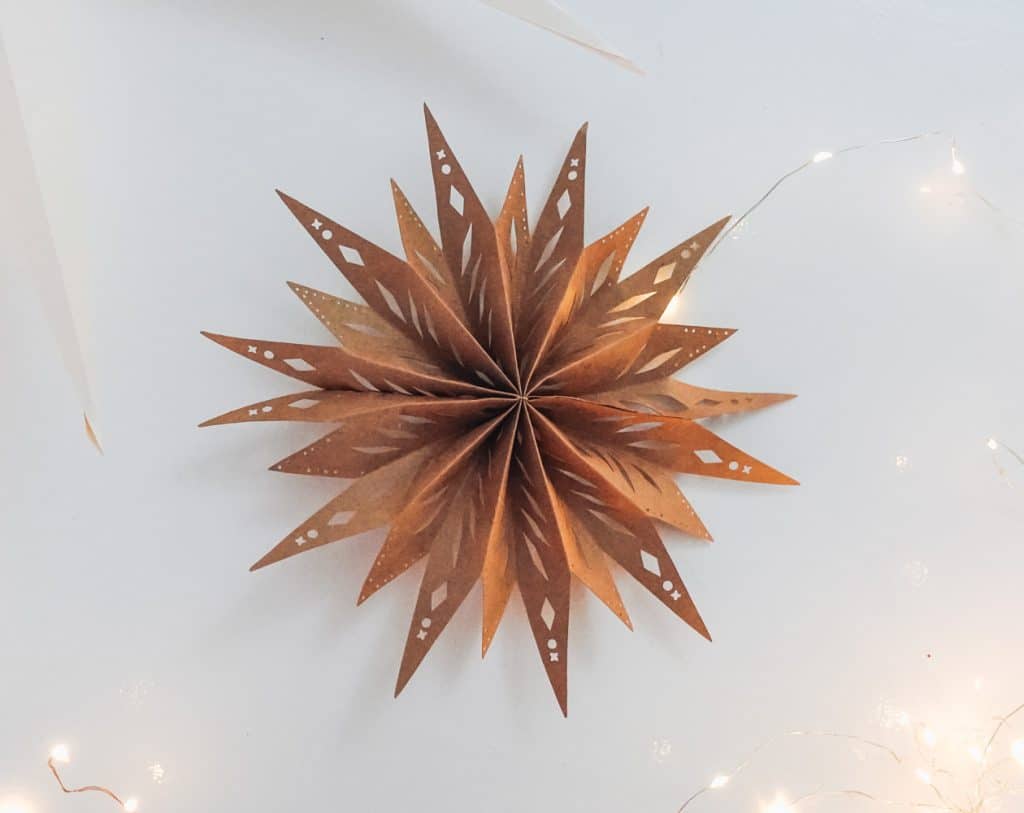
It’s literally that easy! It only takes me about 1 minute to put together after the cricut machine is done cutting it. Here’s how it looks.
Snowflake Star DIY
This star definitely has way more detail and I would not recommend cutting this with an exacto knife. It took a while to get cut on my cricut machine because of all the little detail but, the result is so worth it. The photo below shows what the template looks like once cut.
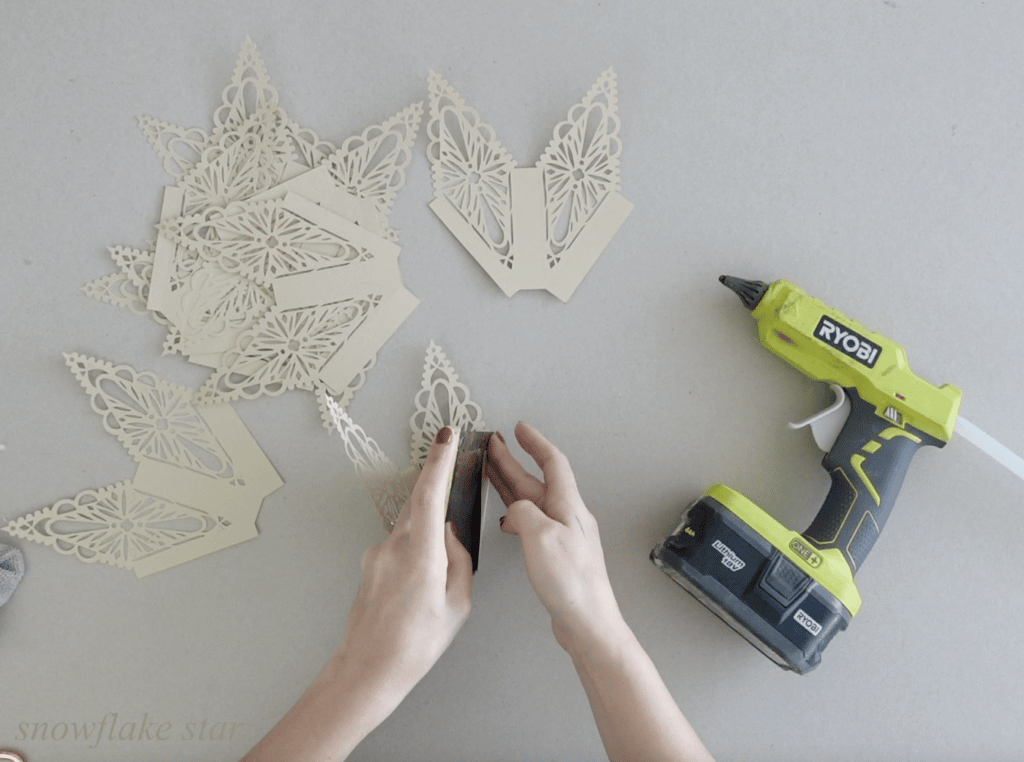
Next I folded all the sides in and hotglued the tabs together.
Once that was done I glued each section of the star together and that’s it! Also pretty easy to put together as long as cricut does all the cutting for you.
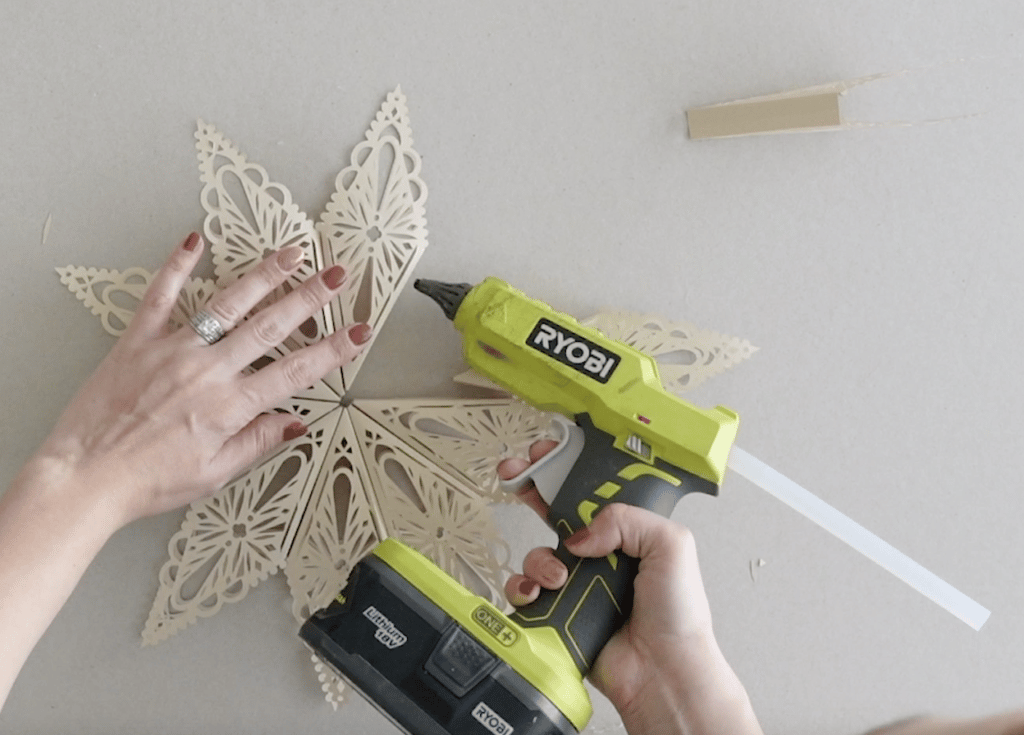
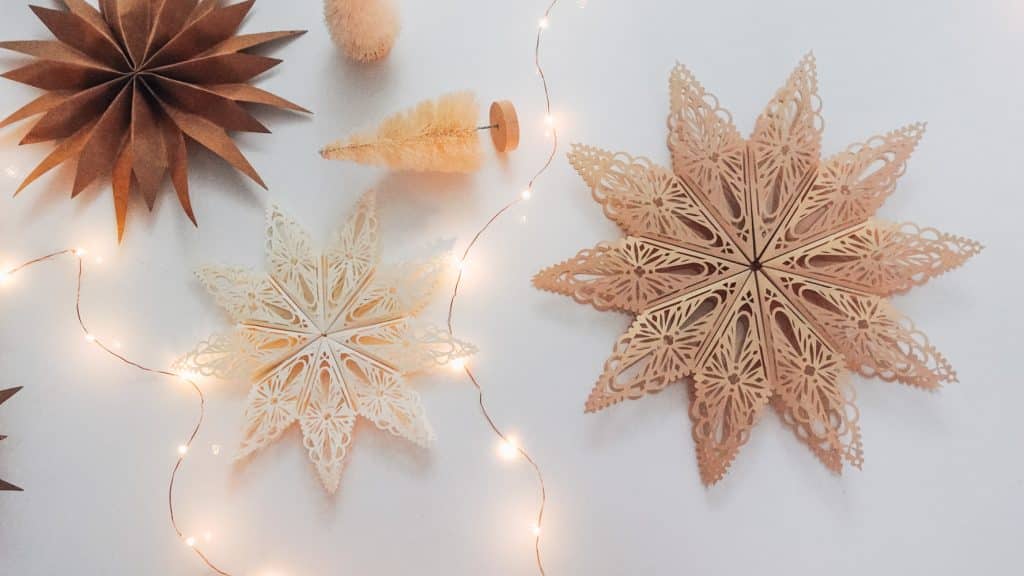
Here’s how the star looks.
DIY 8 Point Giant Star!
I was so excited for this one because I feel like it’s the most popular on this list. I’ve been seeing this one around the most but, what I was most excited for was the size! This thing is huge and I LOVE IT!
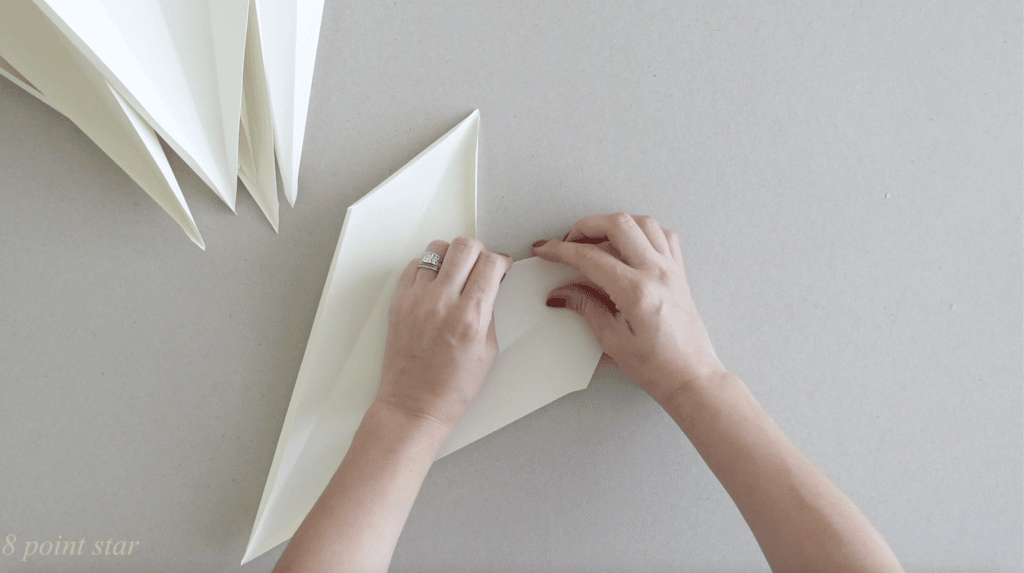
Each star point that’s cut out looks like the photo below. If you look close you’ll see score lines. The cricut machine has this option to help you fold easier.

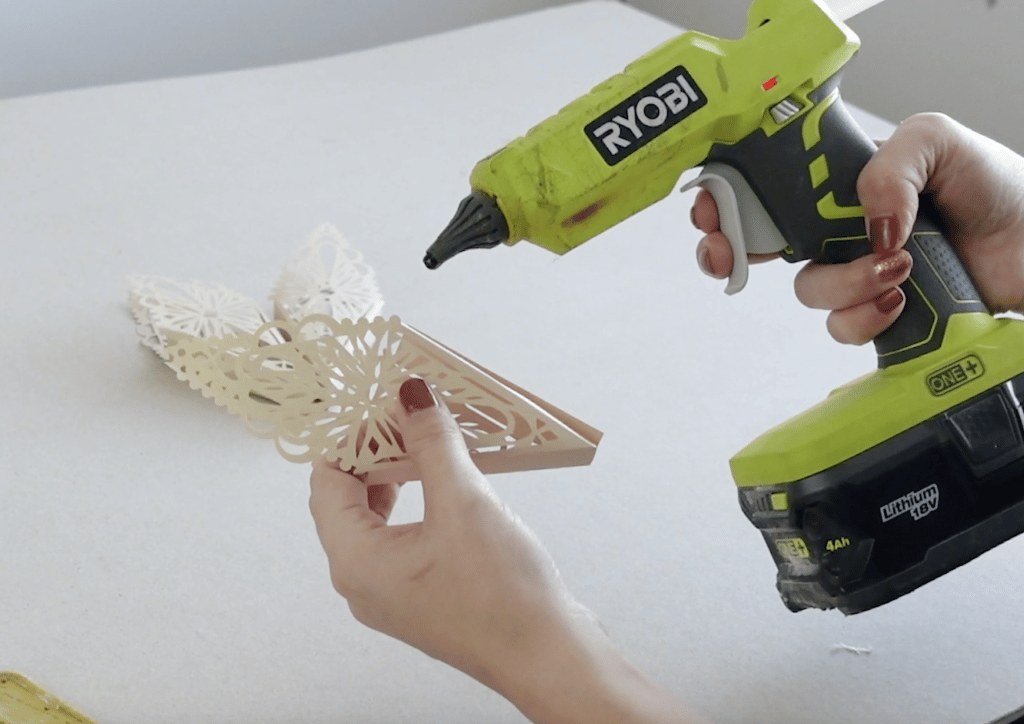
This star point has tabs on almost all the sides that you need to also fold in on all the scored lines.
Here’s what it looks like once it’s all folded in.
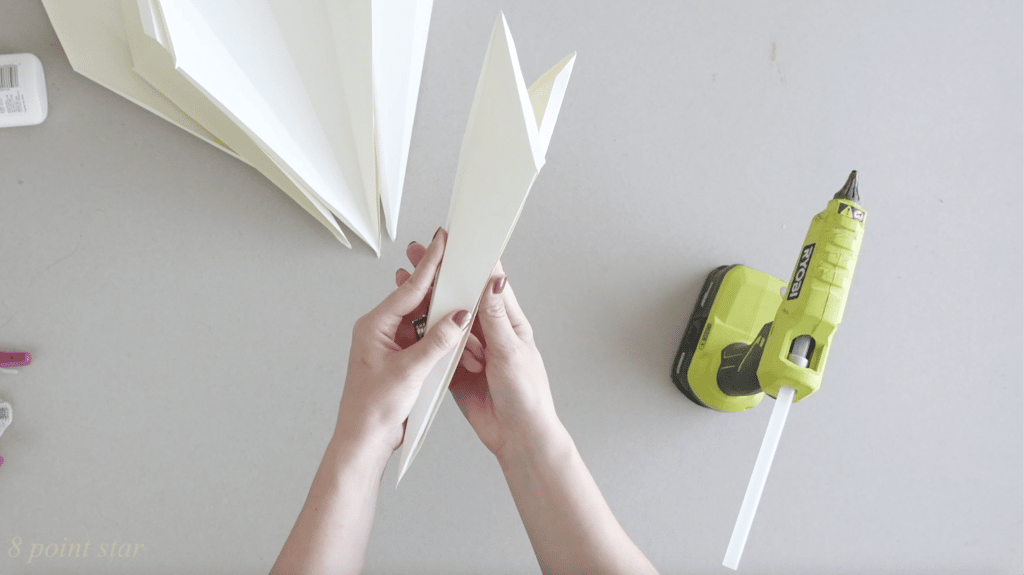
The next step is gluing all the point together where the tabs are.
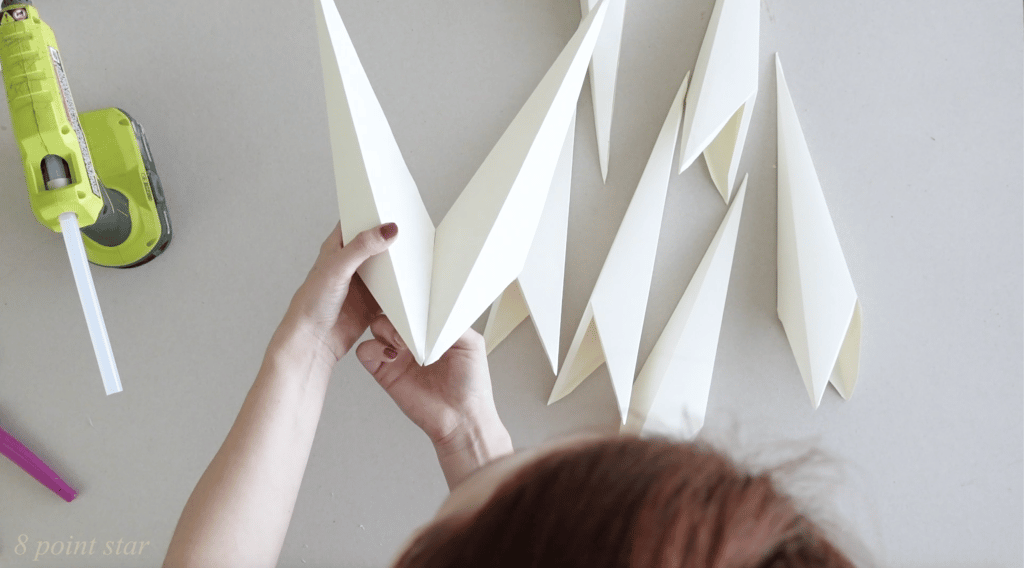
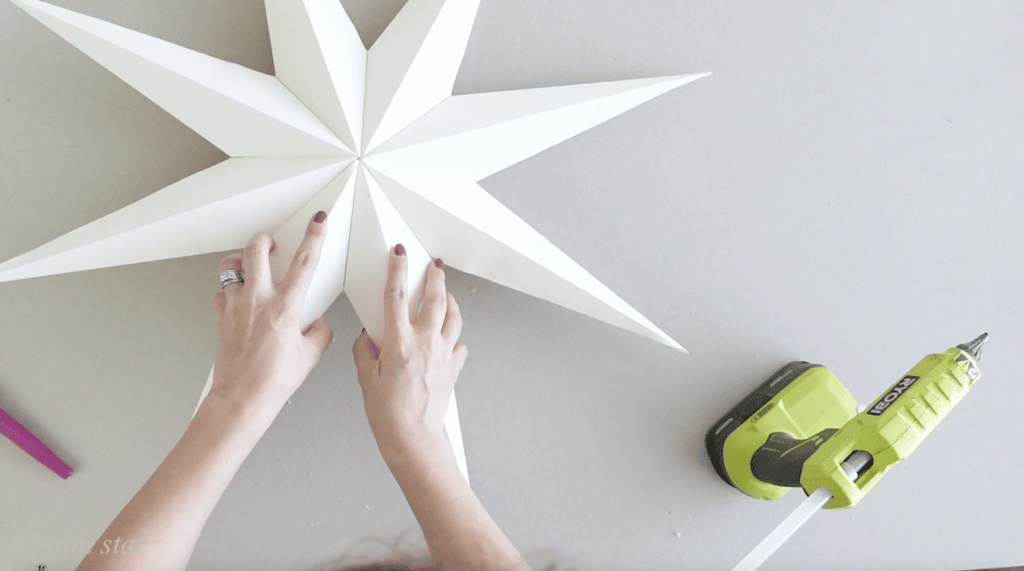
Here’s what it looks like once you have it all glued together. I LOVE how simple this one is!
Again if you’re confused about any of these you can check out my youtube video here. I share how I made the SVG’s for each star and how I assembled them in the video.
Here’s the youtube video
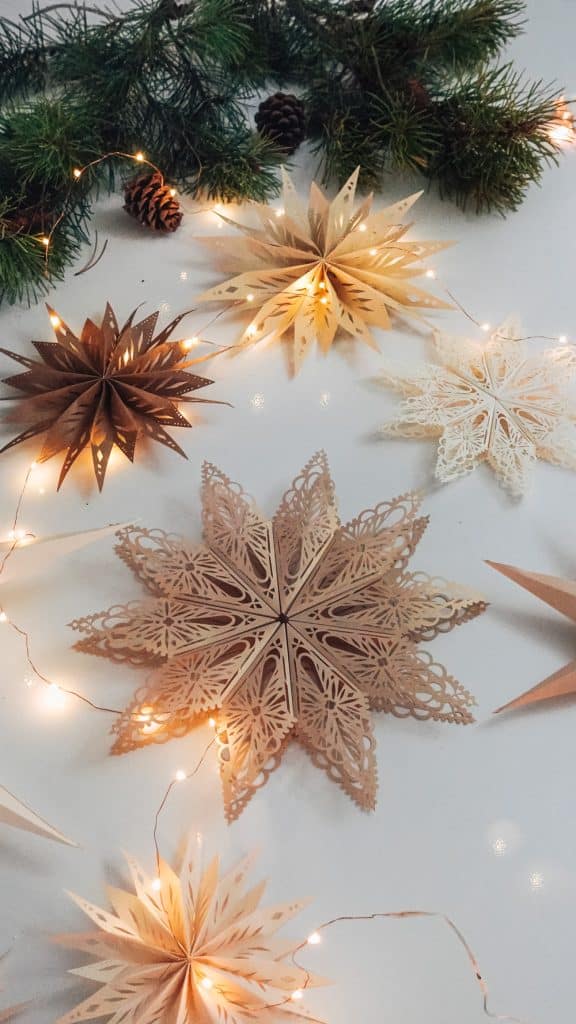
That’s all for today! I can’t wait to share more Christmas DIYs. Next I want to make DIY bell candles similar to what I saw at pottery barn but, can’t afford. Stay Tuned 😀
xx,
Lily
I don’t have a cricut machine
OH DARN! I’ll have to try making some stars without a cricut.
Hi Lily,
I would love to purchase or find access to the svg files to make these, do you have that option? (just looking to decorate my home with them)
Thanks!