Chalk Talk..
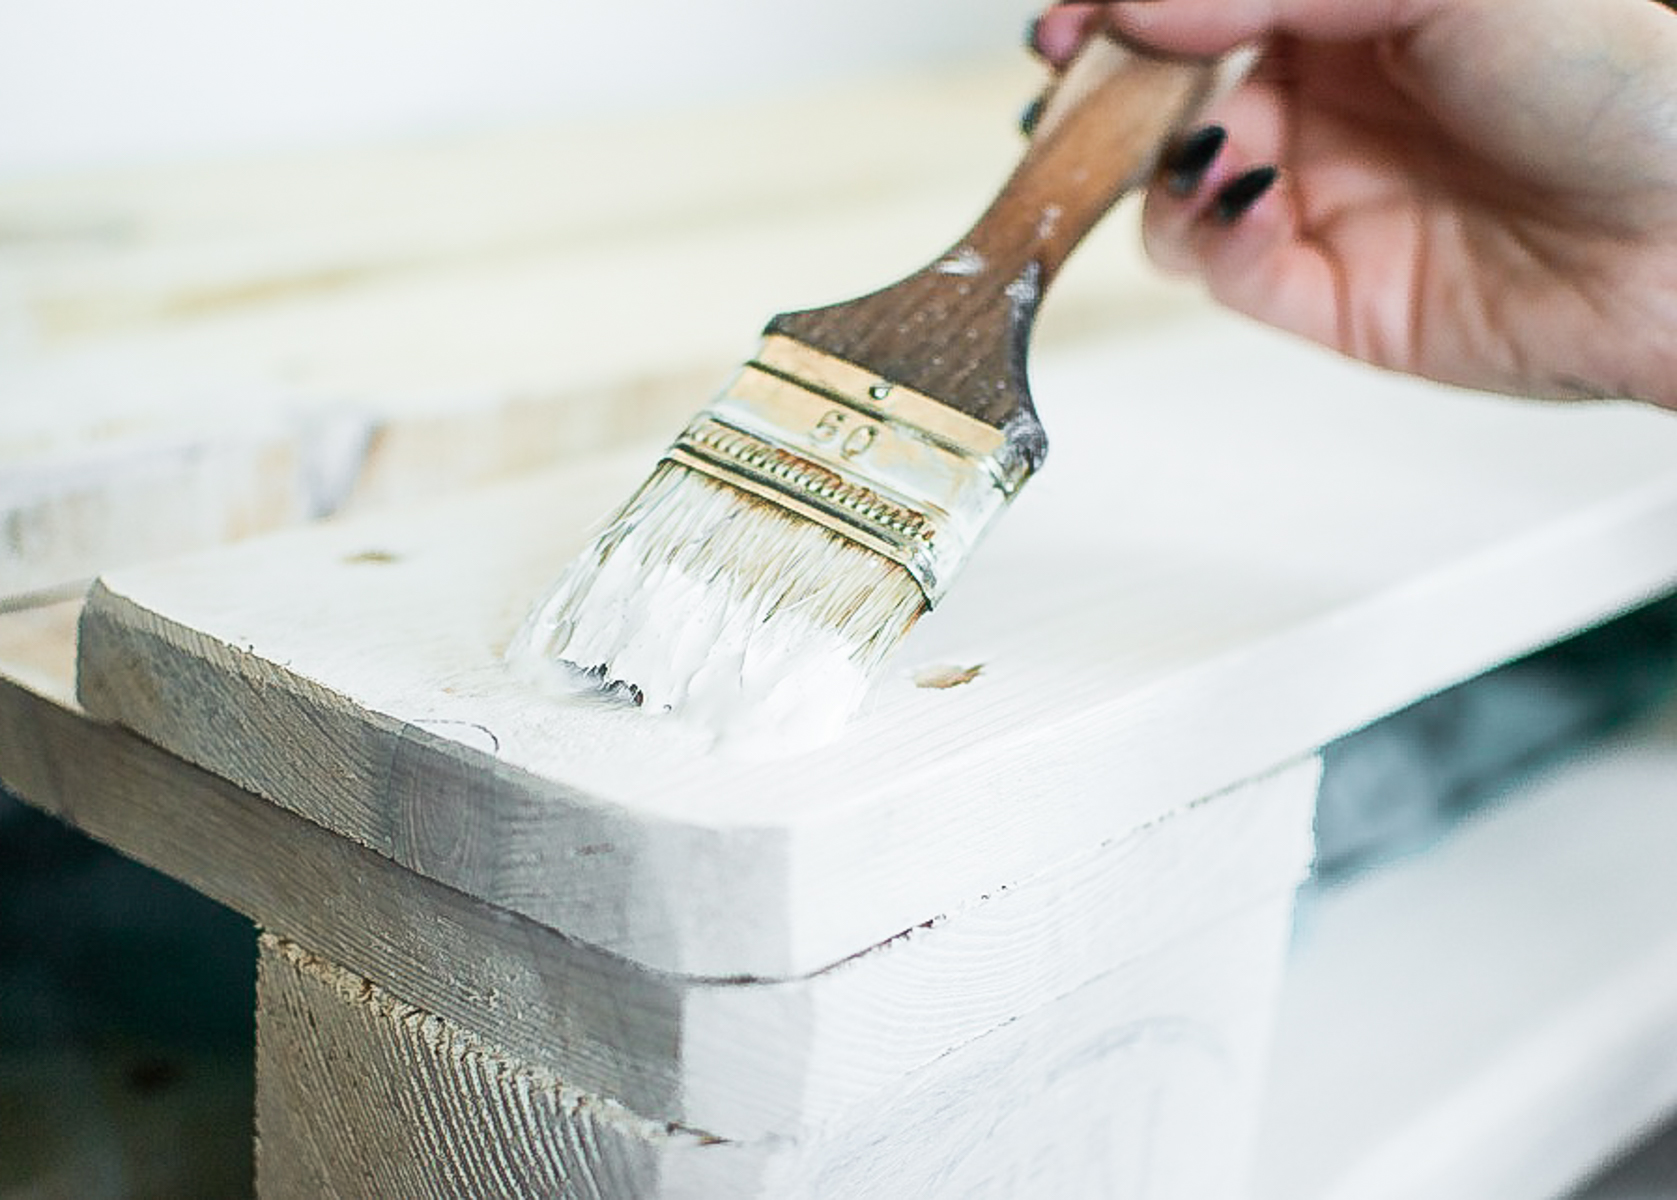
Chalk paint has become all the rage when it comes to up-cycling projects. One of the biggest reasons for it’s popularity is because of it’s ability to stick to furniture so no sanding or primer is needed. Funny thing even though they always say no sanding is needed I still give it a light sand. lol 😀 Can’t help it. Being such a versatile and easy to use paint chalk paint comes with a hefty price tag. I’ve looked into Annie Sloan chalk paint more than once but for $35 a quart I can’t seem to find a project that would fit that budget. So after much thought I’ve decided to make my own. How hard could it be right?.I came across an instructional I picked up on one of my trips to Lowes and I decided to put it to the test.
Ugly or not…
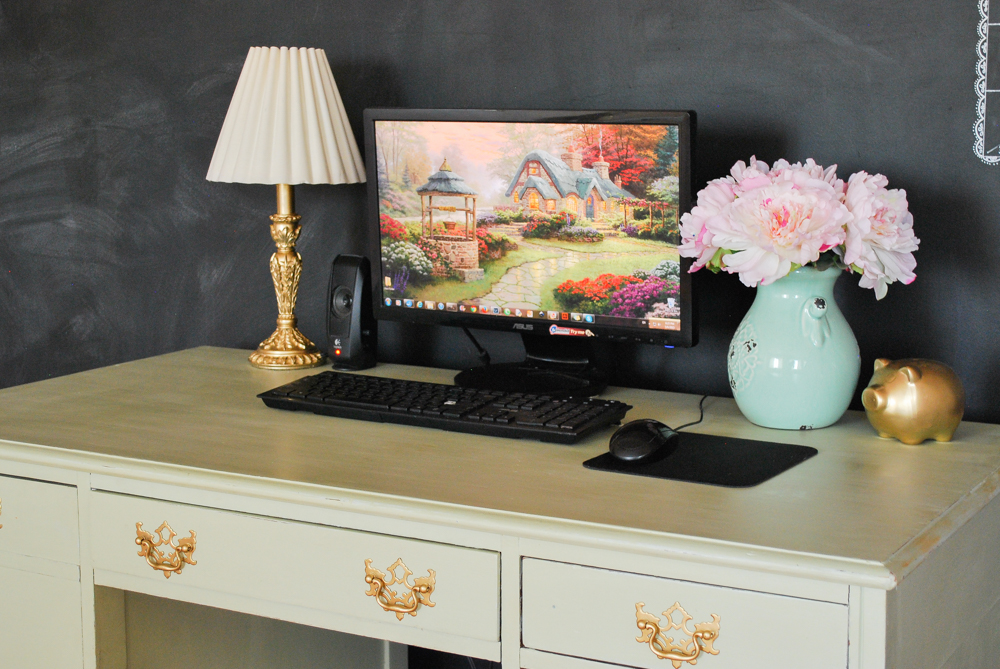
Me and my hubby go thrift store shopping quite a bit. I have to say I enjoy this more then going to the mall. lol 😀 I think it’s the element of surprise that gets me. Knowing you can get something unique for a steal definitely beats going to the mall and spending a fortune on something everyone already has. Anyways enough rambling and back on track. On one of our trips I spotted this awesome desk. Previously we used a plastic foldable table as a desk so I was happy to get anything wood. My husband on the other hand thought it was hideous…Ugly or not I told him I could make it work. 😀 So he agreed knowing I would be putting some elbow grease into prettying that thing up.
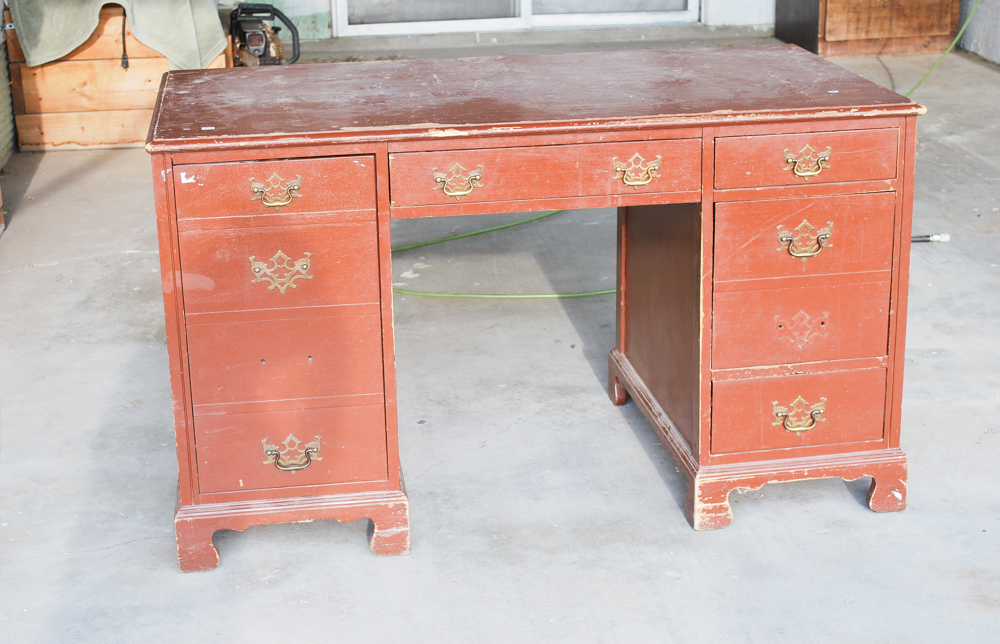
Yes I agree it’s pretty scary looking. lol Probably the worst combination. Brown paint on wood with a bunch of stickers ;( . Hey but for $25 it was a steal.
These were the products I used.
What you’ll need
paint (interior)
plaster of paris
lacquer
brushes
MAKE OR BREAK..
This step can make or break your project. I used the satin Lacquer as my topcoat and I loved it. No yellowing. It was clear in the can not like the polyurethane that comes out yellow even some of the waterbased ones. Now I know everyone has such different opinions when it comes to this. Some say polyurethane is more durable, but this lacquer sure withstood the test in my book and is an A+. I’ve had a few epic fails with polyurethane I really regretted for using it because the yellowing is horrible.
Recipe :
8 oz paint
2 oz Plaster of paris (dry mix)
Instructions:
In 2 oz of COLD water mix plaster of paris until you have a pudding like constancy. You have to act quick because it will harden pretty fast. Oh and whatever you do if you use a bowl you’ll want to reuse after make sure and wash it right away because it will not come off. Add this mixture to your 8 oz of paint. Stir to an even consistency and that’s it paint away.
Picking paint..
From my experience the best paint I’ve used for this is the “Glidden” brand sold at walmart. YEP. I mixed a batch of chalk paint with this paint and after 4 months it was still as good as the the day I mixed it. Other paints will usually harden. If you can’t get a hold of this brand any paint will work it just won’t stay good in storage for to long. In conclusion stay away from paints that come “2-1 prime and paint”.. these will harden the quickest.
Lengthy process..
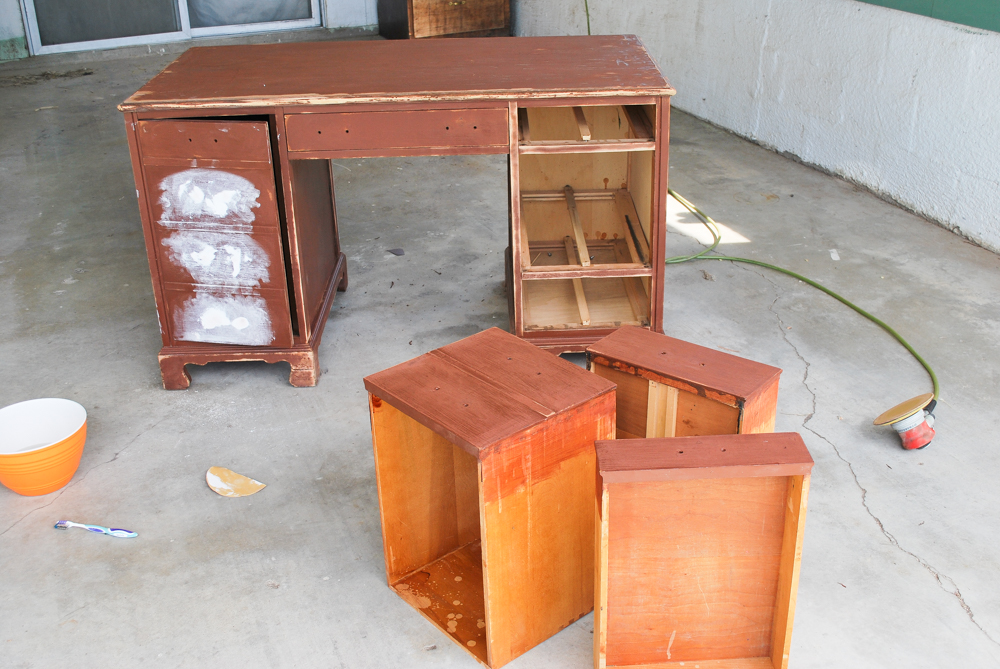
I scrubbed the bujeebers out of it. (yes with a toothbrush. haha) Then I sanded it down just to be on the safe side. Now this is totally optional if you use chalk paint, I’m just weird that way. Some of the knobs were missing so I decided to cover up some of the holes. (on the left) The knobs were a specific size and ordering new ones was out of the question. I used plaster of paris for this and it turned out pretty well. Can’t even tell there were ever holes there.
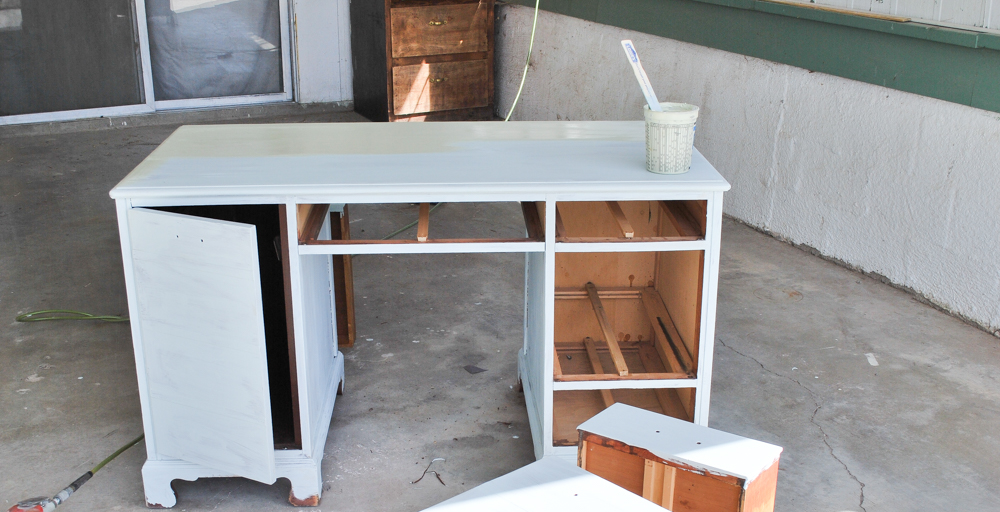
The colors look weird in these pictures because of the direct sunlight but I was going for an olive mint. I dunno if you can tell but I started off with an aqua color and switched over to the green because the aqua looked white. This is why I love mixing my own chalk paint. I can make any color I want. That’s a Biggy for me because I never use the color the store mixes for me. lol . Maybe it’s just me but I’m always tweaking it here and there. My lighting is so different from department stores I had a gray look completely pink at my house. So yehhh. That’s probably why I’m always tweaking it.
WARNING..
One pointer I would give is to prime your desk. Not for the sake of paint sticking better but for the sake of stain seeping through. This was something I came across that definitely thought me a good lesson. This desk was old and had multiple layers of stain, paint..etc When I started painting with chalk paint the stain from the previous layers started seeping through. Lesson learned.. Use primer on old furniture that have multiple layers of ..etc.
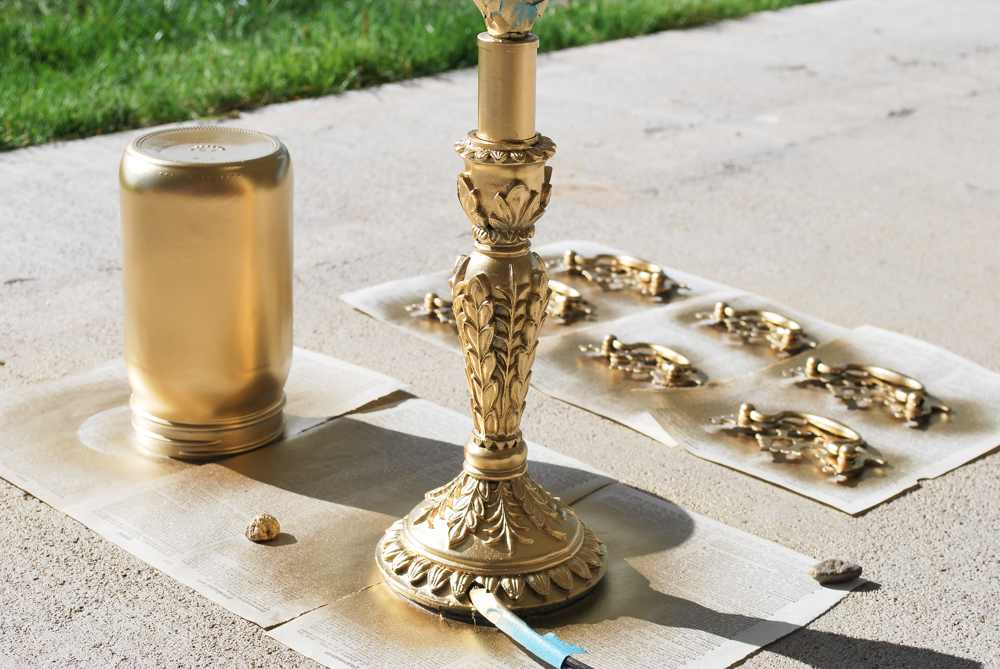
I decided to paint the knobs gold and some accent decor to match. Yes that’s a painted rock Oleg threw in for a paint job. Lol Oh how happy he was to have a real gold rock. 😀
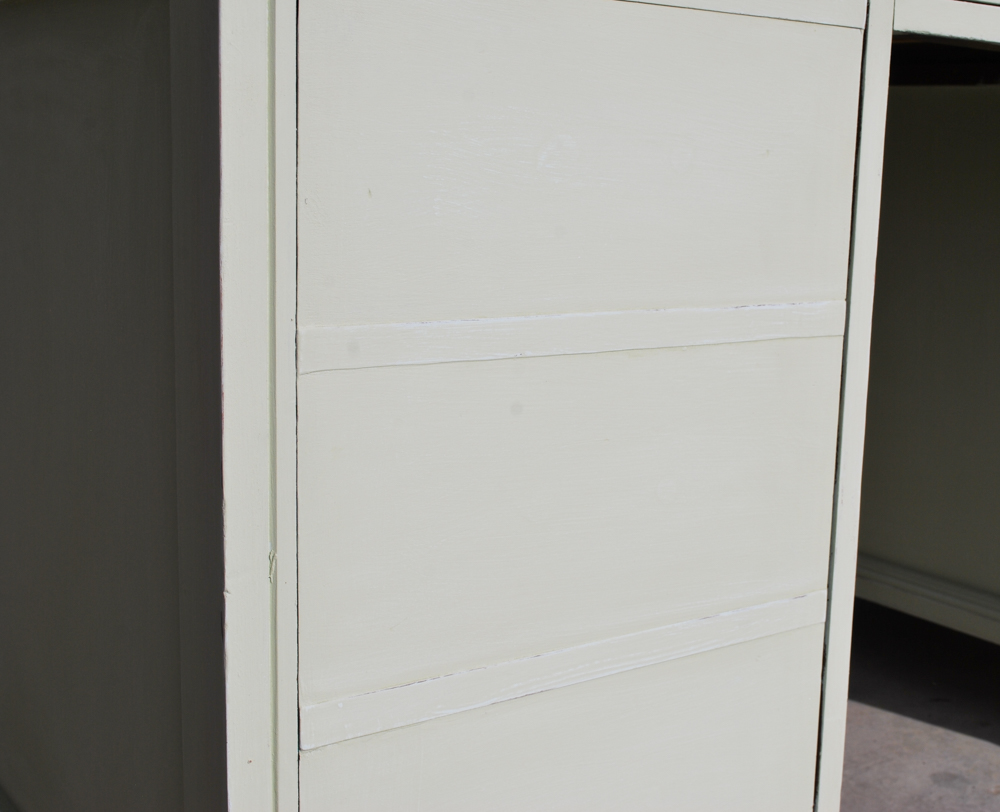
This process took way longer then I expected. Had I known the stain would seep through the paint It would have shortened my project’s time in half. OH I also I sanded the edges down to give it a little antique affect before going over it with my lacquer.
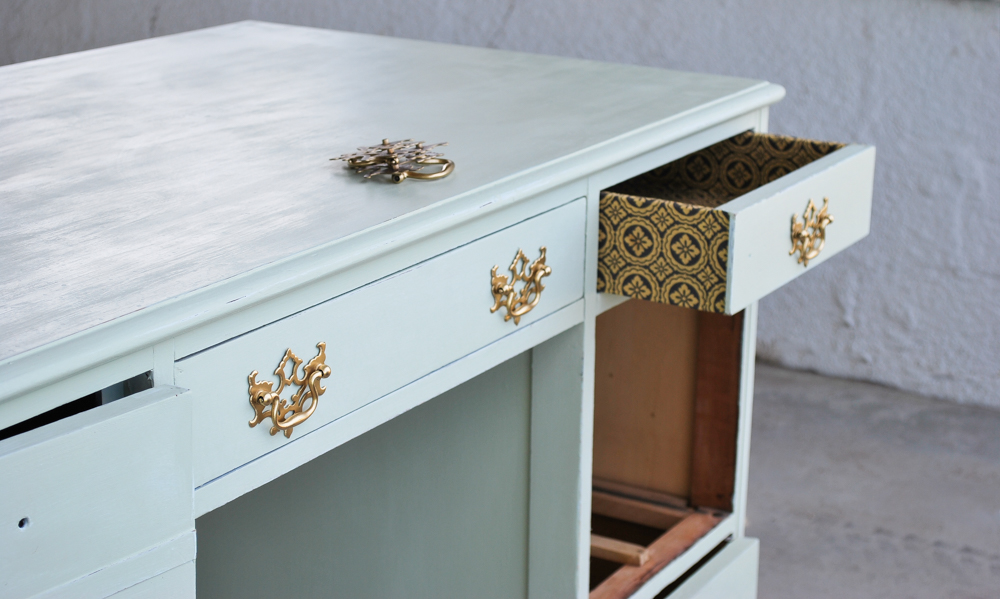
After that I decided to line the insides of the cupboards with some fabric I found in my fabric pile. I used regular mod podge. This project probably took me over a week to complete. oh and don’t forget to leave the desk outdoors for drying after you coat it with lacquer those fumes could be harmful. After a year of constant use it’s a keeper. I still love it and used it everyday 😀
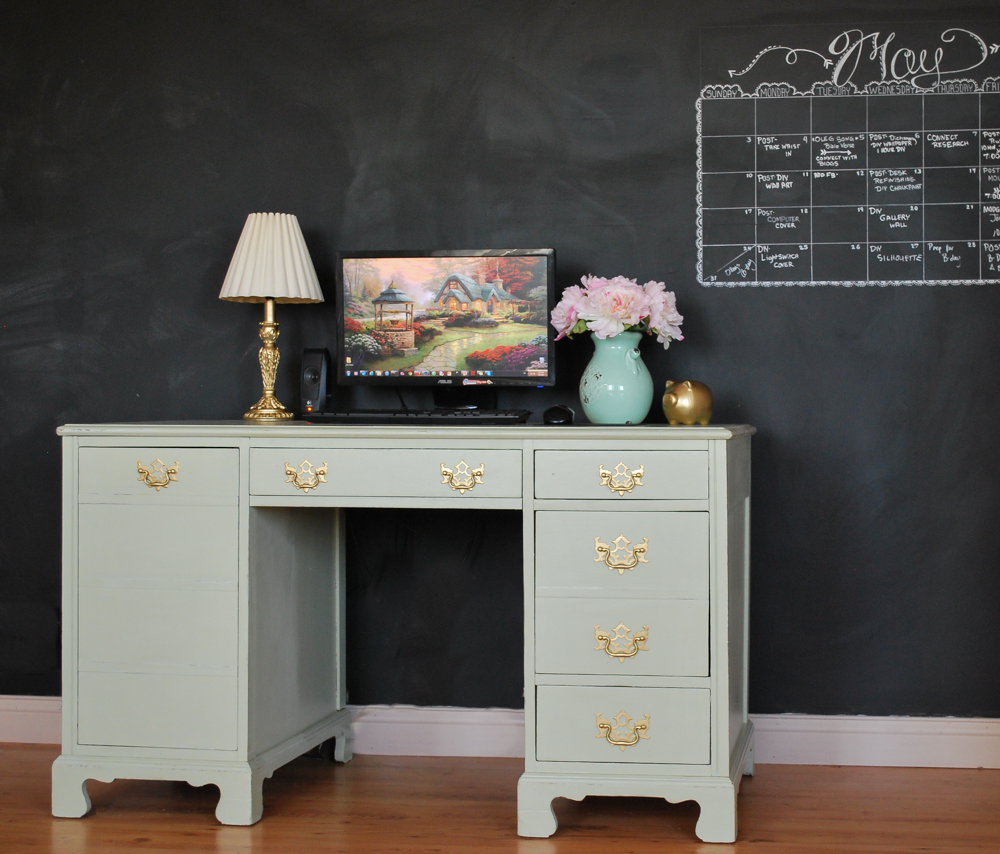
I couldn’t be happier. No chips or flaking. Although the clear coat did crack a tiny bit in the area where my husband drinks his hot tea in the evenings. 😀 but other than that a huge thumbs up.
Don’t forget to tag me on Instagram with your awesome furniture restorations.
What texture of paint do I use.. so happy I found you..hehe
Hello there Bridget, So glad you found me 😀 😀 !! I usually do a satin finish or you can go with eggshell. I would stay away from glossy paint. My two favorite brands are the olympic brand from Lowes and the Glidden from walmart. Even though olympic is a paint and primer (two in one) it has super good coverage so if your using a 2 in 1 paint then mix smaller batches, because it won’t have a long shelf life.