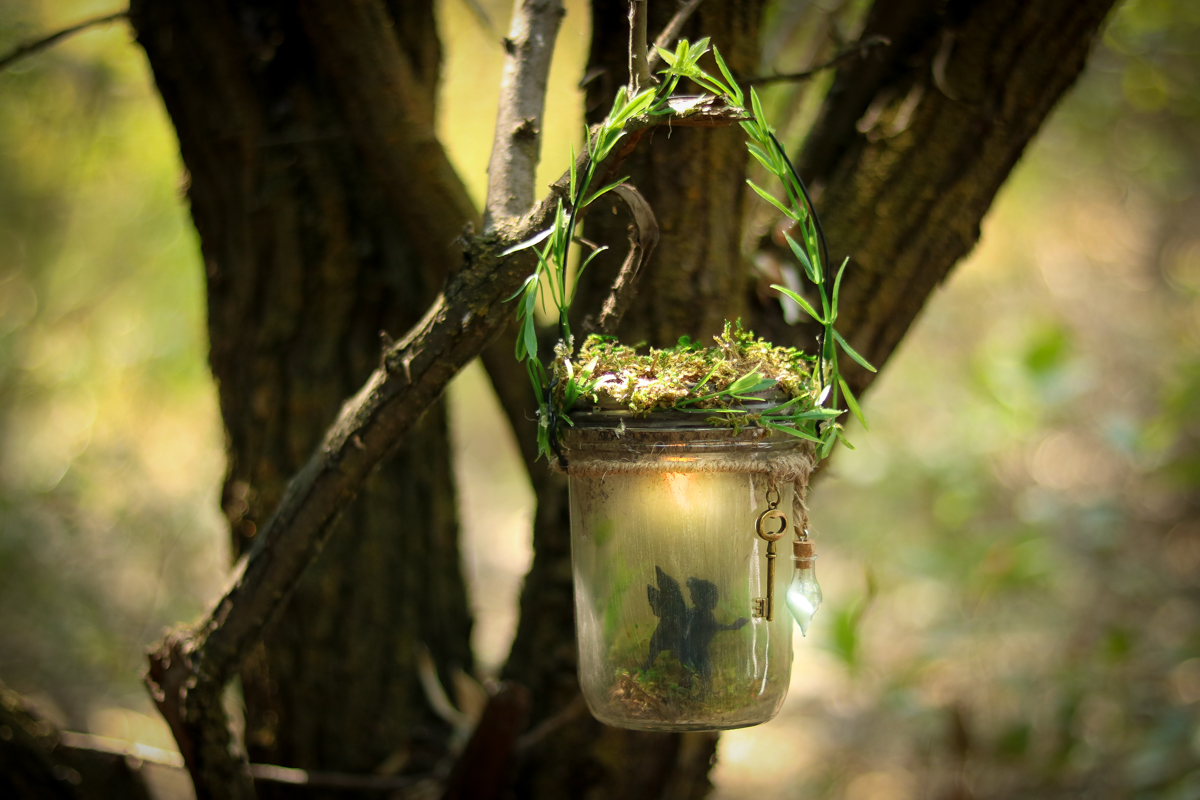
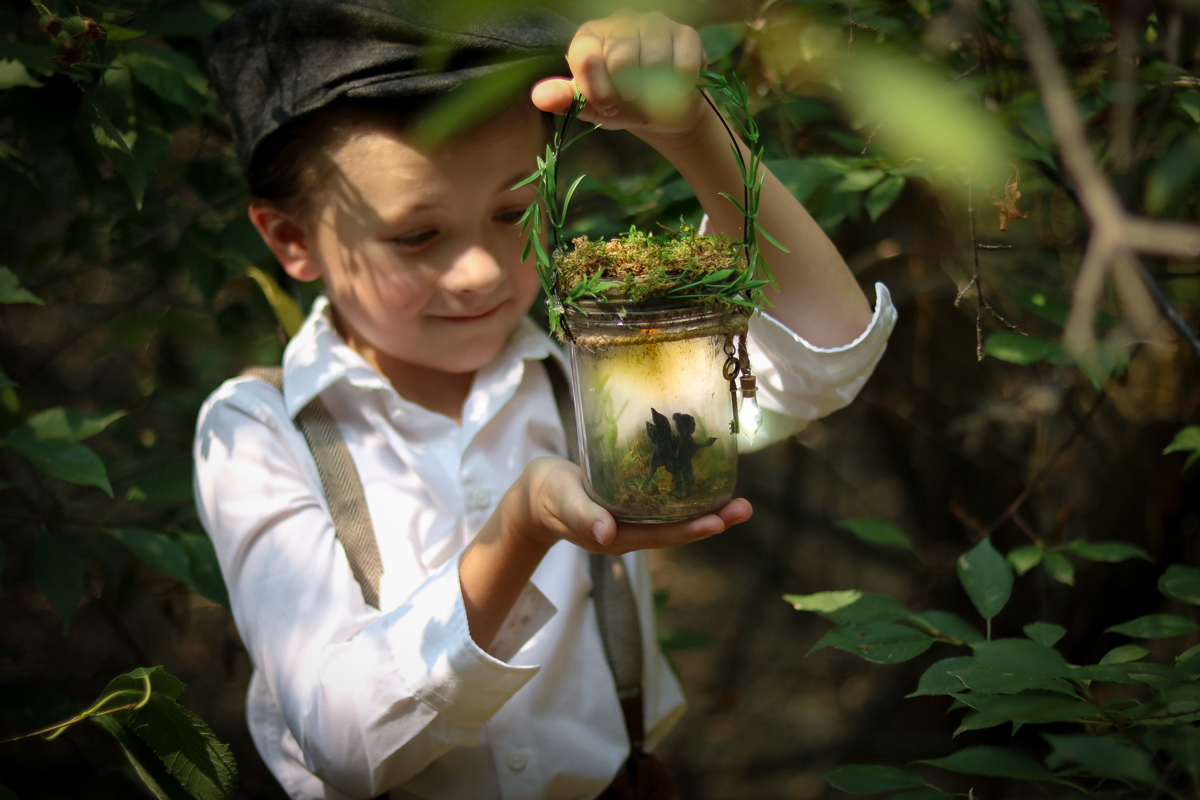
Pleasant Surprise
Okay if you haven’t heard of glow jars or fairy jars then you should probably check them out. I love glow in the dark stuff especially glow in the dark fairy jars. This week I set out to make one and I was ssso excited. YEY!! Ok fast forward..So my attempt at making the glow in the dark paint glow enough for a fairy jar failed!! What I didn’t know at the time was that it was a blessing in disguise. I feel like the best things come unexpected and with DIY’S it’s exactly that. Although this fairy lantern night light wasn’t a planned project it was a pleasant surprise. Don’t worry I didn’t give up on the glow jars!! I’ll be attempting those again soon.
Okay so the list of things you’ll need is a bit long, but most of the stuff you can find around your house. I only invested a total of $15 into this project.
What you’ll need
- Jar with a Lid
- Fairy printable
- Scissors
- Tea light
- Dark Gray Paint
- Copper Paint
- Pen or Marker
- Brushes / Paper
- Glow in the Dark Paint (color Natural)
- Stick (I used a barbecue stick)
- Plastic Bag (I used a recycled grocery bag)
- Metal Wire
- Needle Point Pliers
- Card Board (little piece)
- Foam Sheet
- Plastic Greenery
- Moss
- Drill
- Tape
- Optional decor ( twine , glass vial, key)
Let’s do this
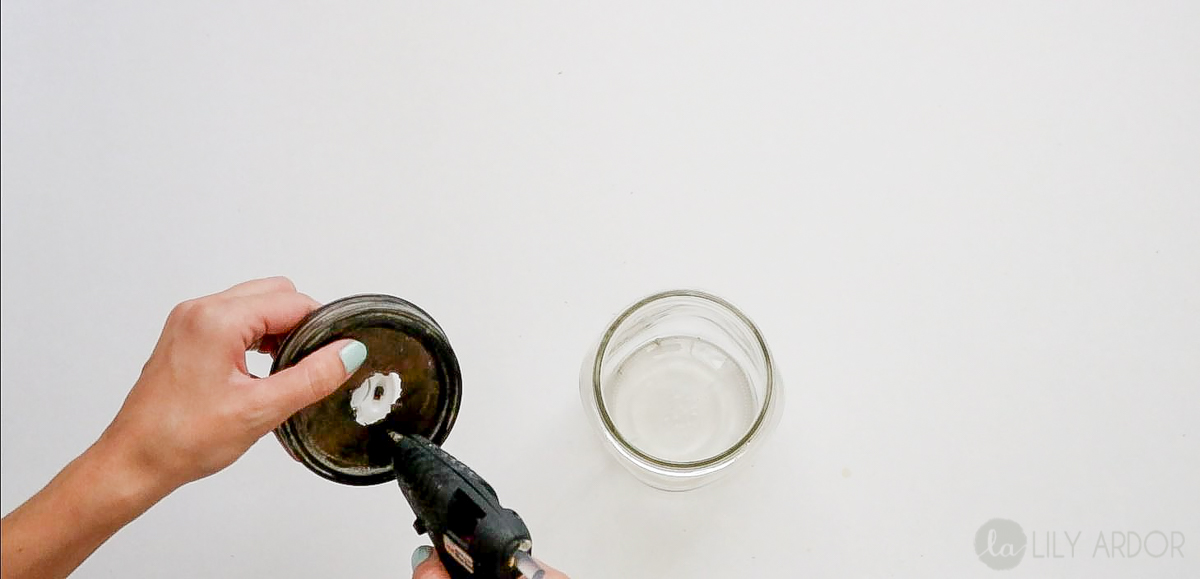
To begin you’ll need to attach your lid to your jar and drill a hole big enough for your on and off switch. The hole doesn’t need to be perfect because it won’t be visible. You will be covering most of it with moss. Here’s a quick tip: (optional) Your edges will probably be rough, You can hammer out all your rough edges against a flat surface if you’d like. Then glue your tea light with the light switch facing up and apply extra glue around all the sharp edges.
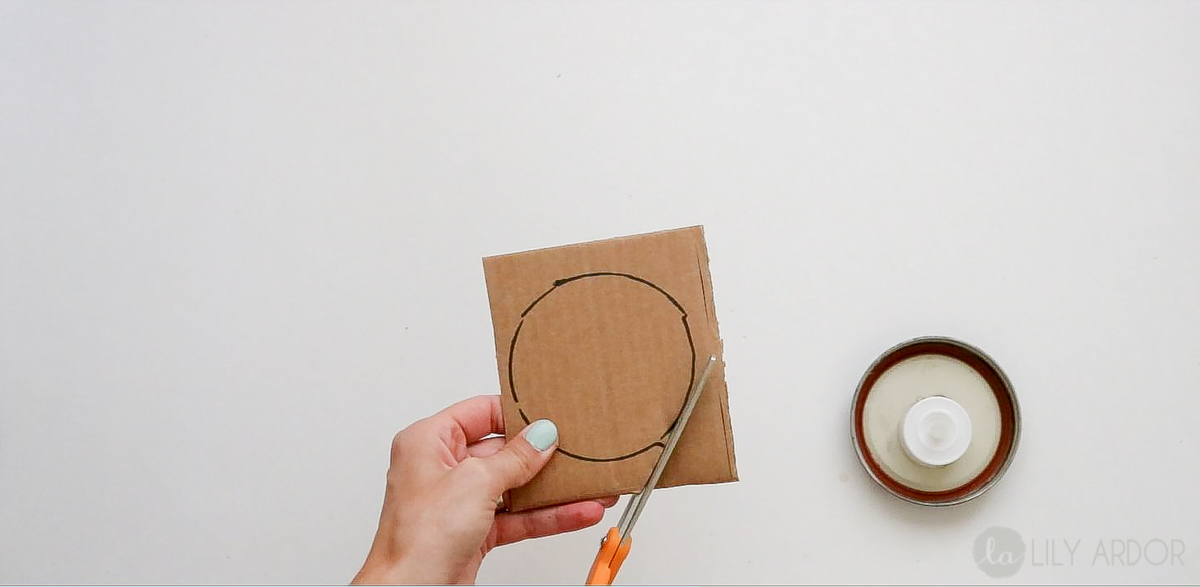
Following that use your pen to trace a circle onto your cardboard and cut it out. I used my lid to trace the circle. I did need to cut it down a bit smaller. It needs to be able to fit into your jar easily.
Free Printable
Here’s the free fairy printable.
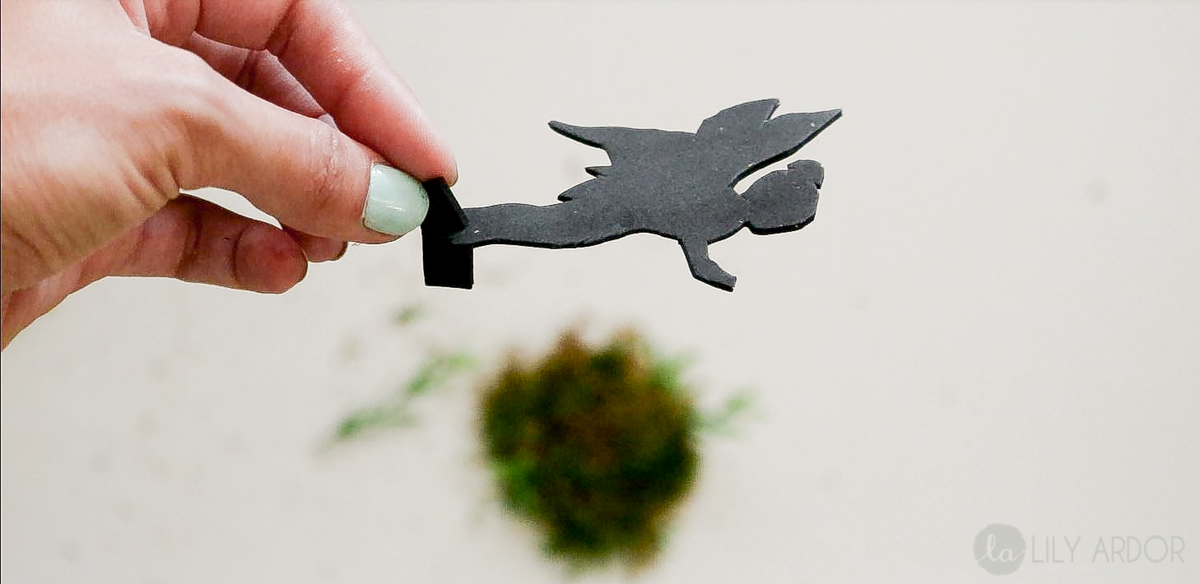
 Cut out your fairy printable and attach it with tape to your foam sheet. Then neatly cut your fairy out again.
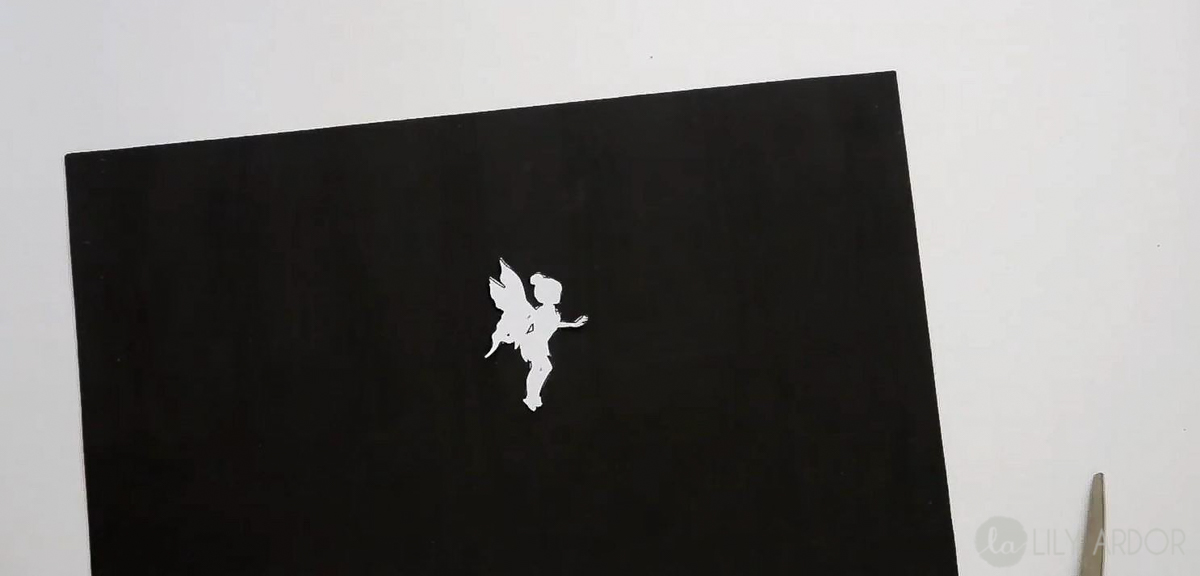
Add a little stand to your fairy. Don’t forget to secure it with some glue. Add some moss to your cardboard circle and attach your fairy to the edge of the circle.
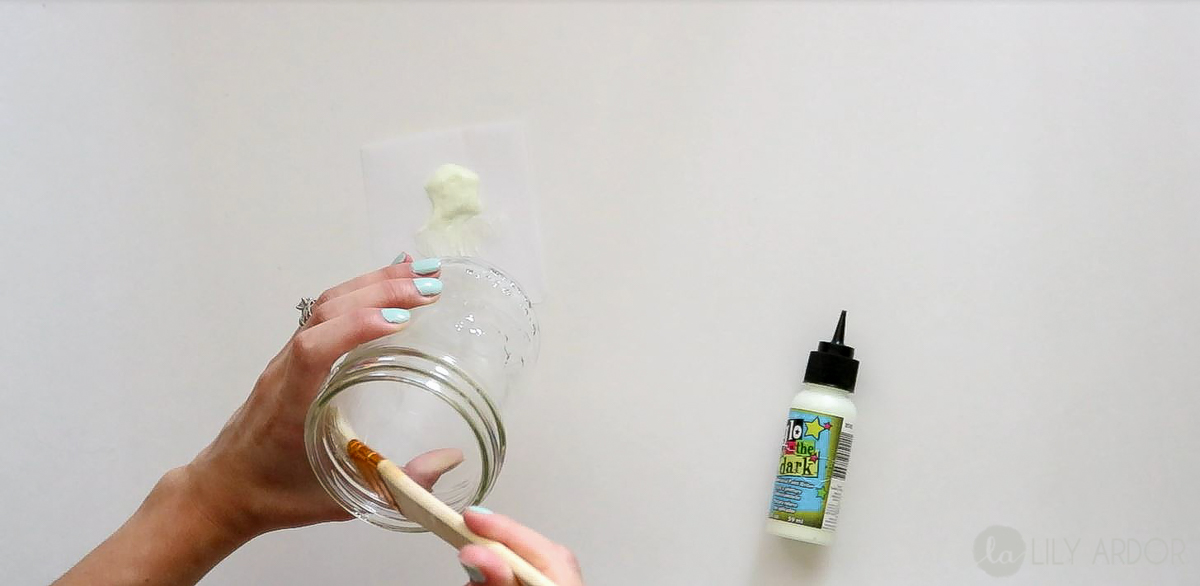
Apply a thin and even coat of glow in the dark paint on the inside of your jar. Try and keep the brush strokes neat. Let it dry completely before applying the antique effect.
Antiquing
Next add some copper paint to your gray paint. Mix it a little and make your antiquing brush using a stick and a piece of plastic bag. Apply hot glue around the stick and wrap the plastic bag around it.

To antique dip your plastic brush into your gray paint and dab most of it off onto another paper. You only need the tiniest bit of paint on your plastic brush for this effect. Once you’ve dabbed most of the paint off apply it on the inside of the jar around the top and bottom avoiding the middle. Use rubbing and dabbing motions.
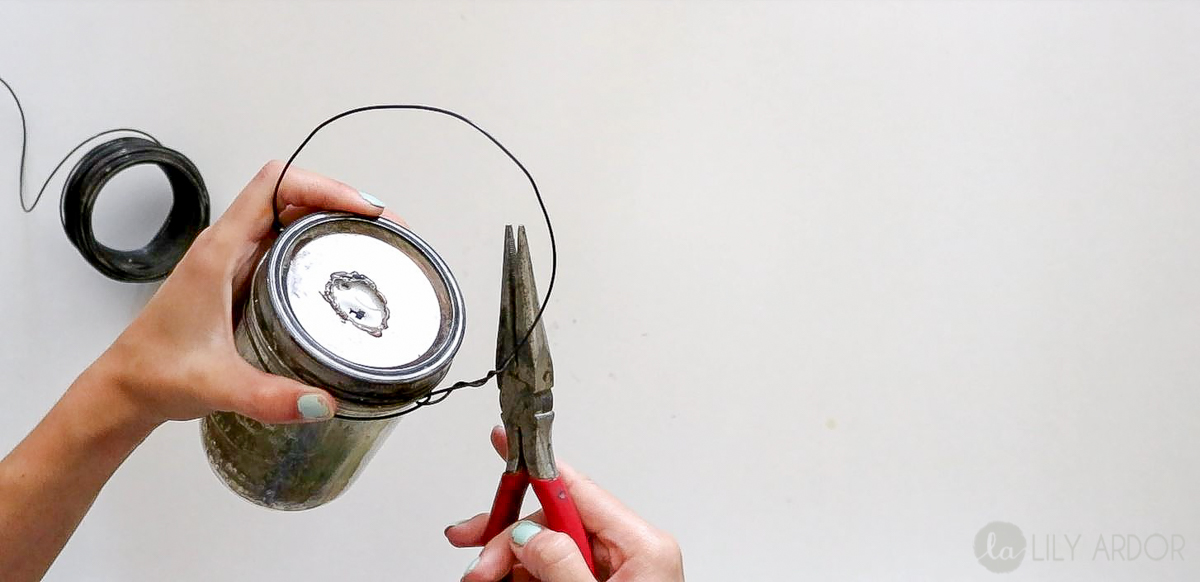
Making the Handle
Ok now cut your wire long enough to make a handle. Wrap it around the jar in a circle and secure it. Fold over what’s left of the wire and secure it to the other side of the circle. You should have a handle ( view video for reference) Keep in mind this doesn’t need to be super tight. You should be able to slide it off easily because you’ll be adding twine to it.
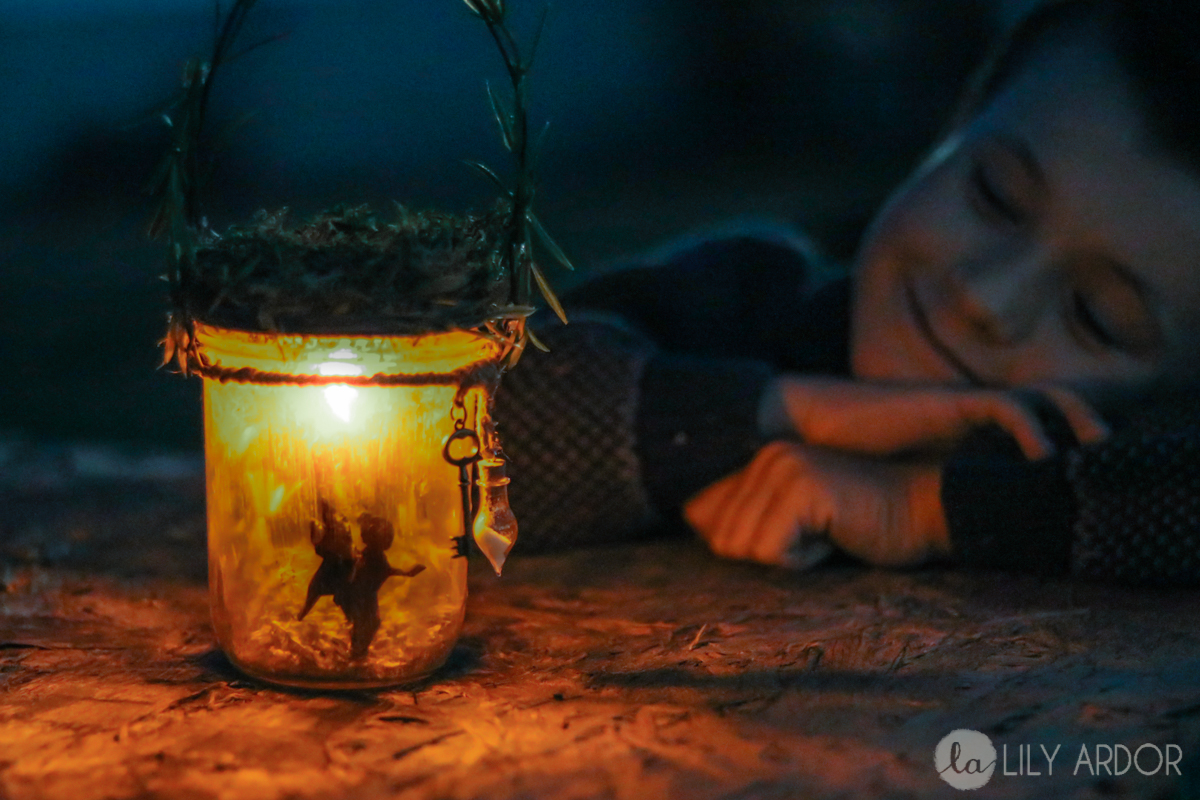
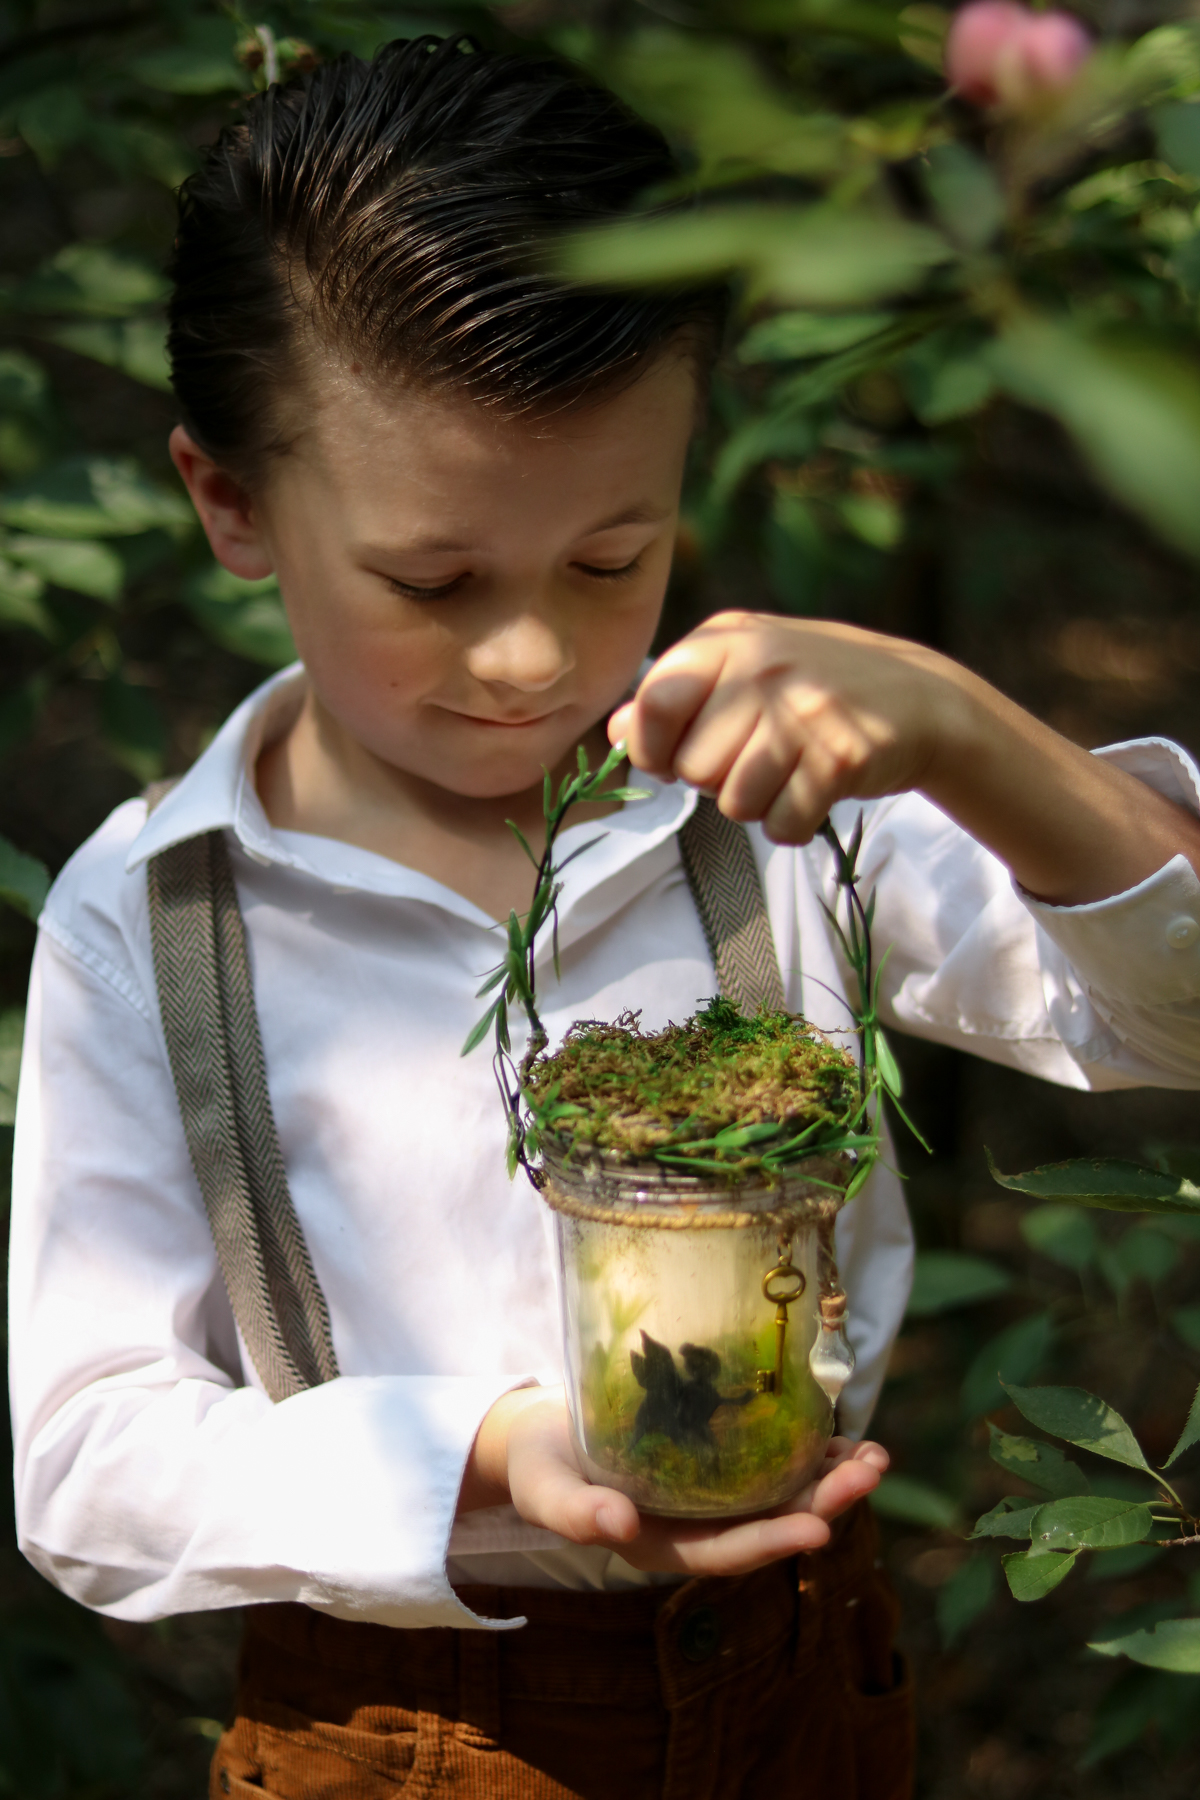
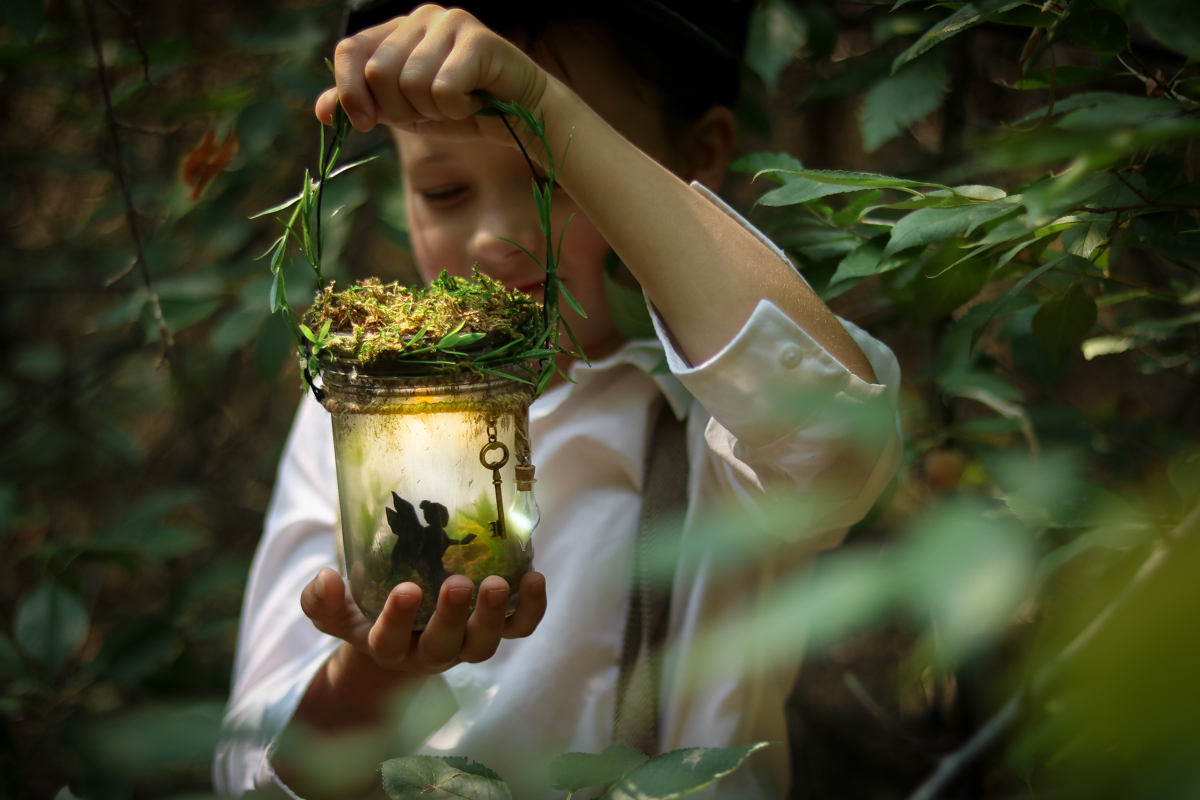
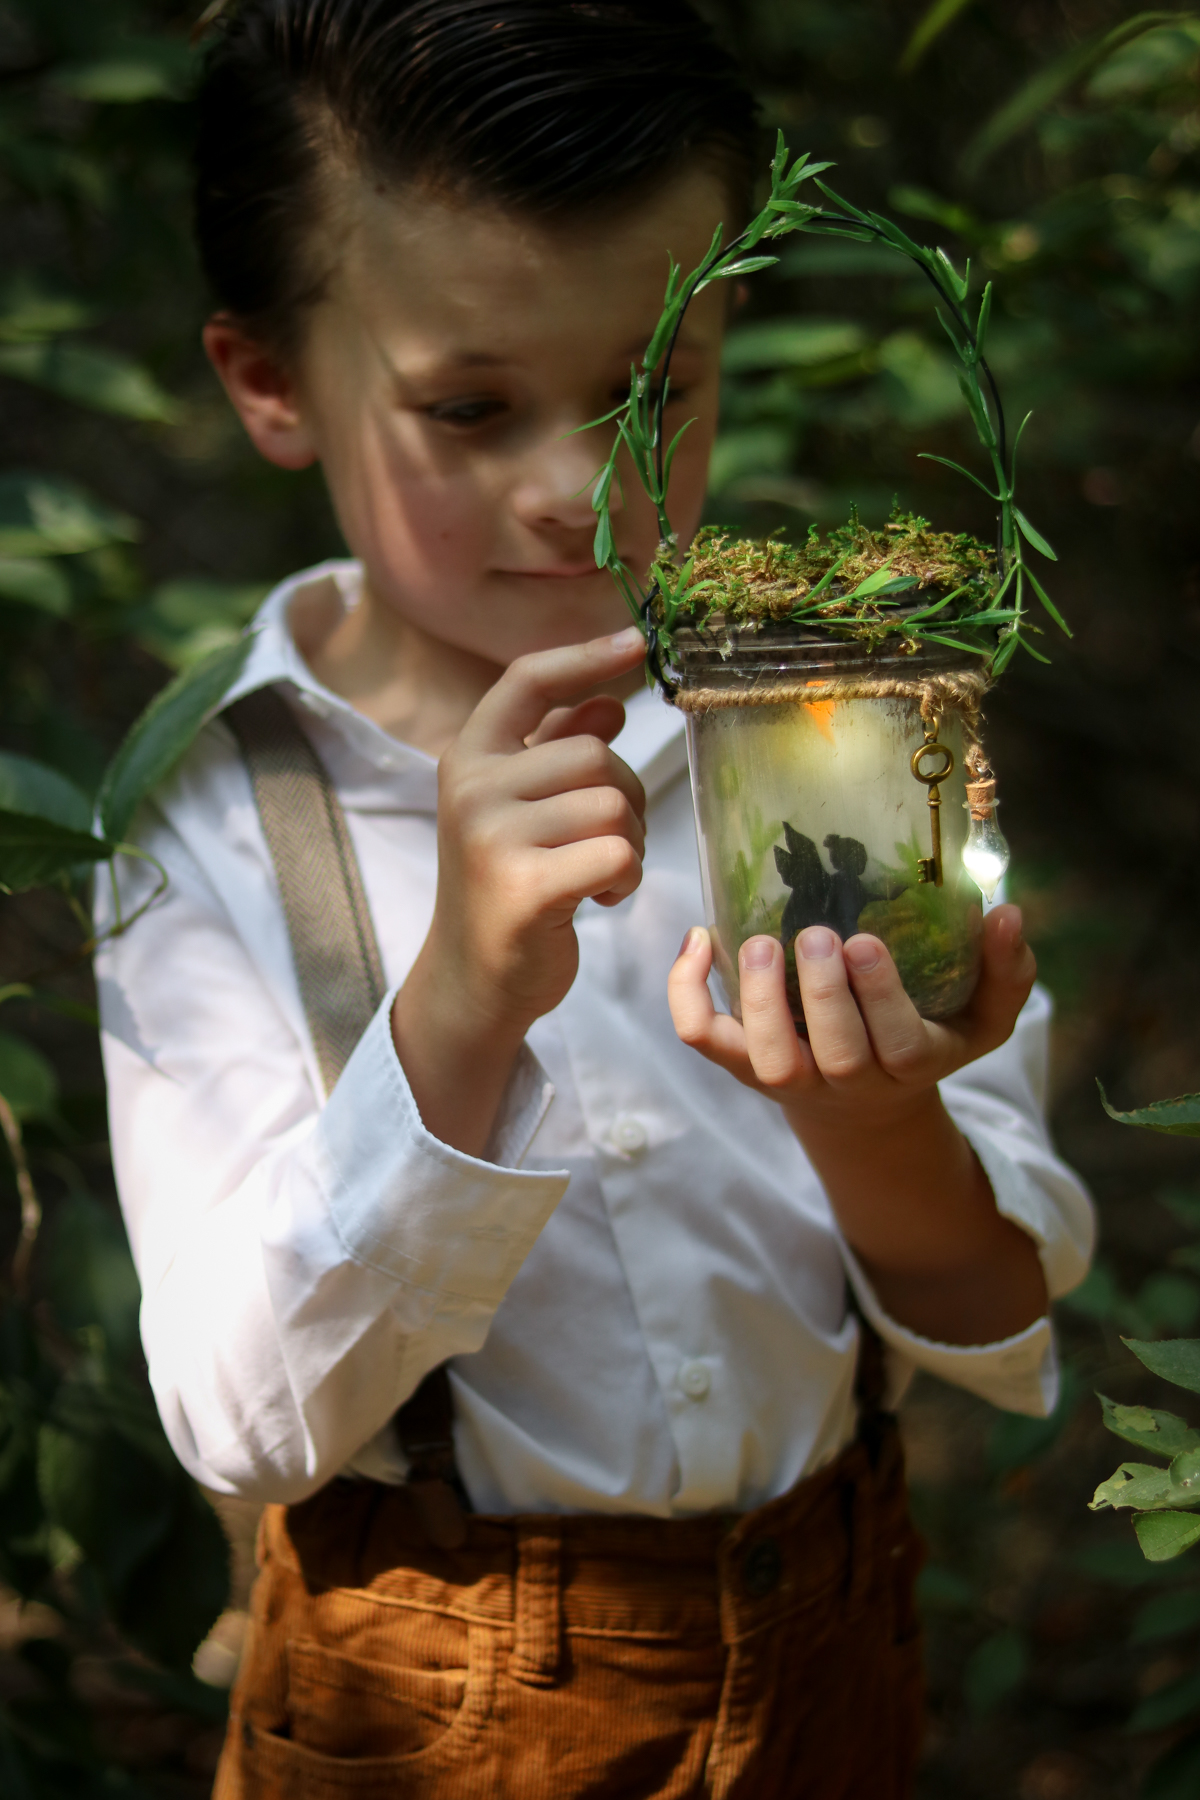
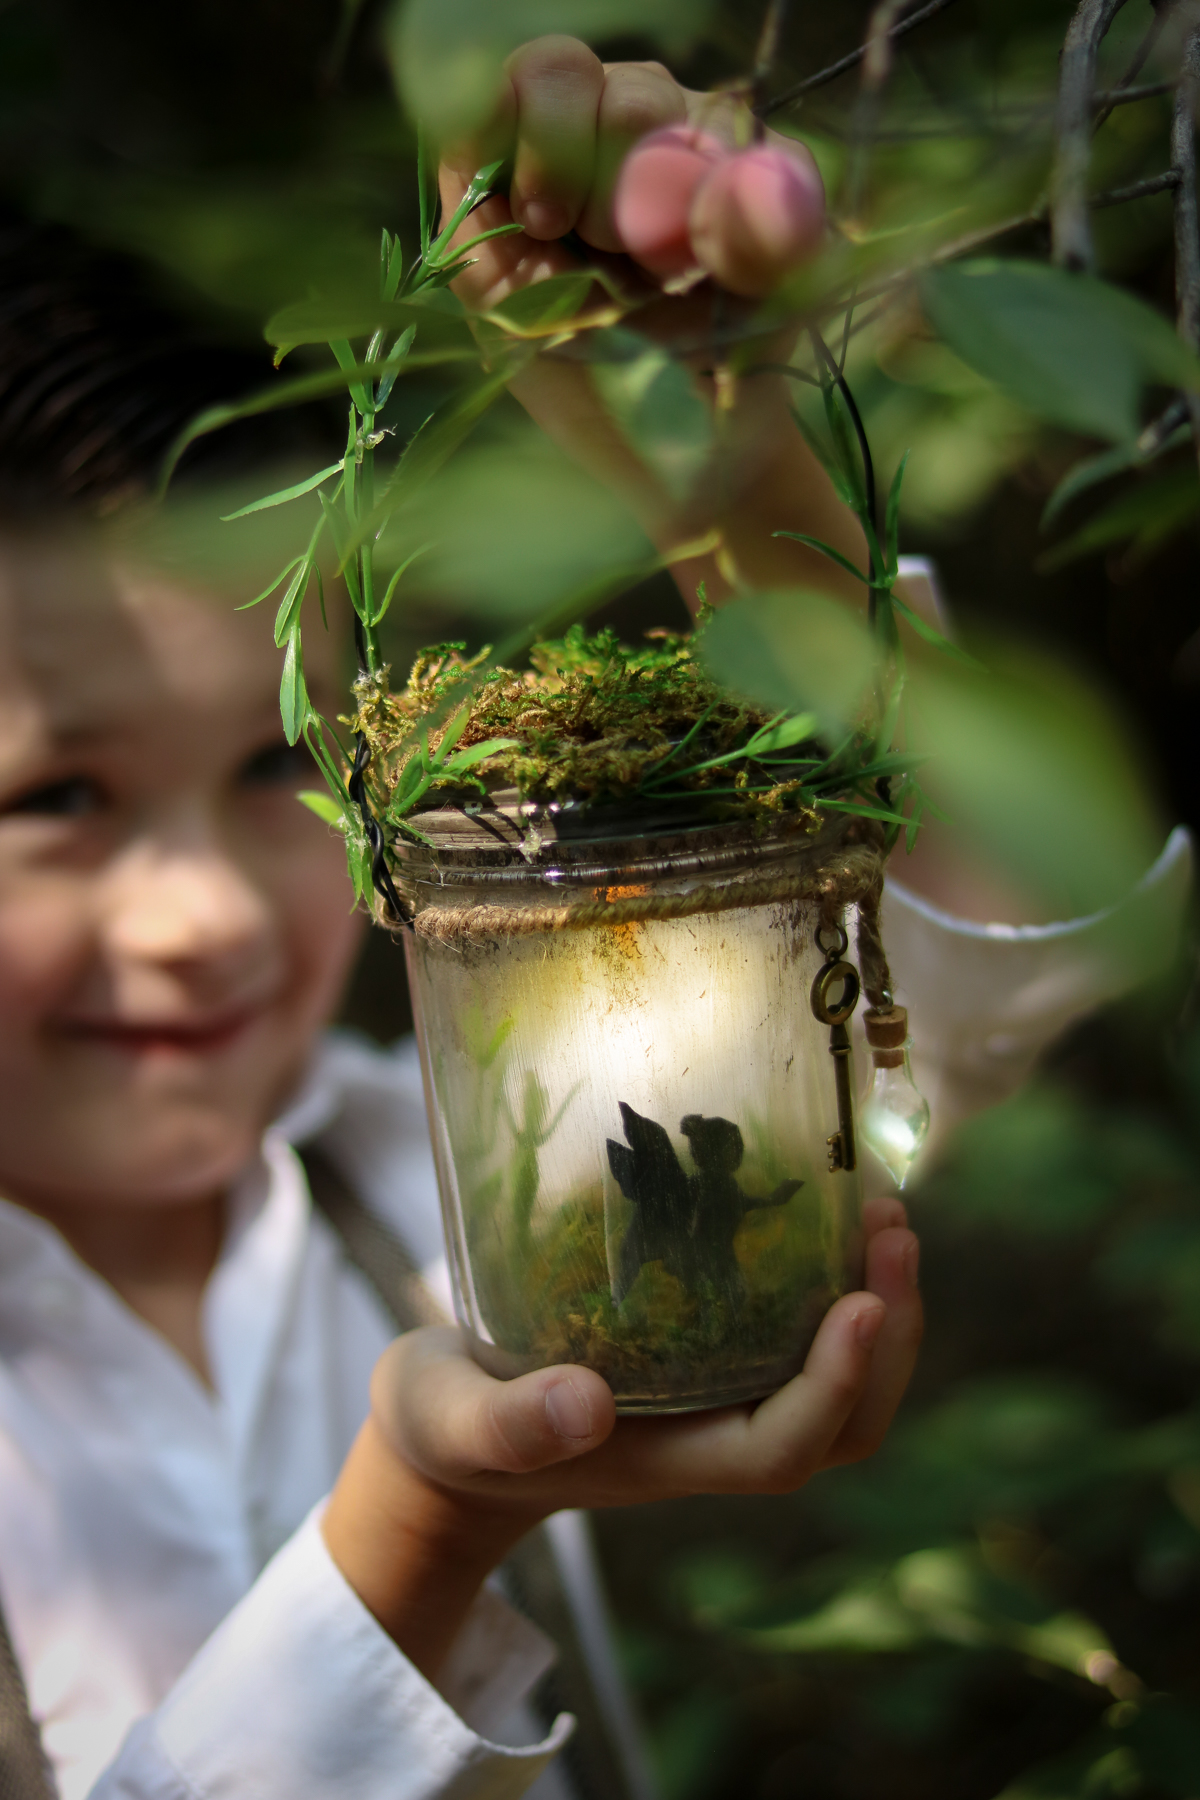
 Then take your fairy and insert her into the jar and use some hot glue to decorate the lid and handle with some greenery.
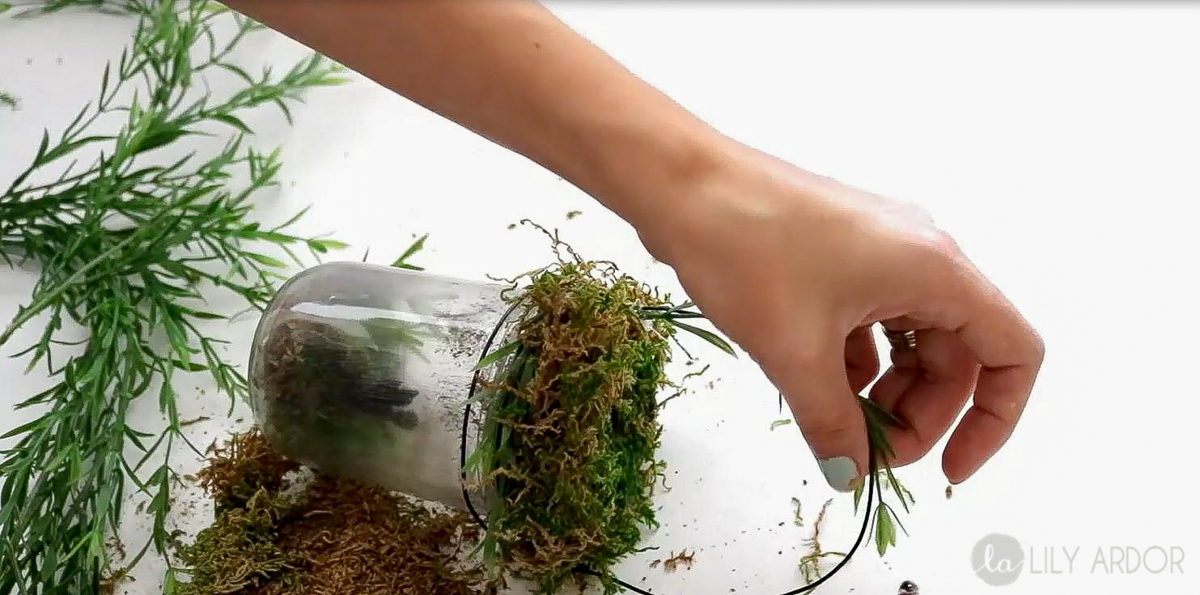
Ok I totally did this step backwards. You should probably apply the greenery on the handle after adding the twine to it. For this step I doubled my twine and wrapped the circle of the handle in twine. You can probably wrap the handle itself too. I literally just thought of that.. 😀 It would probably look cuter too. 😀 To finish it off attach your key and glass vial with some twine and glue. I added a bit of glitter to my glass vial. 😀 That’s it. 😀 Don’t forget to watch the video for more details. 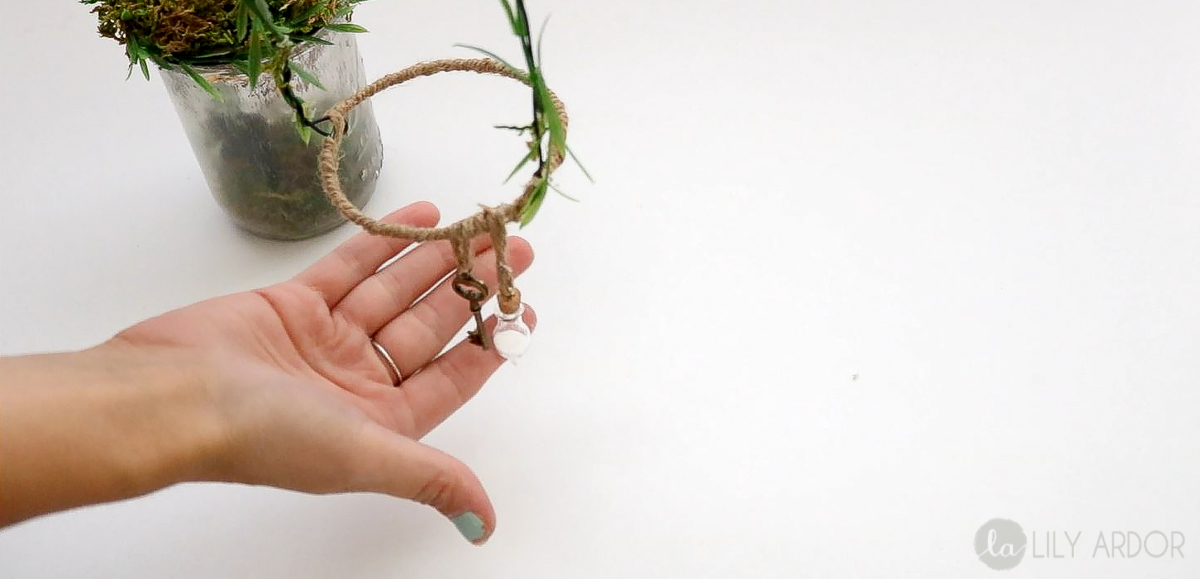
Here’s a video on this fairy lantern night light. Hope you like it. 😀
😀 I would love to know what you guys think about this DIY? What projects would you guys like to see more? Any special requests? Let me know in the comments below I would love to know. 😀 😀 Thank you so much for being a part of this DIY journey with me. I am truly blessed to have an audience like you guys.
Here’s a cute pinnable.

Thanks for joining me today. 😀 I would love to see your creations.
Here are some affiliate links for similar products I used to make this project. (If you purchase anything from my affiliate link I might get a small commission. However this DOES NOT result in any additional charges to you. For more info read my disclosure policy)
Love your ideas and you make it super simply to do them to.
Thank you Jennifer. So glad to hear your loved them. Awe I love hearing feedback like this. 😀 Simplicity is what I strive for! 😀 😀
Cute lantern and absolutely lovely styled photos!
Thank you so much Natasha 😀 !
Where can i find the tiny key and vial?
I got mine at Michaels crafts store. I think they sell them in the jewelry aisle.
Love this sooo much, so glad there was a video,too!
Thank you Angela 😀
This is truly amazing. Not only do I love the fairy lantern (and the pictures, wow!), but the step by step instructions and video make it so easy to recreate! You’ve definitely found a fan! Thank you for sharing at Designing You!
Awe thank you Trudy. I love whimsical photography. I am delighted to hear that you loved it 😀 OH WOW this is music to my ears !! One of my biggest goals is for my DIYS to be easily understood and recreated. 😀 Thank you so much for your feedback. It really means a lot. Glad to have you aboard. 😀 😀
What a darling fairy lantern! I love how you inverted the tealight so the switch is easy for little hands to turn on and off! Enchanting!
🌸 Trenda
Awe Thank you so much Trenda. Yes I was hoping it would be easier to use that way. So glad hear you liked it. 😀
Oh my golly, this is so fantastic, love it to pieces. Will make this for our 47 yr. old daughter for Christmas, she’ll be so surprised. Your tutorial and especially video was so helpful. Thank you so much for supplying the fairy image, so helpful . Can hardly wait to make it for her. She has loved fairies since she was young girl.
Noticed you had some other fairy jars,Will need to go back to look at them also.
Enjoy the weekend.
So glad to hear you loved it Jane. Wow that sounds so exciting. I’m sure she would love it!! 😀 😀
So pretty!
Thank you 😀 😀
This amazing post is a GARDEN feature on the October You’re the STAR blog hop: http://www.godsgrowinggarden.com/2017/10/youre-star-week-1-garden-october-2017.html
Thanks
Angie
Thank you. Oh man that’s so cool! Thank you for featuring me. 😀
THANK YOU
It was the Best tutorial ever
You very welcome Angel. So glad it was helpful! 😀
such a magical project!!! a tip on the tea light…do not glue it in permanently…use sticky dots or other somewhat removable attachment…otherwise you can not change out the battery which will not last forever 🙂
Good point!
Yah! I was wondering how one could change the battery out in it. Thanks for sharing. I cannot wait to try this!
You can heat the glue up with a hair dryer and it should slip right off. 😀 I’m so glad you like this. Let me know how it goes.
OOH love the idea of velcro dots. AWWE how sweet! What an adorable gift this will make.
I love this idea.. how magical there beautiful.. thank you
Thank you Victoria 🙂 So happy to hear you love it
Looks like a fun project!
Thank you Kim It sure was fun to make 😀 😀
I love this! I have these supplies on hand!
The photos are lovely.
YAY!! Glad to hear you have everything to make one. HAppy Crafting 🙂 Thank you we had a blast taking the pics.