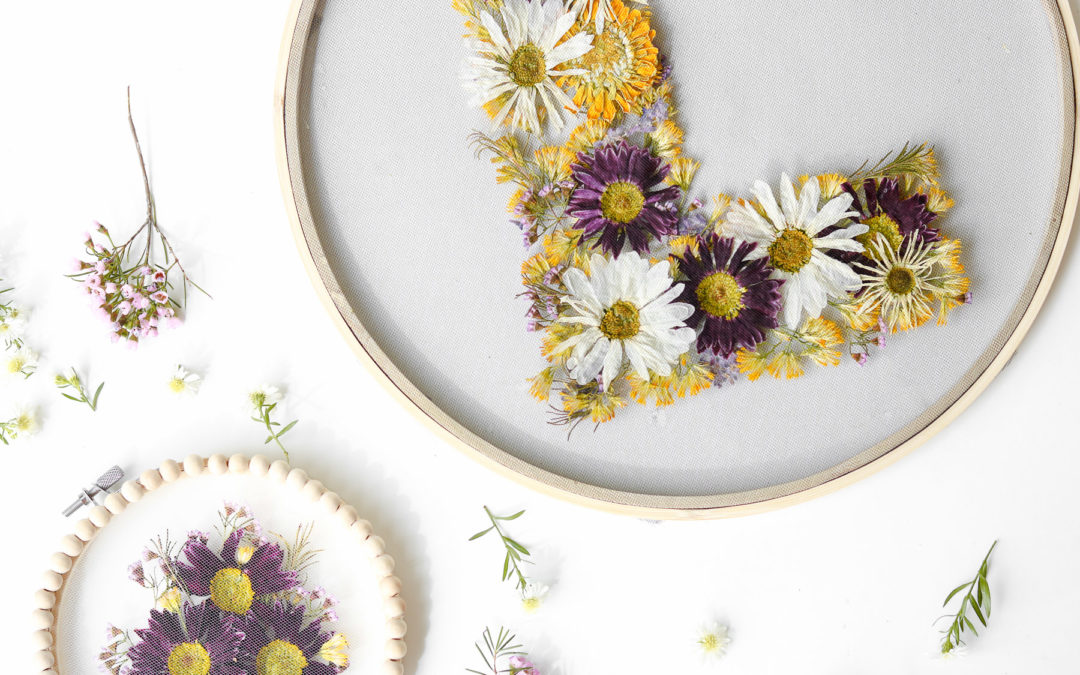
Pressed flowers in tulle
If you’re looking at persevering some flowers or making some floral wall art than your in the right place. Last time I did a similar project to this was for mother’s day and it’s still one of my favorite projects. I’ve been asked multiple times if my flowers faded and although some of the flowers show some fading the purple and yellow flowers show no difference at all. I’m was pretty happy with the results so I decided to give my first project a little twist. A few weeks ago I saw a floral hoop on craftgawker except they used mesh, not tulle and paper flowers instead of real ones. I immediately knew I wanted to make something similar just with real pressed flowers. That’s when I realized I follow this talented lady on instagram although I haven’t seen her in my feed for ages because of instagrams new algorithm, but she posts the most beautiful floral crafts. Her name is Olga Prinku and she is truly amazing. If you need some inspiration check her feed out. She even has a youtube video showing how she makes her flower hoops. Very intricate work. She literally weaves the stems into her mesh. After checking the web out a little I decided to try laying my pressed flowers between stretched tulle. It seemed like a good idea since it would be a lot quicker than weaving the flowers into fabric. I’ve never seen it done this way but, after a few attempts it actually worked! YAY! The most exciting part about this project is how quick you can press your flowers.. YEP!! I’ll be showing you how to press your flowers in under 3 minutes! No books needed… Okay than let’s make some floral hoops. Here’s a quick video version
Time needed: 30 min to 2 hours
This project takes a bit of time which mostly involves prepping your flowers. It took me about 1 hour to press the flowers and an additional hour to put the hoop together. Depending on the size of your hoop this can take you anywhere from 30 minutes to 2 hours to make. I made two hoops. A huge one with my initial and tiny one.
Total Cost: $24
(price may very. Depending on what you already have at home and what sales are in store) Since I don’t have a full garden of flowers blooming I had to get my flowers at the local flower shop. I handpicked the ones I wanted and my total cost for the flowers was $12. If you have hoops at home you can use those or buy some at any craft store. Oooh and the other pricey thing for me was the beads which are totally optional. I had my firebricks on hand but they are very expensive. You don’t necessarily have to use those exact bricks you can use floor tile or concrete bricks sold at hardware stores. As long as they have a flat surface and are microwave safe they should work just fine. (ooh even like a ceramic pan would work) 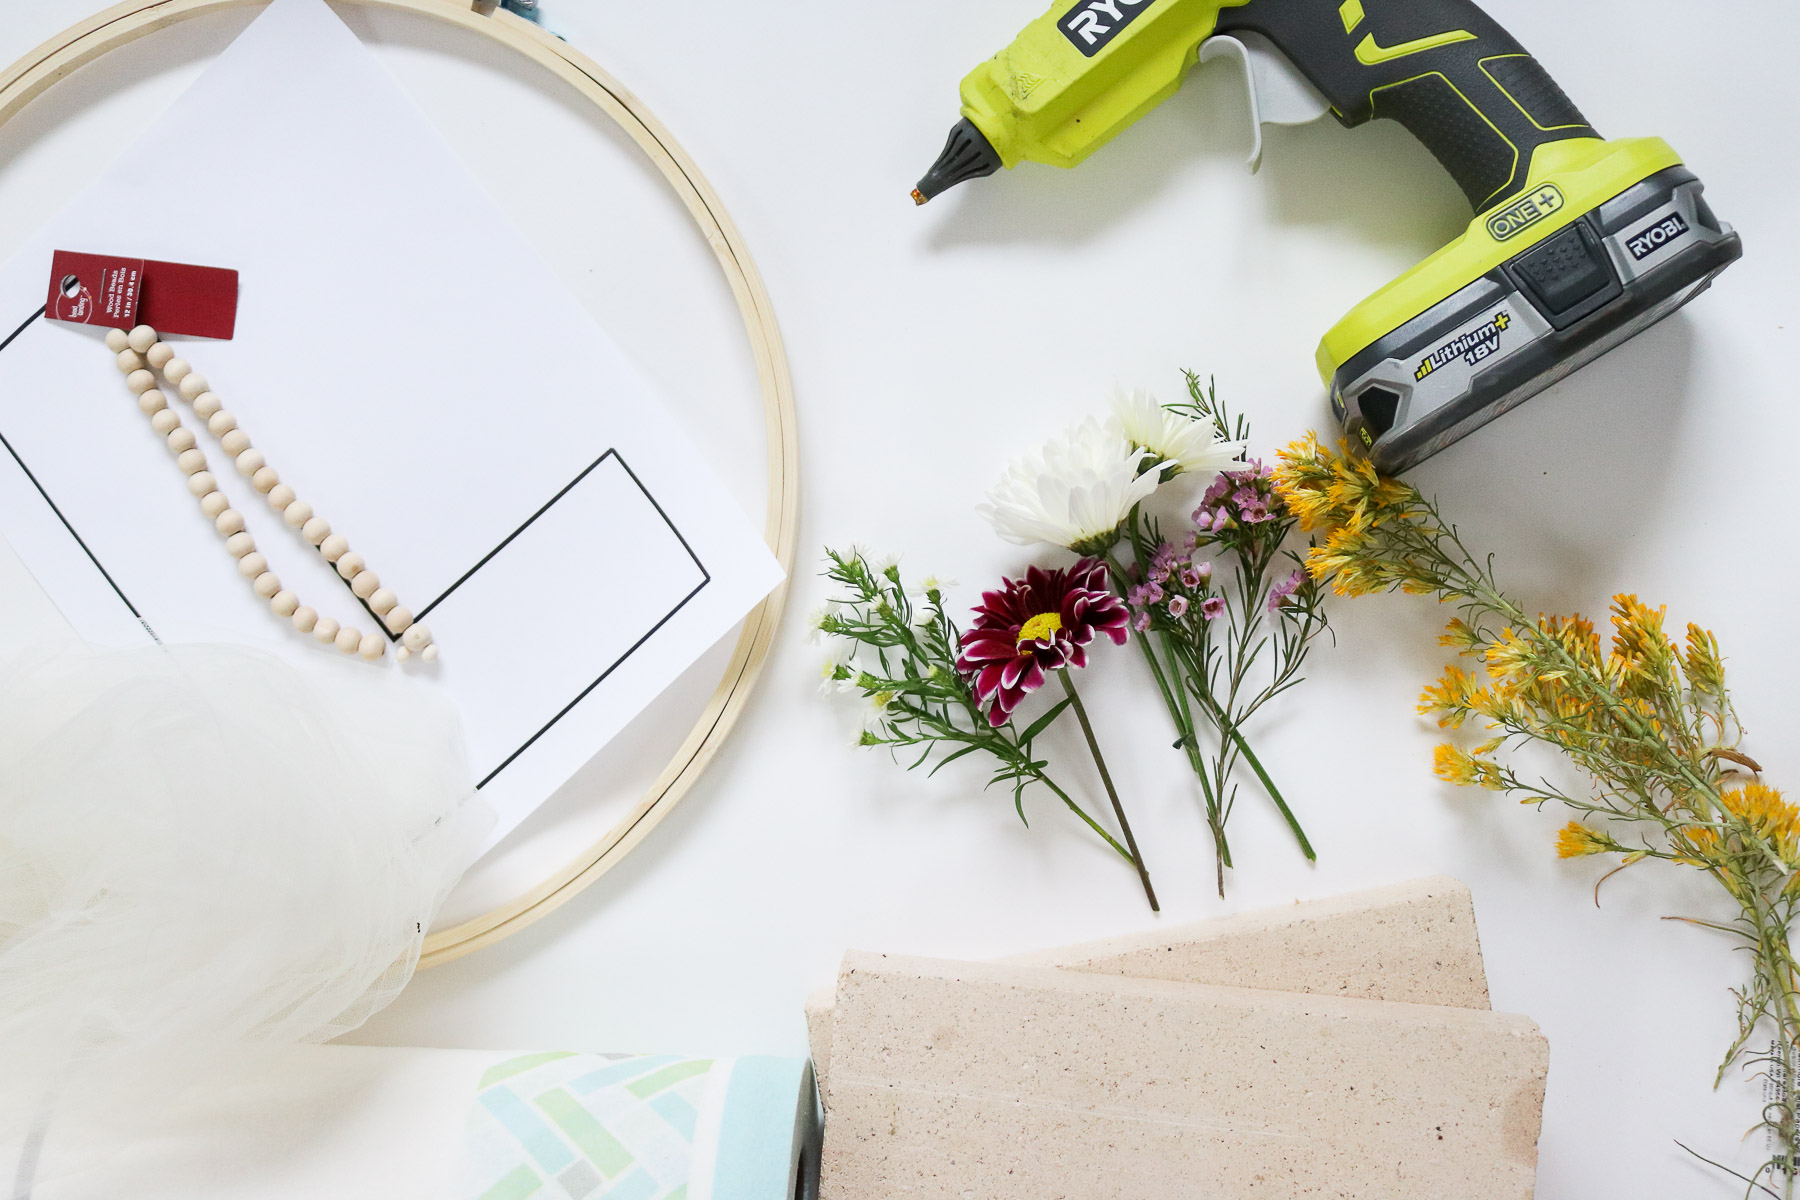
Supply List
Linked to amazon products. *affiliate links
- Embroidery hoops
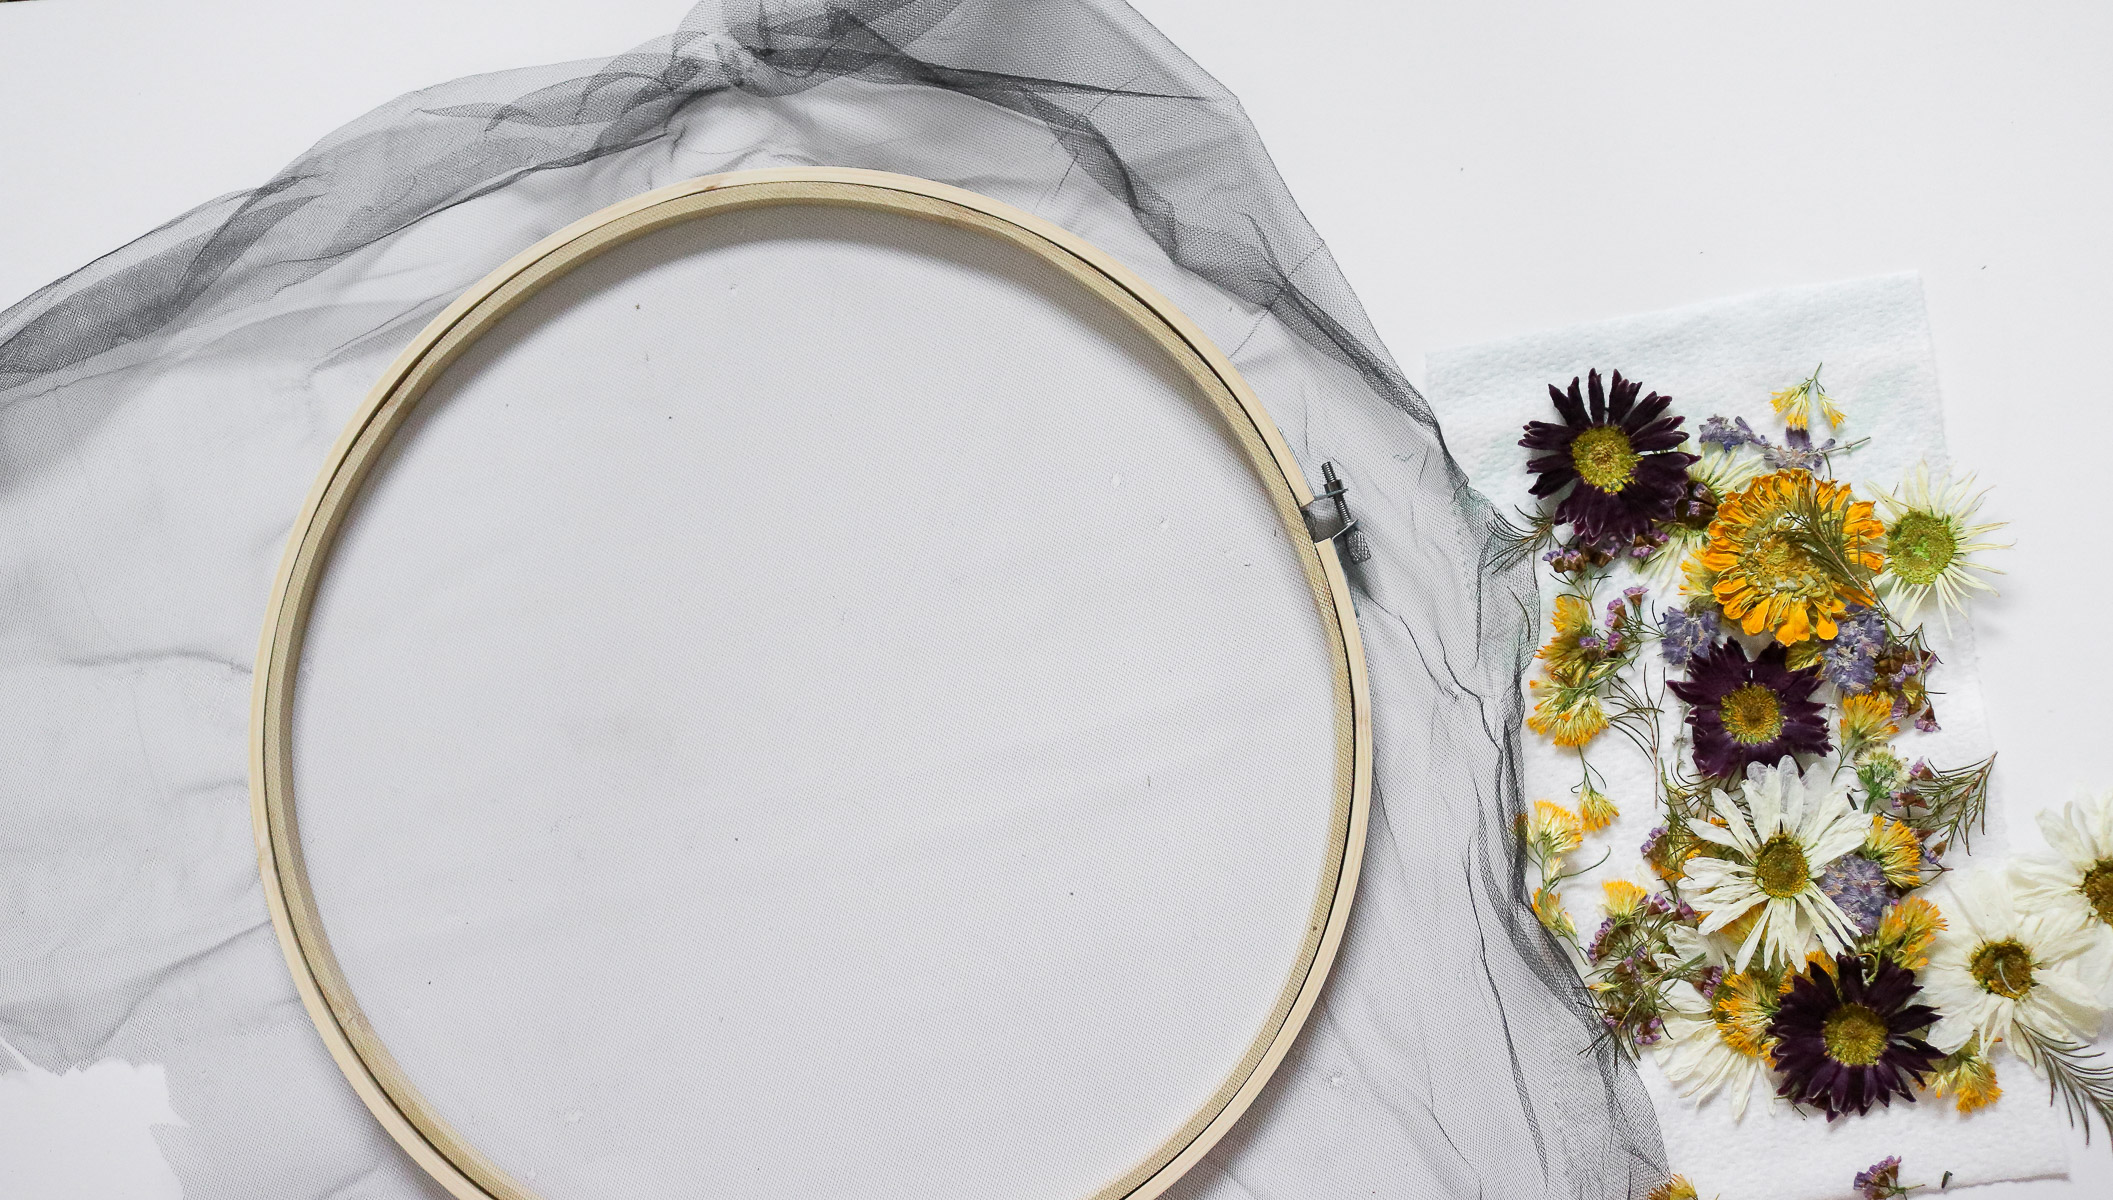
- Tulle fabric
- 2 bricks or tiles
- Wood beads
- Hot glue (here’s the glue gun I use for all my DIYS )
- Paper role
What kind of flowers work for this
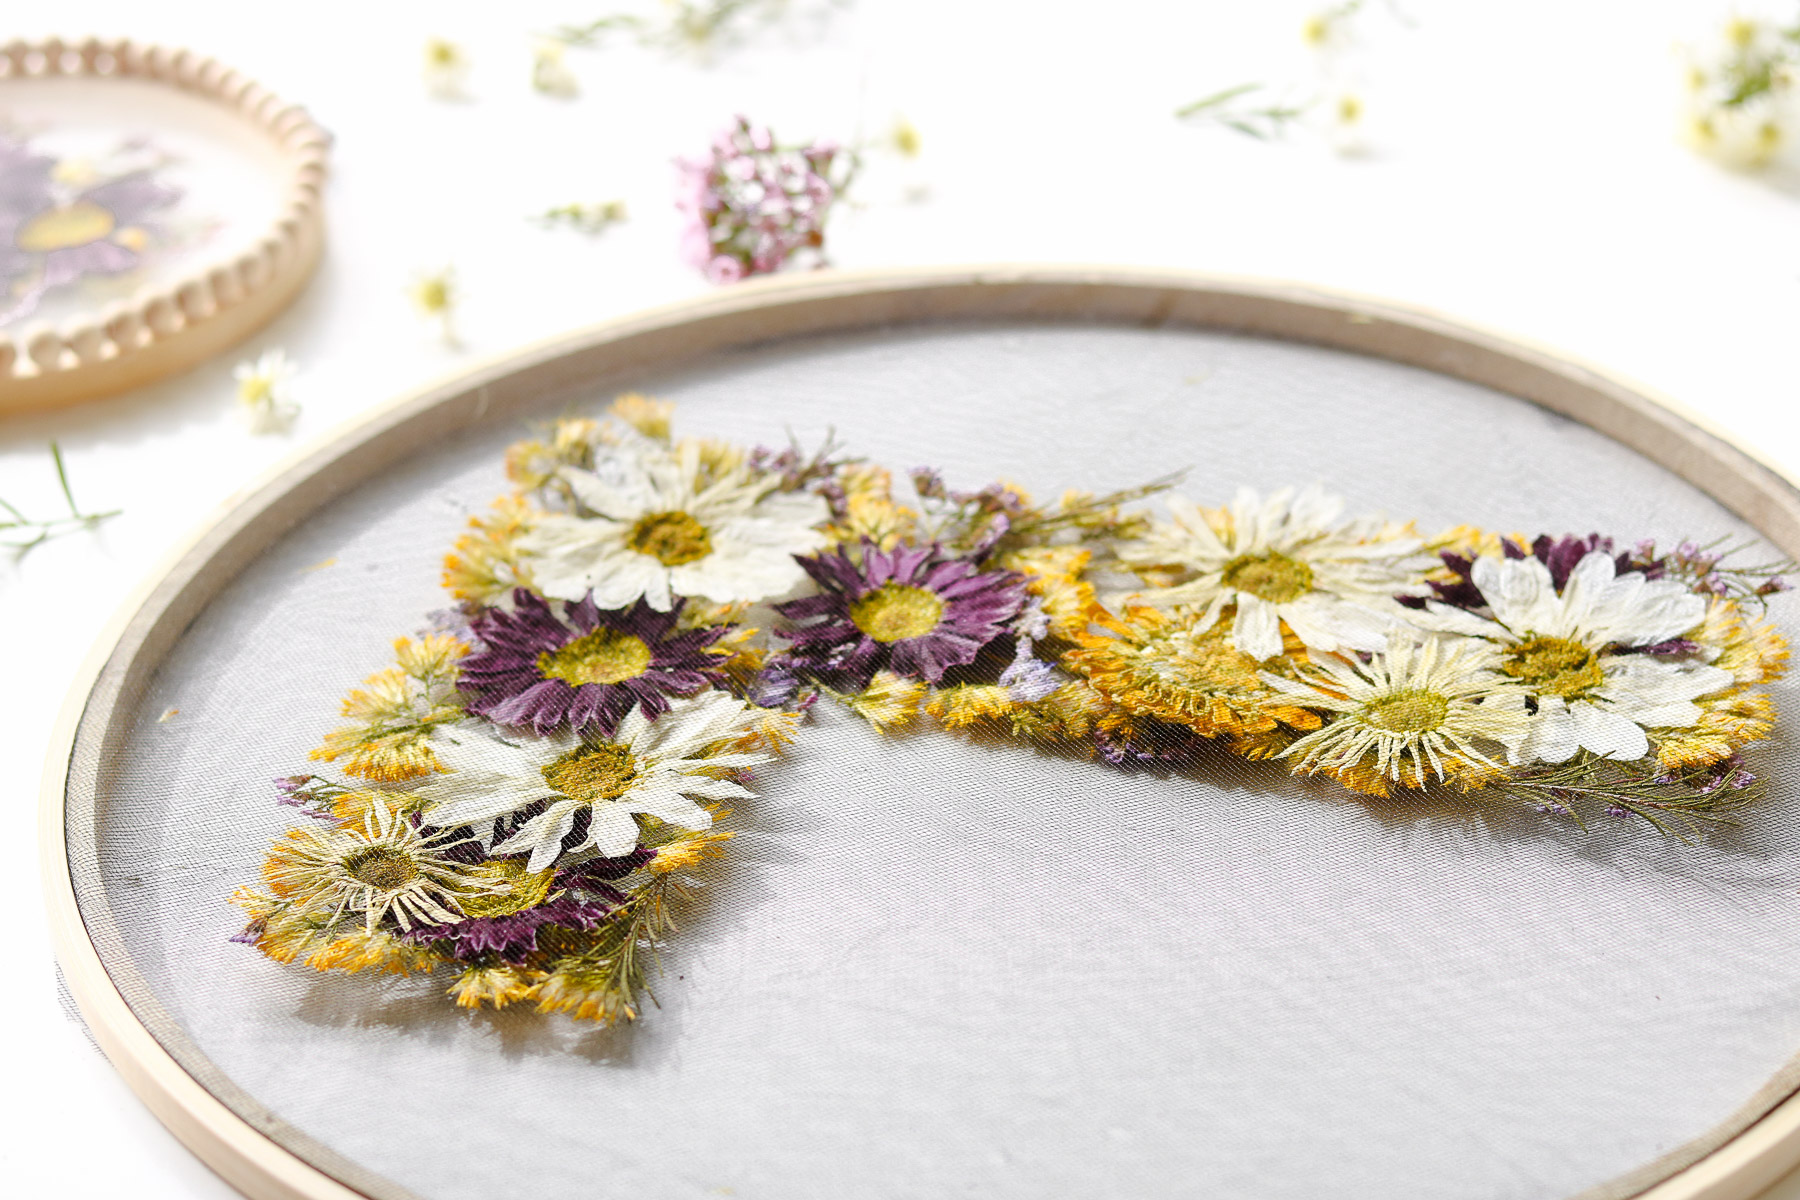
I used a mixture of daises and smaller flowers to fill in the gaps. Whichever flowers you pick make sure the center isn’t thicker than a daisy. If you go any thicker it won’t flatten out really well although sometimes it still looks great. Give it a try if there’s something you have in mind. You never know those bricks really flatten them flowers out. You will need some smaller flowers to fill in gaps. The yellow flowers you see in the photos I actually didn’t buy. I picked them outside. I’m pretty sure it’s some type of weed. So before making a run to your floral shop definitely check out your yard or fav fishing spot for weeds that would make a great filler.
HOW TO PRESS YOUR FLOWERS IN 3 MINUTES
To begin you’ll need to cut your flowers off the stems leaving just the flower bud. Than lay a napkin on your firebrick and the flowers face down. 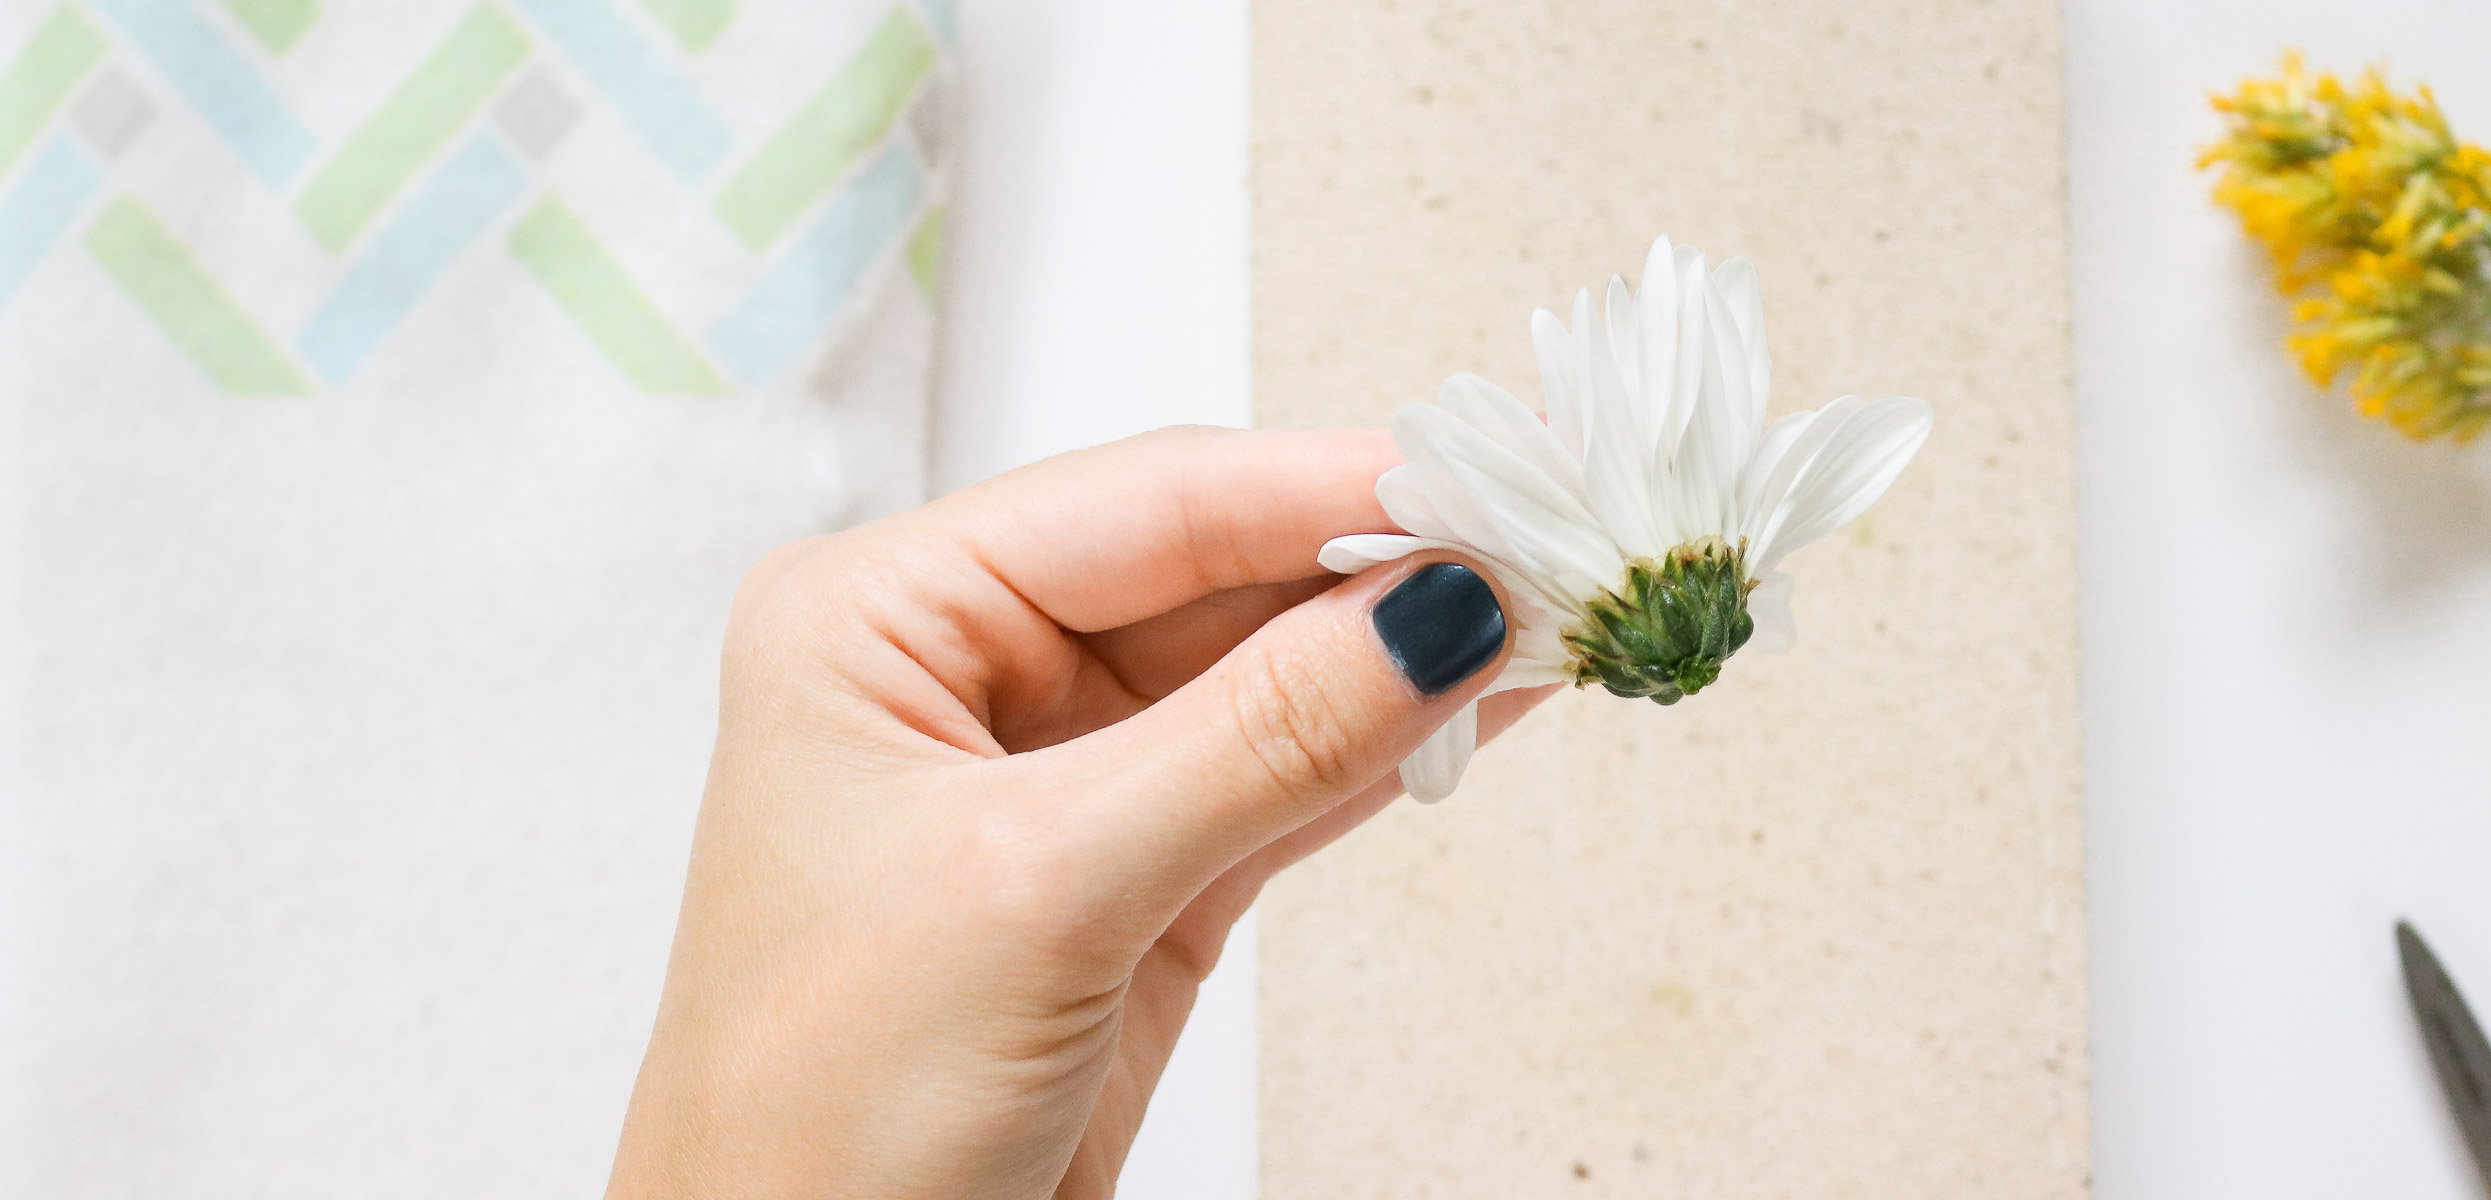
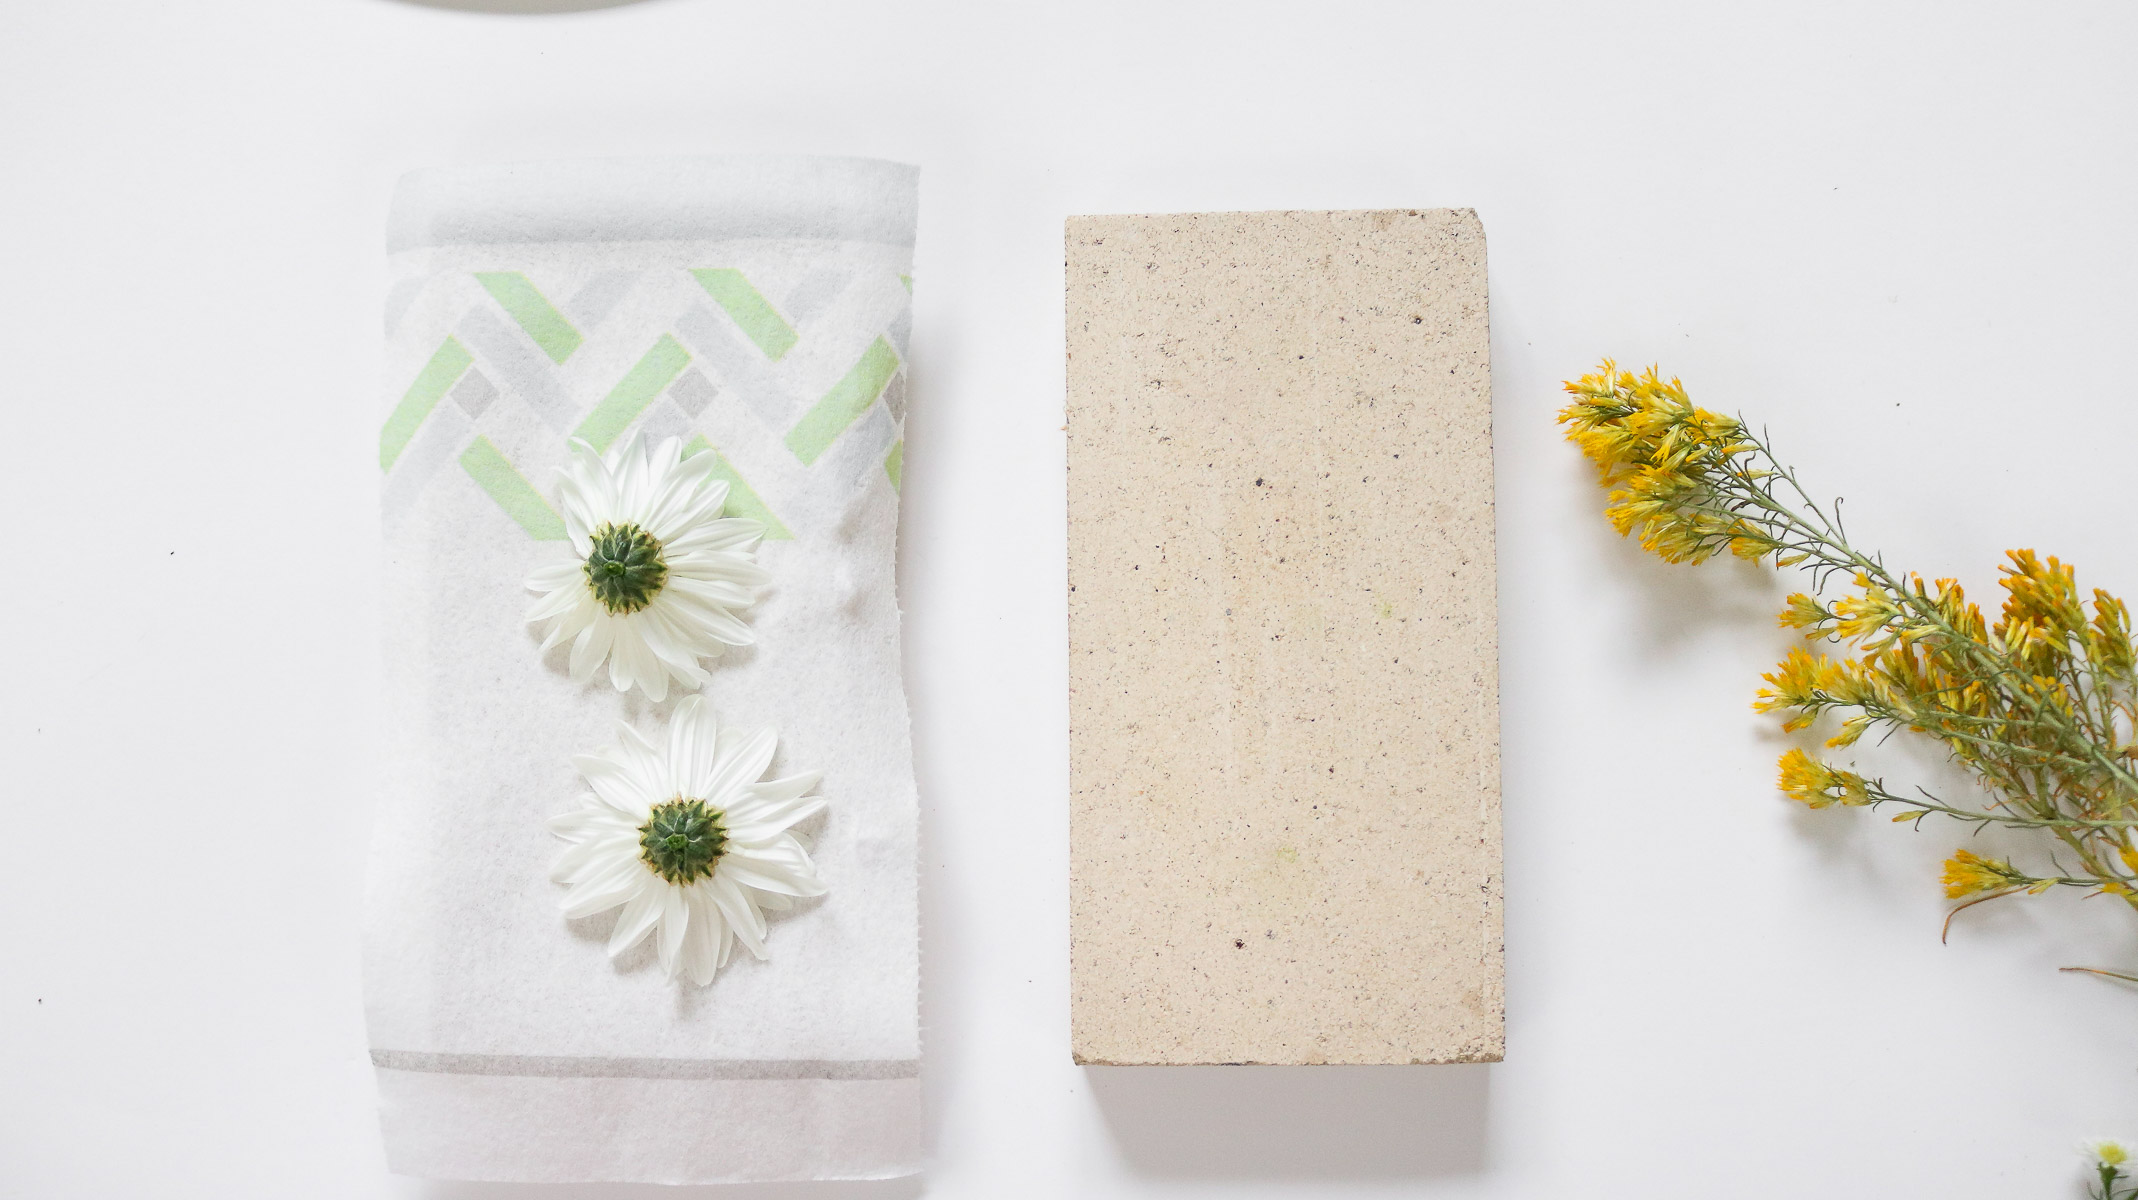 Following that lay a napkin over your flowers and than the top brick. At this point your flowers should be sandwiched between the two napkins and bricks.
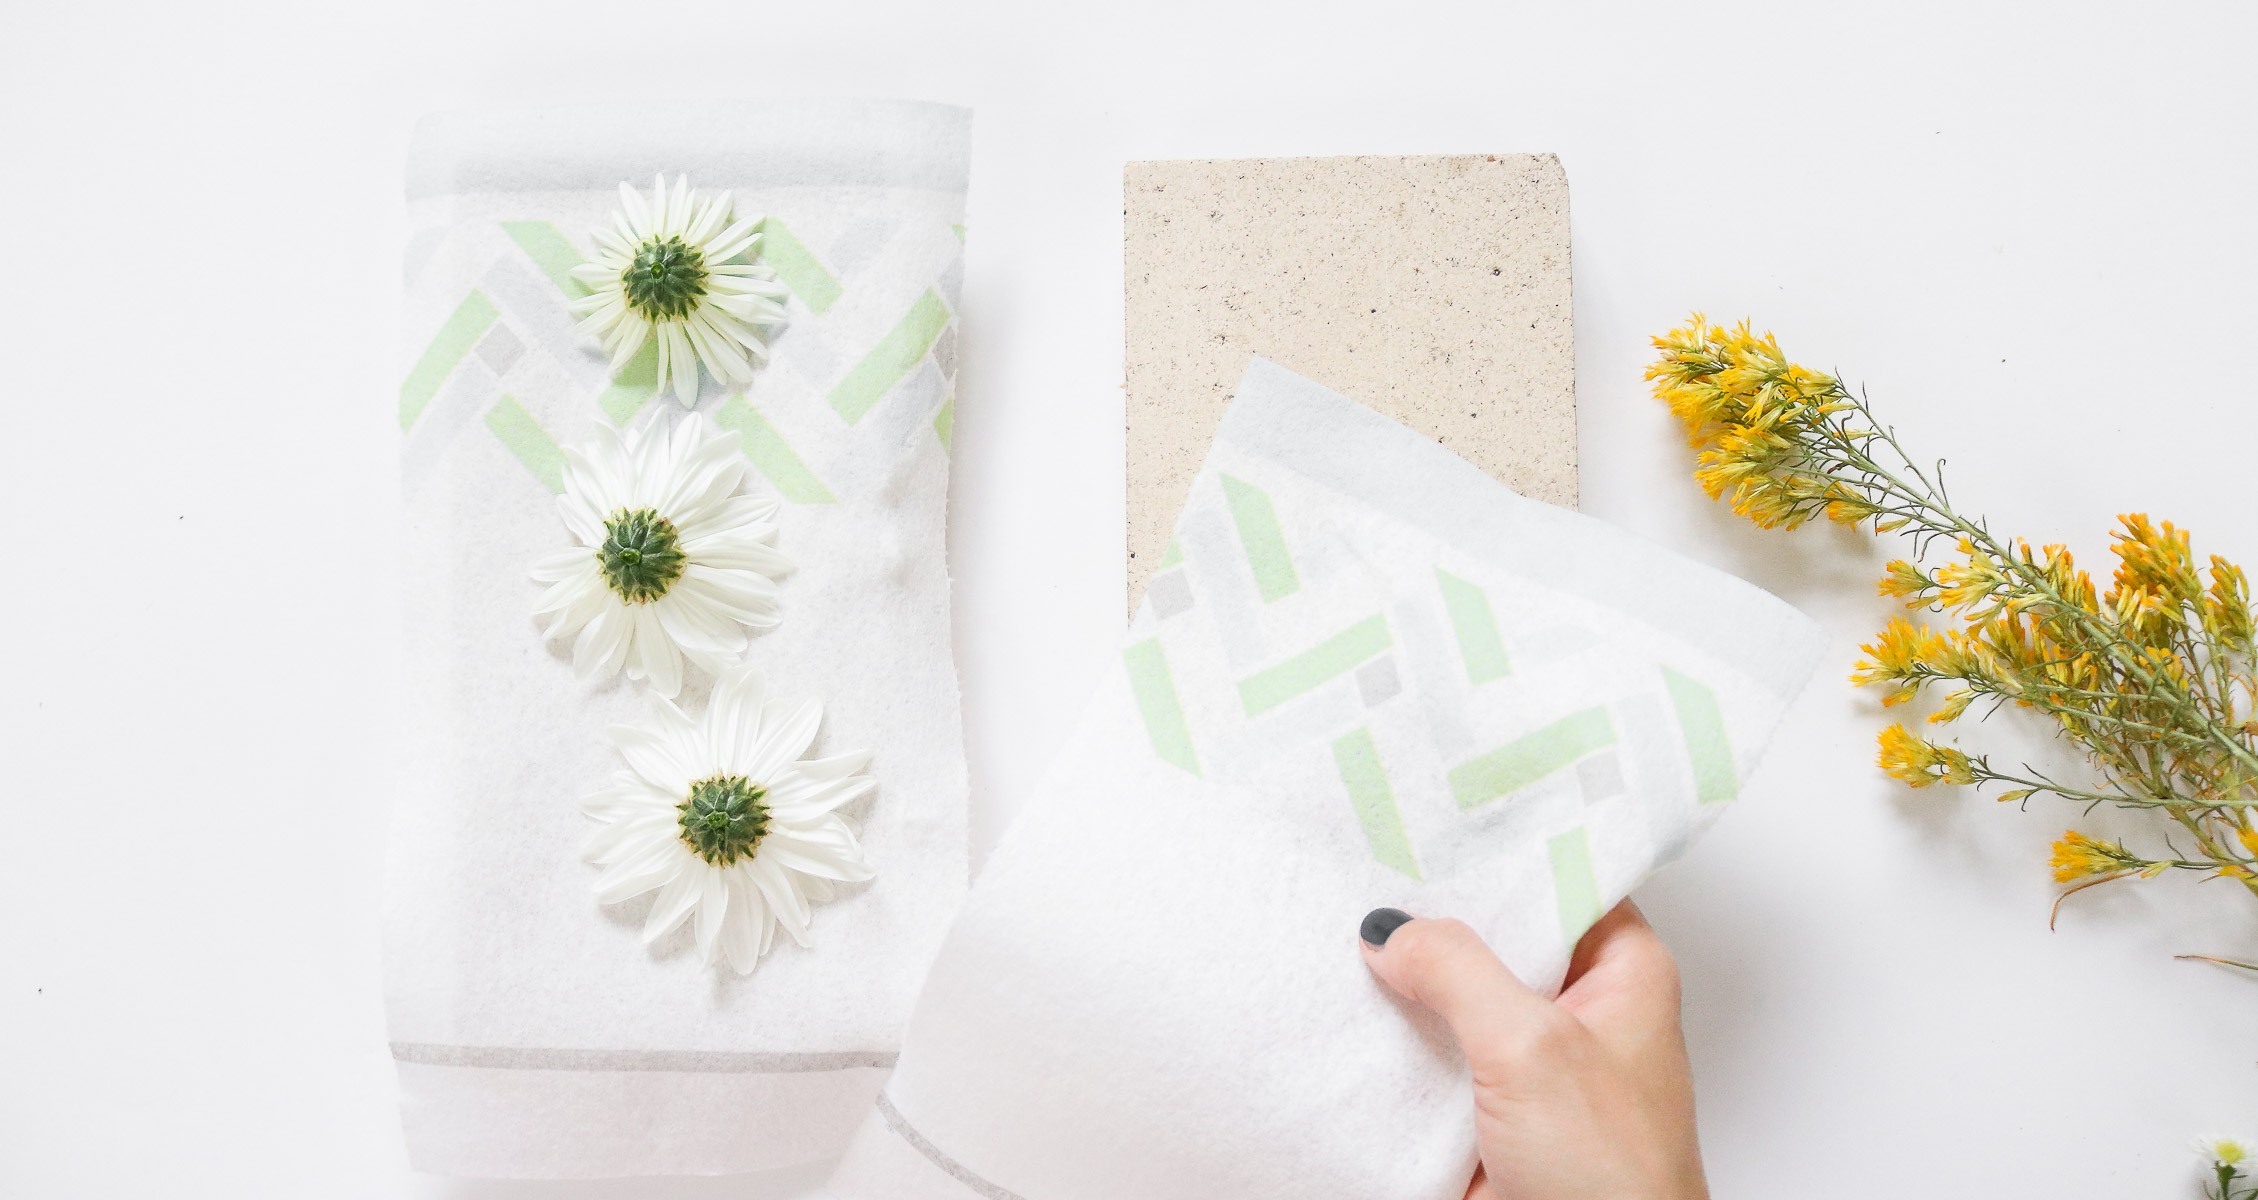
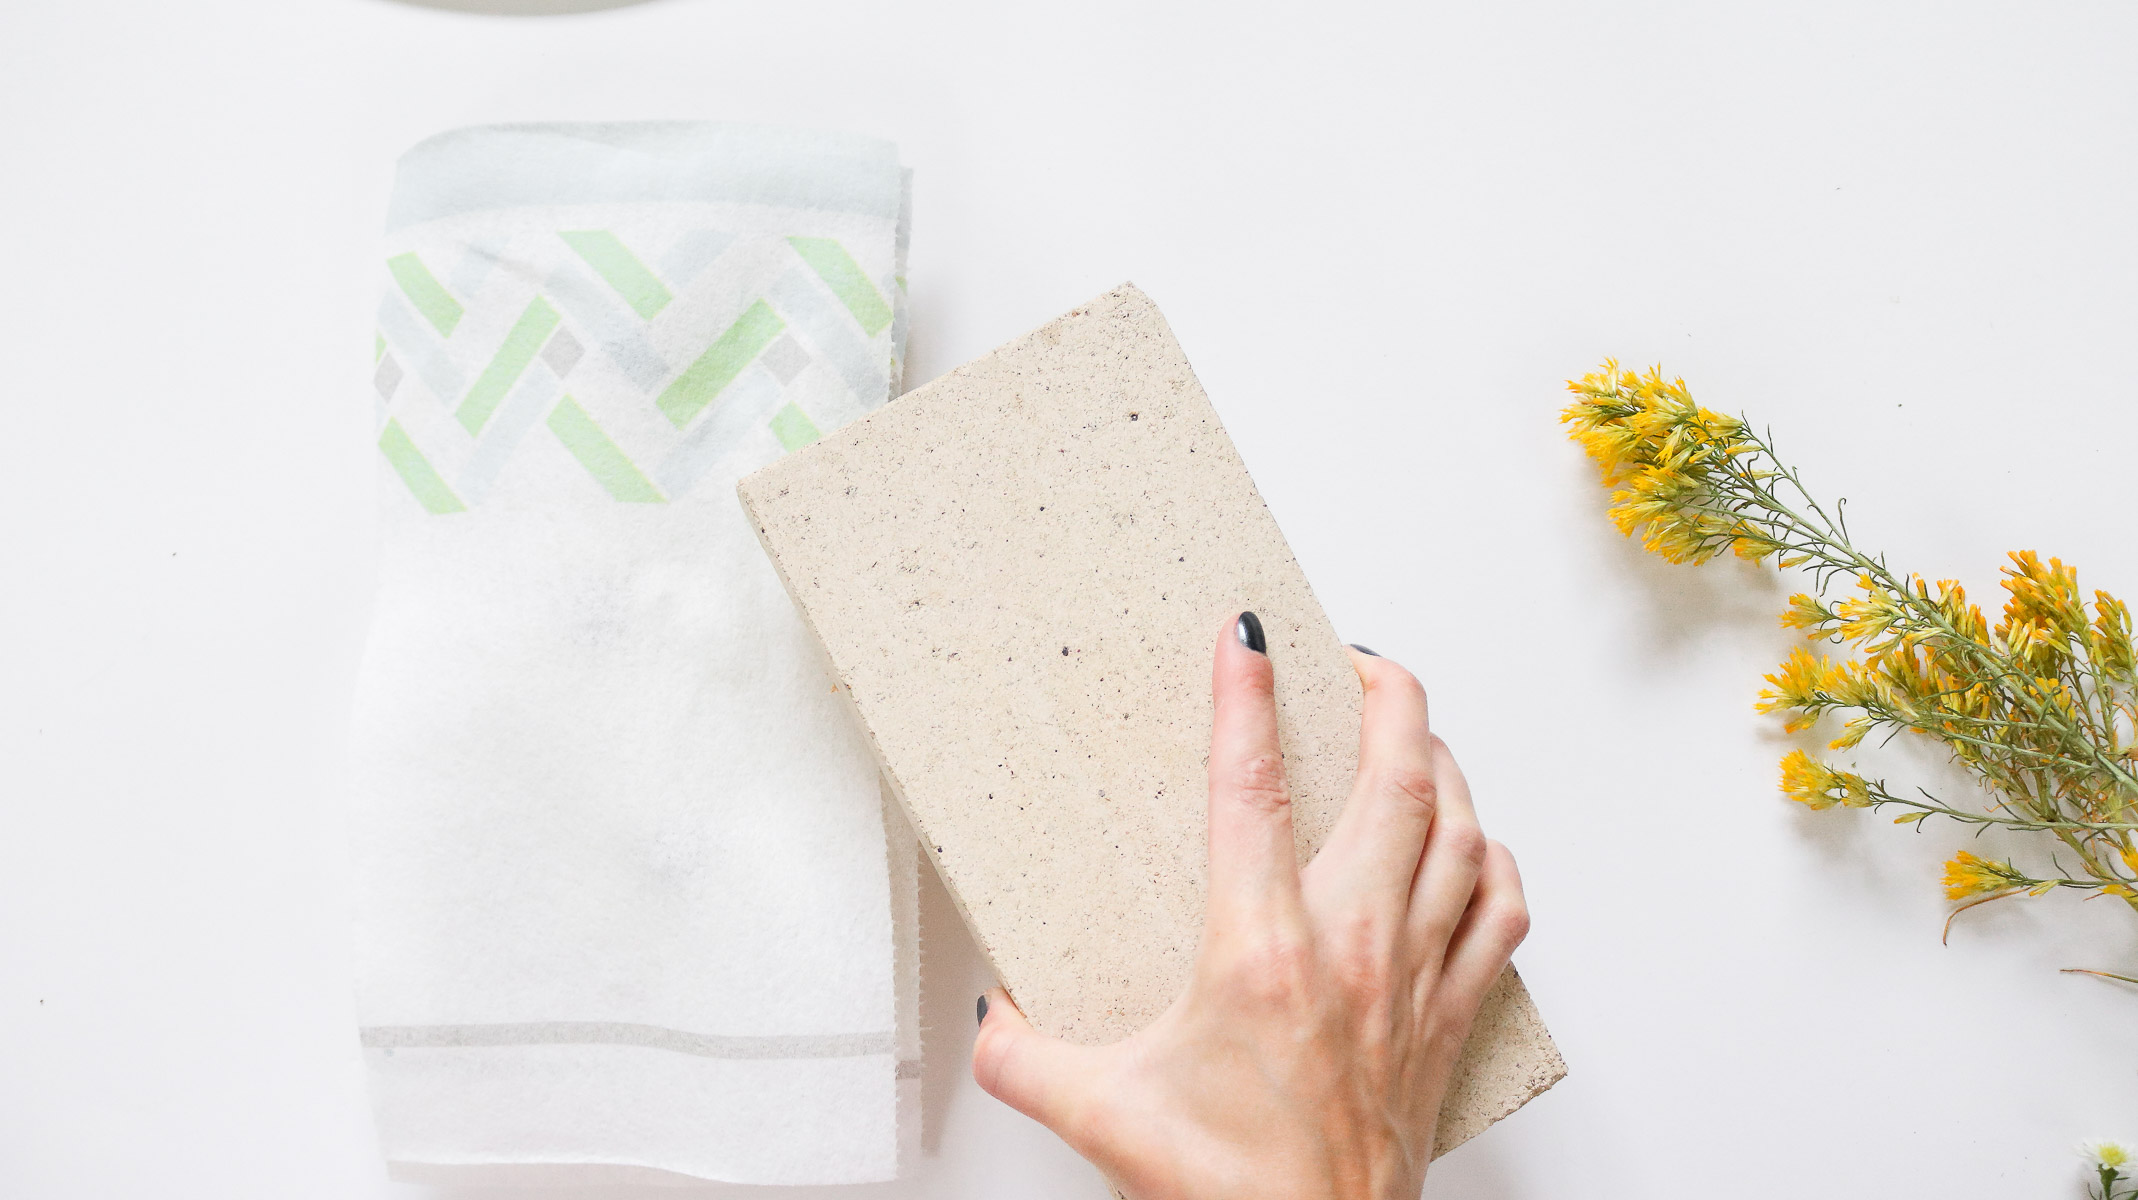
 Stick them in the microwave for about a minute and a half and you should have perfectly pressed flowers. I always checked my flowers after about a minute than if they were still flimsy I would nuke them for an additional 30 seconds without the top brick just the napkin on top. The brick sometines lets the moister back into the flower. Oh and if you only have one piece of tile you can totally use your microwave tray as the base brick. (hope this makes sense feel free to ask any questions if it’s confusing)
 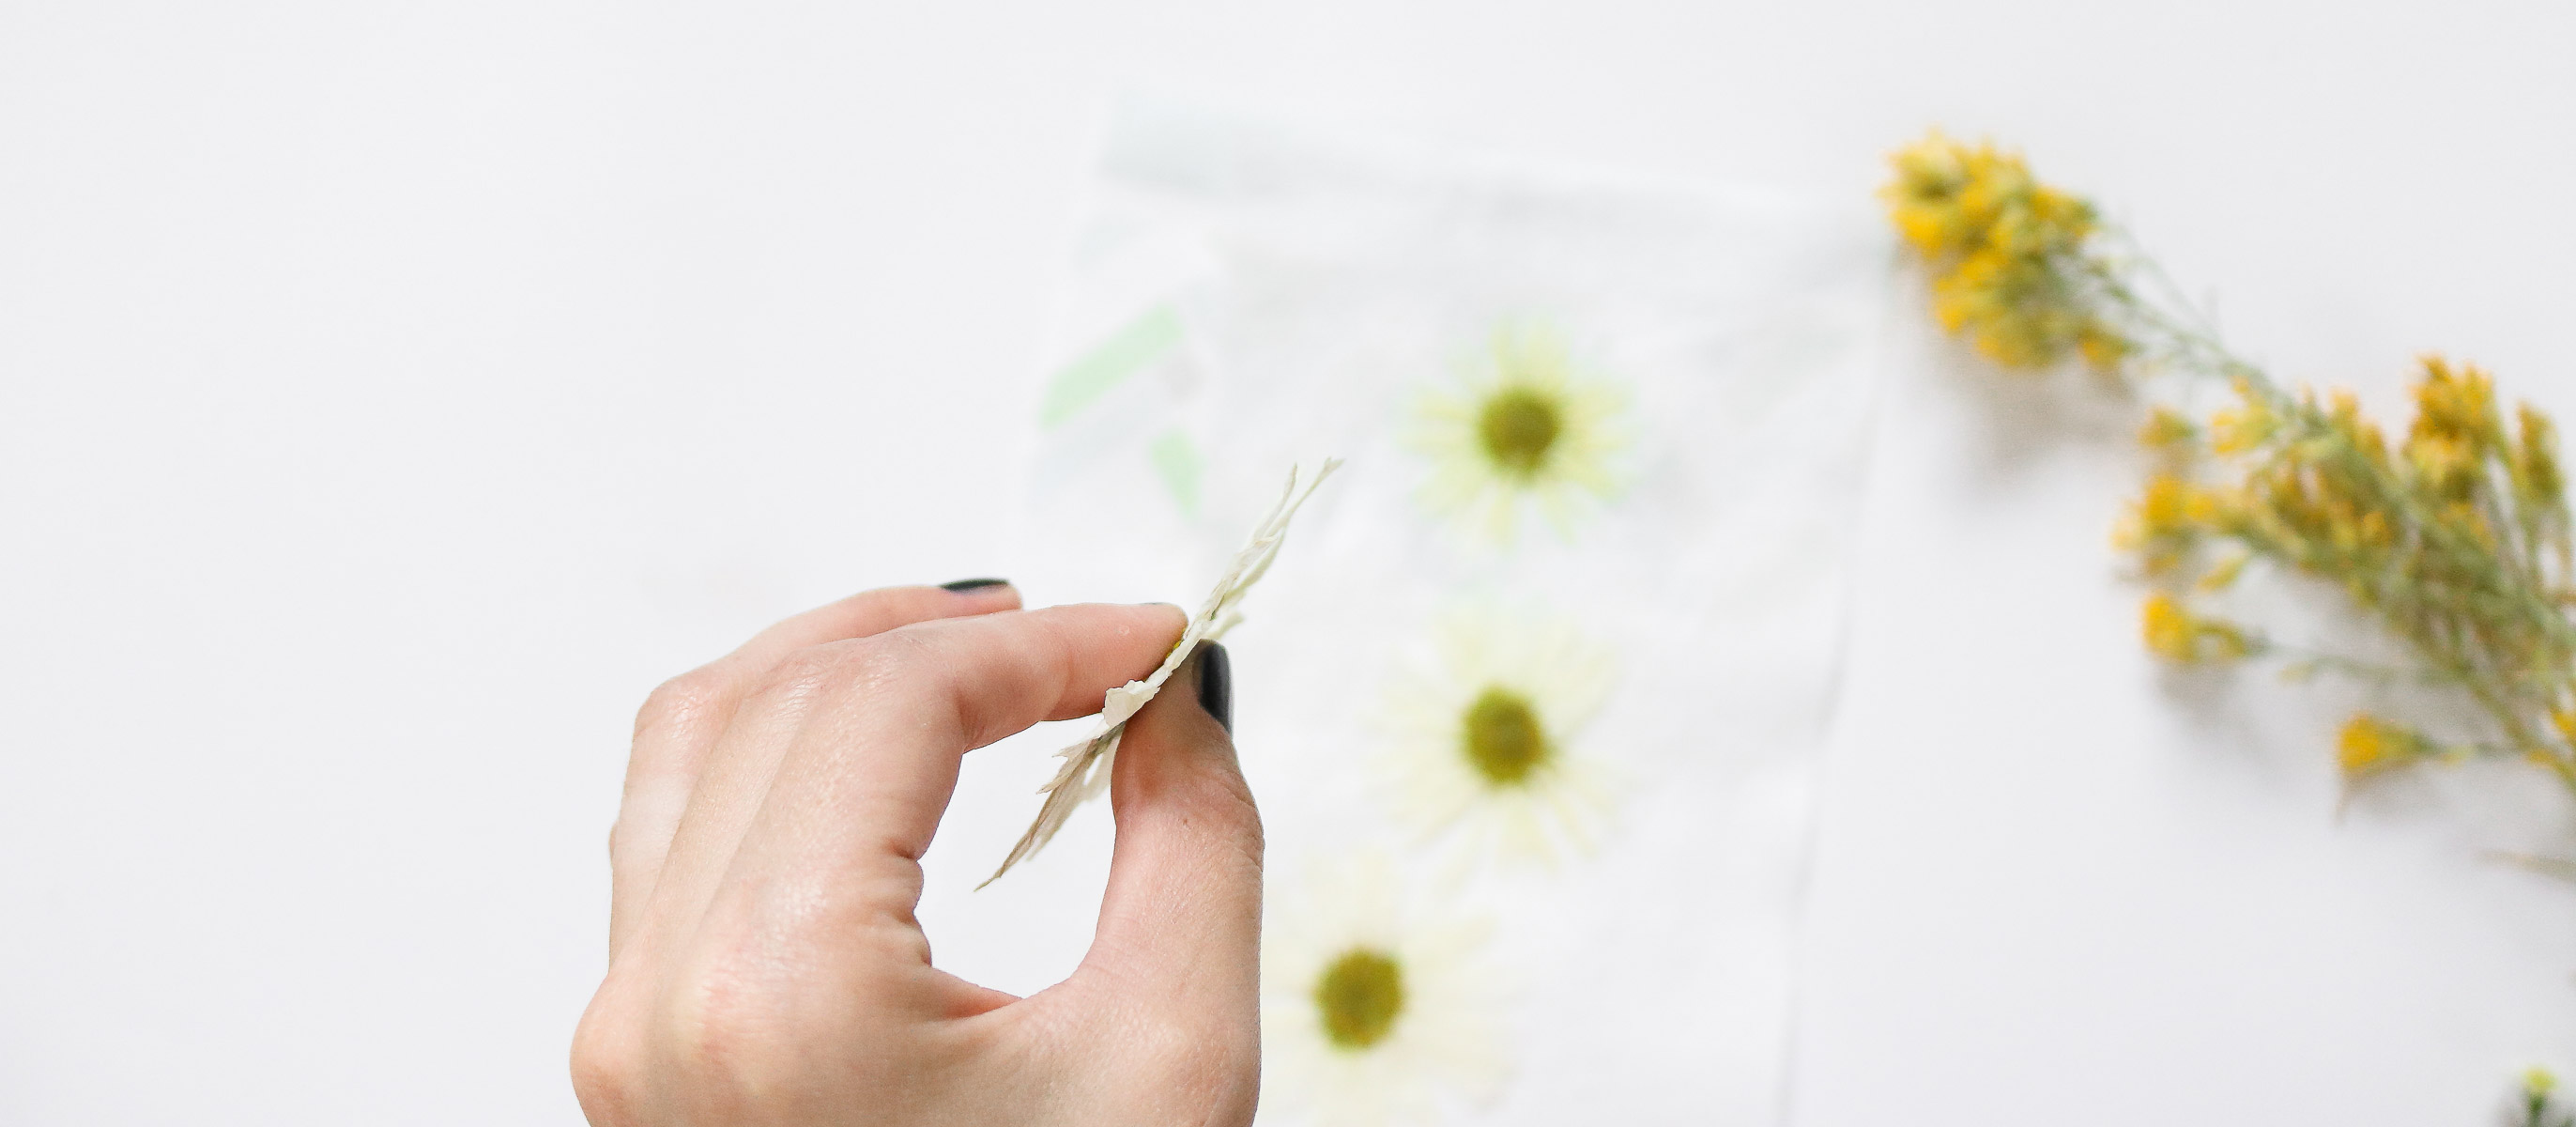 Once you press your flowers they will change in color. Usually darken. Photo below is a great example of this. If you look at the fresh flower it has vivid magenta hues and the pressed version looks plum purple.
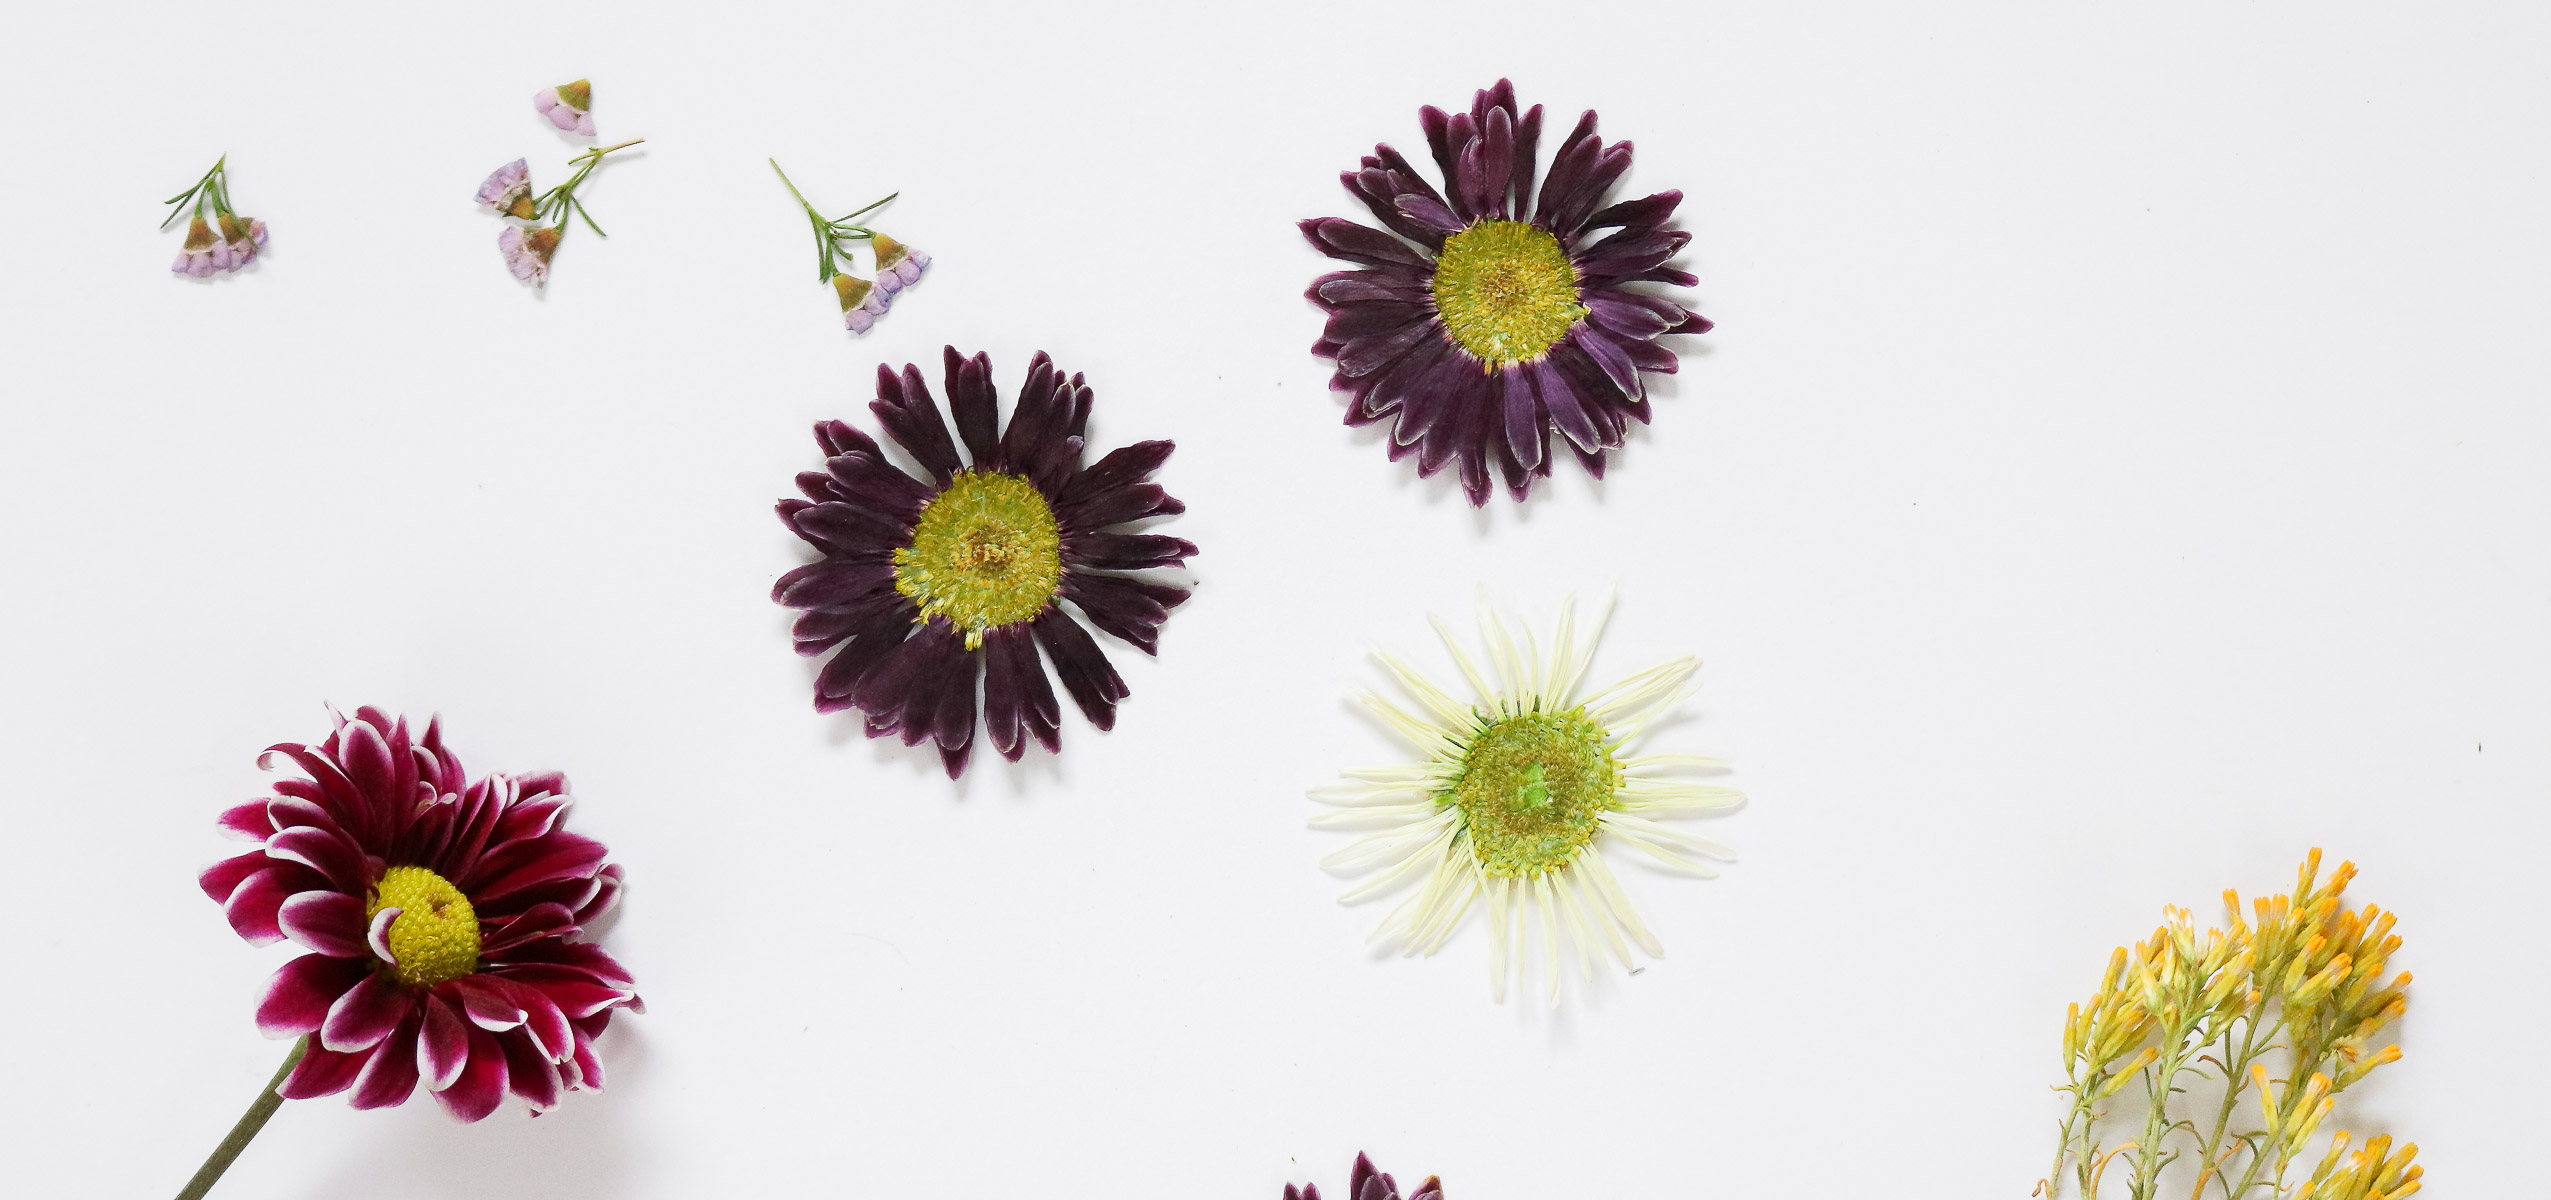
Making your floral hoop
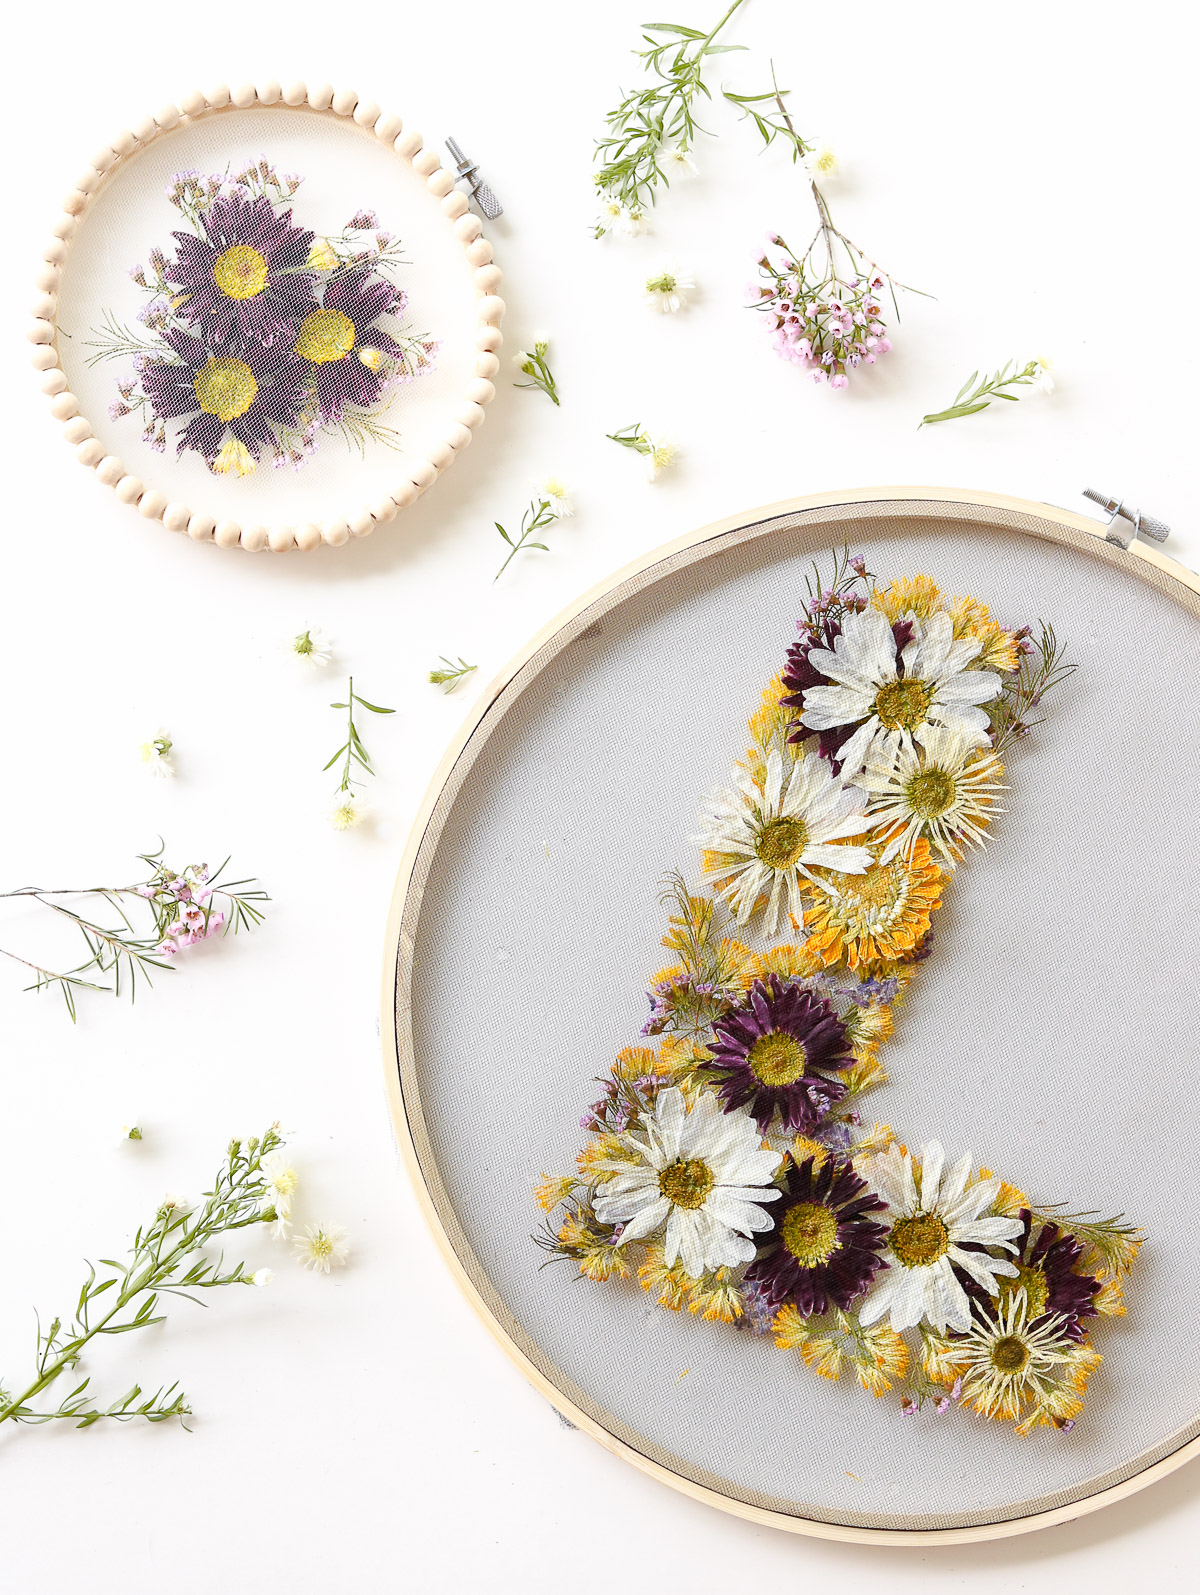
The idea behind these floral hoops is to have your pressed flowers displayed between tulle. There’s a few different ways to display your flowers and to begin I’ll show you how I made my initial. You’ll need to stretch some tulle on your hoop. Just one layer of tulle will work. I used black tulle for my letter. Then while the tulle is nice and tight on the hoop lay your printable under it. This will help you make sure your letter is uniform. 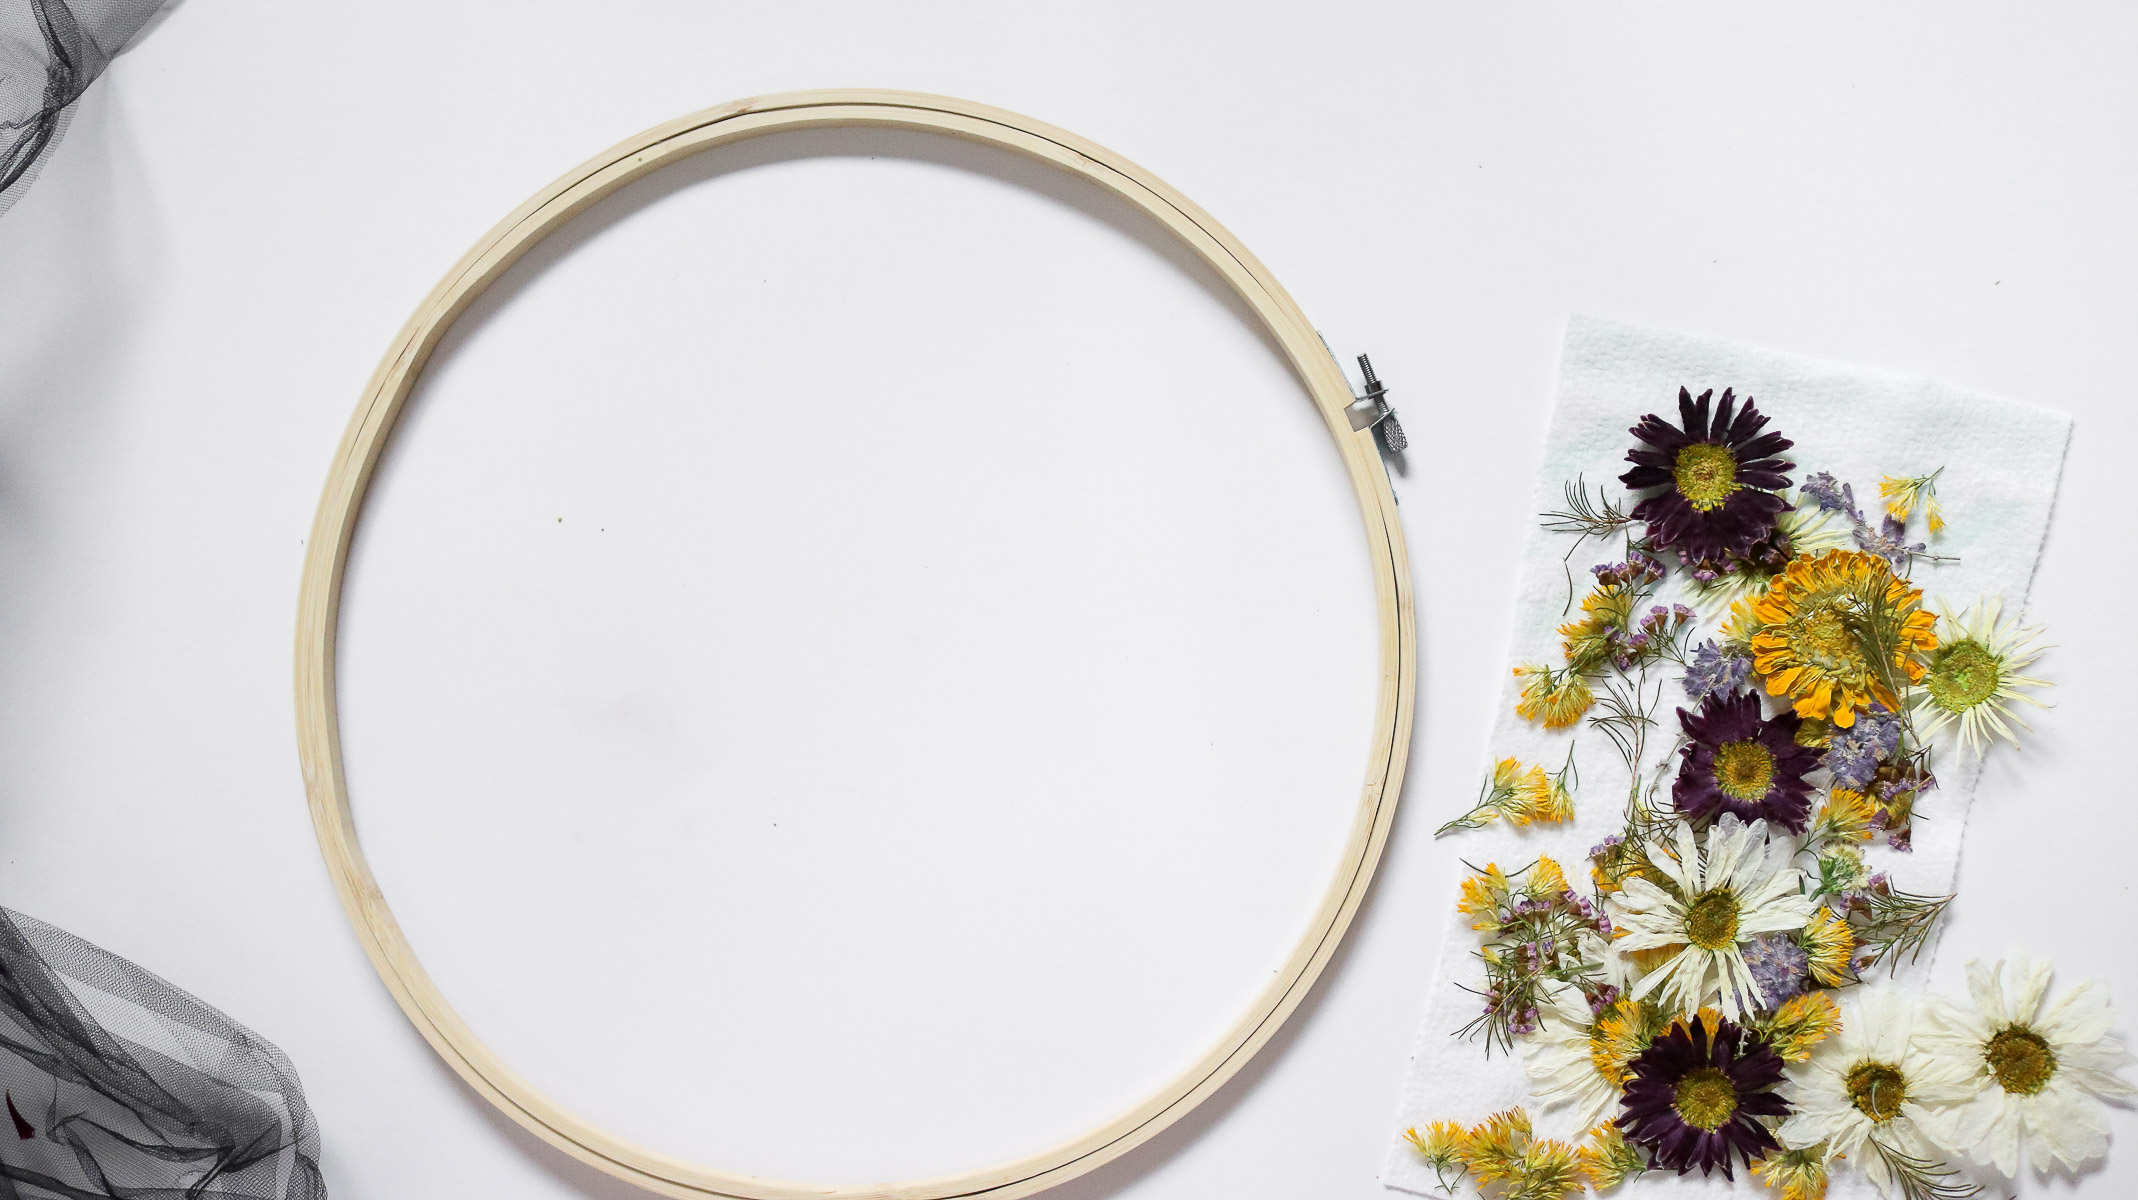
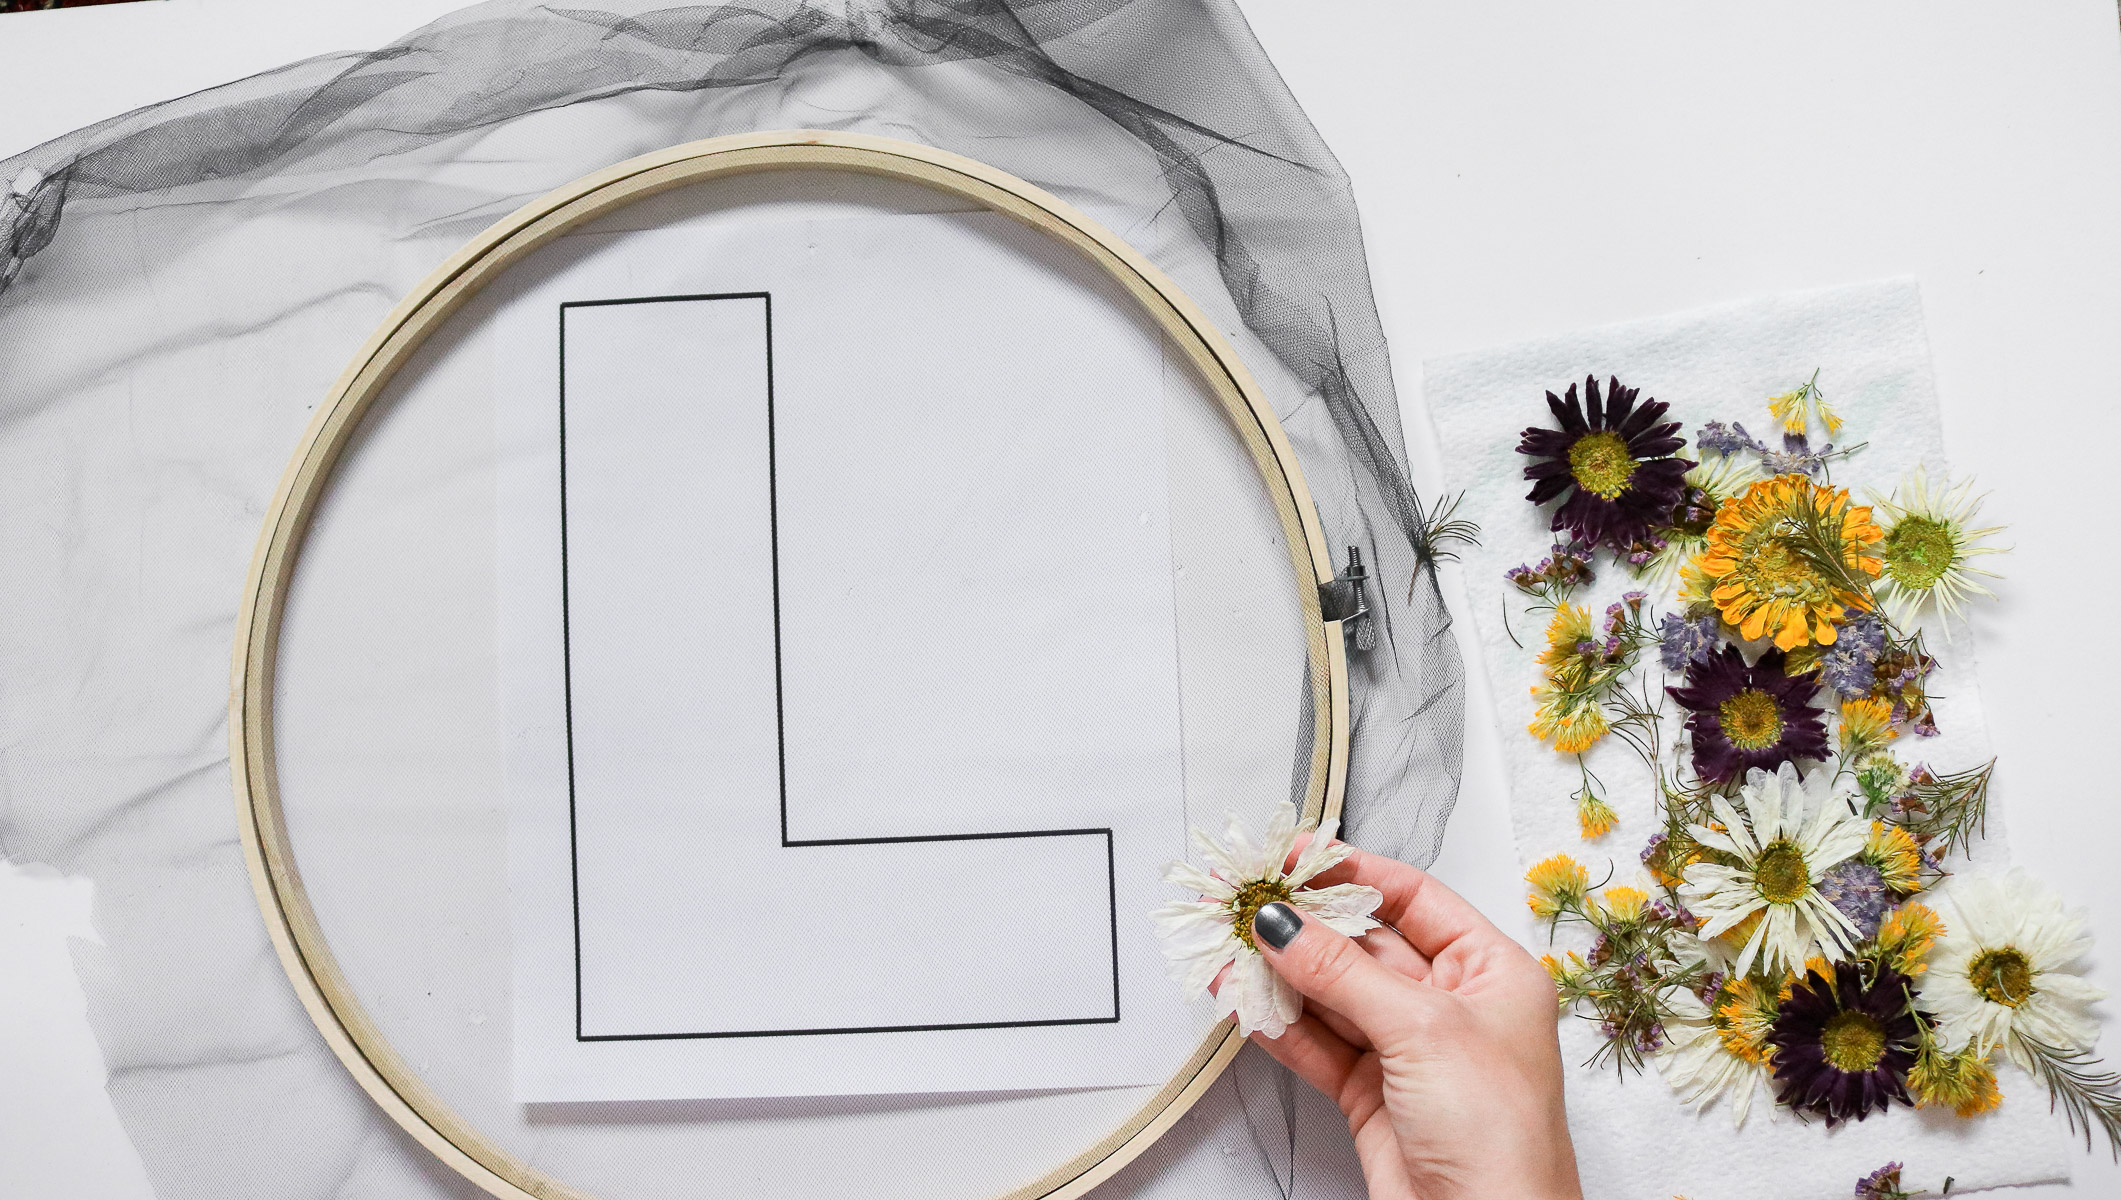 Okay following that use some hot glue to glue your filler flowers by outlining the shape of your letter. Remove your printable from behind and you should have a floral outline. Be careful not to glue your flowers to your printable. It’s totally optional to hot glue them and a little glue goes a long way. I literally barely dipped the stems in the hot glue (no drops or glubs of glue). WHY glue? I tried both ways and believe it or not the flowers actually stayed between the tulle without moving much even if they’re not glued but, just to be safe since this is a pretty big hoop I decided to at least glue the tiny flowers on the edges. If you’re making a smaller hoop. (up to 6 inches) I wouldn’t worry about gluing the flowers at all.
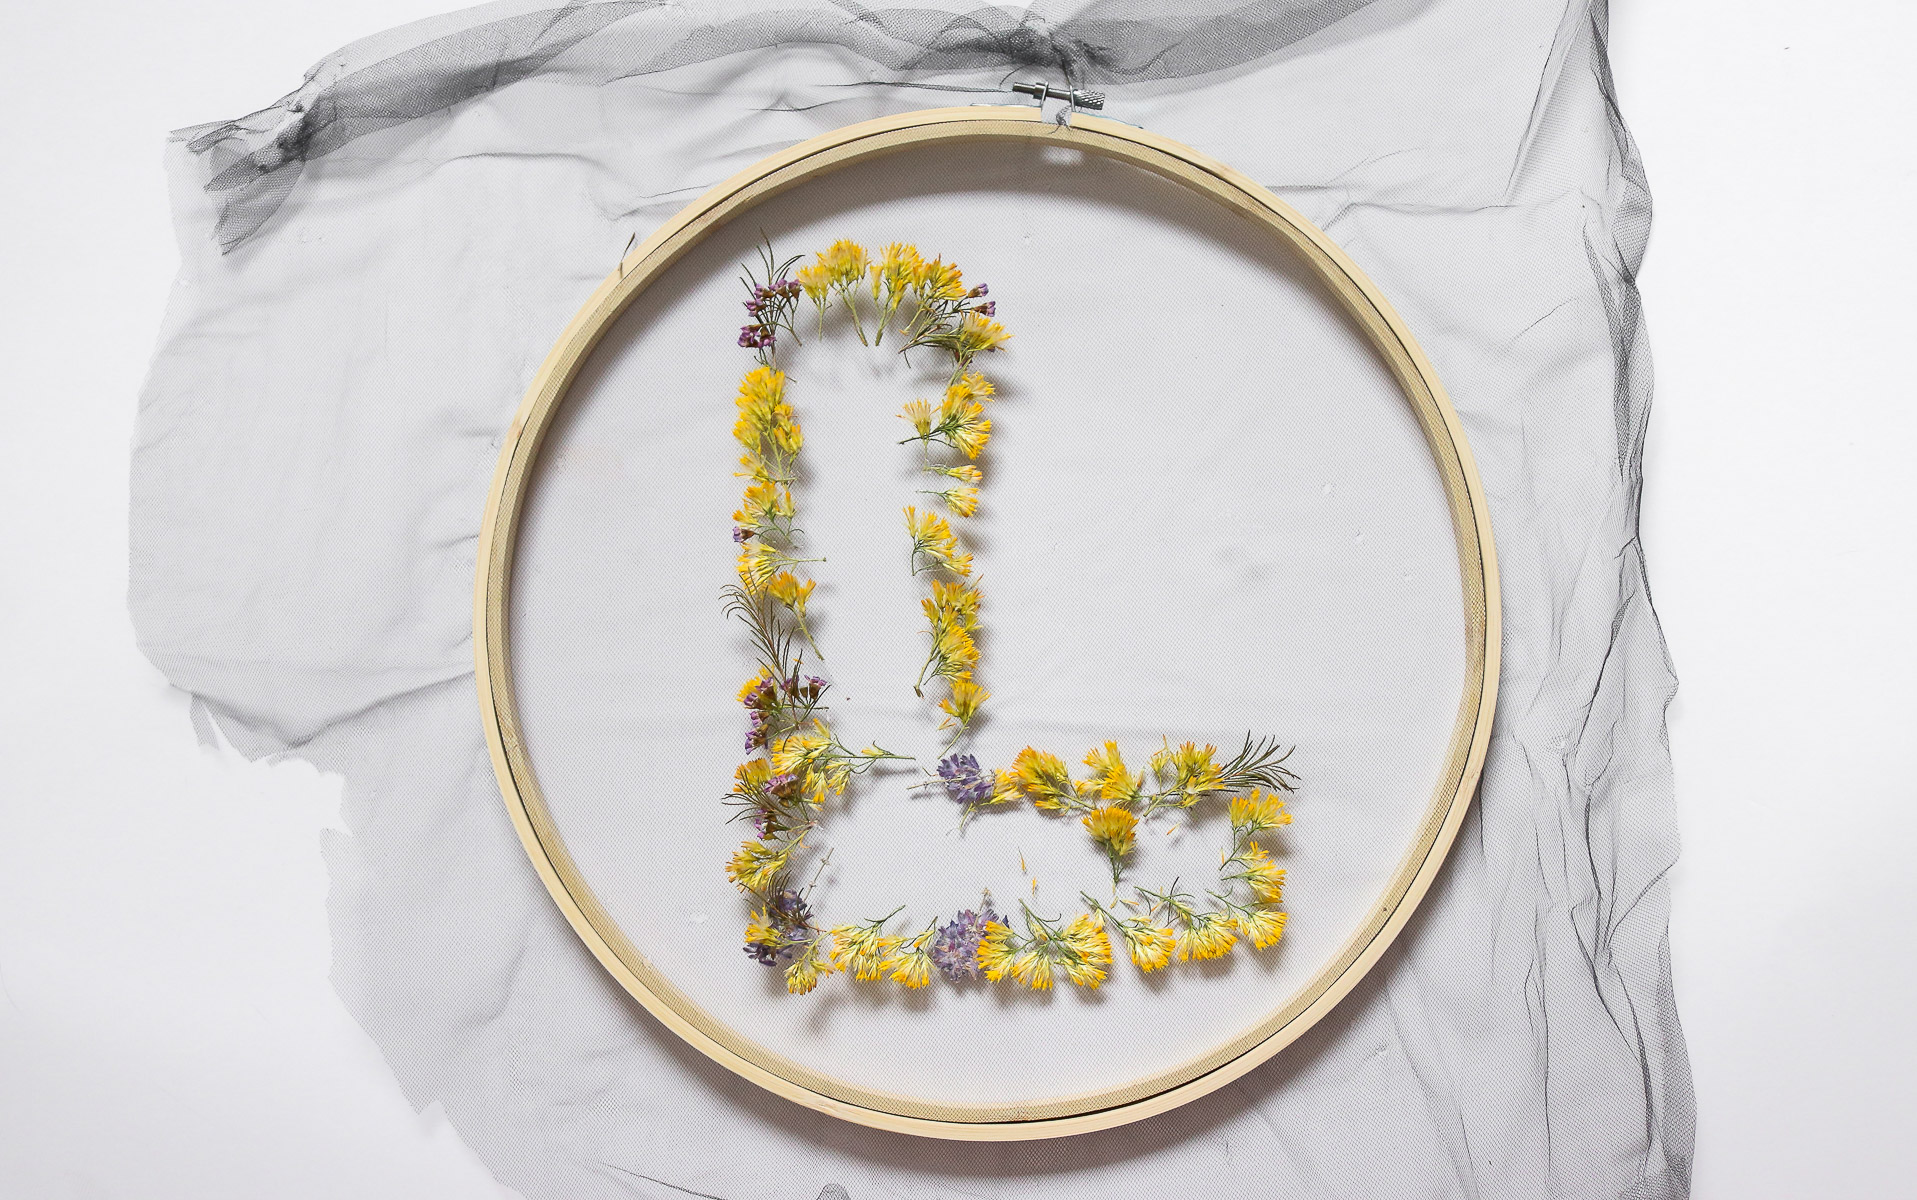
Securing Your flowers in between your tulle
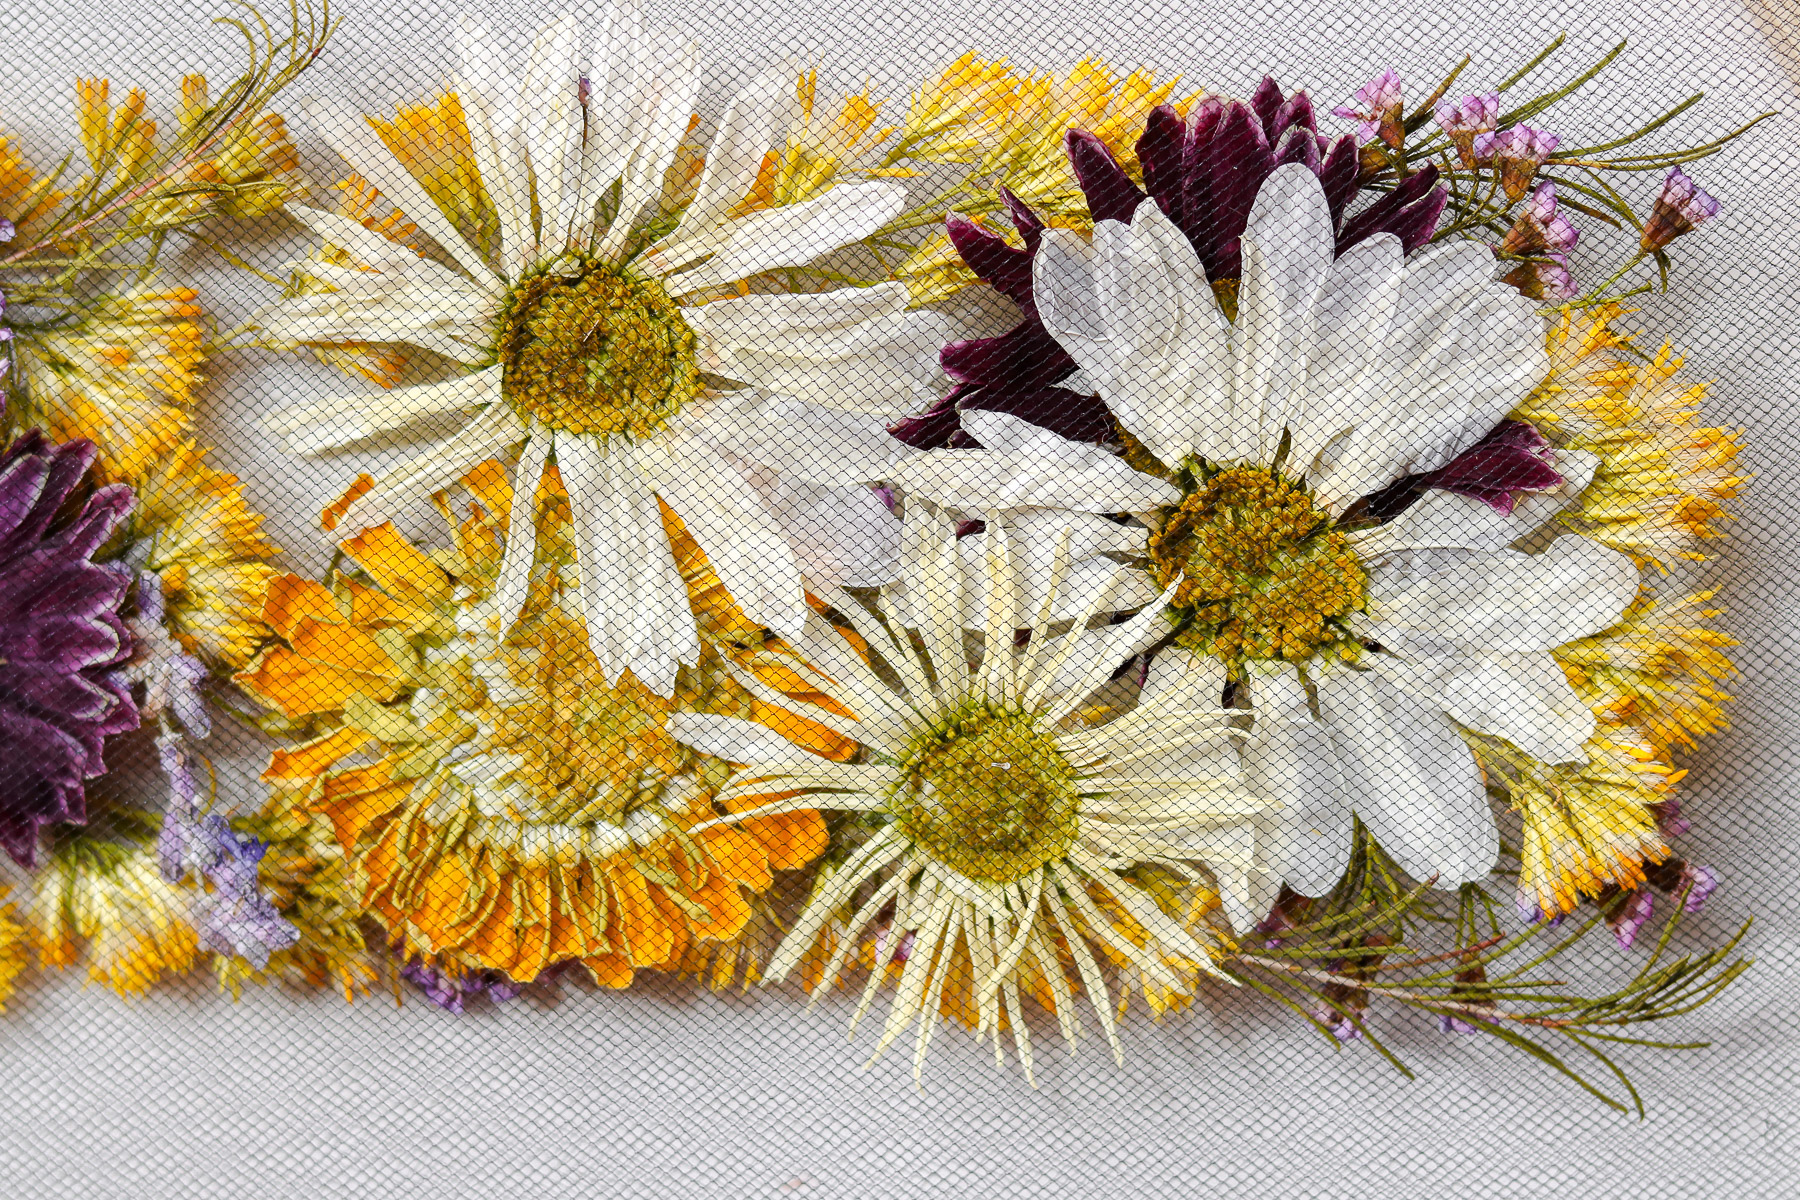
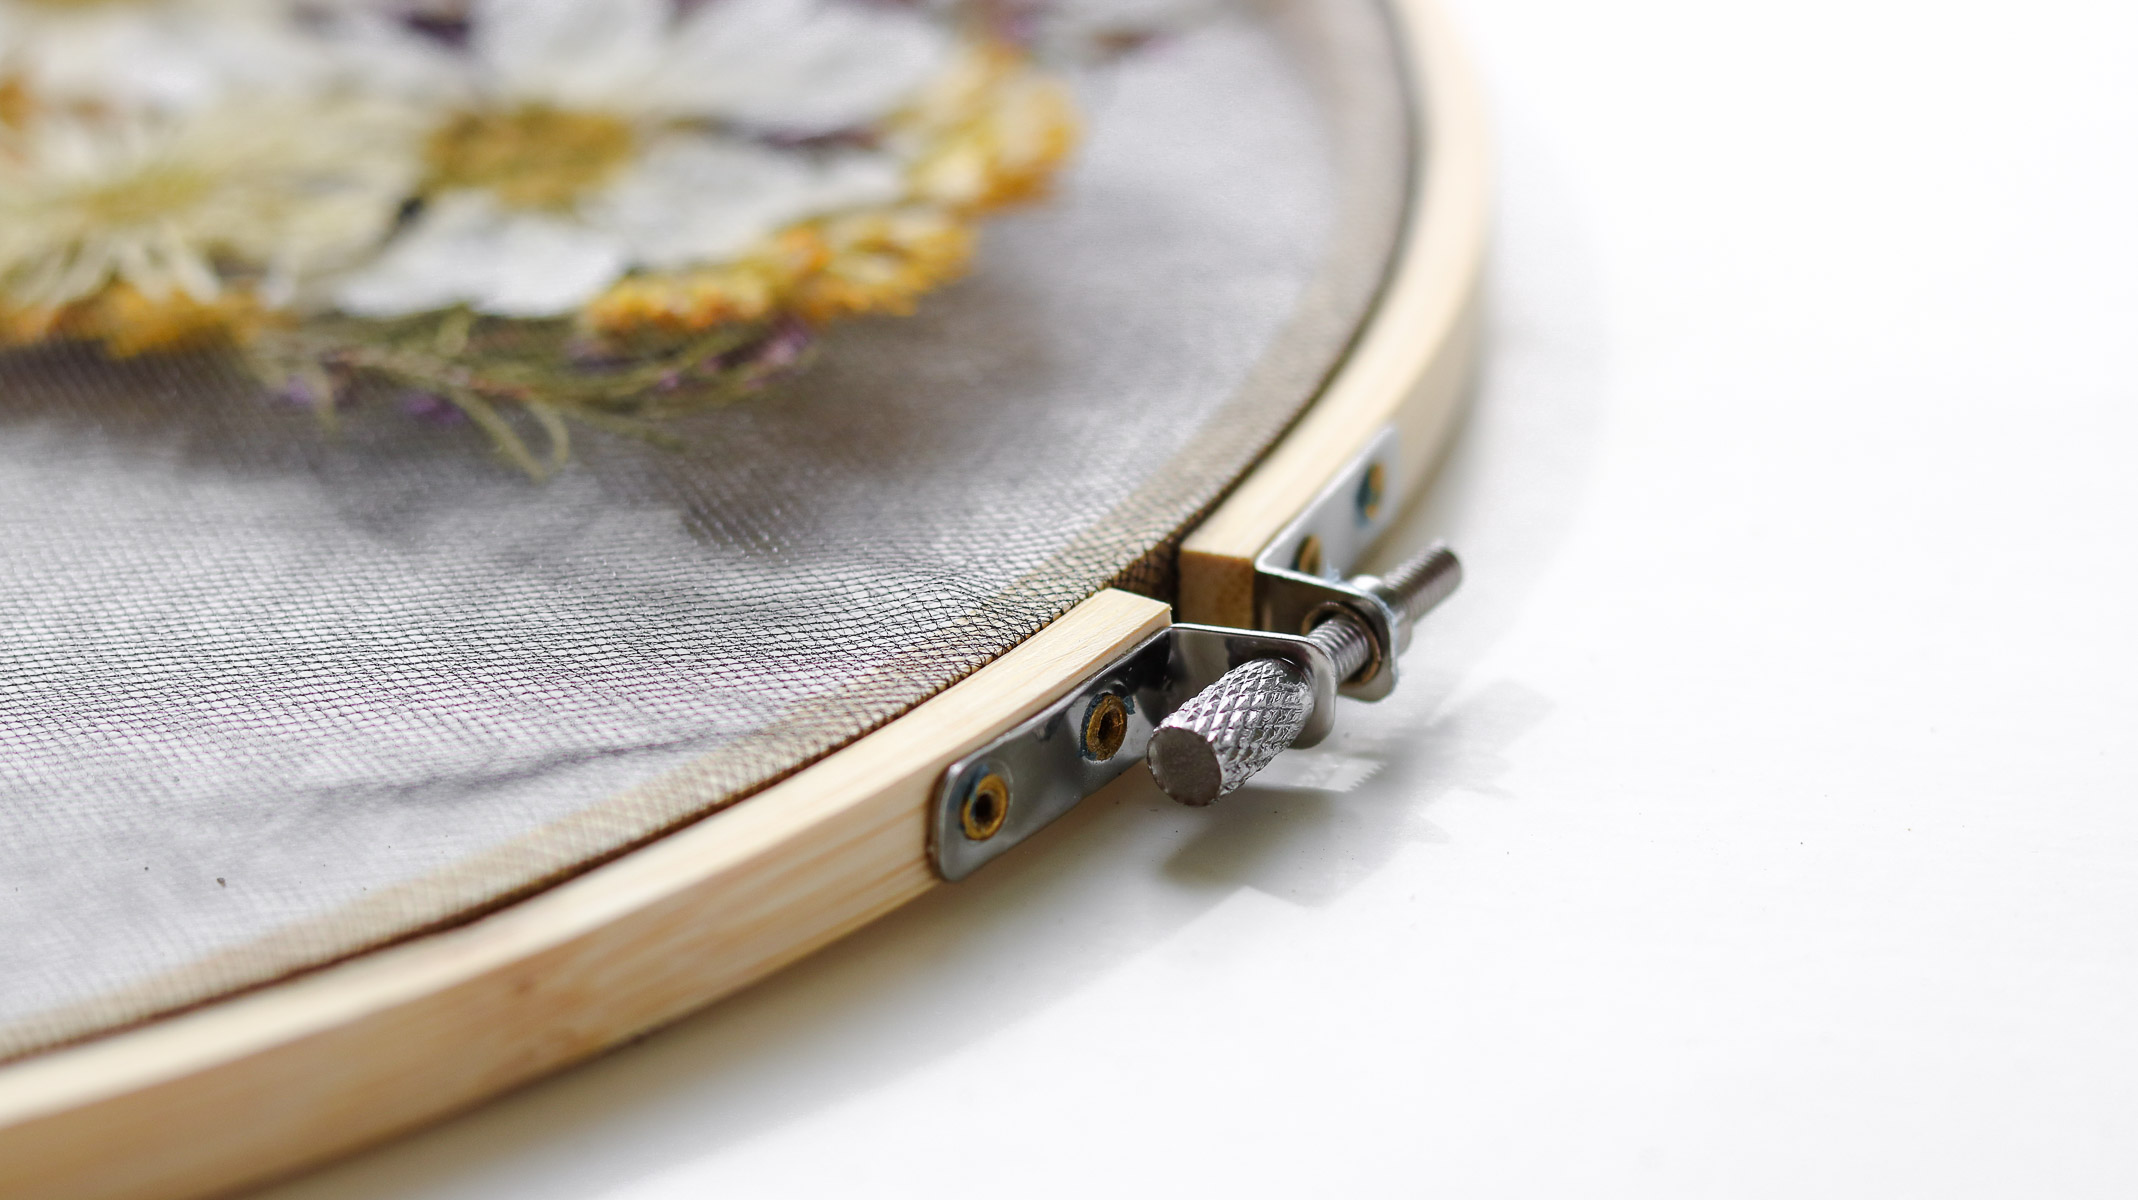
Once you’ve outlined your letters with filler flowers fill in the center of your letter with your bigger flowers. In my case these were daises and more filler flowers in between the daises. There’s no need to glue the bigger flowers on. The top layer of tulle will hold them in place. Than take your hoop apart and carefully lay your second layer of tulle on top of your letter. Make sure your letter is centered on the hoop and stretch both layers of tulle with the flowers in between. Tighten your hoop as much as you can to ensure your flowers are secure. 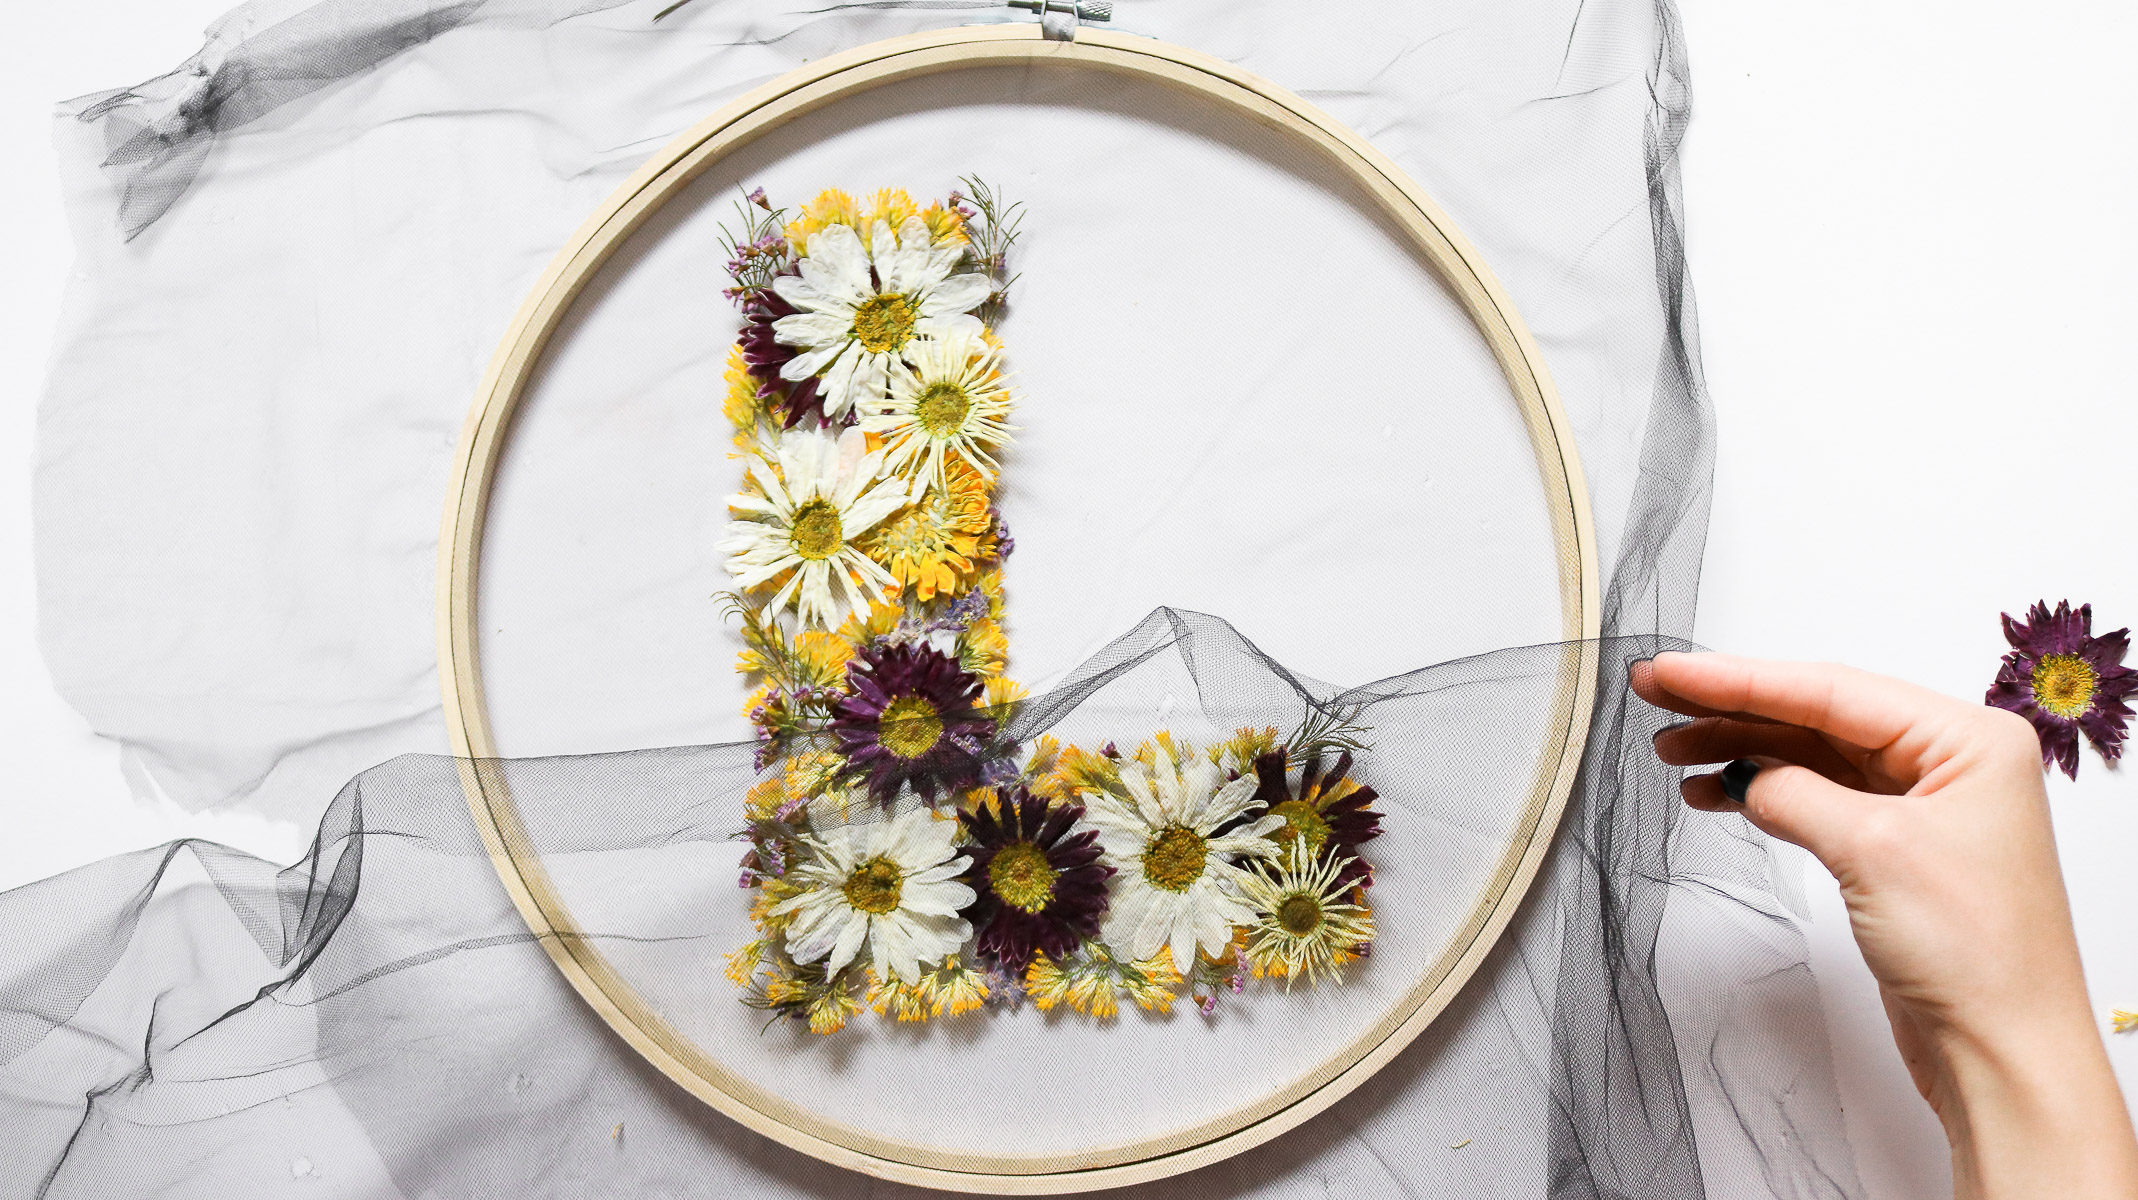
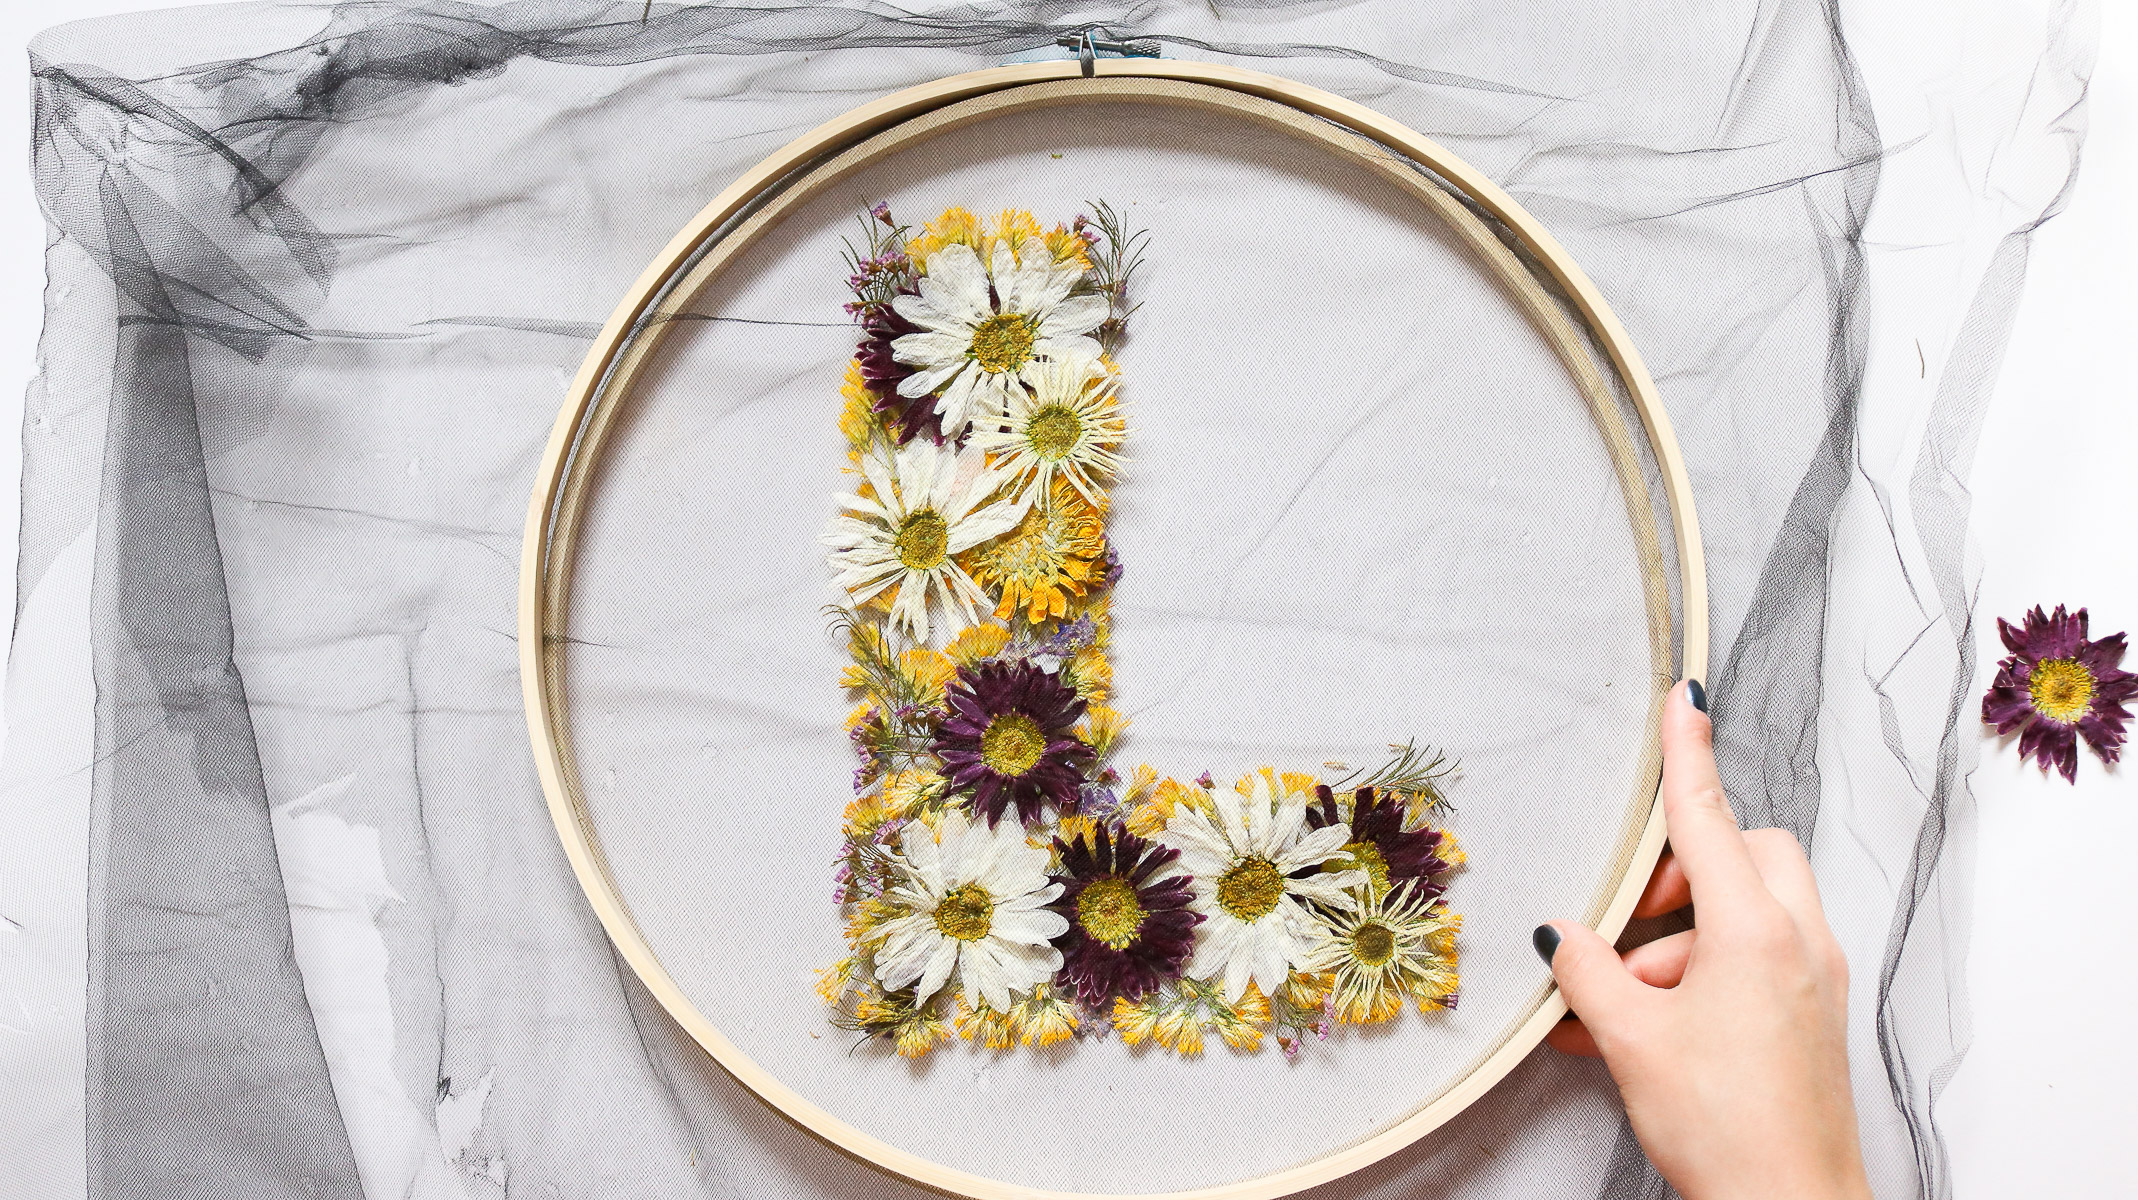
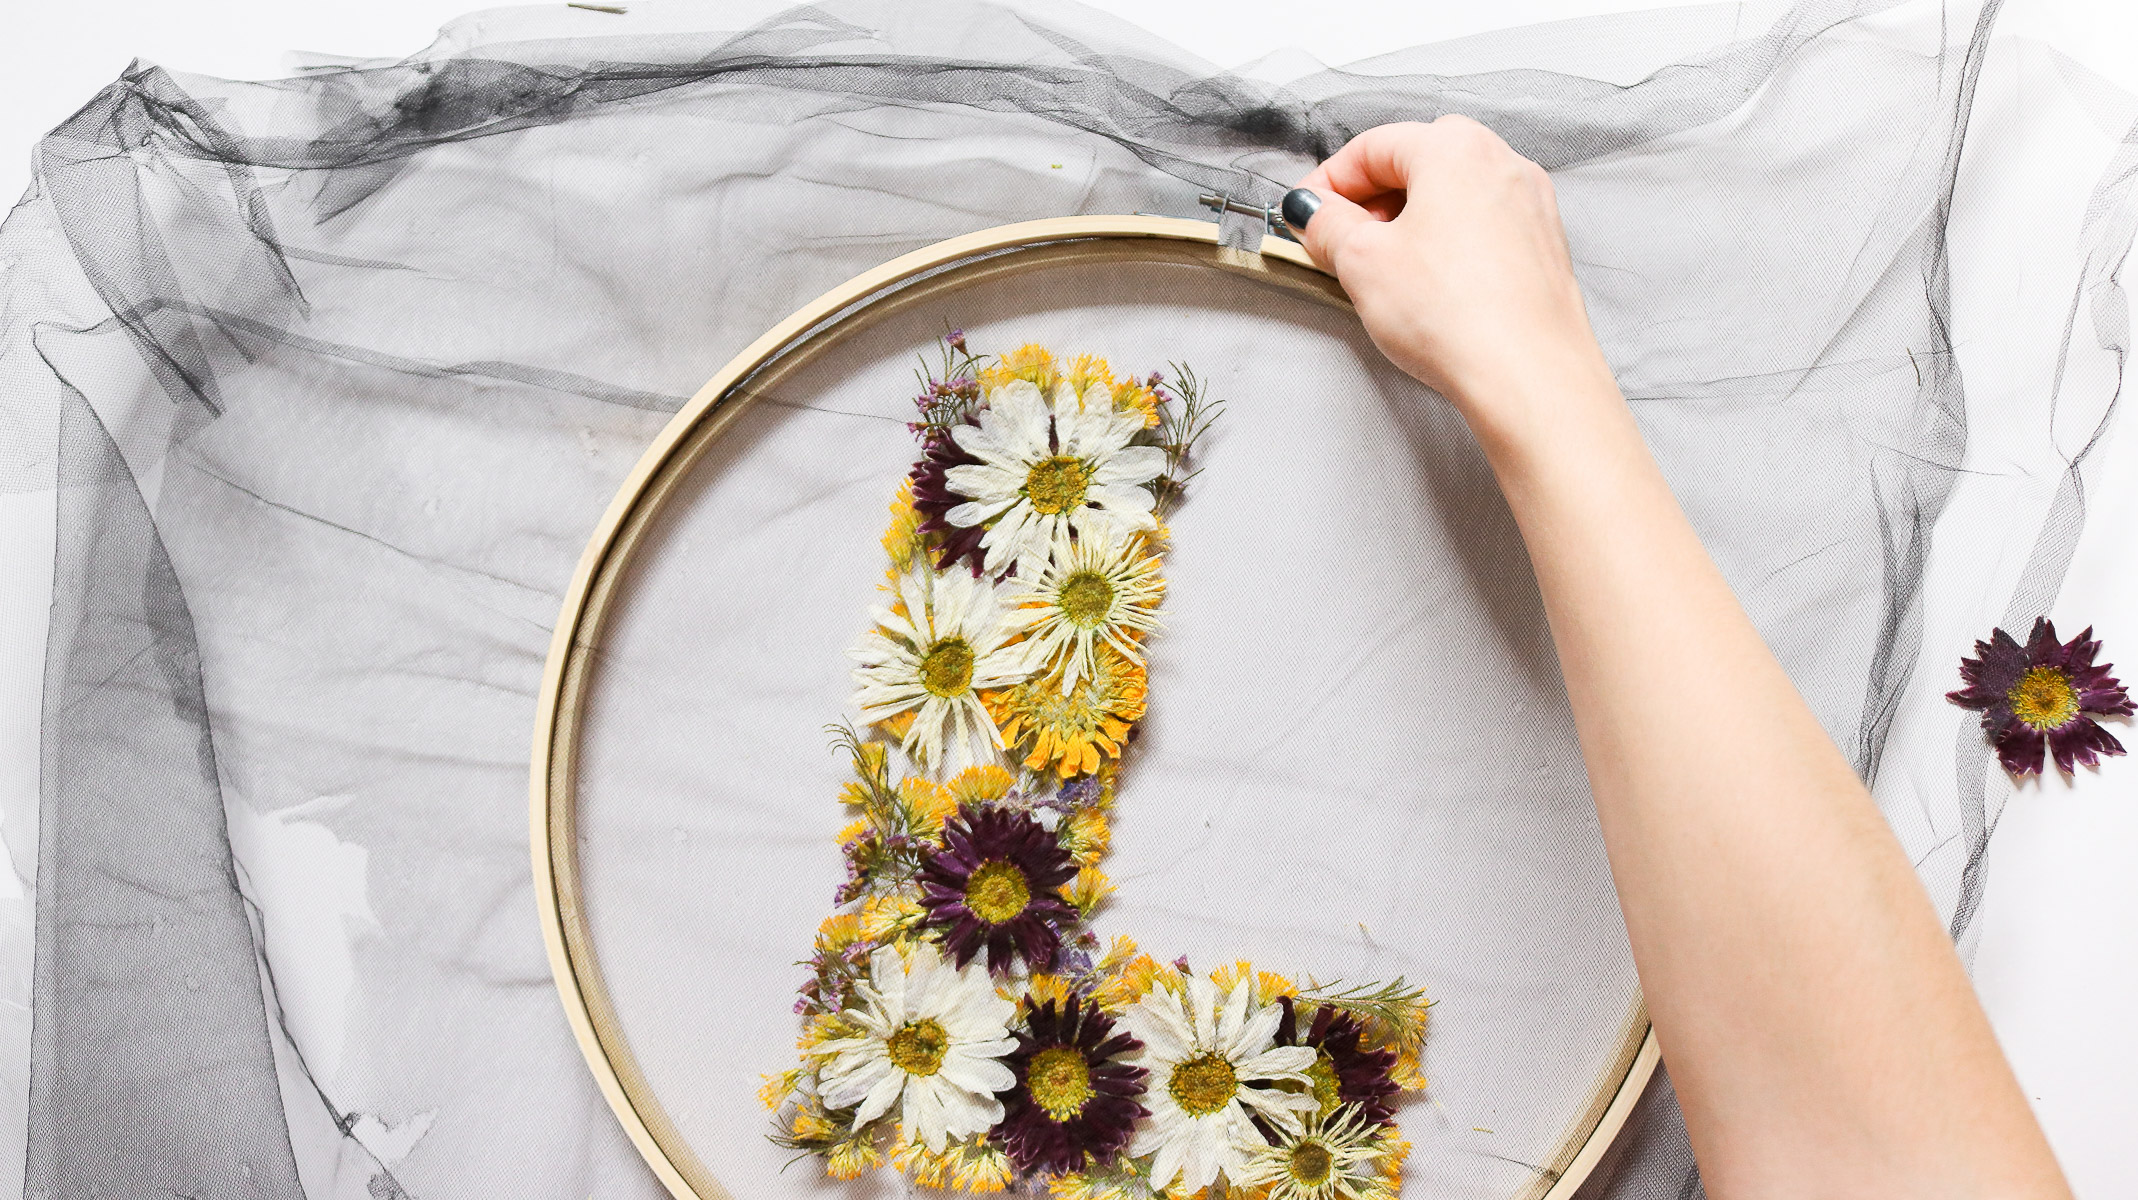 Okay now all that’s left is to clean up the extra tulle. Before cutting off any tulle make sure your flowers are secured by picking up your hoop and moving it around a bit. You’ll notice if there is any movement. If there is you might need to glue some of the flowers into place. When you’re ready flip it over and cut your tulle.
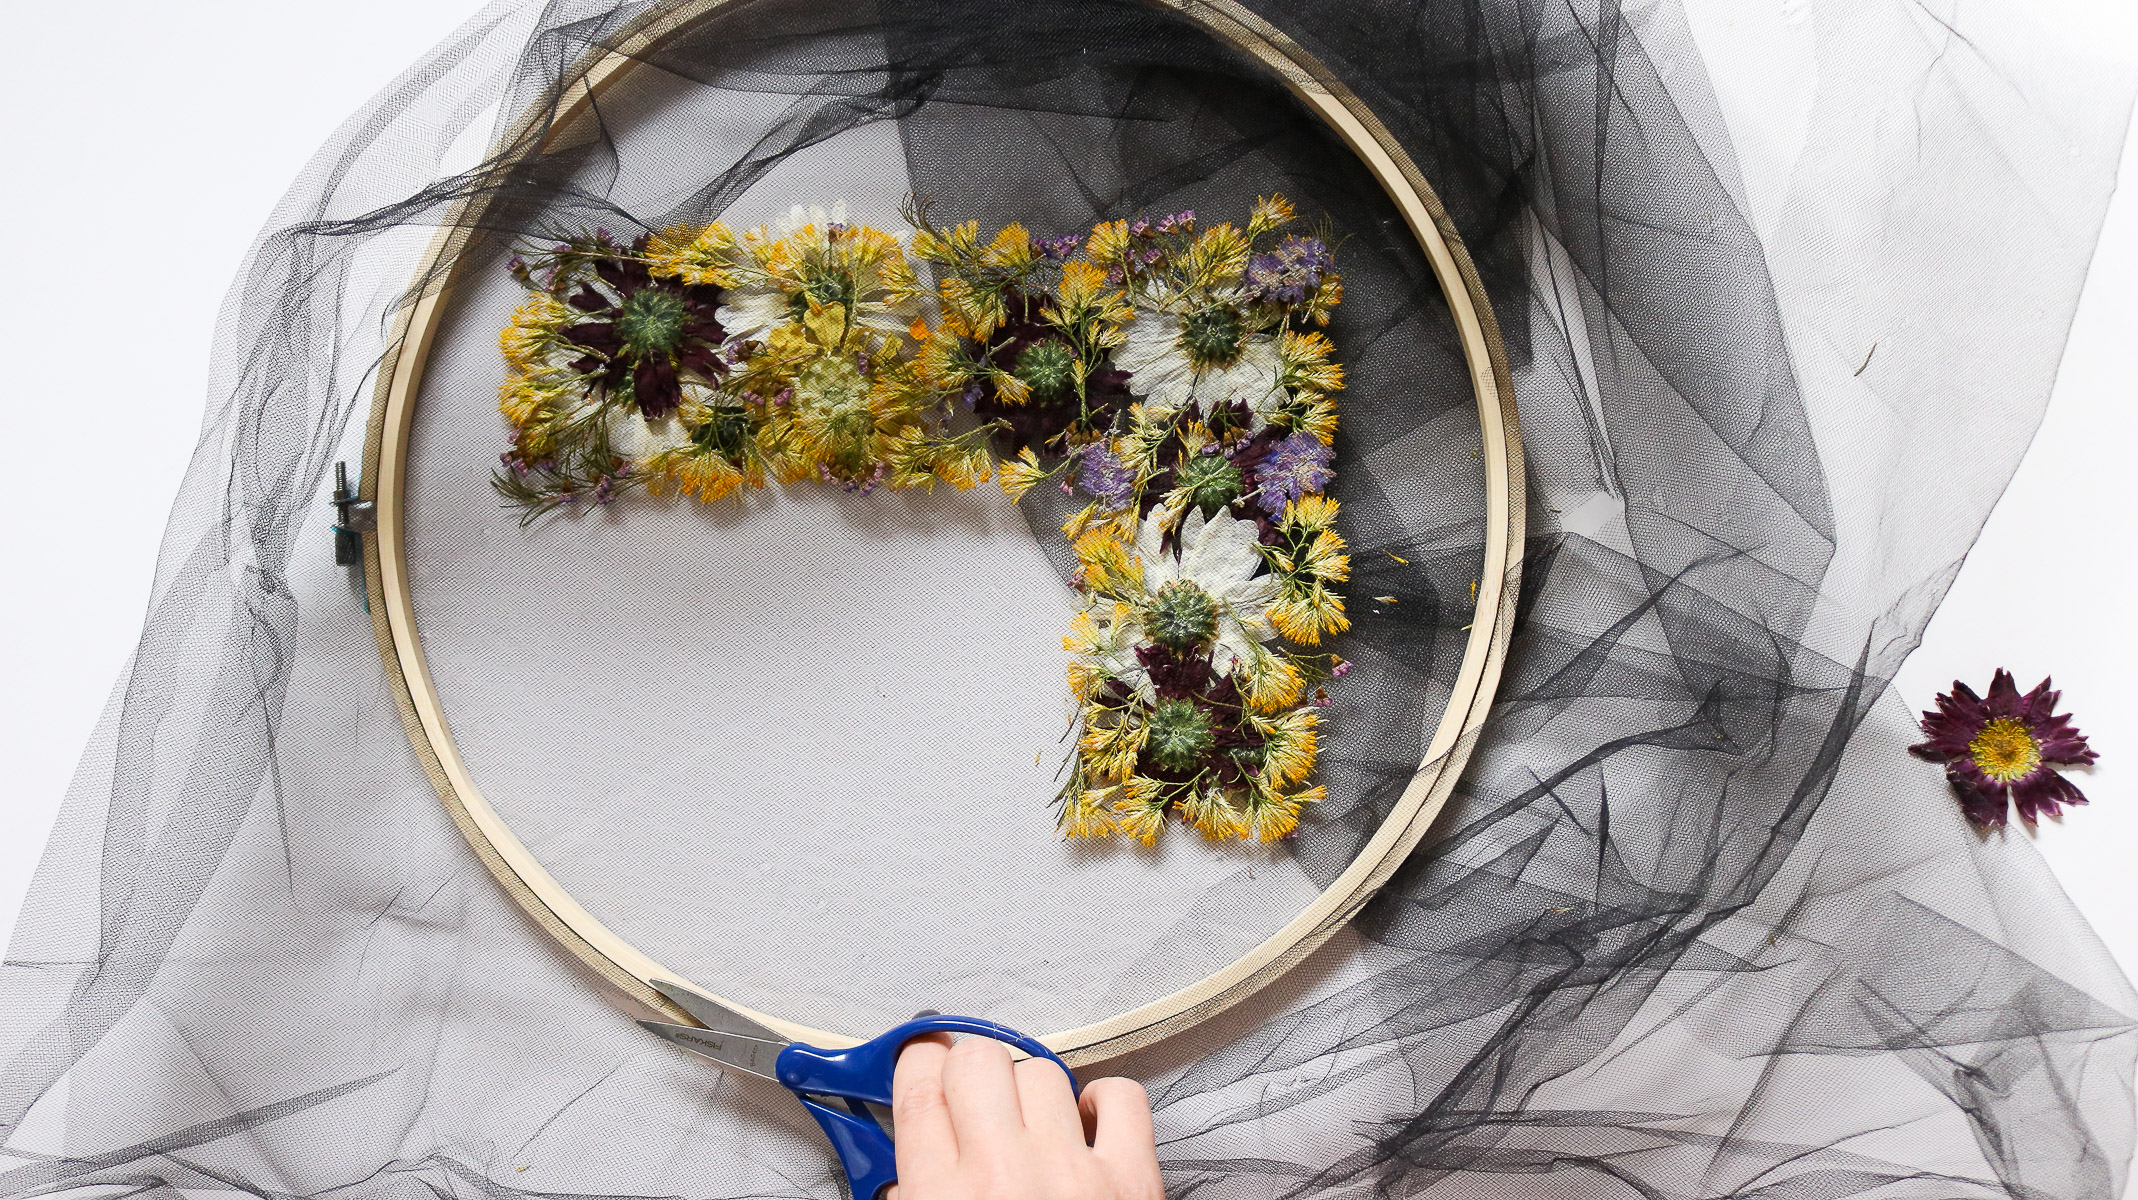
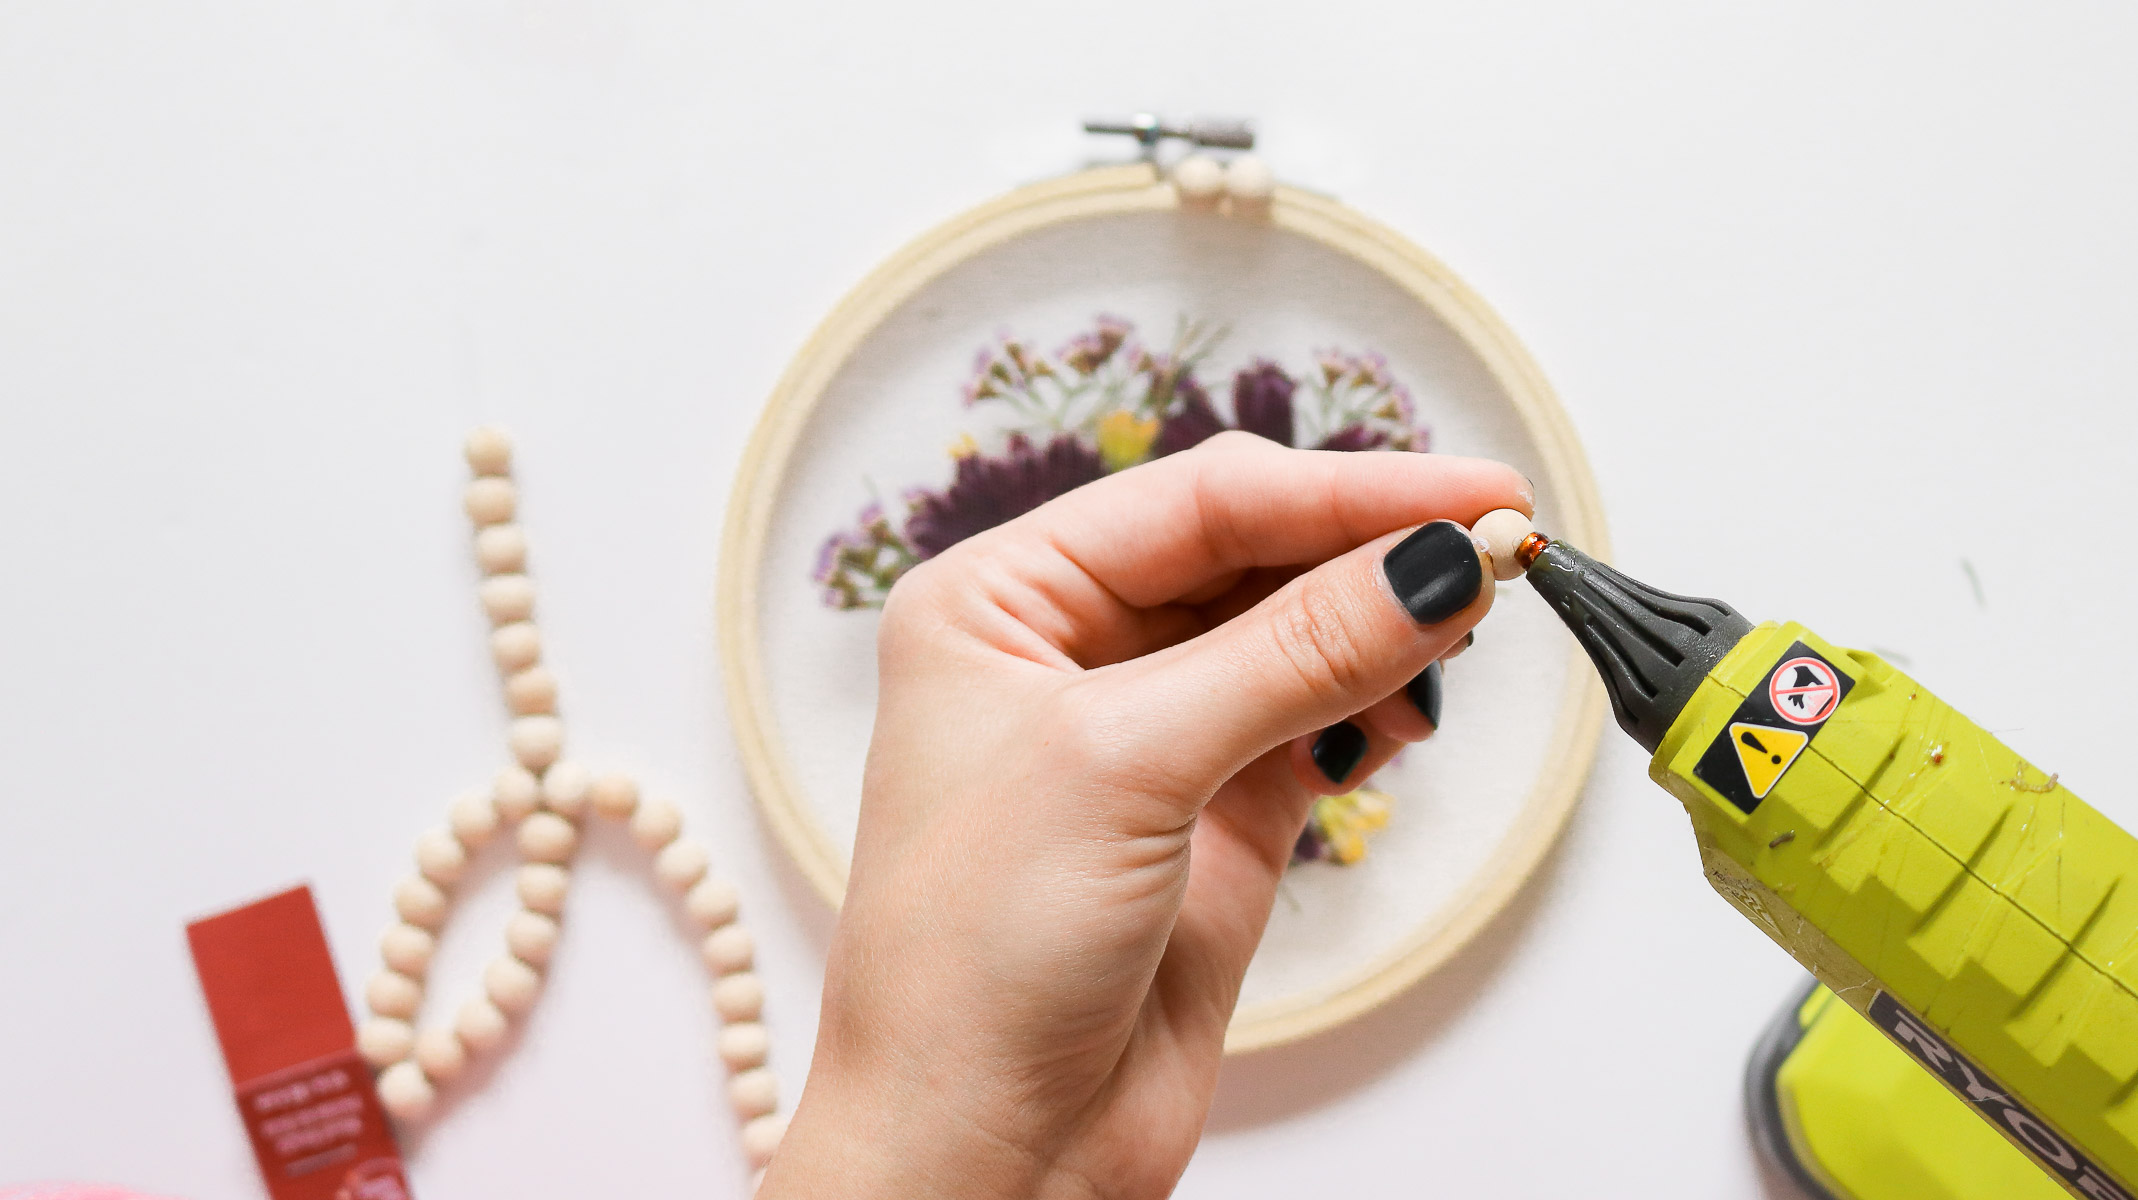
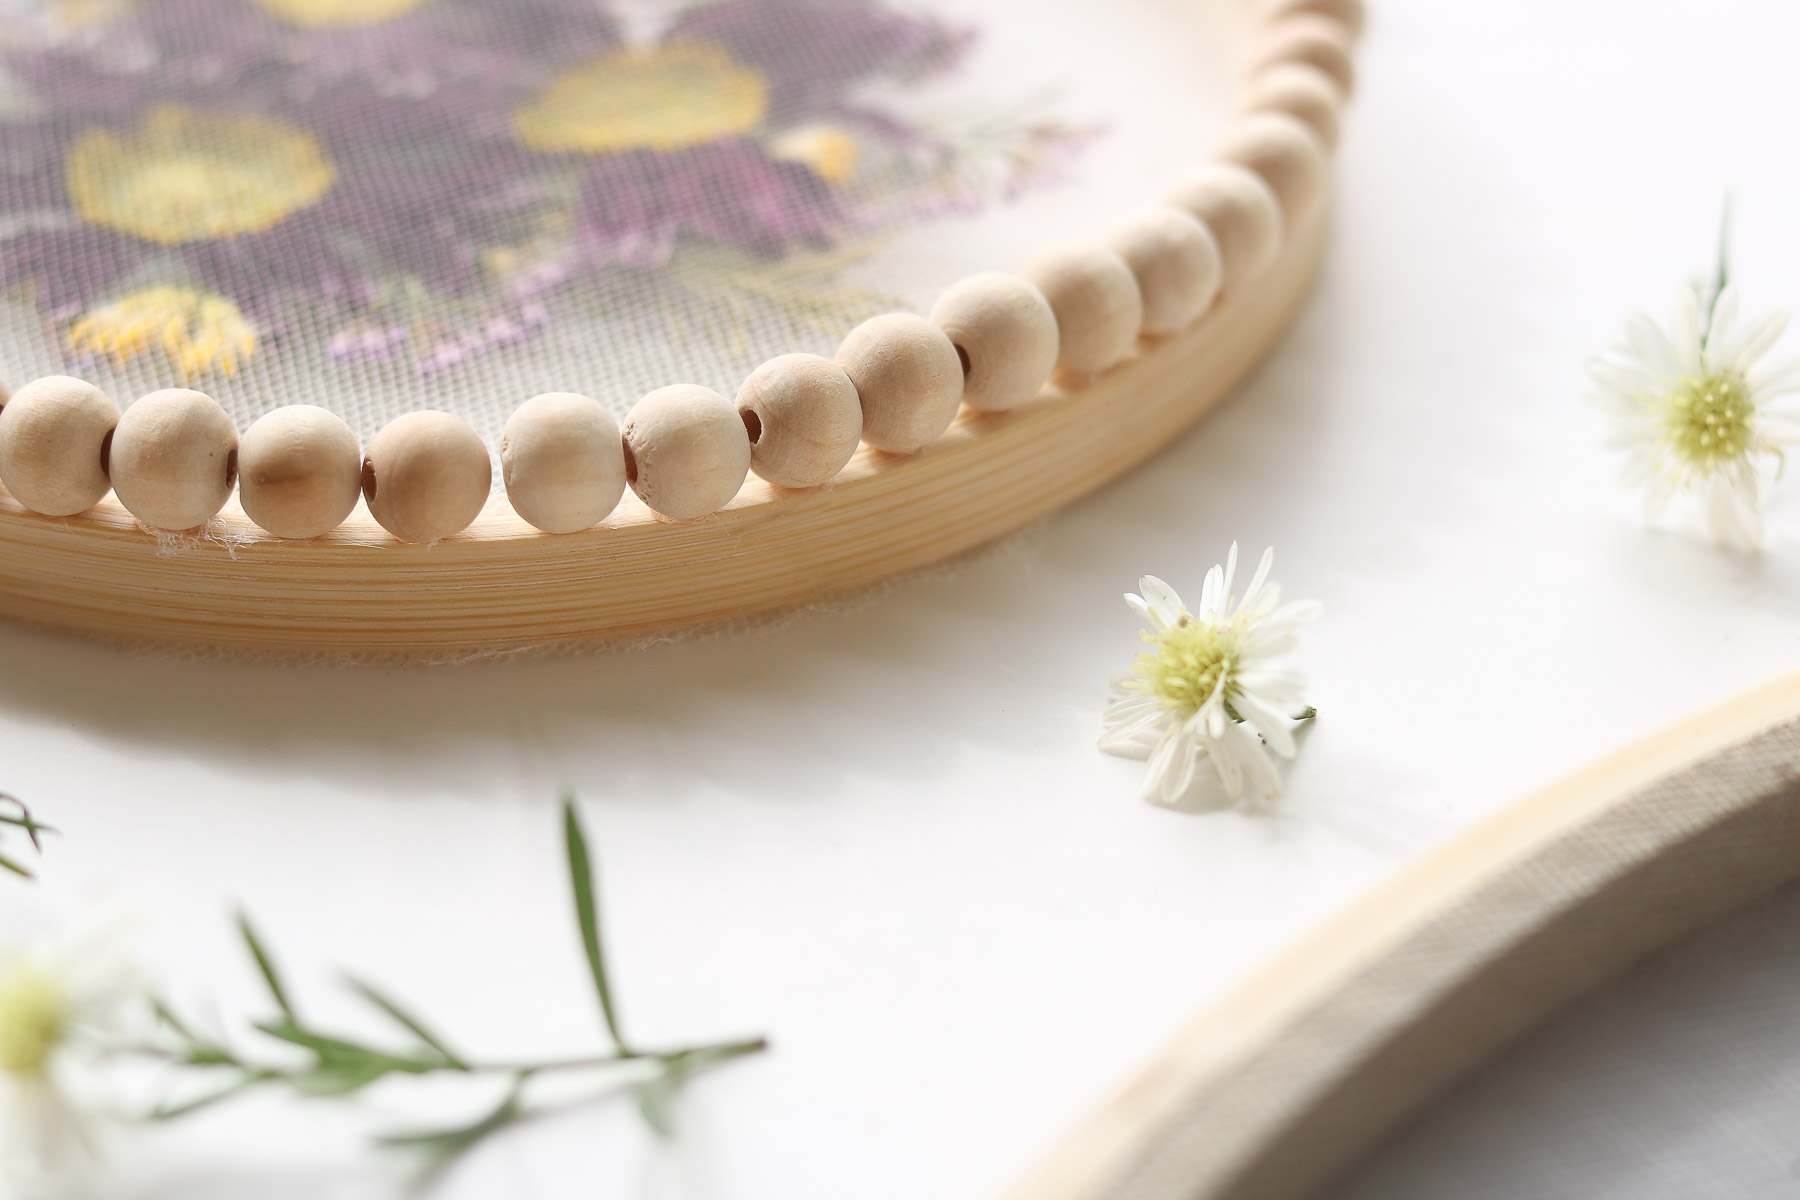
Adding beads to your floral hoop
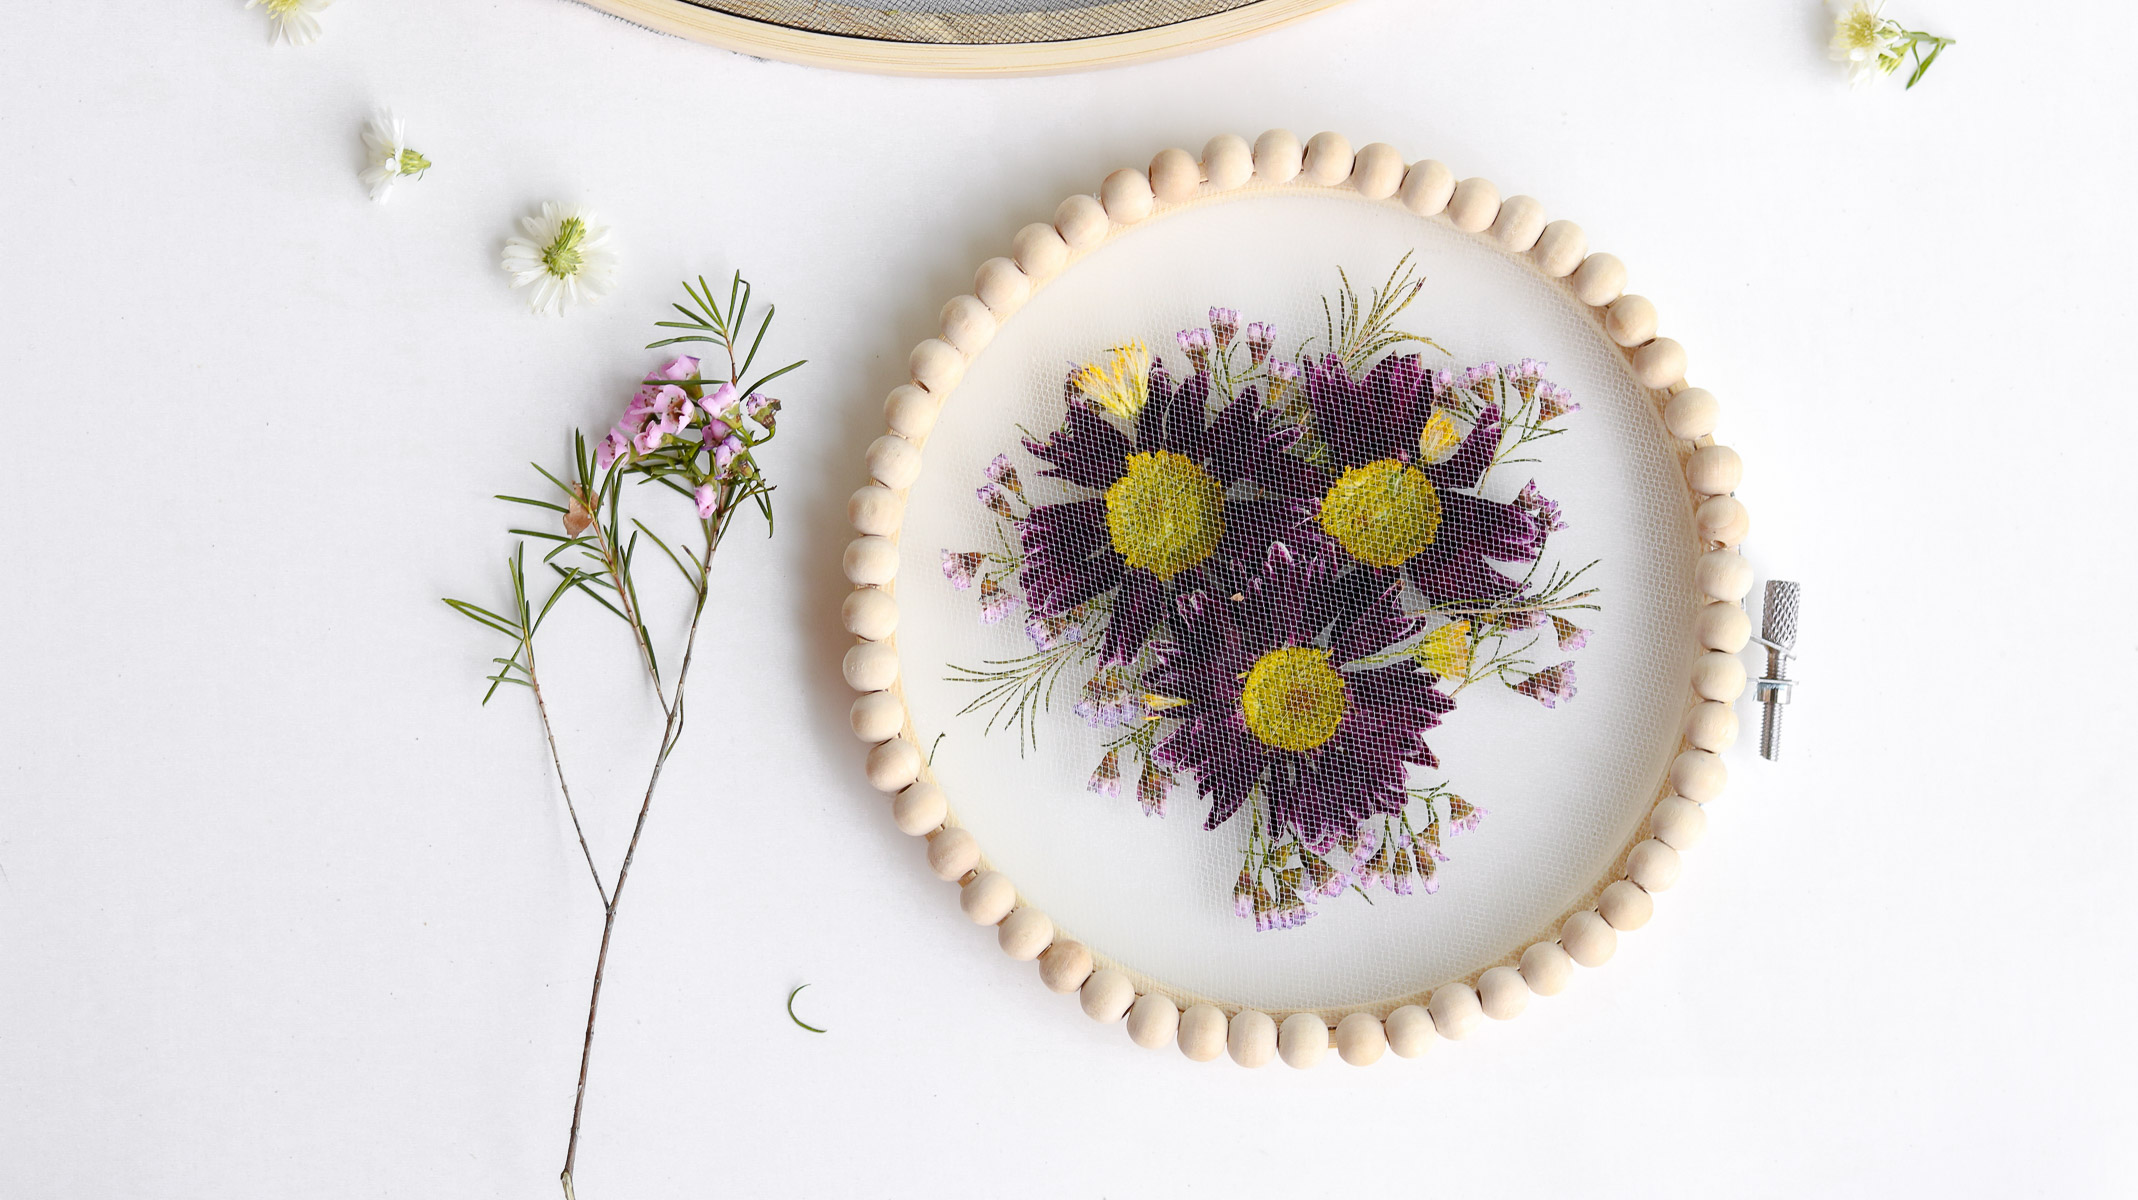
For my small hoop I used some off white tulle instead of black and decorated the edges of the hoop with wooden beads. I didn’t glue the flowers into place at all since this was a smaller hoop and the tulle stretched plenty tight. I used hot glue to glue the beads into place. It was nice and quick. If you plan on outlining a bigger hoop with beads I would recommend buying the beads in bulk somewhere online. I payed around $3 for the small string of beads and I would probably need at least 6 to outline my bigger hoop. Gets kinda pricey. 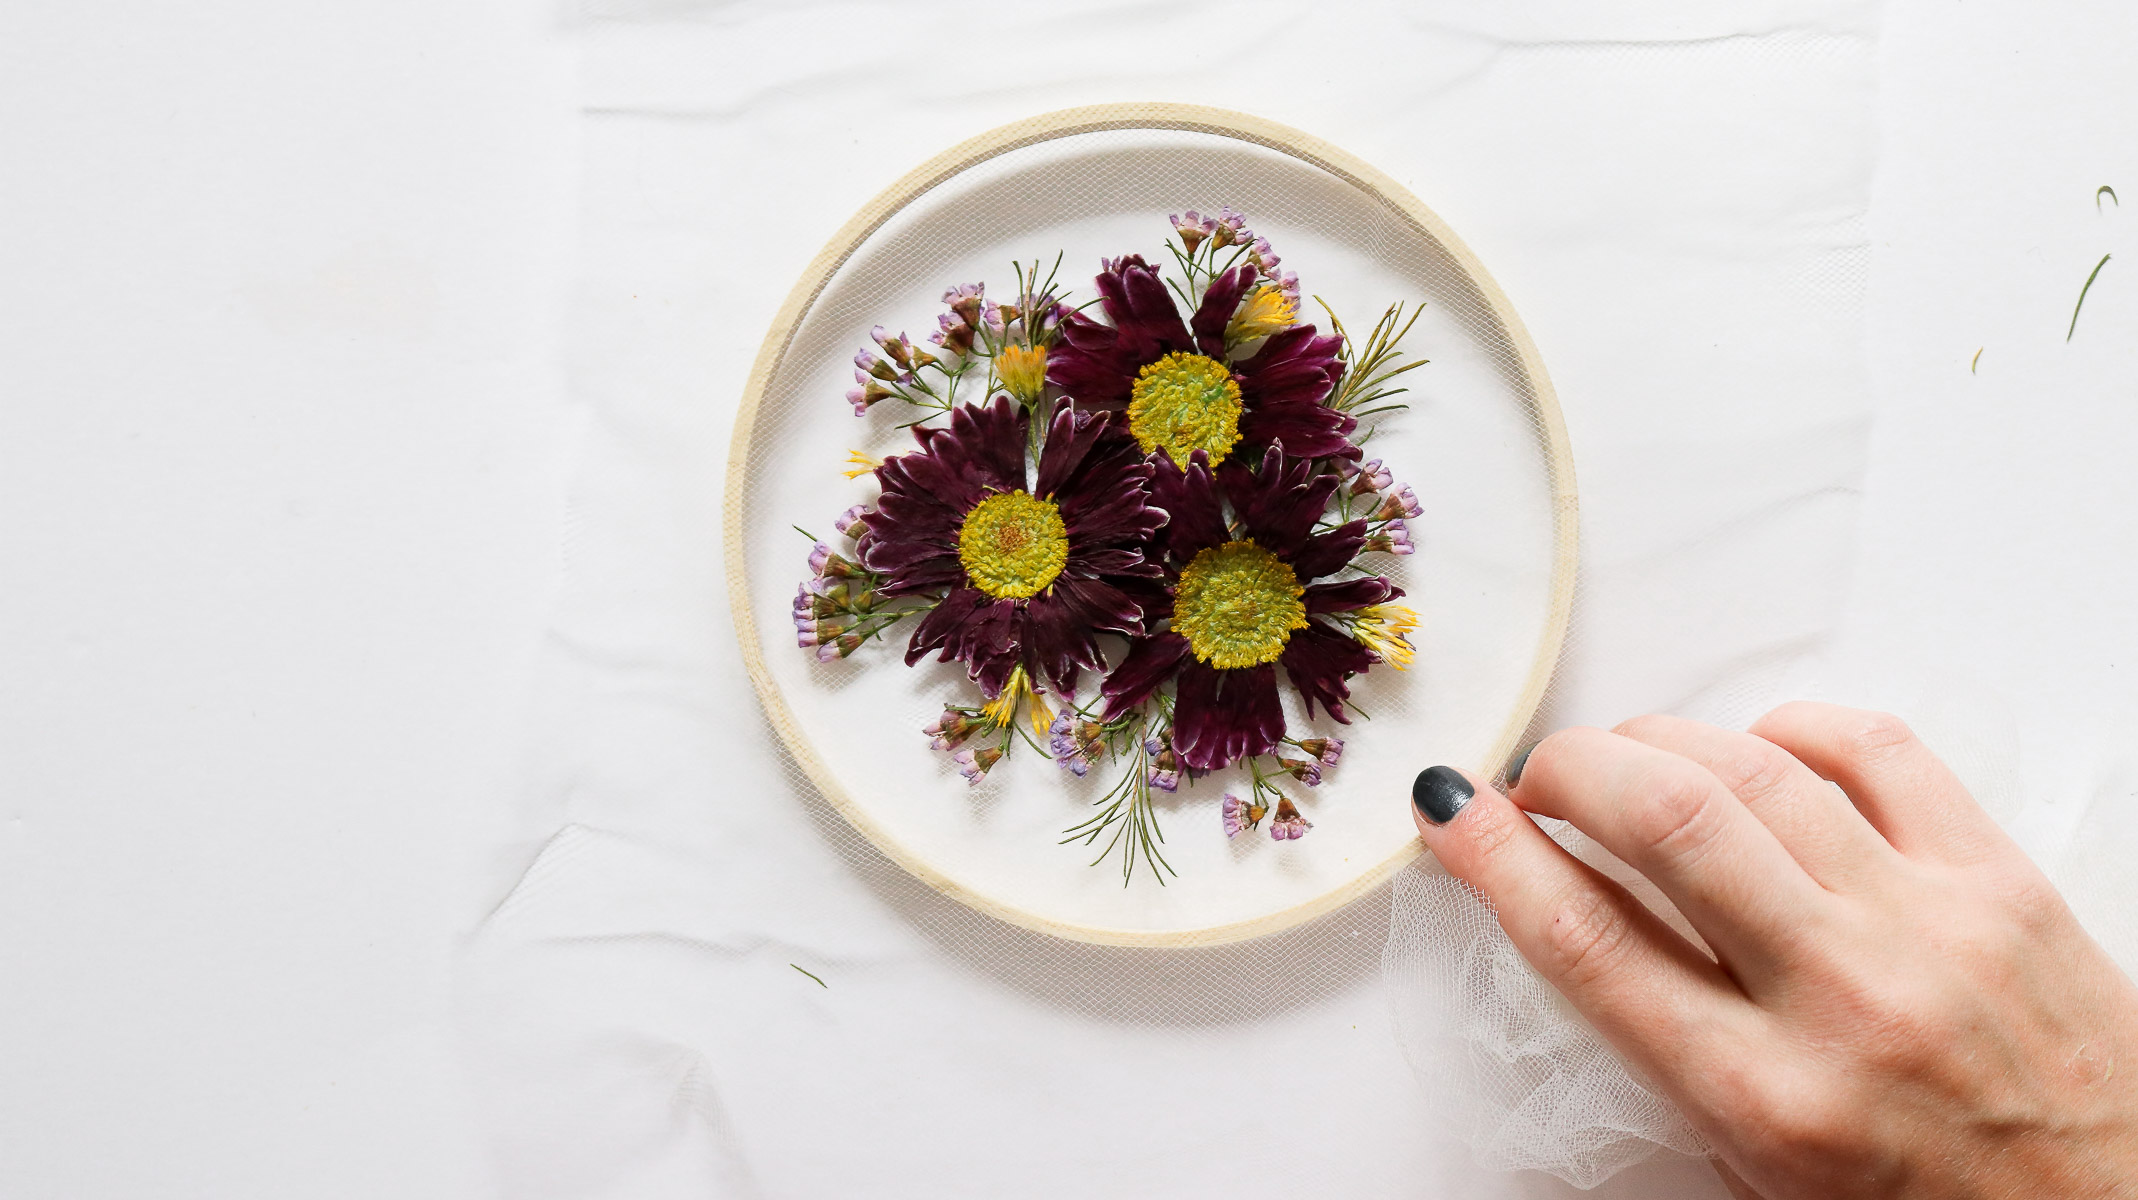
 That’s it! I love how the black tulle makes the colors pop.
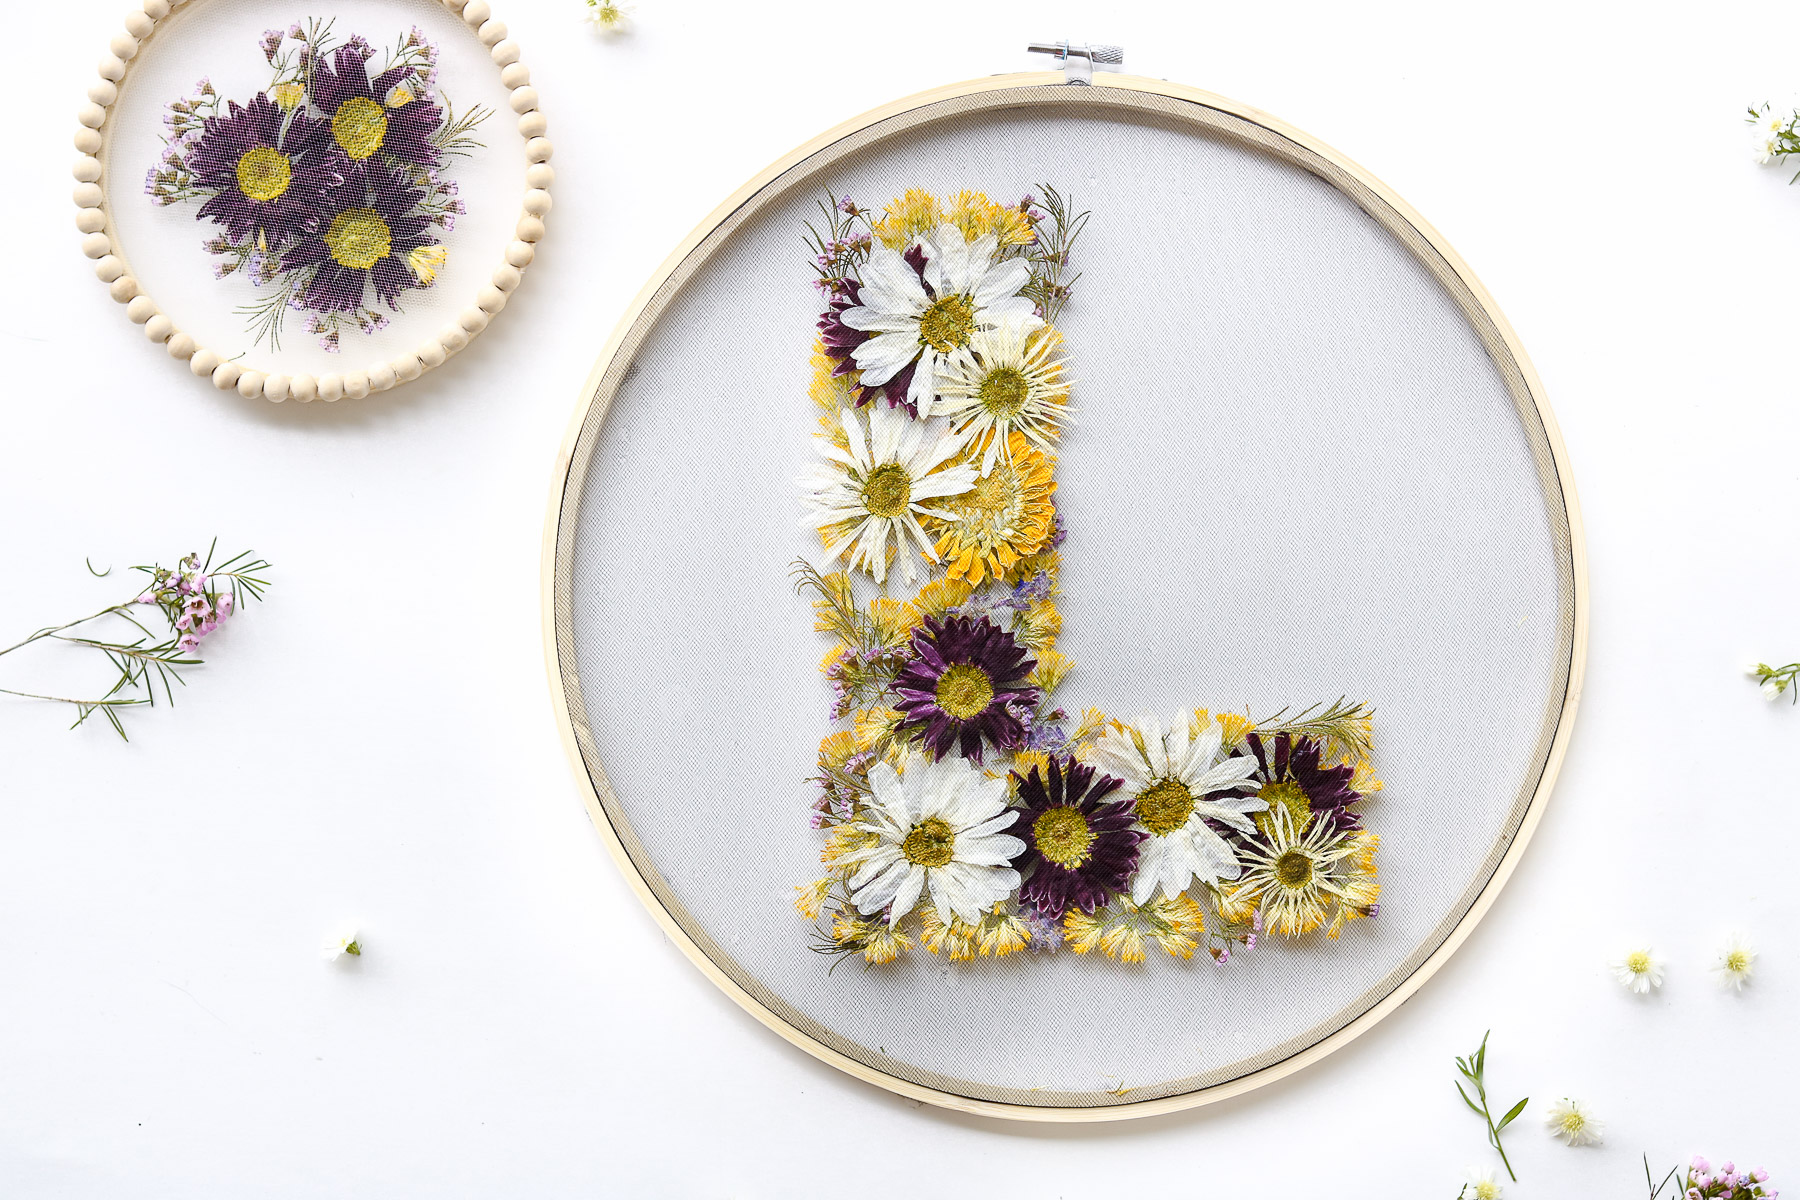
 These beads though!! 😍😍 I wish I had enough to outline my bigger hoop. That was the plan originally but I didn’t realize I didn’t buy enough.
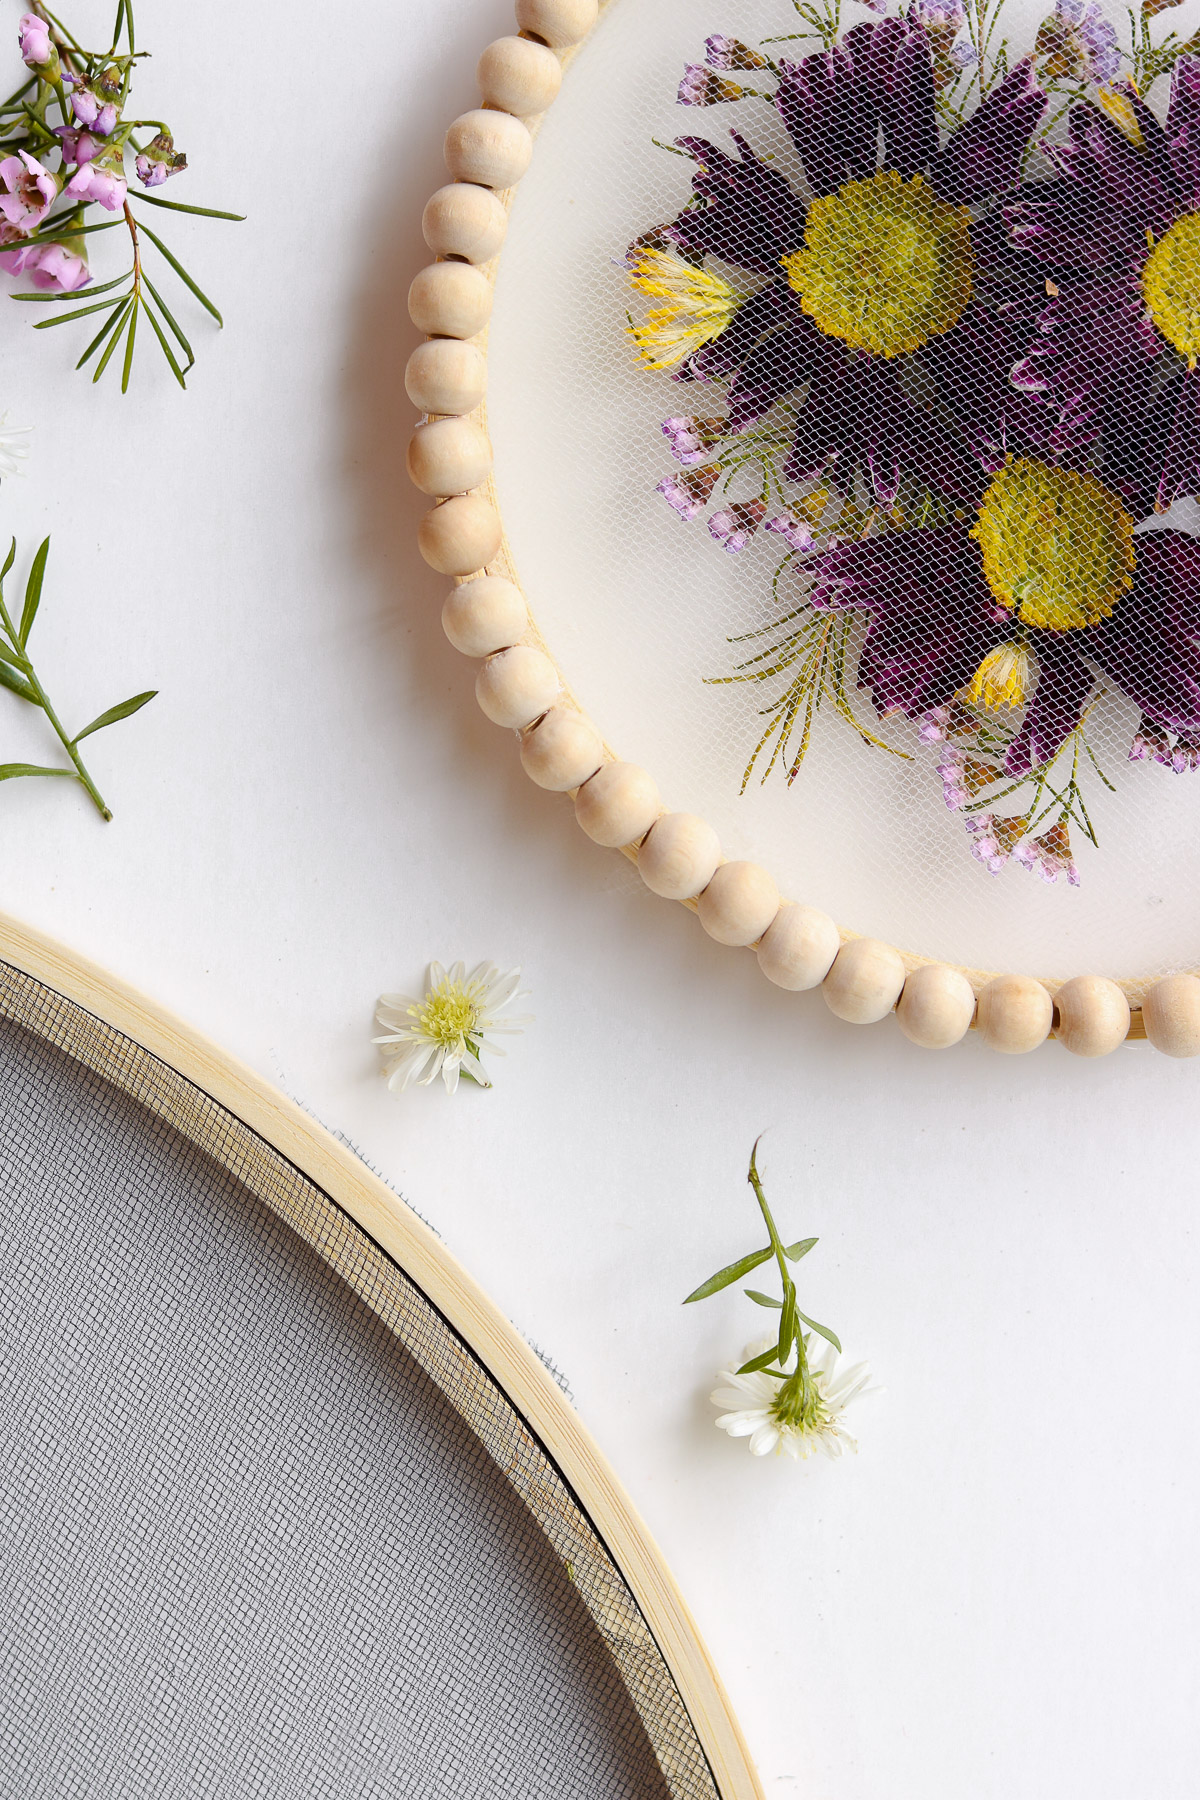
These are so beautiful, I love dried flowers too 🙂 & thanks for the link, Claire xx
Thank you Maggie 😀 😀
I am so excited about doing this I’ve been trying flowers for almost a year now and this idea I will just love love love thank you so much💕
AWWWE YAY! I’m so glad you loved this idea! Happy Crafting!
Will these flowers mold over time? I’m wanting to preserve my sisters funeral flowers with pressing method! Thank you
They won’t mold over time but, if they will fake and fall apart eventually. If you want to preserve them to last I would recommend letting them sit in silica gel for a few weeks ( a flower dehydrator sold at craft stores) Once they’re dry you can them display them in a shadow box and pour clear resin. Also sold at almost any craft store. I tried the aluminte brand resin it’s pretty good for this kind of stuff. Be sure to tape of all the corners of the frame on the outside before pouring the resin so it doesn’t seep out. Once the resin sets remove the tape. Hope this is helpful. Let me know if you have anymore questions 🙂