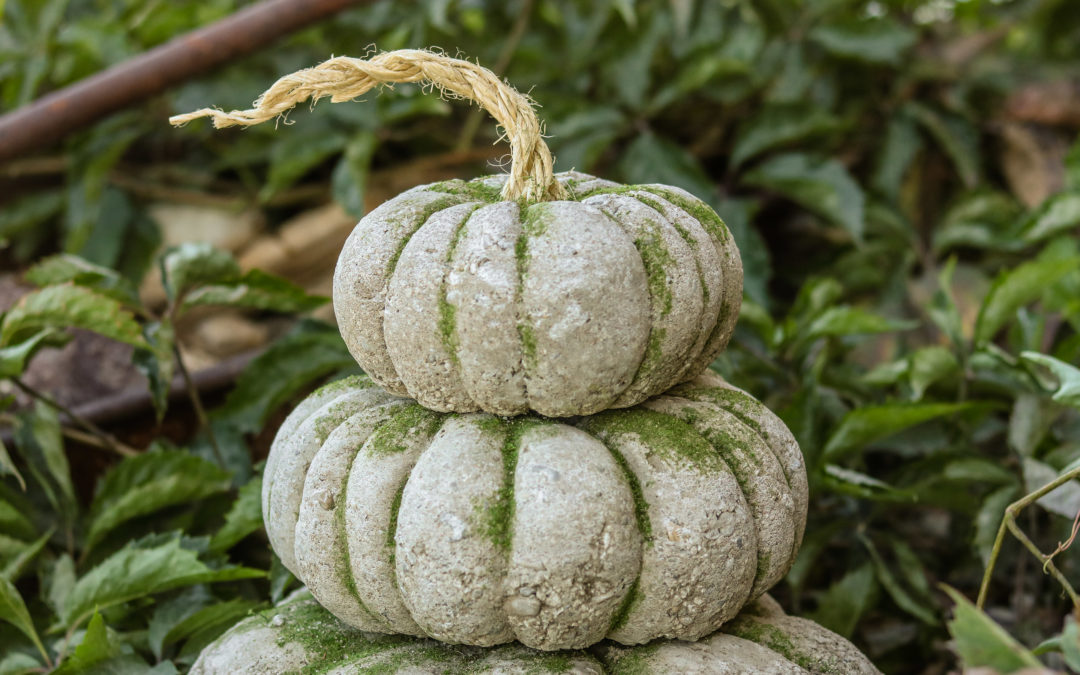
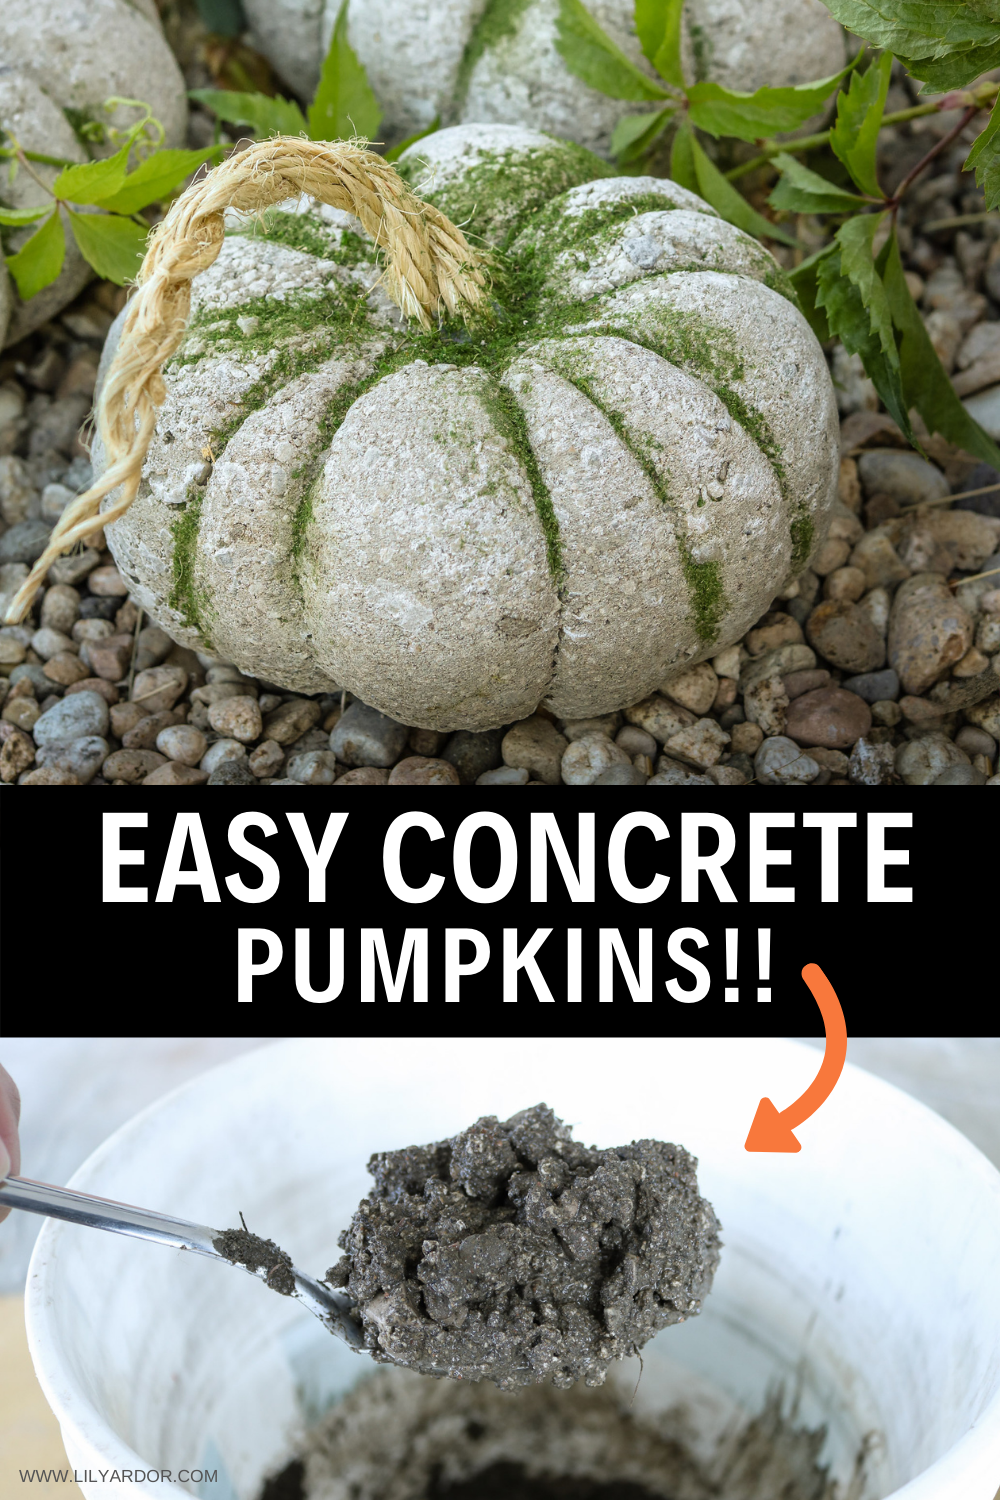
Here’s a fun Pumpkin idea for your fall decor!
Of all the pumpkin ideas I would have to say these concrete pumpkins really stuck to me. They are super versatile and take under an hour to make. If you plan on making a small one pumpkin it will probably only take you around 20 minutes to complete (minus the drying time). Honestly I couldn’t believe these were this easy to make! I know they look a bit complicated especially making the pumpkin shape but, forming the shape of your pumpkin will be the least of your worries because the rubber bands will do all the hard work for you. YEP! 😊 Just some plain little rubber bands will do the trick. So SIMPLE!
Okay than let’s get crafty!
Here’s how long it took me to complete
Depending on the size and the amount of pumpkins you do this project can take you from 20 minutes to 2 hours to make. A small 6″ pumpkin will be in the 20 minute range. Take into consideration that I mixed my concrete in small batches by hand (with a metal spoon). So it took a bit longer than if I would of had a mixing attachment to help mix my concrete. I’m sure that would shorten my projects time almost in half.
Total Cost : $17-$20.
(price may very. Depending on what you already have at home. My pumpkins cost me around $17 to make)
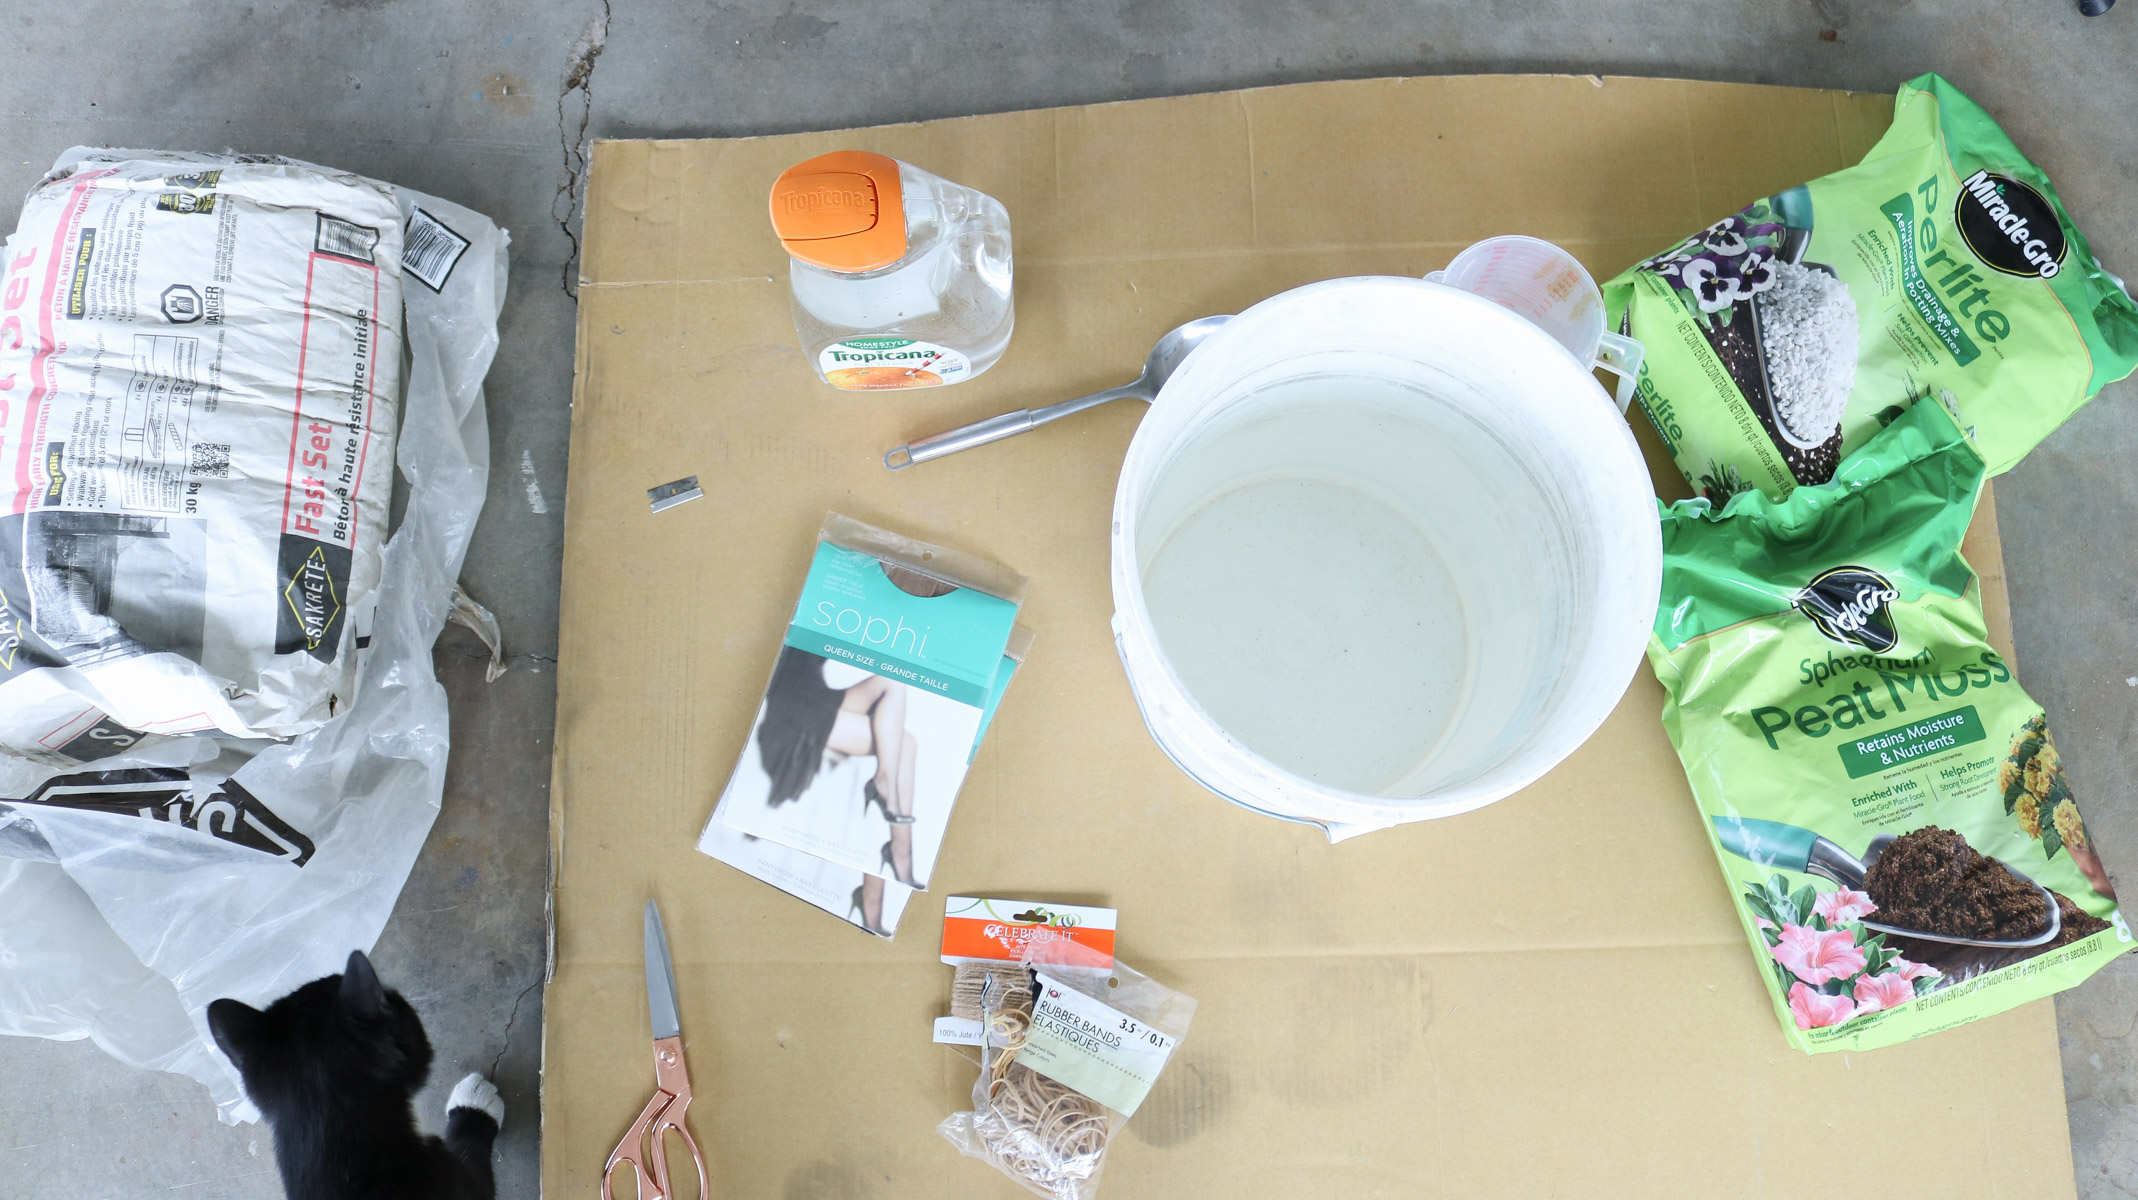
Supply List ( I purchased my supplies in two stores, listed below)
- Concrete Mix (@sakreteCAN)
- Peat Moss (home depot, smallest bag)
- Perlite (home depot, smallest bag)
- Tights (dollar store)
- Scissors
- Rubber bands or string (dollar store)
- Bucket
- Mixing spoon
- Water
- Piece of rope (home depot sells it by the foot)
- Hot glue or which ever glue is more durable.
Before we jump in here’s how to keep your concrete pumpkins lightweight!
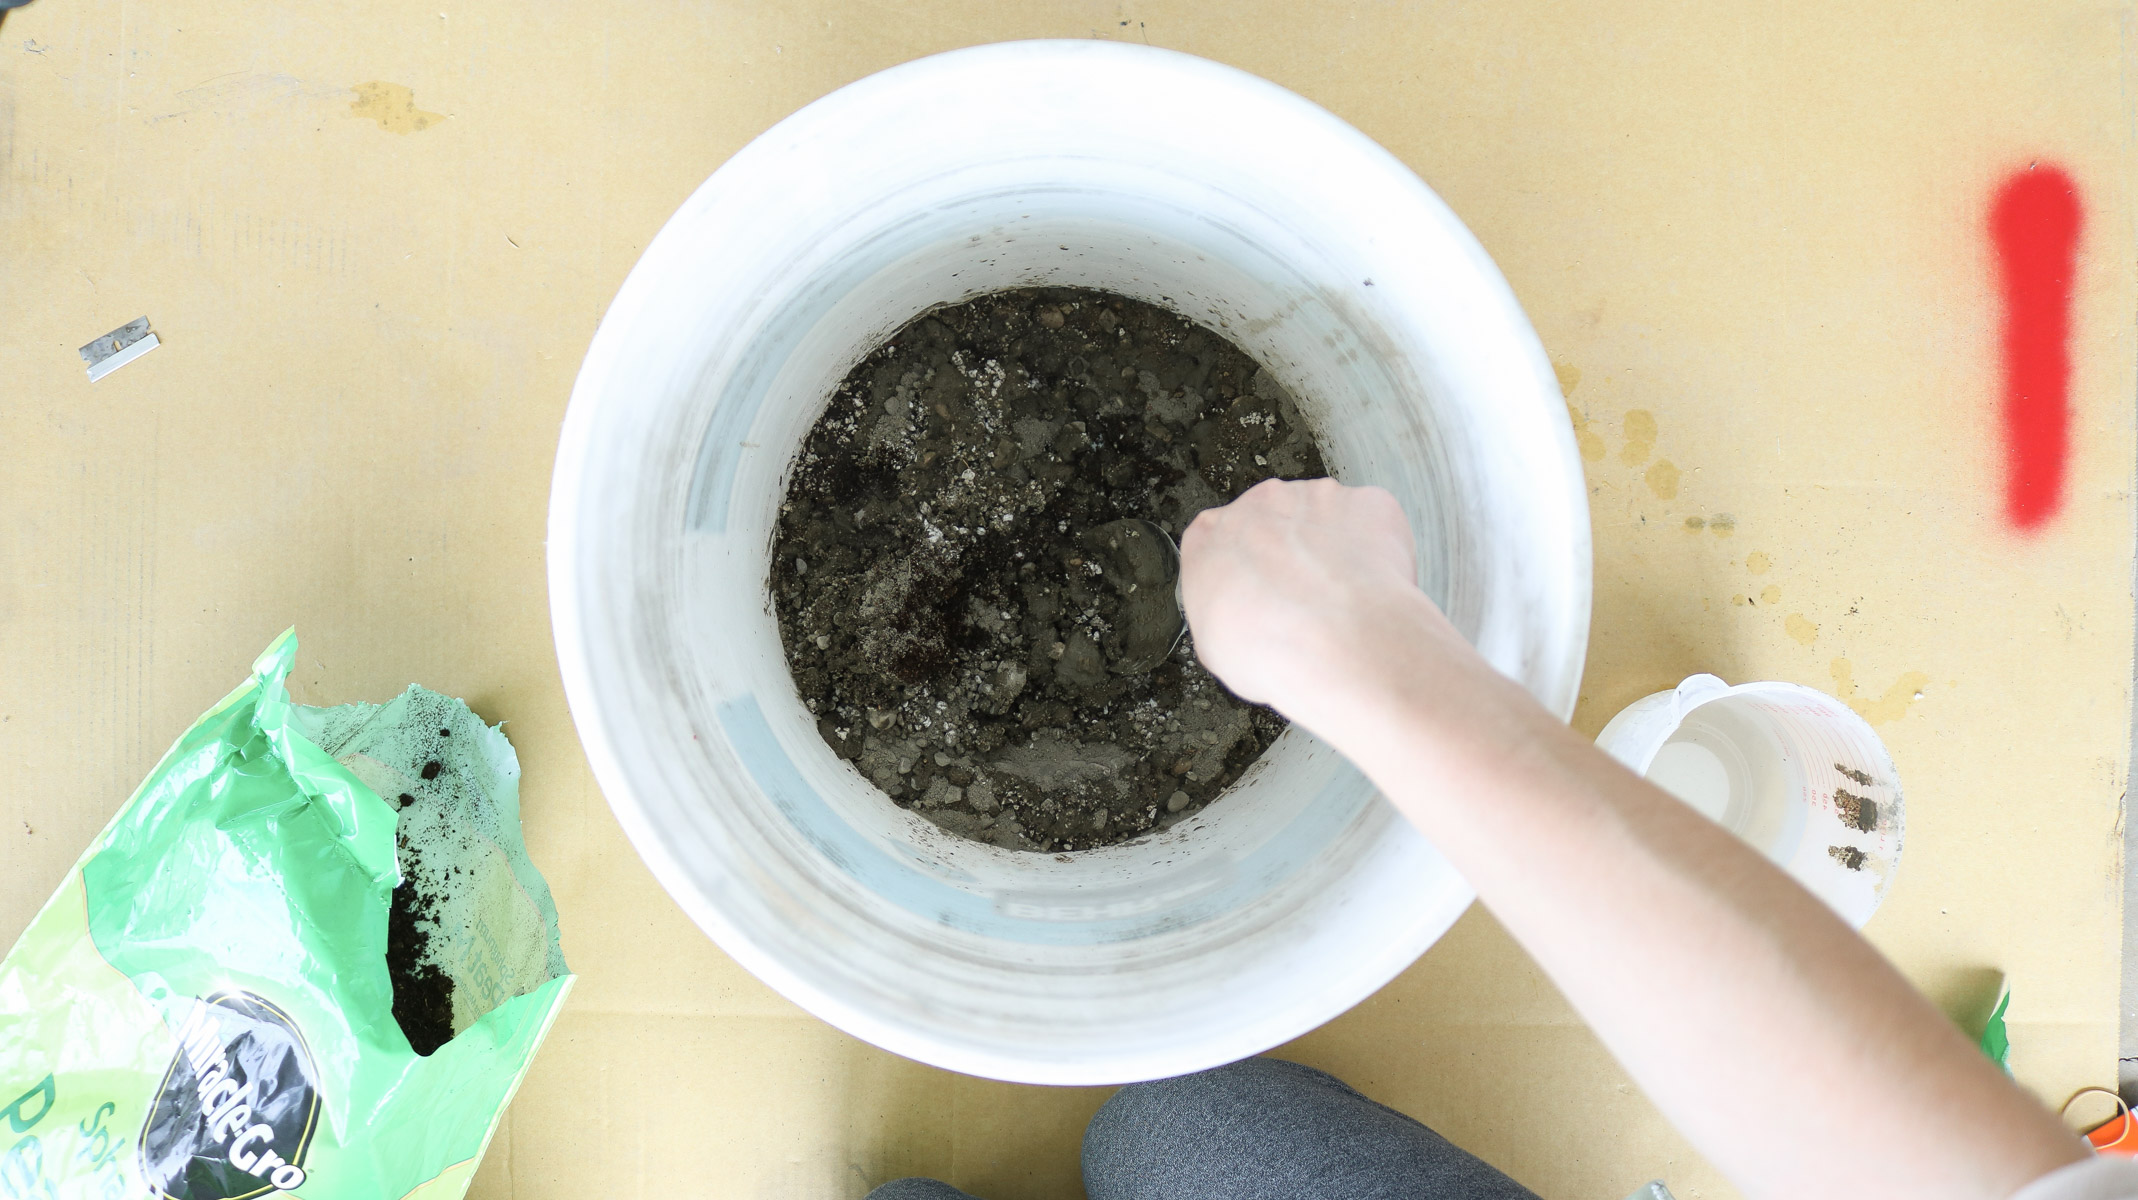
The photo below shows the exact brand name concrete I used. Okay so there’s two ways you can make your pumpkins. You can use a mixture of just concrete alone or you can create what’s called hypertyfa by adding perlite and peat moss to your concrete mix. The Hypertufa method will keep your concrete lightweight once dried. Pretty cool right?!! I chose to go with Hyperftyfa since I planned on making some pretty big pumpkins. 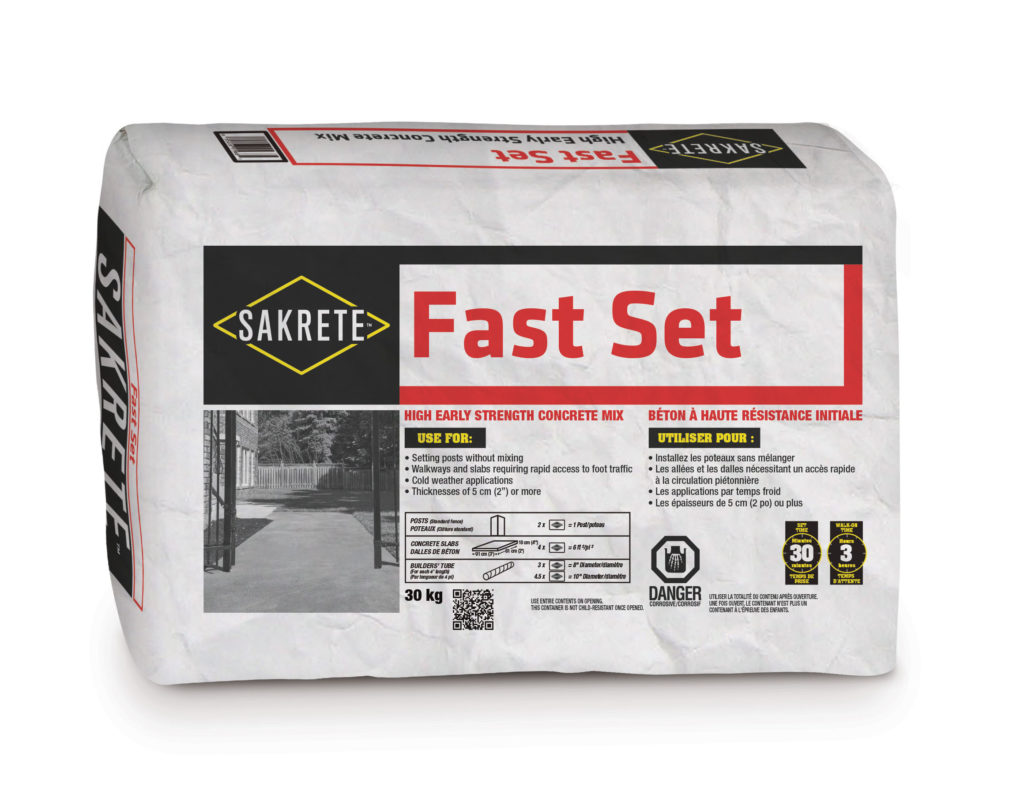
INSTRUCTIONS to make these cute pumpkins!
Creating your Hypertyfa
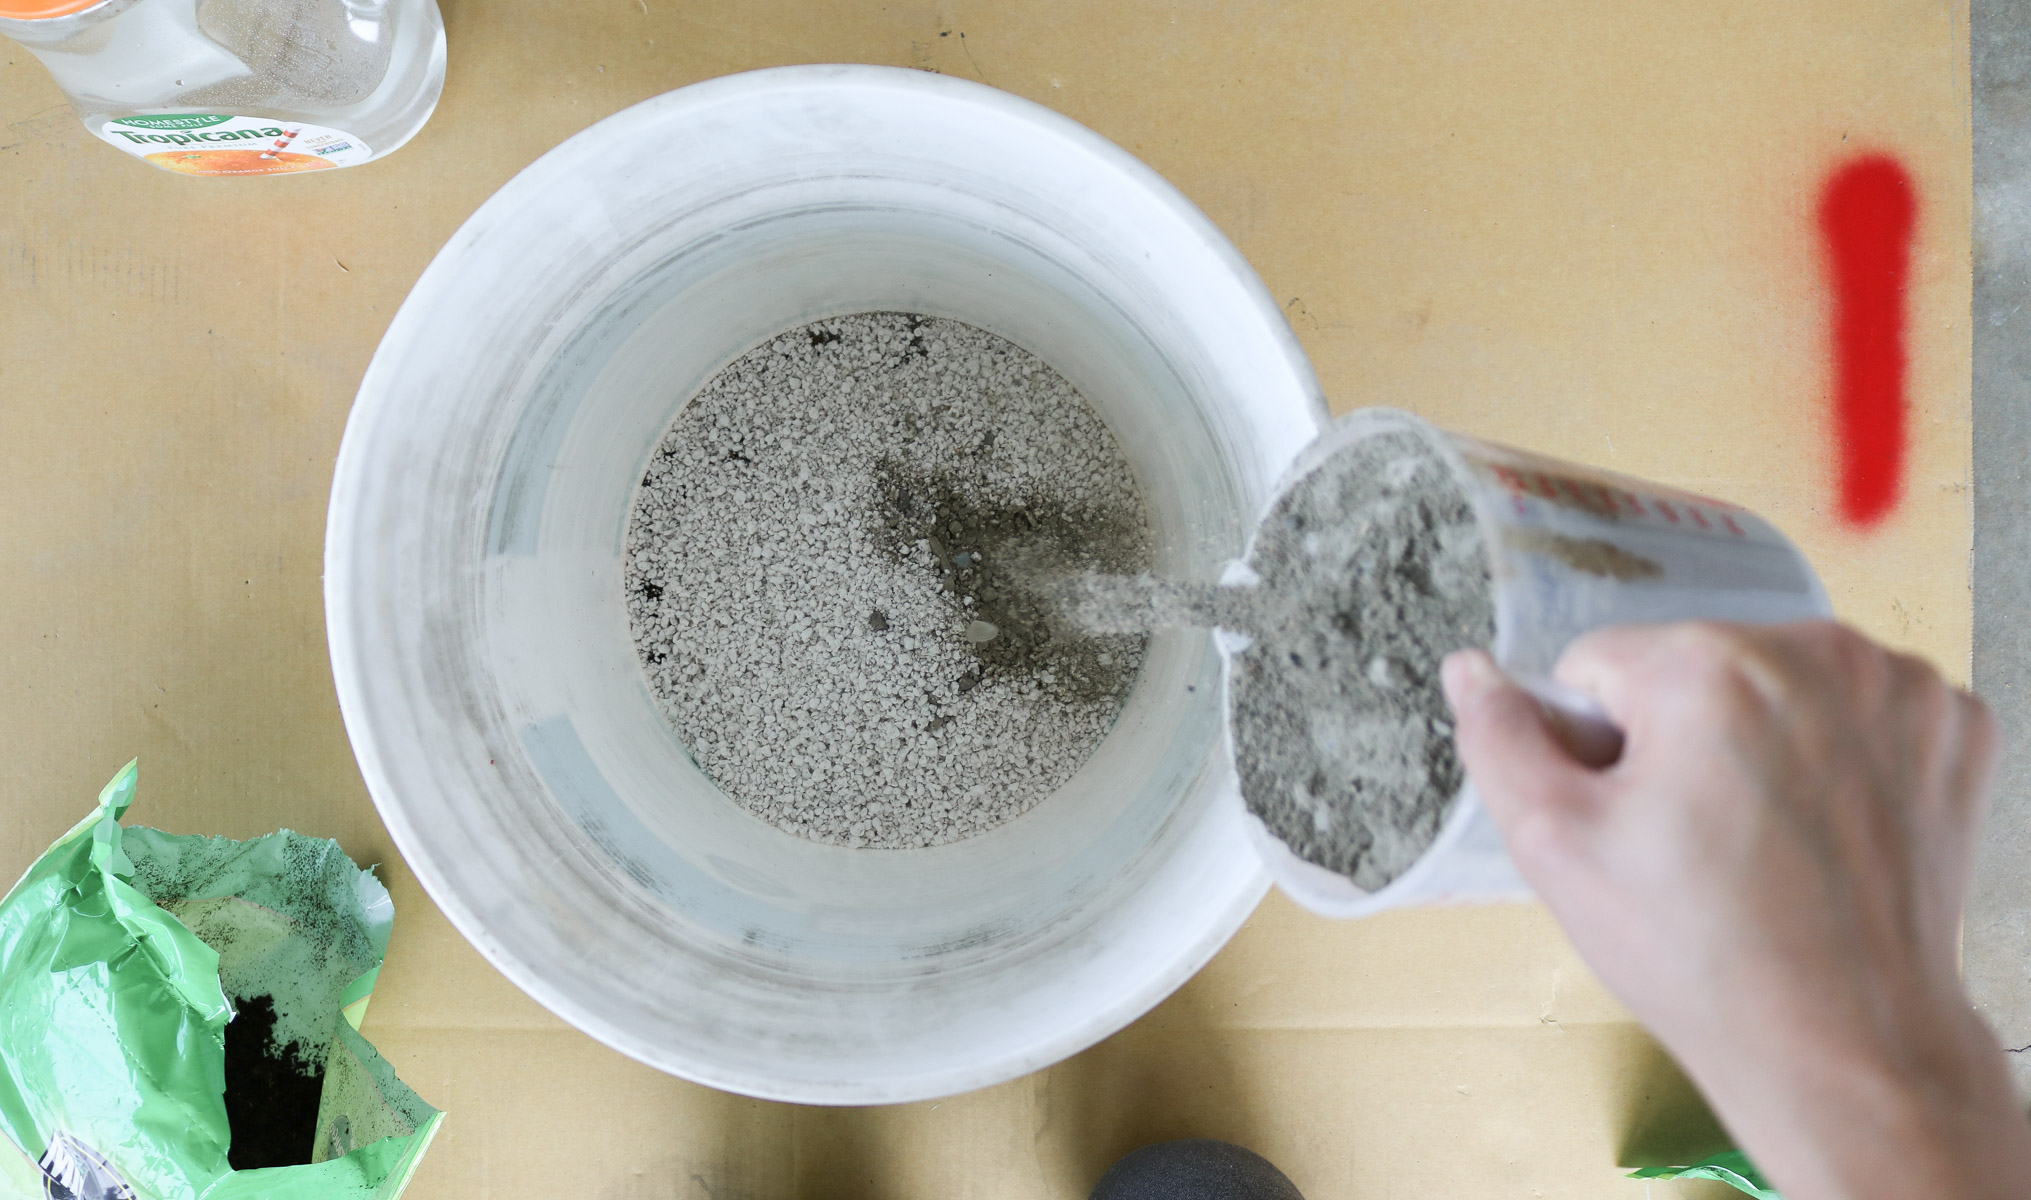
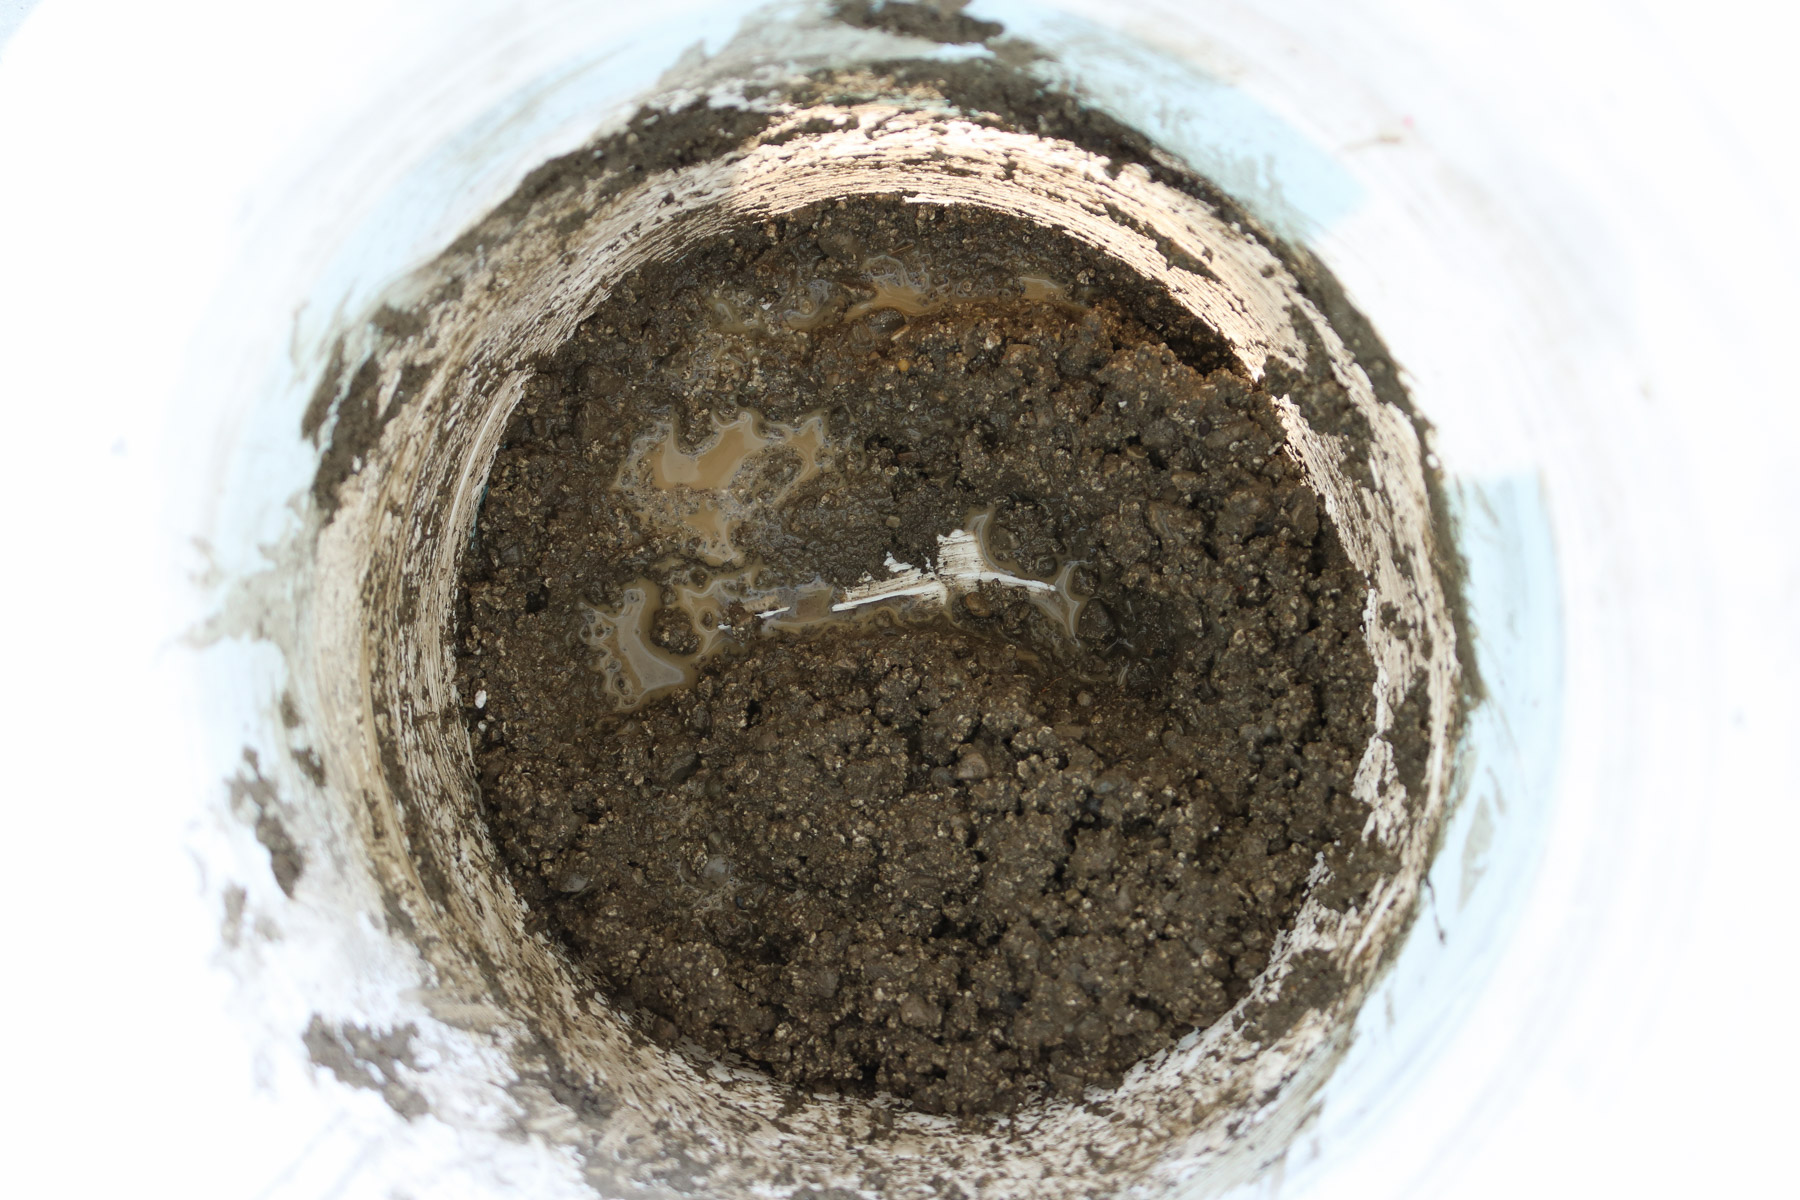
- First you’ll need to mix equal parts of concrete, perlite, and peat moss. Then add an additional equal amount of water. Don’t add in all the water at once since it might be too much. You don’t want it too soupy. Photo below shows how concrete should look. (Example recipe : 2 cups of concrete mix, 2 cups of peat moss, 2 cups of perlite mix plus add water as needed)
Prepping your tights
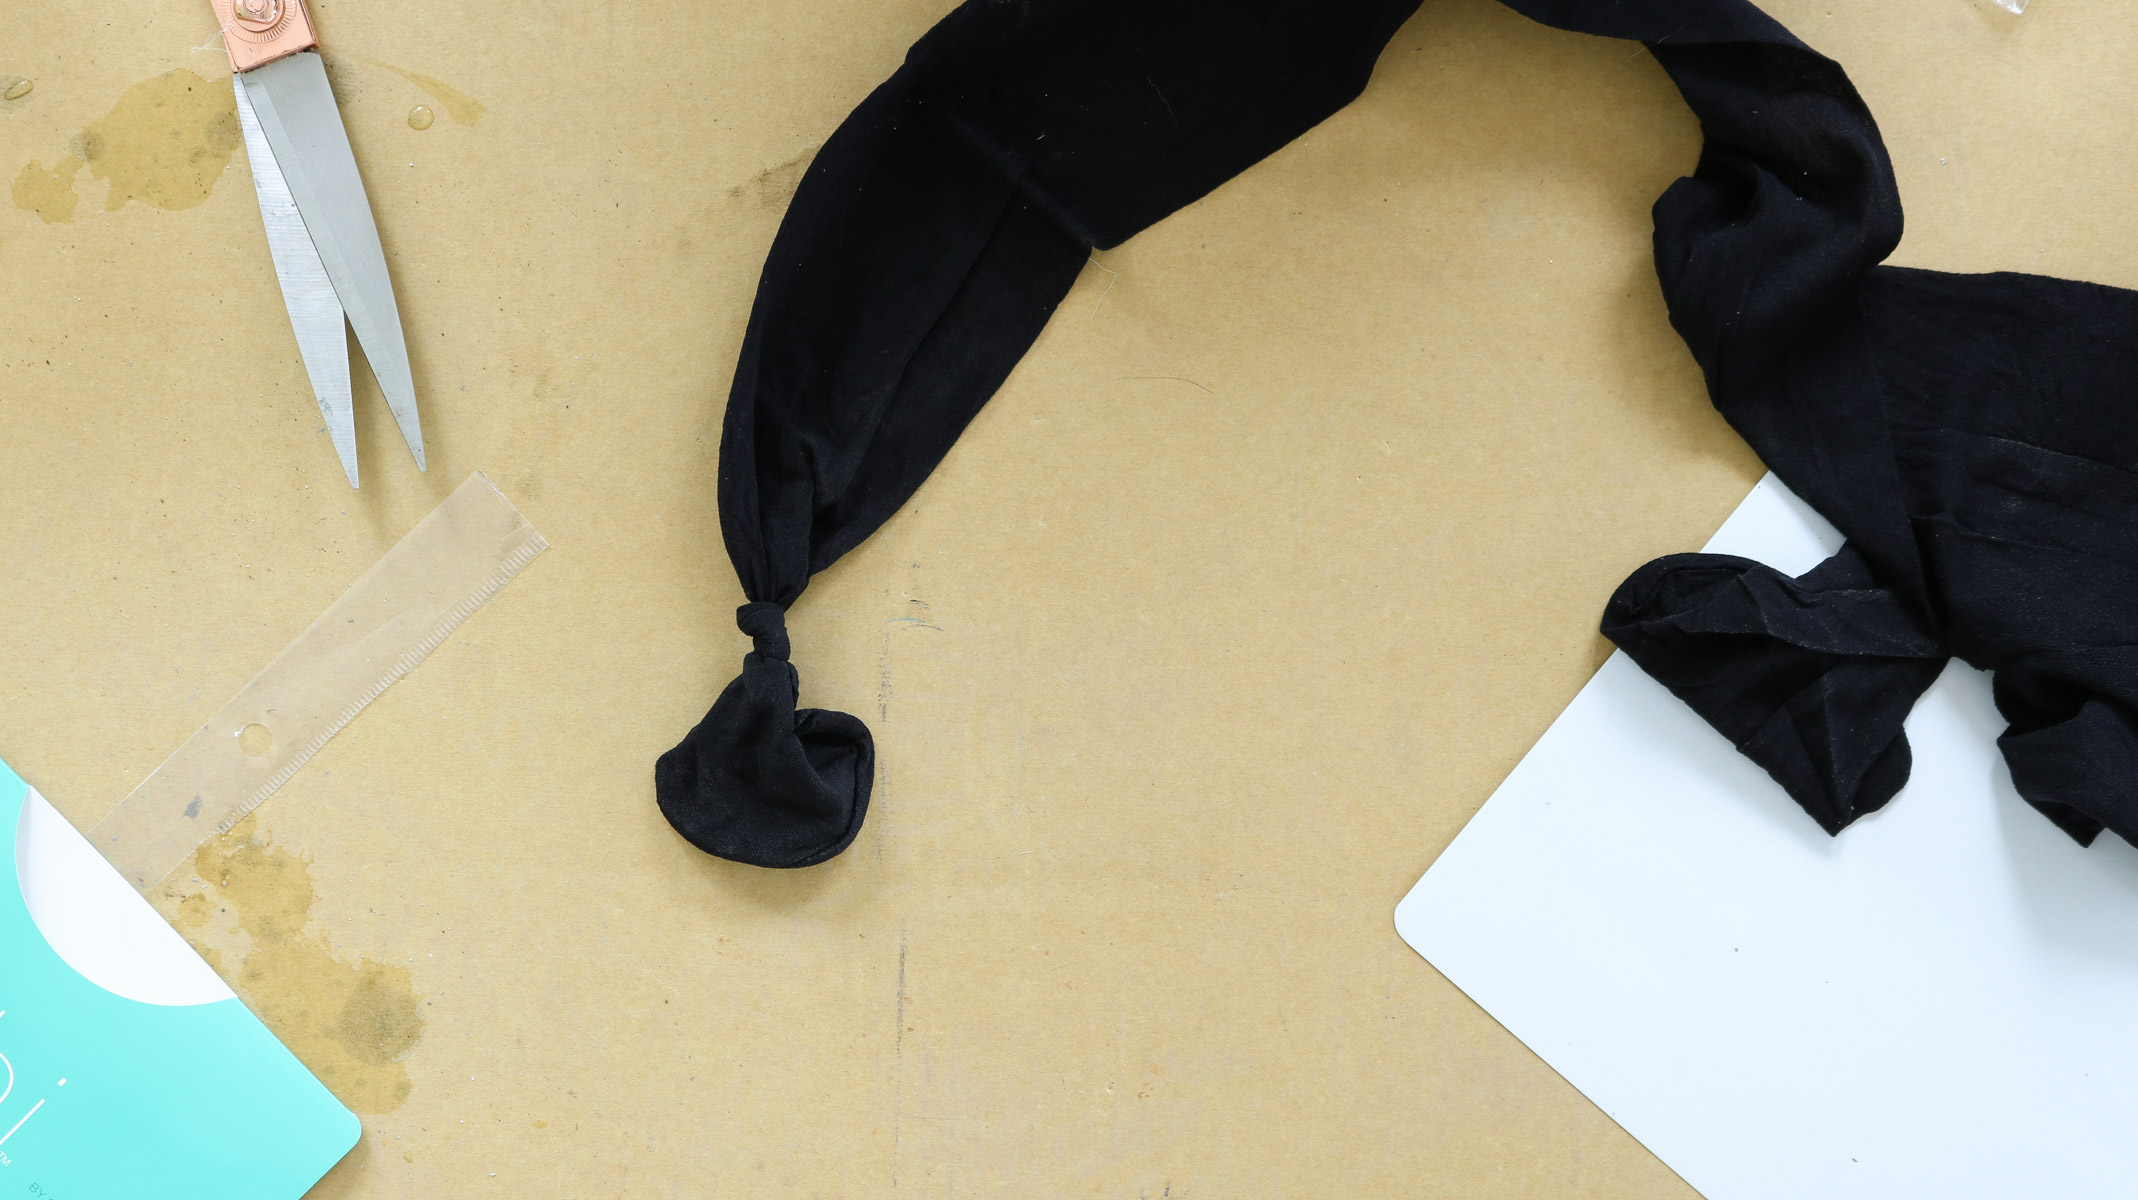
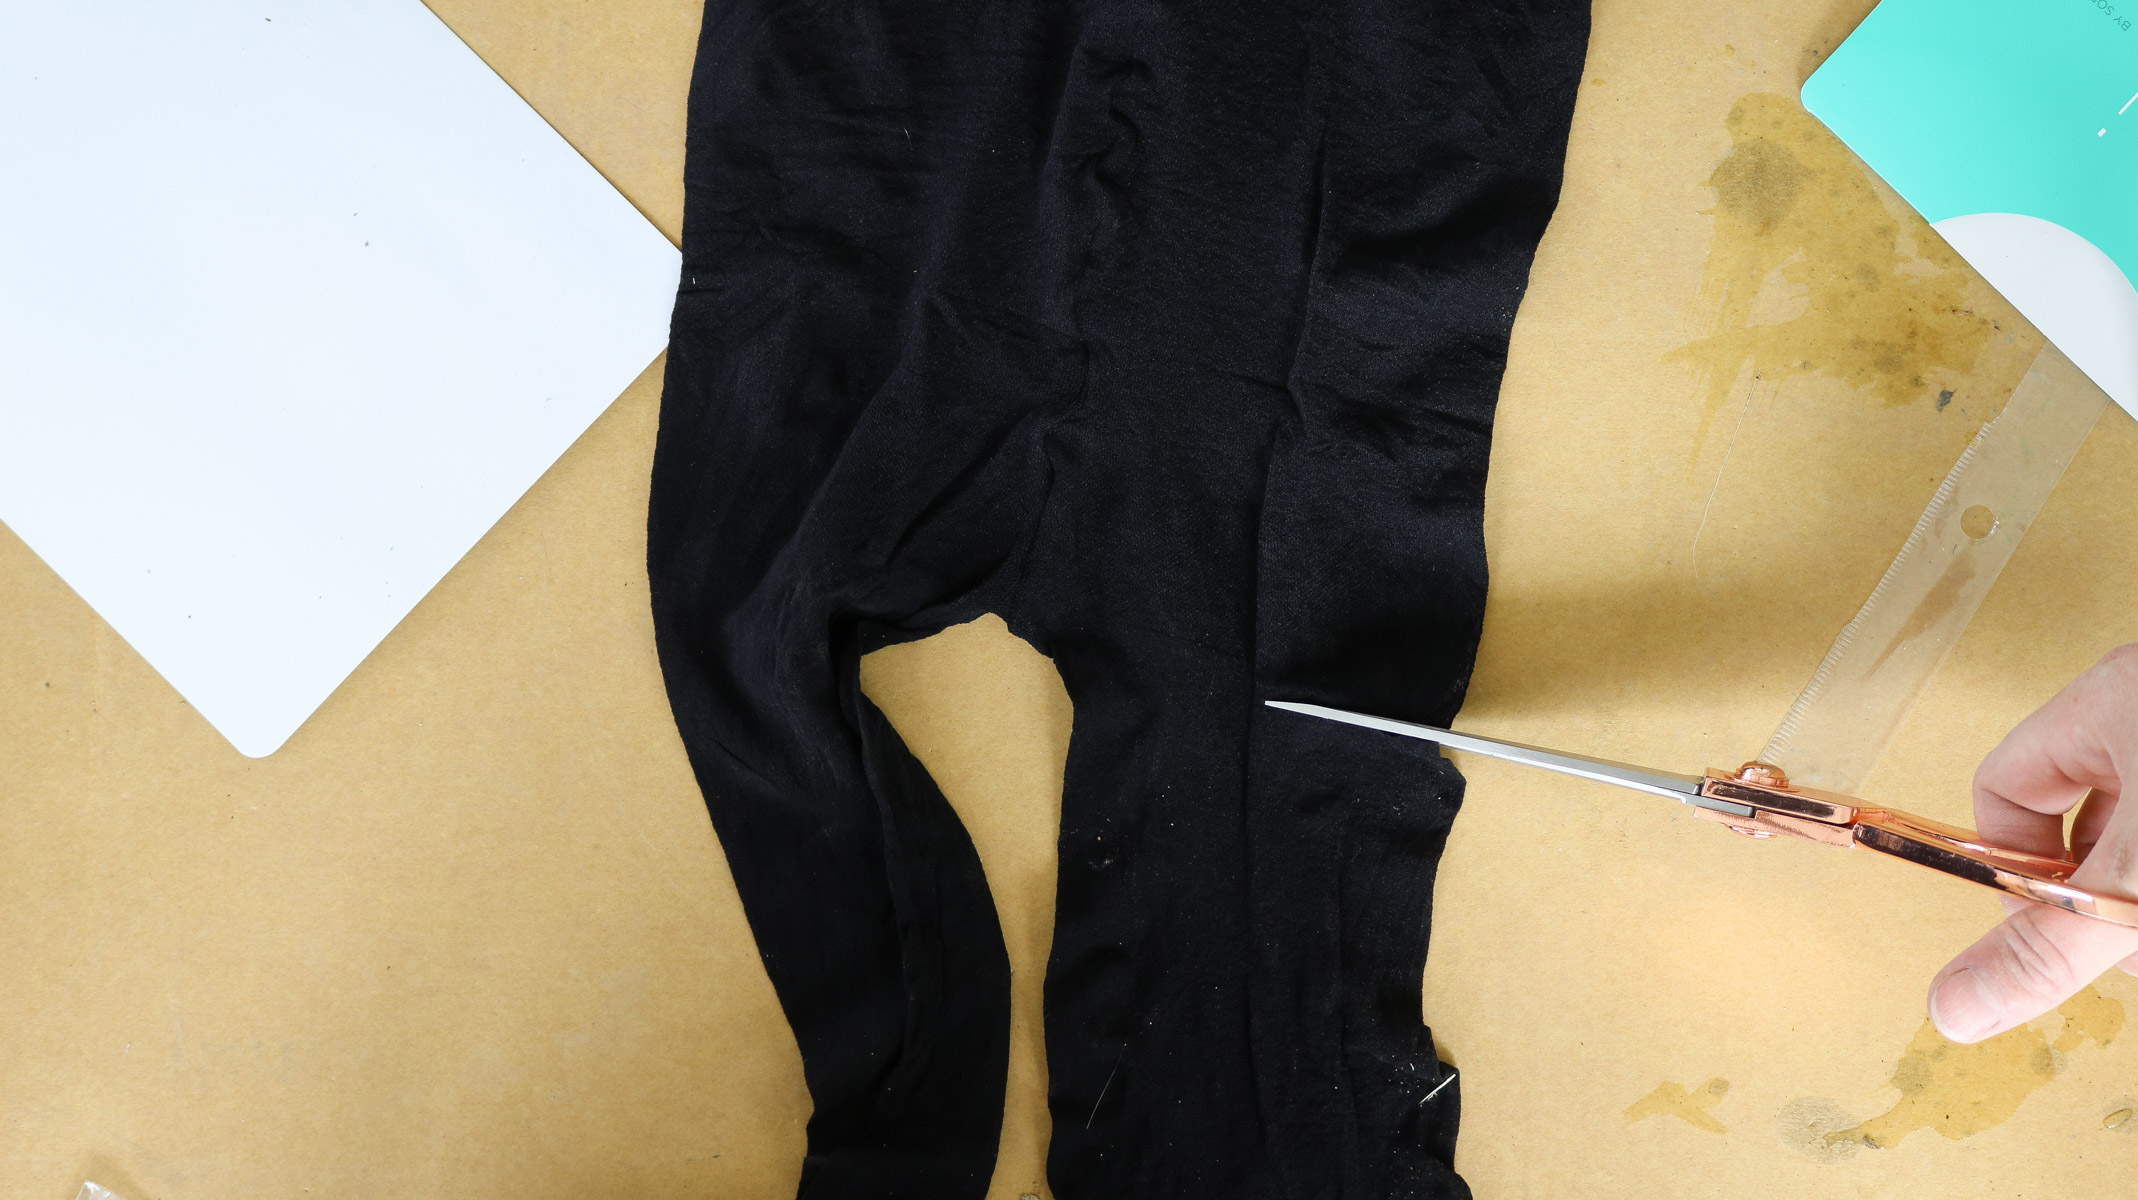
2. Than you’ll need to tie a knot at the bottom of your tights and cut about a 14″ above your knot or more if you plan on making a bigger pumpkin.
Making your pumpkin mold
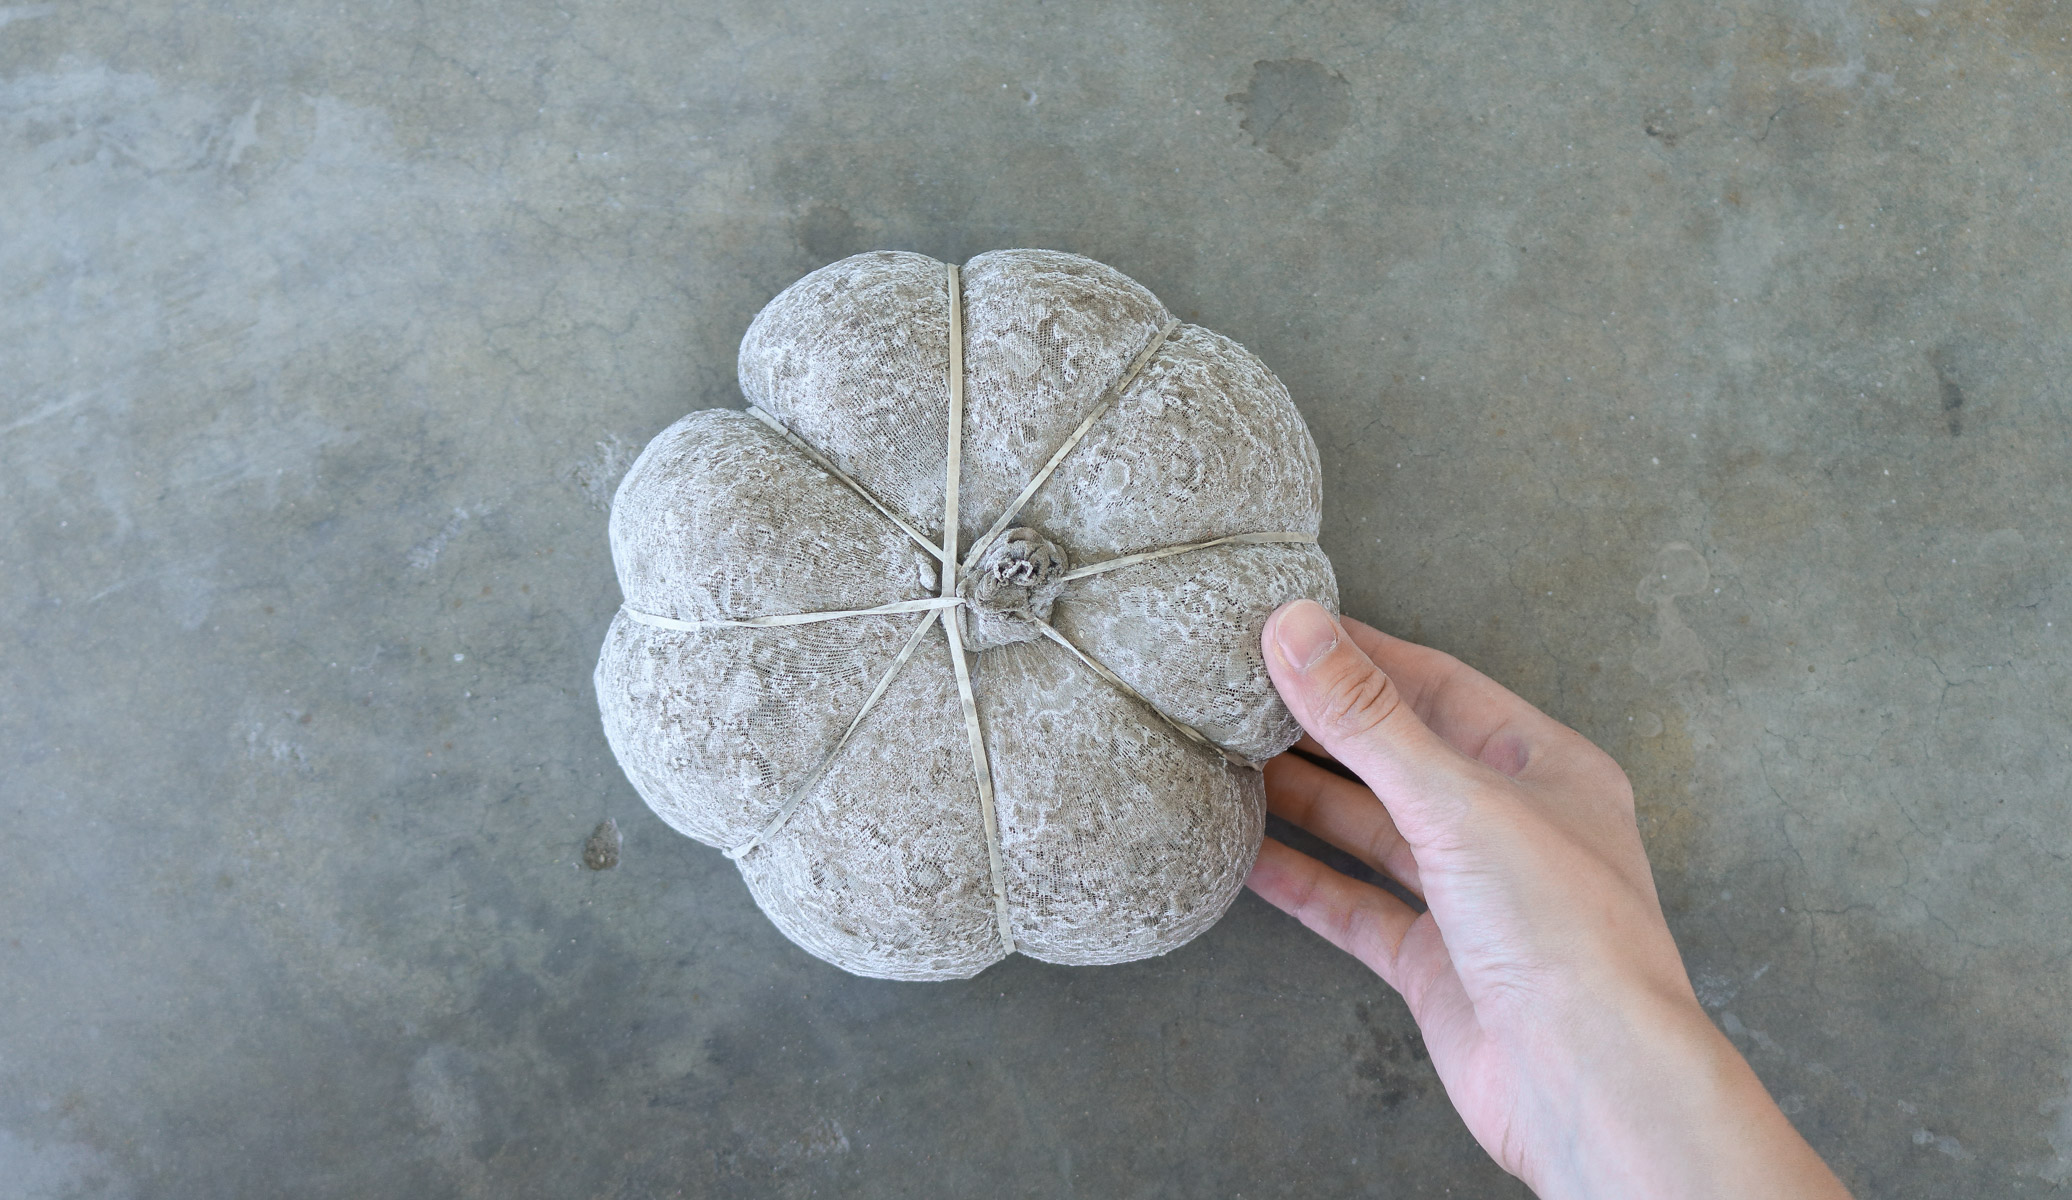
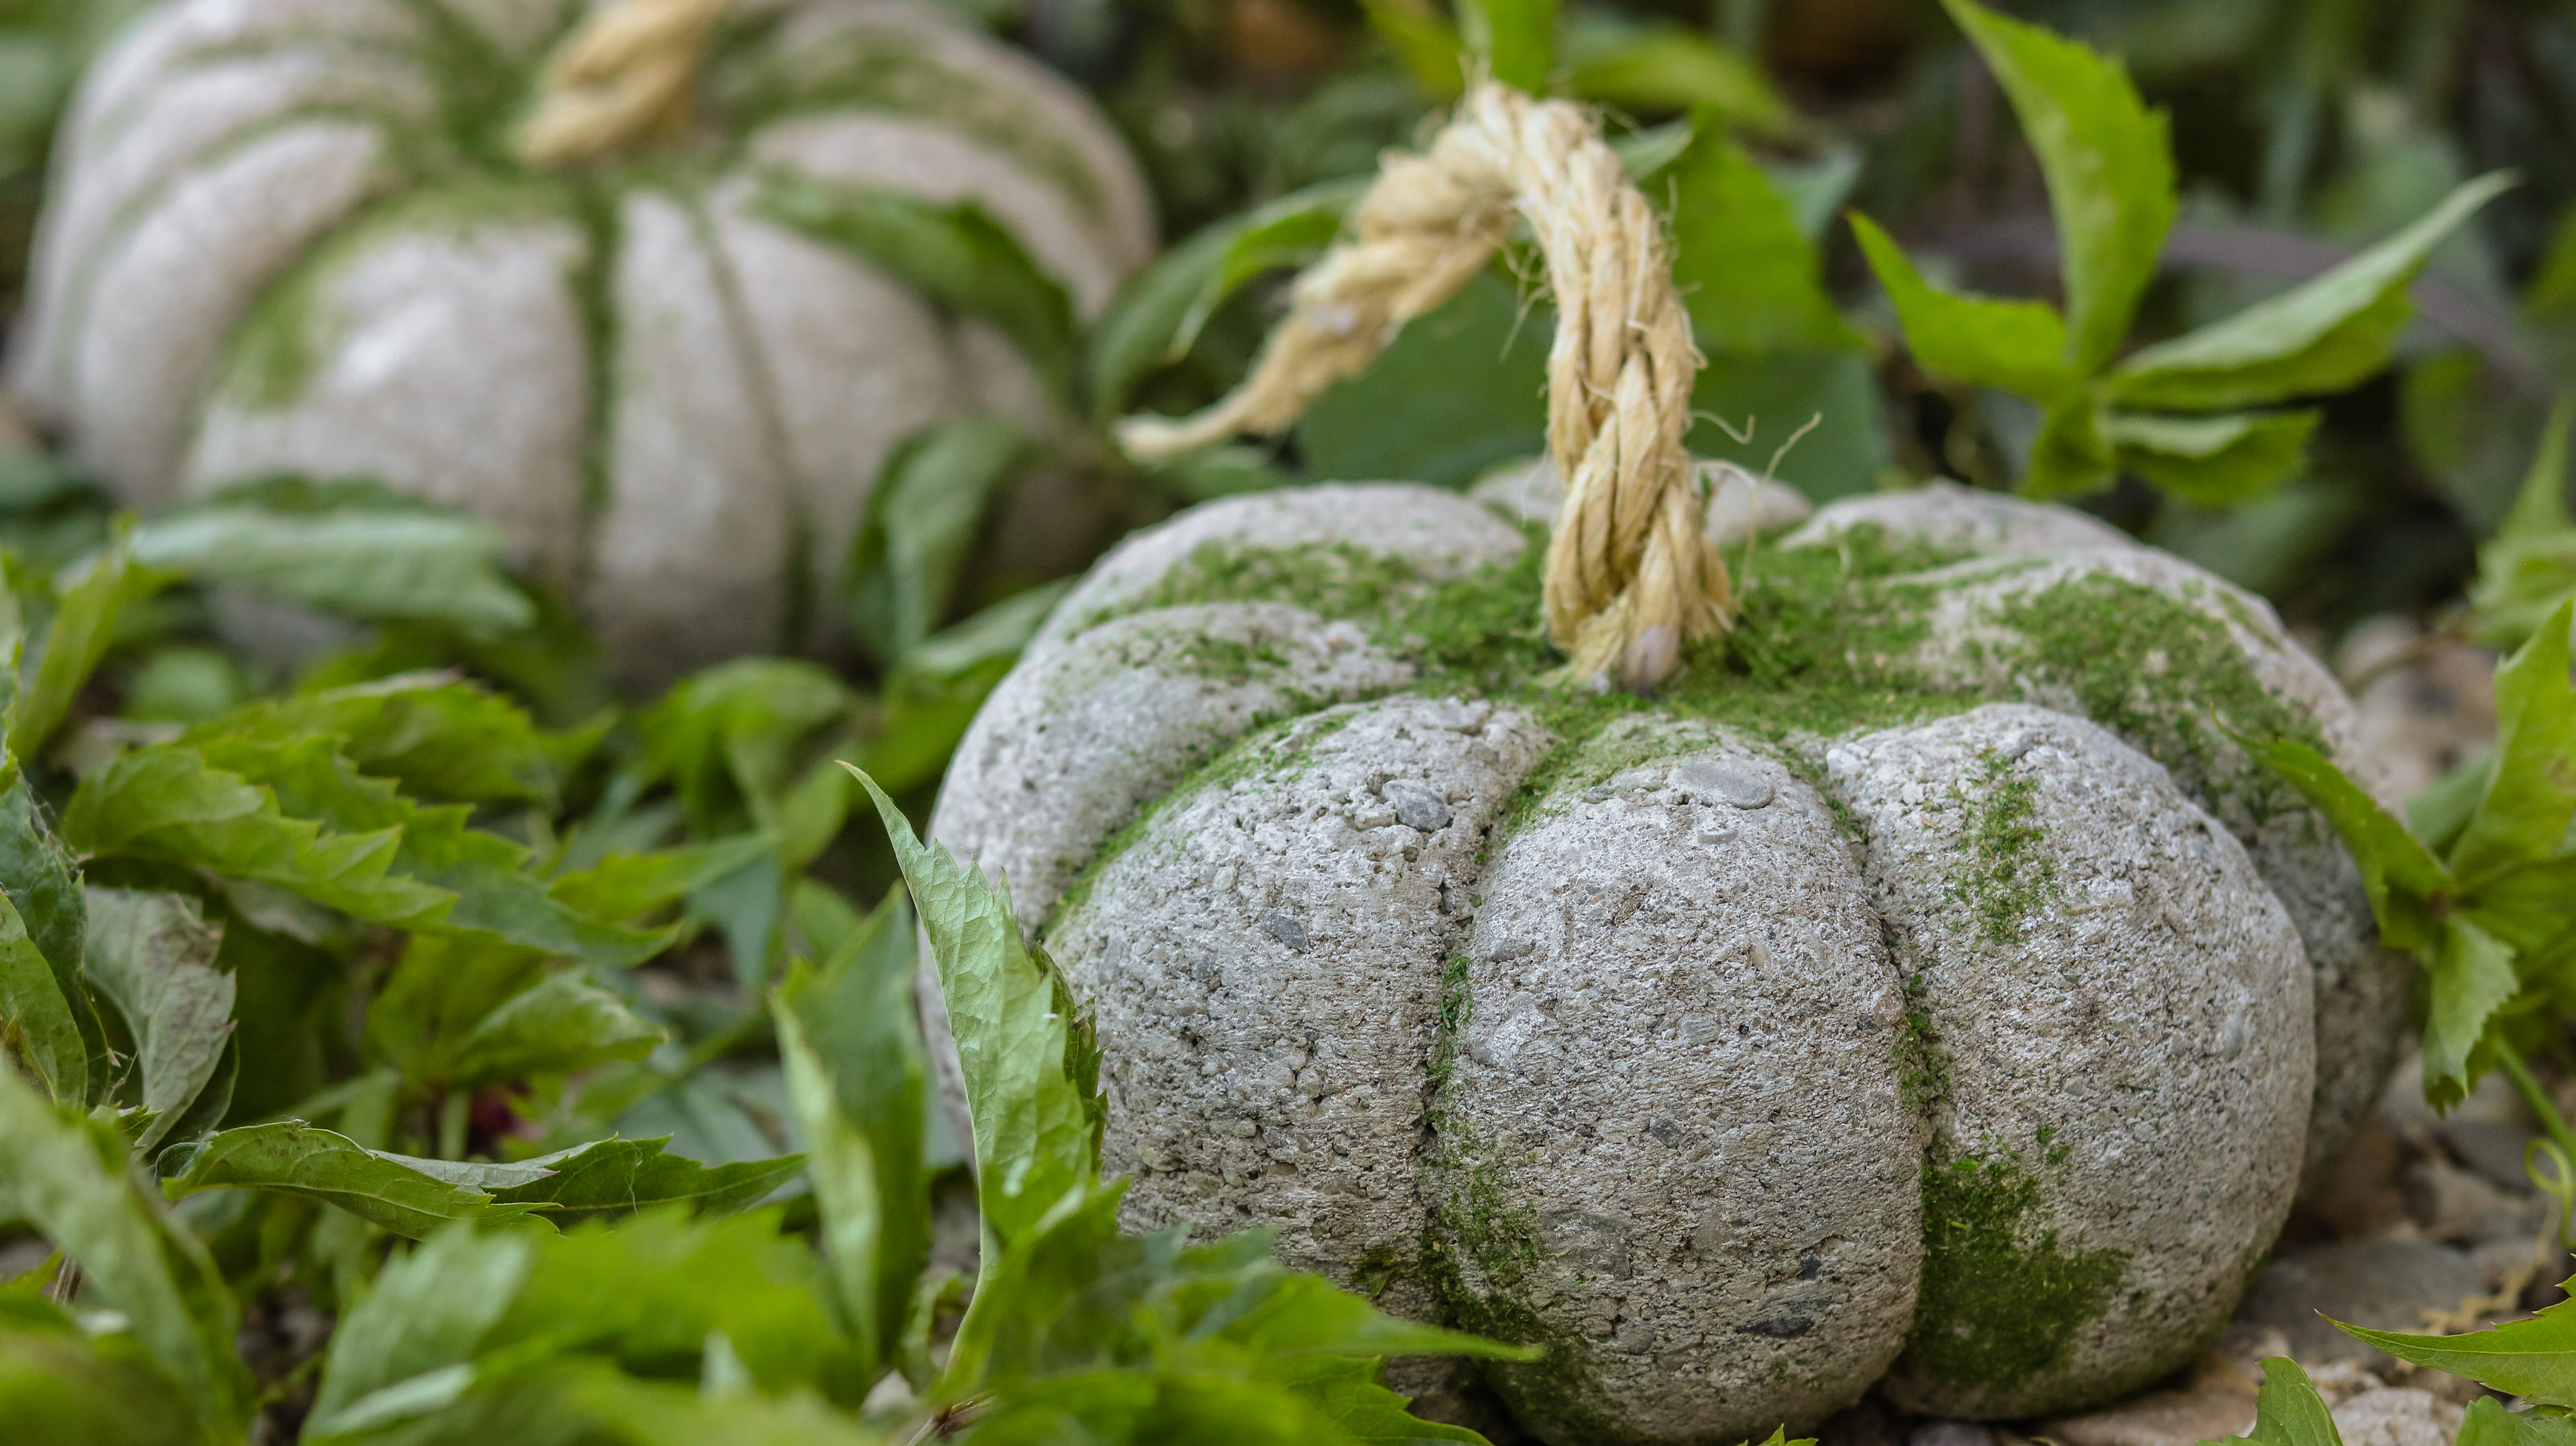
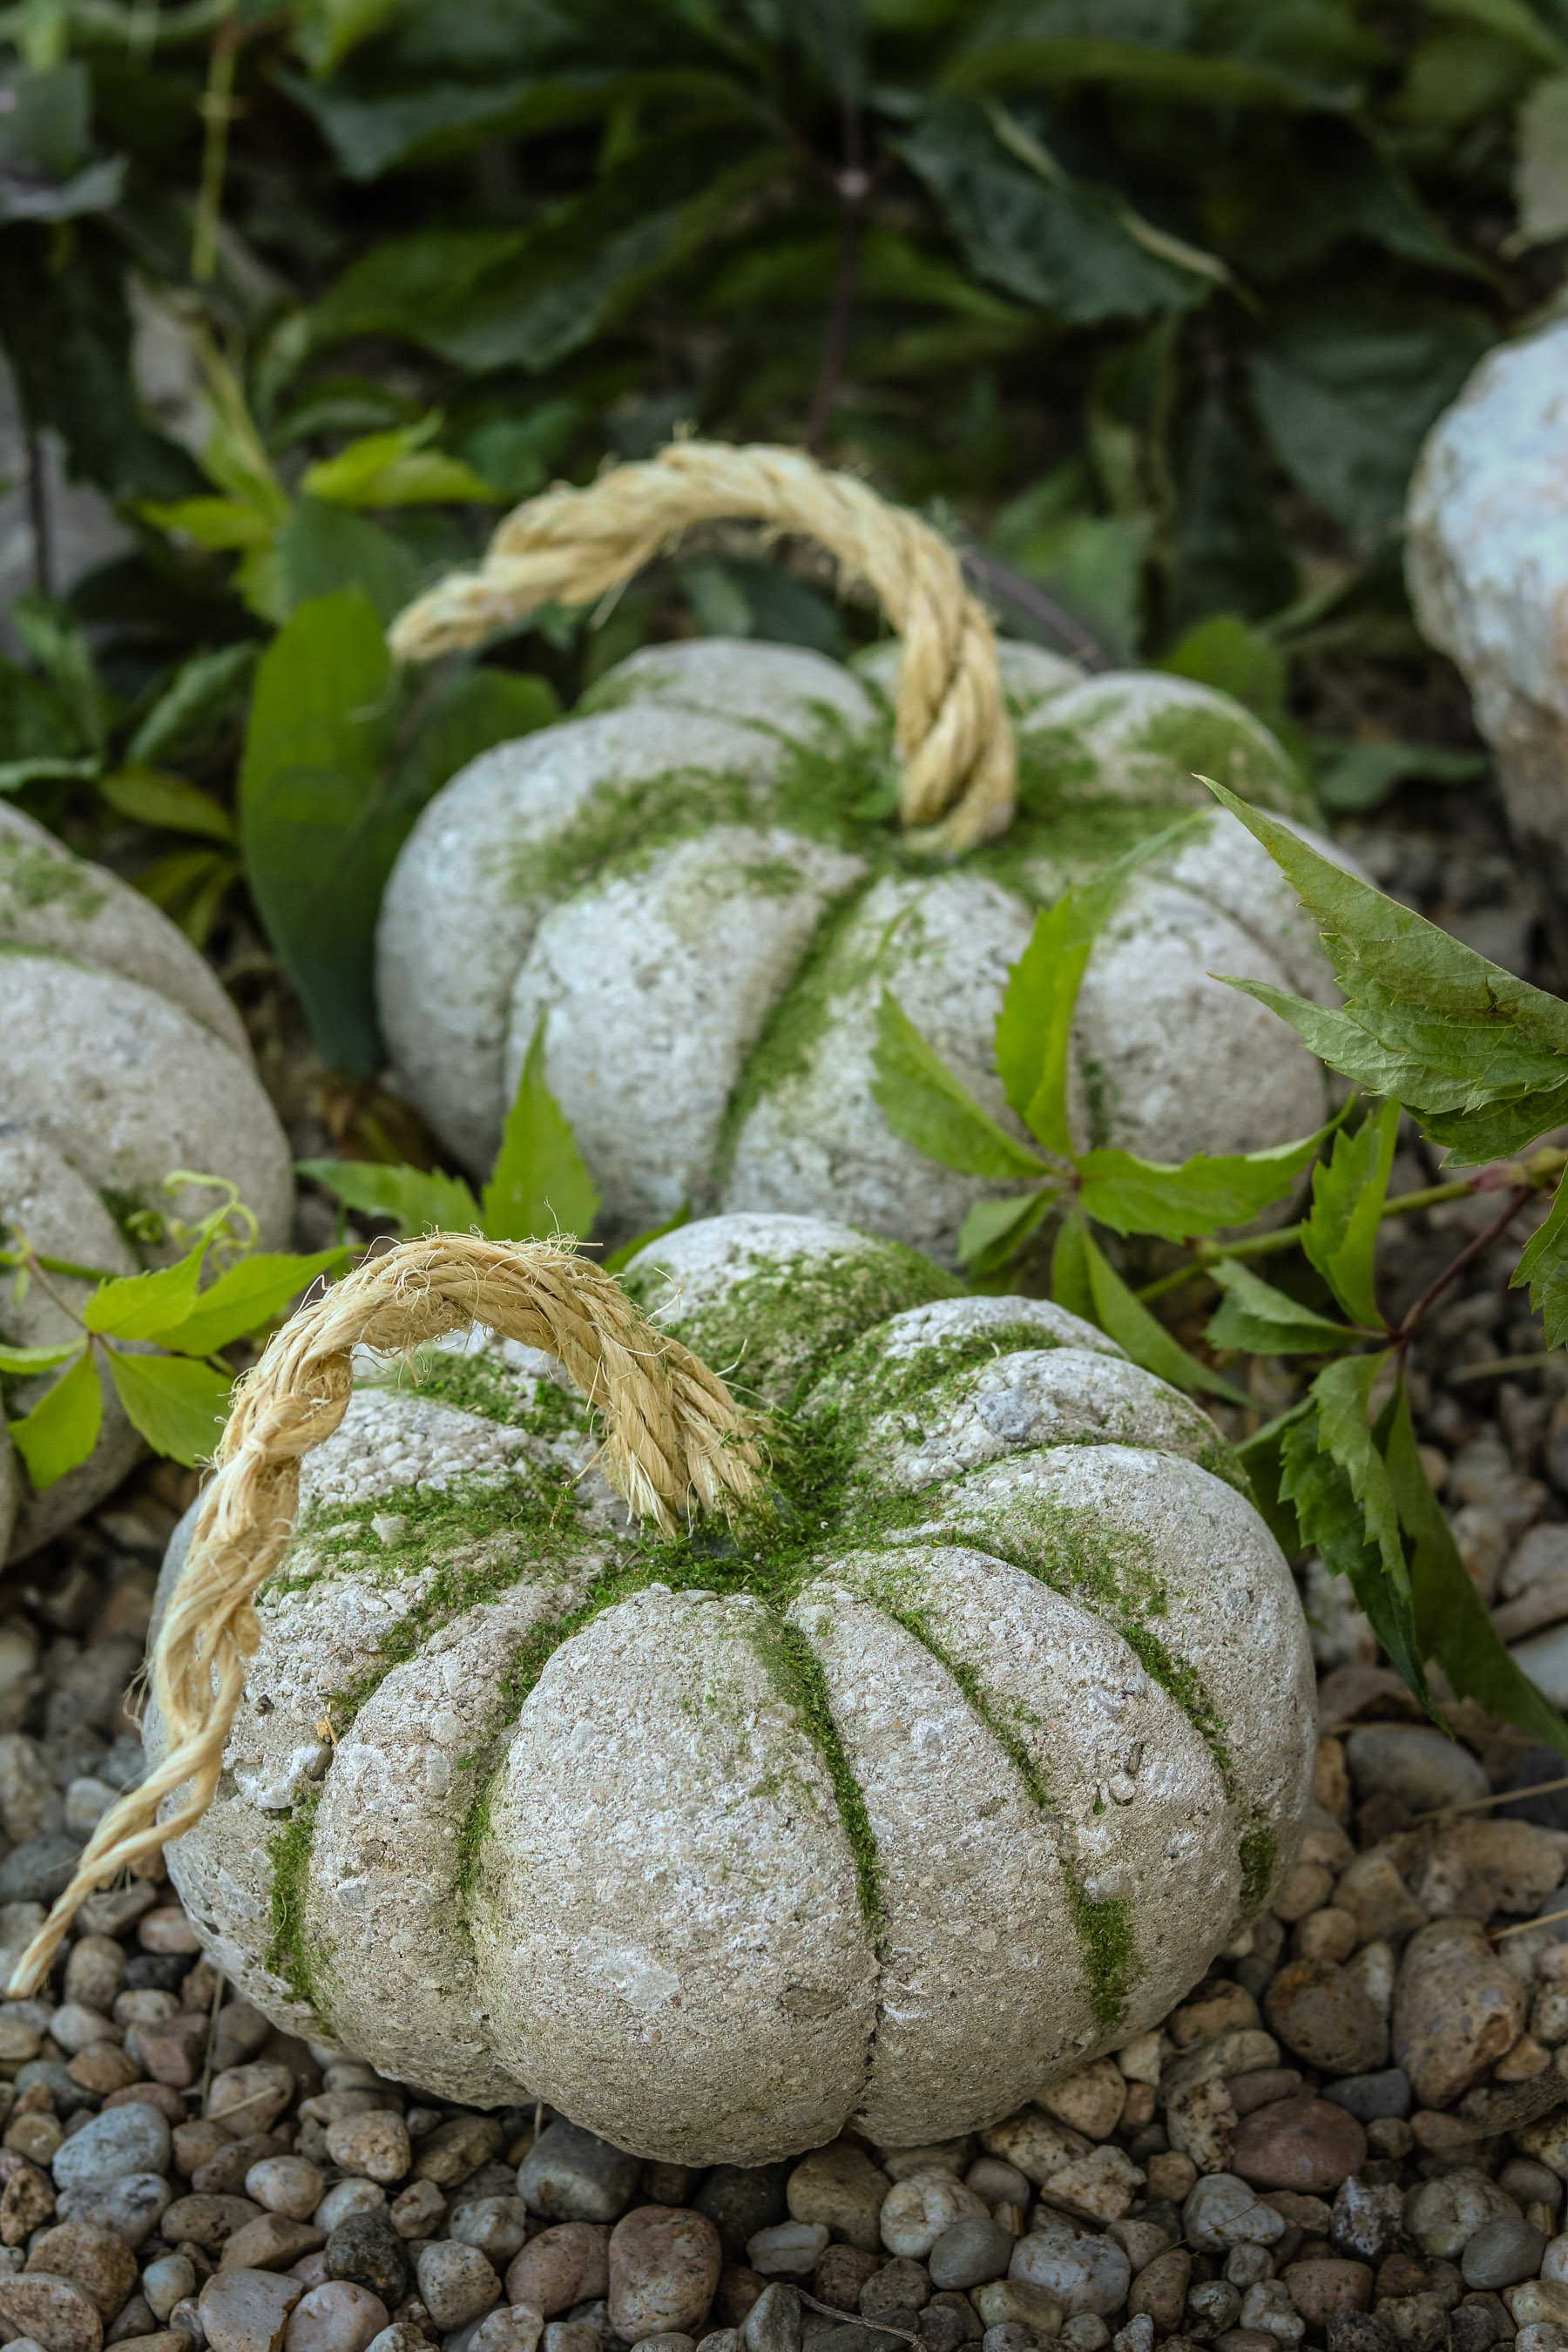
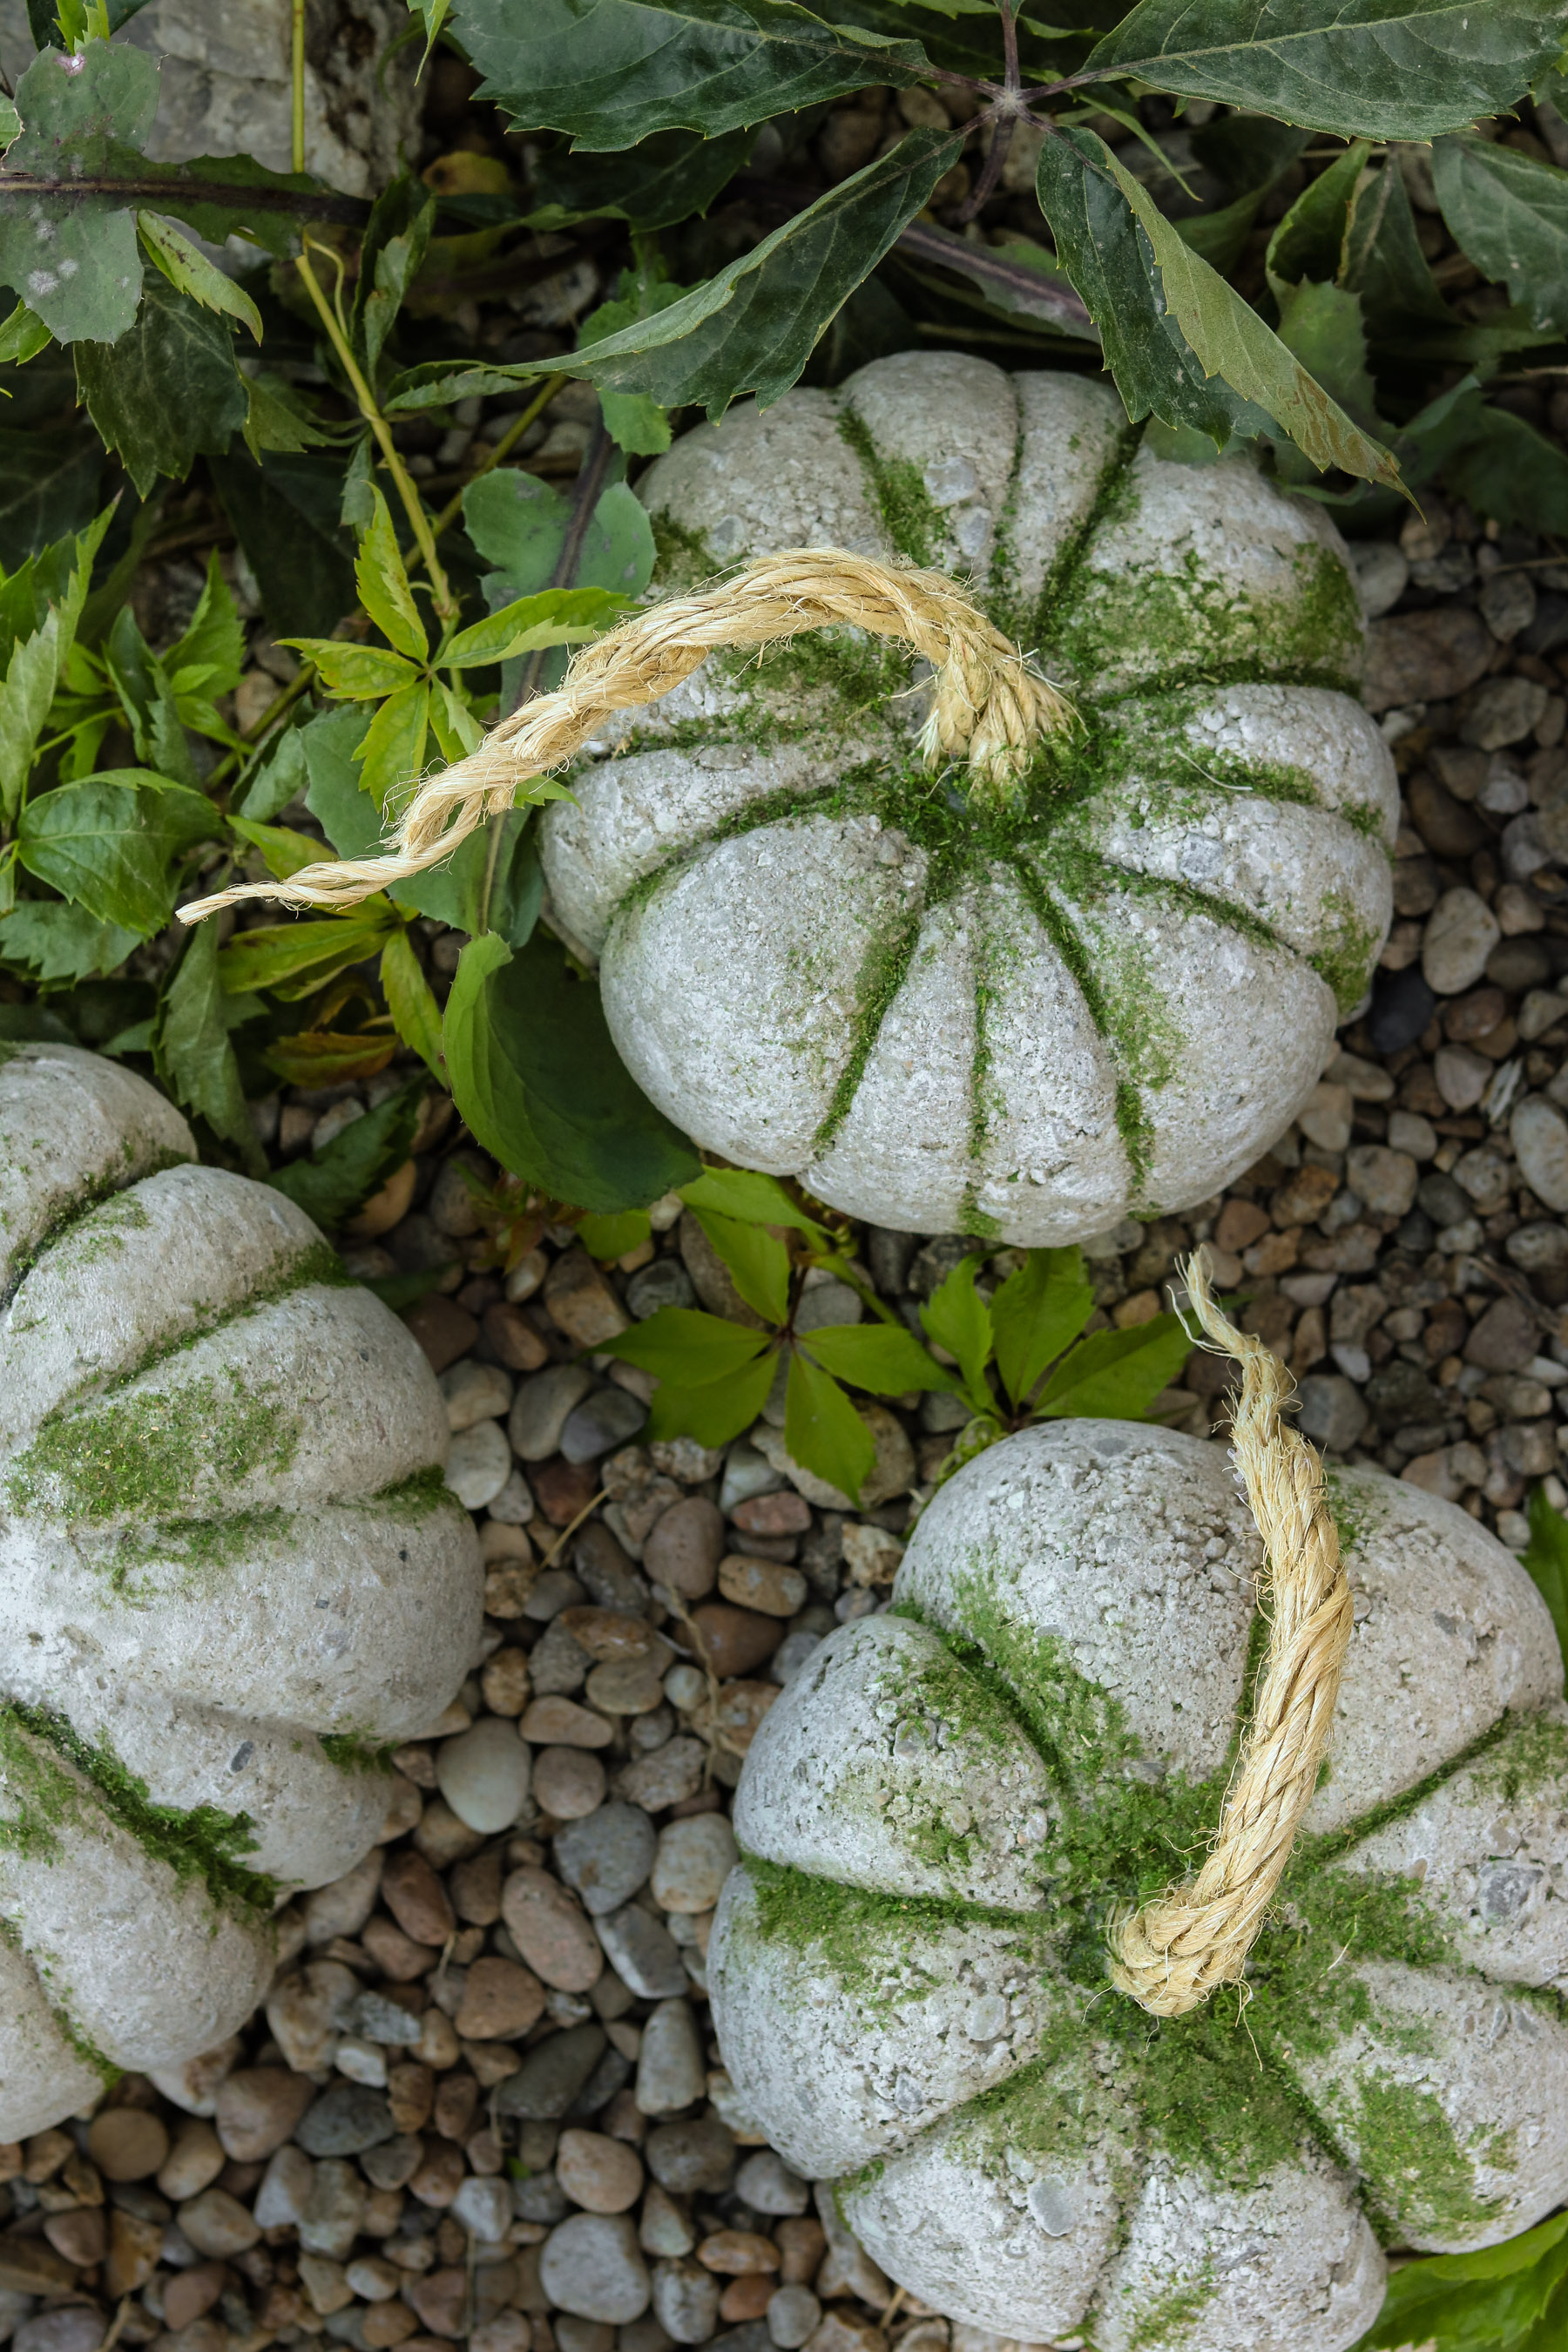
3. Following that fill your tights with concrete. Make sure and massage the mixture around every time you add a few spoons. This will help the pumpkin take shape better. Than either tie with string or use a rubber band to tighten off sections. Section it off in a pizza cutting pattern.

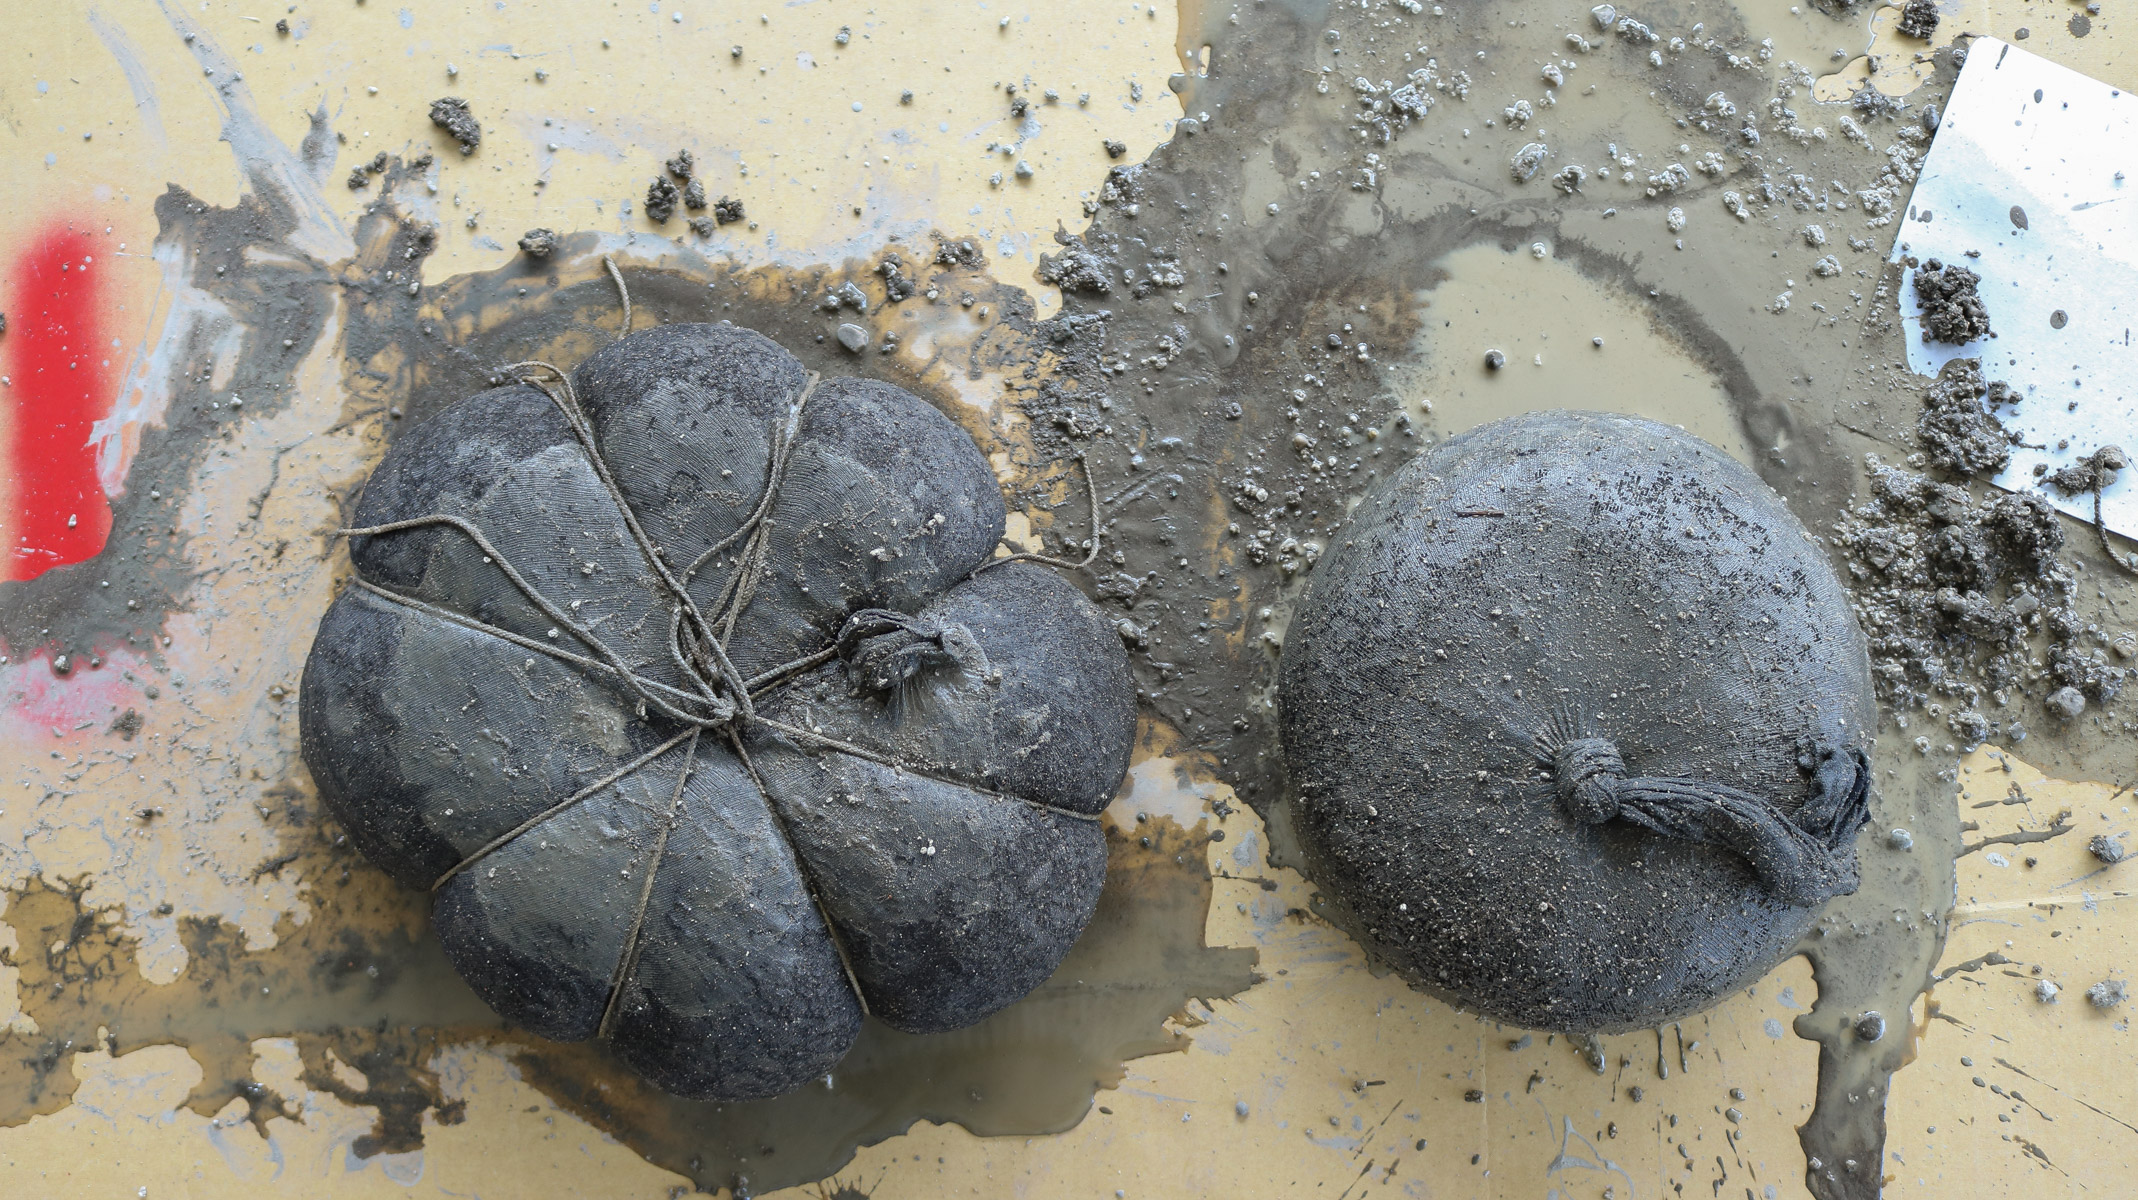
The bigger pumpkin was tightened off with string and the smaller one was simply done with rubber bands. You can let them dry on top of each other or lay them out separately. I chose to lay them out separately since I figured it would quicken drying time. 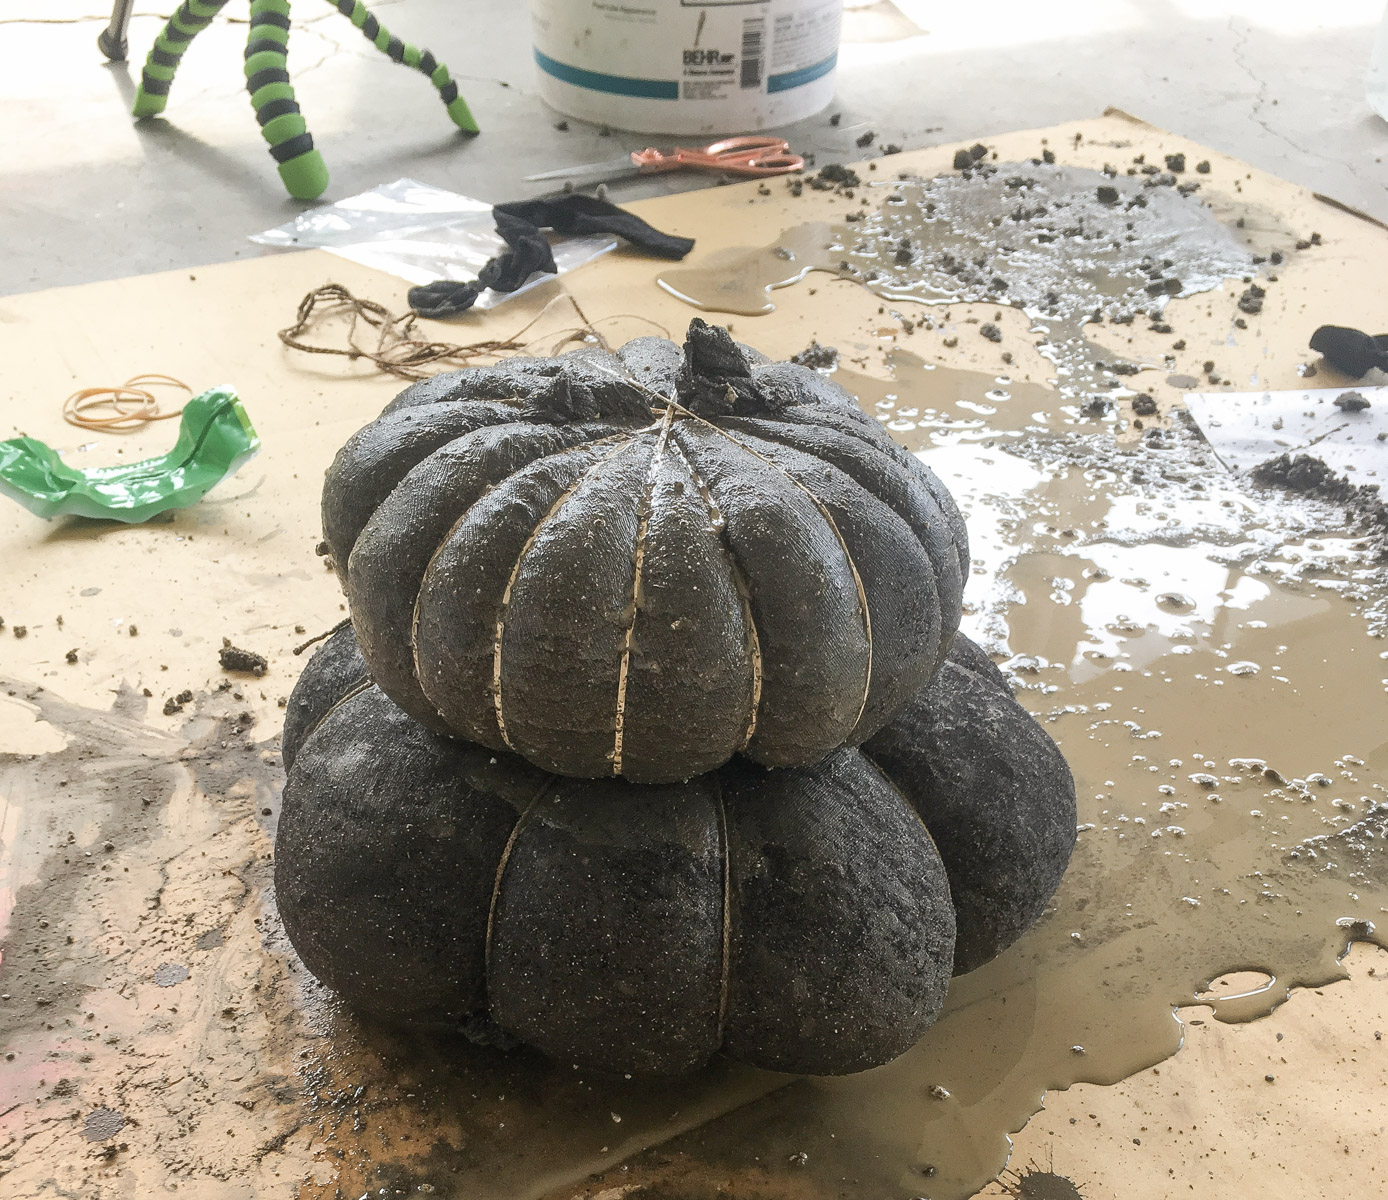
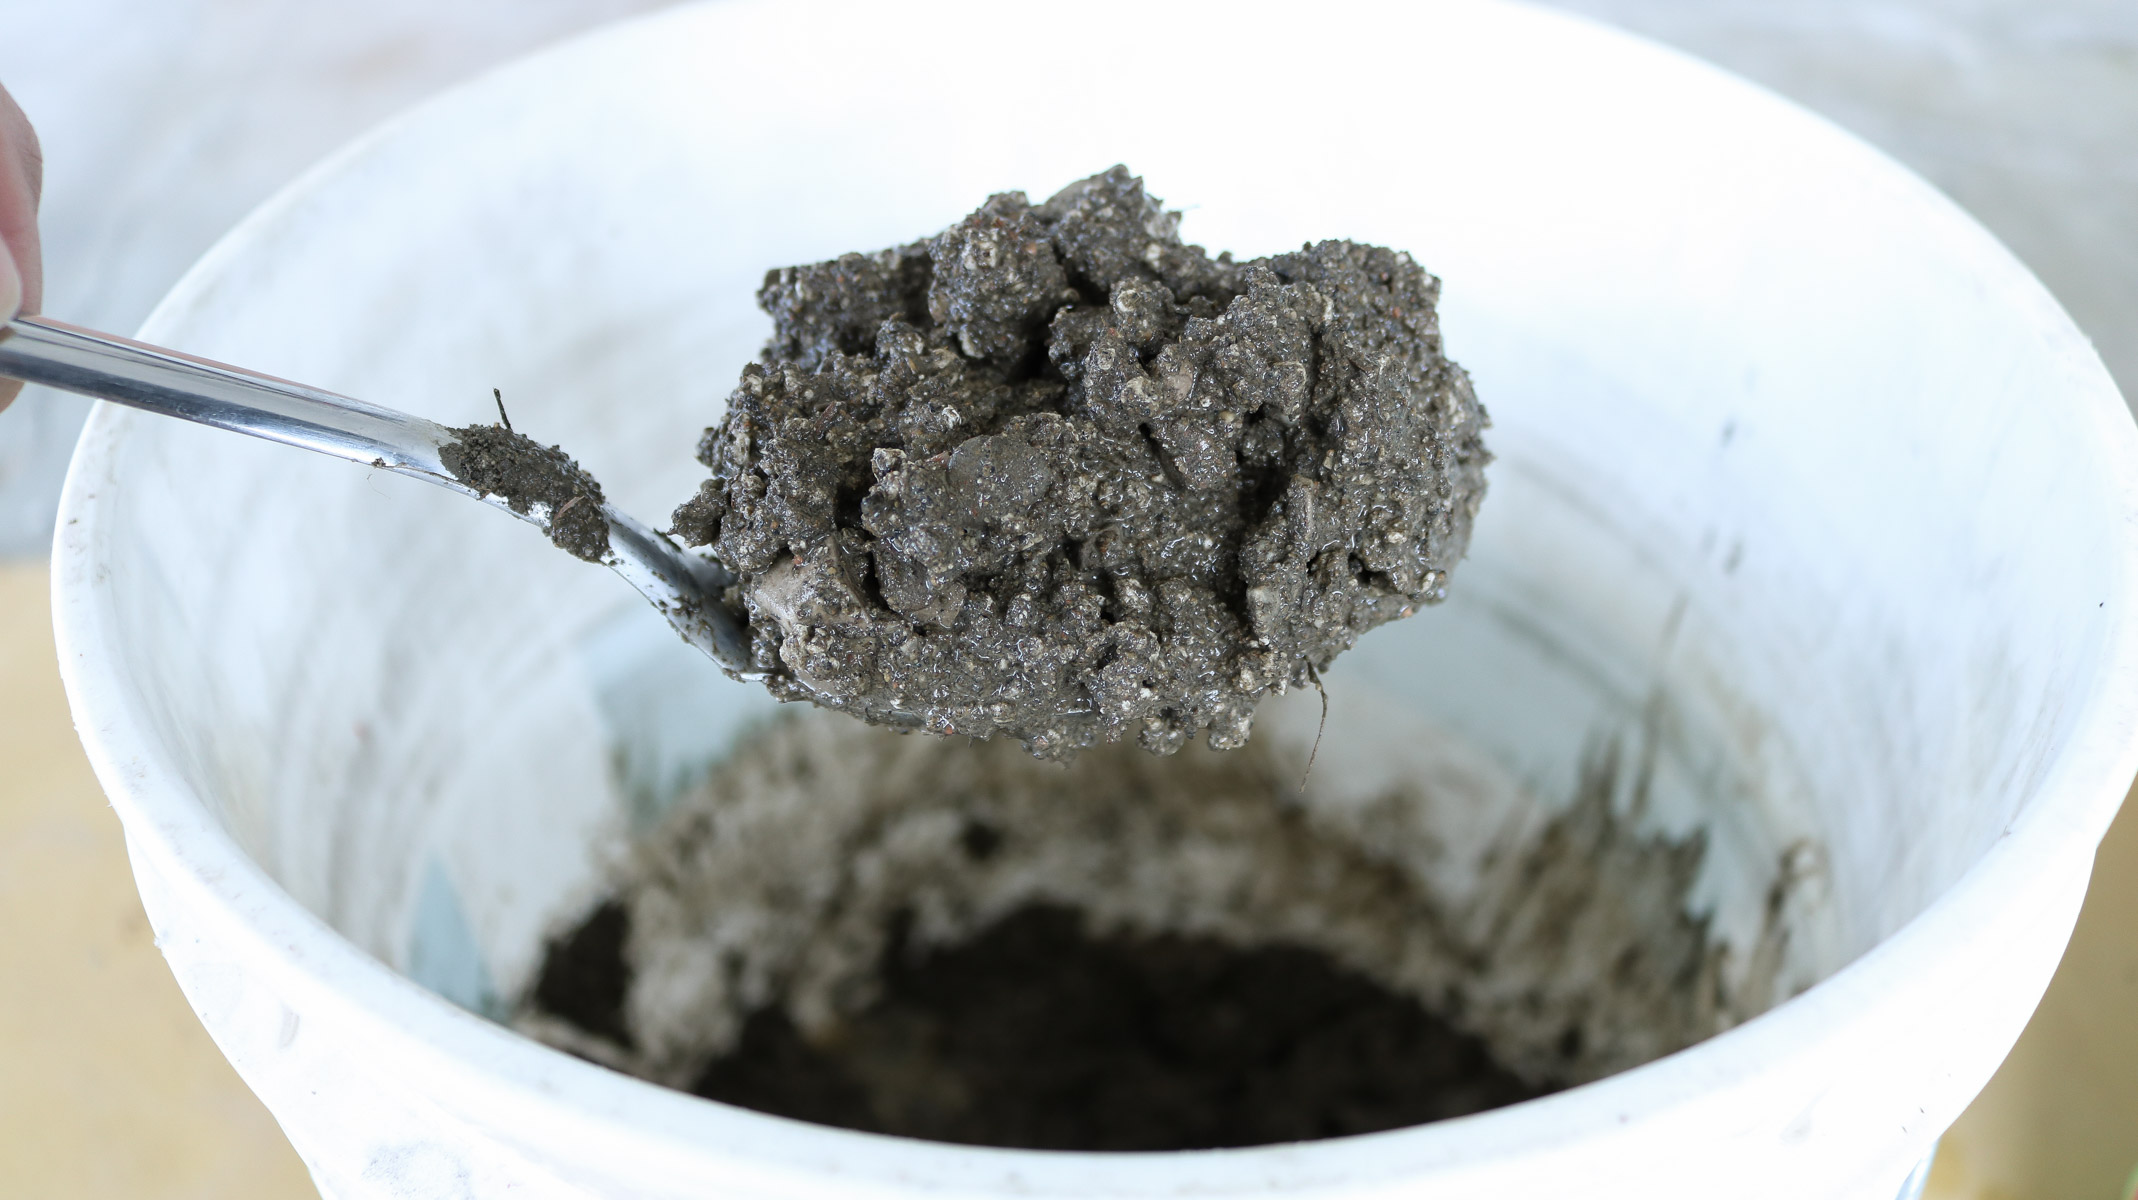
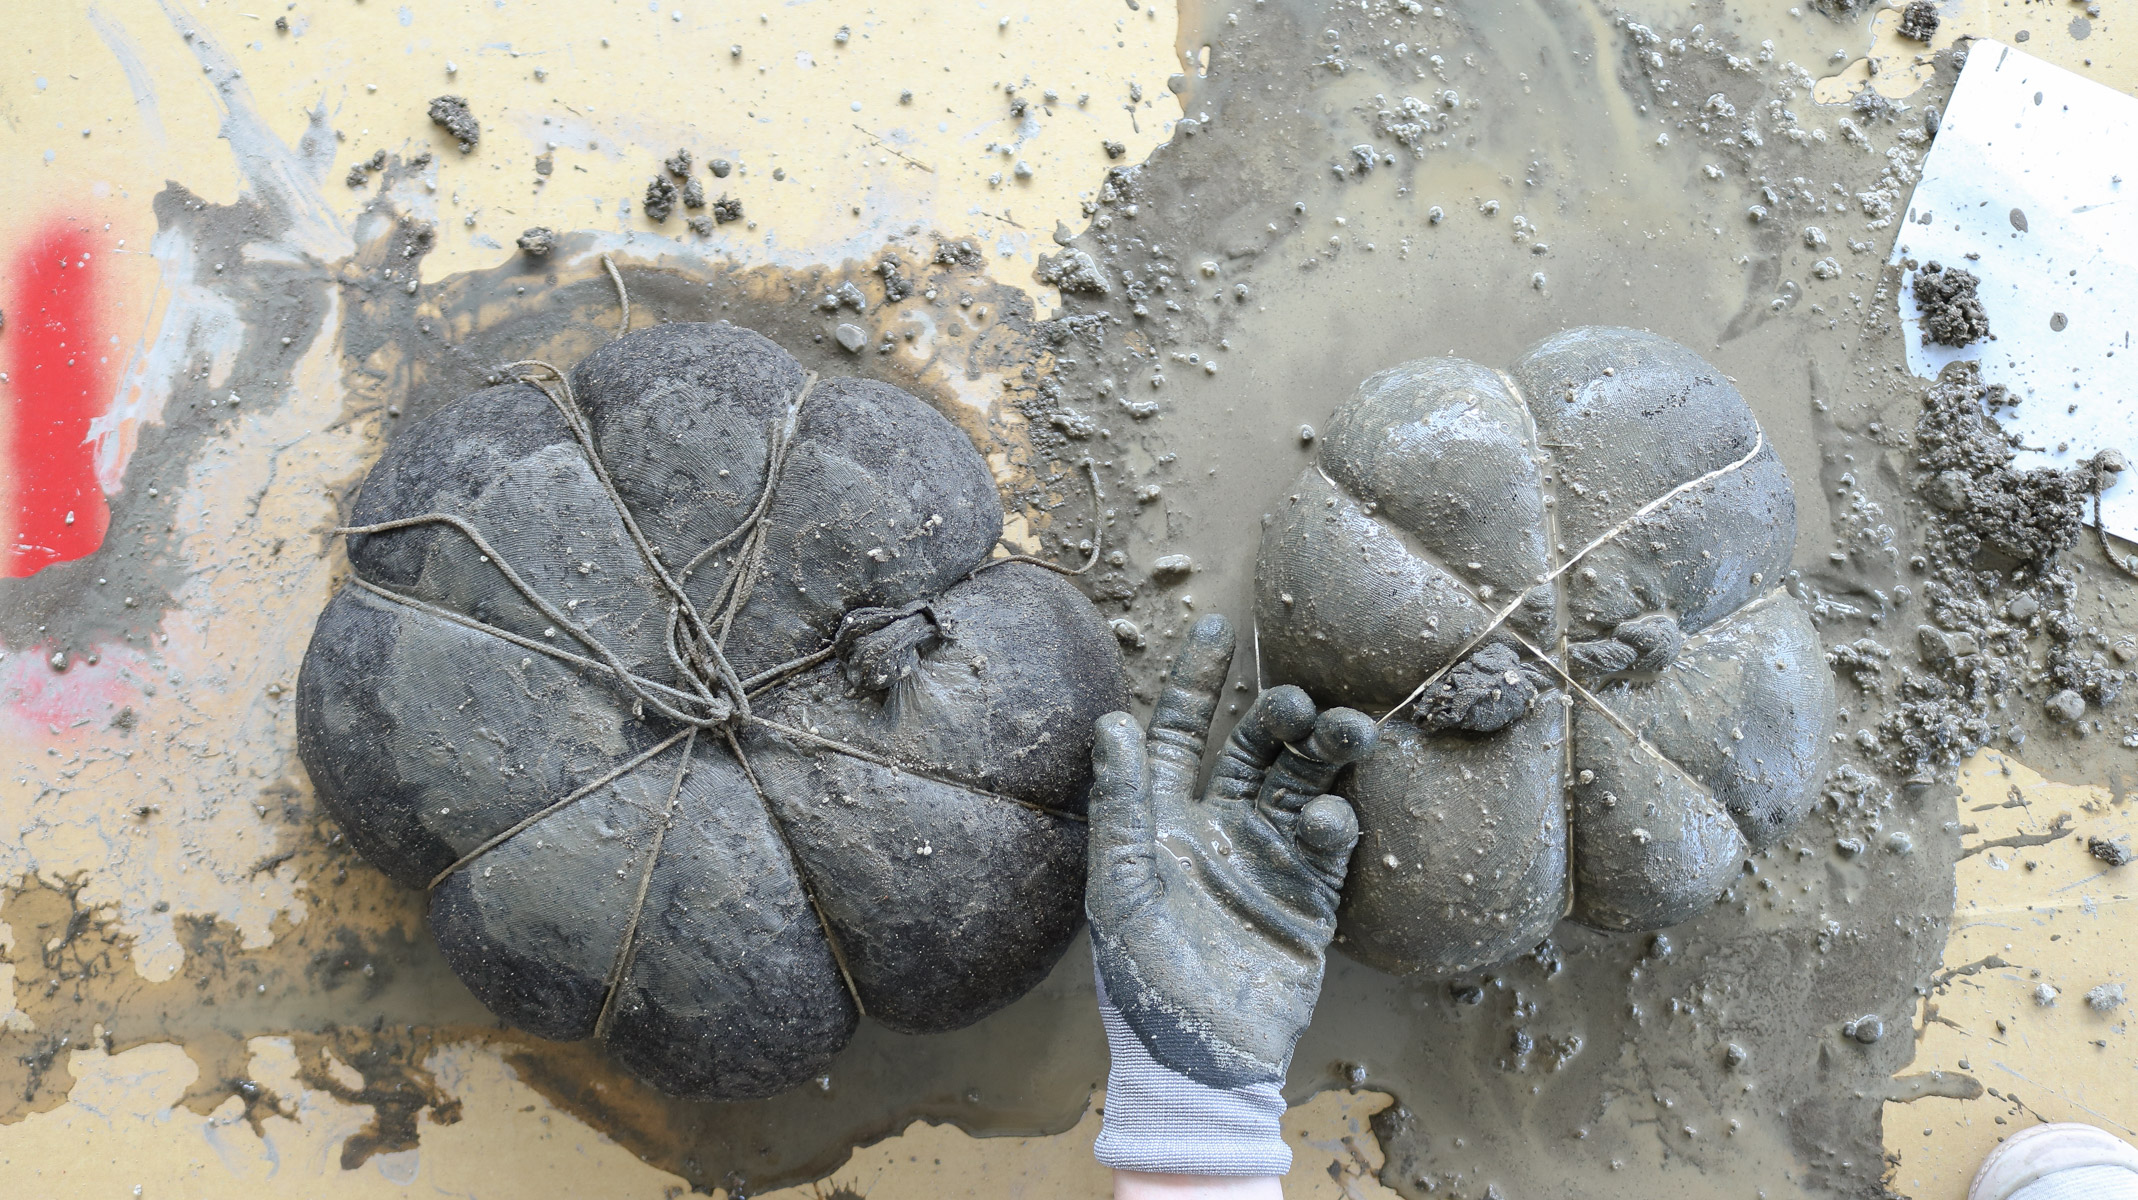
Here’s a photo (below) showing my biggest pumpkin stuffed and ready to be sectioned off. I ended up removing a few spoons and really having to massage it to get it to take shape when I was sectioning it off. The bigger the pumpkin the harder it’ll be to section it off because the concrete get’s packed in and the tights become super tight. I’ve also noticed it’s a little easier if the concrete is a little on the wetter side. Not soupy wet just as long as it’s not too chunky and dry looking. 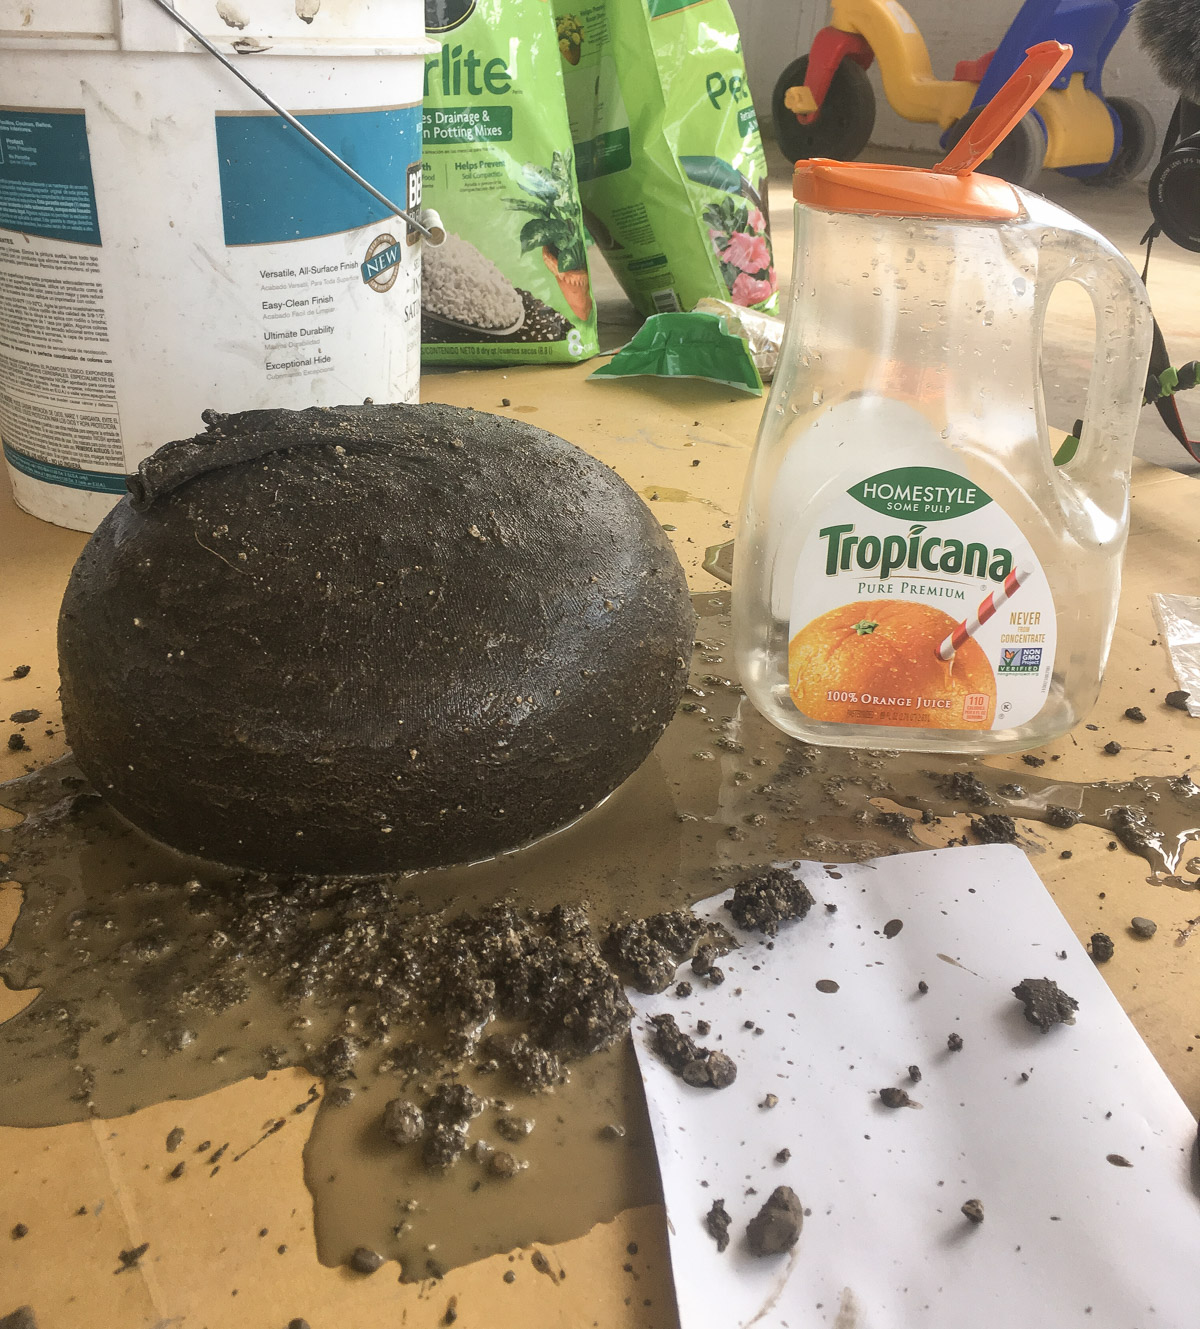
Here’s great photo (below) showing how the concrete worked best.
Adding a cute pumpkin stem!
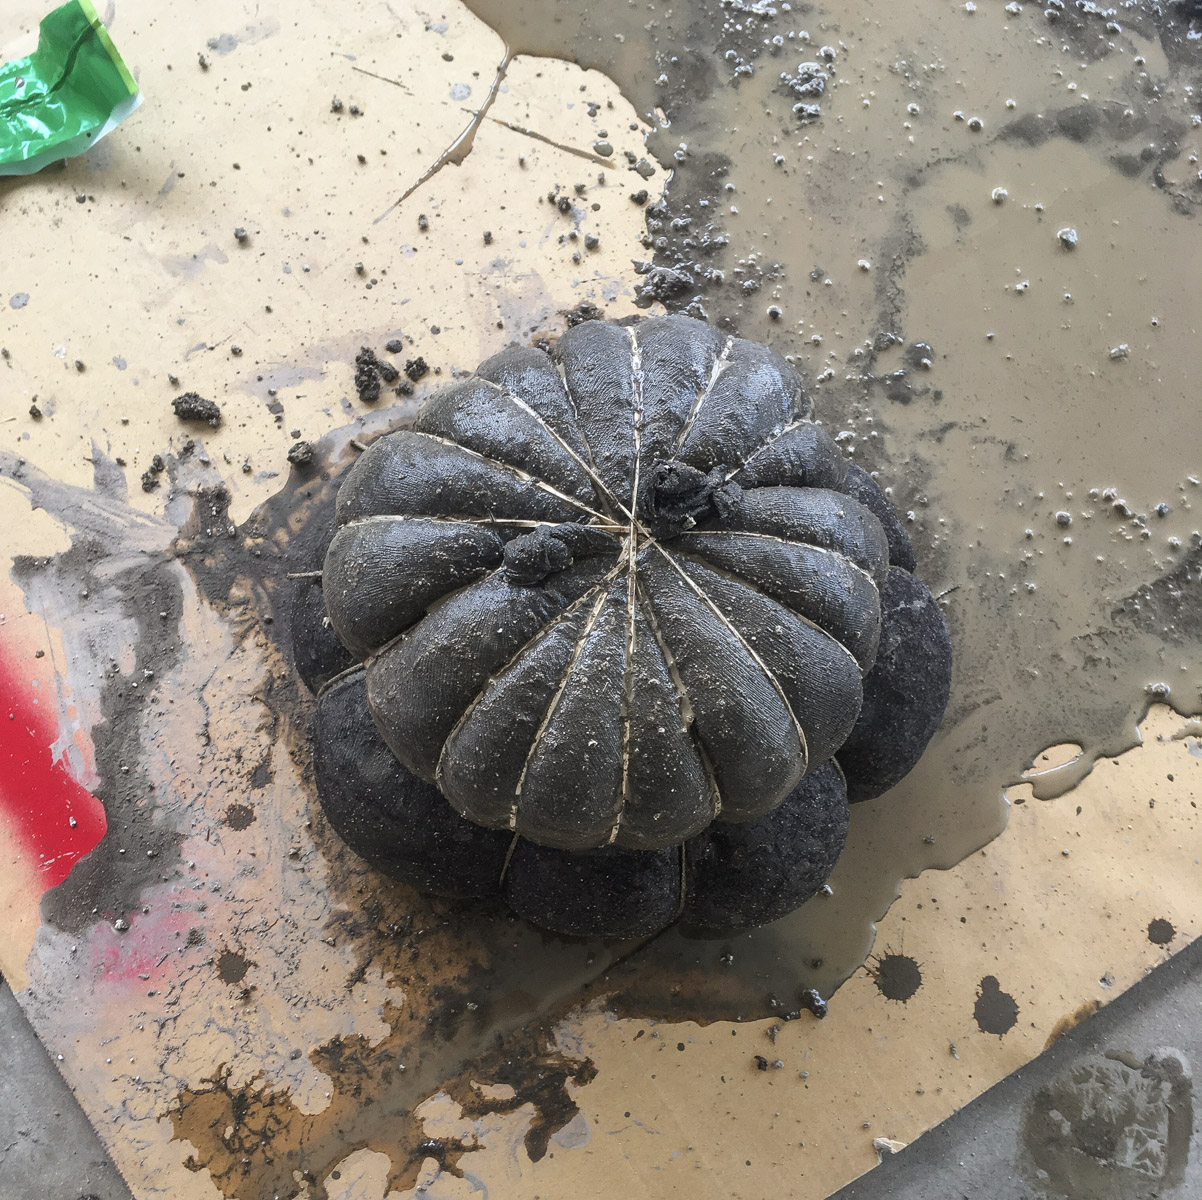
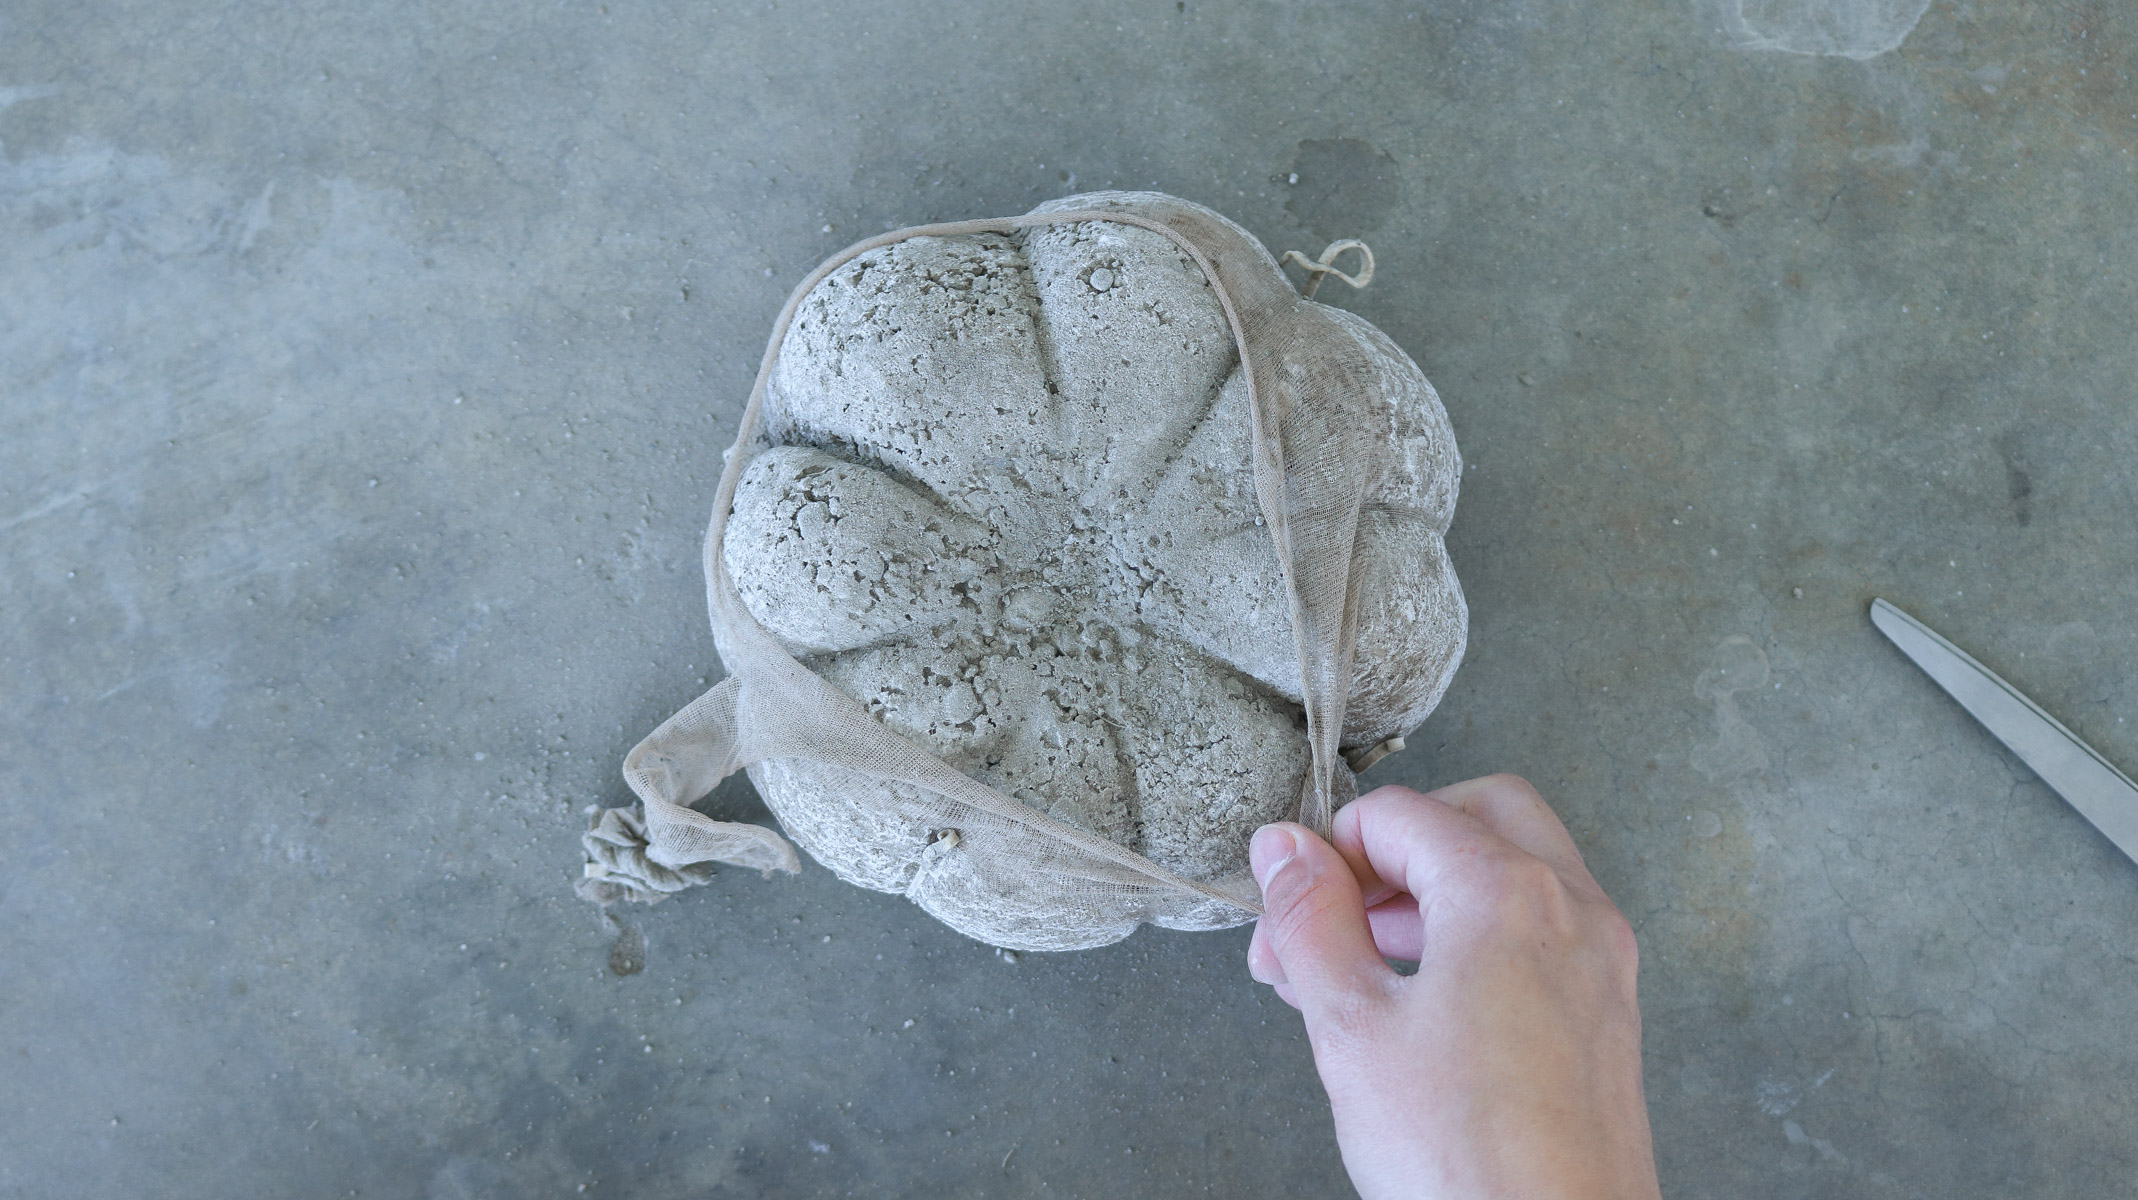
4. Okay here’s what it looked like 4 days after drying. I would not recommend removing the pantyhose any sooner. You want it to be as dry as possible because it’ll be stronger. If you remove your rubber bands too soon and they’re too deep in the pumpkins they can rip chunks off the pumpkin.
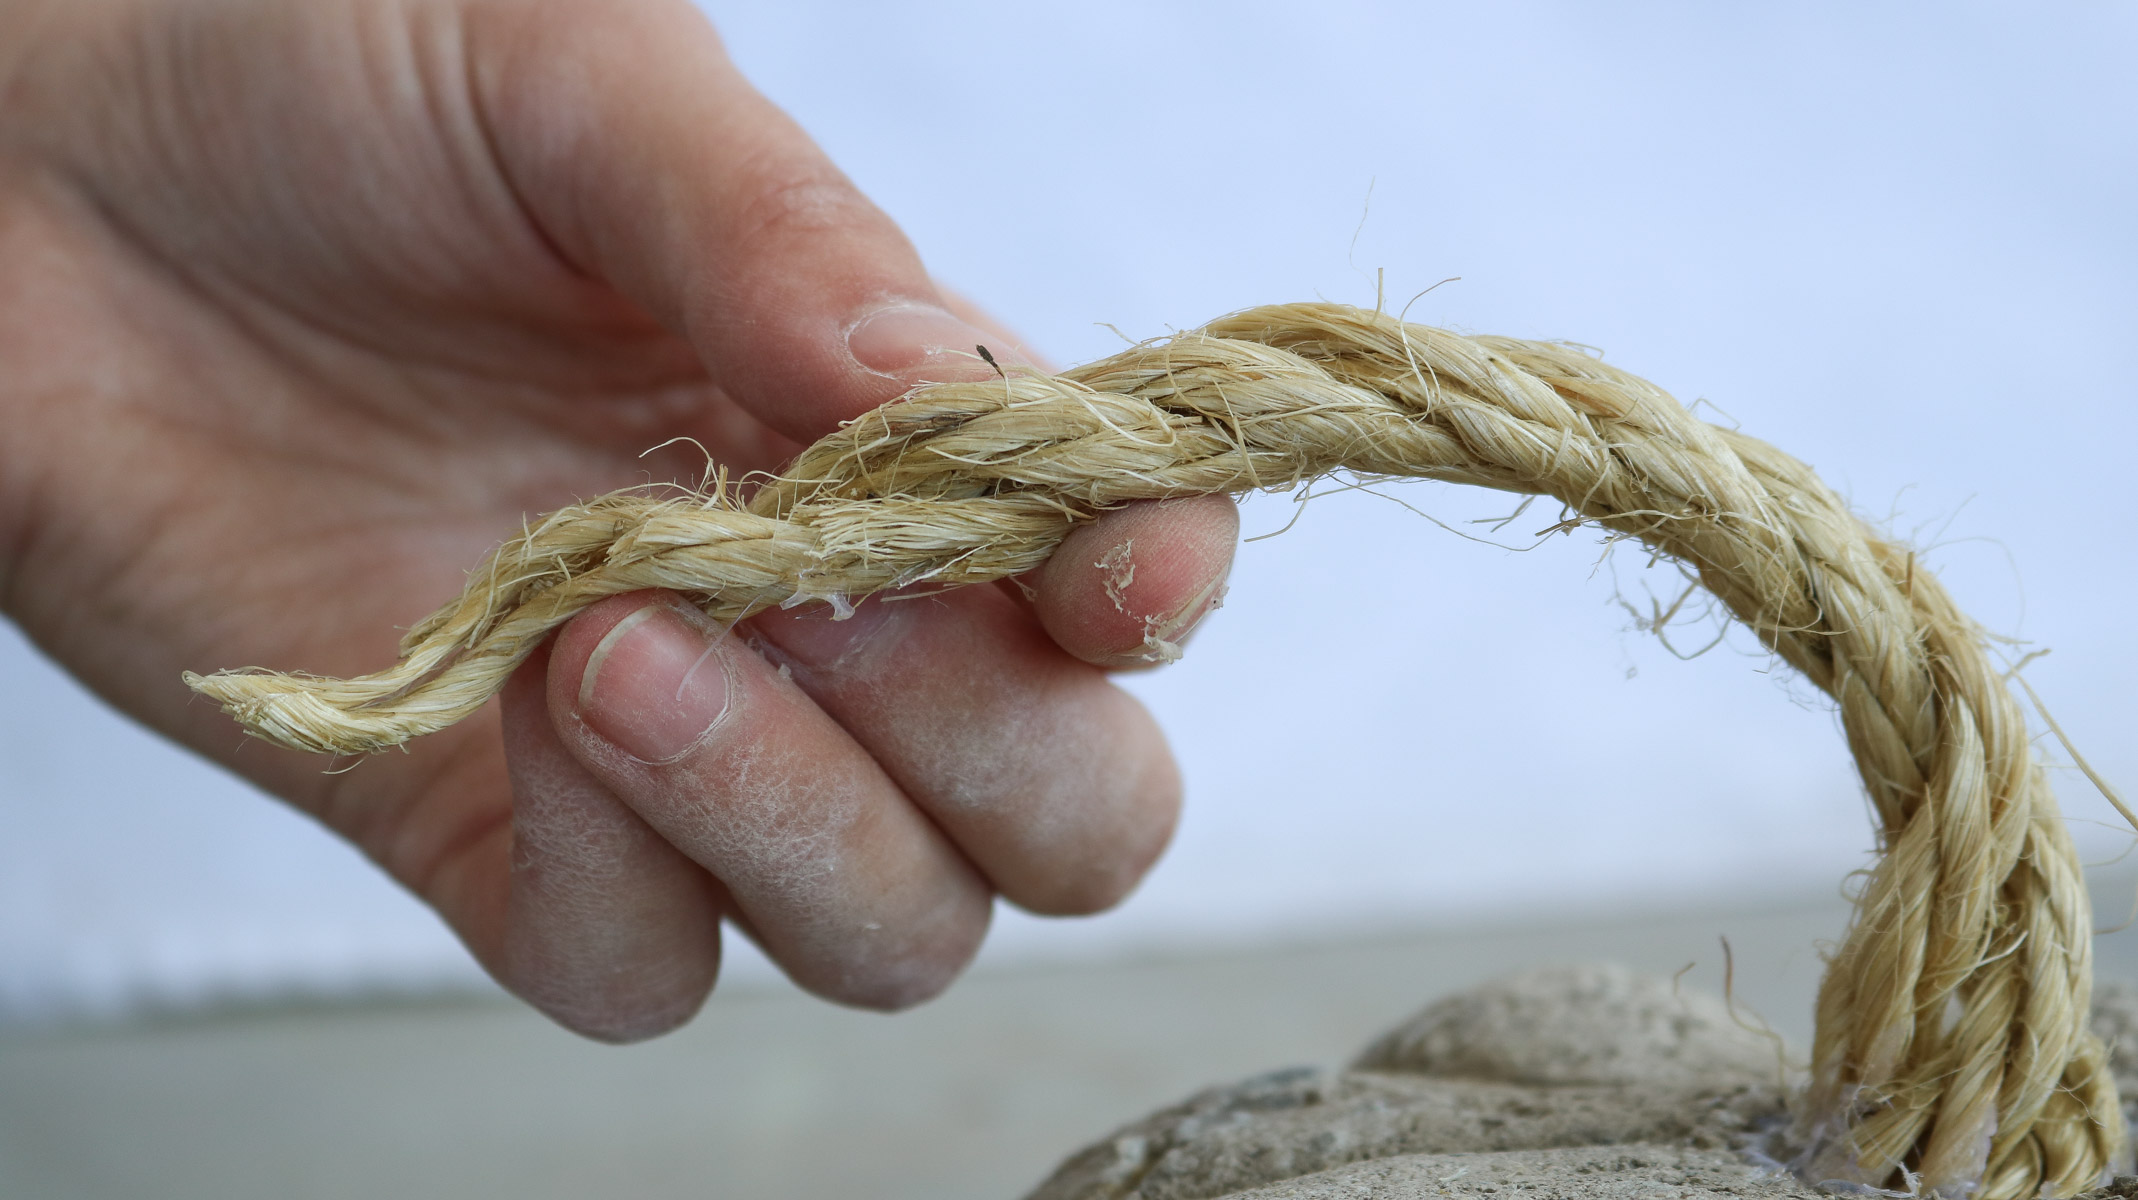
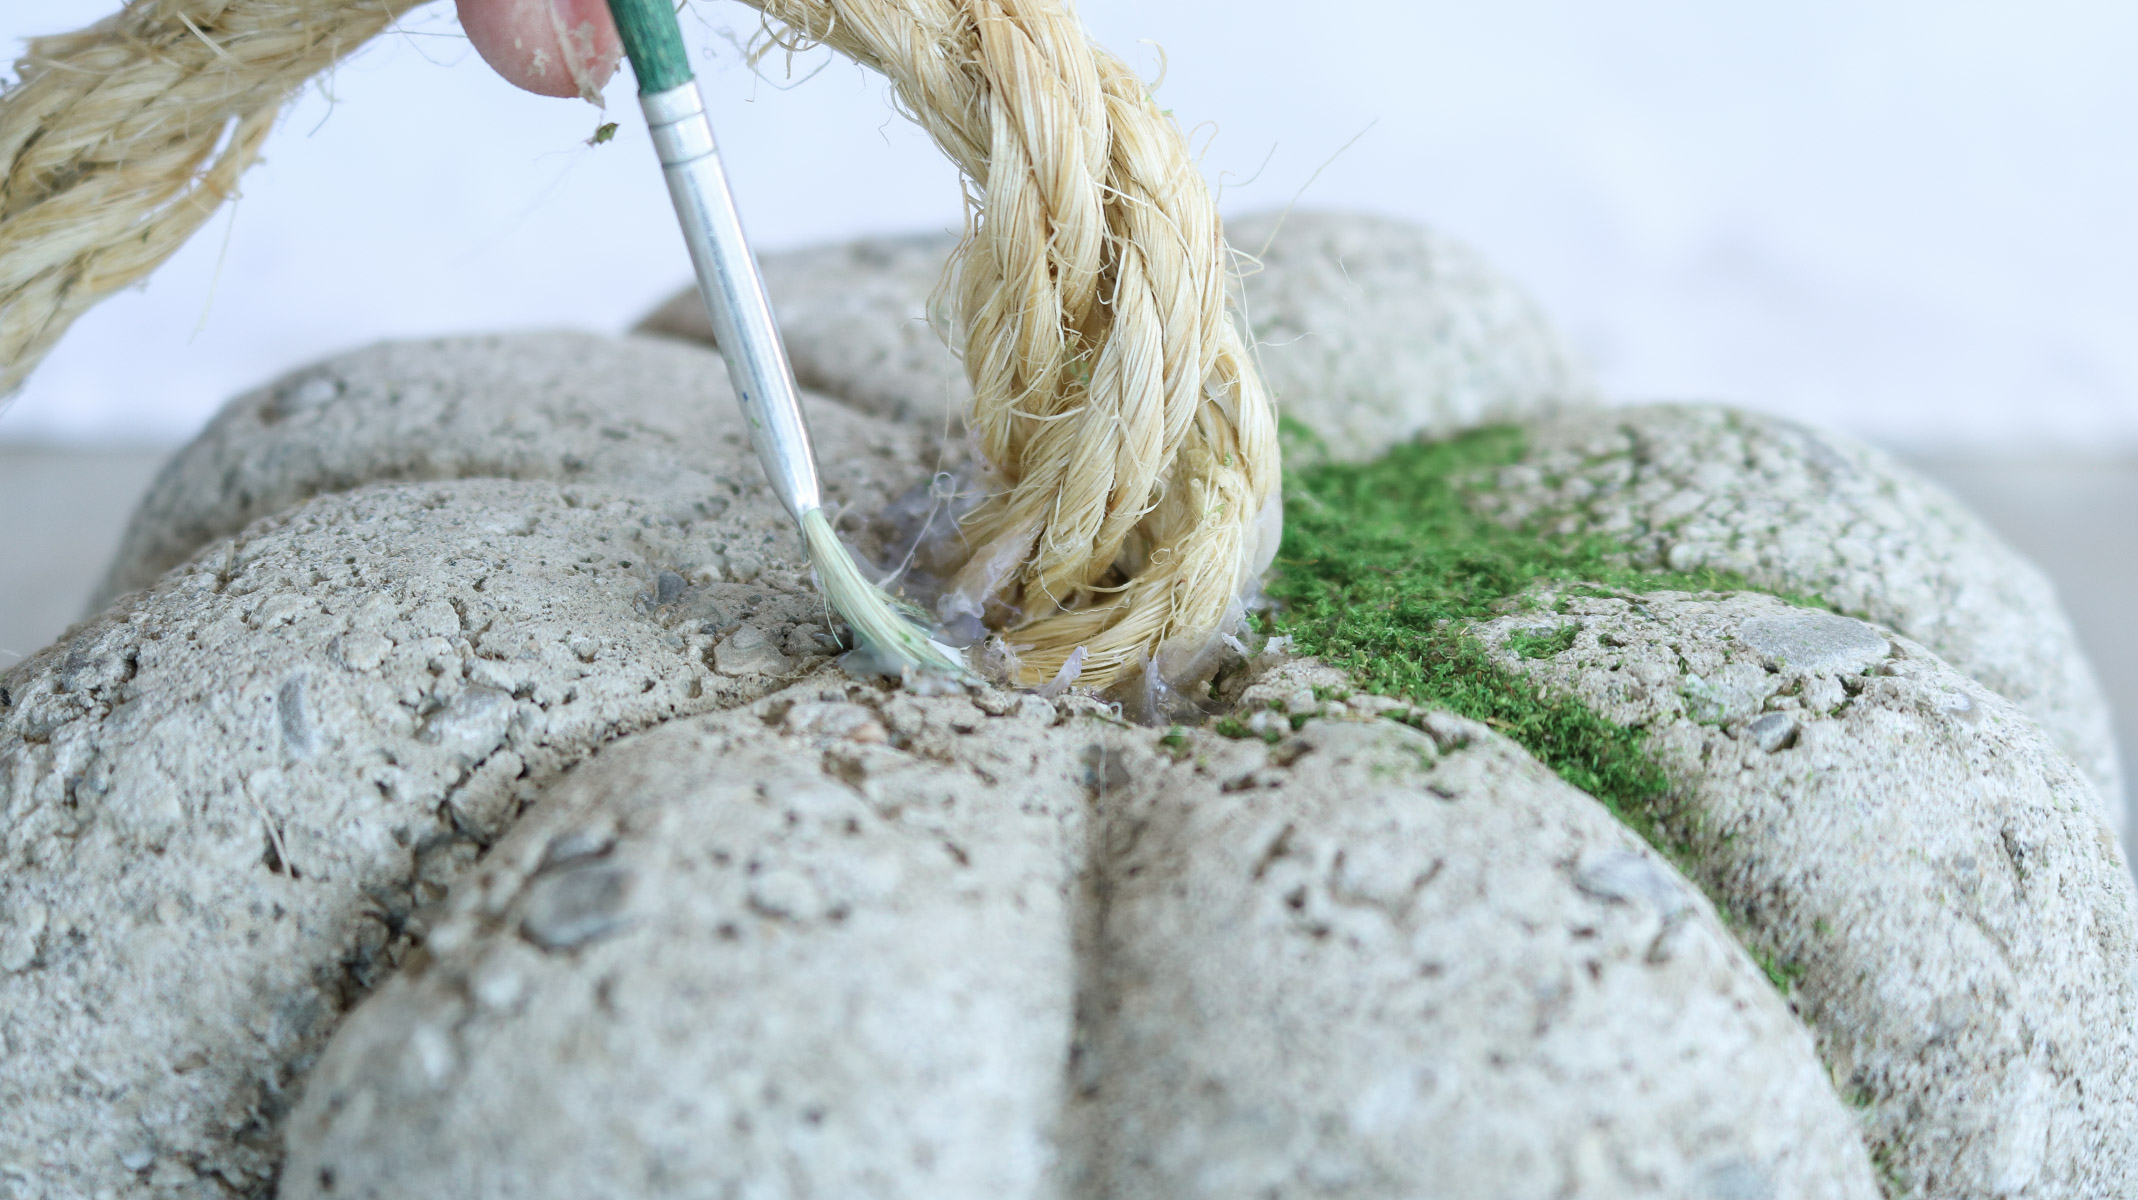
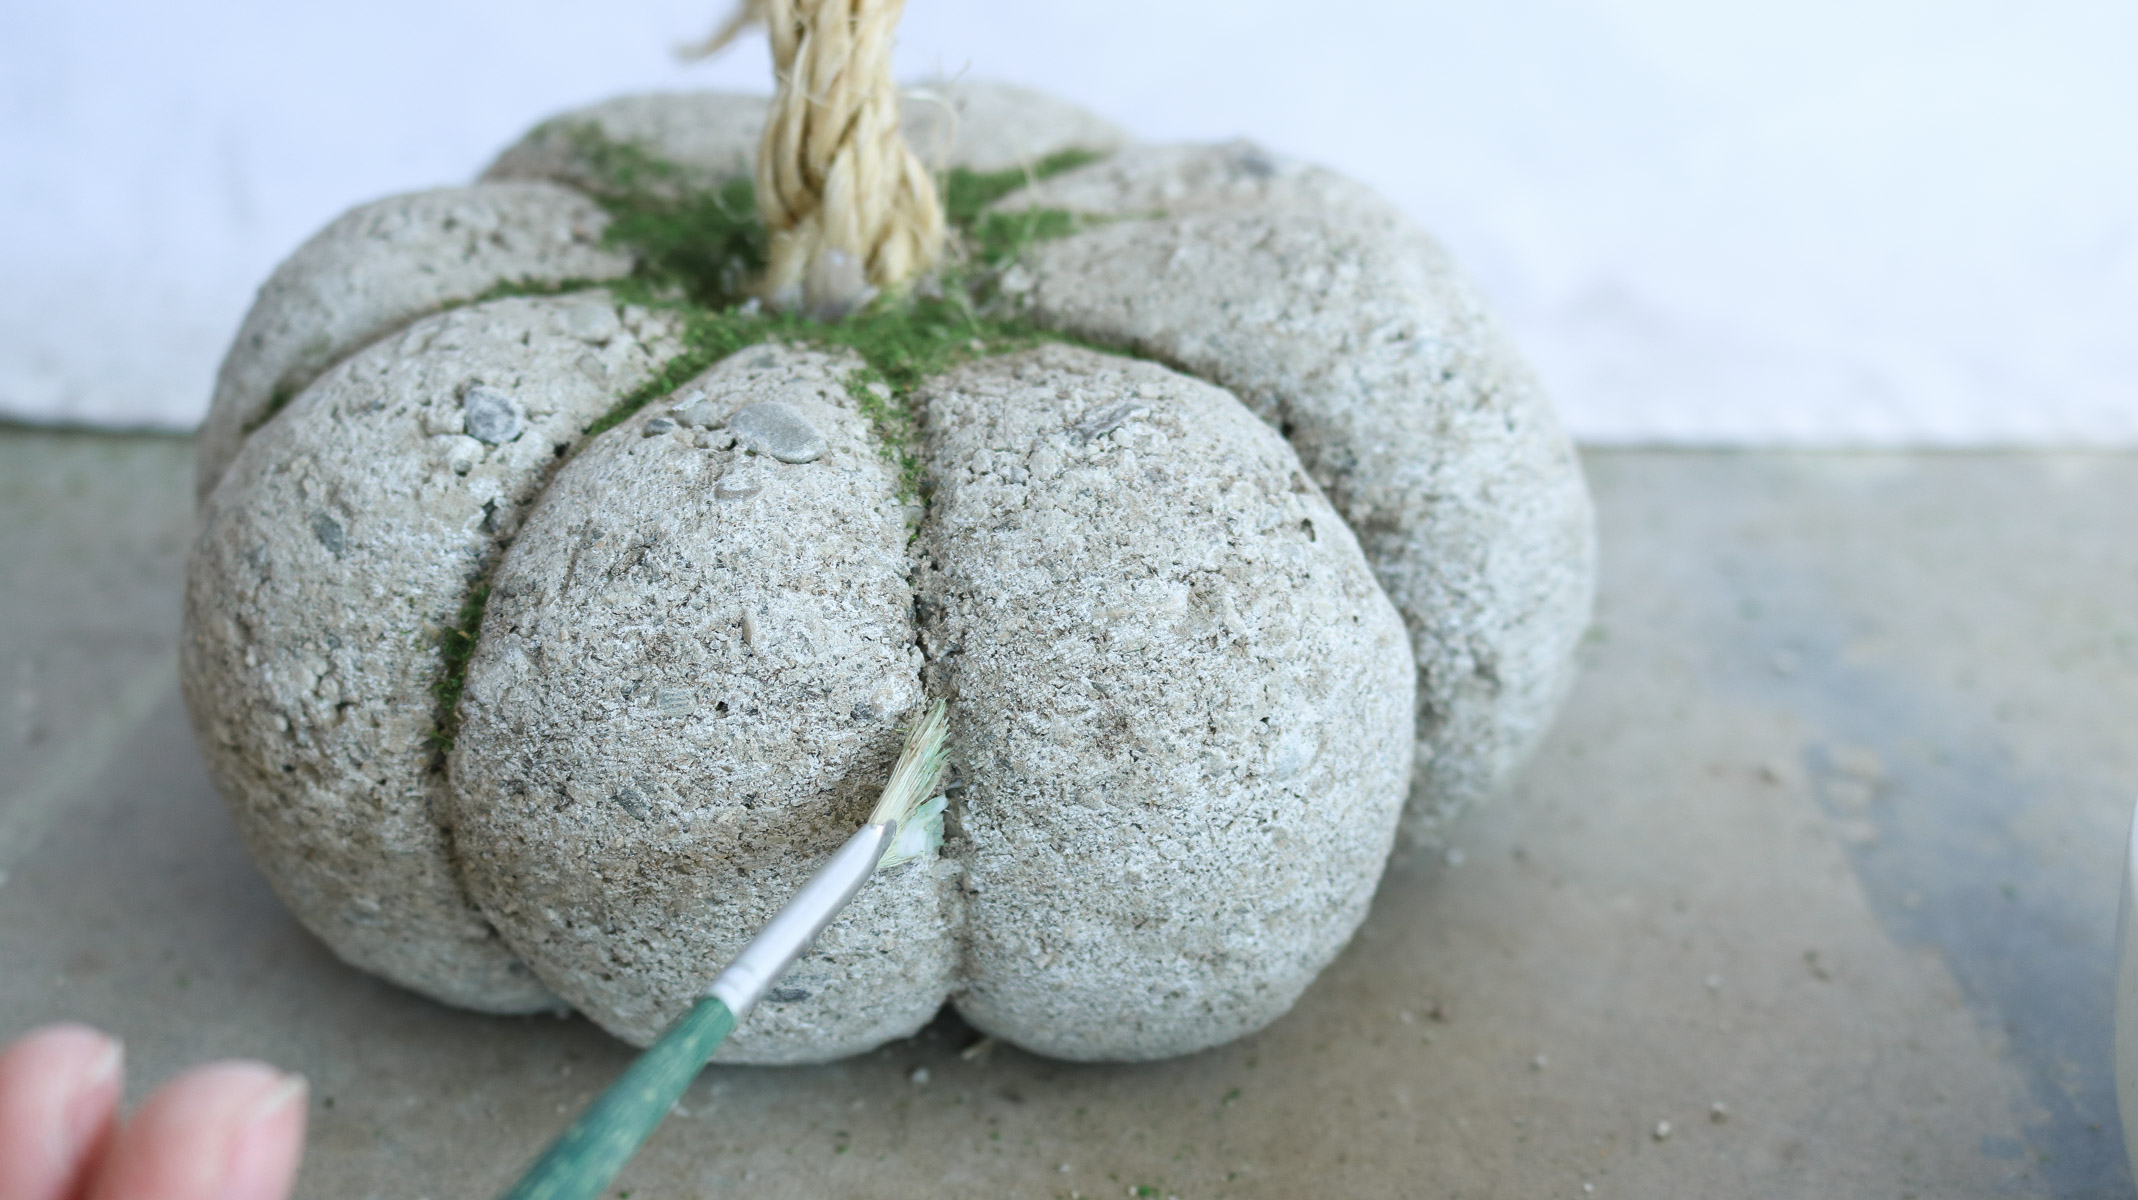
So this is super easy. You will simply need to cut off about a 6 inch piece of rope. Loosen it up on one side where your stem will attach to your pumpkin. Then brush off any dust or loose concrete where you plan to secure the stem. The better you brush it off the better your stem will stick. And apply a big blob of glue to the area. Take your rope and hold it in place until it dries enough to sit on it’s own. 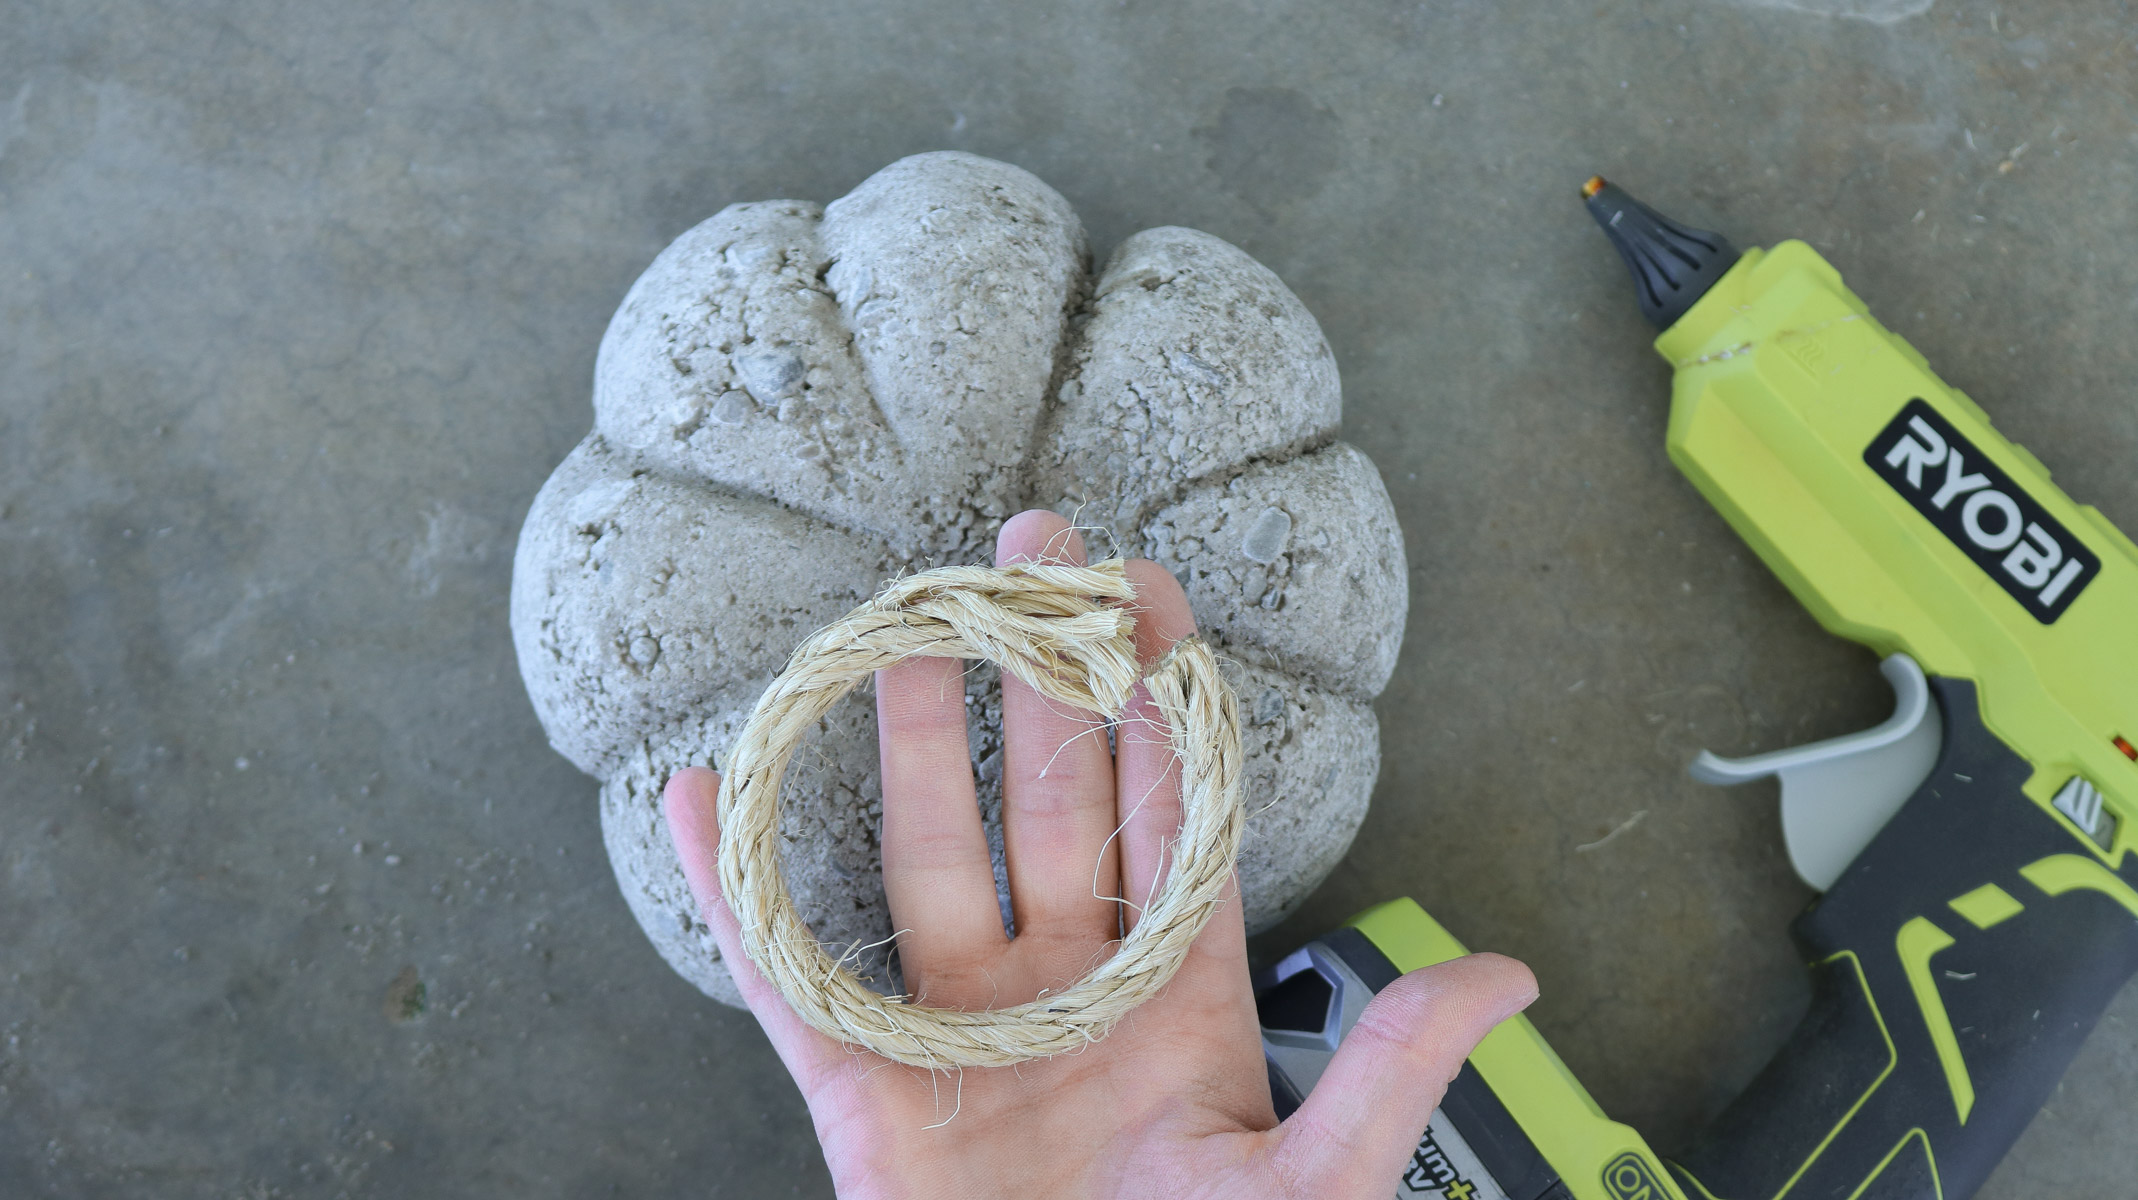
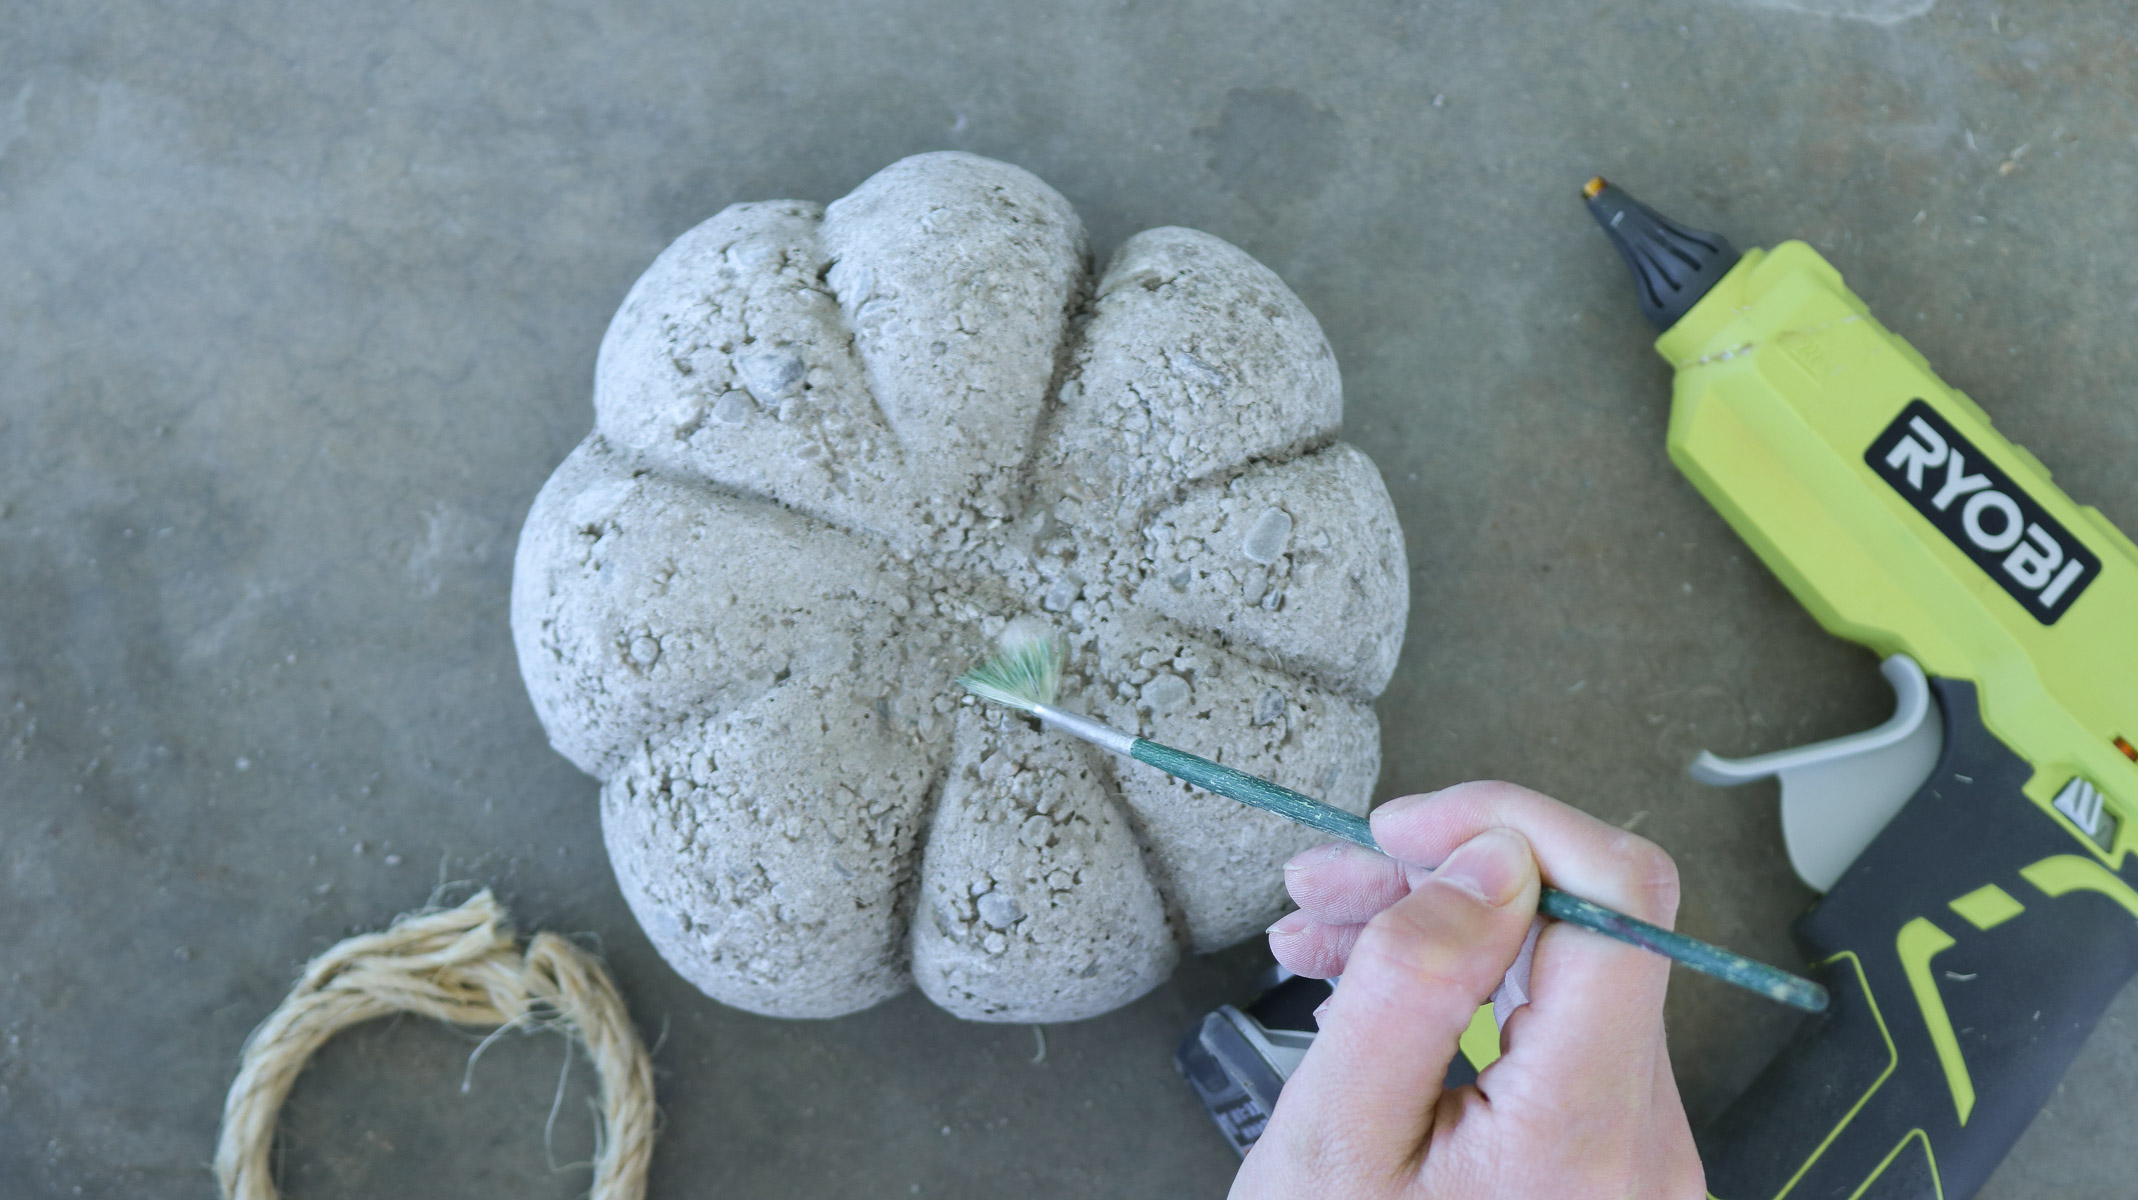

Following that use some scissors to thin out your stem.
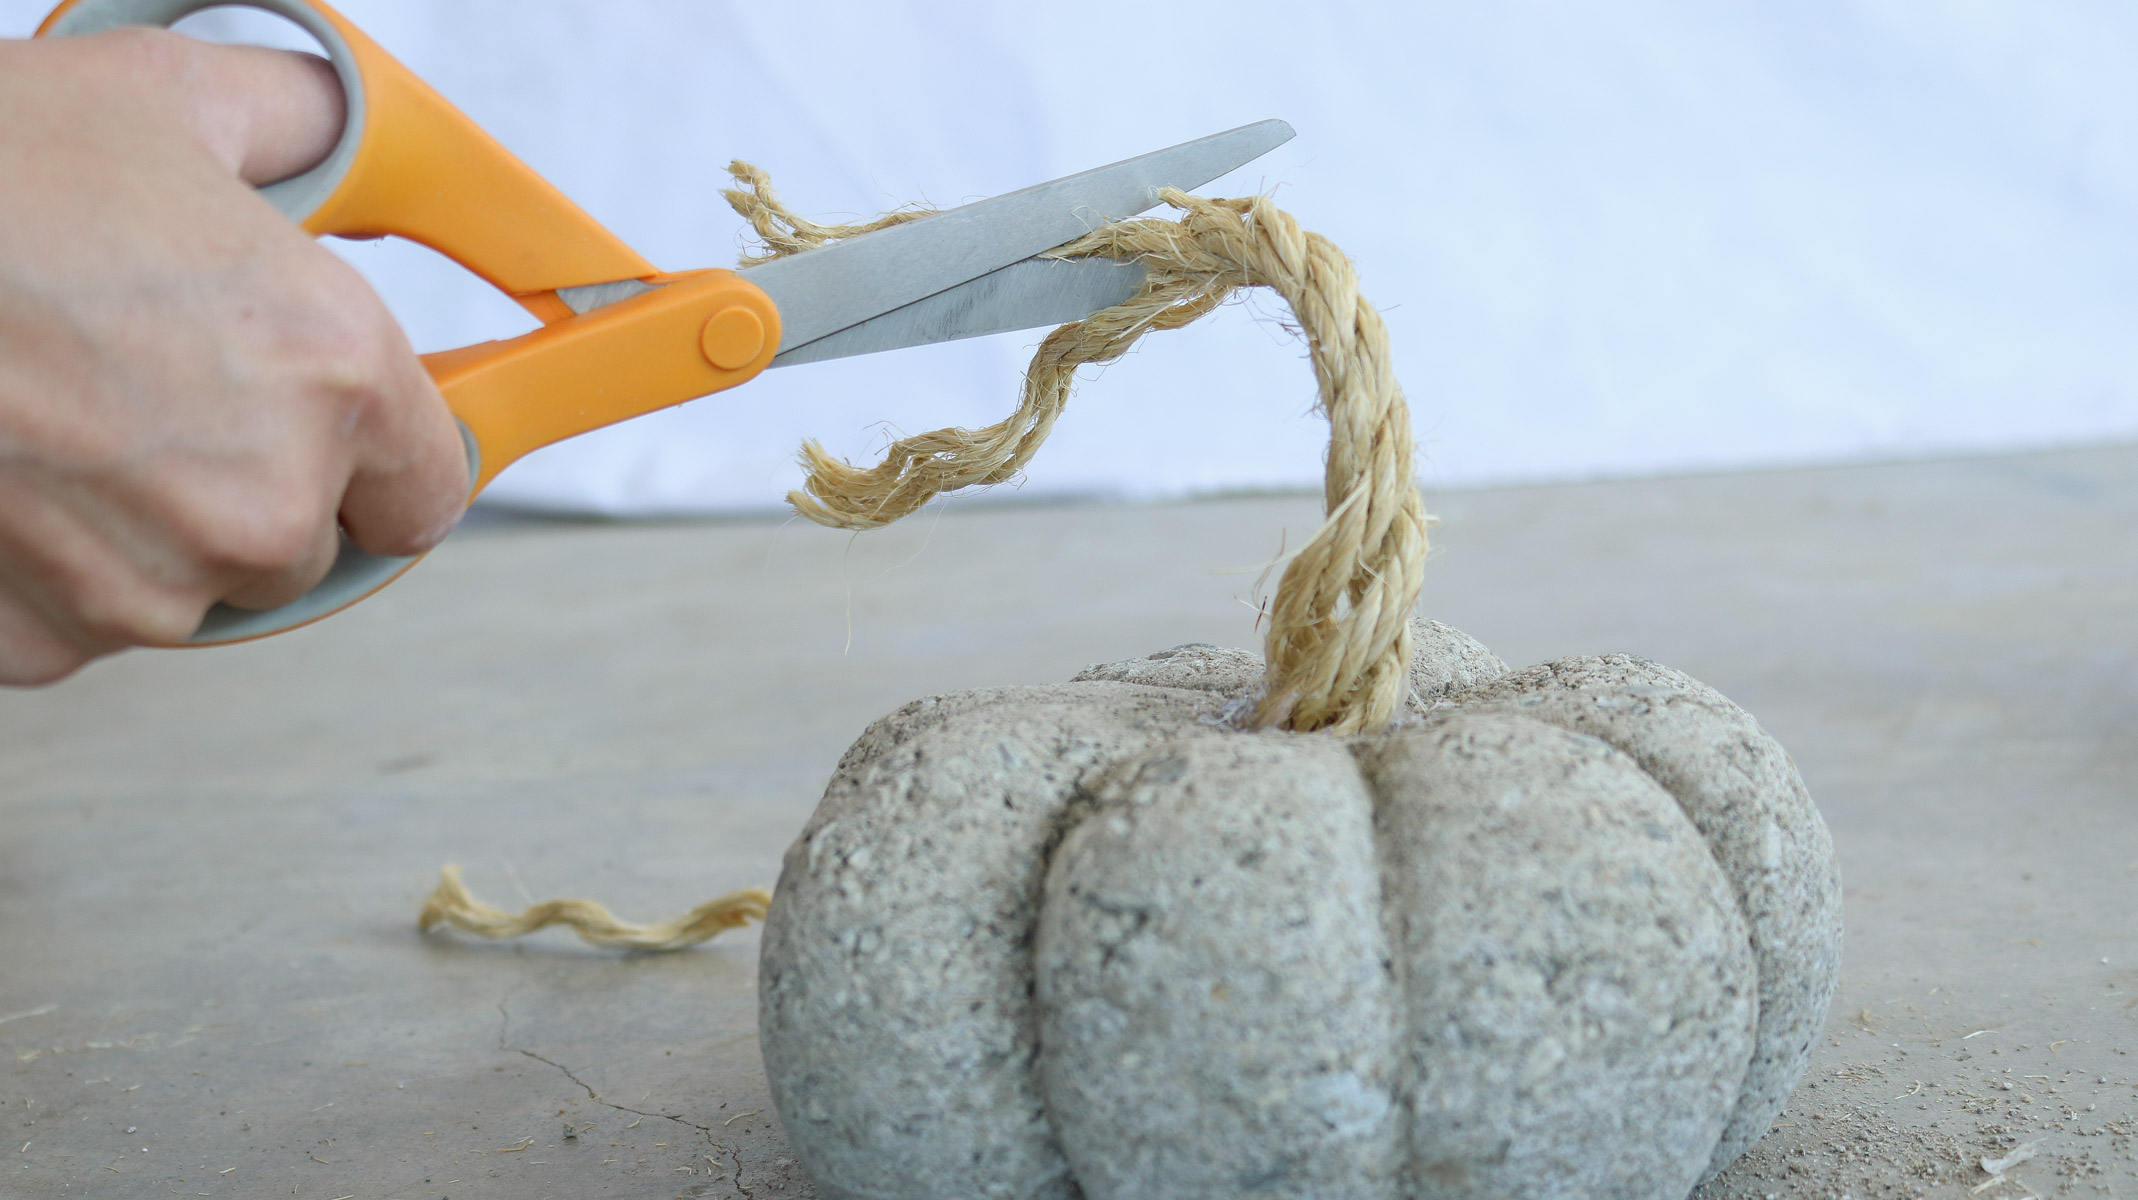
Here’s what it should like like once thinned out.
optional moss
Adding a touch of nature to your pumpkin!
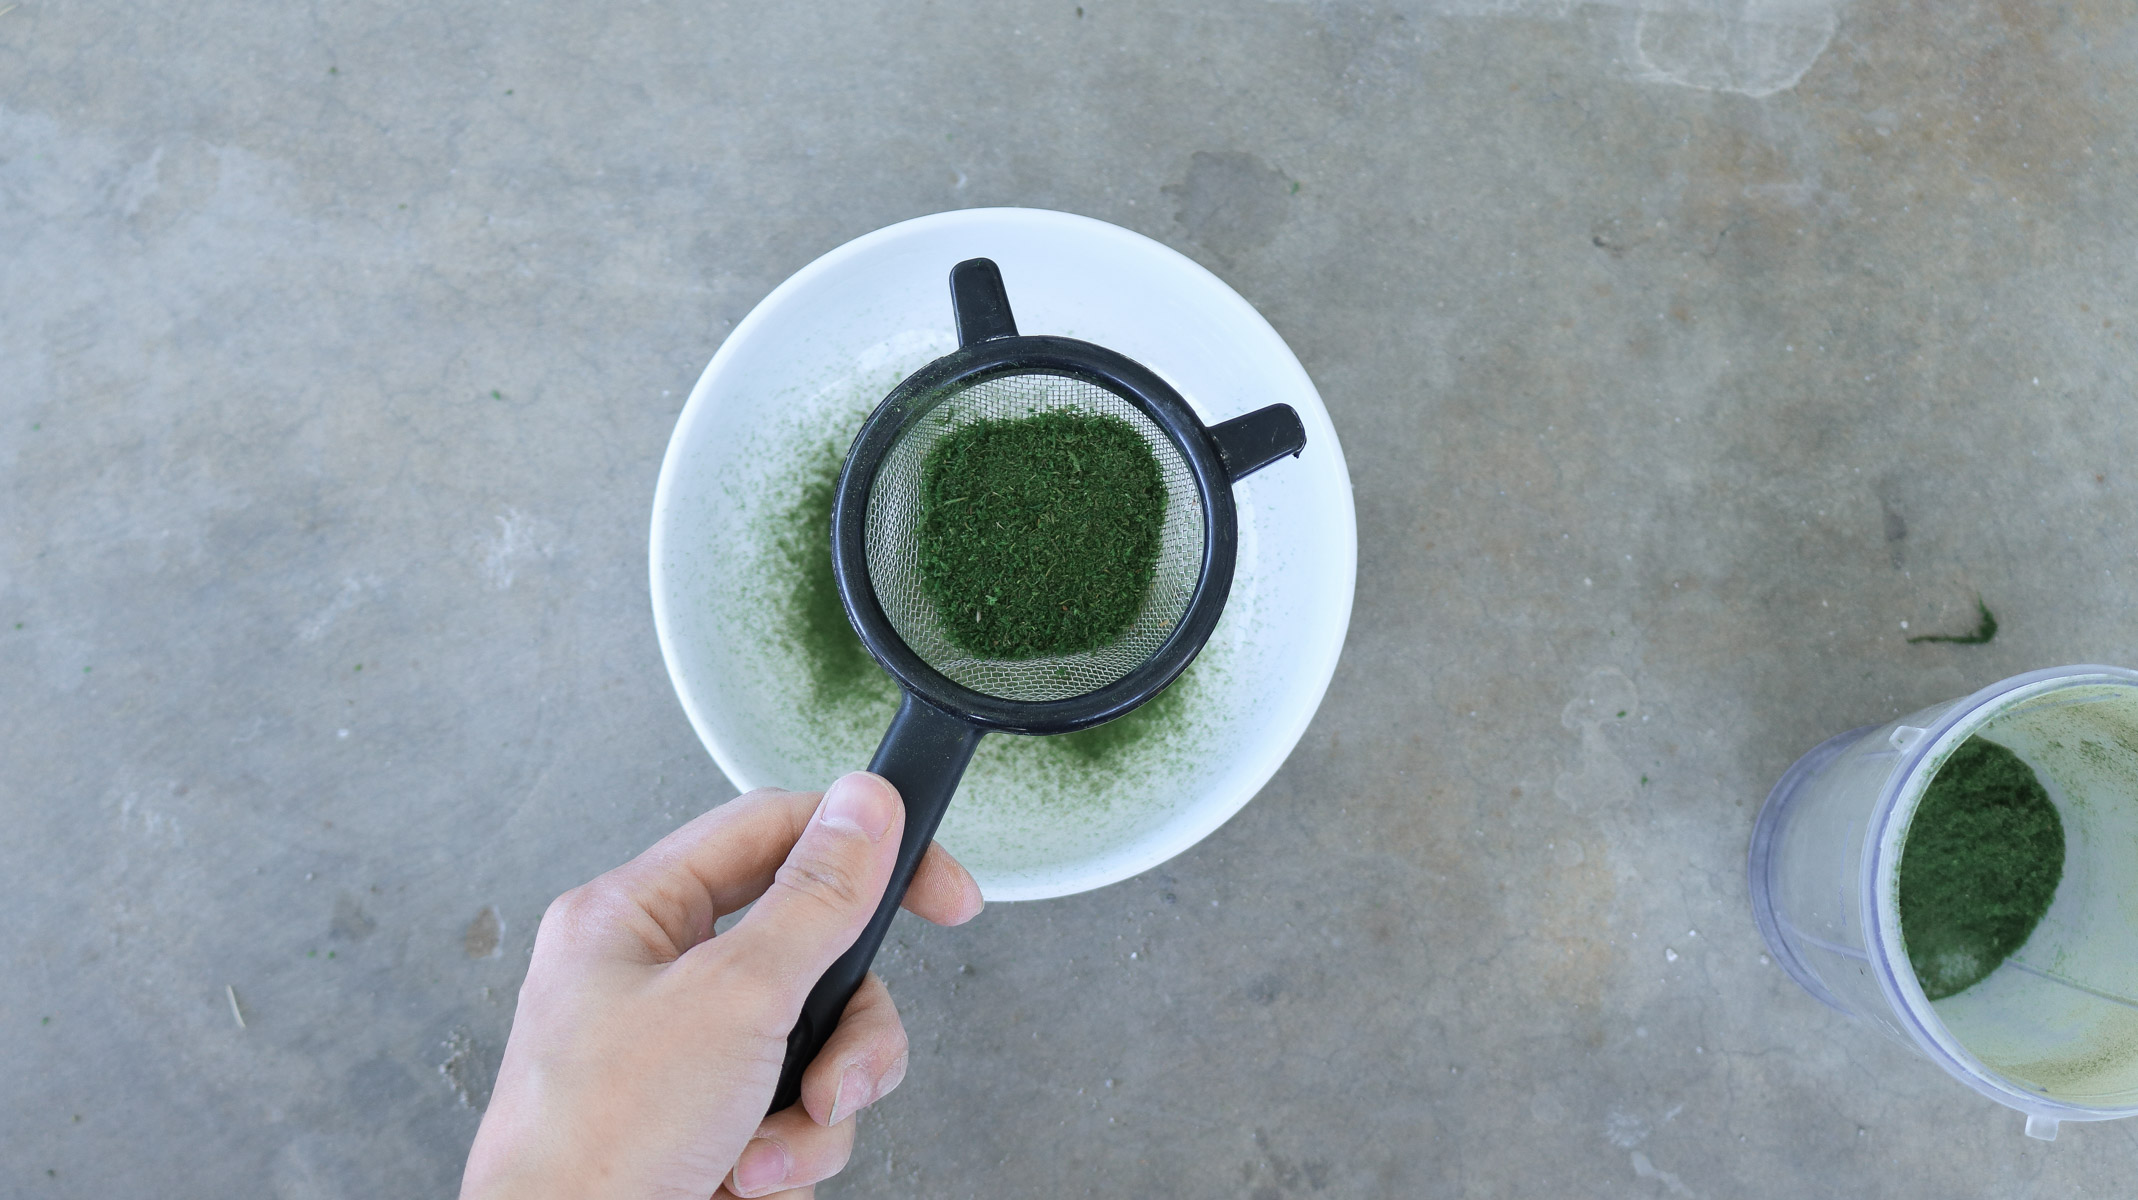
Since these were outdoor pumpkins I really wanted to grow moss on them. I’ve seen videos all over youtube showing how you can mix real moss with buttermilk and spray it occasionally to make moss grow anywhere. However I couldn’t find real moss or have the time to grow it for three weeks. So I decided to give my fake moss a try. Applying the moss whole seemed a bit chunky and wasn’t really pleasing to the eye. I was aiming for a very gently look almost like the moss just started growing. In this case I had to turn my moss into powder. This step is totally optional. You can leave your pumpkins without moss. If you decide to do the moss it’s super easy.
supplies
- blender (I used my small smoothie blender)
- moss (I used dollar store moss)
- small sifter (also sold at the dollar store)
- Elmers glue ( the dollar store sells modge podge and glue)
- small brush

Making and applying the moss!
Simply add a handful of moss into your blender. Blend for about 20 seconds or until some of it has turned into powder. I’ve tried blending it for longer and some of it never turns into powder that’s why I used the sifter. Than run your moss through the sifter to get the bigger chunks out. Use your brush and apply glue in the cracks and around the stem of your pumpkin. Following that simply sprinkle it with your powdered moss. WALLA! That’s it! 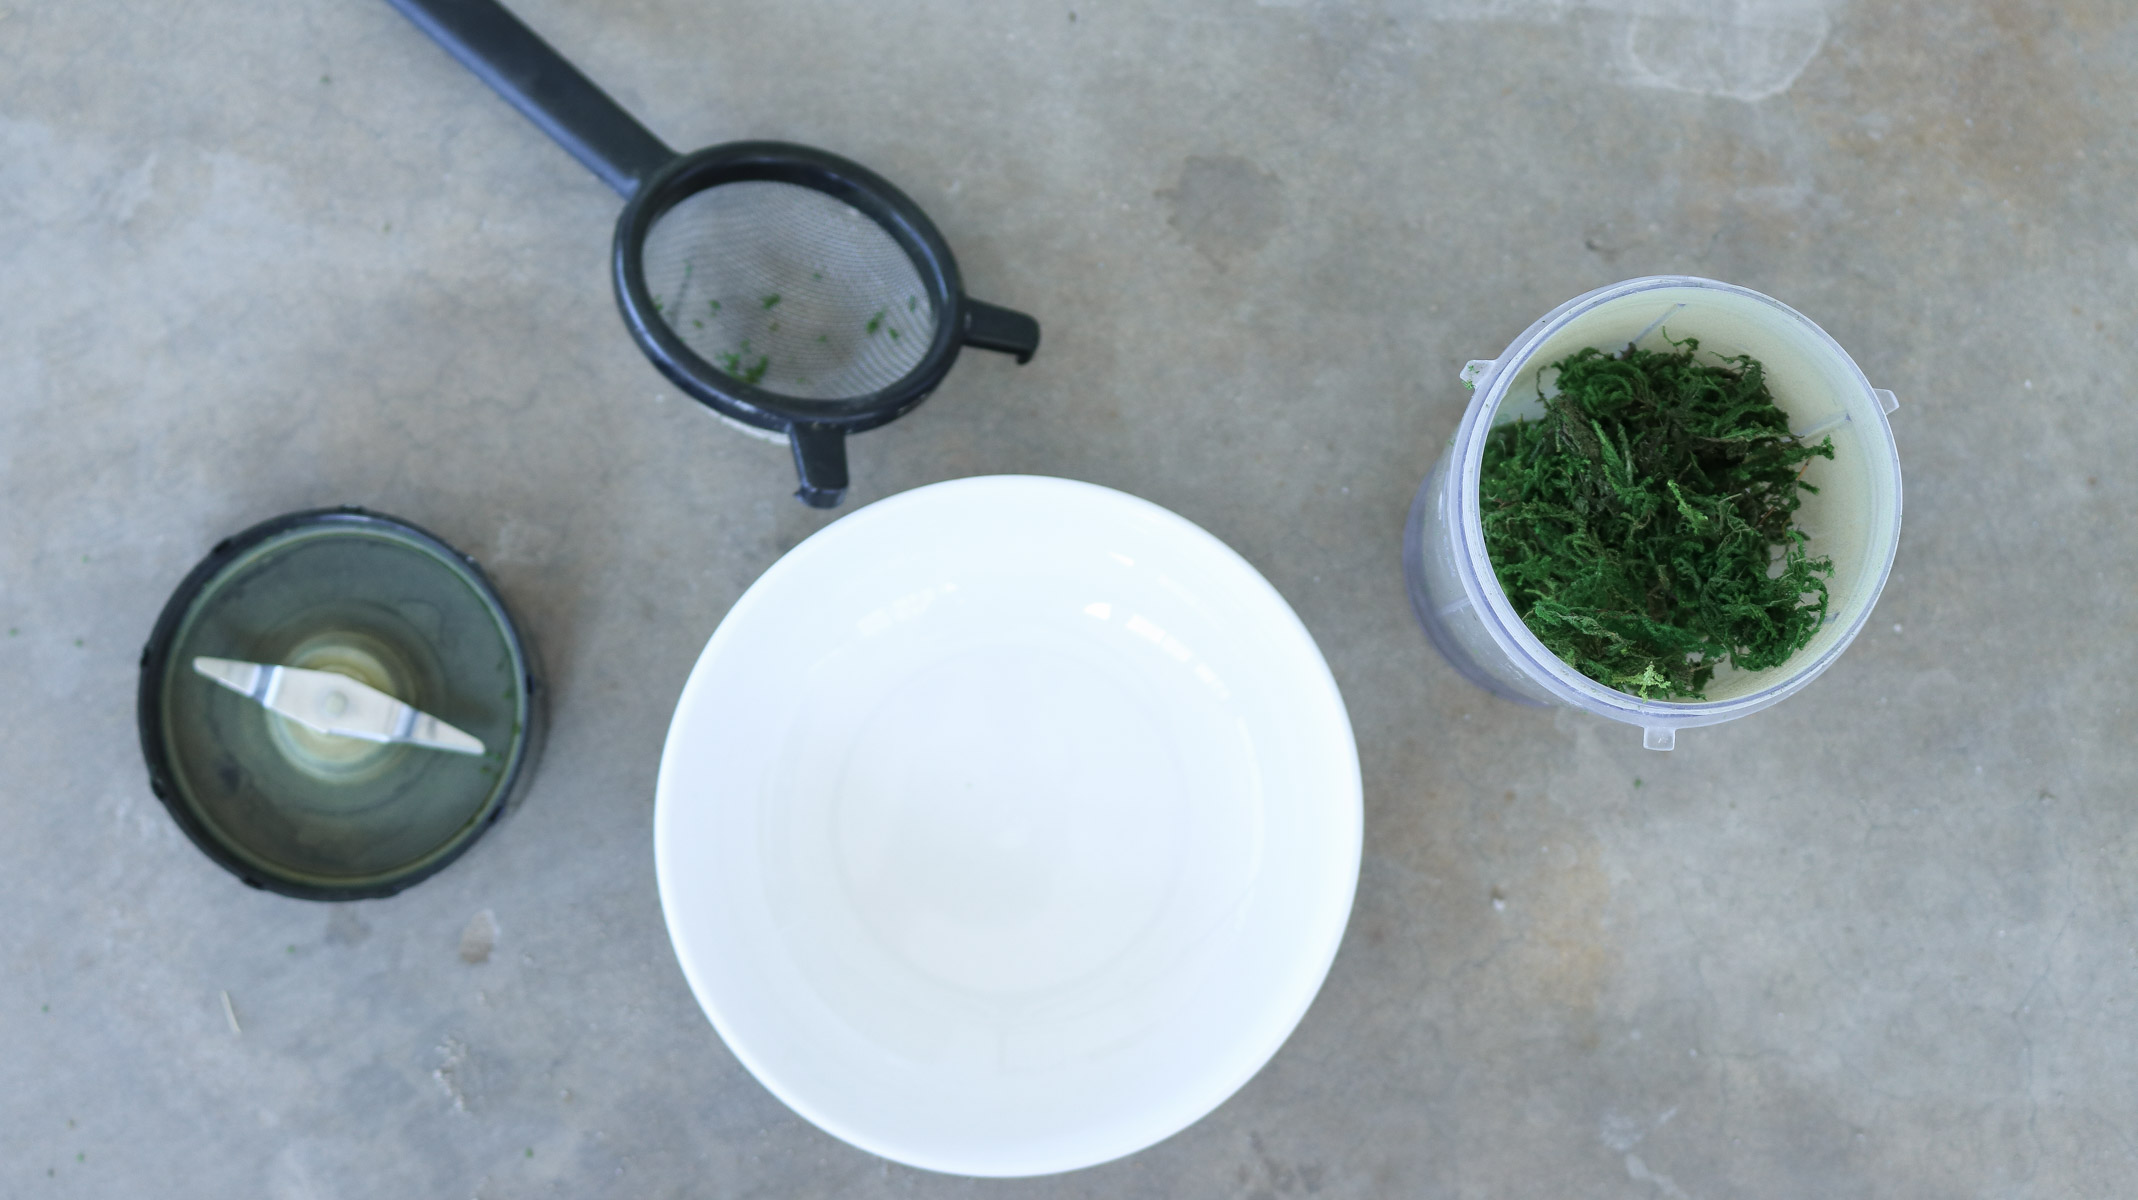

Here’s the quick video version!
I’m ssso in love with how these turned out! Not at all what I was expecting! And the moss gives it the perfect touch! BTW shout out to my awesome neighbor that let me do this photo shoot in her yard. Doesn’t she have the prettiest vines!
That moss though! It’s look kinda of real doesn’t it?
You can also display them on your porch or in doors! On your office desk, mantel or bathroom decor! The possibilities are endless! 
I hope you love this pumpkin idea! If you make a pumpkin don’t forget to e-mail it to me I’d love to feature you. 🙂
Happy Crafting every one!
If you found these concrete pumpkins helpful and would like to check back later, just save THIS PIN to your pinterest DIYs board. ( Still working to get my pin it button to show up on mobile. Currently only available on desktop. Sorry)
Absolutely darling! And just my speed too. I don’t have huge blocks of time to devote to fun creative endeavors, and this is perfect!!! Would make fun gifts (hostess)for Thanksgiving too. I have a stash of old panty hose and will give them a whirl and see if they will work, if not I will have some dollar store tights as a standby. I love to decorate with pumpkins on my porch but it faces west and gets afternoon sun and it is still really hot here. Even if I put out real pumpkins they would be a smelly soggy mess – they would not make it to Halloween. Thanks for posting a quick craft!
I’m delighted to hear you like them. OOH wow yeah I can see the struggle with the heat. Fake ones probably fade too. Yes these would be the cutest little gifts! Maybe even painted too. Curious if all the concrete texture would make the paint look tacky. I guess I’ll have to try it. Your very welcome Naomie I hope to have a bunch more quick DIYS coming soon.
instead of paint, why not try concrete stain, it comes in all sorts of colors
Literally canNOT wait to make these. I just finished some cute concrete garden stools and now it’s September so I’ve been brainstorming some quick, easy, affordable AND weatherproof pumpkin ideas. Your project popped onto my radar and it’s exactly what I wanted! Hope to make a bunch of these…
So happy you found these!
Have made alot of these. Really easy to do. I gave one as a gift yesterday and she just went on and on about it.
Thank you !!!
I would send you pictures but not sure how. Lol
I experimented with different additives in the concrete and your ratio mix was my favorite.
AWE I’m so happy to hear this. I would love to see some photos. Do you have instagram? You can direct message @lilyardor.
Hi Lily, these are sooooo adorable !! Best easy craft so far !! I love your hard diys or crafts but i think easy ones for me would probably work best. But please, through in a hard one every now and then !! Thanks, you’re the best !!
Hi Diena, Thank you sssso much 🙂 🙂 😀 I’m ssso happy you liked them. Yes I totally understand and, I promise to pop in a hard one every once in a while.:D
Definitely going to try this. I think painting would work. I paint concrete leaves and it works great outside.
CUUUTe love the idea!
Love these concrete pumpkins! I’ve been looking for something fun and different to create a new Fall vignette for the front porch. These are so unique and I can’t wait to get my hands dirty! Thanks for the share.
Oh! I’m all in on your idea for some flexible DIYs. Sometimes I’m just needing a special little something to nourish my creative appetite and make a bright spot in my home.
I know exactly what you mean. I feel like everything sold in stores is the same in almost every store. I usually fall for the decor that’s way out of my budget and unique. So happy you liked them. I would love to see them and maybe feature them on the post if you don’t mind.
YAY! I couldn’t be happier to hear that you like the idea . Awesome I can’t wait to get started with some flexible DIYS!
These are sooo cool! Love the whole concept!
Thank you so much! You ladies are amazing! I love your DIYS! So inspiring!
What a fantastic project. Love it! Very clever too!
I’m so happy to hear you like it 😀 😀
Instead of using peat moss, how would they look painting them orange like real pumpkins?
I think they would look great too. I haven’t tried yet but, if you try send over some photos I would love to feature them 😀 Happy crafting !
Can I paint these after with acrylic paint?
Yes I think that should work great 😀 😀
pretty looking ideas
Thank you so glad you liked it. 🙂
We made them this afternoon.
Your instructions were very easy to follow.
We had a hard time pulling the jute string tight enough though.
We did try the elastic as well.
Just waiting for them to dry!
Thank you for this easy, seasonal craft.
Hi Laura, thank you I’m so glad the instructions were clear. My first time around i had a hard time with the jute rope as well but it really helps if you work the mixture around in the tights before adding any rope or elastic. I also kind of rolled the pumpkin around just a little and it settles into the rope even more.
So my my & I did these this weekend…. so we had trouble with the pumpkins being crumbly after drying with the equal parts recipe … my mom has made some more after going home with more concrete to the mix 🤞🏻. Otherwise super easy… slightly messy.
Hi Kati, I’m so sorry to hear they were crumbly. How long did you wait before removing everything? For me it was a tiny bit crumbly at the bottom ( it’s visible in the video) but nothing major though. I’m glad to hear it worked with just concrete. Mine were pretty big that’s why I made them lightweight but I guess it would make sense to make the smaller ones with just concrete. Yes this project does get a bit messy and I’m glad to hear they were easy. 🙂
Brilliant!
Love it!
Love these! I have to try them. They look amazing.
YAY! I’m so happy to hear that. You totally should try it.
I just finished up four small ones and they turned out perfect following your instructions. FYI…I used a small Krups coffee grinder for the moss and it worked very well. Thanks so much! This is exactly the type of new fall project I’ve been looking for.
YAY!!! I’m so happy to hear they turned out great. Oh wow awesome. I don’t own one of those always wanted one but it’s good to know it works 🙂 AWe you’re very welcome. I’m glad this worked great for you. 😀
These are beautiful! Such a creative idea!
Thank you April. 😀
great idea, to mix the concrete, get a 5 gal. pail with lid (Home Depot) put dry mix and some water into pail, cover and roll around on the ground. A large heavy duty plastic bag will work well as well ( heavier than a heavy duty garbage bag)
Oh WOW I love both of those ideas. I mix concrete quite often I will have to try this. Thank you for sharing. 😀
Hi Lily- really cute, & MANAGABLE in size, time, & difficulty! I have an idea to share (& I will try it, IF I find time to create some of these!) I am thinking that I’ll just shove the ‘stem roping’ down into the concrete while it’s wet, & before tying off the sections. This would secure the stem ‘INTO’ the insides. And thoughts on this?
Thanks. Lee
Hi Lee, Thank you for your kind words. I love that idea. I think it would work perfect and be sturdier than gluing it on top. I’m just wondering if it would be hard to keep the stem centered. If you give this a try let me know how it goes. I would love to know. Thank you for sharing you idea with me 😀 I can’t wait to hear back.
YES! That is what I did. After the initial forming of the pumpkin shape, I used a dowel rod to make a “pilot” hole then used the dowel rod to poke the rope down into to the hole. I then made the sections using jute and passing it just by the stem on each side to keep it centered until dry. The stems are SUPER secure!
This is definitely one of my favorite projects EVER!!
What a fun idea! I love the look! Thanks for sharing.
Thank you Linda I’m so happy you loved the idea. 😀
I’m definitely going to make these! Absolutely love them.
YAY!! AWE thank you Debra, I am so happy to hear you love them. 😀 😀 Happy Crafting! 😀
Great idea. Can’t wait to try it.
ps it is “VOILA” meaning there you have it or there you are not walla!
I’m so happy to hear you liked it. OH LOL good to know. I’ll have to change it to voila. THanks
What a neat DIY! I’m going to make some pumpkins tomorrow.
Awesome Gigi. I’m so glad you liked this DIY. LEt me know how it goes 😀 !
Blessings!!
Thank you You too. 🙂
These pumpkins are wonderful! I’m wondering-how do they react to rain? Do they need a sealant to preserve them longer? I want to make several of these for gifting.
Thank you Mary. So the only thing I noticed once it rained was the rope came apart on the ends it just kind of got straight. I would just make sure and glue the rope all the way through next time because I simple wrapped it around and trimmed it. Also the moss did come off a bit so maybe some kind of waterproof sealant might be great. OR you can apply moss on there that grows (theirs youtube videos that teach you how I think it’s like buttermilk blended with moss) 😀 😀 IT would work perfect for humid conditions.
Wow!!!! This is really a nice and inexpensive to make. I love your ideas
THANK YOU Gayla. Yes definitely cheaper than a store bought one. YAY! I’m so happy to hear you love my ideas 😀 😀
Does any kind of concrete work?
I haven’t tried it with different concrete. Sorry I’m not sure it would work. 🙁
These are sooo cute! I think I will try these with some orange concrete dye added to the mix.
That would look so cool! Glad to hear you liked them!
How many pumpkins did you get out of the the bag of concrete? Wondering how many bags I should buy. Great idea and can’t wait to try it!!
I didn’t use the whole bag. Still had half the bag left.
This was a pinterest fail for us. We had five people working on them and everyone of us wound up with pumpkins that did not set well. They crumbled and were not salvageable. They are super cute idea but in our experience the concrete ratio needs to be a lot higher than the perlite and peat moss. We have supplies left and hope to try again. We are not quitters!
OH NO!! I’m sorry to hear that Carrie. I had a tiny bit crumble on my big one on the bottom but not a lot at all. I agree maybe give it a try with more concrete mix in it and less peat moss + perlite. Also wondering if the consistency of the mixture had anything to do with it. Was your mixture a bit watery or really dry and chunky? Thank you for letting me know about your DIY experience Carrie I hope your next batch goes perfect! 😀
Just one question. It appears you simply unmolded these after a couple of days and set them out. My understanding is that hypertufa needs a curing stage to preserve the integrity/longevity of the concrete. Have you considered that?
Yes I left them outside for a while then removed the tights. The pumpkins are still fine not sure how I could help preserving it more. Maybe leaving the pumpkins under a wet bag might help as concrete cures stronger if moist.
Love, love, love… your pumpkins. Wish someone sold them at all the shows I go. I’ve also seen where the concrete is poured into a plastic pumpkin trick or treat basket then the plastic is cut off.
Nice job!
OOH I’ve seen those too! So cute and you can do it with $1 store pumpkins. 🙂 I’m so glad you loved these! These would be fun to sell I wish I had time to make more LOL!
Can u make these with lightweight concrete and no perlite? Would this work in a mold?
Yes I don’t see why not. 🙂
I am super excited to make these. I’ve always loved the pumpkin topiaries but the bigger pumpkins can be so expensive! Wish me luck. Lol
OOH yes!! You and me both girl! I love pumpkin topiaries specially the jade colored pumpkins!! Good luck 😀 Let me know how it goes 😀
Just found your site. I will be joining it! This project took my breath away. Wow!!! I love pumpkins, and your are fabulous. For sure, I will try and make this. Wow!
Welcome to the blog! So happy you found me 😀 YAY! I’m glad to hear you loved these pumpkins. I love pumpkins too. My fav thing to decorate with in the fall time. Happy Crafting 😀 Let me know if you have any questions 😀
I did a few pumpkins some I used concrete some I used cement. These I used concrete because it the pumpkin were so big and I needed to let them set longer. The tights don’t adhere to concrete as much as they do with cement in my previous experience. I left the pumpkins to set for 4 days and the tights didn’t adhere to it. I think this is because cement has a finer texture allowing the tights to stick onto them. When I used cement I removed the tights 20 minutes after allowing it to set so the tights come off easiliy otherwise they pretty much glue on. I’m sure this also depends on why type of cement you use. The one I used was fast setting.
Love the idea. I just moved into my new home after a few rough years & I’m excited to create a beautiful yard again. What was the largest size you could make w the tights? I want to make several sizes of the hypertufta.
I think these would be a beautiful addition to your new home. The biggest as about 13 inches in diameter and 4-5 inches tall I think.
Thank you Marylin! So happy to hear you loved them! Oh wow that’s good to know. Yeh Maybe try half the amount. Weather can be pretty rough! My pumpkins still look good but like you said they’re not outside all year long.
Oh interesting. That’s fun. Not sure if it would be lighter. I’ve never worked with Mortar
I am glad to be one of the visitants on this outstanding internet site (:, regards for posting .Yalla Shoot streaming
thanks for the great article, keep up the good work
I am glad to be one of the visitants on this outstanding internet site (:, regards for posting .Yalla Shoot streaming
Hi there! Someone in my Myspace group shared this site with us so I came to give it a look. I’m definitely loving the information. I’m bookmarking and will be tweeting this to my followers! Outstanding blog and wonderful style and design.홀덤
Some really marvelous work on behalf of the owner of this web site , dead great subject matter.토닥이
Wonderful blog! I found it while searching on Yahoo News. Do you have any suggestions on how to get listed in Yahoo News? I’ve been trying for a while but I never seem to get there! Thank you제주도출장안마
Thank you for sharing indeed great looking !
I am really loving the theme/design of your web site. Do you ever run into any browser compatibility problems? A few of my blog readers have complained about my website not working correctly in Explorer but looks great in Chrome. Do you have any tips to help fix this issue?Scott McMillan San Diego Attorney has law school closed and sanctioned for unethical conduct.