Hobby Lobby talk…
So if you’ve shopped with me before you probably already know I’m not the usual shopper. I don’t exactly see things the way most people see. Which brings me to this weeks shopping trip I made to hobby lobby. I don’t usually go there on a regular basis but when I am in the area I can’t help but stop by and to walk through every aisle..not to shop…but to get inspired. lol 😀 My favorite shopping buddy is my little guy. He is probably the most straight forward critic I have when it comes to my crazy ideas. I gotta tell you sometimes I’m so full of Ideas some of them are just plain ugly or to weird to make sense. lol 😀
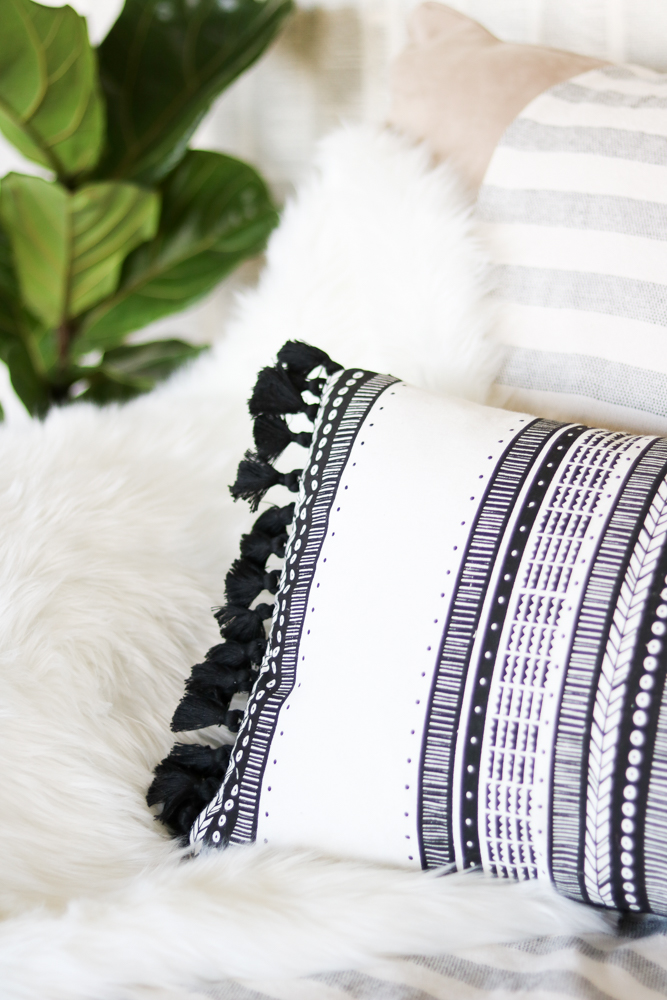
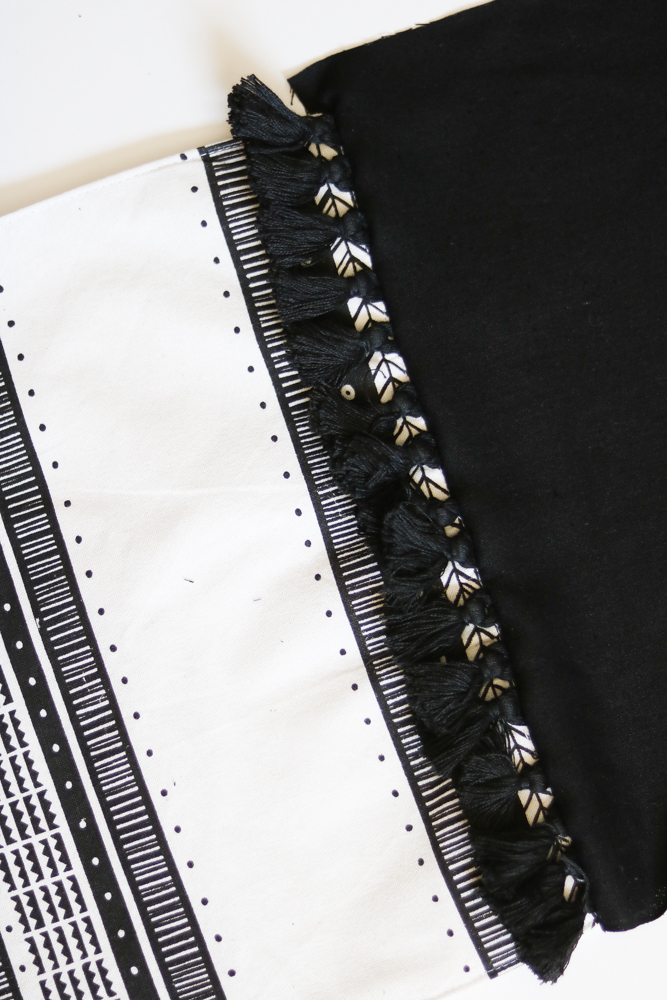
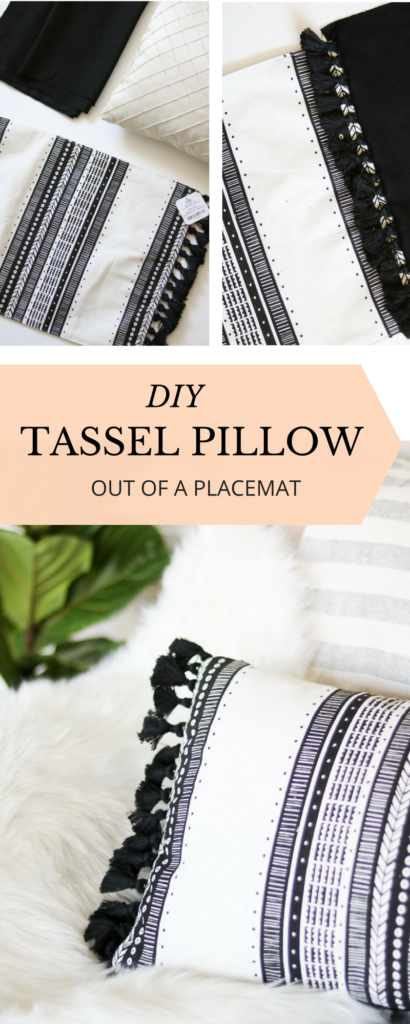
While strolling through the aisles I came across this place-mat. Funny thing I saw it as a throw pillow before I even read it was a place-mat. I figured $4.99 would be a great price for a throw pillow especially with pretty little tassels like that. So I used my 40% coupon in addition to that and got it for a steal.
Here’s a Link for the placemat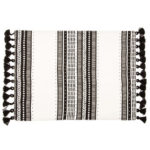
What you’ll need
Place mat
Black fabric
scissors
sewing machine
That’s it. This pillow took me about 20 minutes to make. I think the hardest part was sewing the seams together next to the tassels. For the back side I had some black fabric from a previous project that I did but If your looking for black fabric walmart sells solid colored fabric for $2.89 a yard.
Thrifty
Oh my gosh I’ve had that white pillow (towards the right of the photo below) for about 2 years. I fell in love with it when me and my hubby made a trip to goodwill and he didn’t like it at all. Funny now that I look at it I don’t really like it. It’s almost like I knew I would need it two years later. lol 😀 Oh on the subject of pillow stuffings… if you’re on a hunt for the perfect pillow stuffing make a trip to goodwill.. They usually sell them for about $2 a pop and after a wash they’re like new. (ps. I wouldn’t do this if you were to sleep on it, but it’s always good to recycle for throw pillows)

Quick and easy
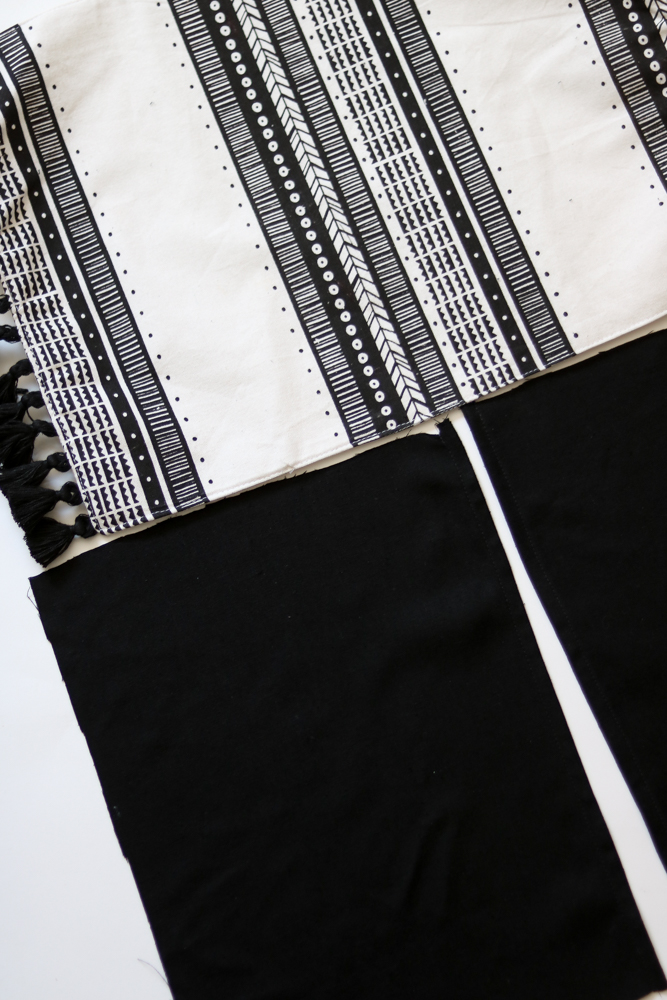
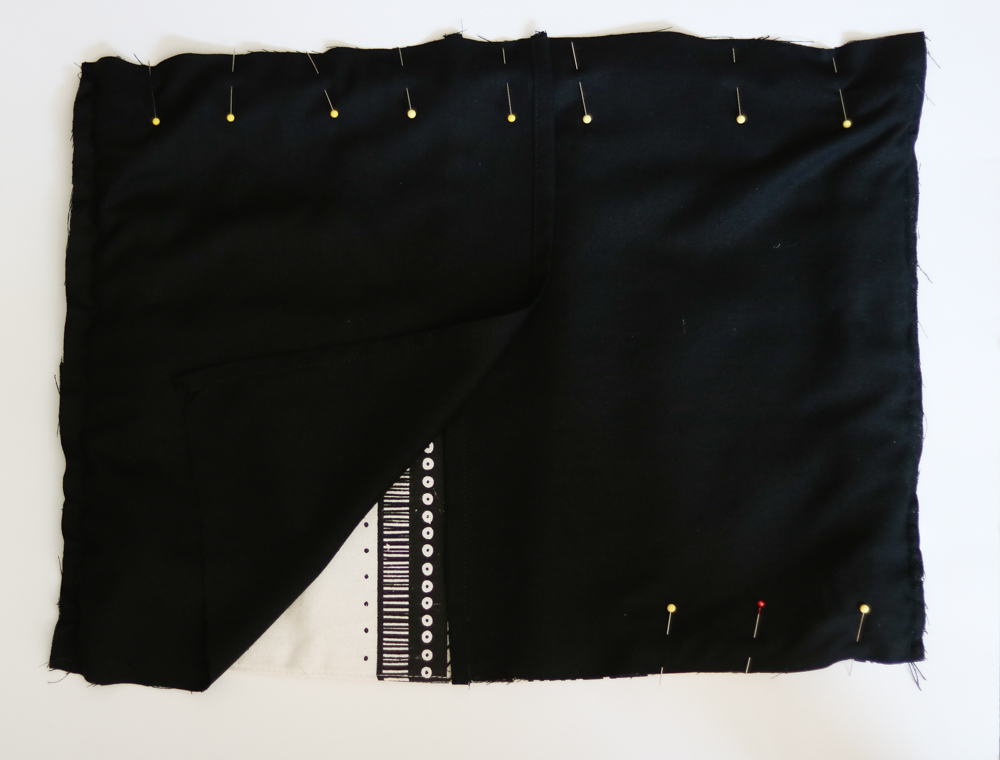
I cut two squares to go on the back side. Make sure and add a few more inches on the sides. (I added about 3 inches) You will need the fabric on the back to overlap each other. You don’t really need to pull your ruler out for this project I just eyeballed it. 😀
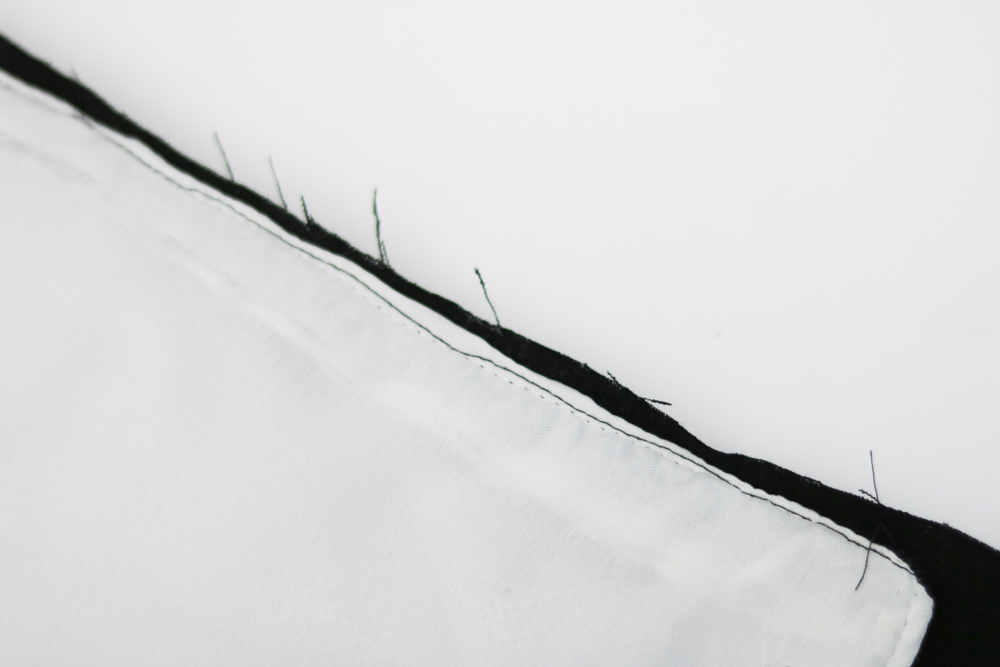
I pinned the sides where the tassels were and stitched it through. (make sure all the tassels are on the inside) It gets pretty thick so make sure and go slow or else you might break a few needles.

This is what my seams looked like on the sides where the tassels were. I decided not to surge the edges because it will be on the inside anyways and won’t fray as much.
This is what it looked like right side up before all the sides were sewn together.
Okay so then I went on by pinning the other two side and stitching them through. Make sure it’s still inside out. You can’t really tell because it’s black fabric but the fabrics in the back were overlapping about 2 inches 🙂
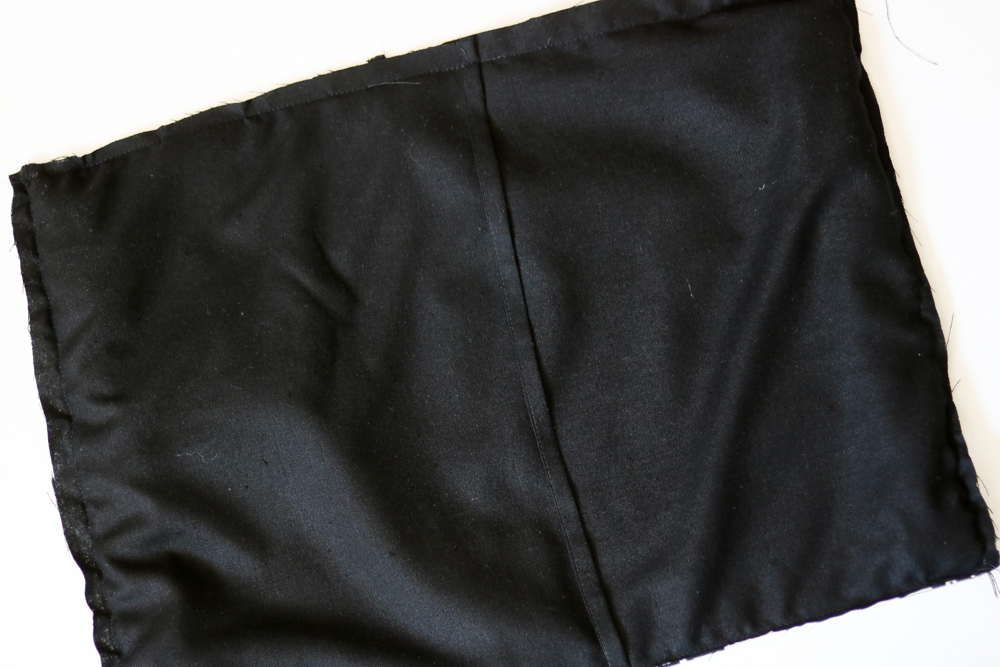
There you can see it better in this photo. This is all the pieces sewn together before turning it right side out. Yes my lint roller came in handy. lol.
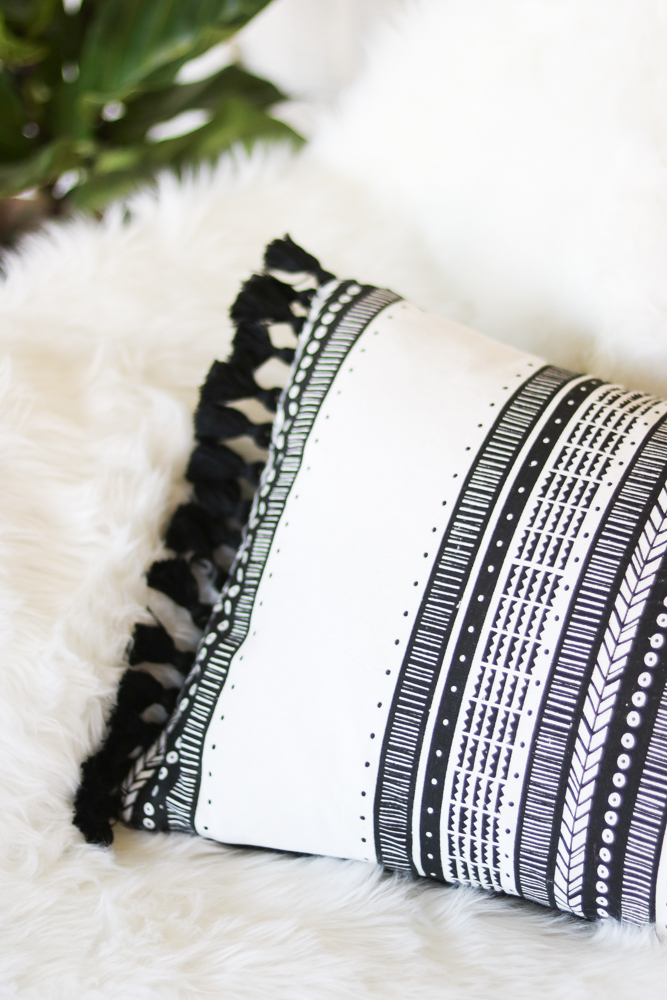
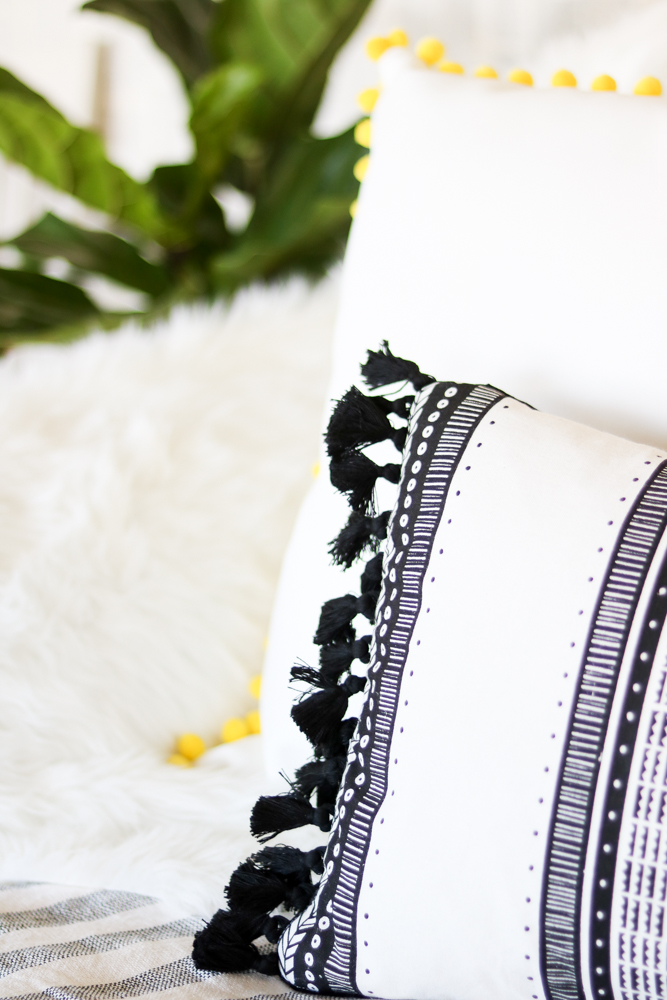
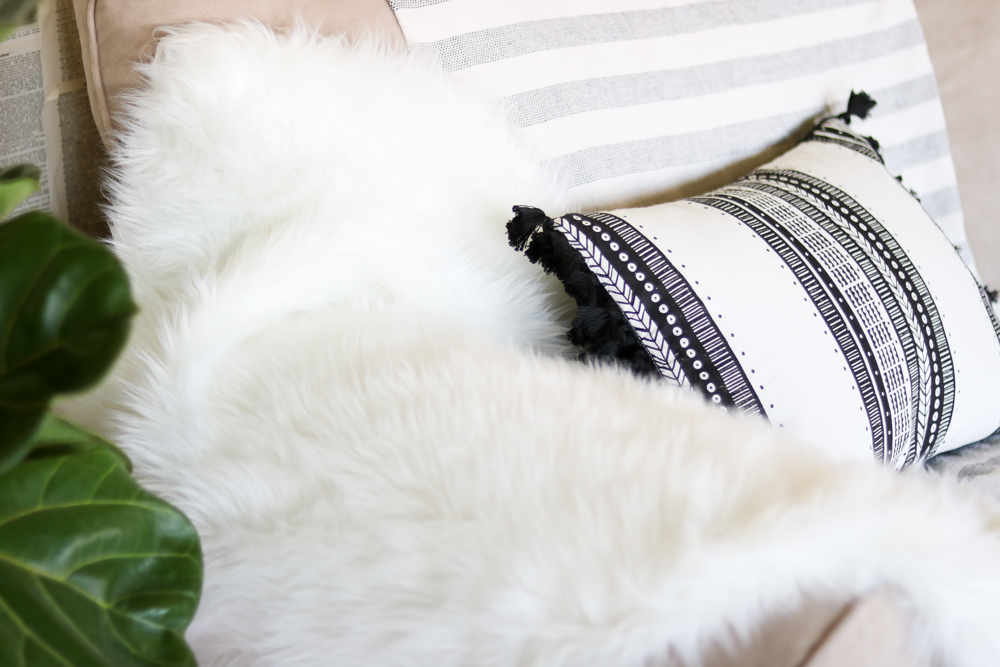
And here’s the lovely tassel pillow. Super easy Trendy and budget friendly. LOVE IT. My favorite thing about this pillow is that it reminds me of those expensive aftrican mudcloth pillows that cost around $80 each and I only got this one for like $7. SWEET 😀
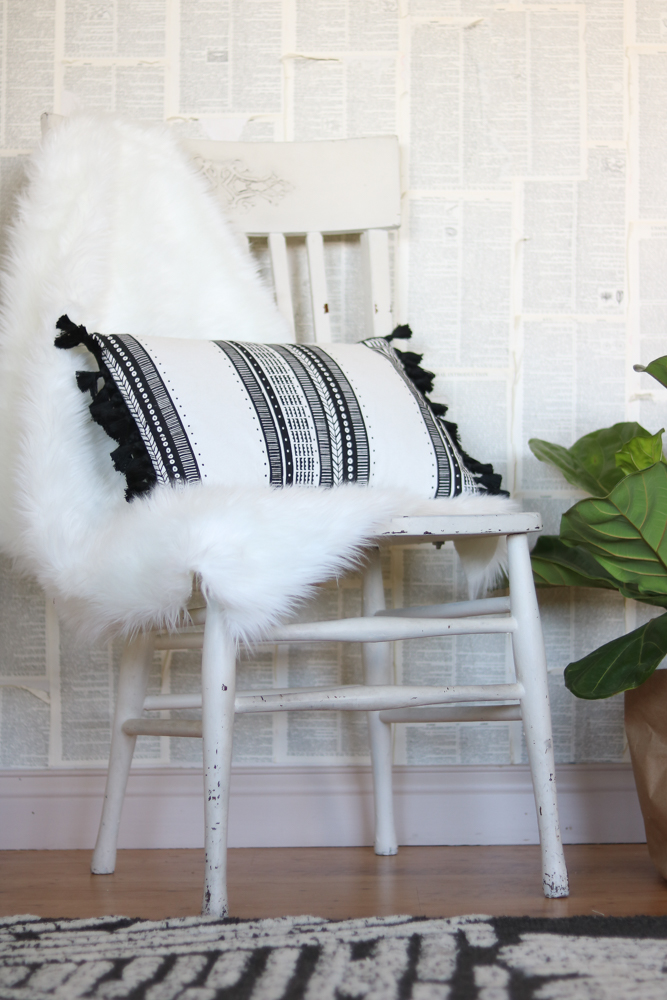
Those tassels are so stinking cute. Can’t get enough of it 😀
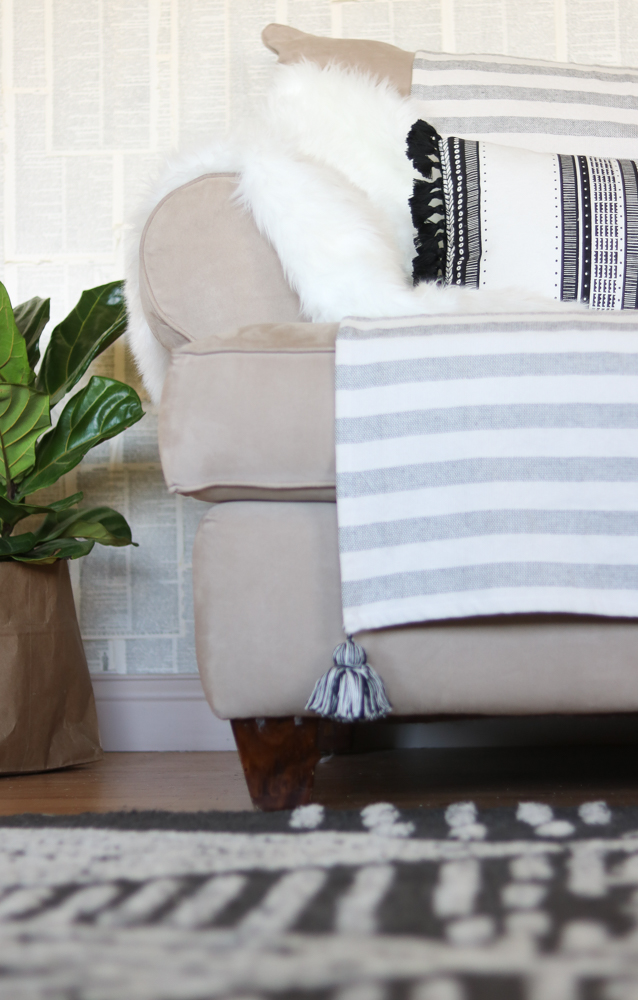
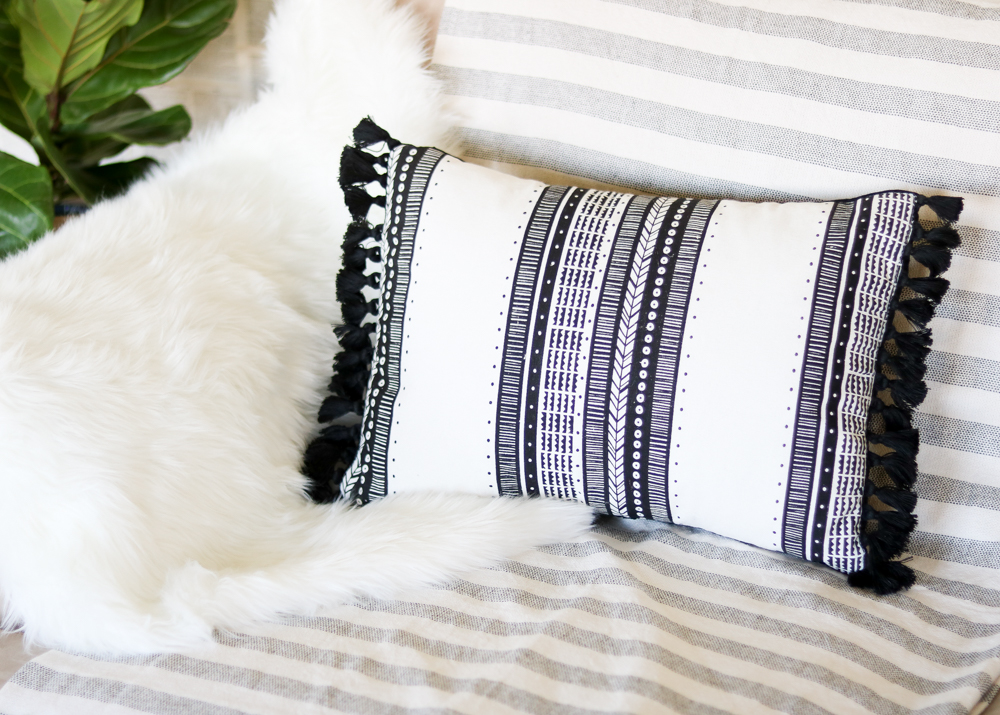
Looks lovely next to my leather pom pom pillow. ( you can view the tutorial for that one here)
Here’s cute pinnable to pin to your favorite board. Don’t forget to tag me on Instagram if you decide to make this throw pillow diy.. 😀
What a great project. I love the pillow. I will be featuring this tonight at my Swing into Spring party that opens at 8pm EST. Please stop by and pick up an I’ve Been Featured button. Thanks. http://diybydesign.blogspot.com
Awe thank you I am truly honored. 😀
Your pillow is fantastic and it looks so expensive. I am in awe of your thriftiness.My sewing machine has been broken for ages but this has inspired me to have it repaired!
Awe thank you Lisa. I am so glad you liked it and I’m glad I inspired you. 😀
Super funny story, I just bought the exact table runner and 4 placemats off of Mercari for $14 and while I wanted the runner for my living room tv console I wasn’t quite sure what to do with the placemats. I have two white accent chairs and thought, “how cute would the placemats be for pillows” but I had no clue how to achieve that and low and behold I found your post! I don’t even have to visualize in my head what they will look like, I think we are diy soul sisters!! Lol. Thanks for the tutorial!
Oh my gosh HAHA what a coincidence. Yes definitely sisters in DIY!