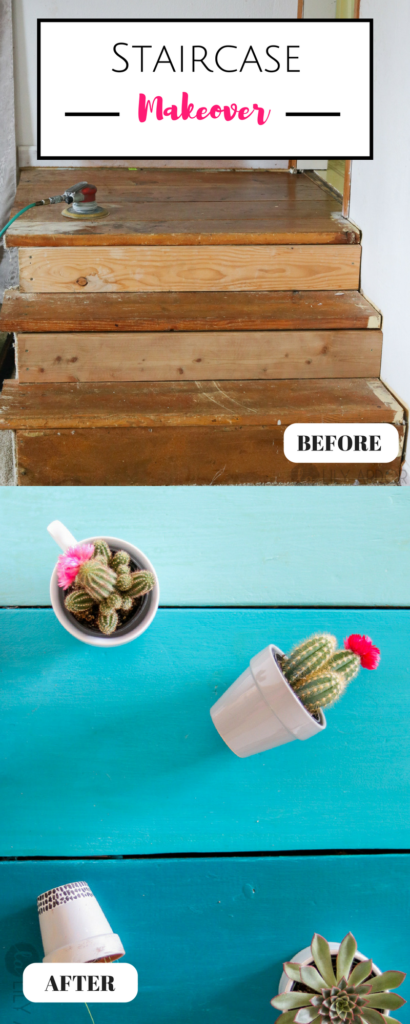
Staircase Design with Ombre Vibes
It’s been a week and I still can’t get enough. I’ll be honest I was afraid I would get sick of the vibrant colors but.. it puts a smile on my face every time I walk on my new stairs. Our house is super old and I wish I could call out a bulldozer to tear the place down because believe me when I say EVERY corner needs to be revamped or made-over. Unfortunately we can’t afford to make such big discussions so I decided I’d have some fun with it. HEY!! Everyone needs practice 😀 😀 right?? Who knows maybe someday we will built a new house and I’ll have all the experience I need when it comes to making a colorful staircase. So here’s my scoop on DIY ombre stairs.
Truth be Told
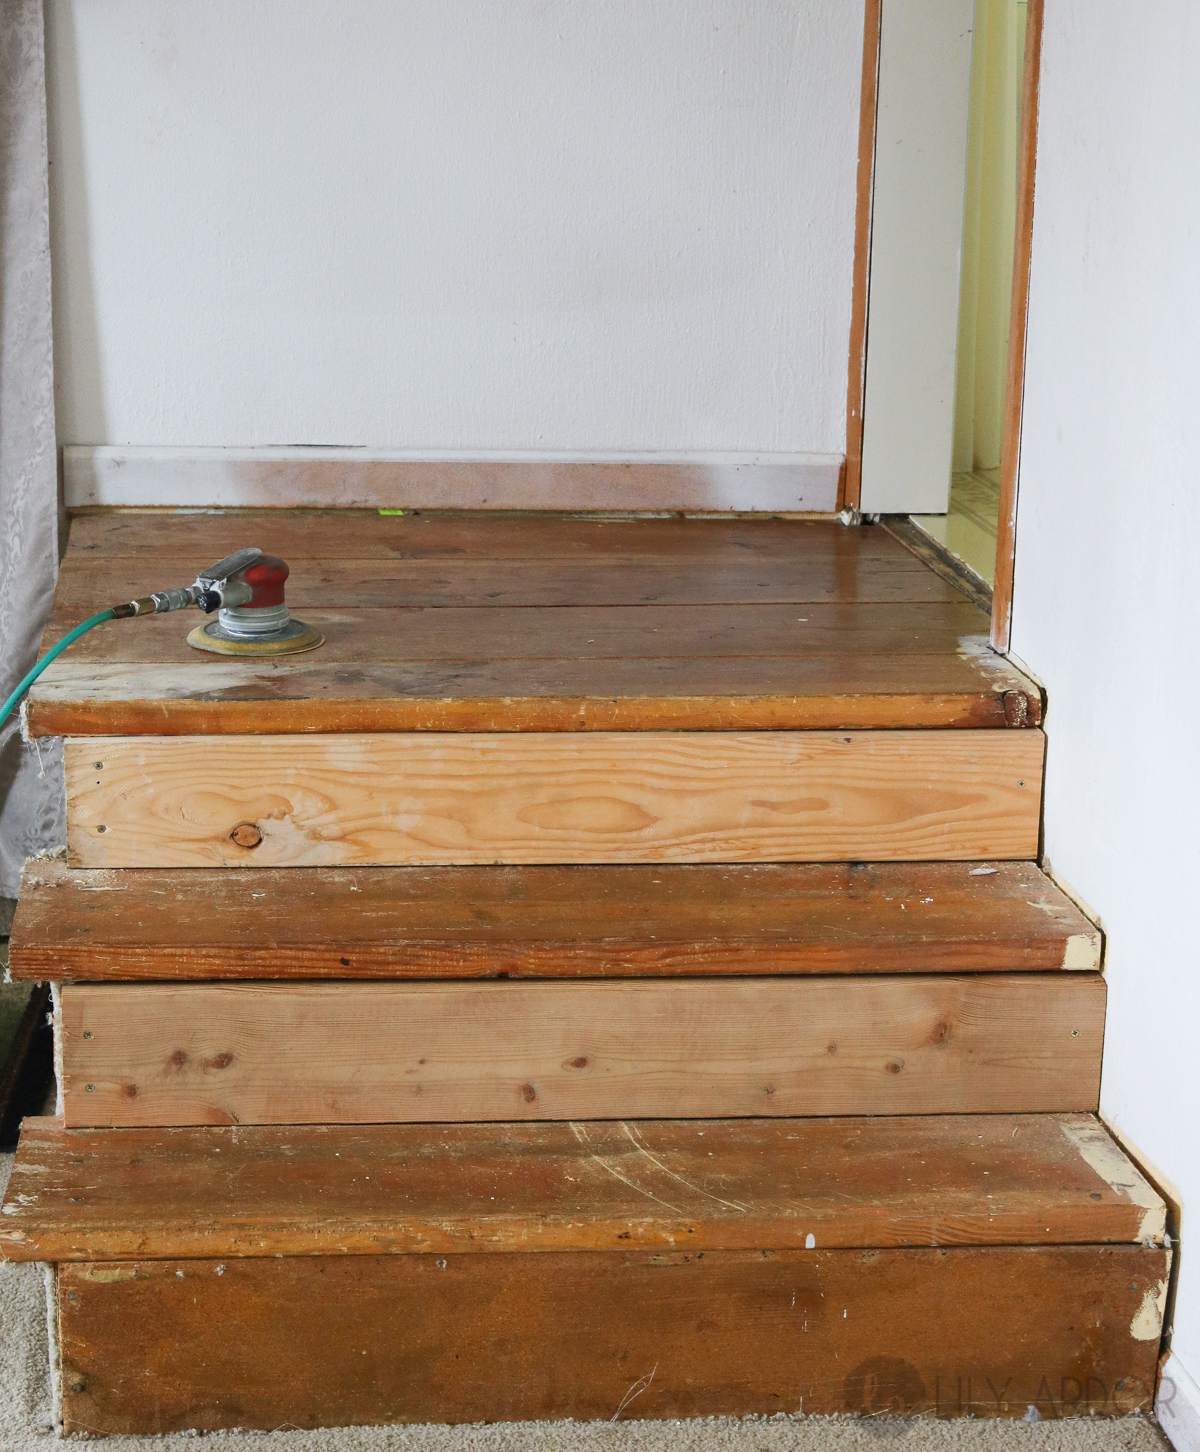
Okay so I’ve walked on these stairs like this for the past four years… YEP 4 whole years. lol. Yuk right..!! Wow they look worse then I remember. hehe 😀 These stairs are located toward the back of the house leading into a room that was considered our storage room so I didn’t care much until…, now that I’m turning this storage room into my craft room. 😀 😀
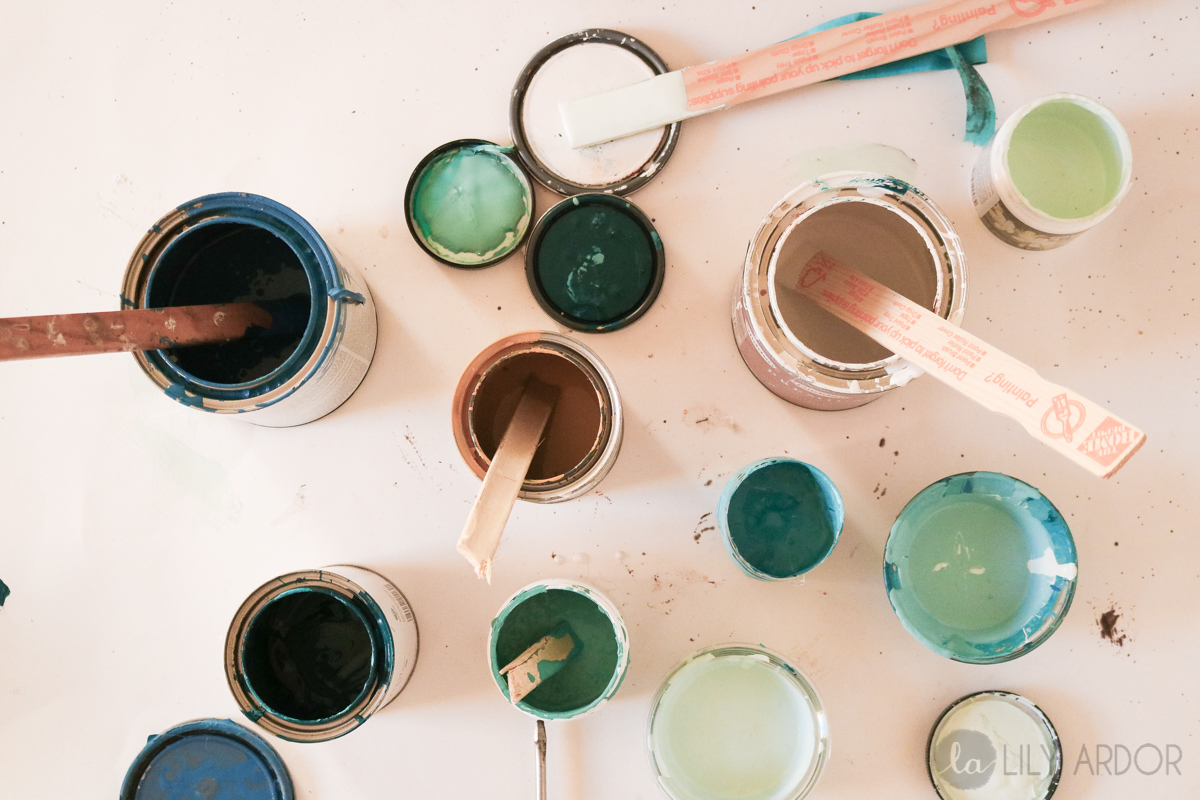
Makeover Supplies
Bonds primer
Paint (bunch of colors.. Or use a dark color and add white as you go)
Sander (80 grit sand paper)
Clear Coat or Polyurethane
Brushes
Wood Stain
Tape ( optional : masking paper)
First step
I’m sure you probably noticed the sander in the pic above. Oh wait…,never mind you were probably to distracted by the hideous stairs.. LOL. So for the first step I sanded down my stairs until I couldn’t feel my hands. LOL seriously though. My hands were falling off by the time I was done and we’re only talking 2 stairs. HEHE. OMG 😀 I need to workout more.
Second Step
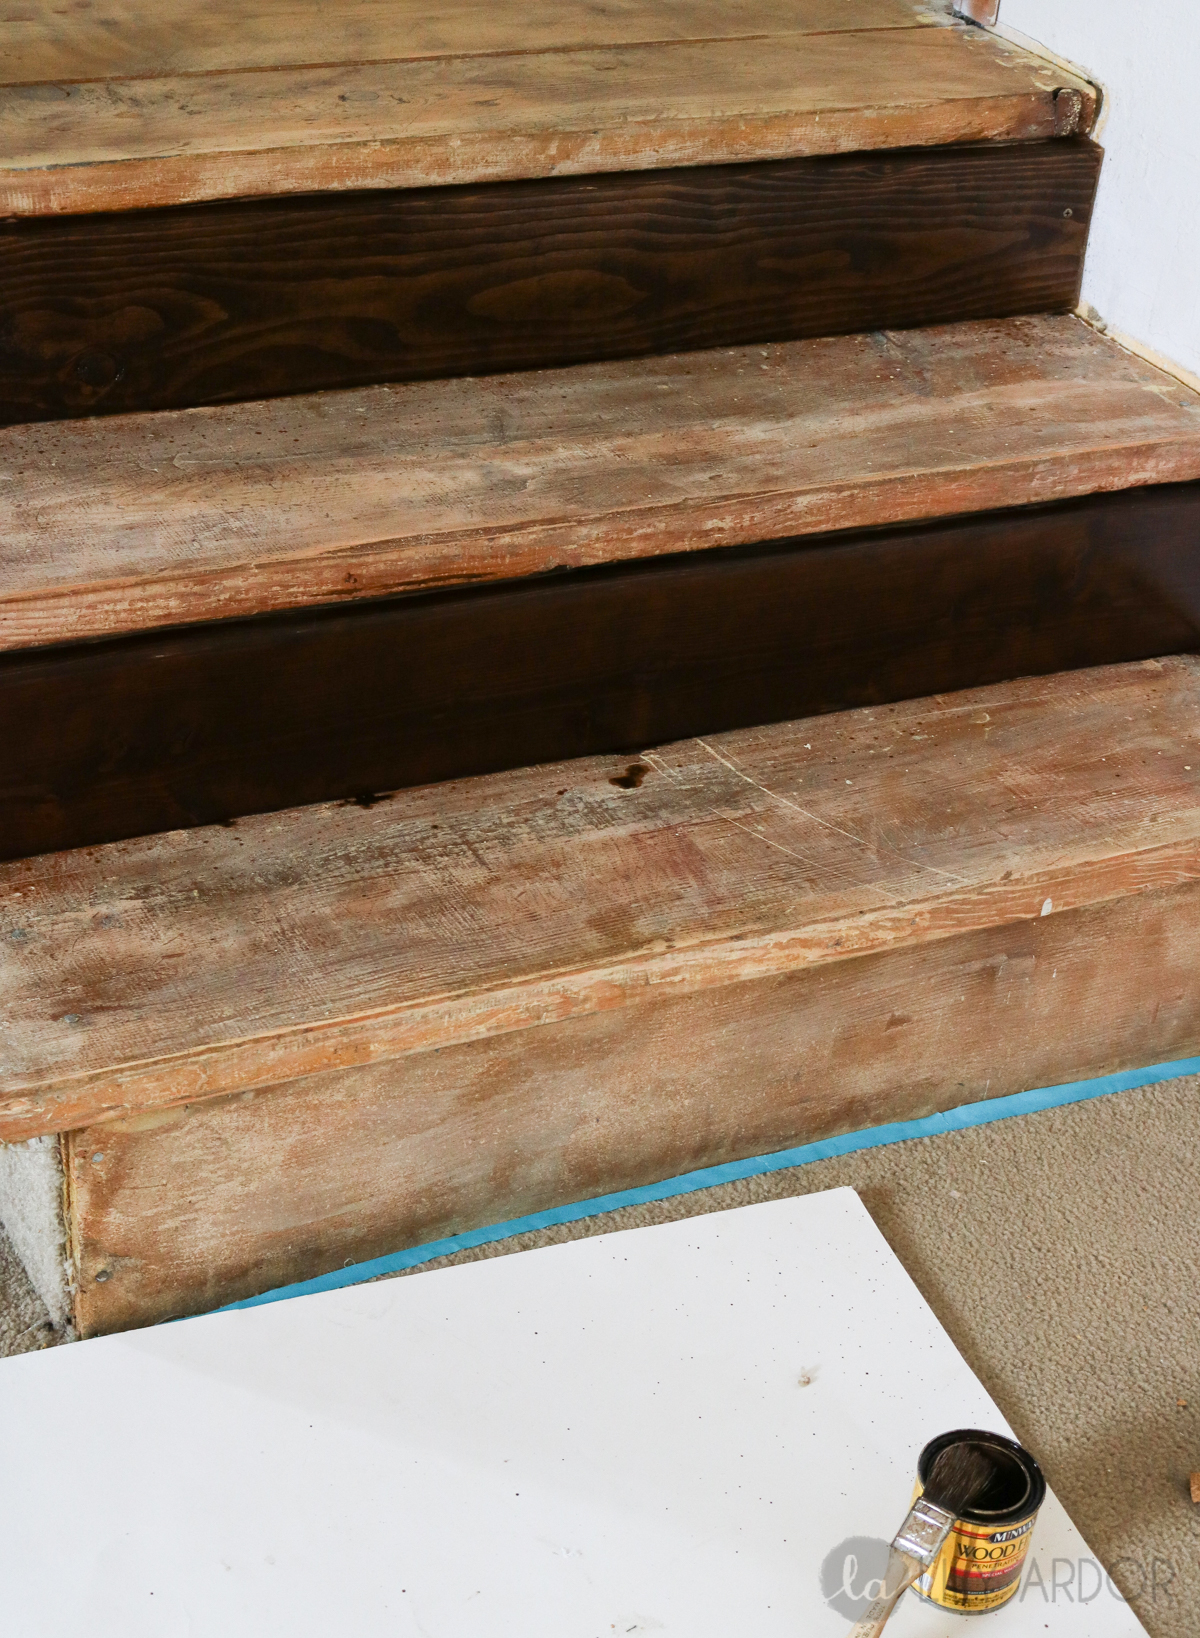
Then I gave my side boards a good coat of wood stain. I used the special walnut minwax wood stain. Okay when it comes to staining wood I go through gallons of this stuff. lol... maybe not gallons but I’ve went through quite a few cans of it. It’s the perfect color.. Matches everything 😀
Step 3
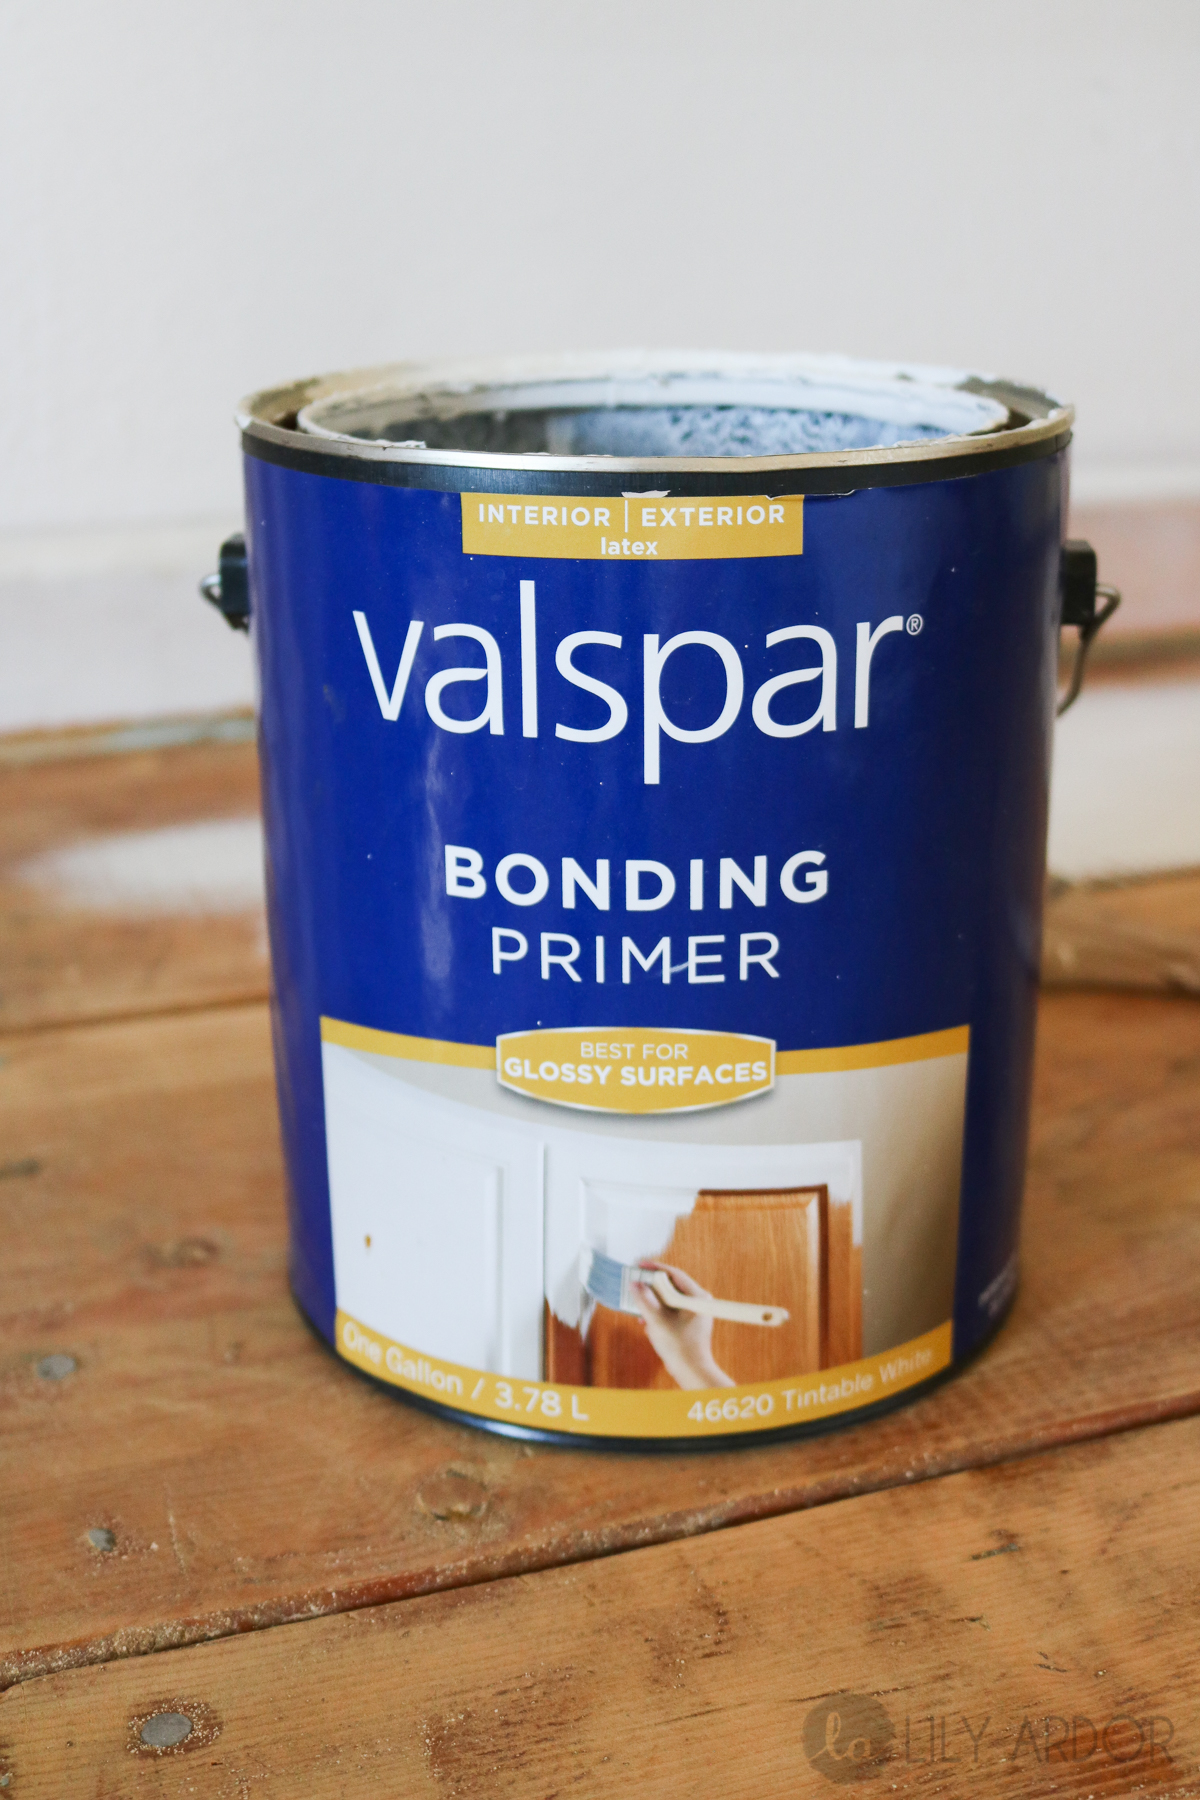
Let me start off by saying whatever you do.. DO NOT SKIP this step. Bonding primer is a must have. At least in my rule book it is. 😀 If you want your paint to last long and not peal after a week then this stuff is your answer. Just to give you an Idea…I painted my kitchen floor using the same bonding primer 3 years ago.. YES laminate flooring that is practically un-sandable and believe it or not.. Still as good as the day I painted my floor. This stuff works and I won’t paint a floor without it!!!
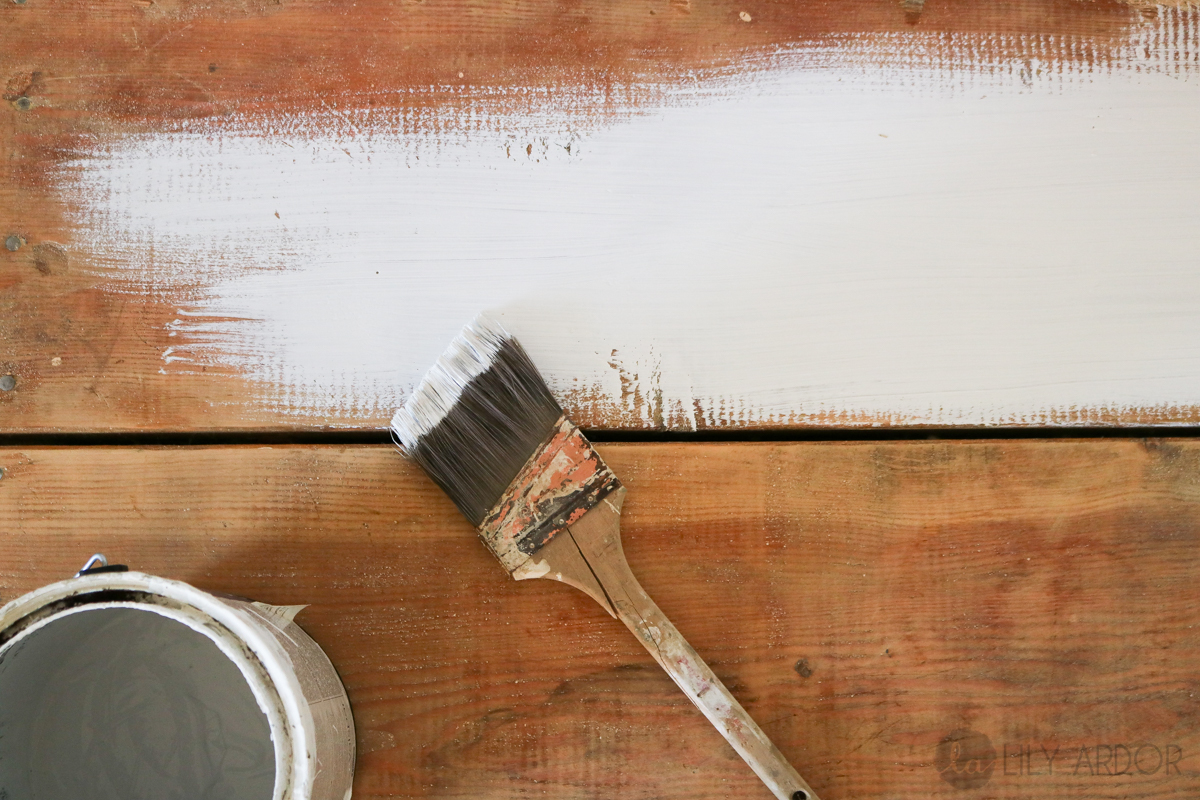
This is the stuff.
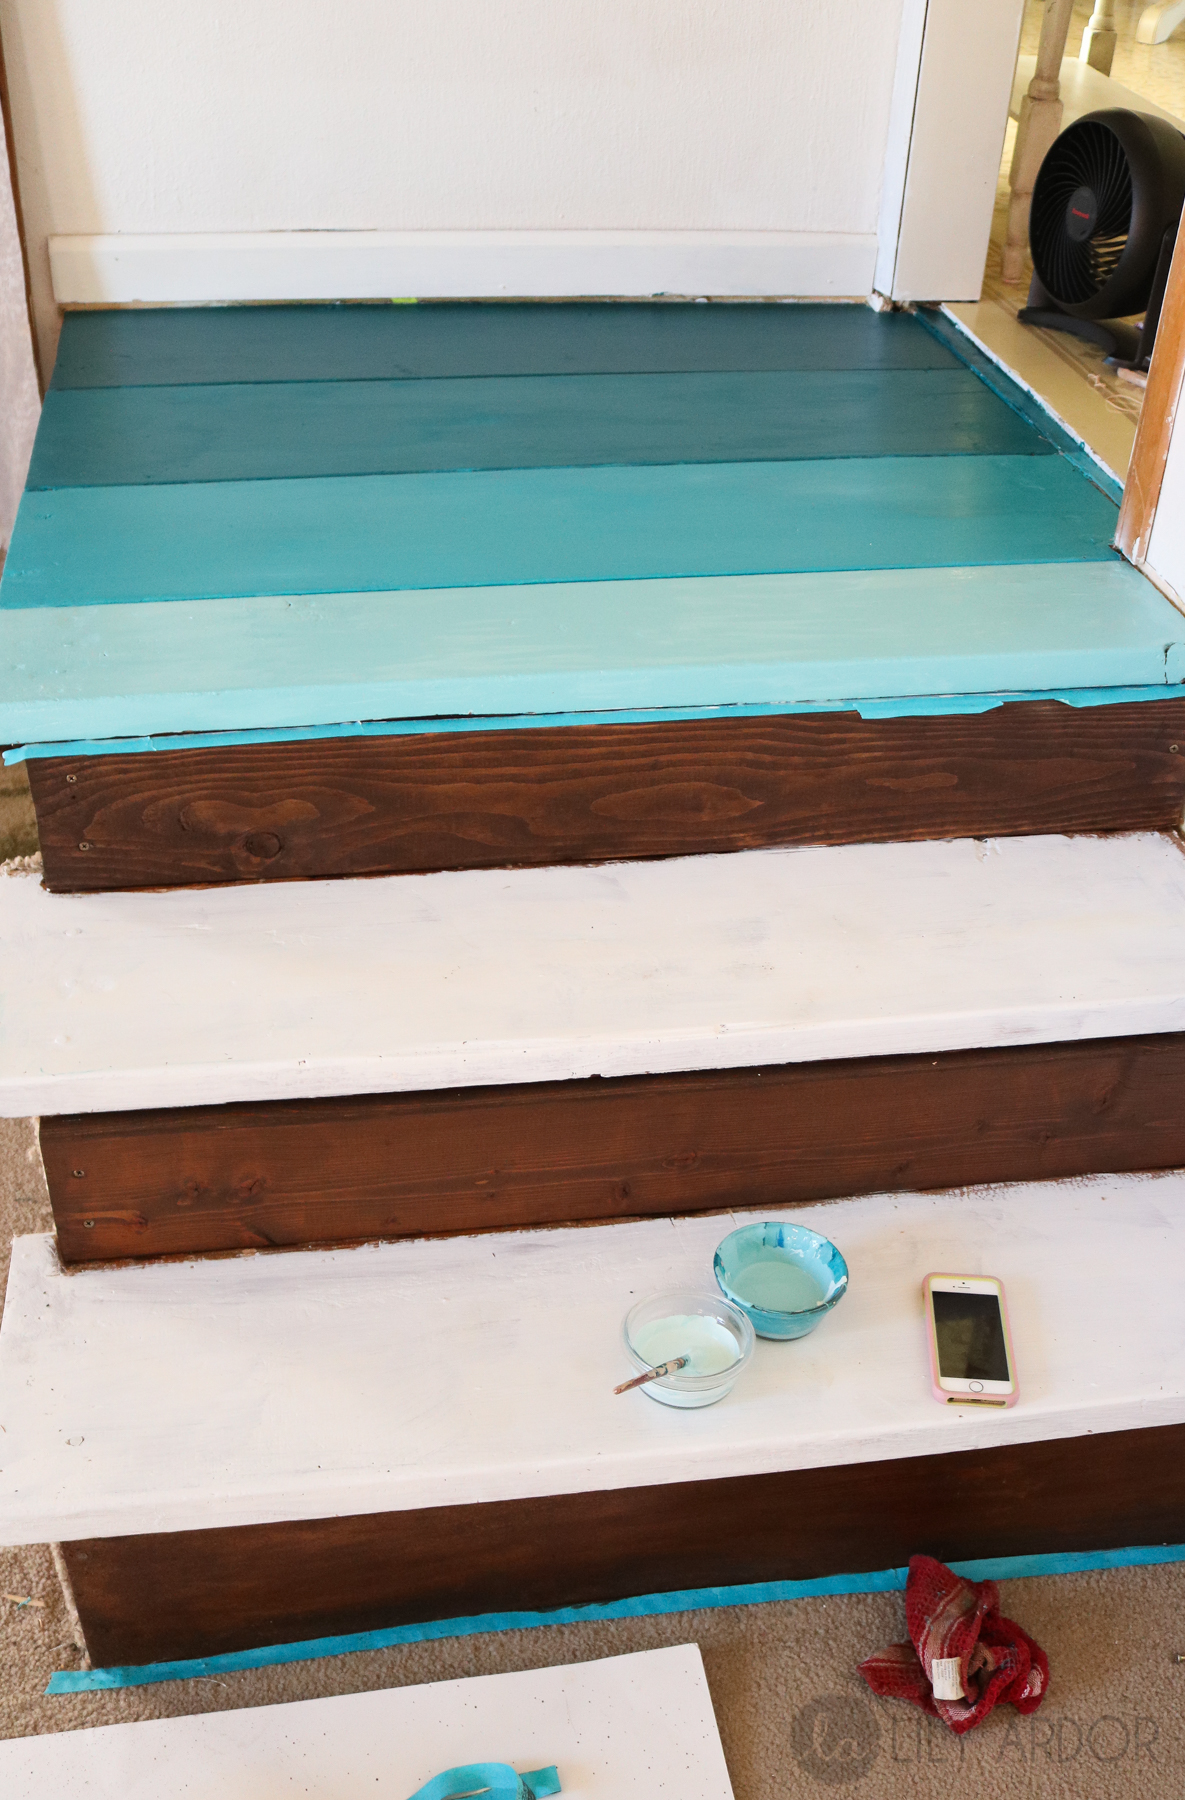
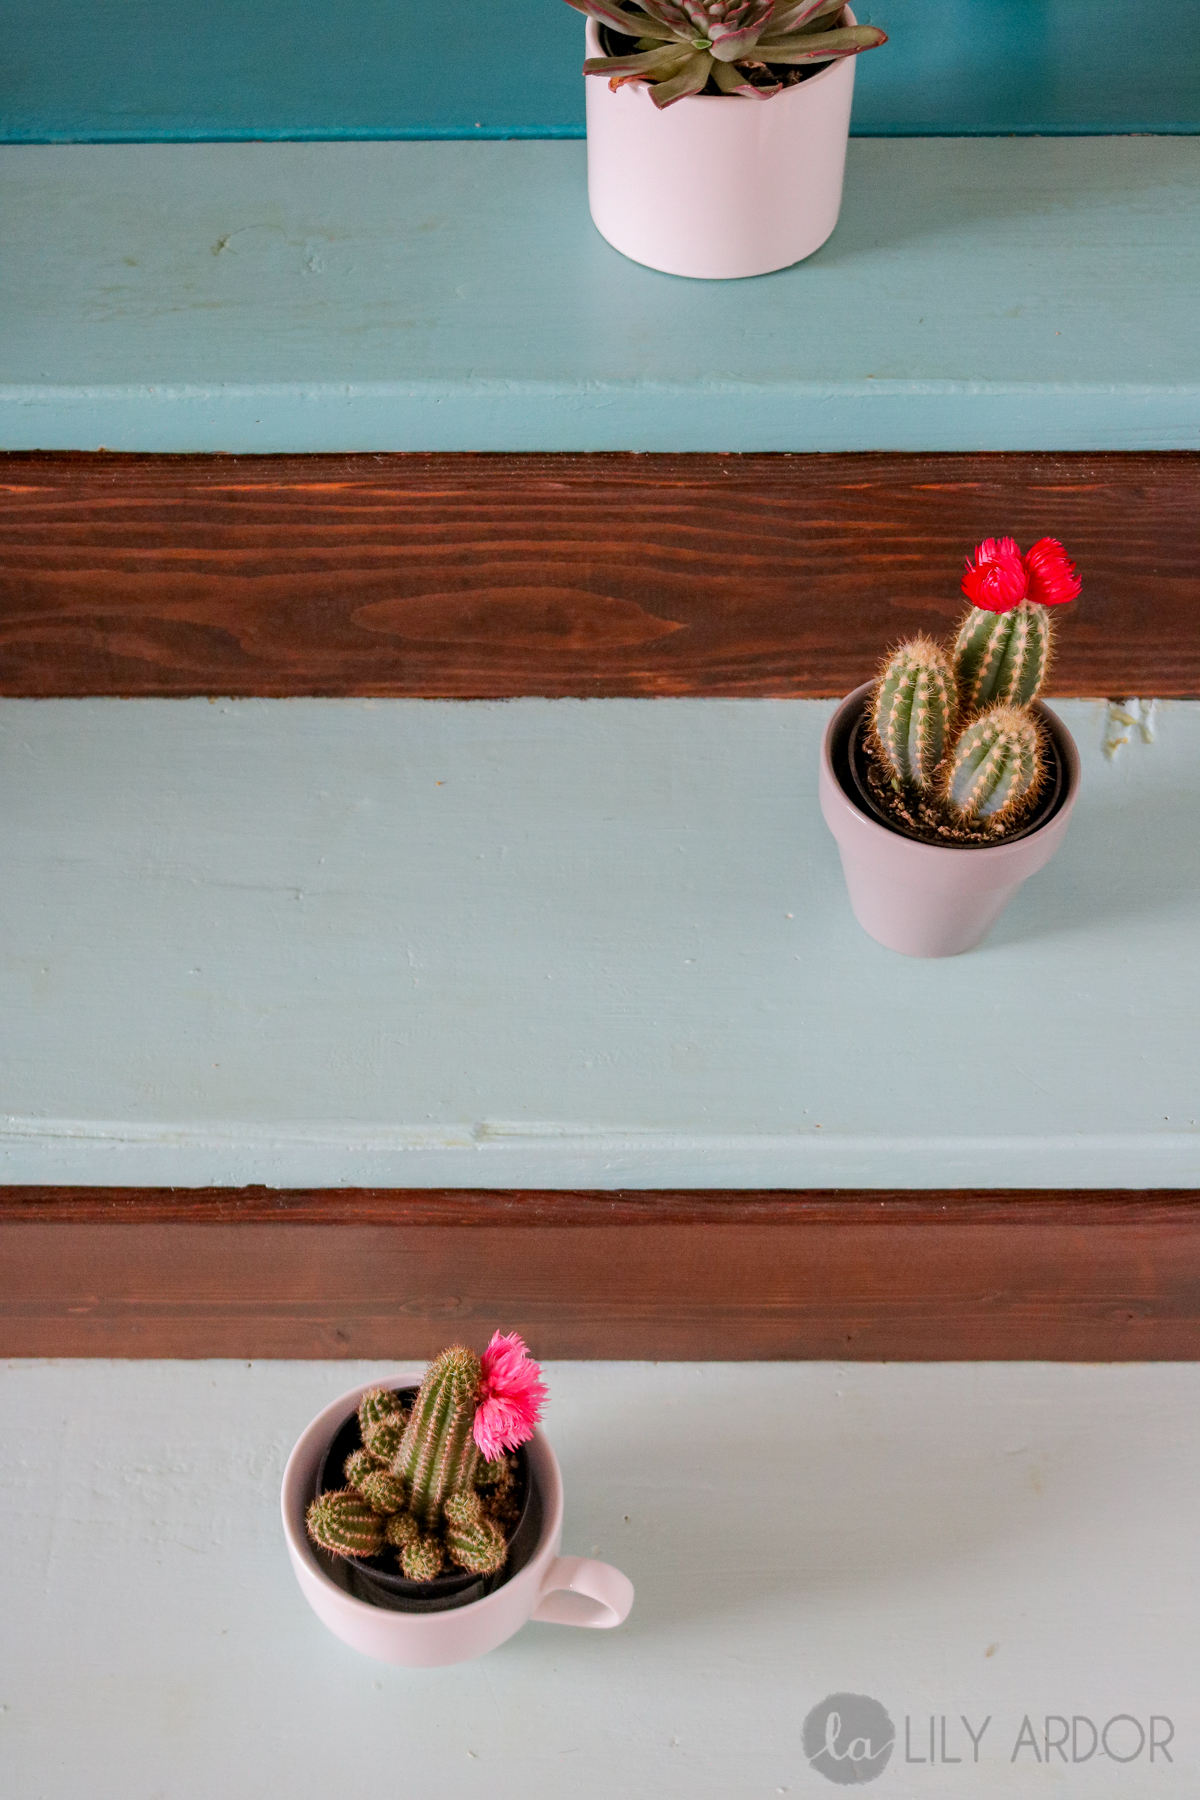
Step 4
Once my primer dried. I started with the darkest color first and worked my way lighter and lighter. I had to coat each shade twice. Although it did look kinda cool with one coat but I wasn’t really going for a shabby chic. I wanted solid colors. (my darkest shade was the Valspar “Fish Tale” color)
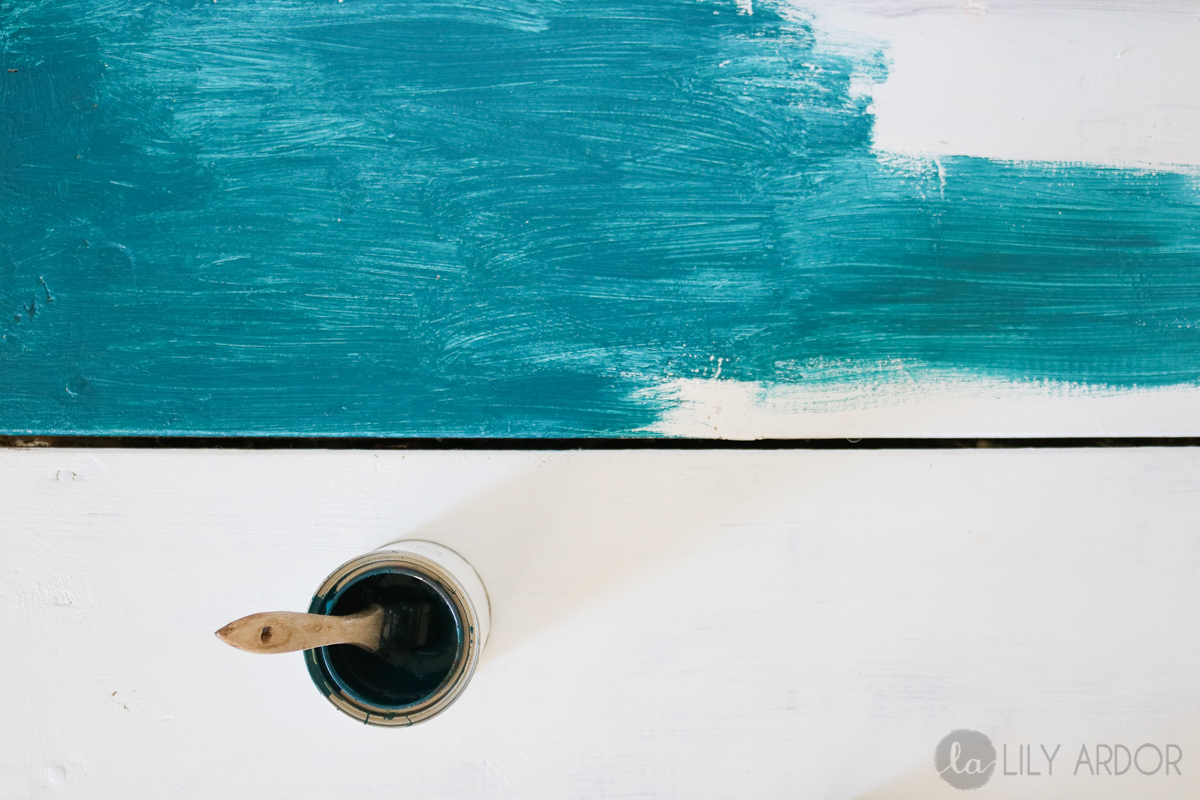
To make the second color I simply added white to my Valspar “fish tale”.
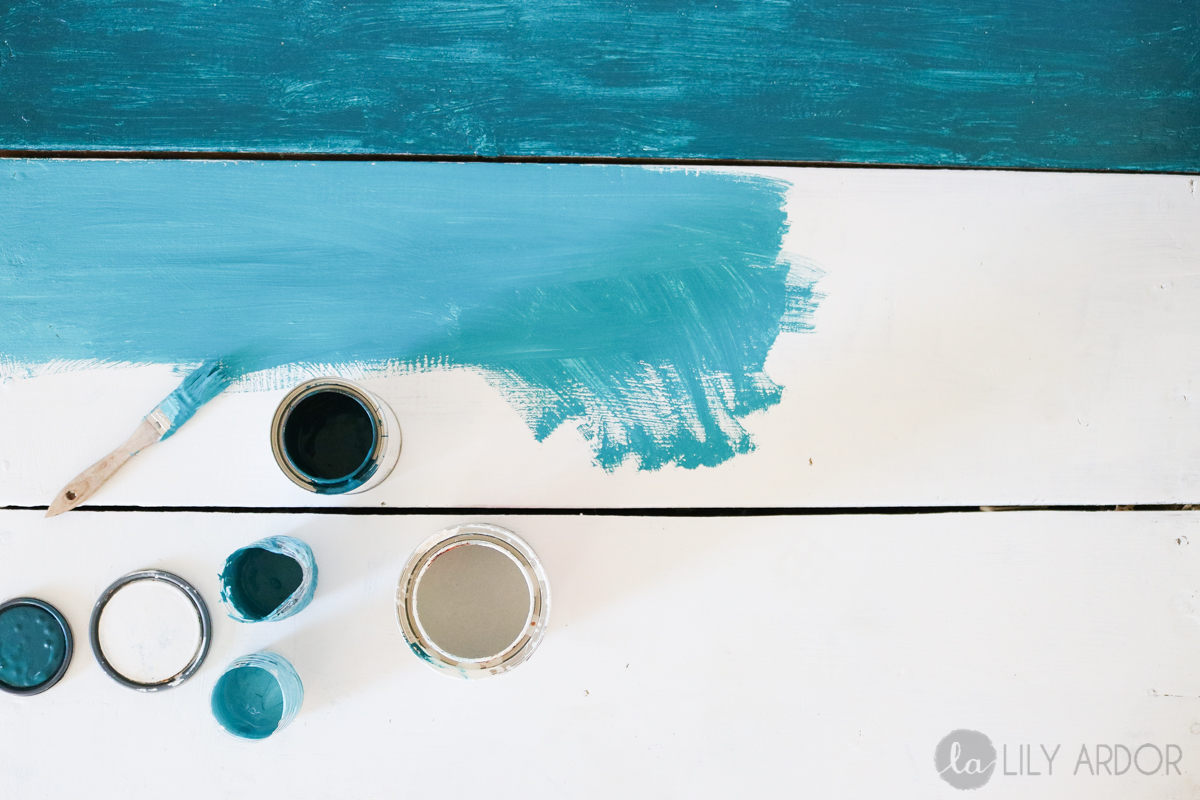
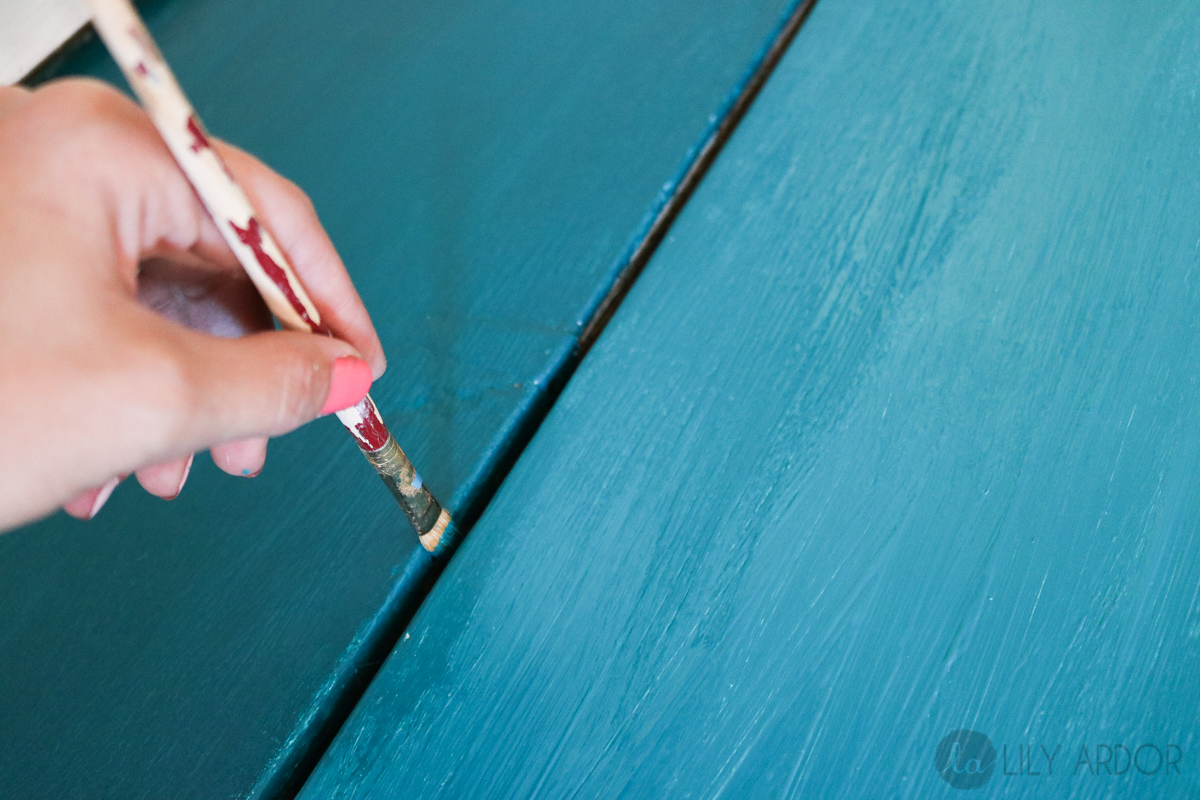
Don’t forget to get your edges with a detail brush. 😀
I had a fan set up to make the drying process a little quicker between coats and I worked my way down the stairs. Don’t forget to mask off your wood stain areas. Sucks if you get paint on it. Practically un-removable unless your quick enough with a wet rag. Yes I had one on hand just in case.
Coloring mixing techniques
So this is all I had out by the end of the project. Not exactly working with only two colors. LOL It’s really a piece of art work. Once I got to the fourth stair I actually used a sea foam color as my base and I added a tiny bit of the “fish tale (darker shade)” to it. So I guess to better explain the paint mixing process start with the dark color first… for each shade add white until you feel like your adding to much white. Then use a lighter shade for the base and add the darker color to it. LOL.. 😀 HEHE OMG that sounds confusing. I hope it makes sense. (If your painting a staircase that has 10 or more stairs then stick to adding white to the darkest shade.. I needed to change my technique because I didn’t have enough stairs to slowly transition my ombre effect )
Big reveal
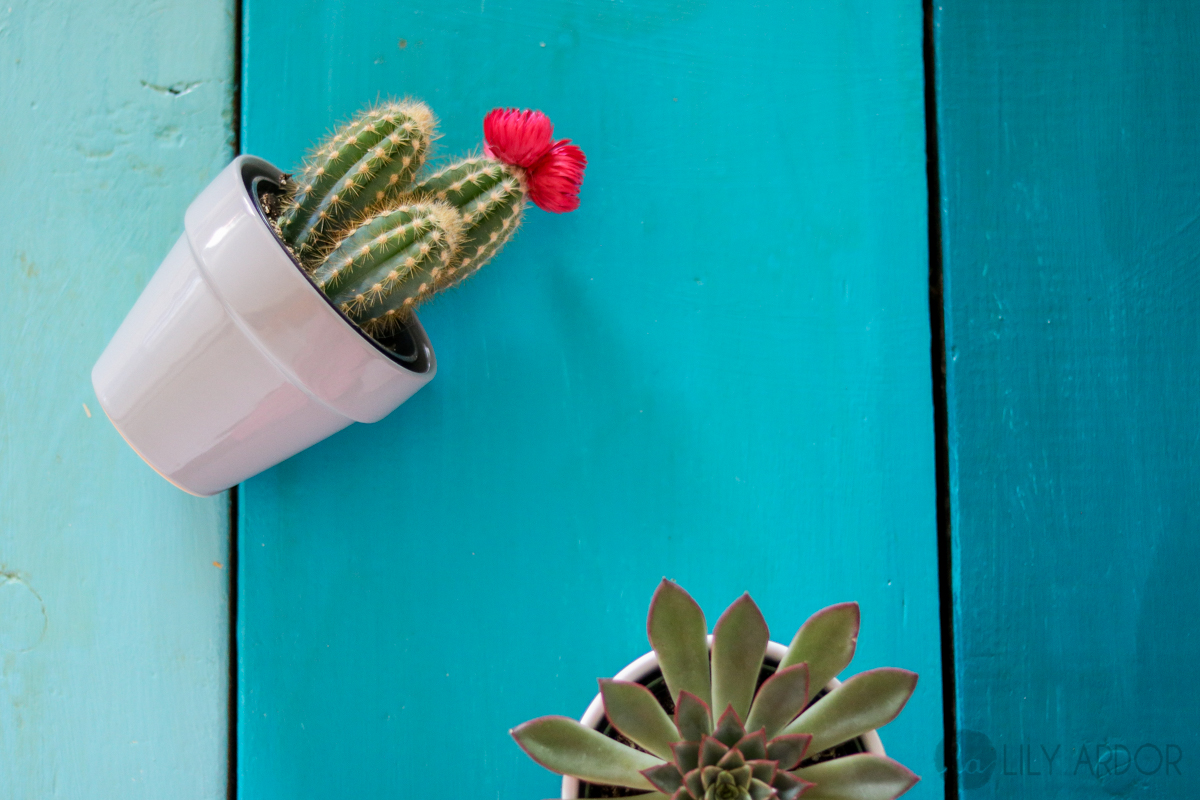
Much better. I actually feel like they’re clean when I clean them now.. lol
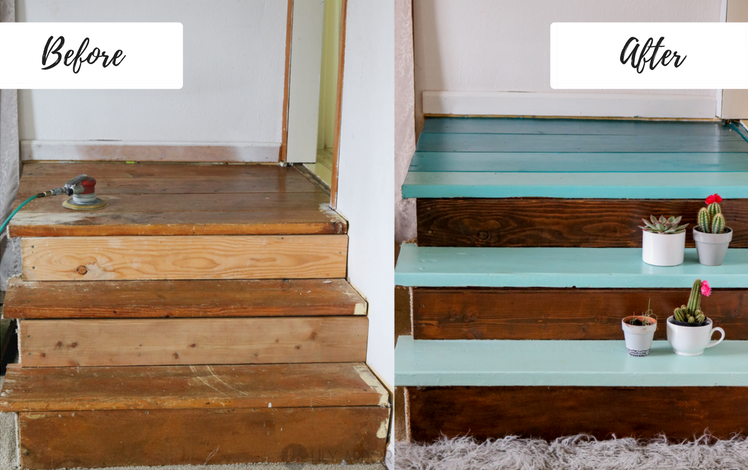
I love aqua but, believe it or not I’m not a crazy color chic. My whole living room is full of neutrals so this was a big leap for me.. A leap I don’t regret not one little bit.
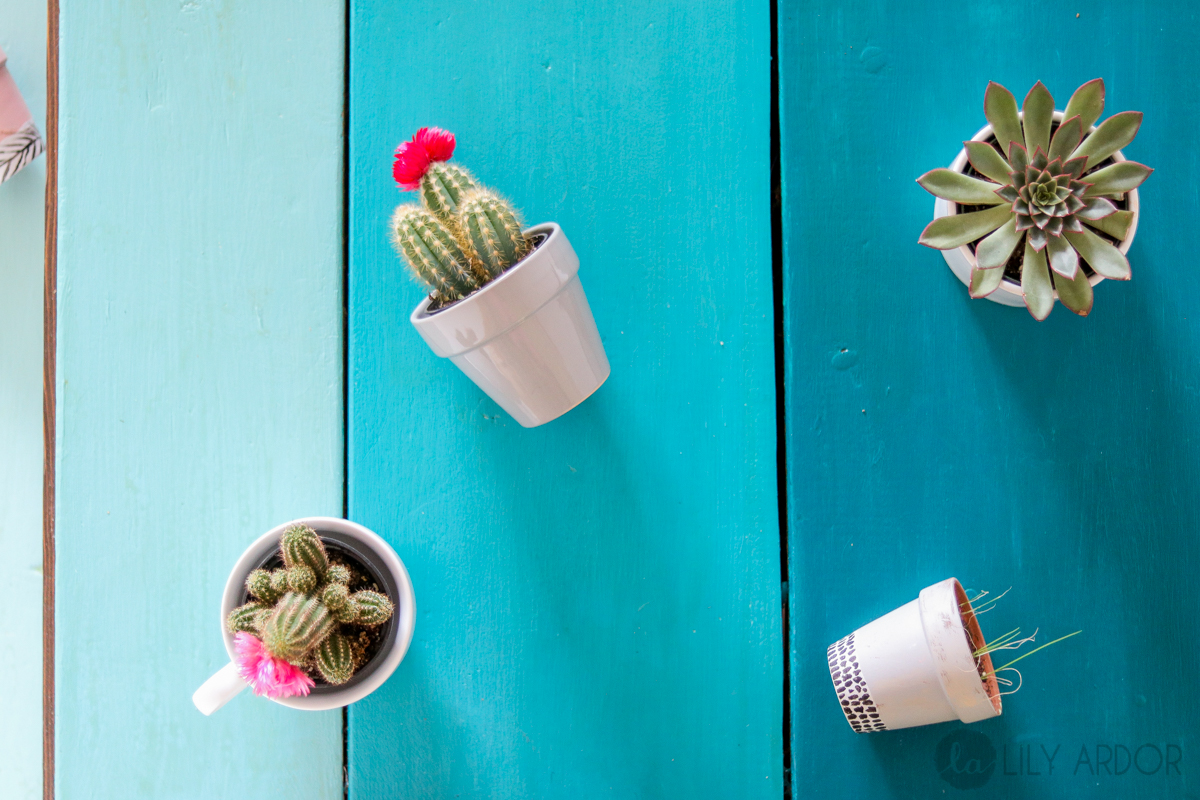
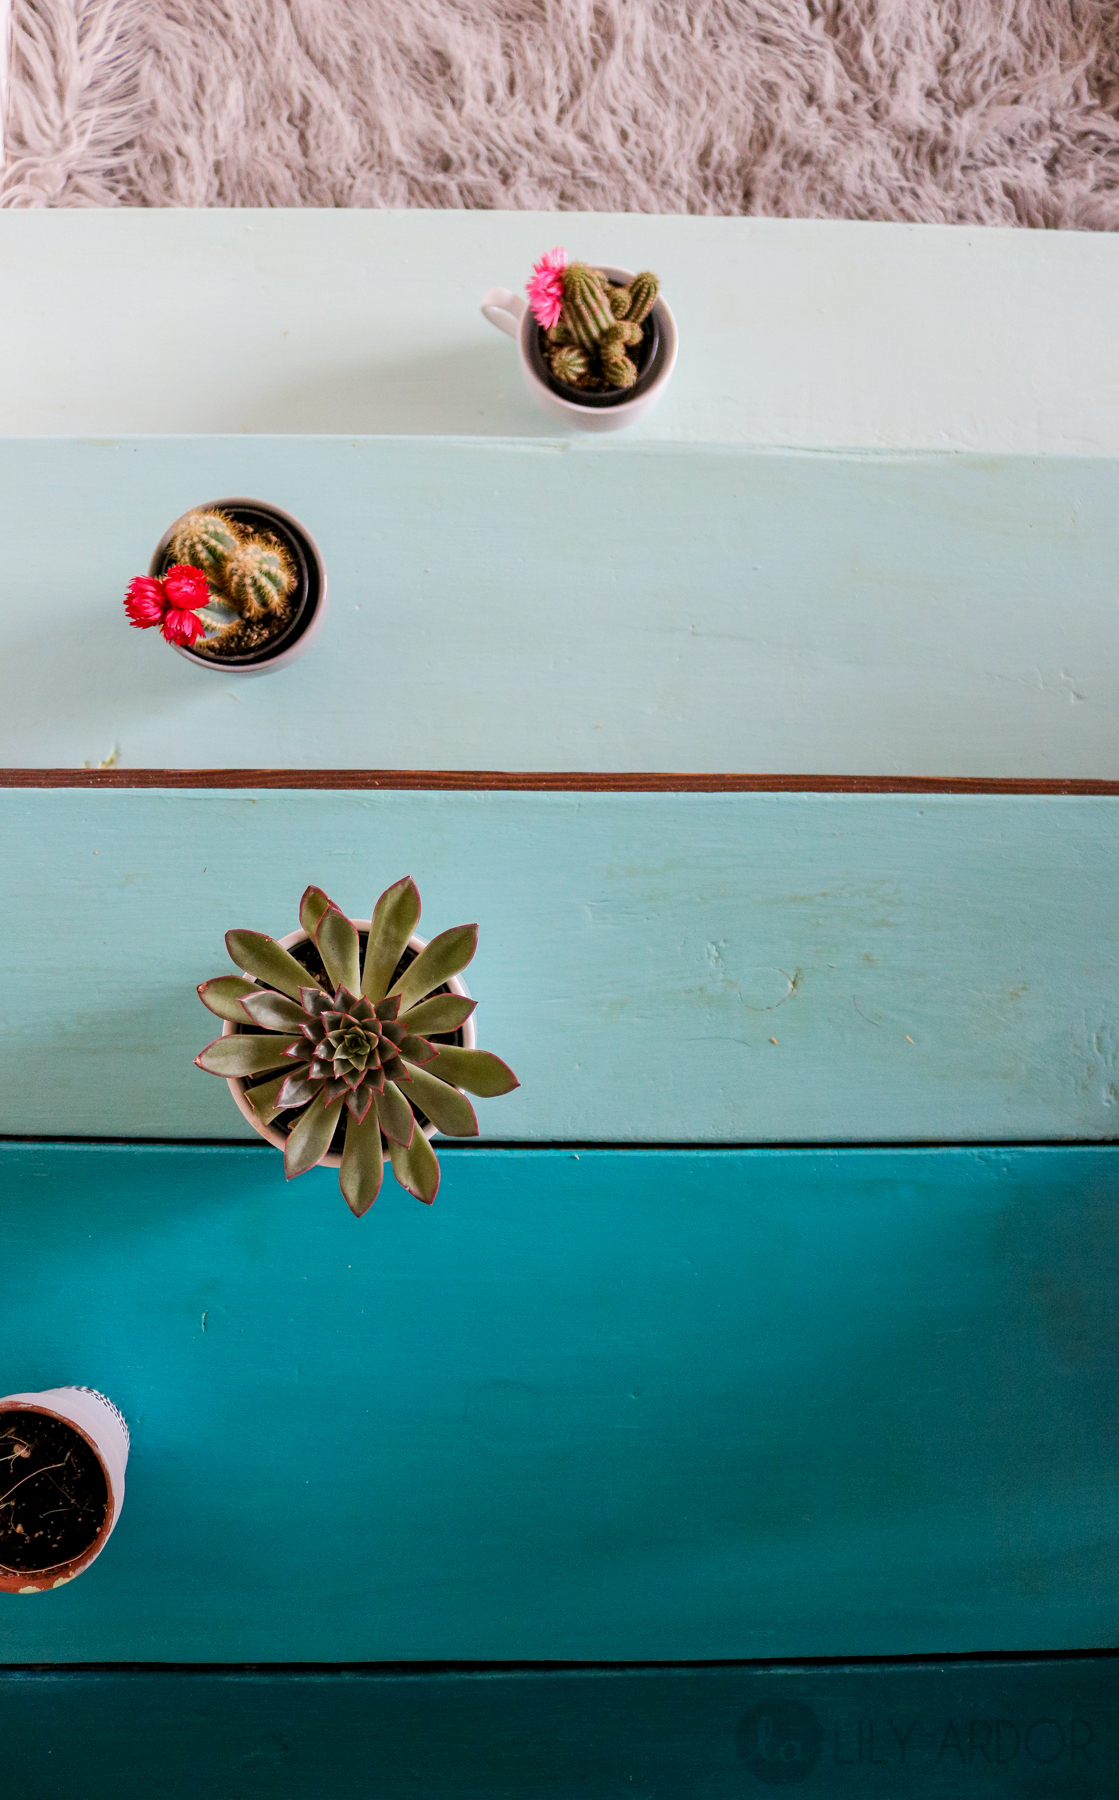
I love how the wood stain gave it the perfect amount of warmth. I feel like if I had it all in blues it wouldn’t look as good.
This project took me 1/2 a day with the drying and all. So totally worth the time 😀 I couldn’t be happier.
IMPORTANT NOTE!!
Before I finish off today’s DIY I wanted to mention. Be careful what clear coat or polyurethane you use. I put to much work into these stairs only to ruin them with a bad poly finish. In the photo below you’ll notice the nasty marks that look like a coca cola was spilled..poorly wiped and dried up.. 🙁 seriously though. This clear coat is horrible and YES I used a new clean brush. The spots are throughout the whole floor starting at the first brush stroke. Saddest part is they came out once the stuff was almost dry. I’ve never had this happen to me and I’ve probably tried almost every clear coat or polyurethane out there. I used a water-based because I don’t like that the oil based ones are yellow tinted, but I probably would of been better off with a yellow tint rather then weird brown spotting.

The clear coat I used was the Ace hardware Satin finish Waterbased Poly Finish. (below) I’ve used this stuff on a dark surface as well to see if it would do better and it left white spotting….AGH. Yep officially the worst poly finish I’ve used and it’s not cheap too. 🙁
Here are some clear coats I’ve used and loved..
This Minwax Laquer is awesome and durable. I used it on my computer desk that I refinished years ago and it held up pretty good although it does have a strong smell to it. (not yellowing) You can’t go wrong with Minwax. So far anything Minwax hasn’t let me down yet.
If your looking for a great water-based clear protector that doesn’t stink so much try the Valspar clear protector sold at Lowes stores. I love this stuff it’s perfect for small projects.
Thanks so much for tuning in. I would love to hear your thoughts on this DIY. What are some things you would do with your Staircase Design?
Here’s a cute pinnable to pin to your favorite board.
Here are some of my favorite finds. 😀
Very cool! I love the blues you chose. Thanks for the head’s up about the Ace finish – I need to clear coat something this week and was thinking of buying at Ace because it’s nearby.
Awe thanks Natasha. lol That was my case too. I live close to and ACE and it was quicker then going clear down to homedepot or lowes. 😉 Lesson learned. 😀
Love this! Ocean water blue is my favorite color! My problem is that I fall down stairs; it seems to be my “schtick”— not a good thing and something I would rather not do!! I fear falling on painted (harder than carpeted) stairs. Did you add anything to give the paint some “grit” it stop clumsy people such as myself) from slipping and falling? I love the combo of wood stain and the paint, BTW. Thanks for sharing.
Awe thank you Sue. I know what you mean I had a time when I constantly walked into walls. hehe. 😀 Unfortunately this surface needs to be somewhat glossy so you could wipe them to keep clean. If the finish was satin or matte I’m afraid it would be a dirt magnet. Although… Here’s an idea you could add some sand into the paint or clear coat to give it grip. 😀 Or use anti-grip gel clear mats. (there’s a link above to give you an example) I hope this helps. 😀
Love your stairs! I have the very same thing in my condo, though there are about 14 steps going upstairs, including a landing. Its raw/functional wood, as it was once covered by carpet until I removed it! I have always believed I needed to pay someone to come in and add “nice” wood….but yours looks beautiful so i might just try it!! You’ve given me some courage to give it a go!! Thanks for sharing your project!
Oooh how exciting. 😀 That sounds like the perfect project. 😀 I know what you mean… wood seems tough to work with but the beauty of wood is that even if it looks rough it could be stained and turn out looking rustic or painted into whatever style your home is. I love adding a pop of color here and there.. 😀 makes me smile.. 😀 Oh on the subject of inspiration 😀 — If you type “ombre stairs” in the search bar on pinterest it will show you many more Ideas that inspired me to do my stairs like this. Thank you 😀 Carol I am so glad you liked my stairs.. 😀 I’m excited for you 😀 😀 YOU GO GIRL !!! 😀
Hi Lily, I love the stairs. But what do I do with 17 stairs! I painted the landings navy blue and the risers white but they look ugly and the edges are horrible on most of the stairs, they used to be covered with carpet. How do I paint these stairs without replacing the wood? And I’m on a very tight budget. Any suggestions?
Awe thank you Allison. I’m sorry to here about your stairs. 🙁 You can paint right on top of the paint you already have but with that much stairs I would do the risers ombre and the landings stained wood. (try searching “ombre stairs” on pinterest they have some examples) Only thing I’m thinking is since you already have the landings navy blue how would you stain them ?.. It’s to much work stripping the paint..You can try maybe a charcoal gray color on top? Is this for your living room? What’s your color theme?