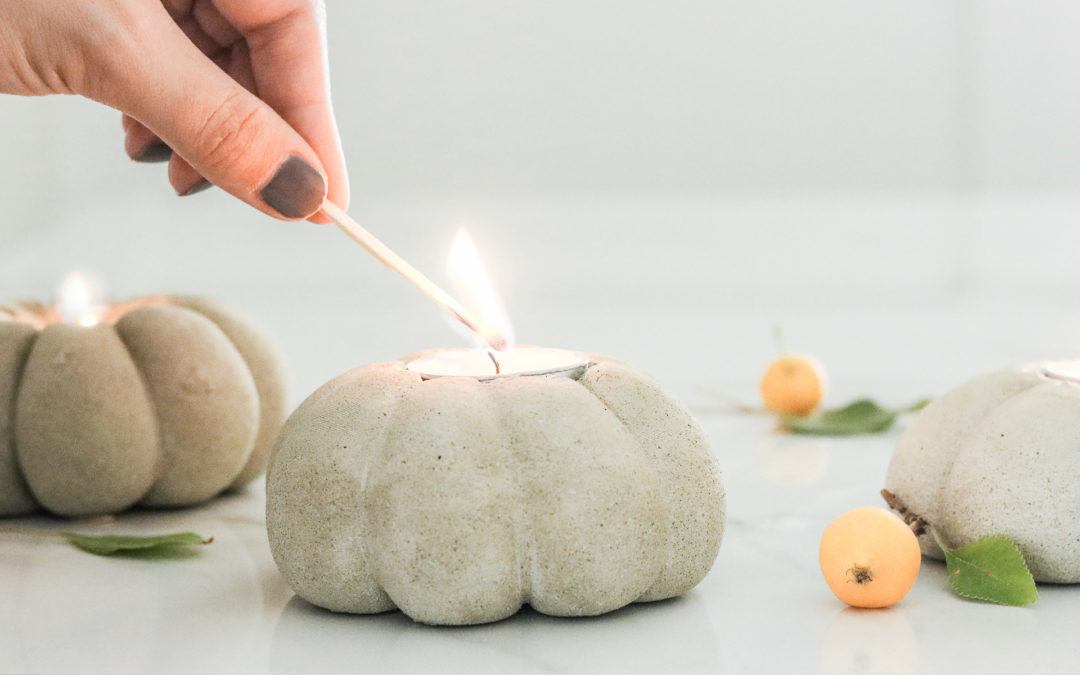
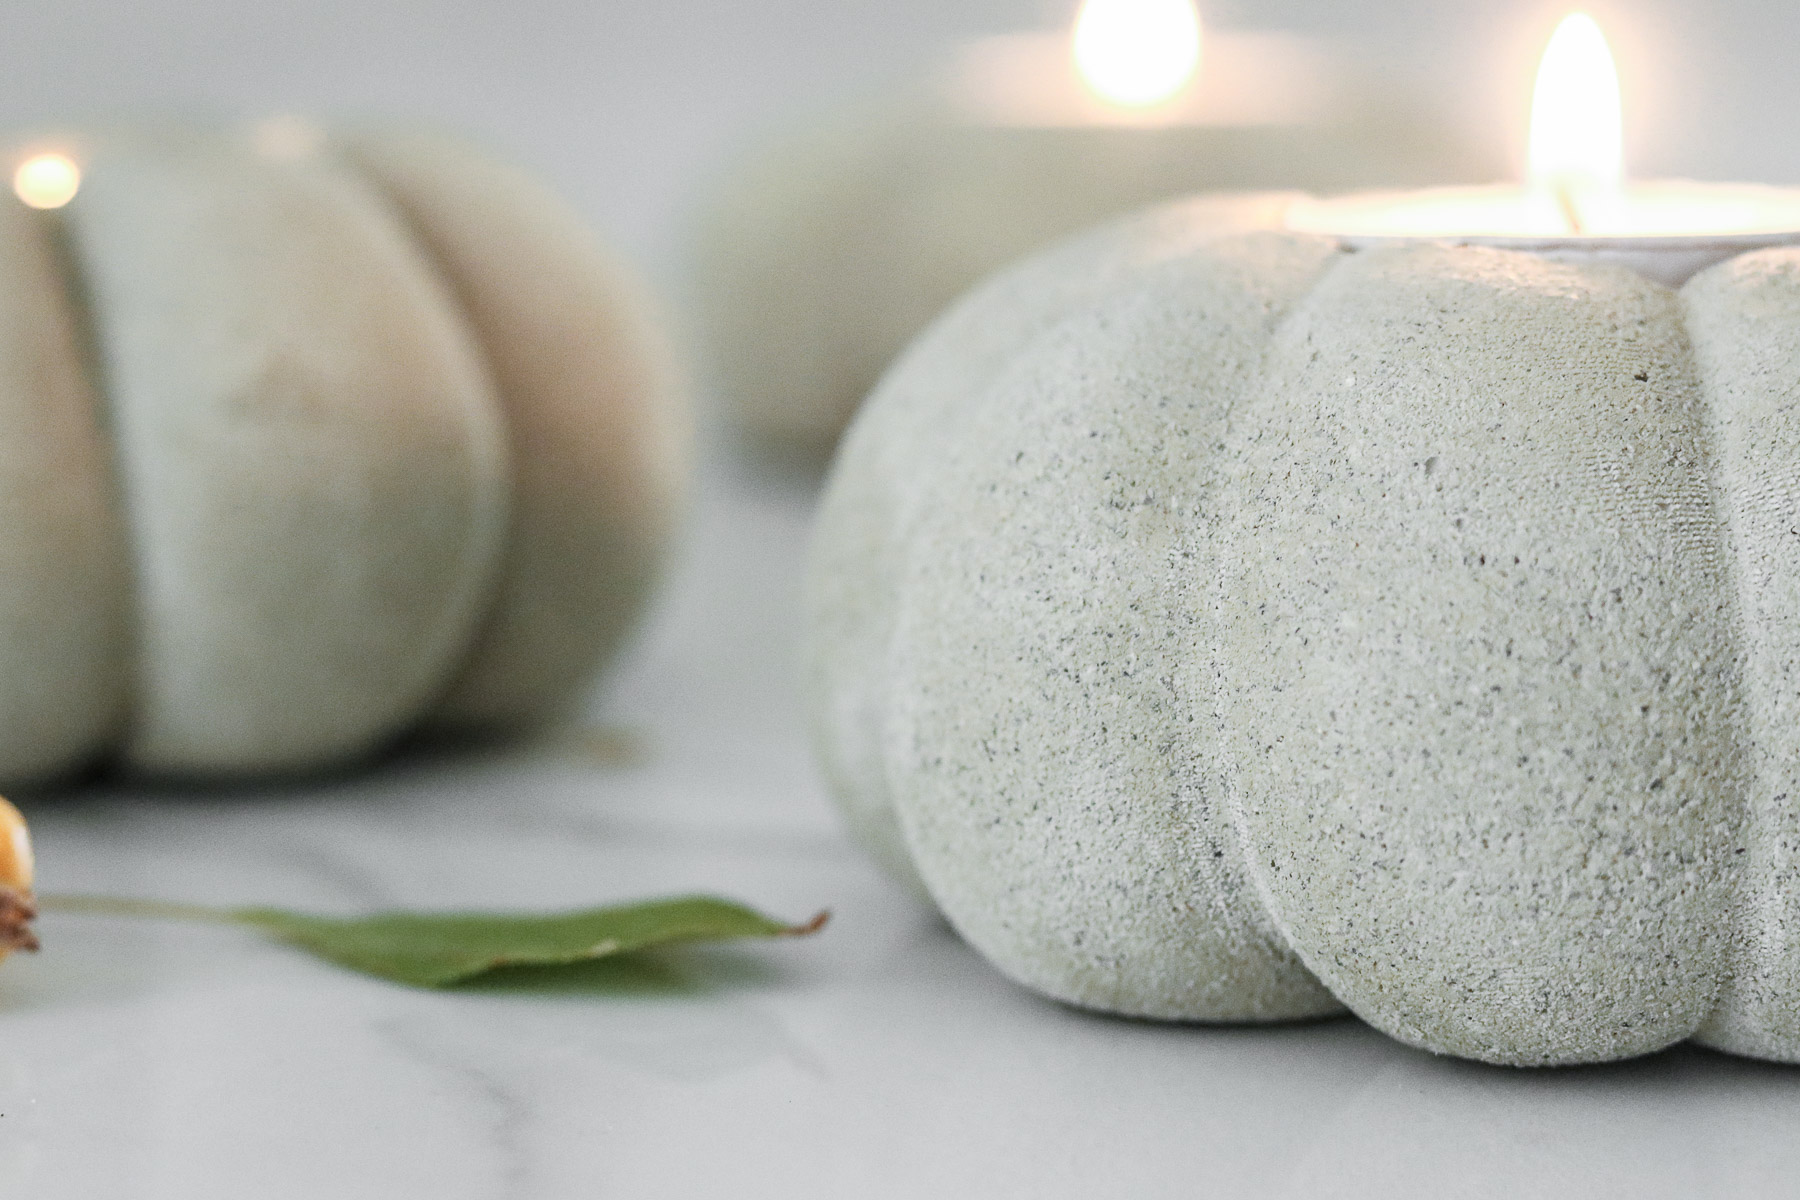
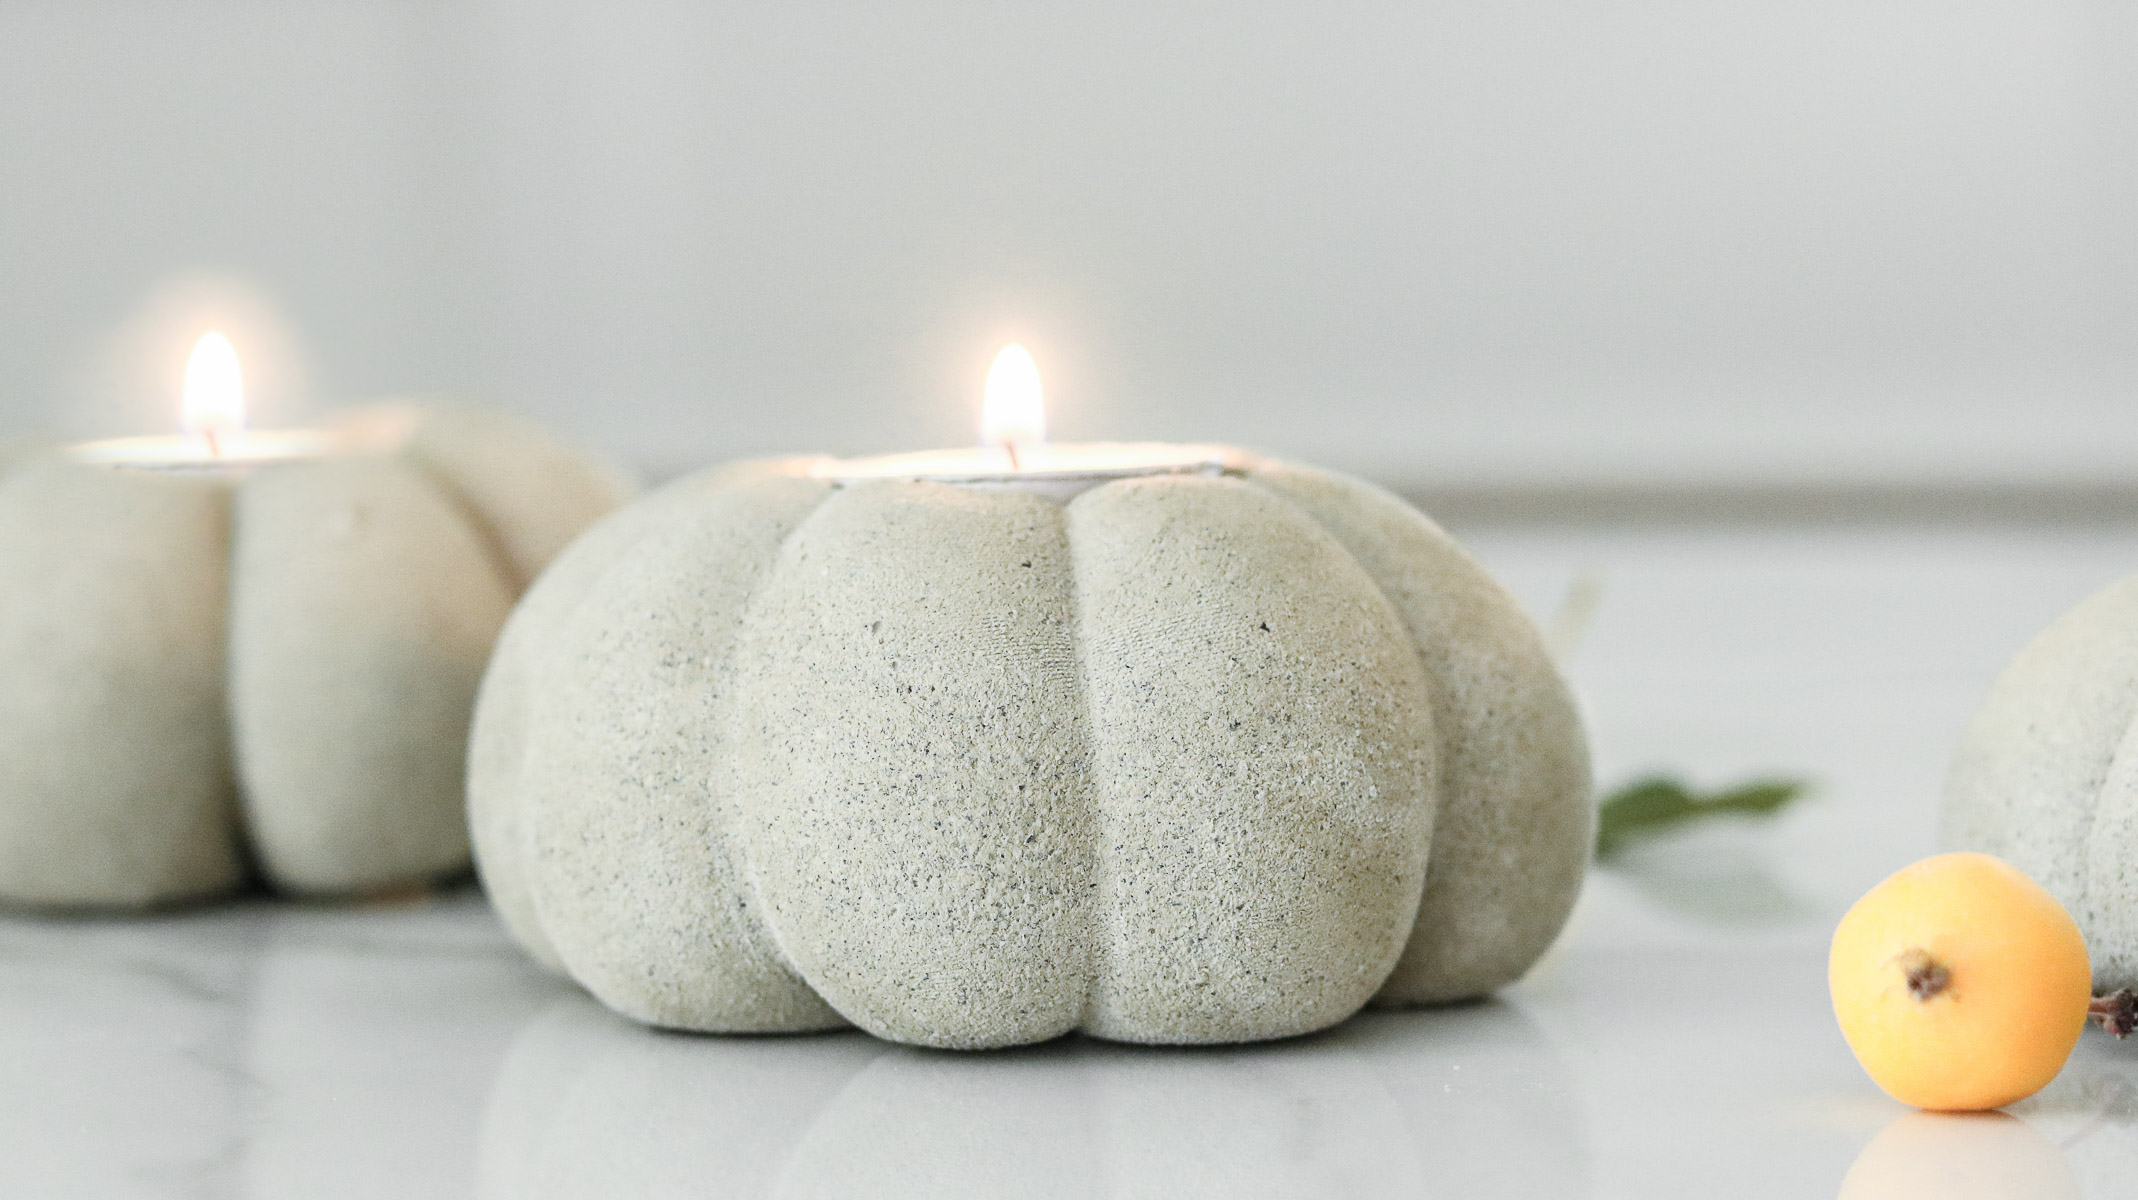
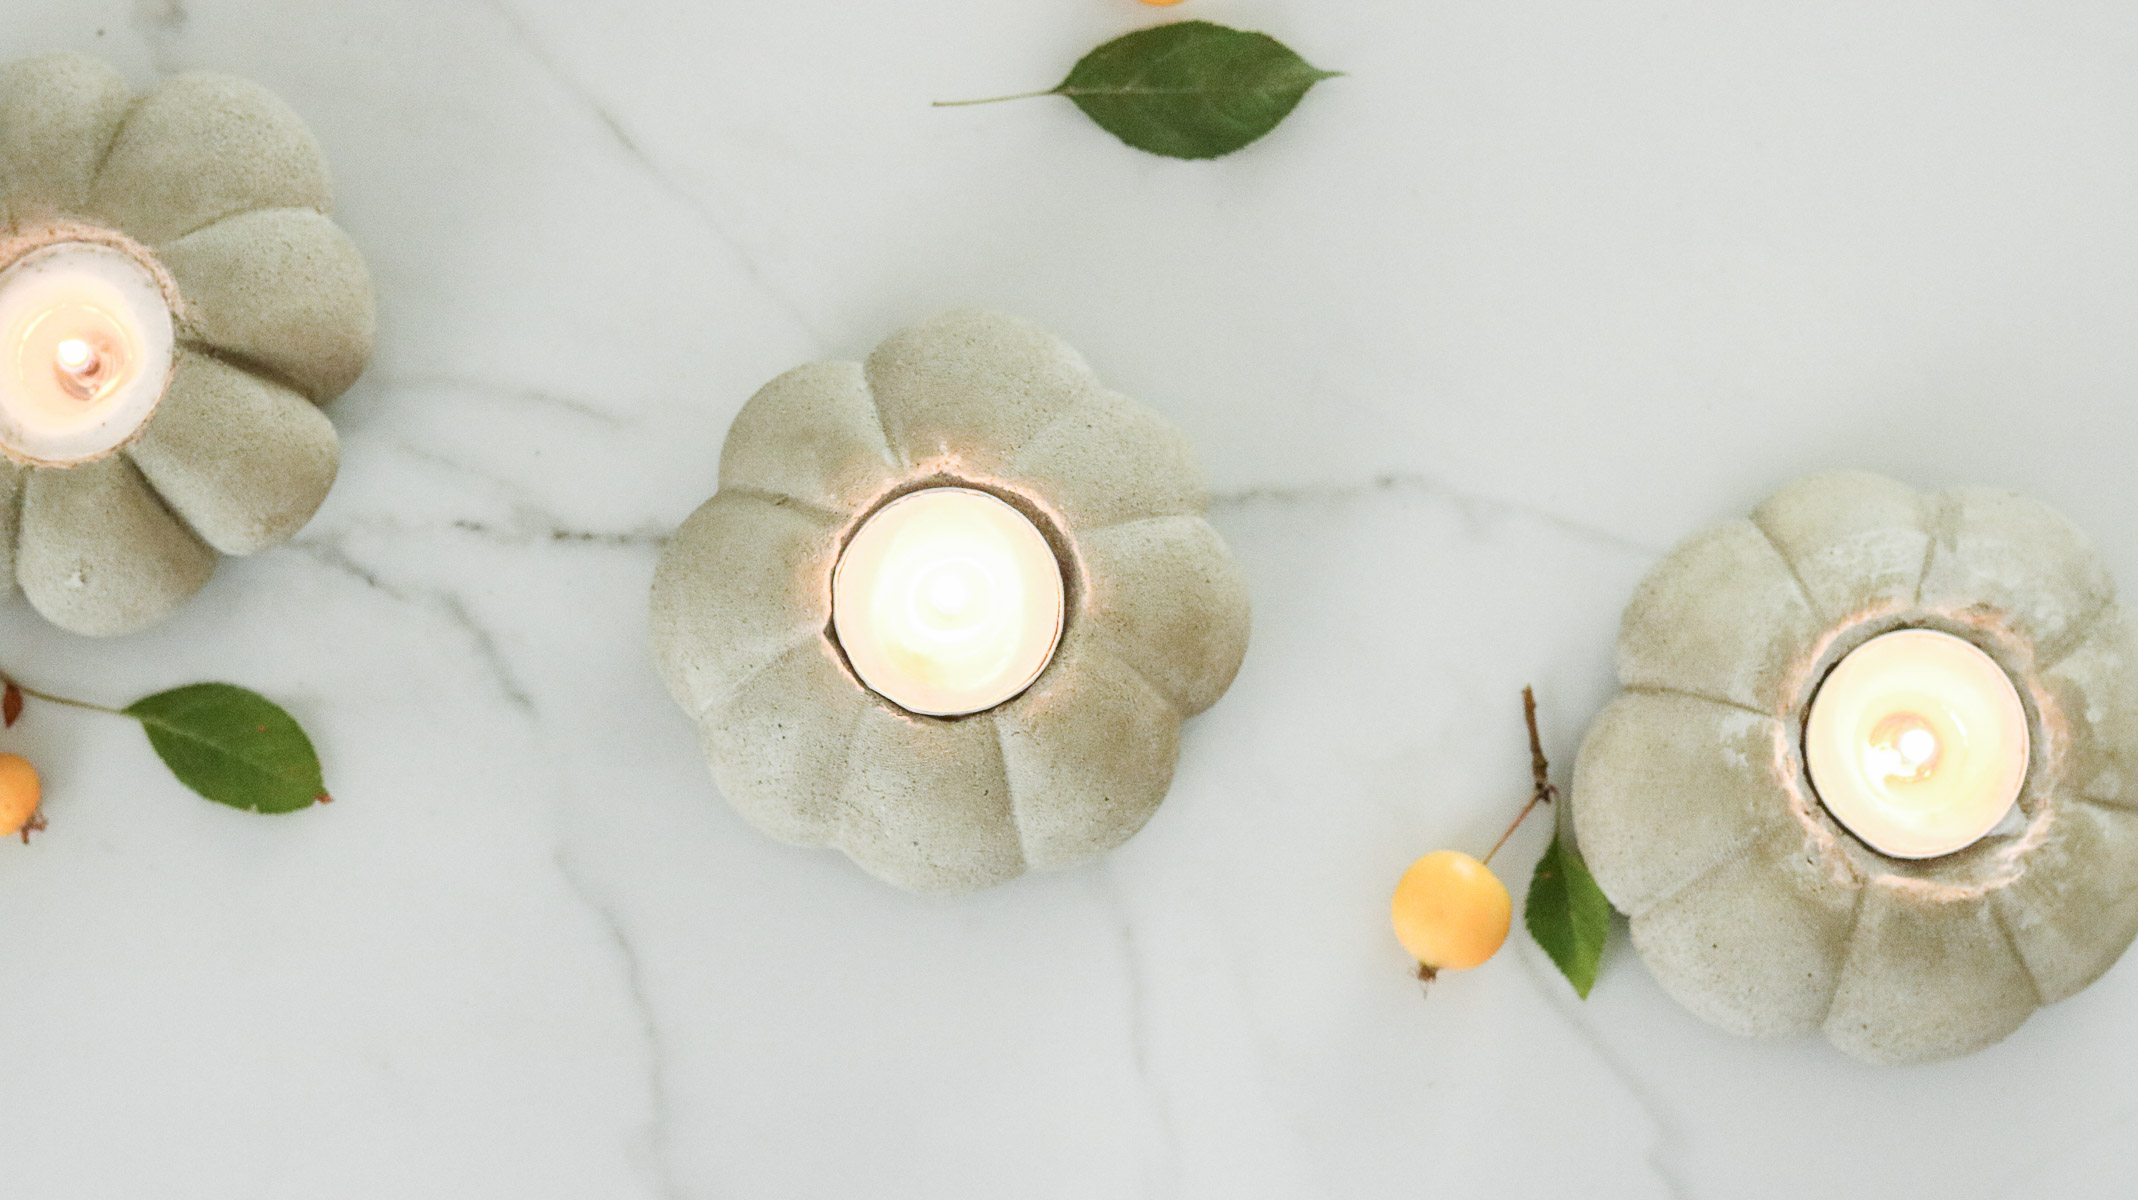
Mini Concrete Pumpkin Votives
These little concrete pumpkin candles were inspired by a DIY I did a few weeks ago. I really loved the idea of industrial fall decor and decided to make some indoor pumpkins instead of the outdoor ones I made last time. Since my last pumpkins were pretty big I found a way to keep them lightweight by turning the concrete into hypertyfa (if you’ve missed that DIY you can check it out here). This time around I knew my pumpkins would be a lot smaller and weight wasn’t really an issue so I’ve decide to use different concrete. Although these pumpkins look very similar the DIYS are very different. Okay, let’s jump right in.
TIME NEEDED
It takes about 30-35 minutes to make one pumpkin. That’s including drying time although you will need to let it set fully overnight.
TOTAL COST: AROUND $16
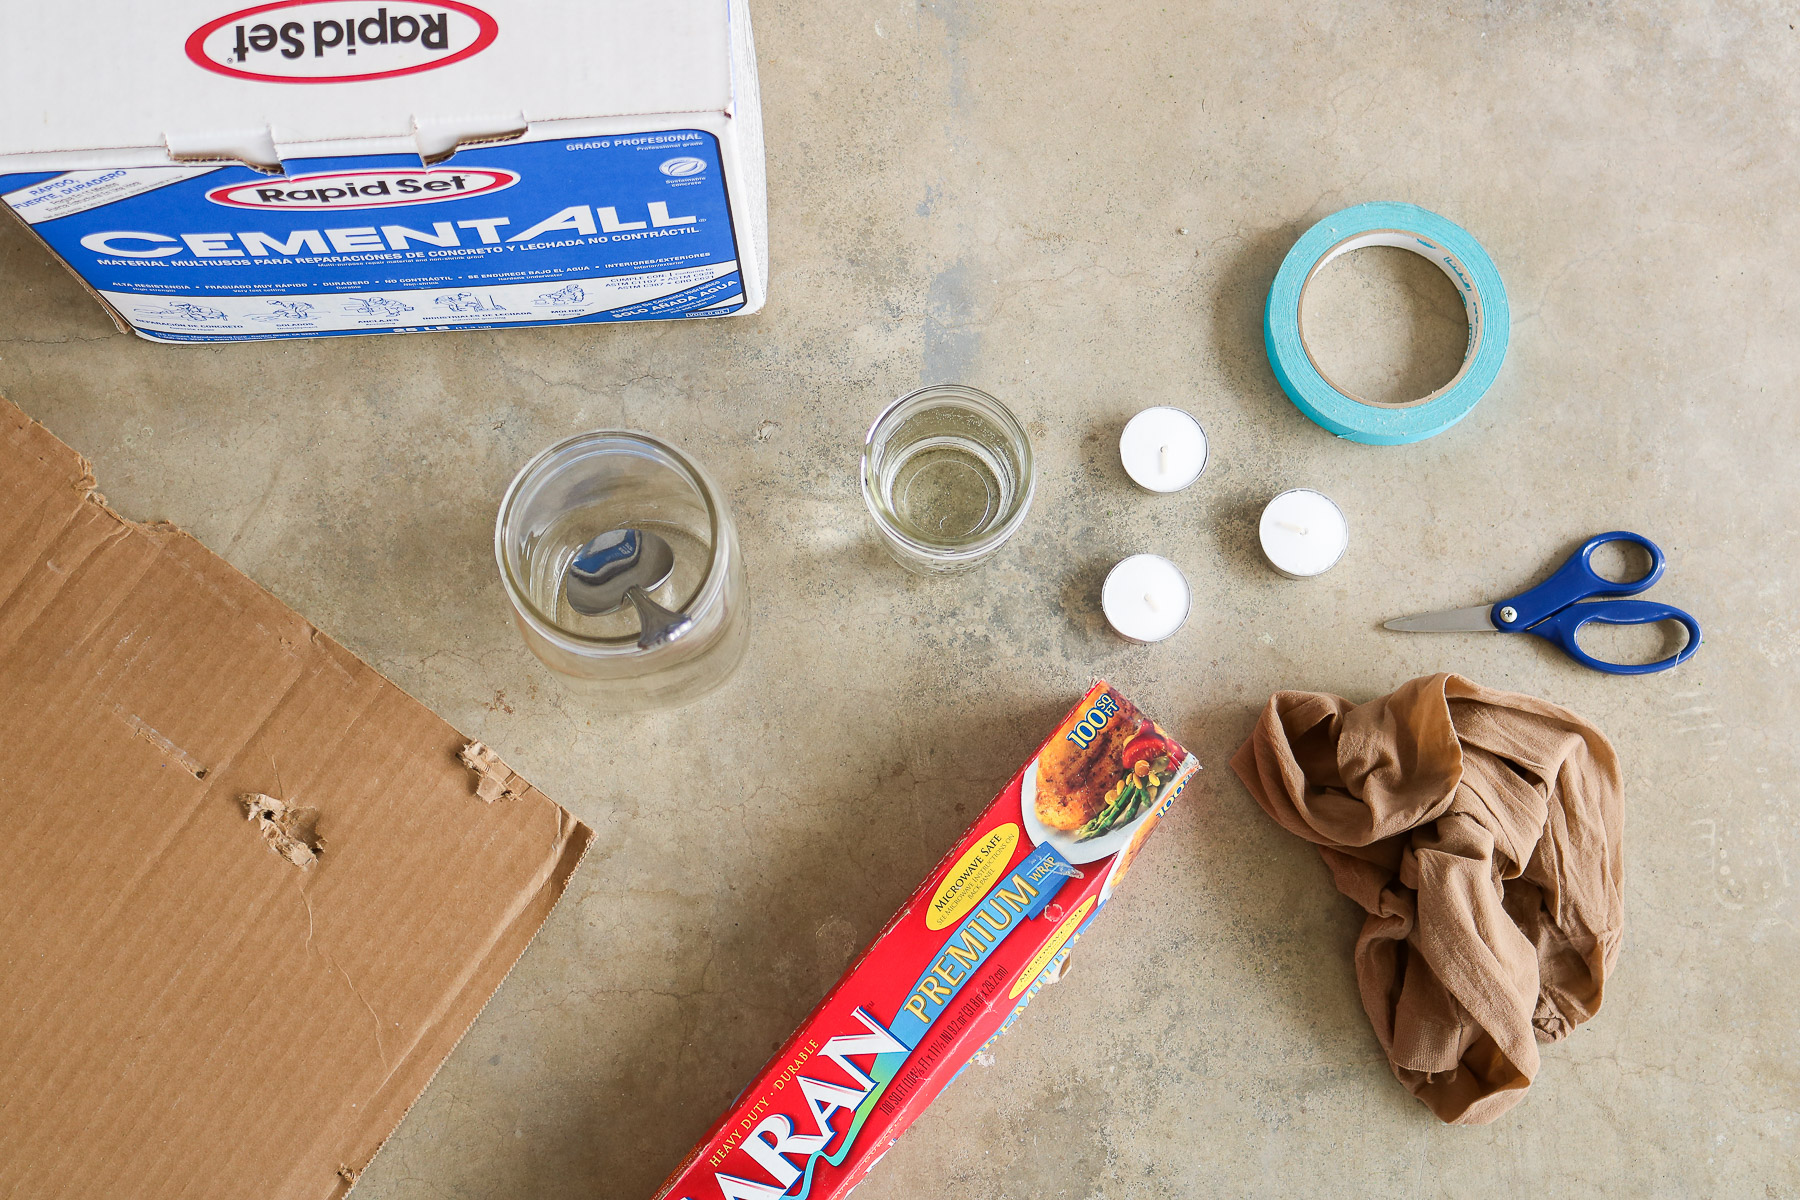
SUPPLIES
I purchased my concrete at home depot and the tights and candles at the dollar store. I had everything else at home. (I’ve attached affiliate links to all the products if you’d like to purchase them online)
- concrete
- tape
- scissors
- saran wrap
- panty hose
- mixing containers + spoon
- water
Here’s a quick video version
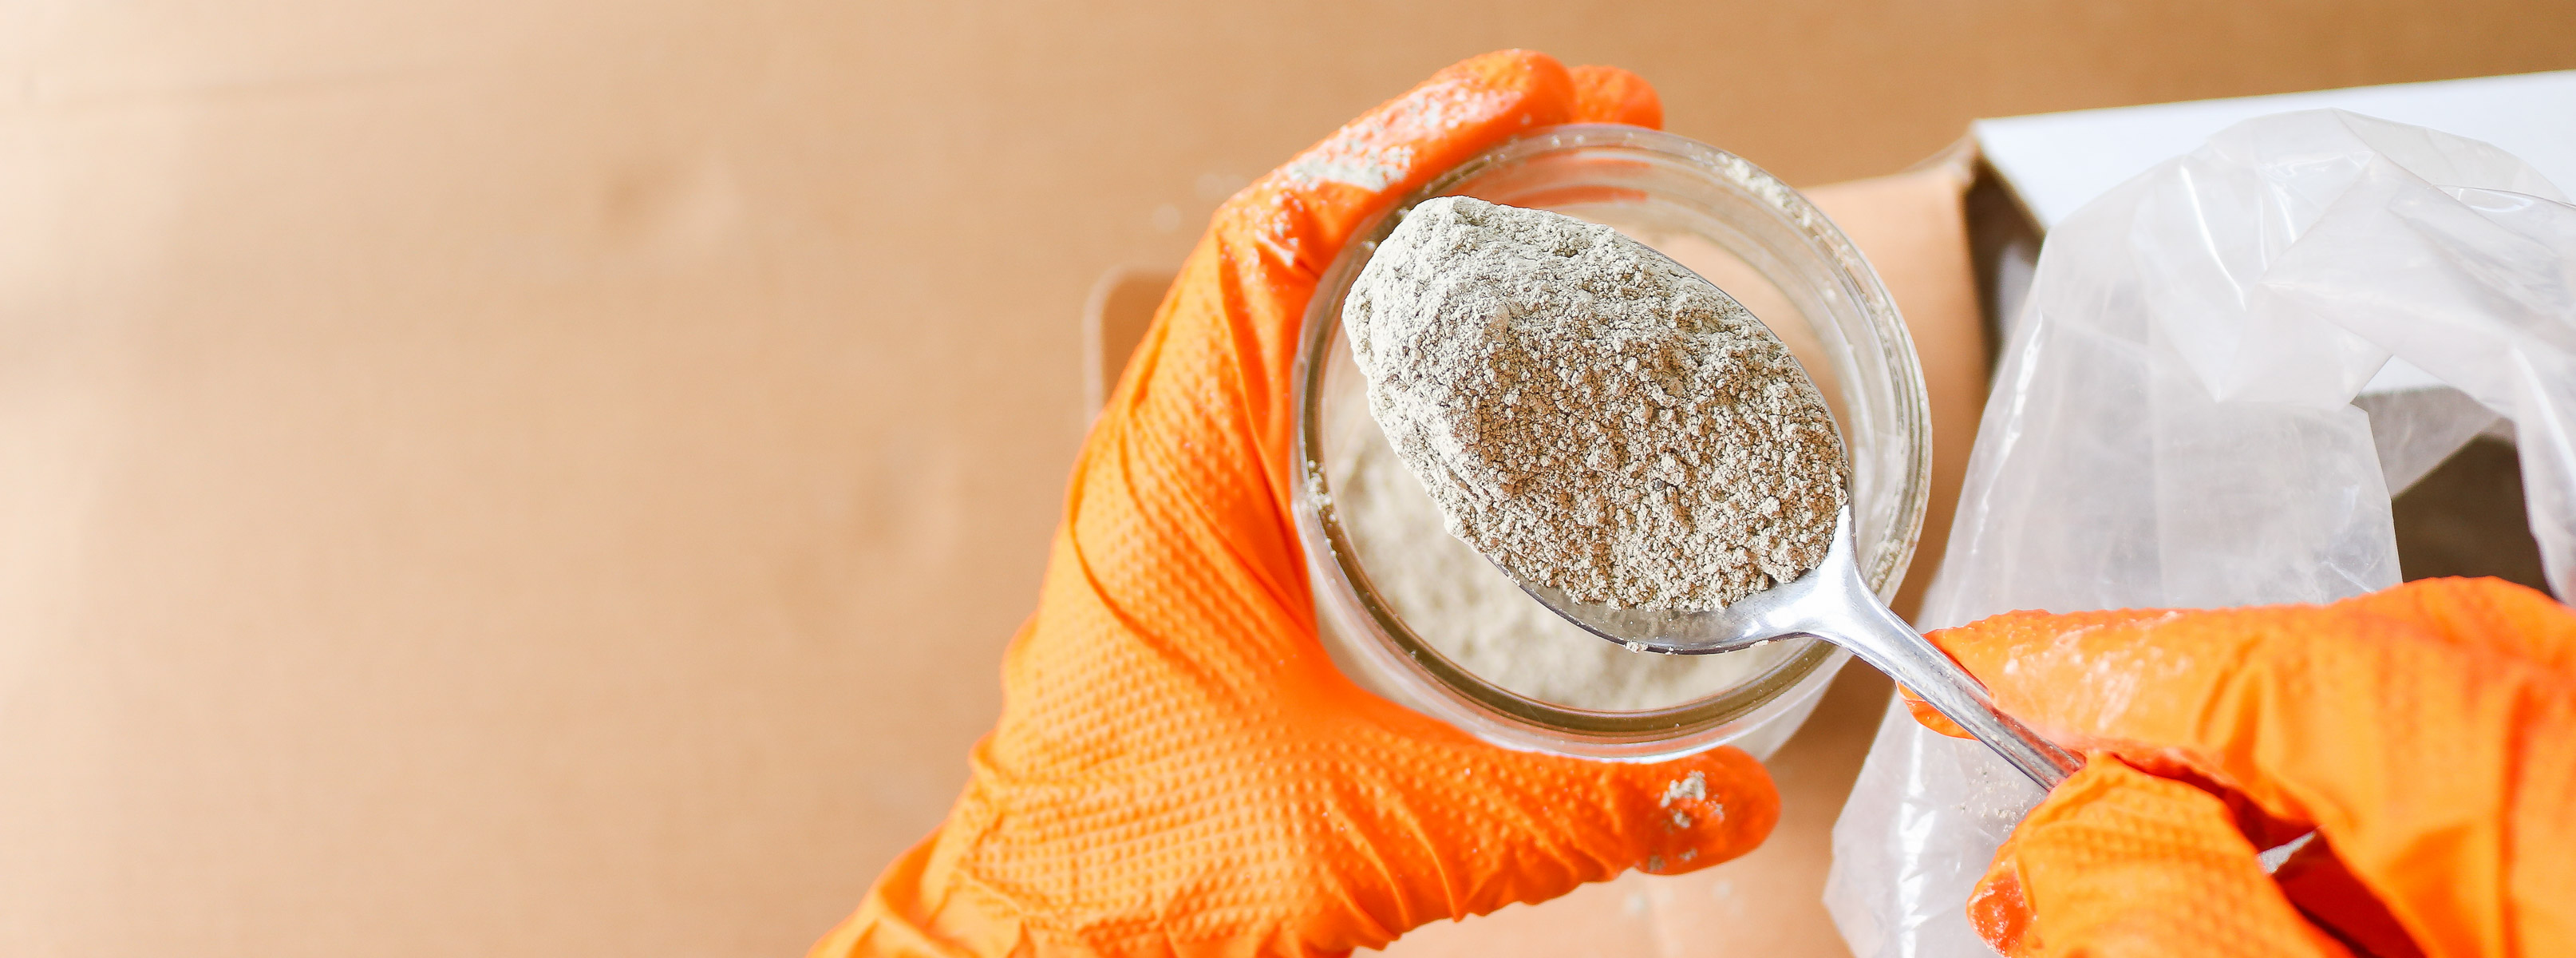
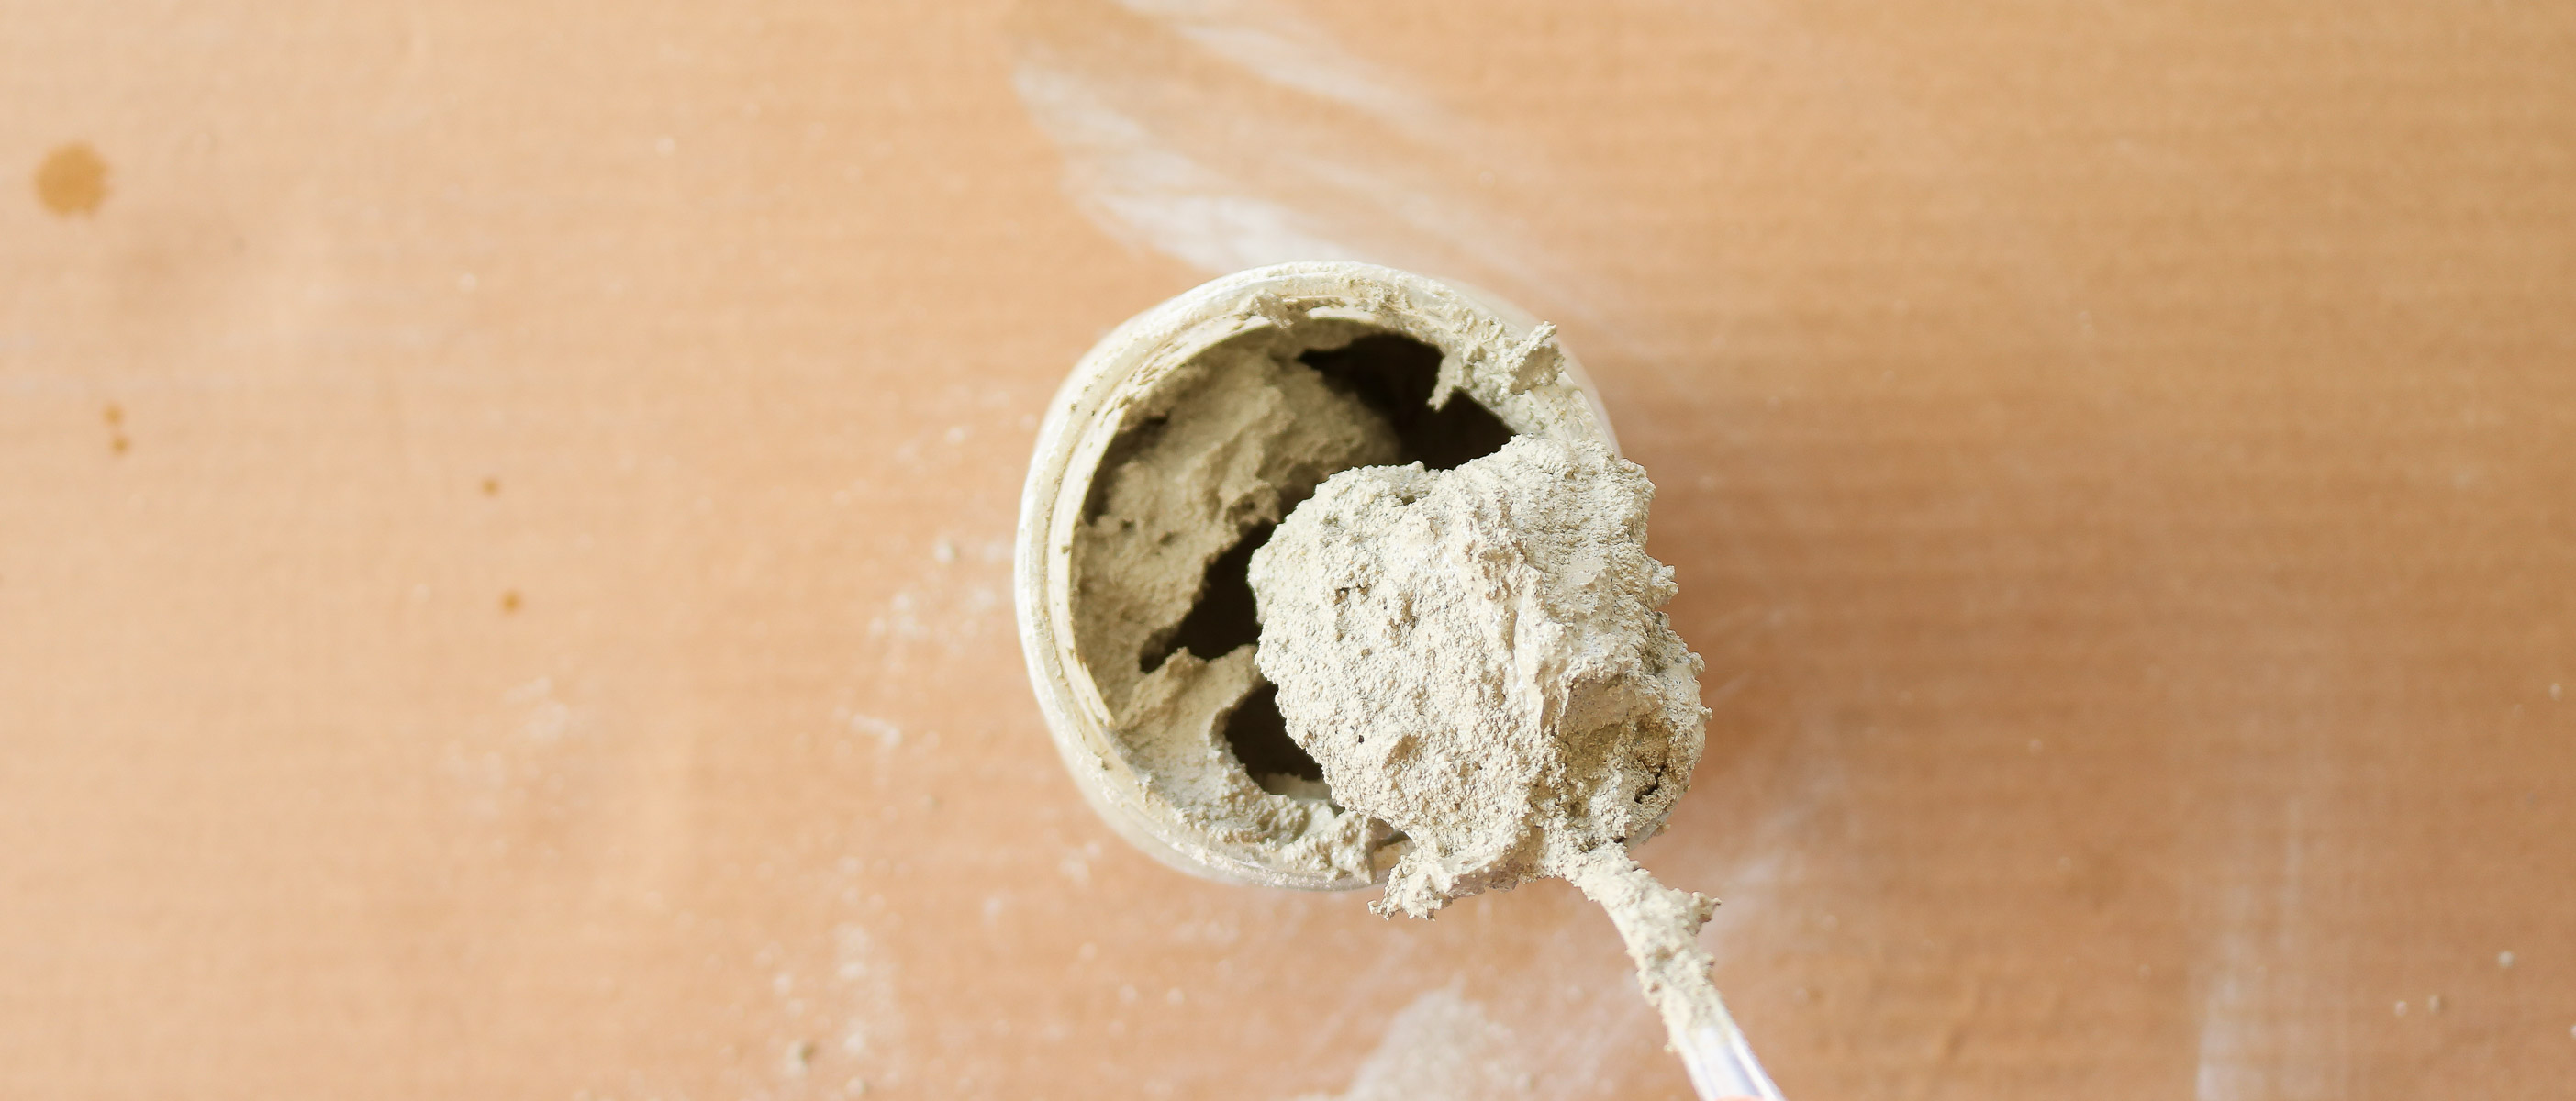
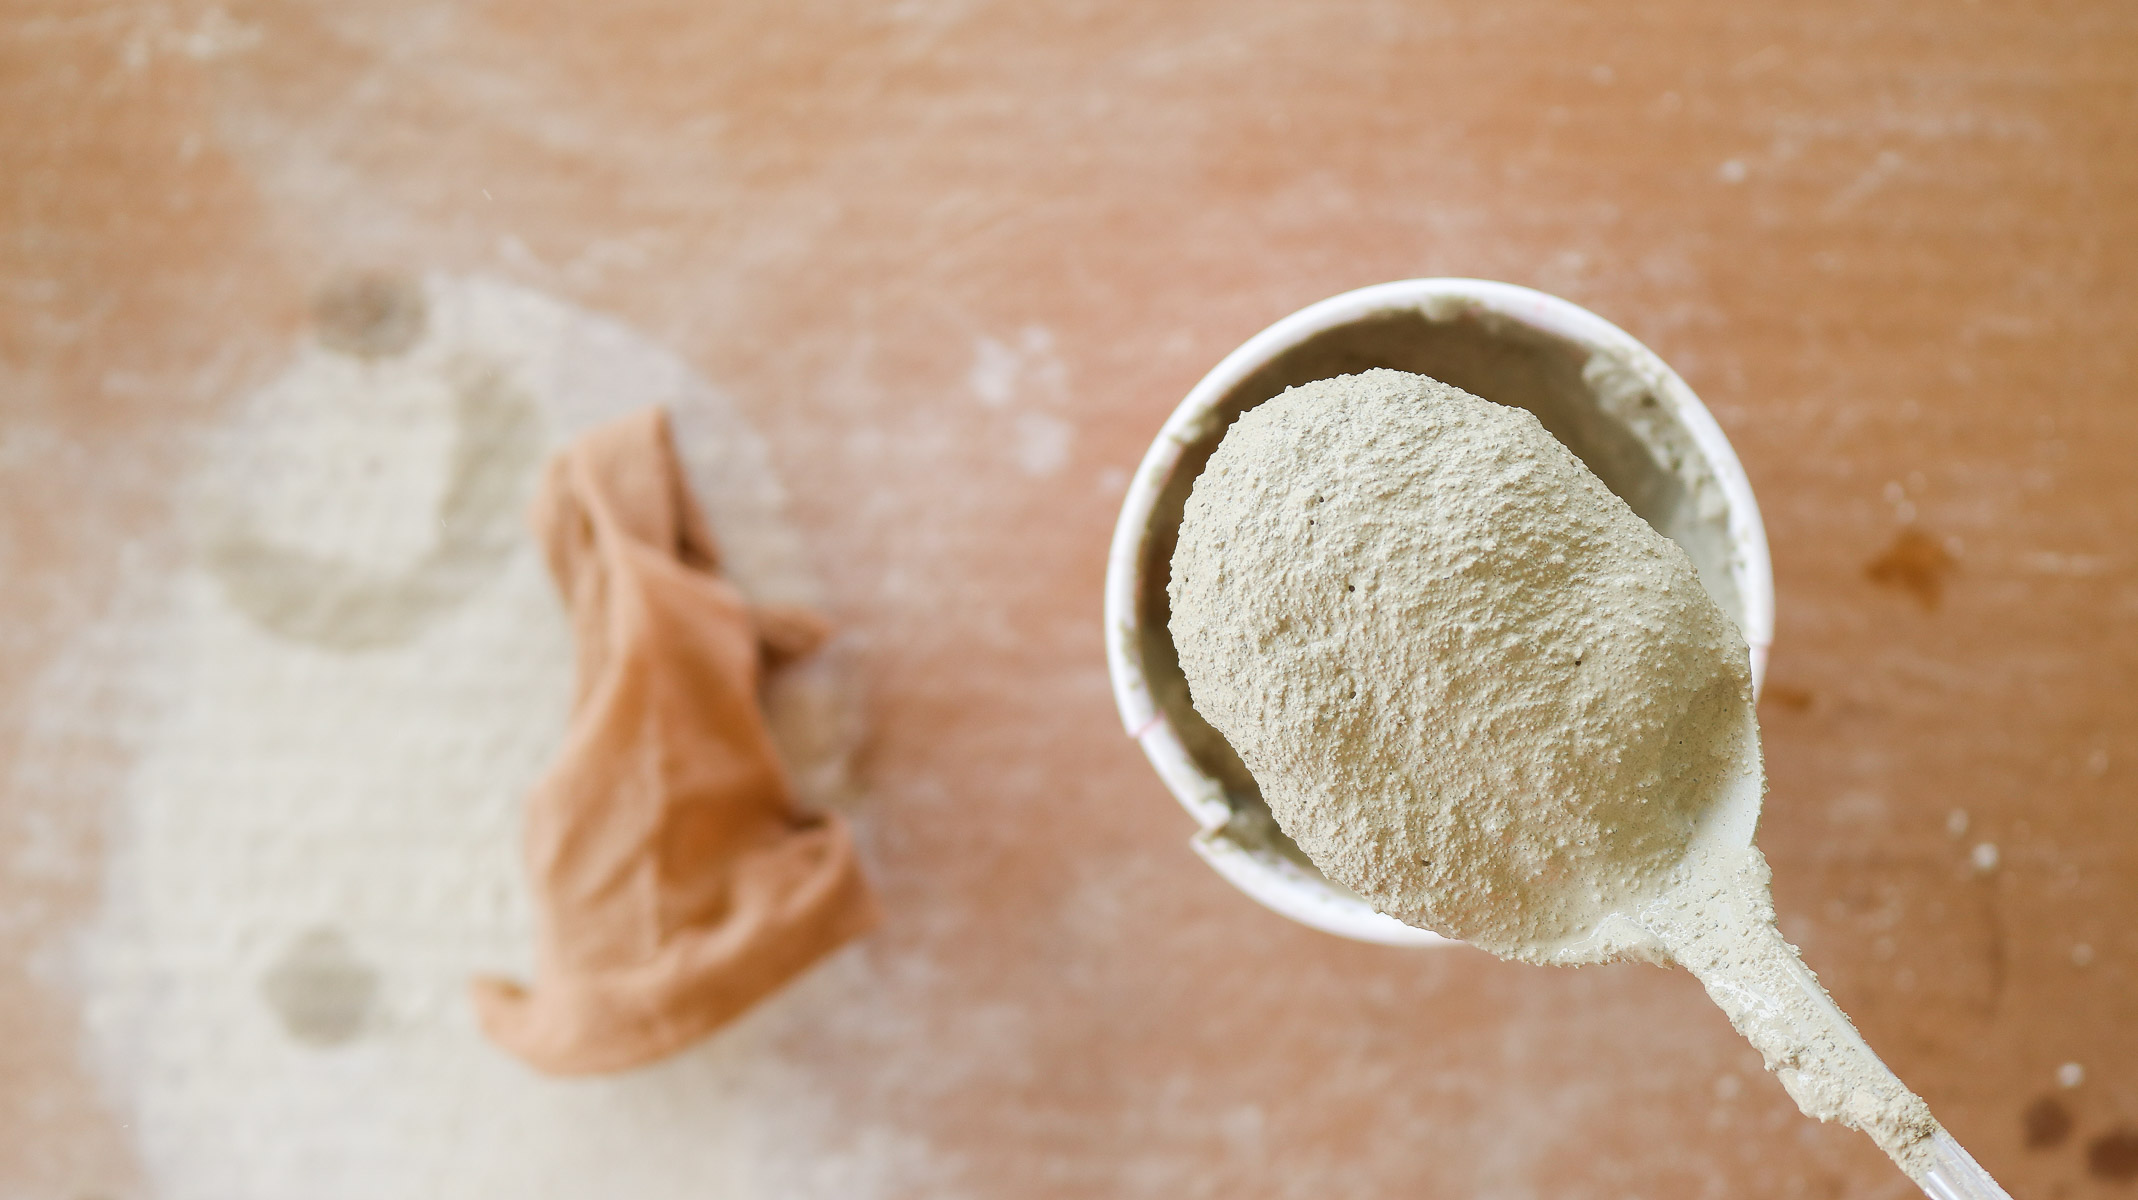
What should your concrete consistency be
I used the rapid set cement all concrete. It is super fine in texture and mixes a little easier then the last concrete I used. I tired mixing my concrete a little runnier and a bit thicker. They both worked great however the concrete that was runnier made the pumpkins flatter. So depending on what type of pumpkins you want to make you can adjust the consistency of your concrete by adding more or less water.

Here’s an example showing you a thicker mix of concrete. (photo below)
Here’s a runnier mix of concrete. (photo below)
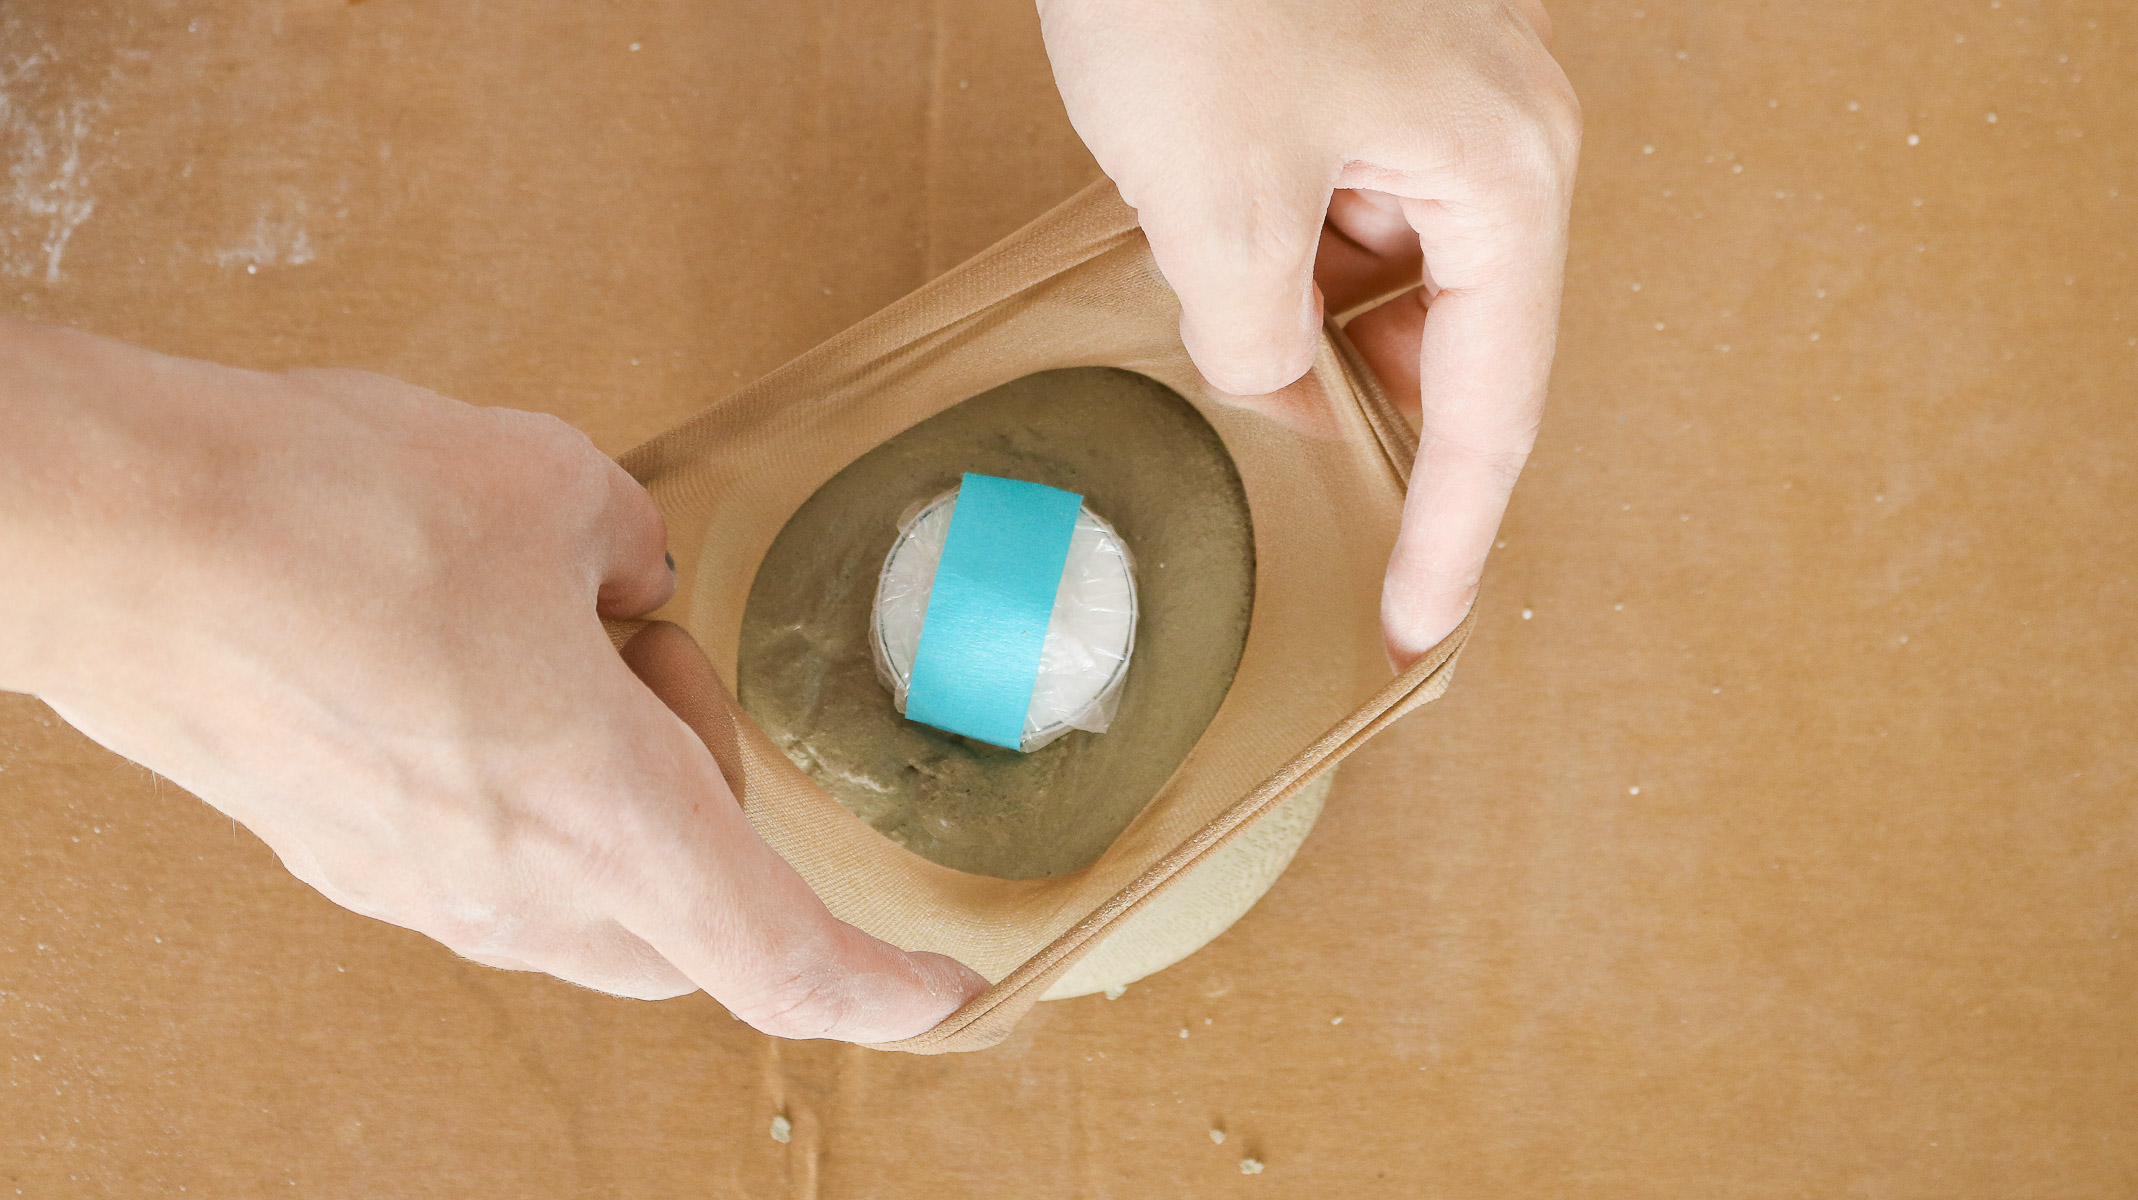
How to fill your tights to make mini pumpkins
Although this could be done just by yourself I found it worked better if you fill the tights while someone holds them open. This helps keep the top of your tights cleaner that way you can see your candle when you have to center it.
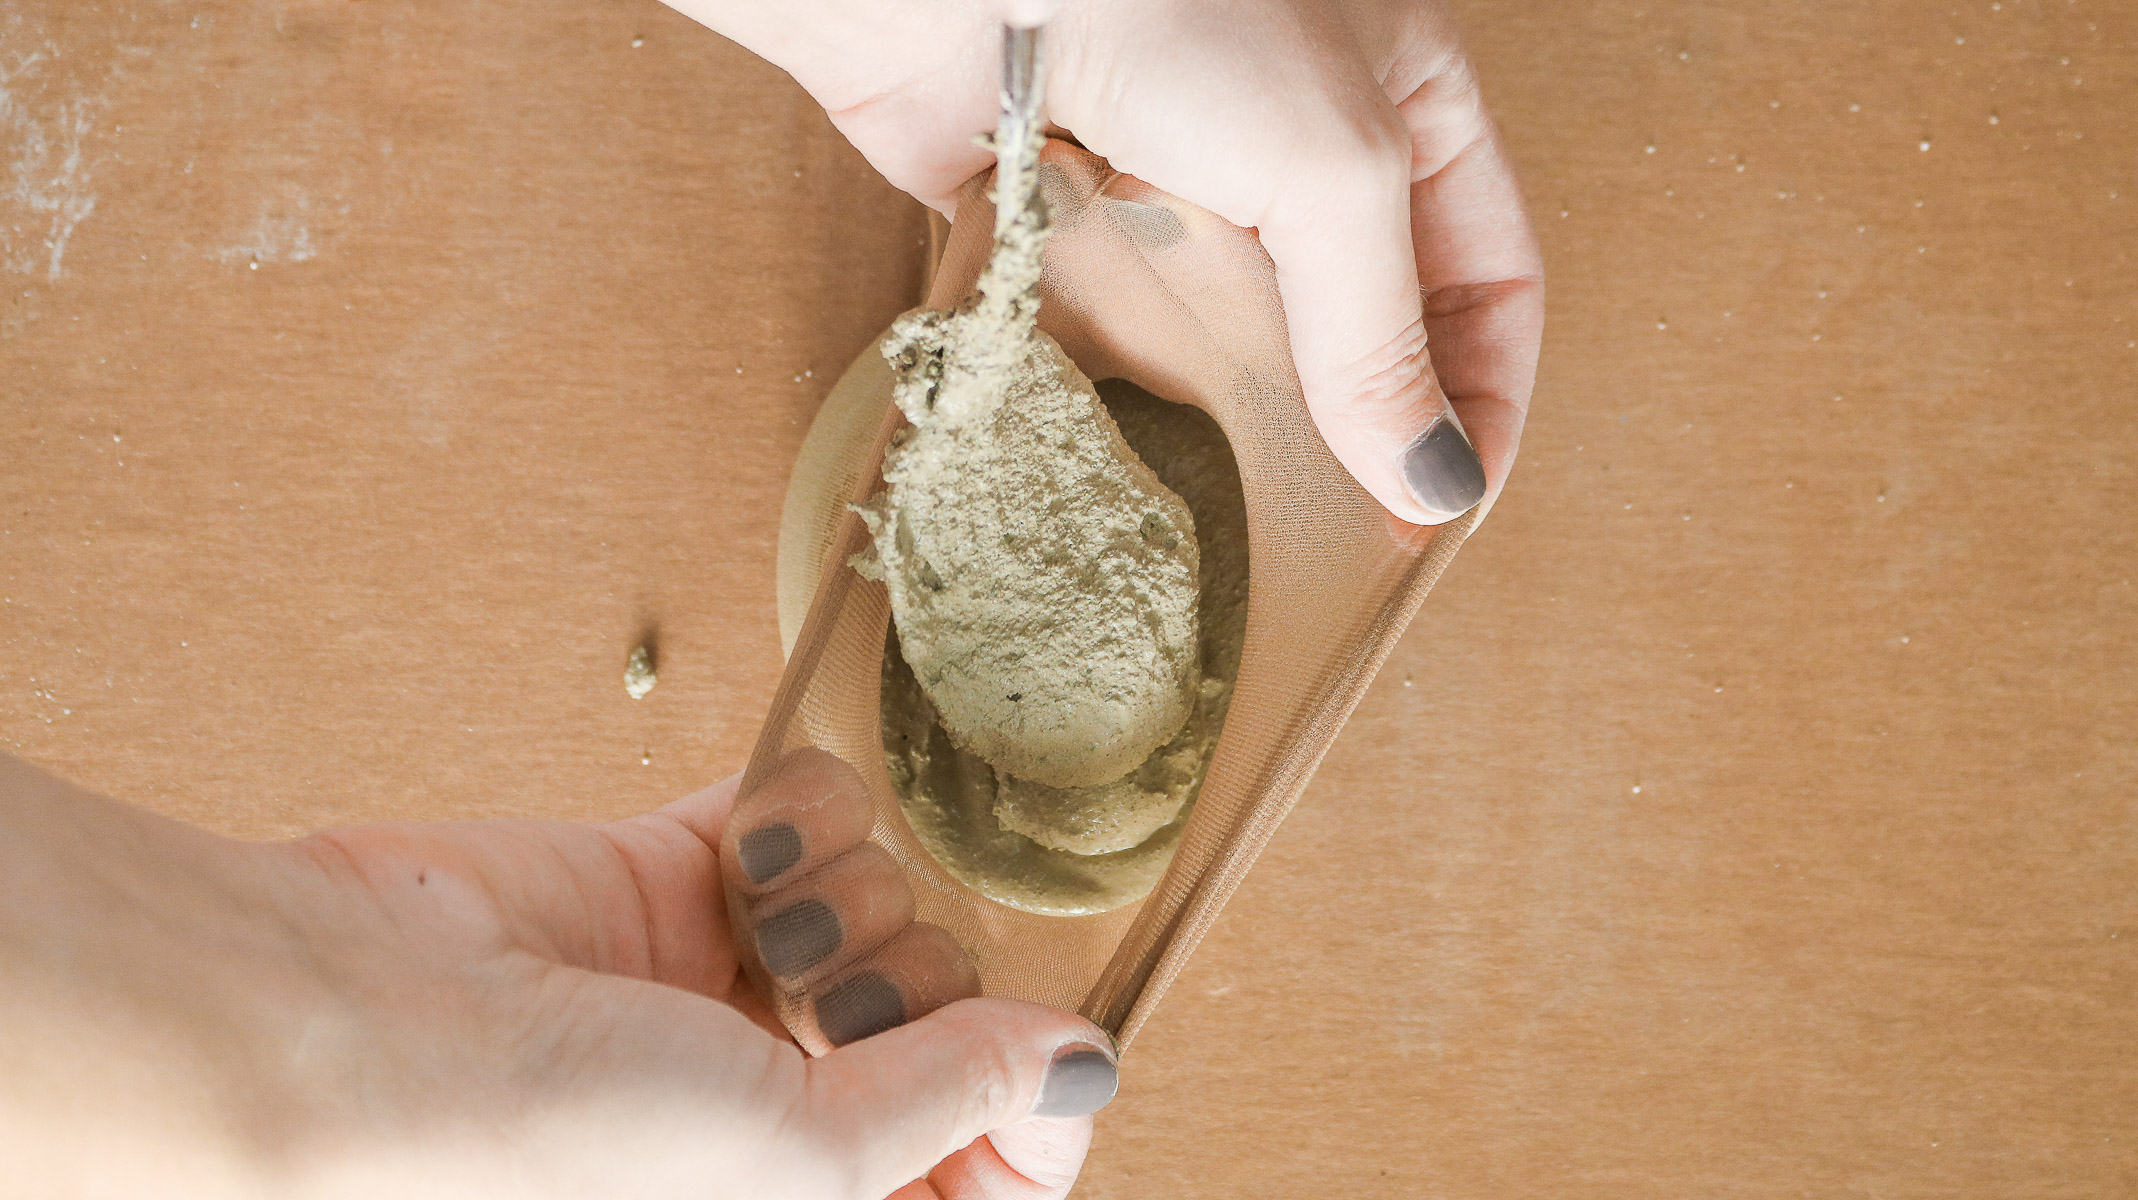
Here’s a pumpkin I filled on my own as you can see the tights got dirty with the concrete and the candle isn’t really visible. (photo below)

This one I filled with my hubbies helped. Notice I can still see the candle and if it’s sinking or not.
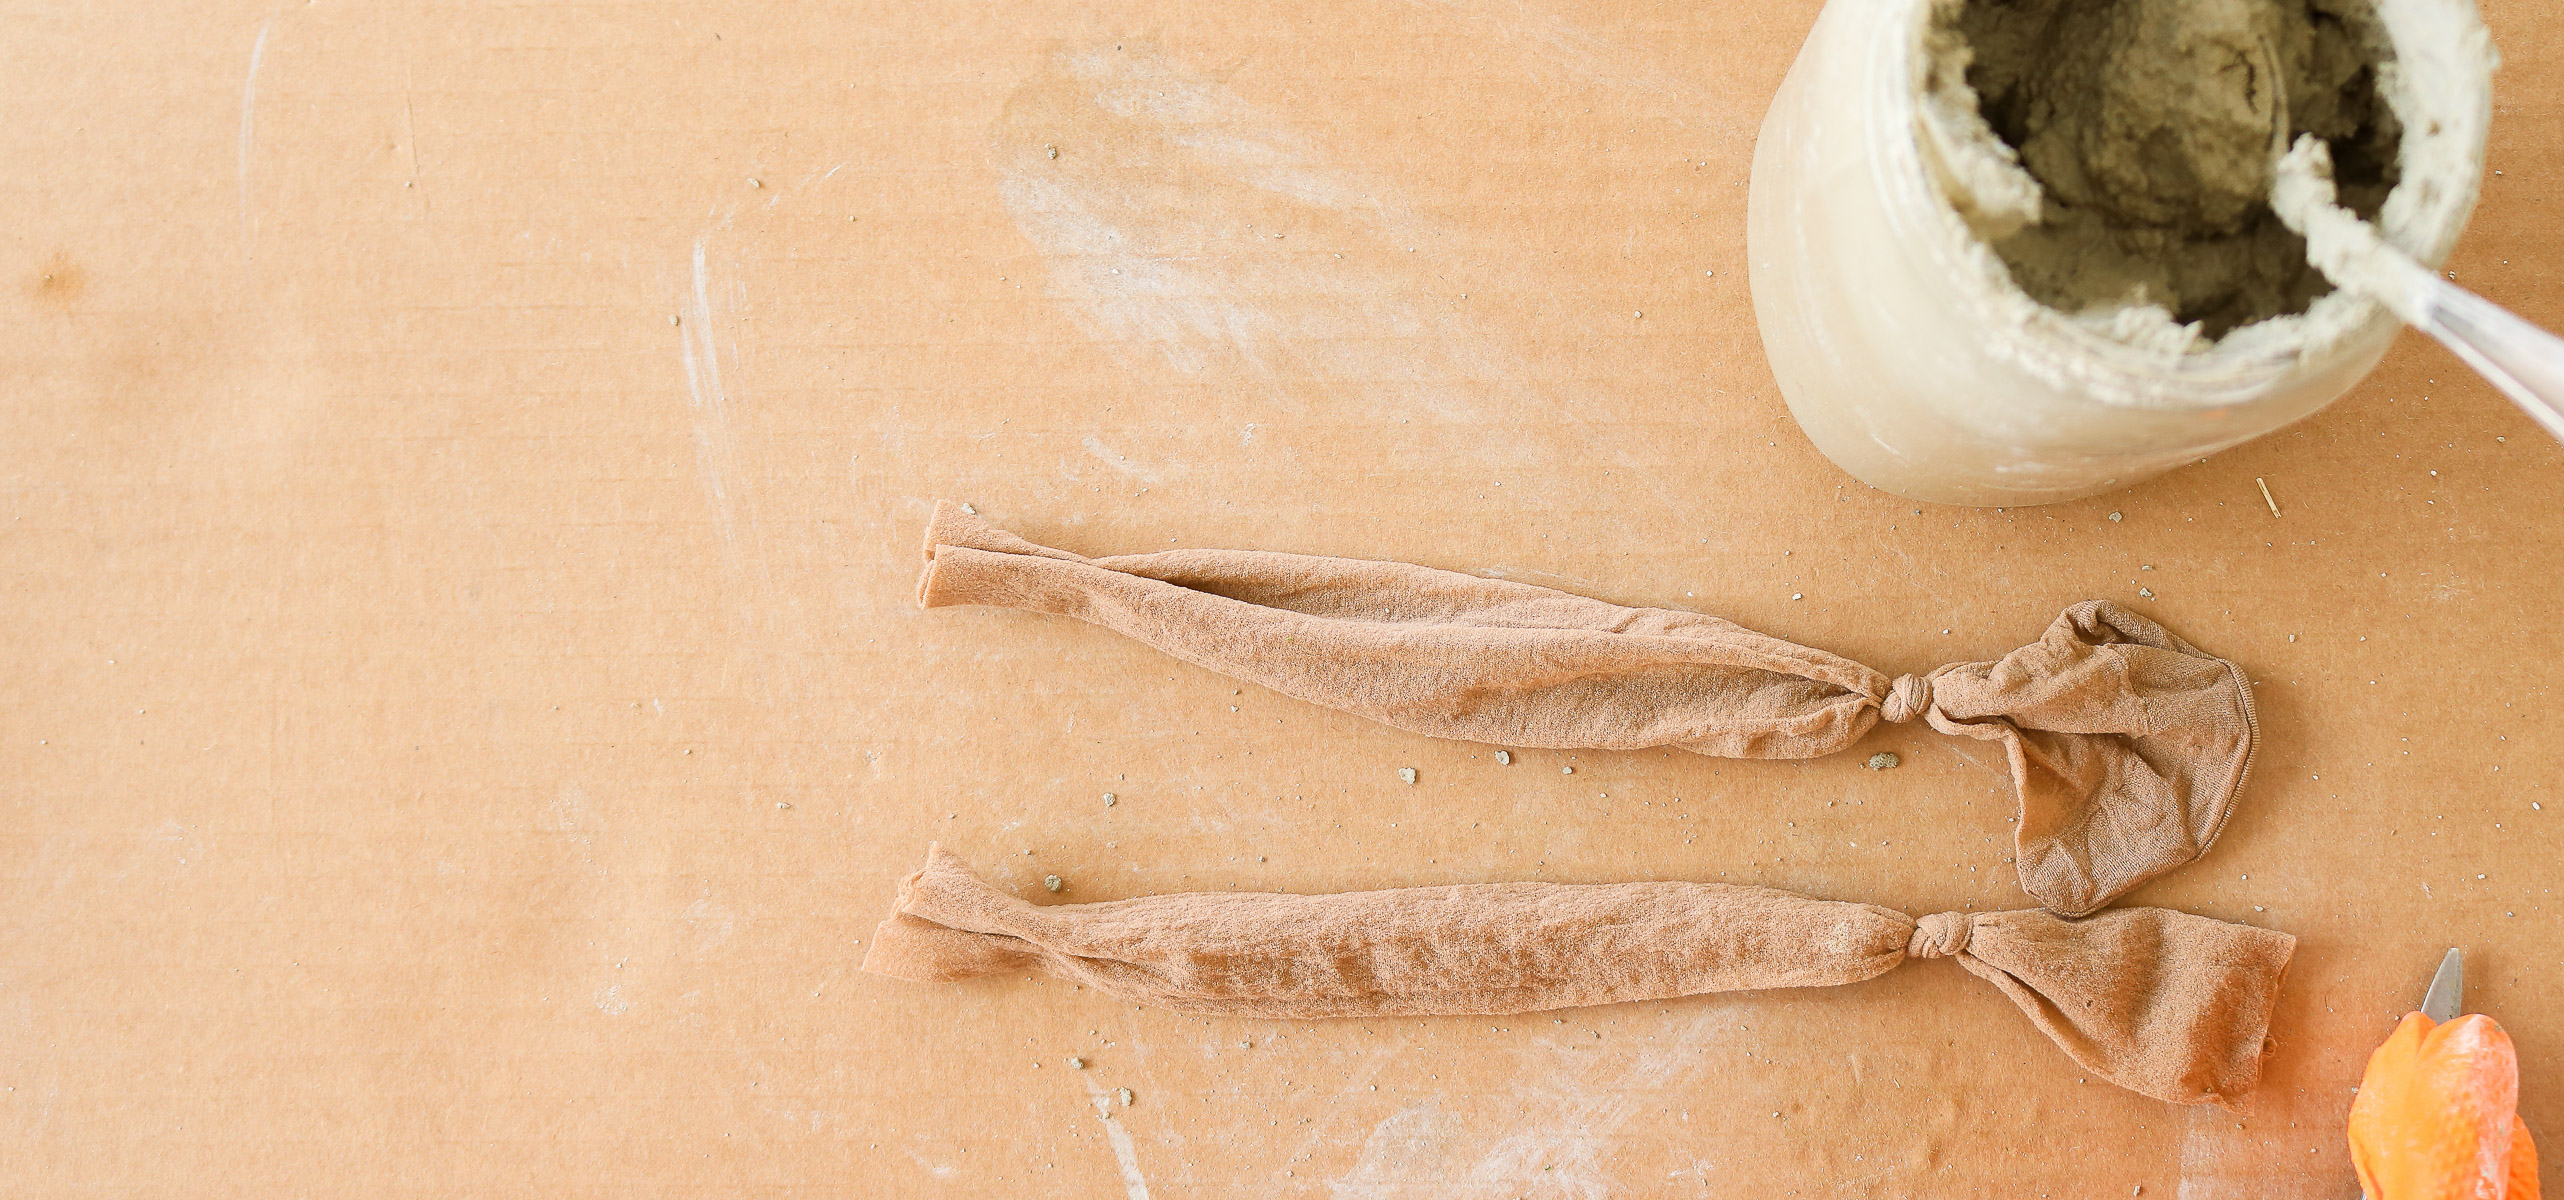
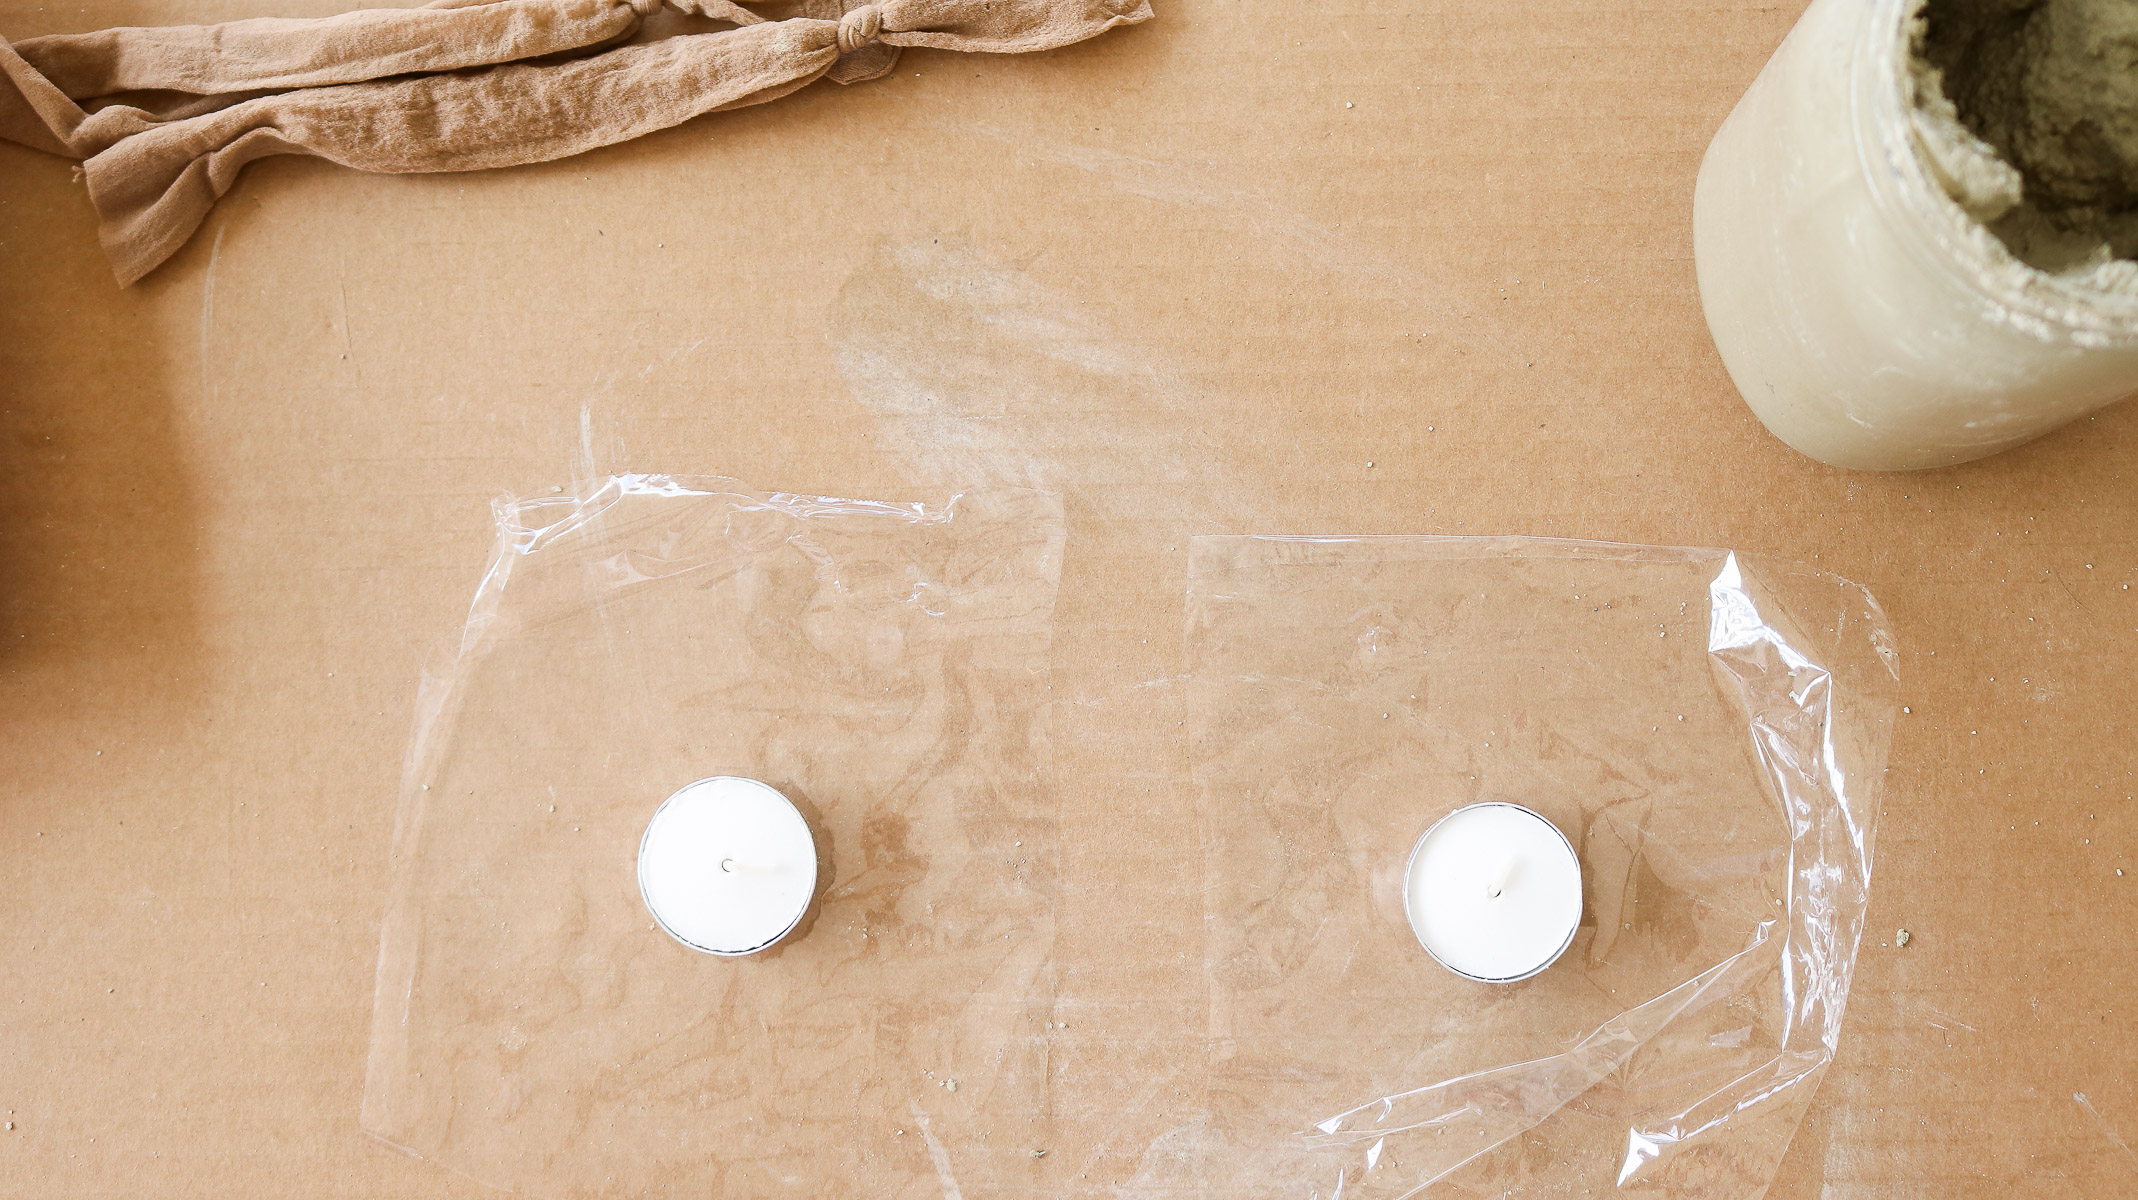
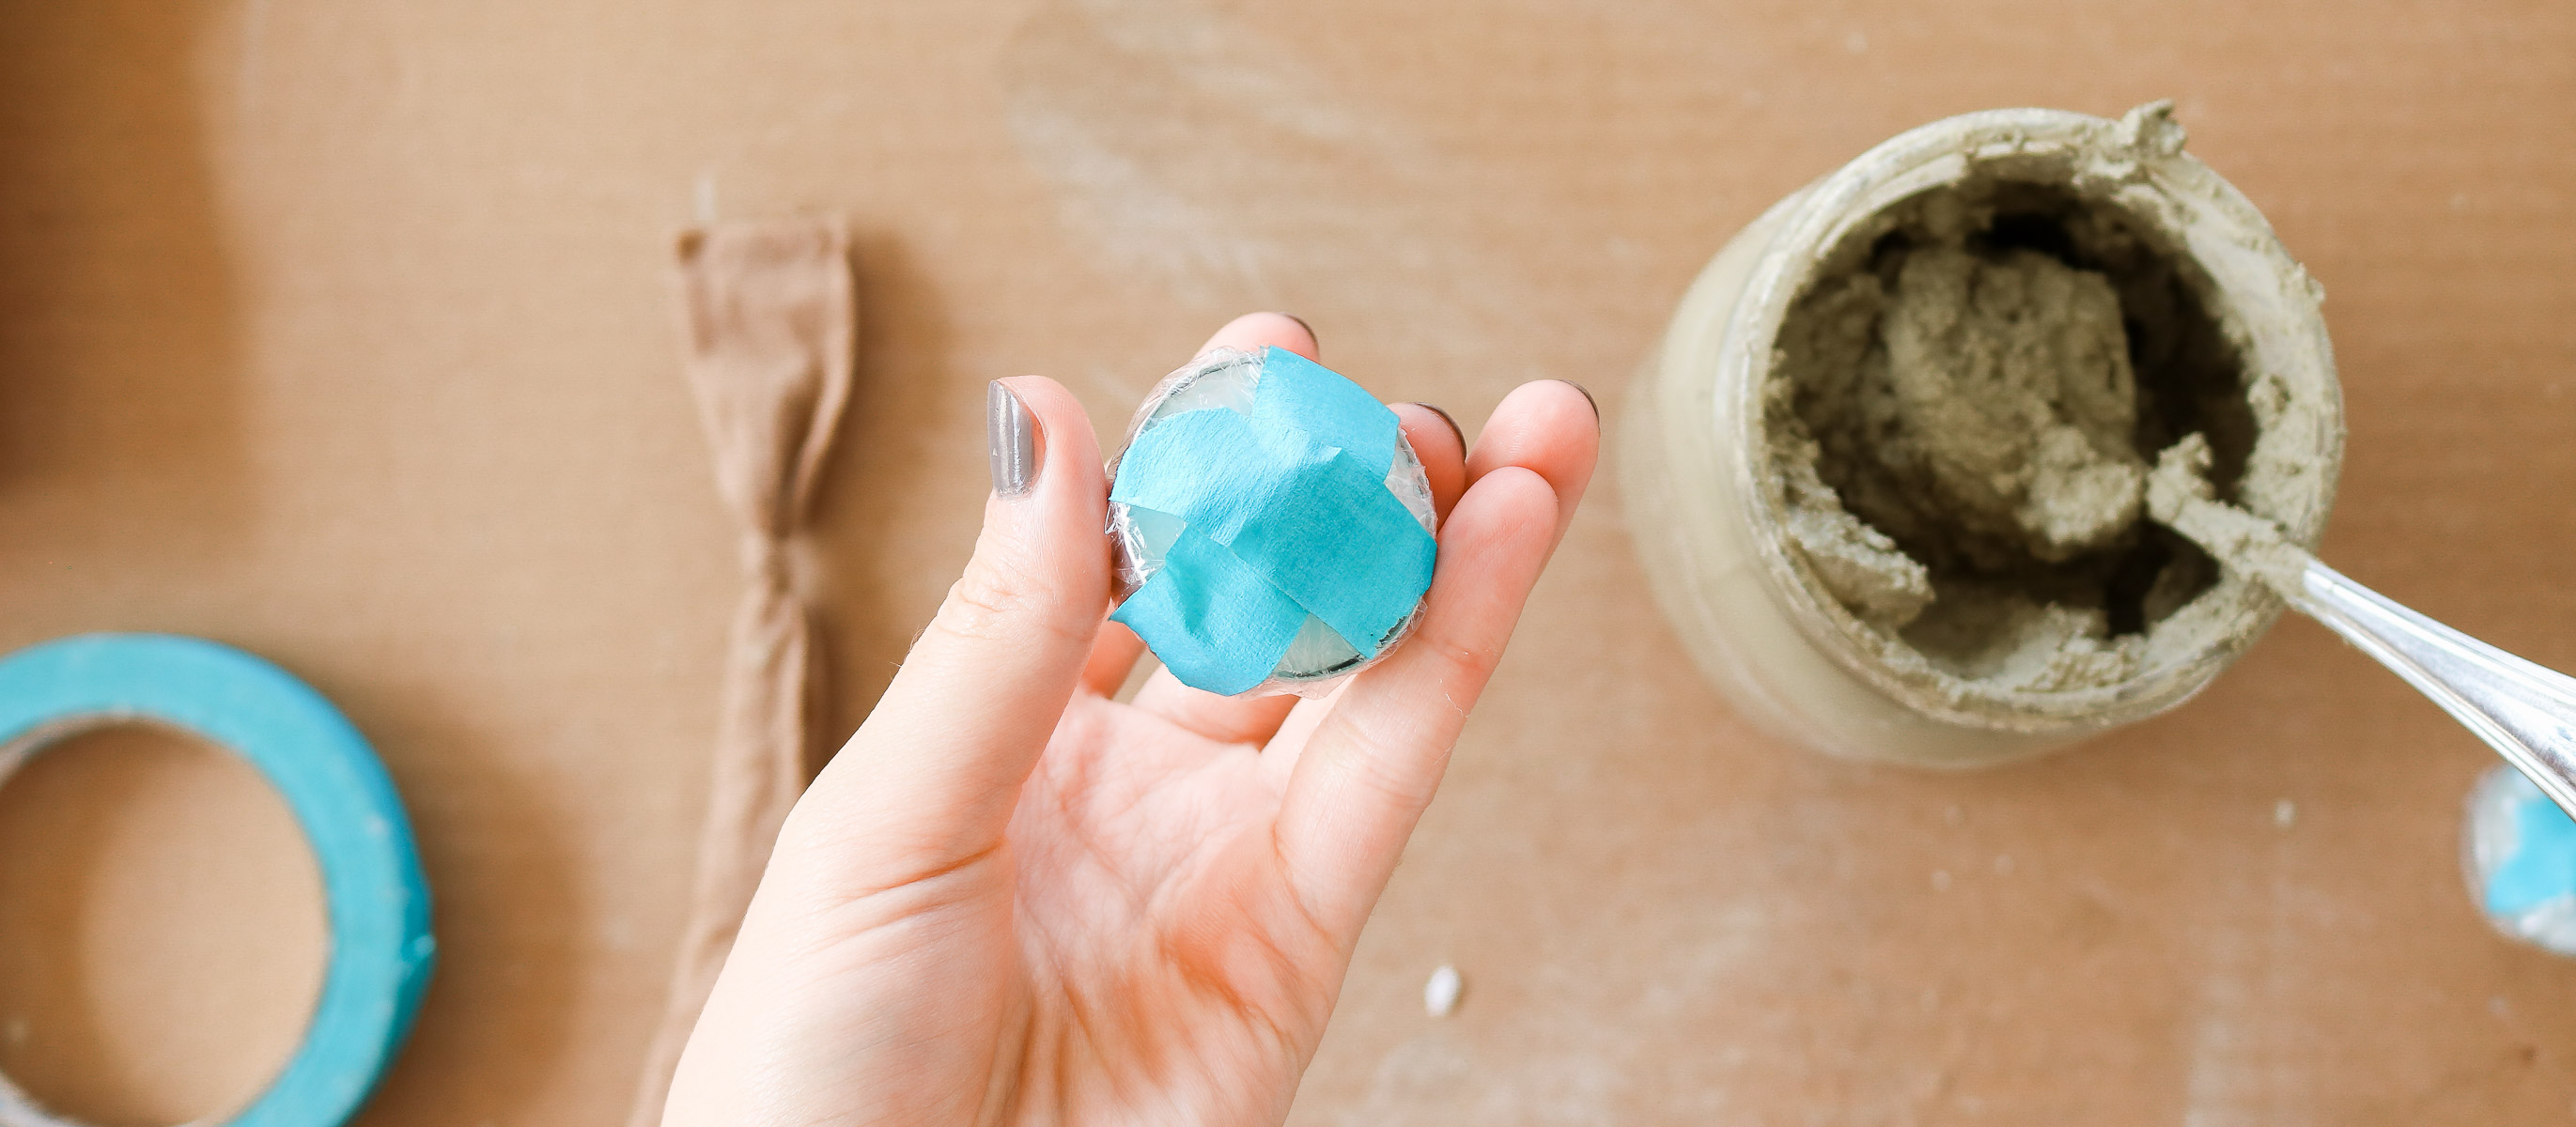
Creating your candle molds
For this step simply wrap your candles in saran wrap as neatly as possible and tape any excess saran wrap flat.
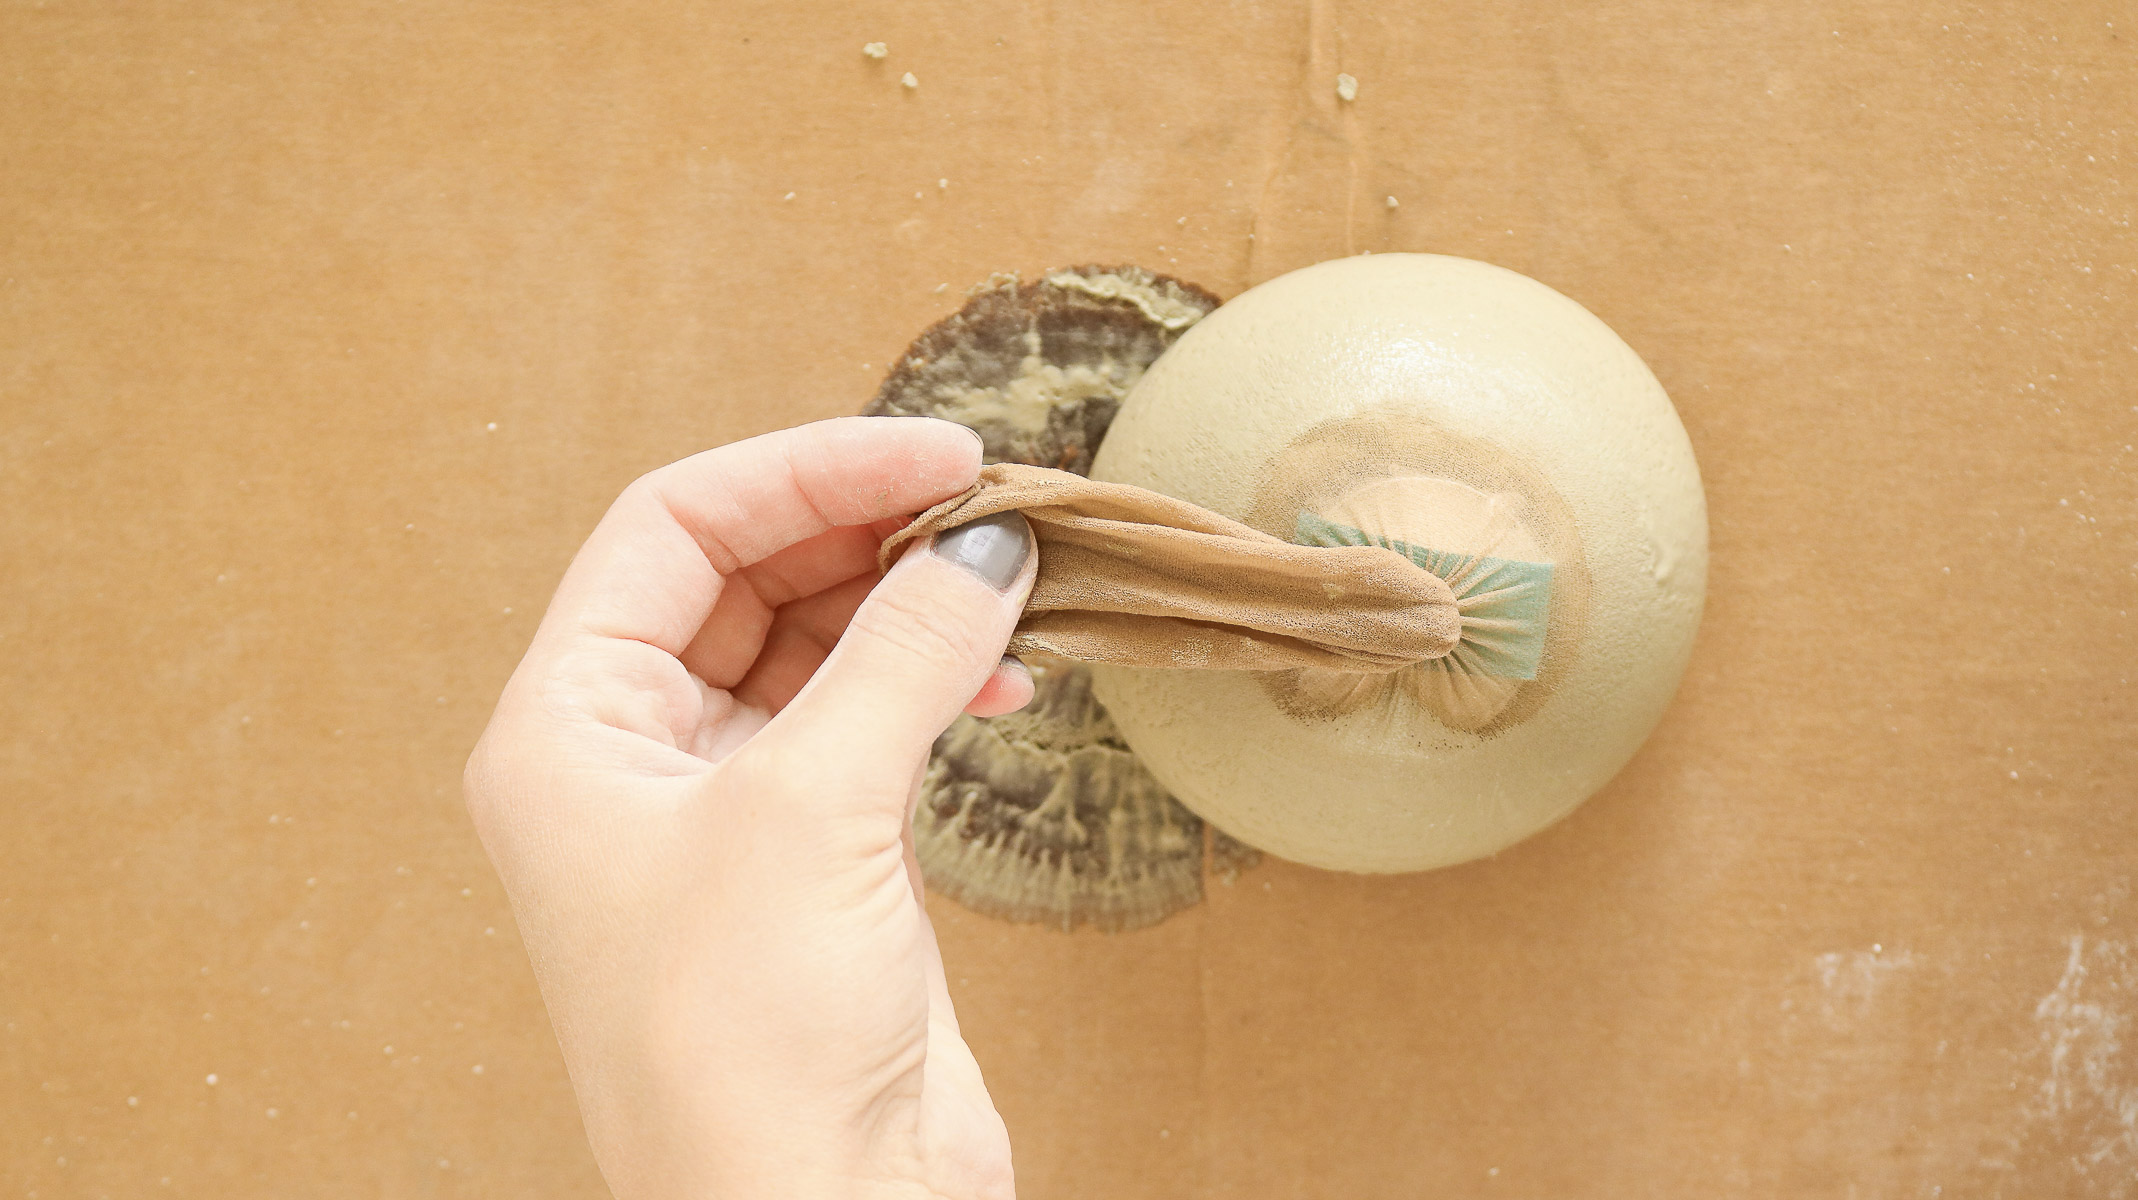
OKAY shaping your mini concrete pumpkins!
Once you’ve filled your tights to the size you’d like your pumpkin lay your wrapped candle in the center. Don’t push it in. Once you tie it and add rubber bands it should settle in nicely. Than tie a knot on top trying to keep the candle as centered as possible.
CODE RED!! These three tips will save your pumpkins!
Following that start by adding rubber bands by simply sliding them under. TIP #1: Do not pick your pumpkin up while doing this step because, it’ll either sink your candle or move it off center. Apply the rubber bands while your pumpkin is laying on the ground.
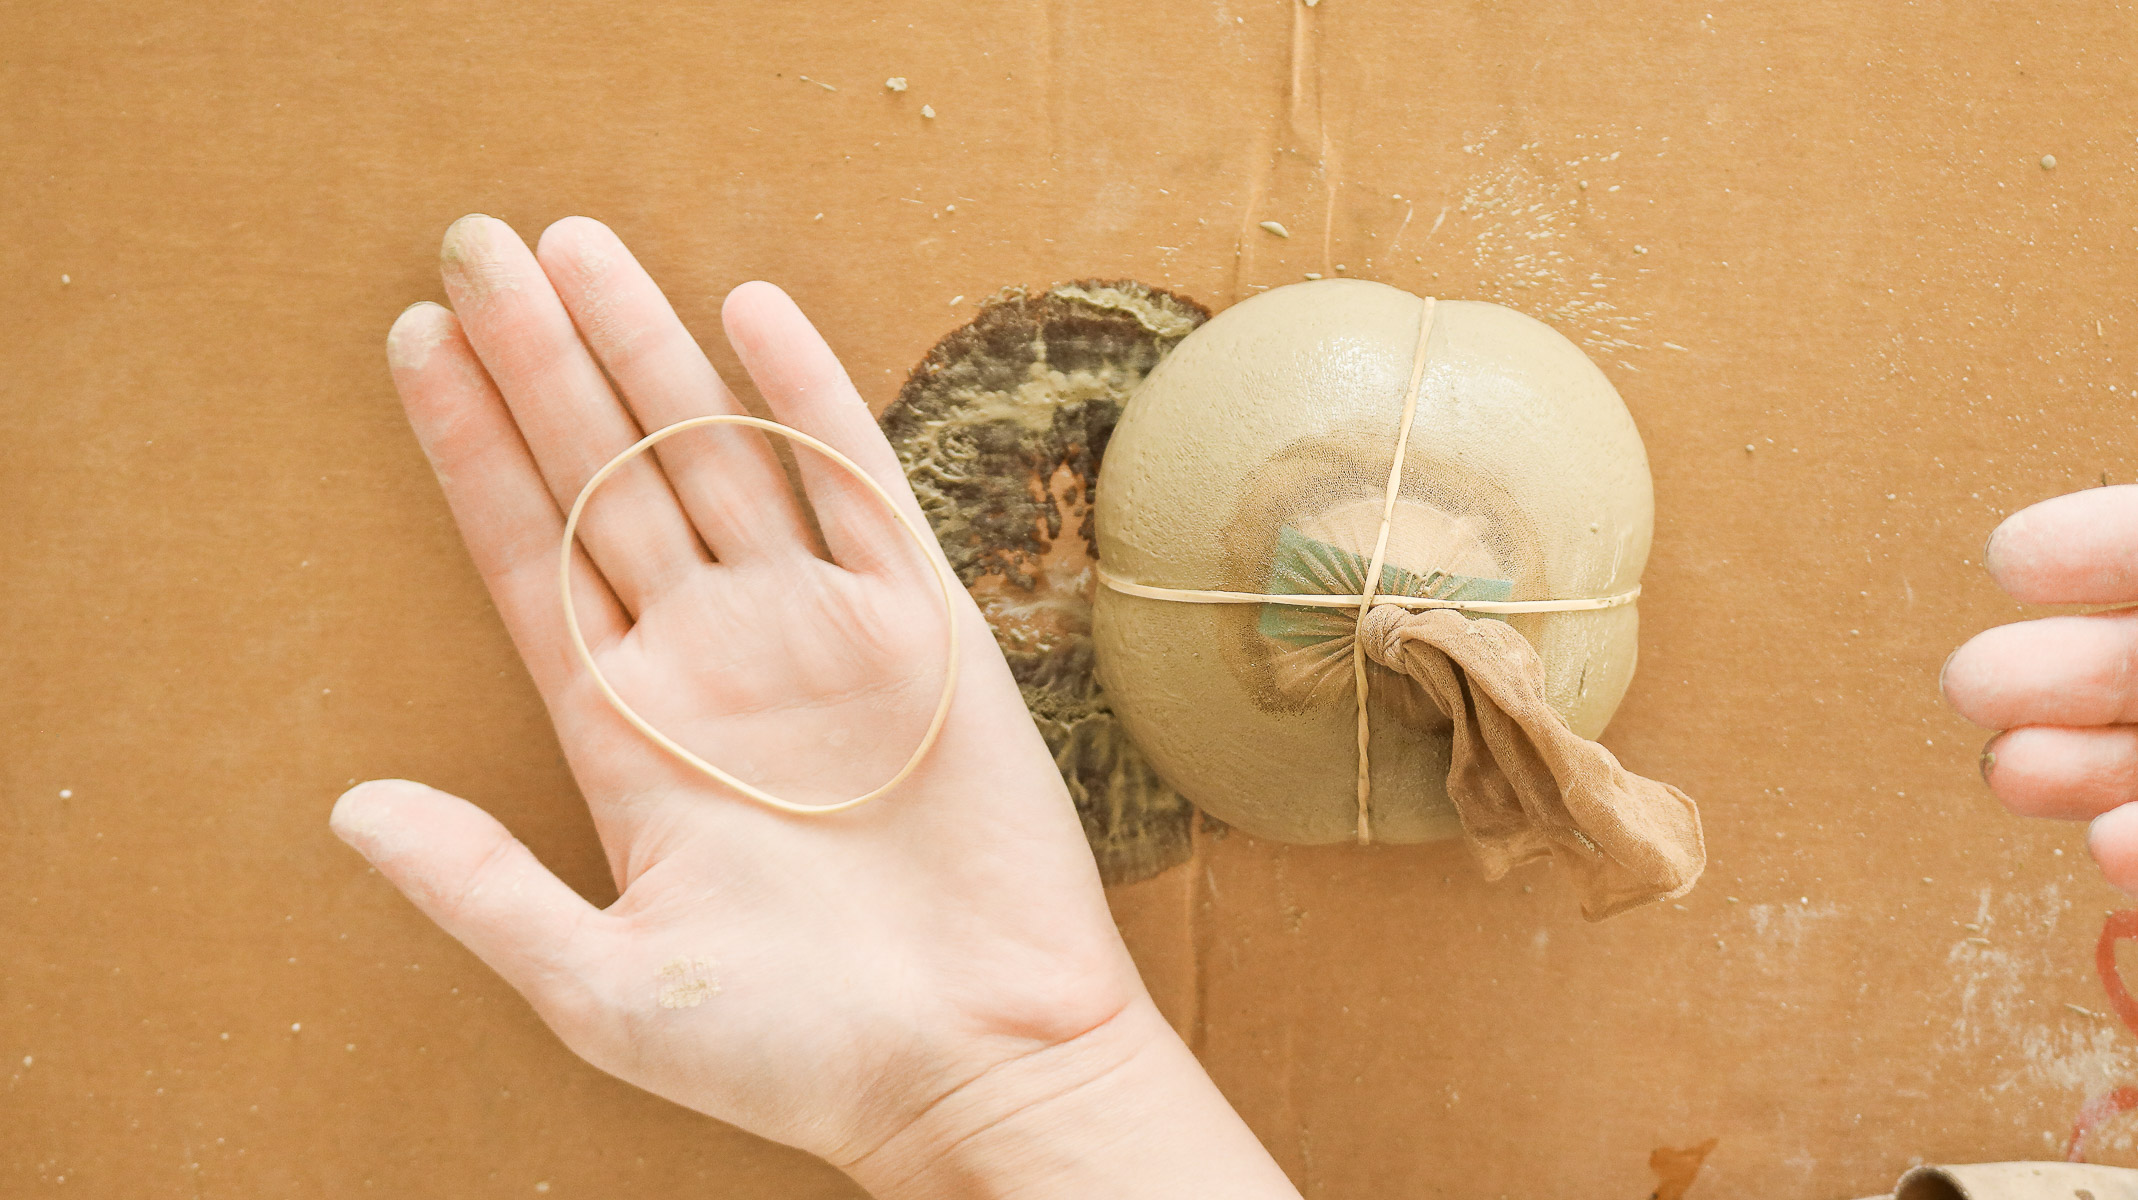
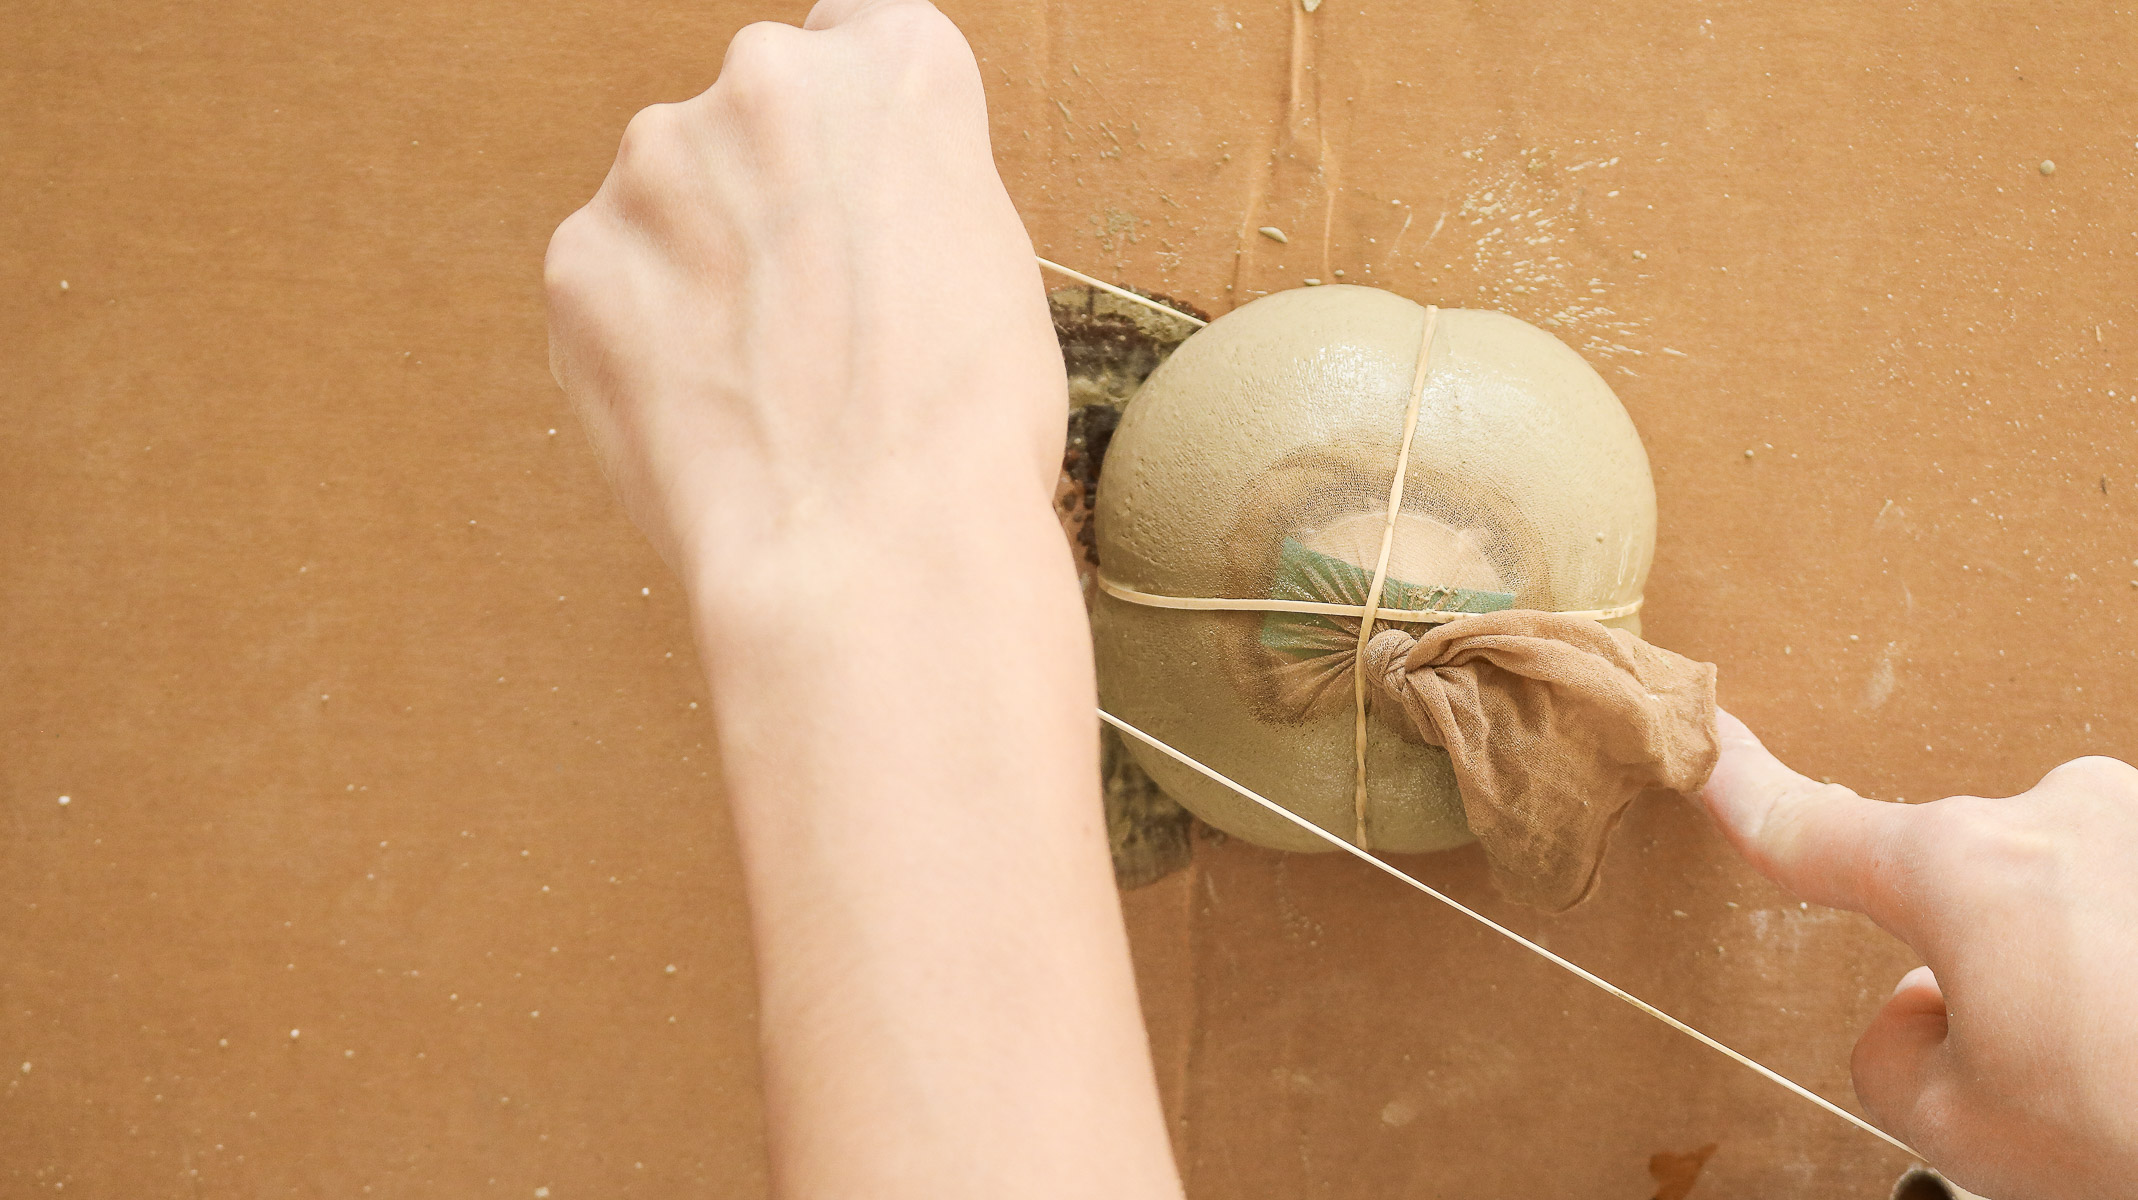
TIP #2: Make sure your rubber bands aren’t really tight because it’ll break you’re pumpkin when you try removing them. And keep in mind that your rubber bands will tighten over time. Give them 10 seconds if they still don’t look tight enough tie a little knot to tighten it. It’s better to have looser rubber bands than ones slashing through your pumpkin. 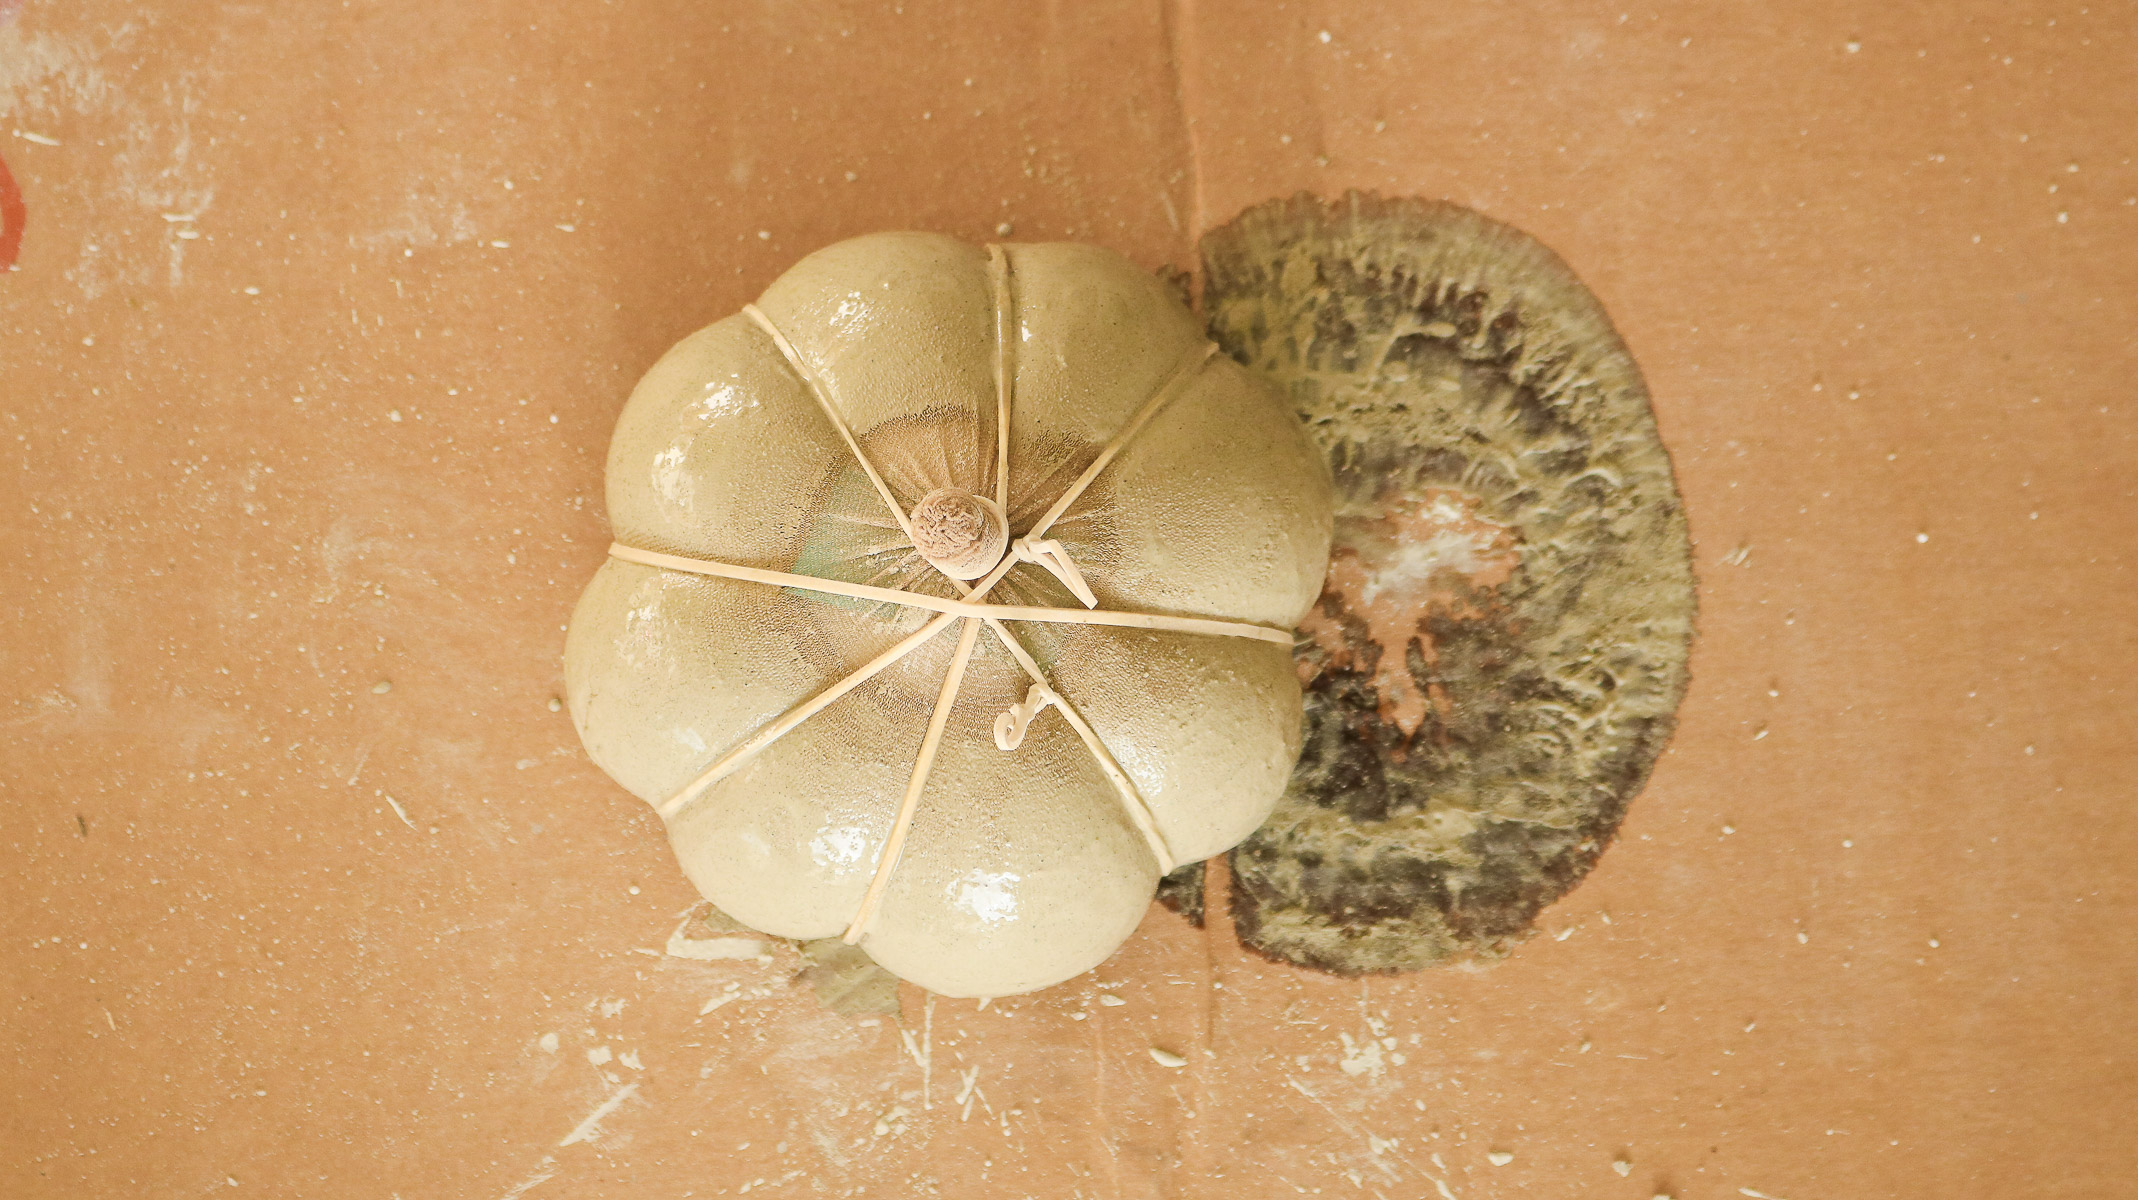
TIP #3: Time is everything!! Your concrete will take between 10-15 minutes to harden and it’ll still look wet during this time frame. It will not be set fully but this will be the time you quickly need to remove the tights and rubber bands carefully. If you’re not sure whether it’s ready..Touch the concrete lightly if it’s hard enough not to leave an indent than it’s ready. If your tights have already dried that means you’re waited to long and the tights won’t come off the pumpkin. ( I had a timer on to make sure I didn’t miss my time frame)
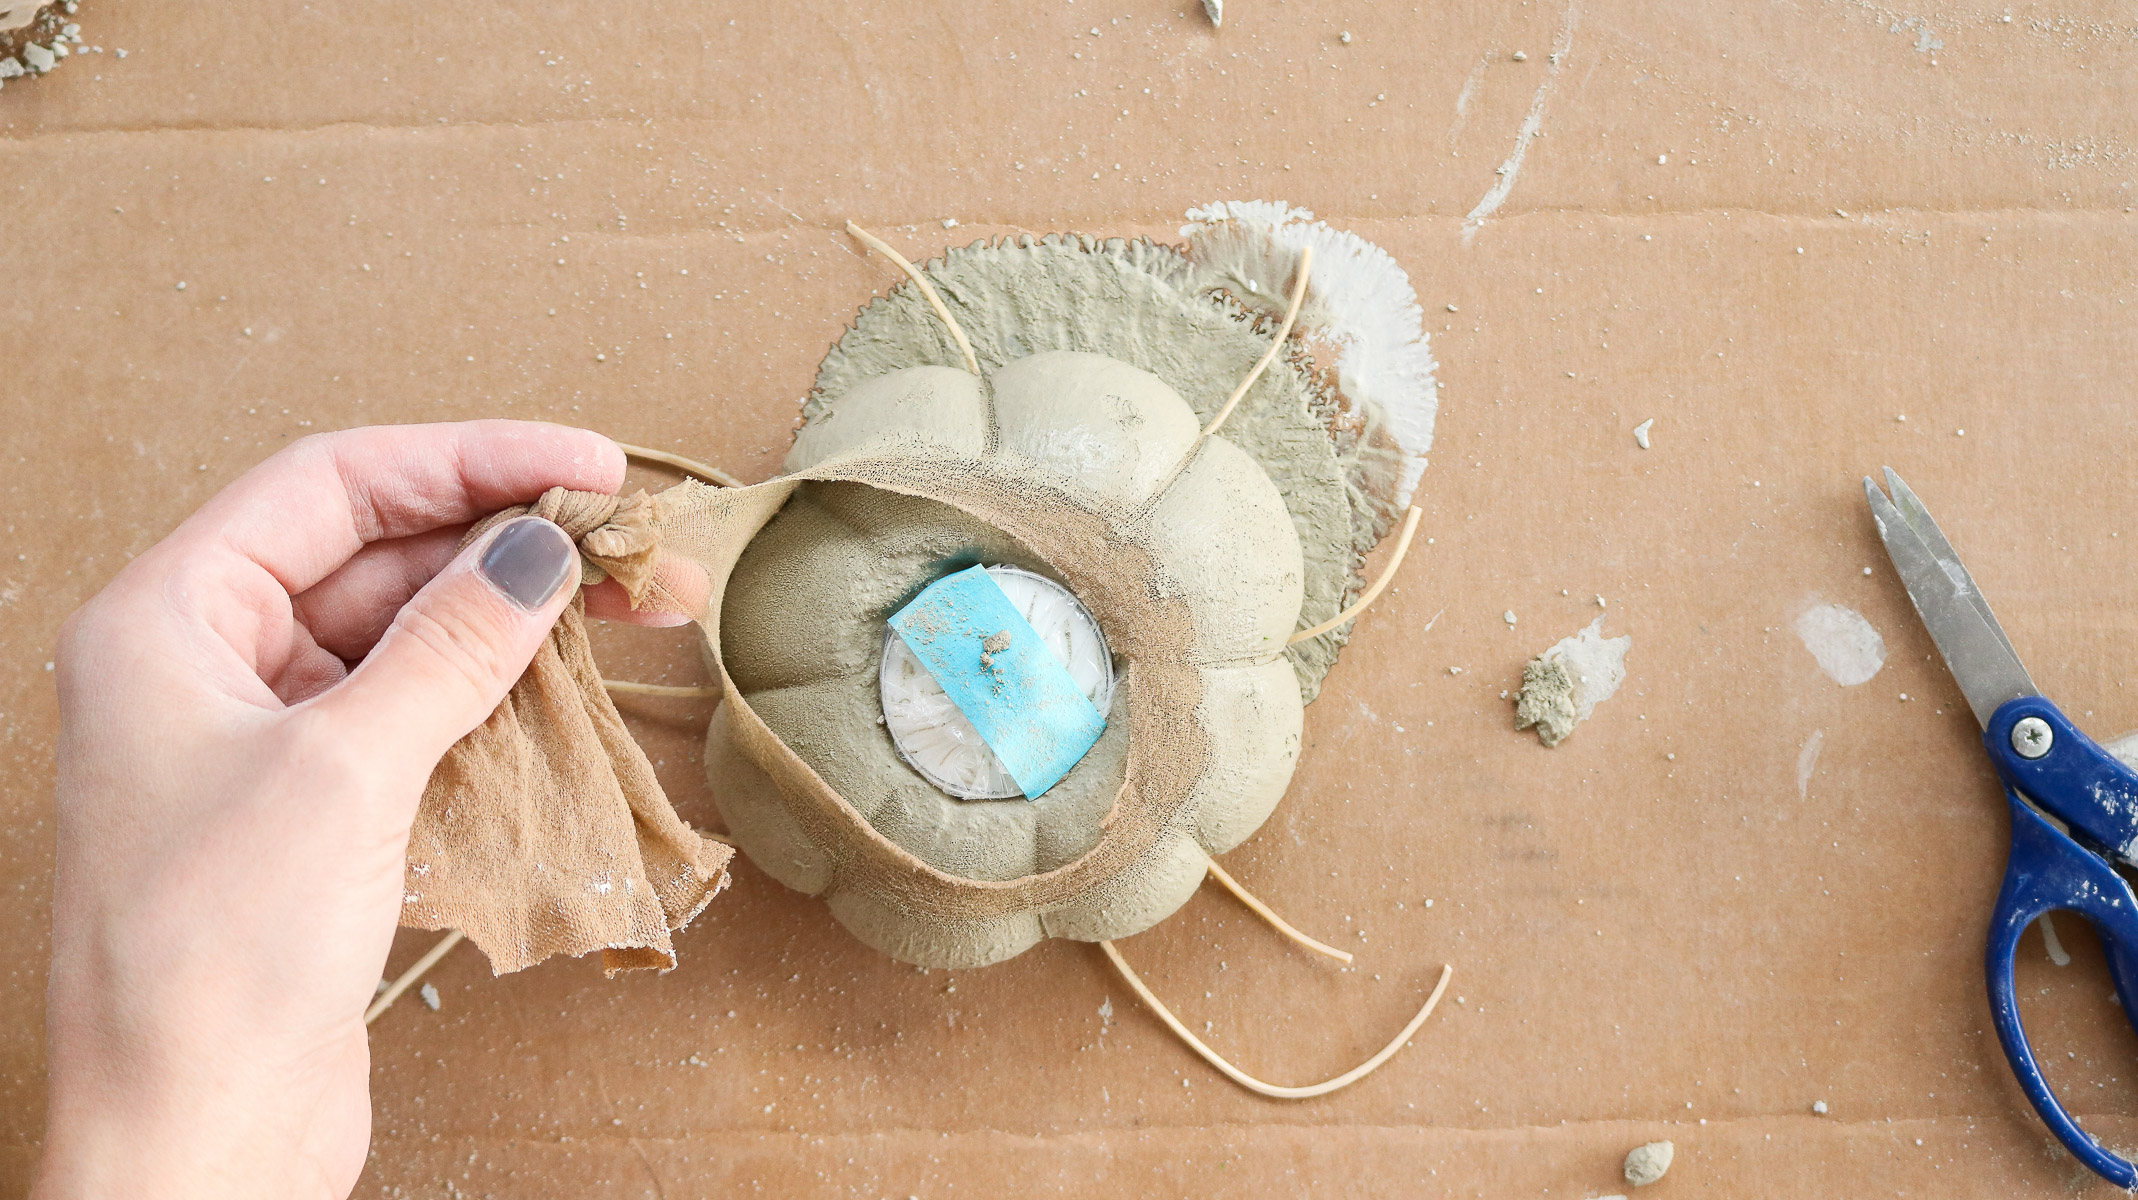
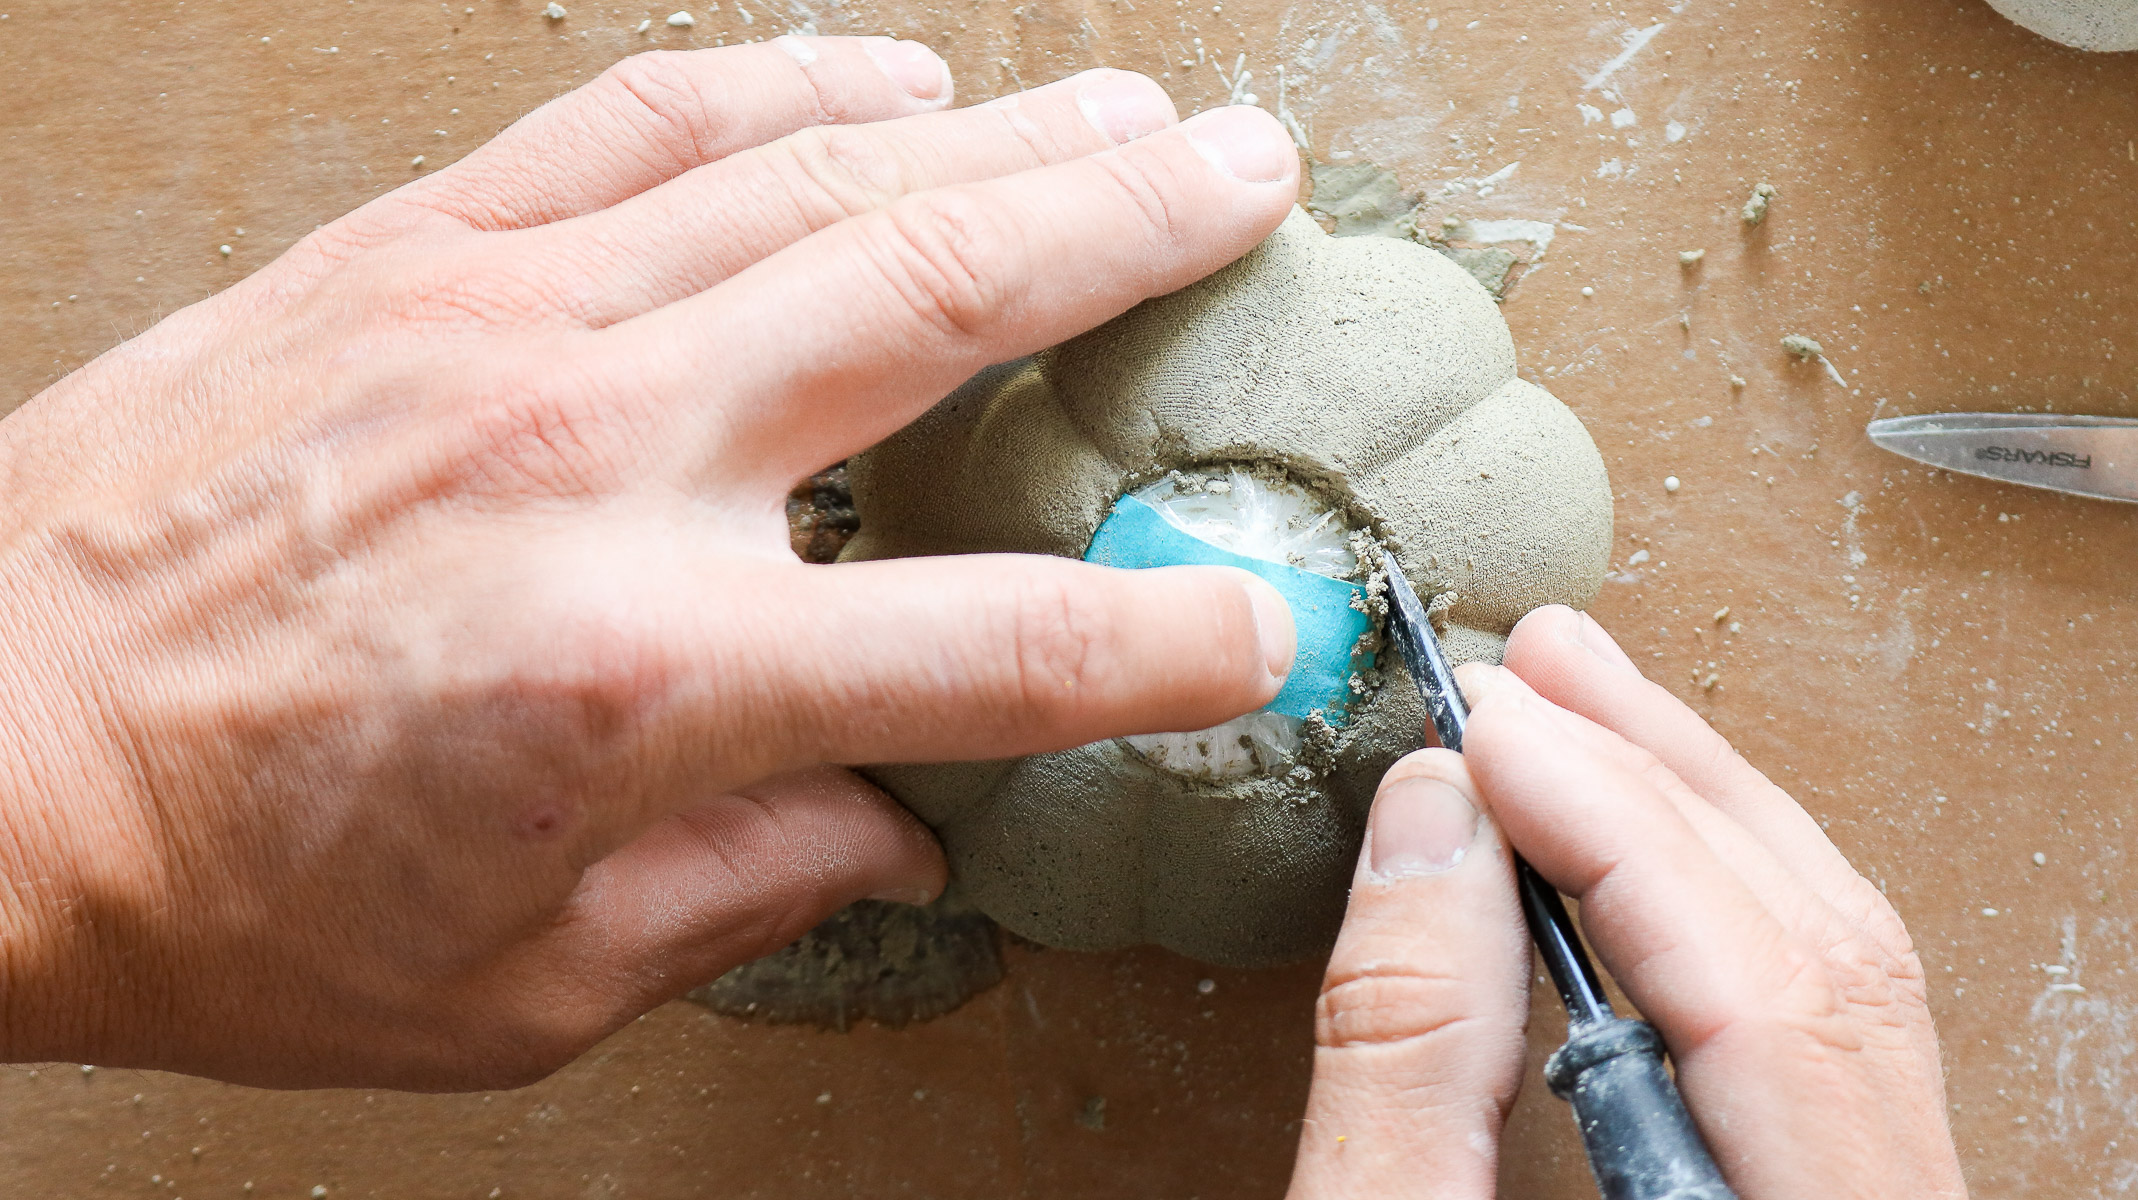
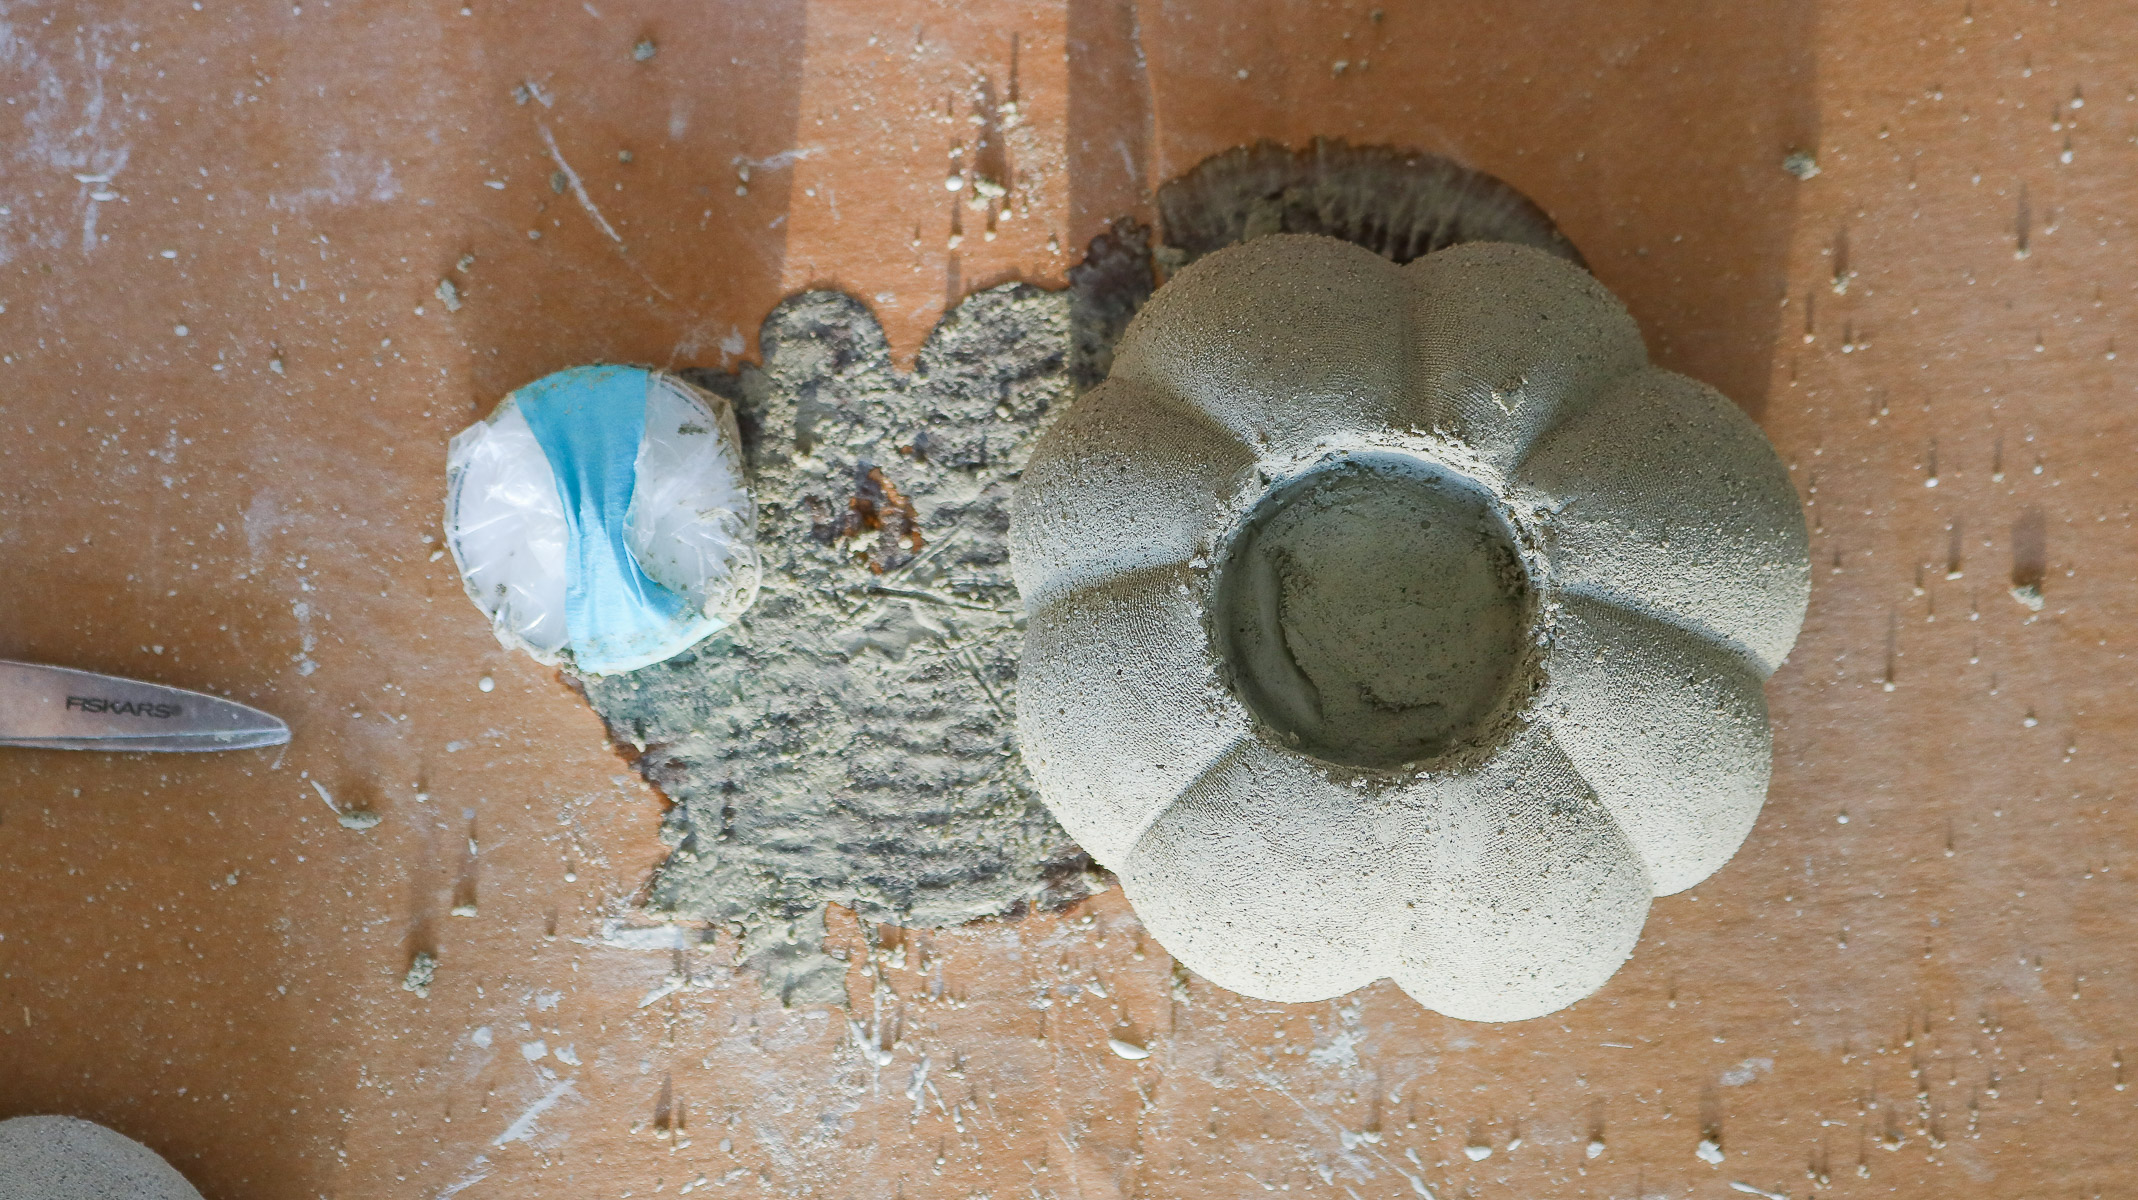
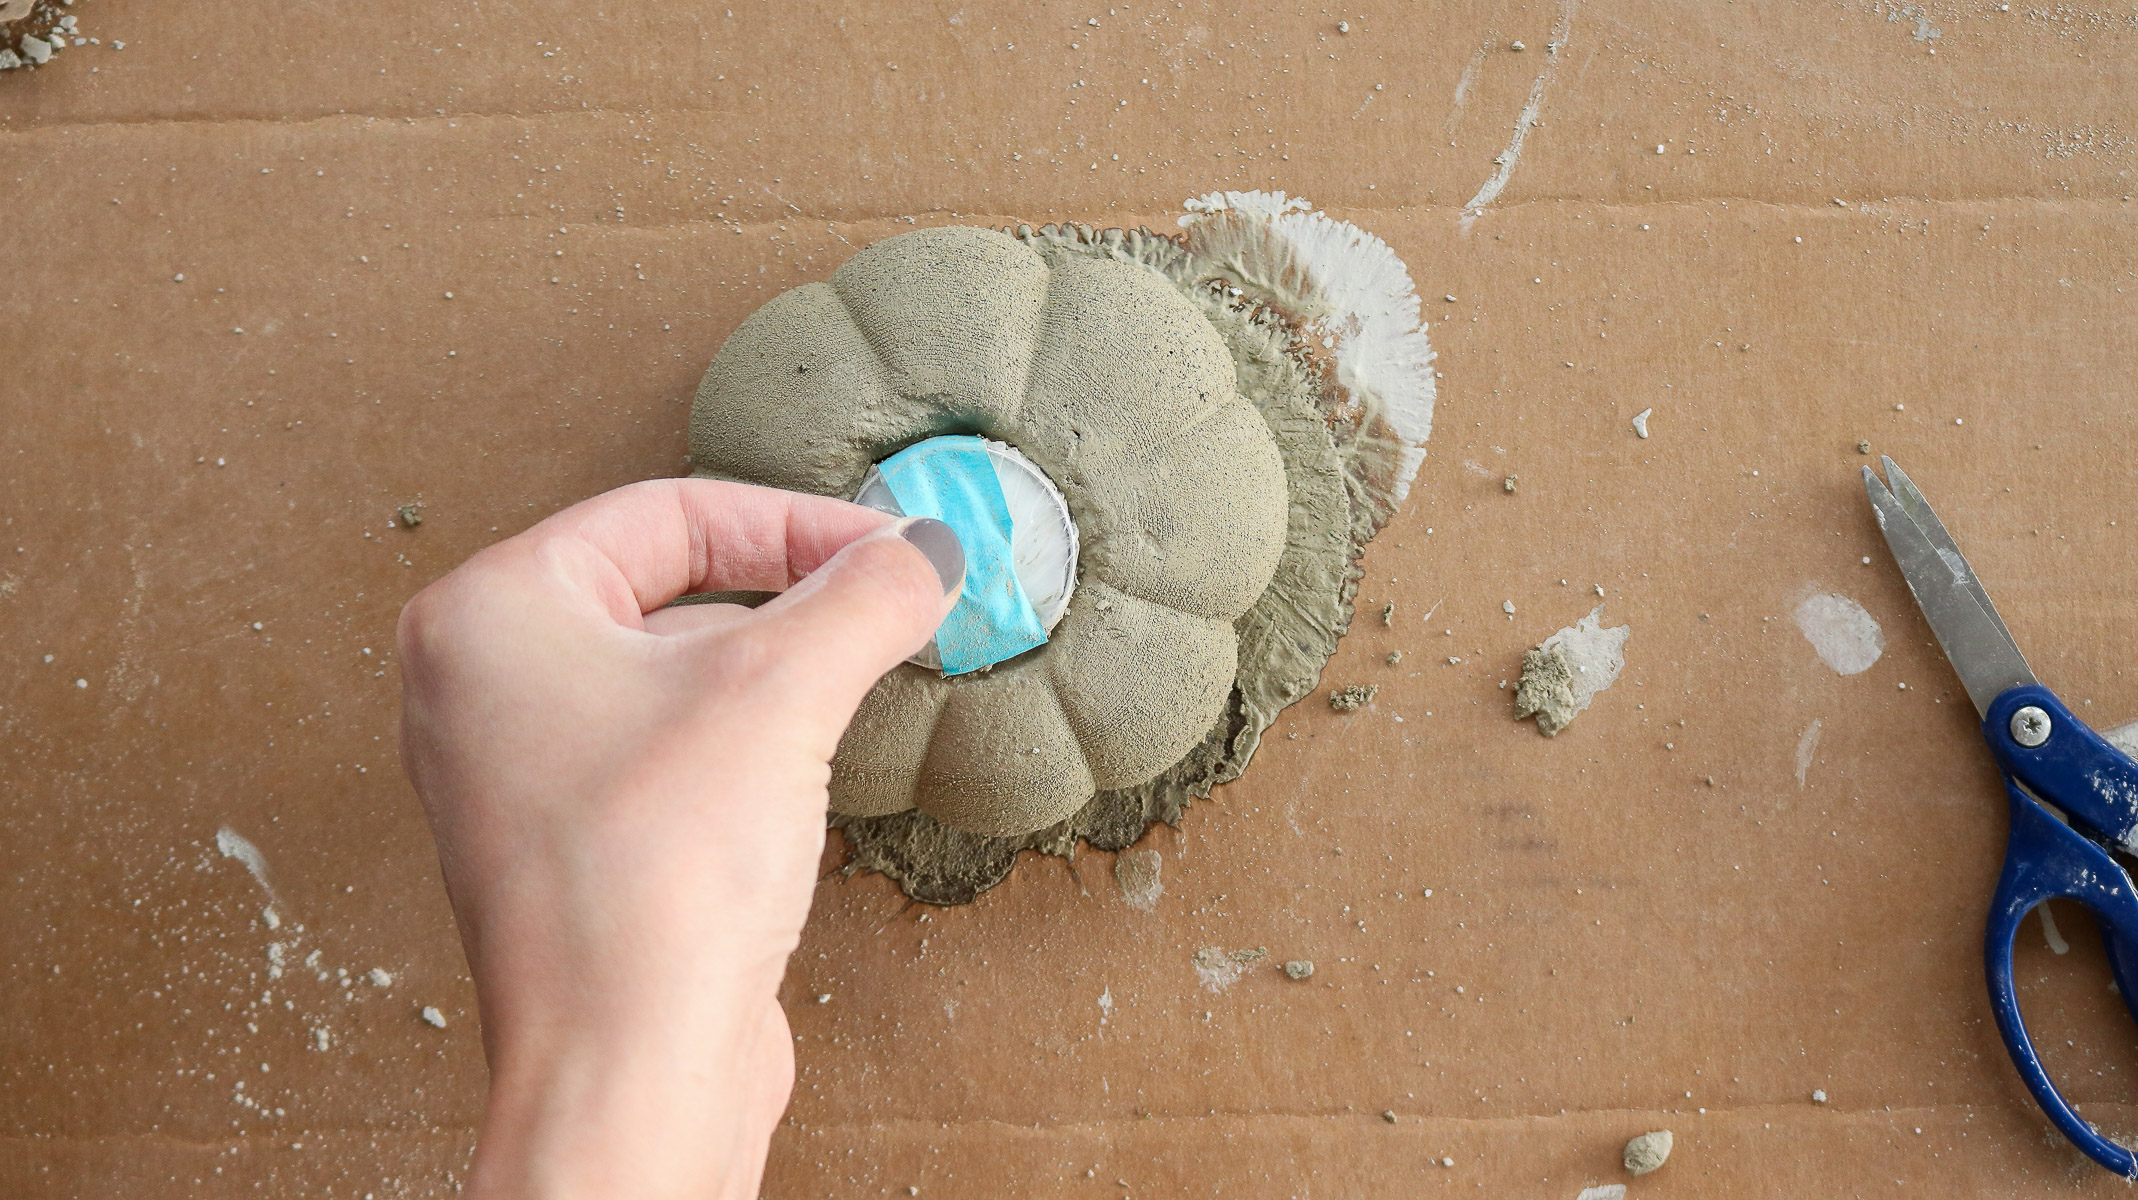 Your candle’s might get stuck a little in the concrete simply use a flat head screw driver and scrap away any concrete that overflowed. It should come right off but you need to be careful not to chip a lot off. If you wait over night to remove your candle the concrete will harden too much and you won’t be able to chip it off.
That’s it. 😀 😀 The original idea behind these pumpkin candles was to have the flame look kind of like a stem. 🙂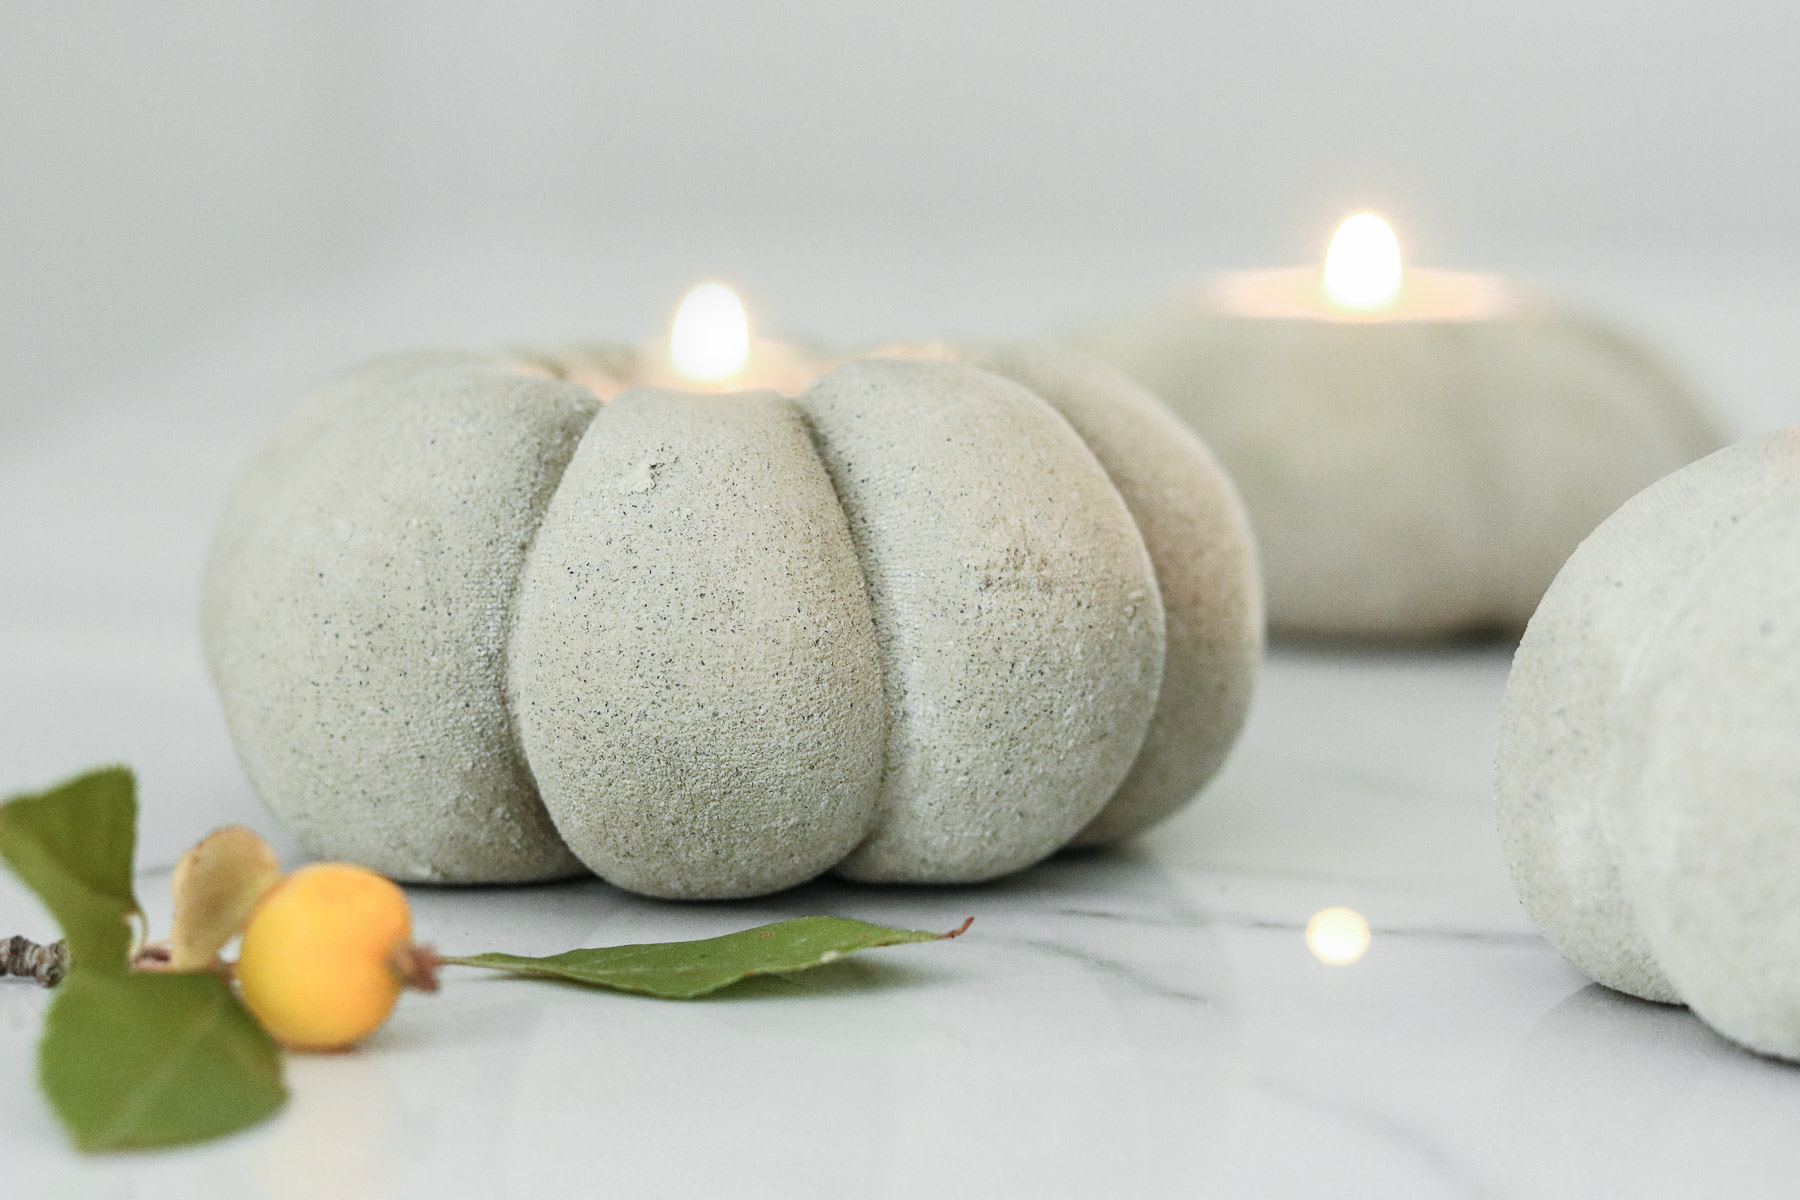
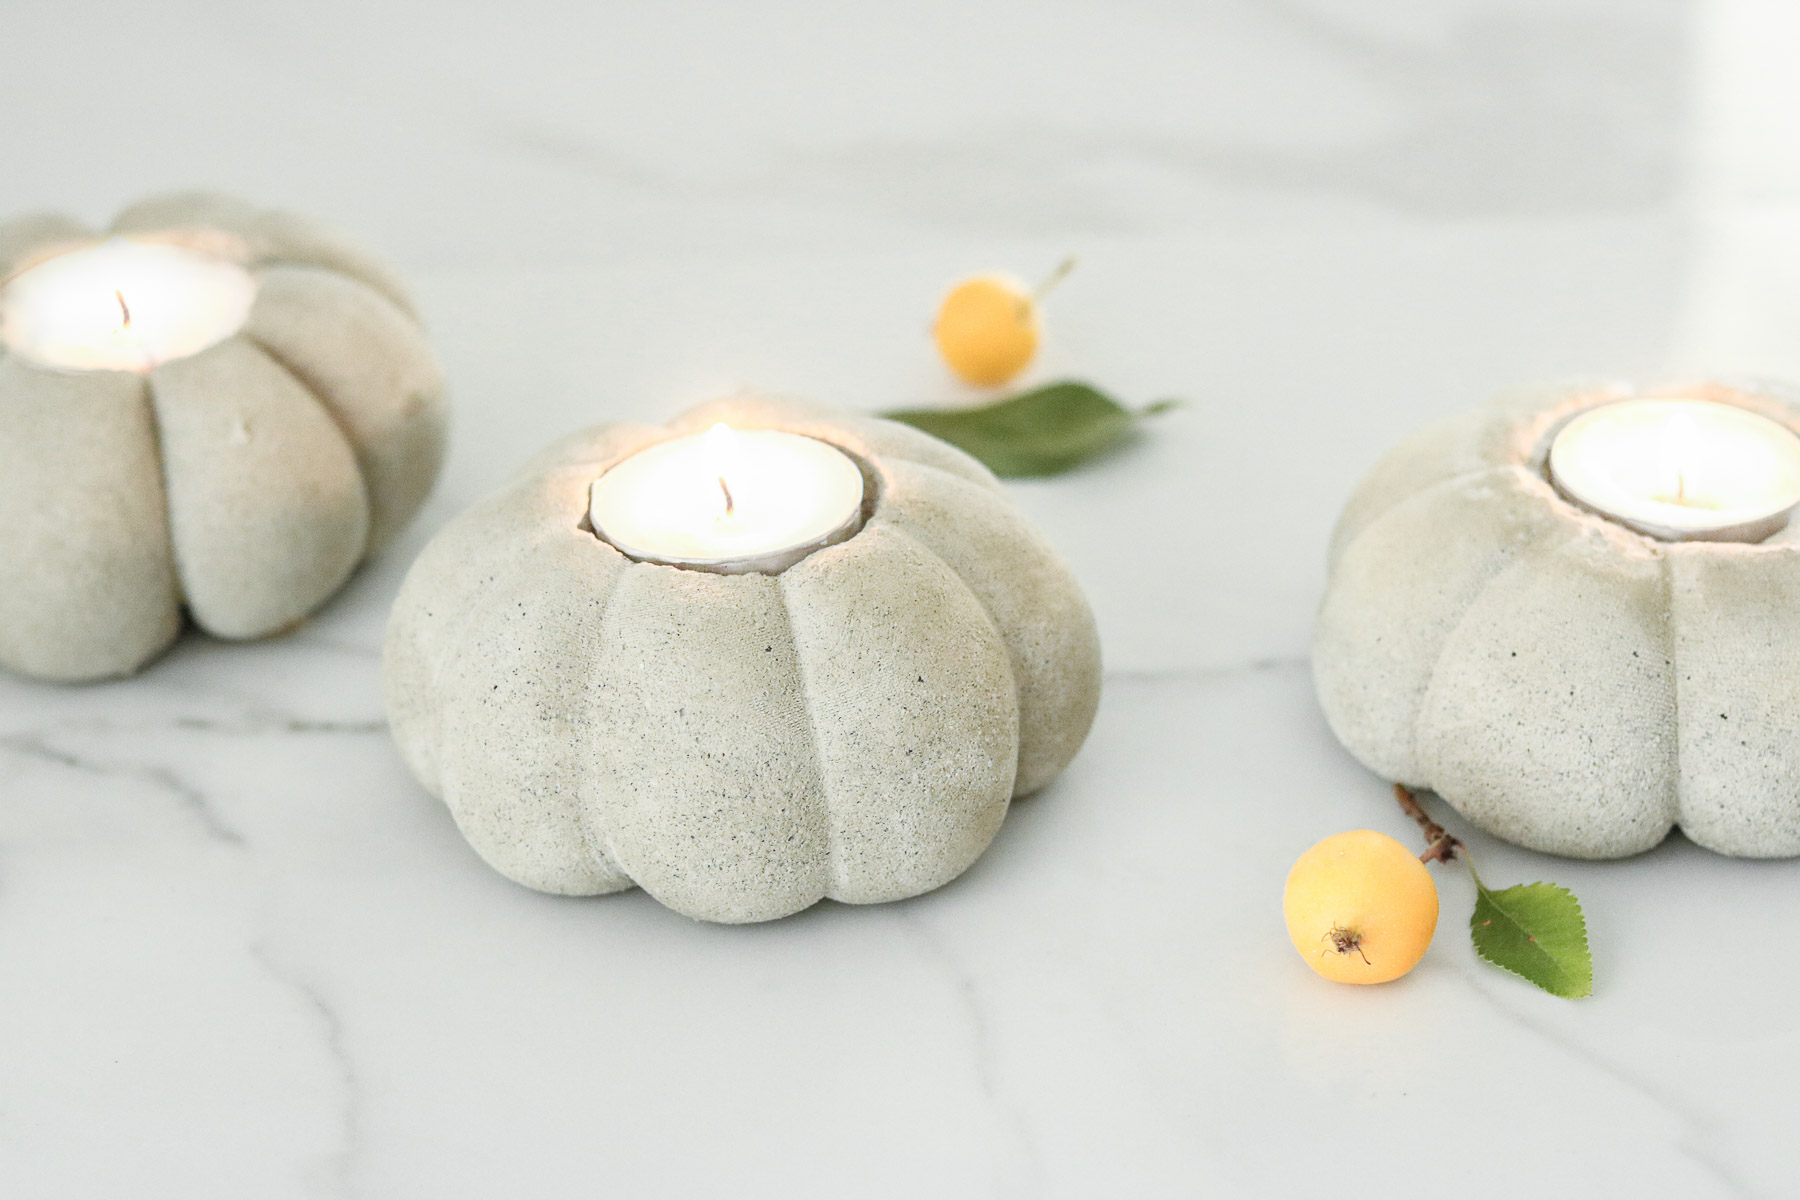
Happy Crafting! I hope you liked these cute mini pumpkin candles and have a wonderful weekend! 😀
Can you paint the pumpkin after it has dried either by spray paint or the brush kind?
Yes of course either one should work 😀
Where did you find Rapid Set CementAll? Thank you!
I purchased mine at the home depot
Thank you!
How many pumpkins will the ox of cement make?
Sorry I’m not sure. I would say at least 10 maybe more ? Just a geuss
box, not ox 🙂
Can you use knee highs instead of panty hose?
Yes of course. Shouldn’t make a difference 😀
Might like to add cement color to turn it orange! There also is glaze for cement that can make it more realistic. Great job.
That would be so cute. Oh wow I didn’t know that. A glaze sounds beautiful. Thank you