Himmeli Light DIY
This was on my list of must make DIYS for a few years now. Why so long? I’m sure I’m not the only DIYer out their with a list that runs a couple of miles long. hehe Okay Not Really! 😀 But pretty darn close! 😀 😀 With so much on my list this lovely fixture got forgotten and found it’s way at the bottom of the list. However I remembered about this pendant light when I was creating my mood board a while back, and I realized I still want this lovely light fixture for my dining room. I wouldn’t say this is the hardest DIY but, just like every other trade out their you have to nail a technique to get the perfect outcome.
Behind the Scenes
I don’t usually talk much about the process of my DIY’s in depth but, in honor of this long awaited pendant light here’s a little snippet of how this beauty came to life. I had way to many ideas jumping into this project. We started off with a metal base and ended up with a light and fluffy miss- shaped diamond.
YES!! That’s a good thing! 😀 I wanted a raw look, although the perfectly symmetrical hemmeli lights look just as beautiful.
Me and my hubby originally started this project about a year and half ago. We used metal rods and a welder to make it happen. It’s was a great bonding project but we ran out of metal rods before we finished it. So, I put it in storage for safekeeping because we weren’t in a rush to finish it. I wanted a dinning table to match and I felt like my vision wouldn’t be the same without it..
BIGGEST Concerns
So here’s the thing… I’m assuming ??… a lot of you don’t have welders and would probably love a pendant light like this. So.. I decided to take a different approach. NO METAL AT ALL! OR WELDING for that matter! 😀 Now now… This doesn’t mean it’s not sturdy. As a matter of fact all of my guests assume it’s made of metal. 😀
Perfecting those Straws!!
The first time I mentioned to my husband that I wanted to try and make this out of straws he wasn’t on the same page with me. FLIMSY!! Was the first word rolling off his tongue. 😀 I am so glad he said something because I figured straws would work just fine. It wasn’t until I did some research that I noticed straws bend easily and are easily recognized as straws because of that. So on one of my trips to the Michaels crafts store I happen to come across treat sticks or some may call them lollipop sticks. Not just any lollipop sticks these were thick plastic, hollow on the inside and didn’t bend easily. Perfect I thought to myself… This is finally happening!! 😀
Yes I’m done jibber jabbering.. 😀 Let’s make this lovely light fixture!!
What you’ll need
- Lollipop Sticks (hollow plastic only.. Will not work with paper sticks. You can try this with coffee stirrers I just don’t know how sturdy it would be)
- Wire cutter
- Floral Wire ( I purchased mine from the dollar store)
- Copper Spray Paint ( I used rustoleum )
- Hot Glue
- Light Cord
- Antique style light bulb (this is optional. You can use whichever style you like )
Don’t forget to check out the video
I’m going to try and explain the process as clearly as possible. Feel free to ask any questions in the comments below if I’m not making any sense. 😀 This technique is pretty simple. It’s just kind of time consuming. To make the process easier I worked in sections. I also added a video down below demonstrating how to put it together.
Step one:
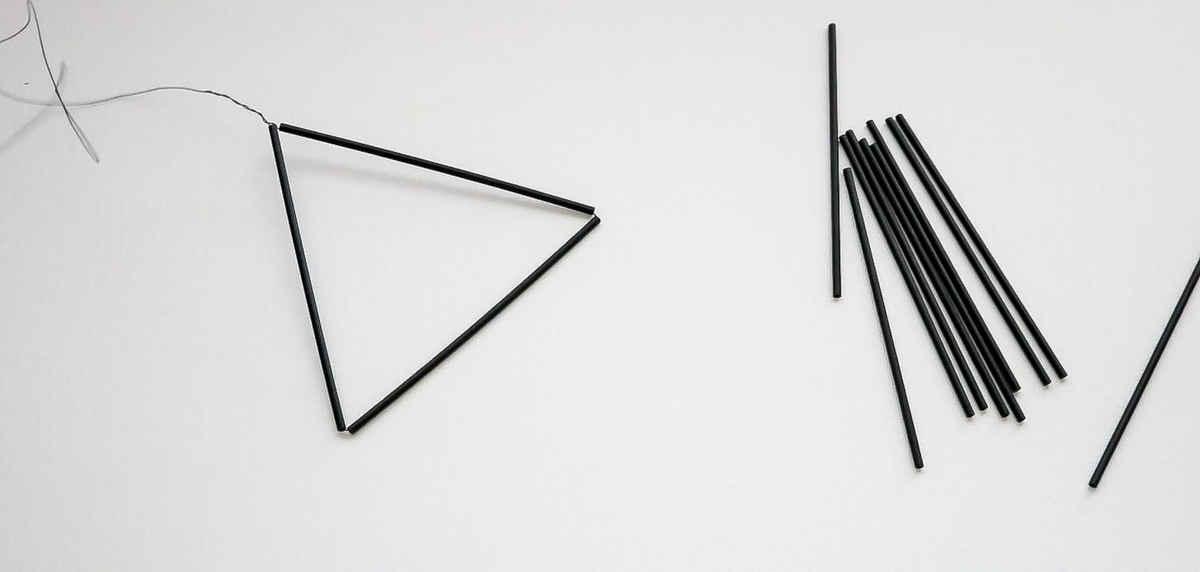
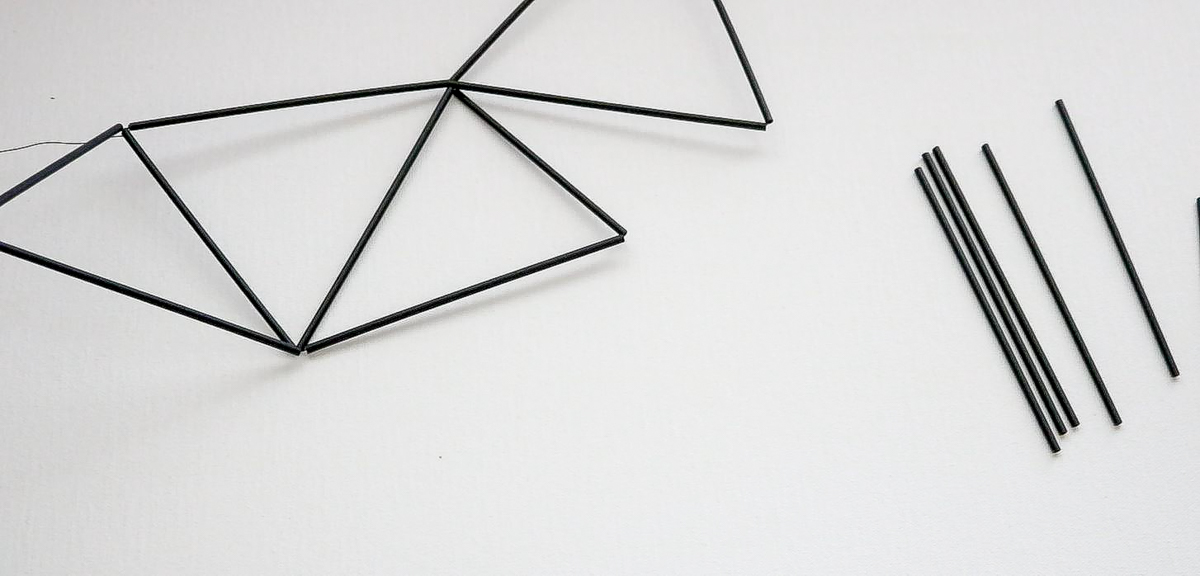
First cut your wire at about 3 feet long and pull it through 3 lollipop sticks. Make a triangle out of that and secure your wires by wrapping them around each other at one of the ends. (photo below) Leave the remaining wire for additional threading. Then keep adding lollipop sticks and securing every 1-2 sticks creating little triangles. When your ready to secure your triangle connect it to your previous triangle and wrap it around twice before going onto building your next triangle. Don’t worry about your 3 foot wire not being long enough. The reason I kept it at three feet is because floral wire gets tangled super easy and this eliminates that problem.
Step two:
Shaping it up
At first I started off with all my sticks being the same size. Then I realized that to make it more rough edged the sticks will have to be different sizes. I didn’t cut each stick. I only cut 1 stick every 3-4 sticks I threaded. This gave my light fixture the perfect rough shape that I wanted. If you want a more symmetrical shape make sure all your sticks are the same size.

Step Three
Finishing off your first 3ft of wire
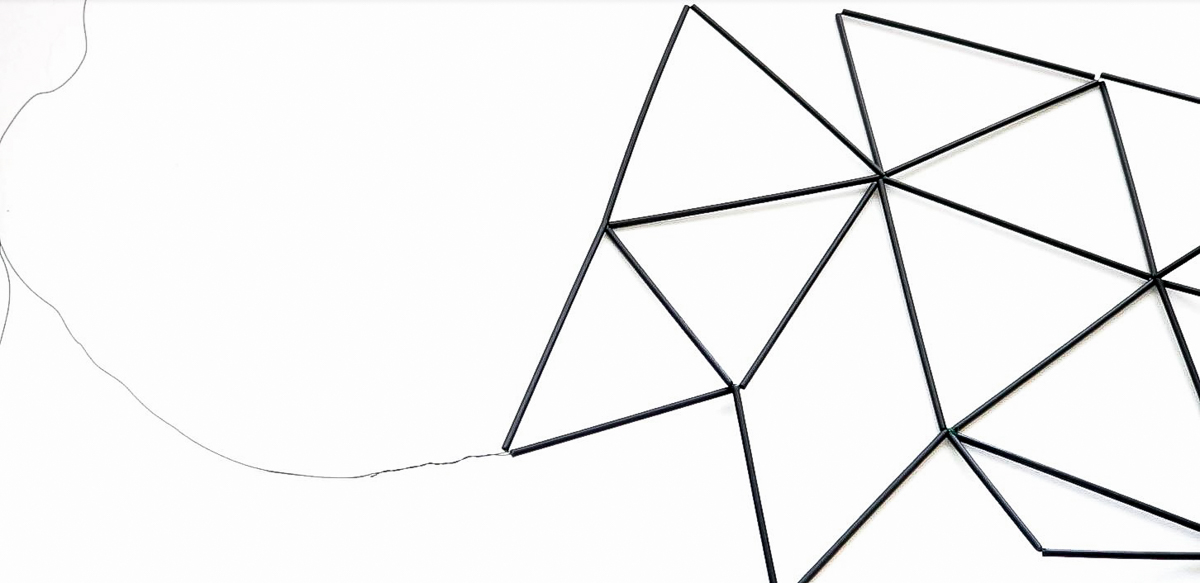
This is what it looked like once my first round of 3 ft of wire was up. (photo above) Not exactly enough to start connecting the dots, so I secured what was left and inserted the remaining wire into one of the straws. (photo below shows what it looked like secured before sticking it in the straw)
Step 4
Attaching more Wire
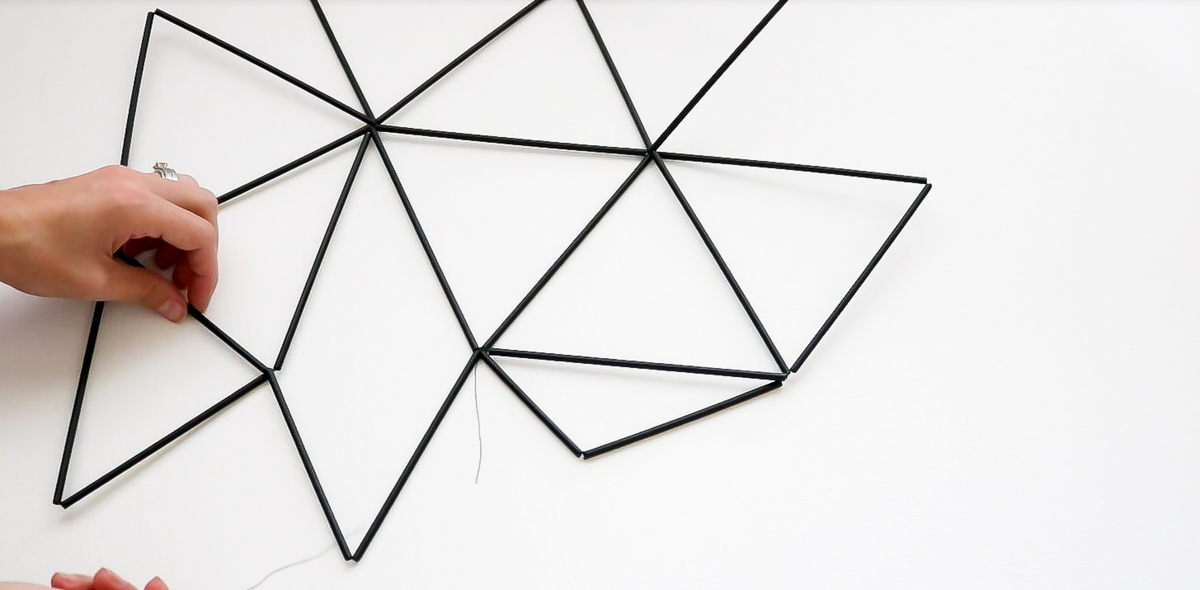
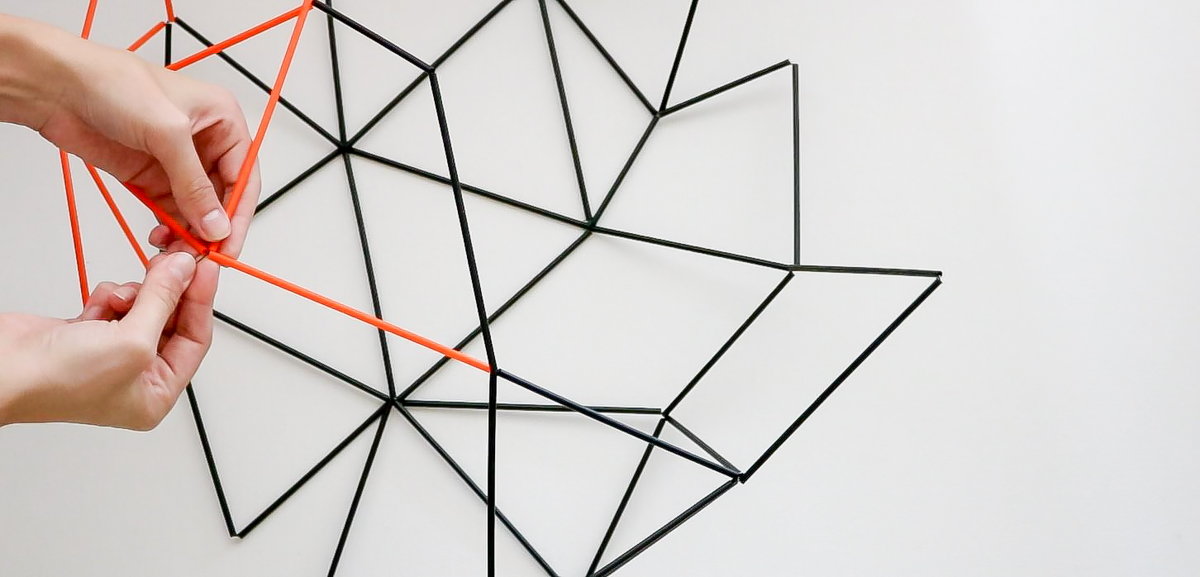
To began on your next section you will need to attach a new piece of 3 ft wire. I believe if I recall correctly I used 3 sets of 3ft wire. 😀

Secure your wire like shown in the photo below. Then keep adding more straws and creating triangles until you feel it’s big enough. Keep in mind this should be laying flat while your adding your straws. My structure looked kind of like a thick spiky strip. I would say it was about 3 ft long maybe longer. 😀
Step 5
Connecting the Dots
You will know your spiky strip is long enough when you connect the two longest ends and it starts to round off. Or at least it looks somewhat rounded structure.. I tried to connect my spiky strip three times before It was long enough. Once you’ve connected your two ends keep connecting the rest of your loose triangles bringing the whole thing together. You may need to add more sticks in random places to shape it off. (use the technique above to add wire and straws in your random spots) Keep in mind if you want a small light fixture most of your straws will have to be small… Unless you want a super spiky small pendant then use longer sticks and make your spiky thick strip shorter (under three feet) WOW!!! Gosh I hope the is somewhat understandable.
Step 6
Once you’ve connected all your ends your structure should be pretty flimsy at this point. Lay it on the ground a few different ways to see what form you want it to take. Then hot glue all the corners on the outside and inside of your structure. This will secure it and help turn your flimsy structure into a solid pendant light. It will also give it a welded look. (I lay my structure on the ground at least 15 different ways before I liked the the form it took. )
Step 7
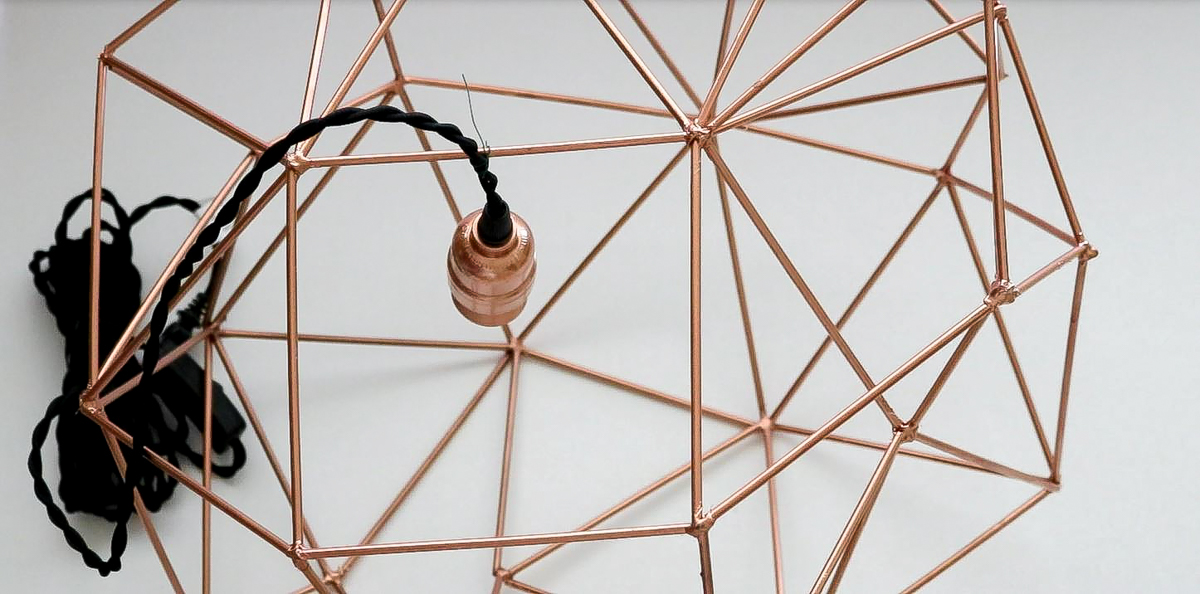
Spray paint your pendant light and add your lighting to it. To add my light I fed my wire through the cord and attached it to my pendant. It helps if you look in a mirror before attaching the light. This is how I chose the perfect spot for my light.
FIXING MISTAKES :
If you’ve made a mistake don’t worry. I had this happen to me where one spot stuck out way to much. So I simply snipped a bit off and re-hot-glued it . I wouldn’t do this in more than two spots because your loosing the sturdiness of your pendant light. Hot glue is great but it isn’t super strong that’s why we fed the wire through all of them before hot gluing. 😀
I apologize if this was hard to understand. This project is easier done then said. HAHA!! 😀 For some reason I had the hardest time explaining the steps. Let me know what you think ? 😀
Here’s a quick video you can check out. (yep I show every step in the video)
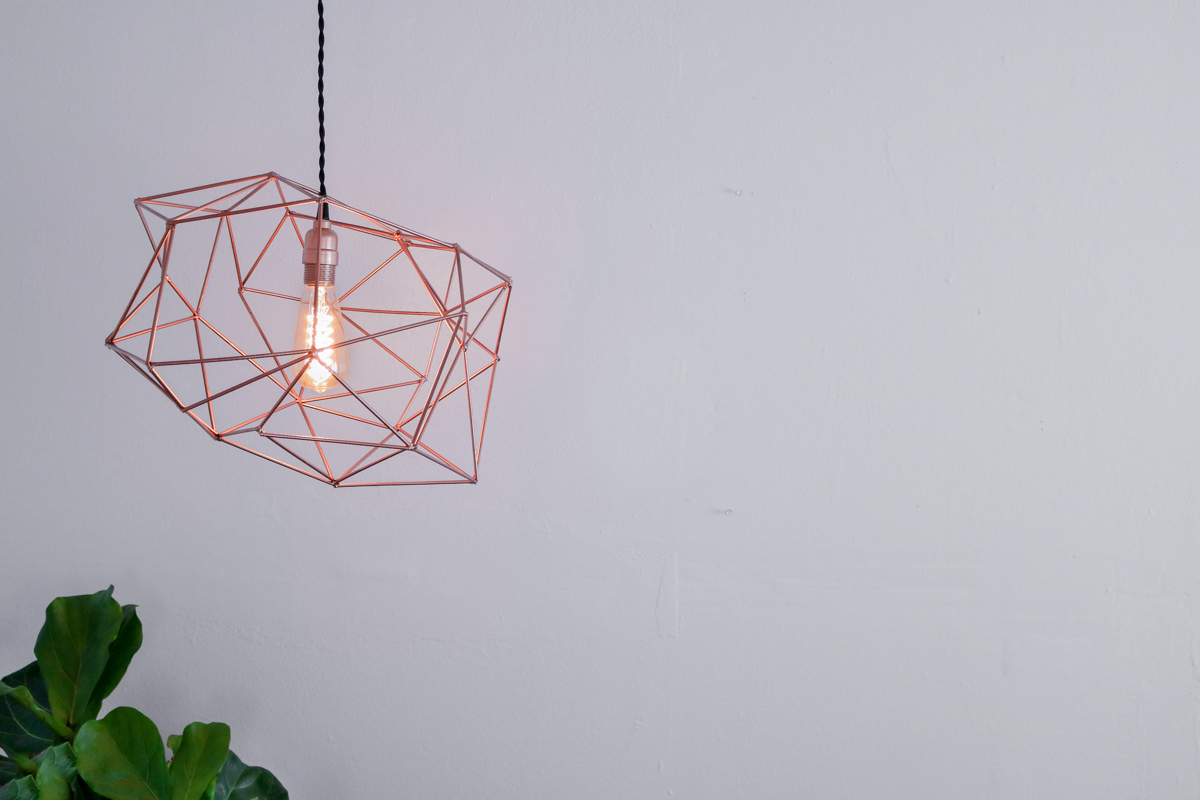
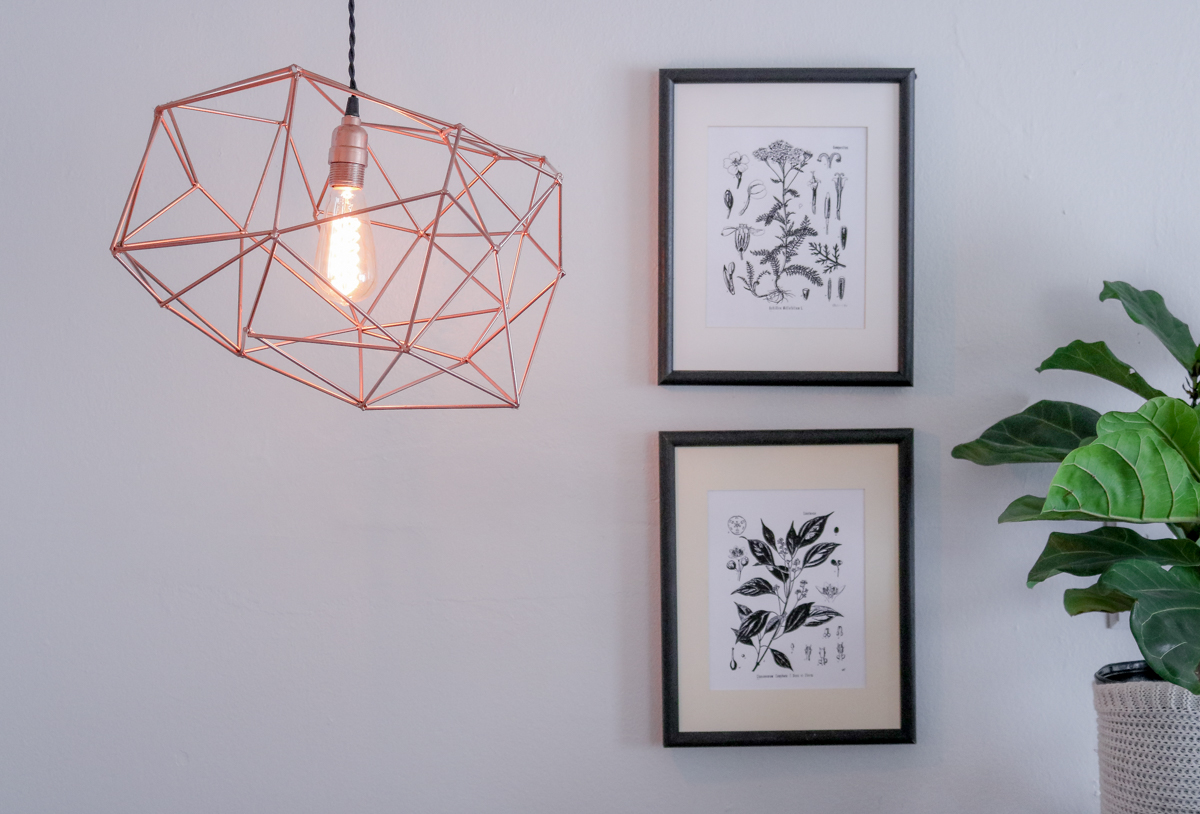
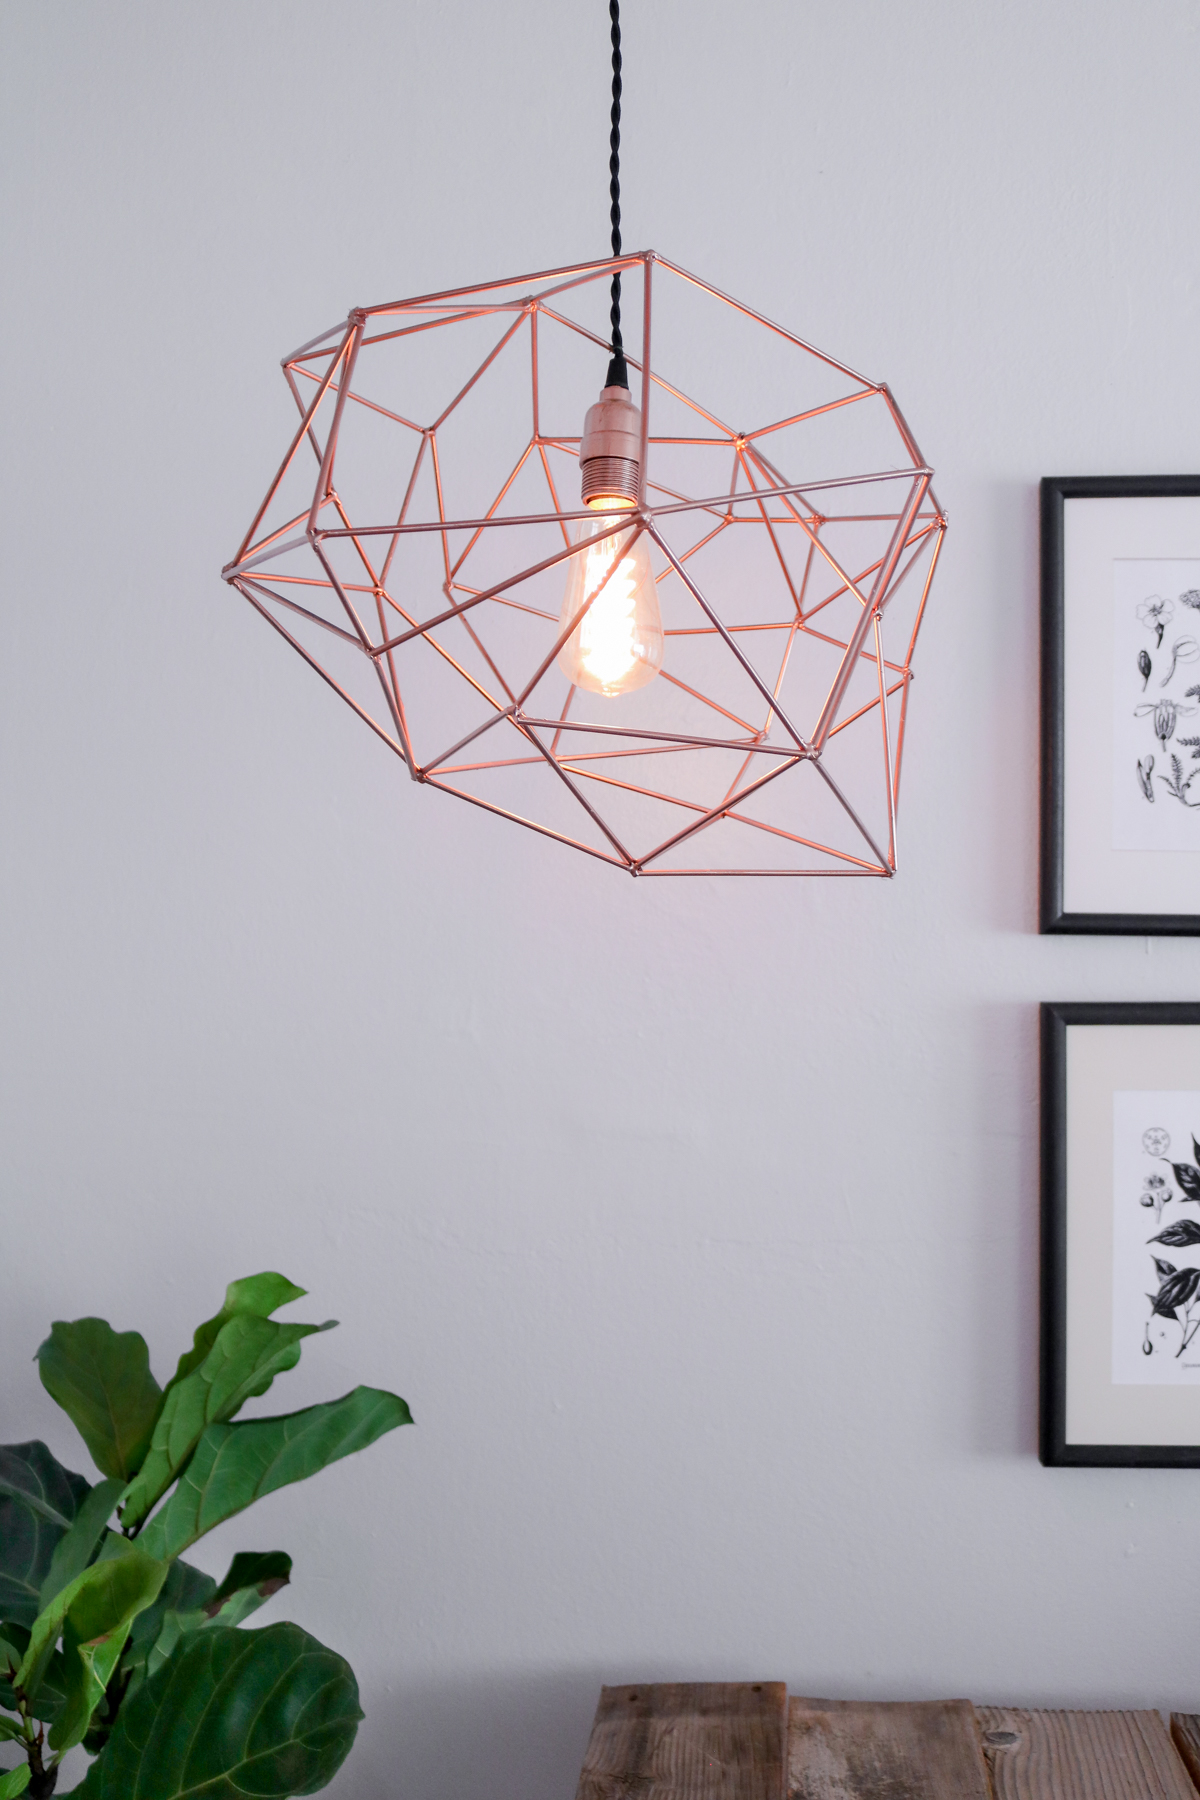
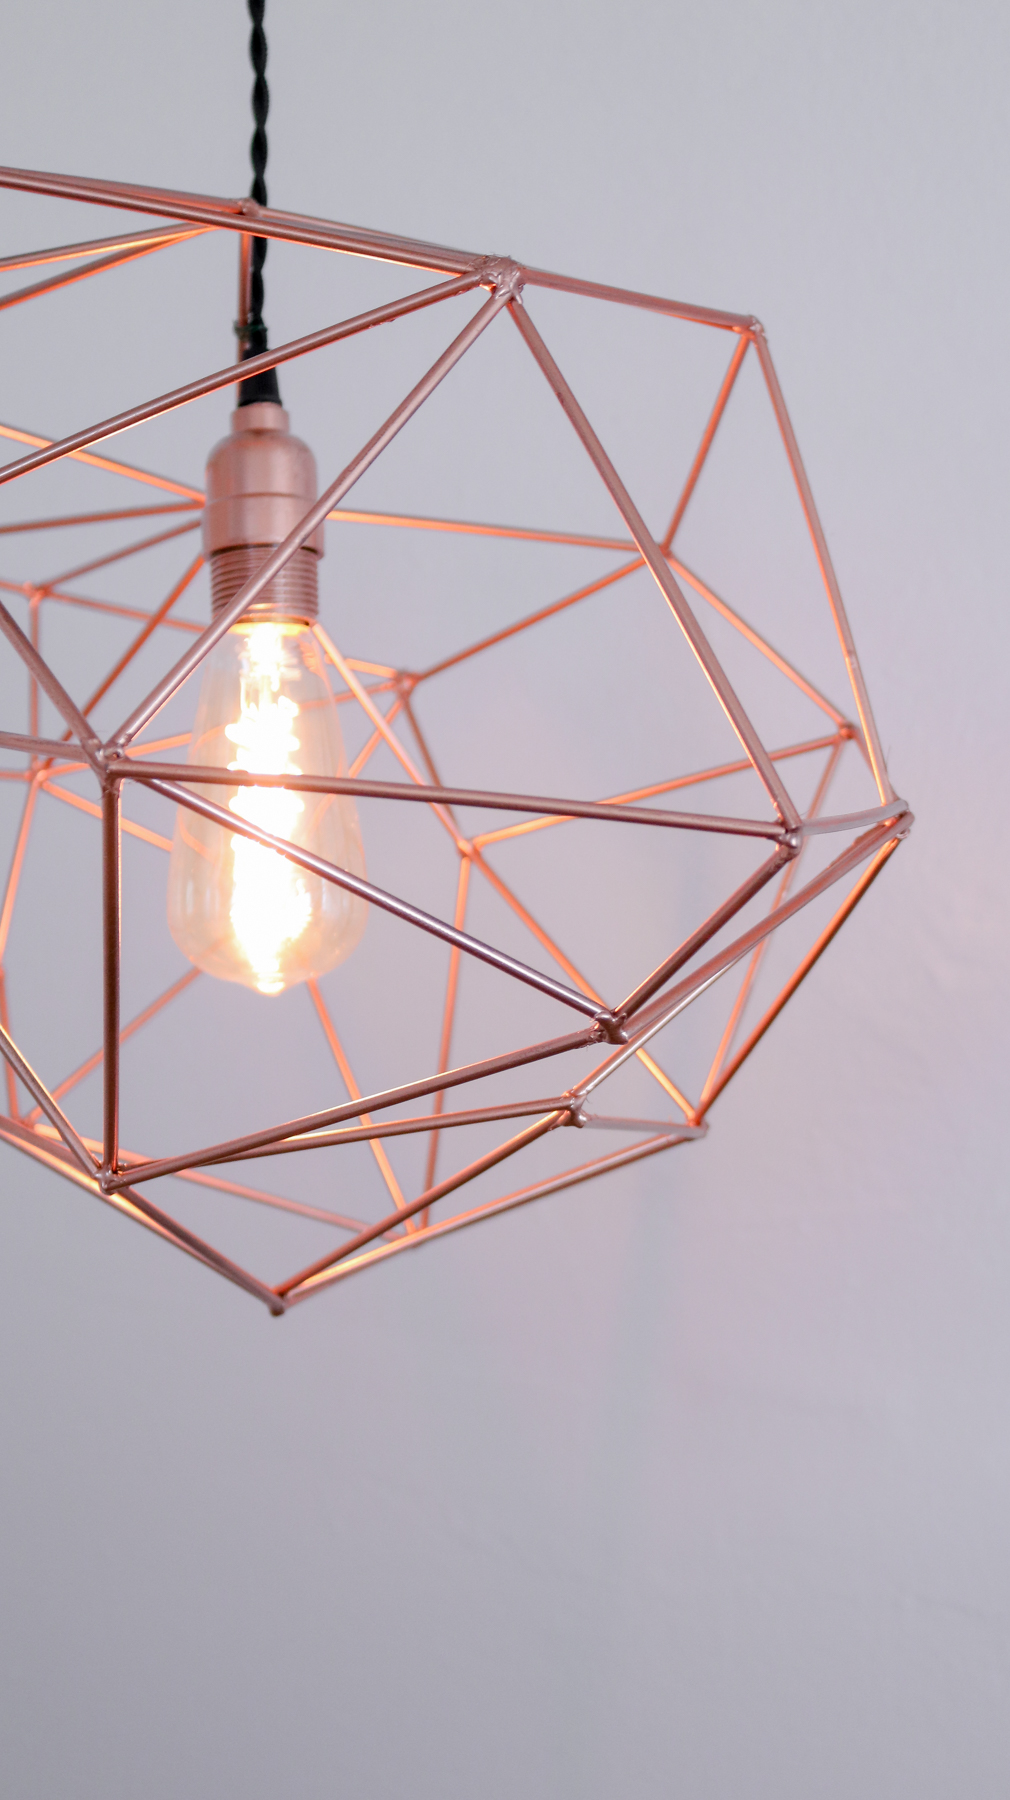
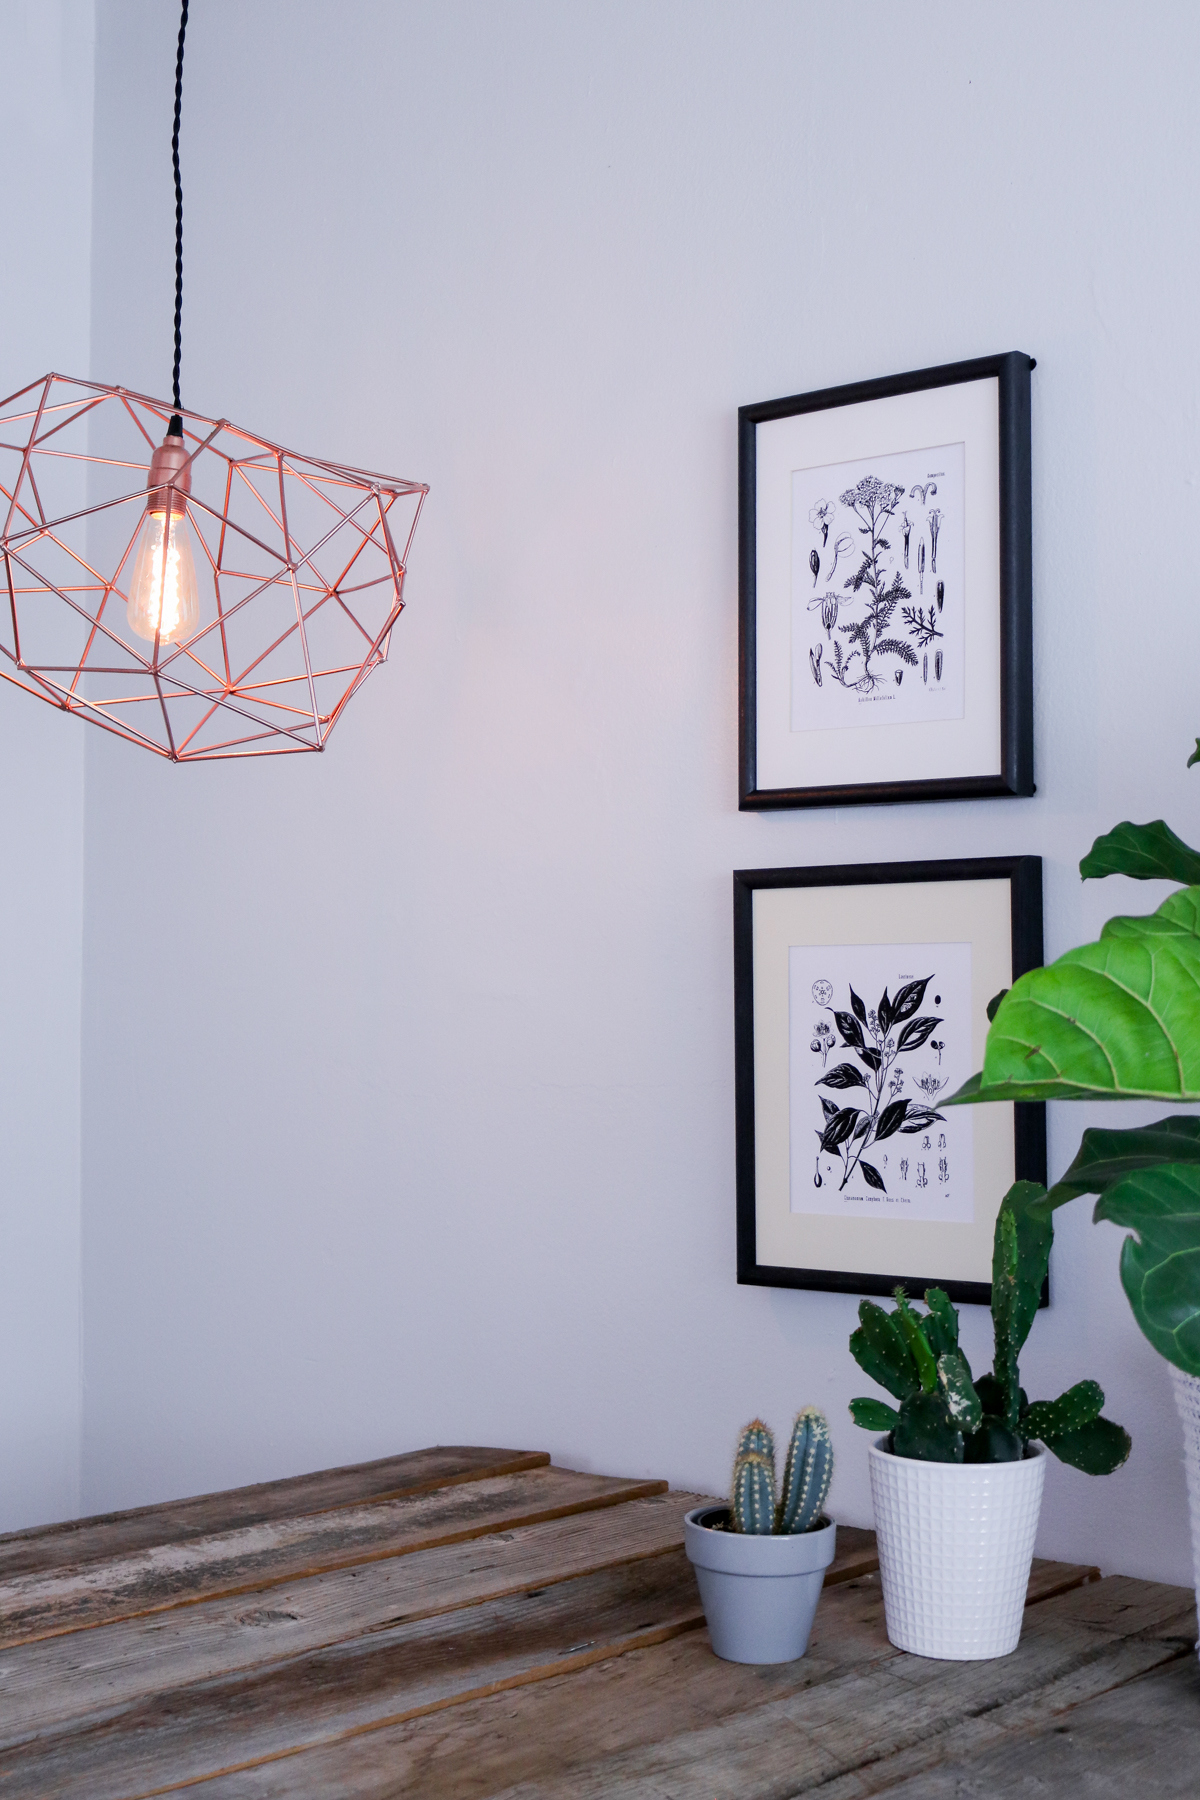
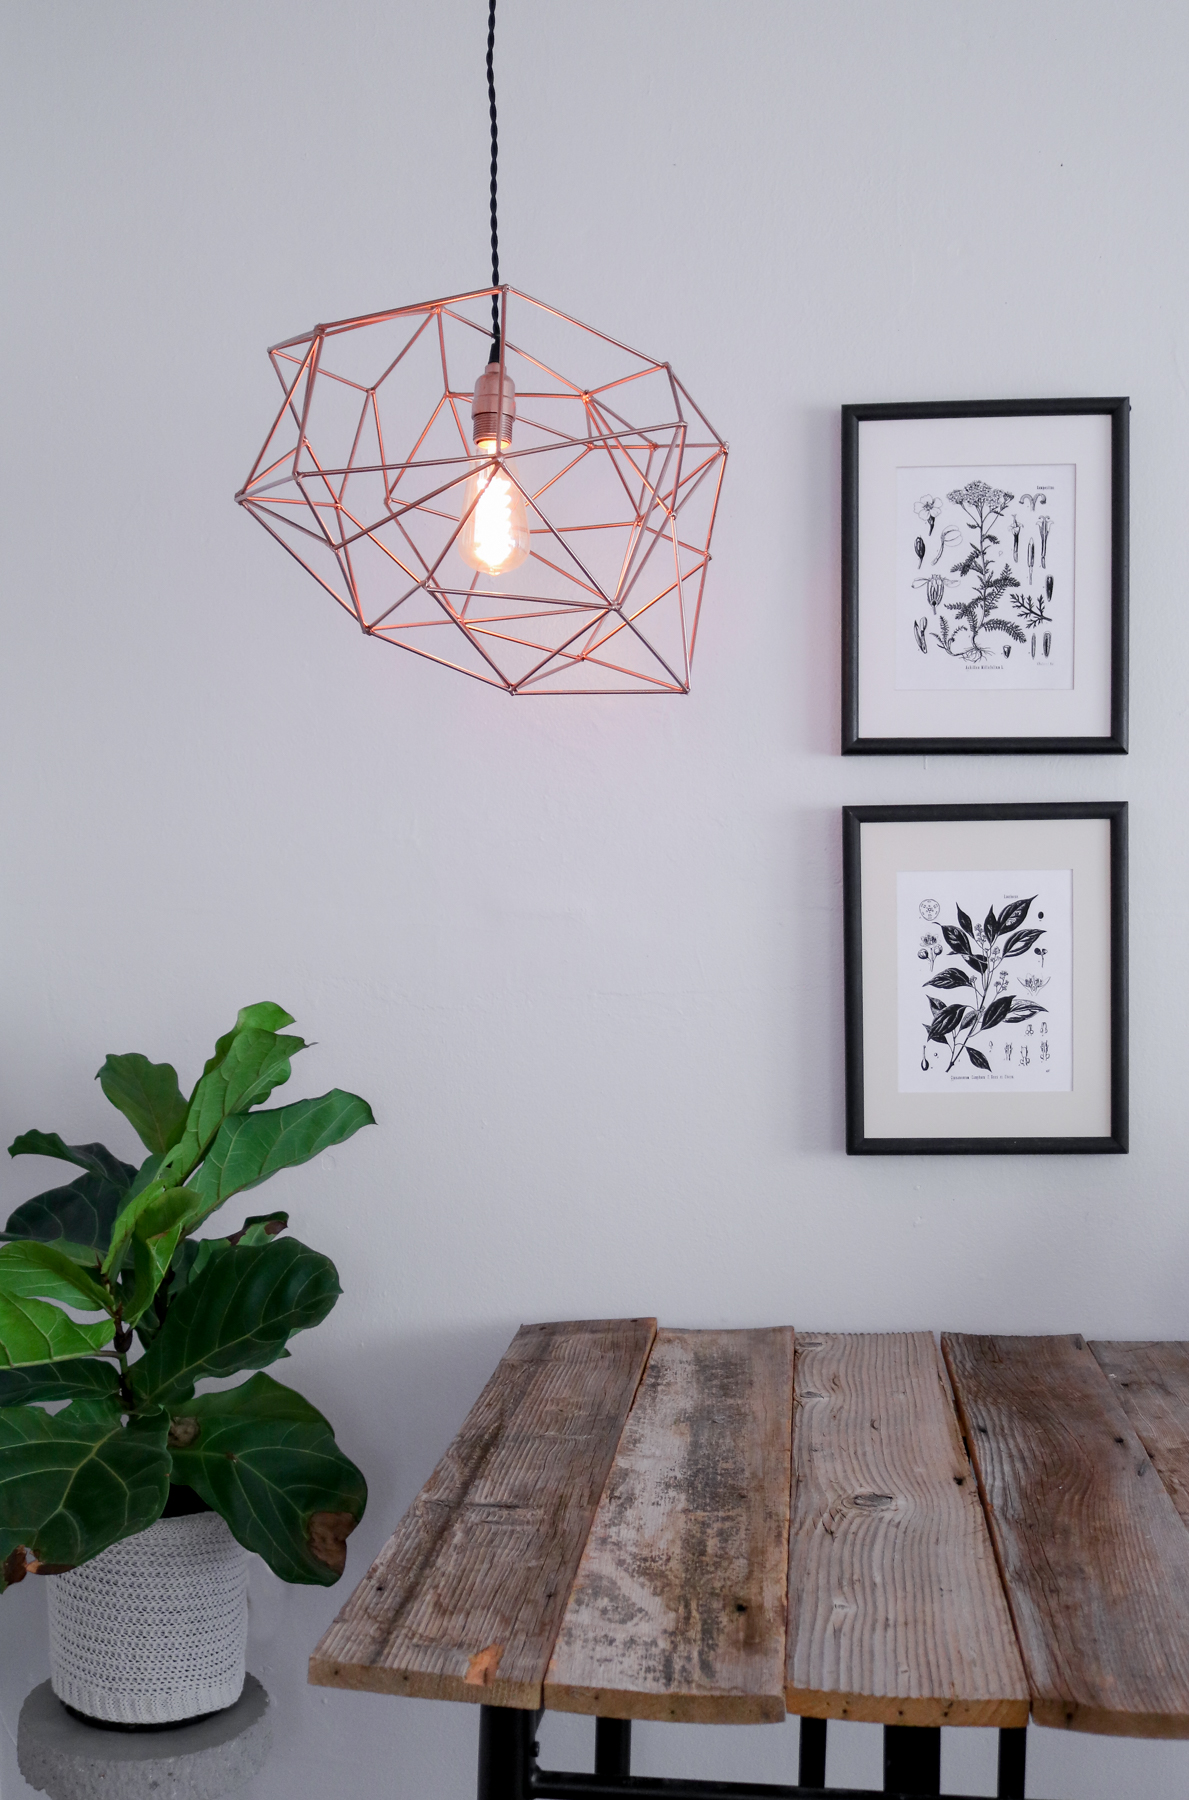
Final Result
Okay lets get a closer look at this beauty. 😀
Here’s the cool part… This pendant light looks different from every angle!! 😀
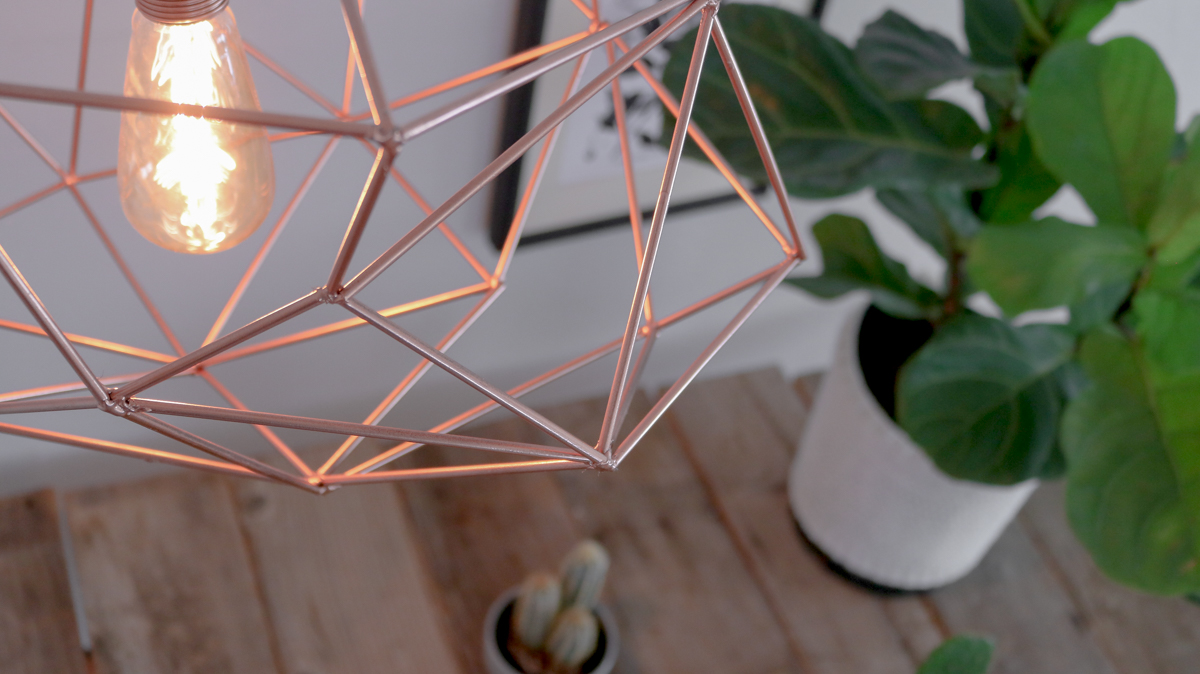
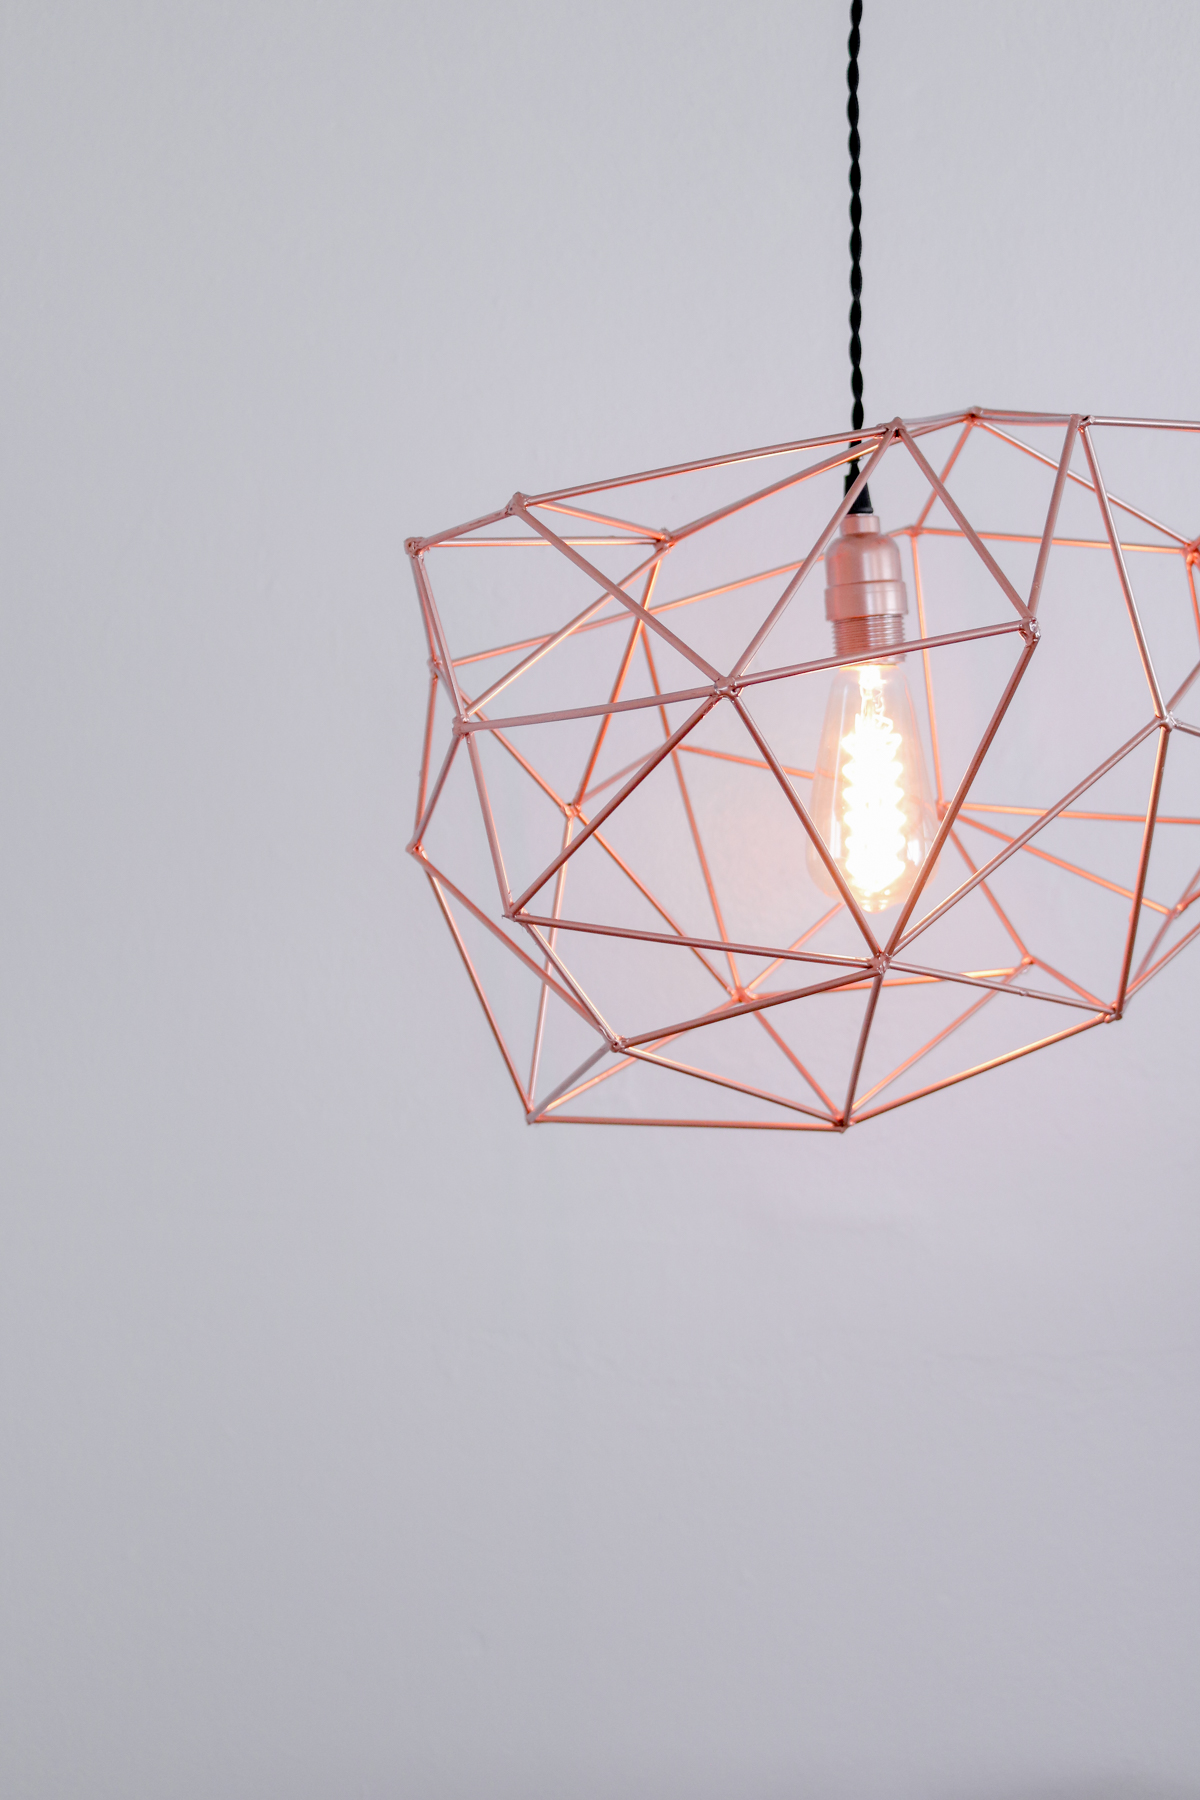
Here’s a close up of how my welds look. Or shall I say hot glue welds. haha 😀 !! 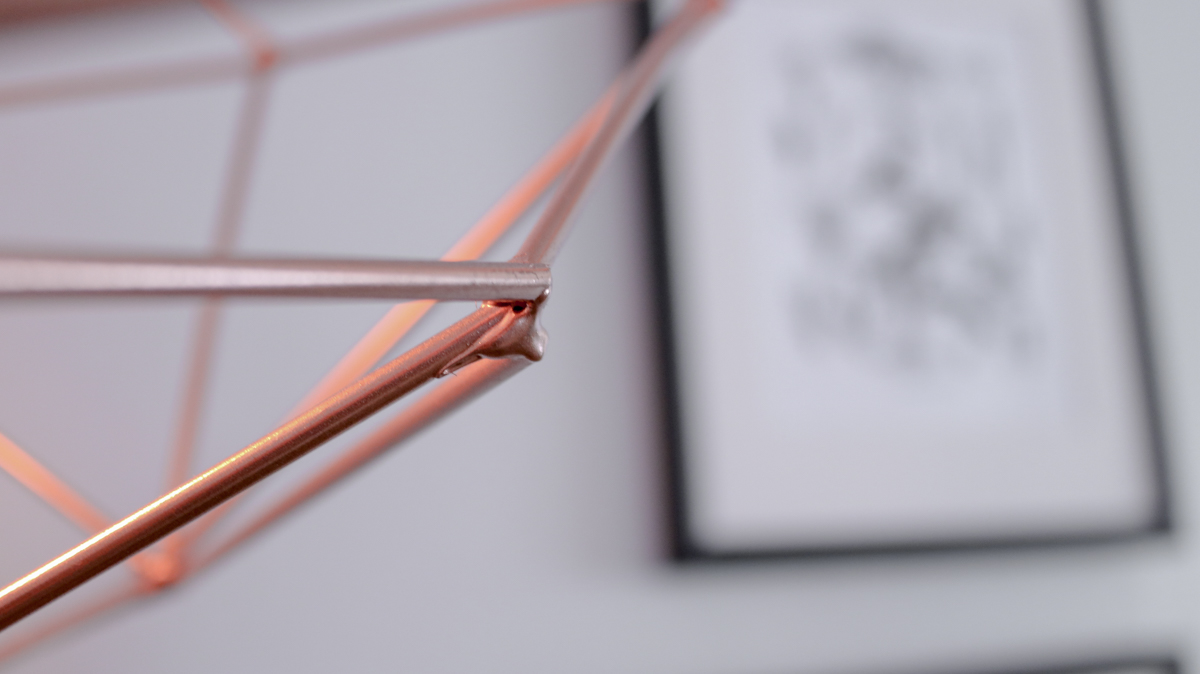
I don’t know if it’s the light bulb or the copper spray paint but the whole room lit up with a rose gold ambience. It’s truly beautiful lit up.
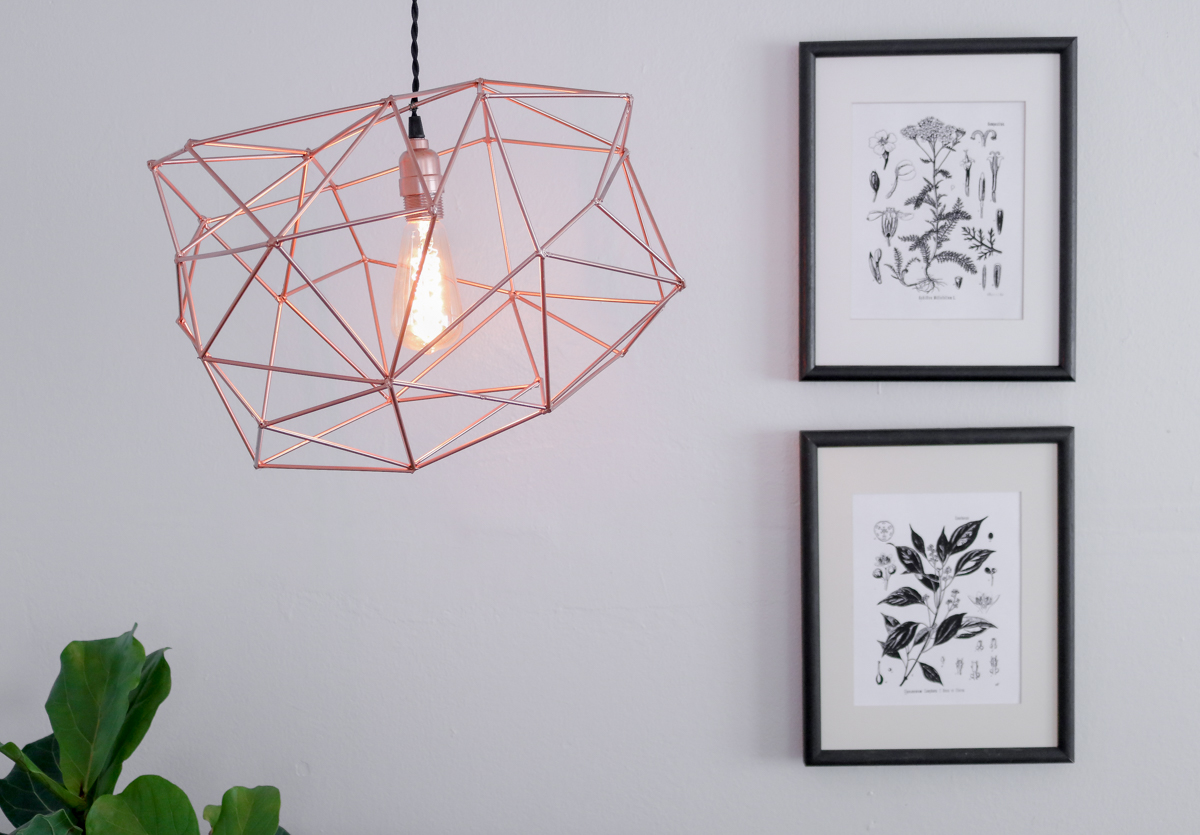
Are you starting to notice what I was talking about… The pendant light has such a unqiue shape in every picture. Change your angle just a slight bit and BOOM!! You got yourself a fresh new look. HAHA!! Who knew this baby would have transforming abilities!!! 😀

Take at look at this spiky angle (photo above) Oops!! missed a spot.. Need to add a bit more weld in that corner. 😀 Can you tell I enjoyed taking these photo. LOL I couldn’t decided which angle looked better 😀
Okay I think I covered about every angle in these photos. 😀 Thank you for tuning in guys.
I wanted to take the time to thank all my faithful readers. I am grateful for each and every one of you and I hope we’ll stay in touch.
You can contact me privately through the websites contact page. 😀
If you’re a social media kind of person you can find me here. –> Instagram. Facebook. Pinterest.
Thank you guys. I can’t wait to embark on my next DIY challange 😀 Hope you liked this DIY. 😀
Hi Lily
This is something that has endless configurations and multiple applications.
Thank you for sharing.
Yes, I love how it looks different from every angle. 😀 Glad you like it!
What is the brand of treat sticks that you used? I have ben searching everywhere and cannot find any that are hollow
I’m not sure what brand they are however if you search for hallow Popsicle sticks online you should be able to find them . Here’s some I found on etsy – https://www.etsy.com/listing/84399284/45-black-lollipop-sticks-small-black?ref=pla_similar_listing_top-1
so much wonderful info on here, : D.
I’ll immediately grab your rss feed as I can not in finding your e-mail
subscription link or e-newsletter service. Do you have any?
Please permit me recognise so that I may subscribe.
Thanks.